
|
 04-23-2015, 08:32 AM
|
#1 |
|
Registered User
Join Date: Sep 2014
Location: Toms River, NJ
Posts: 437
|
My 86 Stepside
I've been meaning to start a thread for a while now, but never did. I picked up an 86 stepside in October 2014. It was in pretty good condition. I had plans to swap the 4 speed saginaw out for a 700r4 and redo the interior. Had a mild built 350 in it. One day while driving, I lost oil pressure and spun a bearing, so needed to get a motor. That plus the ridiculously cold winter made it tough to get to work. Anyway, here's what I started with.
Exterior: 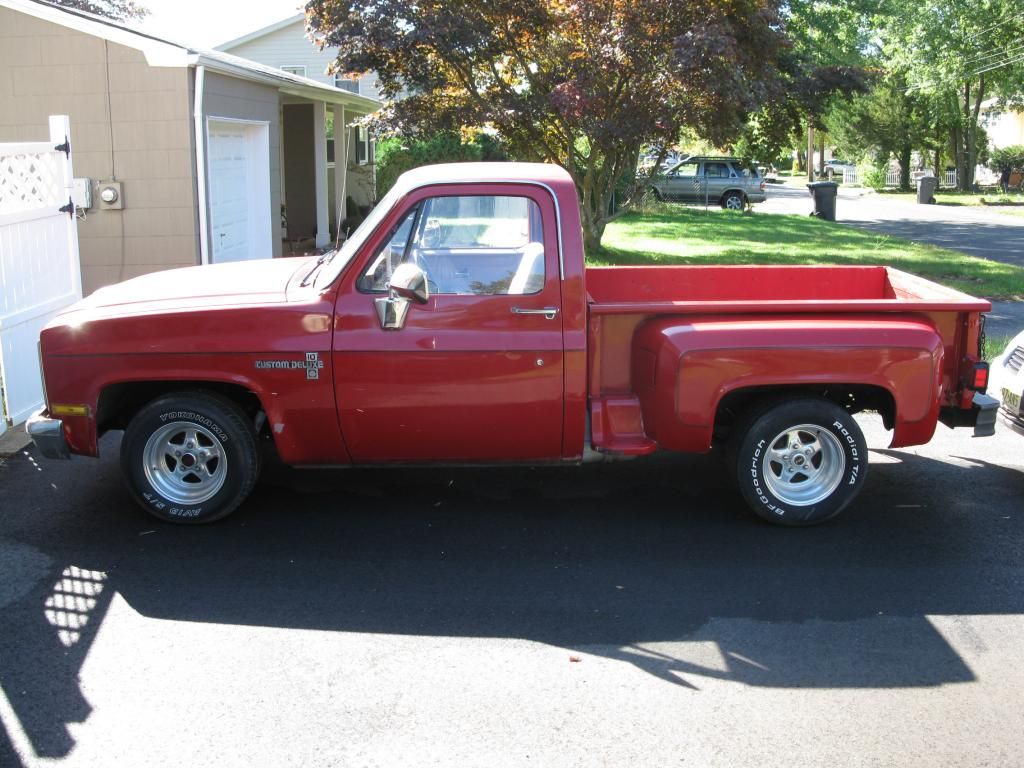 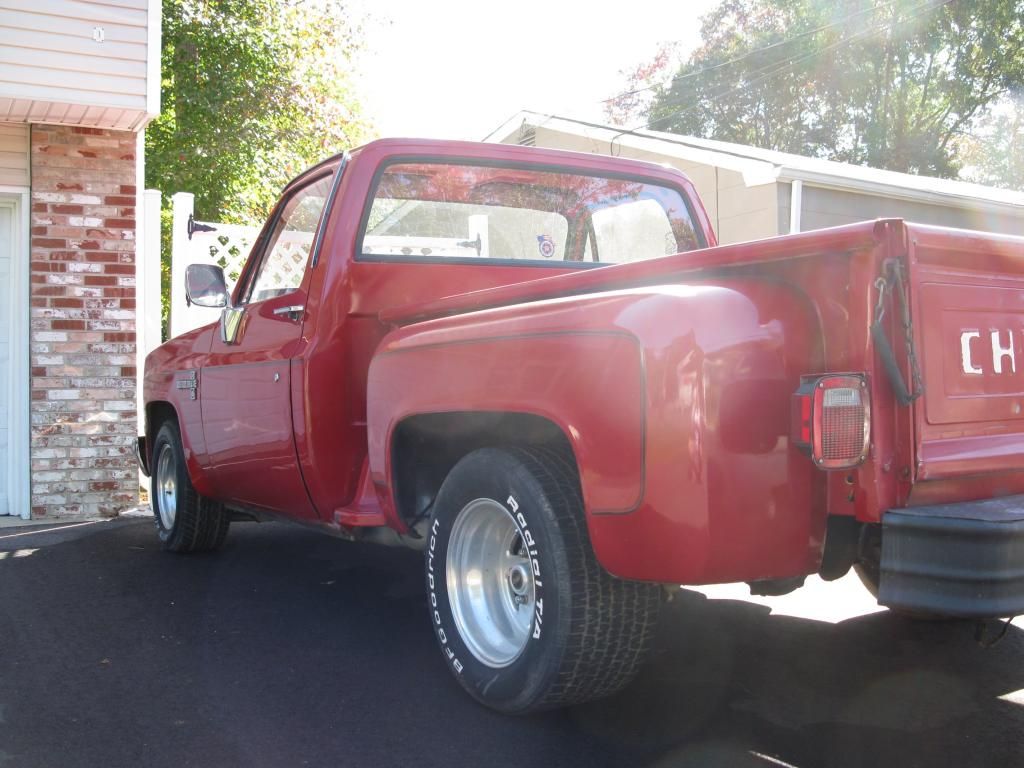  http://i1192.photobucket.com/albums/...ps21d36487.jpg |

|

|
|
04-23-2015, 08:35 AM
|
#2 |
|
Registered User
Join Date: Sep 2014
Location: Toms River, NJ
Posts: 437
|
Re: My 86 Stepside
Interior:
Tired bench seat and ridiculous shifter: 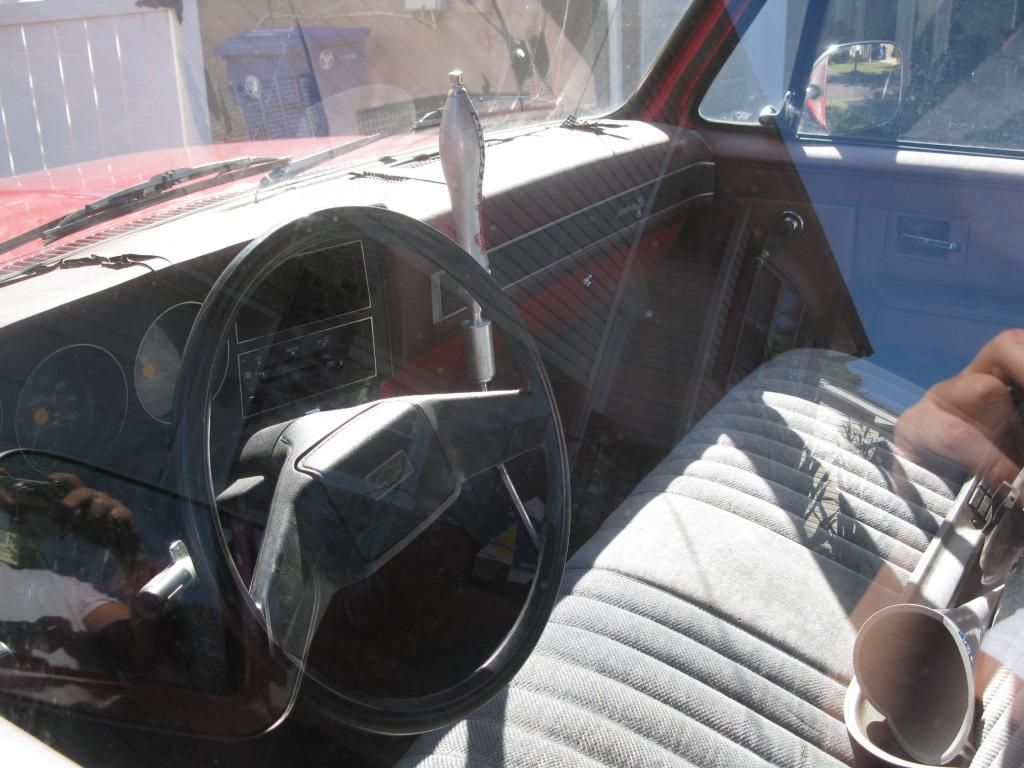 Beat up dash: 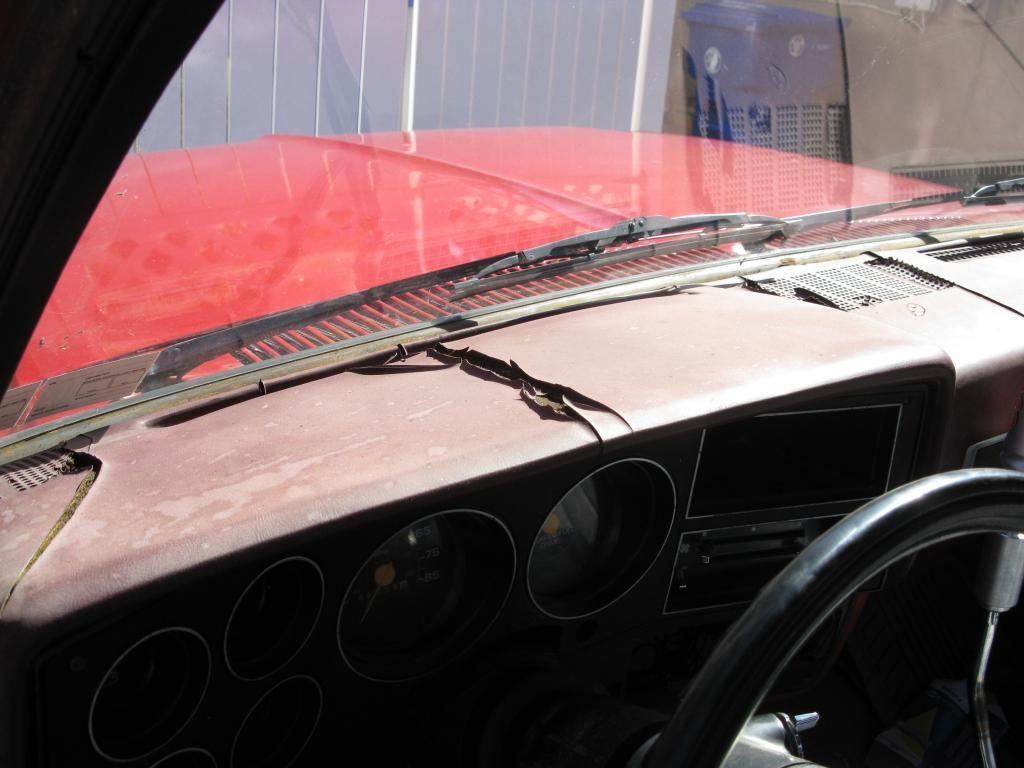 Hole cut in floor for shifter: 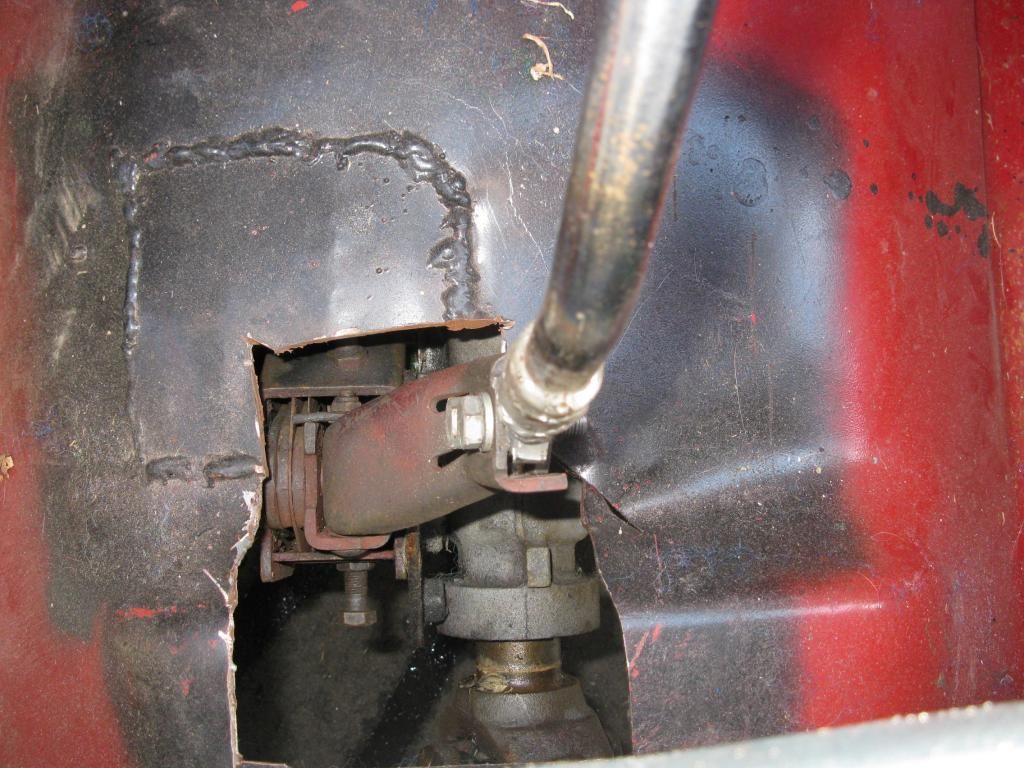 Door panels are in decent shape: 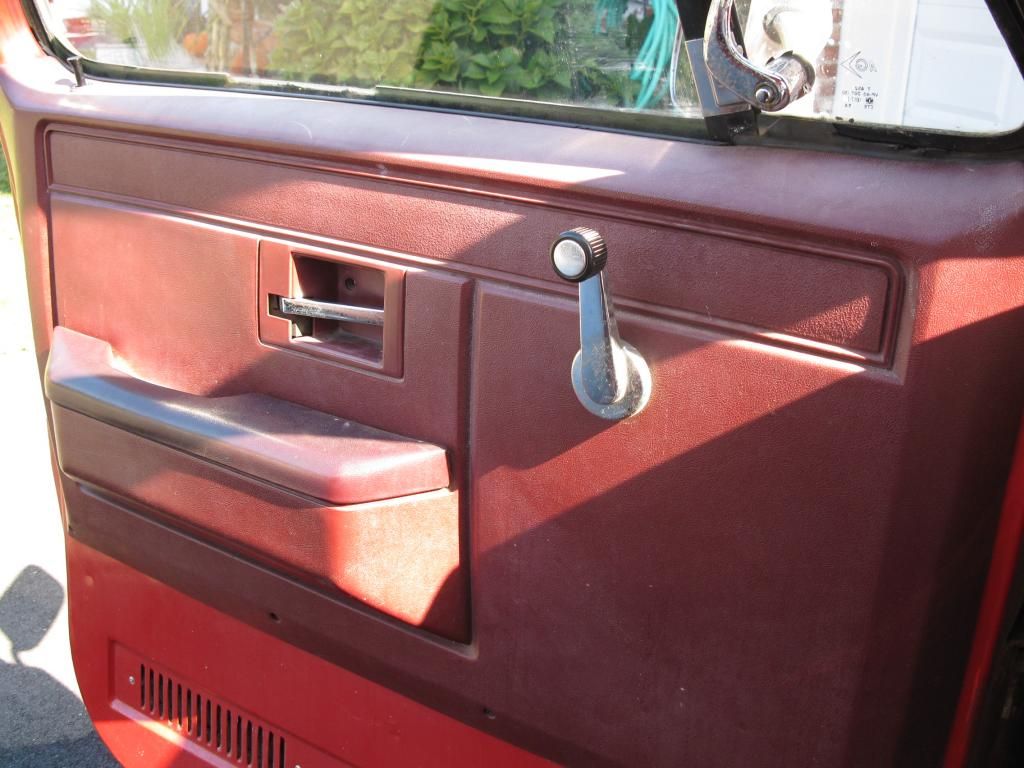
|
|
|
|
|
04-23-2015, 08:36 AM
|
#3 |
|
Registered User
Join Date: Sep 2014
Location: Toms River, NJ
Posts: 437
|
Re: My 86 Stepside
Under the hood:
|
|
|
|
|
04-23-2015, 08:40 AM
|
#4 |
|
Registered User
Join Date: Sep 2014
Location: Toms River, NJ
Posts: 437
|
Re: My 86 Stepside
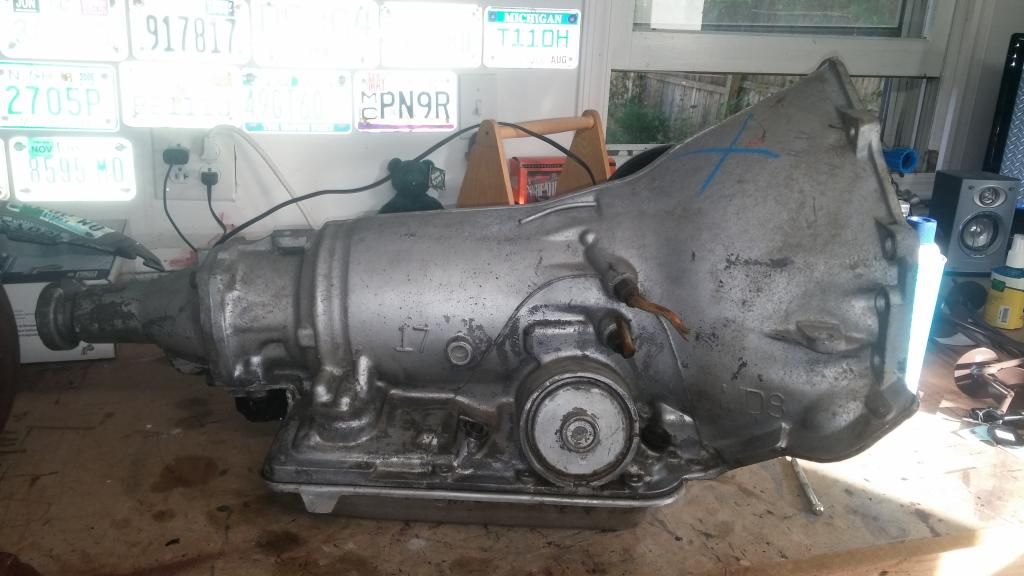
Picked up a 700r4 out of a 1990 suburban. I bought the rest of what I needed (torque converter, lockup kit, trans cooler lines, etc.) from bowtie overdrives and summit:
|
|
|
|
|
04-23-2015, 08:42 AM
|
#5 |
|
Registered User
Join Date: Sep 2014
Location: Toms River, NJ
Posts: 437
|
Re: My 86 Stepside
Then, I heard a knock while driving, cut the filter open and found this:
All those specs = not good  
|
|
|
|
|
04-23-2015, 08:50 AM
|
#6 |
|
Registered User
Join Date: Sep 2014
Location: Toms River, NJ
Posts: 437
|
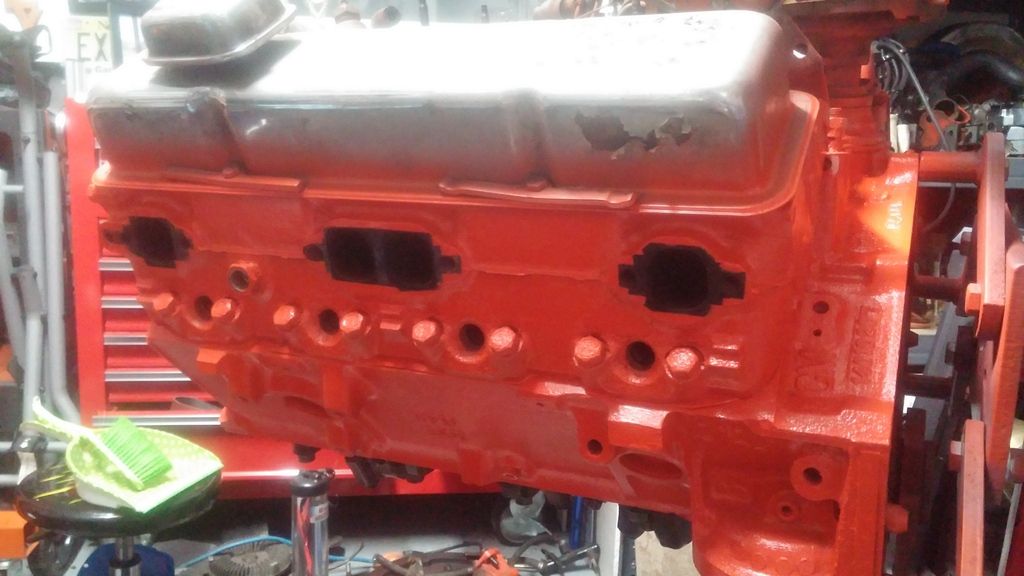
Re: My 86 Stepside
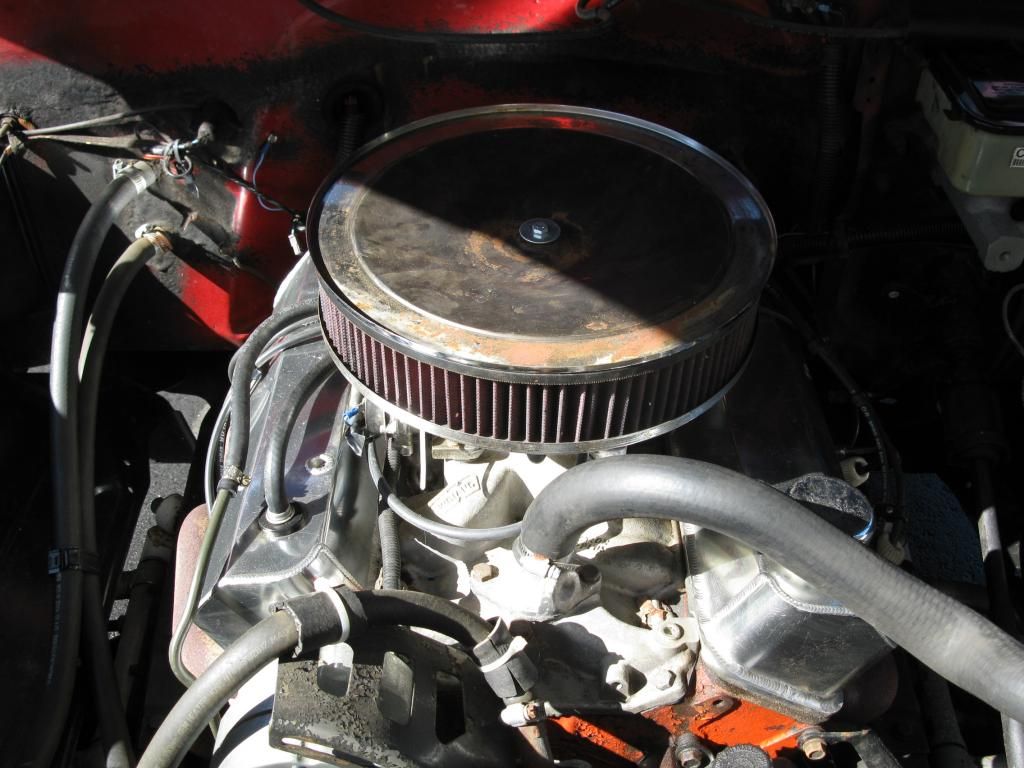
Picked this up. It's an L48 out of a Corvette, somewhere between 78-80 I believe. I did my best to look up the casting numbers and partial vin, but they are very difficult to see. The motor also came with a practically new Edelbrock 1405 on it. Plans for this are to clean and paint it, swap the intake from the old motor to the new and put on new belts, gaskets, and plugs.
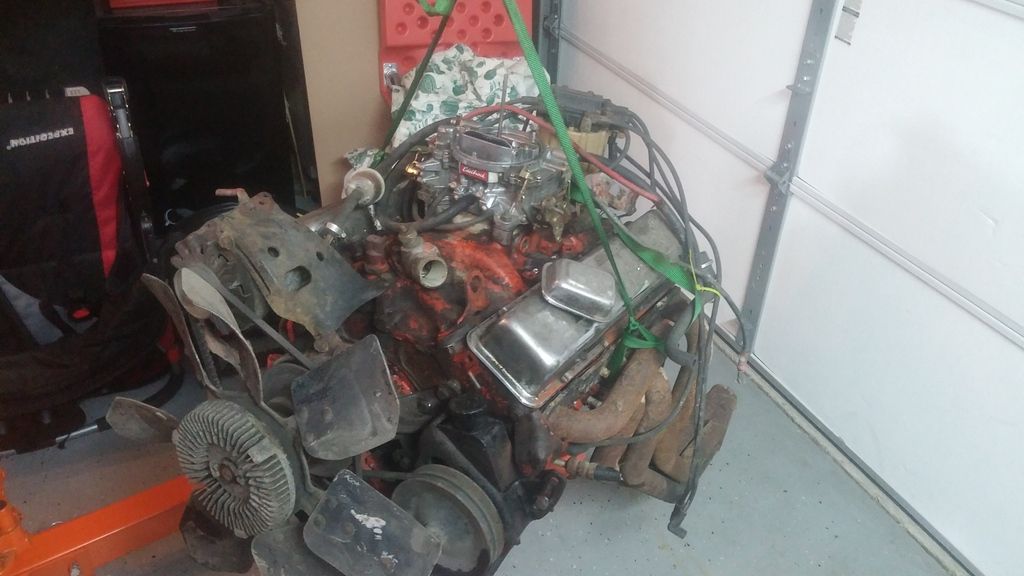 Previous owner thought one of the spark plugs was fouled. I'd say it was running a little rich...  Here was the power steering belt: 
Last edited by NJ C10 Guy; 04-23-2015 at 02:29 PM. |
|
|
|
|
04-23-2015, 08:52 AM
|
#7 |
|
Registered User
Join Date: Sep 2014
Location: Toms River, NJ
Posts: 437
|
Re: My 86 Stepside
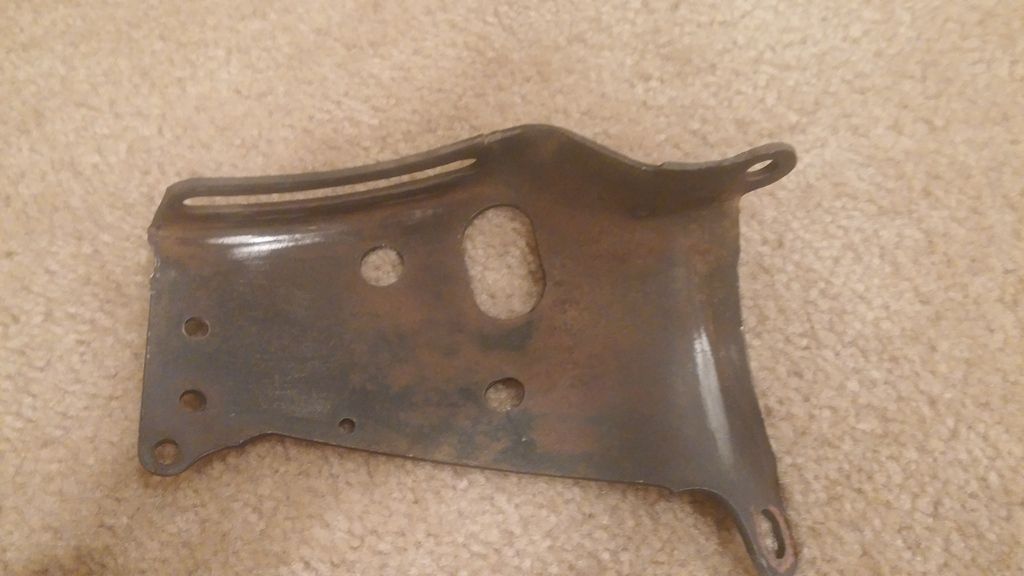
I figured while I'm taking the motor apart, I may as well paint the pulleys and brackets and make them look nice.
|
|
|
|
|
04-23-2015, 08:59 AM
|
#8 |
|
Registered User
Join Date: Sep 2014
Location: Toms River, NJ
Posts: 437
|
Re: My 86 Stepside
Since I am delaying getting the old motor out until I do what I want to the one on my engine stand, I figured I'd get to work on some interior parts. I used SEM paint on the plastics and DupliColor Perfect Match on the metal. The DupliColor is a surprisingly close match.
Old kick panel vent cover color: 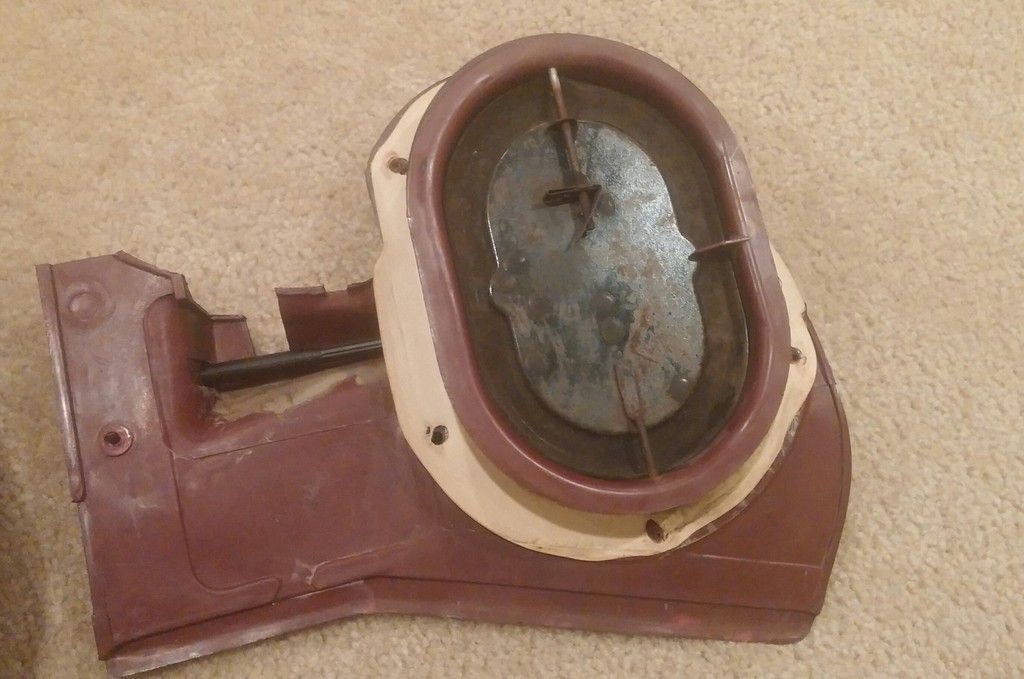 Freshened up: 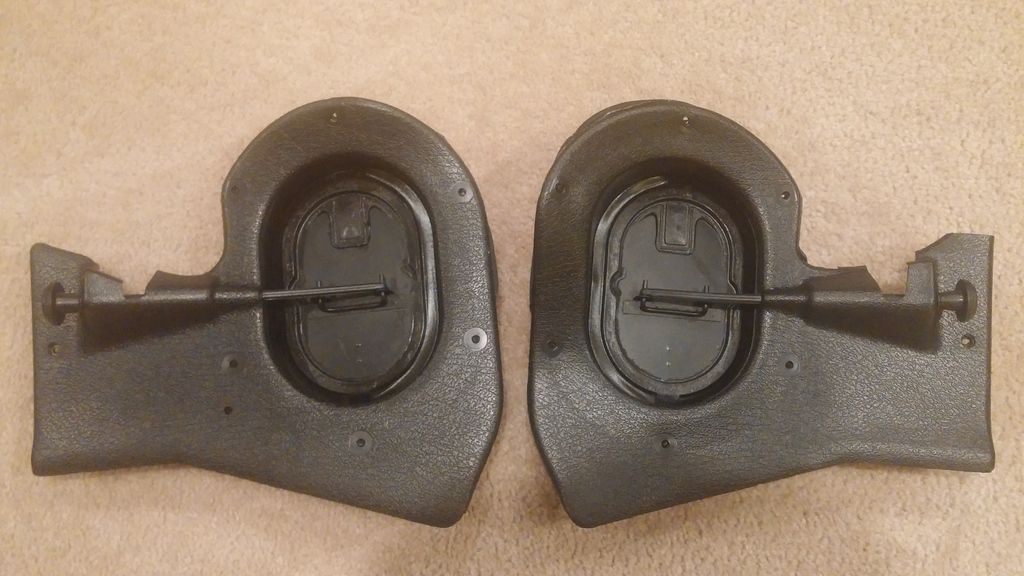 Sill plates. They were black originally but I figured hitting them with SEM wasn't a bad idea: 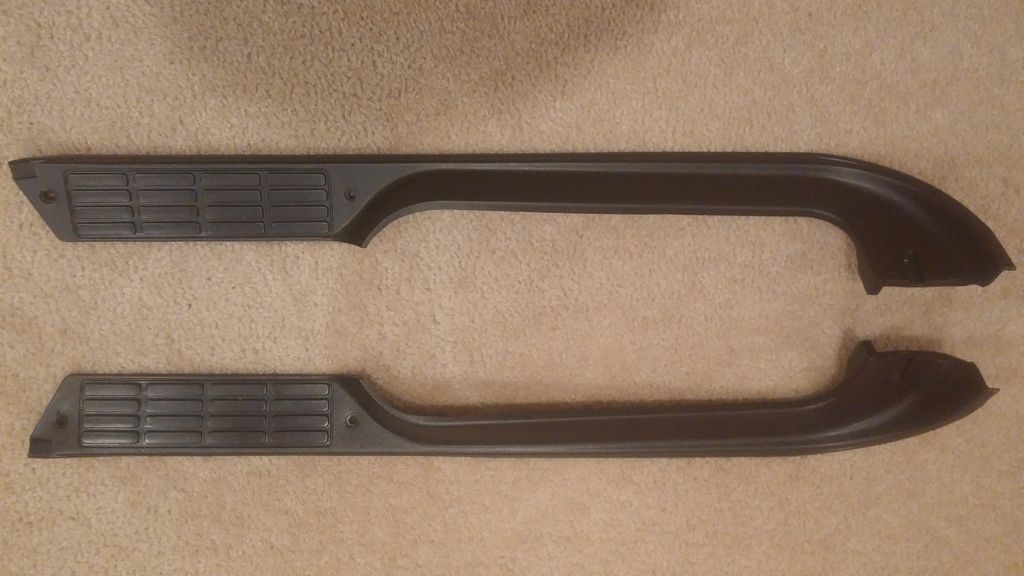 Here is an "after" shot of the glovebox. I suck at taking before pics: 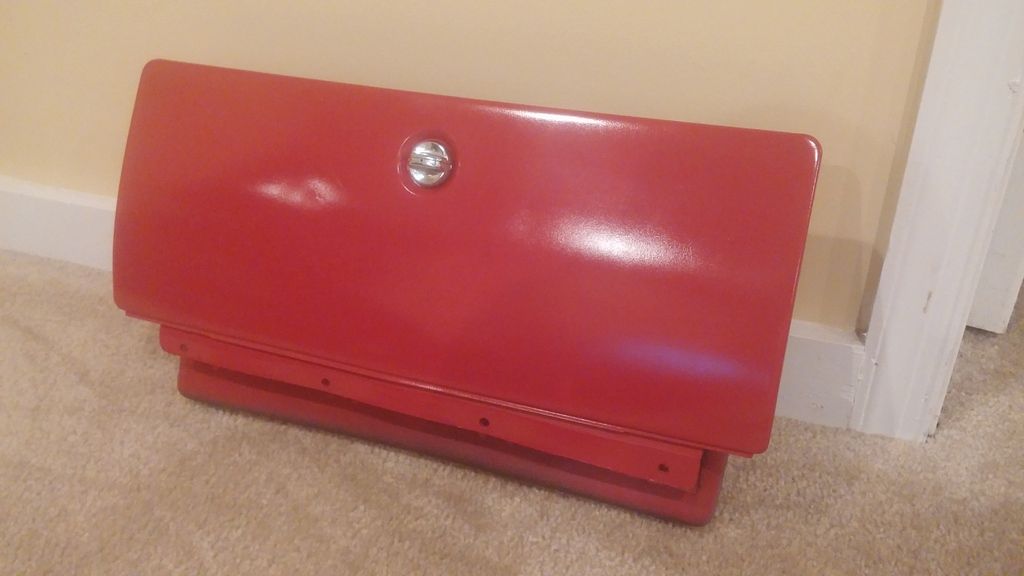 6x9 speaker brackets before: 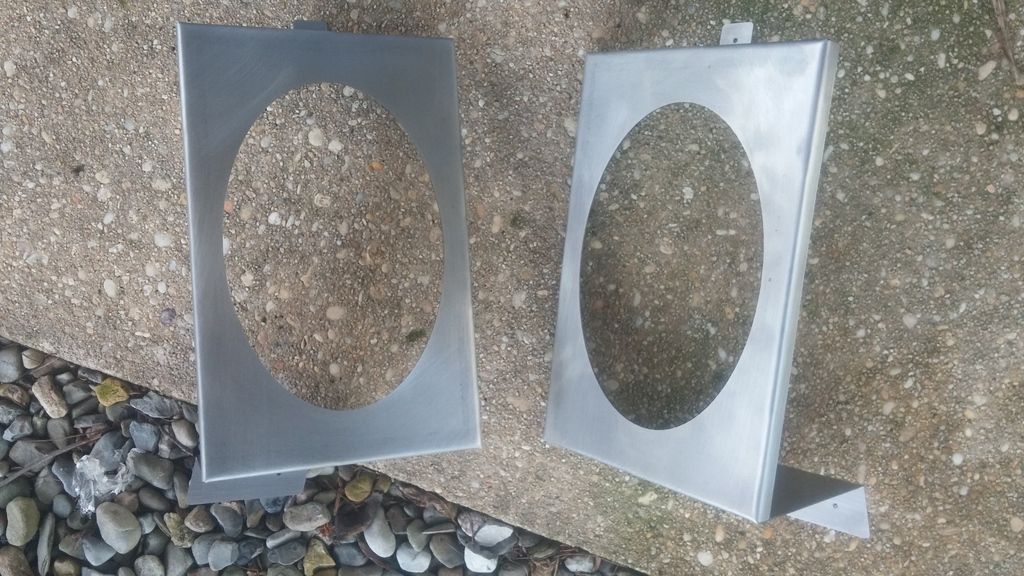 And after: 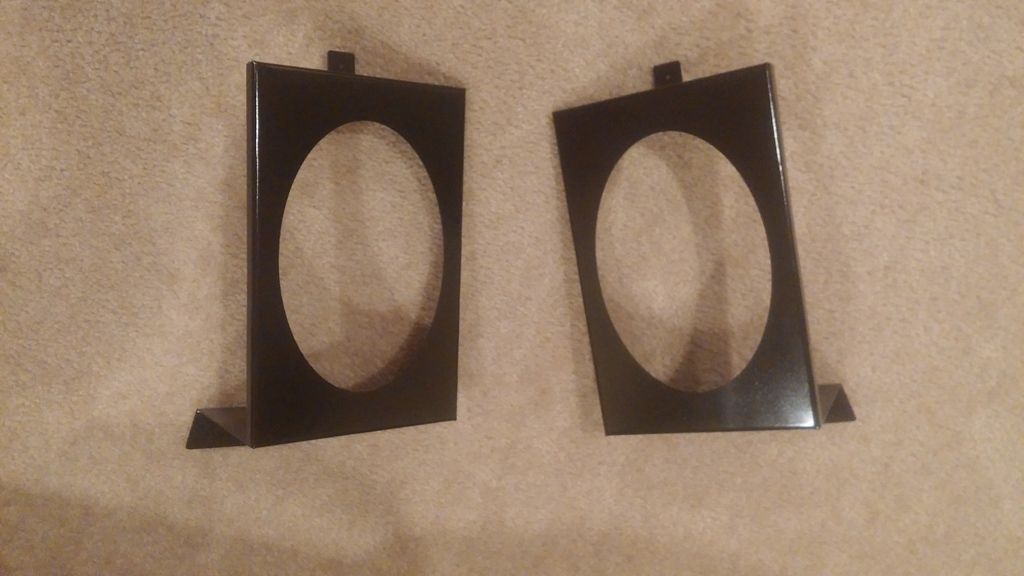 Lower radiator support cover after sanding, before prime and paint: 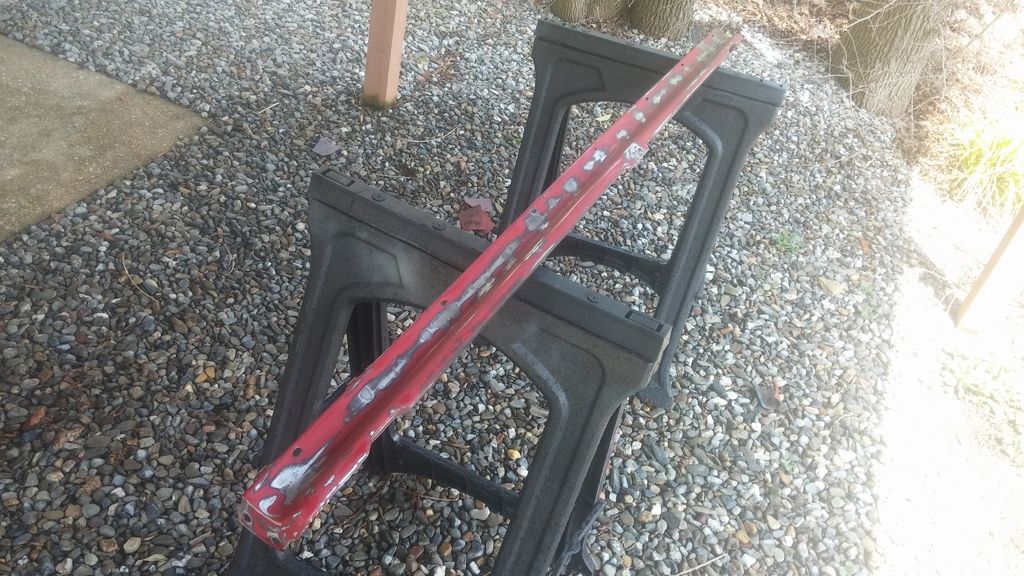 After paint: 
|
|
|
|
|
04-23-2015, 09:57 AM
|
#9 |
|
Registered User
Join Date: Sep 2014
Location: Toms River, NJ
Posts: 437
|
Re: My 86 Stepside
I have had to do a bunch of miscellaneous stuff from when I bought it until now. For me, this was all brand new. i had never turned a wrench on a car before, minus oil changes and general maintenance.
I did get the ring and pinion swapped out from 2.73 to 3.73, but I had a shop do it for me. I've also: -Put new lights all the way around -Replaced the striker bolts -Replaced the on cab weatherstripping -Replaced the fuel pump -Replaced the bed to frame mounting bolts -Swapped out the steering column to an automatic with tilt -Swapped out the steering wheel with a new Grant wheel -Replaced the rear u-joint because it decided to blow apart while I was doing 65mph down the highway. That was fun I'm really trying to get the cab mount bolts loose. I must have soaked them with PB Blaster 10 times already. I've gotten the rear ones loose, but the front ones I can't get to budge. I've tried a regular ratchet, a breaker bar (hitting it with a mini sledge), and a cordless impact gun. I haven't tried heat yet. Any other suggestions or tips? |
|
|
|
|
06-02-2015, 10:32 PM
|
#10 |
|
Registered User
Join Date: Sep 2014
Location: Toms River, NJ
Posts: 437
|
Re: My 86 Stepside
These stupid cab mounts are killing me. I really don't want to cut my floor pan, but I think I'm going to have to. The fronts just aren't moving and I think I broke the captive nut on the driver's side. It looks like it's coming out at an angle and it turns and turns but won't back out. The top rubber mount actually ripped while it was turning and I was able to just pull it out. The 2 rear ones came out without too much struggle, so I guess it's kind of a win.

|
|
|
|
|
06-02-2015, 10:49 PM
|
#11 |
|
Registered User
Join Date: Sep 2014
Location: Toms River, NJ
Posts: 437
|
Re: My 86 Stepside
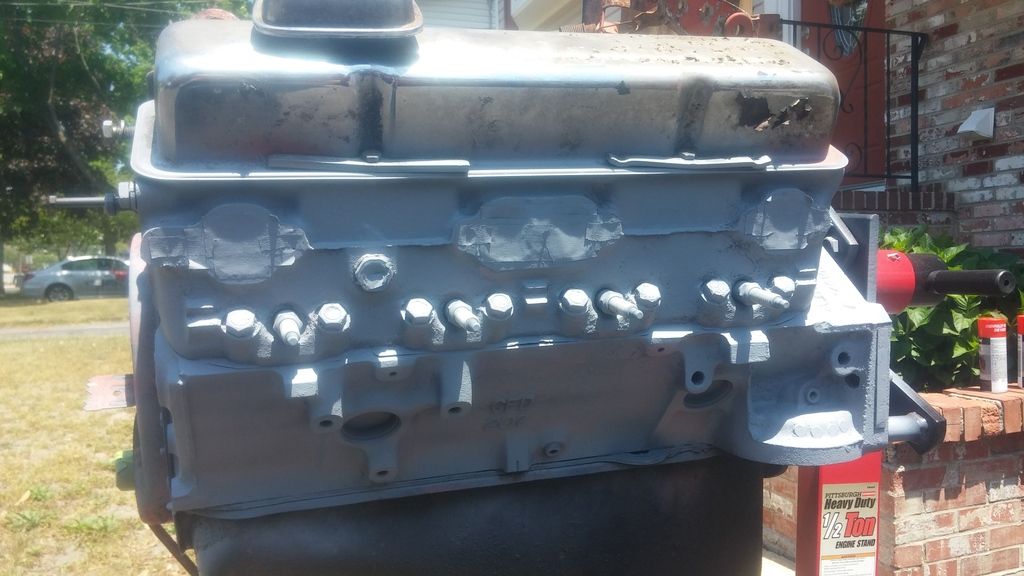
I painted my block. Left on as much as I could (old spark plugs, accessory bolts, manifold, distributor, etc) so I didn't have to tape any more than I needed. I started by spraying it with Greased Lightning, scrubbing it with a grout brush and washing it, then I hit it with a wire wheel, then more Greased Lightning, and finally grease and wax remover. Then I used DupliColor primer and hit it with Chevy Orange. Block came out awesome.
|
|
|
|
|
06-02-2015, 10:56 PM
|
#12 |
|
Registered User
Join Date: Sep 2014
Location: Toms River, NJ
Posts: 437
|
Re: My 86 Stepside
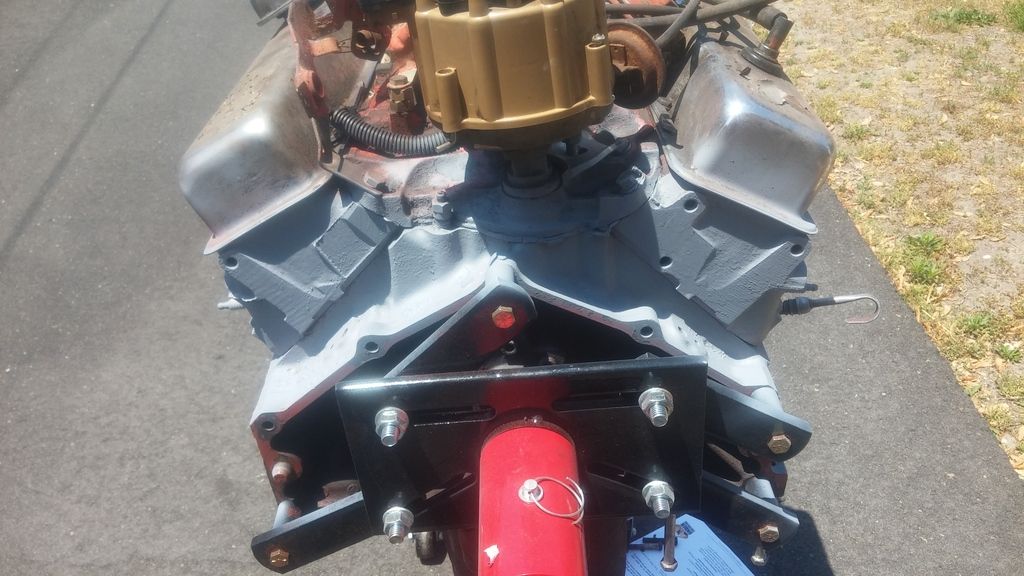
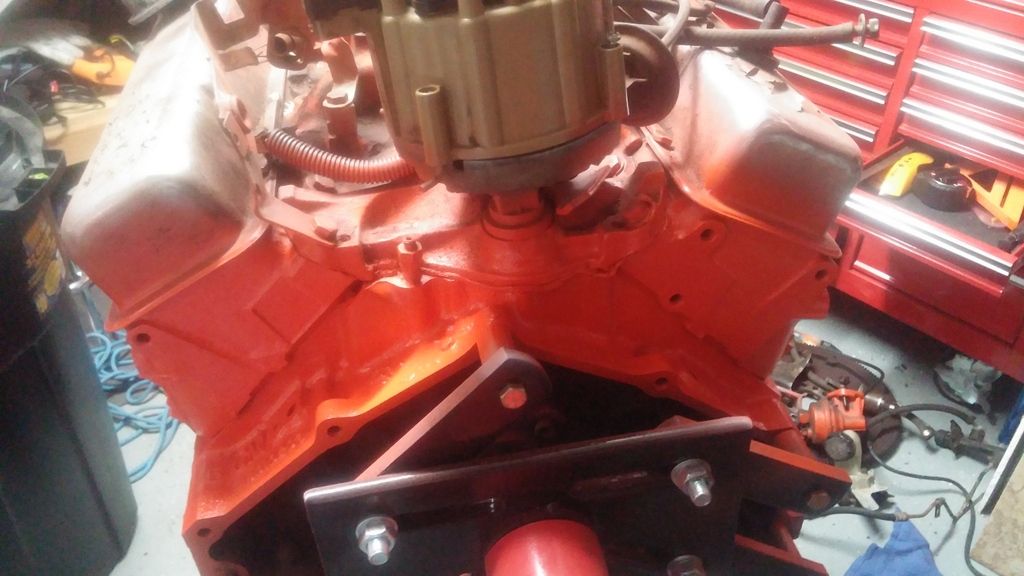
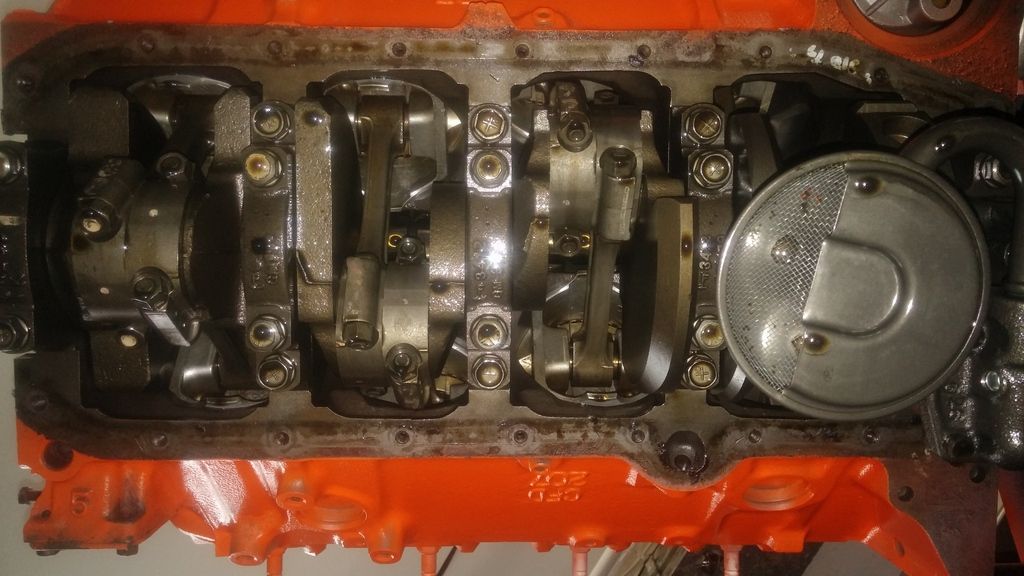
I did my best to ID the block. Keeps coming back to an 80-85 350, 2 bolt or 4 bolt main. It has an intake off an L48 and 882 heads. Turns out they did use this motor in a Corvette, but it's all been a mystery to me. Took the oil pan off today and was pleasantly surprised to see it's a 4 bolt main. Also noticed the double roller timing chain. I'm not going to check the cam, but I wouldn't be surprised if it was swapped. Only thing is, if they swapped the cam and put a new timing chain on, why not at least swap out the intake? Oh well. Now I just need to swap out all the gaskets, but I'm going to get a new timing cover since the one I had was leaking and stripping it and painting it will be a PITA. I'd rather spend the $20 on a new one.
|
|
|
|
|
06-22-2015, 04:55 AM
|
#13 |
|
Registered User
Join Date: Sep 2014
Location: Toms River, NJ
Posts: 437
|
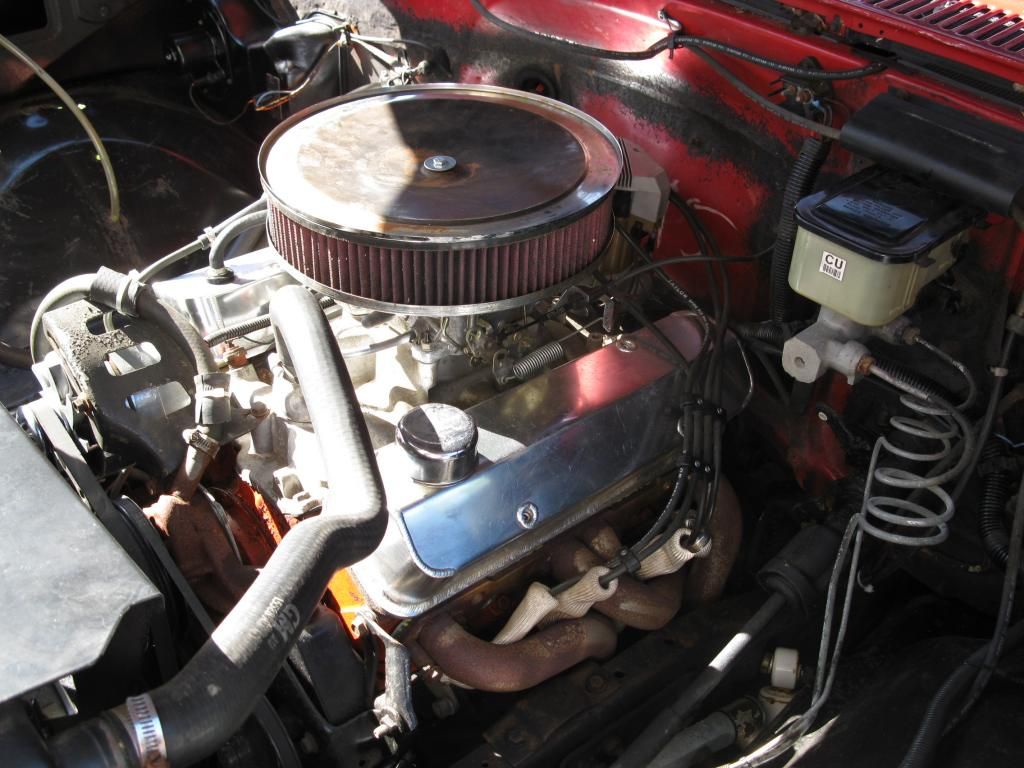
Re: My 86 Stepside
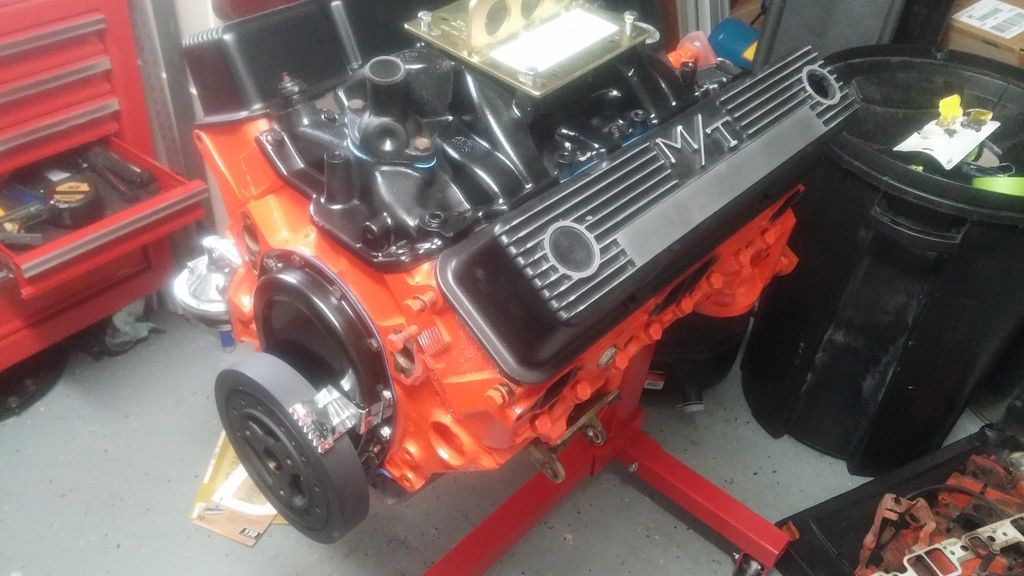
So I did a lot of scraping off the old gaskets, and was able to install the new timing cover, harmonic balancer, a new oil pan, swapped out the fuel pump from the old motor to this one, and painted the aluminum intake and installed that. Also painted some Mickey Thompson valve covers and put them over the heads for the time being. I wasn't sure how they would look, but I really like them. Everything went relatively smoothly. I did make one mistake that fortunately didn't turn around and bite me in the ass. I was going to hold the intake manifold gasket in place with a couple bolts while I applied the RTV to the china walls. Well, one of the bolts didnt thread properly, slipped out of my hand, into the lifter valley and right down the oil passage. Fortunately I'm a wizard with a magnet and I got it out.
|
|
|
|
|
06-22-2015, 05:30 AM
|
#14 |
|
Registered User
Join Date: Sep 2014
Location: Toms River, NJ
Posts: 437
|
Re: My 86 Stepside
Next up is the trans. I have to wire the lockup kit, and the brake switch kit. Then put a new filter in, mate it up to the engine, and it will be ready to drop in. Oh, I also need to remove the pilot bearing. I think I'm going to try the bread trick.
I also have to reconnect a wire to the bulkhead that pulled out when I was removing my steering column, get a neutral safety switch and install it, and install the steering column. Then I get to go through the stereo wiring and try to clean that mess up, as well as the MSD box that's wired but not hooked up. Gonna be a good time. |
|
|
|
|
06-22-2015, 06:55 AM
|
#15 |
|
Registered User
Join Date: Aug 2005
Location: Louisiana
Posts: 711
|
Re: My 86 Stepside
Looking Good! BTW, you can leave that pilot bushing/bearing in there, it does not interfere with the torque converter snout.
|
|
|
|
|
06-22-2015, 09:44 AM
|
#16 |
|
Registered User
Join Date: Sep 2014
Location: Toms River, NJ
Posts: 437
|
Re: My 86 Stepside
Thank you, sir. I had heard I'll need to remove it since I'm going from manual to auto but if I don't need to, one less thing I can mess up!
|
|
|
|
|
07-24-2015, 01:24 PM
|
#17 |
|
Registered User
Join Date: Sep 2014
Location: Toms River, NJ
Posts: 437
|
Re: My 86 Stepside
Just wanted to post some updates:
I got the cab mounts done finally. What a PITA. The 2 front mounts broke so I had to cut a hole. I used a 3.5" hole saw, heated up the nuts/bolts from up top and they came free. I don't have a MIG welder, so I just cut out a bigger piece of sheet metal, prepped it, and JB Welded it to the floor. I figured it wasn't that big of a deal since it's well-sealed and it's on the floor, not part of anything structural. Here is a pic from up top after one of the holes were cut 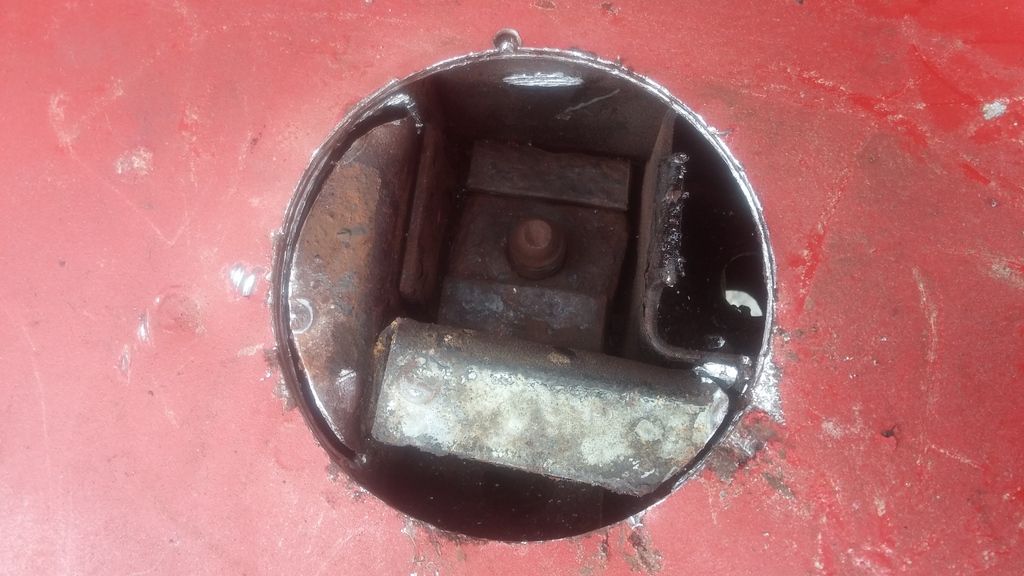 Here is a video of the nut broken free and spinning http://i1192.photobucket.com/albums/...psbc3tgsss.jpg |
|
|
|
|
07-24-2015, 01:27 PM
|
#18 |
|
Registered User
Join Date: Sep 2014
Location: Toms River, NJ
Posts: 437
|
Re: My 86 Stepside
Next I started on my interior. I had a few woes when it came to the wiring, but I eventually got it all figured out. The PO had wired the backup lights to a switch in the cab. After a lot of digging around I figured out how he wired it up and fixed it. It ended up costing me some time and a $20 neutral safety switch for my column.
Then I started on my interior. I had to drill out the seatbelt bolts because the PO had snapped the torx heads off the 2 outer bolts. I drilled them out to 27/64" and used a 1/2" tap to cut new threads. I also cleaned out all the other threads in the cab just for good measure. Once that was completed, I began the task of installing sound deadener. |
|
|
|
|
07-24-2015, 01:33 PM
|
#19 |
|
Registered User
Join Date: Sep 2014
Location: Toms River, NJ
Posts: 437
|
Re: My 86 Stepside
I used the methods described http://www.sounddeadenershowdown.com/ since it seemed to be the best practice. I got the CLD tiles from the website, but got the cc foam and the MLV at other retailers due to price. Fortunately there is a relatively local place that sells the MLV. Prior to this I ran all new speaker wire.
I don't have many pictures of the process, but laying the CLD tiles was very easy, just peel and stick. You can see them on the back wall in one of the pictures below. They really cut down on the vibration, especially the back wall. Laying the cc foam and the MLV was a little more difficult because of all the contours in the truck, but overall I think it came out alright. Finally I installed my new carpet. I used ACC brand and couldn't be happier. It fit really well and it went in without much problem, especially considering I've never done this before. Lastly, I installed my seat brackets, seats, and connected my amp, which is under the driver's seat. I left the amp wiring above the carpet because I will have a center console which will hide it all.  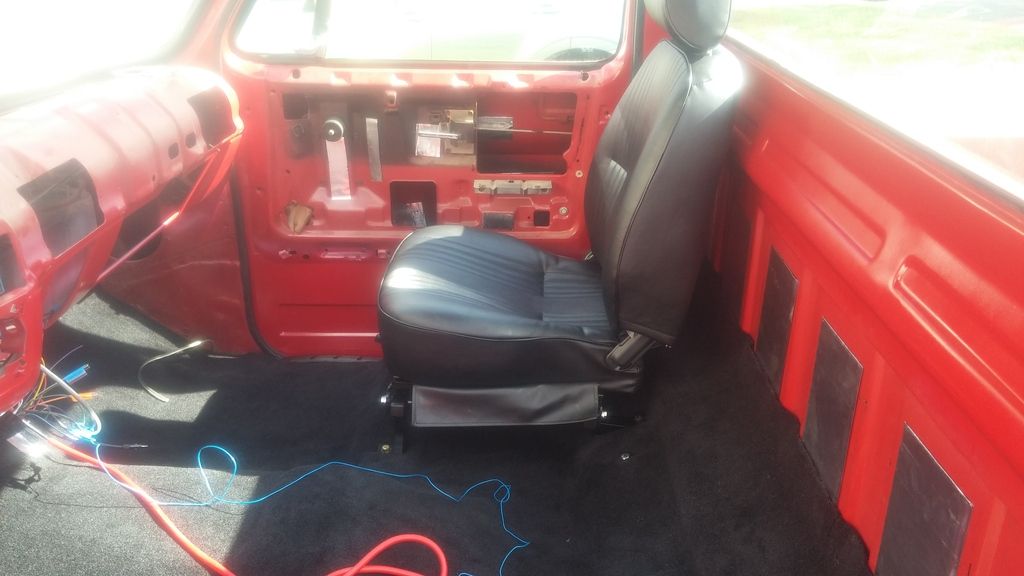
Last edited by NJ C10 Guy; 07-25-2015 at 01:32 PM. |
|
|
|
|
07-24-2015, 01:34 PM
|
#20 |
|
Registered User
Join Date: Sep 2014
Location: Toms River, NJ
Posts: 437
|
Re: My 86 Stepside
I also put all new weather stripping in the windows. Fortunately I had an OEM vent window for the driver's side which I really needed. Installing the weather stripping turned out to be pretty easy, which was a nice surprise. There was nothing rusted, and nothing broke. Big win for this guy.
|
|
|
|
|
07-24-2015, 02:00 PM
|
#21 |
|
Registered User
Join Date: Mar 2012
Location: Woodbury, Ct.
Posts: 1,664
|
Re: My 86 Stepside
What are you going to do with the back wall of the cab?
|
|
|
|
|
07-25-2015, 01:33 PM
|
#22 | |
|
Registered User
Join Date: Sep 2014
Location: Toms River, NJ
Posts: 437
|
Re: My 86 Stepside
Quote:
|
|
|
|
|
|
07-26-2015, 06:34 PM
|
#23 |
|
Registered User
Join Date: Dec 2006
Location: SLC, UT
Posts: 706
|
Re: My 86 Stepside
Love stepsides!
Looking forward to seeing this progress. |
|
|
|
|
09-07-2015, 10:07 PM
|
#24 |
|
Registered User
Join Date: Sep 2014
Location: Toms River, NJ
Posts: 437
|
Re: My 86 Stepside
I put amps under both seats, put the other seat in, put the seat belts in, and put the steering column in. Now it's starting to look like nice. Sorry for the bad picture...lighting was not optimal.

|
|
|
|
|
09-07-2015, 10:21 PM
|
#25 |
|
Registered User
Join Date: Sep 2014
Location: Toms River, NJ
Posts: 437
|
Re: My 86 Stepside
I spent the past month, which felt like a year, on my center console. I really wanted something nice and I am happy with the result. I have maybe $100 into it, but the time it took almost makes me never want to do another one! I will say there was a lot of thinking on how to make it work logistically, as well as how/when to build, glue, screw, and upholster. Overall it came out pretty nice I think, especially for a first timer.
Here I had already made my template and cuts. The template was made using a piece of cardboard. For some reason the two pieces weren't exactly the same on both sides, so there were 2 separate and different cuts to make. 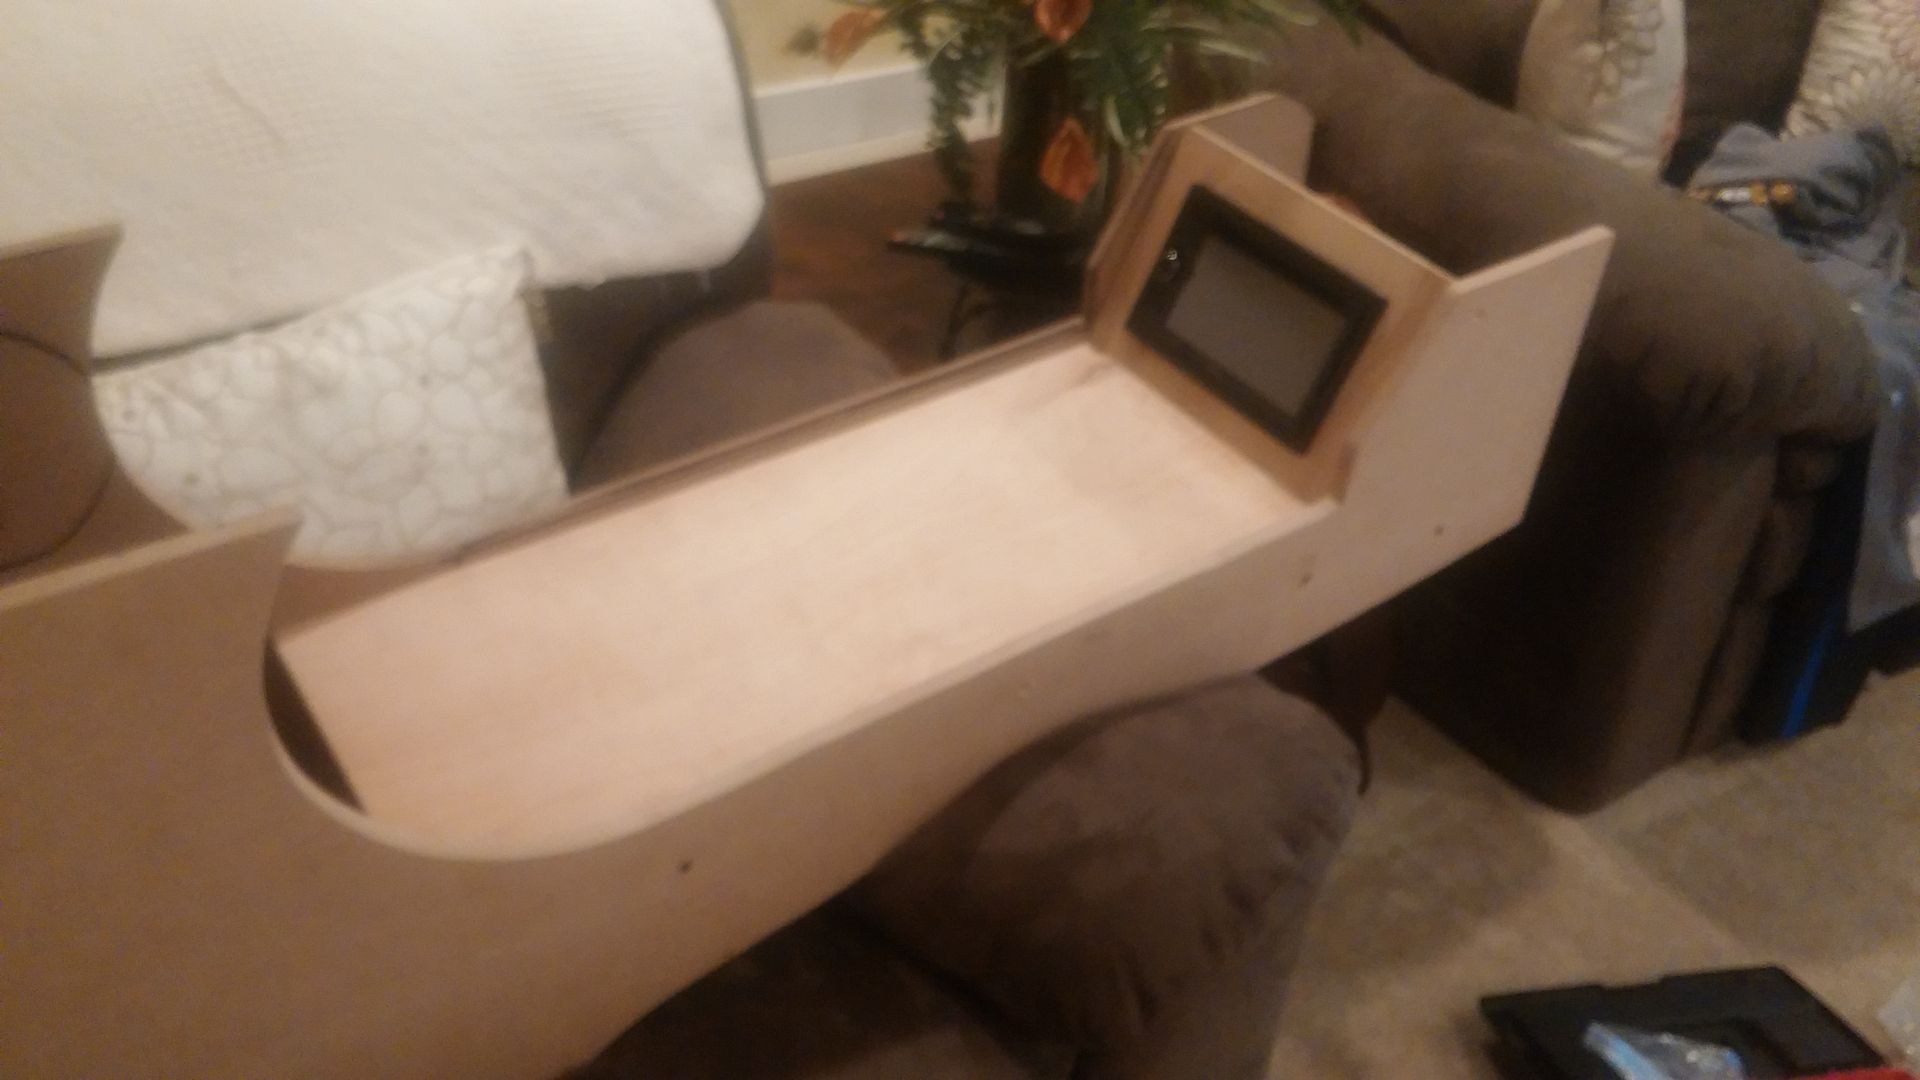 Here I am test-fitting the pieces. It was difficult cutting the right depth because i had to take into account the vinyl that was going on the inside. I think I had more luck than skill in that I didn't need to recut a lot. 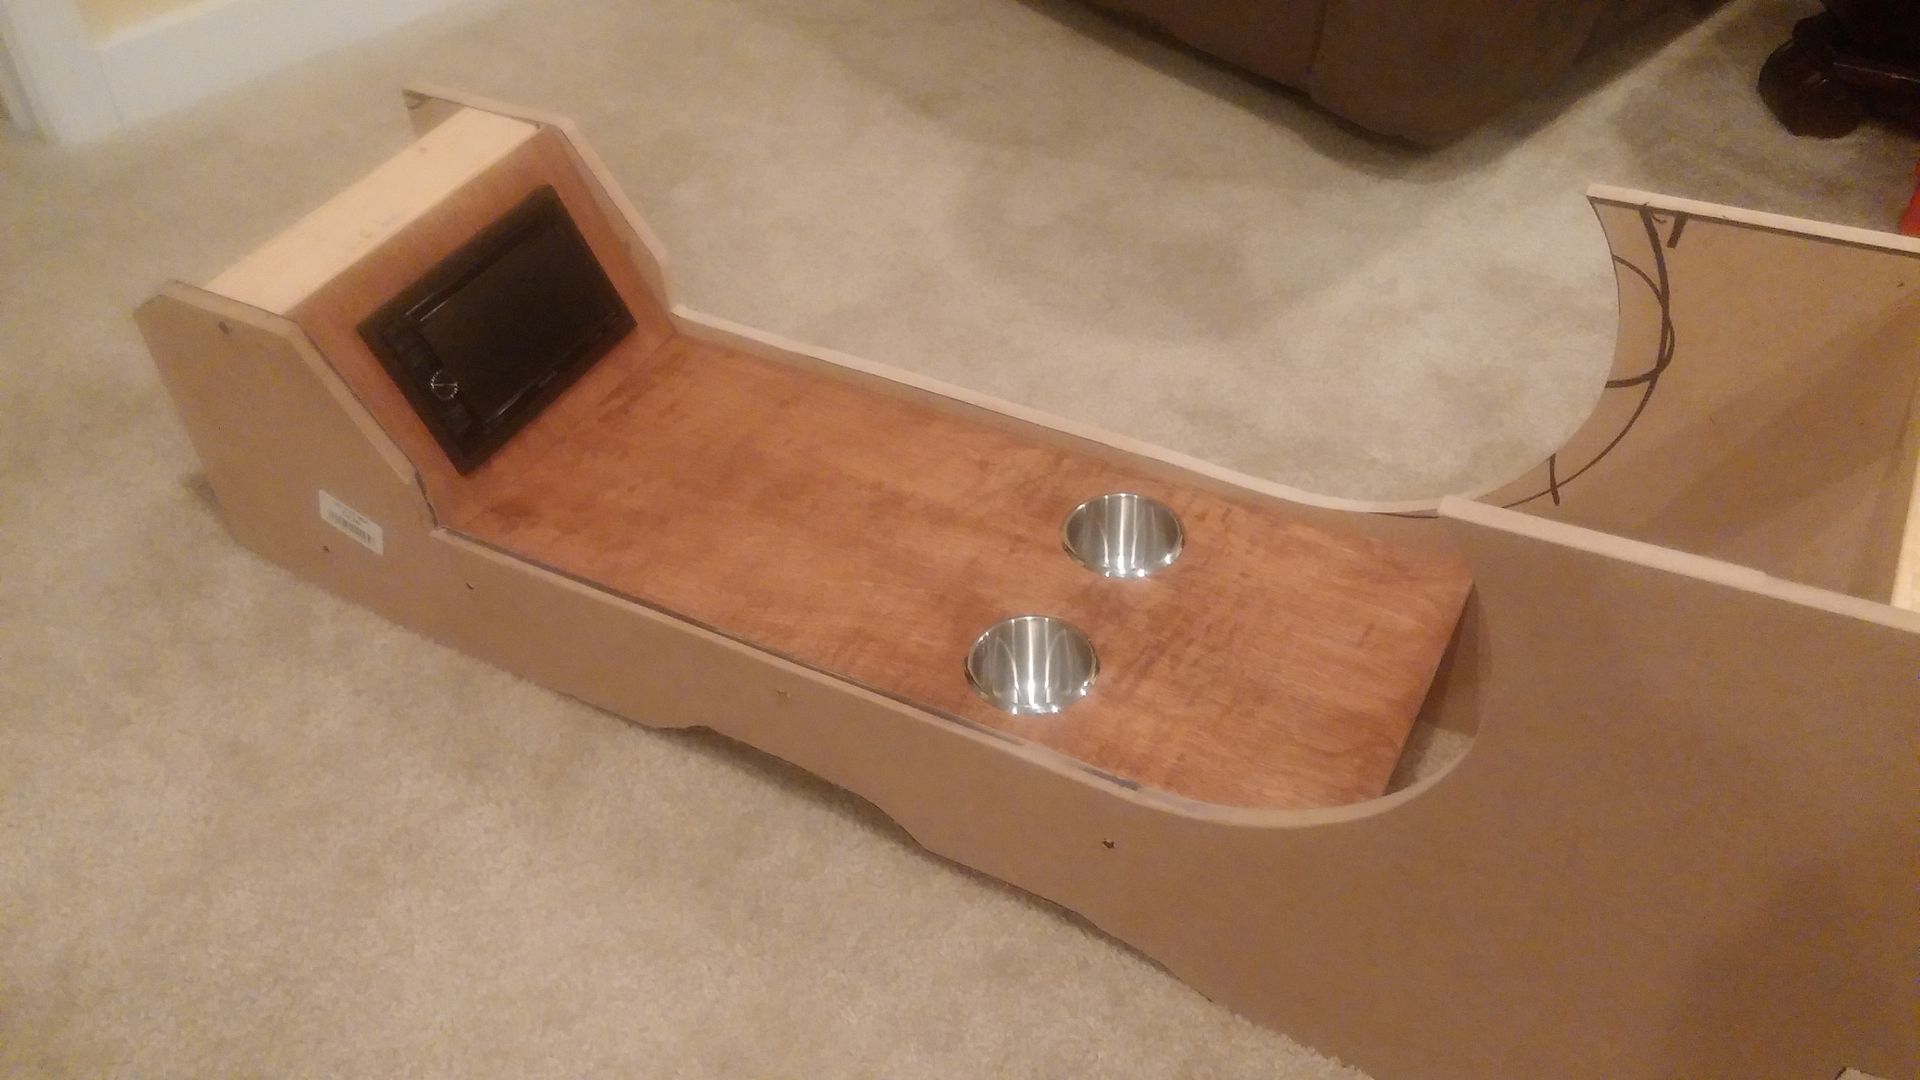 Here is the back piece for the sub all cut out. This was probably the most difficult part because I had to make a sealed enclosure for the box. I went with an 8" Infinity Reference sub, which you will see later. It needs a minimal amount of space to operate, which works for me. 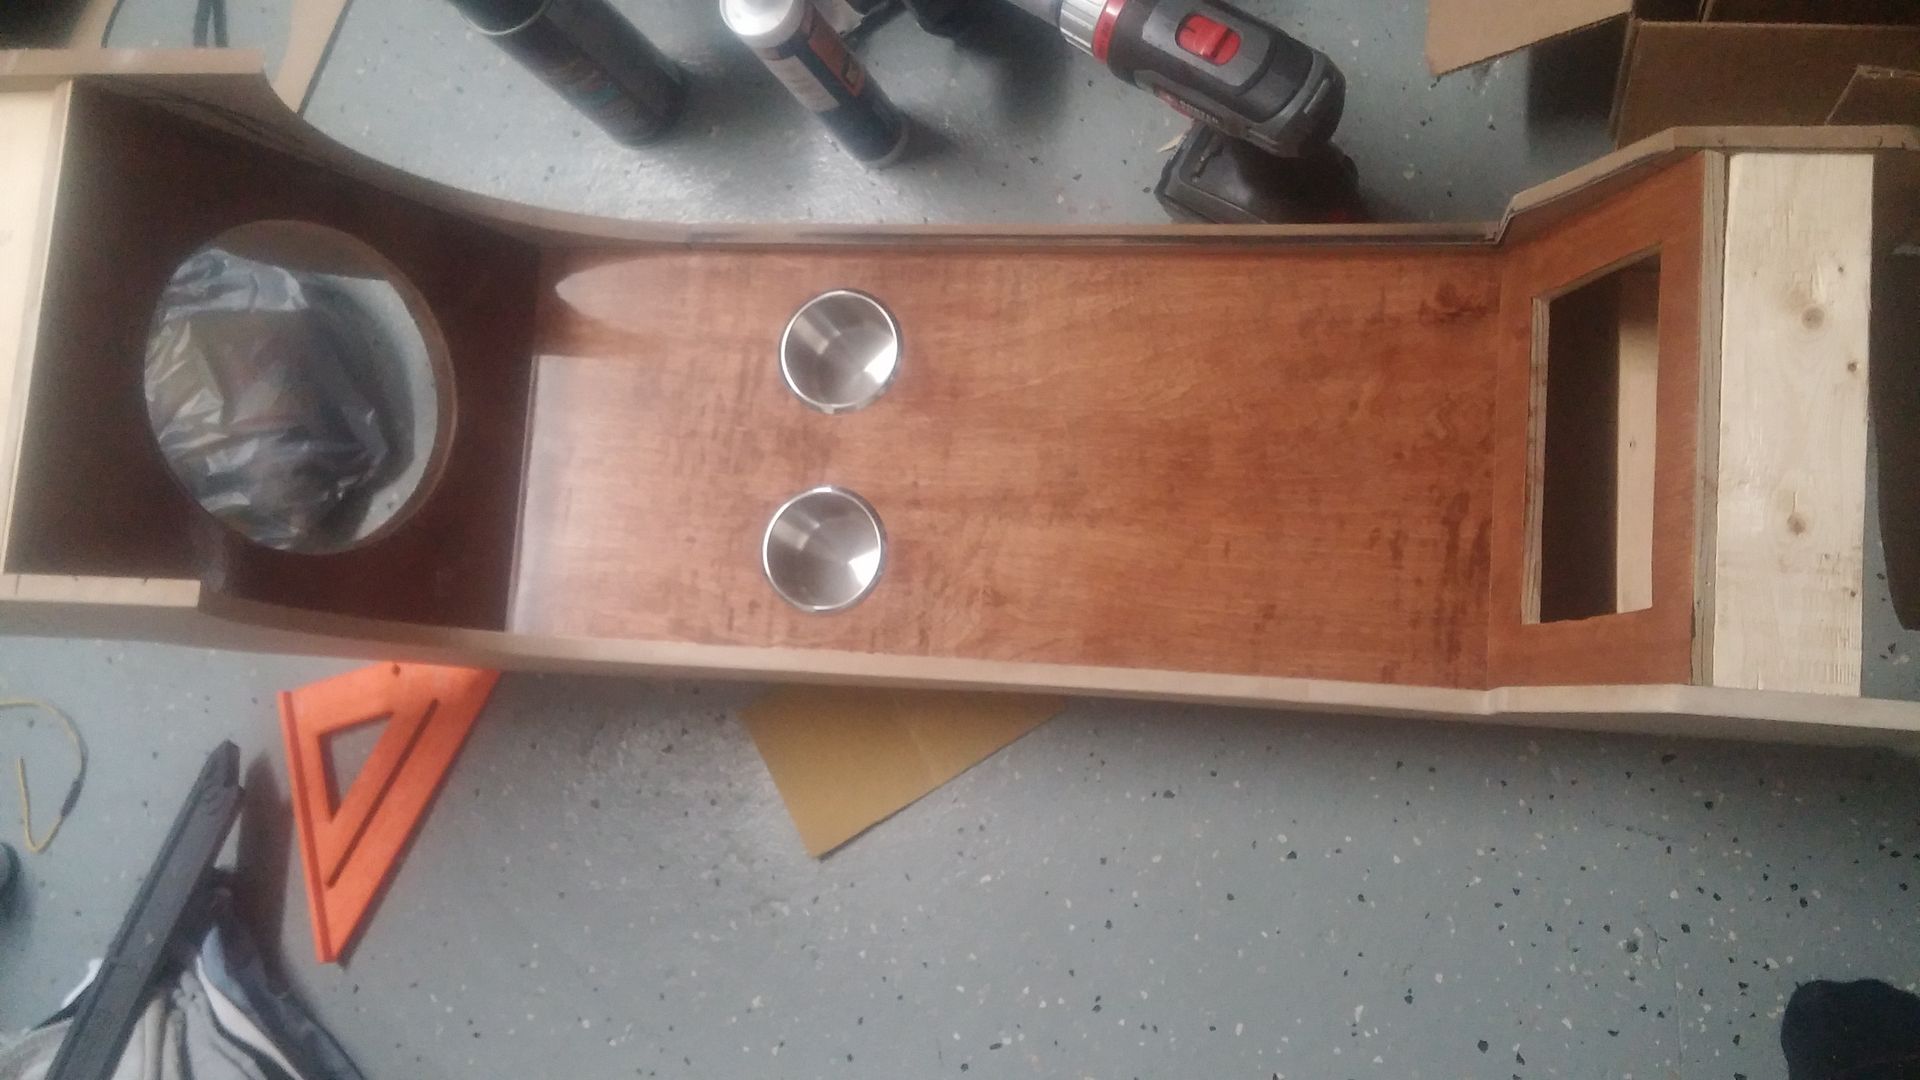 Here I ran into some issues. I could not get the vinyl to wrap around the curve going up to the armrest. It just wouldn't work so I cut vinyl for the inside and outside and glued it on which left the top edges to deal with. I wanted to keep costs down and build as much of it as I could myself, so taking it somewhere was out of the question for me. I tried to use sprinkler hose in this pic, but it kept kinking even after heating it and forming it. 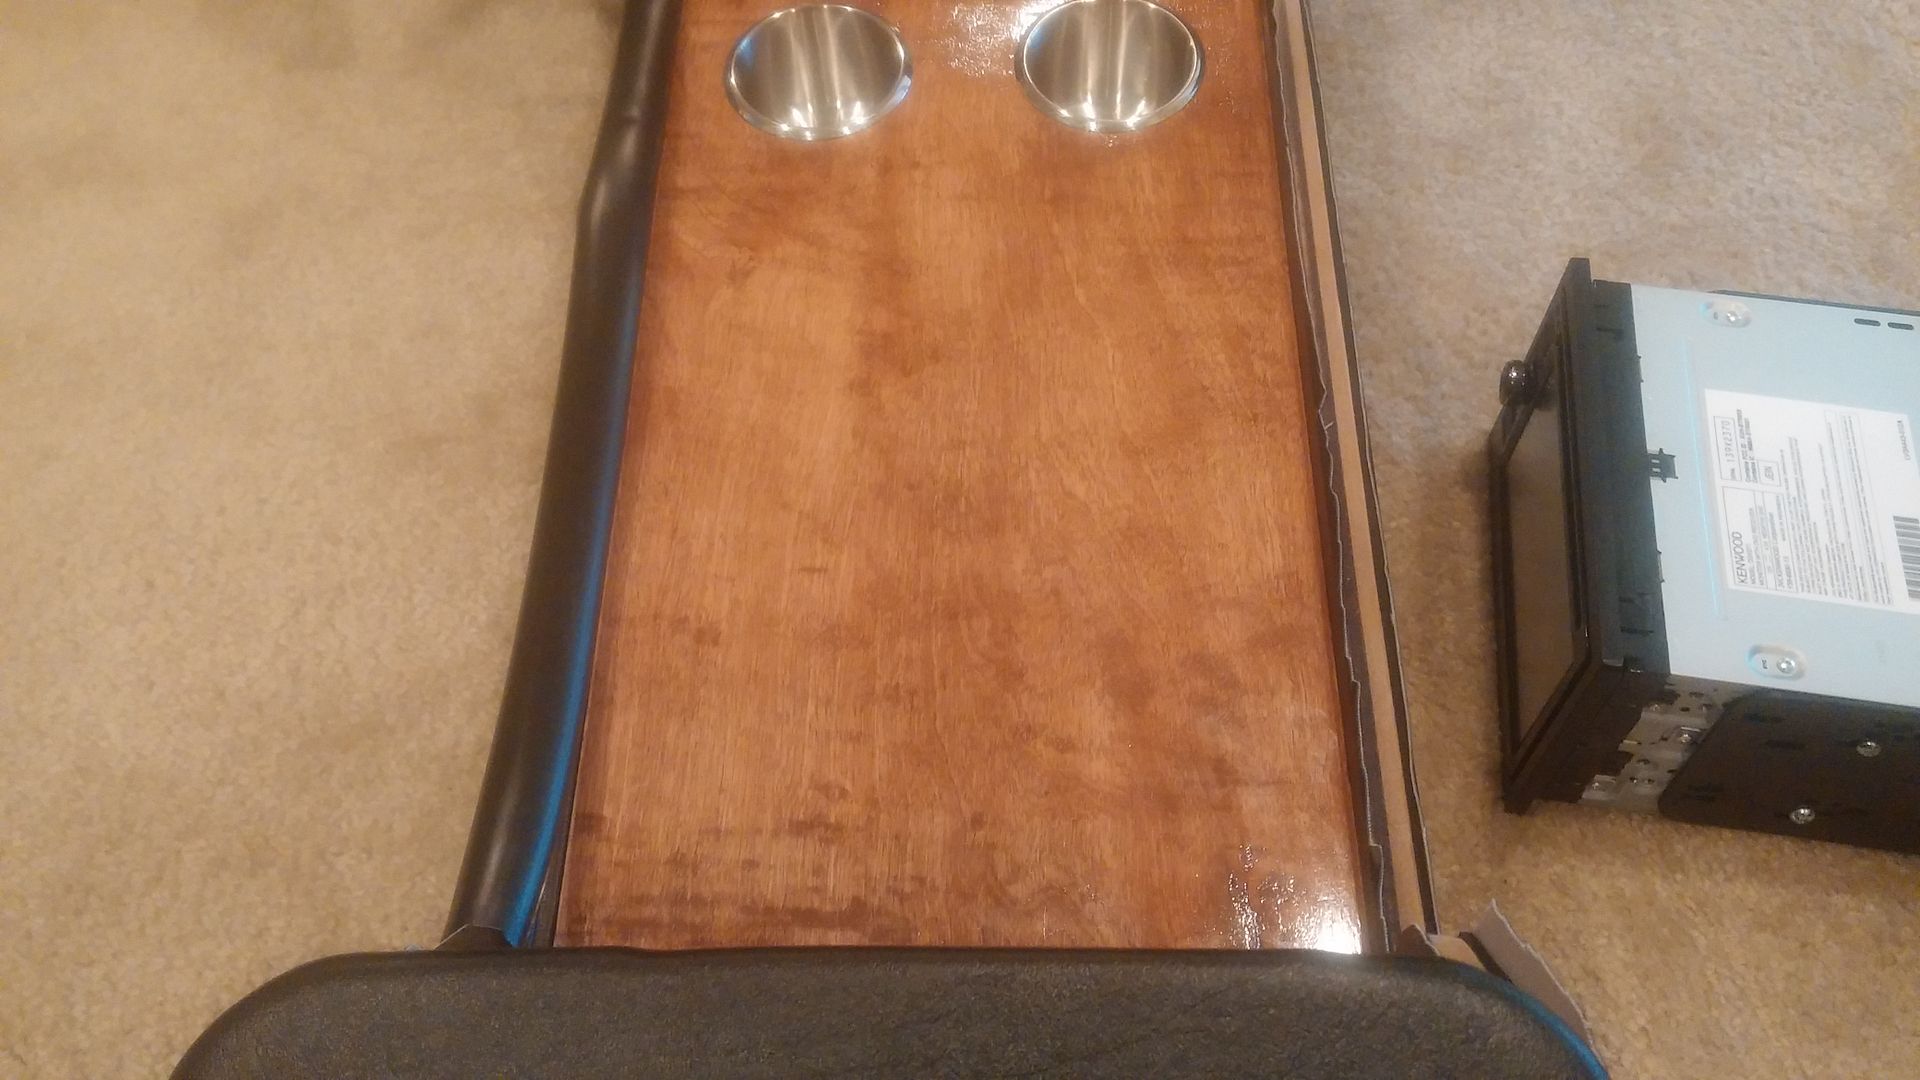 Another pic of the sprinkler hose 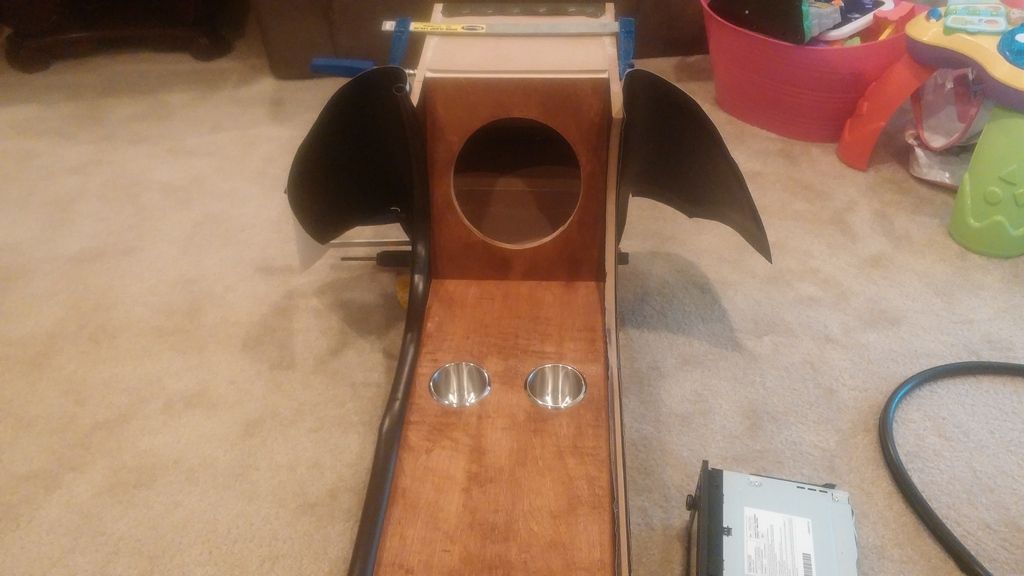 I ended up buying 1/2" rubber hose from the hardware store and it worked like a charm. Took me a couple cuts and tries, but it came out nice. 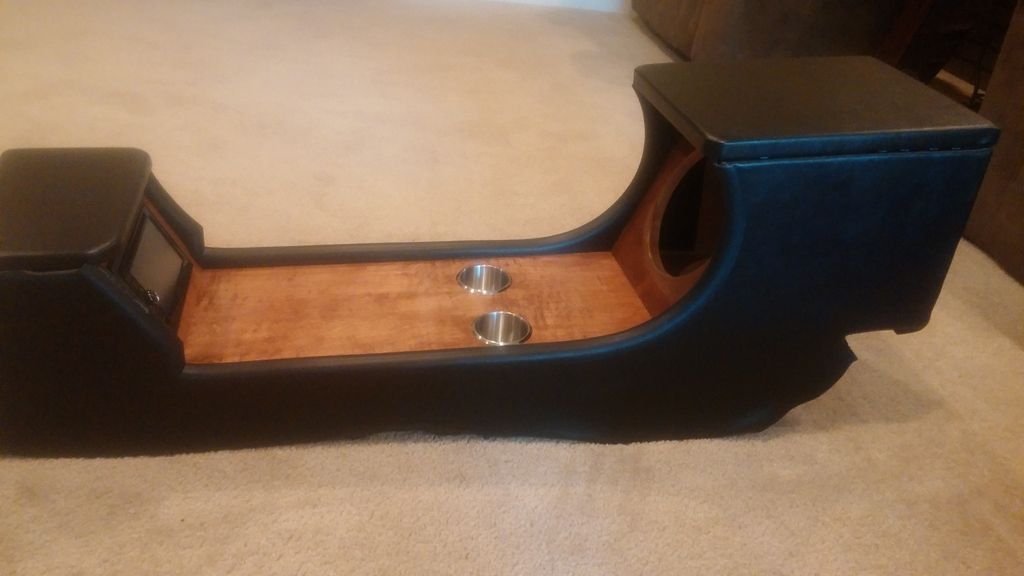 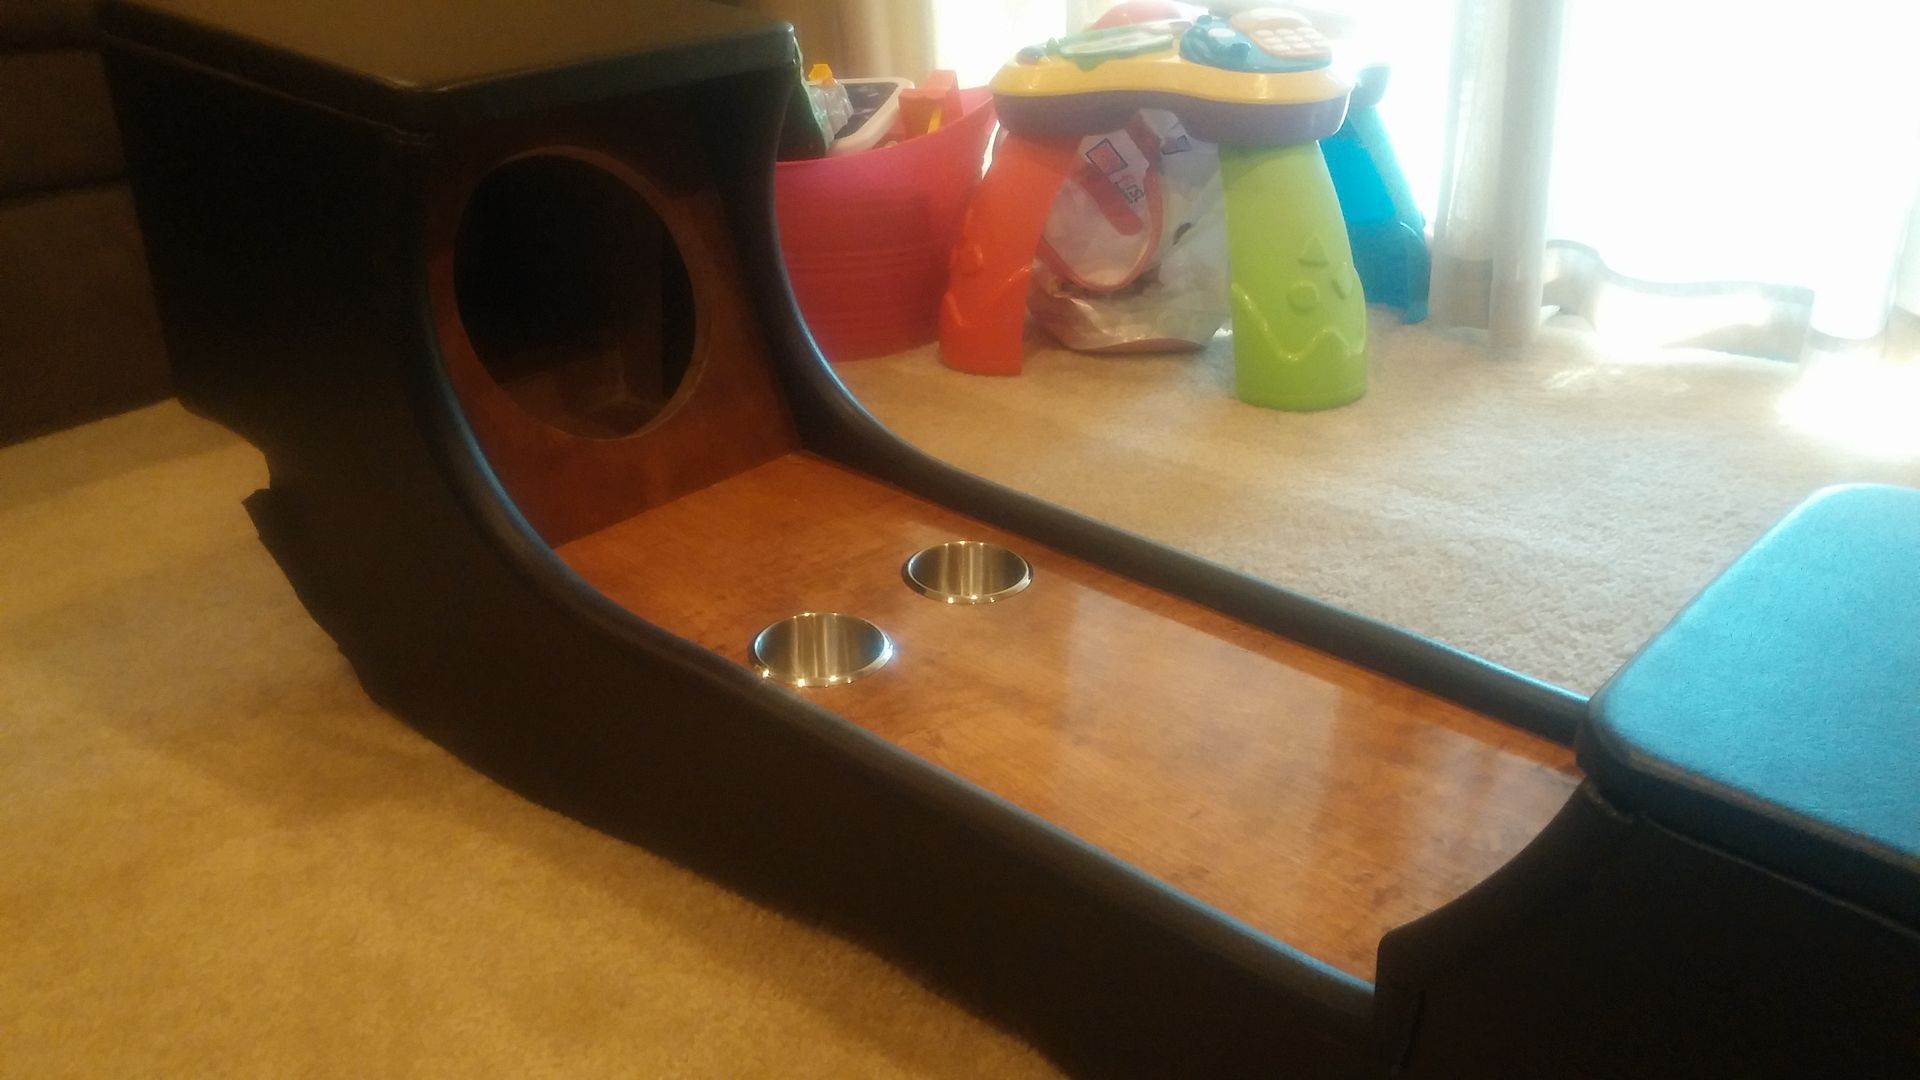 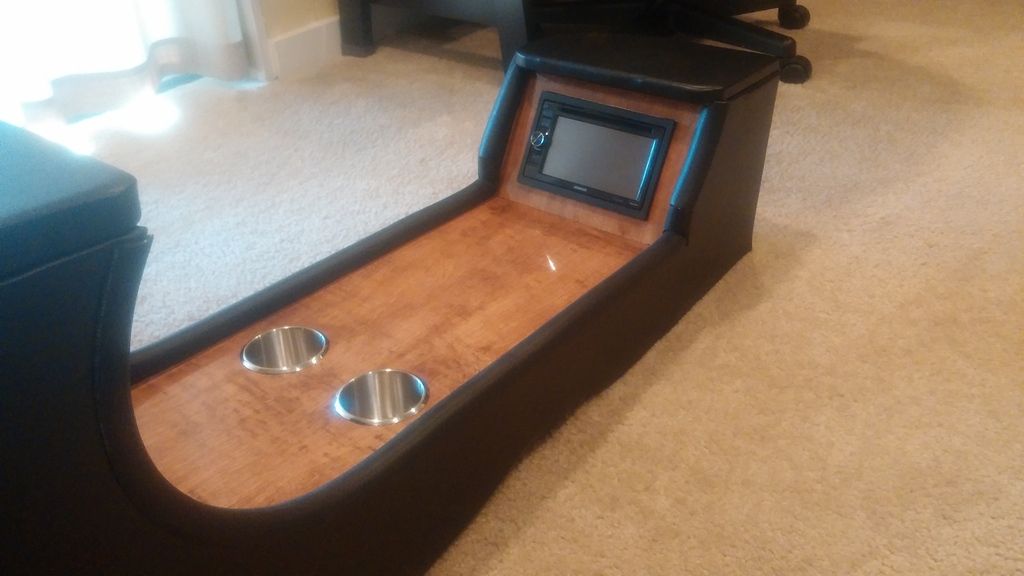 Here it is installed in the truck. It fit great, and it looks awesome. The sub really sets off the look and I know it will sound awesome once I get the thing up and running. 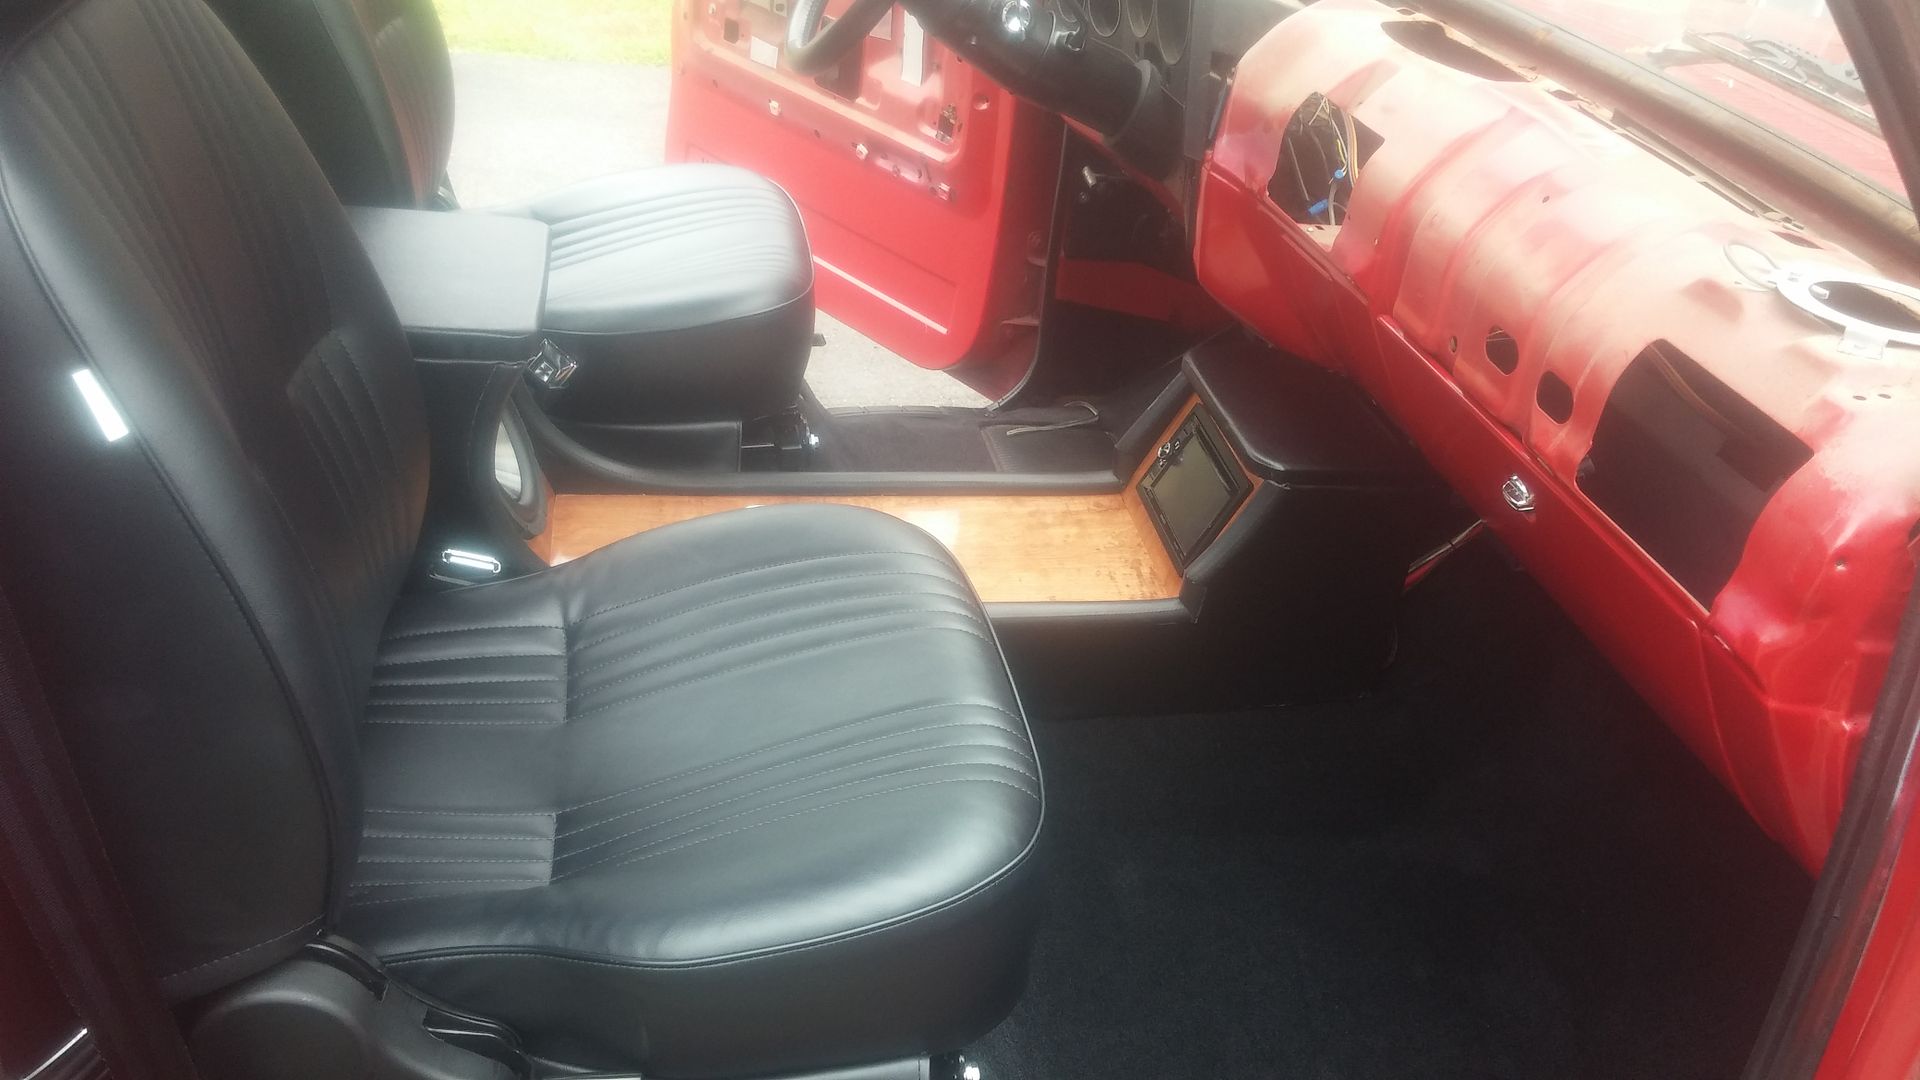 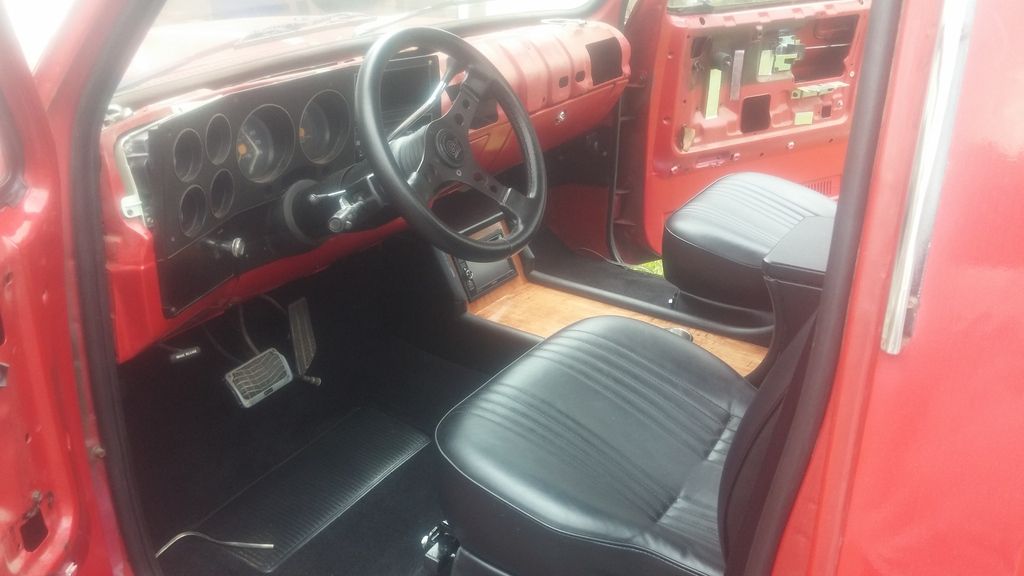 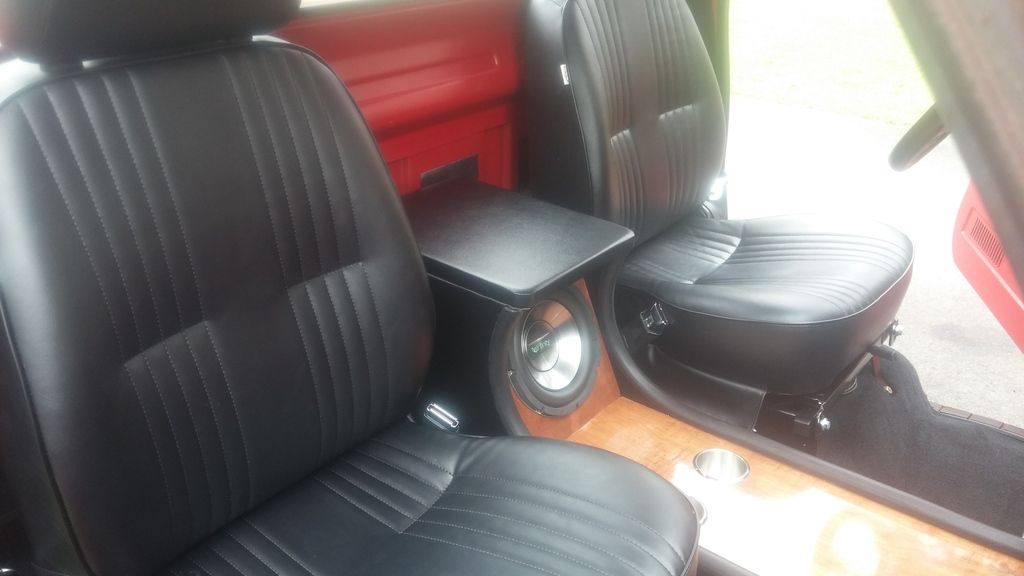
|
|
|
|
 |
| Bookmarks |
|
|


 Linear Mode

