
|
 06-04-2008, 10:53 PM
|
#1 |
|
Registered User
Join Date: Dec 2007
Location: caldwell, idaho
Posts: 132
|
Yet Another s10 swap
I've been lurking for a long time, reading all the great stuff you guys are doing. I've posted in the welcome section awhile back. Thank you to all who took the time to say hello. I was just wondering if there was any interest in a "how to" or better yet a, "how I did it" on the subject of fixed cab mounts for the s10 frame swap. I know there is a lot of info out on the web, and nothing I have done is ground breaking. The only thing that might be different is that I only have about $120 into the cab mounts and front core support. Let me know, and thanks again. You guys are true craftsman.
|

|

|
|
06-05-2008, 12:11 AM
|
#2 |
|
*---------------*
 Join Date: Mar 2008
Location: Central Missouri
Posts: 1,791
|
Re: Yet Another s10 swap
Go ahead and share. There's always someone looking for alternative ideas on how to do stuff.
Make sure and post lots of pics.
__________________
2001 GMC SIERRA 1956 Chevy Panel Build Page with a Scott's Hotrods IFS 1953 Chevy trucks Project Dime Time 1968 Camaro 1968 Volksrod "NOBACK" Jared |
|
|
|
|
06-05-2008, 12:18 AM
|
#3 |
|
Registered User
Join Date: Dec 2007
Location: caldwell, idaho
Posts: 132
|
Re: Yet Another s10 swap
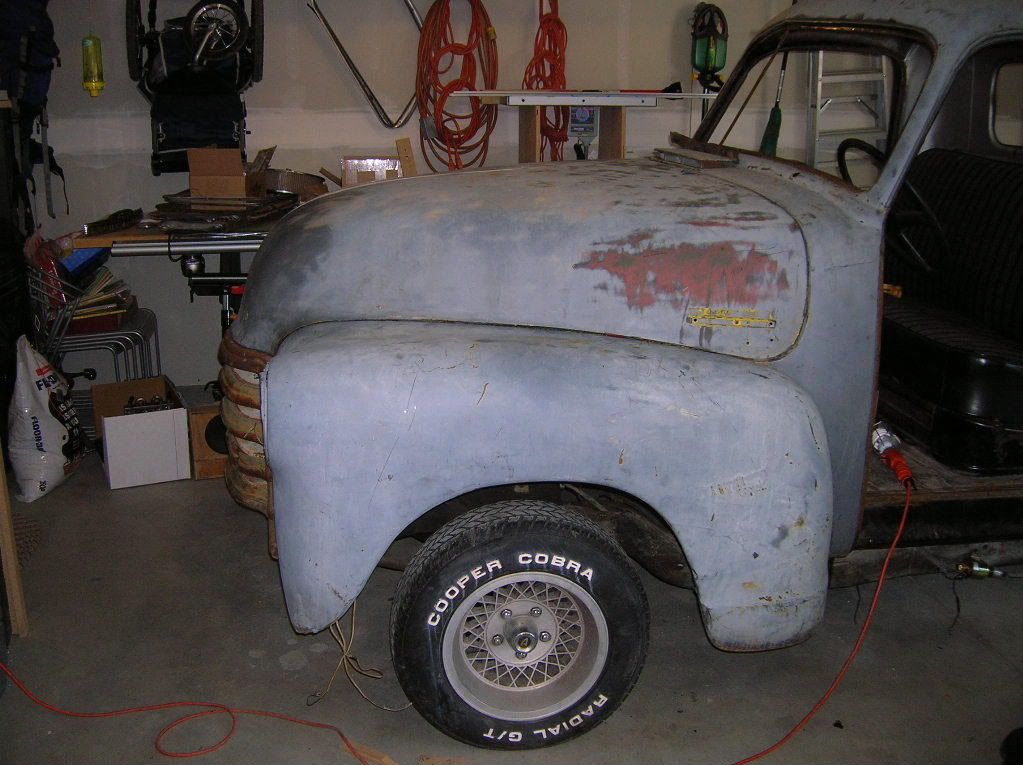
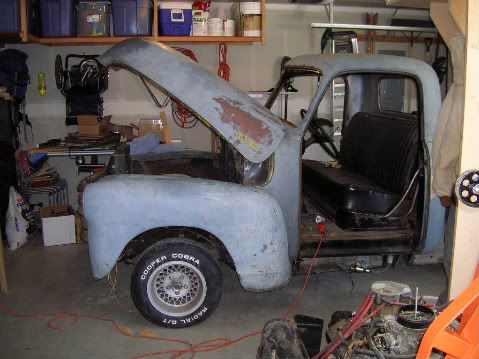
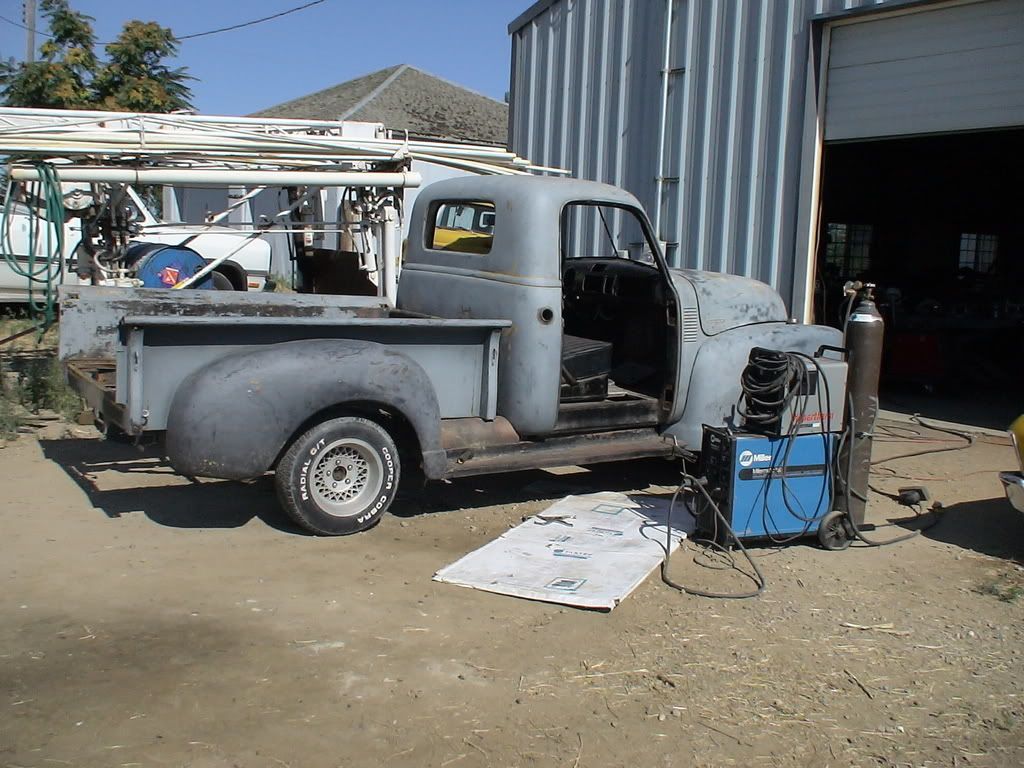
I'm going to try and post a few pics of the progress. Everything is all dirty, rusty, and rough. I will fix that later. I'm just trying to get everything mocked up. I know, I know, the 14 inch tires look very goofy.
|
|
|
|
|
06-05-2008, 06:57 AM
|
#4 |
|
Registered User
Join Date: Oct 2007
Location: pittston,PA
Posts: 1,183
|
Re: Yet Another s10 swap
looks good how did you relocate the motor so it wasn't in the rad?
|
|
|
|
|
06-05-2008, 01:53 PM
|
#5 |
|
Registered User
Join Date: Dec 2007
Location: caldwell, idaho
Posts: 132
|
Re: Yet Another s10 swap
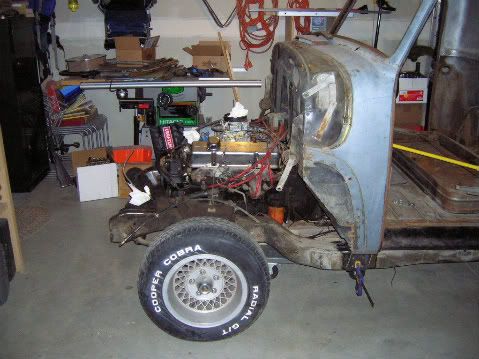
First, I mounted the cab for clearance. Then welded motor mounts to 3/8 steel plates. Next, I bolted the mounts to the engine. Then, I set the engine in place, leveling front to back and side to side. I tacked the steel plates to the cross member, pulled the engine and finished the welds. I currently have about a one to two inch gap between the firewall and the distributor. There is probably a better way, but this was my solution.
|
|
|
|
|
06-05-2008, 08:56 PM
|
#6 |
|
Registered User
Join Date: Oct 2007
Location: pittston,PA
Posts: 1,183
|
sounds good. keep the pics comming
|
|
|
|
|
06-05-2008, 10:00 PM
|
#7 |
|
Registered User
Join Date: Dec 2007
Location: caldwell, idaho
Posts: 132
|
Re: Yet Another s10 swap
Ok, so this is the process I used to build fixed cab mounts for the s10 frame swap. I got back to my kindergarten roots and made some very crude patterns out of old folders in my office.
[IMG] 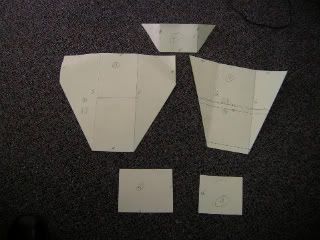 [/IMG] [/IMG]I took these down to the local Agricultural Equipment machine shop and had the pieces sheared and bent. After drilling a few holes (that I ended up not using) and a little welding, I had finished mounts. Here are the results: 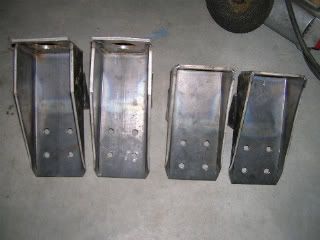 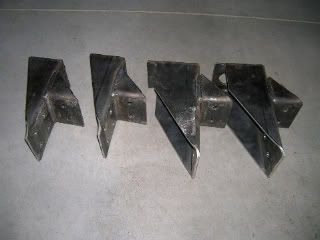 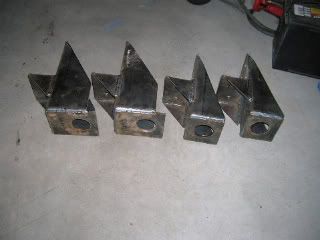 Thanks for looking. BTW- I've tried to shrink these pics down. I chose the preset "website" size 320 x 240 but they still are huge. Can someone give me a fix for this? |
|
|
|
|
06-06-2008, 12:48 AM
|
#8 |
|
Registered User
Join Date: Jul 2007
Location: Toppenish, WA
Posts: 15,287
|
Re: Yet Another s10 swap
Those cab mounts look better than the photos of the high dollar stuff I see some guys using.
I'm still up in the air about these swaps but yours looks to be coming along nicely. |
|
|
|
|
06-06-2008, 07:12 AM
|
#9 |
|
Registered User
Join Date: Oct 2007
Location: pittston,PA
Posts: 1,183
|
Re: Yet Another s10 swap
those mounts look as good or better than the advanced design kit that i bought.
|
|
|
|
|
06-06-2008, 04:11 PM
|
#10 |
|
Registered User
Join Date: Nov 2004
Location: Fort Meade Fl
Posts: 184
|
Re: Yet Another s10 swap
would mind posting or emailing a copy of the patterns? if so ffnels@aol.com
|
|
|
|
|
06-06-2008, 08:48 PM
|
#11 |
|
Registered User
Join Date: Feb 2008
Location: st cloud, fl
Posts: 266
|
How much is the cab raised front & back above the frame?
How much was the bed floor raised? Don |
|
|
|
|
06-06-2008, 09:44 PM
|
#12 |
|
Registered User
Join Date: Dec 2007
Location: caldwell, idaho
Posts: 132
|
Re: Yet Another s10 swap
the cab mounts are 5 inches from the top of the s10 frame rail, both front and back. (If I had it to do over again, I would make the FRONT mount 3/4 of an inch taller.) Then the stock s10 bushing. I shimmed it some after that to level everything.
 As for the bed, I'm only in the "mock up" stage, but I don't think I will have to raise it at all. I should have more work done this weekend. Thanks, Last edited by jeffs51chevy; 06-07-2008 at 10:43 AM. |
|
|
|
|
06-07-2008, 12:17 AM
|
#13 |
|
Registered User
Join Date: Dec 2007
Location: caldwell, idaho
Posts: 132
|
Re: Yet Another s10 swap
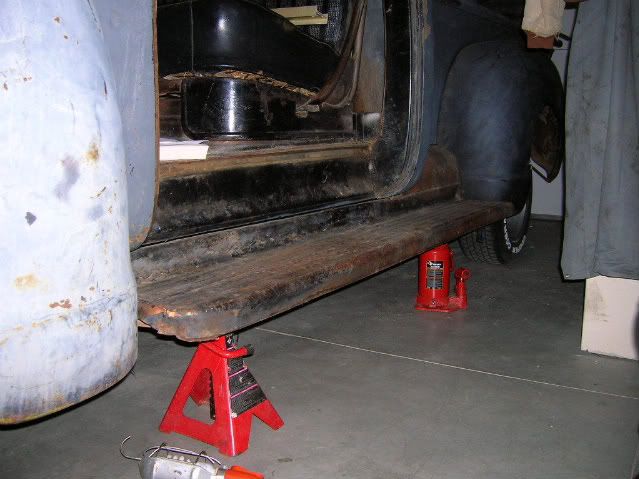
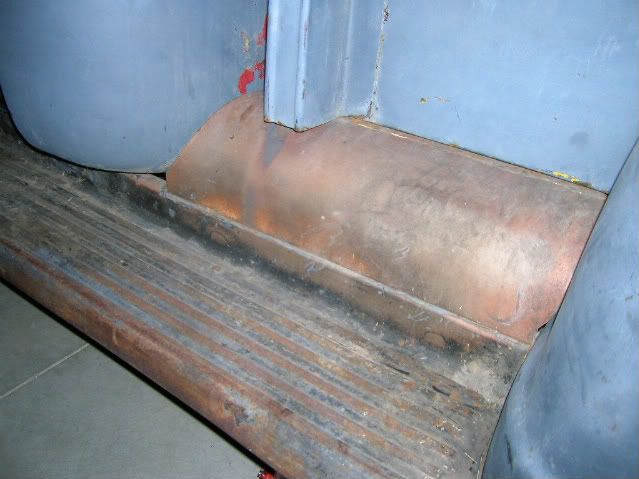
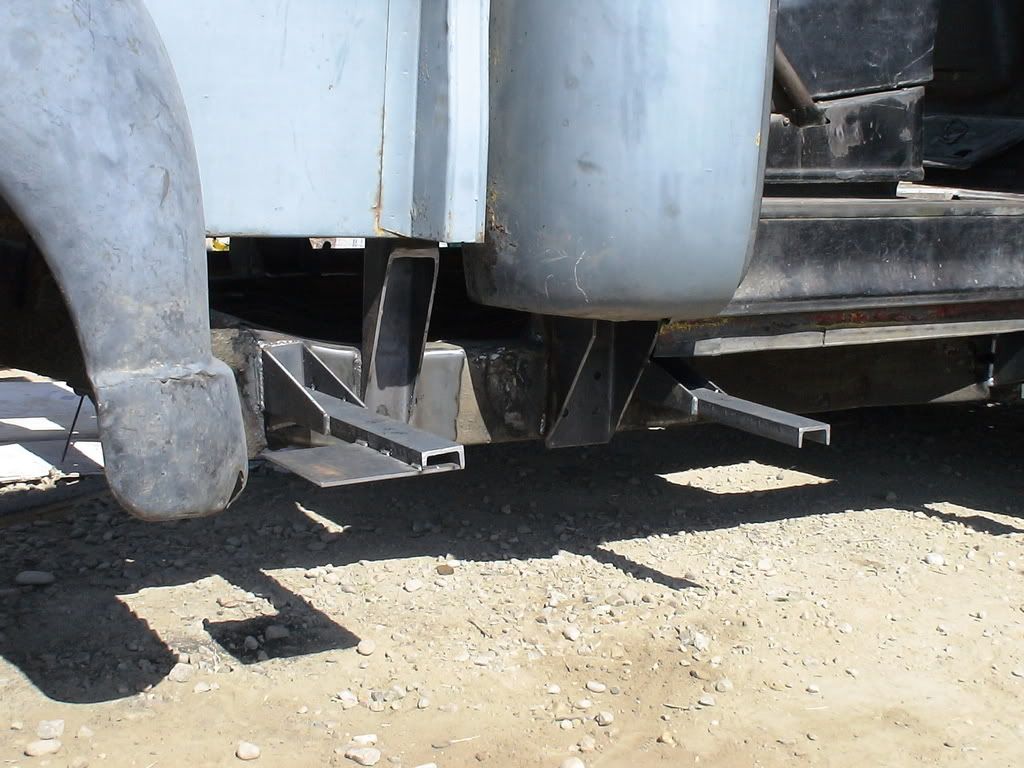
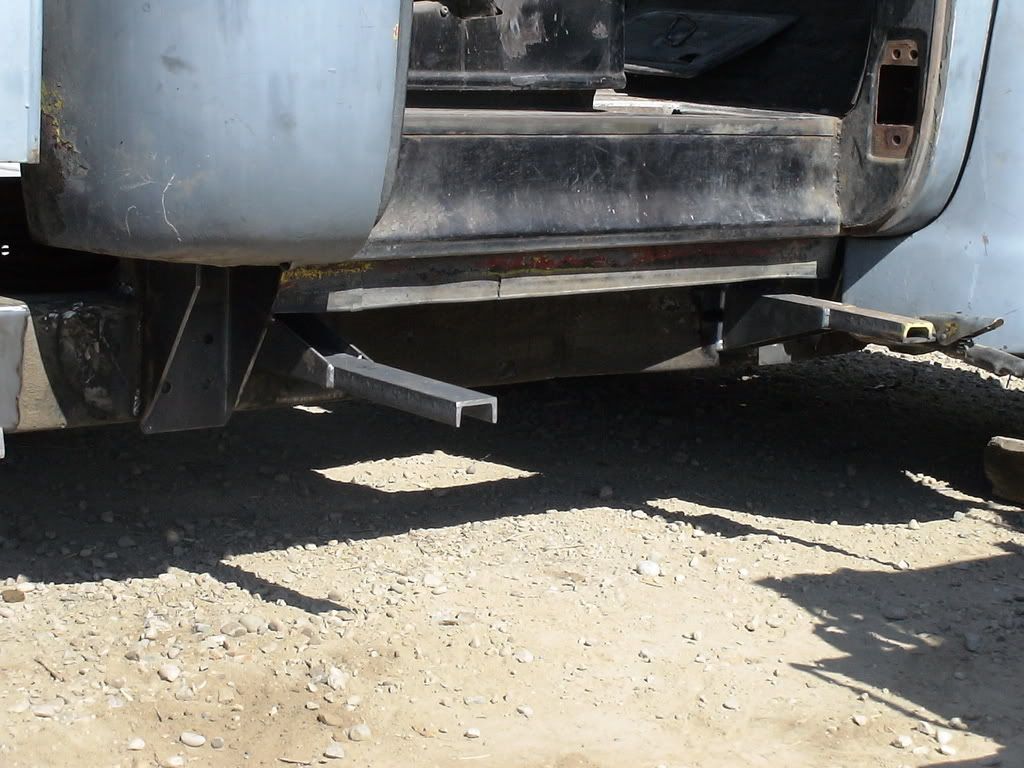
I'll try to get better pics tomorrow, but here is a couple pics of the running boards. I like the way everything is fitting - gaps look good. Can anyone get me a close up picture of the running board - looking down from the cab. My truck was in a million pieces when I got it, so I don't have a reference to go from.
|
|
|
|
|
06-08-2008, 12:22 AM
|
#14 |
|
Registered User
Join Date: Dec 2007
Location: caldwell, idaho
Posts: 132
|
Re: Yet Another s10 swap
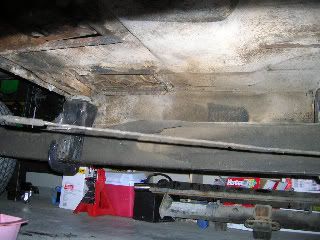
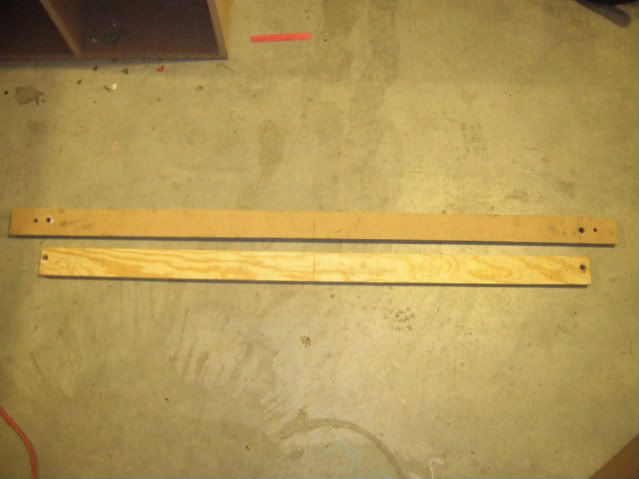
Ive had a few requests for measurements and a more detailed account of what Ive done thus far. Ive even been approached with monetary incentives to explain the process. I am not here to make a buck. I believe this forum to be a place for exchanging ideas and helping each other. My project was born out of the generosity of others who shared their knowledge and expertise. In fact, my original plans were scraped after I found work done by guys on this very board. Having said that, I would like to give a better explanation of the process. The front mounts are 9 ¼ tall and the sides are 3 ¼ - 4 - 3 ¼ respectively. The rear mounts are 10 ¼ inches tall and 4 - 4 - 4. The side edges that drop from the top down and then diagonals back to the bottom of the mount is 3 ½. The top plate for the mounts are 3 ¼ x 4 for the fronts and 5 x 4 for the rear. I hope this is making sense. You need to just tack weld the top plates flush, so that you can get an accurate measurement of 5 inches down from the top of the mount. It is here that you will weld the foot. The foots dimensions are 3 x 4 x 3. You pretty much have completed mounts at this point, so lets get to mounting them on the s10 frame. I transferred the existing bolt holes from my cab to strips of plywood so that I would not have to use the actual cab. Here is a pic:
 I clamped the mounts to the frame starting with the front mounts 2 inches forward the long oblong frame hole. On my truck there is 32 1/8 between the front mounts and the rear mounts. I then placed the plywood strips across the front and rear mounts and centered them. From here it was a lot of measuring - forward, aft, and diagonally. I used the holes in the strips to mark the top plates. I then broke the tack welds on the top plates and used a 2 hole saw to cut the bushing seats. Make sure you measure and center everything. I re-used the stock s10 cab bushings. The cab was finally set and bolted to the mounts. I measured and re-measured differing points until I was happy with how it sat on the frame. I bolted on a front fender to make sure I had the front wheel centered. After a little welding, I had the cab mounted. I hope this makes someones build a little easier. Ive had a blast playing MacGyver in my garage |
|
|
|
|
06-08-2008, 11:55 AM
|
#15 |
|
*---------------*
Join Date: Mar 2008
Location: Central Missouri
Posts: 1,791
|
Re: Yet Another s10 swap
Here's jeffs51chevy's bracket design. Hope this helps some people out on their projects.
******removed for changes****** _
__________________
2001 GMC SIERRA 1956 Chevy Panel Build Page with a Scott's Hotrods IFS 1953 Chevy trucks Project Dime Time 1968 Camaro 1968 Volksrod "NOBACK" Jared Last edited by GRIMSS; 03-17-2009 at 11:03 PM. |
|
|
|
|
06-08-2008, 04:43 PM
|
#16 |
|
*---------------*
Join Date: Mar 2008
Location: Central Missouri
Posts: 1,791
|
Re: Yet Another s10 swap
**note to design**
This drawing is the improved version from the ones he made. We moved the foot 3/4" to raise the mount some more. Kind of a "if I was to do again thing".
__________________
2001 GMC SIERRA 1956 Chevy Panel Build Page with a Scott's Hotrods IFS 1953 Chevy trucks Project Dime Time 1968 Camaro 1968 Volksrod "NOBACK" Jared |
|
|
|
|
06-22-2008, 08:52 PM
|
#17 |
|
Registered User
Join Date: Dec 2007
Location: caldwell, idaho
Posts: 132
|
Re: Yet Another s10 swap
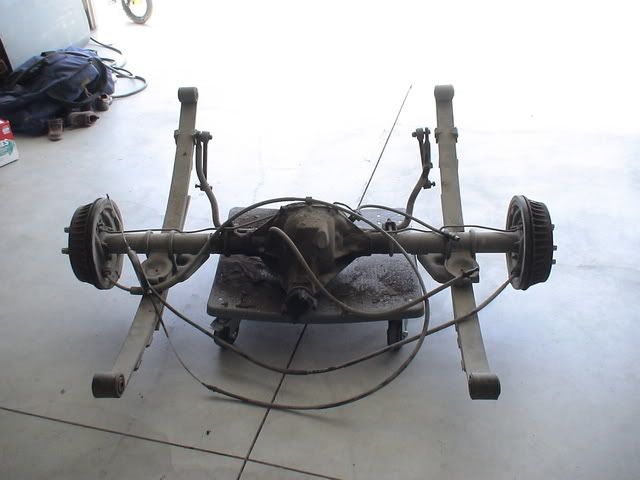
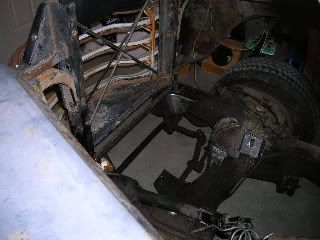
Well not much progress lately, but I did get a chance to track down a 4x4 rear end. It's not that photo worthy, but it does show the rear track width. I wanted the rear disk set up, but $75 for the whole assembly, ebrake, and sway bar I'll drive it and save for the next one.
 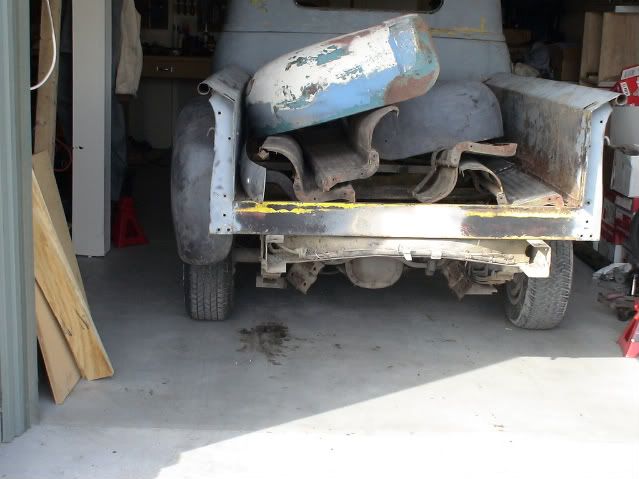 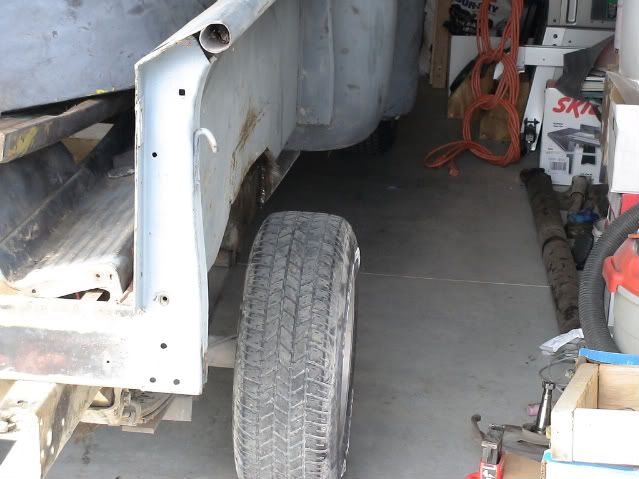 I have to still trim the rear frame rails, and set the bed, but it's what I could get done today. One man show you now. Thanks for looking. |
|
|
|
|
06-26-2008, 05:44 PM
|
#18 |
|
Registered User
Join Date: Jan 2007
Location: tacoma wa.
Posts: 1,037
|
Re: Yet Another s10 swap
nice job! great reading and well detailed. the really funny thing about "body mounts" is over the years i have seen some really"ghetto" ones that functioned fine just not pretty. safe is really the key issue and you seem to have done that in your design. old pipe used to be the standard type i came across in the past and they were scary!
|
|
|
|
|
07-05-2008, 09:50 AM
|
#19 | |
|
and a few others
Join Date: Jun 2007
Location: Blue Ridge Mountains of VA
Posts: 5,638
|
Re: Yet Another s10 swap
Quote:
www.photobucket.com upload your photos to your new account, then click on the thing that says "direct link" right below the photo. then on this forum, use this little thingy, circled in red here.... and right click, paste and there's your pic, and big too.
__________________
Bill  US Army Vet -193rd Infantry US Army Vet -193rd InfantryBlueRidgeMuscleCars.com The greatness of a nation and its moral progress can be judged by the way its animals are treated Gandhi |
|
|
|
|
|
07-05-2008, 04:08 PM
|
#20 |
|
Registered User
Join Date: Dec 2007
Location: caldwell, idaho
Posts: 132
|
Re: Yet Another s10 swap
Thanks for the computer help. I will try to post when I have some progress to show. On a differnt note, can anyone tell me if the bed is mounted exactly level on the frame, or if it slopes forward. I'm working out the bed mounts and need someone to put a level to their bed. If someone will go to the trouble, would you please check at the top of the bed rail and on the wood bottom.
Thanks in advance, |
|
|
|
|
07-06-2008, 10:07 PM
|
#21 |
|
Senior Member
Join Date: Jul 2006
Location: Blountville, Tn.
Posts: 3,904
|
Re: Yet Another s10 swap
This is just the type of write up I have been looking for. I was offered a 51 Chevy recentlly. I have the long bed S10 in the backyard so I just might take to guy up on the offer.
__________________
*We could learn a lot from crayons... Some are sharp; some are pretty;and some are dull. Some have weird names; and all are different colours;but they all have to live in the same box. * You may be only one person in the world, But you may also be the world to one person. * Some mistakes are too much fun to only make once. Two rules in life. 1. Never sweat the small stuff! 2. Everything is small stuff! |
|
|
|
|
07-06-2008, 11:24 PM
|
#22 |
|
Registered User
Join Date: Dec 2007
Location: caldwell, idaho
Posts: 132
|
Re: Yet Another s10 swap
Thank you BarryB. I appreciate the feedback. I will tell you this, the swap is no small undertaking. It has been a ton of fun for me and my four year old, but everyone on the web makes it sound like a peice of cake. Swap the sheet metal and you'll be on the road. It's much more involved. Do not let me detour you. I am just saying it is not as easy as everyone makes it out to be.
|
|
|
|
|
07-13-2008, 03:21 PM
|
#23 |
|
Registered User
Join Date: Oct 2006
Location: Alberta, Canada
Posts: 18
|
Re: Yet Another s10 swap
Just wondering if you have any pics of how you mounted the front end? Fenders, rad support, ect? Did you have to cut the inners? I've seen many builds where they did but with it sitting 5" from the frame do you still need to cut the fenders and how did you mount the rad support?
Last edited by littleb; 07-13-2008 at 09:38 PM. |
|
|
|
|
07-13-2008, 10:00 PM
|
#24 |
|
Registered User
Join Date: Dec 2007
Location: caldwell, idaho
Posts: 132
|
Re: Yet Another s10 swap
Of this whole project, the front radiator support was what dictated the height of the cab. Next time I would like to be more daring and fab the front end differently, but I used conventional wisdom this time. I cut the bottom of the rad support off right below the two welded nuts that hold the grill, and then welded a peice of 3/4 angle iron to hold things together.
 I then used some 1/4 steel plate, bent in a 45 degree, to hold the rad support to the frame. The plan is to weld them to the frame when I get everything else set in a final position. I want good gaps everywhere before I weld for the last time.  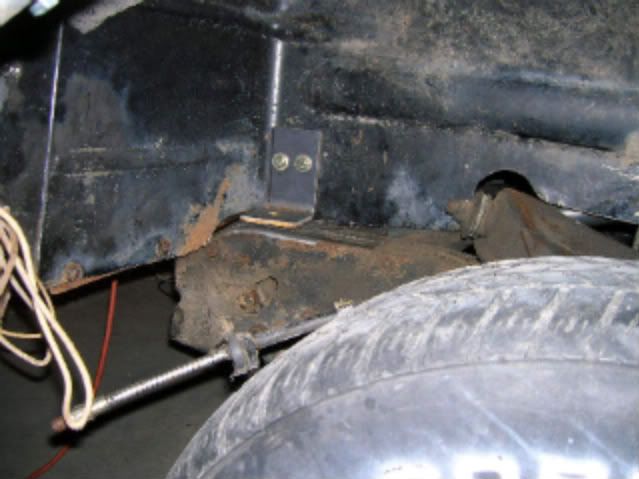 The passenger side frame slopes, so a peice of angle iron will be used. As you can see from the pics, the inner fender skirts are trimed to miss the upper A arms. The photos were from a month ago, and were only a trial run. I will get new shots as they come available. Thanks, Sorry for the photo sizes. My computer skills suck. |
|
|
|
|
07-19-2008, 01:42 PM
|
#25 |
|
Registered User
Join Date: Dec 2007
Location: caldwell, idaho
Posts: 132
|
Re: Yet Another s10 swap
I got a little more done on the runningboard mounts today. They are 1 x 2 channel. The bed mounts are 3" tubing cut on a bias.
   Thanks for looking |
|
|
|
 |
| Bookmarks |
|
|


 55-59 one piece window


 Linear Mode

