
|
Register or Log In To remove these advertisements. |
|
|
|
|||||||
 |
|
|
Thread Tools | Display Modes |
 03-10-2016, 11:22 PM
|
#1 |
|
Registered User
Join Date: Jan 2013
Location: Leonardtown, MD
Posts: 1,633
|
1947 Biederman Truck Fender repairs
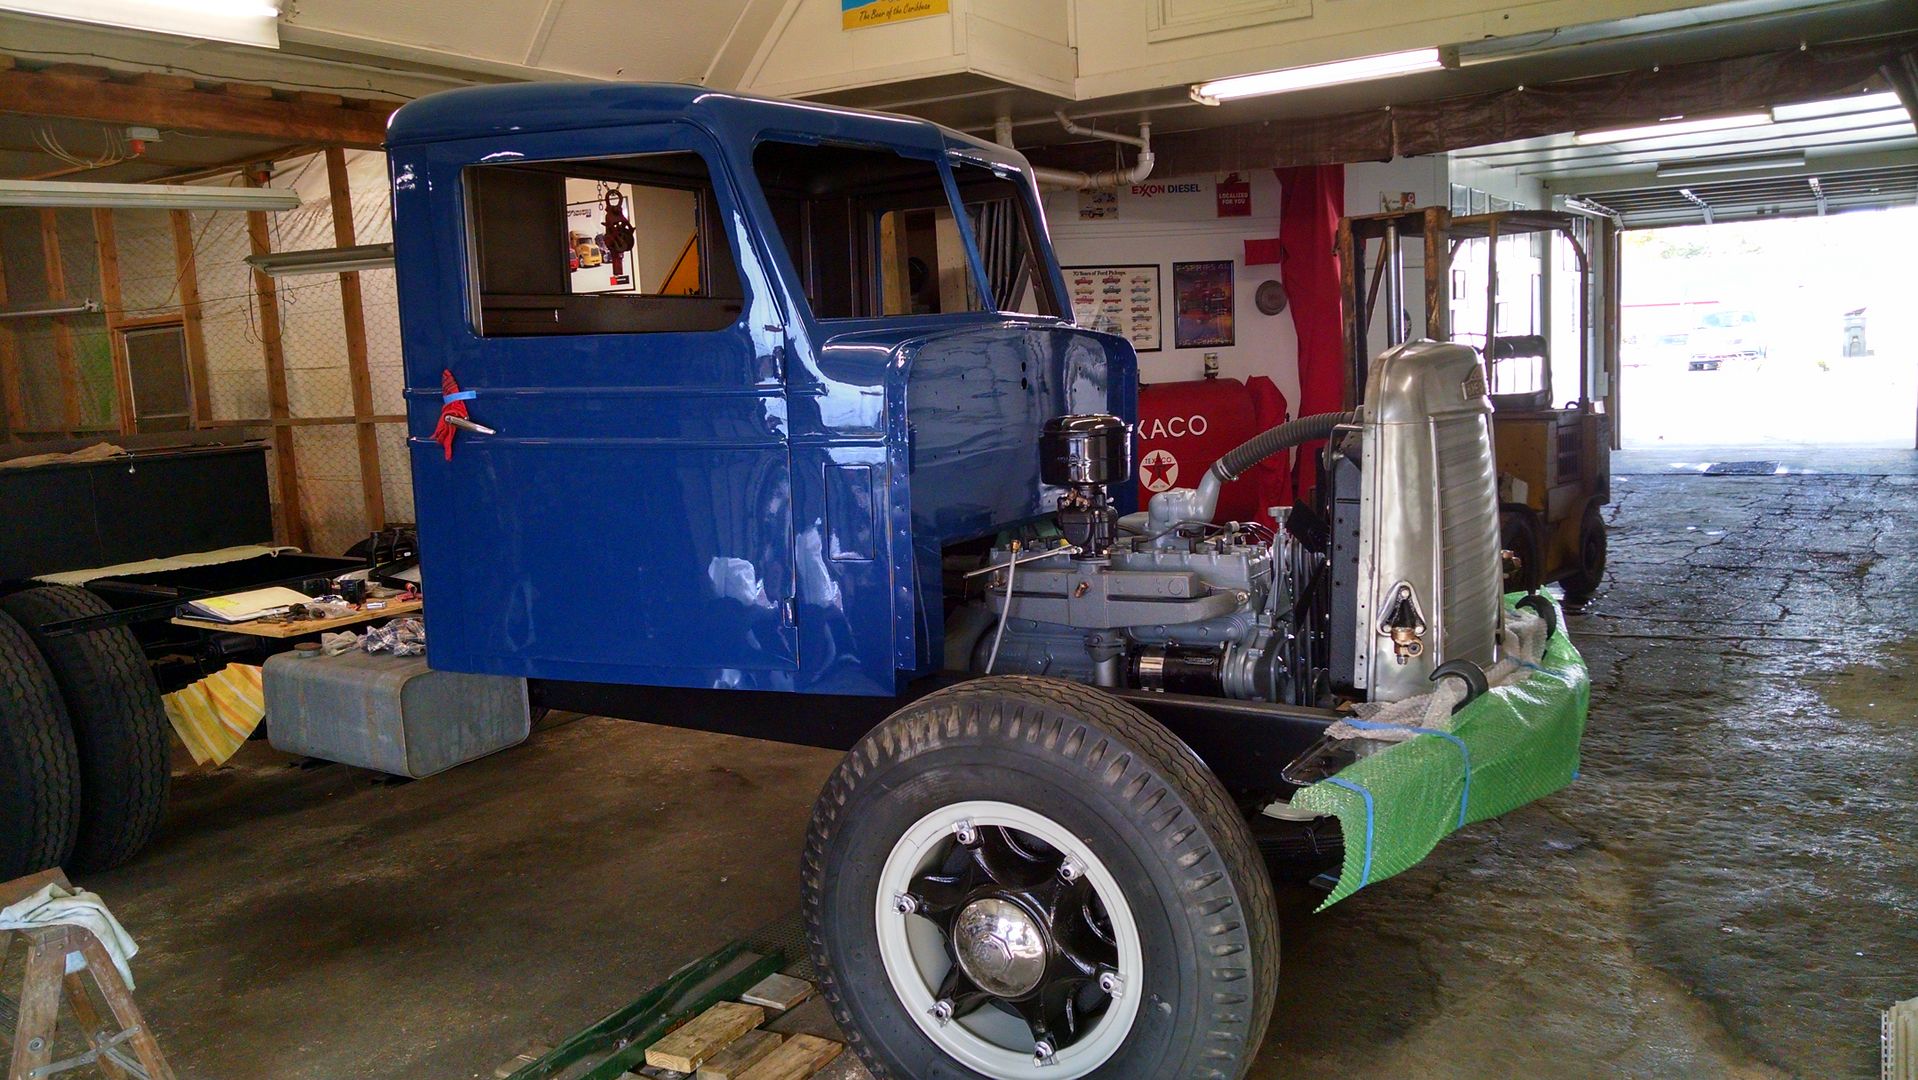
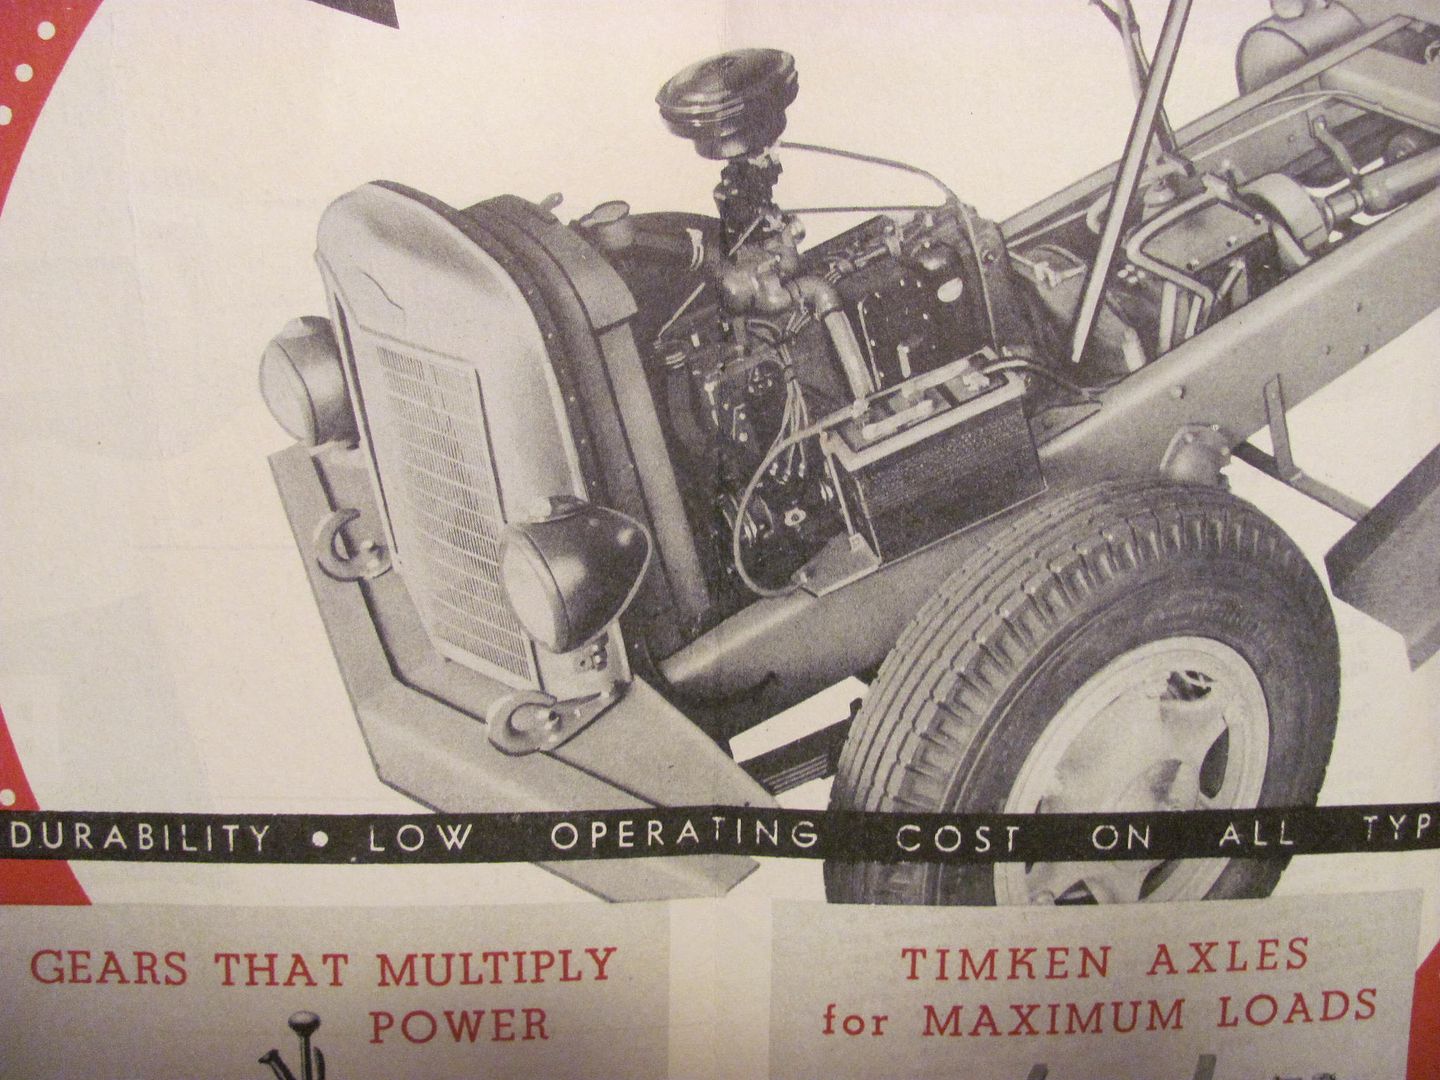
Tonight in the shop we started the repair work on the front fenders for the 1947 Biederman Truck, seen here for reference:
 The fenders are made using 16 gauge steel, so this may be a bit challenging when we get to blocking and wheeling patches for the fenders themselves. In the meantime (while still waiting for the new English wheel) let's get started on the inner fenders. The driver's side is the worst, with so much rotted away that we couldn't get accurate dimensions. The passenger side was in much better condition, but just shy of 70 years has taken its toll in adding some wavy distortion. So we'll remake both sides for a better match.  In order to get a more crisp bend on the 16 gauge steel, we used a tipping die in the Lennox to thin the metal at the line of the bend. 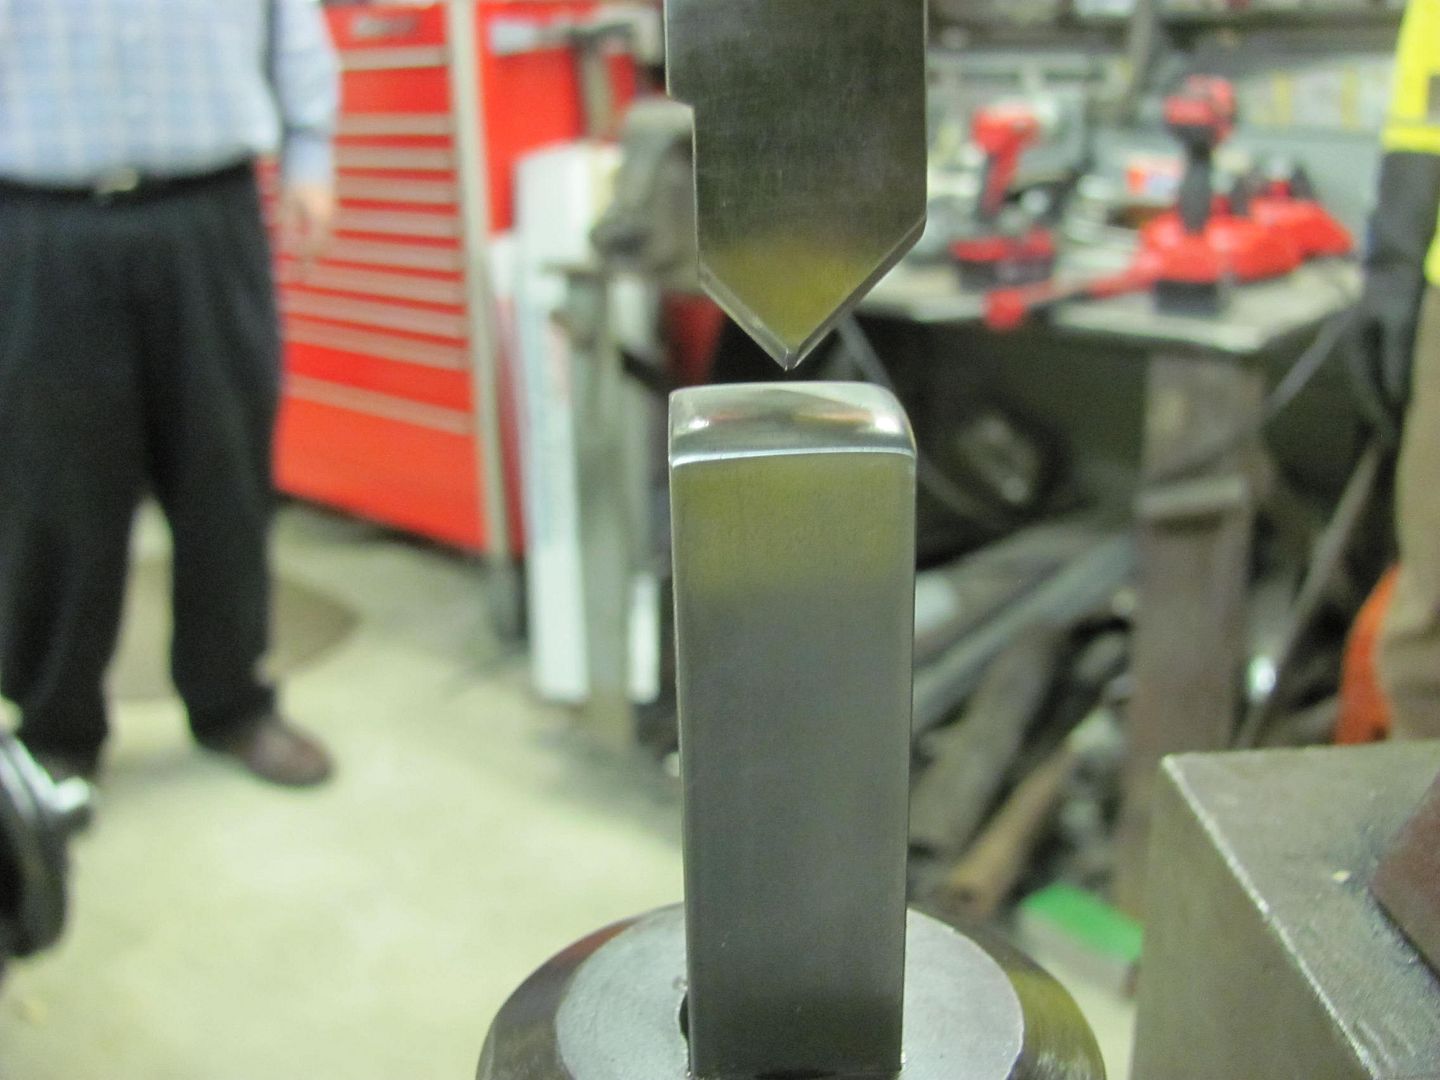 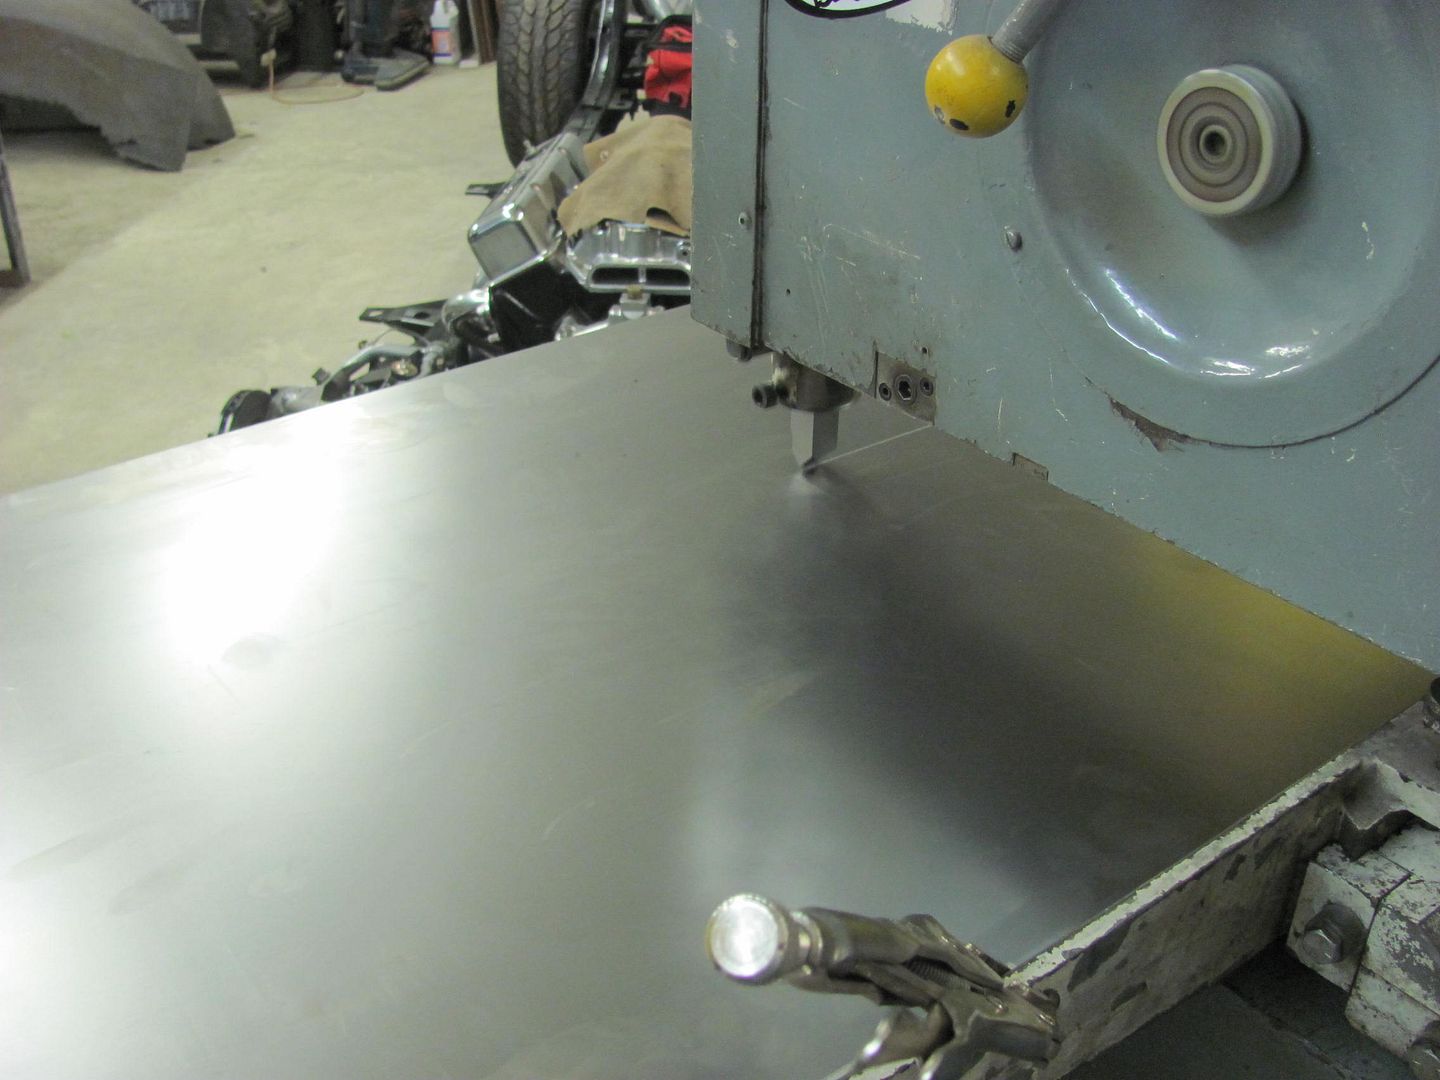  Bending in the Baileigh Magnetic Brake..  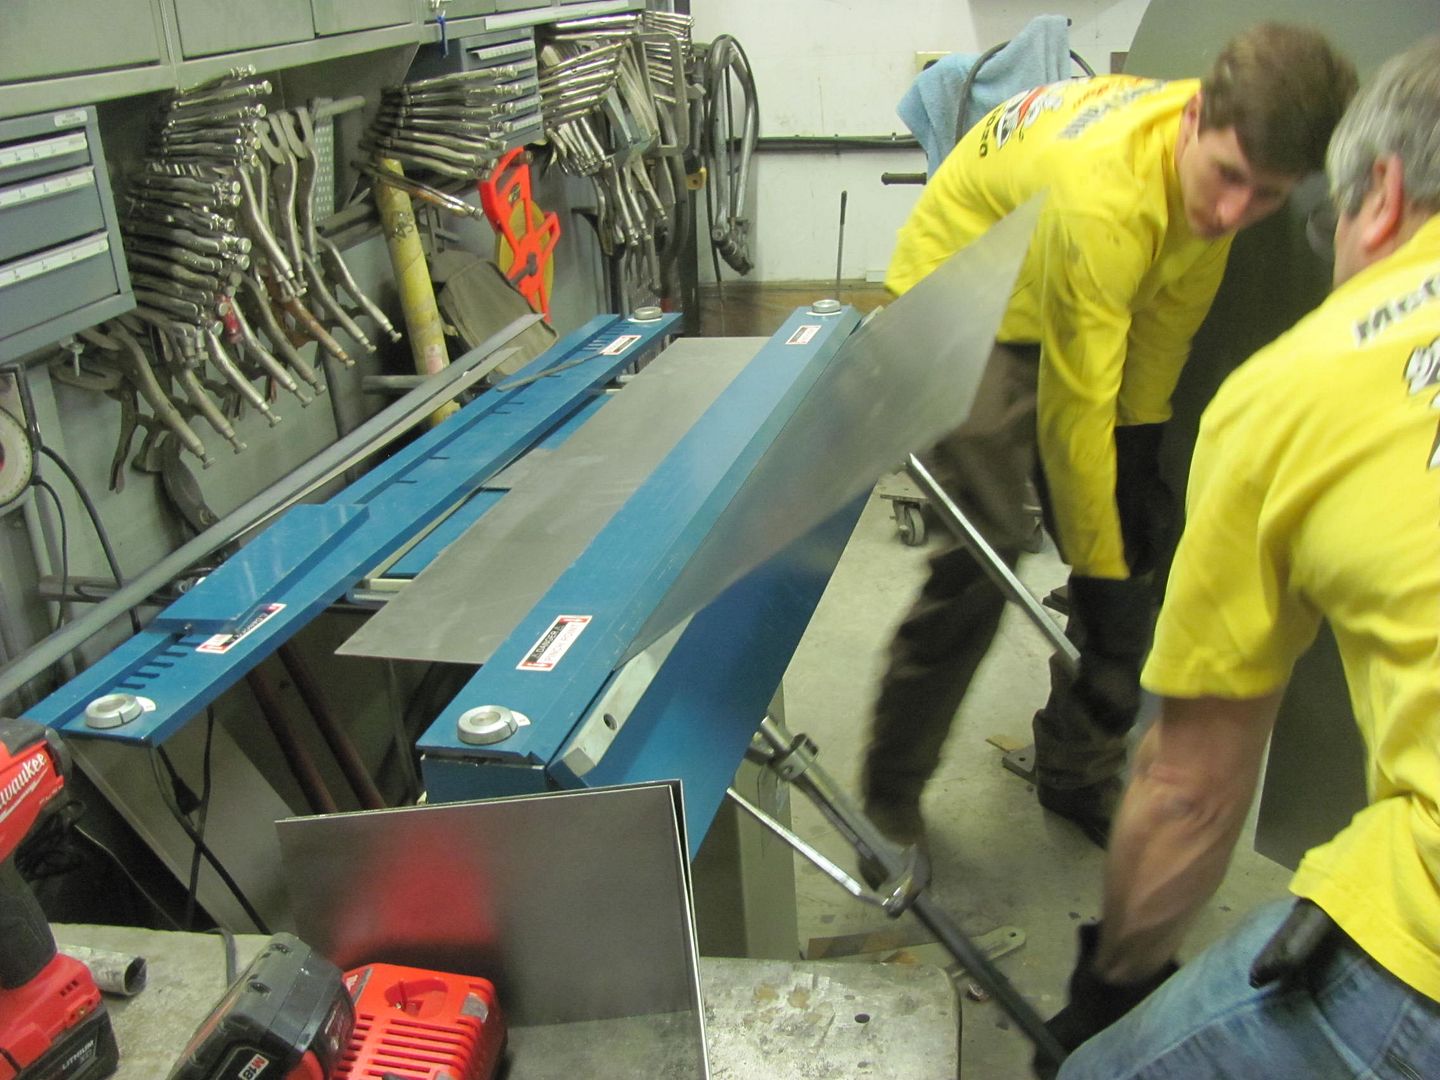 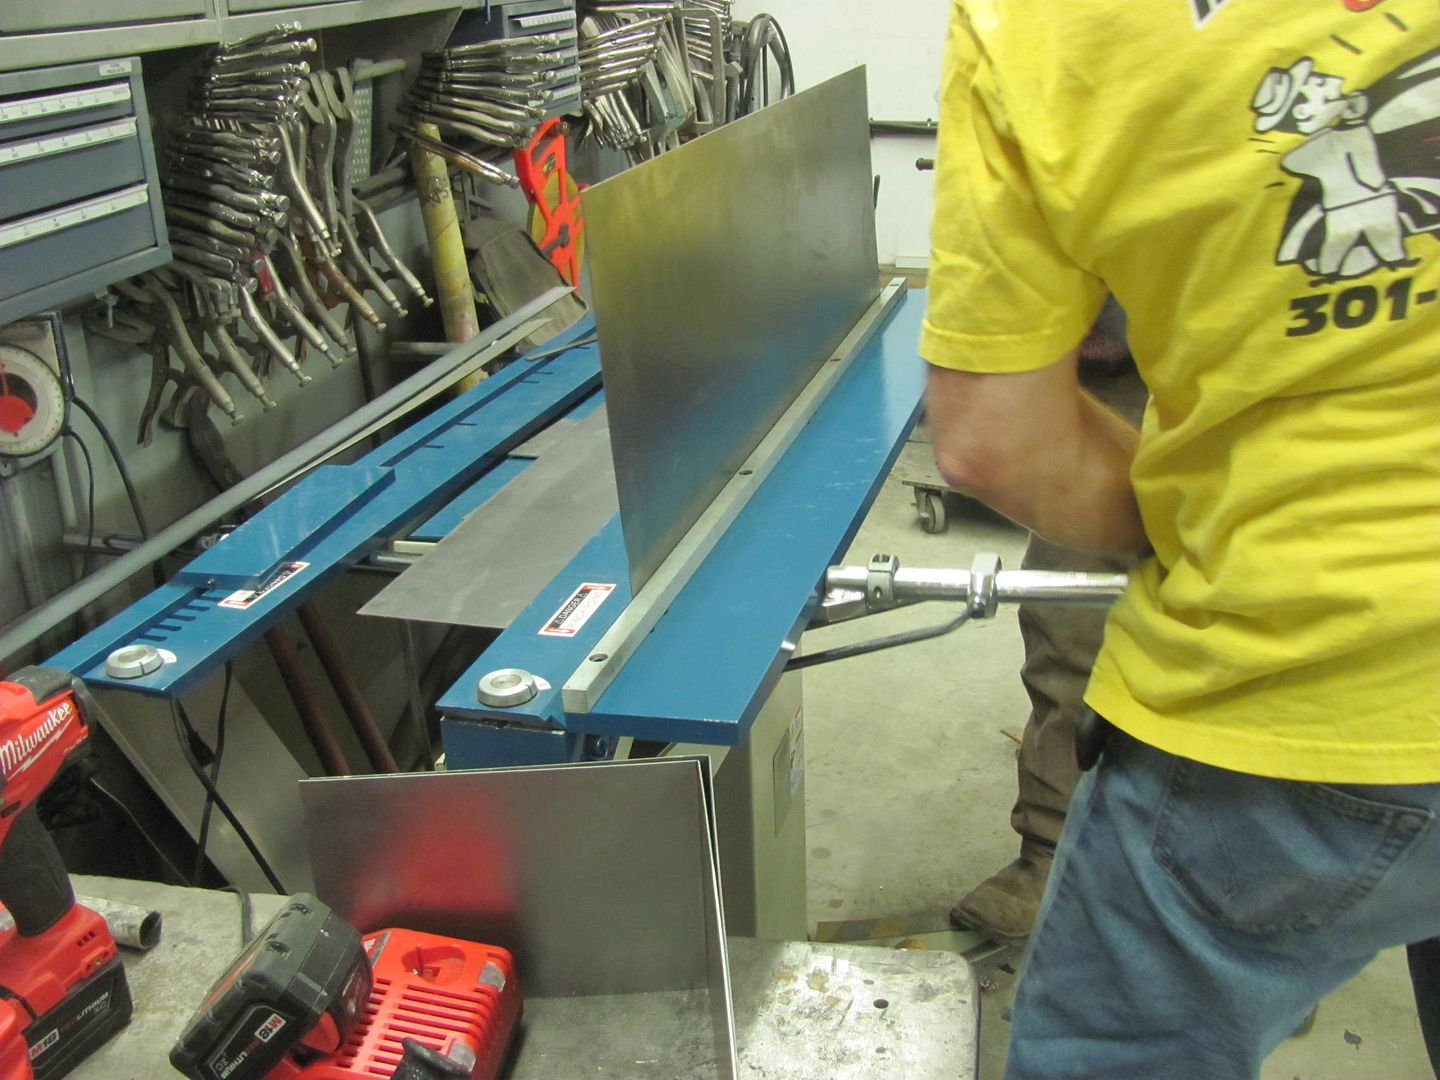 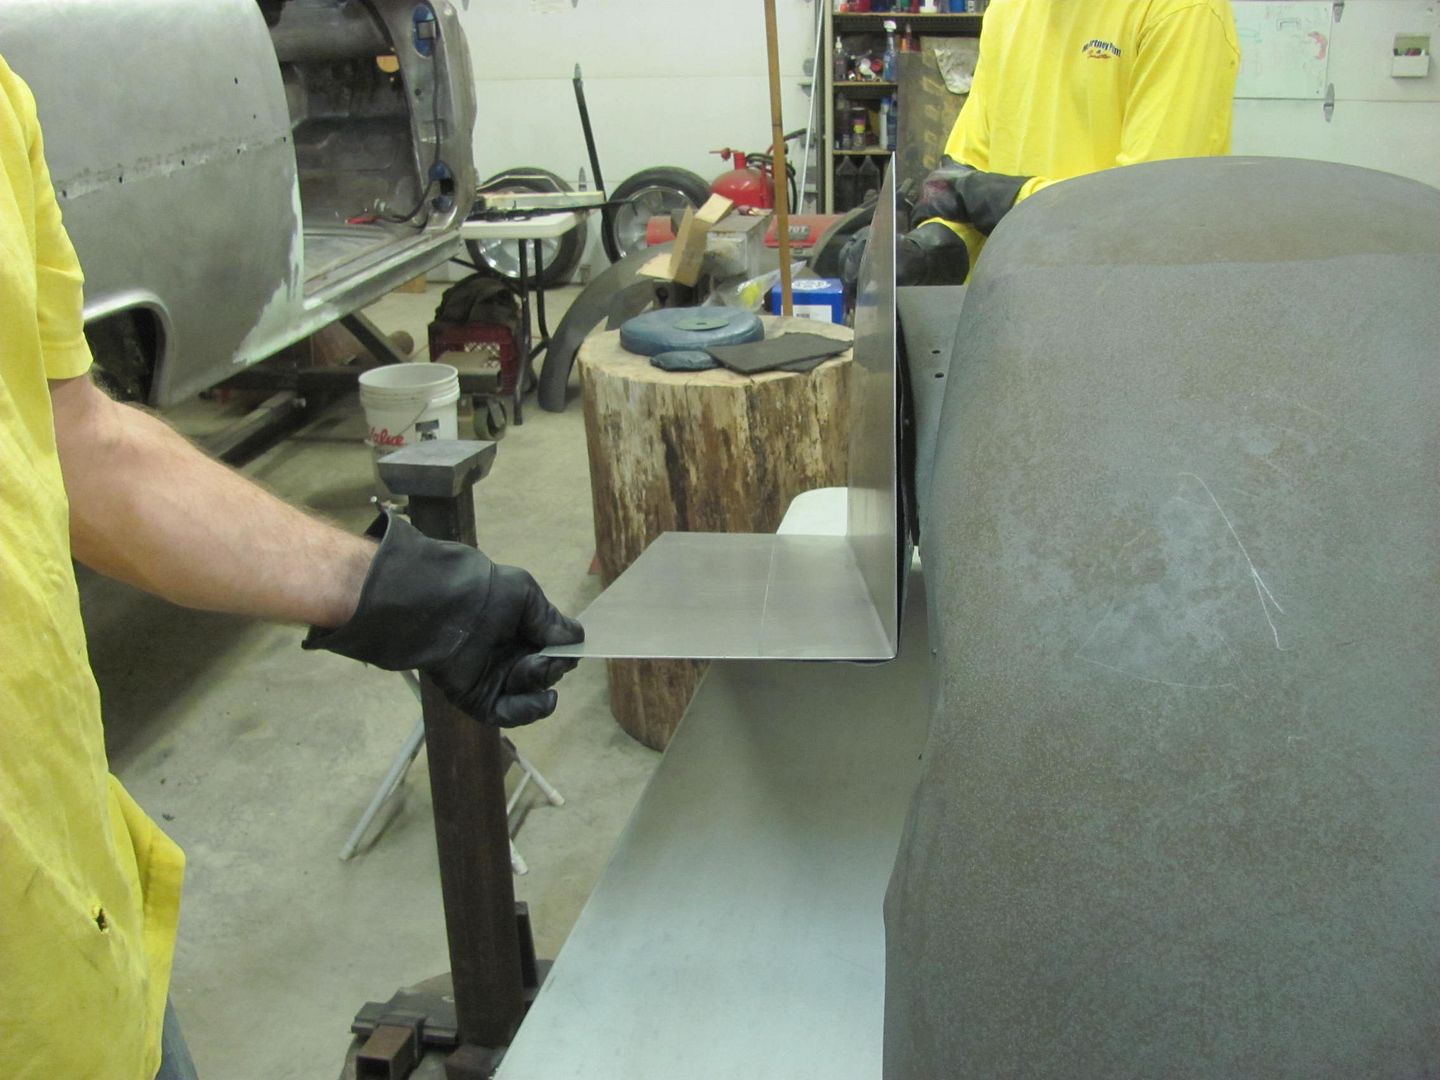 This detail shot shows how the thinning helps get a tighter bend.. 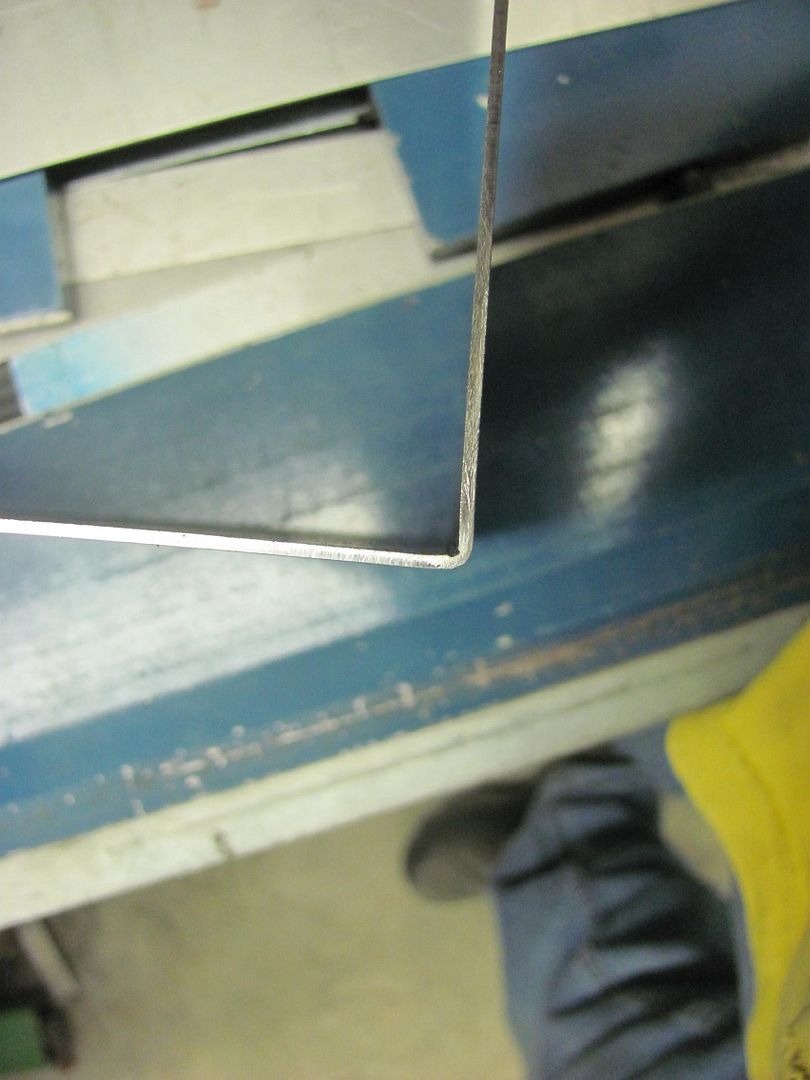 Next, we needed a profile template for the rear radius, so the kick shrinker is used on a folded 19 gauge strip to add the radius..  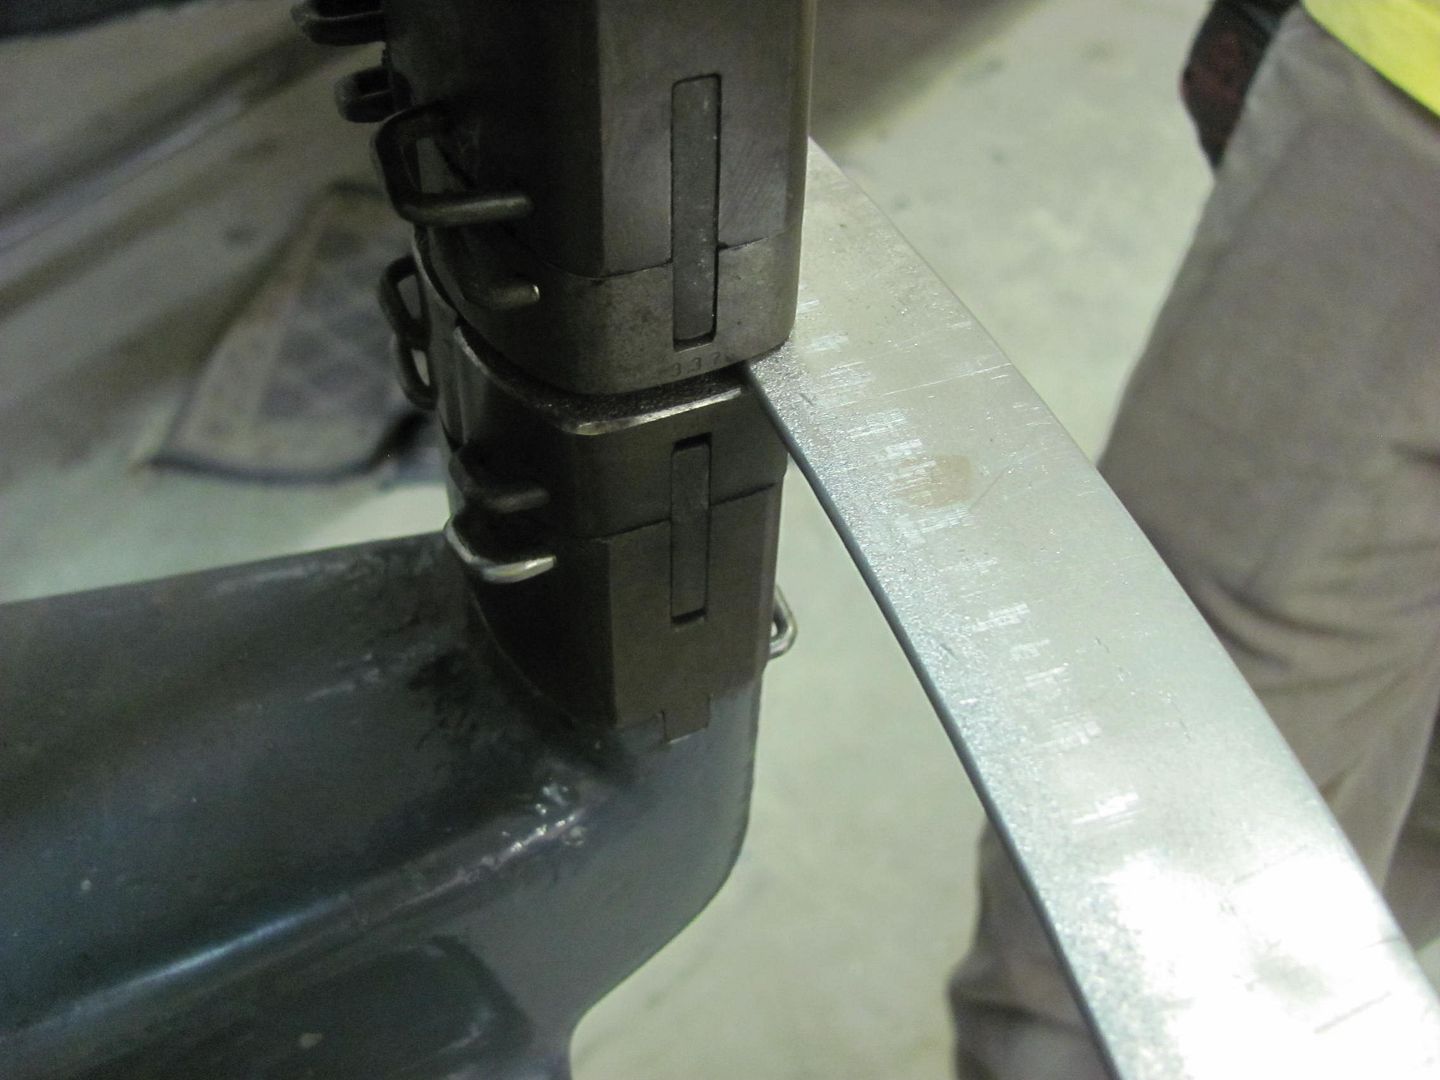 A flat folded strip works better than an angle as if you shrink too far in this direction..... 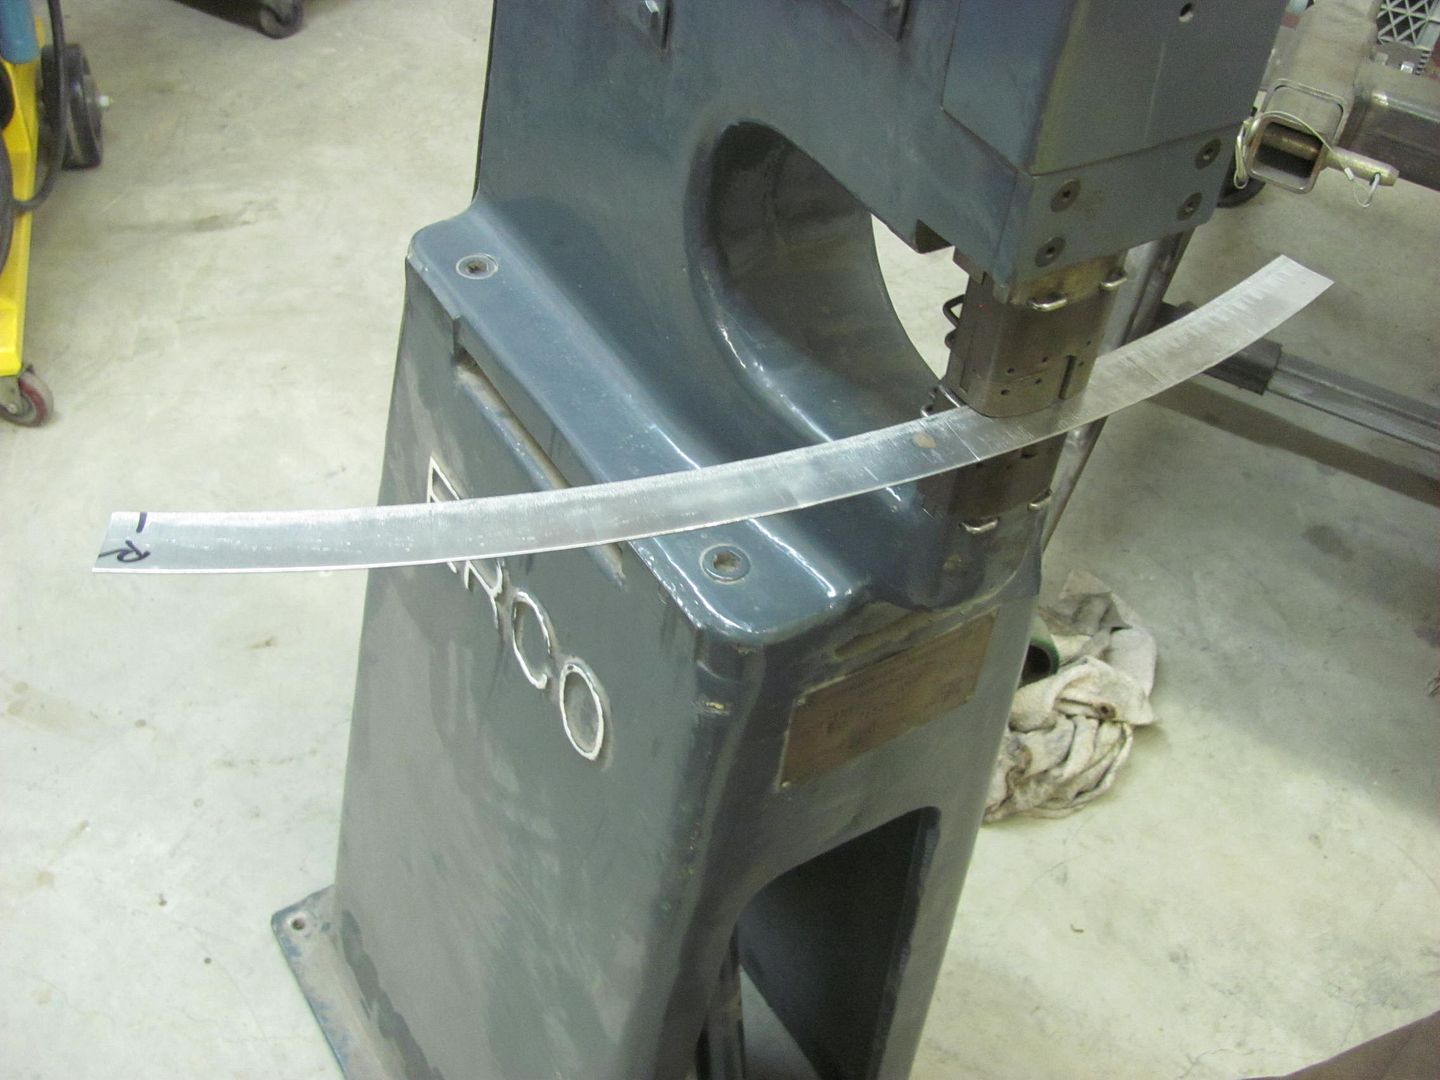 ......you can simply shrink the back half to reverse the effect without the need for changing to the stretching die..  Now with an accurate pattern, we can use the template on the new inner fender..  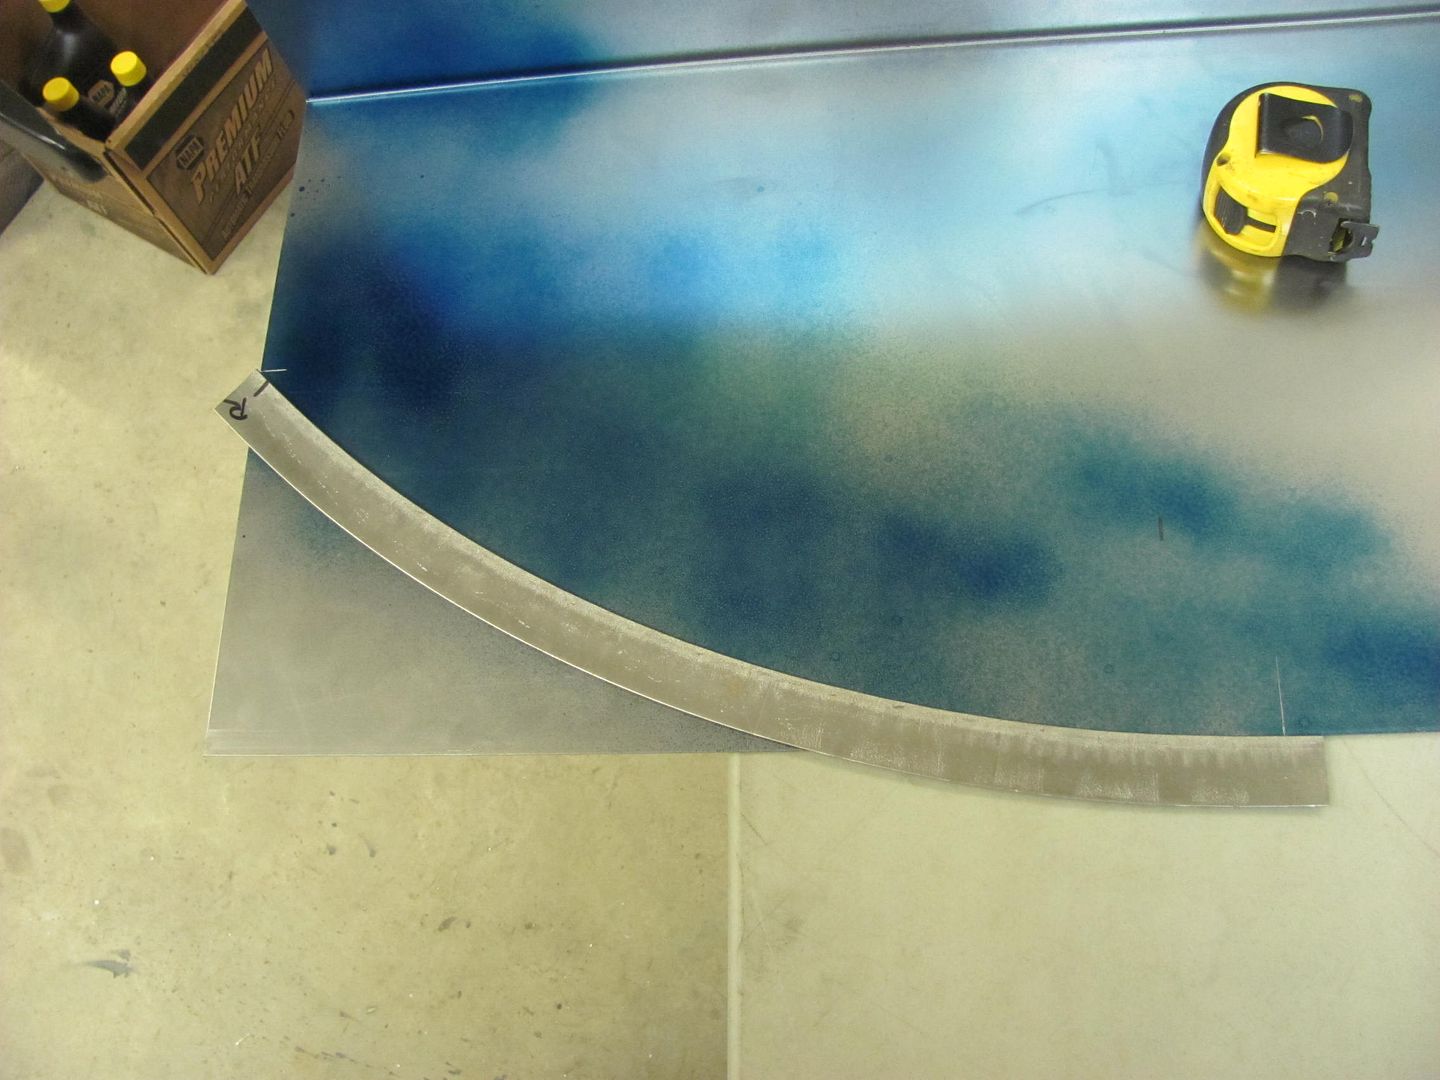 All trimmed... 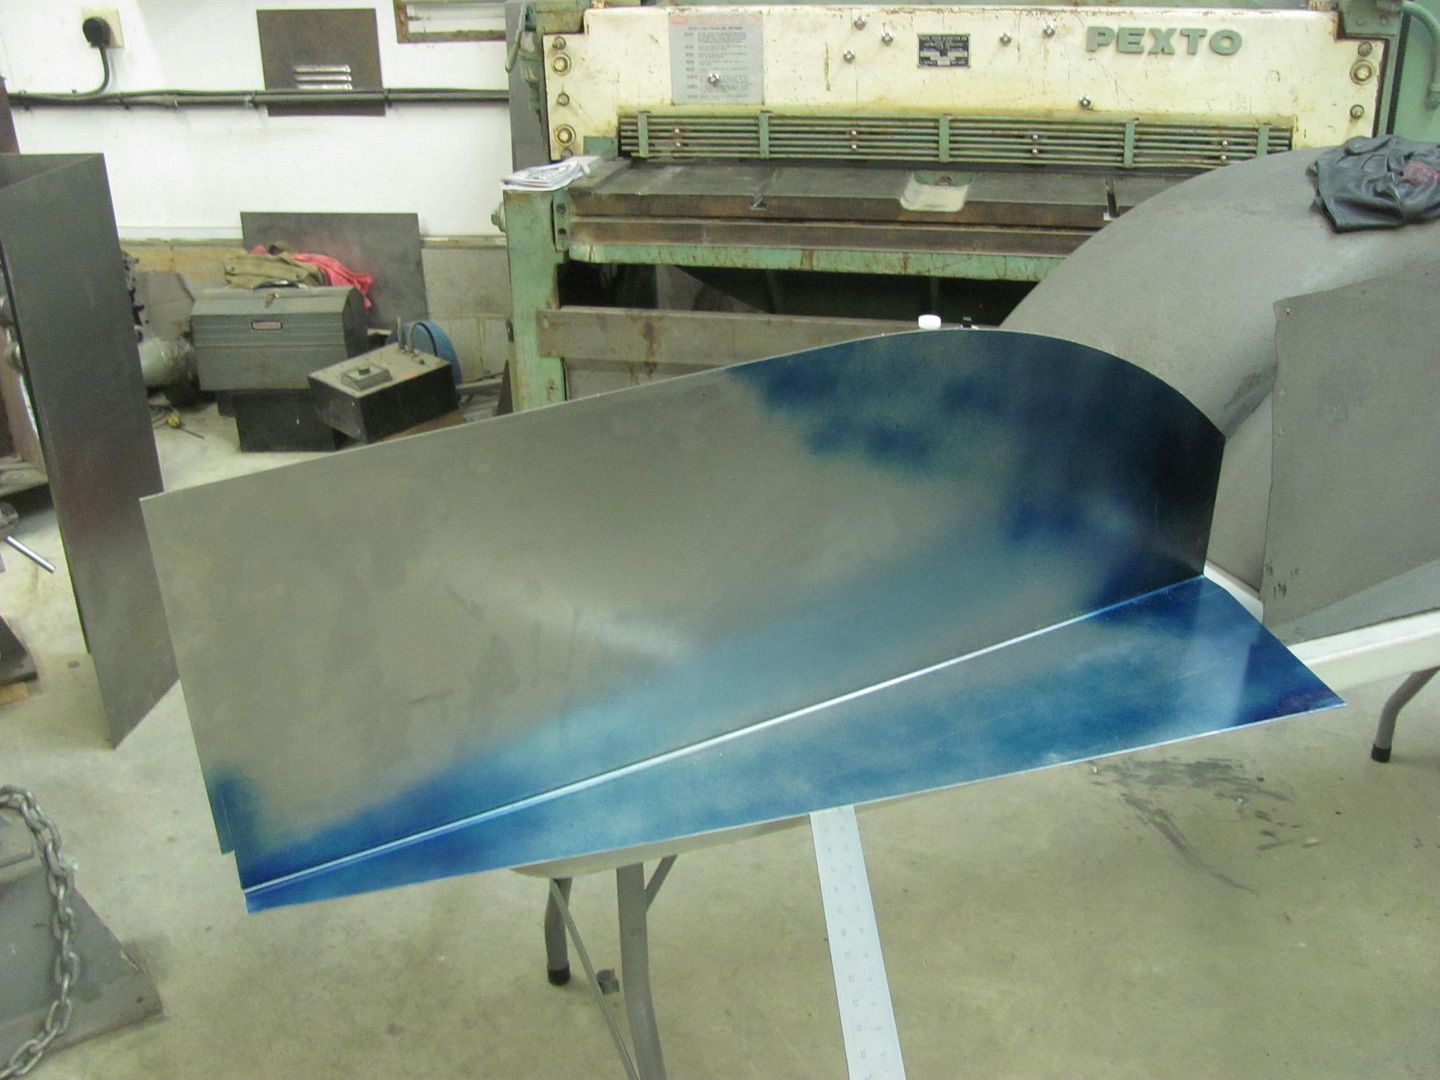 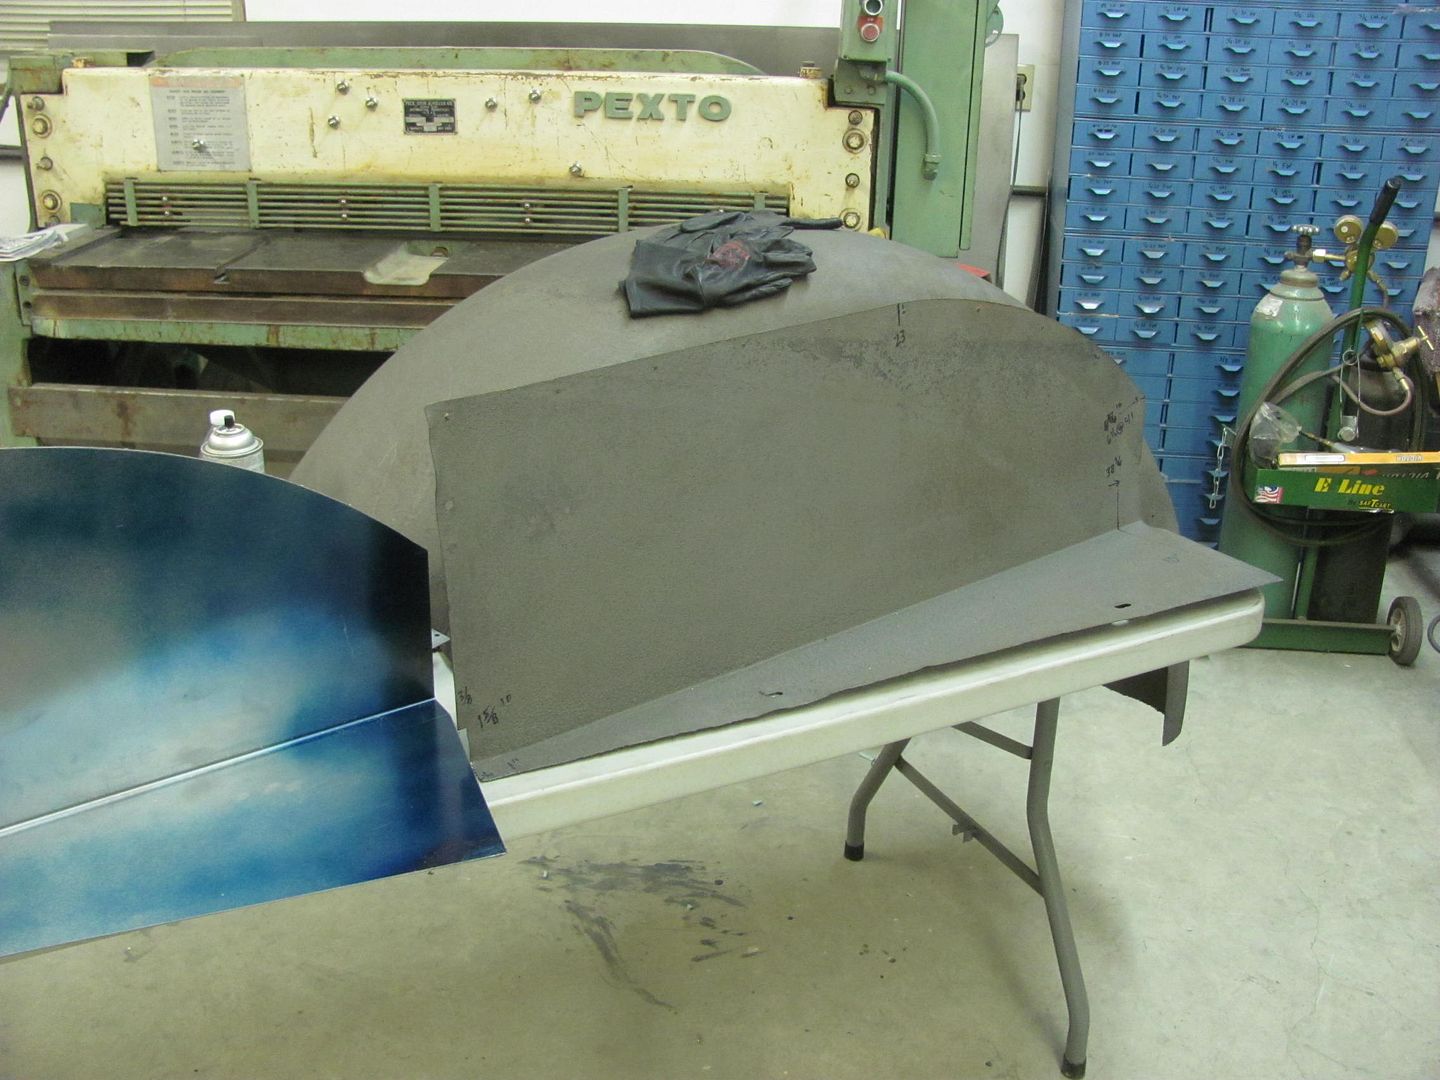 With the new clamped to the old, we can see what the years of abuse has done.. 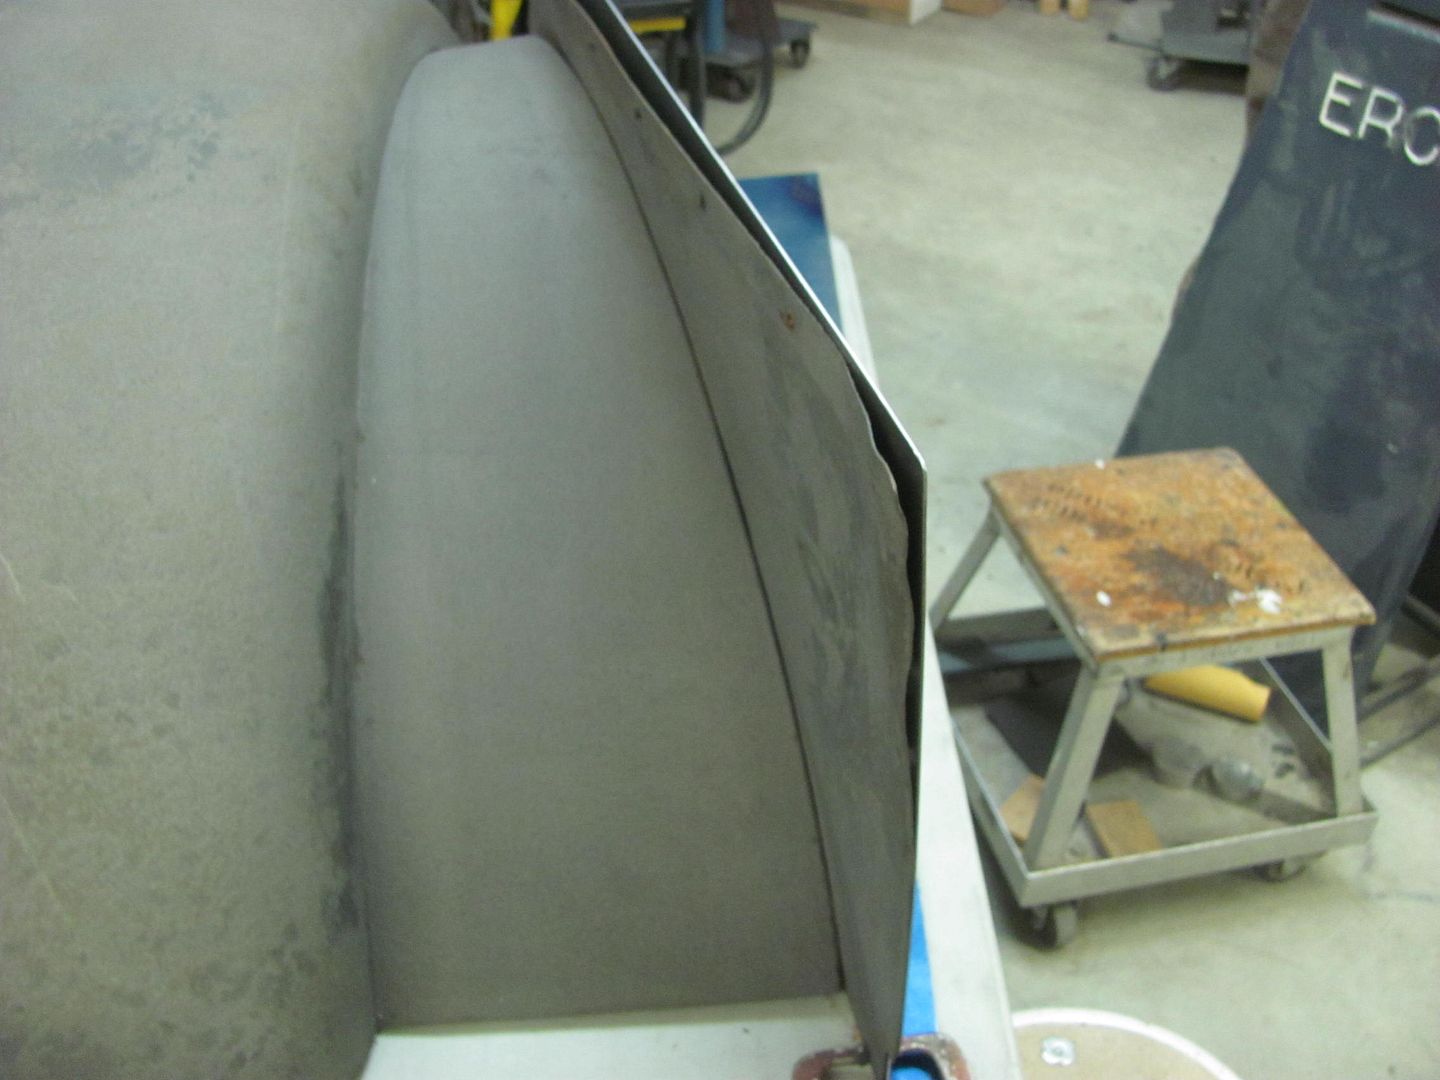 One down, one to go..
__________________
Robert |

|

|
|
03-12-2016, 10:02 PM
|
#2 |
|
Registered User
Join Date: Jan 2013
Location: Leonardtown, MD
Posts: 1,633
|
Re: 1947 Biederman Truck Fender repairs
Today we got the second inner fender cut out, and took them both over for a test fit on the truck
  The driver's side has a bolting plate in the middle of the frame for the steering box, so a relief notch was in order... 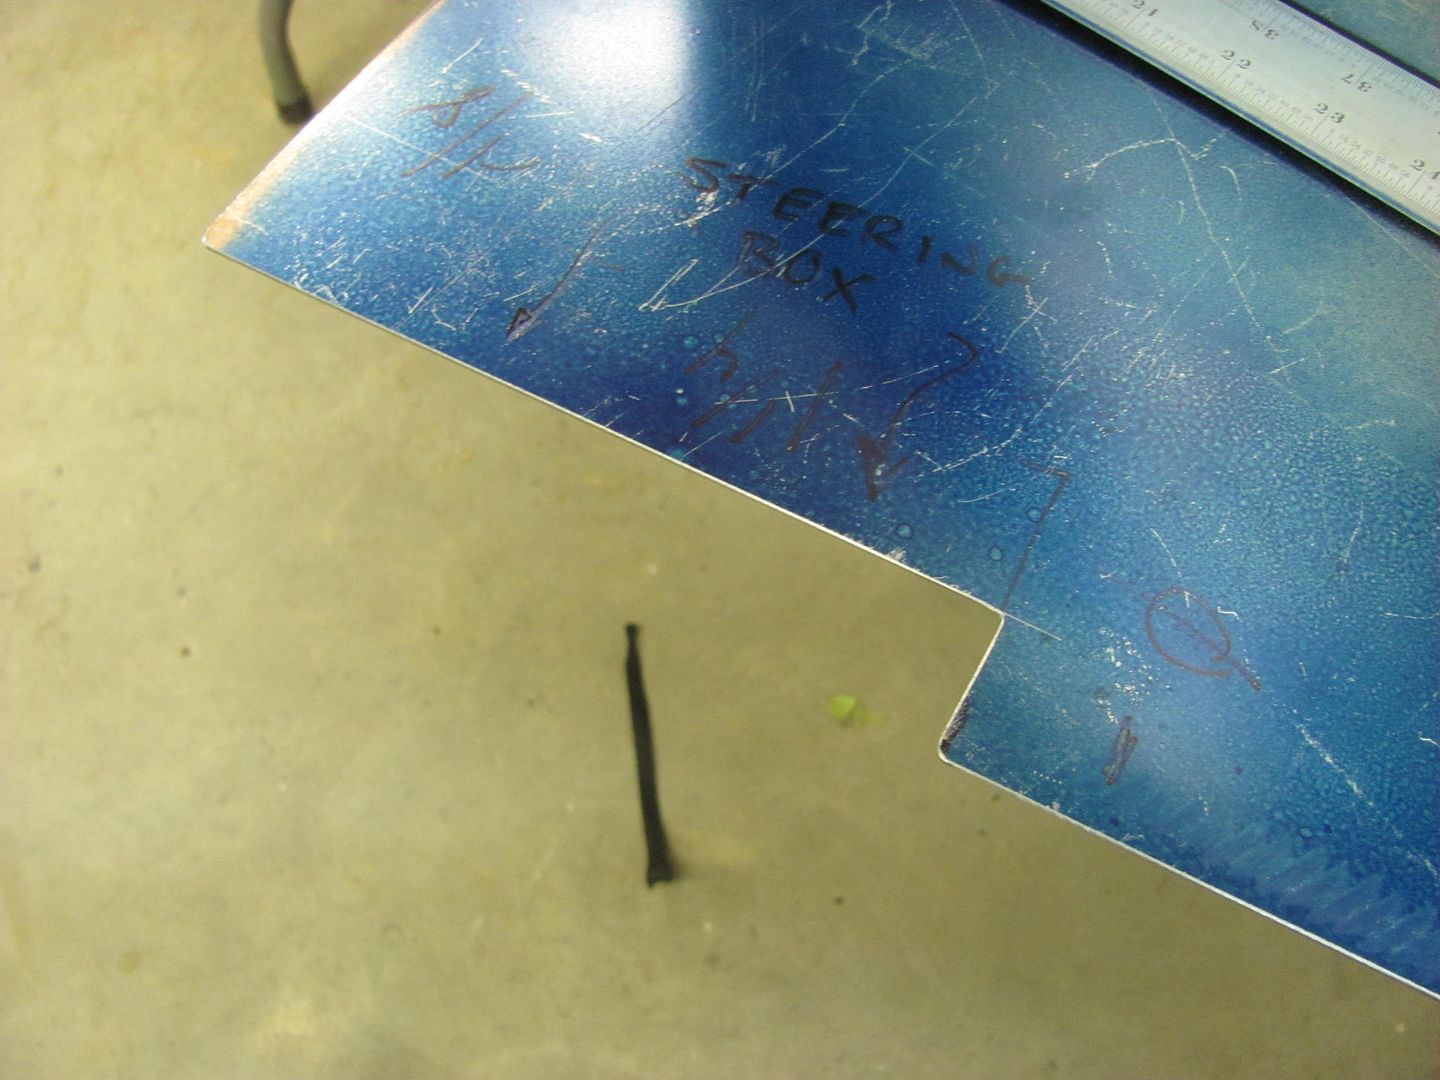 ....as well as a bit of trimming for some clearance so that the paint won't be chipped off on the first test drive. The fabrication of these parts are done, and we should pick up the new Tommasini Wheeling Machine this coming weekend so we can get started on the fender patches.. 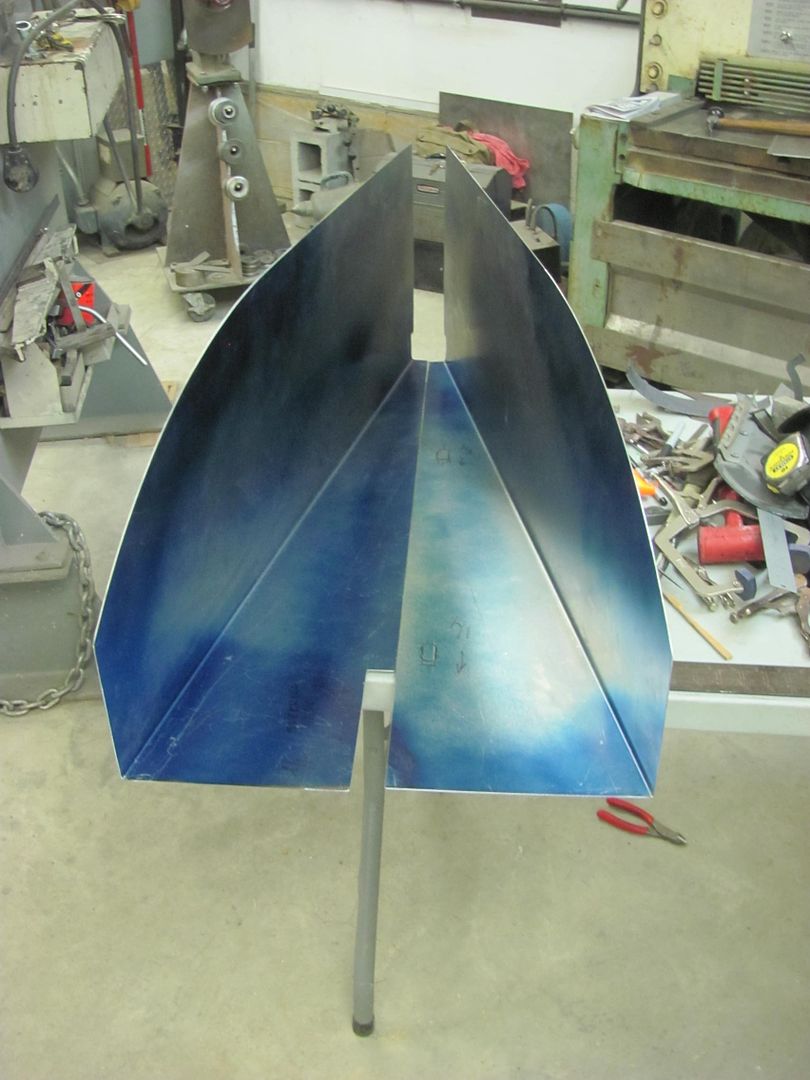 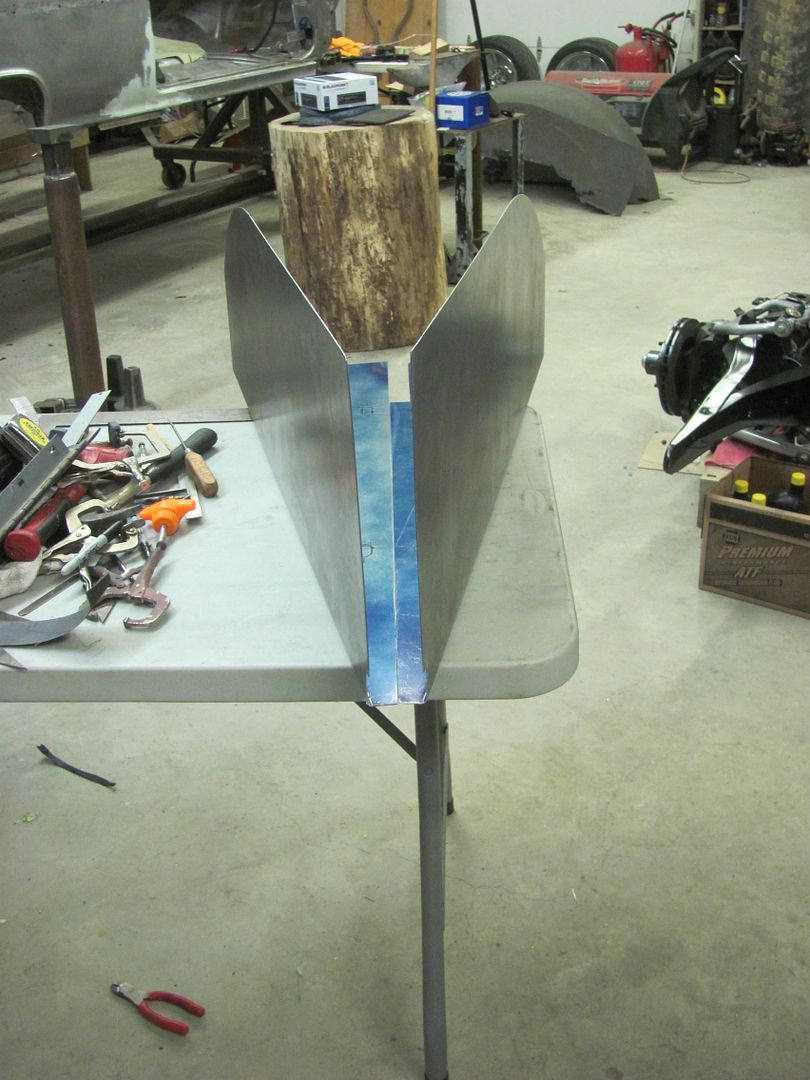 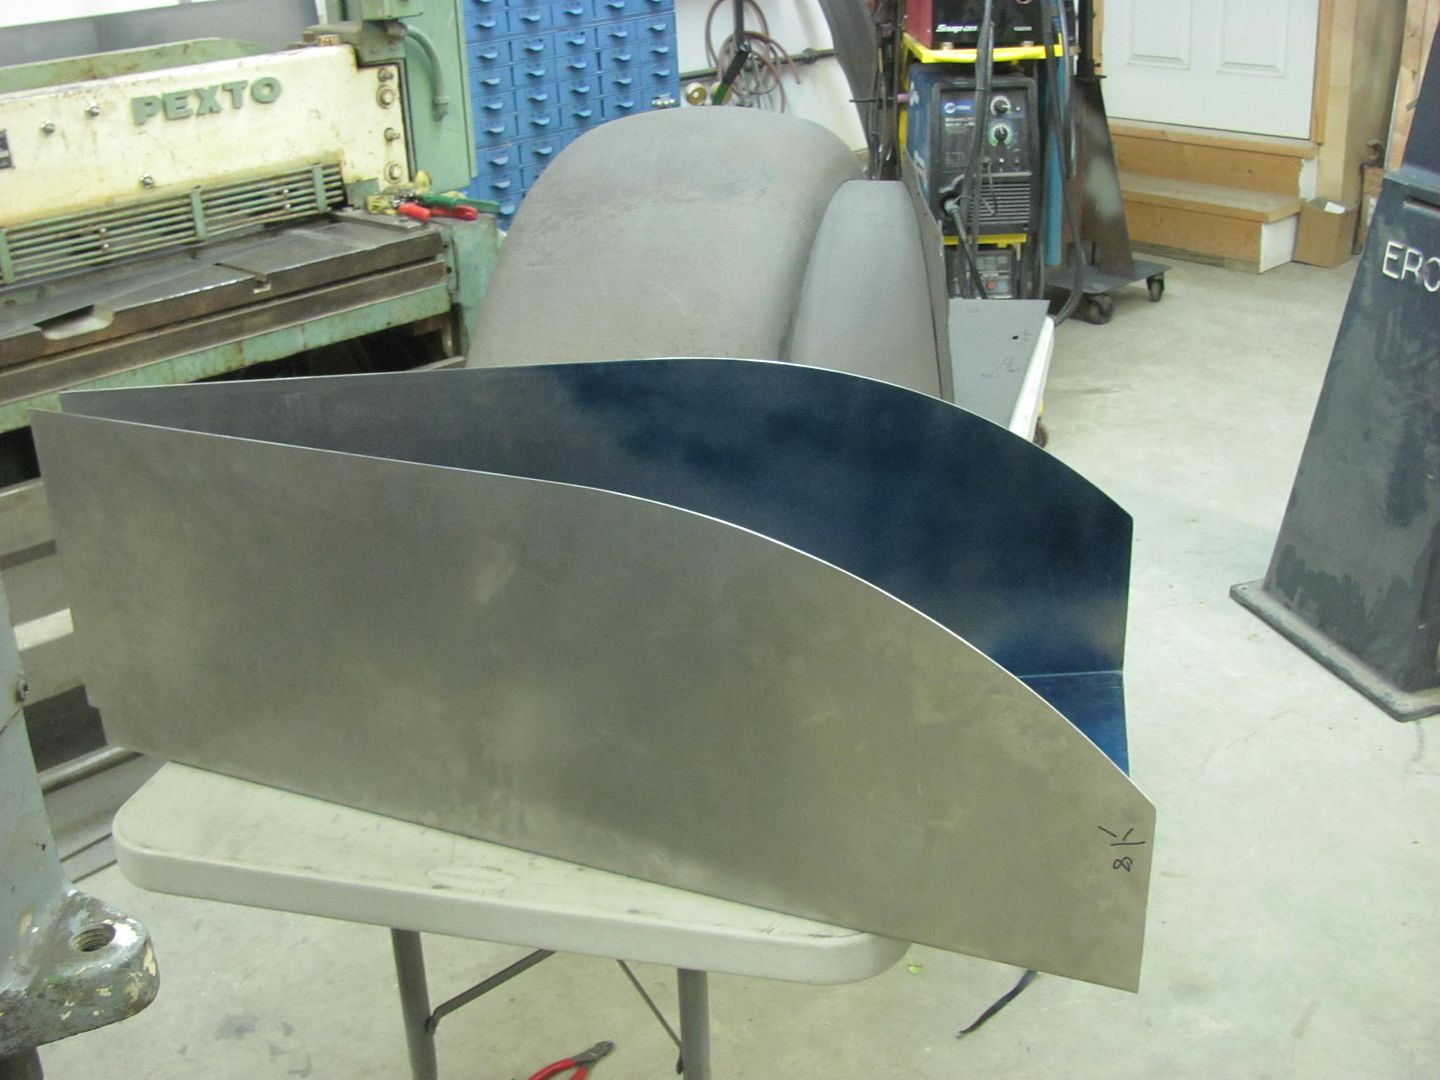
__________________
Robert |
|
|
|
|
03-12-2016, 10:13 PM
|
#3 |
|
Registered User
Join Date: Oct 2009
Location: canton ga
Posts: 12,729
|
Re: 1947 Biederman Truck Fender repairs
Nice work ,neat truck .
|
|
|
|
|
03-14-2016, 12:17 AM
|
#4 |
|
Registered User
Join Date: Oct 2007
Location: Spanaway
Posts: 8,451
|
Re: 1947 Biederman Truck Fender repairs
Following!
__________________
Mike. Swamp Rat build thread : http://67-72chevytrucks.com/vboard/s...d.php?t=595019 72 3/4T 4X4 4" BDS Lift 33" BFG's |
|
|
|
|
04-03-2016, 07:42 AM
|
#5 |
|
Registered User
Join Date: Dec 2011
Location: Mobile, Alabama
Posts: 996
|
Re: 1947 Biederman Truck Fender repairs
Nice build. Keep the photos coming. dug
__________________
My Build - http://67-72chevytrucks.com/vboard/s...d.php?t=515876 |
|
|
|
|
04-05-2016, 12:52 PM
|
#6 |
|
Registered User
Join Date: Apr 2003
Location: Indep, MO
Posts: 5,893
|
Re: 1947 Biederman Truck Fender repairs
Gonna be neat!
__________________
Boppa's Old Yeller Truck Build, Old Yeller's New Heart! Project Buzz Bomb Flyin' Low! |
|
|
|
|
07-01-2016, 09:52 PM
|
#7 |
|
Registered User
Join Date: Jan 2013
Location: Leonardtown, MD
Posts: 1,633
|
Re: 1947 Biederman Truck Fender repairs
John's getting ready for engine start ceremonies, so I guess I need to get off my duff here. To help out in that regard, next we'll fabricate the battery tray which I don't believe came with the truck when John got it. Here's the best we have for a pattern:
 The hold down bracket for the prescribed Group 4 battery was with the truck, so we did some test fitting with the inner fender in place. It is a bit cramped for space, and John expressed concern of the availability of the Group 4 battery. Most local sources only carry the Group 1 in stock, which would also be a better fit.. So out with the old... 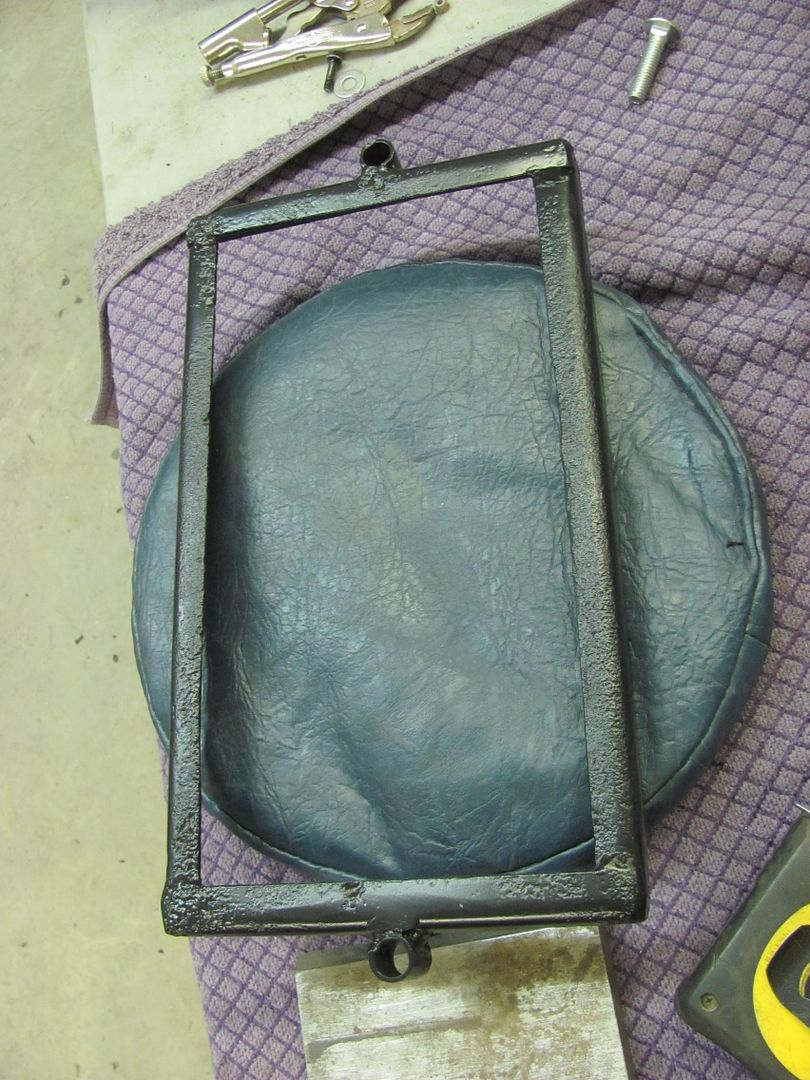 I did miss getting in the flat pictures, but here is the freshly folded and welded hold down bracket for the new battery size. 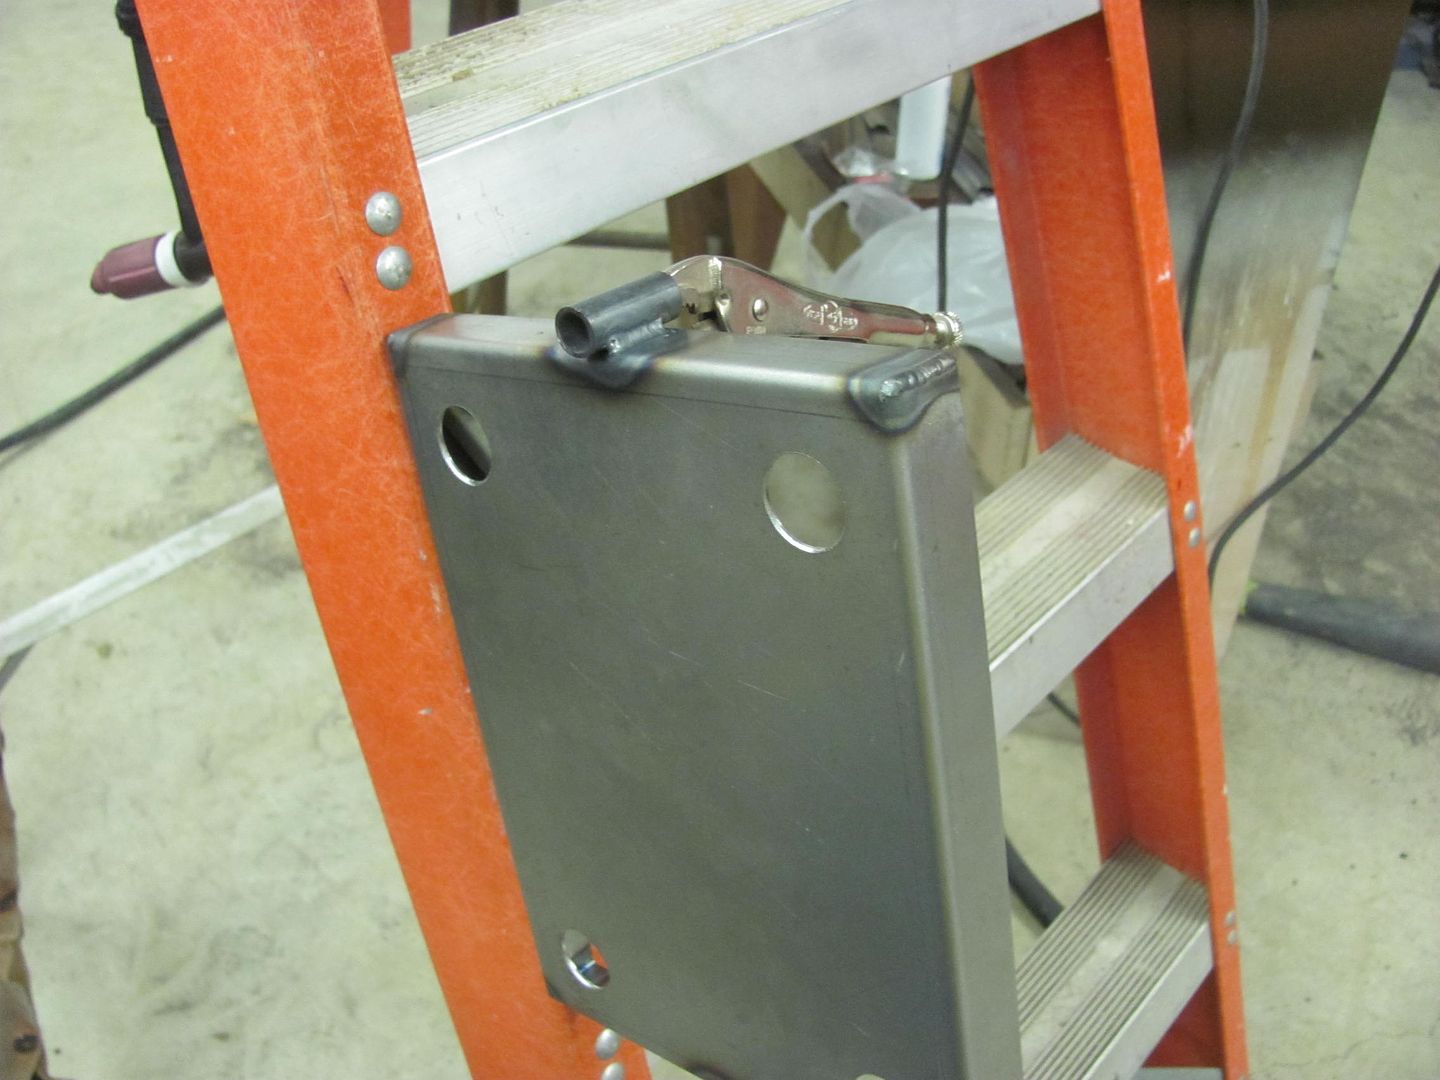 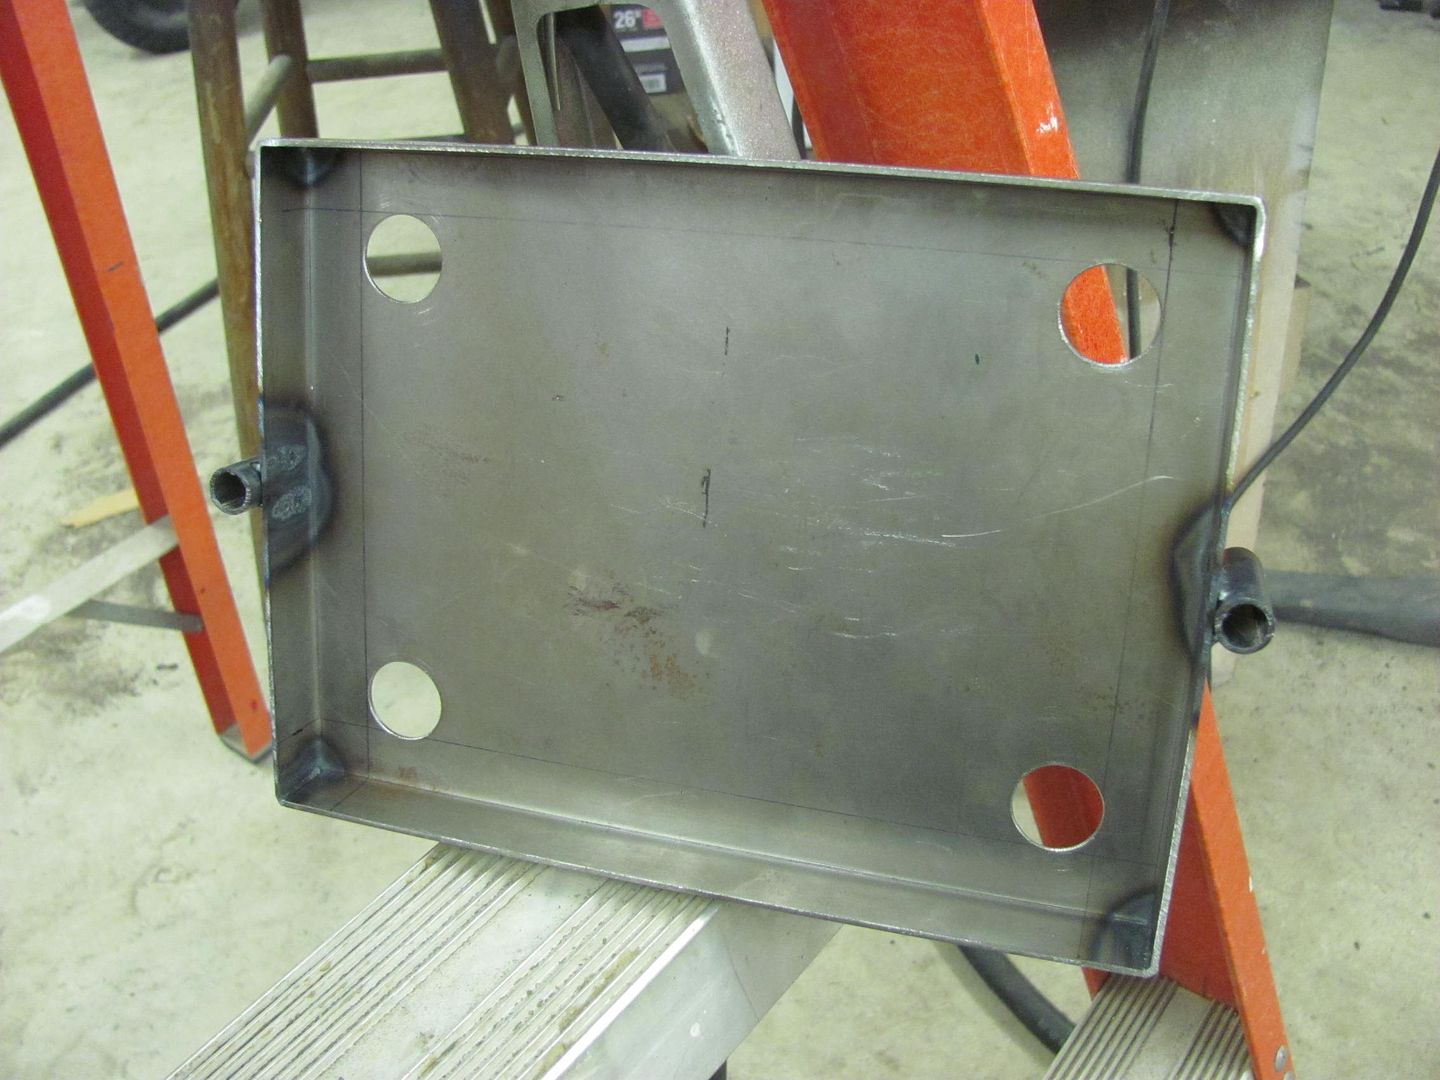 All trimmed and prepped for paint..   Comparing the new to the old...  Next will be the new battery tray.
__________________
Robert |
|
|
|
|
07-04-2016, 01:41 PM
|
#8 |
|
Registered User
Join Date: Jan 2013
Location: Leonardtown, MD
Posts: 1,633
|
Re: 1947 Biederman Truck Fender repairs
...and now for the battery tray, shown here cut to size and sides folded up...
  For the end folds, the cut was started using a .035 cutoff wheel..  ...and our trusty jig saw again...  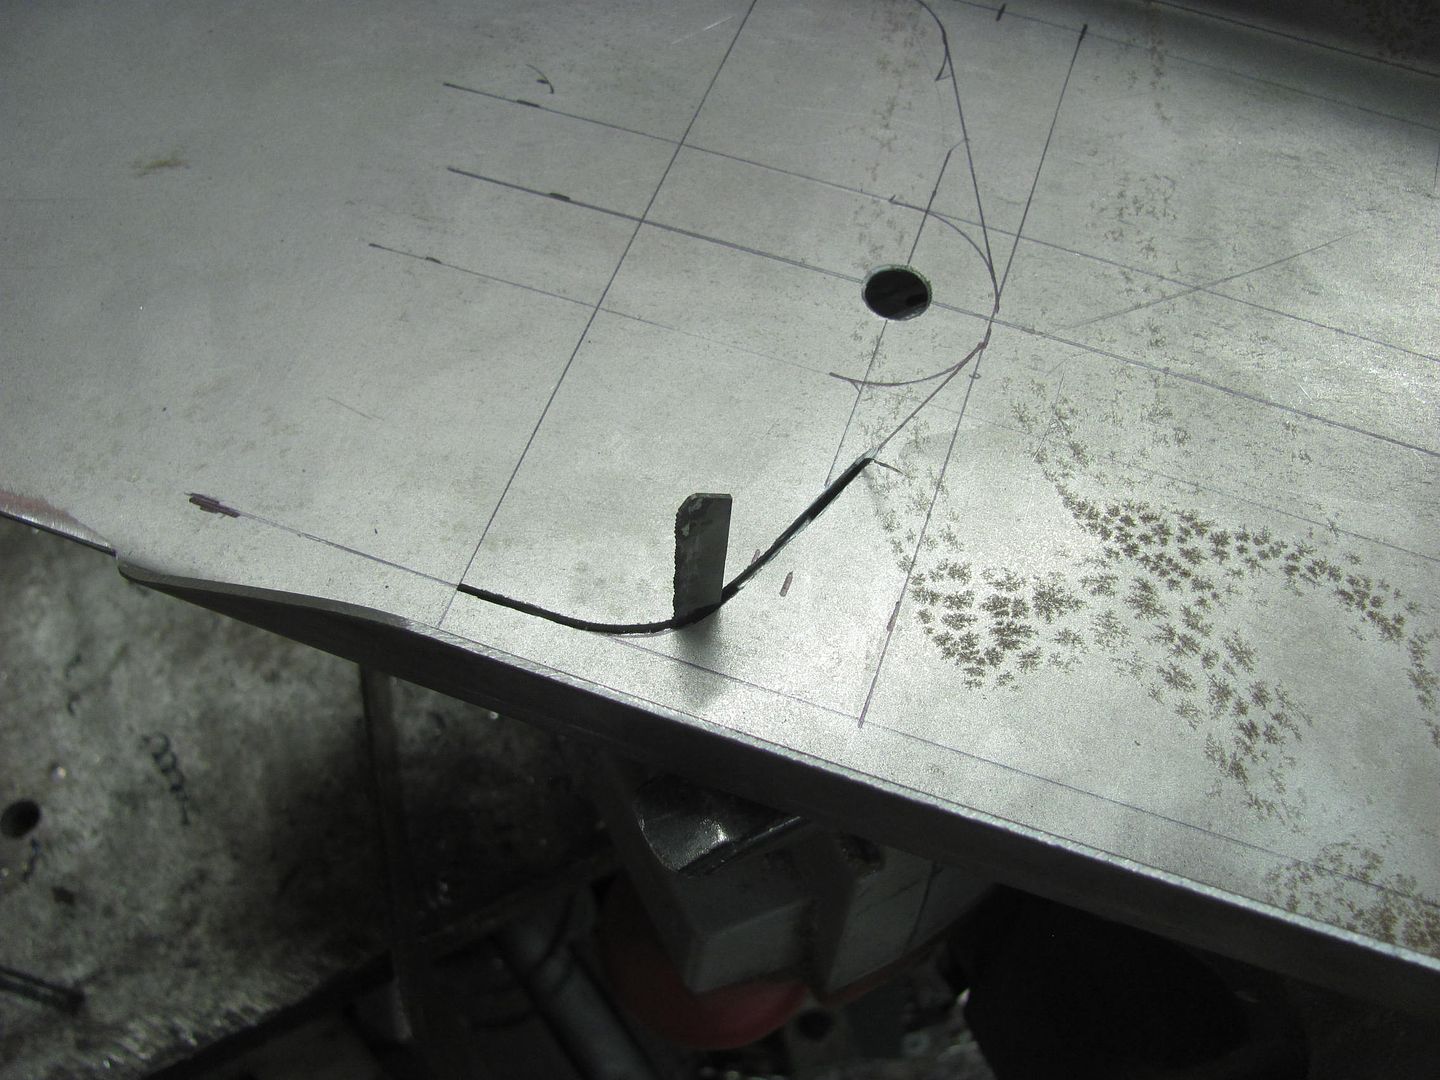  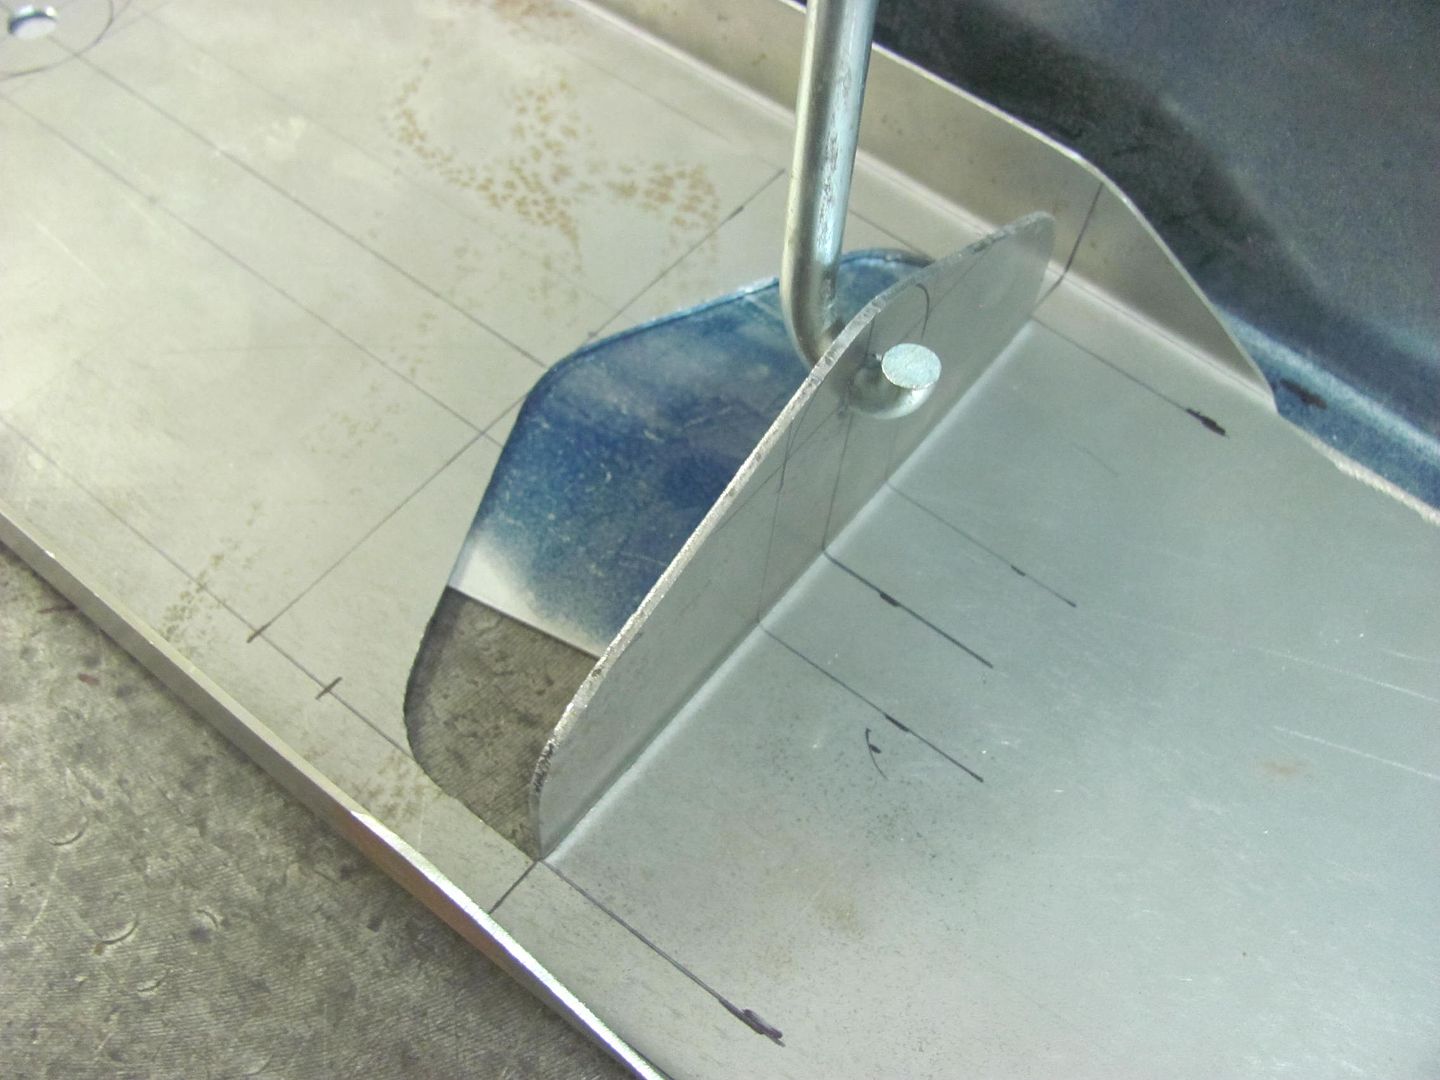 Both ends complete, and frame holes have been piloted. Once checked to the hole spacing on the frame they can be drilled out for the 3/8 bolts. 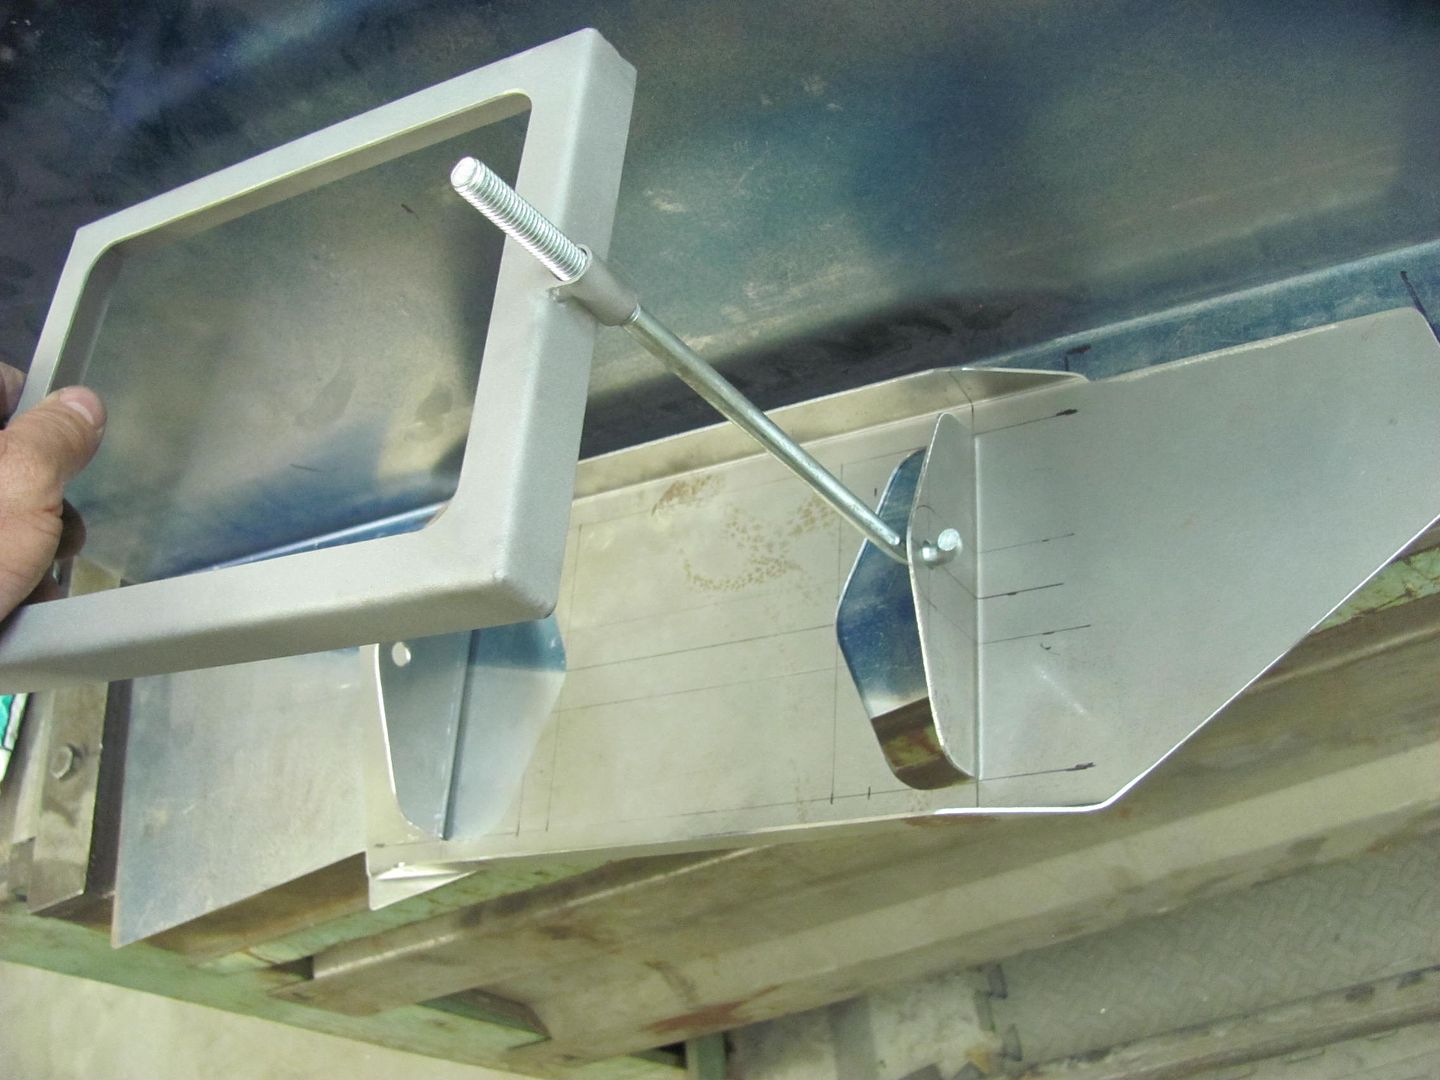 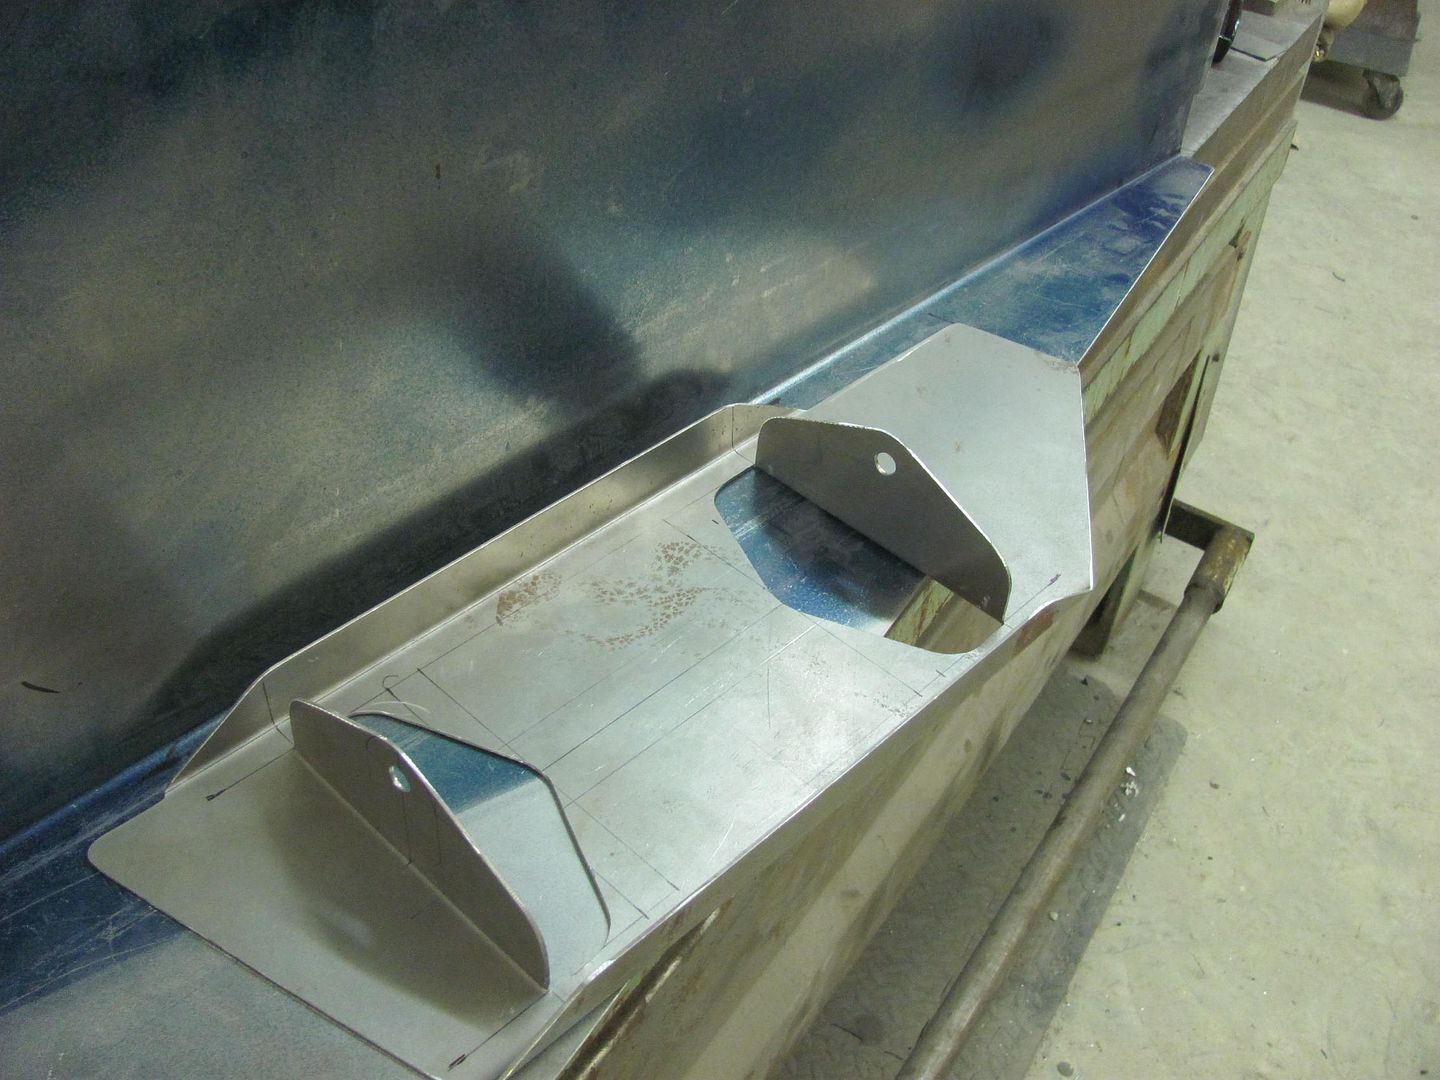
__________________
Robert |
|
|
|
|
07-04-2016, 04:00 PM
|
#9 |
|
Registered User
Join Date: Apr 2011
Location: .
Posts: 3,104
|
Re: 1947 Biederman Truck Fender repairs
Always learn something when looking at your work.
I will put to use using the tipping die to help sharpen up the edge. Currently don't have a Lennox but when I grow up I will. Thanks |
|
|
|
|
08-13-2016, 11:54 PM
|
#10 |
|
Registered User
Join Date: Jan 2013
Location: Leonardtown, MD
Posts: 1,633
|
Re: 1947 Biederman Truck Fender repairs
More progress on the Biederman fenders.. With Kyle on vacation I was shorthanded in the shop so John (the owner) came by and lent a hand.
First step was to remove the inner fender to see what we had to work with, added some 1/8 holes to use later for clecos in putting things back together.. 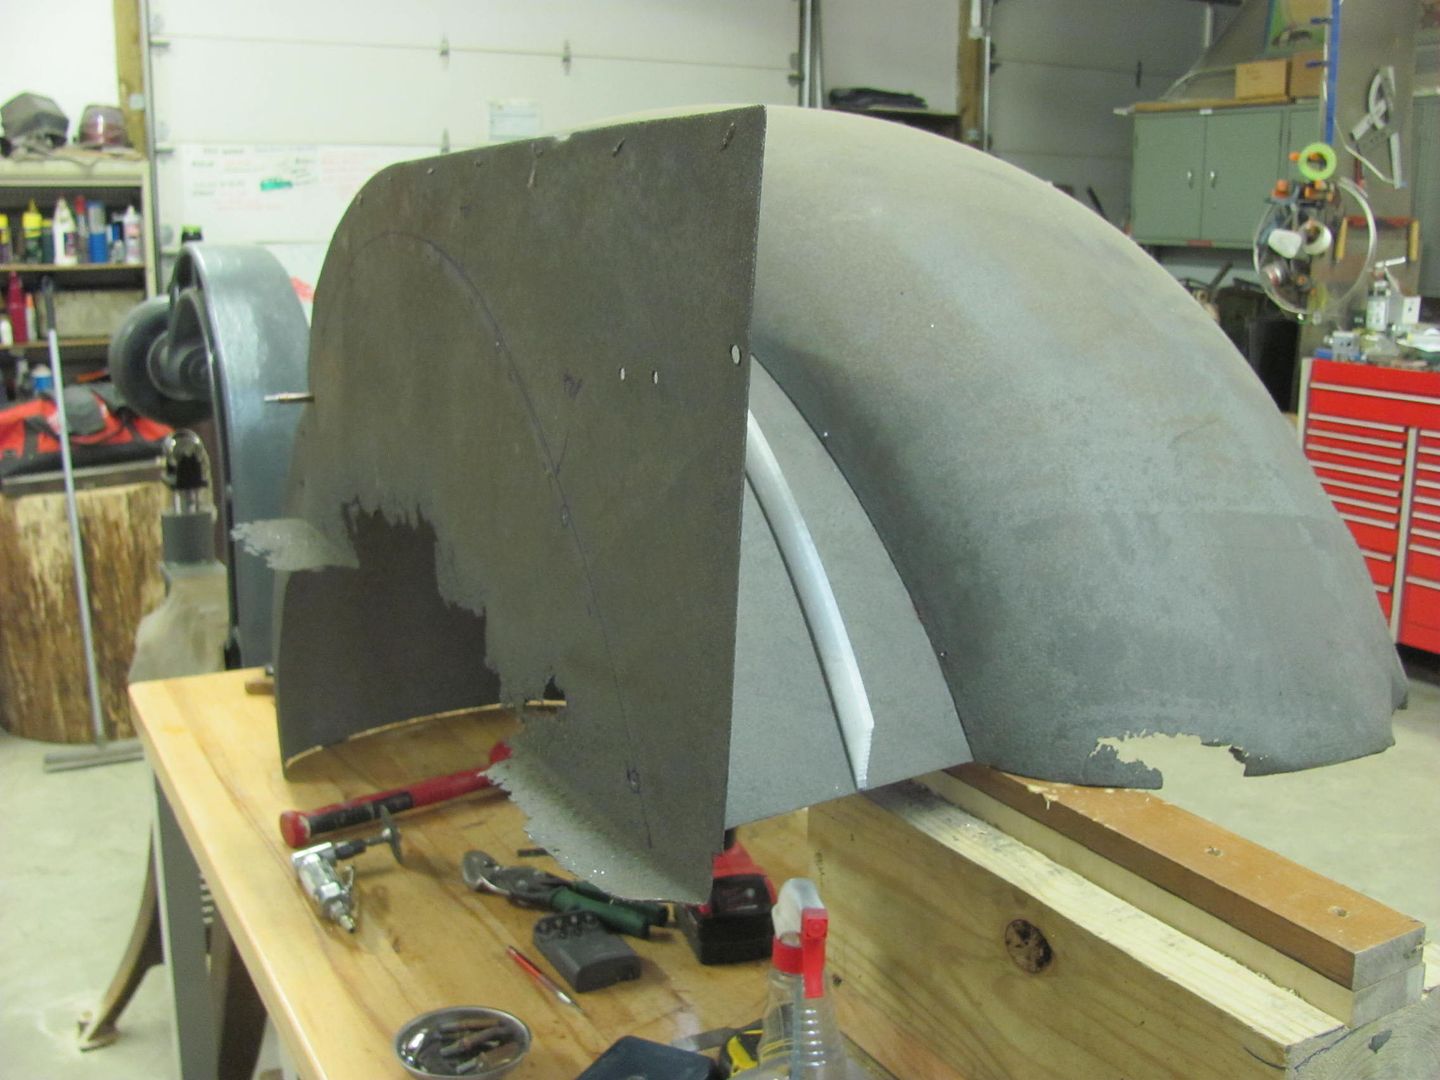 The front of the fender bolts to the bumper filler panel, and the rear bolts to the running board. These have a difference in height of 13-3/4, so some blocks were screwed together to hold the fender in correct placement while we worked. 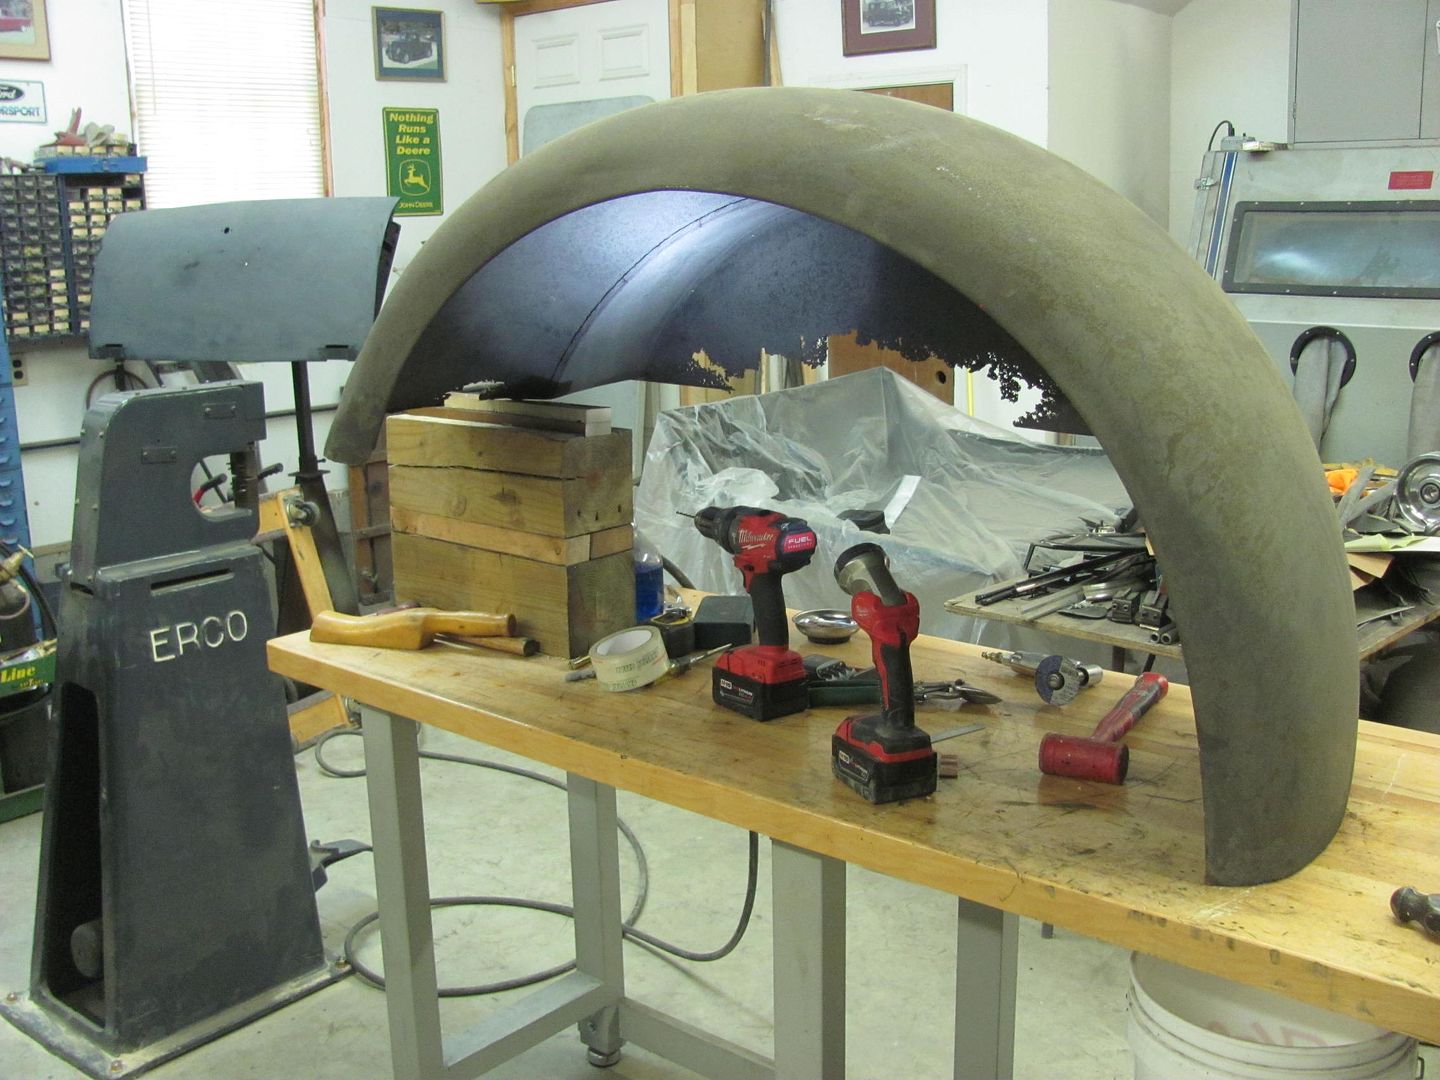 The inner is getting replaced so the spot welds were ground out for removal. 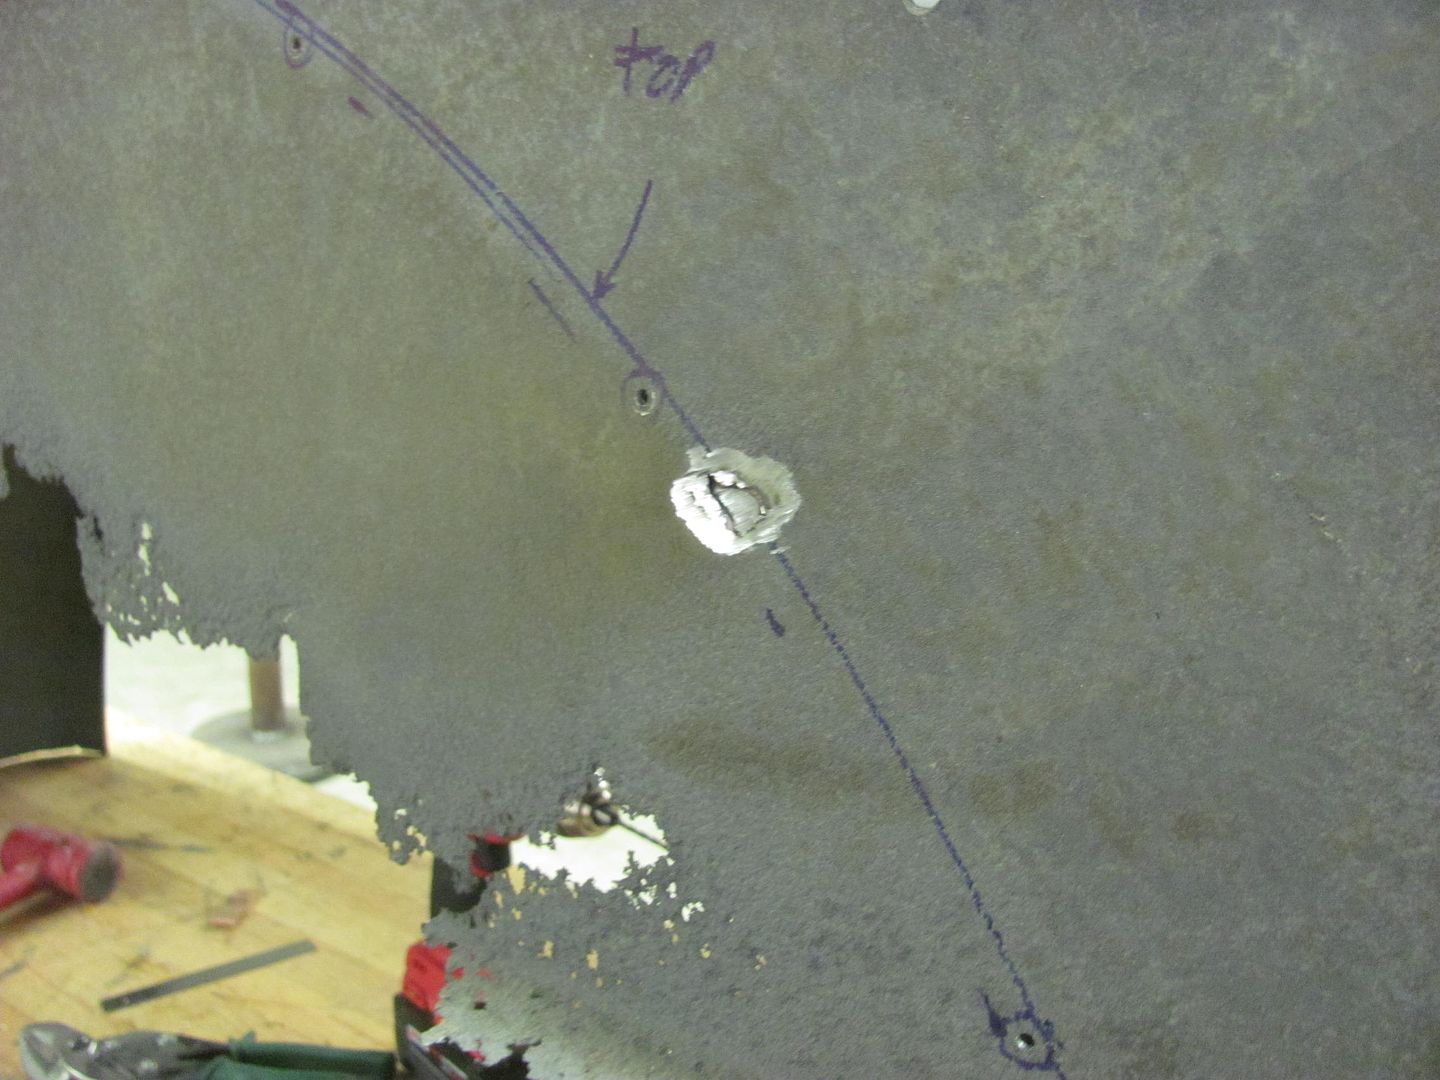 Once removed, we found more pitting and damage than we originally thought was there, so now lets make this new as well..  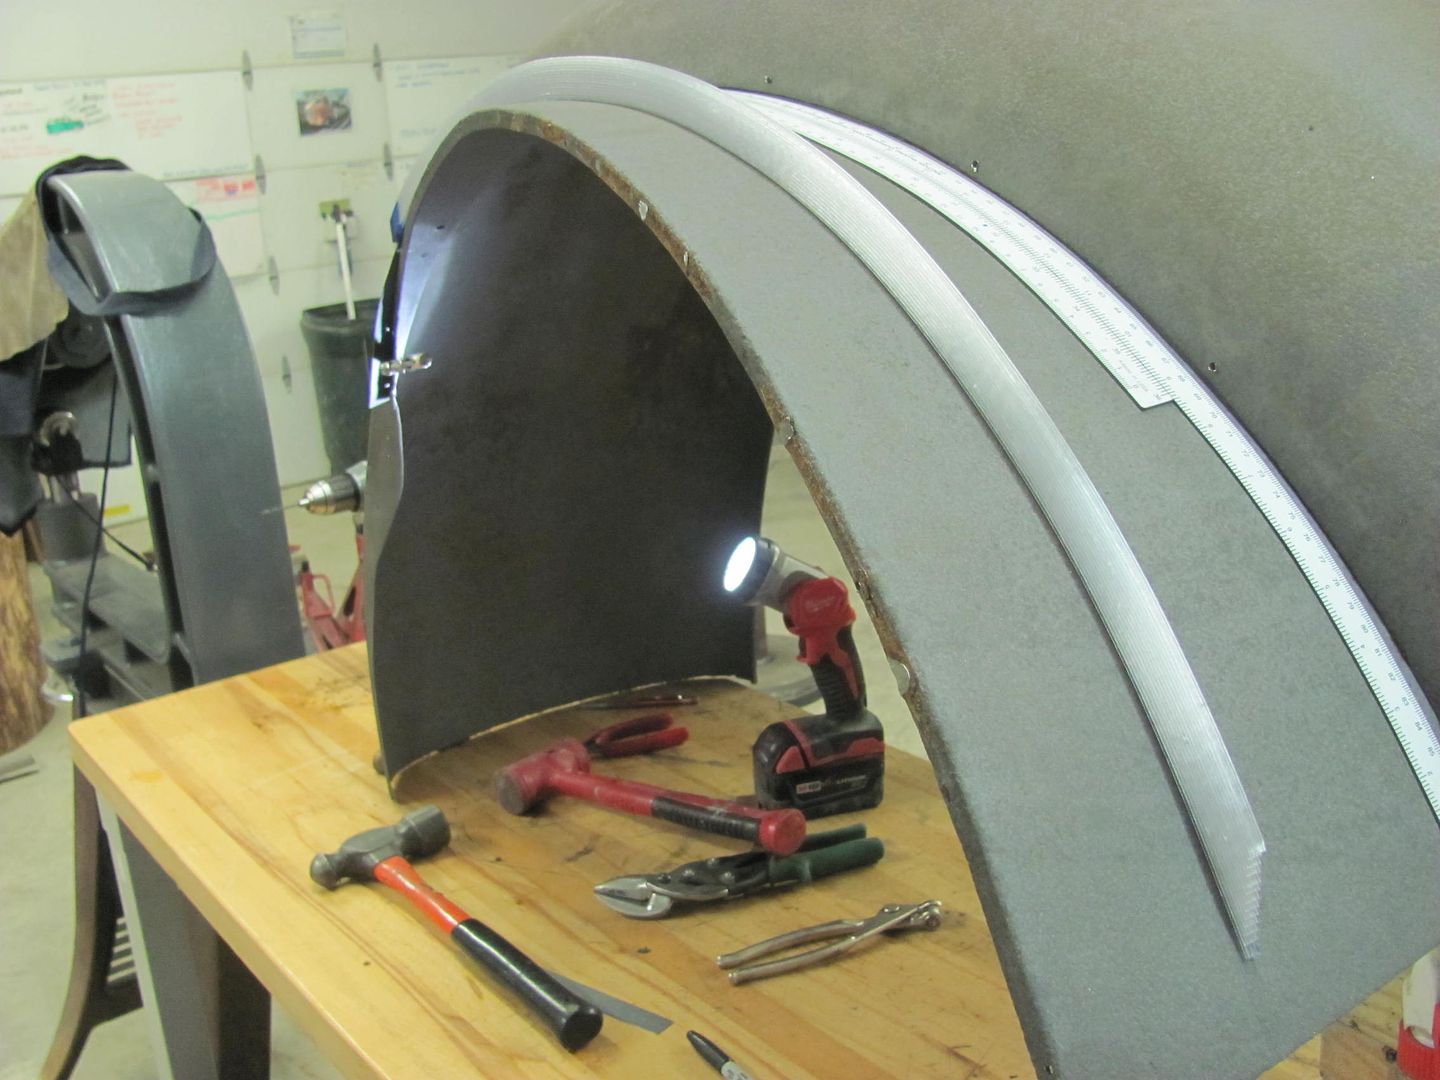 New piece is cut out and the Wheeling machine with the go kart slick is used to add the correct radius.. 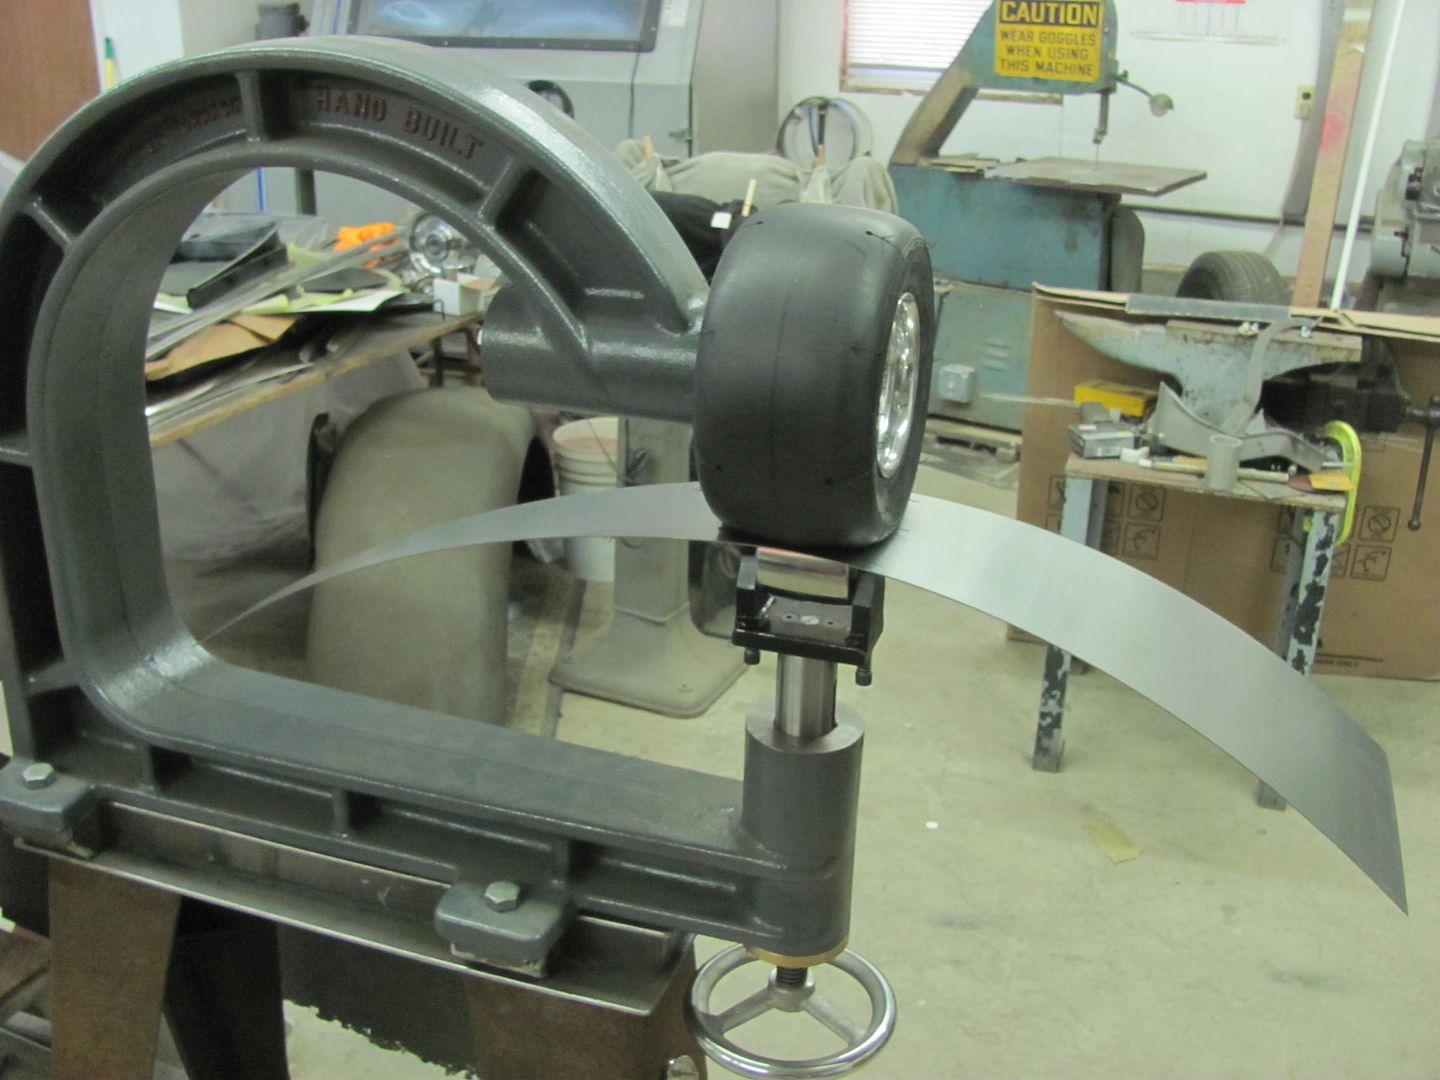 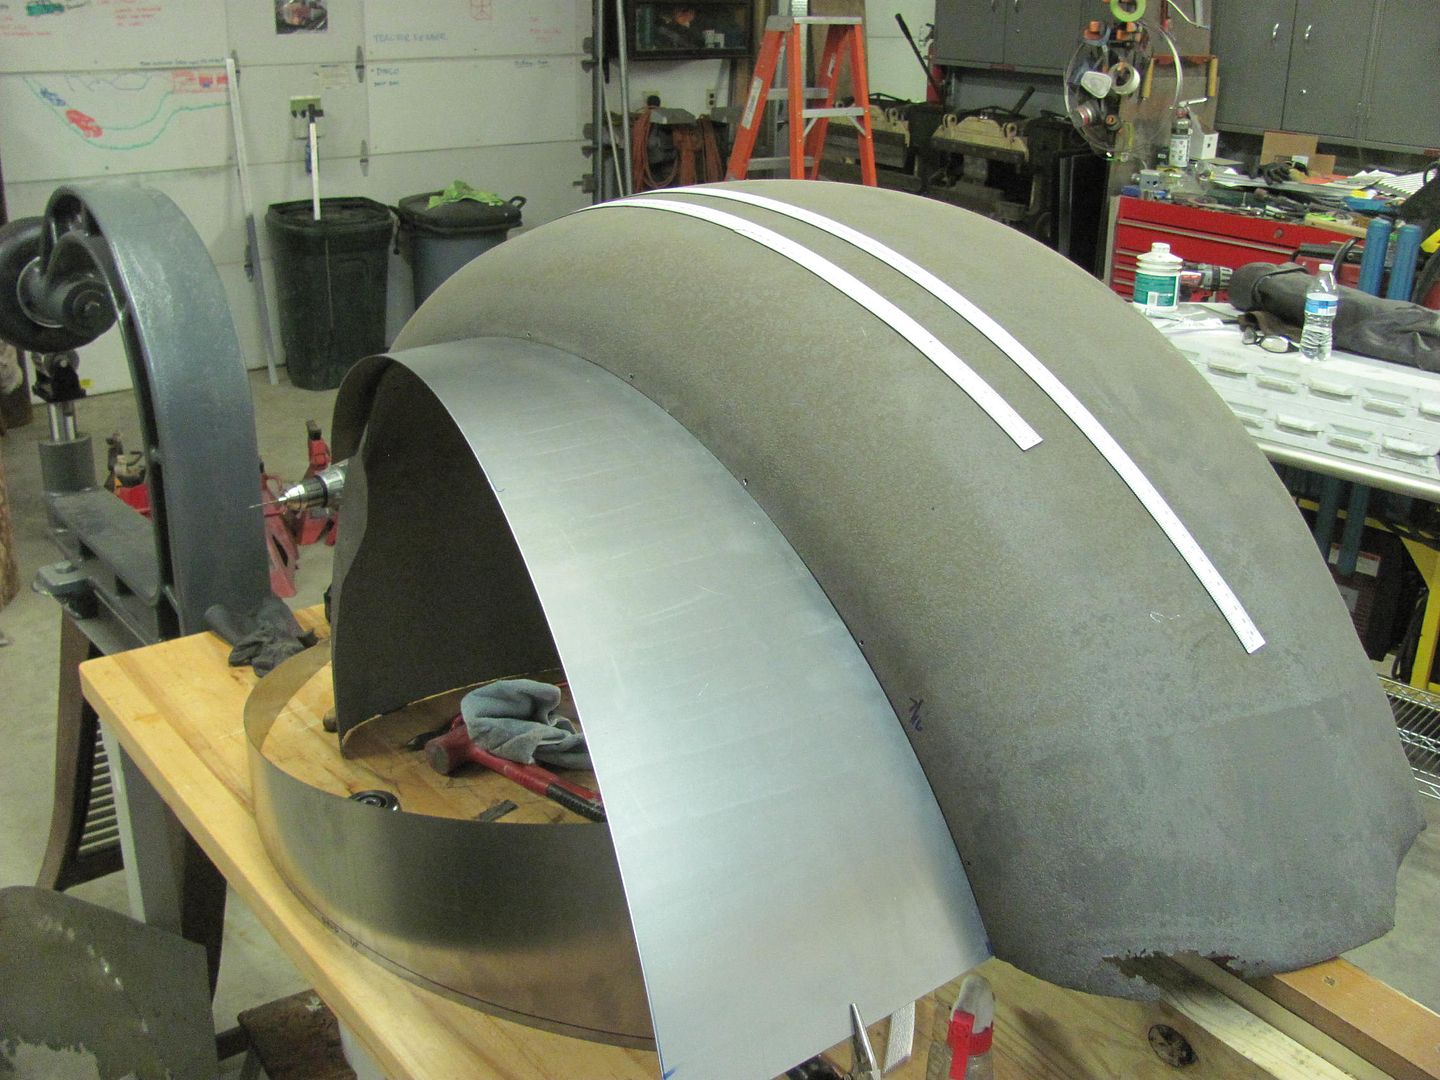 Then the flange bend line is marked/thinned using a tipping die in the Lennox like we did for the inner panels we made.. 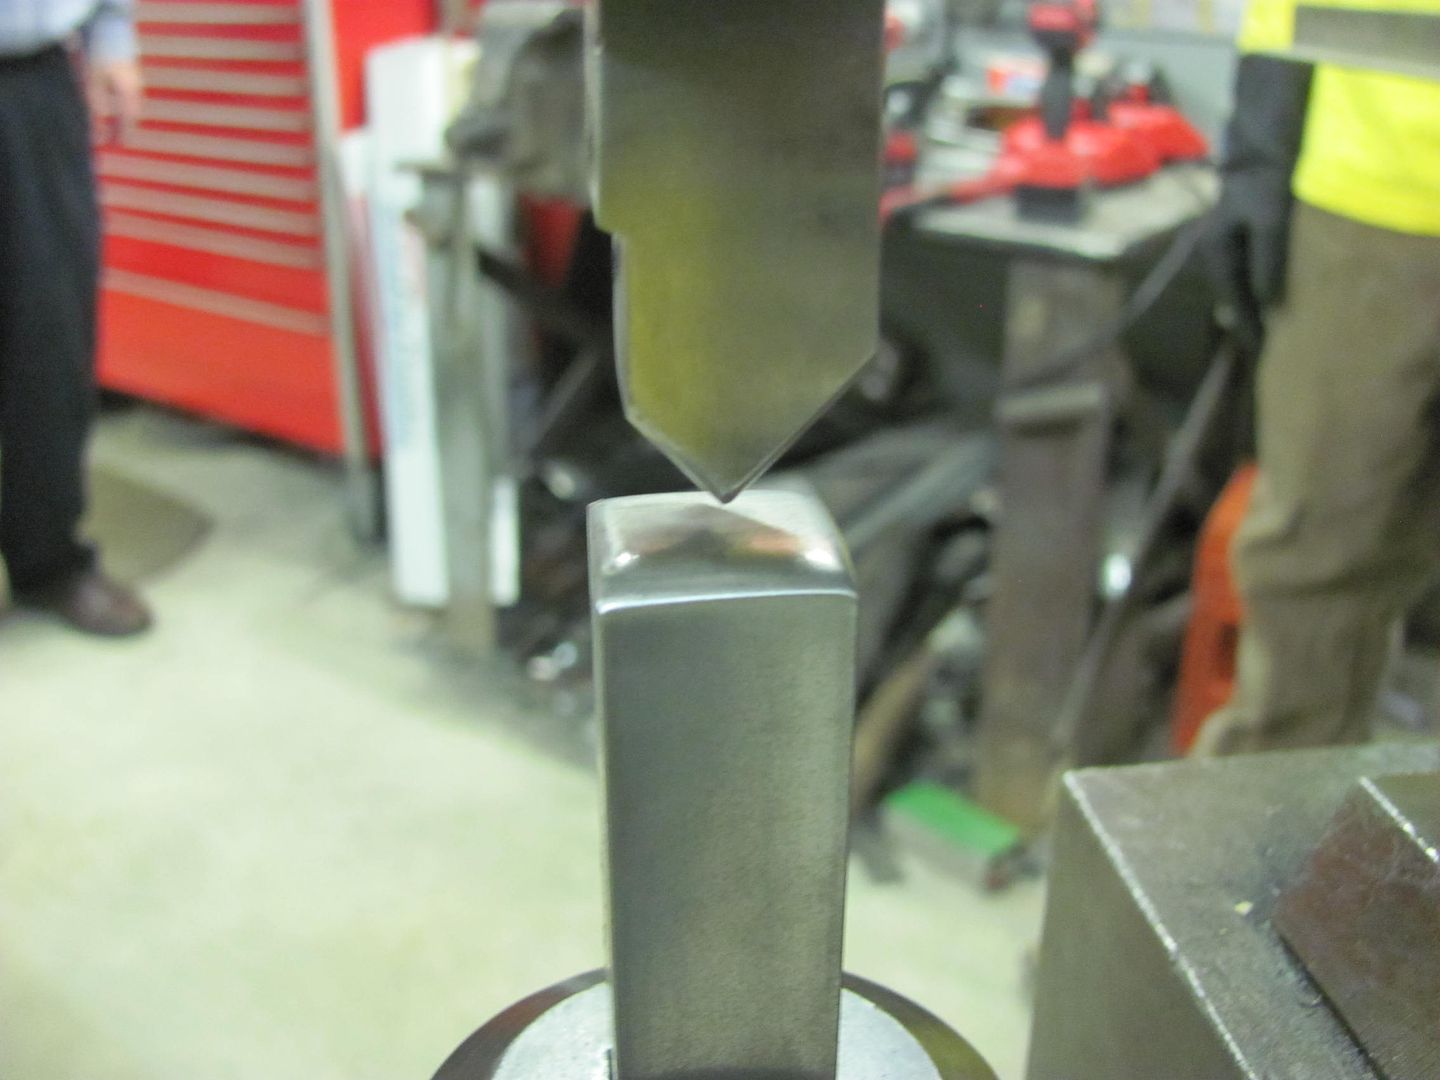 Then a tipping die and Skateboard wheel in the bead roller is used to make the initial fold on the marked line 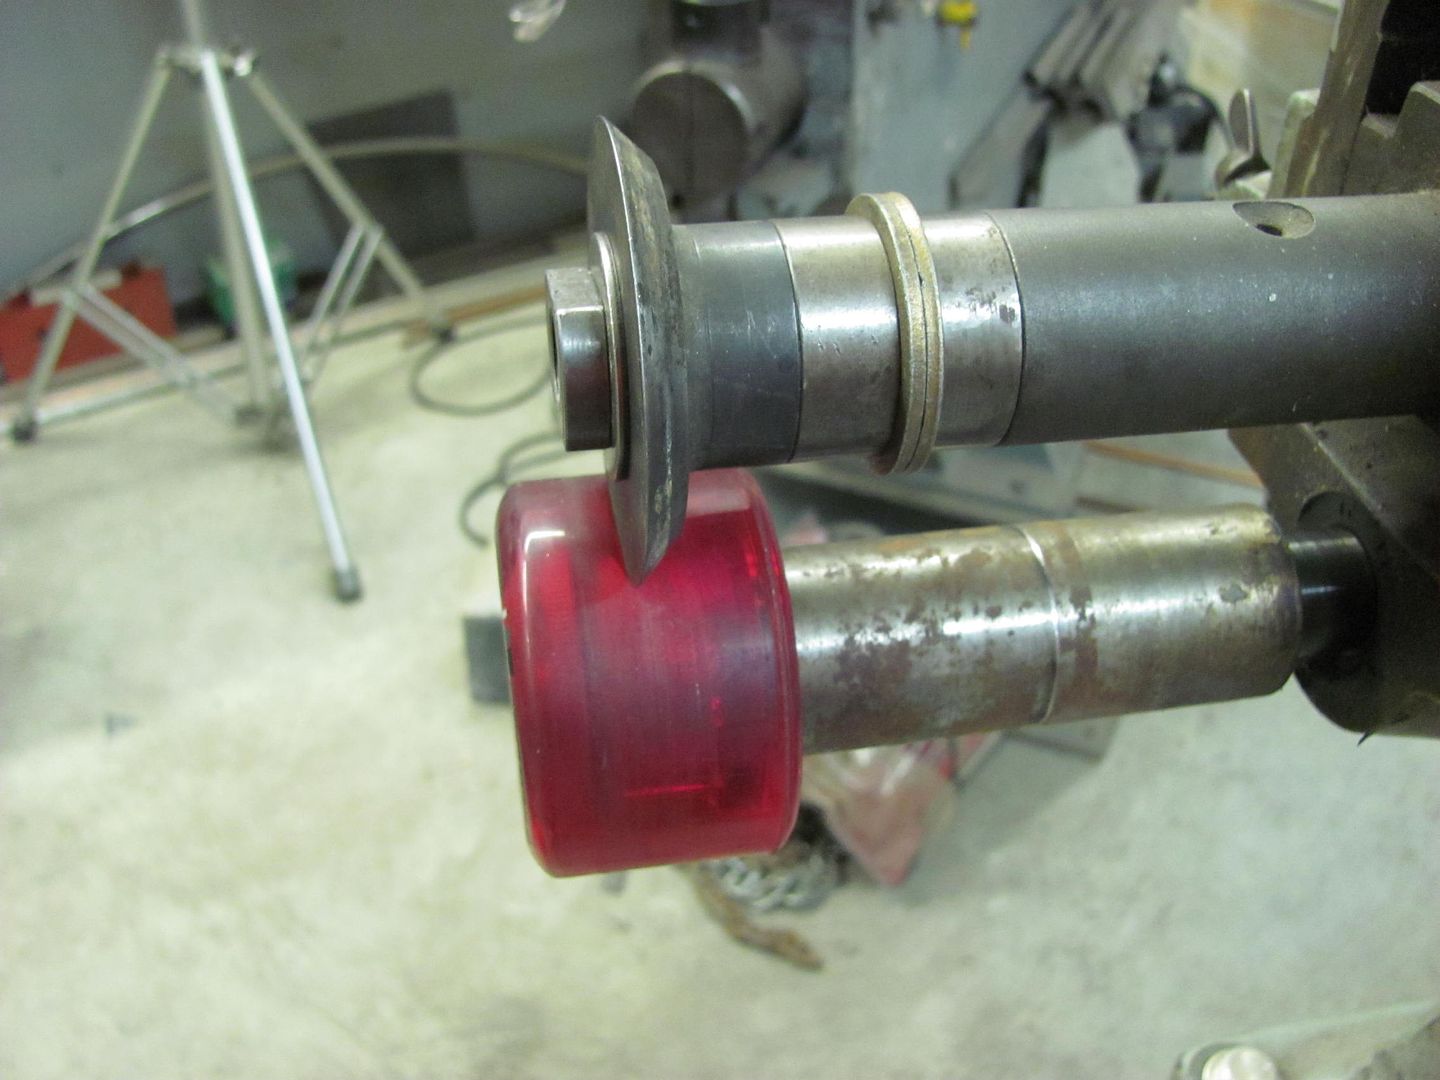 and finished up with a Step die so we could use it as a backstop 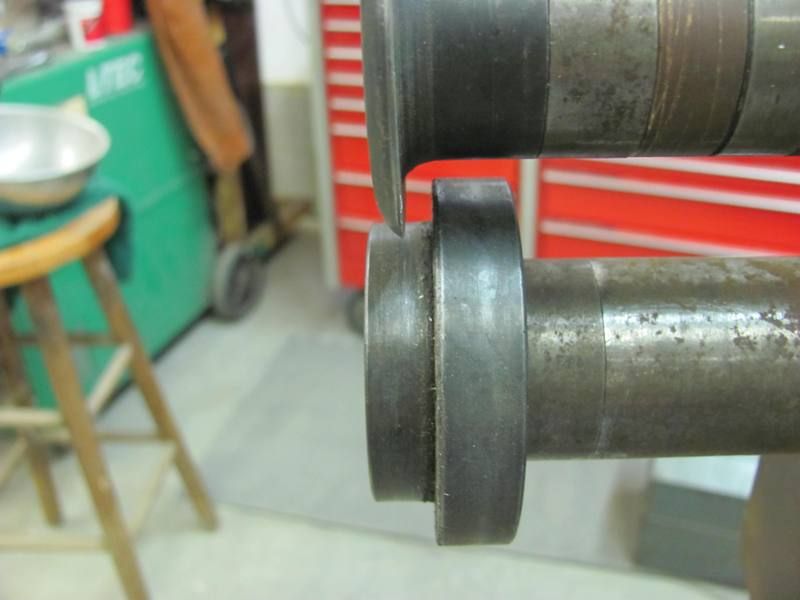 The Erco 1447 with stretcher dies was used to stretch the flange in between tipping sessions. All done, matches the fender contour, we'll get the other side folded down next time.. 
__________________
Robert |
|
|
|
|
08-14-2016, 07:32 AM
|
#11 |
|
Registered User
Join Date: Dec 2011
Location: Mobile, Alabama
Posts: 996
|
Re: 1947 Biederman Truck Fender repairs
Beautiful work!
__________________
My Build - http://67-72chevytrucks.com/vboard/s...d.php?t=515876 |
|
|
|
|
08-14-2016, 12:04 PM
|
#12 |
|
Registered User
Join Date: Oct 2009
Location: canton ga
Posts: 12,729
|
Re: 1947 Biederman Truck Fender repairs
Amazing work ,love watching this stuff happen.
|
|
|
|
|
08-14-2016, 12:31 PM
|
#13 |
|
Registered User
Join Date: Apr 2011
Location: .
Posts: 3,104
|
Re: 1947 Biederman Truck Fender repairs
Thanks for sharing, learn a bunch from your work. Wish I could be a fly on the wall with a note pad.
|
|
|
|
|
08-14-2016, 04:56 PM
|
#14 |
|
Senior Member
 Join Date: Jul 2012
Location: Oblong, Illinois
Posts: 7,017
|
Re: 1947 Biederman Truck Fender repairs
Nice work and great tutorial Robert.
|
|
|
|
|
08-25-2016, 11:43 PM
|
#15 |
|
Registered User
Join Date: Jan 2013
Location: Leonardtown, MD
Posts: 1,633
|
Re: 1947 Biederman Truck Fender repairs
Thanks guys!
Here's a quick video to show how the radius for the filler panel was done.. https://www.youtube.com/watch?v=ZnCTqLZg9lg With the flanges turned both directions....  Looking at the rear of the fender that was adjacent to the cab, we found flat areas that seem to indicate some rubbing was occurring. So while we were fabricating the filler panel, we added about 1/8" to shove the fender outward away from the cab. 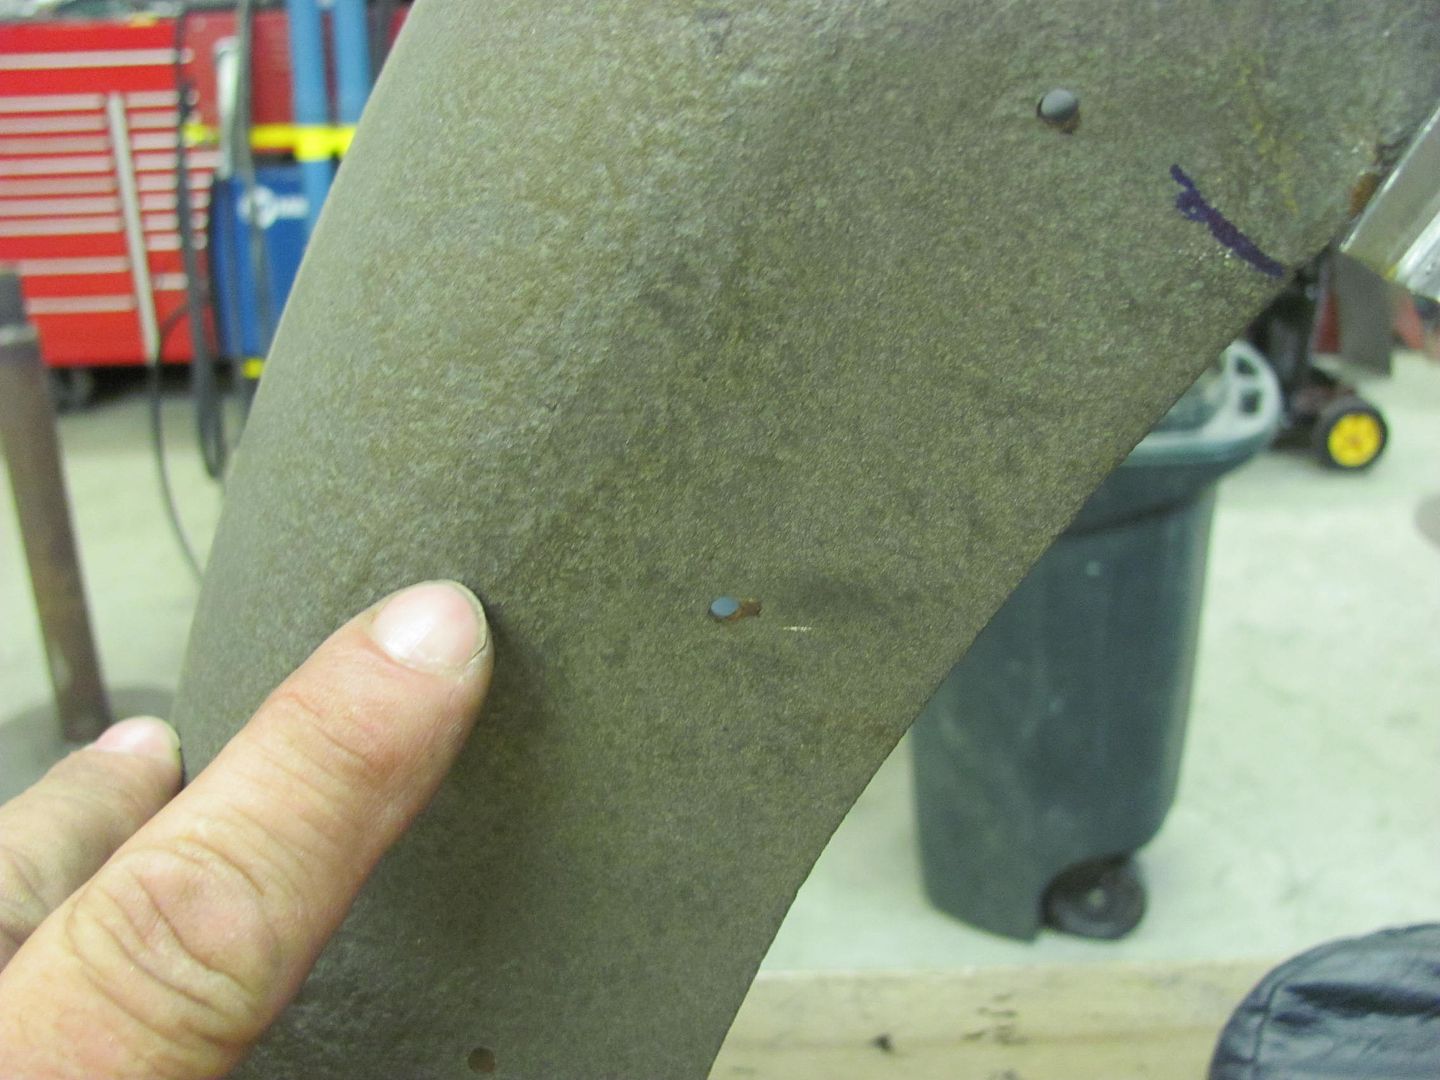 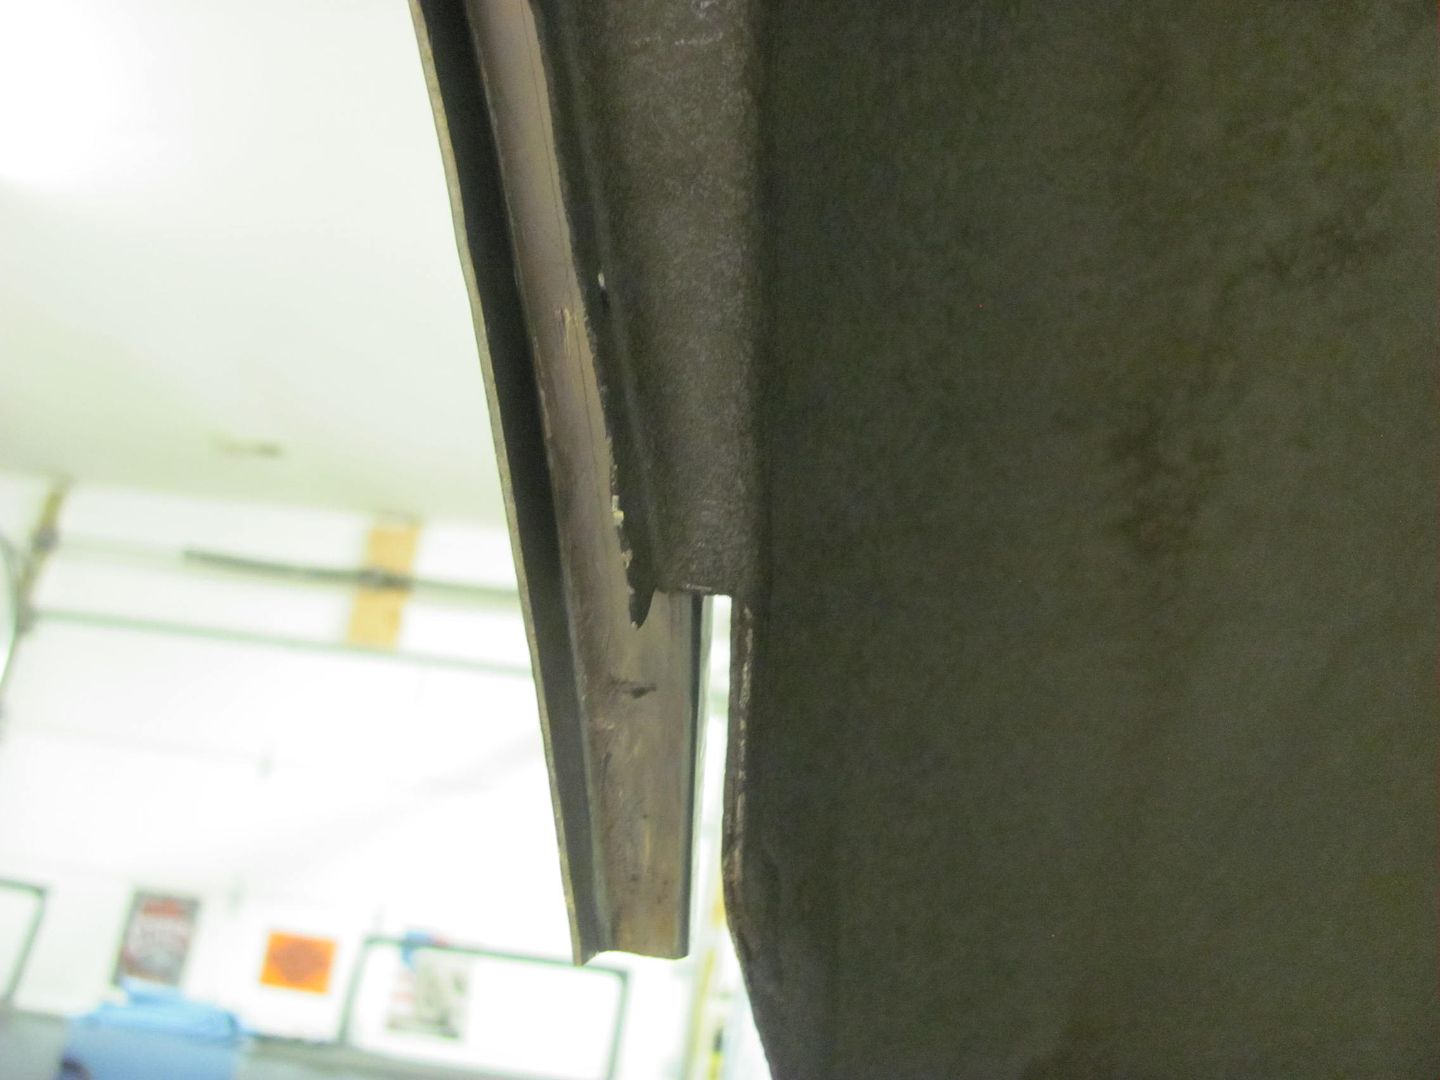 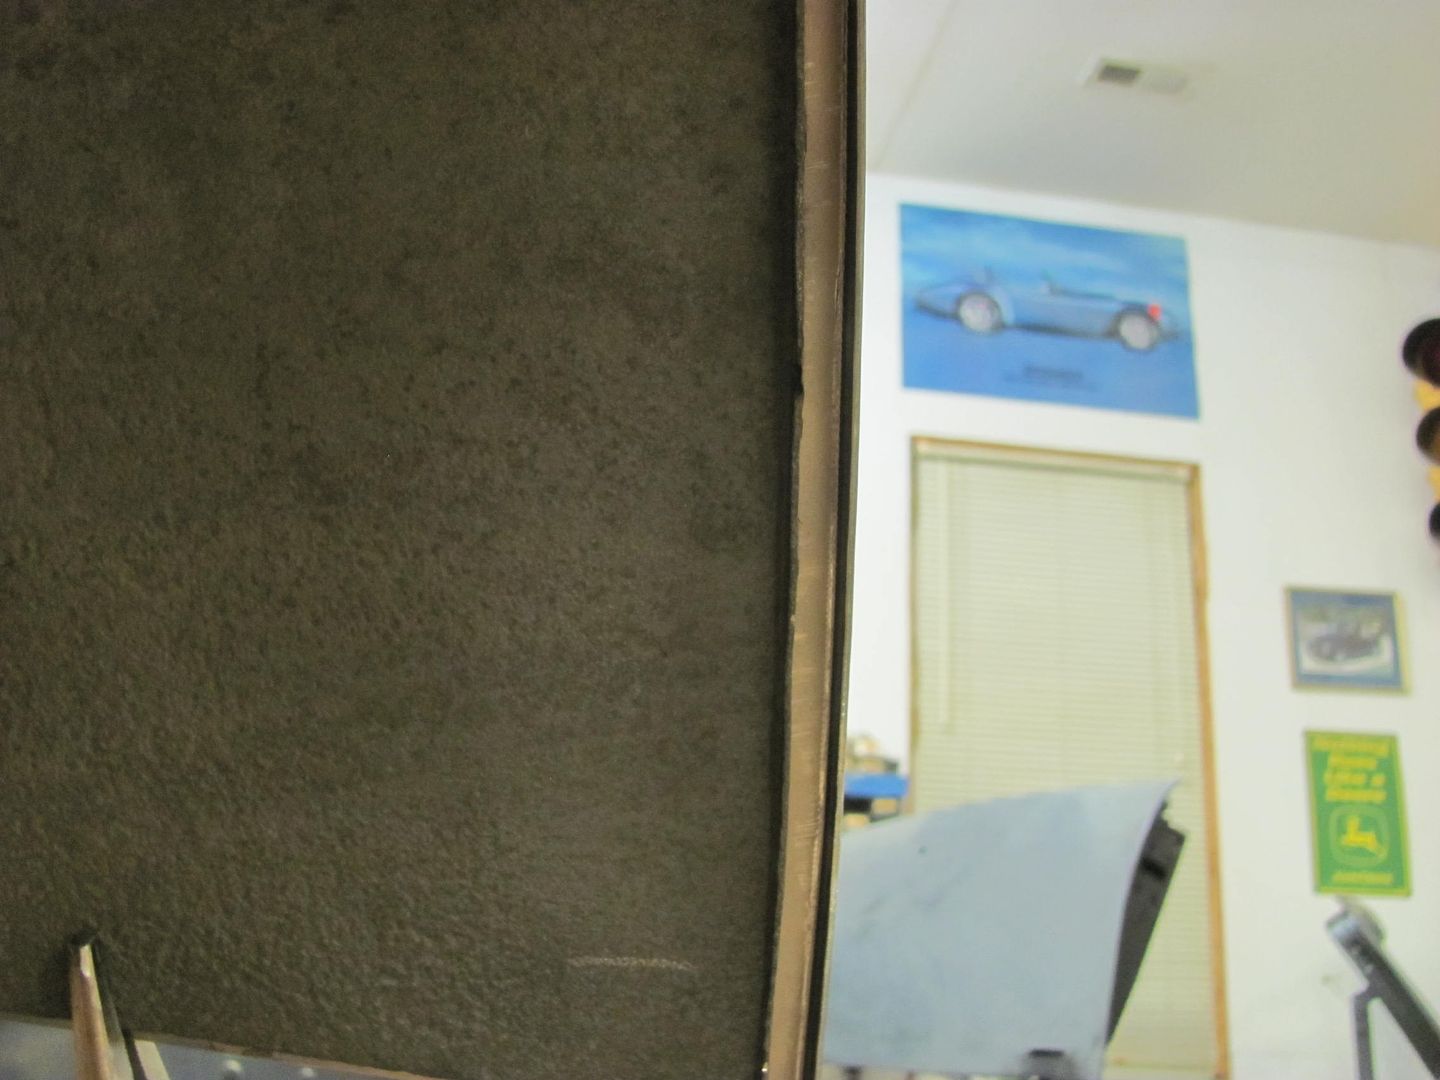 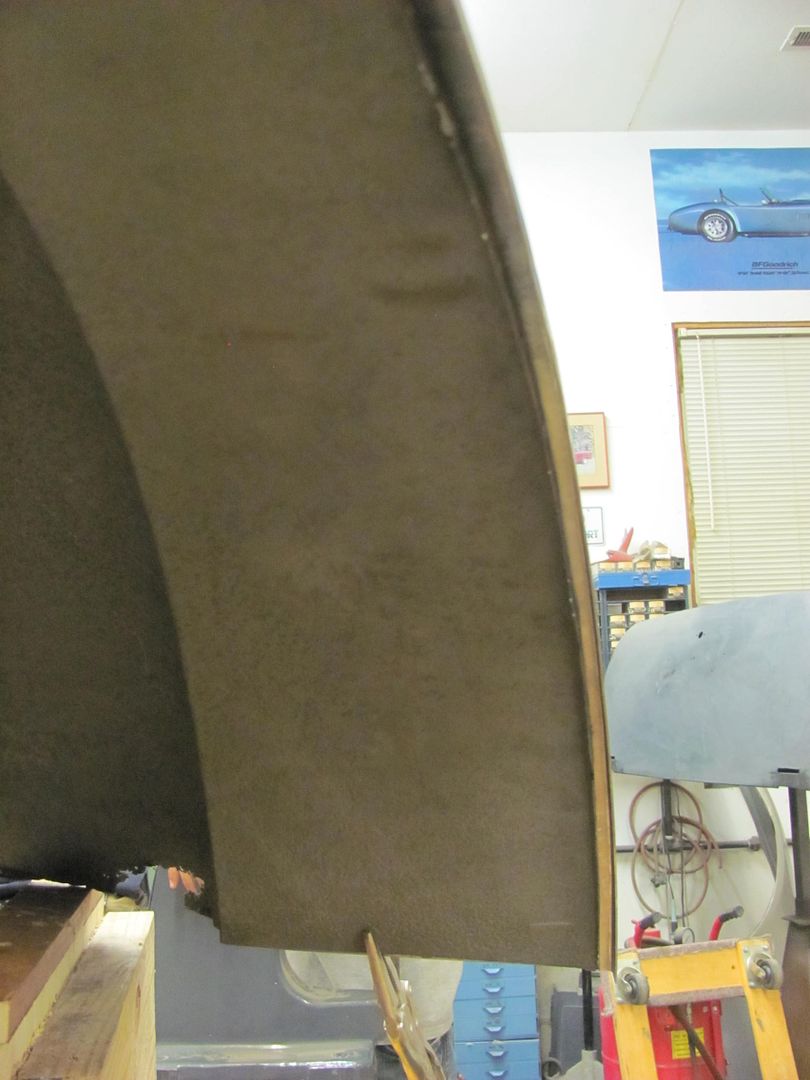 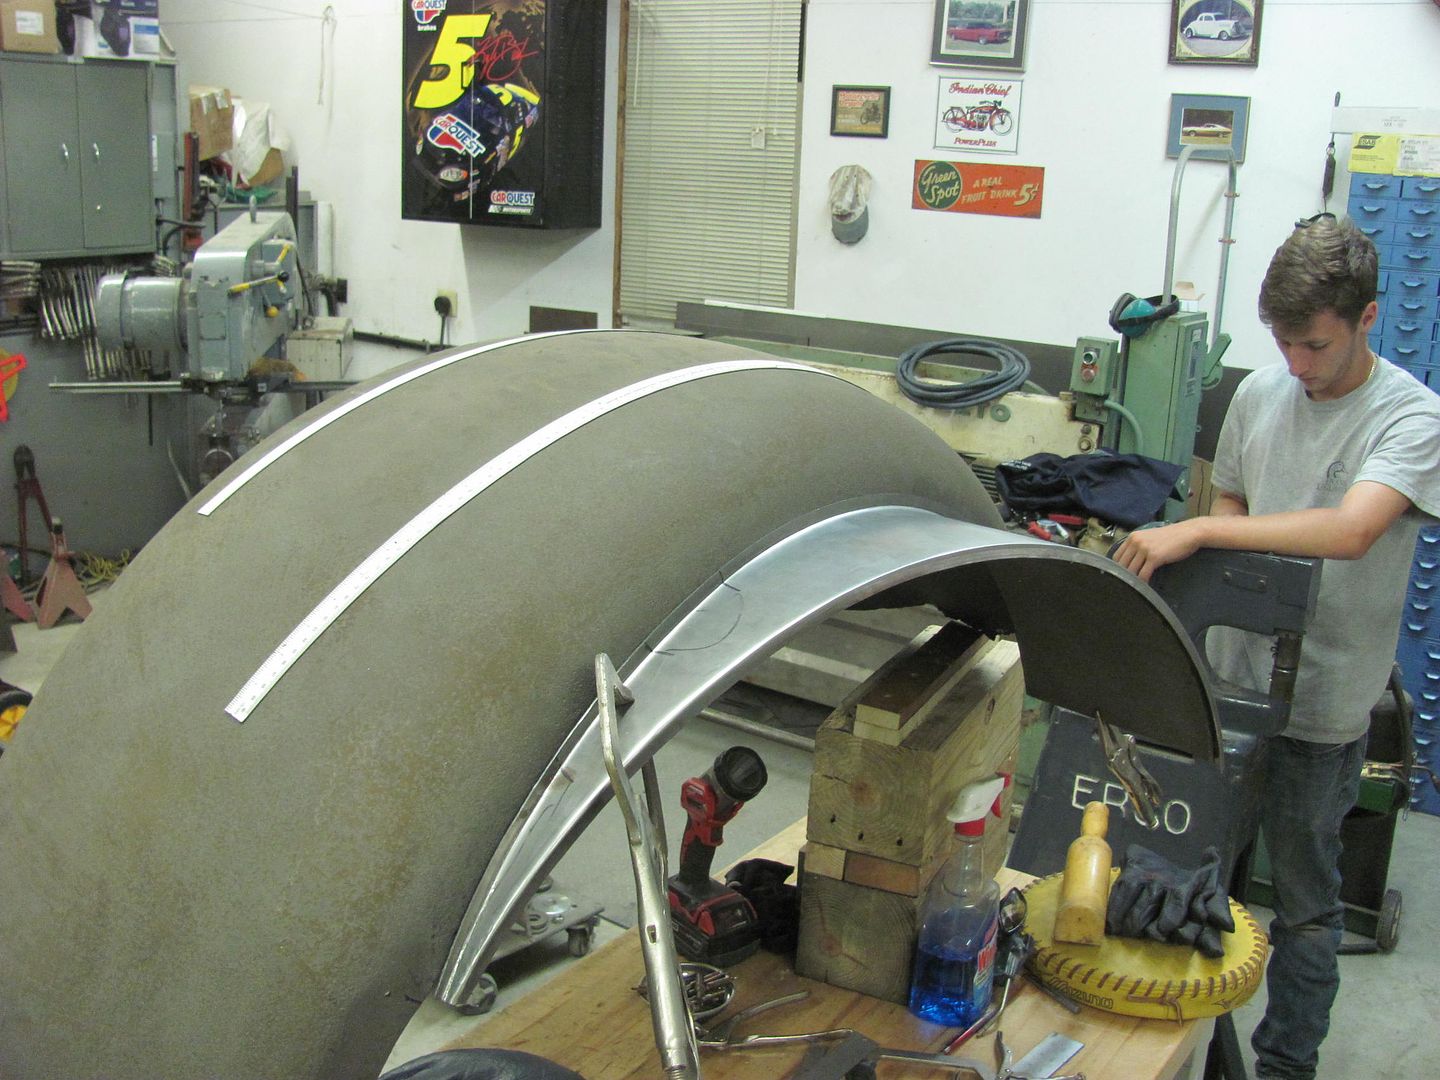 https://www.youtube.com/watch?v=4mZTMi3VMr4
__________________
Robert |
|
|
|
|
09-04-2016, 09:30 PM
|
#16 |
|
Registered User
Join Date: Jan 2013
Location: Leonardtown, MD
Posts: 1,633
|
Re: 1947 Biederman Truck Fender repairs
Some more work on the Biederman fenders..
A paper pattern was taken from the front of the fender to use as a guide to cut out the new piece from 16 ga cold rolled steel. 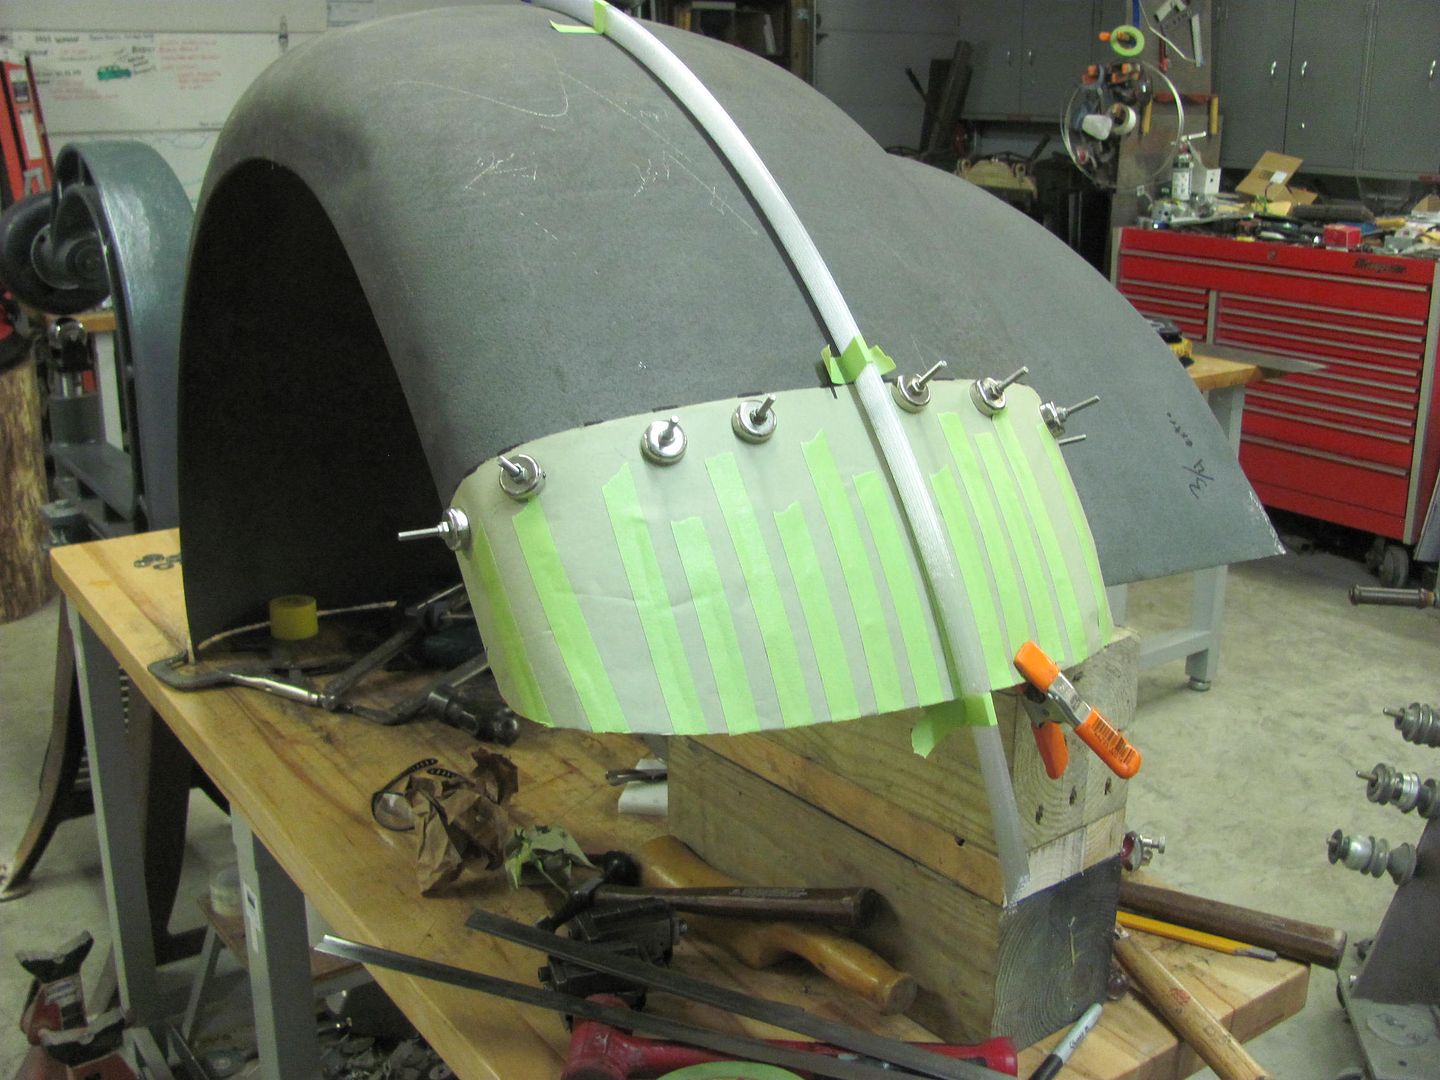 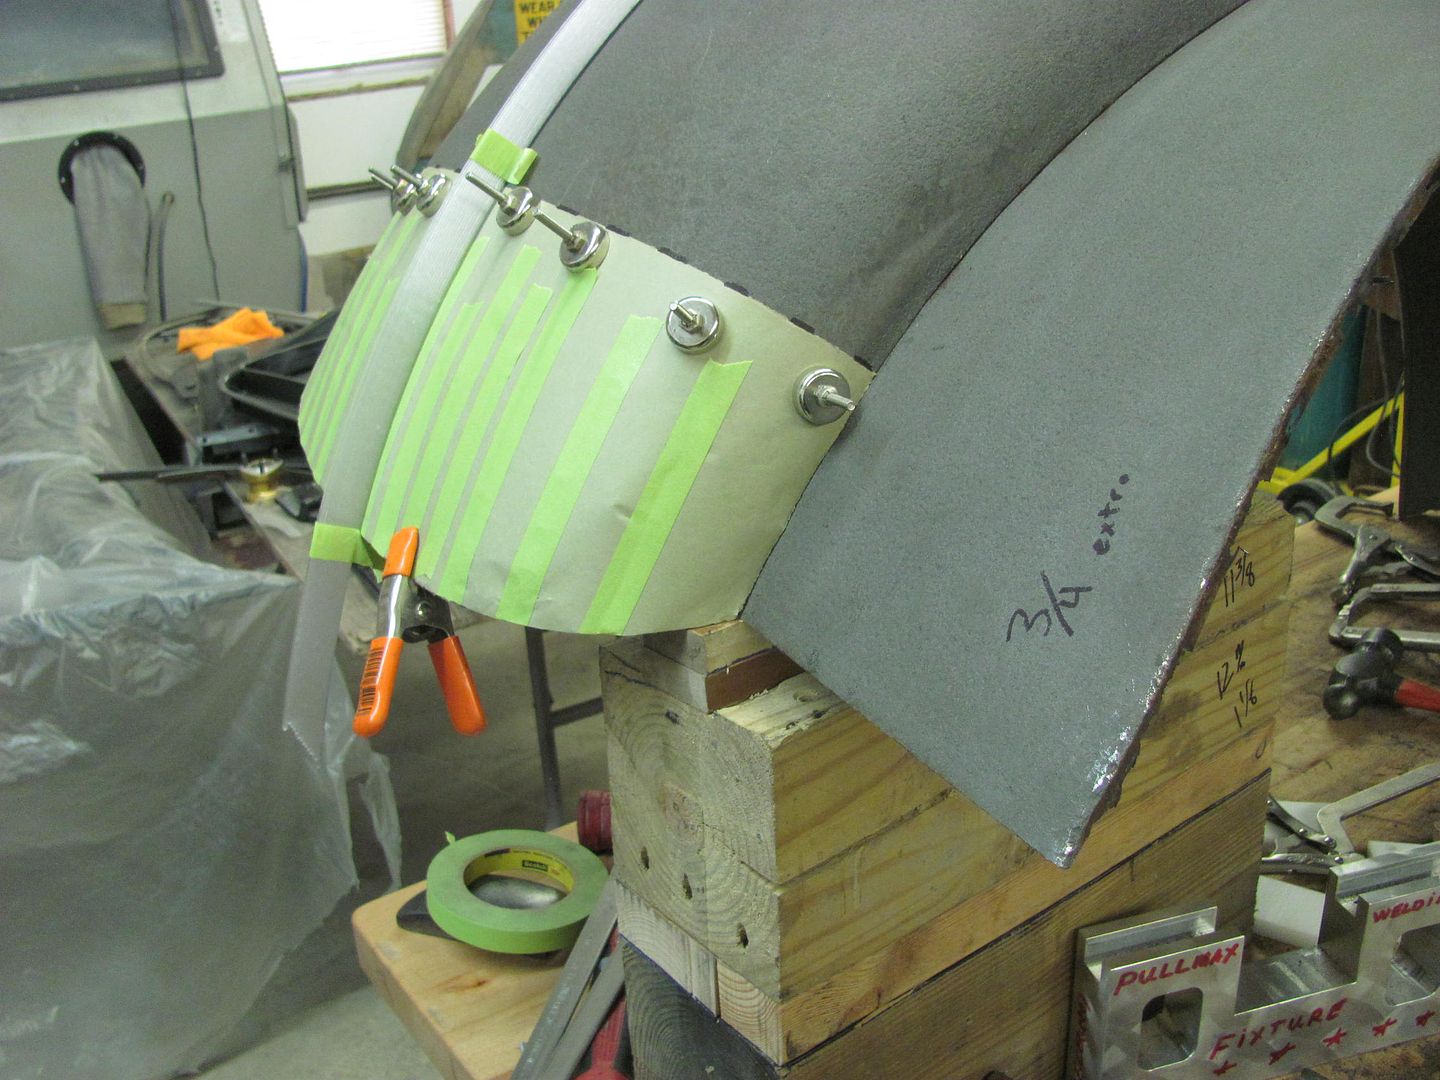 Some 19 gauge was hemmed flat and the Erco kick shrinker used to make profile templates for the horizontal and vertical directions.. 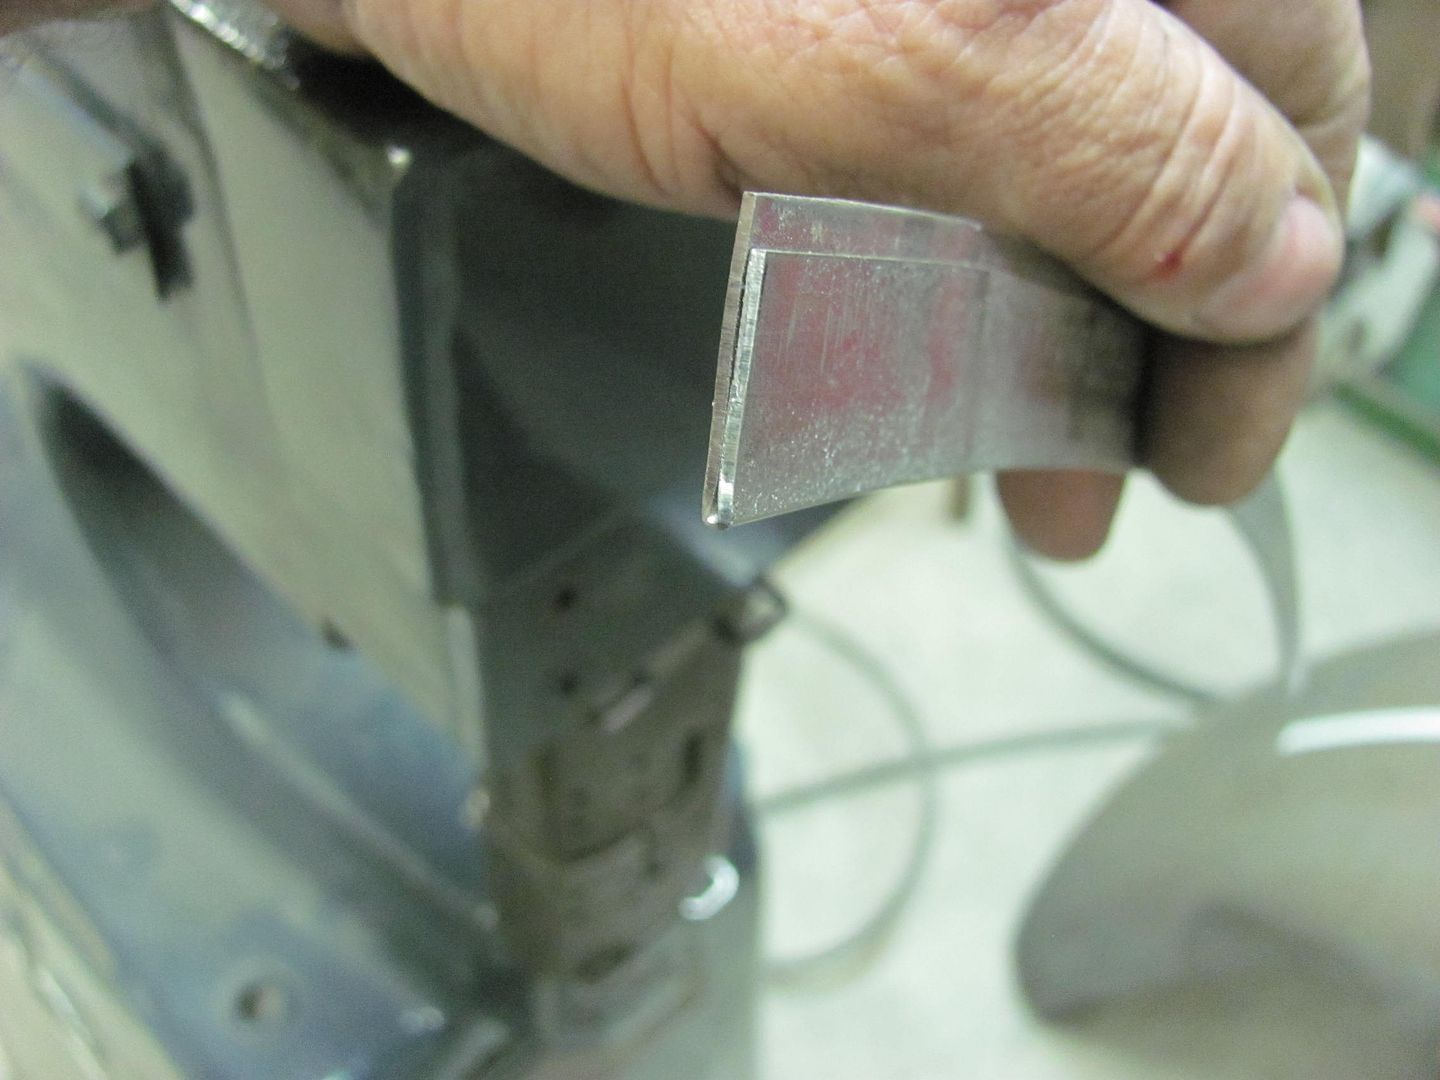 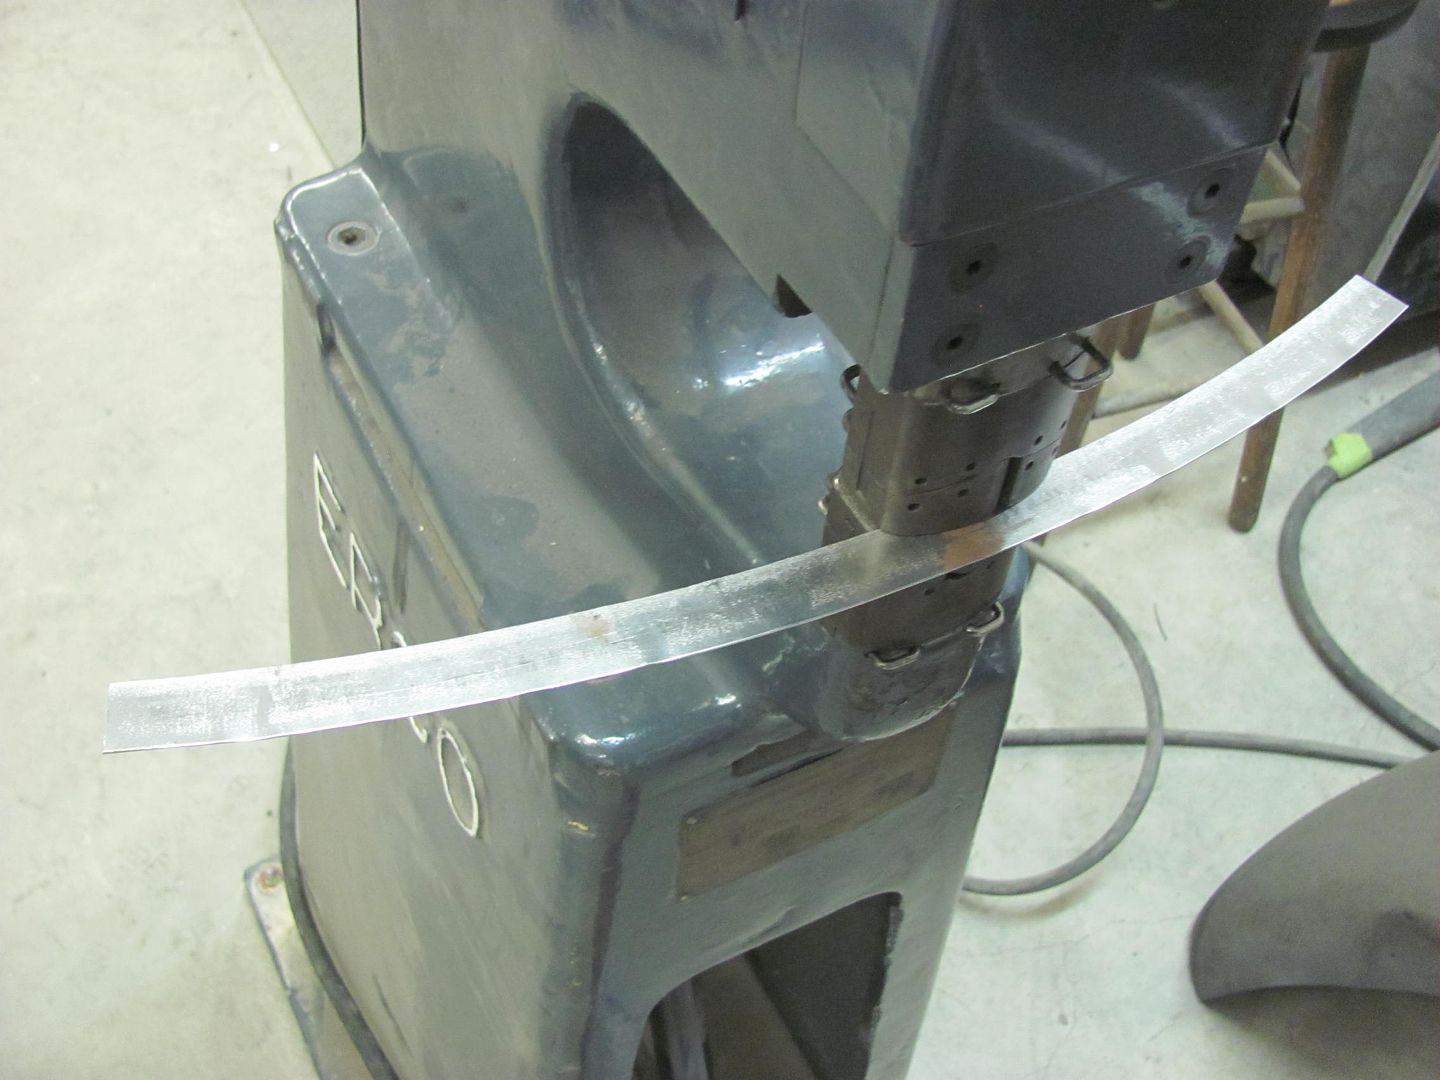 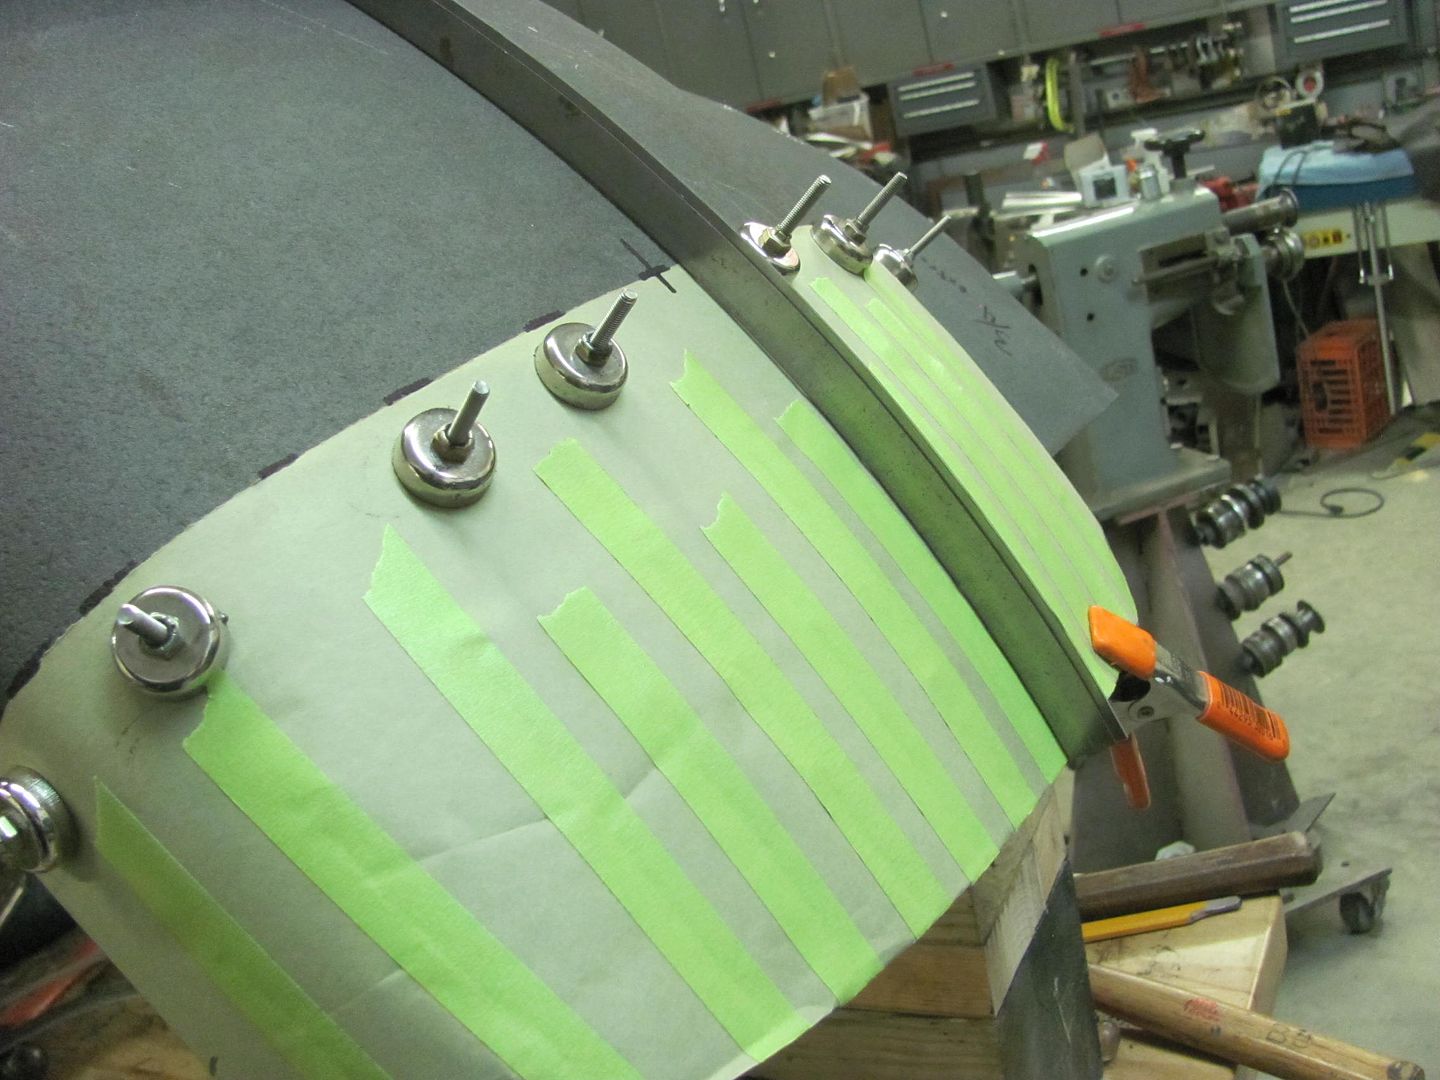 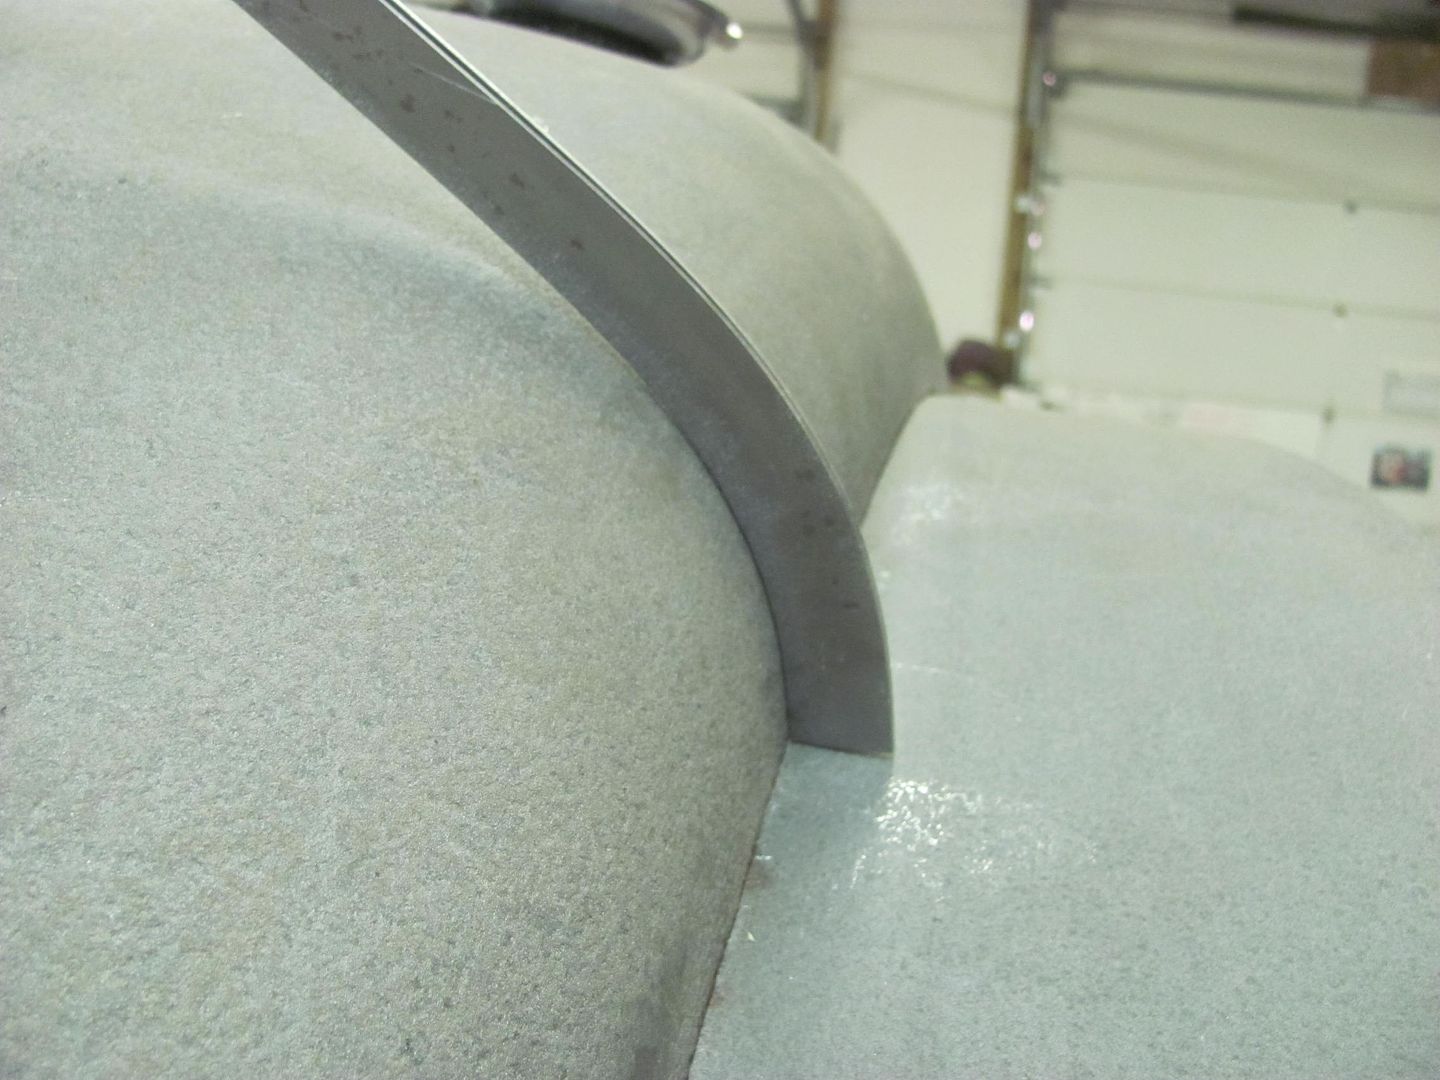 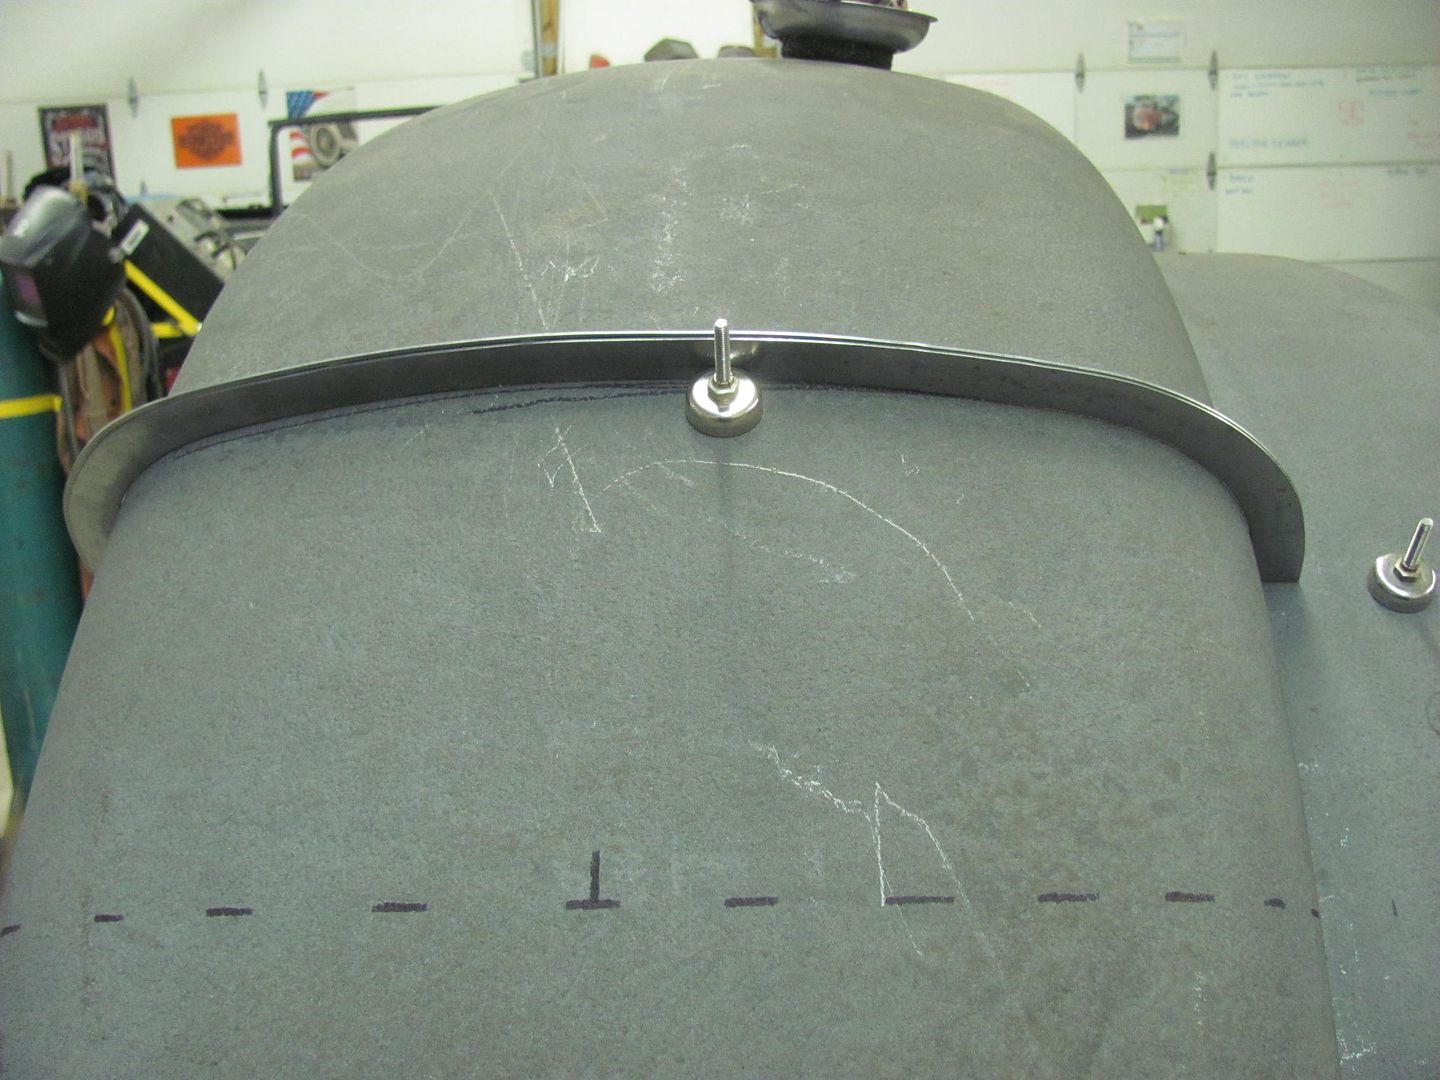 The initial shape was added with a blocking hammer and shot bag, and finished on the Wheeling Machine..   Getting close.... 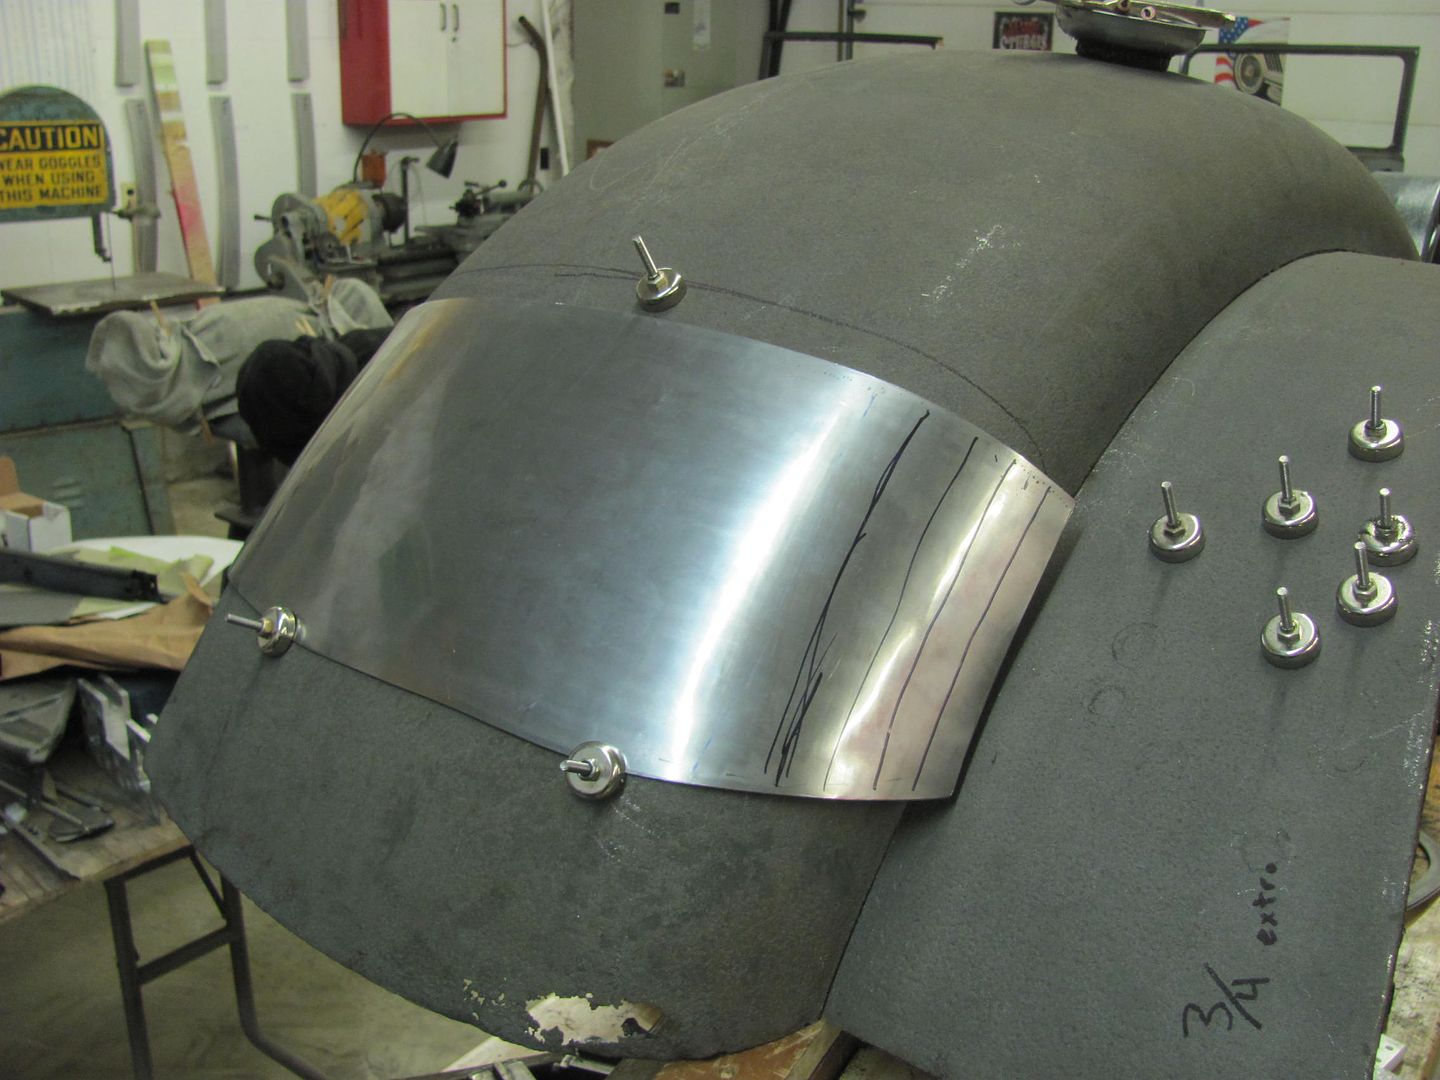 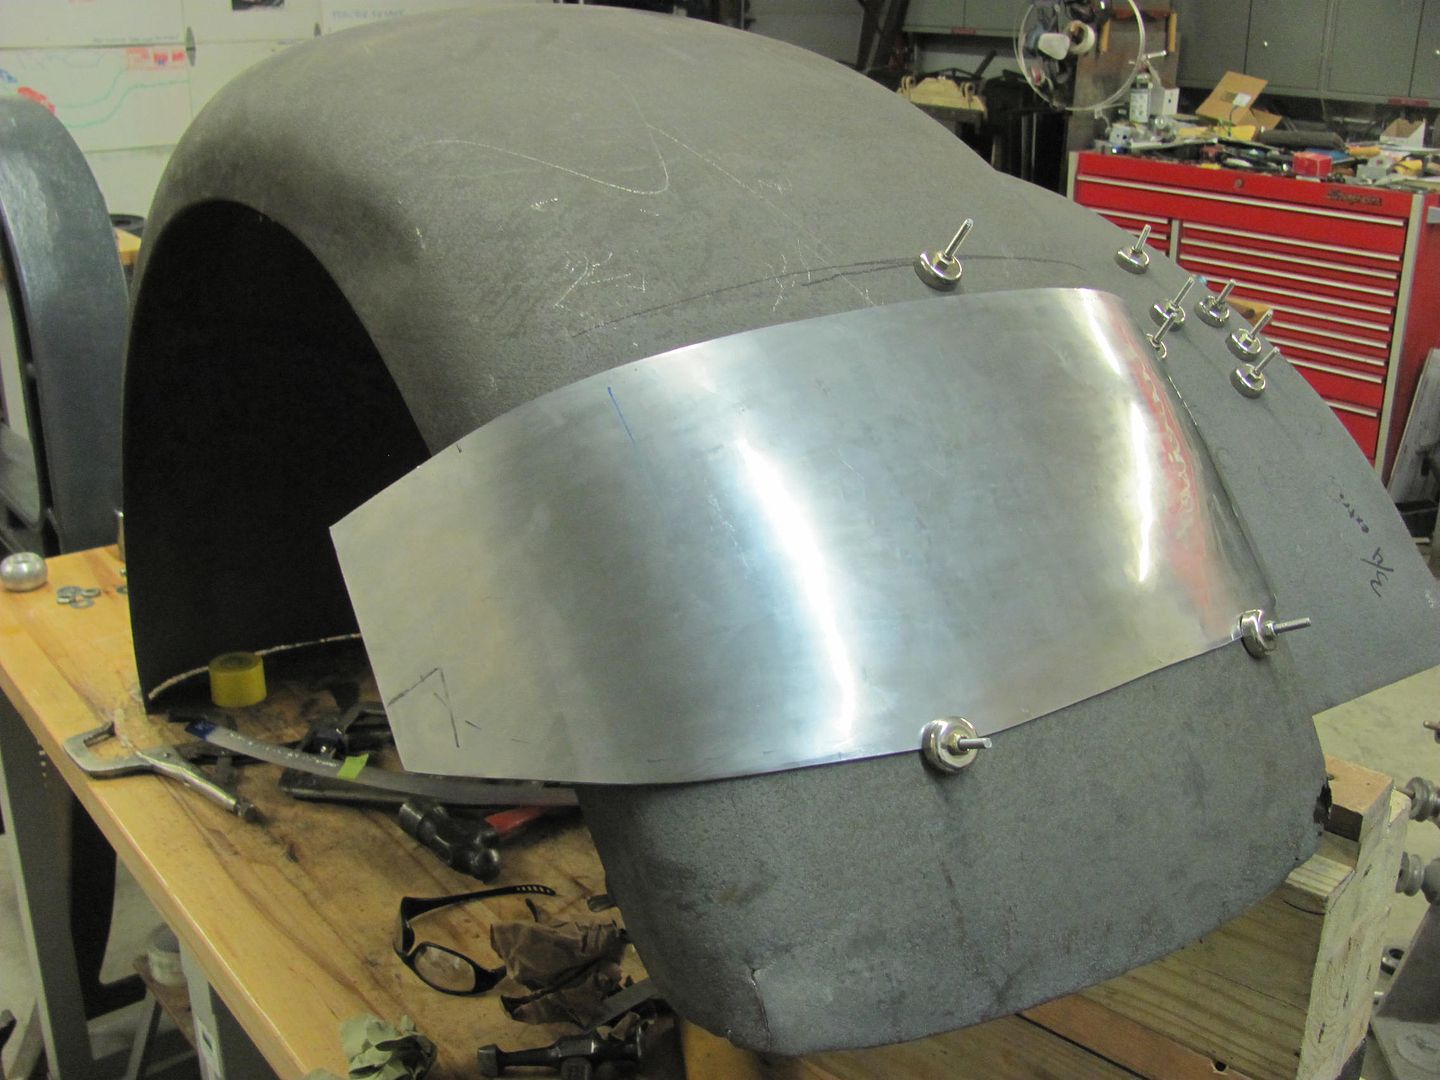 This video shows the progress so far, as well as the rust on the leading edge we're repairing.. https://youtu.be/zc4hdatz-hE
__________________
Robert |
|
|
|
|
09-05-2016, 09:33 AM
|
#17 |
|
Registered User
Join Date: Oct 2009
Location: canton ga
Posts: 12,729
|
Re: 1947 Biederman Truck Fender repairs
Impressive workmanship ,cant wait to see more.
|
|
|
|
|
09-07-2016, 10:53 PM
|
#18 |
|
Registered User
Join Date: Jan 2013
Location: Leonardtown, MD
Posts: 1,633
|
Re: 1947 Biederman Truck Fender repairs
Fender filler panel Number 2 is complete..
https://www.youtube.com/watch?v=7uvnvZTTEbs Fender patch is getting closer... 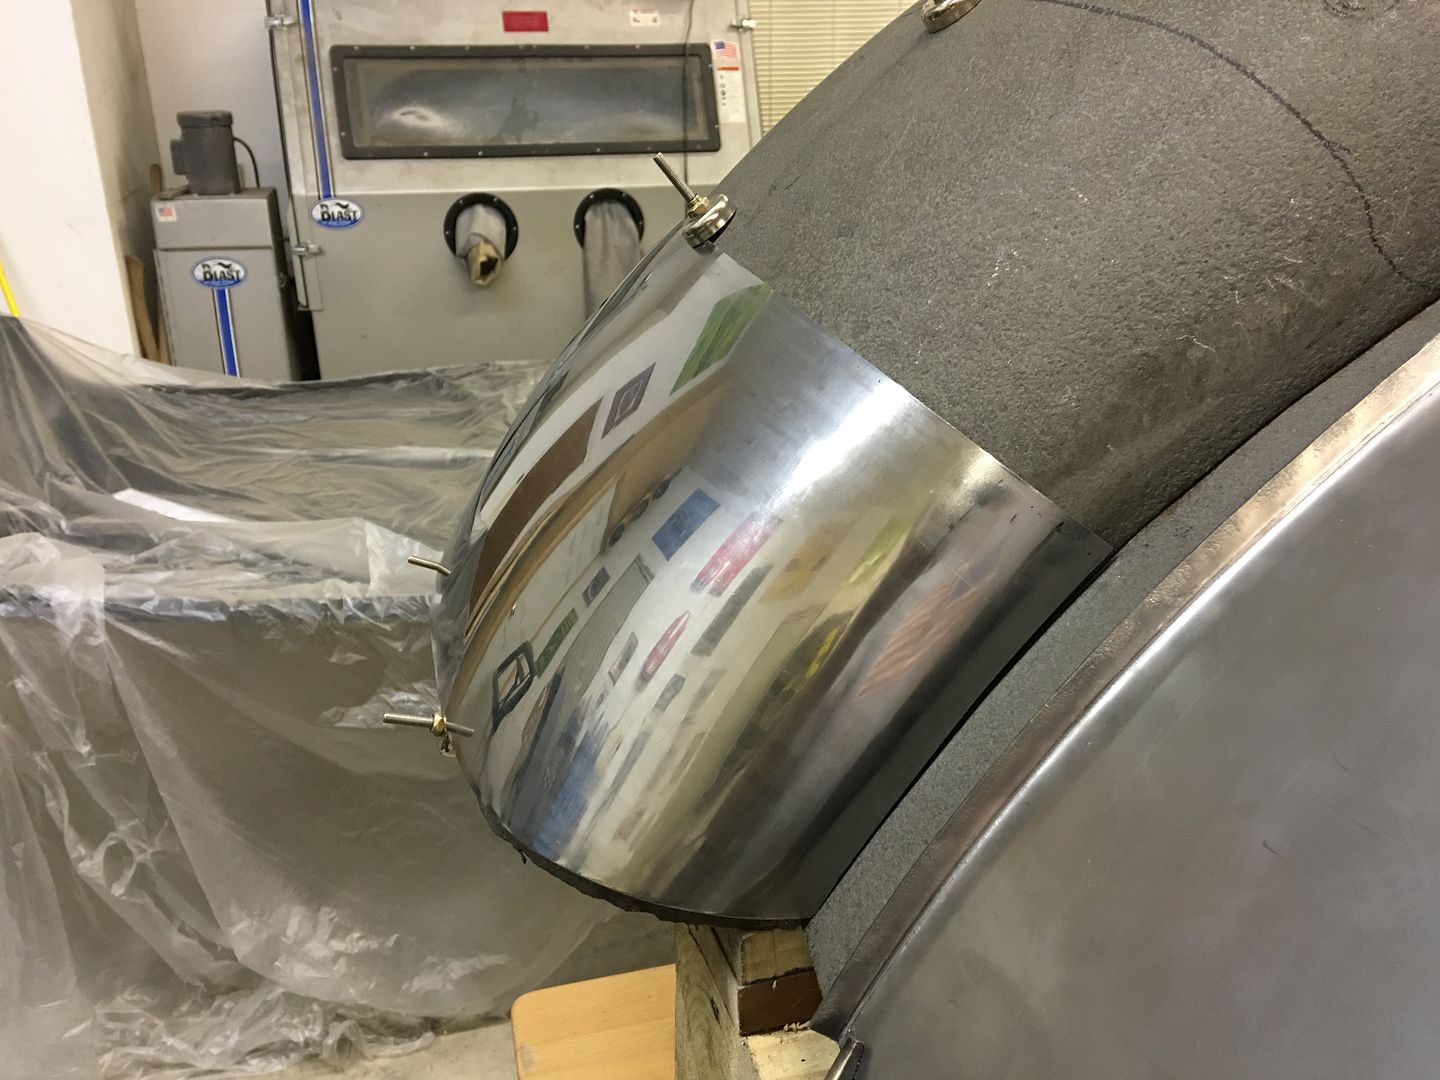
__________________
Robert |
|
|
|
|
09-08-2016, 09:52 PM
|
#19 |
|
Registered User
Join Date: Jan 2013
Location: Leonardtown, MD
Posts: 1,633
|
Re: 1947 Biederman Truck Fender repairs
Final tweaks ..... clamped and marked with a scribe..
 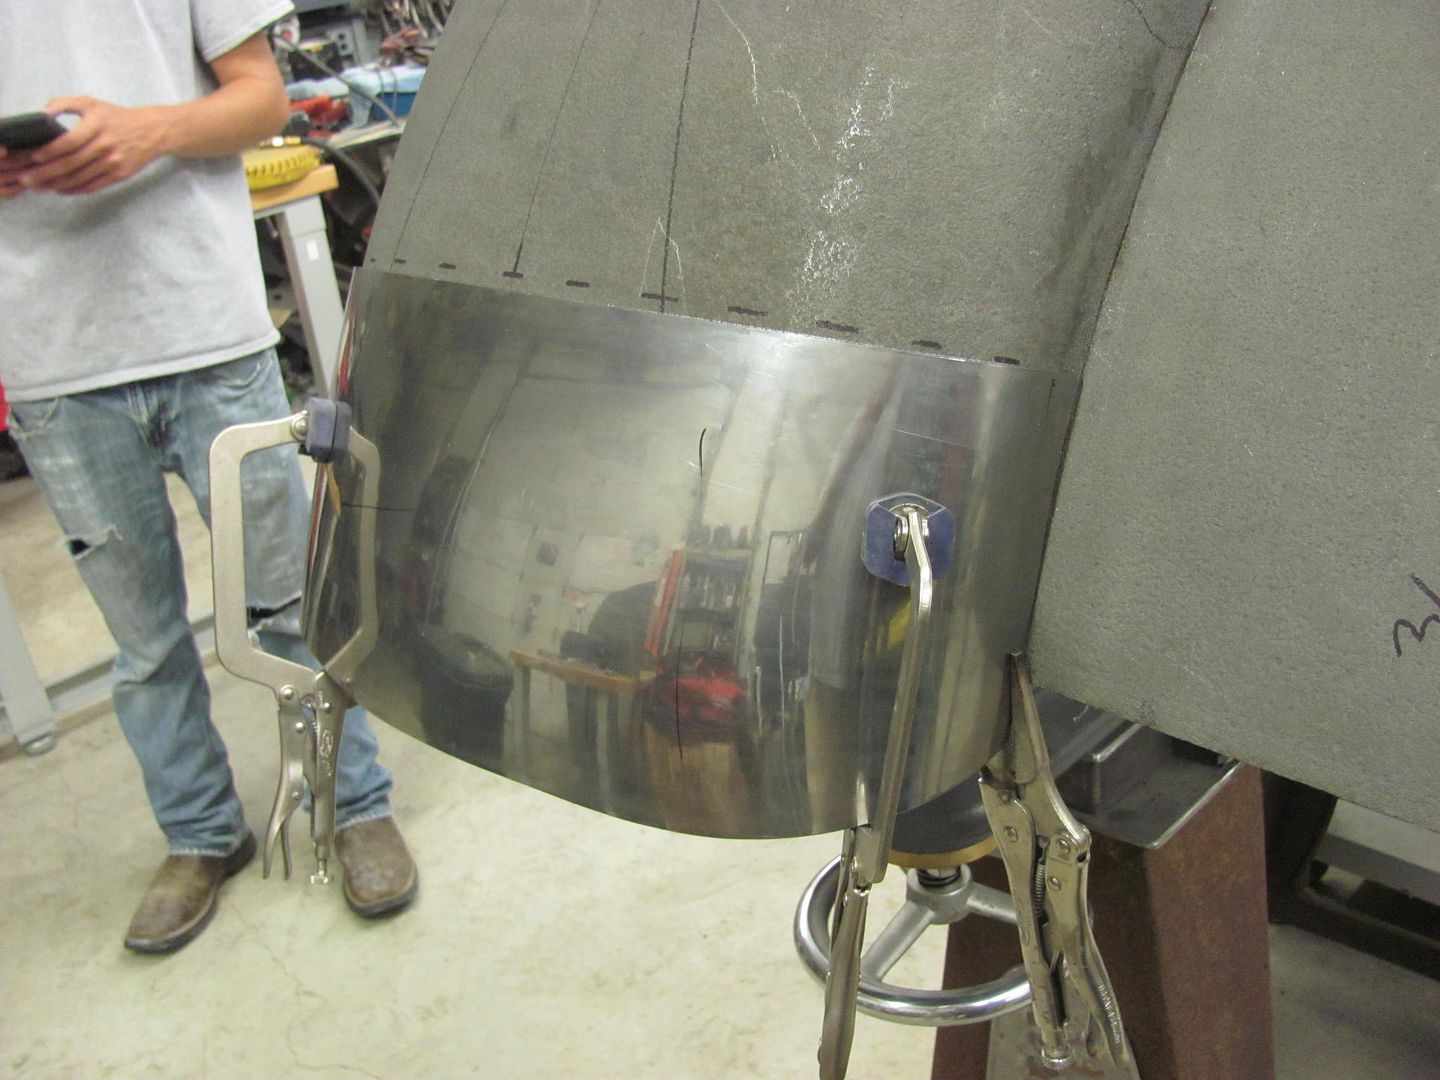 Trimming out the rust... 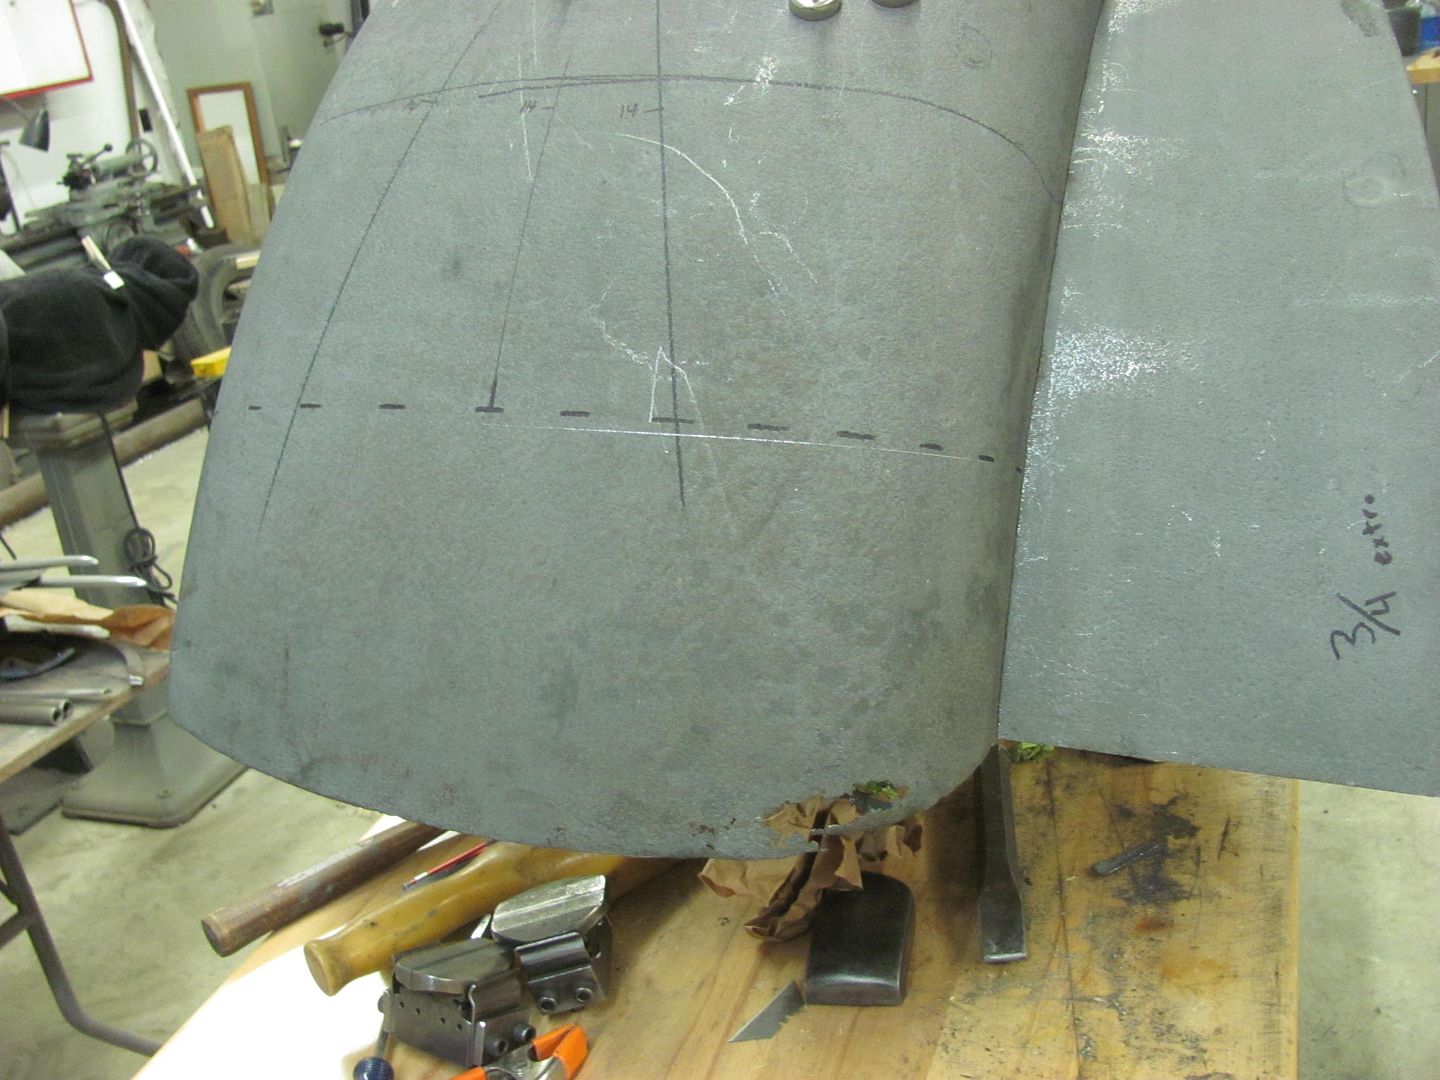 14 ga rated Milwaukee shear walks right through... 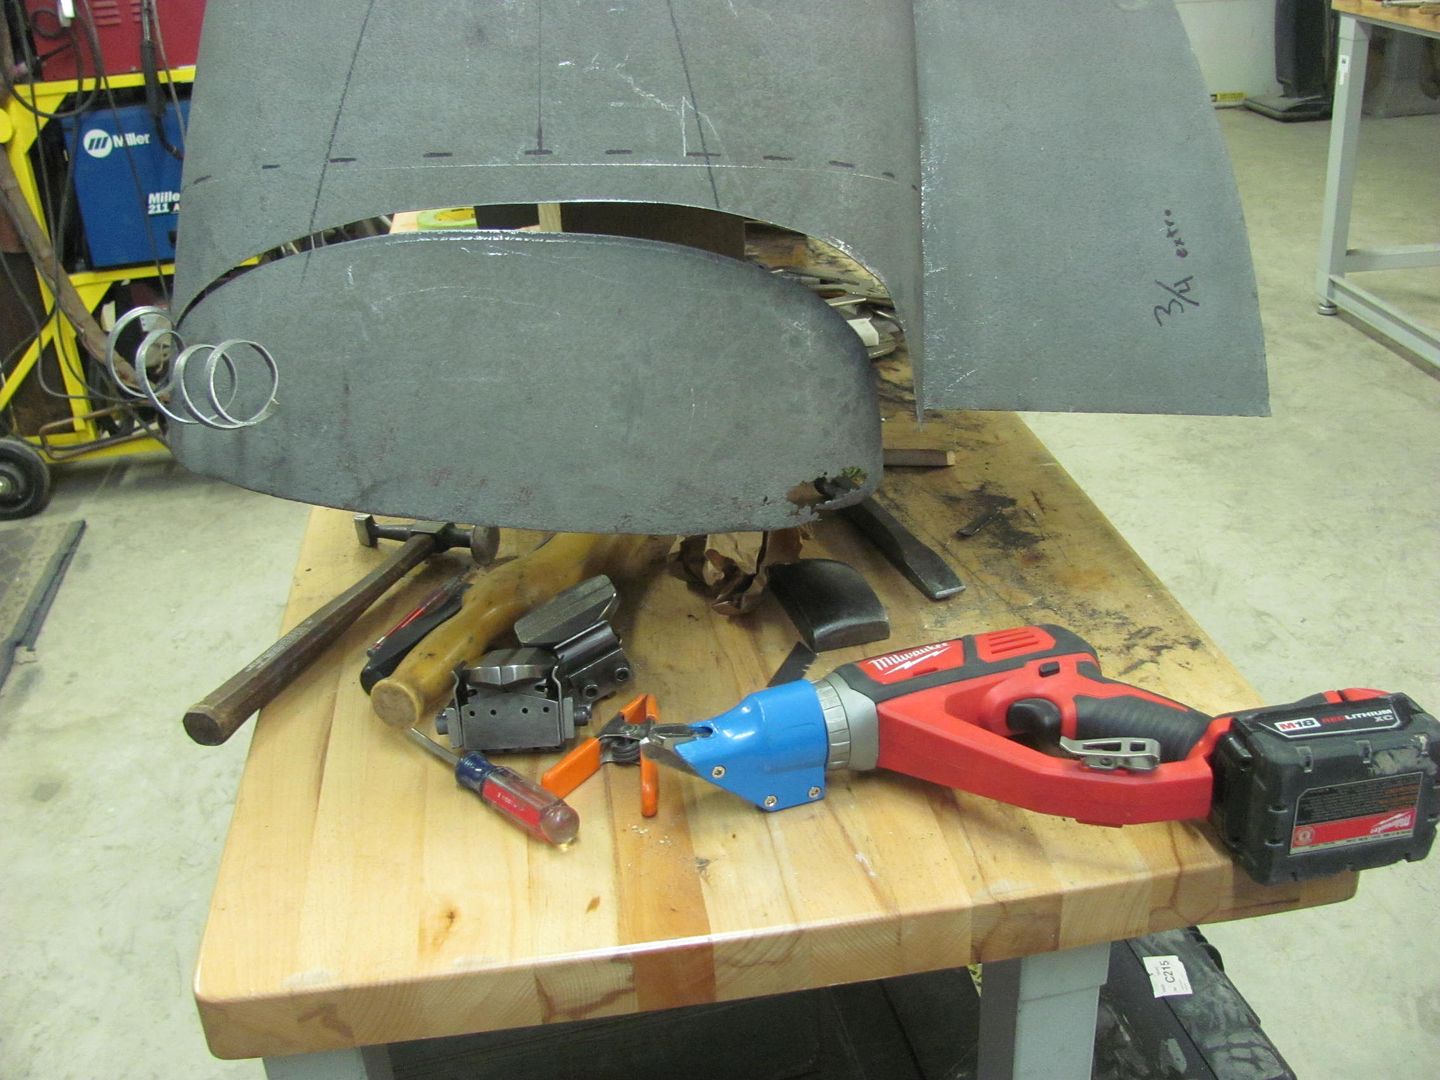 Trimming around the wired edging, careful not to nick it. The wrapped sheet metal is opened slightly using the door skin pliers..  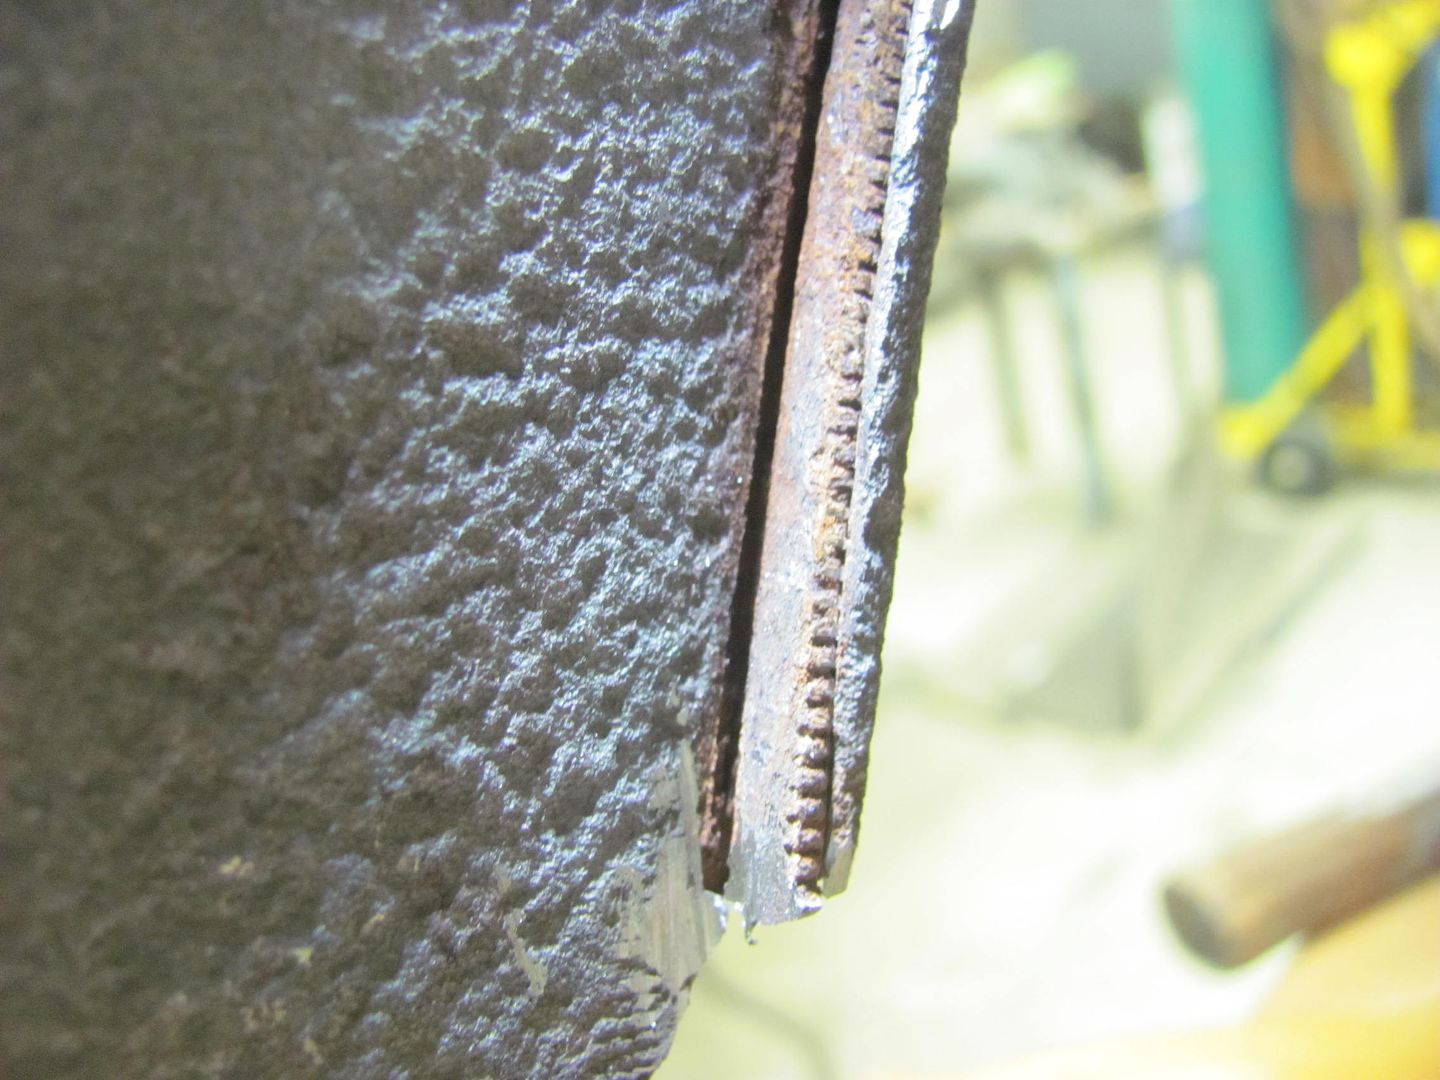 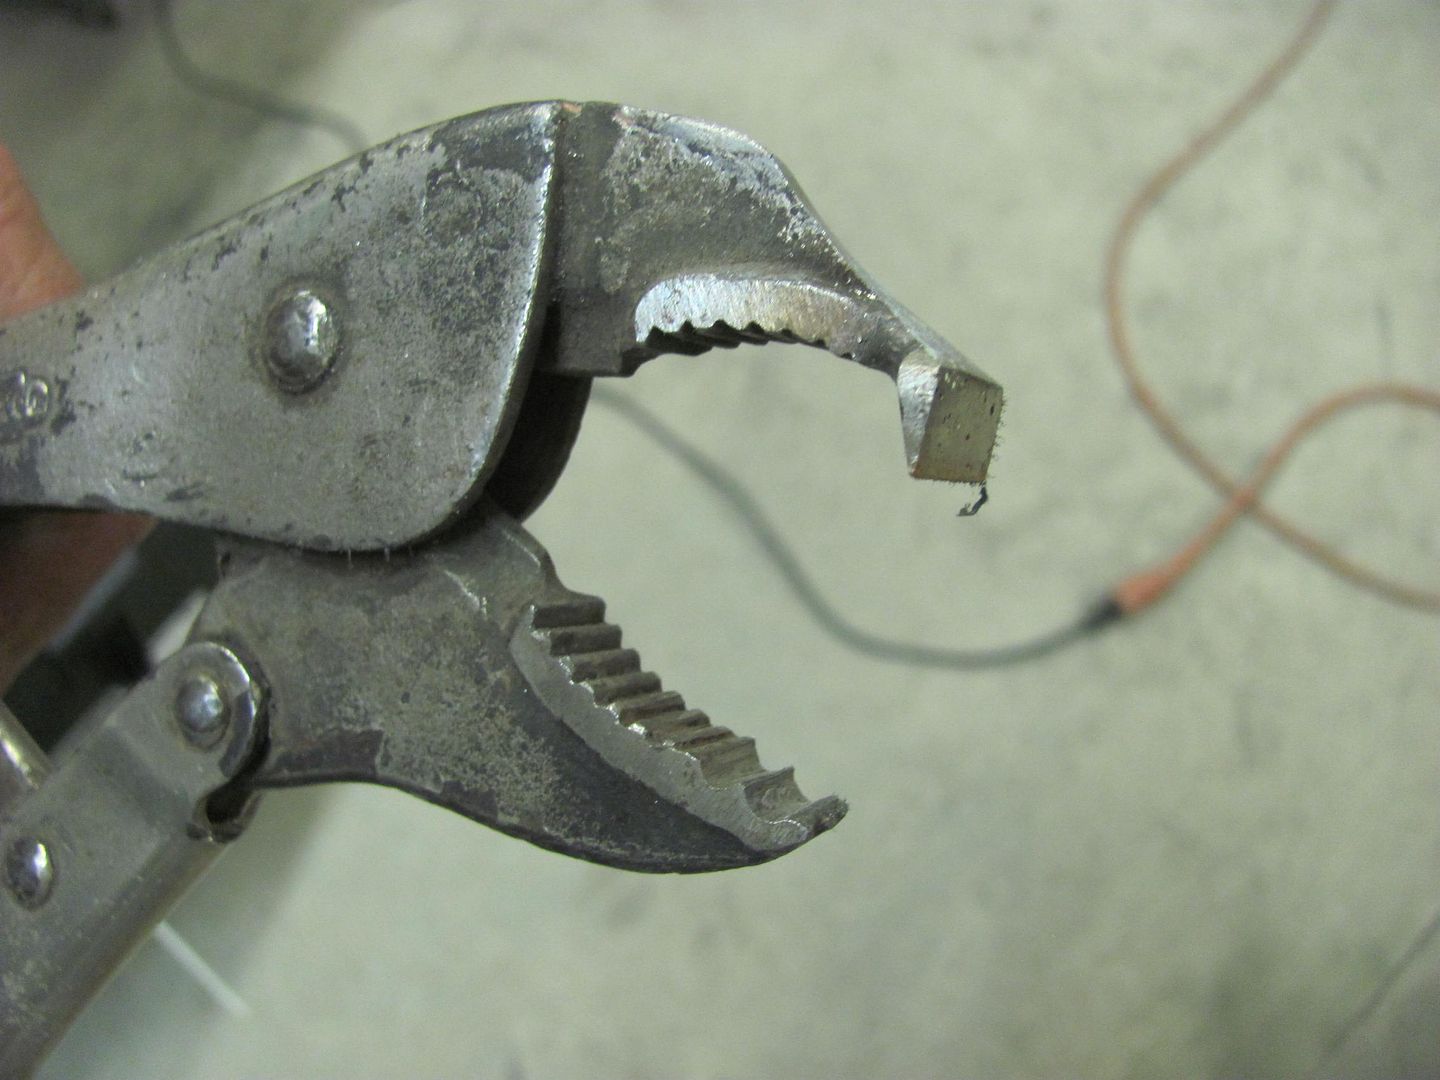 With the sheet metal loosened from the wire, a slight twist will break the sheet metal at the score even not having cut through to the wire. 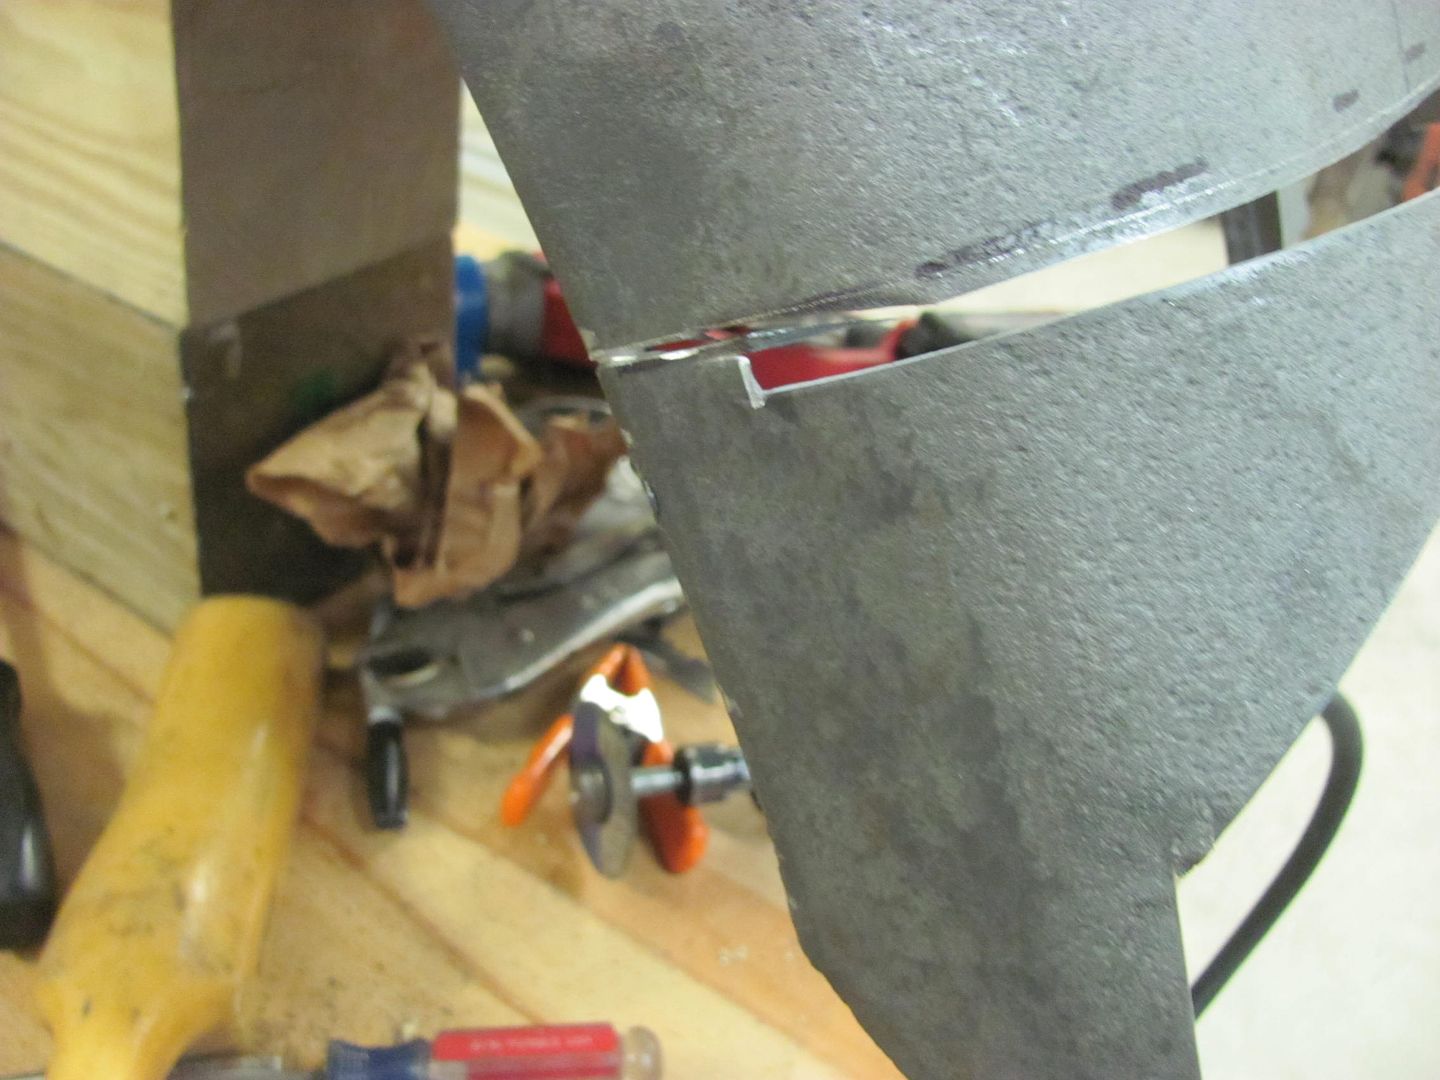 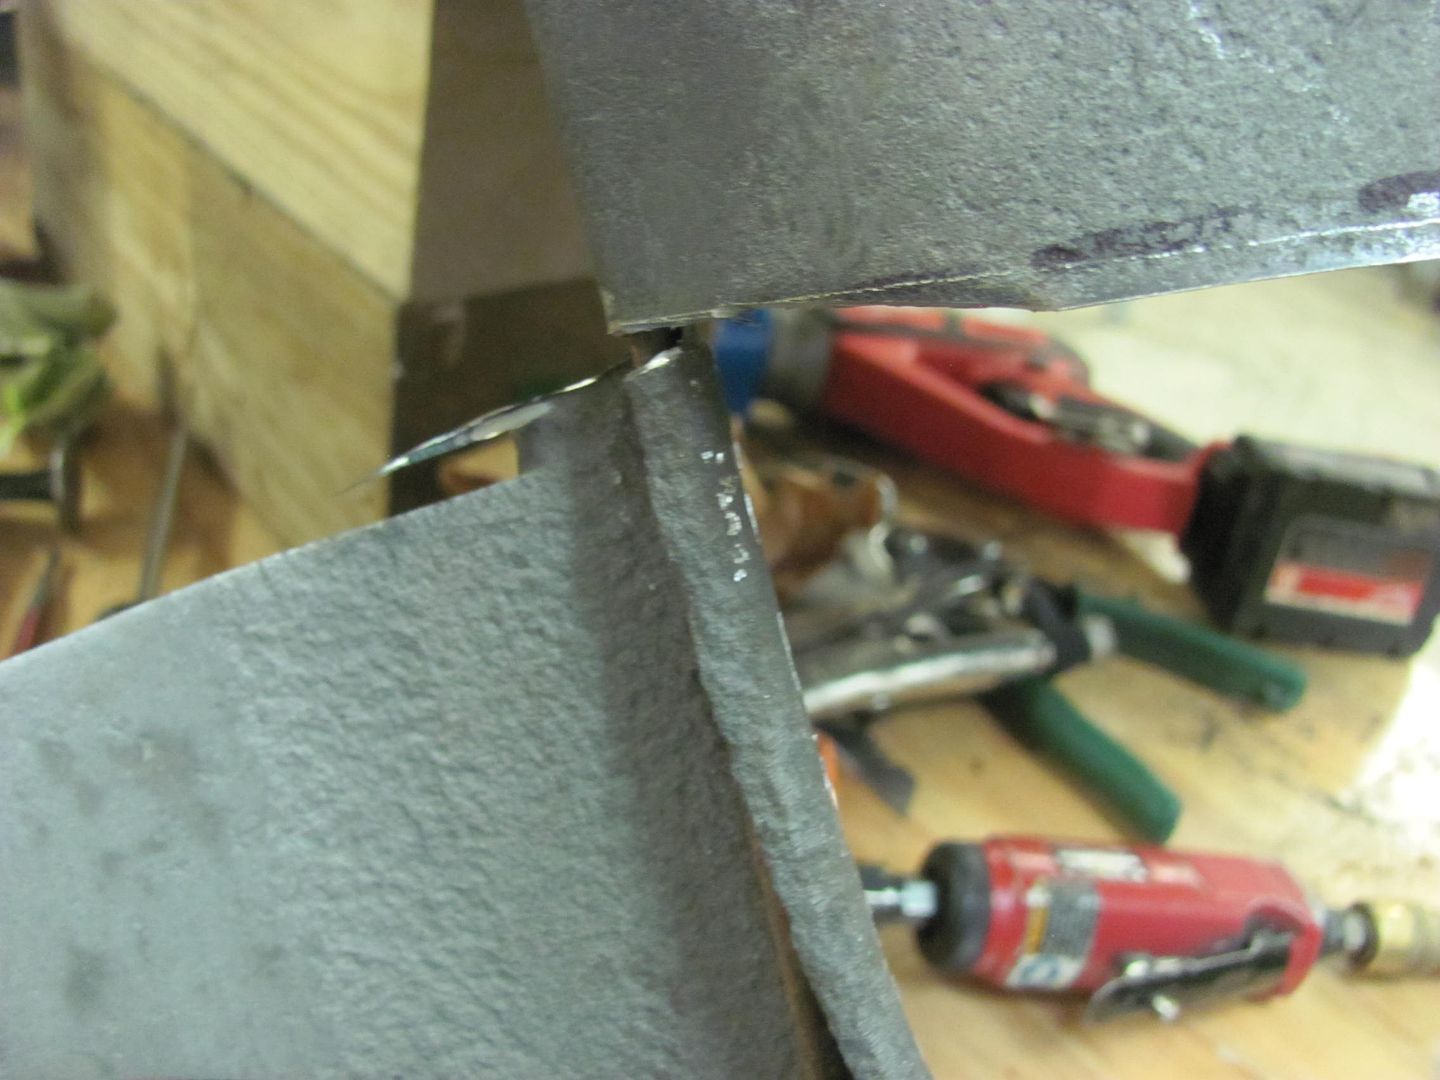 This outer section will become a template for the radius on the new patch. 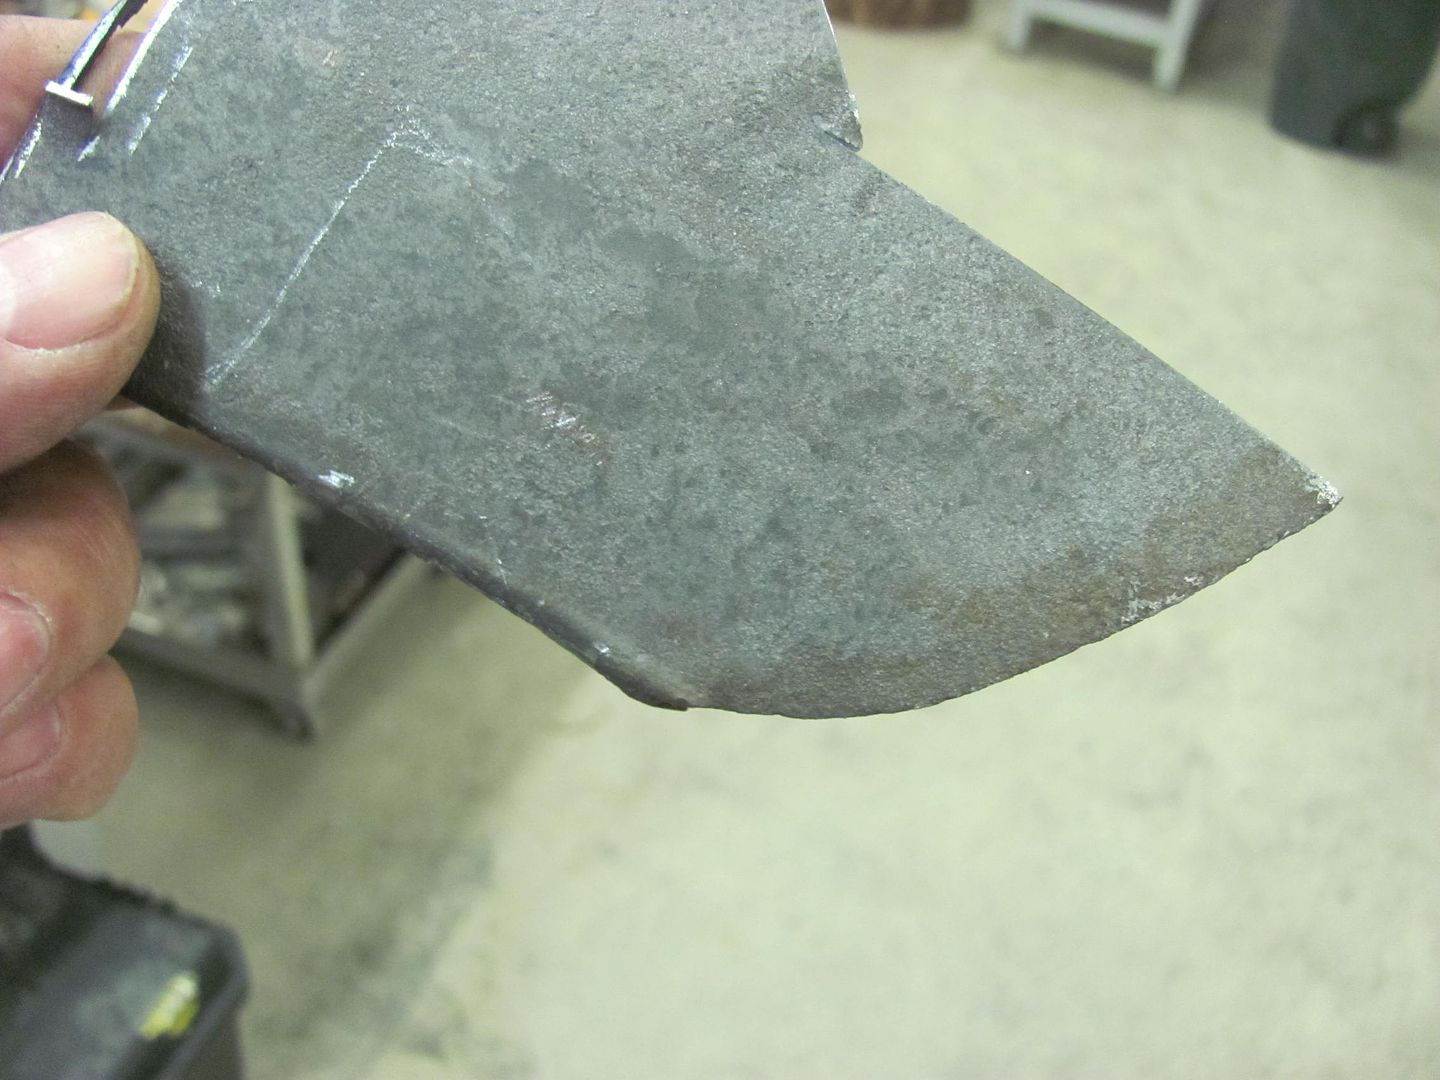 Trimmed.... 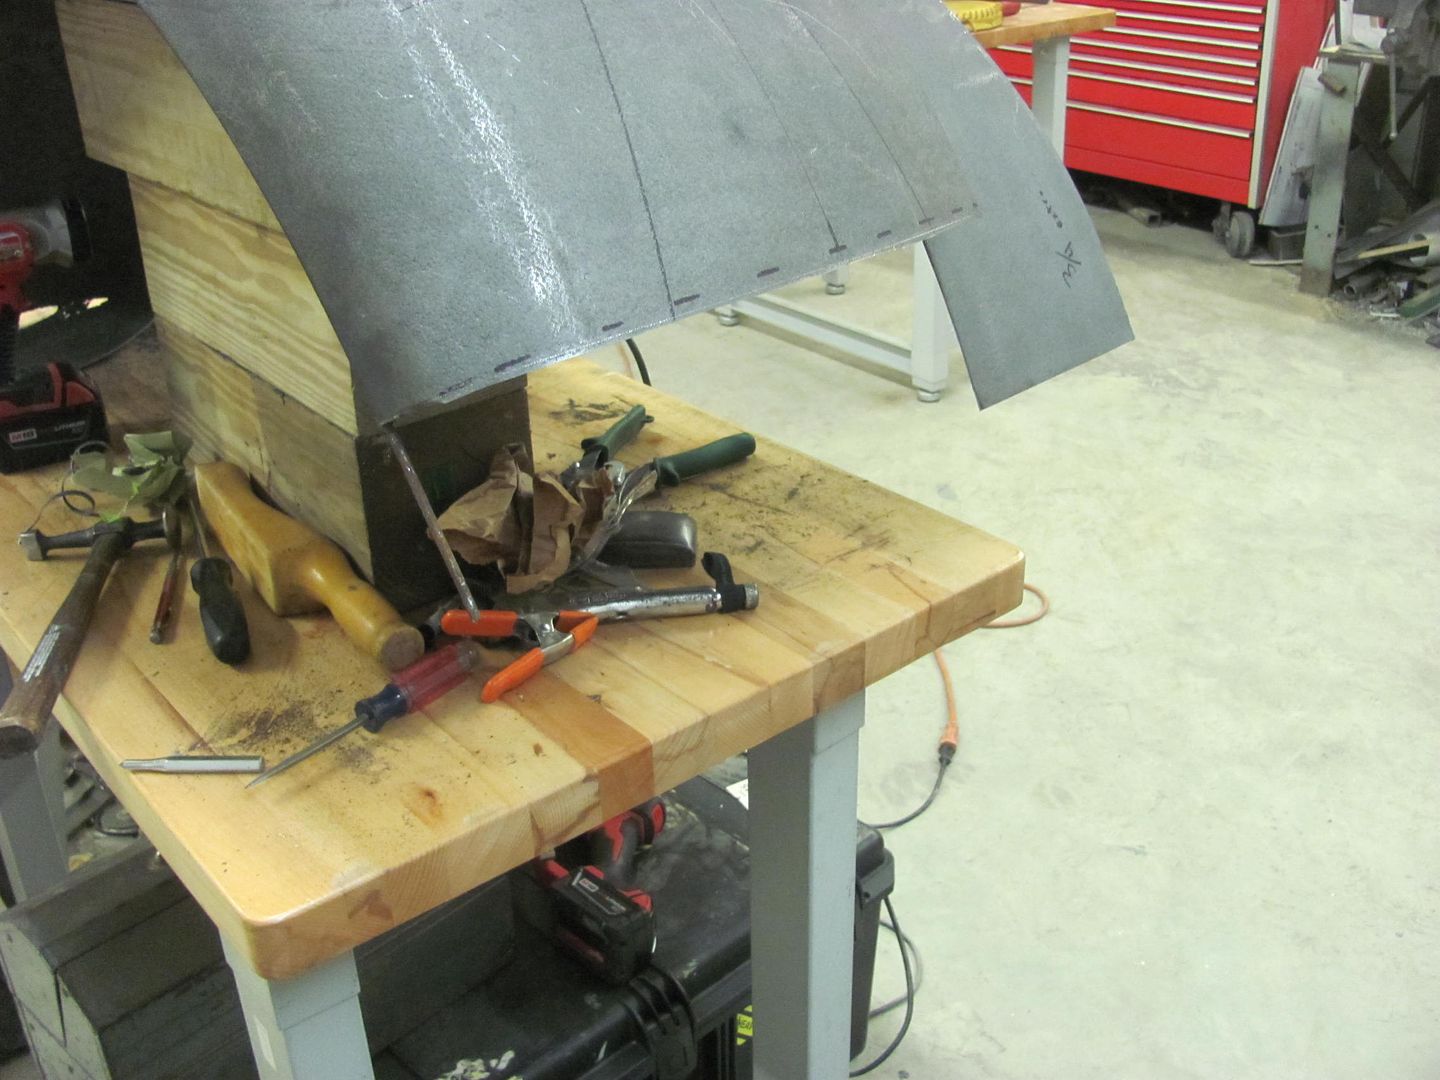 Fitted....  Saturday Kyle will get the old metal media blasted next to the weld seam so we can fire up the TIG welder..
__________________
Robert |
|
|
|
|
09-08-2016, 10:03 PM
|
#20 |
|
Registered User
Join Date: Apr 2014
Location: calgary alberta
Posts: 1,248
|
Re: 1947 Biederman Truck Fender repairs
hats off great work i love metal work like that just dont have all those nice tools good job
|
|
|
|
|
09-14-2016, 10:34 PM
|
#21 |
|
Registered User
Join Date: Jan 2013
Location: Leonardtown, MD
Posts: 1,633
|
Re: 1947 Biederman Truck Fender repairs
Thanks!
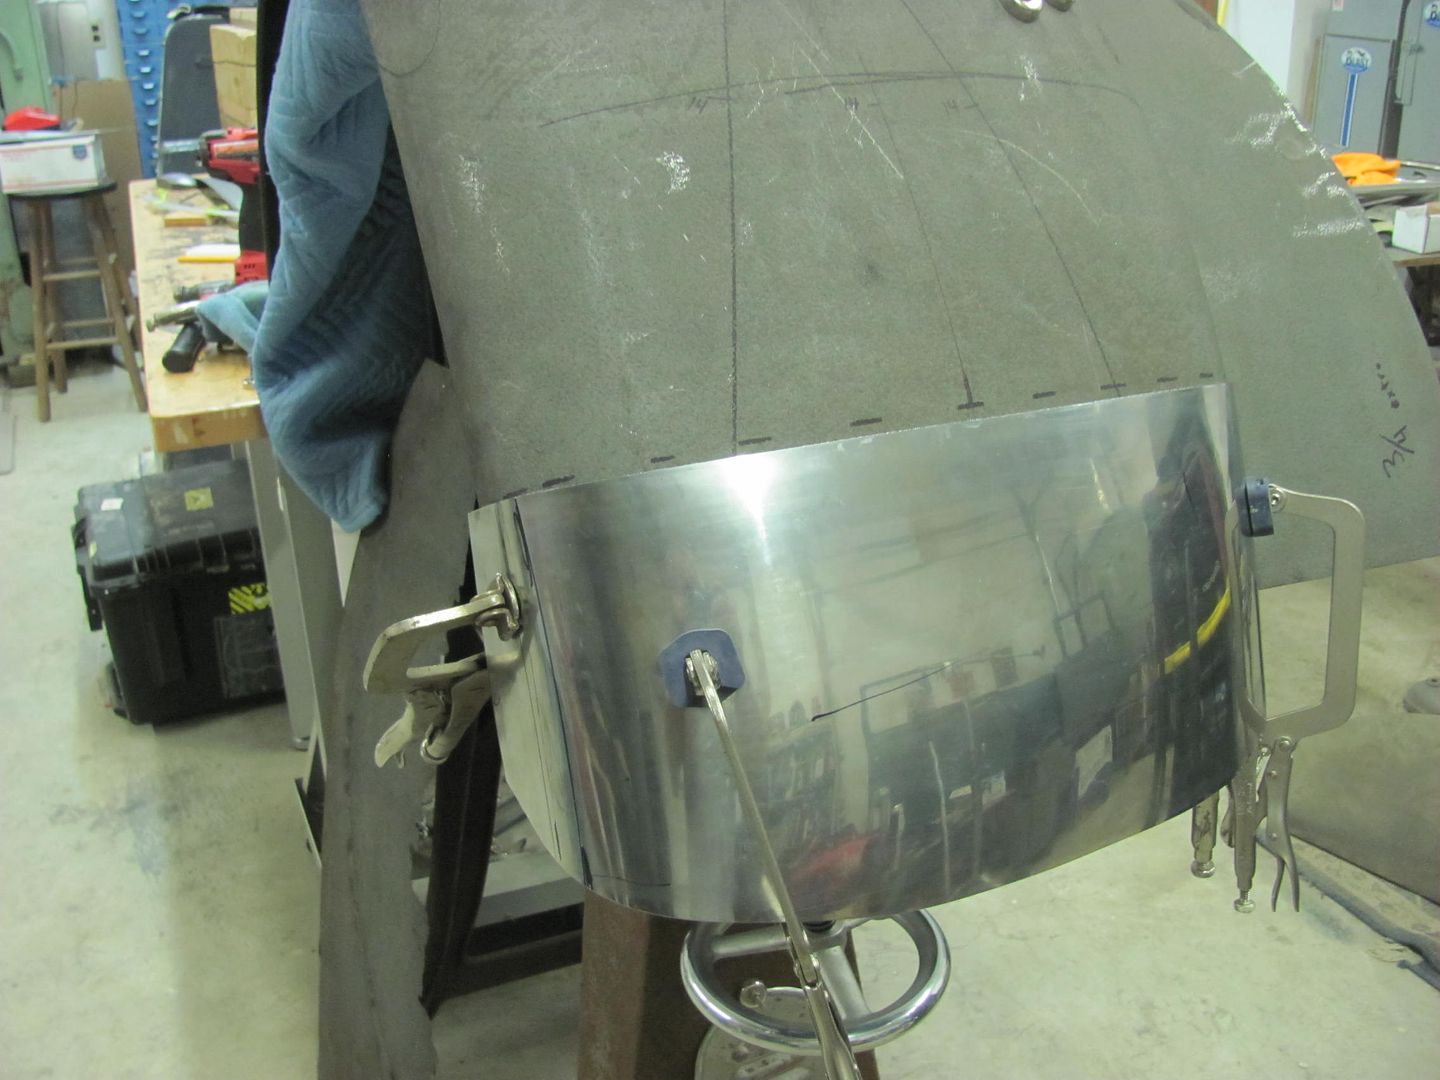
Time to break out the TIG welder. The new stumps for the upcoming metalshaping class work well as a welding table. The patch is securely clamped from inside to outside to get an accurate marking for tipping the fold around the wire. 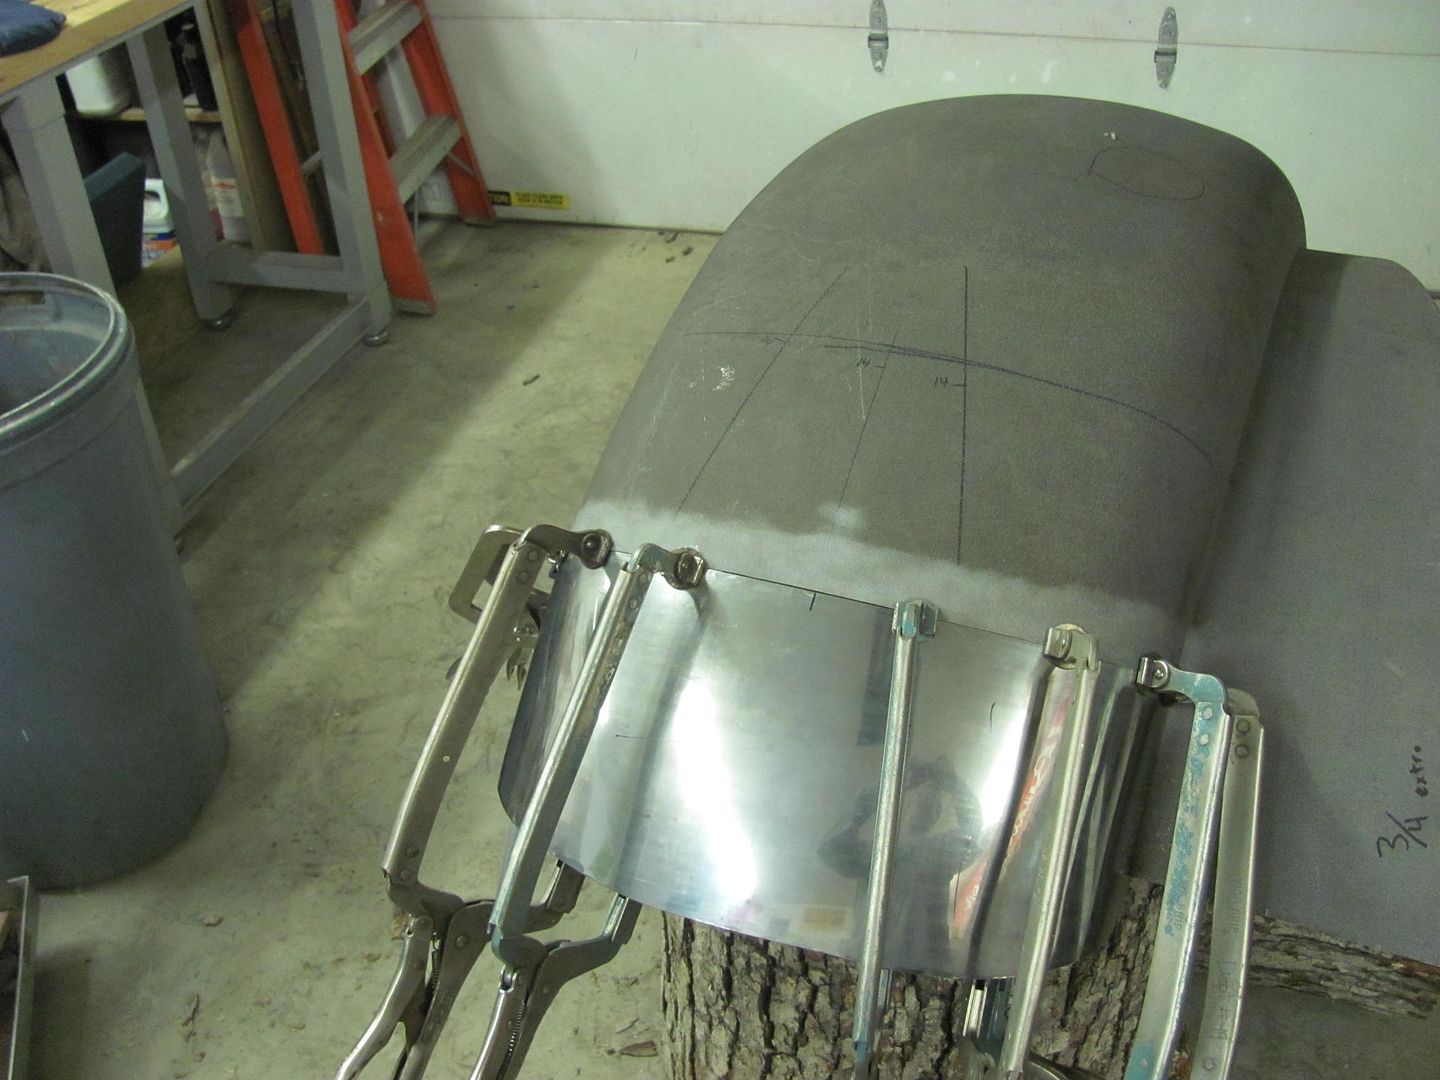 Flexible Spline is used to carry the opening mark down the patch...  Tacked in with the TIG 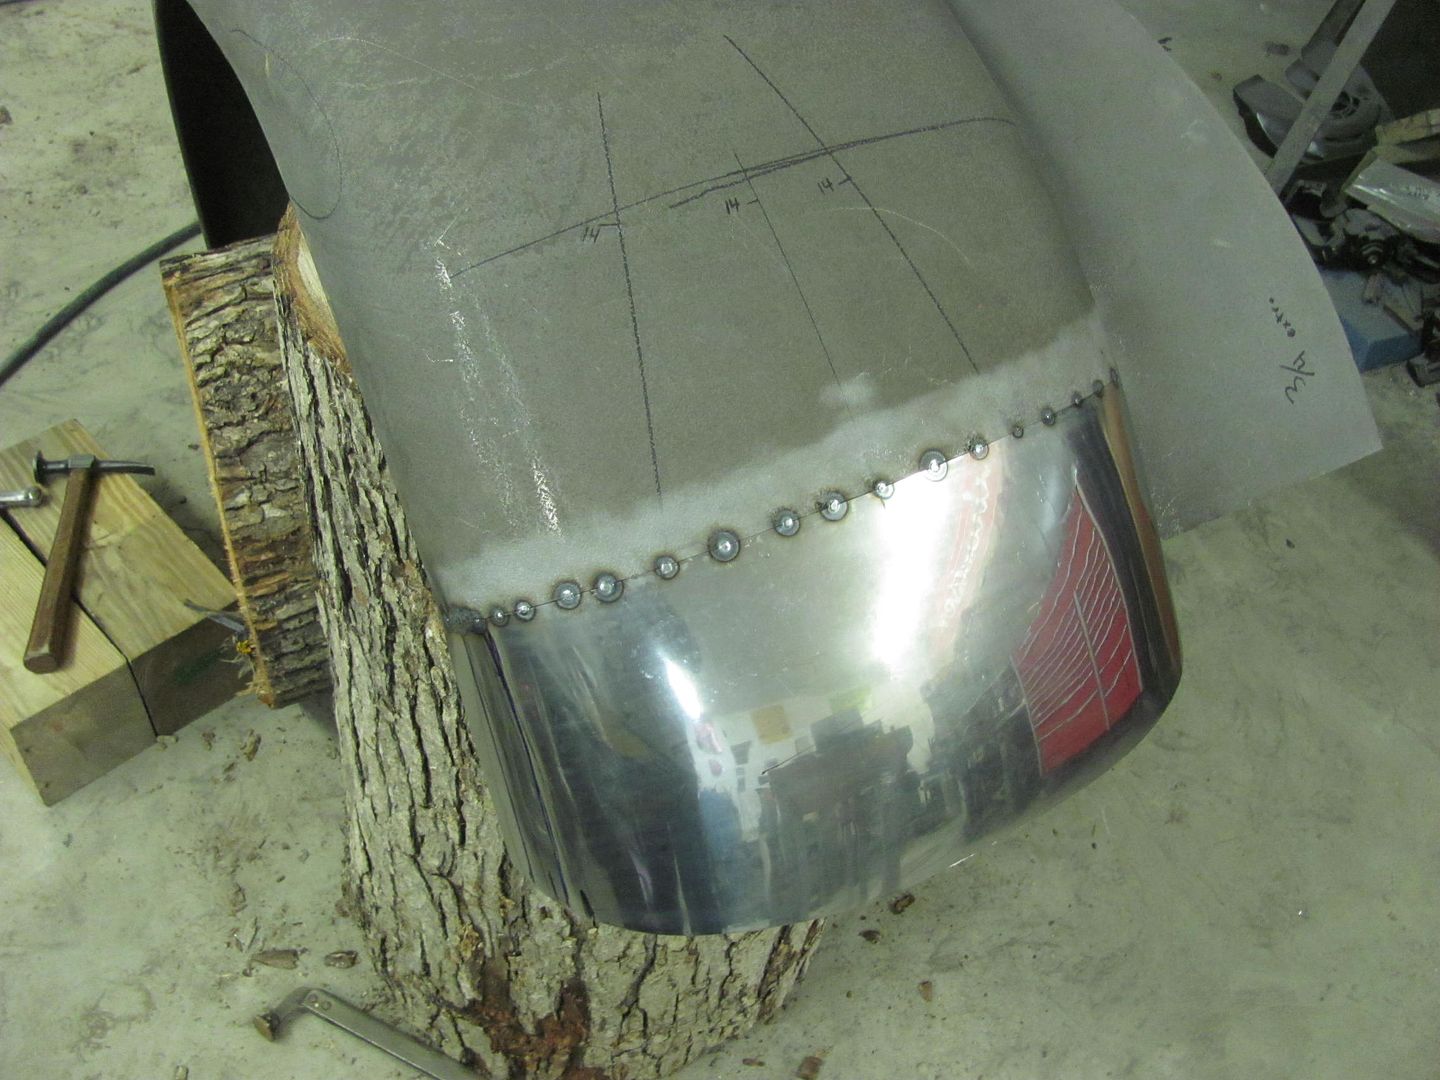 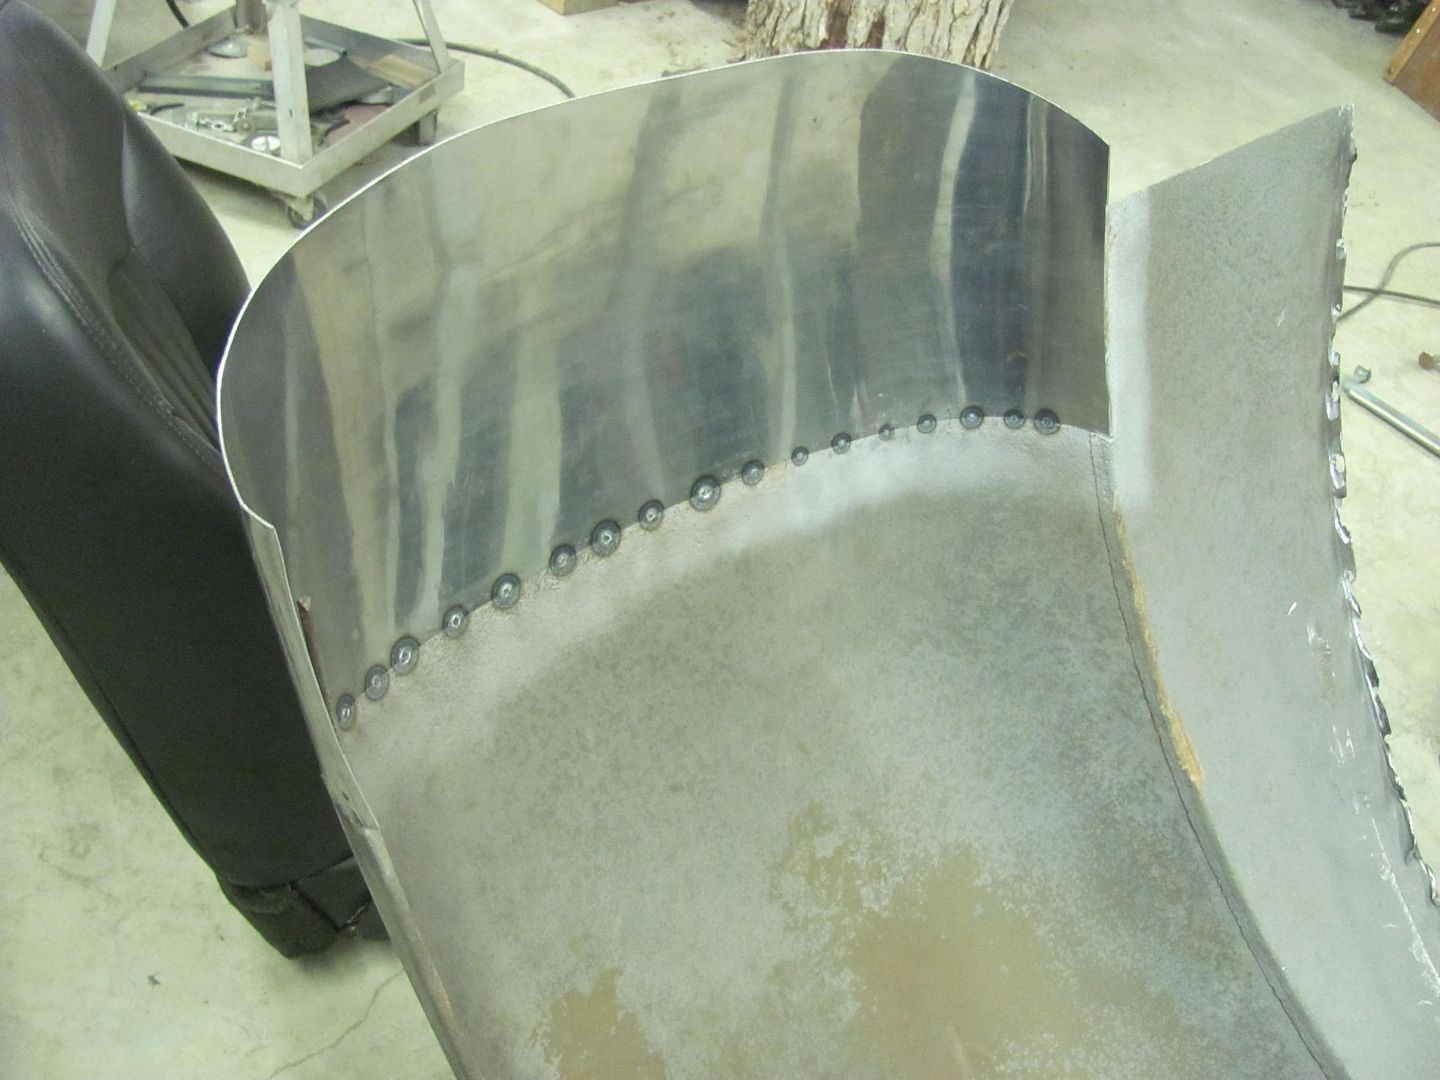  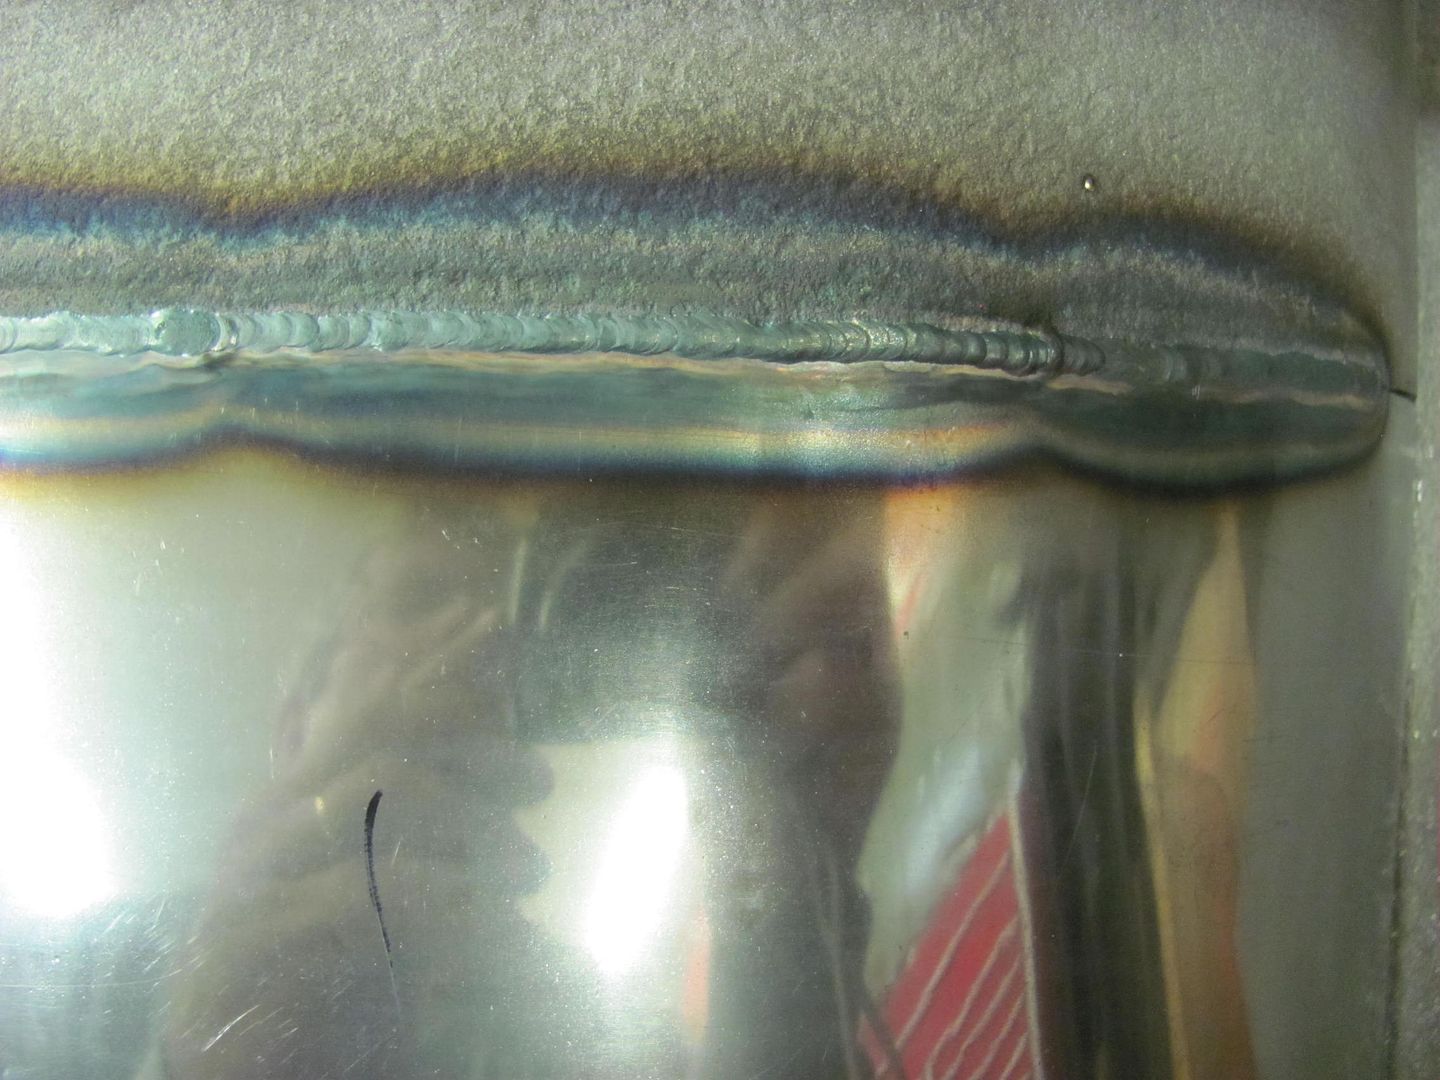  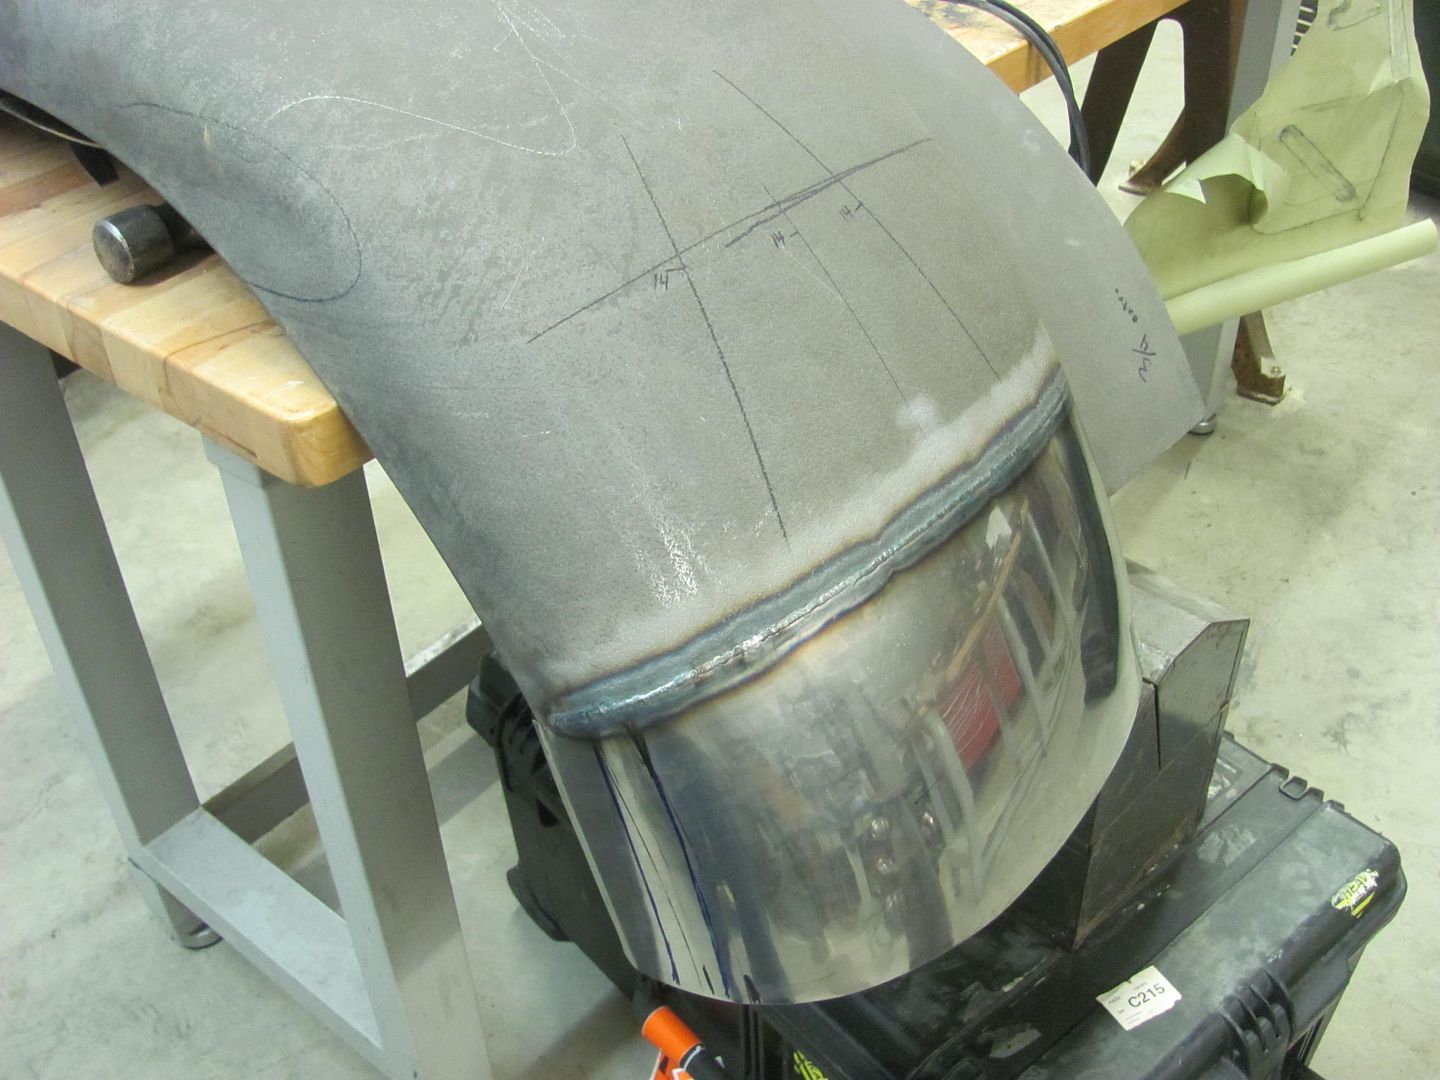 Next we'll wrap the wire and trim the front edge to size.
__________________
Robert |
|
|
|
|
10-21-2016, 10:34 AM
|
#22 |
|
Registered User
Join Date: Jan 2013
Location: Leonardtown, MD
Posts: 1,633
|
Re: 1947 Biederman Truck Fender repairs
The shop is hosting another Peter Tommasini class this year, one of the items to pass out to the attendees will be some of the rare earth magnets that we use. I just got my delivery in yesterday, these are Cup-26 magnets from Applied Magnets, they have a 65 lb pull. We use them for holding paper patterns to wheel wells during test fit to copper strip for welding backer..
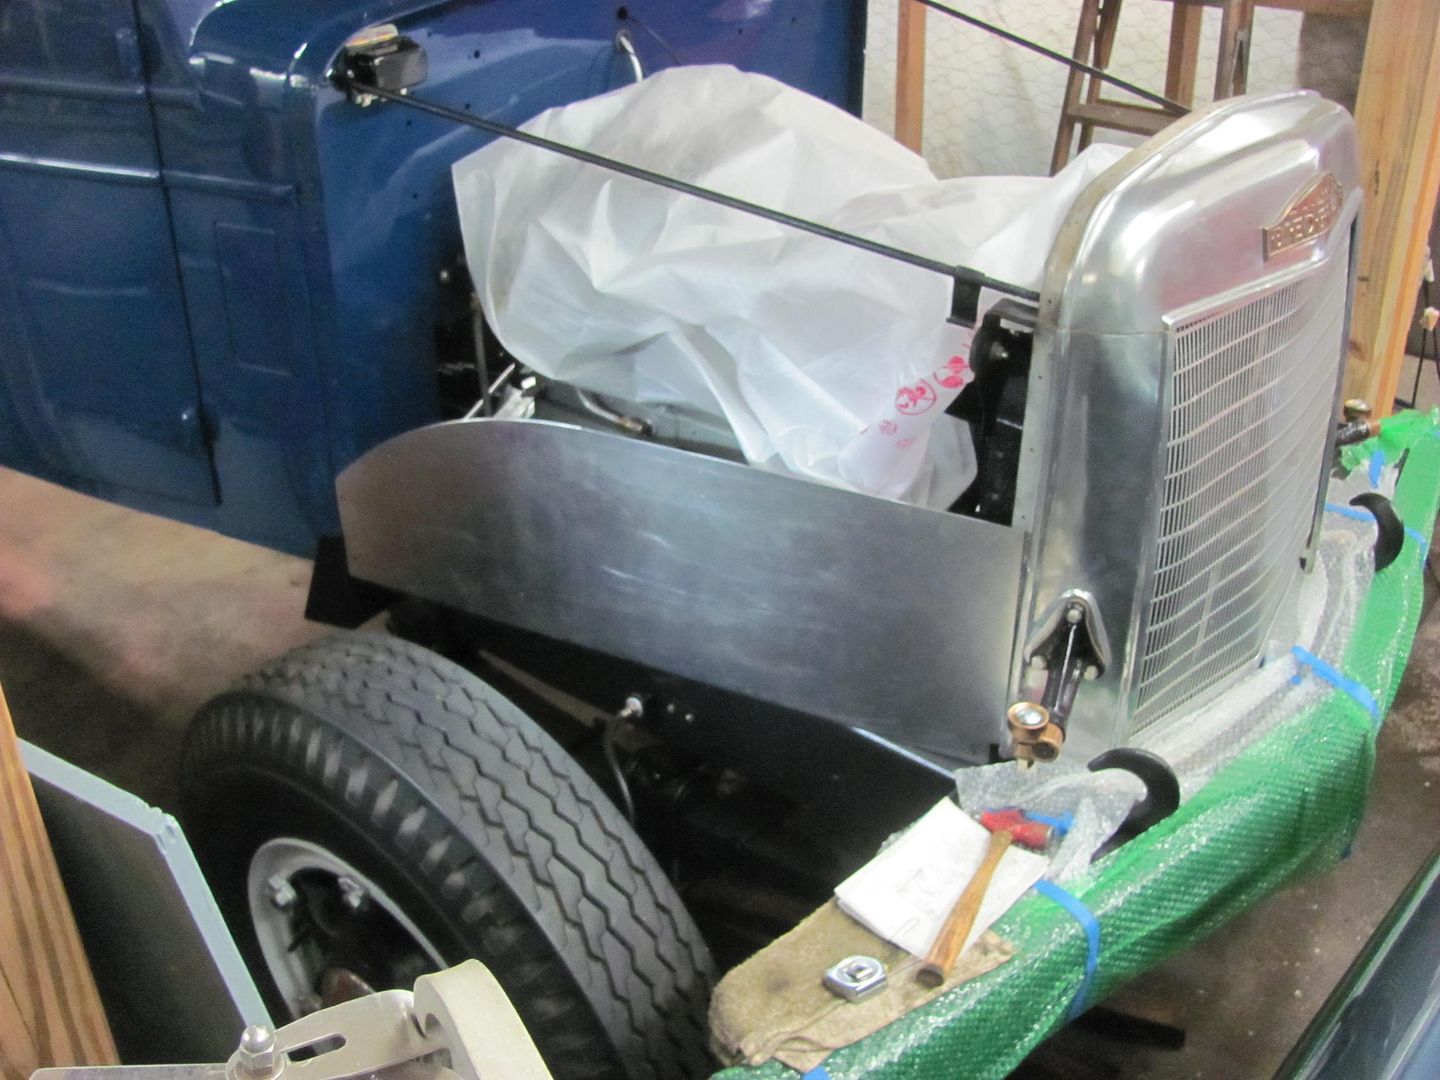
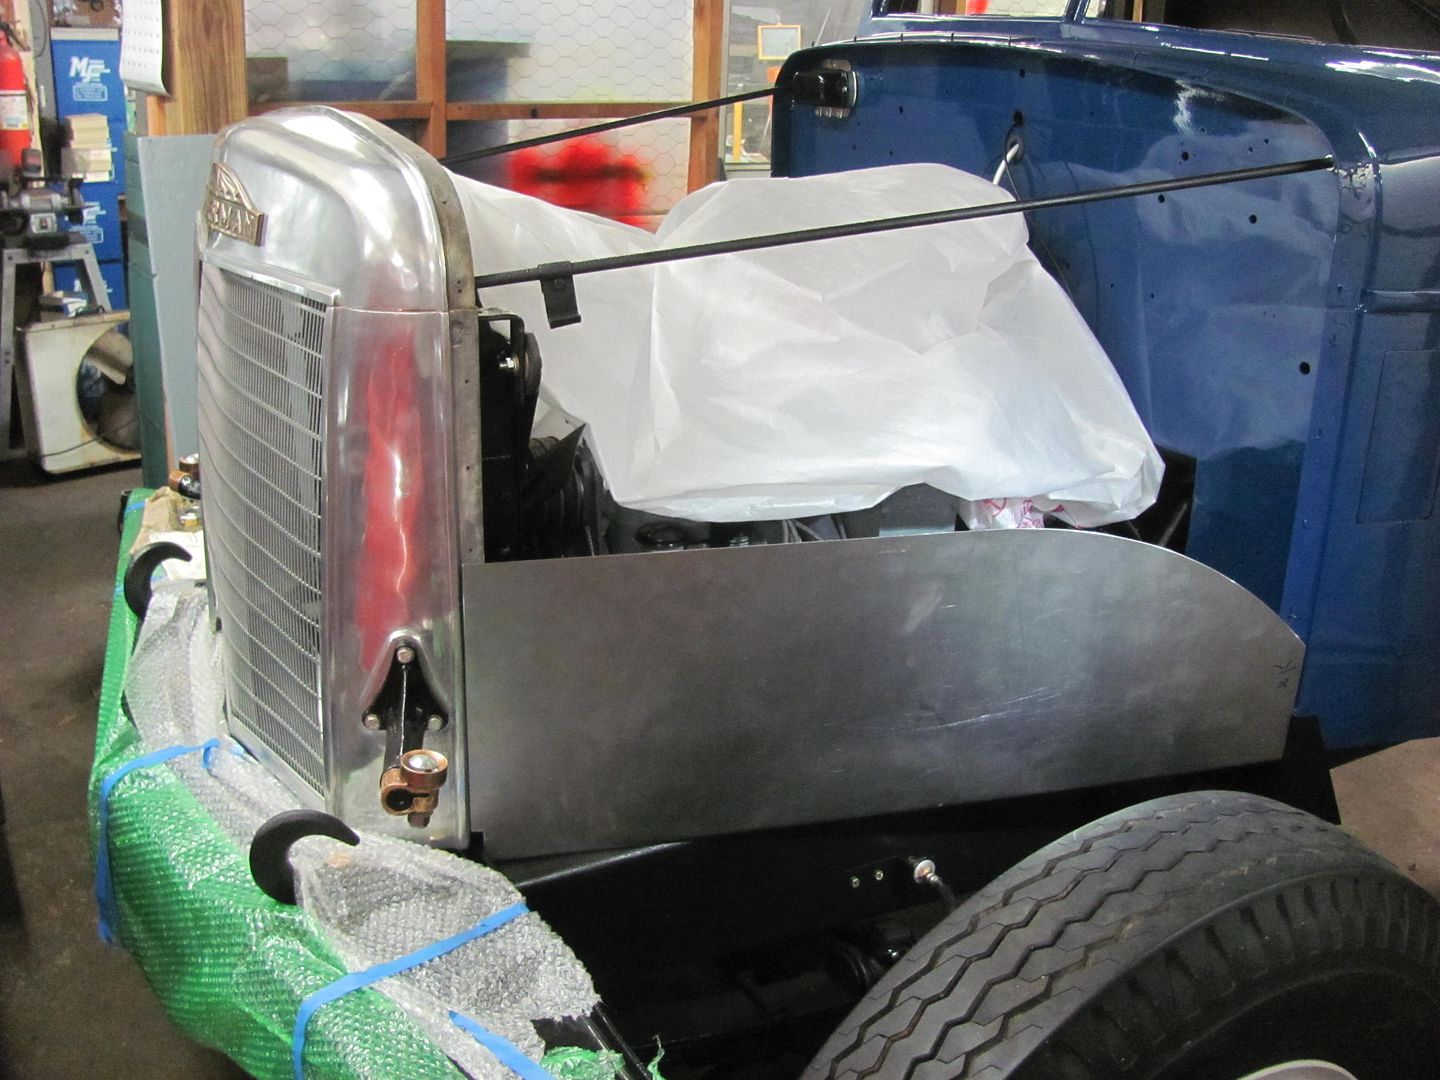
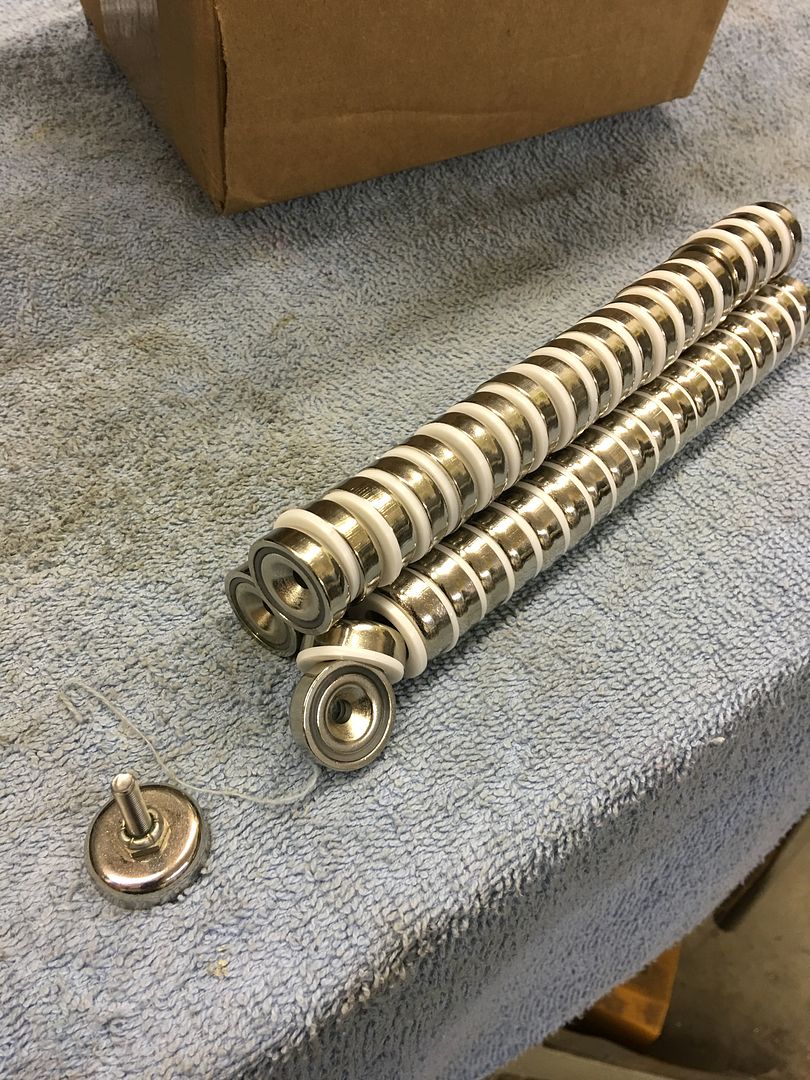 We install a csk 10-32 and lock nut to act as a handle, and they are ready to use...    John has been assembling parts of the Biederman truck front end while waiting for the fender completion. He mocked up the hood the other day only to find out it didn't fit the cab as it should.  It looks like the cab is wider than the hood, as the radius does not match and it's pushing the hood outward and up....  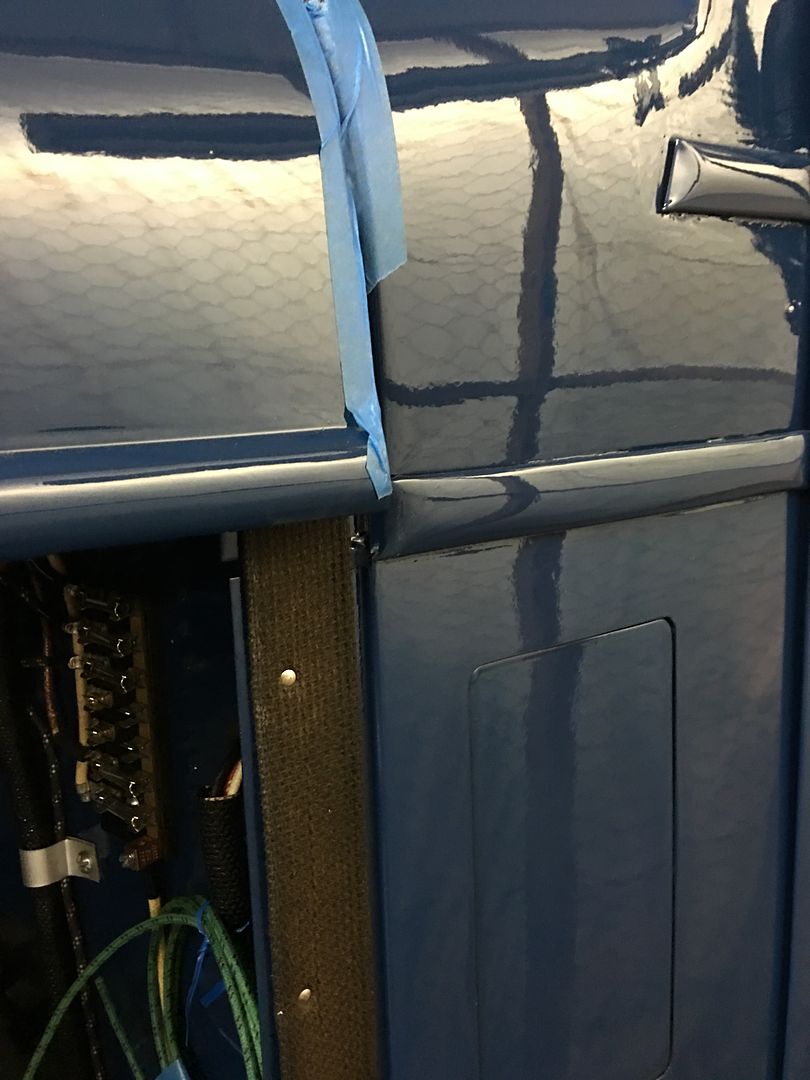 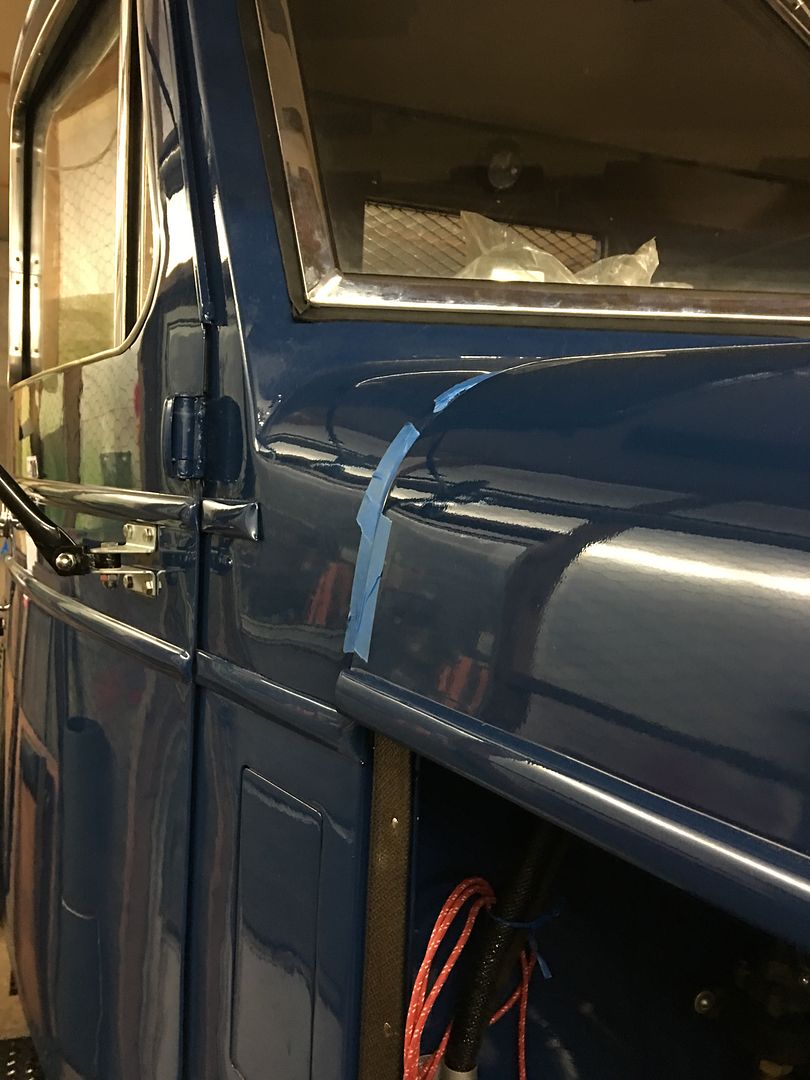 To explain, this is a 1947 truck that had extensive rust in the cab. He found a cab on a newer truck, 1951 IIRC, that was made by the same company. It now appears the newer replacement cab is slightly wider than the original, so our intended option is to cut a slice from back to almost the front and add a pie slice to push the radius out and the beltline down where it belongs. Looks like an easier option than remaking the hood. Something else to add to the list. Just to make sure the wider cab doesn't affect fender fitment, we also mocked up the lower hood side and clamped the tapered filler panels and took a comparison measurement from the outside edges, front and back. 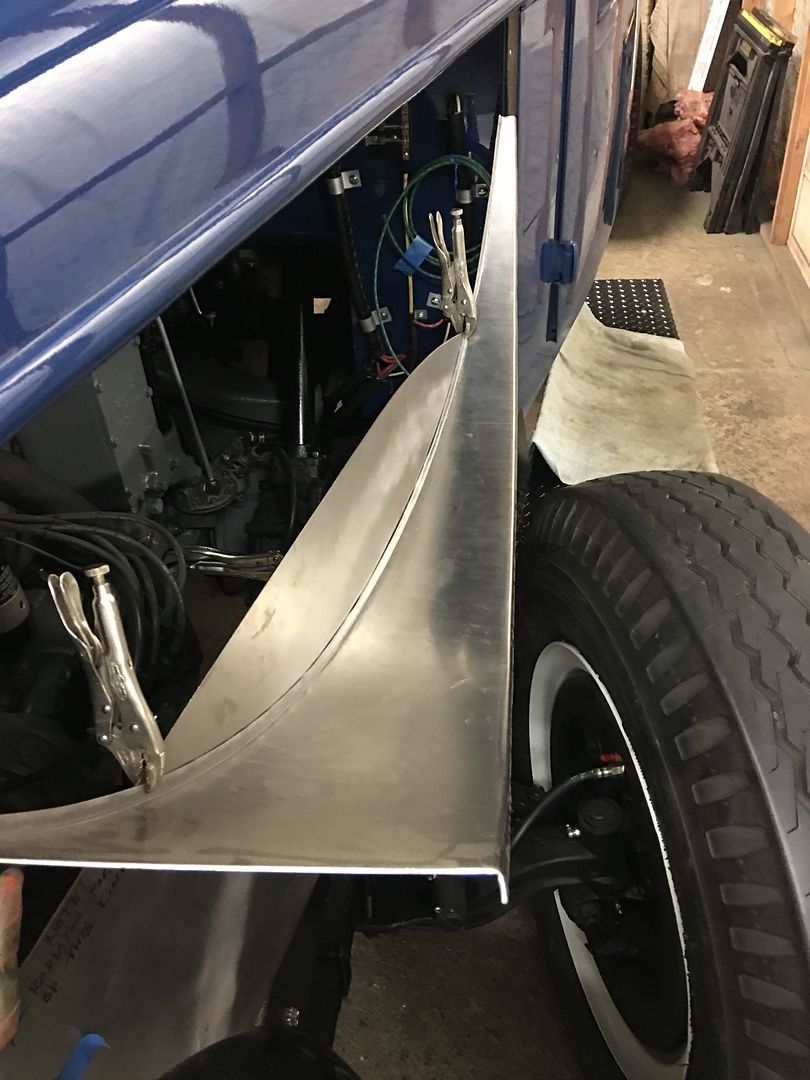 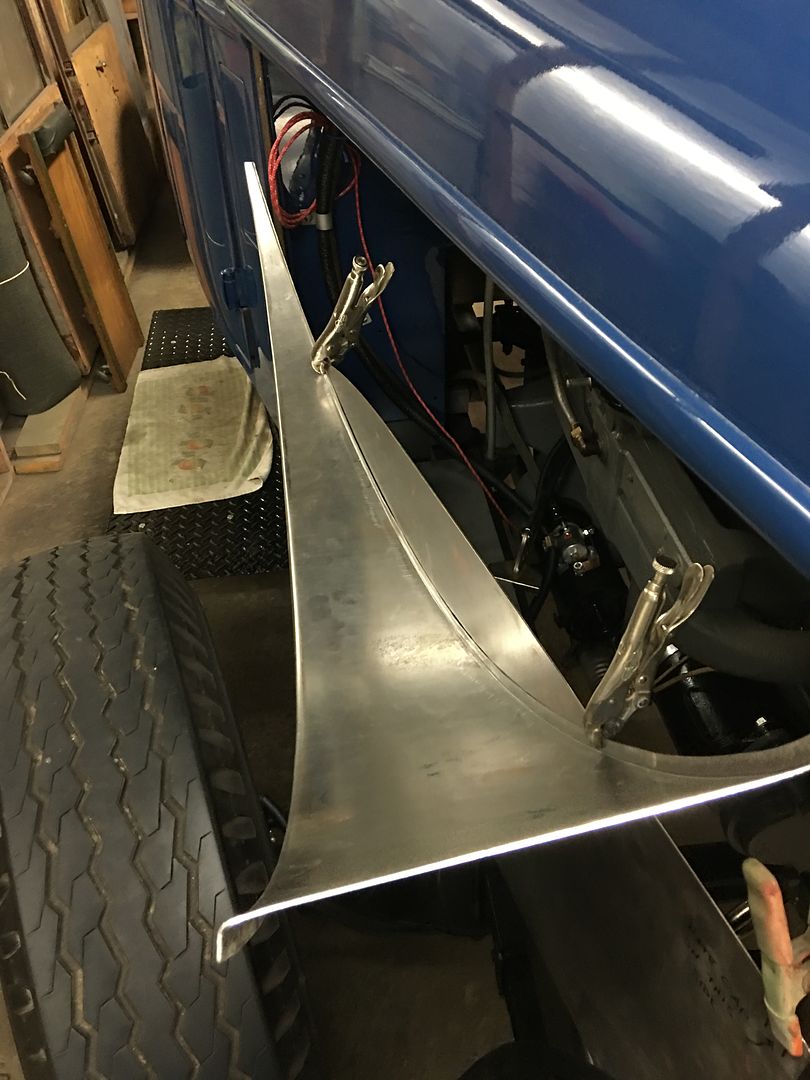 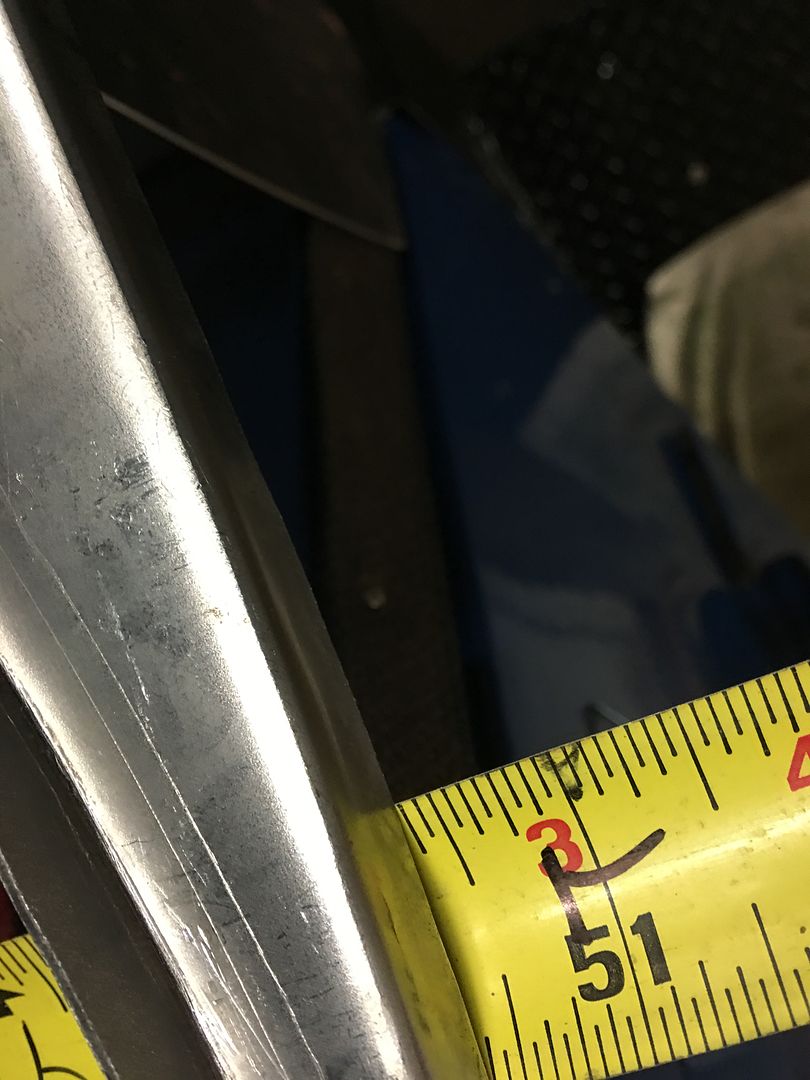 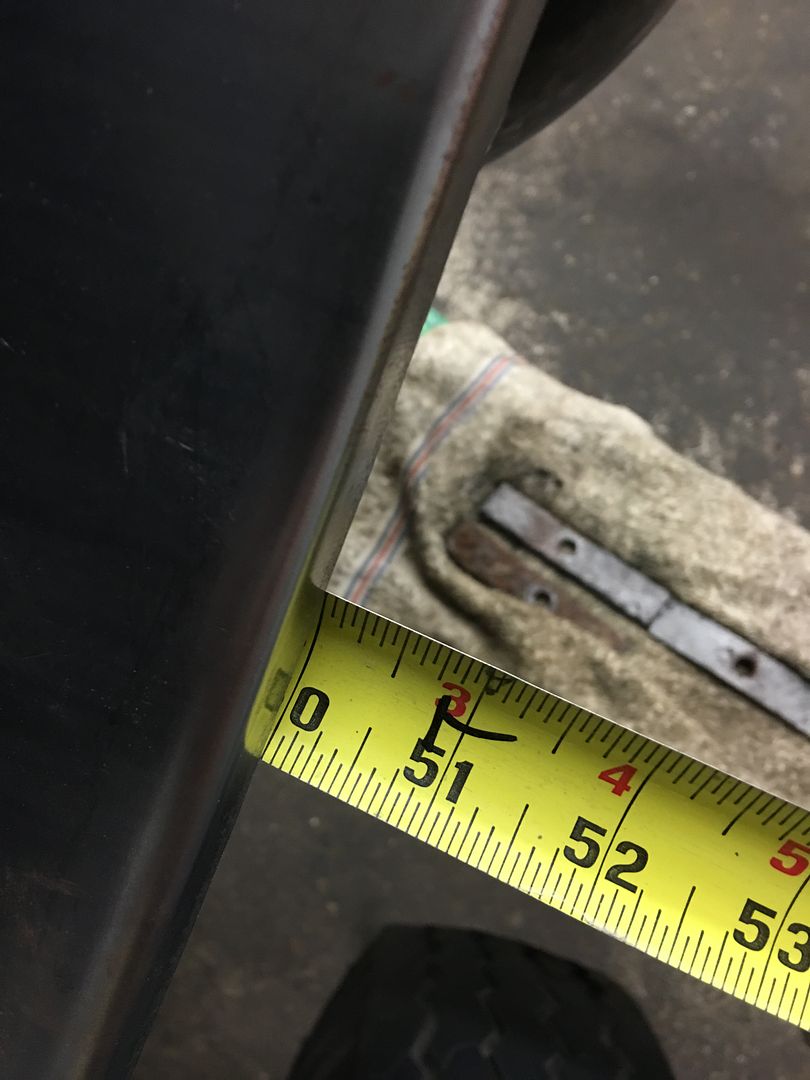 So we have just shy of 3/8 more in the back, or 3/16 pushed outward on each side. I think we can live with that, it likely is well within factory tolerance.. More to come..
__________________
Robert |
|
|
|
|
10-21-2016, 08:42 PM
|
#23 |
|
Senior Member
Join Date: Jul 2012
Location: Oblong, Illinois
Posts: 7,017
|
Re: 1947 Biederman Truck Fender repairs
Very nice work. How do you like Peter's wheel?
|
|
|
|
|
10-22-2016, 04:45 PM
|
#24 | |
|
Registered User
Join Date: Jan 2013
Location: Leonardtown, MD
Posts: 1,633
|
Quote:
Posted via Mobile Device |
|
|
|
|
|
02-05-2017, 09:33 PM
|
#25 |
|
Registered User
Join Date: Jan 2013
Location: Leonardtown, MD
Posts: 1,633
|
Re: 1947 Biederman Truck Fender repairs
Well, I need to make a little progress on a 16 gauge fender, so the highly precise stand for the Laser Level was used. We have about 13-3/4" difference in height from back edge of fender to front edge. So Laser is set at 13-3/4 above the table, with heights verified to all four corners of the table.
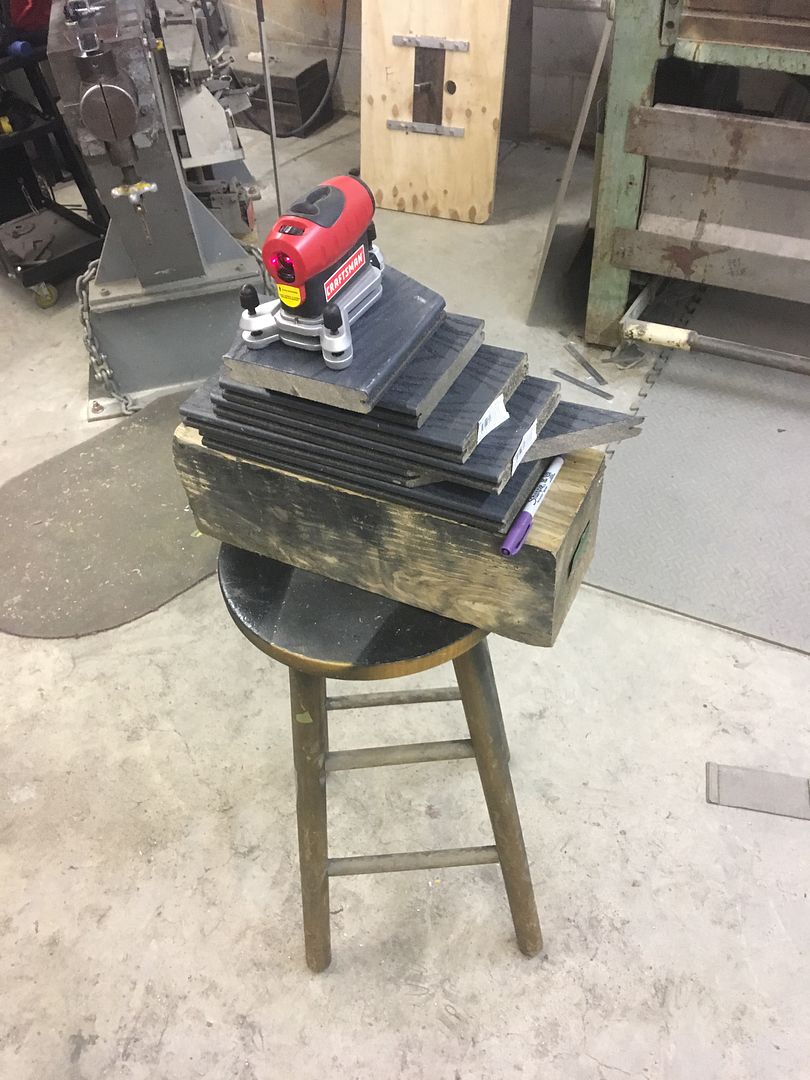 Prior to trimming the front of the fender we had measured some reference marks to the front edge for locating the new cut line.. Adding those lower edge marks back on our fender patch, we adjusted the height of the fender front for the laser to match those marks by sliding our jack stand fixture around inside the fender until we had the correct height. Hey, this is technical stuff!  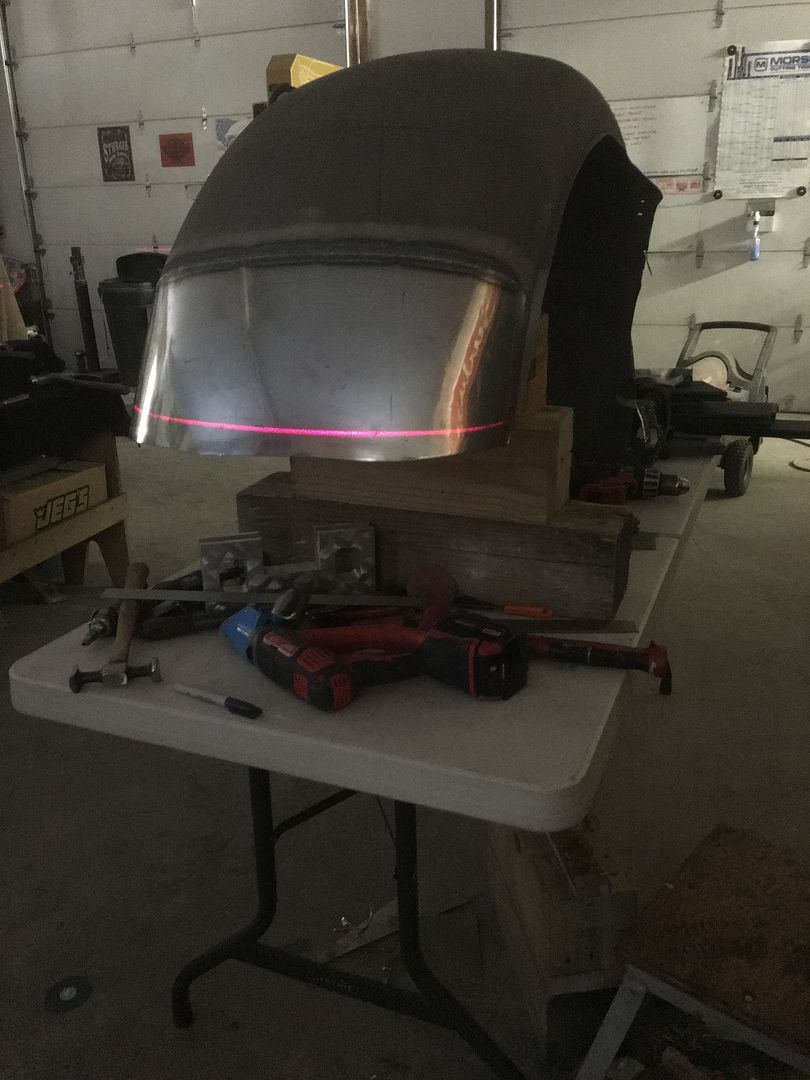 And traced the laser mark with the sharpie... 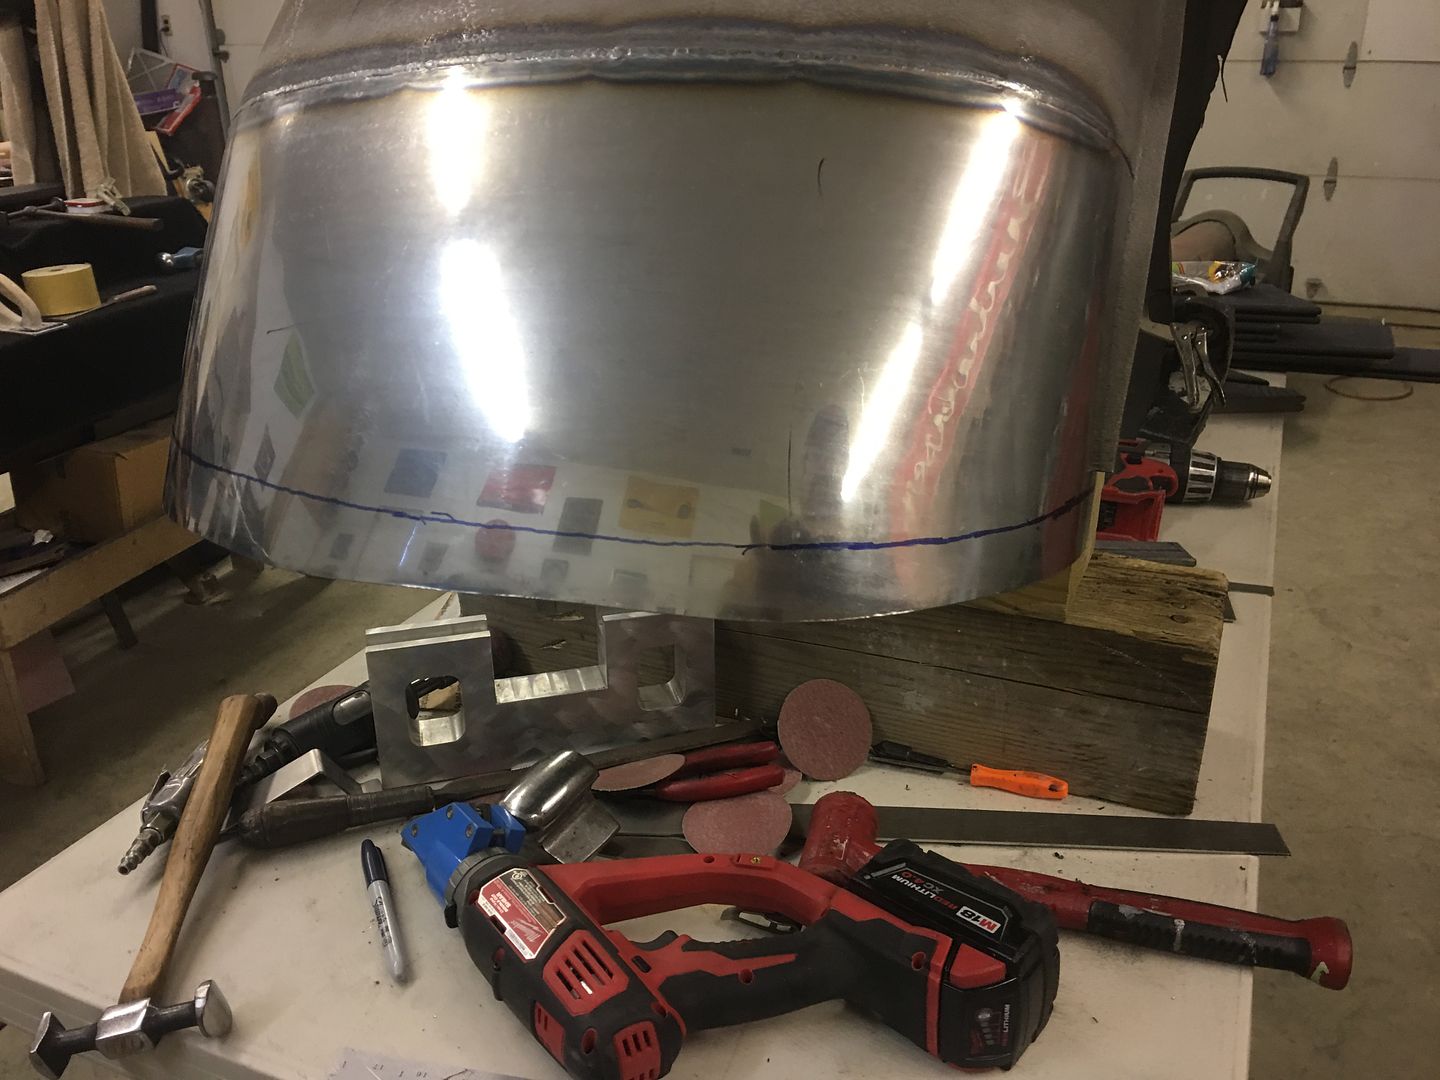 Initial cut to remove the bulk was done with the Milwaukee shear, the final was done with Midwest Shears. I figured slower = more precise... 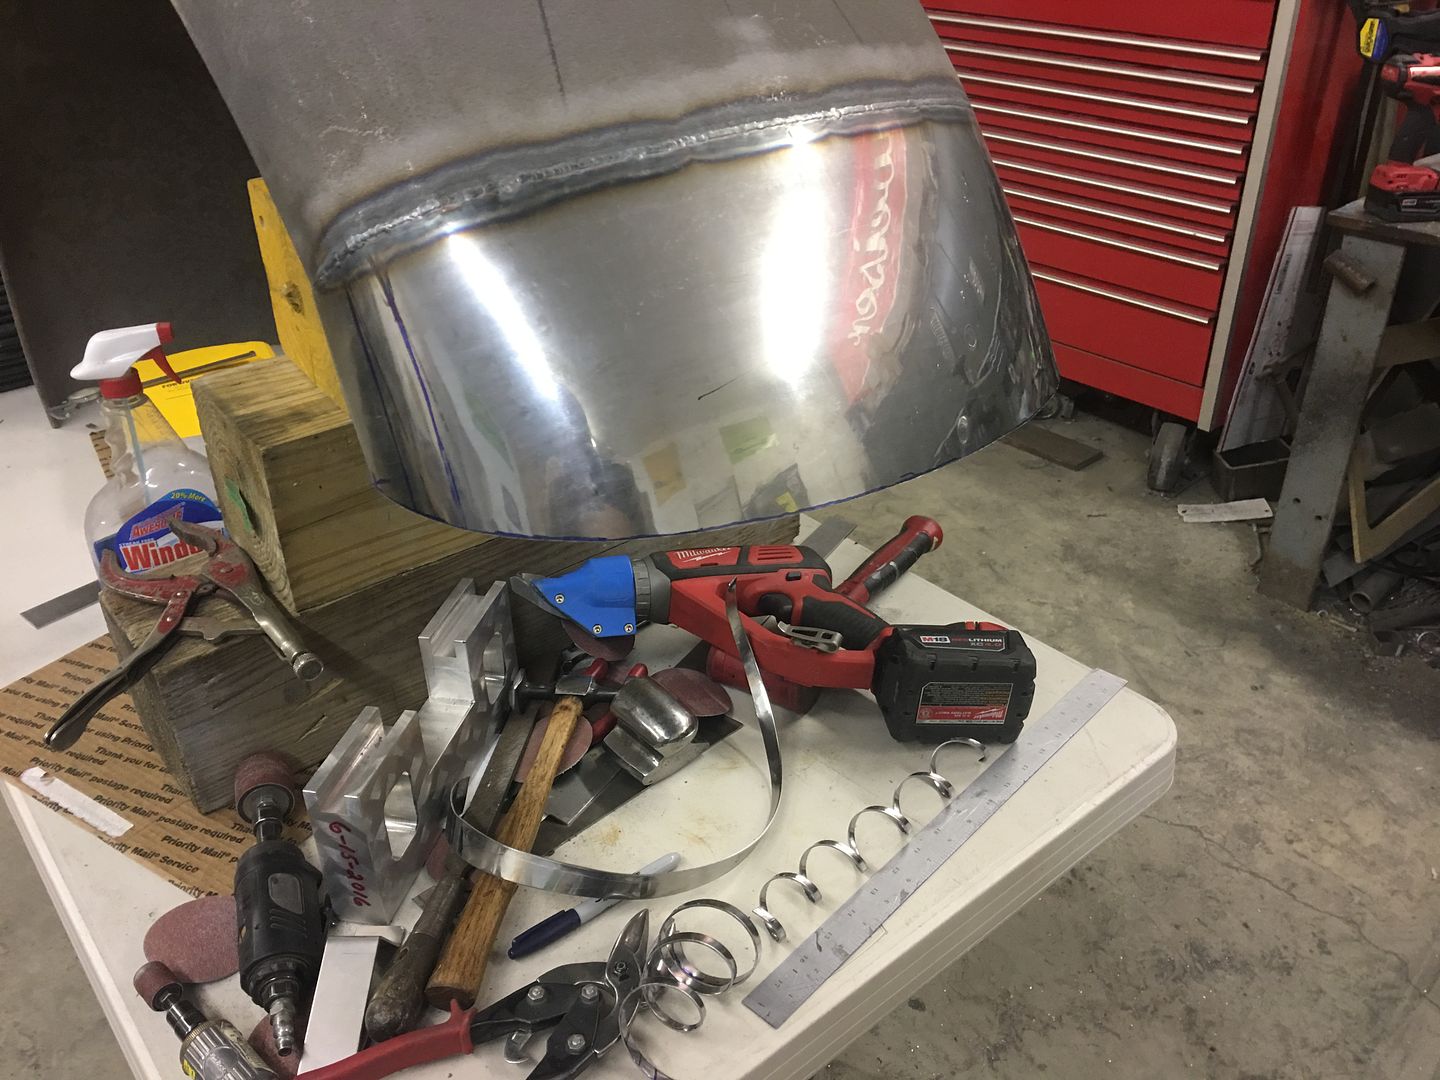 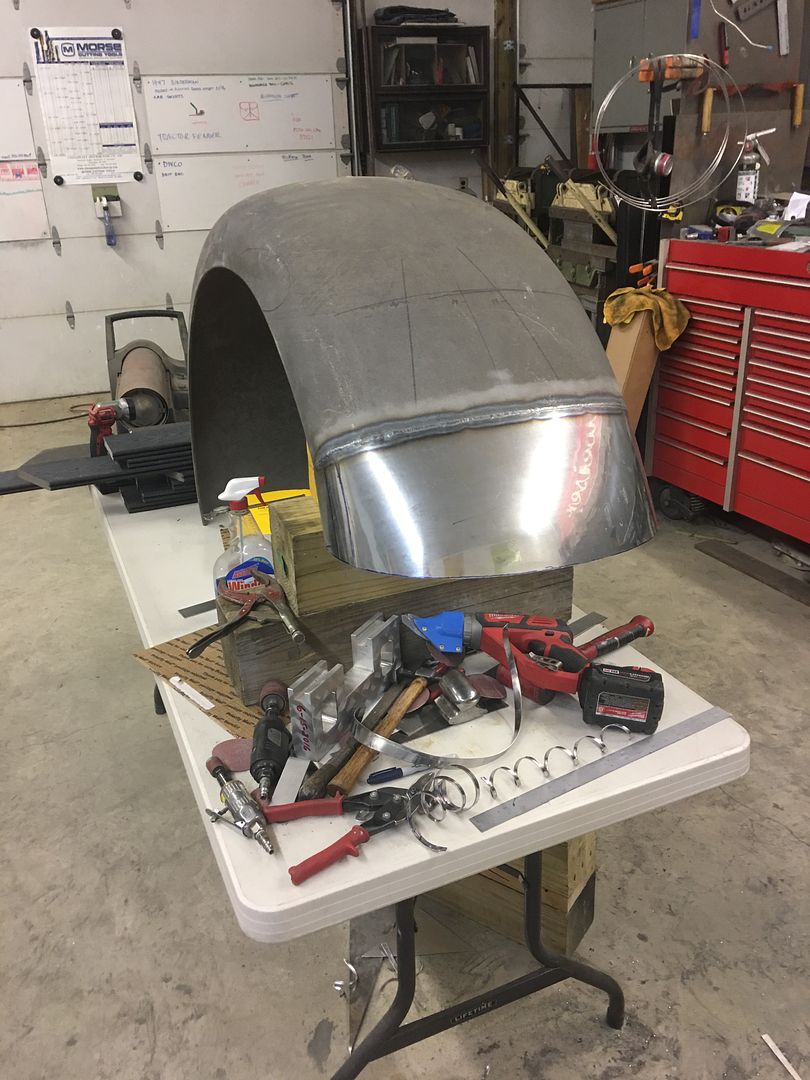
__________________
Robert |
|
|
|
|
| Bookmarks |
|
|


 Linear Mode

