
|
Register or Log In To remove these advertisements. |
|
|
|
|||||||
 |
|
|
Thread Tools | Display Modes |
 03-12-2012, 01:11 AM
|
#26 |
|
Registered User
Join Date: Dec 2007
Location: Southington CT
Posts: 548
|
Re: 68 Build Thread**Better Late Than Never**
MAR.-14th 2011
SPINTECH EXHAUST INSTALL                 
Last edited by AustinScott; 03-12-2012 at 01:25 AM. Reason: missed an important date!!! |

|

|
|
03-12-2012, 01:14 AM
|
#27 |
|
Registered User
Join Date: Dec 2007
Location: Southington CT
Posts: 548
|
Re: 68 Build Thread**Better Late Than Never**
MAR.-19th 2011
FRONT GRILL PAINT   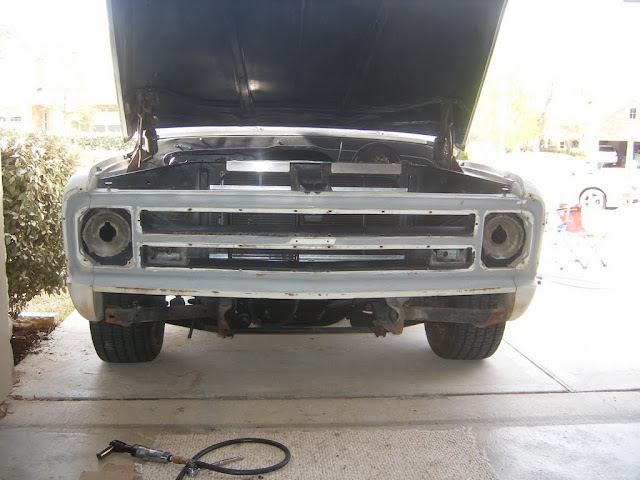   
Last edited by AustinScott; 03-12-2012 at 01:24 AM. |
|
|
|
|
03-12-2012, 01:26 AM
|
#28 |
|
Registered User
Join Date: Dec 2007
Location: Southington CT
Posts: 548
|
Re: 68 Build Thread**Better Late Than Never**
Ok time for bed, more tomorrow.
|
|
|
|
|
03-18-2012, 11:35 AM
|
#29 |
|
Registered User
Join Date: Dec 2007
Location: Southington CT
Posts: 548
|
Re: 68 Build Thread**Better Late Than Never**
APRIL 6th 2011
DRIVE SHAFT REPLACEMENT well looks like the "stock 2 piece" drive shaft was just not up to the task of moving out truck anymore. On March 27th we had just got off the freeway, sitting at a light on the frontage road & the drive shaft gave out. Light turns green, gave it some gas... and "DING.. BAM..BAM..BAM..BAM." I was like.... O great! got out and looked under the truck expecting to see the drive shaft sitting on the ground. But to my surprise, it was still in place and connected to the rear end and the carrier. So I figured I must of broke the transmission... but it sure was loud! So helpful folks helped me push the truck off to the side and into an ikea parking lot driveway. After getting towed home... I investigated some and found that I did indeed break the drive shaft, but it was the "front half" that broke.. leaving the back half still in-tacked and looking normal... FOOLED ME!!!  Here is what it looked like under the truck broken...  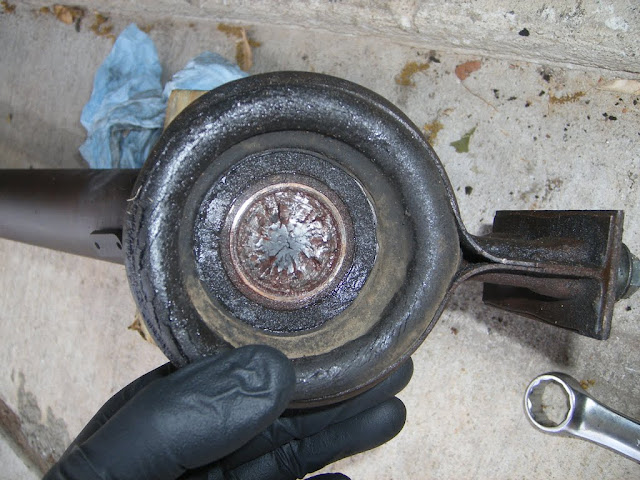 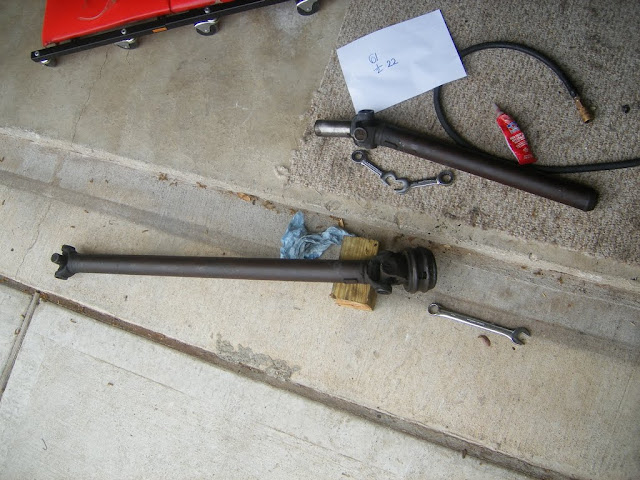 We had a new 1-piece drive shaft made for the truck...   Before I installed the drive shaft I figured I would replace the tranny rear seal. Doing this in the truck in not impossible, but it requires a lot of patience, and a home made install tool...  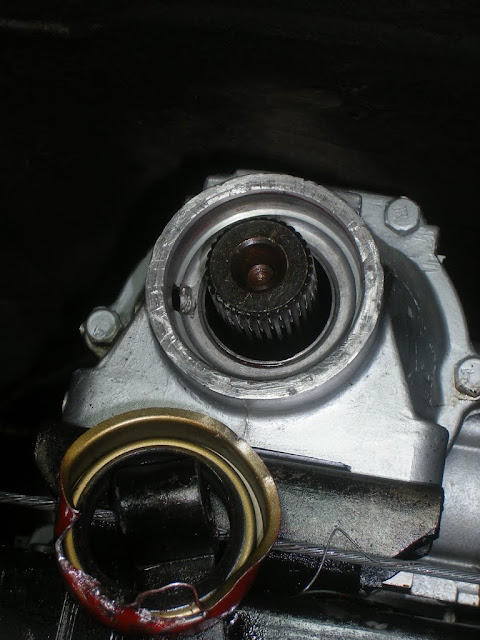 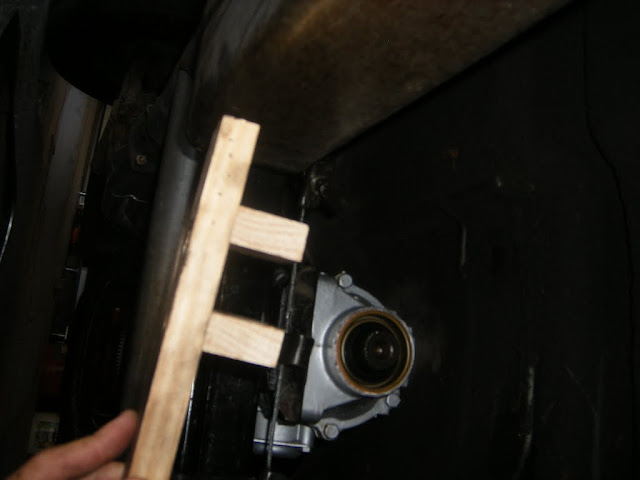 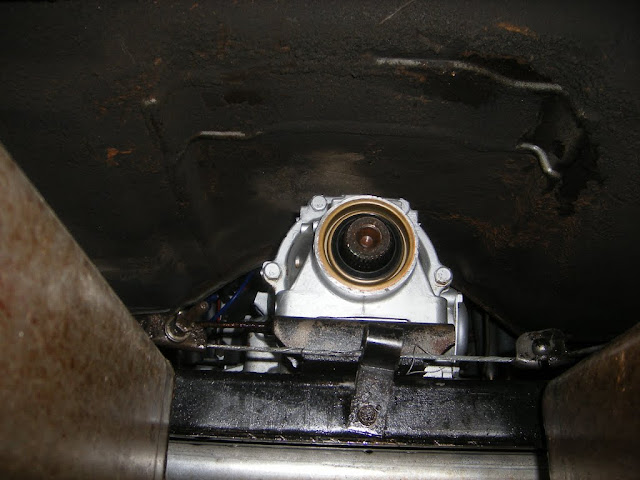 I also had to cut out the carrier mount.... what a painful process, rivets do not like coming out. I found drill of the heads to be the quickest route. I just bought a few drill bits to do the job...  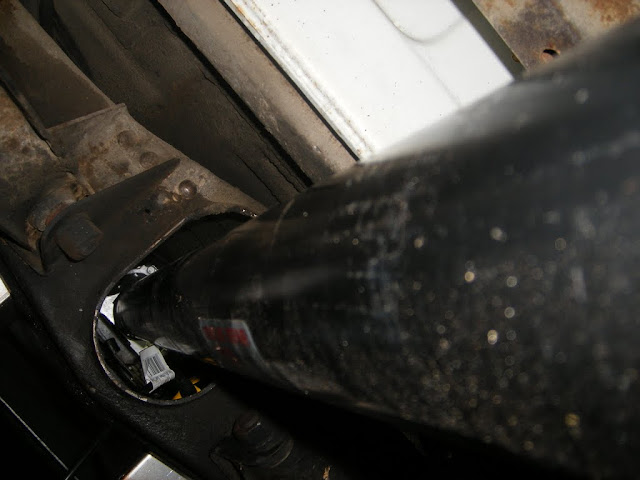  And if anyone is wondering... Notice something missing form the pictures? Yep you guessed it, MY SON!, he decided to leave this job to dad... Thanks Son! -=Scott=- |
|
|
|
|
03-18-2012, 11:55 AM
|
#30 |
|
Registered User
Join Date: Dec 2007
Location: Southington CT
Posts: 548
|
Re: 68 Build Thread**Better Late Than Never**
MAY 29th 2011
HOOD PAINT TEST So we decided to play around with some olivedrab paint today.. As as normal... the hood was the victim.... This time my son did the spray job. Forgot to get any pics of him doing the job.. it was really just to spontaneous to think about the camera. BEFORE:  AFTER:   -=Scott=- |
|
|
|
|
03-18-2012, 12:26 PM
|
#31 |
|
Registered User
Join Date: Dec 2007
Location: Southington CT
Posts: 548
|
Re: 68 Build Thread**Better Late Than Never**
OCT 16th 2011
FRONT DISC CONVERSION well after a long wait, it came time to just bite the bullet and buy a complete new front brake system. So we decided to go with POL's front disc brake kit with 2.5" drop spindles. We also about all new front brake lines We also purchased a new power brake booster & master-cylinder combo. So we start by tearing everything down.     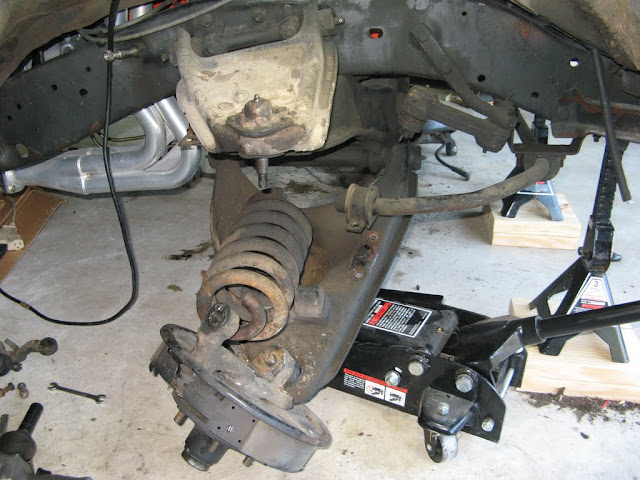  AND SHE IS BARE!!! 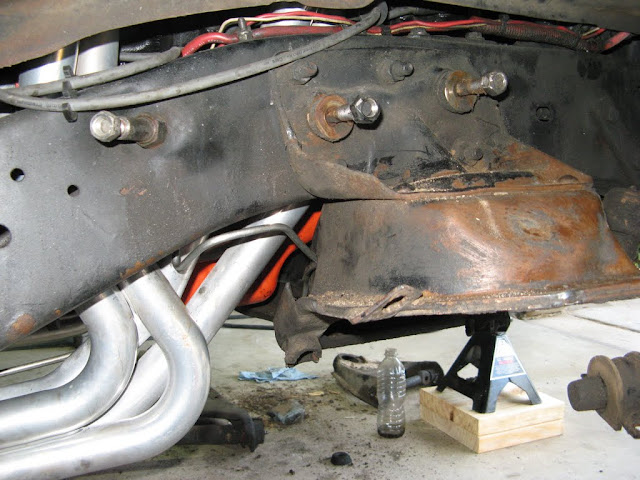 Next comes the booster/MC      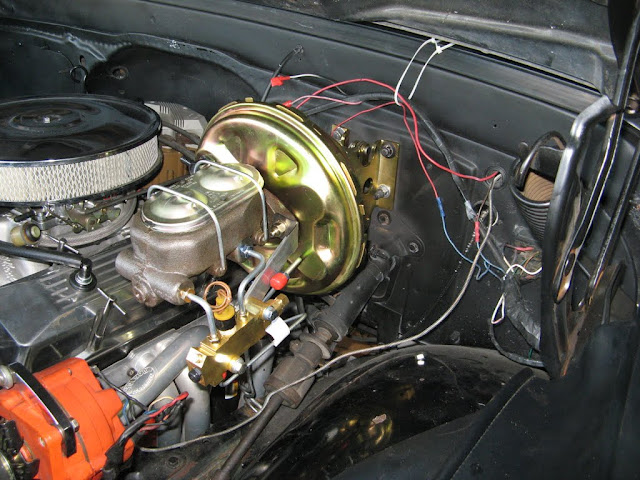  HERE IS A LINK TO MY BRAKE LINE REVIEW POST. FRONT BRAKE LINE REVIEW THREAD/POST NEW WHEEL & DISC CLEARANCE... GOING TO BE TIGHT 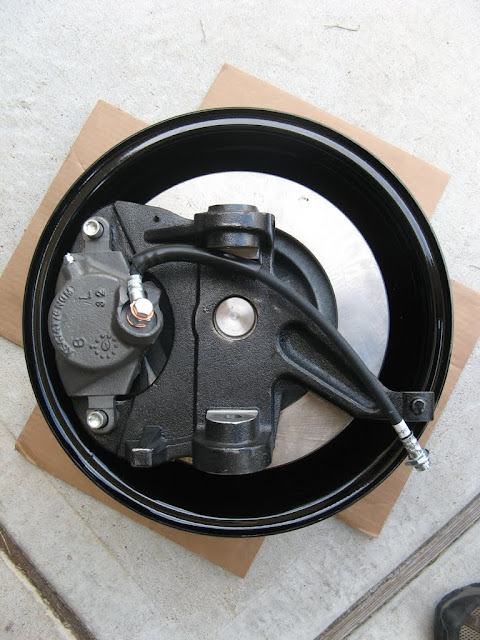 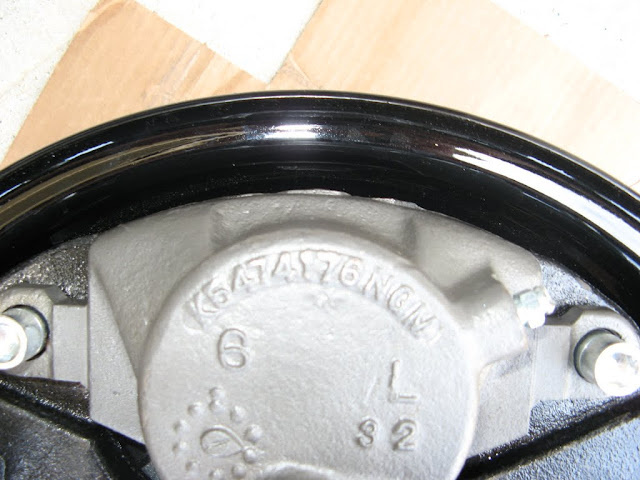 HERE IS HOW I TOOK THE LOWERS APART. 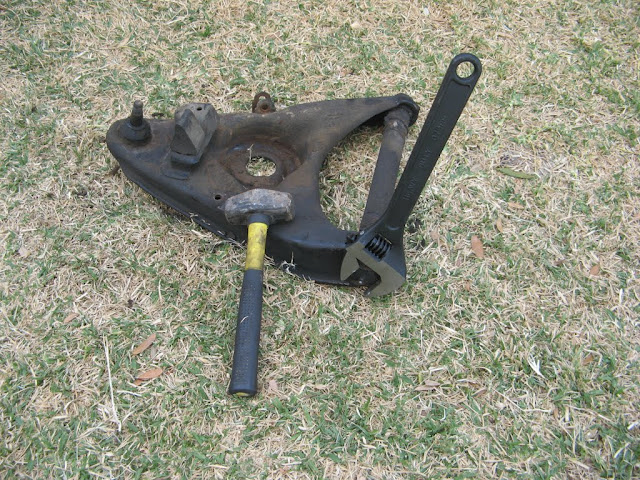  HERE IS MY SON GIVING IT A SHOT... A LOT HARDER THAN IT LOOKS.   STAY TUNED MORE TO COME..... |
|
|
|
|
03-18-2012, 12:35 PM
|
#32 |
|
Registered User
Join Date: Dec 2007
Location: Southington CT
Posts: 548
|
Re: 68 Build Thread**Better Late Than Never**
NOV 23rd 2011
FRONT CONTROL ARM PREP We picked up our control arms form the blasters today. $25.00 to blast everything.. not cheap but well worth it. Now time to make a mess.... Notice how my son is up for this one... hes good at making messes...  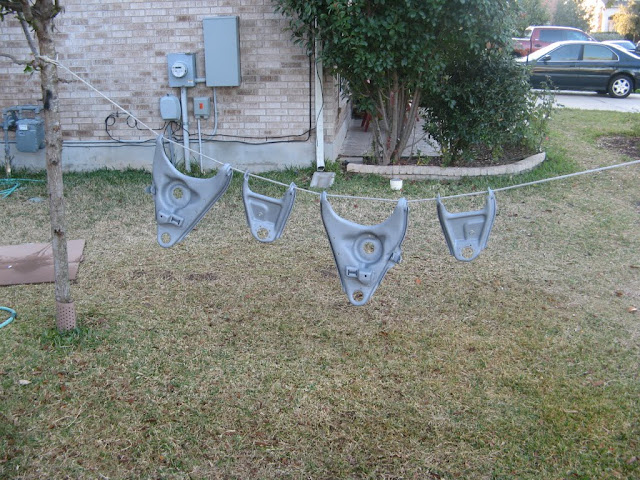        WE HAD FUN THAT DAY..... -=Scott=- |
|
|
|
|
03-18-2012, 12:50 PM
|
#33 |
|
Registered User
Join Date: Dec 2007
Location: Southington CT
Posts: 548
|
Re: 68 Build Thread**Better Late Than Never**
NOV 24th 2011
FRONT CONTROL ARM BALL JOINT/BUSHING INSTALL We got up ate some breakfast & went out in the garage again for day 2 of this front rebuild. NOW THE FUN BEGINS... CHILD LABOR! 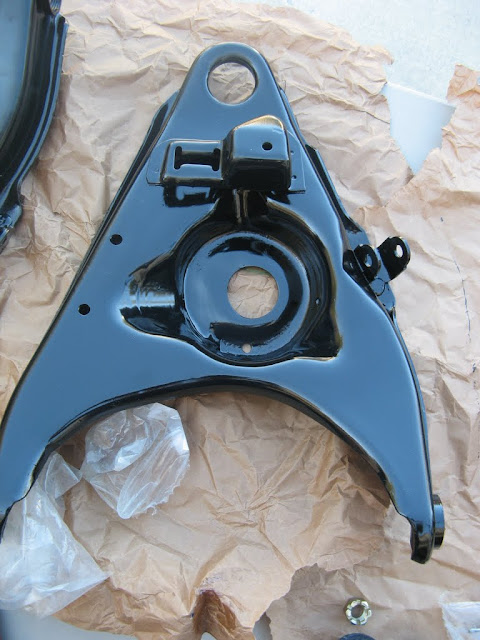 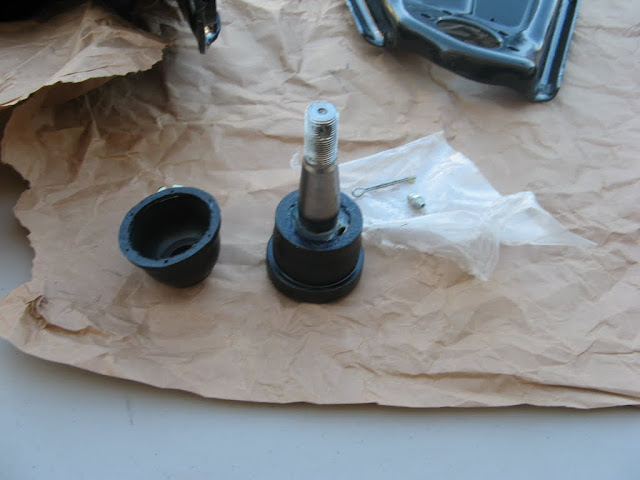 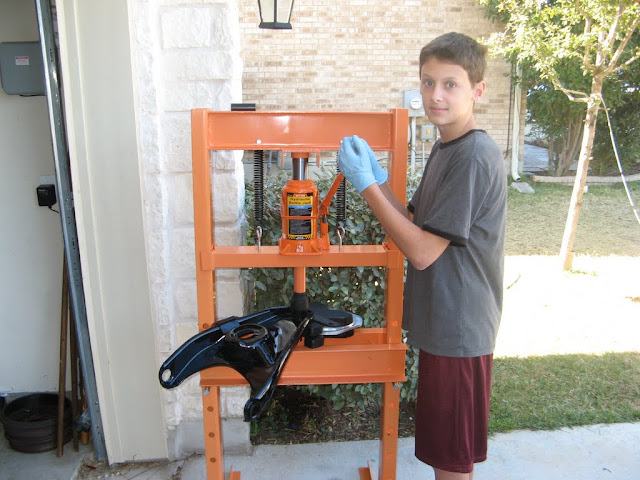       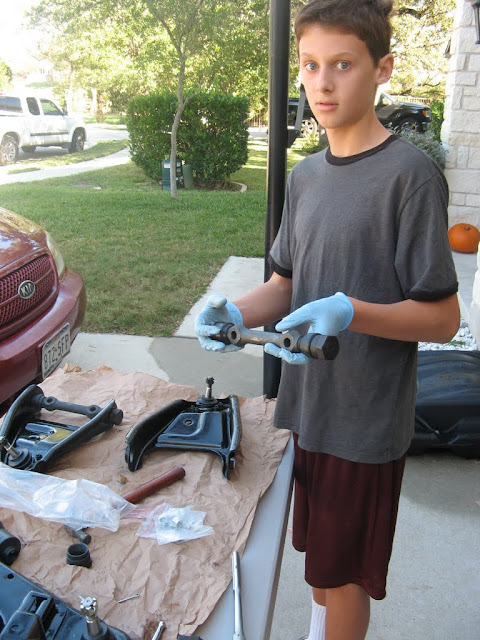   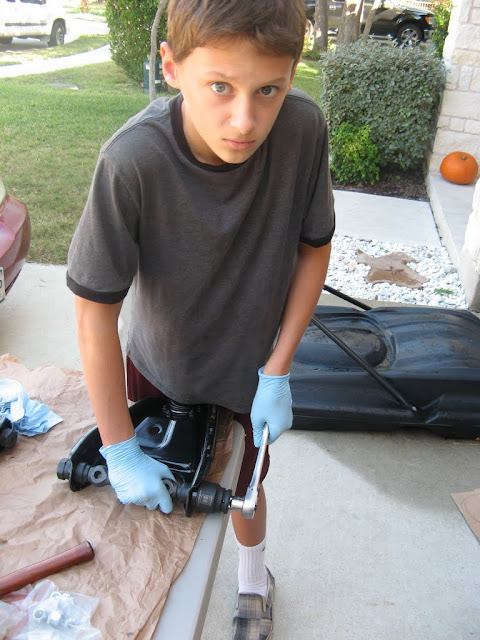     SO NOW MY SON IS TIRED, SO I ASKED HIM IF HE WANTED TO DO SOME "BENCH" WORK             NEXT UP SPINDLE INSTALL... -=Scott=- Last edited by AustinScott; 03-18-2012 at 01:10 PM. |
|
|
|
|
03-18-2012, 01:02 PM
|
#34 |
|
Registered User
Join Date: Dec 2007
Location: Southington CT
Posts: 548
|
Re: 68 Build Thread**Better Late Than Never**
NOV 25th 2011
FRONT SPINDLE INSTALL SO once we got these spindles on we noticed they would rub the upper control arm when the truck was jack up. So we did what anyone else would of done... clearanced them.... 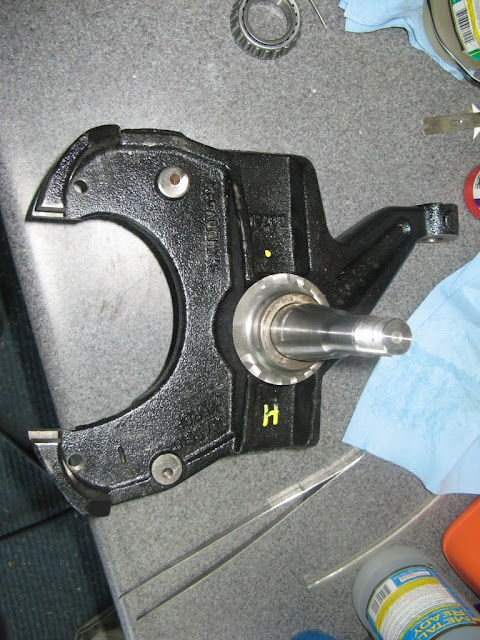  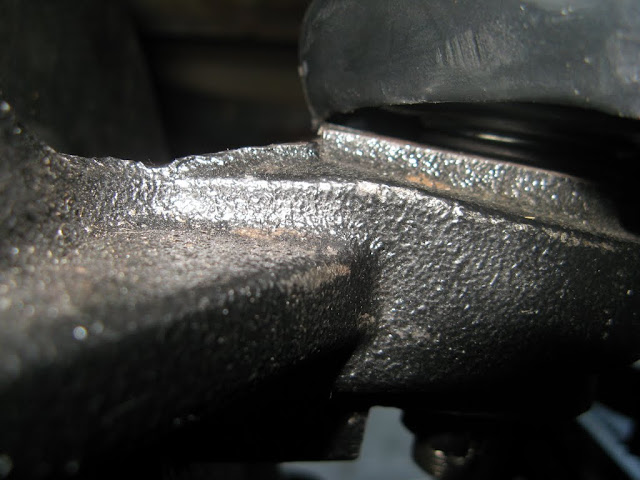        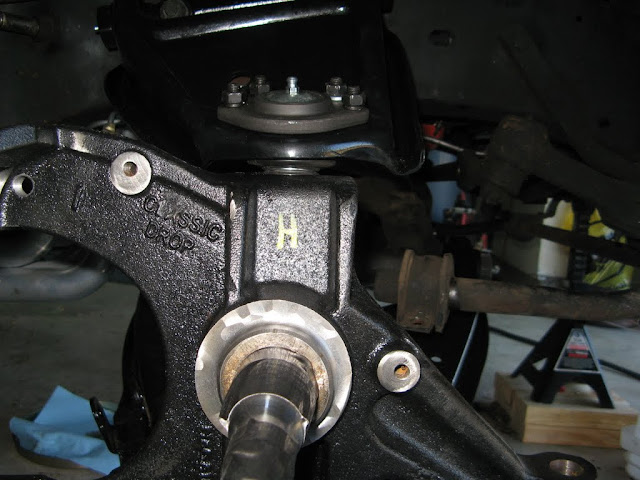     Keep in mind, this is still with the "cut front spring" in with the drop spindle. Later we will change the springs out with true 1" drop springs  -=Scott=- Last edited by AustinScott; 03-18-2012 at 01:10 PM. |
|
|
|
|
03-18-2012, 01:25 PM
|
#35 |
|
Registered User
Join Date: Dec 2007
Location: Southington CT
Posts: 548
|
Re: 68 Build Thread**Better Late Than Never**
FRONT PARTS
here are some parts reference images I forgot to upload on the last post.. All these parts came in the POL kit 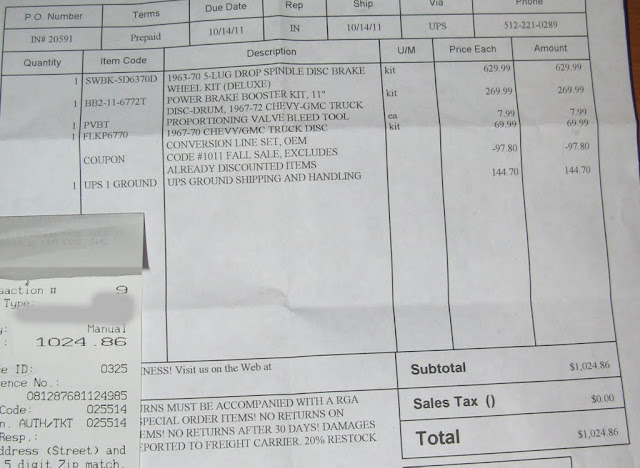  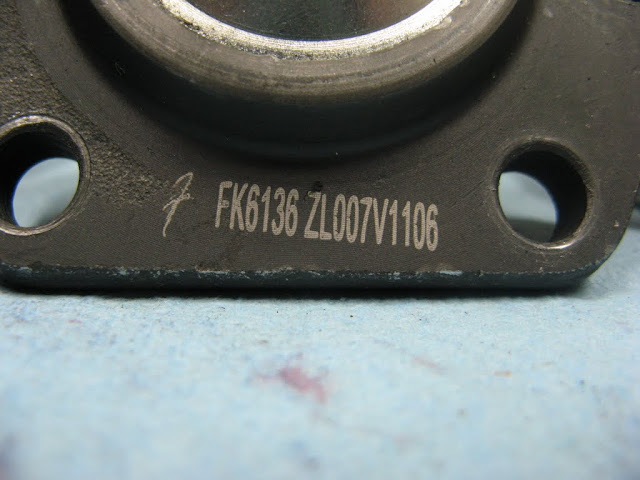 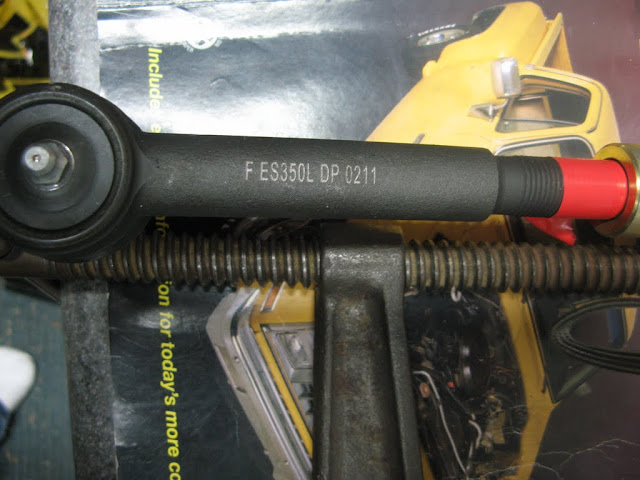 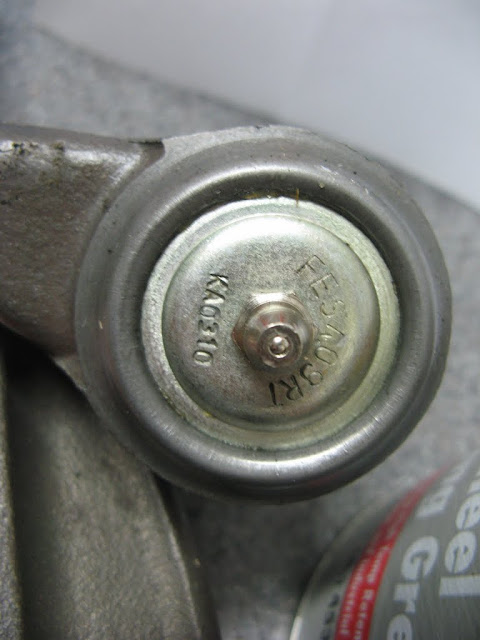  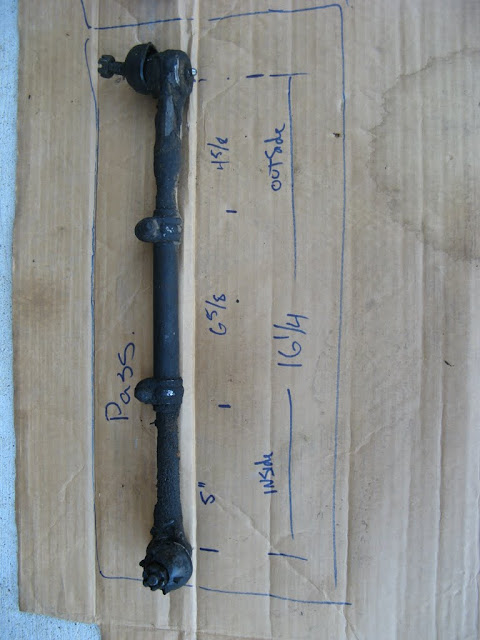  they shipped us two different adjusting rods by mistake, WE called them and they express shipped us the correct one. POL Service is great so far!!  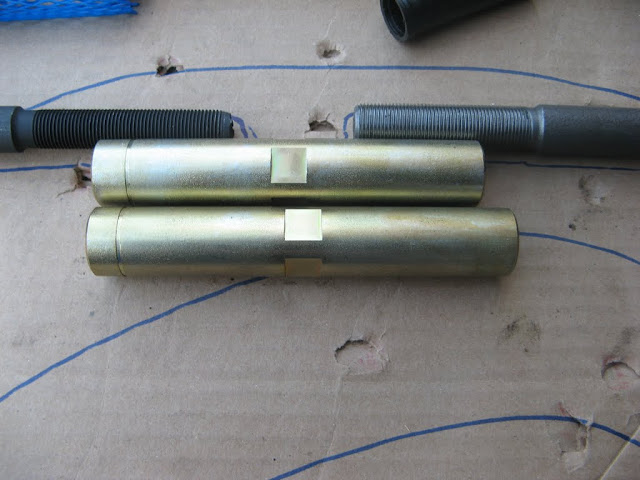  -=Scott=- |
|
|
|
|
03-18-2012, 01:47 PM
|
#36 |
|
Registered User
Join Date: Dec 2007
Location: Southington CT
Posts: 548
|
Re: 68 Build Thread**Better Late Than Never**
DEC 31st 2011
REAR DOP TIME Becasue we had to buy new front springs, we decided to buy a whole new rear dop kit as well. The drop blocks work great, but with 15" wheels they are just to risky to run. So we removed the drop block and install a new 5" rear drop new shock relocation kit & adjustable track bar. 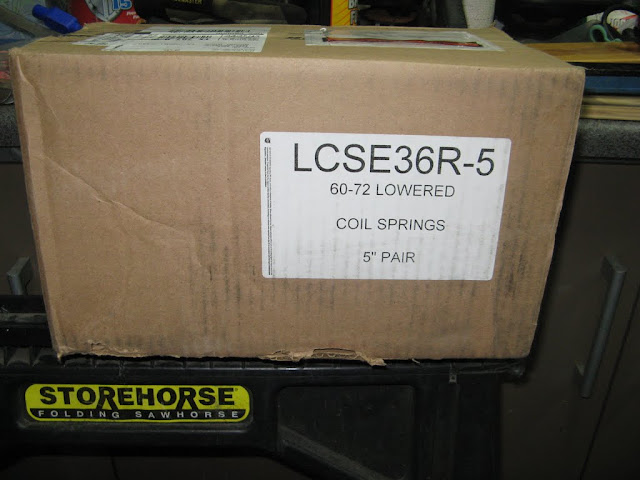 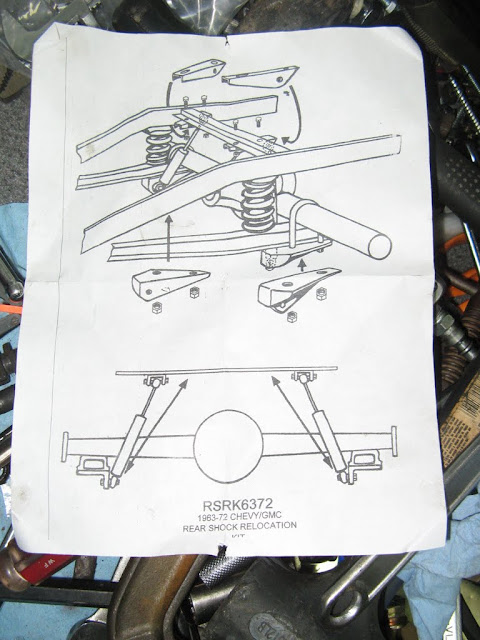    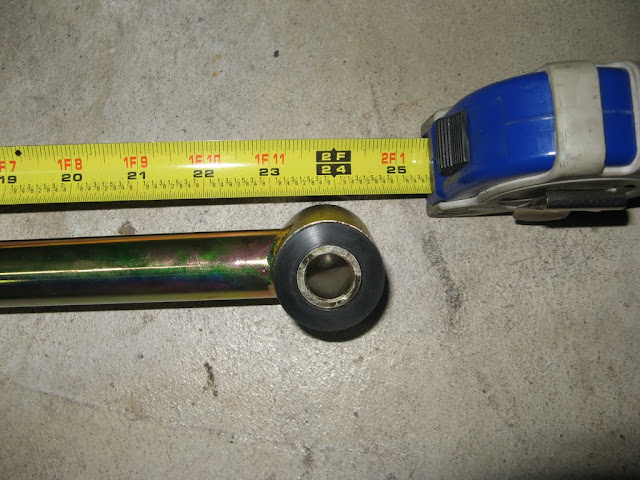  LEFT - NEW "STOCK LENGTH U-BOLT" RIGHT - CUSTOM 2" DROP BLOCK U-BOLT"     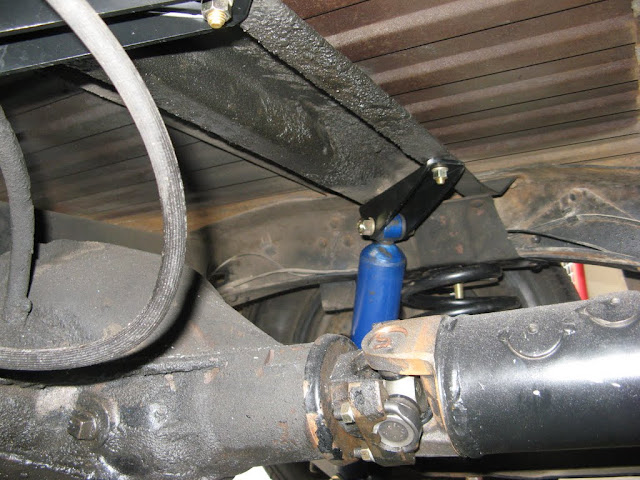  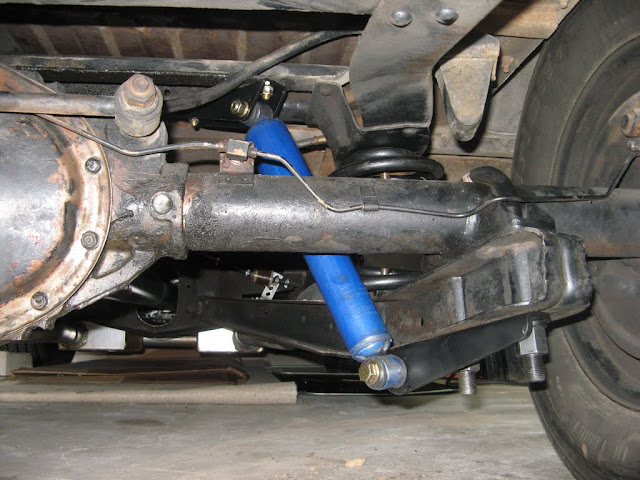    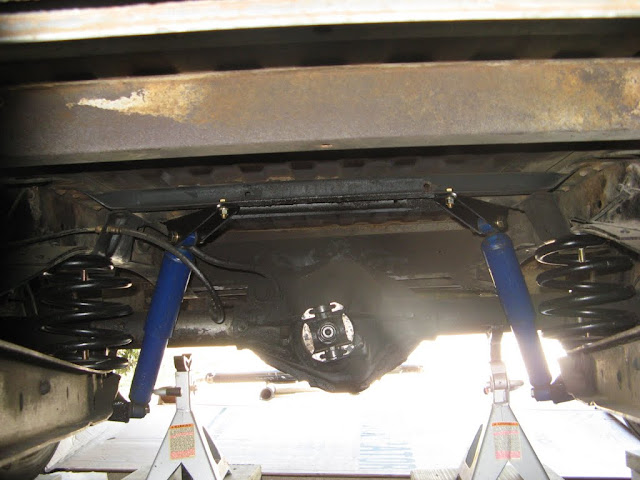 WHEEL WELL CLEARANCE AFTER 5" REAR DROP = 1-1/4" WITH "NARROW" REAR END & (275-60-15 TIRES)   HERE IS THE AFTERMATH OF THE PROJECT, A BUNCH OF LONELY PARTS, 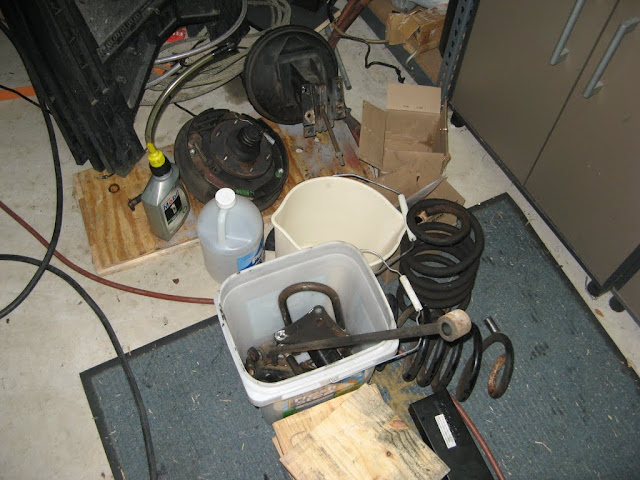 -=SCOTT=- |
|
|
|
|
03-18-2012, 01:50 PM
|
#37 |
|
Registered User
Join Date: Dec 2007
Location: Southington CT
Posts: 548
|
Re: 68 Build Thread**Better Late Than Never**
DEC 31st 2011
FRONT SPRING REPLACEMENT Here is an image for reference between the stock front cut coil spring & a 1" aftermarket drop spring  -=SCOTT=- |
|
|
|
|
03-18-2012, 02:00 PM
|
#38 |
|
Registered User
 Join Date: Mar 2010
Location: A t w a t e r, Ca
Posts: 1,201
|
Re: 68 Build Thread**Better Late Than Never**
Awesome project! Looks like family fun!
|
|
|
|
|
03-18-2012, 02:03 PM
|
#39 |
|
Registered User
Join Date: Dec 2007
Location: Southington CT
Posts: 548
|
Re: 68 Build Thread**Better Late Than Never**
MORE FRONT REFERENCE MATERIAL
I Forgot to post these a few post back, but here they are.  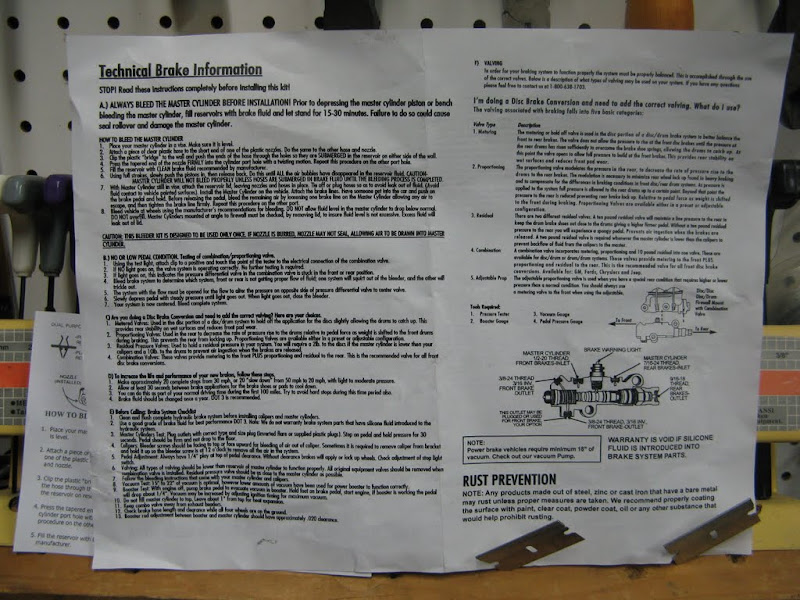 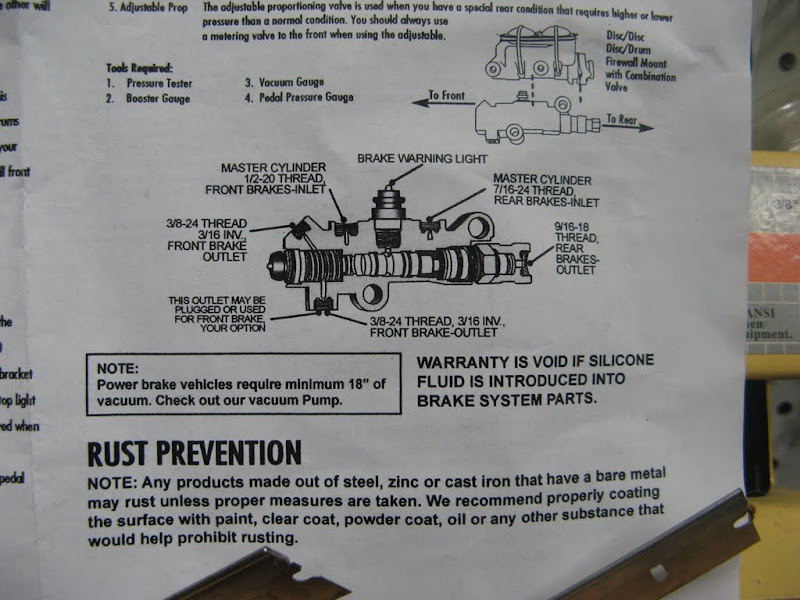  -=SCOTT=- |
|
|
|
|
03-18-2012, 02:05 PM
|
#40 |
|
Registered User
Join Date: Dec 2007
Location: Southington CT
Posts: 548
|
Re: 68 Build Thread**Better Late Than Never**
OK WE WE ARE TO THE POINT IN THIS THREAD THAT WE COME TO THE TRANSMISSION SWAP.
This is happening right now & it is a pain in the BUTT! |
|
|
|
|
03-18-2012, 02:11 PM
|
#41 |
|
Registered User
Join Date: Dec 2007
Location: Southington CT
Posts: 548
|
Re: 68 Build Thread**Better Late Than Never**
MAR 4th 2012
TRUCK STAND BUILD So we are getting ready to swap out the TH400 for a 2004r. to do this we need enough ground clearance to slide the transmission out from underneath the truck. So we are building some blocks to sit the truck on. Nothing fancy, just something safe and effective.   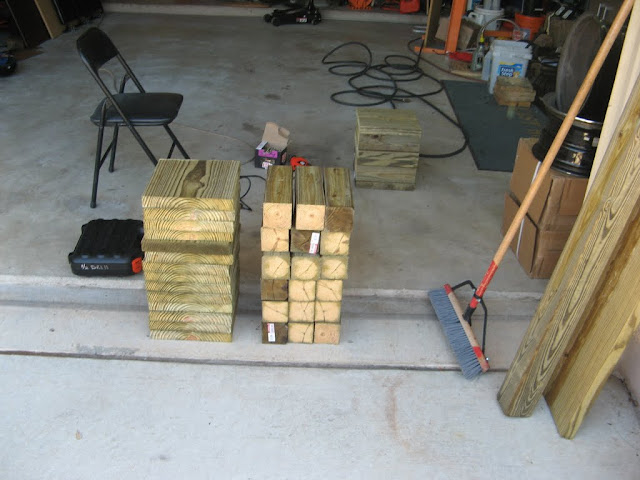 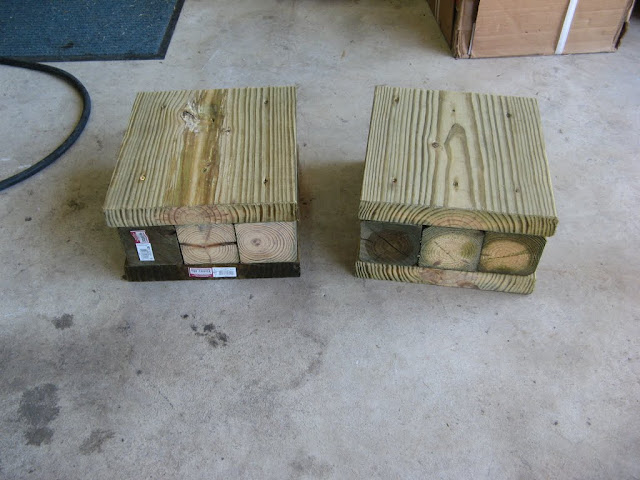  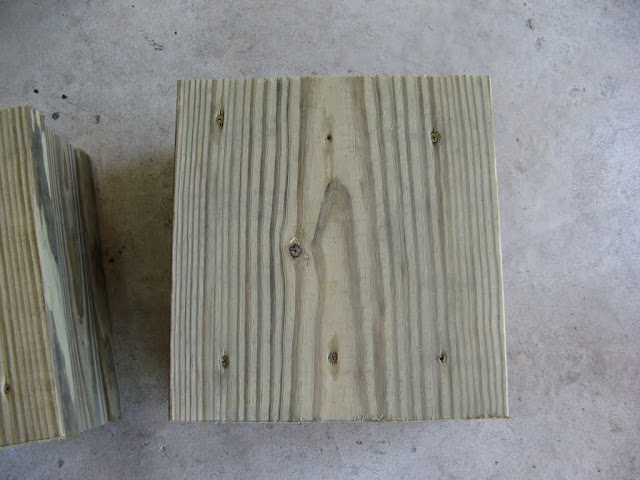 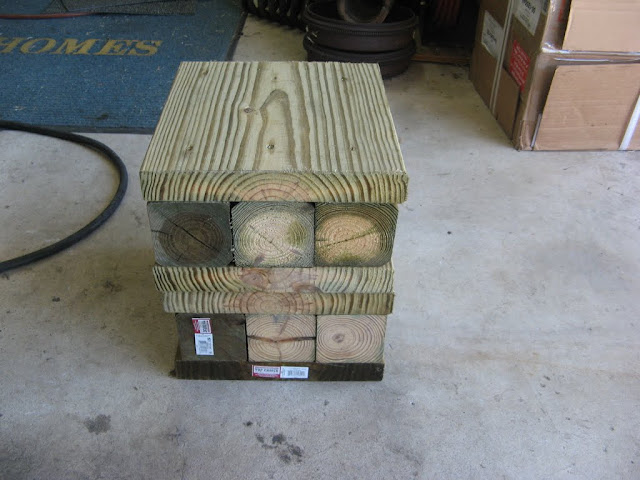 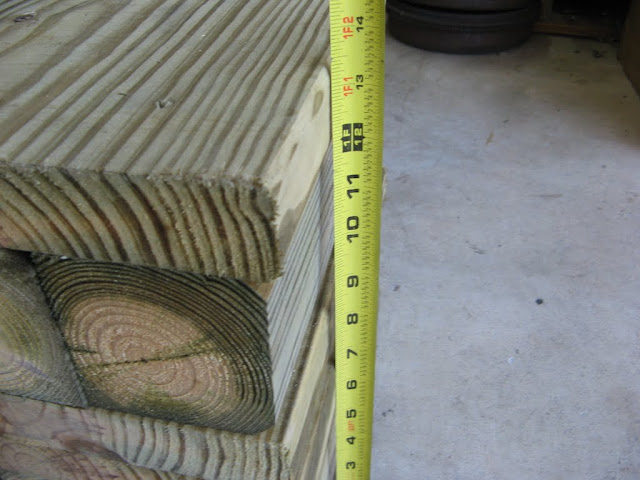  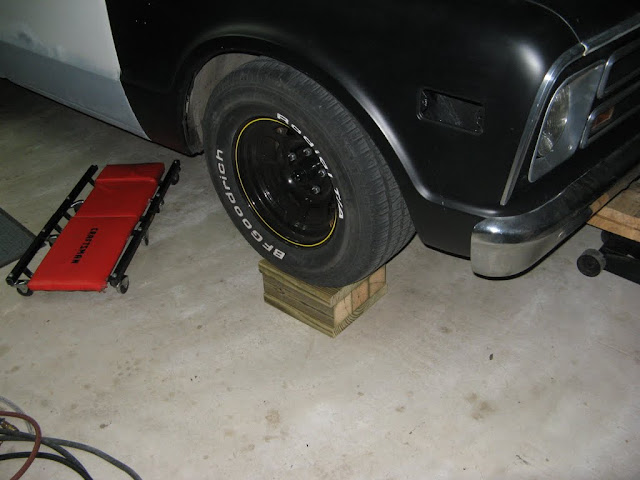  Now the fun begins........... MY neck is hurting just thinking about it!!! -=SCOTT=- |
|
|
|
|
03-18-2012, 02:49 PM
|
#42 |
|
Registered User
Join Date: Dec 2007
Location: Southington CT
Posts: 548
|
Re: 68 Build Thread**Better Late Than Never**
MAR 5th 2012
TRANSMISSION REMOVAL OK, the day has come to remove the TH400.. I needed to get some info before we start. I wanted to get the drive-line angle info, so when I get the new transmission in I can make sure nothing has changed. When making these measurements, you must have the truck sitting on its wheels at ride height. FRAME ANGLE - 0 deg... (PINCH WELD OF TRUCK IS THE SAME) 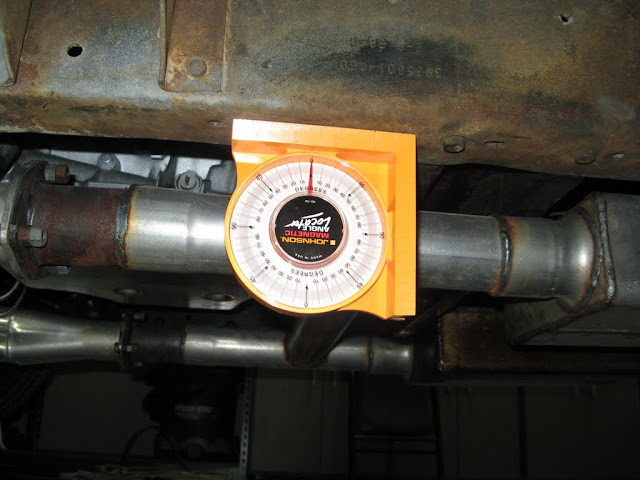 TRANSMISSION PAN ANGLE = 0 deg  DRIVE SHAFT ANGLE = +3 deg 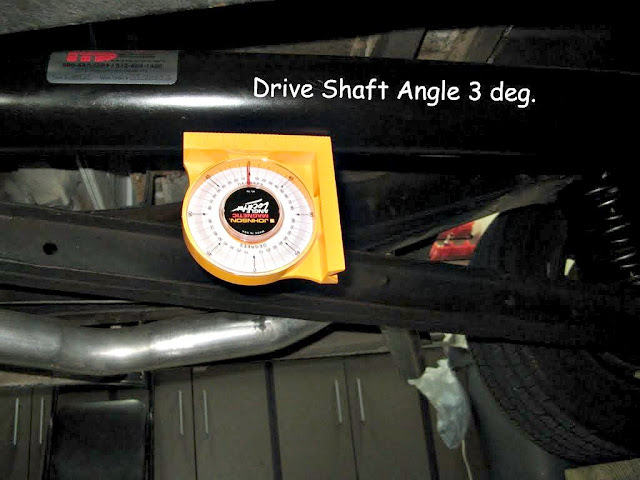 REAREND ANGLE = +8.5 deg  DRIVE SHAFT SLIP YOKE = 1.5" OUT (MORE ON THIS IN A MINUTE)  FIRST ORDER OF BUSINESS, GETTING THE EXHAUST OUT, REAR HANGERS ARE WELDED ON..... TIME TO GET THE GRINDER! 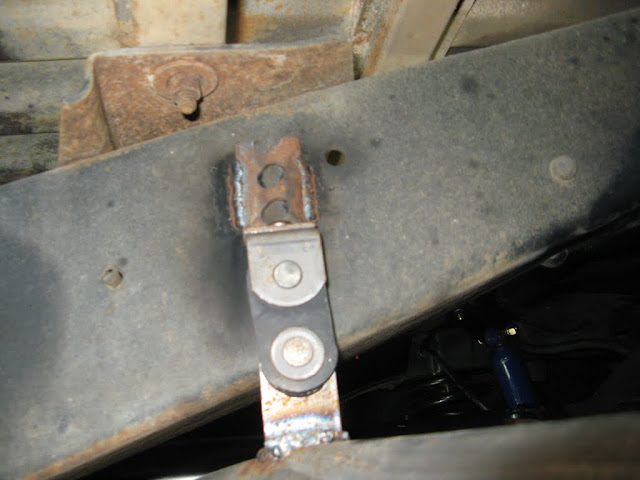 I MADE SURE TO DRILL MOUNTING HOLES IN FRAME BEFORE I CUT THEM OFF  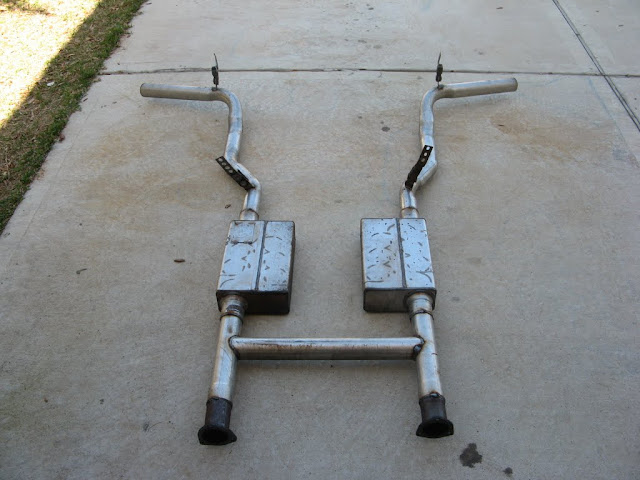 TIME TO DRAIN THE TRANSMISSION, I'M SO GLAD THE NEW PAN HAS A DRAIN PLUG!! IT WAS RAINING DOWN FLUID UNDER THE TRUCK.   HMMM... WHAT DO I SEE.... CLUCH/BAND DUST.... NO WONDER 4TH GEAR WAS SLIPPING SO BAD. I THINK I KILLED IT DUE TO LOW FLUID, TO MANY LEAKS!!  OK PUT THE PAN BACK ON, AND ITS TIME THE BOY STARTS WORKING. GOT IT SECURE AND LOOSENING THE BELL-HOUSING BOLTS.   CROSS MEMBER TIME. WE TOOK THE BOLTS OUT, SLID IT BACKWARDS ENOUGH TO CLEAR THE TAIL SHAFT. HAD TO USE A SLEDGE HAMMER TO MAKE IT MOVE!  SO WHAT YOU DIDN'T SEE IS.... THE TRANSMISSION FALLING OFF THE JACK HALF WAY DOWN!!! BUT IT WAS A QUICK WAY TO GET IT OFF THE JACK, NO DAMAGE....  WELL IT SCARED THE POOP OUT OF MY SON, SO MAYBE A LITTLE CLOTHING DAMAGE   AFTER A FEW YEARS OF ABUSE, THE PAINT HAS HELD UP GREAT. HERE IS WHAT I USED 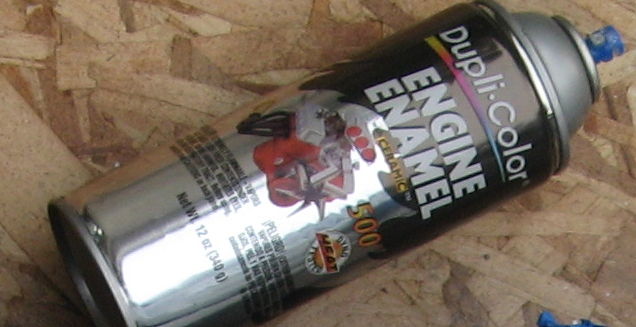   DUAL BOLT PATTERN FLEX PLATE. THANK GOODNESS, I DON'T HAVE TO BUY A NEW ONE. INSPECTION RESULTS IN NO CRACKS AND READY FOR PRIME-TIME!  NEXT UP....THE NEW TRANSMISSION -=SCOTT=- Last edited by AustinScott; 03-18-2012 at 02:55 PM. |
|
|
|
|
03-18-2012, 05:25 PM
|
#43 |
|
Registered User
Join Date: Dec 2007
Location: Southington CT
Posts: 548
|
Re: 68 Build Thread**Better Late Than Never**
MAR 16th 2012
NEW TRANSMISSION ARRIVES So I "borrowed" my wife's kid hauler and went to go pick up our transmission. I had it delivered to work to save a few bucks!. This is what was purchased 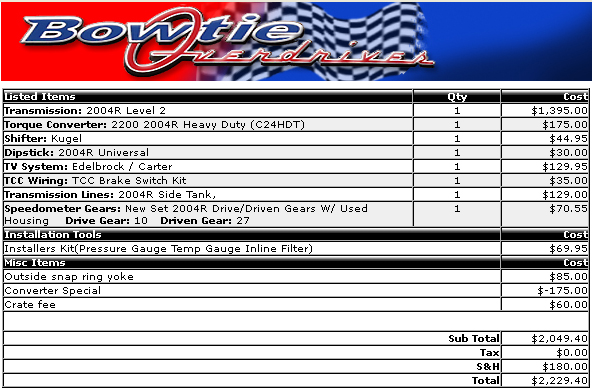 SHIPMENT ARRIVAL, THEY COULDN'T WAIT TO SEE WHAT WAS INSIDE.  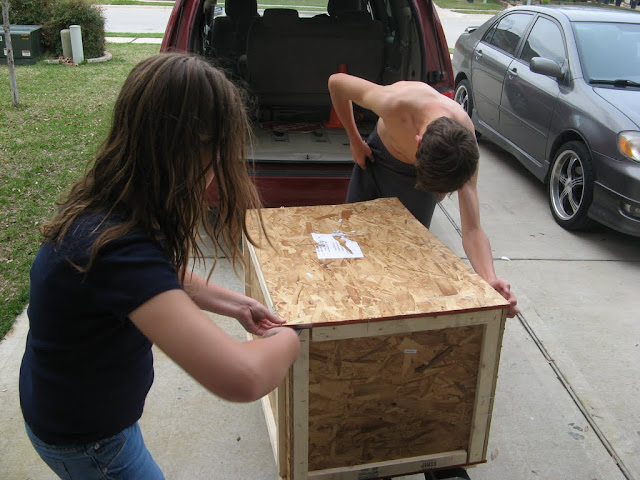   BOWIE OVERDRIVES STAGE-2 2004R  EVERYTHING ELSE  2200 STALL CONVERTER  LOOKS LIKE THEY OUTSOURCE THE CONVERTERS  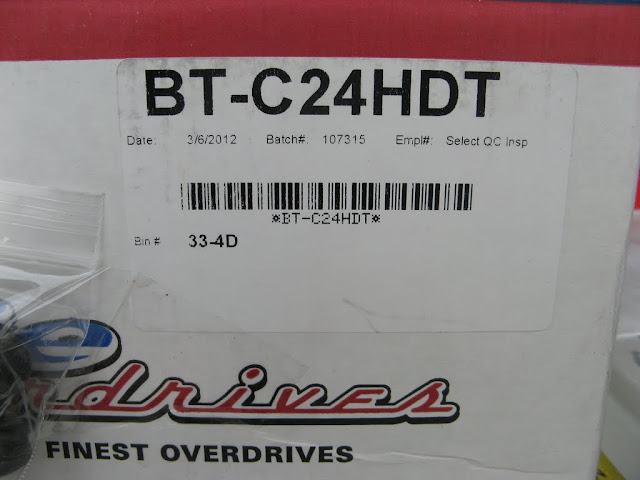  DIP STICK  PRE-BENT STAINLESS COOLING LINE W/ BRAIDED RADIATOR LINES  INLINE FILTER FOR COOLING RETURN LINE. THIS IS TO BE INSTALLED THE FIRST 100 MILE TO REMOVE ANY DEBEE THAT MAY HAVE BEEN IN COOLER. BETTER SAFE THAT SORRY. (CHEAP INSURANCE)  300 PSI PRESSURE GAUGE & 7' OF HOSE. THIS WILL BE USED DURING START UP AND TESTING, IT WILL BE REMOVED AFTER ALL IS GOOD.  TRANS TEMP GAUGE AND SENDING UNIT. THEY OFFER WHITE & BLACK FACED GAUGES  TV MADE EZ KIT FOR EDELBROCK CARB   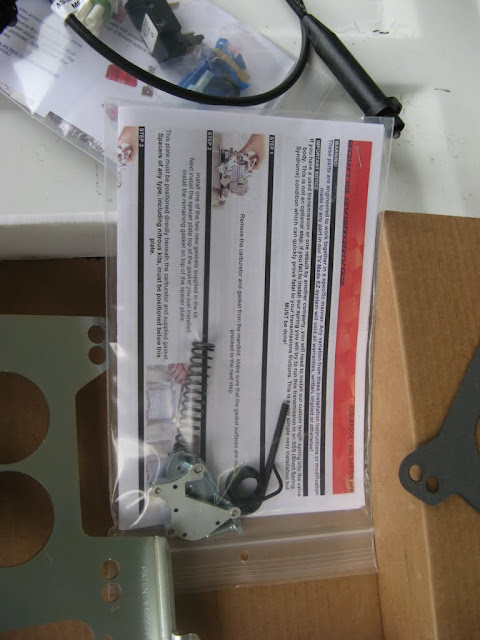 BRAKE PEDAL LOCKUP RELEASE SWITCH. AKA: GM CRUISE CONTROL BREAK PEDAL SWITCH  STAINLESS SHIFTER SHAFT KIT  2004R TRANSMISSION    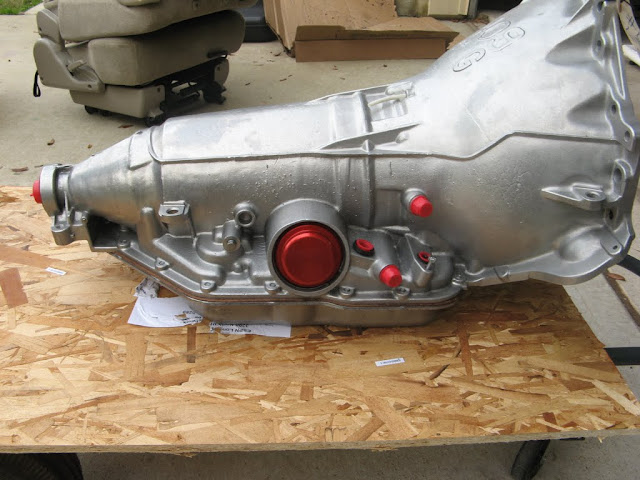 PRE-INSTALLED DRAIN PLUG. IT IS THREADED THE SAME AS THE SENDING UNIT SO ITS A DUAL PURPOSE HOLE  AFTER A QUICK CLEANING & A LIGHT COAT OF PAINT  SITTING NEXT TO THE 400. THEY DIDNT EVEN LOOK AT EACH OTHER  Next up.....the install..... Boy-o-boy~~ -=Scott=- |
|
|
|
|
03-18-2012, 06:29 PM
|
#44 |
|
Registered User
Join Date: Dec 2007
Location: Southington CT
Posts: 548
|
Re: 68 Build Thread**Better Late Than Never**
MAR 17th 2012
TRANNY INSTALL DAY Today was the day. lets get this thing mounted. LIFTING TRANSMISSION OFF GROUND TO GET JACK UNDER IT. WE USED A CLEAVER METHOD WITH TWO RATCHETING STRAPS. WORKED LIKE A CHARM! 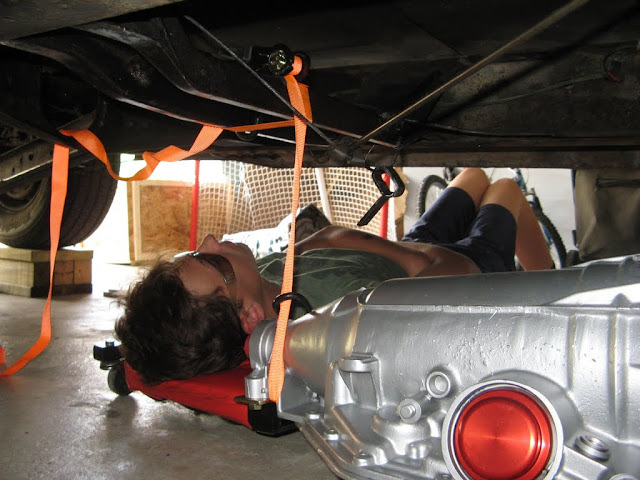     MY SON LOVES... BELL HOUSING BOLTS.... GETS HIM REAL DIRTY 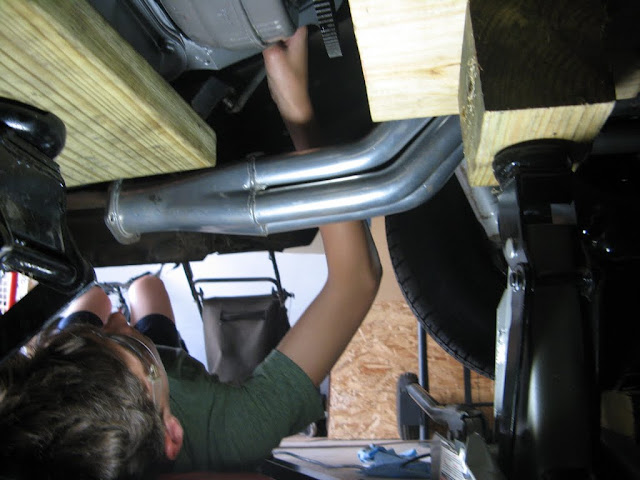 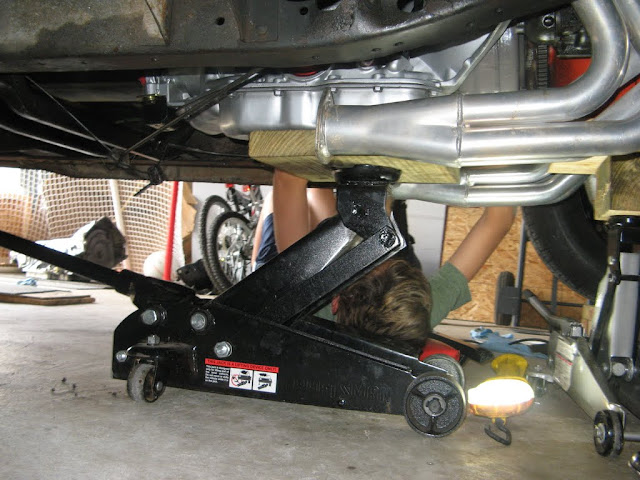 CROSS MEMBER SLID RIGHT BACK IN PLACE AND ALIGNED RIGHT UP TO NEW 200-4R NO MODIFICATIONS NEEDED.   THIS IS THE NEW TRANSMISSION MOUNT WE BOUGHT FROM AUTOZONE $24.99. THE MOUNT FOR THE TH400 IS ABOUT 3/4" TO WIDE ON THE TRANSMISSION SIDE.  HERE YOU CAN SEE THE PAINTED SURFACE VERSES THE NON PAINTED SURFACE IT WAS AMAZING HOW IT LOOKED RIGHT OUT OF THE CRATE. ALMOST DIDN'T PAINT IT... BUT WE KNEW BETTER  3/16" GAP BETWEEN FLEX PLATE AND TORQUE CONVERTER... PERFECT!  TIME FOR THE DIPSTICK. BEING UNIVERSAL IT HAD TO BE TRIMMED TO FIT. 1-1/4" OFF THE TOP PLEASE.. 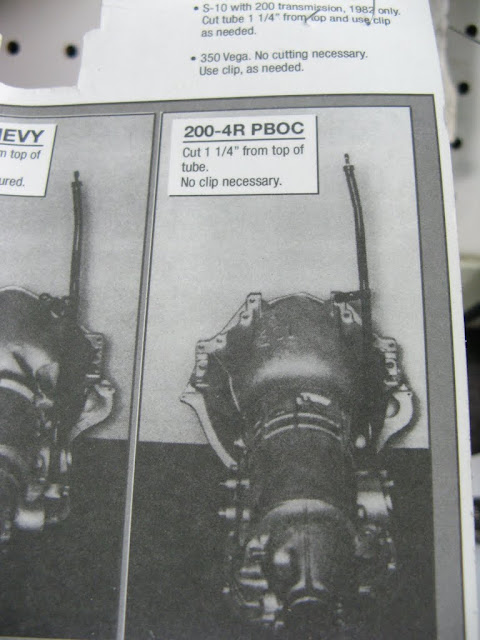  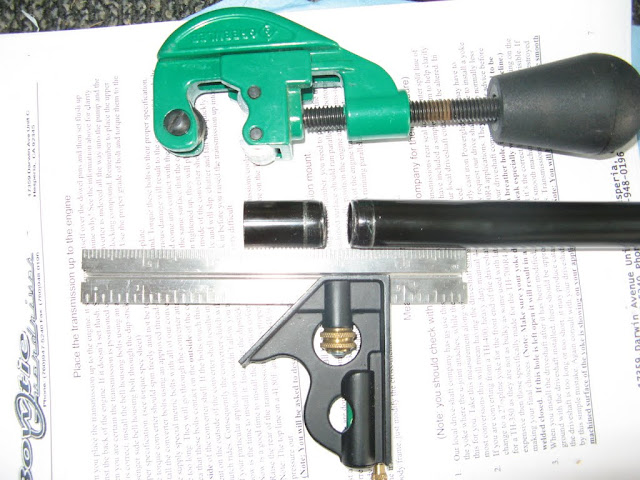 I LIKE HOW IT SITS IN THE BAY, NICE AND TUCKED AWAY  COOLING LINE TIME. THEY COME PRE-BENT AND LONG. SO YOU HAVE TO TRIM THEM TO FIT. I HAD NO PROBLEM TRIMMING THEM WITH THE TUBING CUTTER. THEY FIT PRETTY WELL.      MORE ON THE COOLING LINES IN A BIT, BUT NOW WE GO T MY SON AND HIS ADVENTURE WITH THE DRIVE SHAFT & SLIP YOKE.... BLACK FINISH NEW 200-4R YOKE, METAL FINISH OLD TH400 YOKE  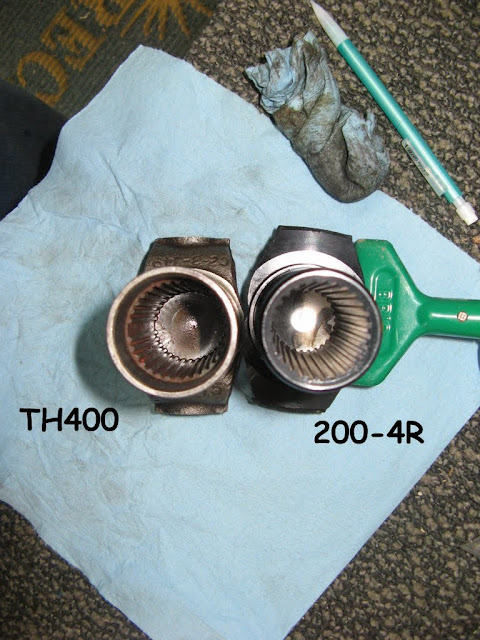   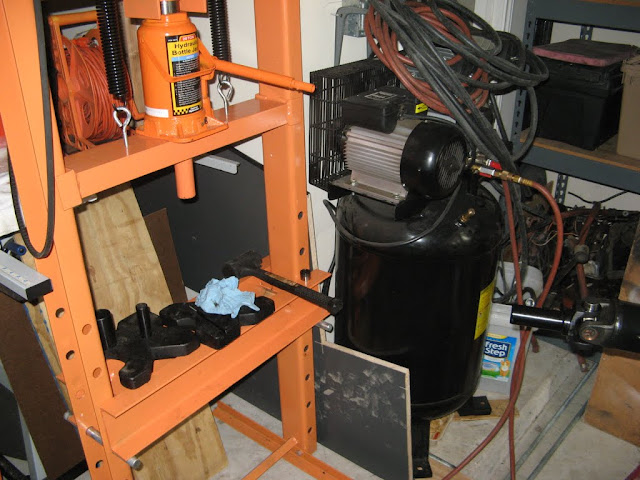  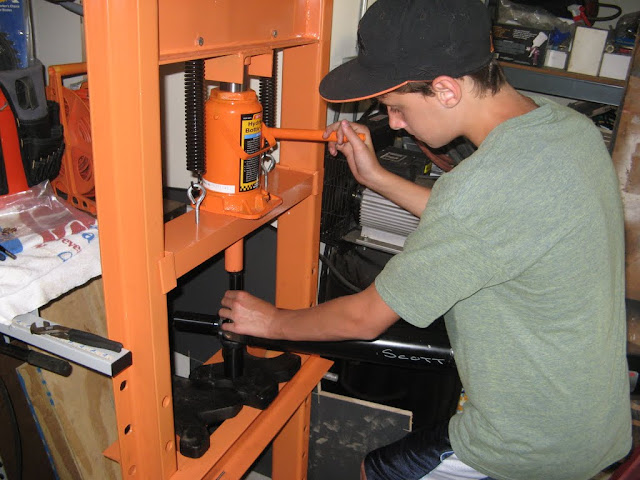     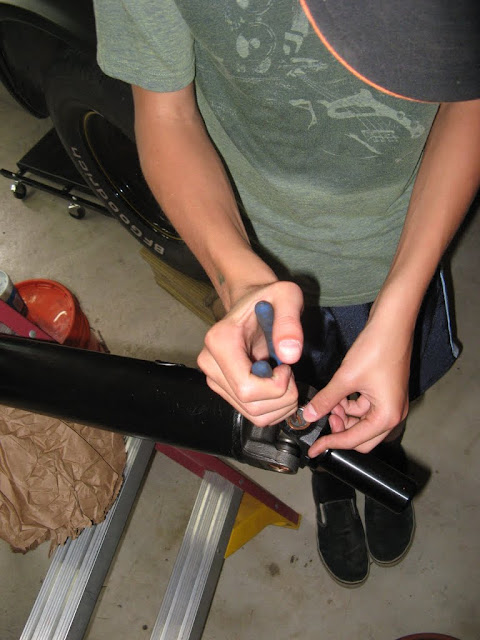  STAY TUNED MORE TO COME.... -=SCOTT=-
__________________
68-SWB, 327, hooker headers, spintec mufflers, disk brake 3.5/5 drop, buddy buckets, 200-4R, 2200 stall, 3.73 12bolt Eaton Posi, My 68-SWB Photo Build Thread All my Google Albums |
|
|
|
|
03-18-2012, 07:02 PM
|
#45 |
|
Too many projects
Join Date: Mar 2004
Location: Fargo, ND land of the flat hills
Posts: 1,147
|
Re: 68 Build Thread**Better Late Than Never**
Looks like a fun build, especially because family is involved and there is more focus on teaching and cruising than tearing down and redoing everything at once.
__________________
Andrew 84 GMC C1500 SWB 6.2 Diesel/700R4/3.42 "Grandpa's odd duck" |
|
|
|
|
03-19-2012, 12:13 AM
|
#46 | |
|
Registered User
Join Date: Dec 2007
Location: Southington CT
Posts: 548
|
Re: 68 Build Thread**Better Late Than Never**
Quote:
The truck is all about passing along the love for these trucks... Part of doing that is enjoying them. Driving them, riding in them.. smelling like gas wen you get out of them... While a frame off would result is a much better finished product. WE like our truck to much to take it all apart, and have it sitting in pieces for years. Knowing us we would change our minds more than once, and never get the truck back together.... So I follow something my dad taught me YEARS AGO... Fix as you go, only take it apart as much as you can get back together in a week end. That is... unless you have 2 trucks... then that theory goes out the window. -=Scott=-
__________________
68-SWB, 327, hooker headers, spintec mufflers, disk brake 3.5/5 drop, buddy buckets, 200-4R, 2200 stall, 3.73 12bolt Eaton Posi, My 68-SWB Photo Build Thread All my Google Albums |
|
|
|
|
|
06-21-2012, 12:44 AM
|
#47 |
|
Registered User
Join Date: Dec 2007
Location: Southington CT
Posts: 548
|
Re: 68 Build Thread**Better Late Than Never**
WELL THE DAY CAME TO CHANGE OUT THE REAR AXLES.
move over 6 Lug axles & wheels... here comes the 5lug stuff.              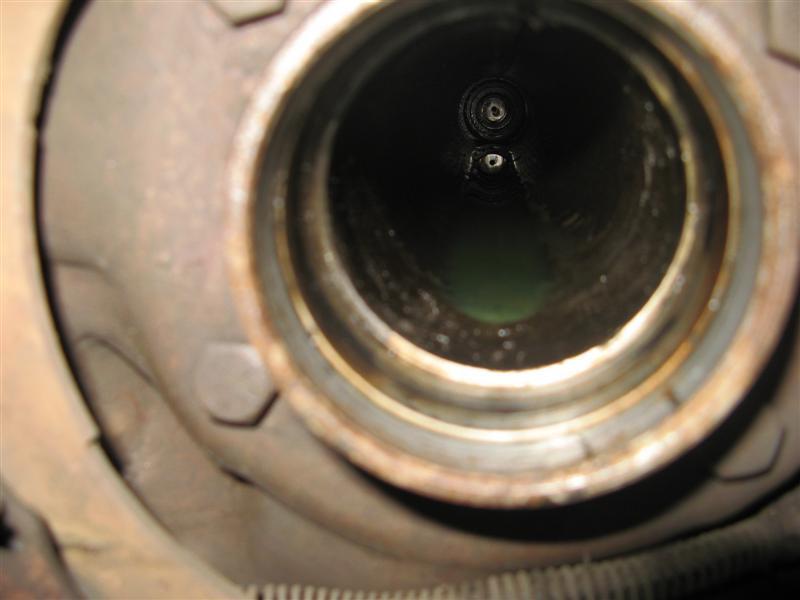      AFTER ALL THE HARD WORK HERE IS HOW SHE IS SITTING 
__________________
68-SWB, 327, hooker headers, spintec mufflers, disk brake 3.5/5 drop, buddy buckets, 200-4R, 2200 stall, 3.73 12bolt Eaton Posi, My 68-SWB Photo Build Thread All my Google Albums |
|
|
|
|
06-21-2012, 03:00 AM
|
#48 |
|
Registered User
Join Date: Aug 2008
Location: mohave valley,arizona
Posts: 1,088
|
Re: 68 Build Thread**Better Late Than Never**
the look on the kids face after the tranny dropped is priceless.love the thread with lots of pictures
__________________
1969 Shortbed in progress 1982 short step, few suspension and motor upgrades.getting a 468 1978 Shortbed fleet side bonanza fully loaded 1978 k20 Silverado loaded.currently engine-less 1989 k10 suburban 9" lift 65 nova And more |
|
|
|
|
07-04-2012, 08:22 AM
|
#49 |
|
Senior Member
Join Date: Nov 2005
Location: Round Rock, TX
Posts: 1,100
|
Re: 68 Build Thread**Better Late Than Never**
Scott,
Lets get together after the 4th about that cab. I do have a roof section from a 68 that may fix your issues if you are interested in that as an option. I've even got a sliding rear window thats still in it too. Loved the build thread! Looks Great! Thomas
__________________
Soon to be selling all but one, or two... Depends on what the Boss has to say....... 67 GMC Shortbed 454 Project more junk and most of it is for sale |
|
|
|
|
08-21-2012, 08:17 PM
|
#50 |
|
Registered User
Join Date: Dec 2007
Location: Southington CT
Posts: 548
|
Re: 68 Build Thread**Better Late Than Never**
NEXT UP.......
1968 12-bolt rear end rebuild PARTS... 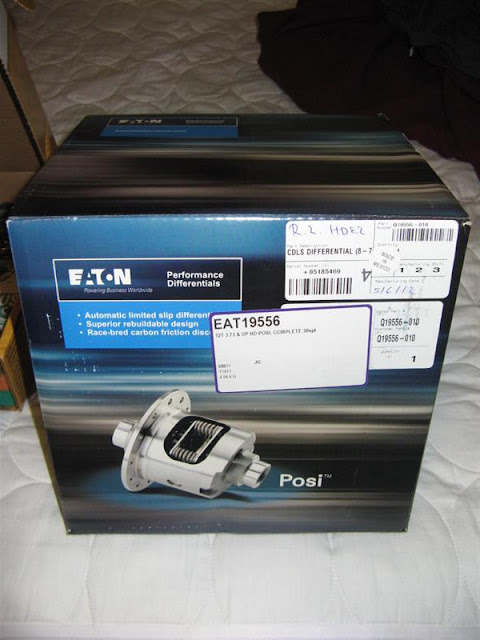      Teardown Time...      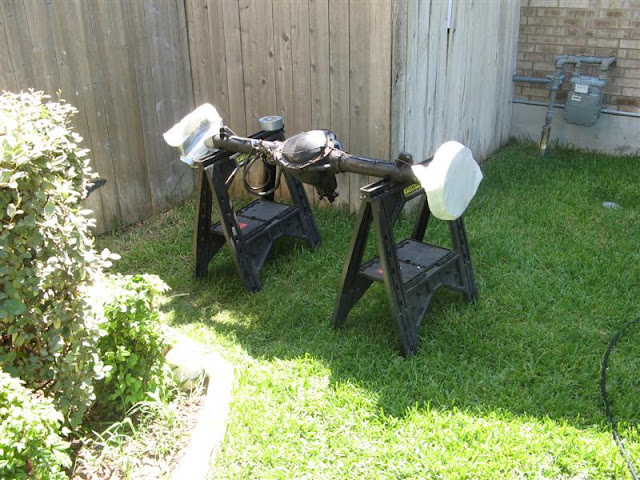   Next up will be the internal parts (Old and New) STAY TUNED...............
__________________
68-SWB, 327, hooker headers, spintec mufflers, disk brake 3.5/5 drop, buddy buckets, 200-4R, 2200 stall, 3.73 12bolt Eaton Posi, My 68-SWB Photo Build Thread All my Google Albums |
|
|
|
|
| Bookmarks |
|
|


 Linear Mode

