
|
 11-26-2012, 01:29 PM
|
#126 | |
|
Senior Member
Join Date: Aug 2002
Location: Valley Center KS
Posts: 3,525
|
Re: Project Family Chummins
Quote:
yeah, I got the snap on (bluepoint) dial indicator, delivery valve socket, and gear puller. |
|

|

|
|
11-26-2012, 03:02 PM
|
#127 |
|
6>8 Plugless........
 Join Date: Sep 2007
Location: Prairie City, Ia
Posts: 17,138
|
Re: Project Family Chummins
Cool deal. If you have any questions on the process feel free to ask. I also recommend removing the IP, sanding the pump shaft and gear lightly with 80 grit horizontally to help keep the 2 from slipping. Towing them back and redoing the process sucks.
 You can also do this when the front cover is off to do the KDP and that will save you from removing the IP. You can also do this when the front cover is off to do the KDP and that will save you from removing the IP.
__________________
Ryan 1972 Chevy Longhorn K30 Cheyenne Super, 359 Inline 6 cylinder, Auto Trans, Tilt, Diesel Tach/Vach, Buckets, Rare Rear 4-link and air ride option Build Thread 1972 GMC Sierra Grande Longhorn 4x4 1972 Chevy Cheyenne Super K20 Long Step side tilt, tach, tow hooks, AC, 350 4 speed 1972 C10 Suburban Custom Deluxe 1969 Chevy milk truck 1971 Camaro RS 5.3 BTR STG3 Cam Super T10 1940 Ford 354 Hemi 46RH Ford 9" on air ride huge project Tired of spark plugs? Check this out. |
|
|
|
|
11-26-2012, 06:50 PM
|
#128 | |
|
Senior Member
Join Date: Aug 2002
Location: Valley Center KS
Posts: 3,525
|
Re: Project Family Chummins
Quote:
|
|
|
|
|
|
11-26-2012, 09:24 PM
|
#129 |
|
Senior Member
Join Date: Aug 2002
Location: Valley Center KS
Posts: 3,525
|
Re: Project Family Chummins
Last nights progress: Pulled the axle back out and destructively removed the one lower control arm that was a huge PITA to get out. Also learned that harbor freight sazall blades SUCK.
Today's progress: Removed the engine. In order to do this I also had to remove some revits from a crossmember that the transfer case drain plug was catching on. Just another thing to do. Then I removed part of the engine crossmember to axle "interferance". Hopefully this will be enough. 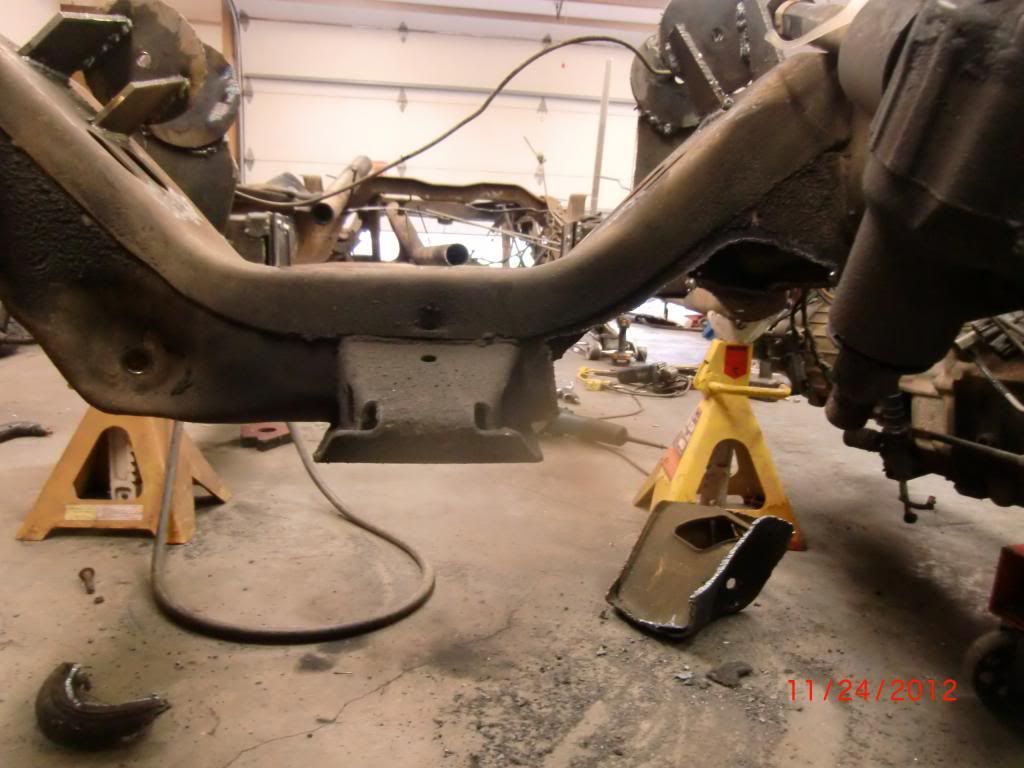 Then I started on the front spring area. The 2wd spring buckets are in the way of where the "new" dodge coil springs will go. Here is what the driver side looks like: 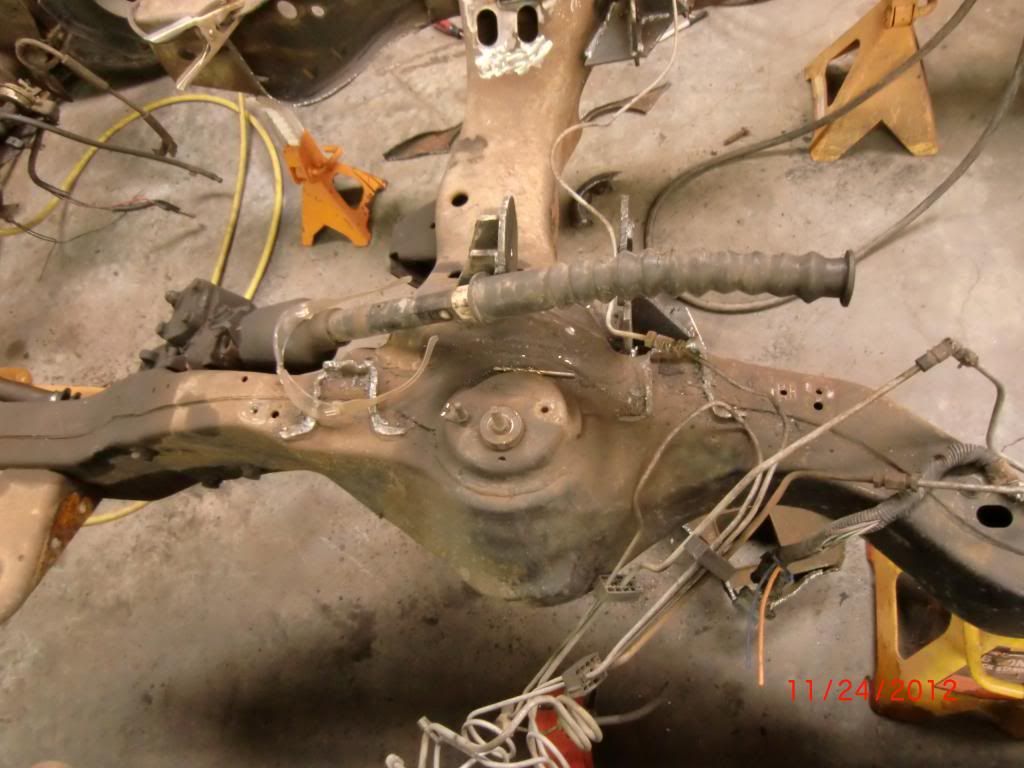 And here is the pass. side opened up just a little:   And all put back together: 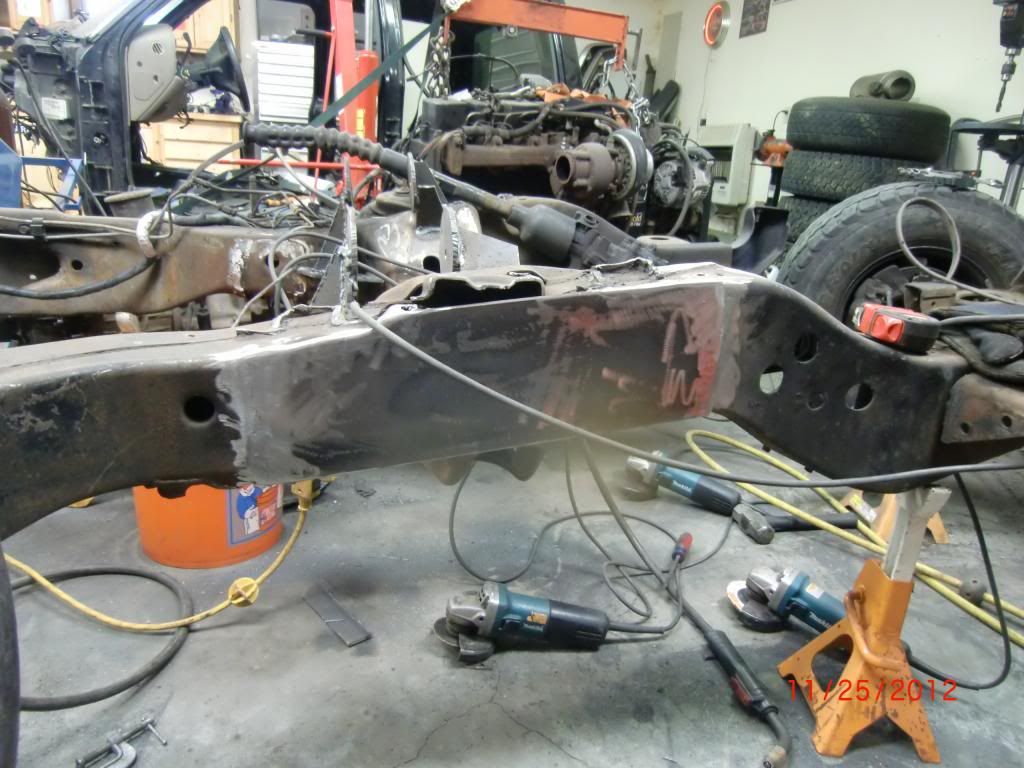 Then I fabricated the brackets that I will use to mount the lower control arms to the trans crossmember: 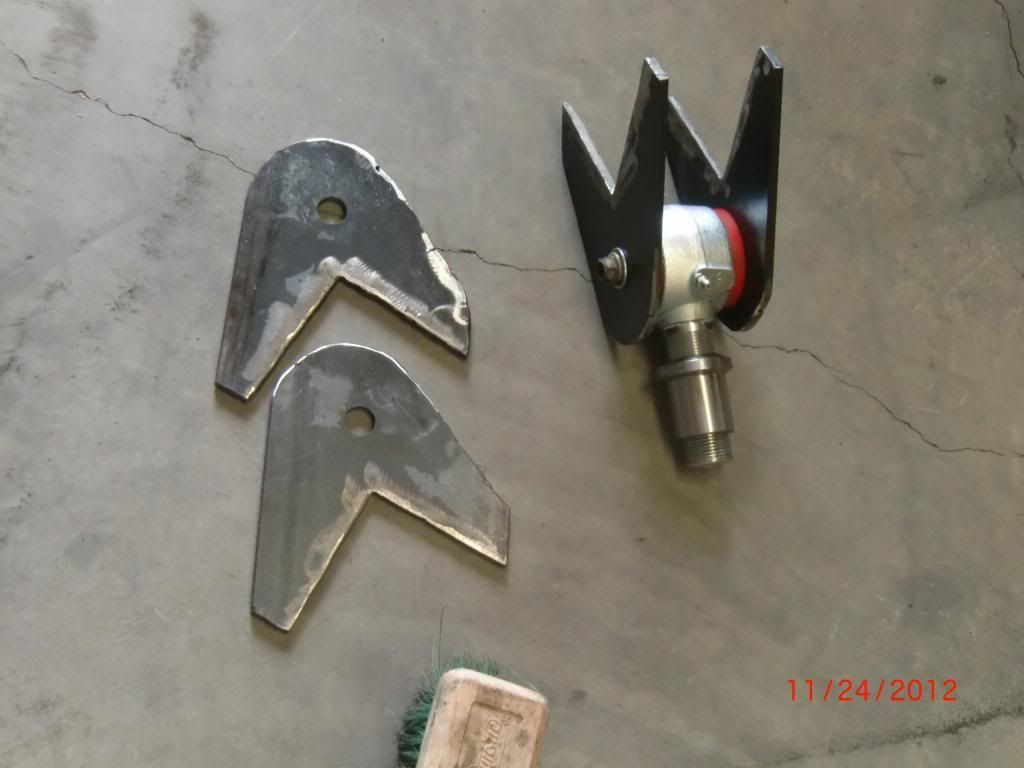 Then I started boxing in where the A/C compressor notch is: 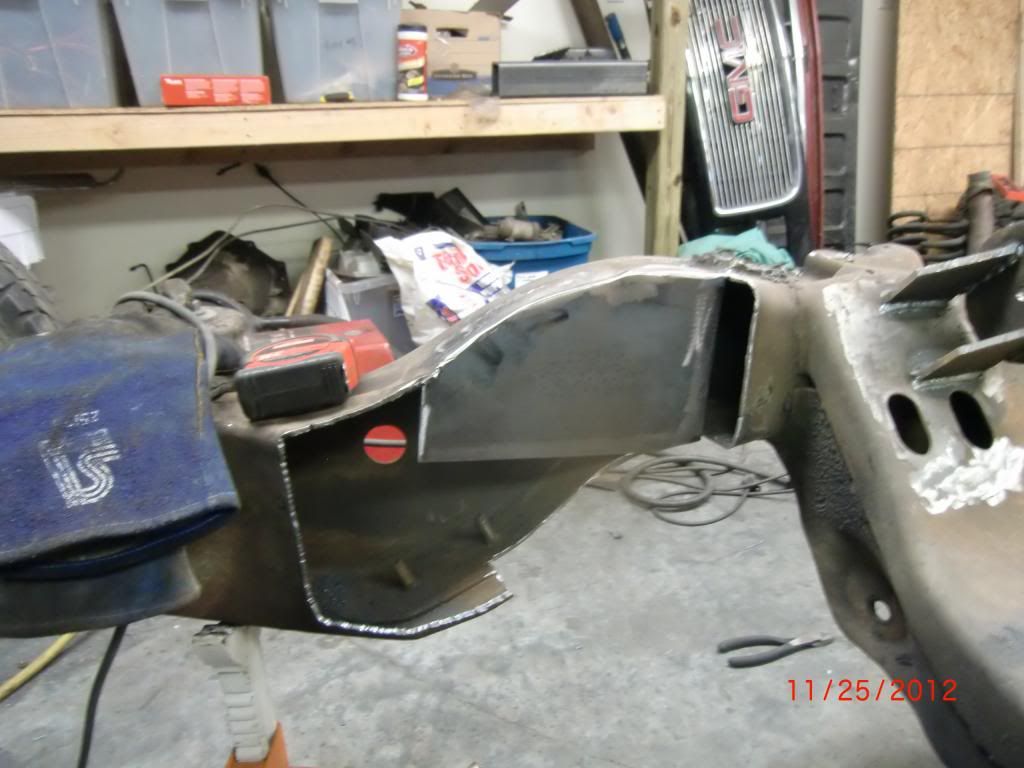 That's about it for today. I'll get a little more done tonight. Maybe cut open the drivers side spring bucket area and/or finish boxing in the A/C compressor area. |
|
|
|
|
11-26-2012, 09:32 PM
|
#130 |
|
Senior Member
Join Date: Apr 2004
Location: sw colorado
Posts: 2,720
|
Re: Project Family Chummins
I love seeing butchered metal!
Good work and that control arm area looks really nice in the after pic! Ryan |
|
|
|
|
11-27-2012, 11:16 AM
|
#131 |
|
Junk Yartist
Join Date: Jul 2009
Location: Greeley, CO
Posts: 2,203
|
Re: Project Family Chummins
Man! You just made my SAS look EASY in 7 pictures!!!!
__________________
-Jeremy YOU ONLY FAIL IF YOU STOP TRYING 70 Crew Cab Build Link 70 GMC Suburban 4X4 build thread 95 Yukon Daily Driver Rebuilding an NP205 |
|
|
|
|
11-28-2012, 12:50 AM
|
#132 |
|
Senior Member
Join Date: Aug 2002
Location: Valley Center KS
Posts: 3,525
|
Re: Project Family Chummins
Last night I was able to finish up boxing in the A/C compressor notch, but forgot to get a picture.
Then today I cut out the drivers side spring cup and then boxed it back in: 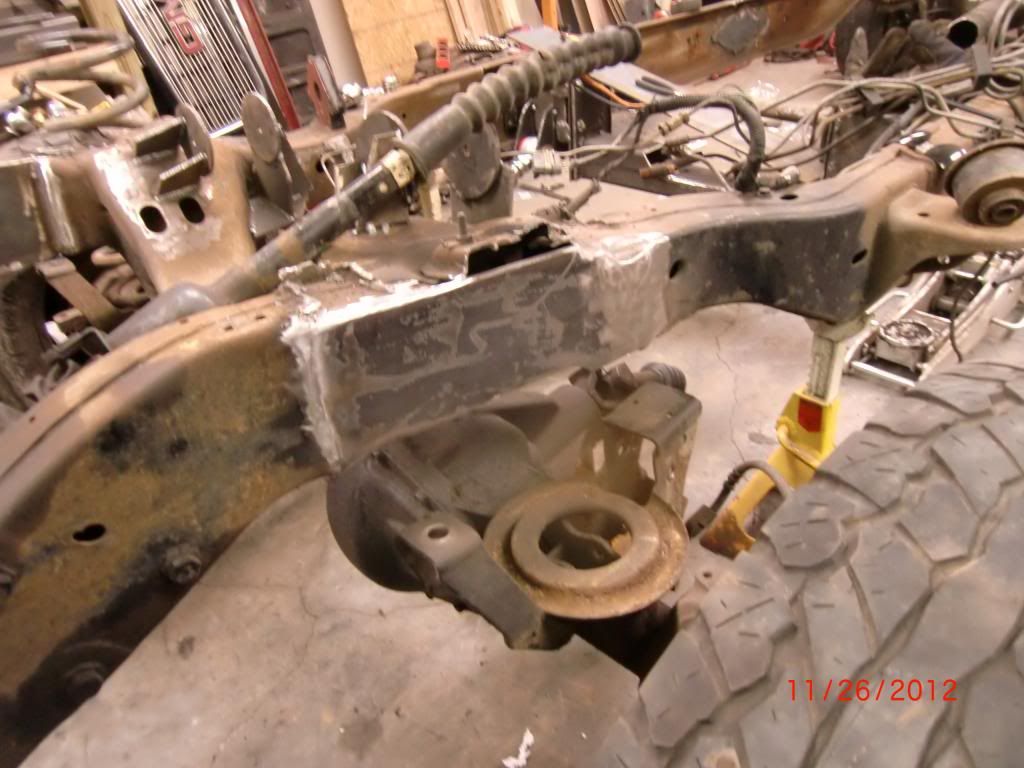 Then I moved the axle into place.  It looks like I should have enough clearance for the axle. The truck will probably sit a little higher at ride height. 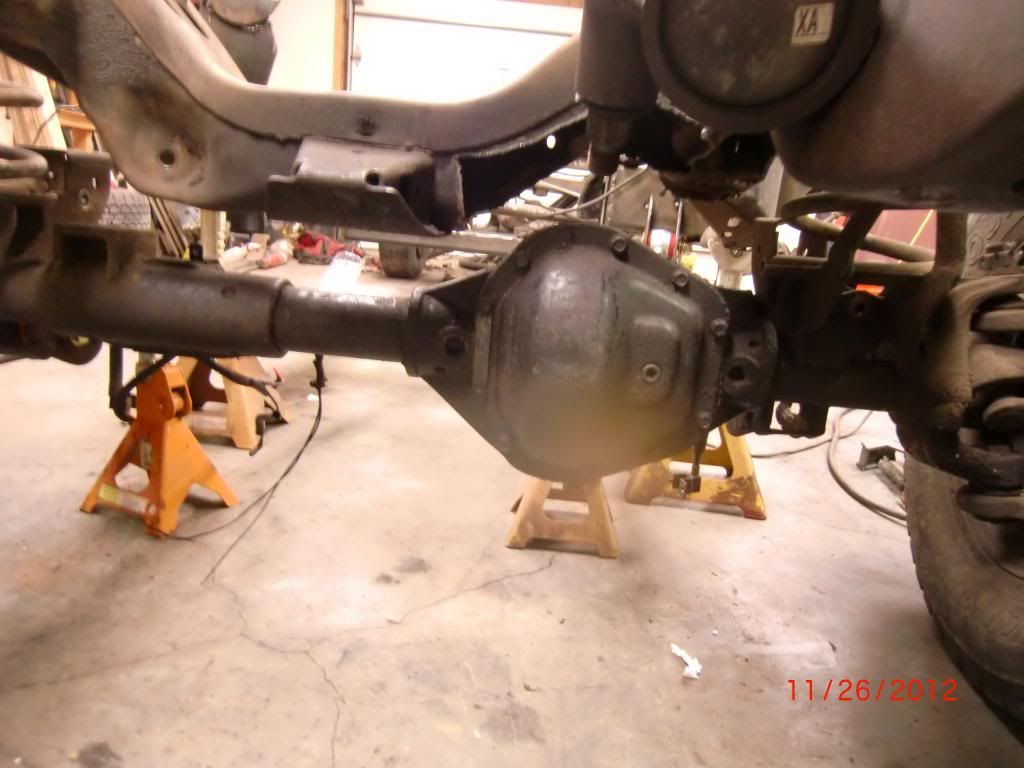 Got the panhard bar bracket tacked together: 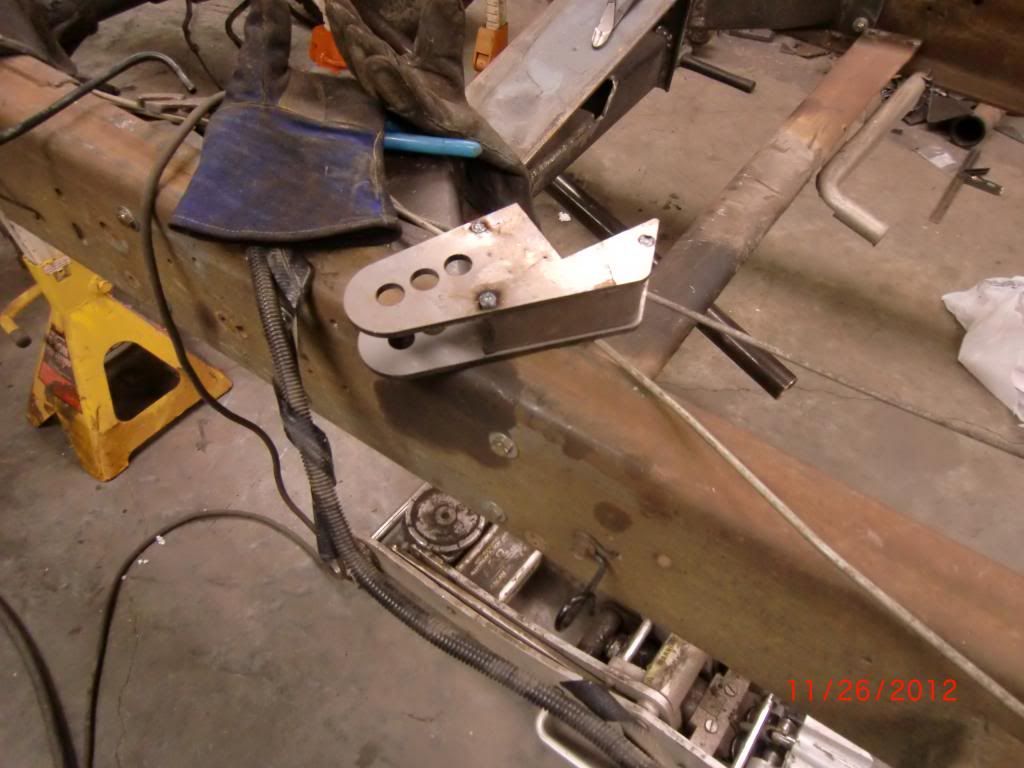 Started notching the lower control arm, but the hole saw got dull, so I'll get a new one tomorrow. 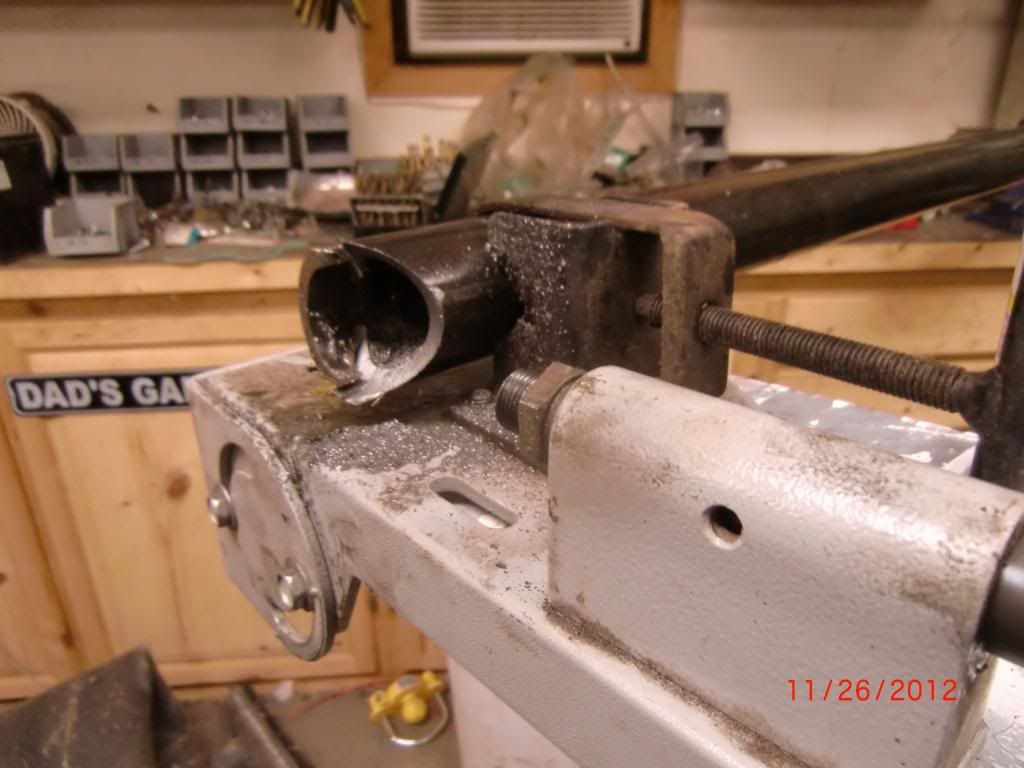 Drilled out the pitman arm to fit the 3/4" bolt through it. 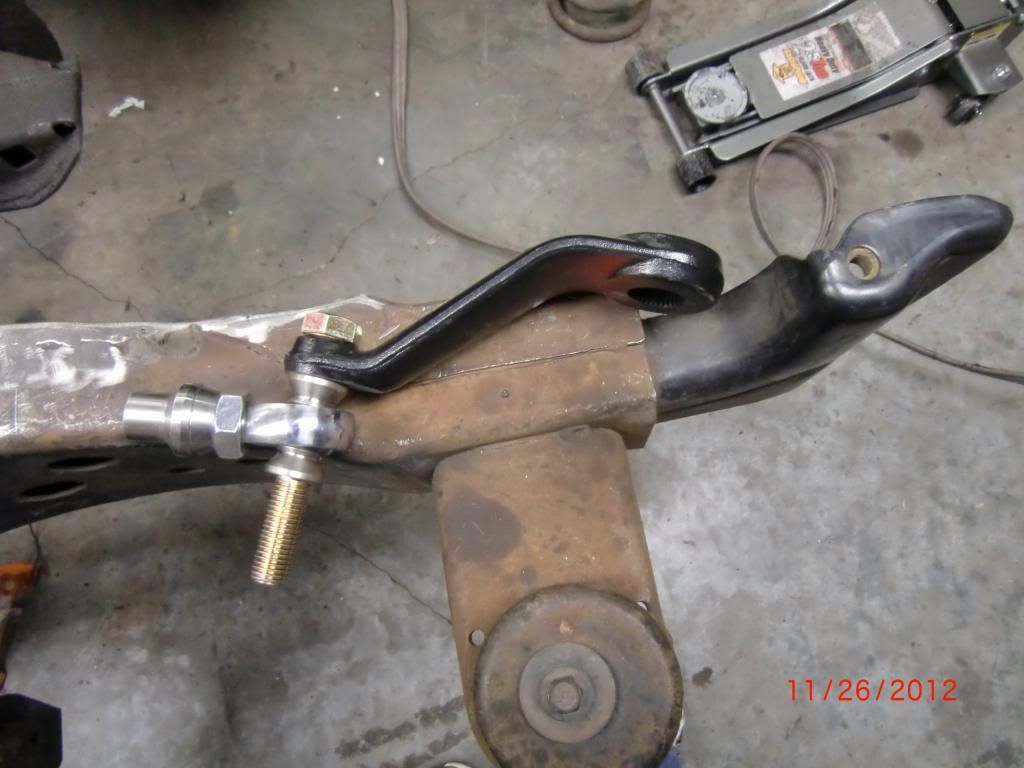 And tacked in the lower control arm mounts:  I also bevelled one end of the tubes: 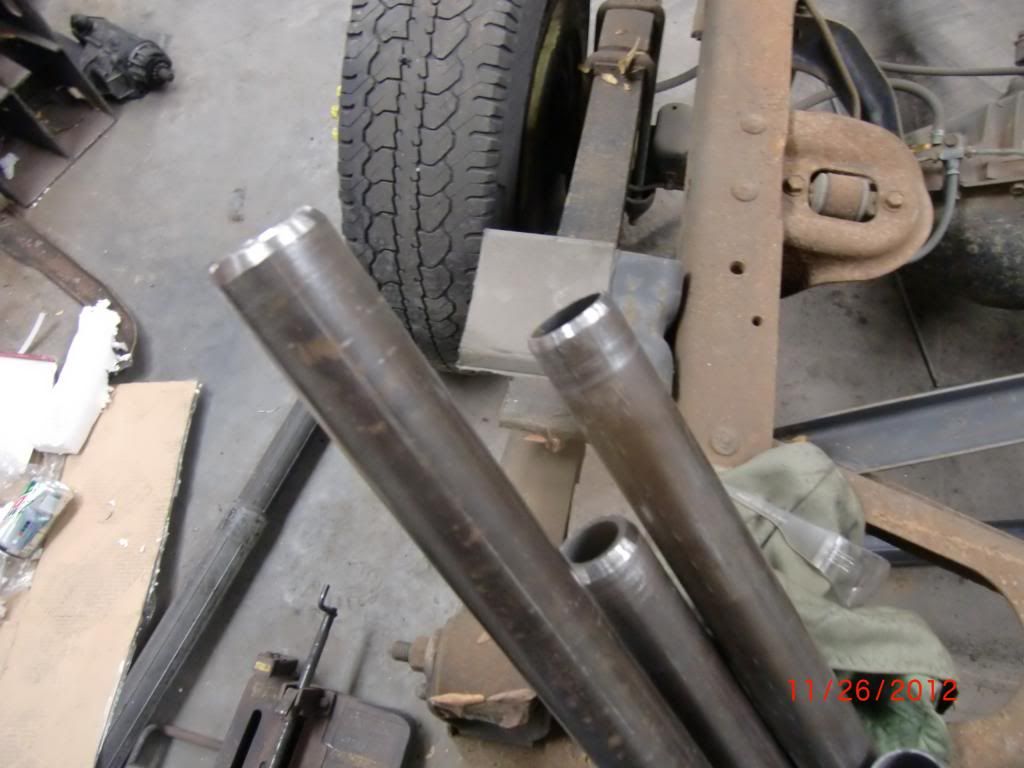 That's it for today (about 4 hrs of work). I should have all day tomorrow to work on it, so hopefully I can make some good progress. |
|
|
|
|
11-29-2012, 11:41 PM
|
#133 |
|
Senior Member
Join Date: Aug 2002
Location: Valley Center KS
Posts: 3,525
|
Re: Project Family Chummins
Going back a few days ago, here is the A/C notch:
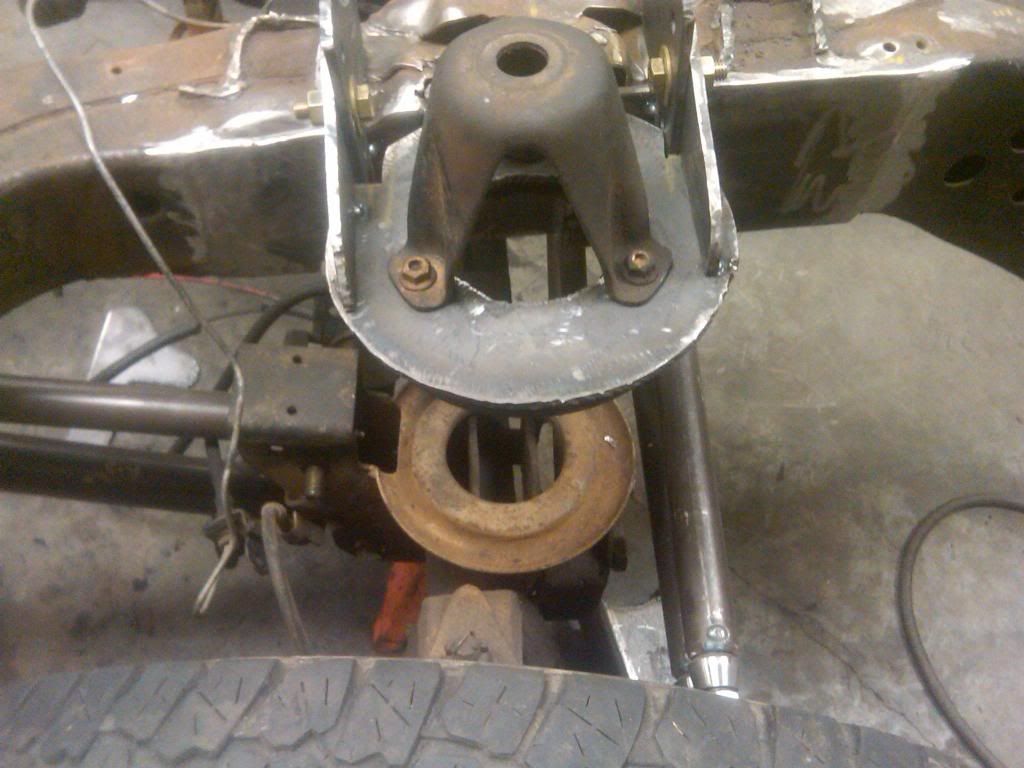
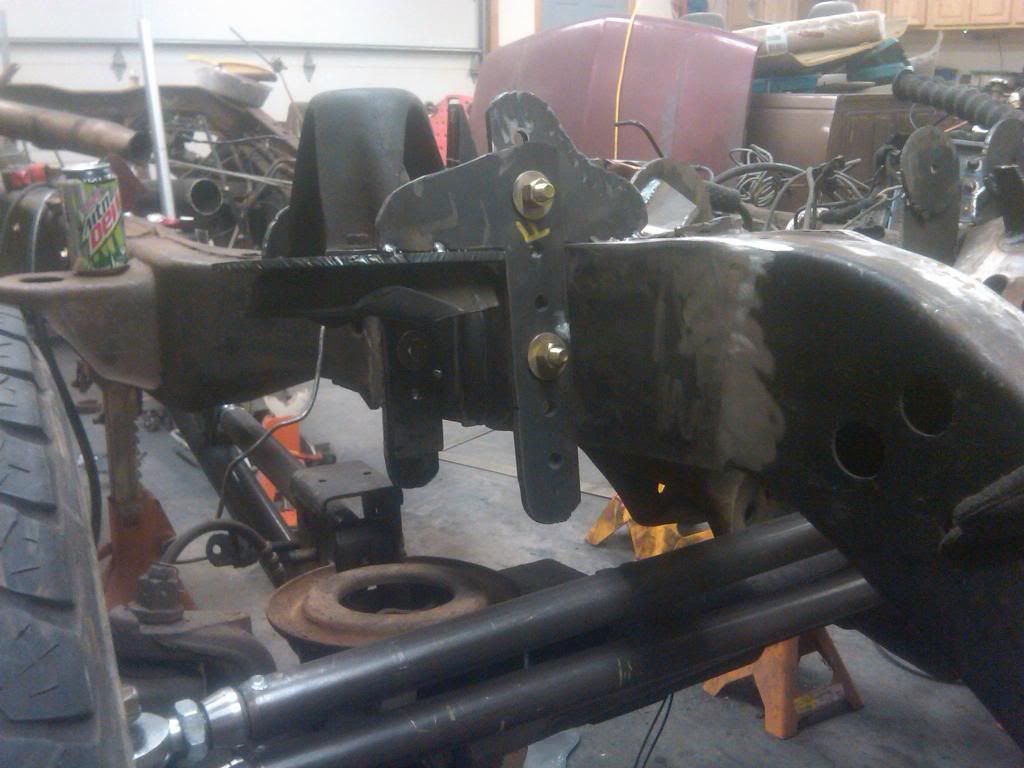
 First, it has been a big pain trying to get all of these links to work out. I spent all day yesterday and today working on it and thinking, measuring, cutting, bolting, etc but it looks like its going to work out. First, here is the additional clearancing I had to do on the engine crossmember to clear the drag link.  Here you can see what I've done for the links for now. I drill a hole near the end and fill it in (rosette weld). If I have to redo the link during mockup, I just have to drill out these 2 welds. You can also see I had to do some triming on the bracket on the axle, including removing the swaybar bracket. I'll have to figure out the sway bar later. 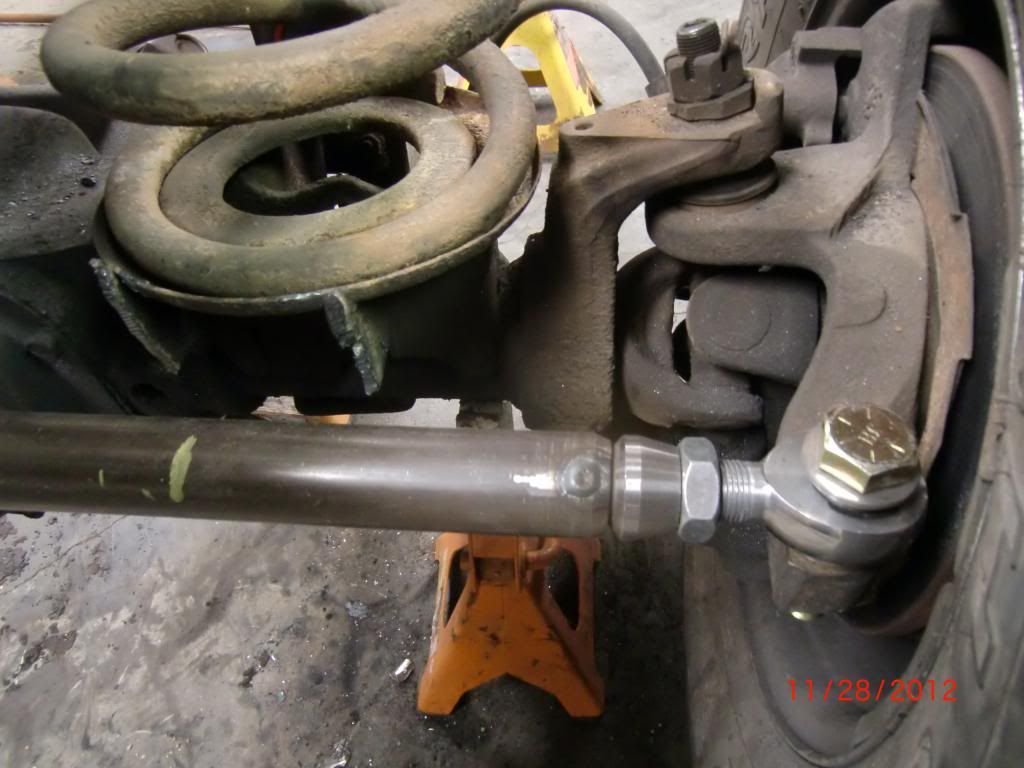 A couple more shots of the steering. Usually you want the trackbar parallel with the drag link, but I can't drop it down that low.   It took me 3 times of tacking in the trackbar bracket to get it where it is now. Lots of interferances. Also, the tie rod is on top of the steering knuckle which is kind of unusual, but with it below, it would hit on the diff cover. And here are the control arms: 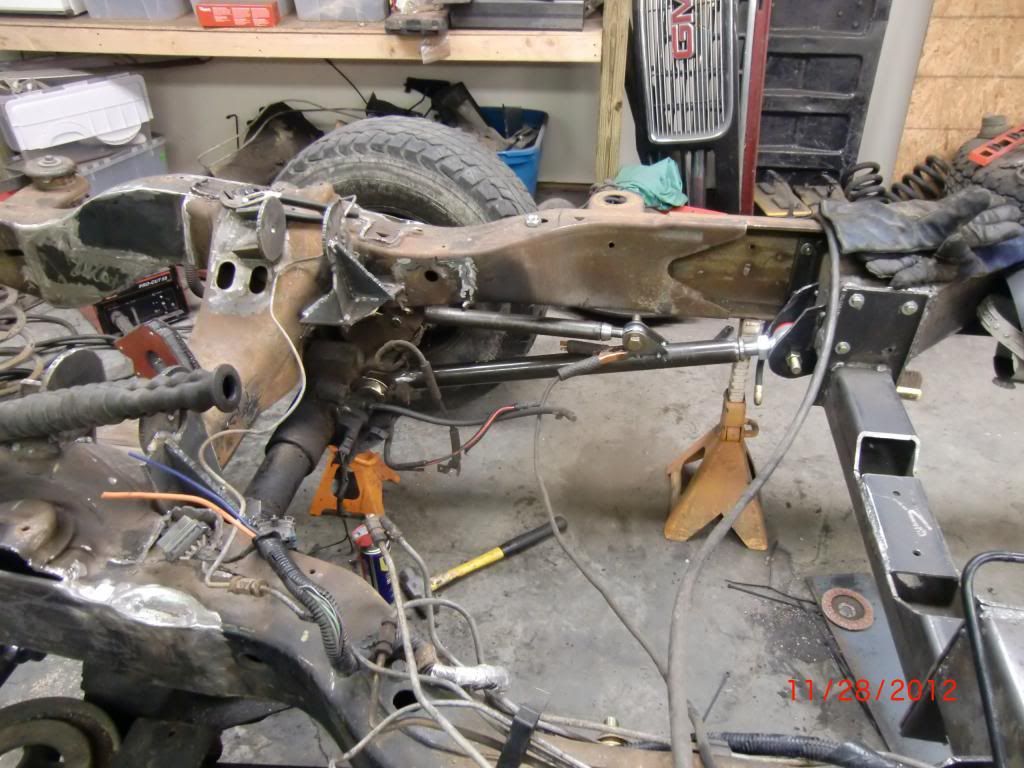  In addition to making the links, I also had to drill out the steering knuckles, pitman arm, and track bar bracket to 3/4". Right now the coil springs are touching the frame, so I'm going to have to notch out the frame for some additional clearance. With using the track bar, the axle will move side to side, pushing one of the springs more into the frame (depending on if the axle is moving up or down). Then I have some more clearancing on the engine crossmember before rebuilding that. Then I'll pull everything apart and finish weld and paint. Overall things are going well, just not making quite as much progress as quickly as I had hoped. |
|
|
|
|
11-30-2012, 02:31 AM
|
#134 |
|
high-Tech Red Neck
Join Date: Feb 2008
Location: Livingston, MT/On my boat WA/BC/AK
Posts: 2,294
|
Re: Project Family Chummins
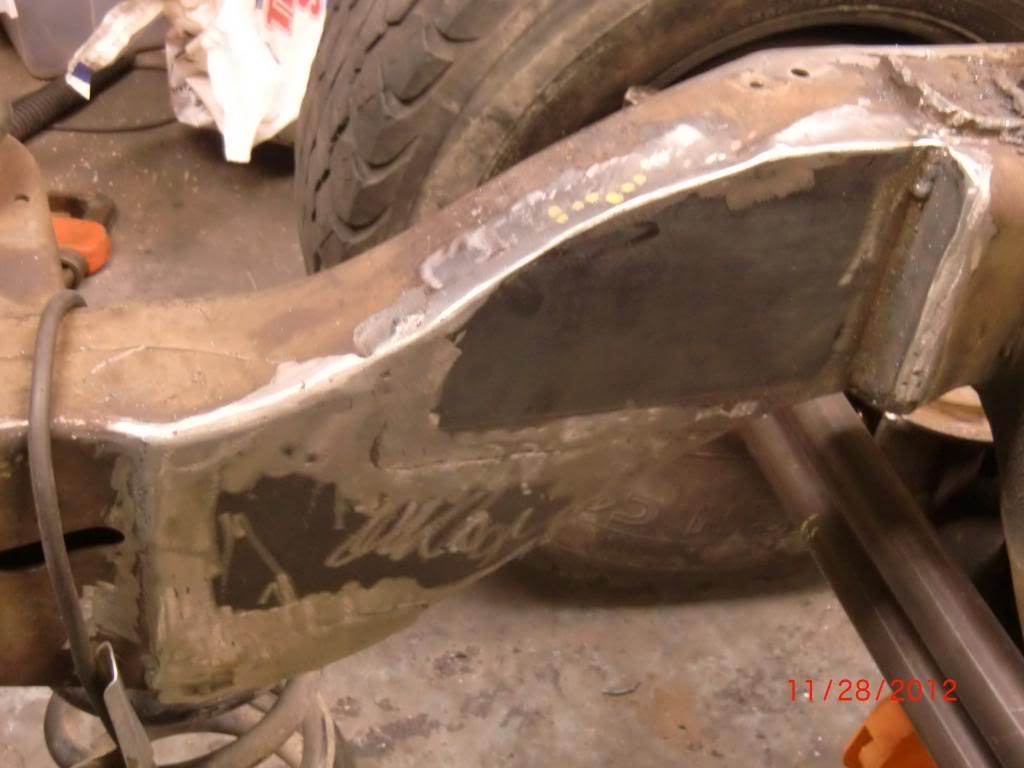
It is looking good, I am going to make a strong suggestion that you add a bevel plate like this to this joint.
 This will carry the load of the frame through, as it is with the way you boxed it if it takes too much abuse you will see a great deal of flex at that corner and possibly cracks. Other than that your job of tidying up the frame looks mighty fine.
__________________
"He used to be a pretty nice feller, now he's a welder!" |
|
|
|
|
11-30-2012, 09:13 PM
|
#135 |
|
6>8 Plugless........
Join Date: Sep 2007
Location: Prairie City, Ia
Posts: 17,138
|
Re: Project Family Chummins
Nice work! I'm not sure if I'm set on the 3 link but it does look nice. Keep at it!
__________________
Ryan 1972 Chevy Longhorn K30 Cheyenne Super, 359 Inline 6 cylinder, Auto Trans, Tilt, Diesel Tach/Vach, Buckets, Rare Rear 4-link and air ride option Build Thread 1972 GMC Sierra Grande Longhorn 4x4 1972 Chevy Cheyenne Super K20 Long Step side tilt, tach, tow hooks, AC, 350 4 speed 1972 C10 Suburban Custom Deluxe 1969 Chevy milk truck 1971 Camaro RS 5.3 BTR STG3 Cam Super T10 1940 Ford 354 Hemi 46RH Ford 9" on air ride huge project Tired of spark plugs? Check this out. |
|
|
|
|
11-30-2012, 10:08 PM
|
#136 | |
|
Senior Member
Join Date: Aug 2002
Location: Valley Center KS
Posts: 3,525
|
Re: Project Family Chummins
Quote:
I worked pretty well on my jeep  
|
|
|
|
|
|
12-01-2012, 11:58 AM
|
#137 |
|
Senior Member
Join Date: Aug 2002
Location: Valley Center KS
Posts: 3,525
|
Re: Project Family Chummins
I didn't get a whole lot of progress made yesterday.
First I notched out the frame to allow for some clearance for the springs:  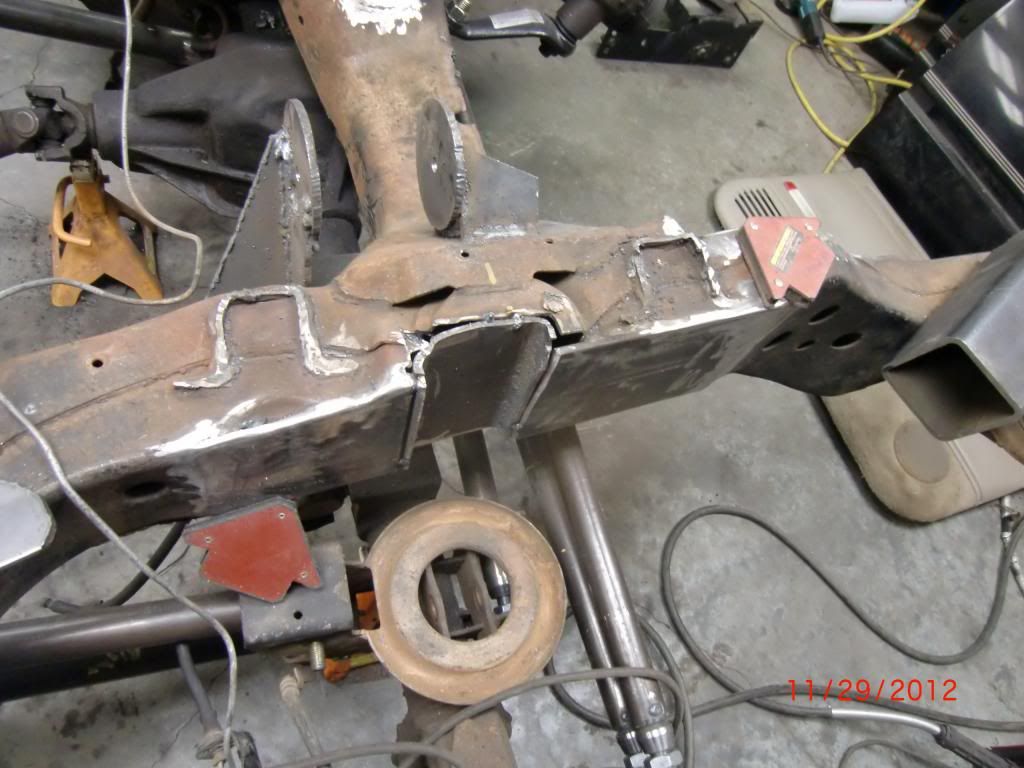 Then I started making the spring hanger brackets. I had to cut 4 of the spring bracket and 4 frame brackets. I welded them together and drilled holes through them so the holes are all in the same position. I made a jig so the holes are all spaced 1-1/2" apart and 1" from the edge. 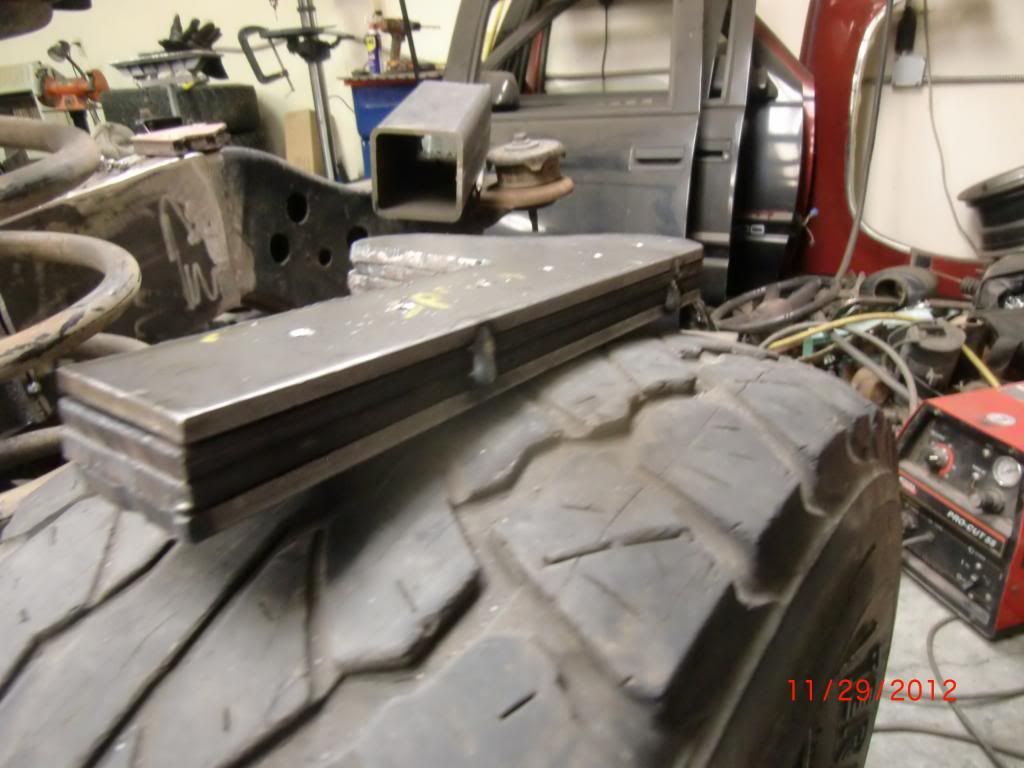 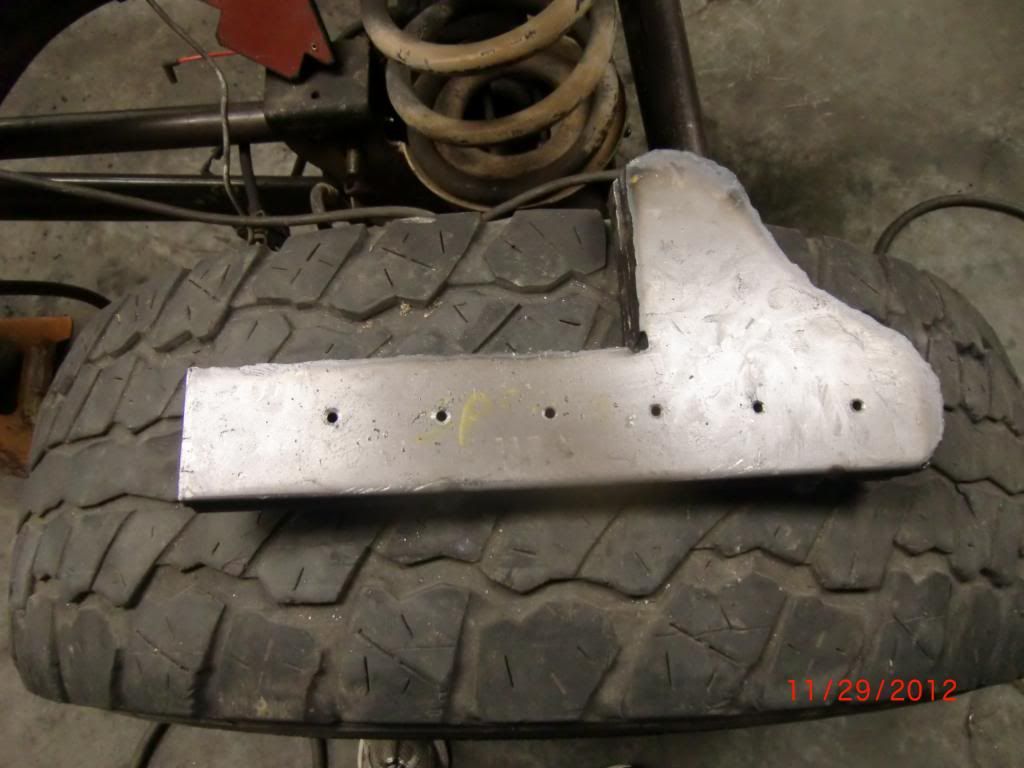 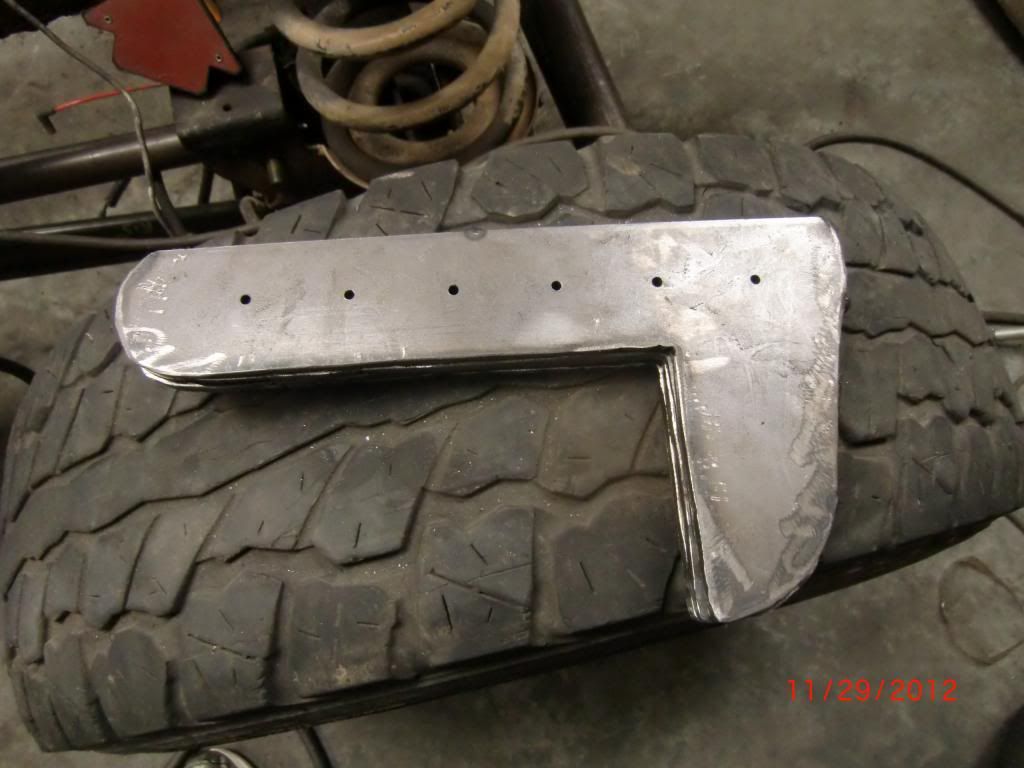 Then I can bolt them together (using 1/2" bolts not the little holes that are in them now )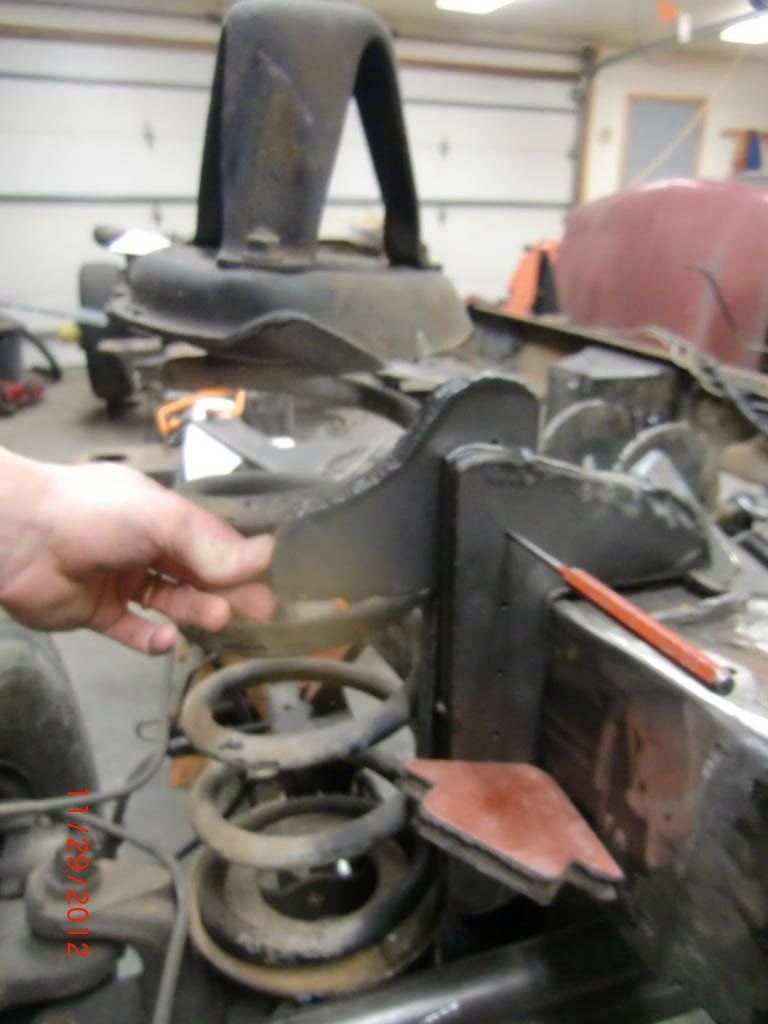 I'm going to get some all thread to make them all square when I go to weld them in. With the multiple holes, I can adjust the height in 1-1/2" increments. |
|
|
|
|
12-01-2012, 08:18 PM
|
#138 |
|
Registered User
Join Date: Feb 2012
Location: Fairview Missouri
Posts: 58
|
Re: Project Family Chummins
Very nice work. I am ready to see more. I would like to have a 12 valve in my crew.
__________________
2000 Chevrolet Silverado Z71  1965 Chevy C-10 on '61 Apache Frame [90s Build] 1997 3500 Chevrolet Custom Mega Cab Project My son's '92/'93/'94 GMC K2500 Conversion Project |
|
|
|
|
12-07-2012, 12:40 AM
|
#139 |
|
Senior Member
Join Date: Aug 2002
Location: Valley Center KS
Posts: 3,525
|
Re: Project Family Chummins
I got the holes drilled out on the brackets (1/2") and then got them all seperated and cleaned up. Cleaned the frame up a little bit and bolted a pair of brackets together using some all thread so they're square and then welded them to the frame. Then I made the top plate and sandwiched it between the stock (dodge) spring bucket and stock shock mount.
  Then I got started on the other side and got the brackets tacked into place: 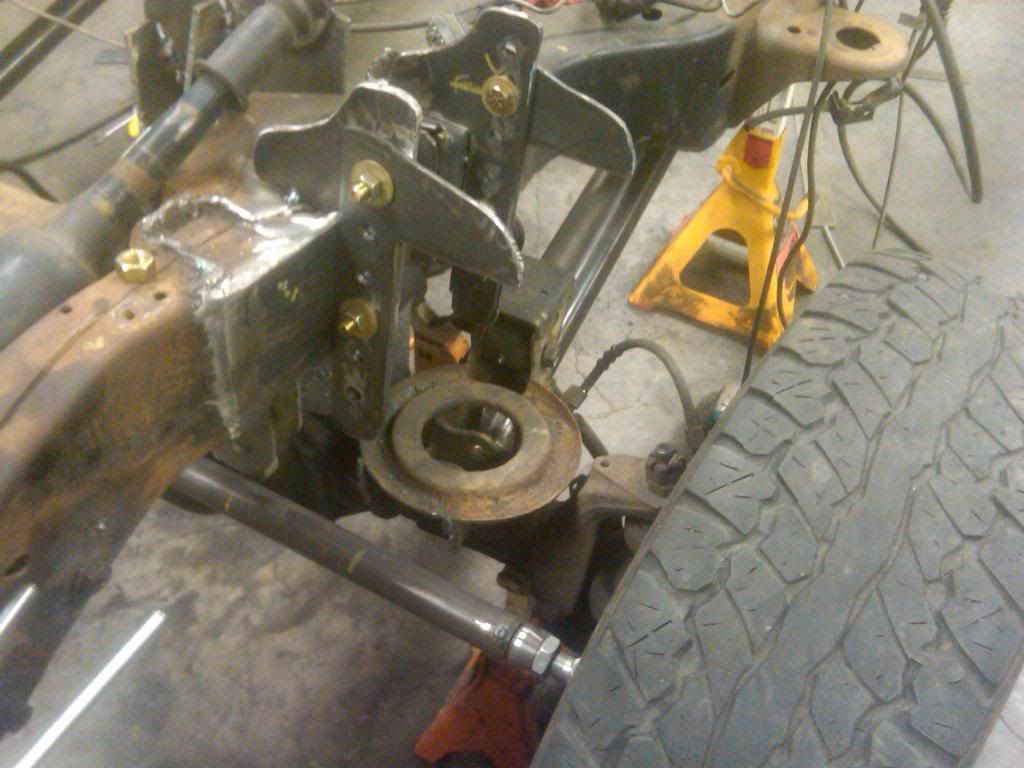 Inside of the stock spring bucket, there is a retaining ring that holds the bolts that hold the shock mount to the spring bucket. With the 1/4" plate in there, the bolts aren't long enough, so I'm going to have to go in there and remove the old bolts to put in some longer ones. Otherwise I think I might loose the top shock mount while driving. |
|
|
|
|
12-07-2012, 02:18 AM
|
#140 |
|
Junk Yartist
Join Date: Jul 2009
Location: Greeley, CO
Posts: 2,203
|
Re: Project Family Chummins
Are you doing that so you can adjust your height? Its pretty cool!
Posted via Mobile Device
__________________
-Jeremy YOU ONLY FAIL IF YOU STOP TRYING 70 Crew Cab Build Link 70 GMC Suburban 4X4 build thread 95 Yukon Daily Driver Rebuilding an NP205 |
|
|
|
|
12-07-2012, 11:11 AM
|
#141 | |
|
Senior Member
Join Date: Aug 2002
Location: Valley Center KS
Posts: 3,525
|
Re: Project Family Chummins
Quote:
|
|
|
|
|
|
12-14-2012, 01:59 PM
|
#142 |
|
Senior Member
Join Date: Aug 2002
Location: Valley Center KS
Posts: 3,525
|
Re: Project Family Chummins
A little update, but no pictures.
I've gotten a lot of welding done. The tranny crossmember and links are all finished being welded and painted. The spring hangers are all welded except for one that I missed welding to the top of the frame. I started re-boxing in the engine crossmember, but its kind of a pain. In the process of doing this, I had to re-assemble all of the links to check clearances. Now I have to make some modifications, re check, and then finish weld it all. With the frame lowered down as far as it can go right now, things start hitting in about 4 locations at nearly the same time. I'm going to need to get some bump stops to ensure that doesn't happen while driving as there is a potential to break joints, bend links, dent the diff cover (and possibly have the cover eaten by the gears. All I can say is this solid axle conversion is taking WAY longer than I anticipated. |
|
|
|
|
12-14-2012, 04:56 PM
|
#143 |
|
Junk Yartist
Join Date: Jul 2009
Location: Greeley, CO
Posts: 2,203
|
Re: Project Family Chummins
Why is it taking so long?! haha! Of course I cheated when I did mine.
__________________
-Jeremy YOU ONLY FAIL IF YOU STOP TRYING 70 Crew Cab Build Link 70 GMC Suburban 4X4 build thread 95 Yukon Daily Driver Rebuilding an NP205 |
|
|
|
|
12-26-2012, 01:21 AM
|
#144 |
|
Senior Member
Join Date: Aug 2002
Location: Valley Center KS
Posts: 3,525
|
Re: Project Family Chummins
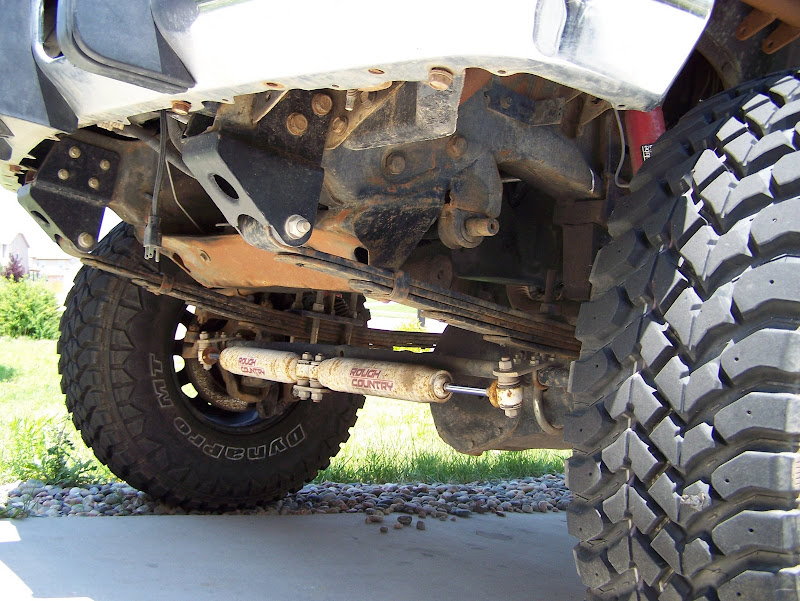
OK, some updated photos:
Tranny crossmember: 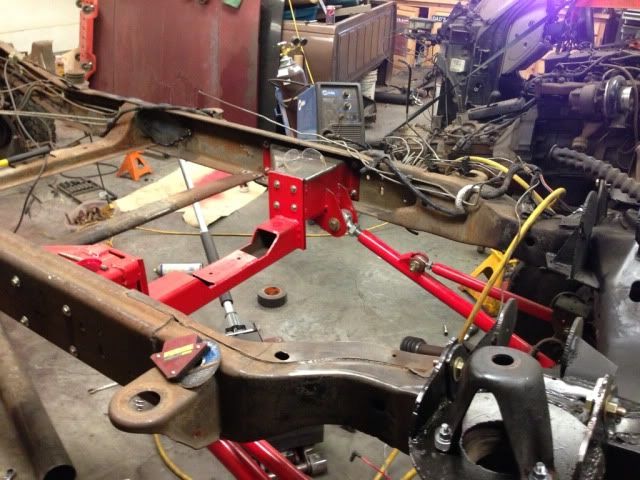 Rear dana 80 installed with "stock dodge 4-1/2" lift blocks" installed under the gmc 1 ton leafs. I had to get new u-bolts: 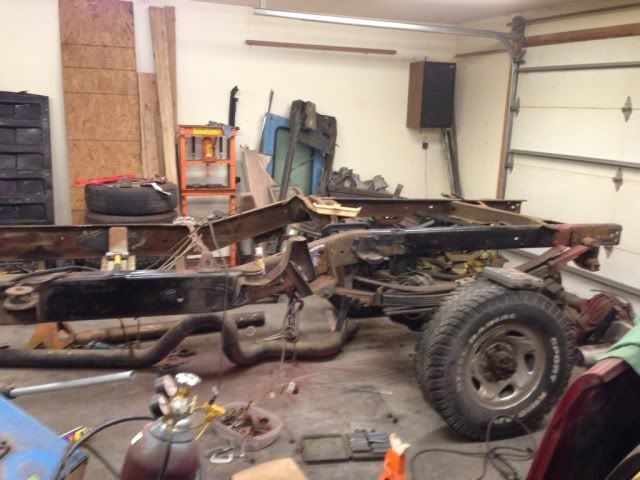 Another shot of the front: 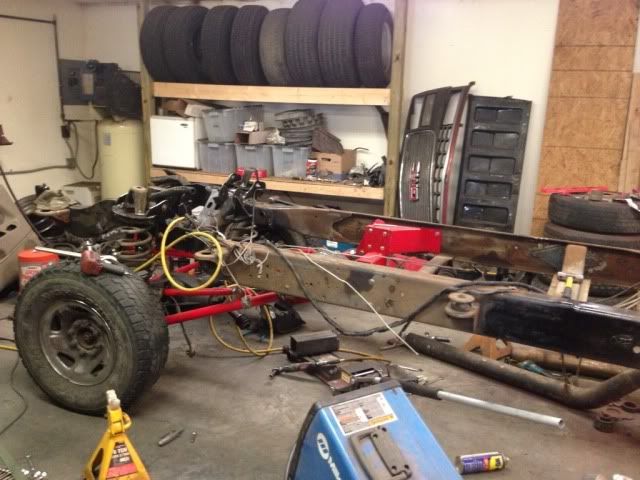 I think I'm all done with the fabrication of the front suspension / steering. I still need to drop in the shocks and tighten. I may go back in and ad a guset to the front of the frame as MrBeast suggested, but I'm not sure if I can with the ac compressor sitting right there. Next on the list is to do a little engine work. I have a few days off, so I hope to get that all tackled starting with changing the rear main seal and oil pan gasket tomorrow before installing the engine for what I hope will be the last time.
__________________
Project Bruiser: 68 Pro-Touring C-10 5.3L / 4L60E Project Ironhide: 97 GMC Crew Cab 4x4 Cummins SOLD: '69 GMC 1/2T SWB TBI'd: Project No Buck Assembly Manual Index Sign up Thread!!! Factory Service Manual Index Last edited by Ackattack; 12-26-2012 at 03:53 PM. |
|
|
|
|
12-26-2012, 01:39 PM
|
#145 |
|
Senior Member
Join Date: Aug 2002
Location: Valley Center KS
Posts: 3,525
|
Re: Project Family Chummins
Pulled the tranny off and it looks like its time for a new clutch. Its worn down to where its wearing on the rivets. I was planning on getting a new clutch a little further down the road, but I guess its time.
|
|
|
|
|
12-26-2012, 04:31 PM
|
#146 |
|
6>8 Plugless........
Join Date: Sep 2007
Location: Prairie City, Ia
Posts: 17,138
|
Re: Project Family Chummins
What clutch are you going to go with? I can get you a priceon a south bend, or valair. I'd avoid local pats store clutches.
__________________
Ryan 1972 Chevy Longhorn K30 Cheyenne Super, 359 Inline 6 cylinder, Auto Trans, Tilt, Diesel Tach/Vach, Buckets, Rare Rear 4-link and air ride option Build Thread 1972 GMC Sierra Grande Longhorn 4x4 1972 Chevy Cheyenne Super K20 Long Step side tilt, tach, tow hooks, AC, 350 4 speed 1972 C10 Suburban Custom Deluxe 1969 Chevy milk truck 1971 Camaro RS 5.3 BTR STG3 Cam Super T10 1940 Ford 354 Hemi 46RH Ford 9" on air ride huge project Tired of spark plugs? Check this out. |
|
|
|
|
12-26-2012, 04:36 PM
|
#147 | |
|
Senior Member
Join Date: Aug 2002
Location: Valley Center KS
Posts: 3,525
|
Re: Project Family Chummins
Quote:
sent you a PM ordered a Valair 13" ceramic/kevlar good for 500HP/1000ft lb. I can't see me putting down more than that. Probably much less actually 
|
|
|
|
|
|
12-28-2012, 09:31 AM
|
#148 |
|
Senior Member
Join Date: Aug 2002
Location: Valley Center KS
Posts: 3,525
|
Re: Project Family Chummins
I finished up putting in the rear main seal and oil pan gasket Then I tore the vacuum/power steering pump assembly apart to re-seal it. Hopefully that will fix the oil leak/oil mist all over everything.
Then I started on rust repair  First I removed the heat sheild from under the cab and then cut out the bad portion of the floor:  Then I cut my patch panel to fit. I left little tabs on it to hold it in place until I got it partially welded in. 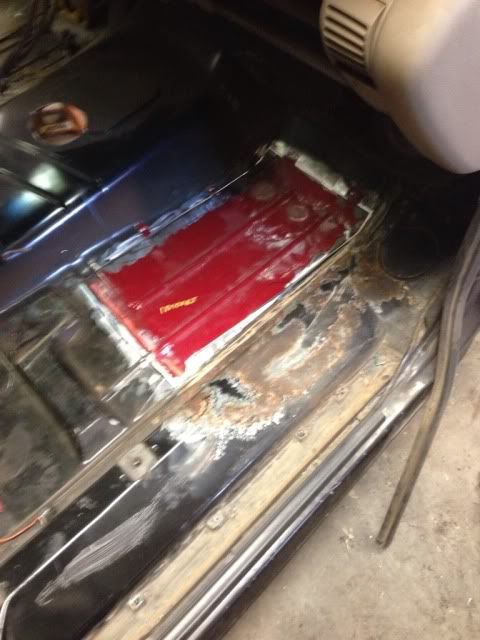 I still have a little more welding to do on it before its finished. I also got the firewall cleaned up and scuffed in preparation for the sound deadener. |
|
|
|
|
12-28-2012, 05:58 PM
|
#149 |
|
KIDHLR
Join Date: Aug 2006
Location: Joplin MO
Posts: 217
|
Re: Project Family Chummins
Nice Job!
__________________
Christopher Johnson Project - Grafted In AKA the "KIDHLR" Conversion - KIDHLR Meets LPG KIDHLR 2.0 Rise of the diesel(a 6.5 powered 6 Door pickup) Romans 11:17-22 "Branches were broken off so that I could be grafted in" |
|
|
|
|
12-28-2012, 06:09 PM
|
#150 |
|
State of Confusion!
  Join Date: Jul 2002
Location: Gulfport, MS USA
Posts: 46,644
|
Re: Project Family Chummins
That test drive is getting closer and closer!
__________________
Bill 1970 Chevy Custom/10 LWB Fleetside 2010 Toyota Tacoma PreRunner SR5 Double Cab - DD Member of Louisiana Classic Truck Club (LCTC) Bill's Gallery Life isn't tied with a bow, but it's still a gift. Live simply. Love generously. Care deeply. Speak kindly. Leave the rest to God! |
|
|
|
 |
| Bookmarks |
|
|


 Linear Mode

