
|
Register or Log In To remove these advertisements. |
|
|
|
|||||||
 |
|
|
Thread Tools | Display Modes |
 06-24-2011, 03:22 PM
|
#1 |
|
Registered User
Join Date: Apr 2011
Location: Sulphur, OK
Posts: 316
|
A couple of my good friends have been building 71 C10 Pro Streets (one started as the parts truck for the other) and Id been hanging out with them so much I sort of caught the bug if you know what I mean. So I put the word out that if anybody ran into a good deal on one I was looking for a running project, since I cant afford to do a frame off restoration and Im not looking to go Pro Street, just have a fun classic truck to cruise around in and maybe be a daily driver.
So anyway, a mutual friend of ours heard about it and mentioned this truck his brother found and passed on. He thought it was a 67 or 68 and the guy only wanted $100.00 bucks! Now that fell right into my budget, i.e. it was ultra cheap!  Big surprise though, when we showed up to haul her off the truck turned out to be a 66!  Which only added to its value in my opinion. The 67-72 trucks are nice
but the 60-66 trucks are better IMHO. Which only added to its value in my opinion. The 67-72 trucks are nice
but the 60-66 trucks are better IMHO.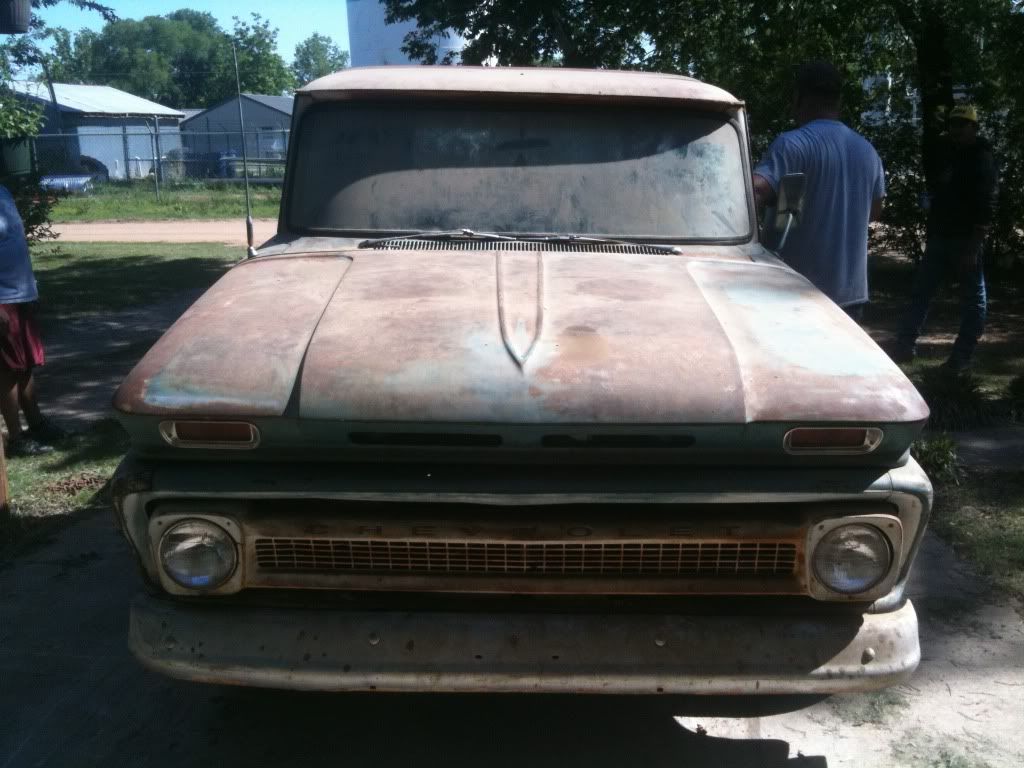 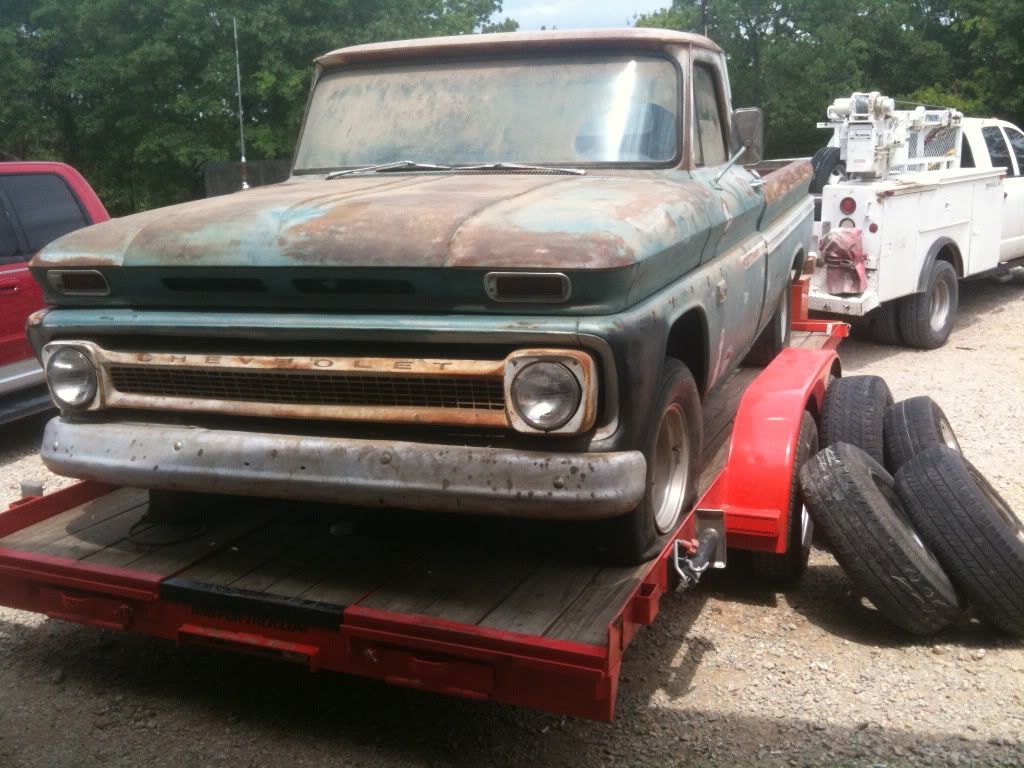 I know that most people posting here are doing full restorations or modifications to their trucks but I thought there must be more folks like me who just want to get their old truck running and drive it and for as little money as possible. So I figure, why not just do a thread about what it took to get this ole gal back into a roadworthy state. No frame offs here (well planned ones anyway), no BBC swaps (I wish  ), no extreme lowering or Zing the frame (cool but not in the budget either). ), no extreme lowering or Zing the frame (cool but not in the budget either). Plans for this project are as follows; 1) Get the drum brakes back in working order. Worry about possible disc conversion later. 2) Freshen up or rebuild the motor whichever is the minimum required  3) Fab up a temporary gas tank until I can find a good under the bed mounted one. The original tank came with the truck but not installed and missing the sending unit. Seems like a good time to move it out of the cab anyway. 4) Put in a new bed floor. 5) Drop her down a little bit with either purchased drop springs or cut front/jeep rear. 6) Replace worn out stuff. New ignition switch (just needed re-keyed until my buddy got a hold of it), various rubber doohickeys, bushings, etc., etc. 7) Run dual exhaust with Cherry Bombs  (always wanted those since I was a kid). (always wanted those since I was a kid).8) Figure out what wheel/tire combo Im going to run and acquire them. Right now Im running freebees with throw away used rubber. 9) Repair major body damage and rust. So far Ive found less than expected but more than I wanted  10) Figure out whether to paint it (small dings and all) with a cheap paint (I really liked ol_skool_chevys suggestion, Ill explain later) or just keep the patina. It may be years before the real body work and nice paint job happen. In the mean time shes rusting
__________________
 1966 C10 LWB, 283, 3 on the tree (lots of work to do!) http://67-72chevytrucks.com/vboard/s...d.php?t=471348 2001 Suburban daily driver 2008 HHR (wife's ride) |

|

|
|
06-24-2011, 03:47 PM
|
#2 |
|
Registered User
Join Date: Apr 2011
Location: Sulphur, OK
Posts: 316
|
Re: Sam's Man Cave 66 Project
We got it to the shop and first order of business was 6 lug wheels that would fit and some rubber
that took a little while so it became second order of business and starting her up was now the first order of business!
 Took about thirty minutes of tinkering, we bypassed the ignition since we didnt have a key, found a battery to use, and she fired right up. Had good oil pressure according to the factory gauge on the dash, but she sure smoked enough to run off all the skeeters in the county. Looks like a valve or ring job (or both) is in her future 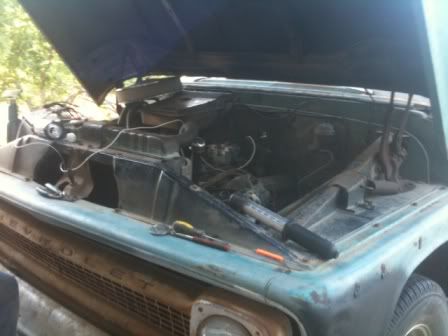 The upshot is she idled well and ran very smooth with no knocks or unusual noises. I havent had much opportunity to diagnose the smoke situation as theres three other vehicles in the shop and my poor 66 is relegated to a spot under the trees unless we make room to work on it. Once weve gotten her engine bugs fixed, starting and stopping good, I can move her to my garage for the other stuff. Im not much of a mechanic so for now she stays where the gear heads can work without having to come to her. Engine is a 283, 2 bolt main (Turns out the easiest way to see the casting numbers was to shine a flashlight from underneath in the wheel well then slide my iPhone over the top of the engine . No matter how I contorted I couldnt force my fat head between the engine and firewall)  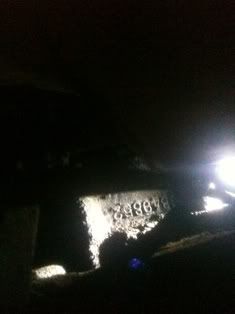 With 3 speed manual column shift tranny. I havent crawled under there yet to figure out which one though. 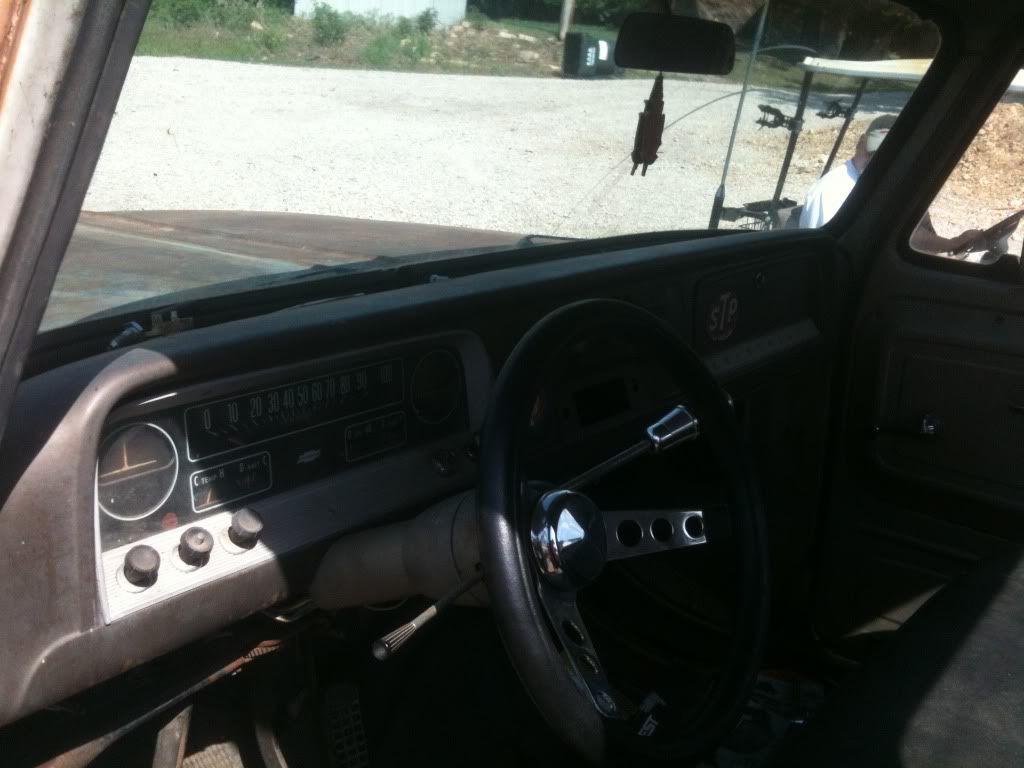 After looking her over and a little bit of research with the VIN tells me she was built in St. Louis, Id say its mostly a base model truck but with the custom cab and trim. The heater is the Econoline model, no A/C, a pretty much unmolested dash with cutouts for the factory radio (shockingly the previous owner(s) did not hack this apart). 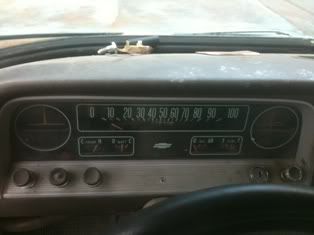 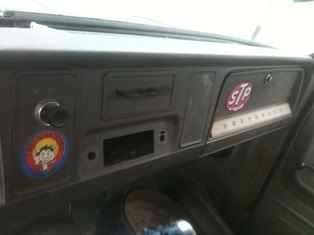 The seat is in excellent condition and I suspect its been recovered or replaced at some point. 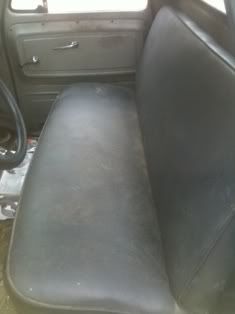 The bed floor has been pulled out long ago. The only thing holding it on to the frame is the tail light wiring  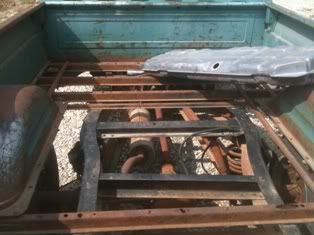 Time for a smoke break  and a cup of Joe. and a cup of Joe. I've got more to follow soon. I know what picture fanatics you guys are so no worries. I'll put up lots. Actually you may tell me to stop I've got more to follow soon. I know what picture fanatics you guys are so no worries. I'll put up lots. Actually you may tell me to stop 
__________________
1966 C10 LWB, 283, 3 on the tree (lots of work to do!) http://67-72chevytrucks.com/vboard/s...d.php?t=471348 2001 Suburban daily driver 2008 HHR (wife's ride) |
|
|
|
|
06-24-2011, 05:00 PM
|
#3 |
|
Registered User
Join Date: Apr 2011
Location: Sulphur, OK
Posts: 316
|
Re: Sam's Man Cave 66 Project
We just recently moved to a new house thats put 30 + miles between me and the truck. That and the fact that work has kept me very busy, kept the progress to a minimum. I have done a few small things to report.
First I gave the truck a much needed bath. It was under the POs carport for like 8 years and had the dust to prove it.  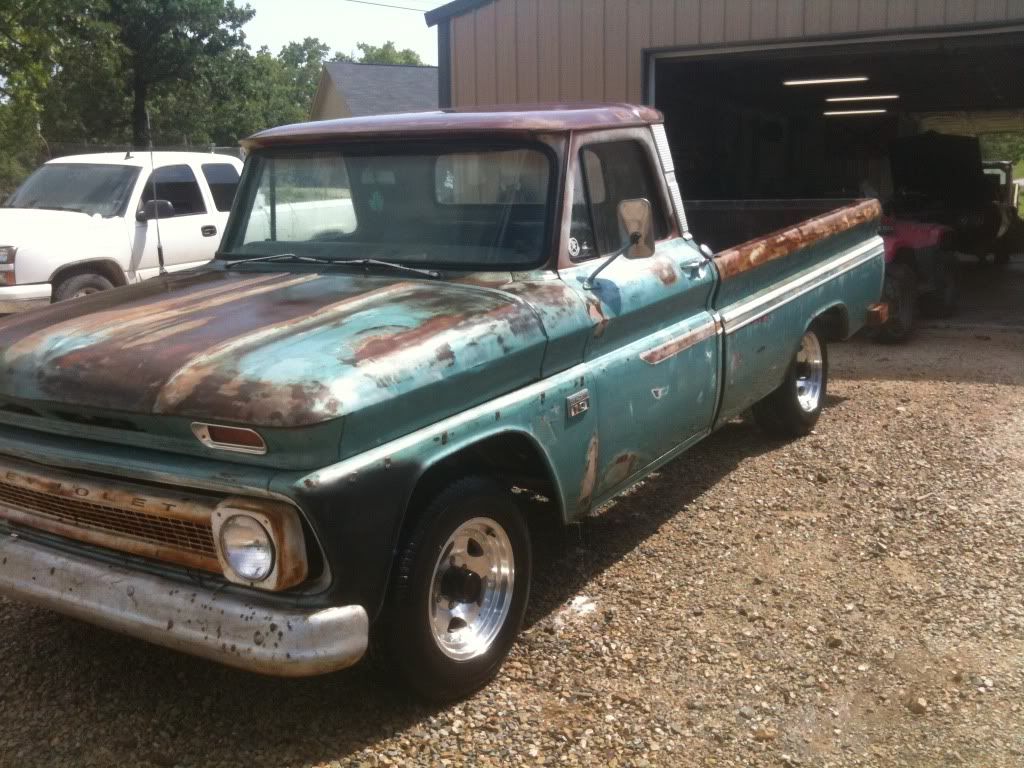 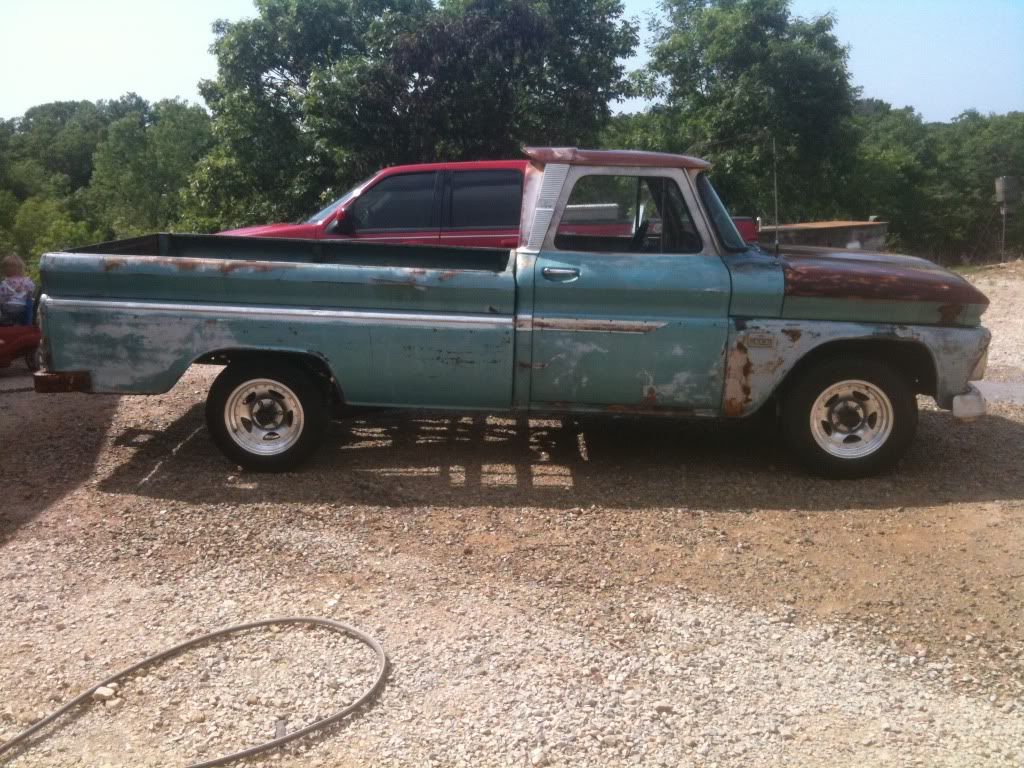 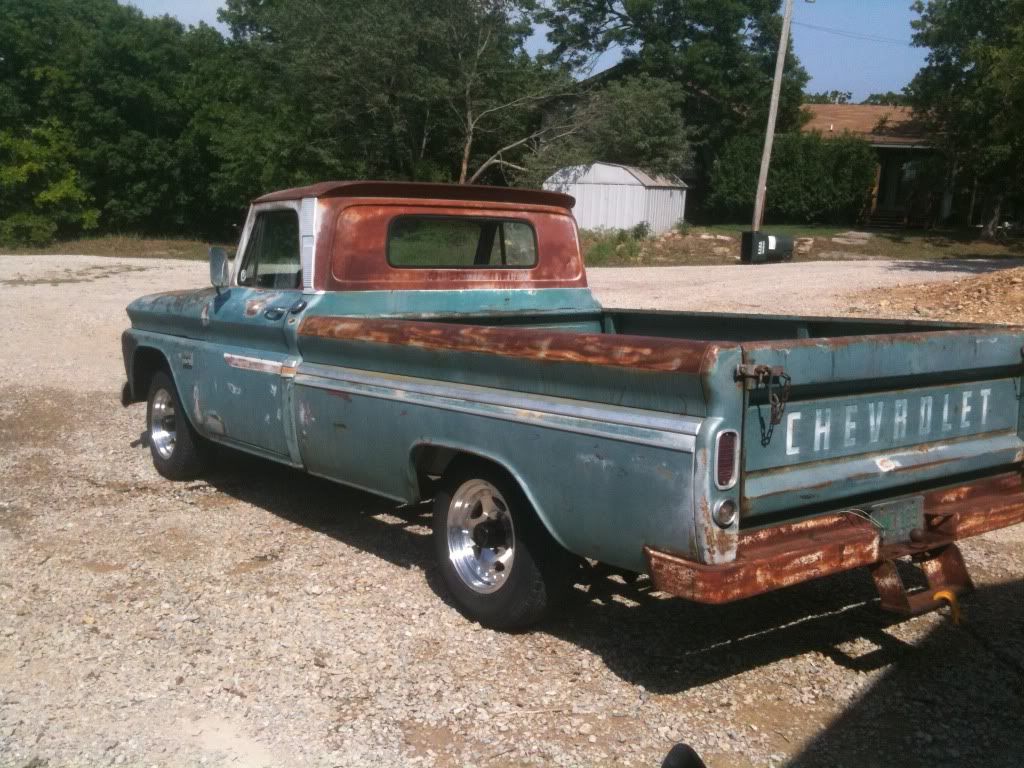 The PO wanted to keep his crappy rims or sell them for $600 bucks...we let him keep them. My friend Daniel had some chevy rally wheels he was willing to give me for free, but the center hole wasn't large enough for this old truck. Oddly enough though another friend saw those wheels and liked them better than what he was running on his blazer so we swapped and these fit. So that's why the shiny wheels in case you were wondering. I'm partial to the stock steel wheels or some old style cragers or smoothies myself. Replaced the brake master cylinder in the pic below. I dont have an after yet but you know what they look like anyway!  We bled the front brakes and got them working but I had to order parts for the rear brakes that were trashed. Rear drivers side brake. Wheel cylinder is very crusty lol 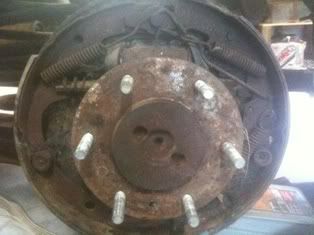 The truck came with the original (or replacement of the original) fuel tank that mounts behind the seat. But this wasnt installed and the sending unit is missing. So since it was out I decided to come up with a temporary solution until I figure out which tank I want to get that mounts under the bed between the frame rails. We were sitting around discussing this when somebody said a beer keg would look cool as a tank. And my buddy whose shop we all shamelessly take advantage of mentioned that he happened to have one laying around. So we fabbed (meaning he did it) up a temporary fuel tank from a bud light keg! 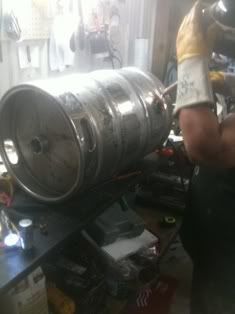 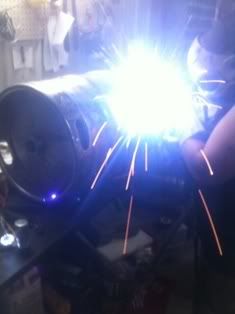 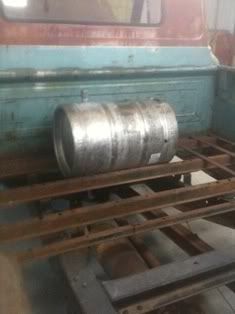 Not bad for a hours work! We ended up placing it in front of the passenger wheel well for now since its too long of a reach in the middle as in the picture and we had just enough fuel line lying around to run it from there. Thats about where Im at for now. Plans for this weekend (if all goes well) are to rebuild the rear brakes. My spring kits, and wheel cylinders came in for this. And to replace the starter so we can run the engine some more. That needs to be run some more so we can better determine whether to pull the motor and do a re-ring. Or leave it in and do the head work first. With my luck well end up needing to do both Here's some random pics I took just for your viewing pleasure 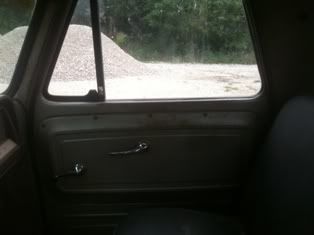 Not too excited about this aftermarket shifter handle 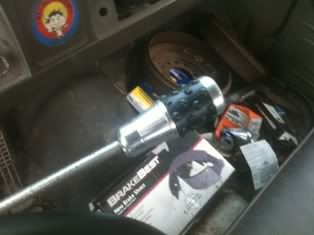 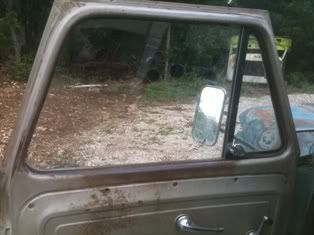 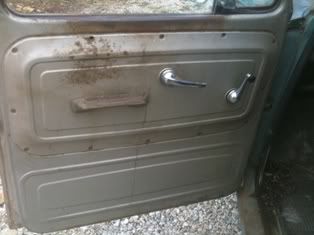 I think I know what this hood ornament was...and I wish it was still there!   My 20 month old daughter thinks daddy's new toy is for her!   That's all I've got for now. Please feel free to comment or give me suggestions etc. I'm not much of a mechanic but my friends have all assured me (with evil grins ) that I will be by the time we're done with my little project  
__________________
1966 C10 LWB, 283, 3 on the tree (lots of work to do!) http://67-72chevytrucks.com/vboard/s...d.php?t=471348 2001 Suburban daily driver 2008 HHR (wife's ride) |
|
|
|
|
06-24-2011, 05:20 PM
|
#4 |
|
1965 Chevy C10, 2005 4.8L/4l60
 Join Date: Aug 2004
Location: DFW Texas
Posts: 8,539
|
Re: Sam's Man Cave 66 Project
I think your going about it perfectly, get it safe and drive the 1@#$%^ out of it and then do the minor things! welcome to the sickness my friend. and a shout out to your buddies who infected you and are helping continue the disease.
__________________
Clyde65 Rebuild of Clyde http://67-72chevytrucks.com/vboard/s...84#post8338184 69 Aristocrat Lo Liner build http://67-72chevytrucks.com/vboard/s...84#post7561684  support our troops! |
|
|
|
|
06-24-2011, 05:30 PM
|
#5 | |
|
Registered User
Join Date: Apr 2011
Location: Sulphur, OK
Posts: 316
|
Re: Sam's Man Cave 66 Project
Quote:
Or least that's what I hope...BTW thanks for your comments 
__________________
1966 C10 LWB, 283, 3 on the tree (lots of work to do!) http://67-72chevytrucks.com/vboard/s...d.php?t=471348 2001 Suburban daily driver 2008 HHR (wife's ride) |
|
|
|
|
|
06-25-2011, 11:01 PM
|
#6 |
|
Registered User
Join Date: Apr 2011
Location: Sulphur, OK
Posts: 316
|
Re: Sam's Man Cave 66 Project
Well I was going to put in a new starter today but even though the bolt patter was correct for some reason they just wouldn't line up. I did swap it out at O'rielly's for another that appeared to more closely match the original I just ran out of time tonight so I'll try again maybe tomorrow. I need to talk myself into rebuilding the rear brakes too...
Anyway here's some shots I took of my friends 71 GMC project just for fun 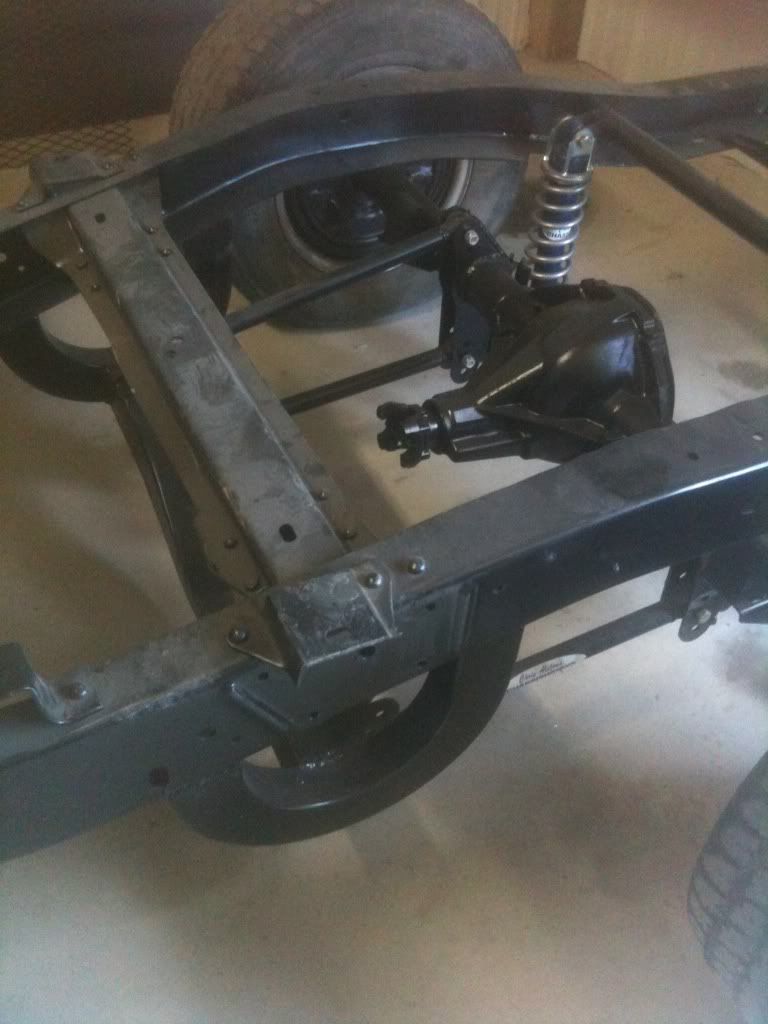 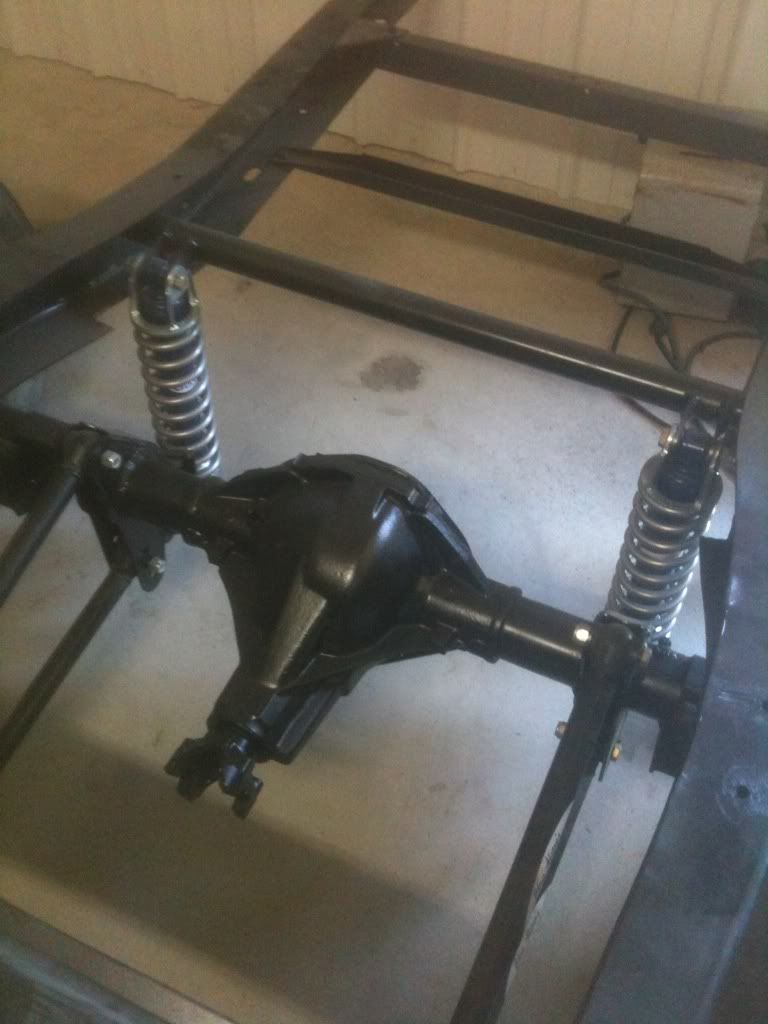 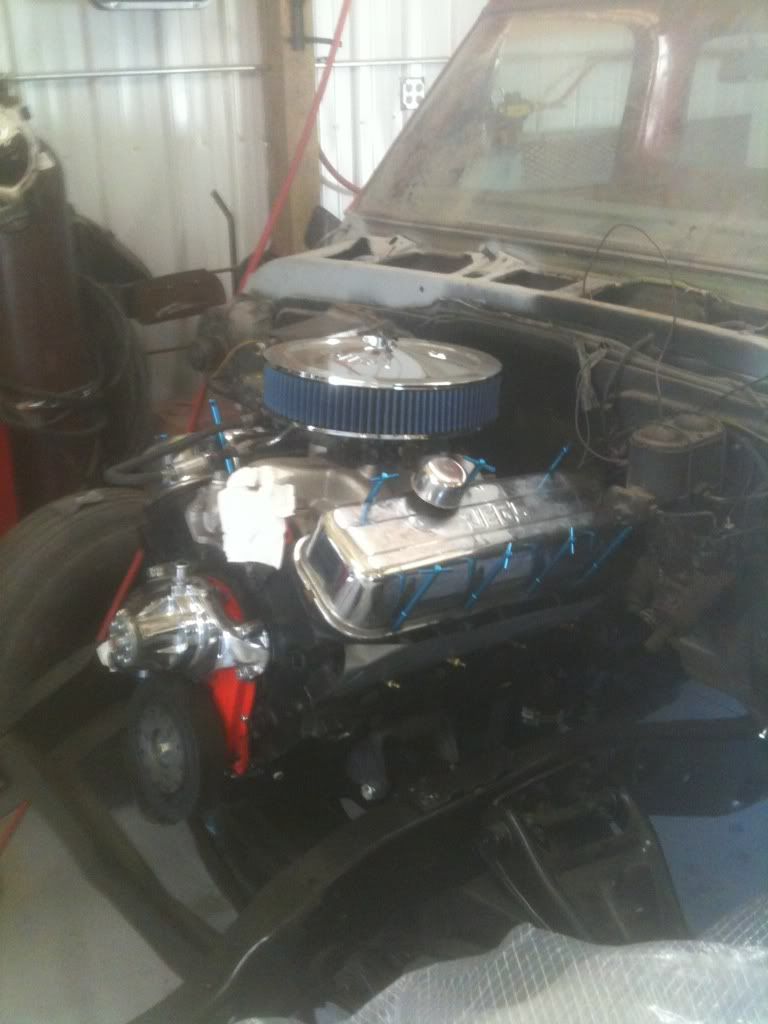 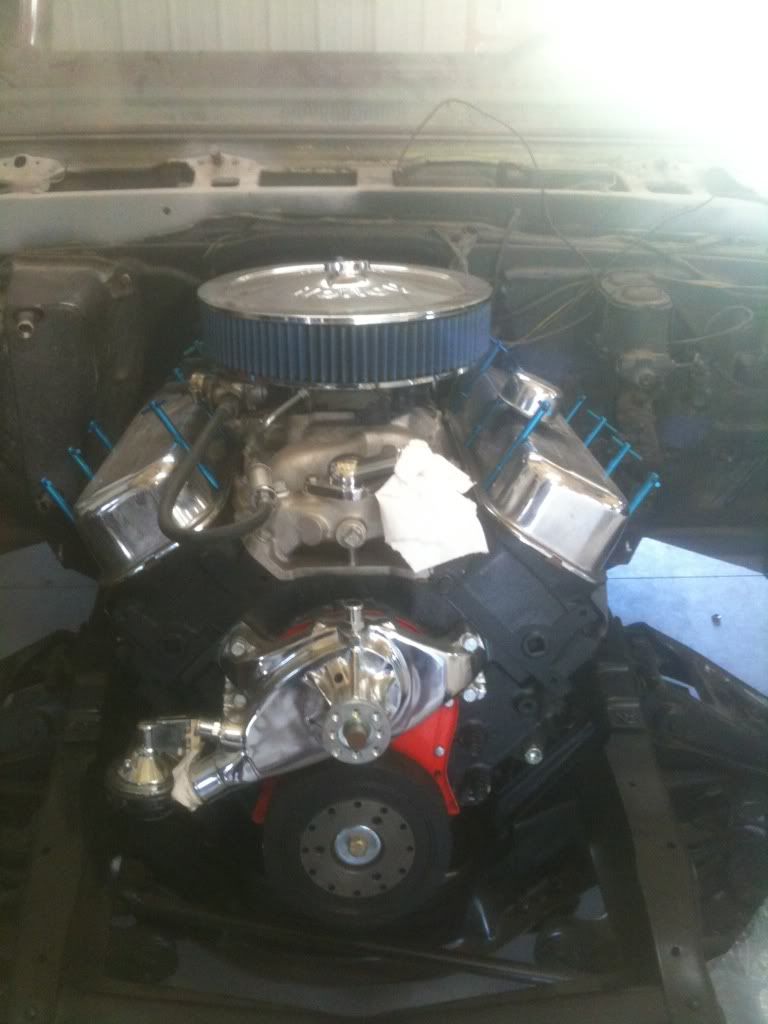 I wish I had the mullah for the stuff he's doing Posted via Mobile Device
__________________
1966 C10 LWB, 283, 3 on the tree (lots of work to do!) http://67-72chevytrucks.com/vboard/s...d.php?t=471348 2001 Suburban daily driver 2008 HHR (wife's ride) |
|
|
|
|
06-25-2011, 11:25 PM
|
#7 |
|
Registered User
Join Date: Oct 2009
Location: Denton, Texas
Posts: 1,695
|
Re: Sam's Man Cave 66 Project
Oh man, what a sweet truck you have. I like what you have done so far. I love the fact that you only paid $100 for it and that it is pretty much all there with a running engine to boot!!
That is classic!Quick question for you. What brand are those rims? I absolutely love em! I have a 1968 chevy pickup. I sure love it but I would love to have a '60 to '66 chevy pick up one day. I scour craigslist all the time. You my friend got one heck of a deal. Congrats! I can't wait to see more progress updates and good luck with your build! Keith |
|
|
|
|
06-26-2011, 12:37 AM
|
#8 | |
|
Registered User
Join Date: Apr 2011
Location: Sulphur, OK
Posts: 316
|
Re: Sam's Man Cave 66 Project
Quote:
The slow progress is killing me though! I'm pretty much an instant gratification type and having to be patient and work in my budget is giving me fits!I'll be honest I never thought to ask what brand those wheels are so I will have to ask the guy we traded what they are and let you know. Posted via Mobile Device Posted via Mobile Device
__________________
1966 C10 LWB, 283, 3 on the tree (lots of work to do!) http://67-72chevytrucks.com/vboard/s...d.php?t=471348 2001 Suburban daily driver 2008 HHR (wife's ride) |
|
|
|
|
|
06-26-2011, 12:39 AM
|
#9 |
|
Registered User
Join Date: Dec 2010
Location: sooke canada
Posts: 211
|
Re: Sam's Man Cave 66 Project
very nice, motor looks perfict under there.
__________________
chevys the way to go.
|
|
|
|
|
06-26-2011, 12:50 AM
|
#10 | |
|
Registered User
Join Date: Apr 2011
Location: Sulphur, OK
Posts: 316
|
Re: Sam's Man Cave 66 Project
Quote:
Posted via Mobile Device
__________________
1966 C10 LWB, 283, 3 on the tree (lots of work to do!) http://67-72chevytrucks.com/vboard/s...d.php?t=471348 2001 Suburban daily driver 2008 HHR (wife's ride) |
|
|
|
|
|
06-26-2011, 01:56 AM
|
#11 |
|
HOW long until spring??
Join Date: Mar 2009
Location: Star Idaho
Posts: 1,413
|
Re: Sam's Man Cave 66 Project
Ahhhh It Is a great thing to have such friends. You are doing it right and enjoying the ride. Welcome to the fun!!
Looks like a great find BUT you know the purchase price you paid will be the cheapest part of the whole project!!
__________________
69 chevelle convertible 71-C-10 short-wide and low 64 C-10 custom shortbox "Bubba"s Recycling project" |
|
|
|
|
06-26-2011, 11:34 AM
|
#12 | |
|
Registered User
Join Date: Apr 2011
Location: Sulphur, OK
Posts: 316
|
Re: Sam's Man Cave 66 Project
Quote:
I think I've already spent more than double just on brake parts, master cylinder and new starter besides that another couple hundred in a week or two for the valve job at the machine shop. At that point truck will be up to $500 or so. I've estimated a couple grand just to get her roadworthy and then I have to decide on body work and such. What keeps me happy is the big block in the pics above cost over twice that by itself Posted via Mobile Device Posted via Mobile Device
__________________
1966 C10 LWB, 283, 3 on the tree (lots of work to do!) http://67-72chevytrucks.com/vboard/s...d.php?t=471348 2001 Suburban daily driver 2008 HHR (wife's ride) |
|
|
|
|
|
06-26-2011, 01:56 PM
|
#13 |
|
HOW long until spring??
Join Date: Mar 2009
Location: Star Idaho
Posts: 1,413
|
Re: Sam's Man Cave 66 Project
I keep all the receipts from a project for return reasons , but I have NEVER once added them up at the end of a project. I never will either.
I could count to $12K worth of parts just on big ticket items when I finished an El Camino SS a few years ago  I am guessing I am around $8K so far in this truck. It is cheaper than a Head Shrink and less trouble than a drinking habit! I am having FUN!!!
__________________
69 chevelle convertible 71-C-10 short-wide and low 64 C-10 custom shortbox "Bubba"s Recycling project" Last edited by bubba327; 06-27-2011 at 12:01 AM. Reason: Oops |
|
|
|
|
06-26-2011, 08:51 PM
|
#14 |
|
1 thing at a time is progress.
Join Date: Jun 2007
Location: Ball Ground GA
Posts: 5,511
|
Re: Sam's Man Cave 66 Project
Very nice looking project.
__________________
Alan
Philippians 2:14-16 |
|
|
|
|
06-27-2011, 12:34 AM
|
#15 | |
|
Registered User
Join Date: Apr 2011
Location: Sulphur, OK
Posts: 316
|
Re: Sam's Man Cave 66 Project
Quote:
Posted via Mobile Device
__________________
1966 C10 LWB, 283, 3 on the tree (lots of work to do!) http://67-72chevytrucks.com/vboard/s...d.php?t=471348 2001 Suburban daily driver 2008 HHR (wife's ride) |
|
|
|
|
|
06-27-2011, 10:31 PM
|
#16 | |
|
1 thing at a time is progress.
Join Date: Jun 2007
Location: Ball Ground GA
Posts: 5,511
|
Re: Sam's Man Cave 66 Project
Quote:
 Wish I could get a deal like that for $100.
__________________
Alan
Philippians 2:14-16 |
|
|
|
|
|
06-28-2011, 07:35 AM
|
#17 |
|
Registered User
Join Date: Mar 2005
Location: apple valley, ca
Posts: 2,670
|
Re: Sam's Man Cave 66 Project
What a killer deal for $100! A running truck is worth at least 5 times that much in my book. Plus, I love the factory turquoise color.
I would do the CLR & Scotchbrite trick on that thing. I just did mine (see my '64 link below) and it was amazing. Super cheap, easy to do, and man, what a difference. I just did the driver's side last weekend, and I'll post up more pics in the next few days.
__________________
Check out my latest endeavor: https://roundsixpod.com My build threads: '55 Chevy: http://67-72chevytrucks.com/vboard/s...d.php?t=247512 '64 C-20: http://67-72chevytrucks.com/vboard/s...d.php?t=446527 |
|
|
|
|
06-28-2011, 09:25 AM
|
#18 | |||
|
Registered User
Join Date: Apr 2011
Location: Sulphur, OK
Posts: 316
|
Re: Sam's Man Cave 66 Project
Quote:
yup I haven't kept any reciepts just a mild running tally of costs. I figure no matter what as long as I stick with my plan I'll come out better than buying something new to feed my little sickness The guy that's building the 71' with the 454 (pics above) told me he doesn't even ask what a part costs when he orders a part. It would just discourage him! I can't be that removed from it since my credit card obviously has a much lower limit than his Quote:
Quote:
 So I'm planning on trying it just to see what will come of it, but I'm thinking I'm going to have to do paint of some sort just to keep the rust from eating the truck. ol_skool_chevy had replied to another thread I posted with questions about paint vs. patina (meaning painting before doing the body work) with a suggestion to use 1 quart paint to 3 (or 4) quarts primer (sorry ol_skool I know that was top secret!!) which i suppose would seal it and also still be sandable... http://67-72chevytrucks.com/vboard/s...d.php?t=465457
__________________
1966 C10 LWB, 283, 3 on the tree (lots of work to do!) http://67-72chevytrucks.com/vboard/s...d.php?t=471348 2001 Suburban daily driver 2008 HHR (wife's ride) |
|||
|
|
|
|
06-28-2011, 10:04 AM
|
#19 |
|
Registered User
Join Date: Mar 2005
Location: apple valley, ca
Posts: 2,670
|
Re: Sam's Man Cave 66 Project
For bare metal areas, here's what I would do in the meantime:
When I CLR'd my truck, I found that GM used either red or black primer in certain areas. On mine, I found black on the bedsides and hood, and red primer on all the other parts. Take a good look at your areas that are bare and mimic the surrounding primer. Do a little prep on the bare areas and fog on some black or red oxide primer, lightly sand back the edges to blend it all in, and you're done. You can brush-touch any small bare metal nicks and do the same thing. You've got so much of that cool turquoise color to buzz it all off just yet. Cover the bare areas, then CLR/scotchbrite. It'll look like a completely different truck. Who knows, you might like it so much that you'll go the paint store and buy a gallon of cheap satin clear and seal it up and be finished!!
__________________
Check out my latest endeavor: https://roundsixpod.com My build threads: '55 Chevy: http://67-72chevytrucks.com/vboard/s...d.php?t=247512 '64 C-20: http://67-72chevytrucks.com/vboard/s...d.php?t=446527 |
|
|
|
|
06-28-2011, 10:33 AM
|
#20 | |
|
Registered User
Join Date: Apr 2011
Location: Sulphur, OK
Posts: 316
|
Re: Sam's Man Cave 66 Project
Quote:
I plan on trying the CLR treatment regardless of the outcome anyway so maybe I can use your suggestion with the primer and see how it comes out. Daverod has the coolest looking patina and it's shockingly all or mostly fake so it can be done I'm just not very confident of my skills (well the lack of anyway) so worst case scenario is I screw it all up and have to paint Part of the problem with running the patina, which I think looks cool, is that most folks in my area see that and think it's just another farmer driving around! People around here hear me talking about the patina look and give me some strange looks cause every other farmer is driving a 20 to 50 year old truck with "patina" and they just don't get that it has a following of sorts I guess I'm just going to have to make sure you won't be able to mistake the sound and stance of this truck as a farmer's ride!
__________________
1966 C10 LWB, 283, 3 on the tree (lots of work to do!) http://67-72chevytrucks.com/vboard/s...d.php?t=471348 2001 Suburban daily driver 2008 HHR (wife's ride) |
|
|
|
|
|
06-29-2011, 09:19 AM
|
#21 |
|
Registered User
Join Date: Apr 2011
Location: Sulphur, OK
Posts: 316
|
Re: Sam's Man Cave 66 Project
I've got a minor update for ya'll.
I had to try three different starters (all the same bolt pattern) in order to find one that fit properly but we finally got my new starter and new ignition switch installed last night. Engine fired right up! And to top off a fun night I actually got to drive my truck for the first time!!! I felt like a novice driver with the combo of no power steering, clutch, and column shift!! I've had vehicles with all three but it's been so looooong Super fun to drive...I think I really should get the bed tied down and a mount fabbed for the gas tank before I do too much more driving though. For a second I thought I had slung the entire bed off while spinning out the tires on my friends gravel drive!  Sorry I got so excited I forgot to take any pictures. My friend's going on vacation so the only plans for the next week or two is possibly head out there and try CLR on the ole girl to see what is left of the paint under all that rust I'll take pics if that plan actually comes to fruition.
__________________
1966 C10 LWB, 283, 3 on the tree (lots of work to do!) http://67-72chevytrucks.com/vboard/s...d.php?t=471348 2001 Suburban daily driver 2008 HHR (wife's ride) |
|
|
|
|
06-29-2011, 06:05 PM
|
#22 |
|
Zero Albedo
Join Date: Mar 2009
Location: San Gabriel, California
Posts: 478
|
Re: Sam's Man Cave 66 Project
Great deal and great truck! I'm running 2' cherry bombs(I too have wanted a set since I was a kid)on my 66 and I grin every time I start the truck. One good thing about having a low budget- if you cant pay someone to do it for you- you have to learn to do it yourself, and coming out of the project with a truck that you've done most of the work on is a wonderful feeling.
Best of luck, have fun, cant wait to see how this beauty turns out.
__________________
Baz "Deserve's got nothin' to do with it." 66 GMC 1500 wideside longbed 250 4spd "Project Rekker"http://67-72chevytrucks.com/vboard/s...d.php?t=467467 65 GMC 1Ton Panelhttp://67-72chevytrucks.com/vboard/s...32#post4794432 65 Chevy Panel (former U.S.Navy truck) 64 Chevy Suburban Carryall 4x4http://67-72chevytrucks.com/vboard/s...d.php?t=358348 64 GMC 1000 wideside longbed 305 4spdhttp://67-72chevytrucks.com/vboard/s....php?p=3600890(Rip- parts truck now) 68 Dodge Charger Last edited by monolith; 07-12-2011 at 11:40 PM. |
|
|
|
|
07-02-2011, 09:40 AM
|
#23 |
|
Registered User
Join Date: Apr 2011
Location: Sulphur, OK
Posts: 316
|
Re: Sam's Man Cave 66 Project
Well, I think I'm going to test the CLR treatment on the hood of my truck this morning before it gets too hot to work. It's been 100+ farenheit all week
Can anybody tell me how fast the CLR works on the rust? Should I expect it to magically disolve before my eyes or should I expect to be scrubbing until the scotchbright pad falls apart? I read in one thread to use about 4 to 1 ratio of water to CLR so that's what i'm going to try, I'm not sure though if I should let that sit on the rust for a while or just start scrubbing like Danny LaRusso prepping for a karate championship? ****crickets**** Uh you know like karate kid?...wax on...wax off...tough crowd Anyway can anybody throw me some pointers on this?
__________________
1966 C10 LWB, 283, 3 on the tree (lots of work to do!) http://67-72chevytrucks.com/vboard/s...d.php?t=471348 2001 Suburban daily driver 2008 HHR (wife's ride) |
|
|
|
|
07-02-2011, 10:12 AM
|
#24 |
|
Registered User
Join Date: Mar 2005
Location: apple valley, ca
Posts: 2,670
|
Re: Sam's Man Cave 66 Project
Yeah, get on that thing before it gets too hot! It's been 100+ here as well, and that makes it a real challenge to get anything done.
CLR doesn't work super-fast. I have tried different strengths (4-1, 2-1, full), and I didn't notice a huge difference. I use it at 100% strength (non-diluted) on all the heavily rusted areas. Spray it on, let it sit for a minute or two, and then scrub it with the Scotchbrite. Back away, spray it again. Do that 2 or 3 times. It'll create a rusty light brown foam when you scrub it, and that will keep the CLR from running all over the place, which is a good thing because it'll continue to work. When you're ready, grab the hose and while it's running over the area where you applied the CLR, scrub with the Scotchbrite. Wet-scrubbing with the Scotchbrite makes a big difference, and it dilutes all of the remnants, which will get messy. The MOST important tip I can give you: A fresh Scotchbrite will kick butt, and not long after, it'll act like it's not doing much. So make sure you have a good supply of Scotchbrite pads standing by. I bought a pack at Home Depot for around $4, and I've still got some left. I also bought another type of chemical at Home Depot called ZEP and it's a little cheaper than CLR and it might work even better. Also, wear gloves. I don't know how nasty that stuff is to your body, but it's always best to play it safe. Do a section at a time. It's something that will take a few days, but the results are worth it. Just pretend that the truck belongs to Mr. Miagi and when it's done, you'll be able to fight that blond punk from the Cobra Kai studio at the State Championships. Show him what that bird style Karate is all about! Go forth and conquer, Daniel-San.......... I cannot wait to see how this turns out. I think it'll look AWESOME!
__________________
Check out my latest endeavor: https://roundsixpod.com My build threads: '55 Chevy: http://67-72chevytrucks.com/vboard/s...d.php?t=247512 '64 C-20: http://67-72chevytrucks.com/vboard/s...d.php?t=446527 Last edited by chevyrestoguy; 07-02-2011 at 10:17 AM. |
|
|
|
|
07-02-2011, 10:37 AM
|
#25 | |
|
Registered User
Join Date: Apr 2011
Location: Sulphur, OK
Posts: 316
|
Re: Sam's Man Cave 66 Project
Quote:
I'm glad you got the joke! I was worried about my lame humor haha. Ok i'll post up pics this afternoon hopefully with some good results! I bought a handfull of scotchbright pads but i'll go grab more along with some gloves on my way out to the truck...thanks for the heads up! I wouldn't want to ruin my manacure
__________________
1966 C10 LWB, 283, 3 on the tree (lots of work to do!) http://67-72chevytrucks.com/vboard/s...d.php?t=471348 2001 Suburban daily driver 2008 HHR (wife's ride) |
|
|
|
|
|
| Bookmarks |
| Tags |
| 1966 c10, 283, cruiser, daily driver, hot rod |
|
|


 Linear Mode

