
|
|
|
 04-25-2018, 03:26 PM
|
#1 |
|
Registered User
 Join Date: Mar 2013
Location: Lenexa, KS
Posts: 547
|
Re: 1972 SWB Build
All of the front bits are out. Not the tedious task of cleaning all of the years of grease and grime off. This all looks to be original. I though that the coils had either been cut or heated, but when I removed them, they had no evidence of either. Once everything is cleaned and painted, I am going to install all of the Moog, Redhead, Ridetech and Wilwood hardware.
Slowly getting there... Here is the video from this week. Not much to video since it was all disassembly. Will get a lot more interesting when I start putting the new parts on! |

|

|
|
06-12-2018, 03:14 PM
|
#2 |
|
Registered User
Join Date: Mar 2013
Location: Lenexa, KS
Posts: 547
|
Re: 1972 SWB Build
Well, I took a month off from the truck. Between working 80 hour weeks and trying to spend time with the family, there just wasn't enough time. It was a nice little break. The entire front end was torn down, thoroughly cleaned and painted. I went ahead and had my control arms powder coated. The price was just too good to pass up. I'd have 3/4 of the cost in it in paint and time spent wire wheeling everything. Worth every penny. At this point, I am ready to start bolting everything back together. Yippee!
I also rebuilt the stock steering intermediate shaft with an Inline Tube replacement boot. My stock boot was torn and all of the grease had leaked out. Smooth as butter now! I tried contacting Inline to make sure the part would fit my truck, and true to form, they were no help. I ended up order it from Amazon on prime so I could send it back it it was not the right part. 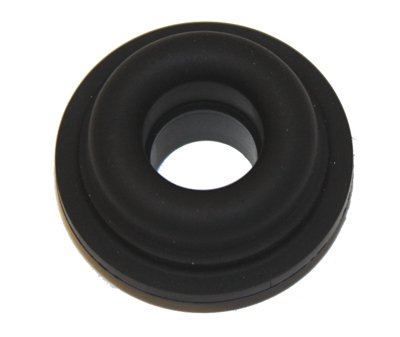 http://a.co/bEfmRPi All that is left to purchase is a new booster and Wilwood master. Going to put it on the lift to run all of the new brake lines and button this project up! Here is an update video of the progress to this point. |
|
|
|
|
06-16-2018, 11:25 PM
|
#3 |
|
Registered User
Join Date: May 2018
Location: Daly City
Posts: 28
|
Re: 1972 SWB Build
Good work!
Will be watching your videos as well. Keep it coming. |
|
|
|
|
06-18-2018, 10:19 AM
|
#4 | |
|
Registered User
Join Date: Mar 2013
Location: Lenexa, KS
Posts: 547
|
Re: 1972 SWB Build
Quote:
Thank you! |
|
|
|
|
|
06-18-2018, 12:37 PM
|
#5 |
|
Registered User
Join Date: Apr 2003
Location: Indep, MO
Posts: 5,893
|
Re: 1972 SWB Build
Looks nice!
__________________
Boppa's Old Yeller Truck Build, Old Yeller's New Heart! Project Buzz Bomb Flyin' Low! |
|
|
|
|
06-18-2018, 04:26 PM
|
#6 |
|
Still Learning
Join Date: Jul 2009
Location: Central Oklahoma
Posts: 10,108
|
Re: 1972 SWB Build
Very nice build! Subscribed...
|
|
|
|
|
07-02-2018, 10:05 AM
|
#7 |
|
Registered User
Join Date: Mar 2013
Location: Lenexa, KS
Posts: 547
|
Re: 1972 SWB Build
So the latest progress started off with the best of intentions. It fought me literally the entire time. The first little hiccup was the lower cross shafts. They holes were offset on the shaft. This was not mentioned in the instructions. I had to wait until Monday to call and ask. They are supposed to be installed with the holes offset towards the rear of the vehicle. This makes sense as that will give more caster. Bueno. Now, on to the next obstacle. How to drive in these bushing casings. Again, no mention in the instruction other than Drive the Outer Shell into the Control Arm until the Shell stops against the Control Arm. The pictures were for another style of control arm. No help there. So I came up with an idea, I cut a short section of 2" thin wall tubing, sliced it open so that it would slip around the shaft. This worked on exactly 1 of the casings. It was like trying to put a square peg in a round hole. We ended up strong arming 2 of the casings in with a brass hammer and socket. It was effective, but our arms were on fire. We ran out of time so I have 2 left, on on the pass upper control arm and 1 on the pass lower control arm. I am little bummed that it dinged up the paint on the cross shaft a little, but that's how it goes sometimes.
On a positive, the steering box and steering is installed. So that is good. |
|
|
|
|
07-09-2018, 11:10 AM
|
#8 |
|
Registered User
Join Date: Mar 2013
Location: Lenexa, KS
Posts: 547
|
Re: 1972 SWB Build
Spent some time yesterday working on the old girl. The front suspension is complete minus the driver side tie rod. My pitman arm is sitting a little low. Going to try to figure out what that is about. Need to carve out some time this week to install the rotor and brakes so I can put it back on the ground.
|
|
|
|
|
07-25-2018, 02:43 PM
|
#9 |
|
Registered User
Join Date: Jul 2012
Location: Rosenberg, Texas
Posts: 3,506
|
Re: 1972 SWB Build
Progressing nicely. You're using some nice parts too. I'll follow along for the rest of the ride.
__________________
-Duane C/10 Club Texas member 1971 Chevy C10 "Brutus" SWB Fleetside 2016 6.0L (L96) 6L90E (driver/project) 1965 Pontiac GTO "Royal Goat" 400/TH400 w/AC (my baby) |
|
|
|
|
07-26-2018, 10:30 AM
|
#10 | |
|
Registered User
Join Date: Mar 2013
Location: Lenexa, KS
Posts: 547
|
Re: 1972 SWB Build
Quote:
|
|
|
|
|
|
07-27-2018, 12:32 PM
|
#11 |
|
Strongman Garage
Join Date: Apr 2000
Location: Salinas, CA
Posts: 10,241
|
Re: 1972 SWB Build
Getting close and great videos!
__________________
Kalle 68 GMC Suburban 1500 4x4 SOLD 69 Pontiac Lemans 99 Silverado 4.8 5 speed ECSB [ Facebook Instagram Subscribe on YOUTUBE |
|
|
|
|
08-06-2018, 02:43 PM
|
#12 | |
|
Registered User
Join Date: Mar 2013
Location: Lenexa, KS
Posts: 547
|
Re: 1972 SWB Build
Quote:
|
|
|
|
|
|
08-06-2018, 03:06 PM
|
#13 |
|
Registered User
Join Date: Mar 2013
Location: Lenexa, KS
Posts: 547
|
Re: 1972 SWB Build
Spent some time yesterday working on the old girl. All of the brake lines are more or less installed. I just need to get some new unions and a tee and a few other parts. The booster/master as also fit up. I still need to bench bleed the master, but I am waiting to sort all of the brake lines first. I installed a ECE trans crossmember to help with driveshaft clearance. Getting closer...
We also bought the Eastwood brake line flaring tool. Man this thing is nice! Pictured below is the 5th flare I did with it. Perfect! |
|
|
|
|
08-13-2018, 03:04 PM
|
#14 |
|
Registered User
Join Date: Mar 2013
Location: Lenexa, KS
Posts: 547
|
Re: 1972 SWB Build
Spent some time out in the shop yesterday. I completely forgot to install the front sway bar. I had packed the box away. Opps. So I installed that and started in on modifying my stainless steel Inline Tube brake line kit. I made a short line that goes from the main line to the rear to the flex line down to the pumpkin. I flipped the tee around on the pumpkin do that it runs forwards instead of back like a typical 72. Since my crossmember is from a 69, it did not have provisions for the line like a typical 72. That went smoothly.
I started in on shortening the rear lines since I am running disc brakes out back. I cut them and started to flare them.... This is when it went south. I tried 3 times to flare the 3/16" line, and every time on the second process forming the flare, the material tore. It was a real head scratcher. I called Inline and they said there shouldn't be a problem using the flaring tool I have and gave me some pointers. Still didn't work. I talked to a family friend and he said that he has never been able to flare 3/16" stainless without tearing and he has the high $$$ Mastercool flaring tool. That made me feel a little better. The Eastwood tool had no problem with the 1/4" stainless line. Must be too much for the smaller 3/16". I was really hopping to do the whole system in stainless. I am going to pick up some nickel copper lines and make my own. They will be covered in the stainless spring so they will not stick out too much. That's how it goes sometimes. I didn't do anything with the lines going to the prop valve yet. I had to order a 7/16 to 3/8 inverted flare adapter to adapter the rear line to the Wilwood prop valve. Once that is hear, I can figure out the exactly length it needs to be. |
|
|
|
|
08-23-2018, 09:52 AM
|
#15 |
|
Still Learning
Join Date: Jul 2009
Location: Central Oklahoma
Posts: 10,108
|
Re: 1972 SWB Build
Looks great, very clean work!
|
|
|
|
|
08-23-2018, 11:44 AM
|
#16 | |
|
Registered User
Join Date: Mar 2013
Location: Lenexa, KS
Posts: 547
|
Re: 1972 SWB Build
Quote:
I have come to a crossroads... I went to put the headers back on the truck so that I could get it back on the road for a few months before winter comes. They don't fit wit the new Ridetech suspension. Doh... My initial reaction was to scrounge up some cast manifolds and make it work for a few months. I borrowed a couple different styles from a buddy to see what would work. I was talking with my wife about the situation and she drops a bomb. She gently reminds me that #3 is due right after the first of the year and that time is going to be really limited and she doesn't want me out in the garage all of the time leaving her with my two wild boys and the newborn. She says "why don't you just go ahead and buy the LS and swap it in now while you have time instead of bandaiding it so you can drive it for a couple of months and then try to find time to swap the engine in the spring?" I'm pretty sure I was smiling like a school boy from ear to ear and said okie dokie dear. So, plans have now changed. I am going to tiddy up everything from the rear end conversion, suspension upgrade and steering upgrade and prepare to pull the old 350/400 combo out. I have an 03 LQ4 that I bought a few years back that needs a rebuild and an 04 4l80E sitting on the shelf. In the interest of time, I am going to sell them off as well as the 350/400 combo and pickup a complete dropout LS setup. I have found a couple of yards semi close to me, American Pickup in Arkansas (board sponsor) and Sam's Riverside in Des Moines that have what I am looking for. I want to stay with a 6L, but am open to a newer 5.3. Must have a 4l80e or 6l90e. I am not messing around with a 60e. Now the hunt is on for the lowest mileage setup I can afford. The big items left to purchase:
There are lots of nickle and dime pieces as well. Items to sell:
Anyway, here is the video from last weekend. Kind of a bummer, but opened up a big door! |
|
|
|
|
|
08-23-2018, 03:35 PM
|
#17 |
|
Registered User
Join Date: Jul 2012
Location: Rosenberg, Texas
Posts: 3,506
|
Re: 1972 SWB Build
Wow, what a great wife you have! Not too often will a wife tell the husband to go spend more money...
 All joking aside, you might want to consider the 6L80 over the 6L90 if you're going the 6-speed route. They're basically the same, but the 6L90 is a little heavier duty and only comes with (as of about a year ago) either a 1410 or 1450 u-joint in slip yoke form. The trans slip yoke on my 6L90 is a 1410 and has a "conversion" u-joint on it to mate a 1410 to a 1350 at the trans end. If you aren't familiar with it, a 1310 was standard on these trucks (or at least my C10). 1350s are a typical upgrade for a performance build. 1400 series u-joints are typically for 1 ton and above vehicles. Or so I'm told. When I went to order my driveshaft, I had a few places tell me they don't have the equipment to work on the 6 speed transmissions. I found one in San Antonio, Texas (not to far from me) that was able to build me a 3.5" aluminum shaft for this. Check them out: http://www.driveshaftspecialist.com/ I'm sure there are others that can do it, and if you end up with the CV joint type mount, this might not be an issue at all.
__________________
-Duane C/10 Club Texas member 1971 Chevy C10 "Brutus" SWB Fleetside 2016 6.0L (L96) 6L90E (driver/project) 1965 Pontiac GTO "Royal Goat" 400/TH400 w/AC (my baby) |
|
|
|
|
08-23-2018, 03:41 PM
|
#18 | |
|
Registered User
Join Date: Mar 2013
Location: Lenexa, KS
Posts: 547
|
Re: 1972 SWB Build
Quote:
That is very good info. I hadn't thought about that. Sure enough I looked it up and the 90e uses a 36 spline 1410. The rear end I just rebuilt has a 1310. The rear end that was in the truck when I bought it has a 1330. I have a conversion in there now, but that is a moot point with a new driveshaft. I wonder if they can make a driveshaft with a 1410 on the trans end and a 1310 on the rear end? |
|
|
|
|
|
08-23-2018, 03:55 PM
|
#19 |
|
Registered User
Join Date: Jul 2012
Location: Rosenberg, Texas
Posts: 3,506
|
Re: 1972 SWB Build
From what a couple of driveshaft shops and the local hot rod shop told me, they need to match on the driveshaft. So if you run a 1410, I think it will only convert down to a 1350, not a 1310. So you'd have to find a 1310 to 1350 at the rear end. I don't know that they make a 1310 to 1350 conversion u-joint, but it would be worth looking into first. The shop I used to cut the driveshaft made it sound like the conversion u-joints weren't very common and I might want to buy an extra. I didn't because I'm fairly certain I'd lose it before I'd ever need it. But, still something to consider. Also, they did supply me with Spicer brand u-joints (good brand) so you might see if you can find a conversion u-joint from 1310 to 1350 before looking for a 6L90. Or consider having the pinion yoke changed to a 1350.
__________________
-Duane C/10 Club Texas member 1971 Chevy C10 "Brutus" SWB Fleetside 2016 6.0L (L96) 6L90E (driver/project) 1965 Pontiac GTO "Royal Goat" 400/TH400 w/AC (my baby) |
|
|
|
|
08-23-2018, 03:59 PM
|
#20 |
|
Registered User
Join Date: Mar 2013
Location: Lenexa, KS
Posts: 547
|
Re: 1972 SWB Build
That does make sense. Hrm. I will do some digging. Did a quick check,
Spicer makes a 1310 to 1350. I have a Spicer 1310 to 1330 in it now. I have not driven it though. I bet it has something to do with the outside dimension of the u-joints matching so you don't have any vibrations. Good info. Thank you! |
|
|
|
|
08-24-2018, 04:06 PM
|
#21 |
|
Registered User
Join Date: Mar 2013
Location: Lenexa, KS
Posts: 547
|
Re: 1972 SWB Build
I called my local driveshaft shop and this was their response. He said in the perfect world, it would be nice to swap the pinion yoke to a 1410, but since they don't make one, he said I can go 2 routes.
1) convert the 1410 to a 1350 with a conversion u-joint at the trans and swap out the pinion yoke to a 1350. 2) 1410 to 1410 on the trans side and 1310 to 1310 on the rear end side. He said the weak link with be the 1310 at the rear. Since I literally just rebuilt the rear end, I am inclined to have a driveshaft made that doesn't require a conversion u-joints and just keep that in mind and no go launching on drag radials. |
|
|
|
|
08-24-2018, 06:54 PM
|
#22 |
|
Registered User
Join Date: Jul 2012
Location: Rosenberg, Texas
Posts: 3,506
|
Re: 1972 SWB Build
If you do the conversion u-joints, it'll let you keep the driveshaft if you change the rearend later. But I see where you're going with it. If you keep the 1310 pinion yoke, you're really only limited by it, not the rest of the combo. You can always have a new driveshaft made if you change the rearend parts later.
I don't know what effect it has, but I've been told it's best to match the u-joint size on both ends of the driveshaft. I think they said it had something to do with balance and harmonics. It should also be on the same plane or alignment at both ends, not turned 90 degrees along the rotational axis. But, obviously it can be built anyway someone wants it. Personally, I wouldn't have a 1410 and 1310 u-joint on the driveshaft. I'd run the two conversion joints, but that's me. It'll work either way, but if...(this is a big IF for me since I don't really know what it would do) ...If you end up with driveline vibrations this would be my first suspect.
__________________
-Duane C/10 Club Texas member 1971 Chevy C10 "Brutus" SWB Fleetside 2016 6.0L (L96) 6L90E (driver/project) 1965 Pontiac GTO "Royal Goat" 400/TH400 w/AC (my baby) |
|
|
|
|
08-24-2018, 07:52 PM
|
#23 |
|
Registered User
Join Date: Mar 2013
Location: Lenexa, KS
Posts: 547
|
Re: 1972 SWB Build
Good points. I suppose I am getting ahead of myself. Depends on which trans I end up with. I like your thinking on the 1350 both ends with conversion joints. Leaves room for future changes.
Appreciate your input! |
|
|
|
|
09-04-2018, 10:52 AM
|
#24 |
|
Registered User
Join Date: Mar 2013
Location: Lenexa, KS
Posts: 547
|
Re: 1972 SWB Build
I've take a break from the truck for the past few weeks. I wanted to spend time with the family this past labor day. I did manage a couple hours on Saturday morning to put the bed back on and get it off the lift. I have started prepping for pulling the motor and trans. Still trying to locate a suitable engine trans combo to buy. I have narrowed it down to a later model 6.0. I want to stay away from the E78 ecm, so I am going to have to do some digging. I am going to buy a standalone harness in the interest of time. No one seems to make a standalone for the E78. I've also been looking at L77 6.0's as well, but they have AFM so I would have to tear it down to disable that. Decisions, decisions...
|
|
|
|
|
09-06-2018, 09:44 AM
|
#25 | |
|
Registered User
Join Date: Jul 2012
Location: Rosenberg, Texas
Posts: 3,506
|
Re: 1972 SWB Build
Quote:
I got a brand new harness from GM (mine was damaged by the freight company, so the seller put in a claim and got me a new harness) that I wound up cutting down on my own, so I don't have any experience with them. I have seen some of their work and it appears to be good quality stuff. A few other places I looked at told me I'd need to buy an E38 ECM from them to go with their harness in order for their stuff to work. That's an option still, but it wasn't going to work for me, since I had no idea if it would control my trans. I say all of that just so you don't have to rule out the E78 ECM setups. It won't narrow your search so much, and you could find a great deal because so many are trying to avoid them too.
__________________
-Duane C/10 Club Texas member 1971 Chevy C10 "Brutus" SWB Fleetside 2016 6.0L (L96) 6L90E (driver/project) 1965 Pontiac GTO "Royal Goat" 400/TH400 w/AC (my baby) |
|
|
|
|
 |
| Bookmarks |
|
|


 Hybrid Mode
