
|
|
|
 09-10-2012, 12:59 AM
|
#1 |
|
Registered User
Join Date: Aug 2012
Location: Salem Mo
Posts: 647
|
Re: 1957 Chevy truck re-rebuild
OKGMC4, you are so correct. Everything I touch I try to think of what and how I can make some small change that will add a personal touch.
Building that exhaust was an exhausting experience.  I started with a set of shorty headers by patriot exhaust. I didn't use the full length headers because I didn't want the headers to dictate how the exhaust was going to fit under the truck. I also had to build my own crossmember, at the time I figured I'd be trying to fit the exhaust up and over the crossmember. By looking at the last set of pictures you'll see no humps or drops to avoid hitting the crossmember.  I had a choice, build the crossmember first, then route the exhaust around it, or build the exhaust first, then build the crossmember around it. I chose to build the crossmember over the exhaust. 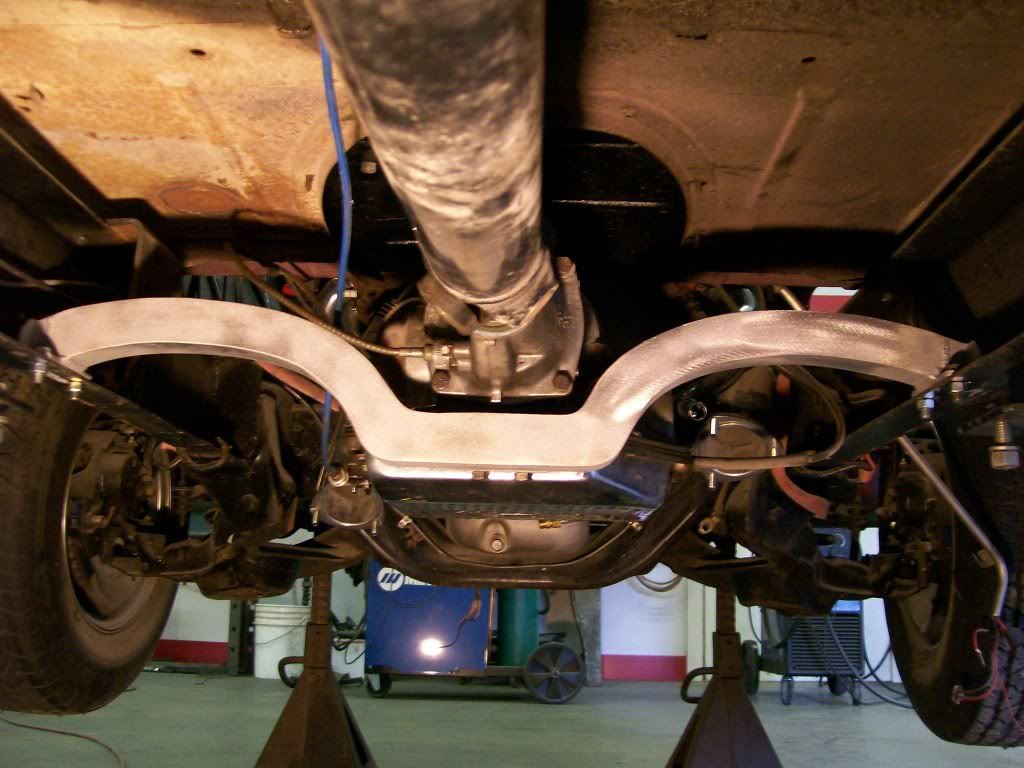 I figured there is performance lost when there are more bends put into the exhaust vs having the bends in the crossmember, which will have no effect on the performance. Next, the total exhaust can removed just by on bolting it and dropping it down. Next, the "X" in the exhaust is back far enough that the transmission can be removed with out touching the exhaust. Yes, I laid under the truck for a couple hours getting this figured out. I hope no one minds, but I have many pics of the process loaded so I'll show some of the work getting this all put together. Originally I was going to do a simple dual exhaust, then I thought about the side outlets, then I was going to do an "H"pipe. Then I didn't want to do all the fish mouth cuts to fit the pipes together. All I can say is, don't let time be the deciding factor in how much of yourself you put into a project. In the end it'll be worth it. What I smile on your face when you describe to people all you did to it later. I decided on the "x" pipe. 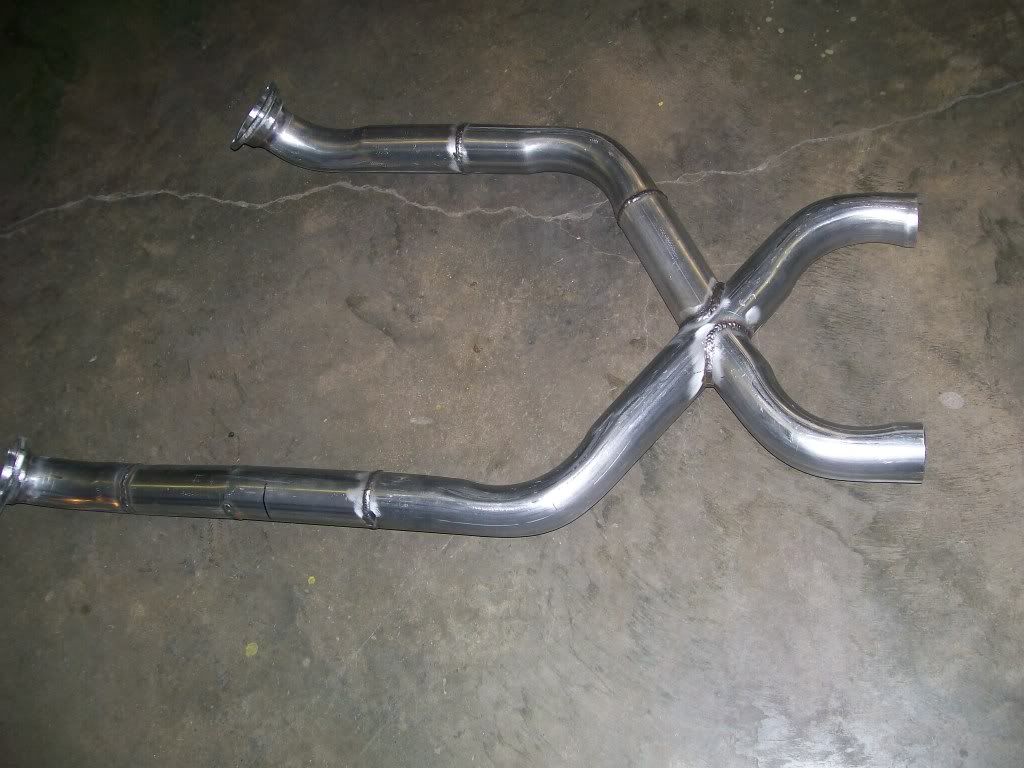 This would have been simple, just slide on a couple mufflers and run the tailpipes, or even the side pipes from here. 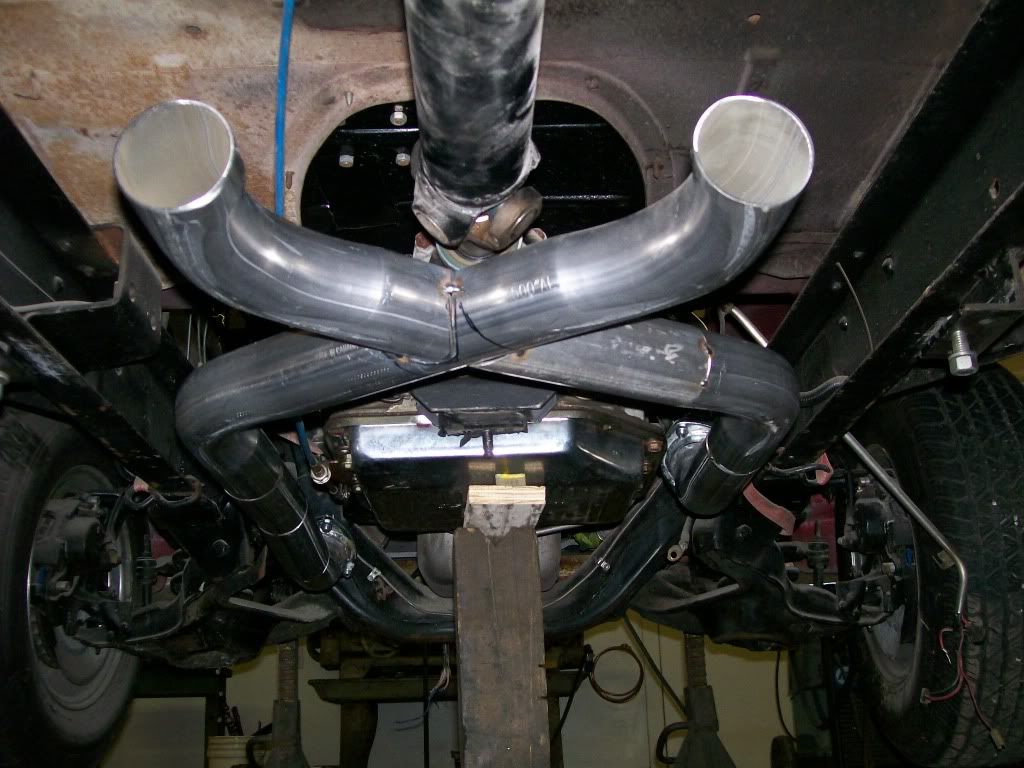 The headers didn't match at their outlets. So once I fabed up the collectors the drivers side was about an inch lower. I found it easier to cut a couple small wedges out of the pipe and pull the pipe back together. I can check the fit and remove more from the wedge if needed. Plus, the pipe is still together, I have some flexibility to get it at the perfect angle before I commit to the weld. 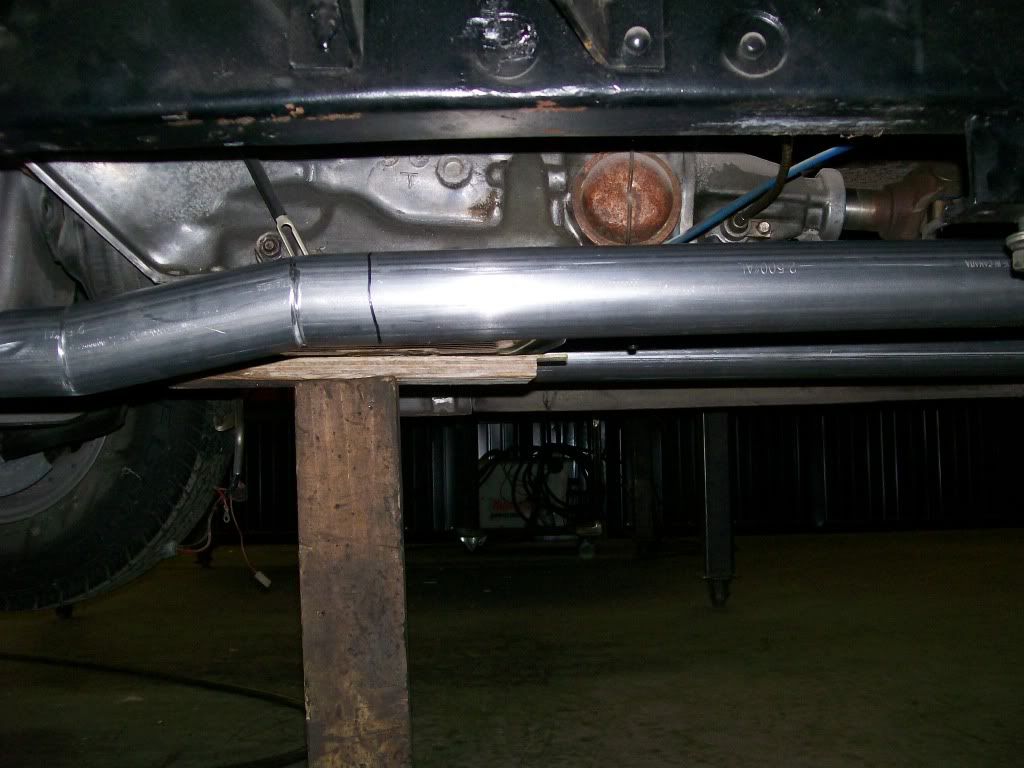 I wanted the same height for the passenger side and the drivers side, if they were off, the "x" would look lopsided. Working my way through building the "x". I know they have preformed "x"s available. I just have issues with being restricted to the prefitted angles of bought pieces sometimes. 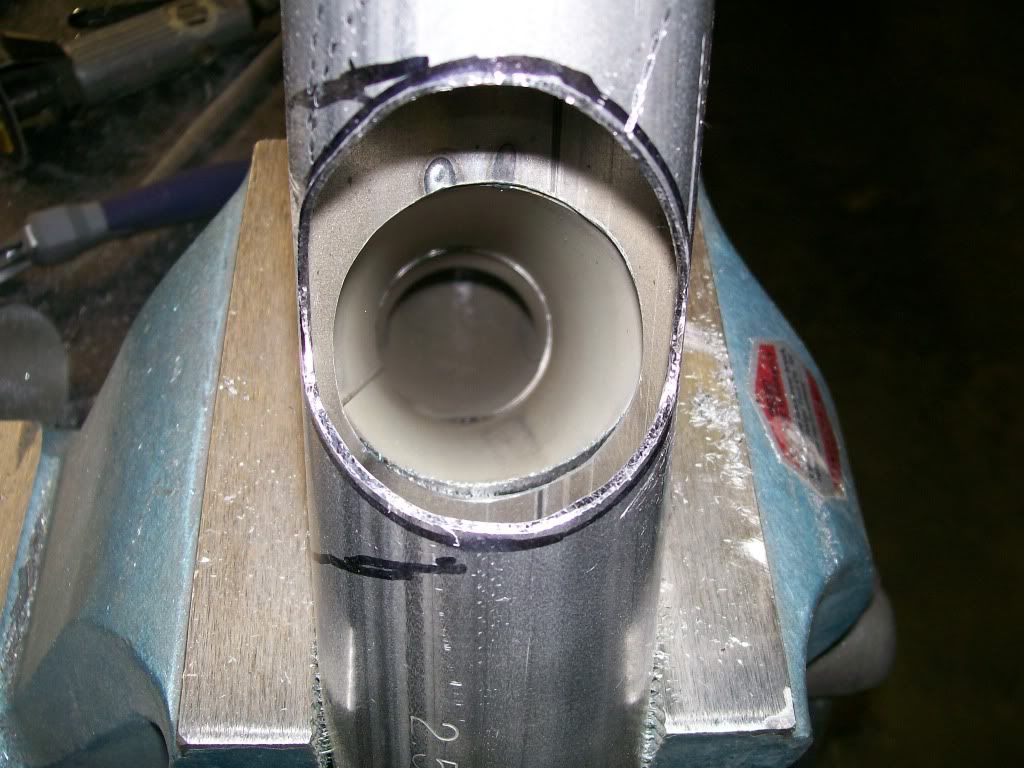 I can't believe this is going to work out ok. LOL.... 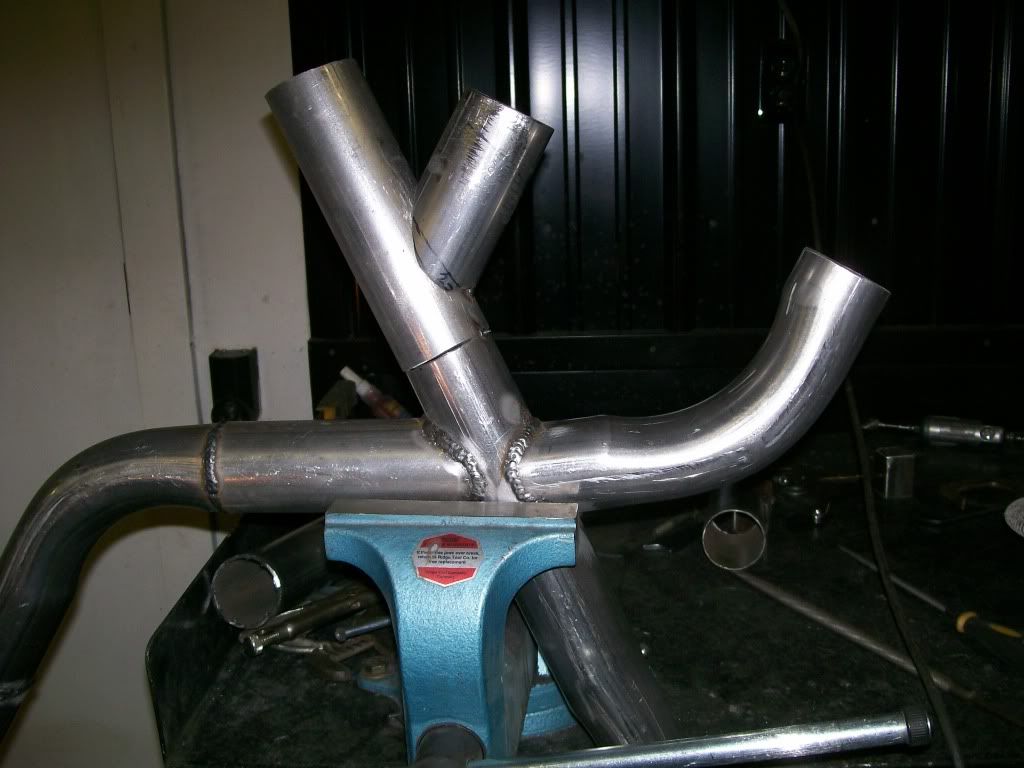 I need a flange on both sides of each of the cut out valves. I used the gasket and scanned it on the computer and had the Torchmate cut the flanges. I however do the bolthole drilling by hand. A plasma torch is not precise enough to cut the small boltholes. 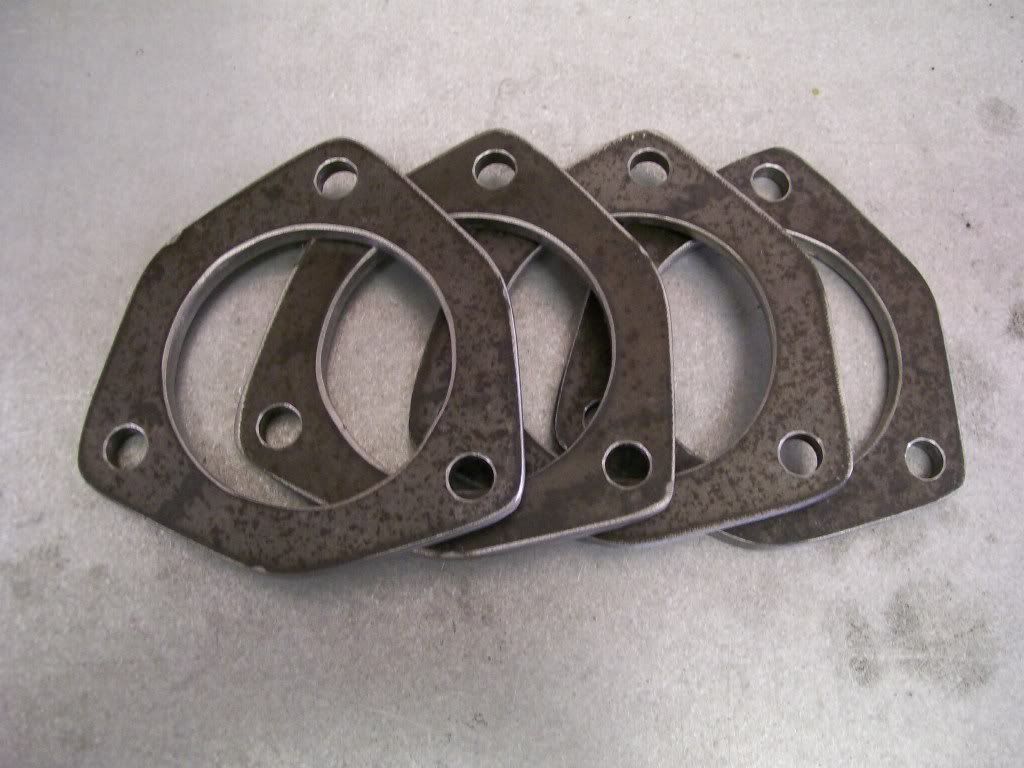 I had four flanges to drill. I drilled one flange to the exact dimensions. I then slid all four flanges together on a piece of pipe, then tack welded them all together. Then removed the pipe. Now with the drill press I can use the one that has the exact holes as my guide to drill all flanges that will be in perfect alignment with the bolt holes and the inside hole as well. 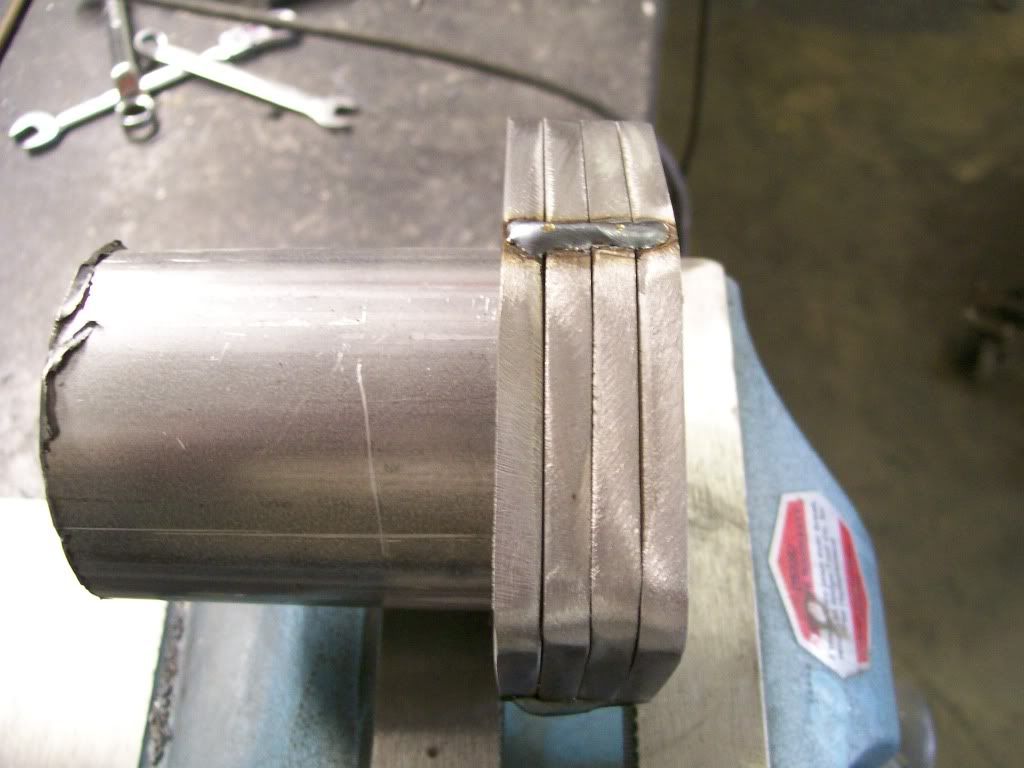 I'll continue the exhaust later, here is a teaser of how the cross member started. 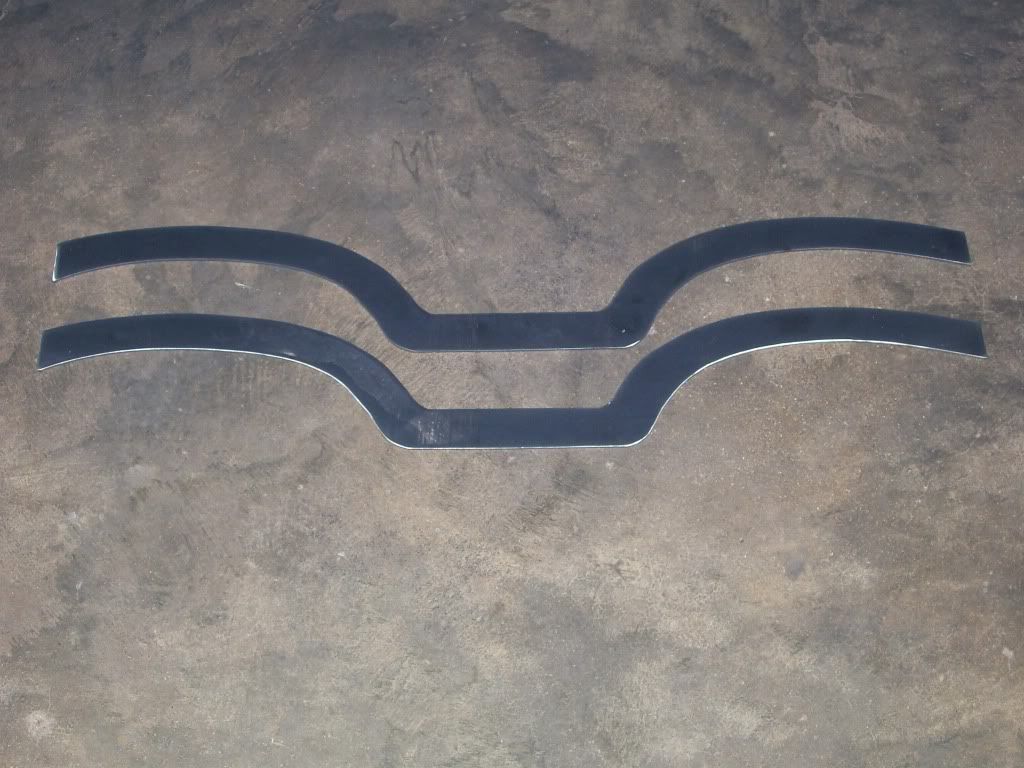
|

|

|
|
09-10-2012, 10:31 AM
|
#2 |
|
Registered User
Join Date: Aug 2007
Location: Corona, California
Posts: 7,998
|
Re: 1957 Chevy truck re-rebuild
Very nice work Jim.
Kim |
|
|
|
|
09-11-2012, 11:21 PM
|
#3 | |
|
Registered User
Join Date: Aug 2012
Location: Salem Mo
Posts: 647
|
Re: 1957 Chevy truck re-rebuild
Quote:
Thank you Kim. One concern I had when building the exhaust was the movement between the engine and the bed steps. I needed a way to allow flexing so the welds wouldn't be stressed. Thumbing through the Jegs catalog I found exactly what I was looking for. They are stainless steel with a braided covering over flex tubing within, exactly what I was looking for. 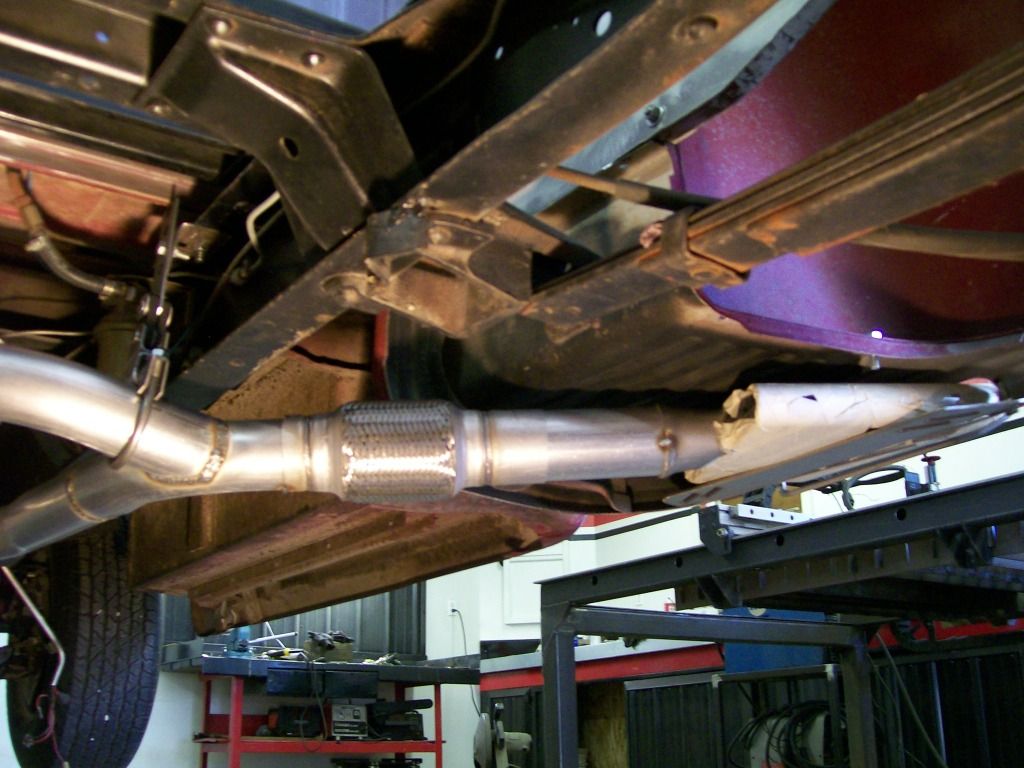 Once the exhaust took it's course I had to get the crossmember made. After taking measurements with the exhaust in place I cut the sides as in the last set of pictures. I used some tubing that was the same with that I wanted the crossmember to be when done. Then clamped the two sides together using these tube spacers. Before clamping as this stage, be sure the two sides are aligned as perfect as possible. 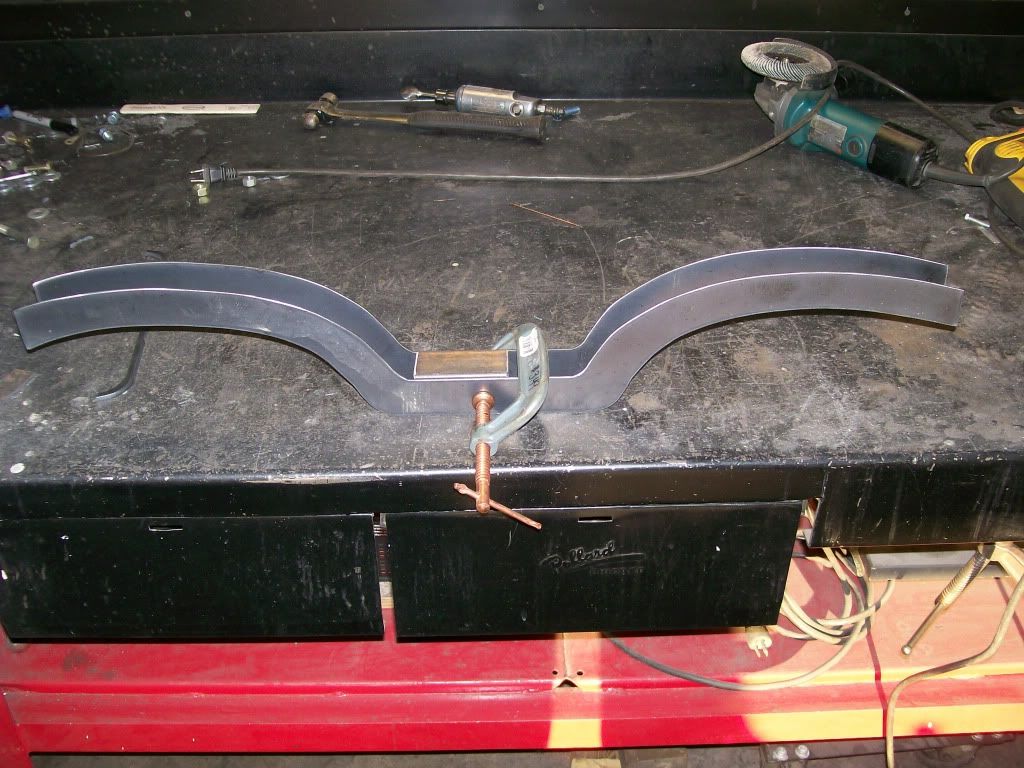 Once the clamping is done, I cut the top and bottom plates to match the width and length of space I have to cover. Now it's a matter of getting the top and bottom to follow the contour. 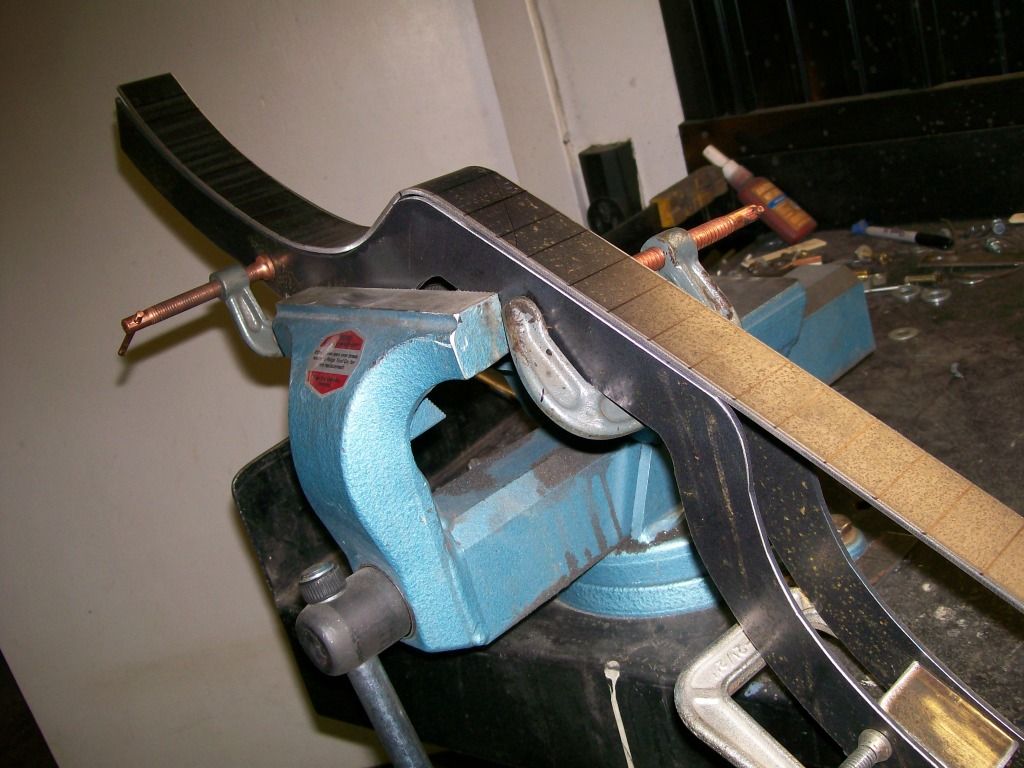 I did not want to use heat or a hammer. I used the press and slowly shaped the plates. The black sharpie markings on the plate gives me a reference to the exact 90 degree, now as I press shape the plate I know it's not going to start going off center. I have just a couple small areas to refine, but coming along quite fine. 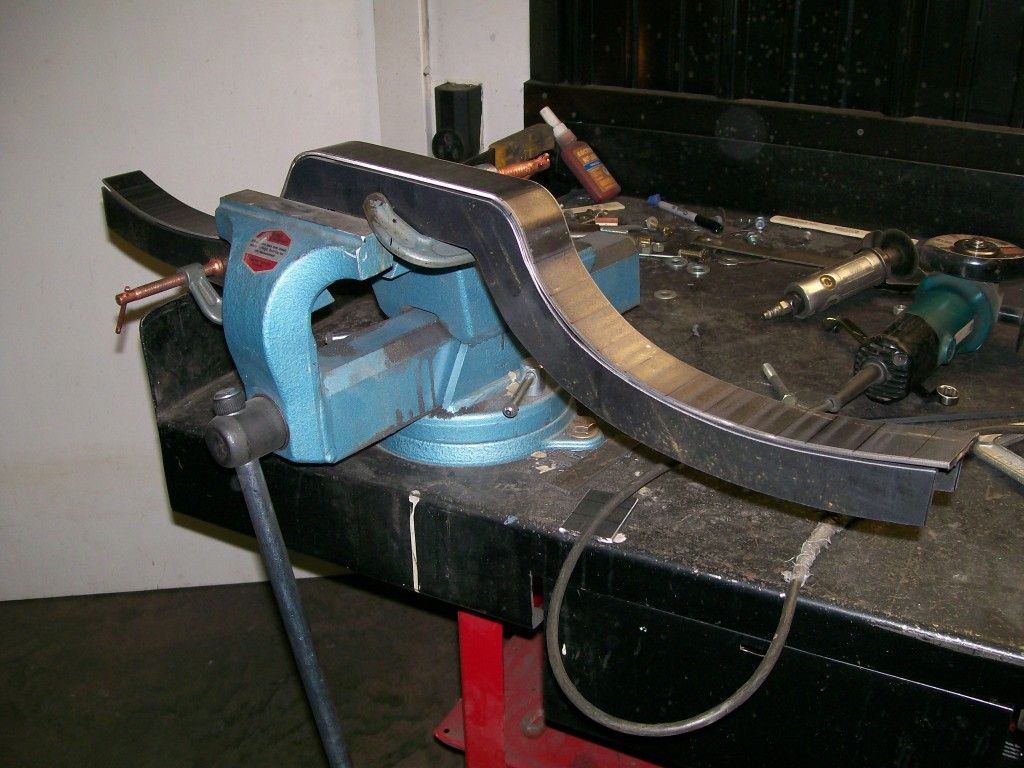 One plate done, one to go.
Last edited by Stepside Jim; 09-11-2012 at 11:26 PM. |
|
|
|
|
|
09-12-2012, 12:17 AM
|
#4 |
|
Registered User
Join Date: Aug 2007
Location: Corona, California
Posts: 7,998
|
Re: 1957 Chevy truck re-rebuild
Very slick way to make the cross member.
Kim |
|
|
|
|
09-12-2012, 01:09 PM
|
#5 |
|
Registered User
Join Date: Jan 2012
Location: Motown
Posts: 7,677
|
Re: 1957 Chevy truck re-rebuild
nice work on that x-member
__________________
cool, an ogre smiley  Ogre's 58 Truk build Ogre's 58 Truk buildhow to put your truck year and build thread into your signature shop air compressor timer |
|
|
|
|
09-13-2012, 11:42 PM
|
#6 |
|
Registered User
Join Date: Aug 2012
Location: Salem Mo
Posts: 647
|
Re: 1957 Chevy truck re-rebuild
Earlier I mentioned the idea of either having the exhaust route around the crossmember or having the crossmember route around the exhaust. I went for option 2, crossmember around the exhaust.
One picture of the center where the crossmember drops between the pipes and under the transmission. 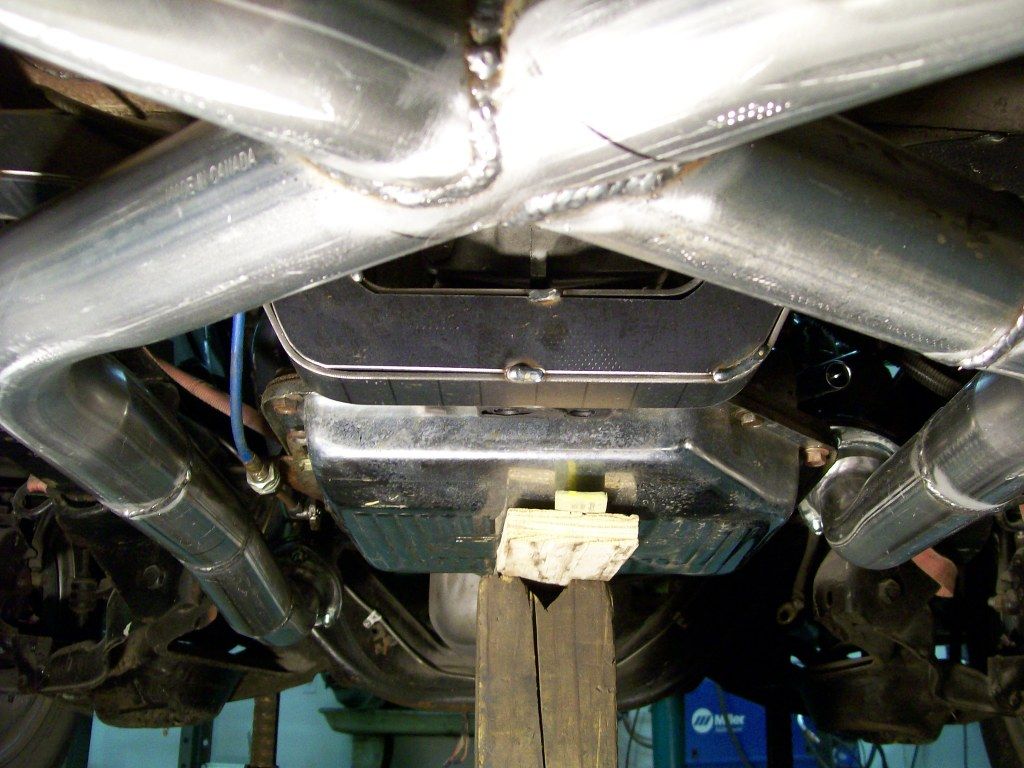 Passenger side. 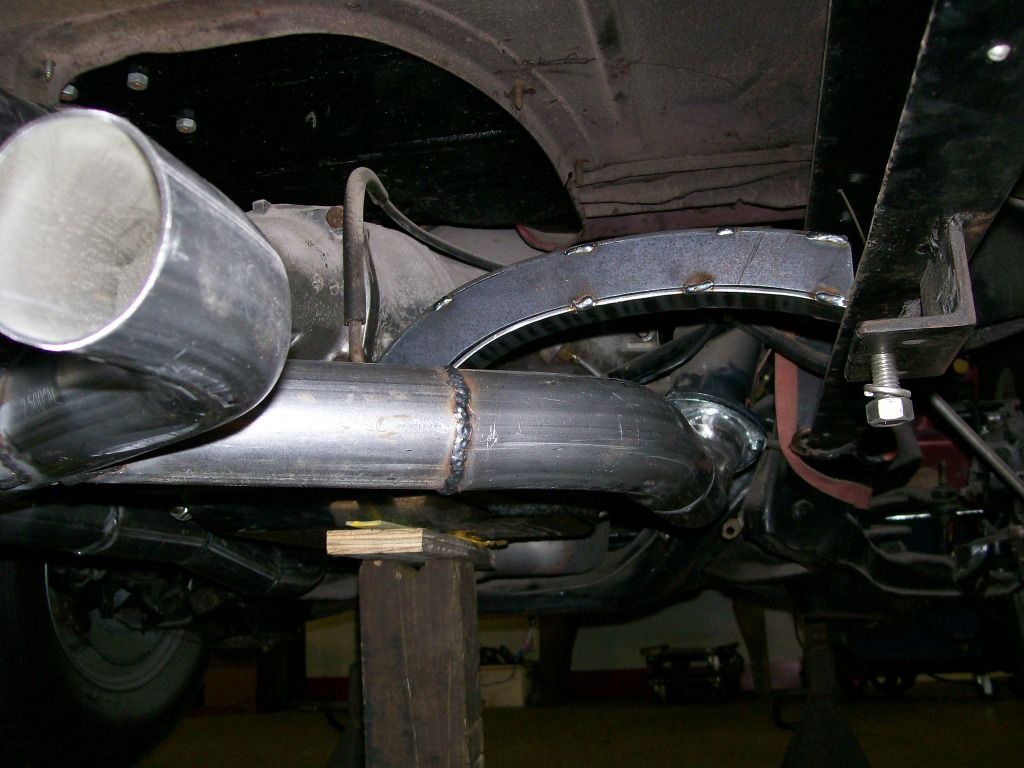 Drivers side. 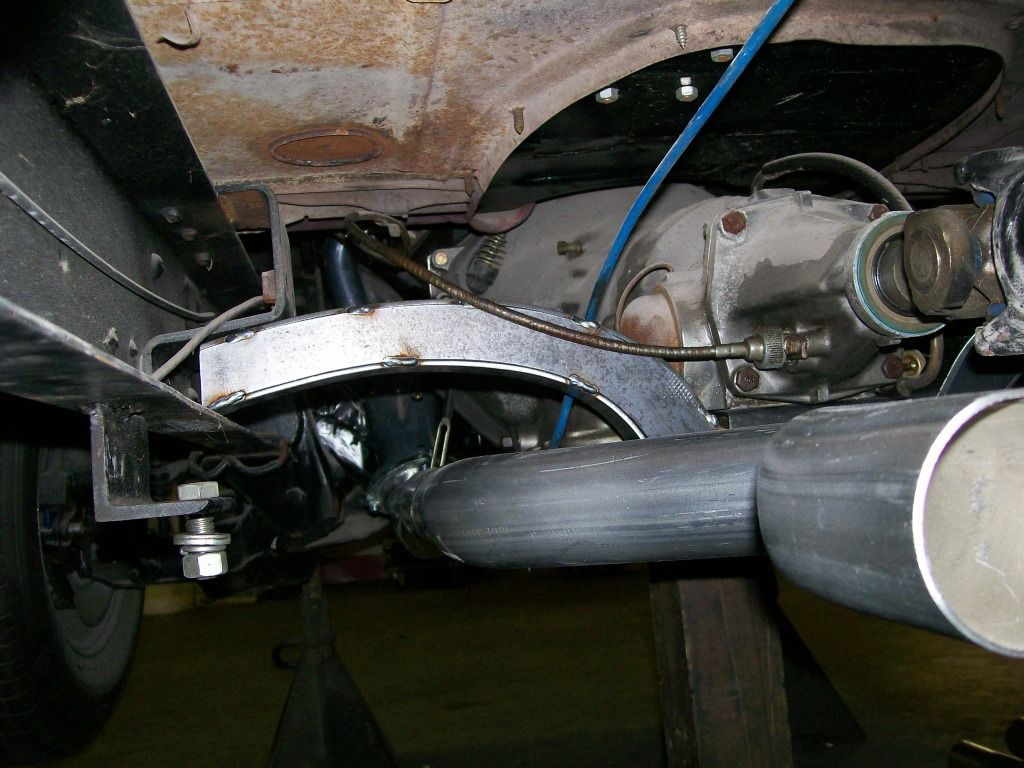 I'm very happy with the fit of the crossmember. Next I have to fabricate the mounting tabs on both the frame mounts and the transmission mount. |
|
|
|
|
09-13-2012, 11:56 PM
|
#7 |
|
Registered User
Join Date: Aug 2007
Location: Corona, California
Posts: 7,998
|
Re: 1957 Chevy truck re-rebuild
Looking real nice.
Kim |
|
|
|
|
09-14-2012, 12:19 AM
|
#8 |
|
Registered User
 Join Date: May 2011
Location: Murrieta, Ca
Posts: 70
|
Re: 1957 Chevy truck re-rebuild
I know I'm a little late to say this but I love your tail light setup you made
Posted via Mobile Device
__________________
55 gmc longbed stepside project http://67-72chevytrucks.com/vboard/s...28#post4708828 |
|
|
|
|
09-14-2012, 12:12 PM
|
#9 |
|
56 - autocross
Join Date: Apr 2010
Location: Camarillo, Ca
Posts: 1,121
|
Re: 1957 Chevy truck re-rebuild
The taillight set up is great. Have been looking for a good solution, and that might be it. Can we get a copy of the shape of the pieces? Do you have any pics and build of the rear bumper fill panel? Did you alter the bumper at all? Also, dont really understand the boltless rear system that hold the whole thing together.
Beautiful Fab work. Cant believe that I have not seen it until now. I want a torchmate. |
|
|
|
|
09-14-2012, 01:30 PM
|
#10 |
|
Registered User
Join Date: Aug 2012
Location: Salem Mo
Posts: 647
|
Re: 1957 Chevy truck re-rebuild
The last two posts on the taillights, Thanks guys. I'm relatively new to working on these old Chevy trucks and to build something I haven't seen before gets me a little nervous. Having posts that like the ideas always helps fuel the passion to keep going.
hotrod1, I can perhaps go one better on the taillight sheet metal... I still have the patterns for the 3 main sections of the housings, not including the circular part I made from 3 inch exhaust pipe. For a reasonable price, I can cut the sections on the torchmate and ship them to you. You would have to shape the outer flat to match the outer curve of the housing then weld it all together. Everything in the picture below for both sides, not including the round tubes. 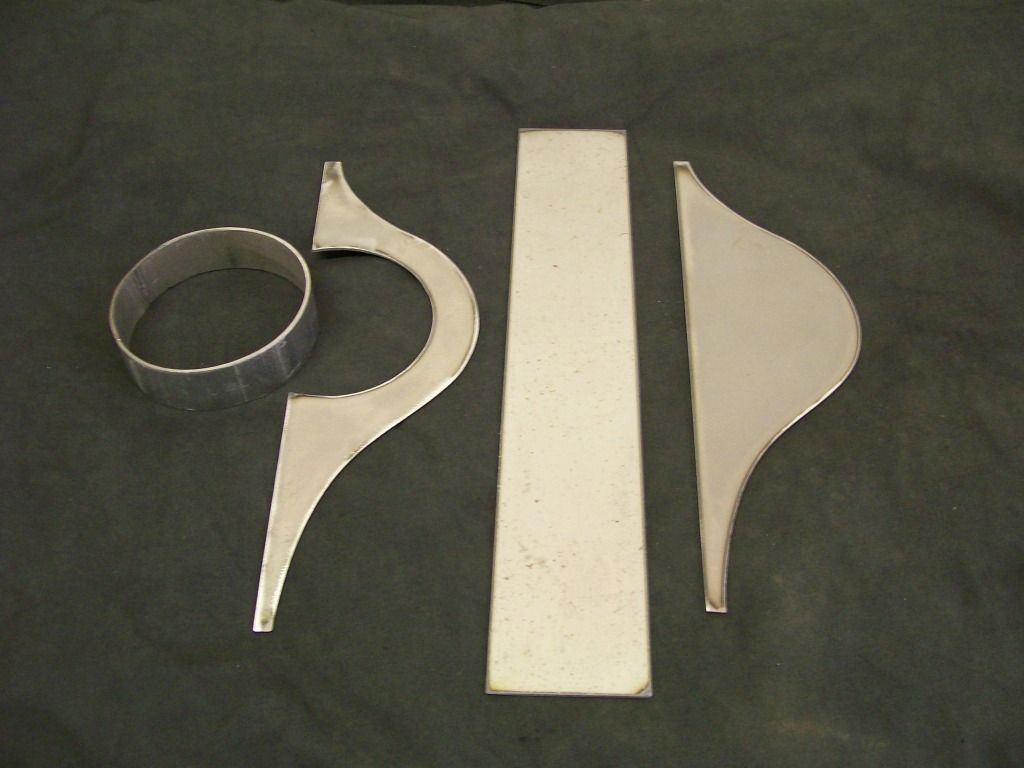 I also loaded the pics of making the eyebrows. I mentioned before, the main was cut from 4" exhaust pipe, it worked great, the near perfect curve is already there. I cut a small flange that would give me a flat flange to run a couple screws through to mount the eyebrow. 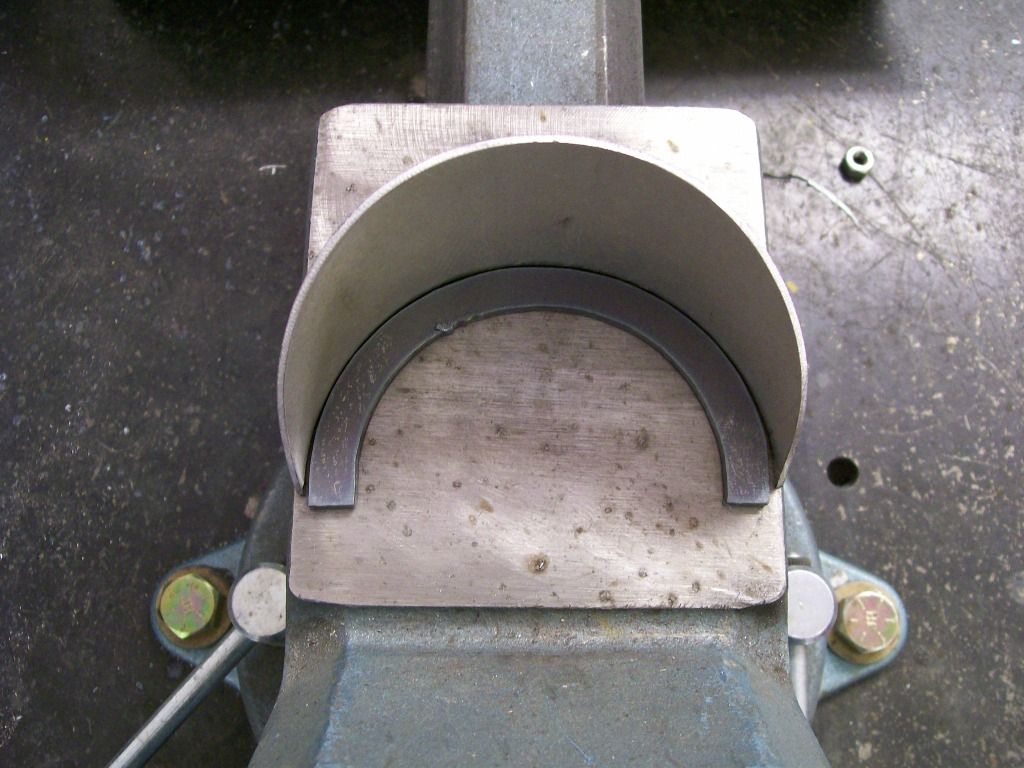 I welded the flange onto the eyebrow. I stitch welded, I didn't want to heat or burn through to the inside where I screw heads would be mating up to the flange. 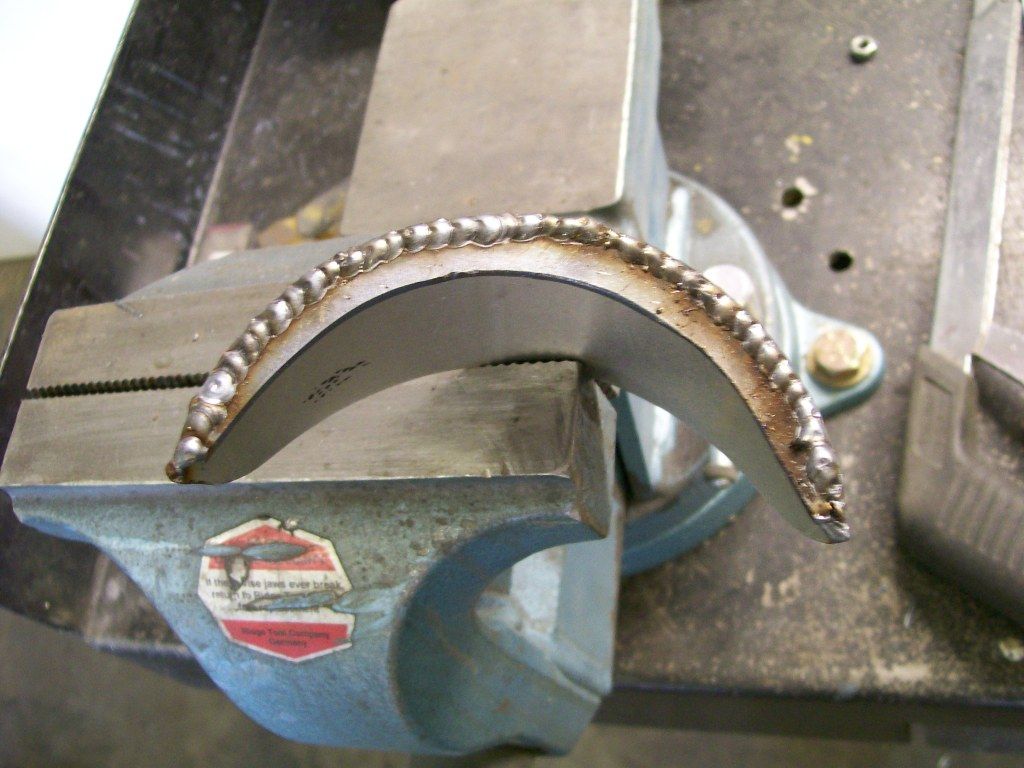 The 4 1/2" grinder with the 40 grit flap disc is my go to tool anymore, so agressive yet so fine at the same time. 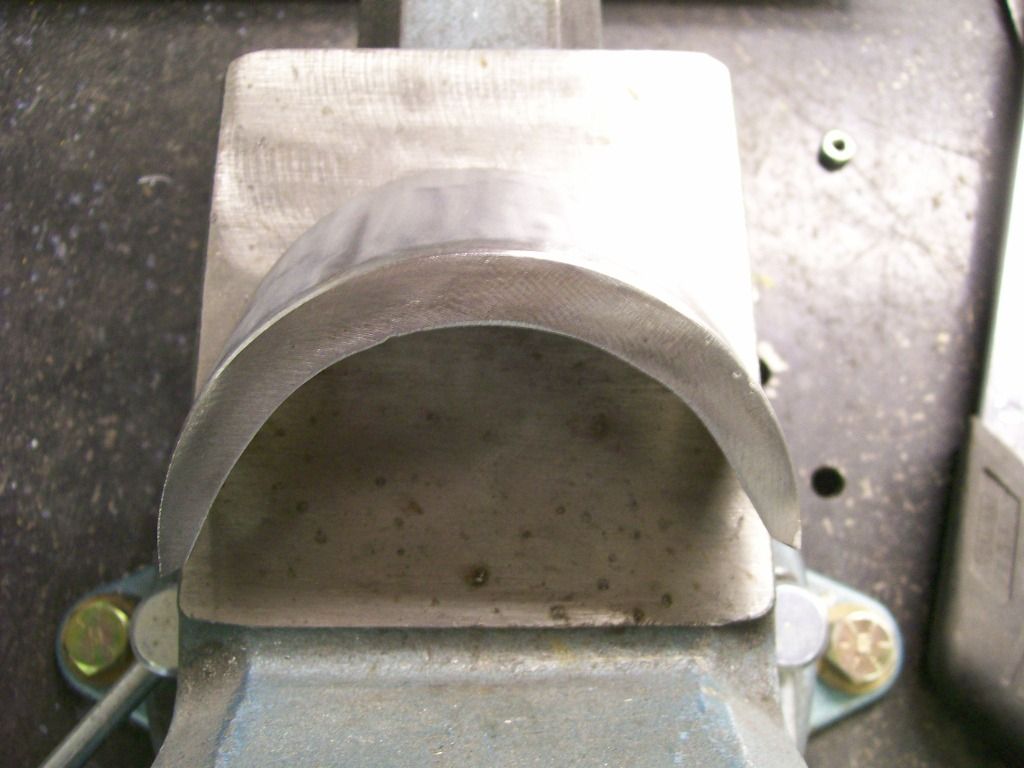 Perfectly clean on the under side of the weld. 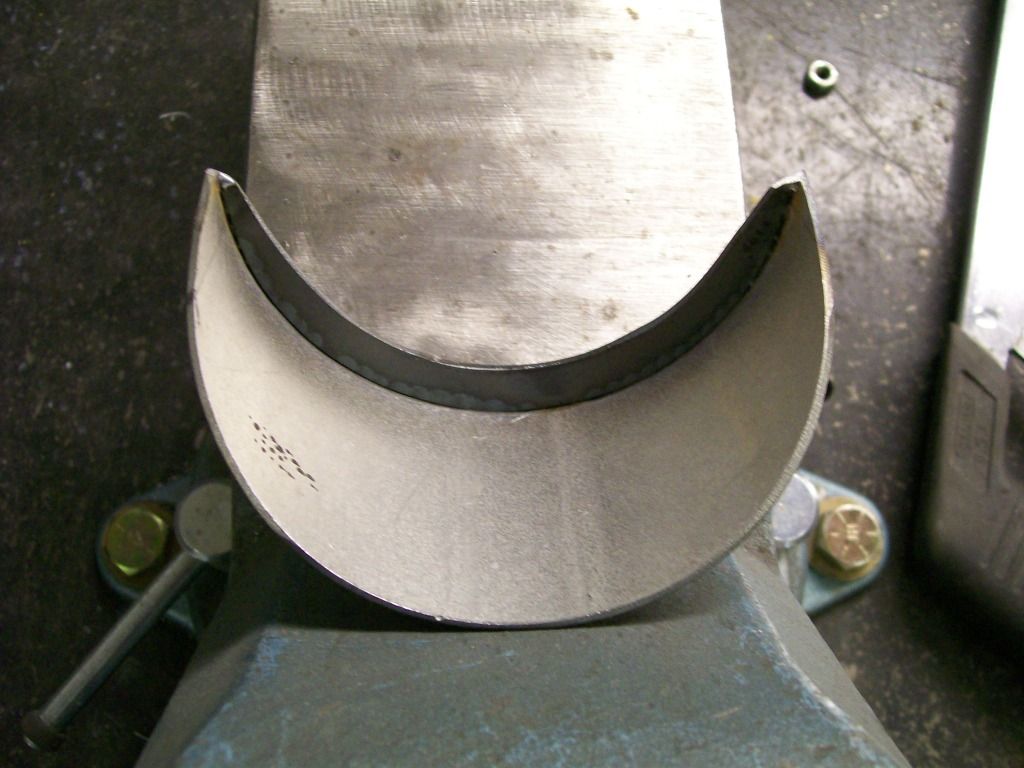 An idea of how it holds to the bed. Simply remove the two screws that hold the taillight in place, remove the tailight, now hold a nut on the backside and tighten the eyebrows with a scredriver. 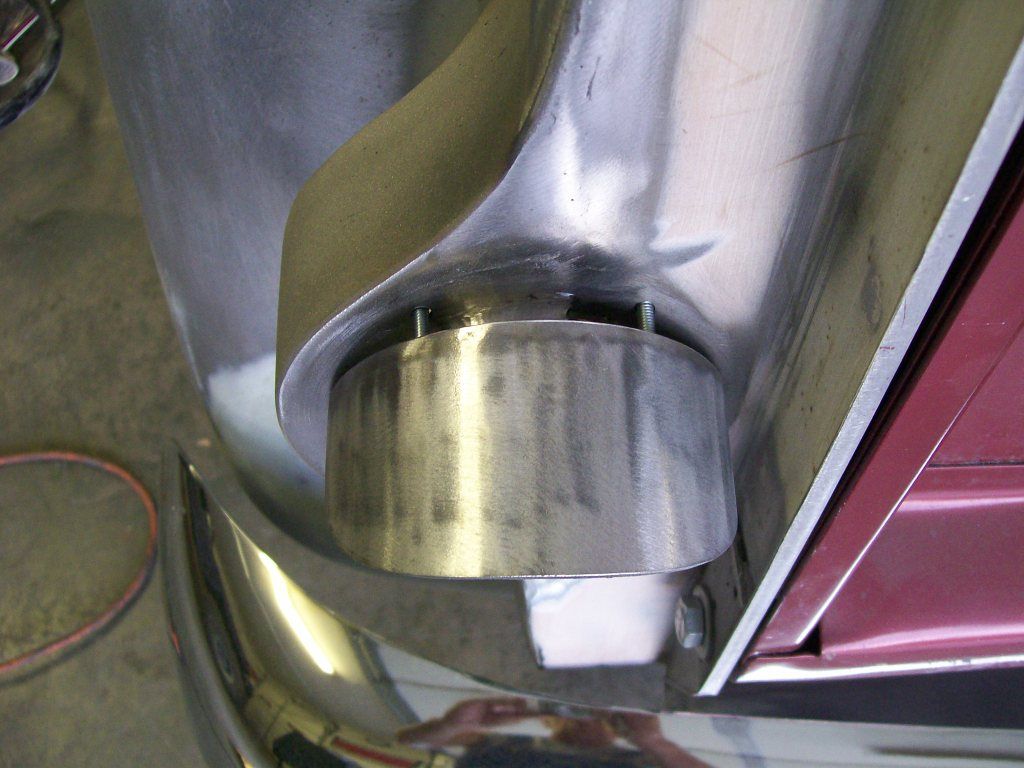 I need to load more pics, hope this helps so far. |
|
|
|
|
09-14-2012, 02:31 PM
|
#11 |
|
Registered User
Join Date: Jun 2006
Location: Idaho
Posts: 8,800
|
Re: 1957 Chevy truck re-rebuild
Inspiring fabrication on the exhaust and taillights, keep the photos and detailed descriptions coming.
__________________
1959 Chevy Short Fleetside w/ 74 4WD drive train (current project) OrrieG Build Thread 1964 Chevelle Malibu w/ 355-350TH (daily driver) Helpful AD and TF Manual Site Old Car Manual Project |
|
|
|
|
09-15-2012, 12:40 PM
|
#12 | |
|
56 - autocross
Join Date: Apr 2010
Location: Camarillo, Ca
Posts: 1,121
|
Re: 1957 Chevy truck re-rebuild
Quote:
Stepside Jim: Thanks for that generous offer. I appreciate it. I am still looking at other options but will let you know. How did you get rid of the bolts that hold the rear cross member (underneath the tailgate) to the side of the fenders? I am also curious about your roll pan. Looks great. |
|
|
|
|
|
09-15-2012, 07:05 PM
|
#13 | |
|
Registered User
Join Date: Aug 2012
Location: Salem Mo
Posts: 647
|
Re: 1957 Chevy truck re-rebuild
Quote:
Oh yeah, I remember those bolt holes. There were the ones for the taillight brackets and the ones that held the bed together, and I think a couple others also. Let's just say the bed isn't coming apart very easy now. With all the bolts removed, I simply welded all the holes shut while at the same time welding everything together. I'll get the pictures for the roll pan up soon. It started with a piece of 16 guage sheet metal with a 90 degree bend. The pictures will be well detailed once I get them posted. |
|
|
|
|
|
12-08-2012, 06:48 PM
|
#14 | |
|
Registered User
Join Date: May 2012
Location: Finley, TN.
Posts: 198
|
Re: 1957 Chevy truck re-rebuild
Quote:
|
|
|
|
|
|
09-14-2012, 06:09 PM
|
#15 |
|
Registered User
Join Date: Aug 2007
Location: Corona, California
Posts: 7,998
|
Re: 1957 Chevy truck re-rebuild
For being new at these old trucks you sure do have some great ideas and skill that we all can appreciate and draw inspiration from.
Kim |
|
|
|
|
09-15-2012, 08:40 PM
|
#16 |
|
Registered User
Join Date: Mar 2012
Location: Vail AZ.
Posts: 104
|
Re: 1957 Chevy truck re-rebuild
Awesome workmanship, do keep the photos coming your doing a great job.
|
|
|
|
|
09-15-2012, 10:24 PM
|
#17 |
|
Registered User
Join Date: Aug 2012
Location: Salem Mo
Posts: 647
|
Re: 1957 Chevy truck re-rebuild
Before I get to the roll pan, I'm going to finish the transmission crossmember.
Once I shaped the top and bottom plates to match the side plates I fully welded all four plates together. Then carefully grinding with the 4 1/2" grinder I cleaned the welds to where the whole crossmember looks like one tube bent to this shape. 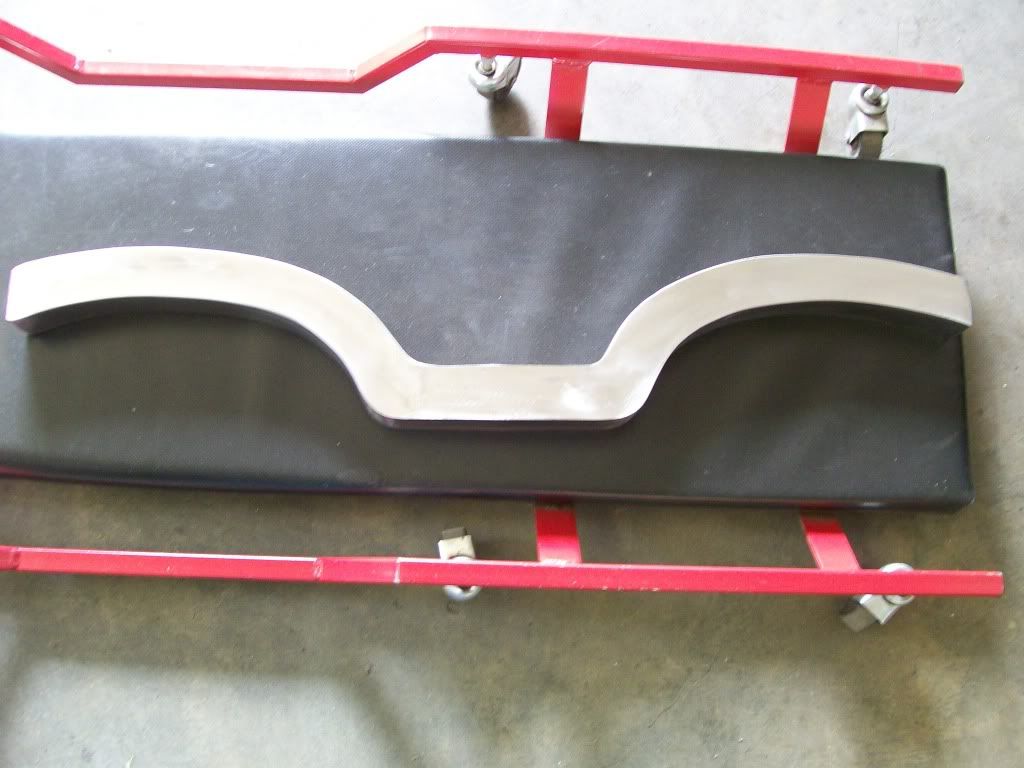 Once I was pleased with the main structure I just had to create the mounting pads on the ends and the center mount tab for the transmission. One thing I won't do without is a sandblaster. It is more than just a way to clean rust. Often times after welding and grinding there is the grinding marks to deal with. I like the sandblasting because it removes the markings from the grinding and now the surface consistancy is pleasing to the eye. 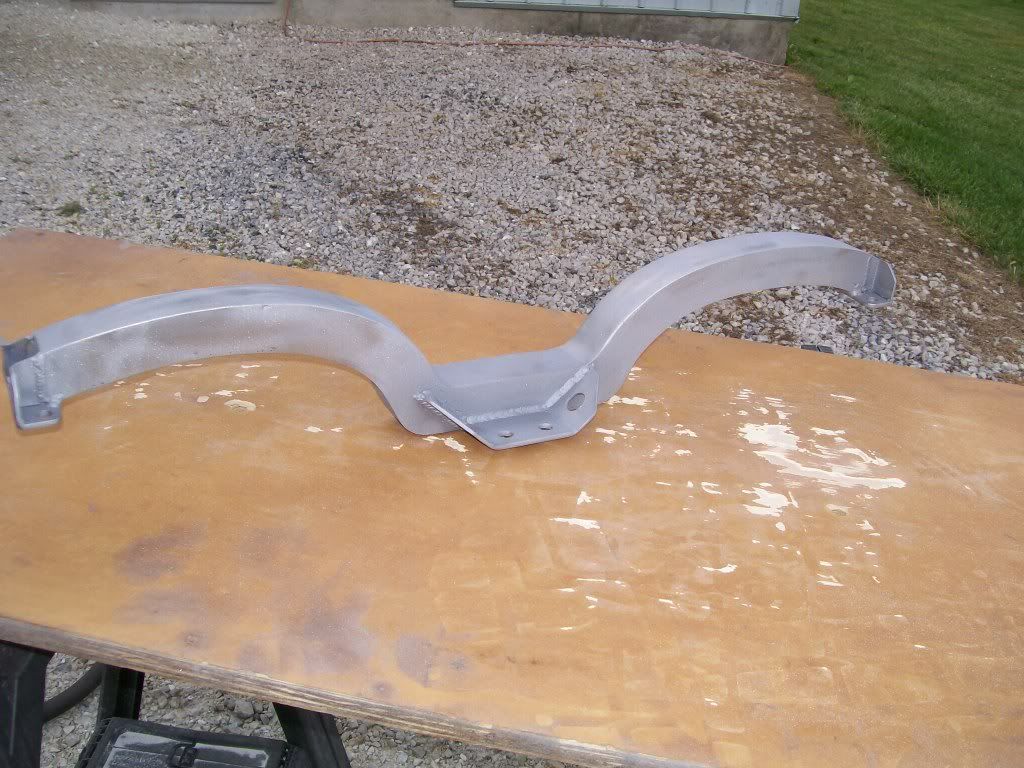 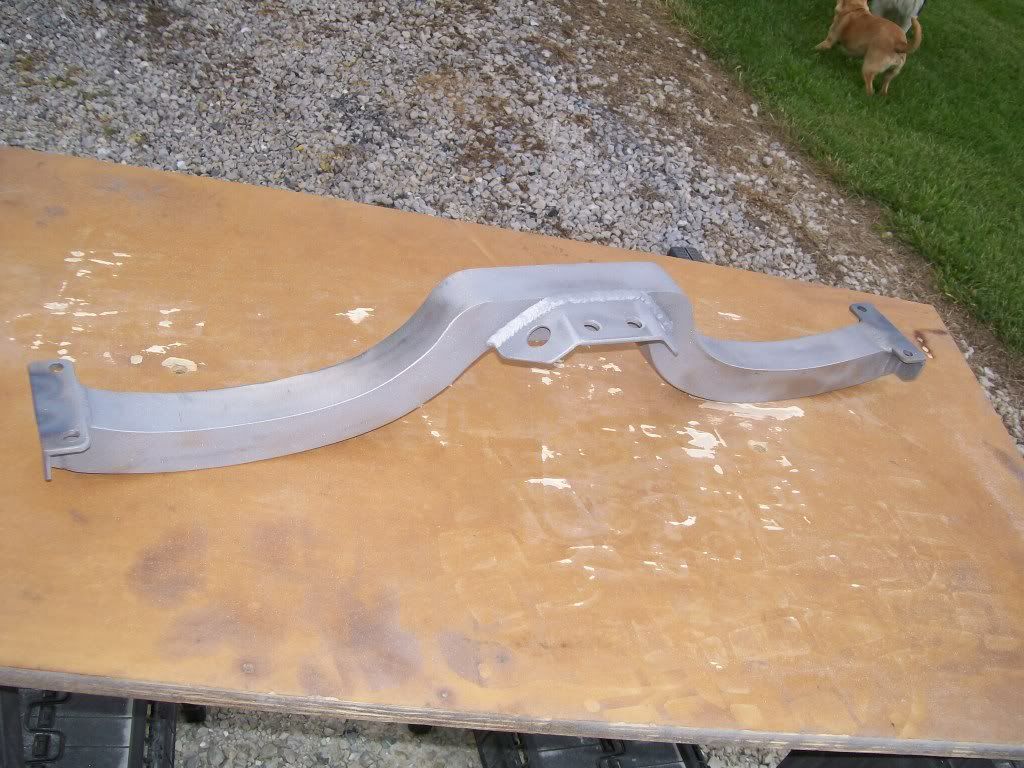 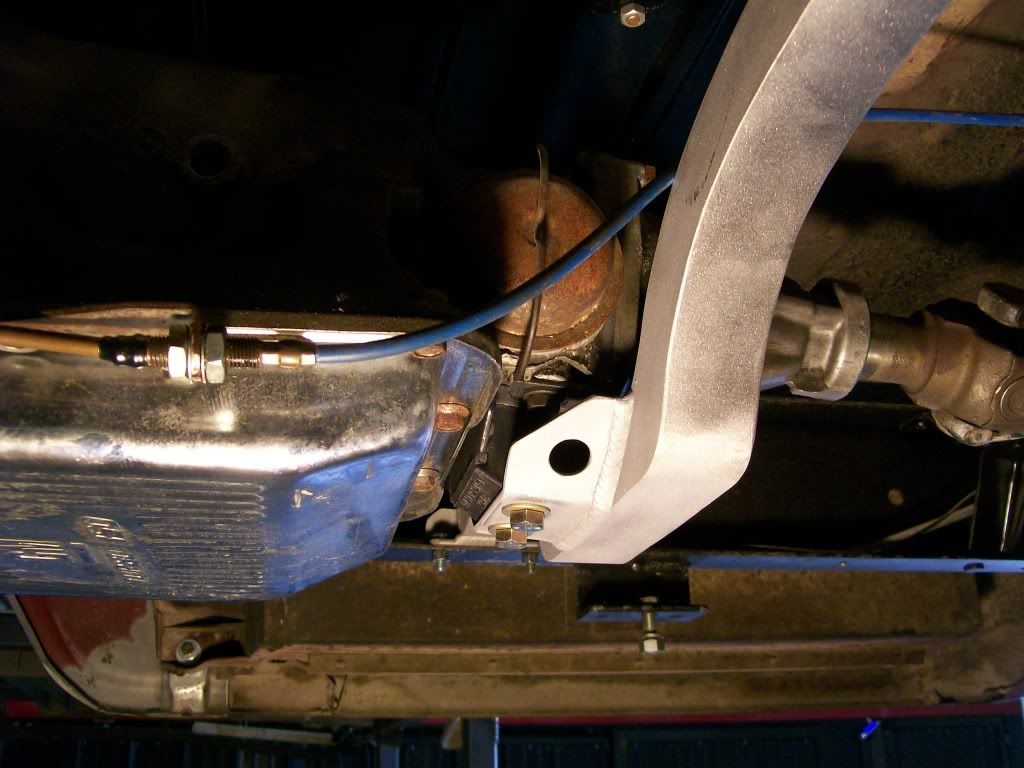 The sandblasting also leaves a good surface for most primers and coatings. |
|
|
|
|
09-16-2012, 12:03 AM
|
#18 |
|
Registered User
Join Date: Aug 2007
Location: Corona, California
Posts: 7,998
|
Re: 1957 Chevy truck re-rebuild
Real nice work.
Kim |
|
|
|
|
09-17-2012, 10:00 AM
|
#19 |
|
Registered User
Join Date: Aug 2012
Location: Salem Mo
Posts: 647
|
Re: 1957 Chevy truck re-rebuild
Earlier I went through the shortening and raising the rear bumper brackets. One thing I really like about bringing the rear bumper forward is that now the rear bumper pretty well matches the way front bumper comes around and overlaps the side fenders.
This was something that the other bumper did that was on here before but it was from a different/newer vehicle. The original front has a rounded look to it, and one that was on it had a square look to it. It just didn't match. Before I started working on this truck I never paid attention to the original fit of the rear bumper and I never noticed there wasn't a filler panel to fill the open area between the bumper and the bed. Time to fill the gap.... Once I got the bumper where I wanted it I grabbed a piece of bent 16 guage sheet metal I had left over. My original intention was to use this as a mock up, then have another one bent that will replace the experiments that I will do while building the filler panel. I ended up using this piece although I had to do some axtra welding, at least I don't have to start all over making another piece. Here's the gap. 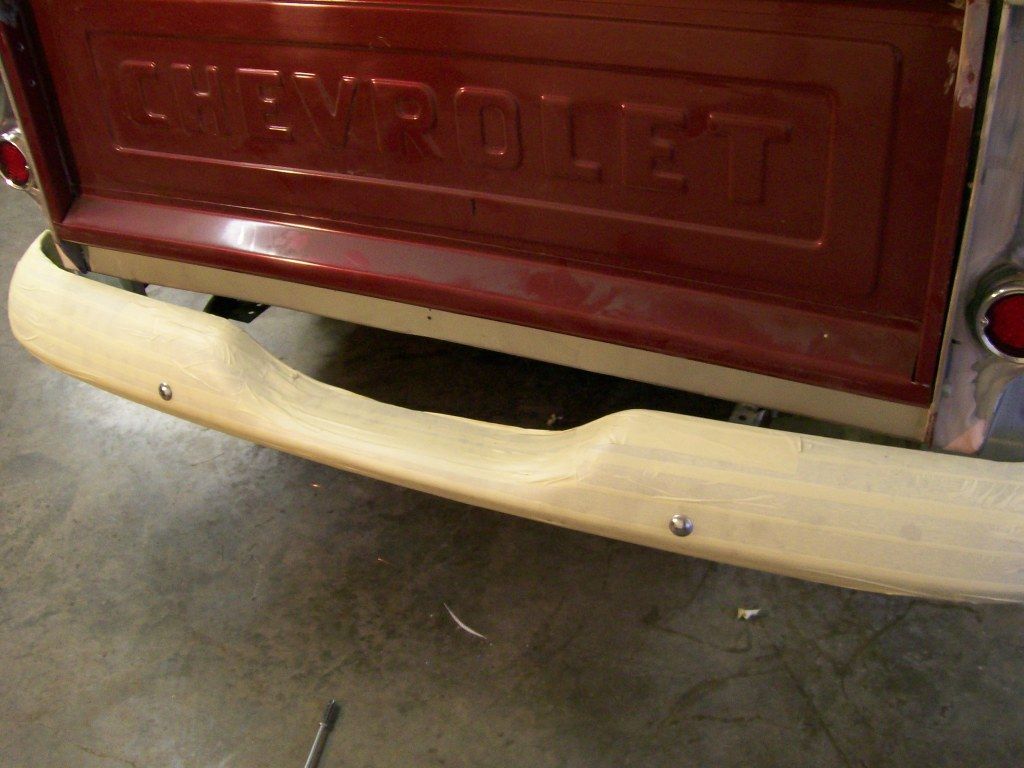 Starting with the old panel, and a piece of sheet metal. I had to get the flow of the drop in the bumper. 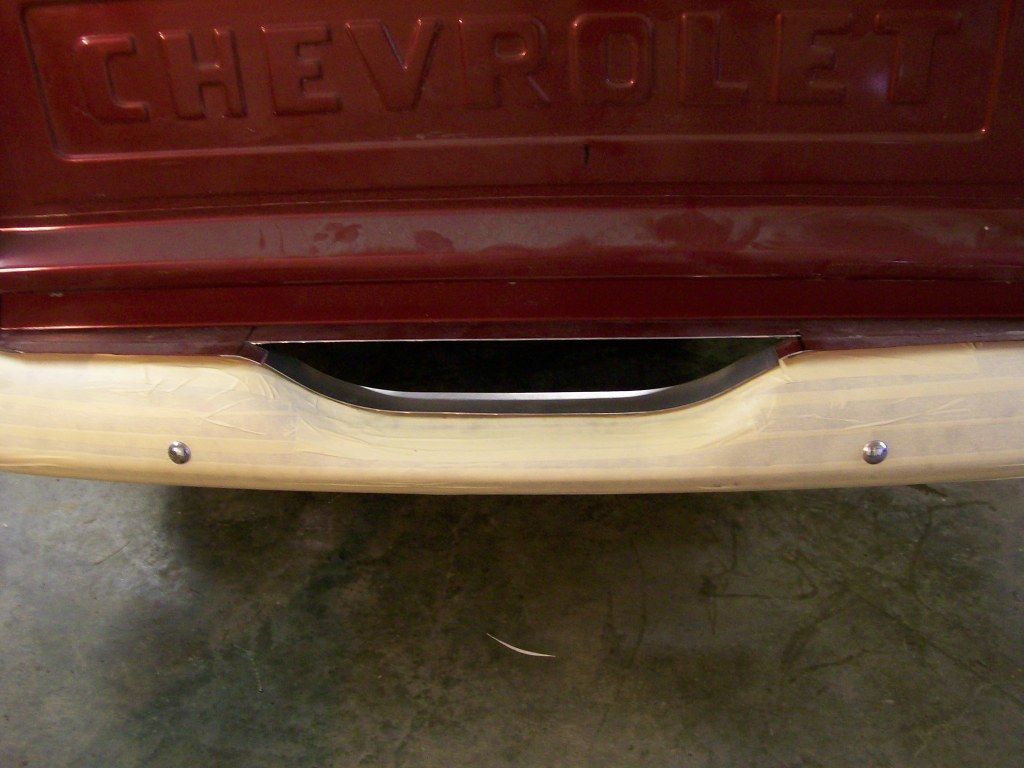 Now to attach the two. Using the triangle I'm assured the new piece is aligned with the rest of the panel. If this isn't squared up, the rest of this is not going to line up later. 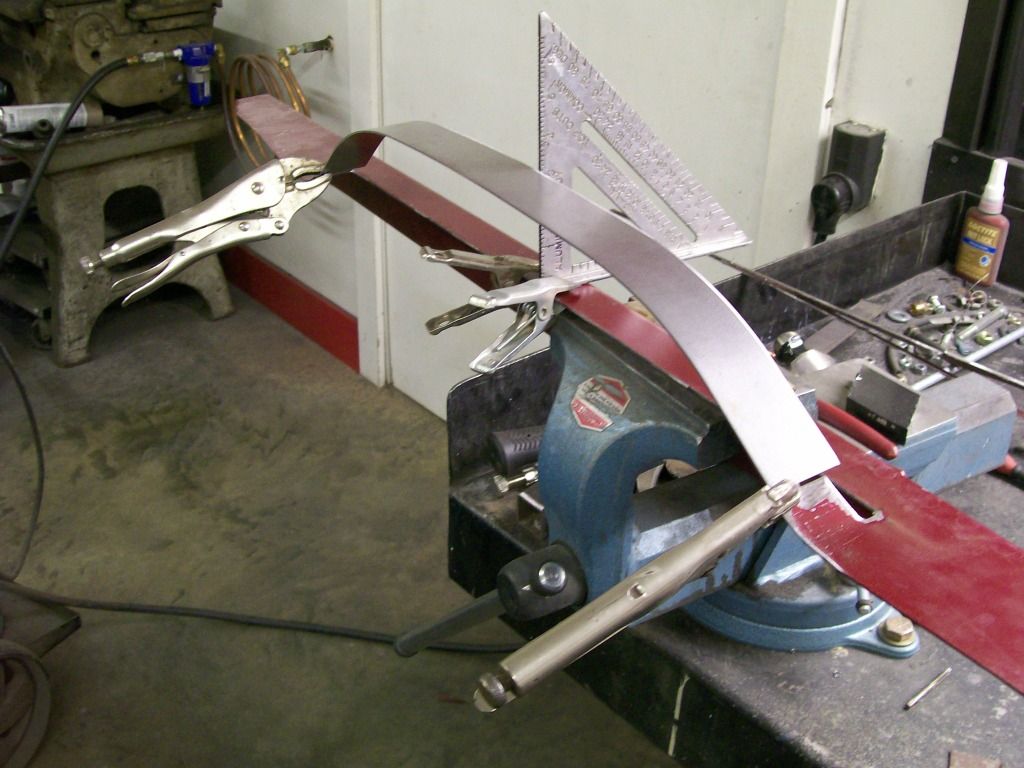 With this next picture you can see the need to keep the alignment when welding this together. The two side wedges would not be straight up and down and would be visible later. 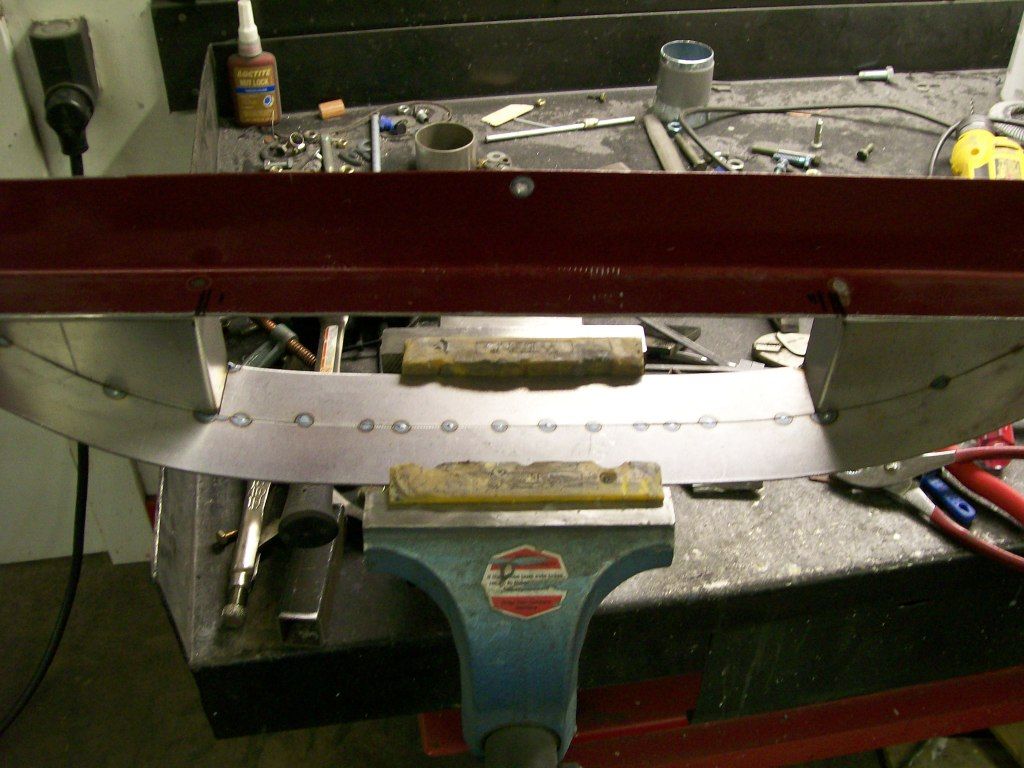 Now to enclose the open area. 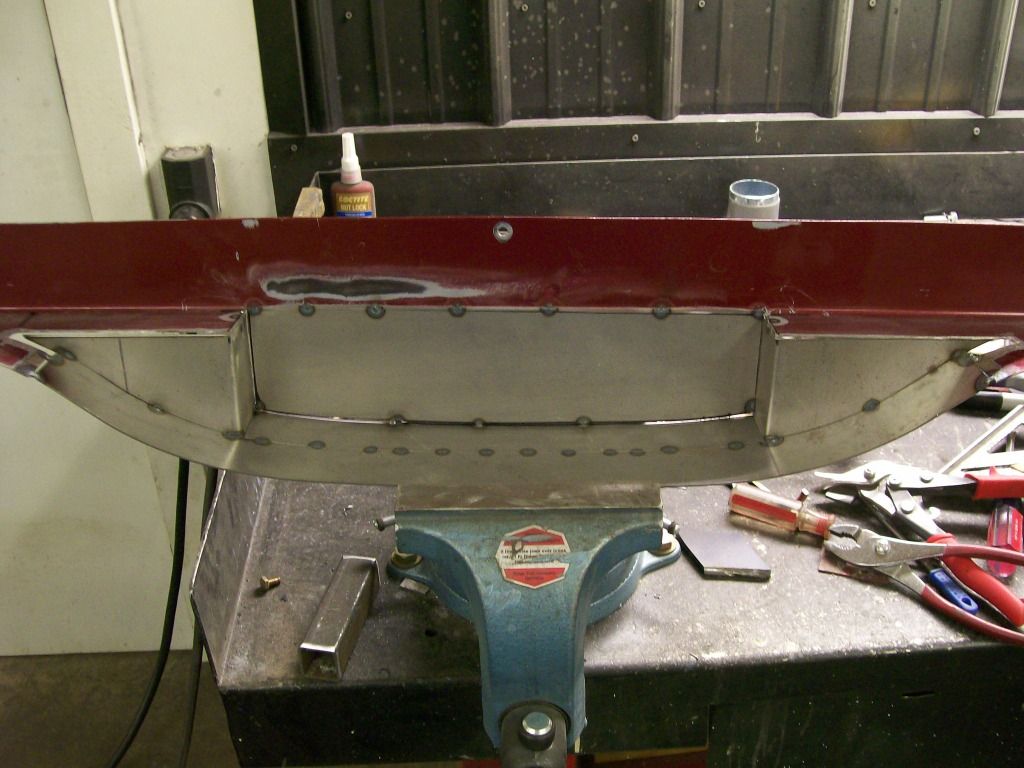 More to folllow. |
|
|
|
|
09-17-2012, 02:34 PM
|
#20 |
|
Registered User
Join Date: Aug 2012
Location: Salem Mo
Posts: 647
|
Re: 1957 Chevy truck re-rebuild
I got more pictures loaded, dial-up.........
When I mentioned starting with a new piece, you can see why. I had to add material to get the coverage I needed which added to the welding and grinding. All in all, I'm happy with how it's coming along. 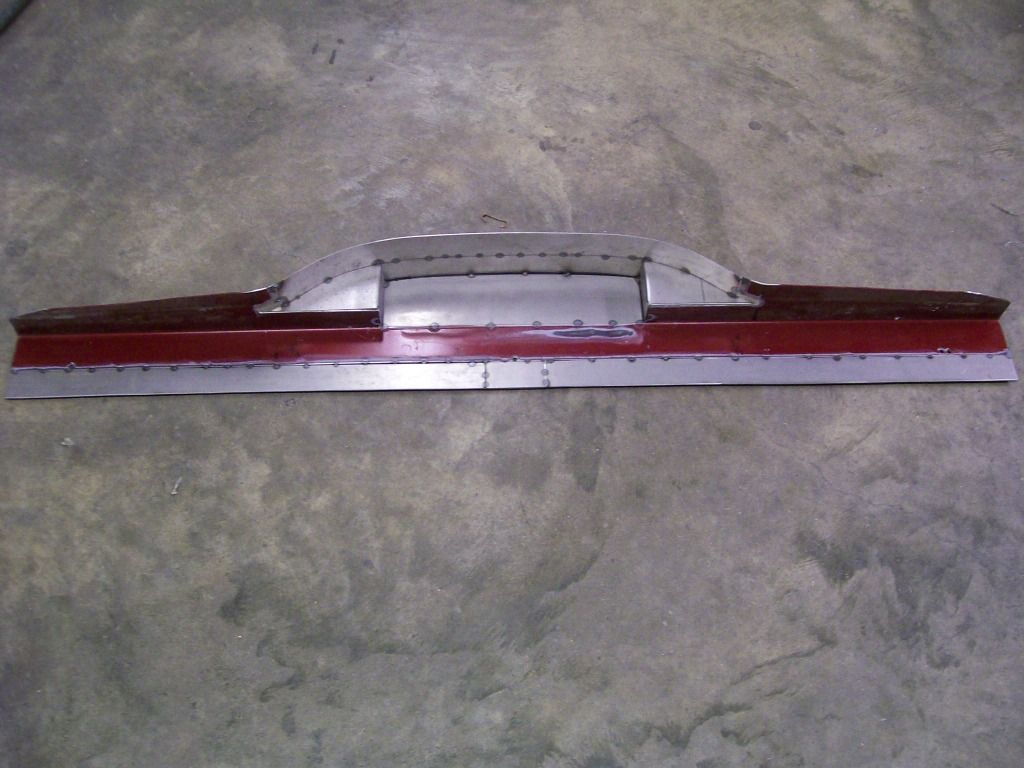 Welding sheet metal can be an ugly chore, but it must be done. 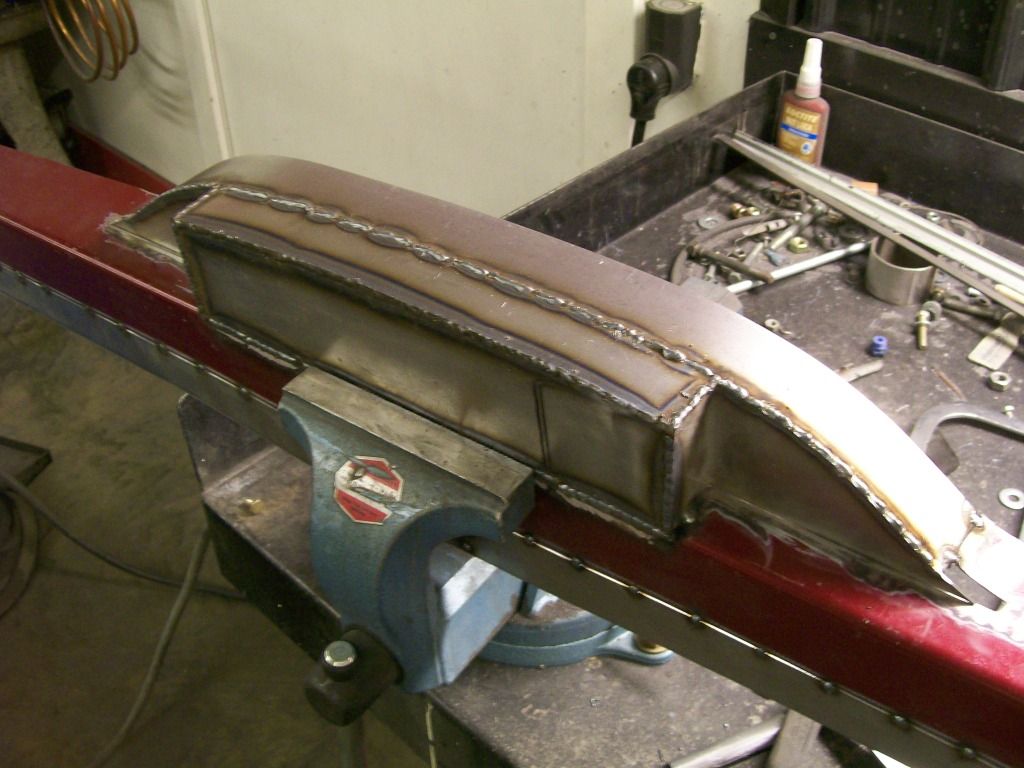 After some of the grinding. 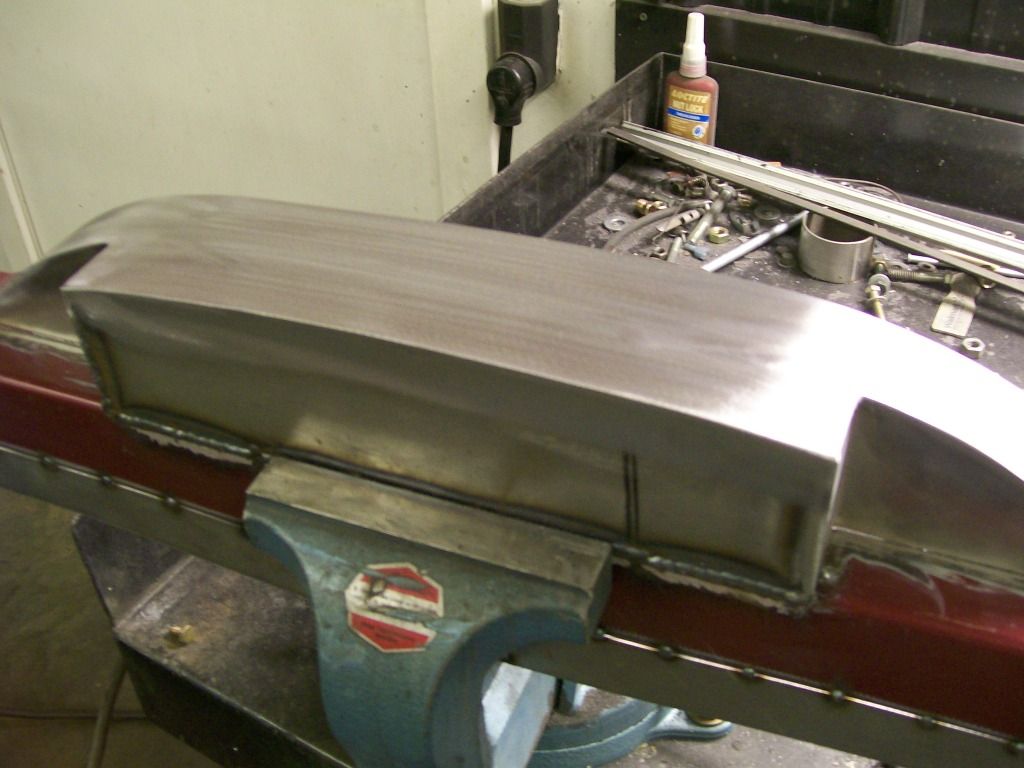 Another picture of a different angle of the back end. 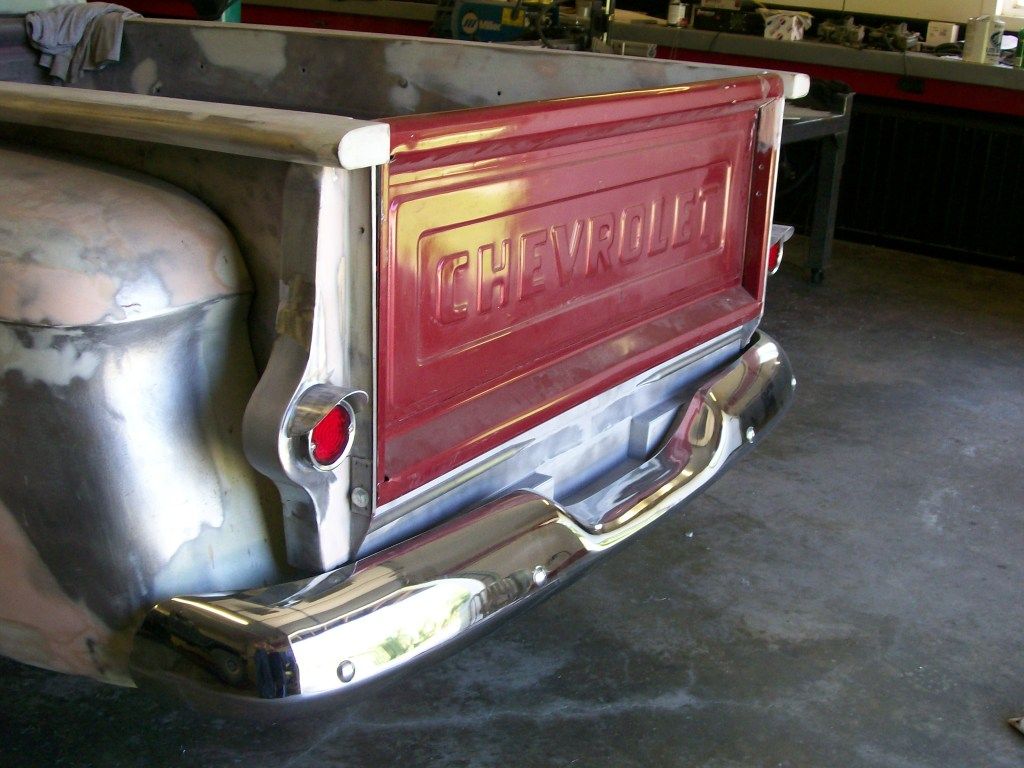 As for the mounting strips, this is one of the 3/4" tubes I cut and used them as mounting hardware for the filler panel. It needs to be cleaned up, but this should show how it works. I just had to drill holes to match the screws in this mounting spear. 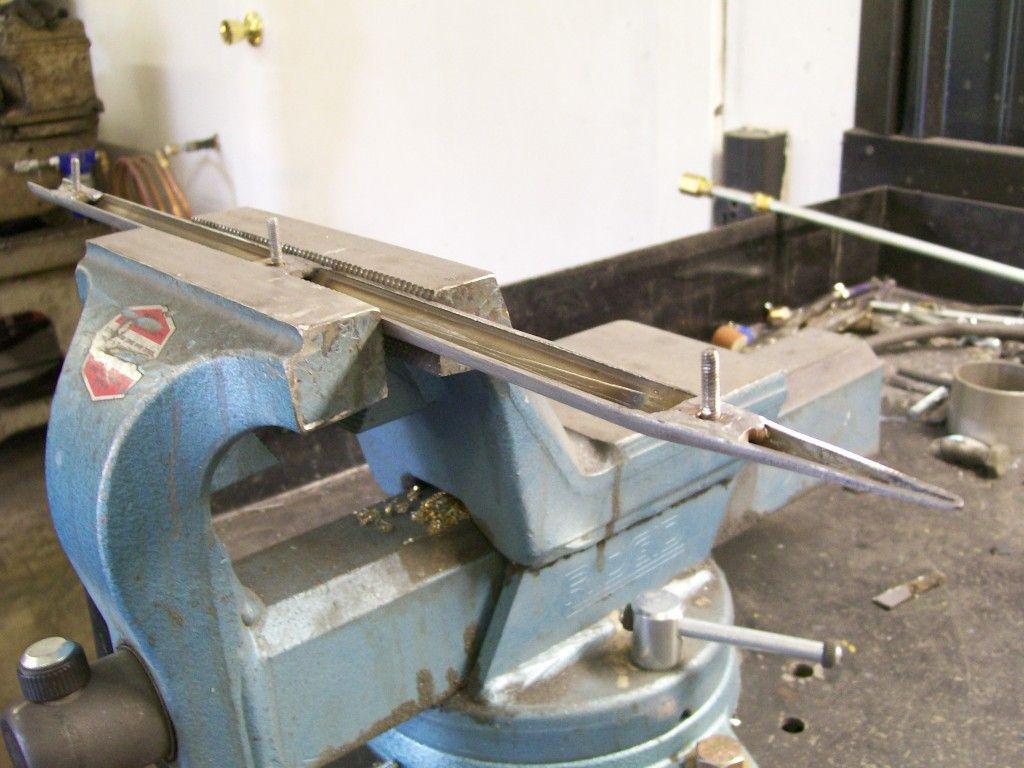 A view from below. I also noticed once mounted, the panel was not stable on the bottom so I made a support to hold it steady. One thing I've learned over the years is the problem of fatigue, anything that is allowed to vibrate will sooner or later start to fracture welds. Looking into the bed channel, you can see the screws from the mounting spear coming through. 
|
|
|
|
|
09-17-2012, 02:50 PM
|
#21 |
|
56 - autocross
Join Date: Apr 2010
Location: Camarillo, Ca
Posts: 1,121
|
Re: 1957 Chevy truck re-rebuild
Wow! I think your attention to detail is great. You have described it and have taken pictures that make it clear and very understandable. It looks great! Thanks again for sharing, as it is very inspiring.
By the way, how did you get those tubes cut so even and straight down the middle? |
|
|
|
|
09-17-2012, 03:11 PM
|
#22 | |
|
Registered User
Join Date: Aug 2012
Location: Salem Mo
Posts: 647
|
Re: 1957 Chevy truck re-rebuild
Quote:
I drew a straight line and followed it with a thin cut off wheel on the 4 1/2" grinder. It seems no matter what I do anymore, my 4 1/2" grinder is always by my side. I was stubborn with my old 7" grinder, but once I changed to the 4 1/2" with either the cut off wheel or a flap disc, the detail of my work increased. |
|
|
|
|
|
09-17-2012, 02:27 PM
|
#23 |
|
Registered User
Join Date: Jan 2012
Location: Motown
Posts: 7,677
|
Re: 1957 Chevy truck re-rebuild
nice work
__________________
cool, an ogre smiley Ogre's 58 Truk buildhow to put your truck year and build thread into your signature shop air compressor timer |
|
|
|
|
09-18-2012, 08:25 PM
|
#24 |
|
Registered User
Join Date: Aug 2007
Location: Corona, California
Posts: 7,998
|
Re: 1957 Chevy truck re-rebuild
That came out real nice.
What did you use to cut it out? Kim |
|
|
|
|
09-18-2012, 10:26 PM
|
#25 |
|
Registered User
Join Date: Nov 2011
Location: Victorville, CA
Posts: 469
|
Re: 1957 Chevy truck re-rebuild
Those look really good.
Posted via Mobile Device |
|
|
|
 |
| Bookmarks |
|
|


 Hybrid Mode
