
|
 01-04-2009, 05:21 PM
|
#401 |
|
Hey Y'all!!
Join Date: Dec 2007
Location: Bay Minette, Alabama
Posts: 1,755
|
Re: My 1965 build thread
Alan, do you know if the Slick Sand is compatible with self etching primer? Just wondering b/c I know that is what some of these guys are using as a base...
Can't comment on the video yet. The computers at work have ALL photo/video sites blocked.  I will check it out when I get home though and I'm sure it is great! Last edited by TimE; 01-04-2009 at 11:17 PM. Reason: stoopid... |

|

|
|
01-04-2009, 05:39 PM
|
#402 |
|
One day...
Join Date: Apr 2008
Location: Tuttle, Ok
Posts: 9,240
|
Re: My 1965 build thread
Video is great, good job!
Hey Tim its a good video im at work too but ours arn't blocked, well as of yet 
|
|
|
|
|
01-04-2009, 05:53 PM
|
#403 | |
|
1 thing at a time is progress.
Join Date: Jun 2007
Location: Ball Ground GA
Posts: 5,511
|
Re: My 1965 build thread
Quote:
Here is some info links http://www.evercoat.com/productDetail.aspx?pID=28 http://www.evercoat.com/imgs/pis/SLICKSANDPIS.pdf http://www.evercoat.com/faq.aspx
__________________
Alan
Philippians 2:14-16 |
|
|
|
|
|
01-04-2009, 06:36 PM
|
#404 |
|
Rottenwood Garage Member..Yes!
Join Date: Oct 2008
Location: Marietta, Georgia
Posts: 174
|
Re: My 1965 build thread
Cool video Alan.. She's gonna be pretty....
__________________
When interests become diversified, not all can be Barrett Jackson. Budgets and Accountants get in the way. My 65 (SOLD) http://67-72chevytrucks.com/vboard/s...d.php?t=317013 My 51 (SOLD) http://67-72chevytrucks.com/vboard/s...80#post3551880 Racetruck III (SOLD) http://67-72chevytrucks.com/vboard/s...72#post4254972 Rottenwood Garage and Speed Shop.....where everything must be racy! Gone to dark side for a while...1966 F100 in the stable 
|
|
|
|
|
01-04-2009, 08:58 PM
|
#405 |
|
Registered User
Join Date: Sep 2008
Location: Newport, North Carolina
Posts: 618
|
Re: My 1965 build thread
I love watching and reading this thread! AWESOME!
|
|
|
|
|
01-04-2009, 10:25 PM
|
#406 | |
|
Hey Y'all!!
Join Date: Dec 2007
Location: Bay Minette, Alabama
Posts: 1,755
|
Re: My 1965 build thread
Quote:
On the subject of the fresh air from the cowl, cost wise you could start out with a junkyard breather, cut off the air inlet and then with your mad skills fab or find something to use for the side/rear facing "snorkel". Very little cash outlay, just planning and ome time. Just a suggestion. BTW, I'm loving your build... Oh and the video was great too. 
|
|
|
|
|
|
01-05-2009, 01:05 AM
|
#407 | |||
|
1 thing at a time is progress.
Join Date: Jun 2007
Location: Ball Ground GA
Posts: 5,511
|
Re: My 1965 build thread
Quote:
Quote:
Quote:
 I had fun making the video. I hope it helps somebody. It's just of hint of whats all involved. I put a link to the video in my signature for others to see incase they missed it. I wish I could say I knew everything, but I'm far from that. Hey Joe, do you only do picture patrol or do you do video patrol as well. You might have to rewrite the rule book.
__________________
Alan
Philippians 2:14-16 |
|||
|
|
|
|
01-05-2009, 08:41 AM
|
#408 |
|
Registered User
Join Date: Dec 2007
Location: Palmer, Alaska
Posts: 13,821
|
Re: My 1965 build thread
__________________
 CHEVY ONLY CHEVY ONLY
|
|
|
|
|
01-05-2009, 11:03 PM
|
#409 |
|
1 thing at a time is progress.
Join Date: Jun 2007
Location: Ball Ground GA
Posts: 5,511
|
Re: My 1965 build thread
Cpp Update:
I sent emails and one or two phone calls back on Dec 9th about the concerns that I had. I never heard from them, until today. The phone call was only to see if they needed to send out more Ubolts. They sent a return authorization for the ubolts 3 weeks ago. I made it known to them the issues I've got. I told him about the instructions for the swaybar install. Like I said before they get the bars from Adco. Adco is the ones that put the instructions in the kit. I told him the instructions on CPP's website was correct. He is going to check with Adco on this issue. As far as the hardware with the kit, the hardware is supposed to be grade 5. I referred him to this thread so he could see the pix. I'll keep ya'll posted on any other info. I hope they can restore my confidence with them. They have some great products that helps us out a bunch.
__________________
Alan
Philippians 2:14-16 |
|
|
|
|
01-06-2009, 12:05 AM
|
#410 |
|
Registered User
Join Date: Aug 2008
Location: Cedar Creek, TX
Posts: 167
|
Re: My 1965 build thread
Good to hear you are getting a response from CPP. It is so tough to find good companies to work with in this day and age. Everyone fights for the best price and service is what usually suffers. Hopefully CPP makes everything right with you.
|
|
|
|
|
01-15-2009, 09:02 PM
|
#411 |
|
1 thing at a time is progress.
Join Date: Jun 2007
Location: Ball Ground GA
Posts: 5,511
|
Re: My 1965 build thread
oK it's been a while. First it was a cold, then I got lazy then american idol auditions came on.
Now it's going to be single digit temps here tonight. I got some blocking done on the dash, going back out in a little bit to get more done. I got too get back in the grove. Bring on warmer temps.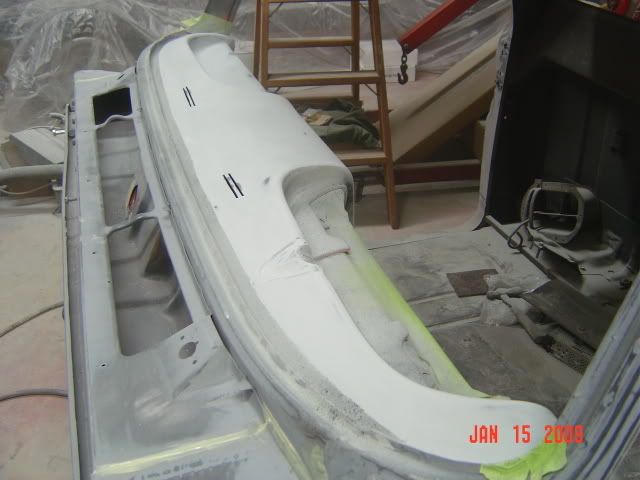
__________________
Alan
Philippians 2:14-16 |
|
|
|
|
01-15-2009, 09:36 PM
|
#412 |
|
Rottenwood Garage Member..Yes!
Join Date: Oct 2008
Location: Marietta, Georgia
Posts: 174
|
Re: My 1965 build thread
Copy cold weather Alan... Its hard to get motivated in the south when you can see your breath
I'm with you Allan, I grew up in a cold snowy climate, thats why I'm in the south now (here to stay!) I bet I can speak for others when I say we were wondering about you and your progress.... Now fire up the stove, turn on Barret Jackson in the back ground ( notice all the trucks) and get crack'in. Just kidding !!!
__________________
When interests become diversified, not all can be Barrett Jackson. Budgets and Accountants get in the way. My 65 (SOLD) http://67-72chevytrucks.com/vboard/s...d.php?t=317013 My 51 (SOLD) http://67-72chevytrucks.com/vboard/s...80#post3551880 Racetruck III (SOLD) http://67-72chevytrucks.com/vboard/s...72#post4254972 Rottenwood Garage and Speed Shop.....where everything must be racy! Gone to dark side for a while...1966 F100 in the stable
|
|
|
|
|
01-15-2009, 11:26 PM
|
#413 | |
|
1 thing at a time is progress.
Join Date: Jun 2007
Location: Ball Ground GA
Posts: 5,511
|
Re: My 1965 build thread
Quote:
. I fired up the stove and got it up to 54. I just couldn't get motivated. While working I remembered there was another reason I haven't been getting much done. I've been working late and on saturdays on my friends miata. Making some progress on something. Now I've got 2 projects that needs to be blocked.   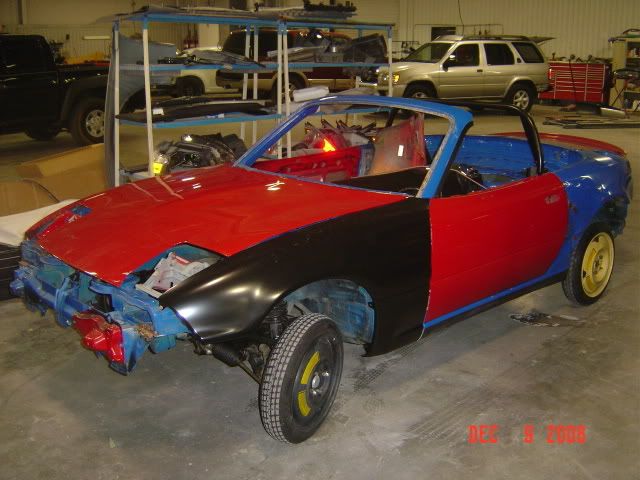 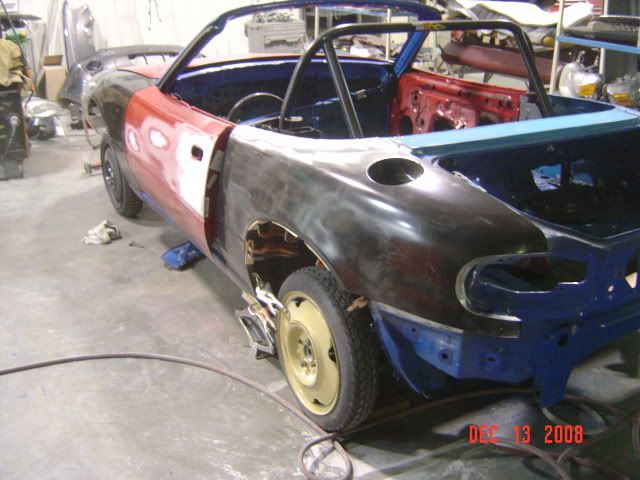 
__________________
Alan
Philippians 2:14-16 |
|
|
|
|
|
01-18-2009, 08:27 PM
|
#414 |
|
1 thing at a time is progress.
Join Date: Jun 2007
Location: Ball Ground GA
Posts: 5,511
|
Re: My 1965 build thread
I've got a question for ya'll...What should I do with the old tank mounts. I will be using a tank between the rails. I am planning on removing this much
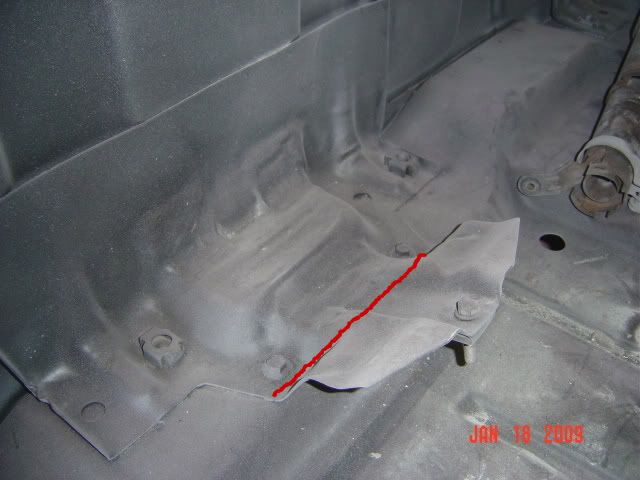 I can get to the inside to clean up the welds, but if I get it too hot it will release the filler on the outside. I'm planning on using a sprayable seam sealer which also acts as a sound deadener. I will coat the the entire cab corner all the way up. Also thinking of coating the inside of the cab back panel for sound deadening. What do ya'll think? 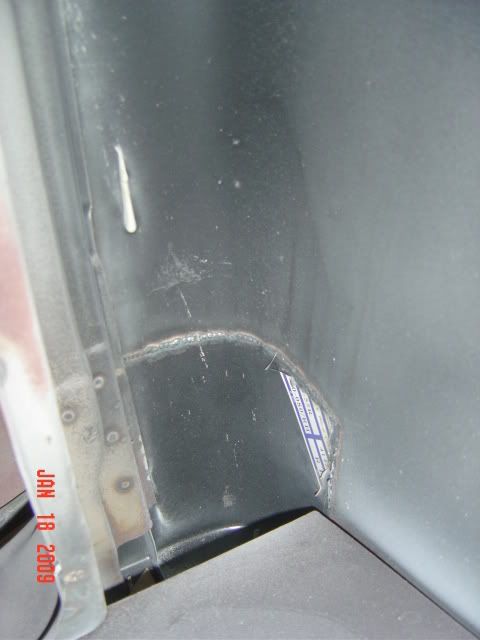 The roof is blocked and ready for self leveling seam sealer in the gutter. Gotta get the shop warm enough for it flow out and cure. I will paint the roof after that to see how it will look there are a few areas of concern. We willl see. 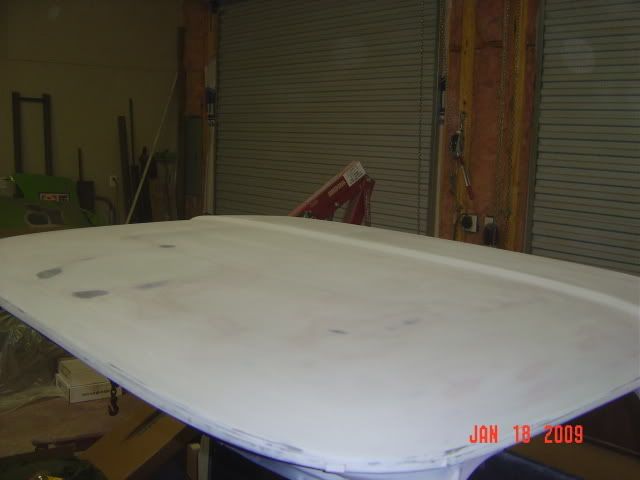
__________________
Alan
Philippians 2:14-16 |
|
|
|
|
01-18-2009, 08:47 PM
|
#415 | |
|
Registered User
Join Date: Aug 2008
Location: Cedar Creek, TX
Posts: 167
|
Re: My 1965 build thread
Quote:
|
|
|
|
|
|
01-18-2009, 09:57 PM
|
#416 |
|
Registered User
Join Date: Dec 2007
Location: Palmer, Alaska
Posts: 13,821
|
Re: My 1965 build thread
that is my plan on the tank mounts also...what tank are you gonna use?
I'd also like more info on the sprayable seam sealer also...... nice work Alan!!
__________________
CHEVY ONLY
|
|
|
|
|
01-18-2009, 10:08 PM
|
#417 |
|
1961 crewcab
Join Date: Dec 2007
Location: missoula, mt
Posts: 6,164
|
Re: My 1965 build thread
I cut the mounts off my 61 right on your mark... saber saw with a long blade worked best.
|
|
|
|
|
01-18-2009, 11:34 PM
|
#418 |
|
One day...
Join Date: Apr 2008
Location: Tuttle, Ok
Posts: 9,240
|
Re: My 1965 build thread
I think mine had a bar that went the whole length of a bench seat in mine, it didnt look like that setup but i did cut it just like your red line shows.
|
|
|
|
|
01-19-2009, 01:07 AM
|
#419 | |||
|
1 thing at a time is progress.
Join Date: Jun 2007
Location: Ball Ground GA
Posts: 5,511
|
Re: My 1965 build thread
Quote:
Quote:
 When I spray the sealer I will post info as well. When I spray the sealer I will post info as well.Quote:
__________________
Alan
Philippians 2:14-16 |
|||
|
|
|
|
01-19-2009, 09:15 AM
|
#420 |
|
The Few, The Proud
 Join Date: Jun 2007
Location: Ball Ground, Georgia
Posts: 1,830
|
Re: My 1965 build thread
Looks good Alan. Keep up the good work. Holler if you need anything.
__________________
Shannon |
|
|
|
|
01-19-2009, 02:39 PM
|
#421 |
|
Registered User
Join Date: Sep 2003
Location: n.e. IL border
Posts: 208
|
Re: My 1965 build thread
just did roof on my 65. old sealer came out in one peice-but saw why snow was melting down inside of my windsheild tho.
after repairs - used 3M #08505 FAST'n FIRM in caulk tube. smoothed it down with reducer soaked finger & worked better than any seamsealer i've ever used. paintable in 30 mins. flat black & it even looks good enuf from my house while still in my garage at eye level. KEEP UP THE GOOD WORK! JW+ART= JWART |
|
|
|
|
01-21-2009, 01:11 AM
|
#422 | ||
|
1 thing at a time is progress.
Join Date: Jun 2007
Location: Ball Ground GA
Posts: 5,511
|
Re: My 1965 build thread
Quote:
Quote:
I would probably try it if I didn't already have the other. Yours is probably easier to use.
__________________
Alan
Philippians 2:14-16 |
||
|
|
|
|
01-22-2009, 12:16 AM
|
#423 |
|
1 thing at a time is progress.
Join Date: Jun 2007
Location: Ball Ground GA
Posts: 5,511
|
Re: My 1965 build thread
Not much going on with the truck. I did manage to work on the bedside a little today. Gotta bolt the bed back together temporarily to check to see where the fuel door will be. Mainly to check the fit of the rear tire wheel's I'm thinking of running that I posted about a few post back.
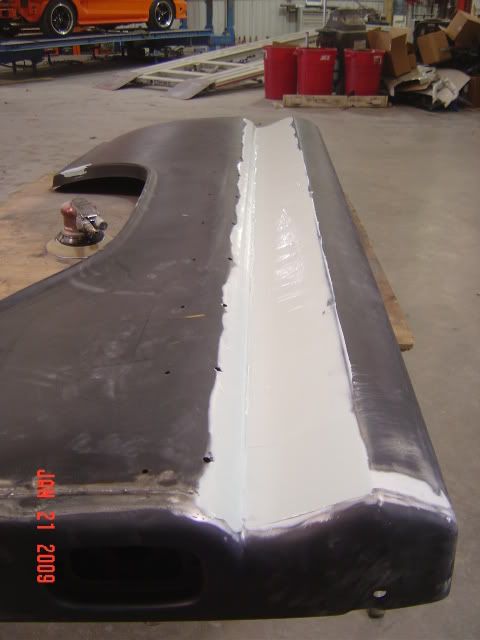 Here are the sealers I'll be using  I've used them all. On my roof I will use the Duramix 4229. It's not as runny as the 3M 8307. Duramix 4229 Application instructions link 3M 8307 Application instructions link 3M 8374 Apllication instructions link These links should answer your questions. Keep in mind they all require there own applicator gun. They are pricey and not worth the cost unless your in the bussiness. You might know someone that works in a shop that might let you borrow it. I never asked, but I wonder if paint suppliers would rent them. Here is a link to one of the guns. Link Another one. Link 2 Sprayable seam sealer gun Link
__________________
Alan
Philippians 2:14-16 |
|
|
|
|
01-22-2009, 06:10 PM
|
#424 |
|
Registered User
Join Date: Oct 2008
Location: Southern, MO
Posts: 233
|
Re: My 1965 build thread
I also plan to cut my old tank mounts on the red line. looks like the best spot for them to not seem out of place. Thought about removing the entire mount, but looks like they give the back of the cab alot of structure, should prolly just cut on red line and be done.
|
|
|
|
|
01-22-2009, 08:15 PM
|
#425 |
|
Registered User
Join Date: Mar 2002
Location: Forney TX
Posts: 4,512
|
Re: My 1965 build thread
So did you weld the seam on the side of the bed? I am wanting to do this to clean it up.
__________________
Troy 1965 Chevy Bagged,361 sbc,voodoo cam,1.5 full roller rockers,patriot 185cc vortec heads 2.02-1.60,vortec weiand polished intake,demon carb my truckhttp://67-72chevytrucks.com/vboard/s...d.php?t=332884 Big Red Dog build http://67-72chevytrucks.com/vboard/s...d.php?t=572274 |
|
|
|
 |
| Bookmarks |
| Tags |
| 1959, 1960, 1964, 1965, 1966, c10, hugger, impala, orange |
|
|


 Linear Mode

