
|
 08-27-2019, 04:36 PM
|
#1 |
|
Registered User
Join Date: Aug 2019
Location: Harrisburg, Pennsylvania
Posts: 66
|
'70 LWB Build
I just bought '70 fleetside long bed for a pretty fair price. The build will be long and slow. I don't have a lot of experience with body work, but am about to go to welding school. The mechanical aspect will be a breeze as I have been turning wrenches forever.
Truck has 63k original miles and currently has a 350 that appears and feels to be a pretty mild build with a saginaw 3 behind it. Runs and drives well just needs some love to wake it back up a bit. I took these two pics the day I bought it (Saturday 24 '19).   I went and picked up the truck on Sunday, and drove it home with no issues. Was about an hour drive mostly on the highway. Parked it, and then took some pics on Monday.   I was told the rockers were done at some point before the person I bought it from got it. They had it for about 1.5 years, fixed very little, but just drove it. I found some receipts in the glove box as well registration for WV. I was worried what was hiding under the rusty chrome trim sill plates, and really had to ditch the carpet.  Such horrible carpet....   The seat has some tears, but it has newer vinyl and I think a new dash pad.  I pulled out the seat, and the carpet, and found the floor a bit better than I expected, but also found some poorly done "repairs" so I will likely have to replace the floor pans either way.  Riveted patch.... Score  Twins!  May be common, but I thought it was cool that the jack was still in tact along with it's mount  Once the floor was empty and vaccuumed up I hit it with a good wire brushing looking for more cancer. I didn't fund much, and will be hitting it with a rust encapsulation for the time being.  You can see the wires, and little speaker pod that I kept working around. Then I pulled out the ash tray and noticed all of the wires for the radio were just electrical taped together which explains why the radio didn't work at all, so I removed it completely. Seat frame looks decent so for now I just lubricated the slide rails a bit and tossed it back in.   I was also happy to find the label still in the glove box  I got some parts on order for the shift linkage at the bottom of the column because the bushing are literally gone as well as a new lock set because the ignition is a bit too worn out to deal with every time I want to start it. |

|

|
|
08-29-2019, 10:14 AM
|
#2 |
|
Registered User
Join Date: Apr 2014
Location: Azle,Texas
Posts: 2,248
|
Re: '70 LWB Build
Welcome aboard! Congratulations on finding a running and driving truck at a fair price. The two minor fixes will definitely improve the drivability for sure. I would encourage you to stay on the same path and keep it on the road, fixing problems when they arise. So many (me for one) think, well, since Ive gone this far, I might as well yank the motor and clean her up a bit. 1 week later the entire truck is labeled and in ziplock baggies
 Good luck and keep us posted! Brian
__________________
Brian 1972 C10, "Loyd", LWB to SWB, 5.3, L83/6L80e, 4:11 Tru Trac, Air Ride, VA, DD, 20" Coys, 4 wheel disc, A quick LS swap turned into a 6 year frame off resto-mod. |
|
|
|
|
09-26-2019, 09:55 AM
|
#3 | |
|
Registered User
Join Date: Aug 2019
Location: Harrisburg, Pennsylvania
Posts: 66
|
Re: '70 LWB Build
Quote:

|
|
|
|
|
|
09-26-2019, 10:46 AM
|
#4 |
|
Registered User
Join Date: Aug 2019
Location: Harrisburg, Pennsylvania
Posts: 66
|
Re: '70 LWB Build
Well I have a done a few small things since my last post. Mostly waiting for parts and tinkering around here and there making decisions and grand plans.
How about a little eye candy to get this post started. My 17 z71 next to my c10. You can get a peak at my streetglide in the back as well  I was preparing to get this safety inspected and found I had a few lights out. mainly the reverse lights didn't work at all. With some quick testing I found that the switch had power in and none out. So I pulled the switch off to try and test for continuity through the switch and ended up with this.  Clearly that guy was inop. After some digging on the net I managed to find one and get it ordered. Installed and worked as intended. I also had rear marker out, and assumed it was the bulb. But when I put the bulb in nothing changed. So I pulled the housing and found the ground wire for the socket had broken from its terminal. Replaced that terminal and good to go. My parts for the lower end of the column finally arrived as well as a lock cylinder set. So I pulled the door panels and replaced all of the lock cylinders. No longer does it take me 5-10 minutes to get it started due to the worn out ignition. Then I tackled the lower column shifter. When I took it all apart the original rubber and metal bushings were just not there. It was clearly rigged up, and poorly. Installed the new parts and immediately knew something was amiss as the rods were moving freely. There was no longer anything to keep them locked in place.  More digging and I found that the little cups that hold the rods in were MIA. With the truck stuck in the driveway I had to make it drive-able so I could move it from it's current location. A few hose clamps later and we were in business  I got lucky and a dude on a facebook group I am in had the cups and got them sent to me next day via snail mail. While I waited for the cups I decided it was time to hit the floor with a wire brush cup on my grinder and cover with rust encapsulator.   The truck has been painted a few times, and the current color is not the original color. So I have been going all over with a paint chip from the truck trying to get a match on this color so I can at least cover the primer spots on the truck. I can deal with "patina" but primer not so much. I finally found a very close match from duplicolor, but it's a ford color. That is a penny and the paint chip I have been carrying around. I used my pocket knife to pry up on a piece that was sticking up. She has had a few sprays.   Finally these little boogers arrived  Got them installed and adjusted the linkage and now she shift like a dream, or at least compared to how it was when I picked it up.  I have a few other small things planned before winter comes, and I have been looking around on the body and finding things I am not a fan of. When the current paint got done it was clearly a rush job to get the truck sold, or someone who just wasn't good at this sort of thing. I found this big ol piece of poo in a hole in the tailgate.  And this is the drivers side door. I had a feeling when I bought it I was going to have to replace this door. I don't have the guts to pull this off and see what is underneath just yet.  As I said it is slow going, but I have some plans for this winter. I will try to update as I go along rather than in large posts like this moving forward. Also apologies for the few big pics in the first post. I have now figured out how to keep that from happening. Last edited by LagunaGlide; 09-26-2019 at 12:30 PM. |
|
|
|
|
09-26-2019, 05:31 PM
|
#5 |
|
Senior Member
 Join Date: Aug 2018
Location: Western Colorado
Posts: 1,165
|
Re: '70 LWB Build
I'm not seeing your pictures show up.
__________________
1964 Chevy C10 - Gen IV 5.3 Restomod http://67-72chevytrucks.com/vboard/s...d.php?t=768632 1968 GMC C15 - Gen III 6.0 Restomod http://67-72chevytrucks.com/vboard/s...d.php?t=772047 1969 Chevy C10 - Restoration http://67-72chevytrucks.com/vboard/s...d.php?t=809184 1978 Chevy Scottsdale K20 1993 Chevy C1500 - 5.3/T56 swapped 2008 Silverado Duramax |
|
|
|
|
09-26-2019, 09:21 PM
|
#6 | |
|
Registered User
Join Date: Aug 2019
Location: Harrisburg, Pennsylvania
Posts: 66
|
Re: '70 LWB Build
Quote:
|
|
|
|
|
|
09-27-2019, 12:41 AM
|
#7 |
|
Registered User
Join Date: Jan 2018
Location: Modesto, CA
Posts: 92
|
Re: '70 LWB Build
Not showing up for me either. You could use the attach image function and upload right to this site. I've not used google photos, so I can't help there. I want to see your longbed though.
|
|
|
|
|
09-27-2019, 09:10 AM
|
#8 | |
|
Registered User
Join Date: Aug 2019
Location: Harrisburg, Pennsylvania
Posts: 66
|
Re: '70 LWB Build
Quote:
|
|
|
|
|
|
09-28-2019, 09:18 AM
|
#9 |
|
Registered User
Join Date: Oct 2010
Location: Ocean Springs, MS
Posts: 1,746
|
Re: '70 LWB Build
Pics look good.
__________________
Gary 1971 Chevrolet C/10 1951 GMC 100 1977 GMC C15 1955 Chevrolet 3100 |
|
|
|
|
09-28-2019, 02:38 PM
|
#10 |
|
Registered User
Join Date: Jan 2018
Location: Modesto, CA
Posts: 92
|
Re: '70 LWB Build
Pics are there now, what ever you did worked. Now i can follow along with your progress. Good work so far.
|
|
|
|
|
09-29-2019, 01:24 PM
|
#11 |
|
Registered User
Join Date: Aug 2019
Location: Harrisburg, Pennsylvania
Posts: 66
|
Re: '70 LWB Build
Decided to clean up and lube the column shifter parts at the engine side of the column. I just used a decent degreaser, an old tooth brush, and a pick to clean it up as good as possible while still in the truck. Then I sprayed it down with brake clean and dried it off.
Still not perfect, but definitely an improvement from all the crap that was in there when I first bought it.  I am trying this out for keeping it lubed.  I had been kicking around what to do with the all the chipping paint, and I had hit a few spots with a wire cup on my grinder. I decided to clean a few spots up a little bit, and then hit them with some clear for a patina look.   Not a huge fan of how this side turned out, but oh well for now.   Plan is to keep working on all these rust spots and hitting them with clear, and then hitting the paint with a polish to hopefully shine it back up a bit. It really is a poorly done paintjob, but hopefully I can get it looking a bit better for a while. Taking it in tomorrow for the state inspection. |
|
|
|
|
09-30-2019, 10:09 AM
|
#12 |
|
Senior Member
Join Date: Aug 2018
Location: Western Colorado
Posts: 1,165
|
Re: '70 LWB Build
Looks like it's in pretty good shape! It has the typical rust, I would say on the lighter side judging by the rockers. You could give it a tune up and you've cleaned up the interior, there's nothing wrong with driving it like that for awhile!
__________________
1964 Chevy C10 - Gen IV 5.3 Restomod http://67-72chevytrucks.com/vboard/s...d.php?t=768632 1968 GMC C15 - Gen III 6.0 Restomod http://67-72chevytrucks.com/vboard/s...d.php?t=772047 1969 Chevy C10 - Restoration http://67-72chevytrucks.com/vboard/s...d.php?t=809184 1978 Chevy Scottsdale K20 1993 Chevy C1500 - 5.3/T56 swapped 2008 Silverado Duramax |
|
|
|
|
09-30-2019, 11:03 PM
|
#13 |
|
Registered User
Join Date: Apr 2004
Location: Boiling Springs, PA
Posts: 435
|
Re: '70 LWB Build
you may know this, but you can apply for PA antique title and tag it that way.
pay more up front, but no renewals and you don't have to mess with yearly inspections. just got a chance to check out your thread, nice writeup and belated welcome to Pennsylvania.
__________________
71 C10 long bed, 2003 6.0L, 06GTO E40, T56, 12bolt 4.10 rear |
|
|
|
|
10-01-2019, 04:53 PM
|
#14 | |
|
Registered User
Join Date: Aug 2019
Location: Harrisburg, Pennsylvania
Posts: 66
|
Re: '70 LWB Build
Quote:
|
|
|
|
|
|
10-07-2019, 05:13 PM
|
#15 |
|
Registered User
Join Date: Apr 2004
Location: Boiling Springs, PA
Posts: 435
|
Re: '70 LWB Build
you don't need to supply pictures, so no it does not need to be "near mint" at all.
It's a simple form, and I think you supply insurance info...convert the tag to Antique and roll out with a new title / plate that moment. The DMV off Cameron St. in Harrisburg is the headquarters...you can do it all there in one step I went there with my dad about 6 months ago, got his '70 Dart setup...it was surprisingly easy
__________________
71 C10 long bed, 2003 6.0L, 06GTO E40, T56, 12bolt 4.10 rear |
|
|
|
|
10-15-2019, 02:04 PM
|
#16 | |
|
Registered User
Join Date: Aug 2019
Location: Harrisburg, Pennsylvania
Posts: 66
|
Re: '70 LWB Build
Quote:
|
|
|
|
|
|
10-15-2019, 02:42 PM
|
#17 |
|
Registered User
Join Date: Aug 2019
Location: Harrisburg, Pennsylvania
Posts: 66
|
Re: '70 LWB Build
Not much has really taken place since my last post. I put a spacer under the air cleaner due to the throttle rod rubbing the bottom of the cleaner housing, found and fixed another oil leak.
I pulled out the plastic grill insert yesterday to clean it up, and give it a spray. The white was all chipped up, so I thought a quick freshen couldn't hurt.  Cleaned it up and hit it with a satin black and a satin clear.  Nothing fancy or truck changing, but it does look a little better. I also managed to clean up all the chipped, cracked, rusty spot, and hit them with clear. And there is no longer any primer visible. That's about it for now. I'll leave a little teaser pic, and soon I'll post pics of the full truck again. That crappy paint may have some hope 
|
|
|
|
|
10-23-2019, 04:07 PM
|
#18 |
|
Registered User
Join Date: Aug 2019
Location: Harrisburg, Pennsylvania
Posts: 66
|
Re: '70 LWB Build
Well I have spent a few days off and on cleaning up the crappy paint job on my truck. I decided that since I can't tear it down for awhile, I should get the best look out of what is on it now. I spent about 8 hours polishing the paint on this thing.
This is a before pic of the hood just to demonstrate how dull the paint was.  This one shows the shine coming through compared to the other side. This pic was day one of polish.  After day 2 of polishing the paint it looked like this.    After the polish I went back over it with a cleaning/polishing wax to remove the stuck on polish and hopefully keep it shiny for awhile. After the wax job I took it for a few pics.     The paint job on this truck honestly didn't deserve all the work I put into it to get it looking this good, but working with what I've got. Planning to drive it a bit before parking it for a few winter projects. Last edited by LagunaGlide; 10-23-2019 at 04:10 PM. Reason: spelling errors |
|
|
|
|
10-22-2020, 03:48 PM
|
#19 |
|
Registered User
Join Date: Aug 2019
Location: Harrisburg, Pennsylvania
Posts: 66
|
Re: '70 LWB Build
Well I haven't been on here much. Been a lot of distractions lately. The truck has been through a few small things since my last post. So I'll sum it all up.
I couldn't help but notice the very different shade of green (under the rust color primer layer) that kept peeking through. It's the same color I noticed in places where the countless bad paintjobs never covered. I started checking panels to see how many had that color below all the junk.  To my surprise most of them did, and I made the decision I was going to strip this thing down to the original paint, and see what happens. I did a few test test to see what would be the best method/process and determined I could scrape off multiple layers fairly easily with a razor blade leaving just that thin rust colored layer of primer protecting the original underneath. So the covid fun began    Obviously this was a slow tedious process that took way too long because who wants to scrape all that paint off? Well somewhere along this going on I went out to the truck one day to find a rock had been chucked through my rear sliding window on the passenger side. I decided it was thrown from a lawn mower, as it was really moving. It went through and hit the windshield in the driver side corner chipping it. Also the glass shards from the rear window put several chips in the windshield. I tried to find a new section of glass just to replace it, but eventually settled on a 1 piece tinted glass.  Lots of soapy water, a willing friend, some rope (regardless of the willing part), and window installed. Pretty pleased with it.  Time goes on, scraping continues, but I start feel like I need some inspiration. Something to drive me to keep on with all the scraping. So I did a little wet sanding to start removing that thin rust primer on the original paint. I was not disappointed.  This truck had been sprayed (paint & Primer) at least 5 times. You can really see how far away from the original green it eventually got.   Most recent progress of paint removal  In the midst of all the paint removal I was tired of fighting with the worn out manual gear box. I did some looking and wasn't pleased with cost of new gear box, and started looking into adding Power steering. After a few thread on this forum and some other resources I pieced together parts from Rock Auto and a few other places to add factory power steering.    Finished up the power steering install yesterday, and it's smooth as silk. Tomorrow I will be cutting the drivers front bumper brace as there is an ear on it that stopped me from being able to install the new gear box, and then on to more paint work. I'll try to update more often, and do a better job with the details. It's not much of a "build" right now, but it is a truck that gets driven and worked on Last edited by LagunaGlide; 10-22-2020 at 04:14 PM. |
|
|
|
|
10-23-2020, 11:13 PM
|
#20 |
|
Registered User
Join Date: Aug 2019
Location: Harrisburg, Pennsylvania
Posts: 66
|
Re: '70 LWB Build
The bumper brace on the drivers side was in the way of the new gear box, so I removed it.
It had an ear, and a lip on it that if trimmed down would get it back in place.   Ended up needing to cut a little more off than I originally thought, but not by much.   After a little paint got it back in place where it belongs.   
|
|
|
|
|
09-19-2021, 01:07 PM
|
#21 |
|
Registered User
Join Date: Aug 2019
Location: Harrisburg, Pennsylvania
Posts: 66
|
Re: '70 LWB Build
It's been a long while since I have updated this thread. Not much has happened, but it is still on the road, and still ugly.
I have still been removing old paint, and was planning to do cab corners, so I got to removing some bondo, and that carried over into the doors. After some further assessment I decided to wait on cab corners until I can pull the cab and to the floor supports, and floor repairs.  The drivers door is pretty much trash on the bottom half, so I am still trying to source doors. Really holding out for original color, but that won't last forever. I started going through the electrical, as the PO had this "jumper" going on, and the original voltage regulator was still there.  They had done an alternator upgrade, but didn't wire it "properly" as I found from digging around on the forums. I decided to wire it all up properly, replace the battery cables and terminals, and just clean it all up. Around this time I had also removed the front inner wheel housings and decided to clean them up and give them a primer coating. I also replaced most of the hardware holding them in.  Here is the engine bay now.  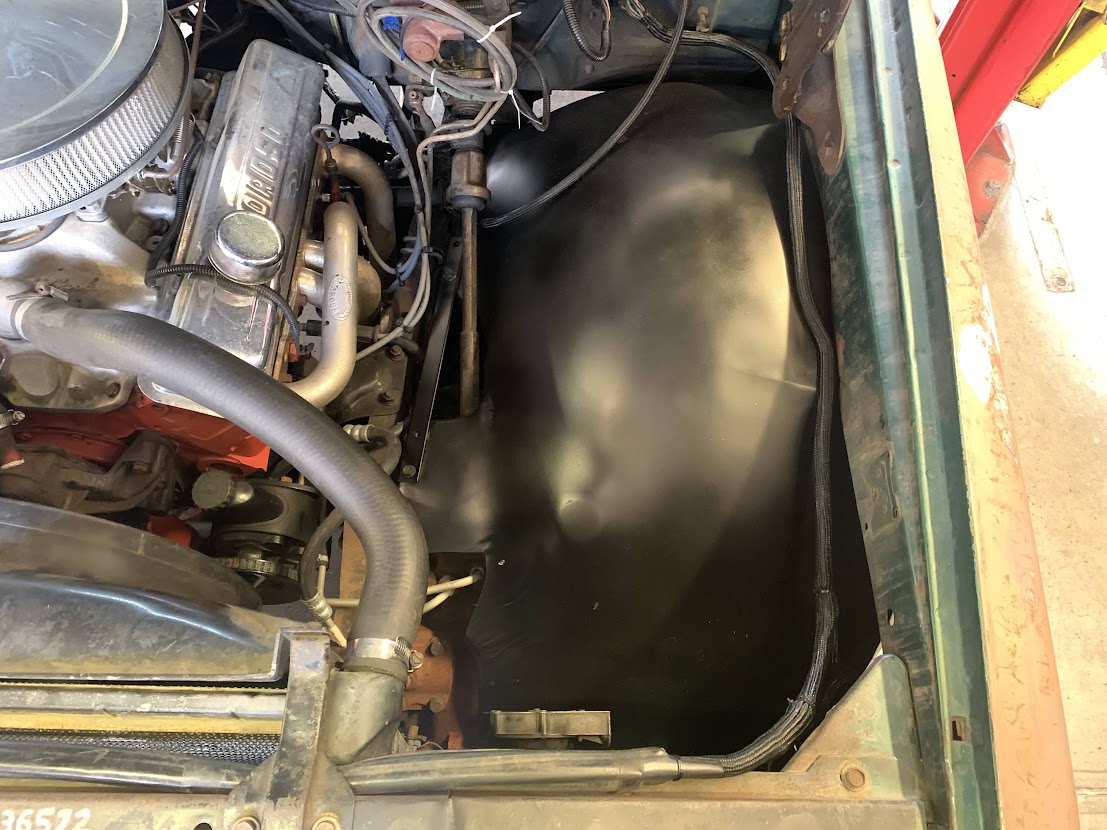 I still need to find some clips/retainers to secure the main harness along the fender. I also have this single black wire that comes from the trans just some little clip connector that I imagine is for a shift light or something that I need to figure out where it goes as it's been cut near the firewall. Gears have shifted a bit, and I am starting to collect parts to lower it, put wheel and tires on, and front discs. Also looking at seat options. If anyone out there finds some 70-70 1/2 doors in my color I am on the hunt. Last edited by LagunaGlide; 09-19-2021 at 01:27 PM. Reason: Photo issues |
|
|
|
|
09-27-2021, 04:53 PM
|
#22 |
|
Registered User
Join Date: Oct 2015
Location: PNW
Posts: 3,508
|
Re: '70 LWB Build
Good work, and I like the truck. While I don't have anything against the full restoration threads, the build it as you drive it - drive it as you build it threads are my favorite. I like that you got rid of all of the layers of paint. You can get some black primer for your rust repairs and have the existing original paint matched. Then you can do your touch ups where there was rust. That will keep with your overall theme and that way you don't have to find doors in your original color, you can fix the ones you've got. Even if you found ones of the right color, they most likely will have faded differently.
|
|
|
|
|
01-30-2022, 12:57 PM
|
#23 |
|
Registered User
Join Date: Aug 2019
Location: Harrisburg, Pennsylvania
Posts: 66
|
Re: '70 LWB Build
I've got a few things under way...
 I've built a seat frame and installed a set of buckets out of a VW MK5, and a center console out of a silverado. Really like having the center console, but may end up changing the seats. Still need to get shoulder belts, and finish some things up, but here is where the seats are now.  Among all the parts I have laying around I got some Wheels as well. Unfortunately I didn't bother to measure or look up the rear hub of my truck, and they didn't fit so well. I assumed they would fit as I had seen these wheels on a few 6 lug trucks. After a littler research I ordered a router bit and some bearings, and went to work. Before  After  They fit now  I removed all the bed bolts, and removed the bumper and bumper brackets for ease of bed removal, and to get those parts cleaned up and repainted.  This past week I removed the old shocks and springs, upper shock mounts, and lower shock mounts. The upper spring retainers were really siezed up. Took a torch and some persuasion.   I had read on these forums and other places how much of a pain these rivets were to remove. I had them off in maybe an hour. I used a grinder to flatten the top of the rivet. Then I drilled a hole about as big as the hole they go through just deep enough to be near or past the base metal. Then I used an air hammer to chisel the drilled part out, and then drove them out with the air hammer punch.   Unfortunately most things I do result in even more work. I removed the upper spring perches from the frame and crossmember. While cleaning them up I noticed they didn't look so good, so I went to tapping with a ball peen. I am likely going to repair them, but I am certainly open to just purchasing something new, or making something new. Open to thoughts or suggestions.  Also I am unsure what to do with these trailing arms. I read about people removing the rivets, sandblasting, coating, and welding back together, but I can't help but wonder if these are too far gone. I don't understand the rust in the middle. Thoughts?  This week I will be sand blasting some parts including the reworked upper shock brackets in the rear. Coating, and reinstalling. While I am doing all of this I am cleaning up and coating the frame. I have parked the truck somewhere I have access to a lift and shop but only a few days a week just in case something makes the truck undriveable. Slow going, but going. Last edited by LagunaGlide; 01-30-2022 at 01:09 PM. |
|
|
|
|
01-30-2022, 05:57 PM
|
#24 |
|
Senior Member
 Join Date: Aug 2019
Location: Cheraw
Posts: 1,305
|
Re: '70 LWB Build
I liked the look of the wiring loume, or covering, that you used. Where did you get it?
|
|
|
|
|
01-30-2022, 08:46 PM
|
#25 | |
|
Registered User
Join Date: Aug 2019
Location: Harrisburg, Pennsylvania
Posts: 66
|
Re: '70 LWB Build
Quote:
There are other options out there, but when I was buying this was the best priced for the split loom. |
|
|
|
|
 |
| Bookmarks |
|
|


 Linear Mode

