
 |
Register or Log In To remove these advertisements. |
|
|
|
|||||||
 |
|
|
Thread Tools | Display Modes |
|
|
#1 |
|
Registered User
 Join Date: Nov 2013
Location: Northglenn, Colorado
Posts: 186
|
Rust Therapy - 62 C-10
I've been building my 62 C-10 for the last 15 months, and I have a thread on the HAMB too. The next posts will get you up to speed on my progress over the last year...
After a lot of watching Craigslist and other places, I've finally found my next project. This morning my friend Brian and I took a 3 1/2 hour drive down to La Junta, CO to pick up this 2 owner Colorado farm truck. 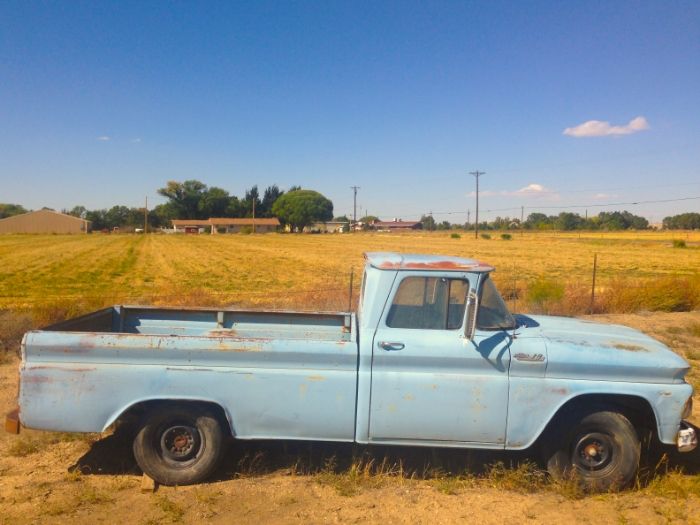 Here are the basics: 283 - runs, but smokes. 3OTT - sloppy linkage, seems to be stuck in 3rd at the moment. 6 lug axles The truck has been parked since 2003. Everything seems to be virgin untouched stock. No weird radio cutouts, stock interior. I think the rear bumper is an aftermarket mod. I'm very impressed with how solid the body is. It looks like the driver door has been creased by opening too far, and there is a dent in the rear passenger quarter panel. |
|
|

|
|
|
#2 |
|
Registered User
 Join Date: Nov 2013
Location: Northglenn, Colorado
Posts: 186
|
Re: Rust Therapy - 62 C-10
The cab corners are clean and rust free. When I pulled up the flooring it looks like you can still see factory paint/primer on most of the floor. I saw some evidence of some rodent nests under the seat which I'll clean up soon.
The plan is to do a frame off rebuild of all things mechanical but try to keep as much of the body as close as possible to what it looks like right now. I want a very functional and mechanically reliable preservation of what it is now. It's a 51 year old truck so it should have some scars and grey hair. I'm just doing a hip and knee replacement. As long as the 283 is salvageable, I will be rebuilding it. Not sure yet what to think about the 3OTT. I love the cool factor, but I'm open to exploring a 5spd since this will be my DD when I'm done and I don't want to be stuck in the slow lane going 60MPH at WOT. I'm definitely doing 4 wheel disc brake conversion, and a moderate drop is also definitely going to happen. It's way too early to decide what I'm doing on wheel/tire combos, but I really like the idea of 17" or 18" matte black steelies or Torq-D's with either a tiny whitewall or black on black. I'm definitely ditching the fuel tank from inside the cab, and the bed will get a full on resto. We're moving in a couple weeks so I probably won't really get going on this project at full steam until we're settled. I have a shop where I can park it and work on it indoors this winter, so next week I'll drag it over there. |
|
|

|
|
|
#3 |
|
Registered User
 Join Date: Nov 2013
Location: Northglenn, Colorado
Posts: 186
|
Re: Rust Therapy - 62 C-10
|
|
|

|
|
|
#4 |
|
Registered User
 Join Date: Nov 2013
Location: Northglenn, Colorado
Posts: 186
|
Re: Rust Therapy - 62 C-10
|
|
|

|
|
|
#5 |
|
Registered User
 Join Date: Nov 2013
Location: Northglenn, Colorado
Posts: 186
|
Re: Rust Therapy - 62 C-10
|
|
|

|
|
|
#6 |
|
Registered User
 Join Date: Nov 2013
Location: Northglenn, Colorado
Posts: 186
|
Re: Rust Therapy - 62 C-10
The thread is called "rust therapy" because that's what my wife calls it when I disappear into the shop. We've had a tough run of it this year medically for both her dad and mine. The time spent getting my hands dirty is cathartic for me.
Happy Birthday to my pops yesterday. We didn't think he'd make it this far and we're sure glad to have him with us still. NOTE: These are posts from more than a year ago... just getting you caught up Got the brakes working enough to drag over to my shop safely. Gonna spend a couple bucks at the car wash on the way, and then get it into the shop. Can't wait to get it out of my head and start WRENCHIN! I got the truck into the shop last week. Yesterday I had a couple of hours of down time, so I began the strip down process. Here's a few shots I took while I was working. Hood off: 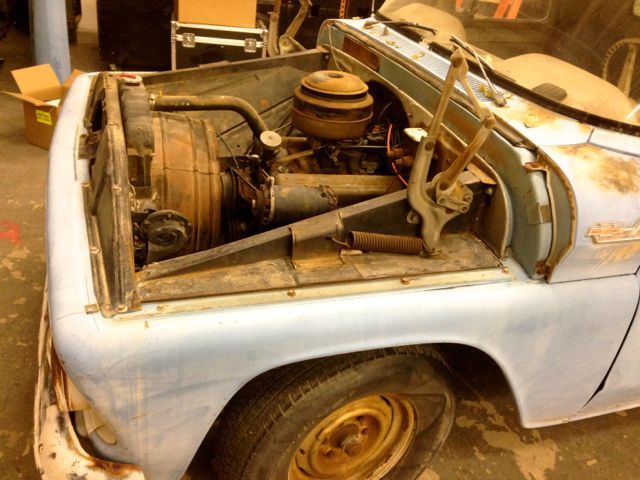 Front Fenders & Supports off: 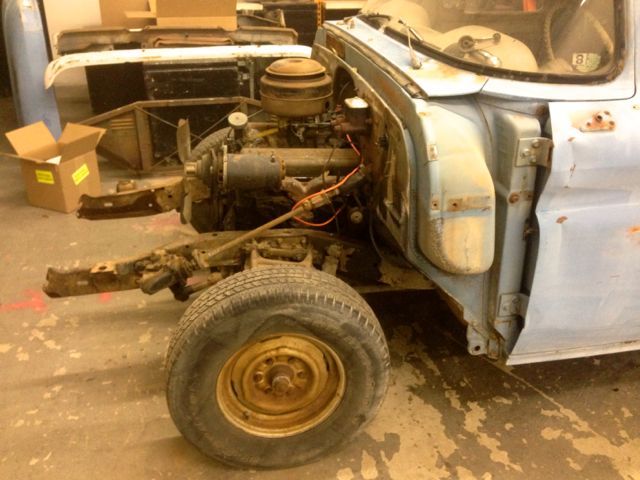 A front view: 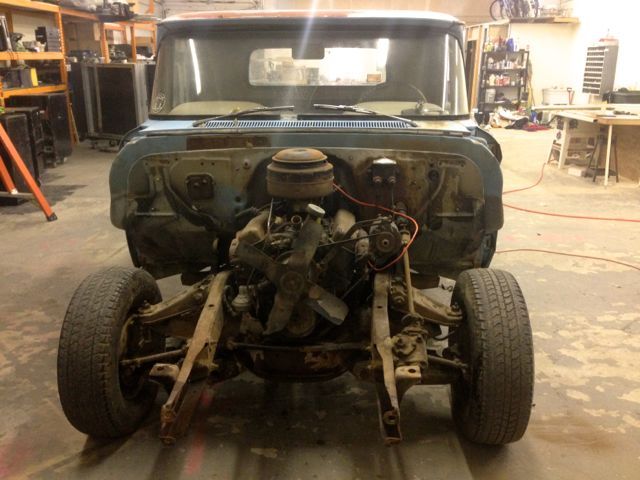 My helper, tool fetcher, and conversation partner, Elise, making vroom vroom noises! 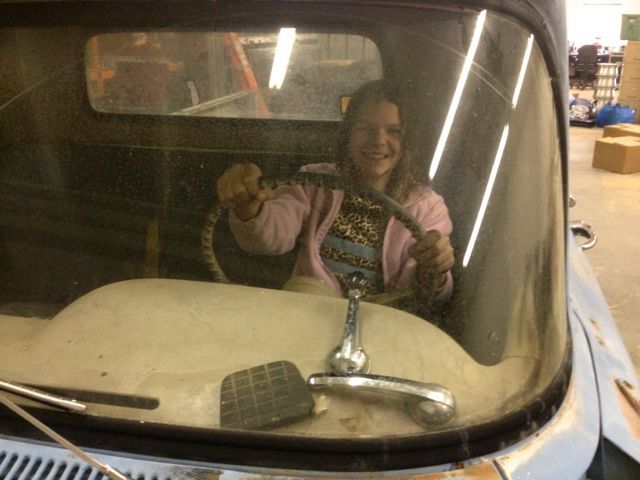 Got the rochester off and the water pump before it was time to quit. 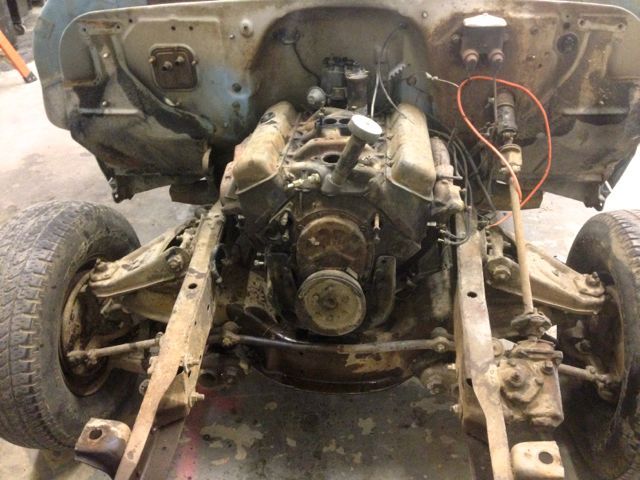
|
|
|

|
|
|
#7 |
|
Registered User
 Join Date: Nov 2013
Location: Northglenn, Colorado
Posts: 186
|
Re: Rust Therapy - 62 C-10
|
|
|

|
|
|
#8 |
|
Registered User
 Join Date: Nov 2013
Location: Northglenn, Colorado
Posts: 186
|
Re: Rust Therapy - 62 C-10
Well, it's been a bit since I've had a chance to work on the truck. Some of you know that my dad's been sick for the past year. I went home to be with him in his last days earlier this month. He left us on Dec 13 at 3:20 AM, after exactly 1 year and a day (down to the minute) from the time he was admitted to the hospital.
He was my mentor, my pal, and the person I most loved to work with. I'm going to miss you, Dad. Here's a pic of him in 1965 with his brother. 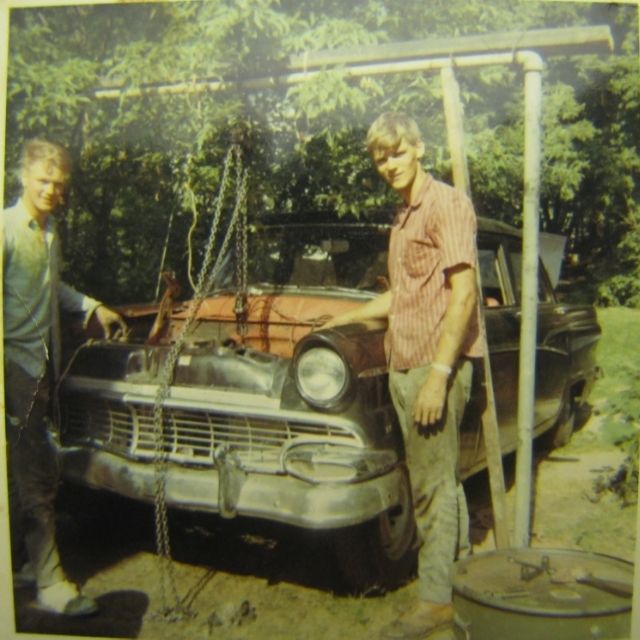 Since I got home from the funeral, I have taken some time to be alone in the shop. Here's what I got done in the past week. Oil Pan off, showing a fairly solid bottom end, not too much crud, and no major issues: 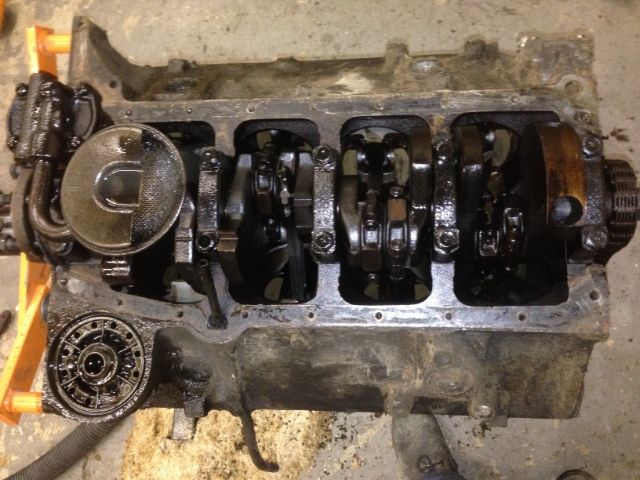 A different view: 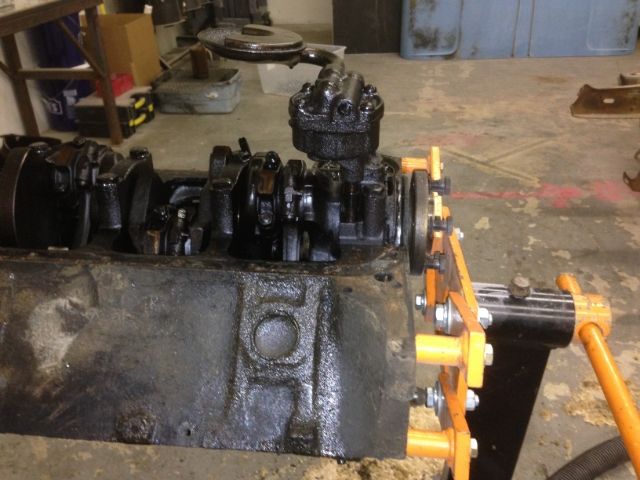 numbering the connecting rods and caps: 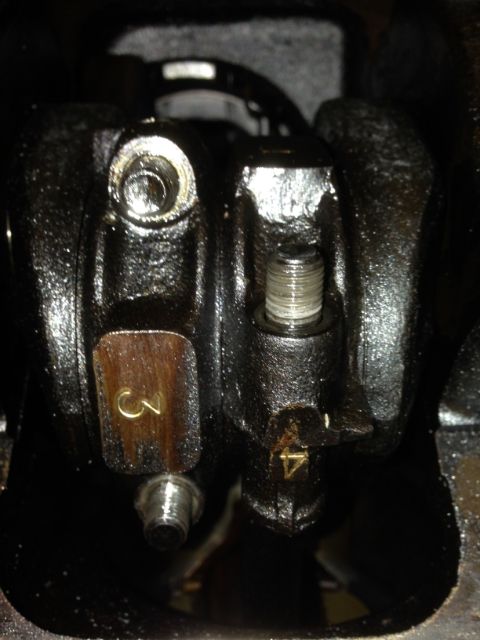 The timing chain was so loose it was almost freewheeling on the crank gear. The pic doesn't quite do it justice: 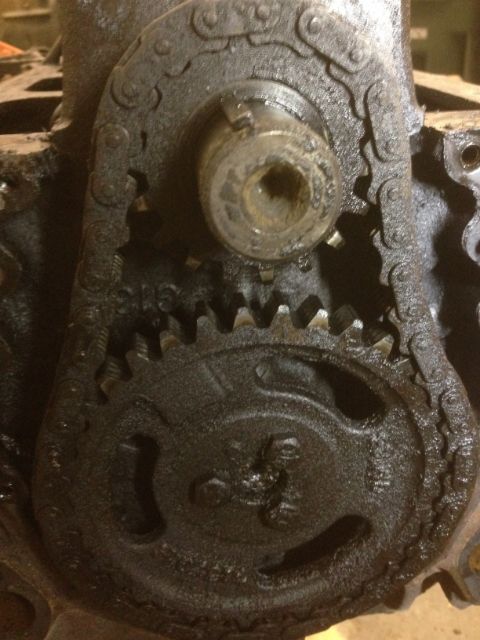 just the bumpstick and a few small parts left to take off: 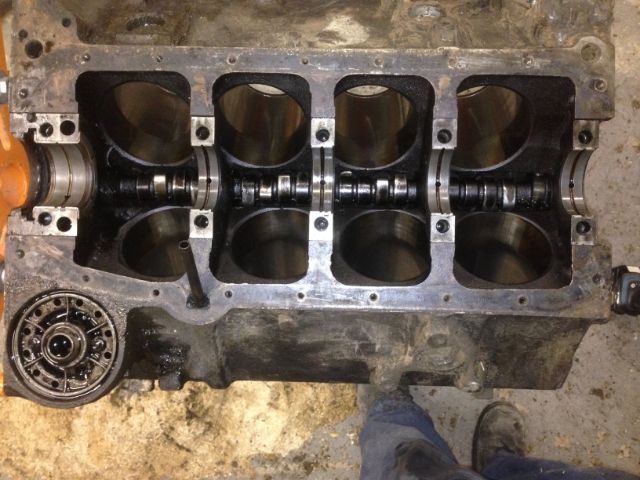 When I got the freeze plugs out, there was a LOT of sludge built up in the block. I went down to the local car wash and blew out close to 1/2 gallon of rusty gross crap. The machine shop will bake and shot peen the block but i wanted to give them a fighting chance. The heads are cast with a rectangle on them, showing that they are the stock 8.5:1 compression heads. They'll be replaced with something better when I put it back together. |
|
|

|
|
|
#9 |
|
Registered User
 Join Date: Nov 2013
Location: Northglenn, Colorado
Posts: 186
|
Re: Rust Therapy - 62 C-10
Today I brought the disassembled block and parts to the machine shop. They're going to bake it clean, shot peen it, then bore & hone the block and prep it for rebuild for me. I don't have any of the right tools or experience for installing cam bearings so they'll do that too. They said they'd look in their inventory for some different period correct (HAMB friendly) heads with larger valves and get back to me. The connecting rods will be resized and the crank will be ground & polished too.
When I got back to the shop I took the doors off, yanked the seat and then the gas tank, and vacuumed the crud off of the floor, including several rodent nests. There was a bit of rust underneath the trim piece at the bottom of the door on the driver side.  With the seat gone, I vacuumed up the rust flakes from the threshold. You can see that it's not really that bad, but the vertical piece of steel that goes under the threshold trim piece is completely rotten: 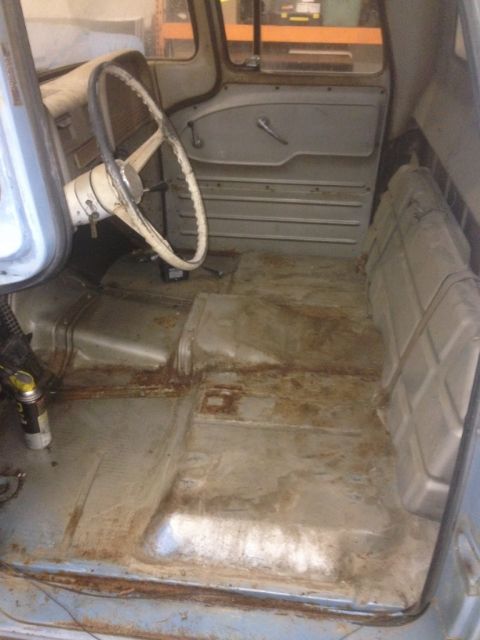 No more fuel tank. 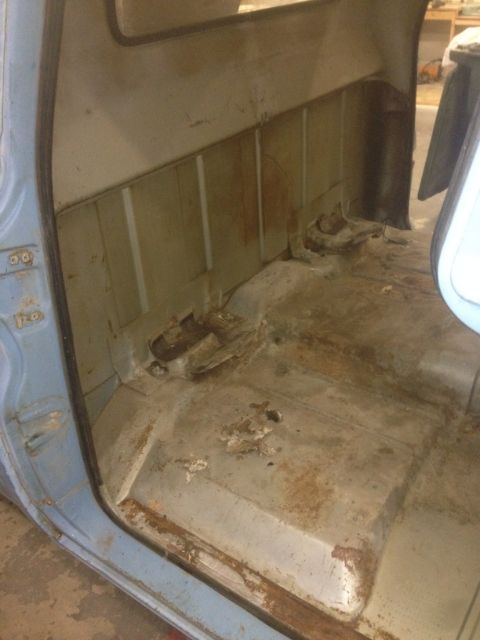
|
|
|

|
|
|
#10 |
|
Registered User
 Join Date: Nov 2013
Location: Northglenn, Colorado
Posts: 186
|
Re: Rust Therapy - 62 C-10
Today I got farther along on the disassembly of the cab, on both sides of the firewall. I pulled the vent cowl off, the wiper motor, heater core, front window, and the glovebox. I am really amazed by how little rust there is around the window. Being raised in Ontario where salt and humid weather eats everything, I'm used to seeing more rust after 5 years of existence, not 50.
Wiper control arms:  Windshield pulled: 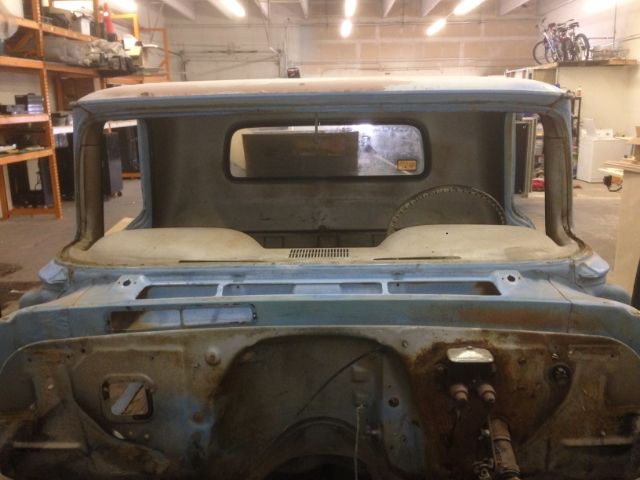 Heavy duty DeLUXE heater!! ;-) 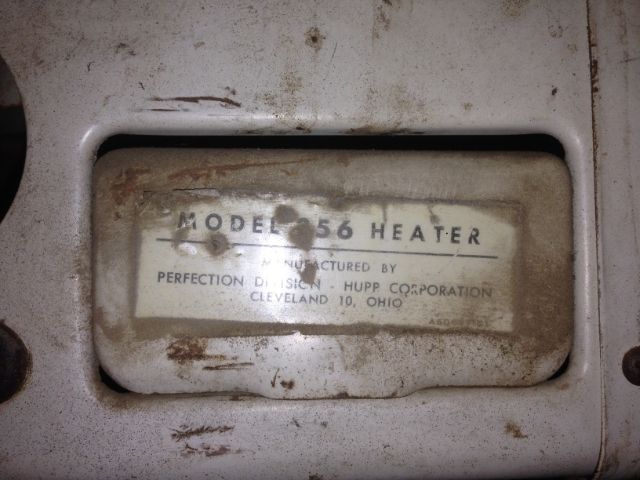 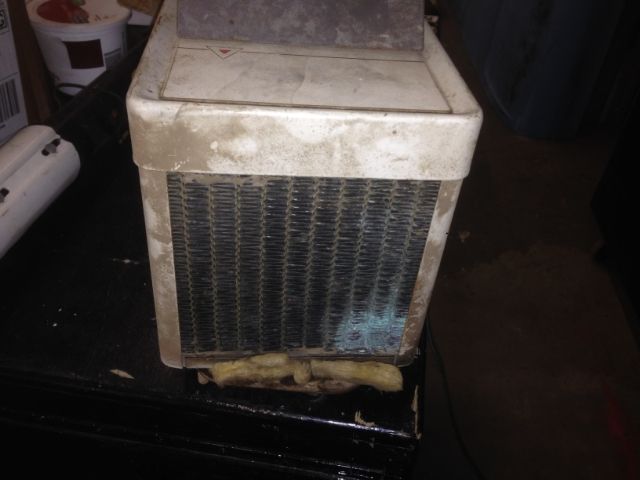 One other major difference living here in Colorado vs. Ontario is that every piece of rubber and plastic is dried out until it's ROCK hard. I don't remember that happening the same way on dad's old projects. When I pulled the rubber gasket from around the windshield it came out in small hard chunks almost like a piece of bondo or dried clay. |
|
|

|
|
|
#11 |
|
Registered User
 Join Date: Nov 2013
Location: Northglenn, Colorado
Posts: 186
|
Re: Rust Therapy - 62 C-10
|
|
|

|
|
|
#12 |
|
Registered User
 Join Date: Nov 2013
Location: Northglenn, Colorado
Posts: 186
|
Re: Rust Therapy - 62 C-10
I've been picking away at the engine rebuild on my truck by spending an hour here and there when I can. It's kind of boring stuff to post on here but I've been working on reconditioning the non moving parts for the 283. My PO kindly drilled a hole in the middle of one of the original valve covers with a great deal of precision and care using what I can only presume was a dull pickaxe. But I found a different set on a 72 C10 at the junk yard last week ($5 each) so I yanked them and sandblasted them. I hammered out a couple small dings, and then applied a couple coats of Chevy Orange VHT Engine Enamel and they're as good as new. I got a used Weiand intake manifold on Craigslist for $30, sandblasted through 3 different colors of paint and then clear coated it, and I cleaned and sandblasted the timing cover with some more orange. The Oil pan is next.
Gotta watch the budget so I'm just waiting to get parts when I can. So far, Craigslist and junk yard finds have been successful. I got a pretty big sandblasting cabinet on Craigslist which came with a pressurized tank, a separate 40lb siphon tank, a small hand held mini blaster, and a brand new 40 lb jug of aluminum oxide for $100. I'll post some pics of my dust collection system too. I normally use it for woodworking at the shop but I connected it to the sandblaster cabinet and it works like a charm. Most of the media falls down into the bottom of the cabinet, but the fine dust gets sucked right out. Even after a couple days of sandblasting, the shop has no (new) dust on anything. Here's the Sandblasting Cabinet and Dust collector: 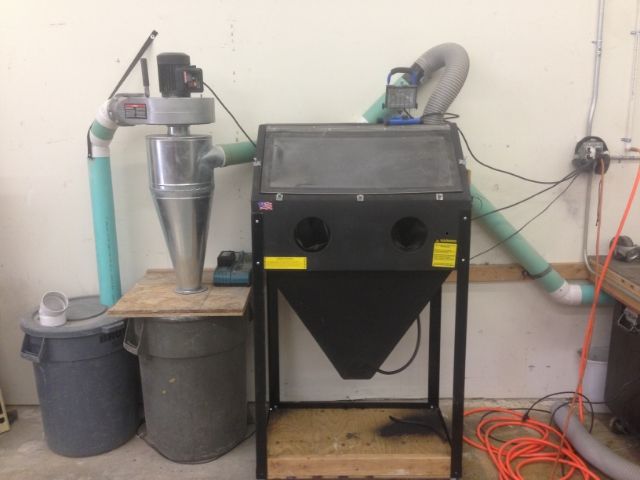 I drilled a 4" hole in the top of the sandblast cabinet, and then a smaller 2" hole on the back to create a place for air to enter. The clean air comes directly across the viewing window and picks up the fine airborne dust inside the cabinet. Then it goes directly through a cyclone filter which normally filters out the larger sawdust (or in this case, sandblasting media that happens to get sucked up). I wasn't happy with the fine dust that used to blow by the cyclone so I added a water filter stage. There are no paper filters in this system but the air that comes out has no dust left. I never lose suction in the system and I only have to empty the catch basin once every couple months if I'm doing a bunch of woodwork. Weiand Intake: 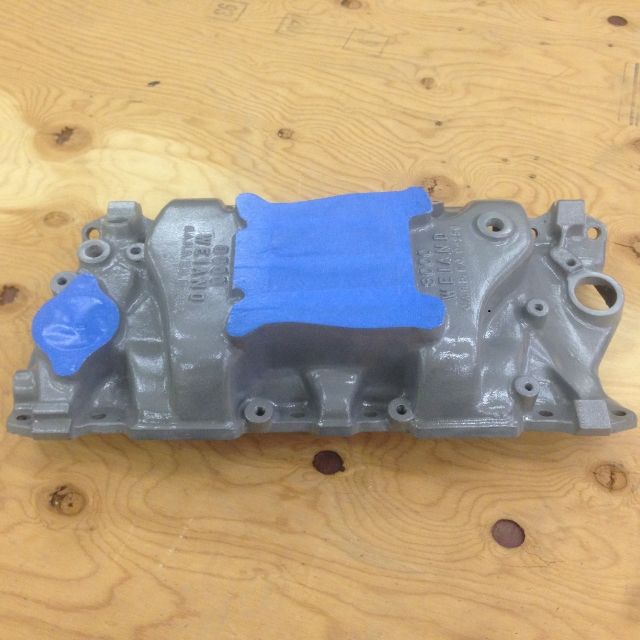 Valve Covers wet sanded once: 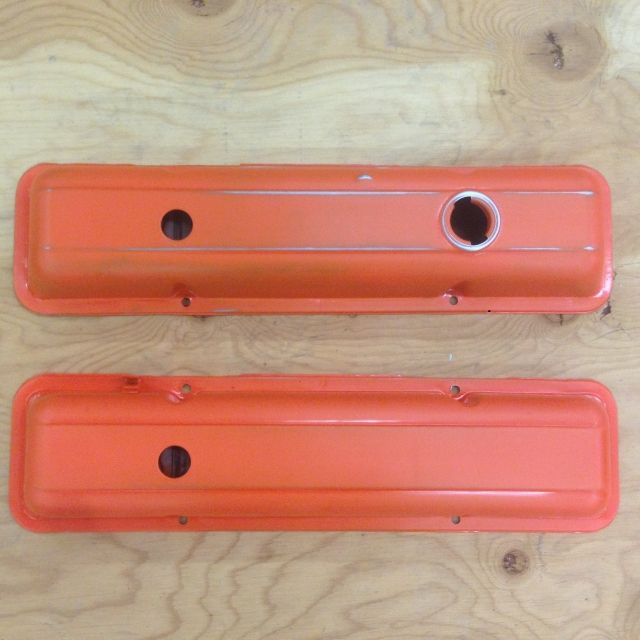 Timing Cover: 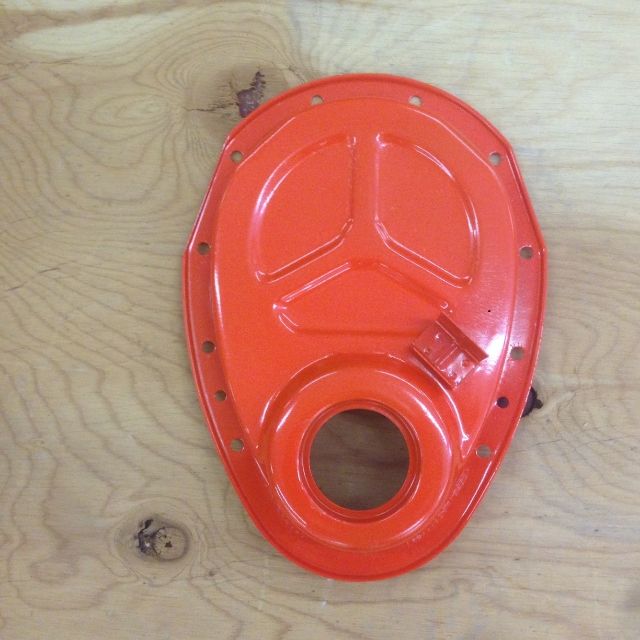 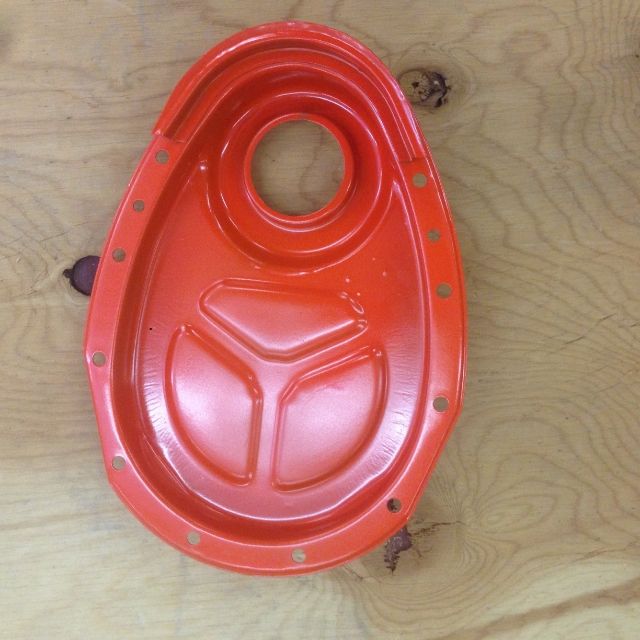
|
|
|

|
|
|
#13 |
|
Registered User
 Join Date: Nov 2013
Location: Northglenn, Colorado
Posts: 186
|
Re: Rust Therapy - 62 C-10
This will probably go down in history as the slowest engine rebuild in history, but I'm making progress. I've been collecting parts and pieces this month, and I had some time this afternoon, so I began the reassembly today. The key to doing this is to be methodical, clinically clean, and double check your process and tolerances all the way through.
I followed behind the machine shop to retap all of the threads, blew out all of the oil galleys, and then used a rifle cleaning brush to make sure there was no metal left from the shop. I used ATF on a lint free rag to super clean the cylinder bores. I installed all the freeze plugs. The machine shop had installed the cam bearings already so I didn't have to do that. This is what the block looked like at this point. 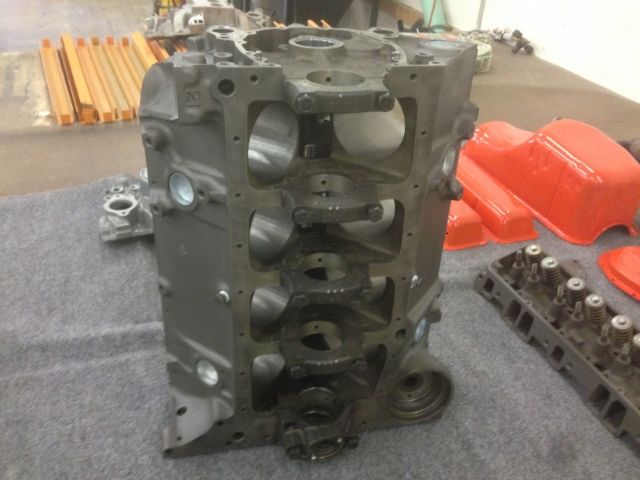 Before I started with the crankshaft, I carefully dropped the cam with a bit of oil on the bearing surfaces to make sure the cam spins freely, and then pulled it back out for later. 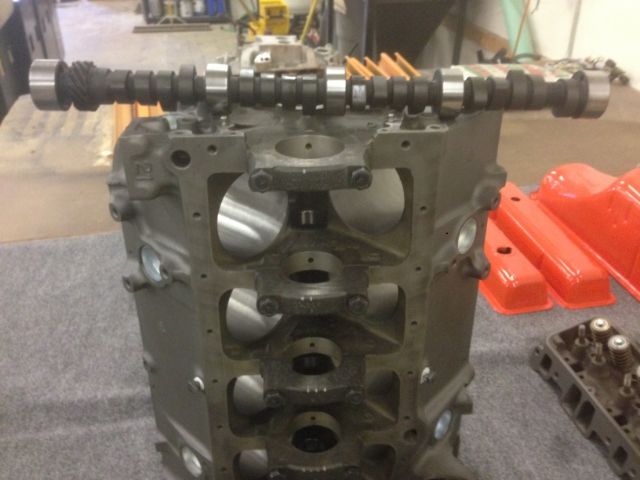 One last check of the bare block before I start reassembly. Looking good! 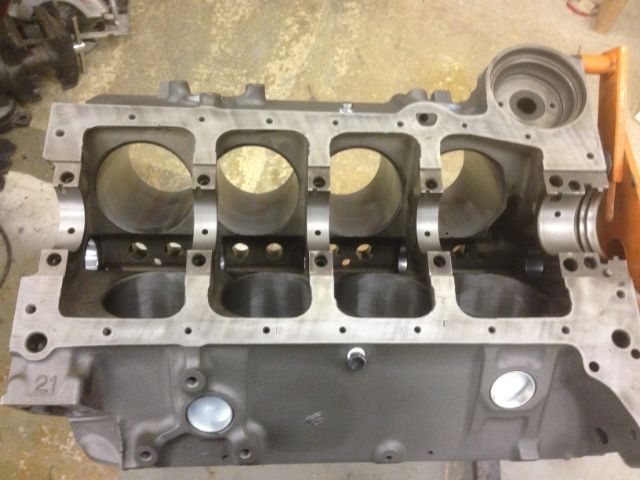
|
|
|

|
|
|
#14 |
|
Enjoy your truck
Join Date: Oct 2007
Location: Newmarket, Ontario, Canada
Posts: 1,066
|
Re: Rust Therapy - 62 C-10
Looks like the truck is in really nice condition.
Greg.
__________________
1 Corinthians 10:13 1963 Chevrolet 1/2 ton 2010 Camaro SS/RS 2014 Jeep Grand Cherokee 2016 Jeep Cherokee |
|
|

|
|
|
#15 |
|
Registered User
 Join Date: Nov 2013
Location: Northglenn, Colorado
Posts: 186
|
Re: Rust Therapy - 62 C-10
|
|
|

|
|
|
#16 |
|
Registered User
Join Date: Mar 2013
Location: central coast monterey county california
Posts: 348
|
Re: Rust Therapy - 62 C-10
First of all my condolences on your dad.May he rest in peace .and keep up the great work on your build
|
|
|

|
|
|
#17 |
|
Registered User
 Join Date: Nov 2013
Location: Northglenn, Colorado
Posts: 186
|
Re: Rust Therapy - 62 C-10
Time to drop the crank into the block, and check how smoothly it spins. It should have almost no resistance at this point.
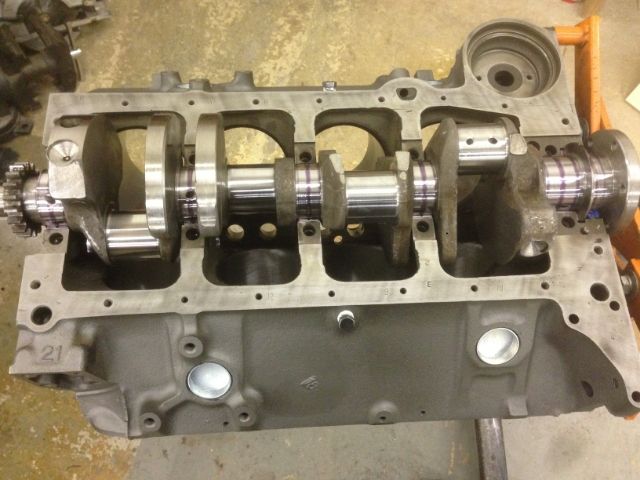 Checking Endplay - we're at .007" gap between the thrust bearing and the crank. That's on the loose side of what is acceptable, but within spec. 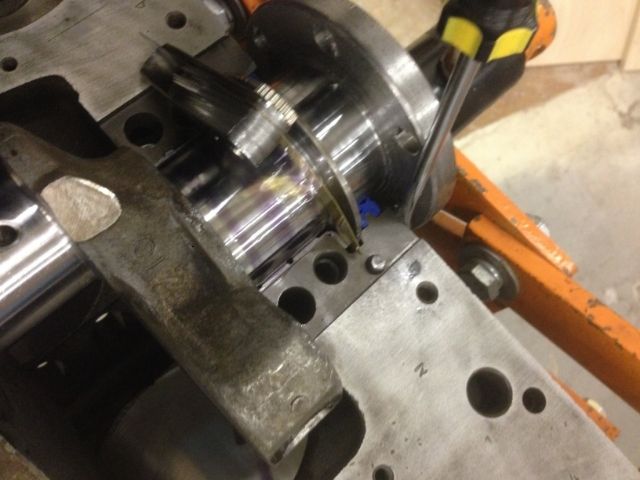 Rear bearing cap installed and torqued to 75 ft lbs. Endplay is now .005", so we know we're OK there. One thing to watch is not to use too much sealant on the bearing cap or the block at the rear main seal so that you don't fill the block up with silicone that gets squeezed out and eventually plugs oil galleys. I also spin the crank every time I add a bearing cap so I know right away if something is binding. 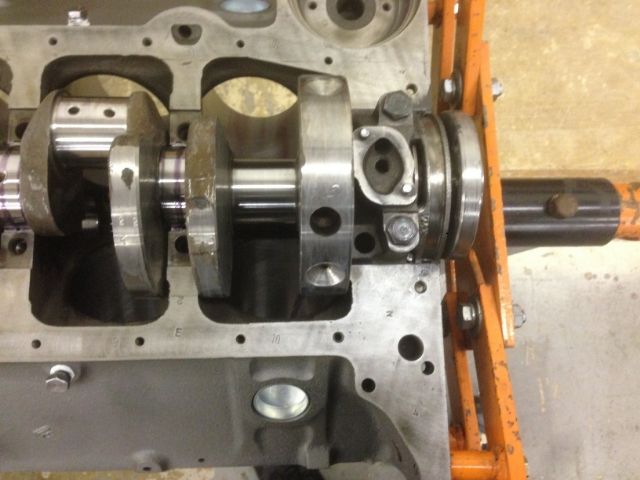 Here's where we are at the end of my time today. All 5 bearing caps are now torqued down to 75 ft lbs. Everything is spinning freely and there's just the right amount of RTV squeezing out from the rear main seal. (It looks like about 1/16" of excess) 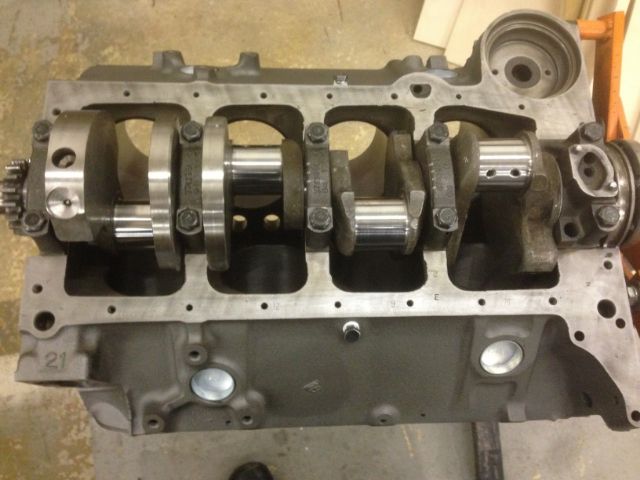
|
|
|

|
|
|
#18 |
|
Registered User
 Join Date: Nov 2013
Location: Northglenn, Colorado
Posts: 186
|
Re: Rust Therapy - 62 C-10
I had a some more time available today so I picked up where I left off yesterday. I double checked the end gap on the piston rings in the correct cylinder before installing all of them onto the pistons. It might be extra work but I prefer to double check. It turned out that the block is machined .030 over and the piston ring set was meant for that size, but there were some minor differences in the end gap overall. Nothing over .003 different from one to another. Maybe in times gone by this was more important.
Here's Piston #5 showing the way that I clock the gap. Top Ring: 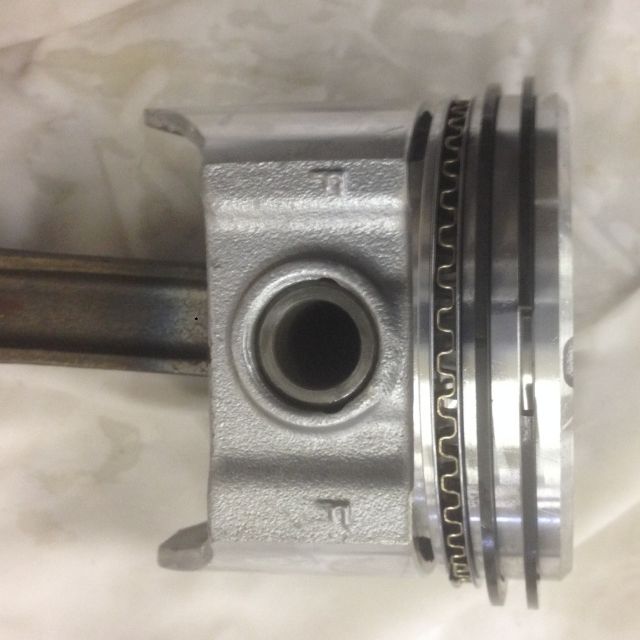 Ring #2: 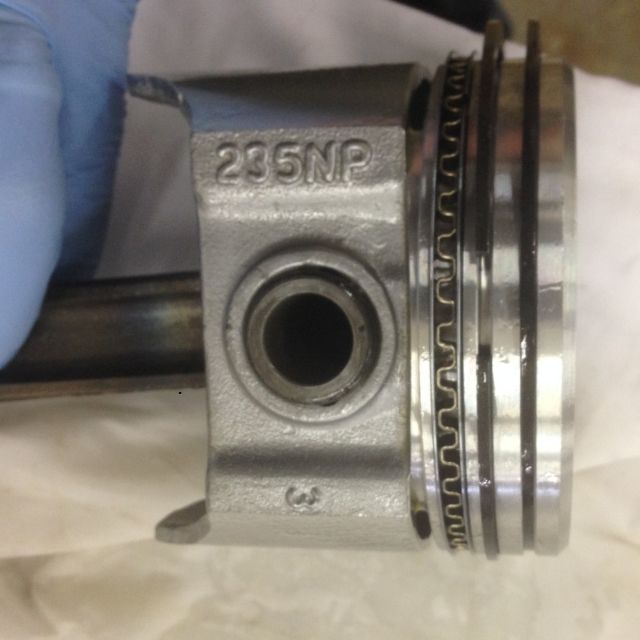 Oil Scraping ring: 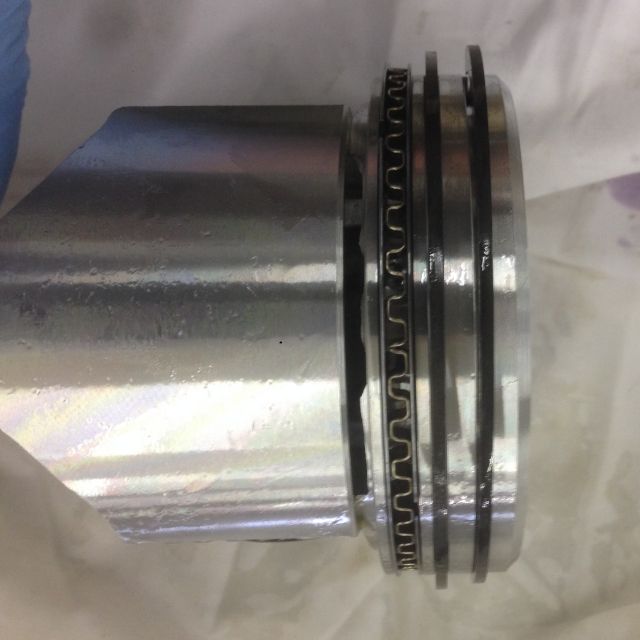
|
|
|

|
|
|
#19 |
|
Registered User
 Join Date: Nov 2013
Location: Northglenn, Colorado
Posts: 186
|
Re: Rust Therapy - 62 C-10
After I get the ring compressor loosely around the piston, everything goes for an oil bath while I install the rod bearing:
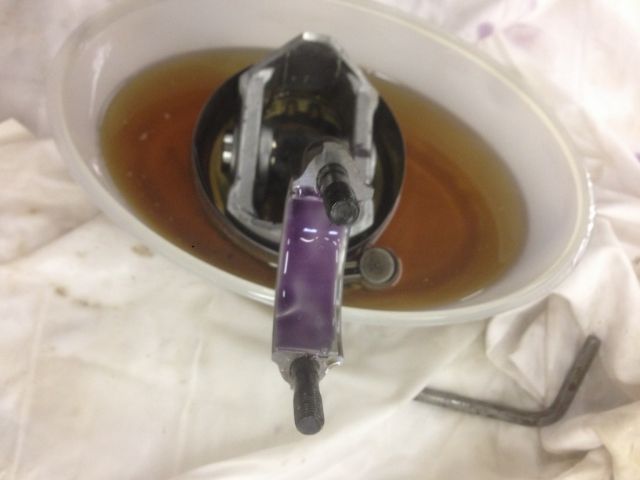 I sleeved a piece of 5/16" fuel line over the bare threads and dropped the piston into place: 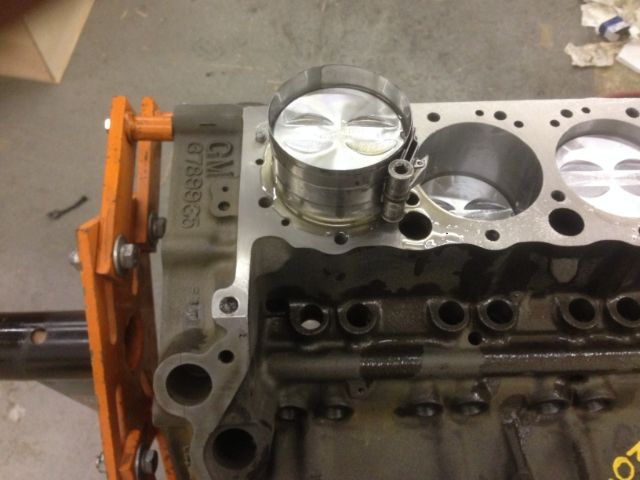 My friend Craig let me use his ring compressor. He said it was his grandfather's from back in the 50's. It's way better than the cheapo POS that I bought last week. I wish they made tools as good as this these days. This is Craig's Gramps from back in the day. He's second from the left. 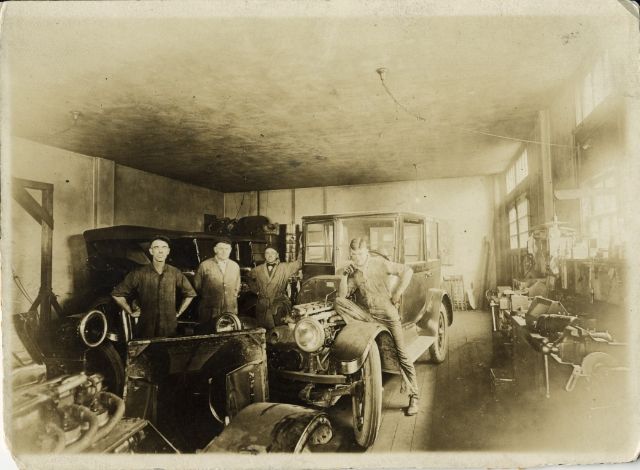 A little lube on the bearing, and in she goes. 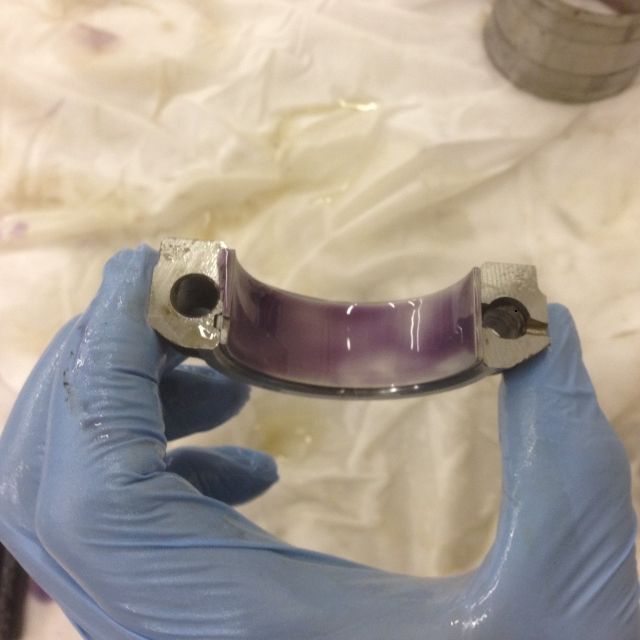
|
|
|

|
|
|
#20 |
|
Registered User
 Join Date: Nov 2013
Location: Northglenn, Colorado
Posts: 186
|
Re: Rust Therapy - 62 C-10
After torquing down the connecting rod bolts to 35 ft lbs, I turned the crank 1 full revolution to check for clearance and to make sure nothing was binding.
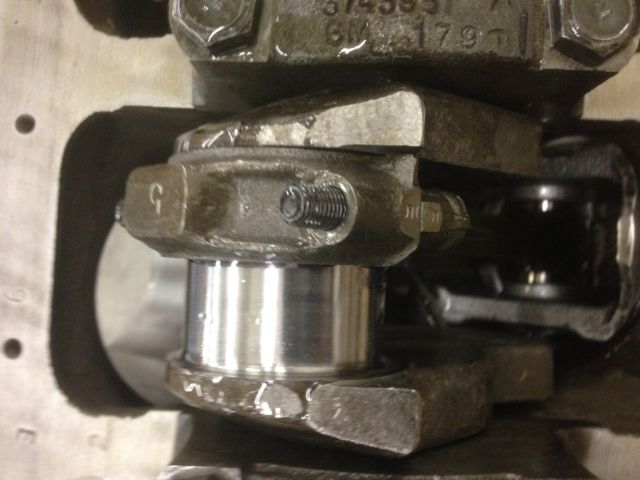 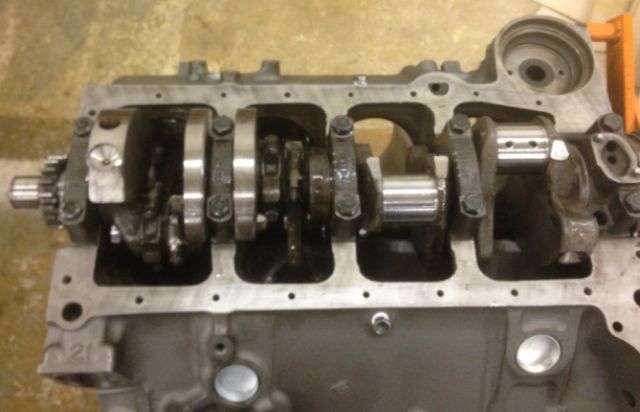 After I got all 8 pistons in, it was time to install the cam and the timing chain. 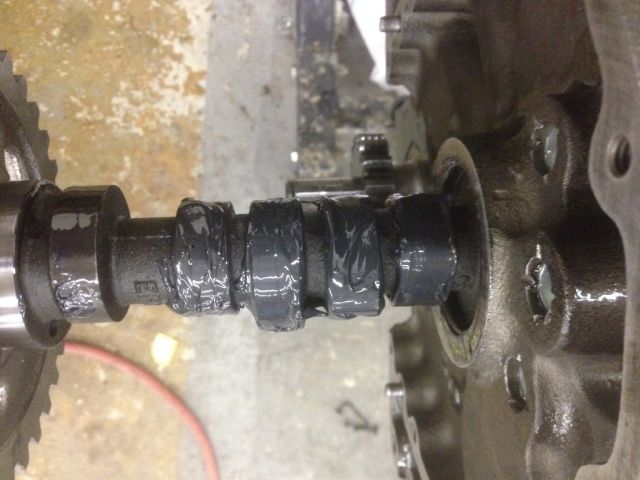 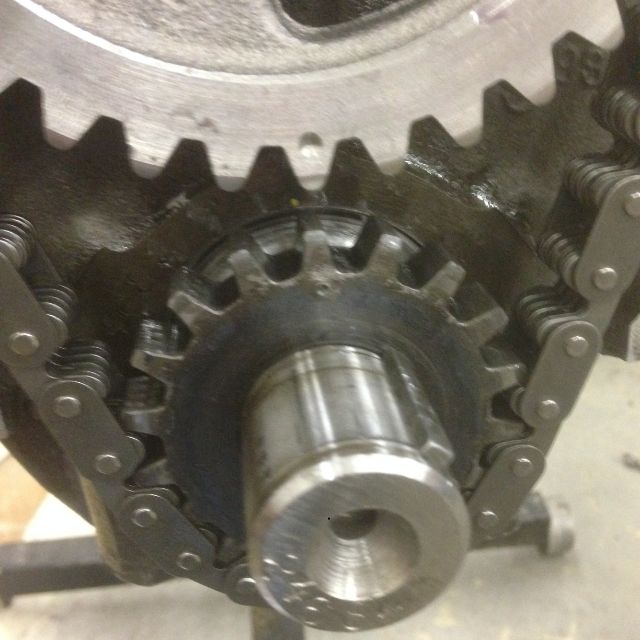 I got the oil pump mounted today too, but I forgot to take a picture before I left the shop. If I get time tomorrow I'll work on getting the timing cover and the oil pan ASAP on so I can keep the dust out of the crankcase when I'm not working on it. Right now there's a big plastic bag over the entire block. |
|
|

|
|
|
#21 |
|
Registered User
 Join Date: Nov 2013
Location: Northglenn, Colorado
Posts: 186
|
Re: Rust Therapy - 62 C-10
Due to a bunch of outside (work and personal) crap, I let the thread slide for a whole year, but I've recently picked up the tools again to continue my project. I have spent a lot of time lurking on here and the 47-present Chevy forum, and have learned a lot from watching threads on both forums from Endlessearth, Flat N Low (chevyrestoguy), the Astronaut, 65 Standard, 65 Gregg, and Alan's Classic. I can't say I'll be able to contribute a their level of proficiency, but I'm going to pick my build thread back up again to pay it forward. Hopefully, somebody will be able to learn something from my thread as I fake my way through this.
Last week I stripped everything down to the frame and began a front crossmember conversion. I picked up a 78 crossmember and ordered new ball joints, tie rod ends, and 3" drop spindles. After I mocked everything up and drilled the holes in my frame, I sent the chassis off to media blast. Torsion bars and old crossmember out. 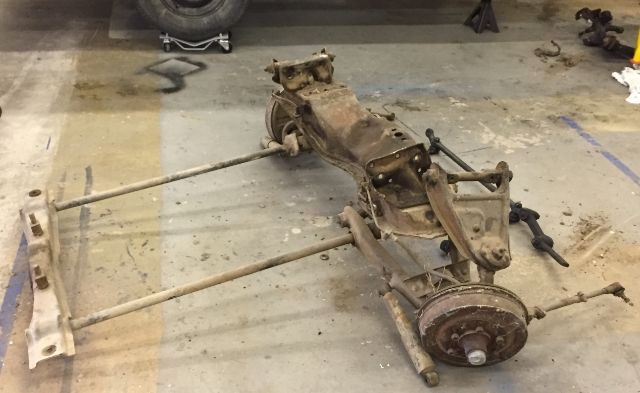 Mocking up the '78 Crossmember 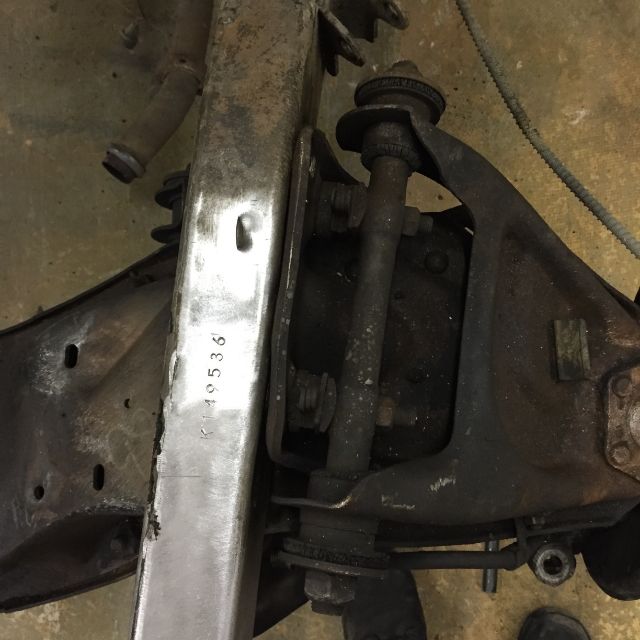 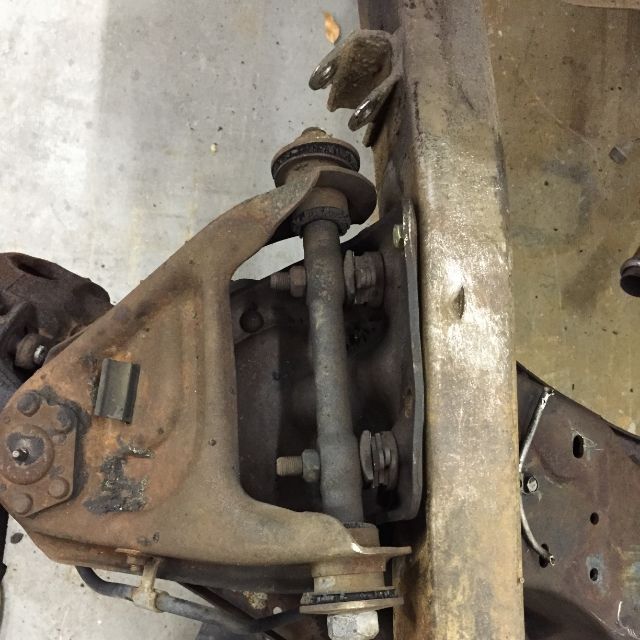
|
|
|

|
|
|
#22 |
|
Registered User
 Join Date: Nov 2013
Location: Northglenn, Colorado
Posts: 186
|
Re: Rust Therapy - 62 C-10
|
|
|

|
|
|
#23 |
|
Registered User
 Join Date: Nov 2013
Location: Northglenn, Colorado
Posts: 186
|
Re: Rust Therapy - 62 C-10
So now you're up to date: I did complete the engine rebuild but wasn't taking many pictures. I did rework some tall Edelbrock valve covers because I installed roller rockers and the stock valve covers didn't have enough clearance, I'll see if I can dig up the pics.
My plan is to build the drivetrain this winter and begin my first real body work project as soon as I can. Thanks for coming along for the ride! |
|
|

|
|
|
#24 |
|
Registered User
 Join Date: Nov 2013
Location: Northglenn, Colorado
Posts: 186
|
Re: Rust Therapy - 62 C-10
|
|
|

|
|
|
#25 |
|
Registered User
 Join Date: Nov 2013
Location: Northglenn, Colorado
Posts: 186
|
Re: Rust Therapy - 62 C-10
|
|
|

|
 |
| Bookmarks |
|
|