
|
Register or Log In To remove these advertisements. |
|
|
|
|||||||
 |
|
|
Thread Tools | Display Modes |
|
|
 09-02-2012, 11:32 PM
|
#1 | |
|
Registered User
Join Date: Aug 2012
Location: Salem Mo
Posts: 647
|
Re: 1957 Chevy truck re-rebuild
Quote:
 Ok. will do. I'll do a run of pics dealing with making the taillight out housings. First mark where I decided to have the tailligts. 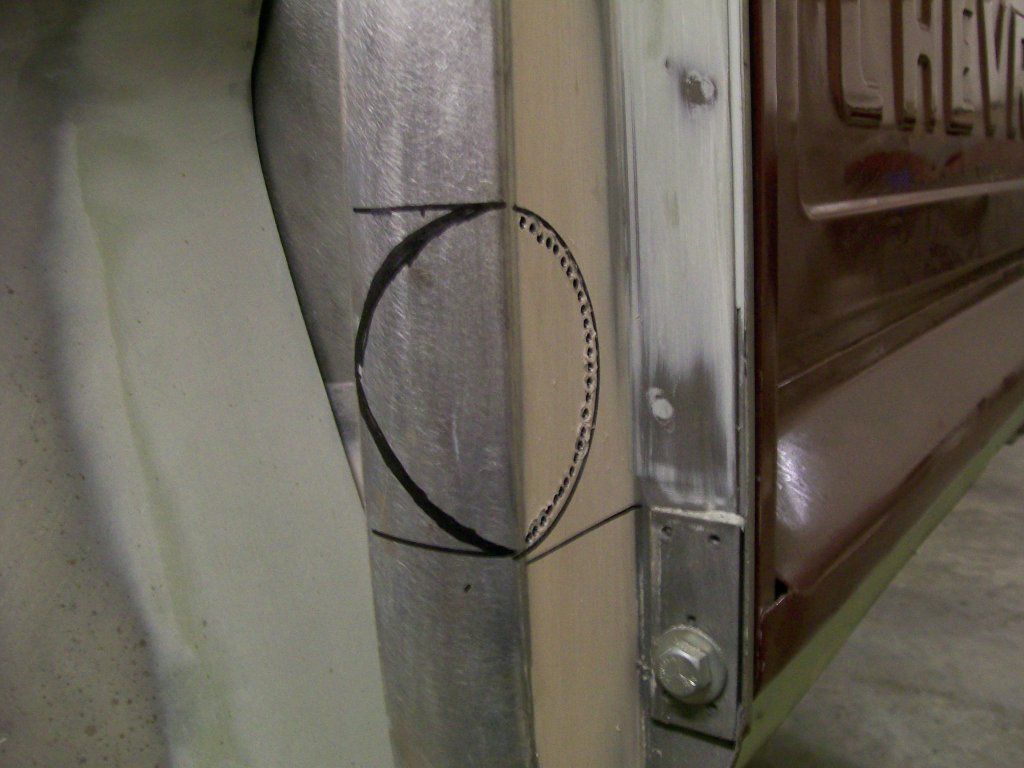 Once the half hole was cut I taped the light in place and used construction paper to get an idea of the size and dimention of the outer housing I had to make. 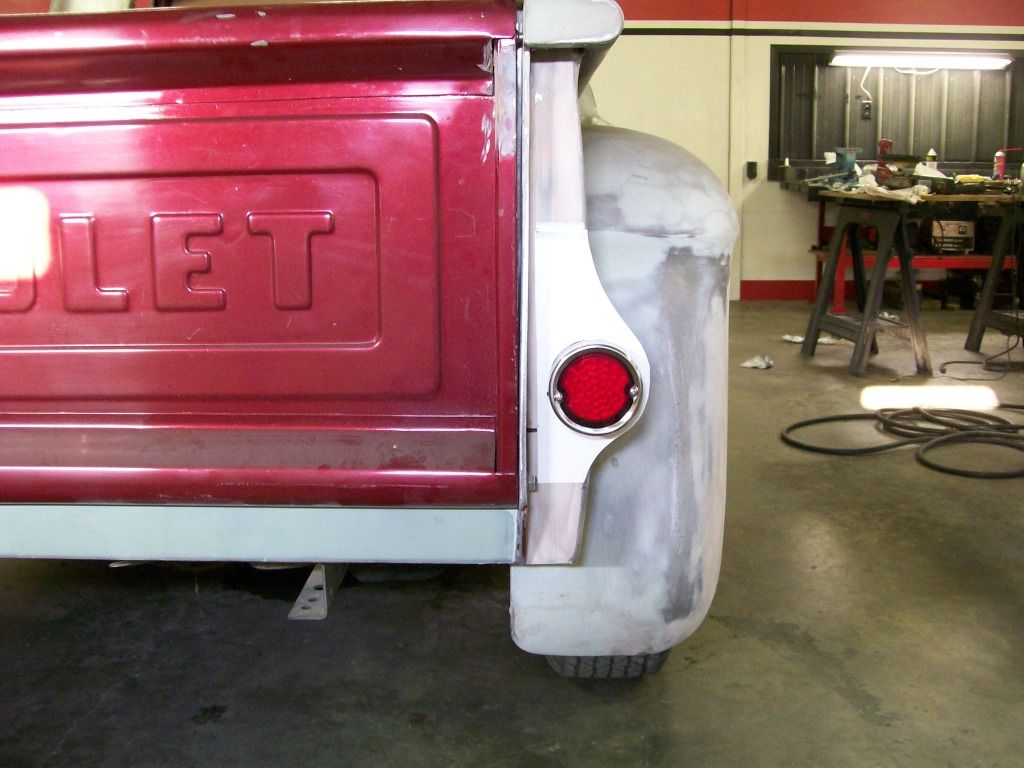 Once I had the construction paper cut for the front, back and outer pieces I used a Torchmate plasma cutter to convert the paper to metal pieces. The round item in this picture was made from 3" exhaust pipe. I will not be using the original housing, this round piece will be what will hold the led light and what the 2 screws that holds the stainless bezel in place. 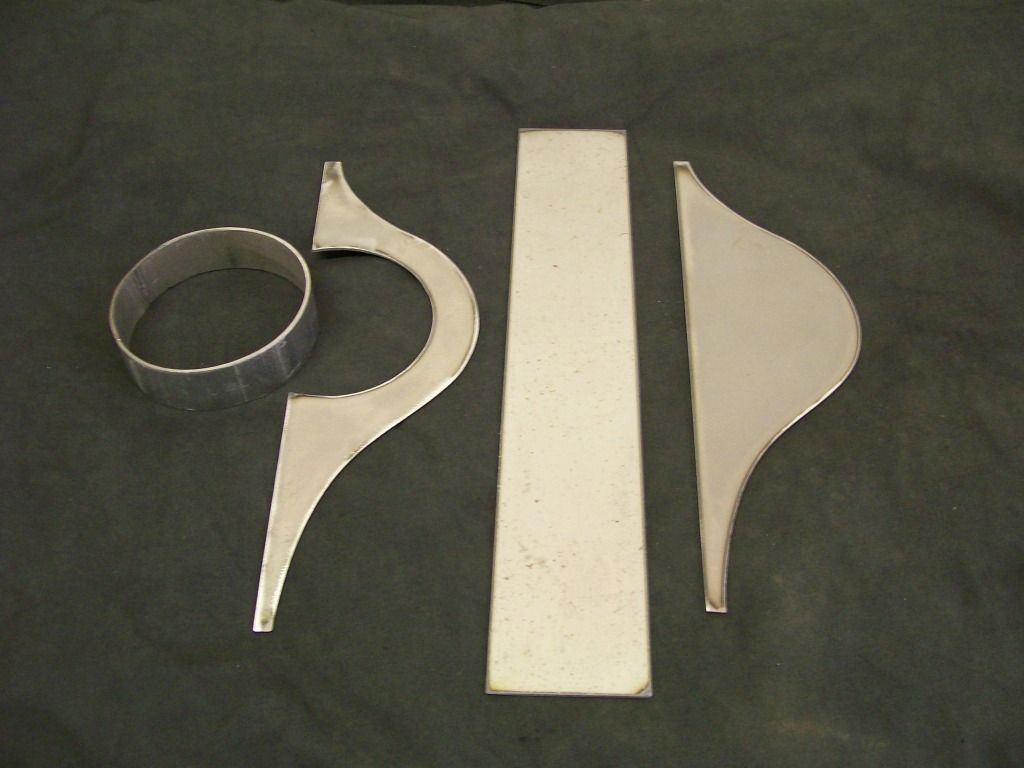 Three inch pipe was too small, my only other choice was 4" that was too big. I used the 3" and split and spread it to the right size. Then welded a piece to fill the gap. At the time I had no 4" in my shop, otherwise I probably would have used it. 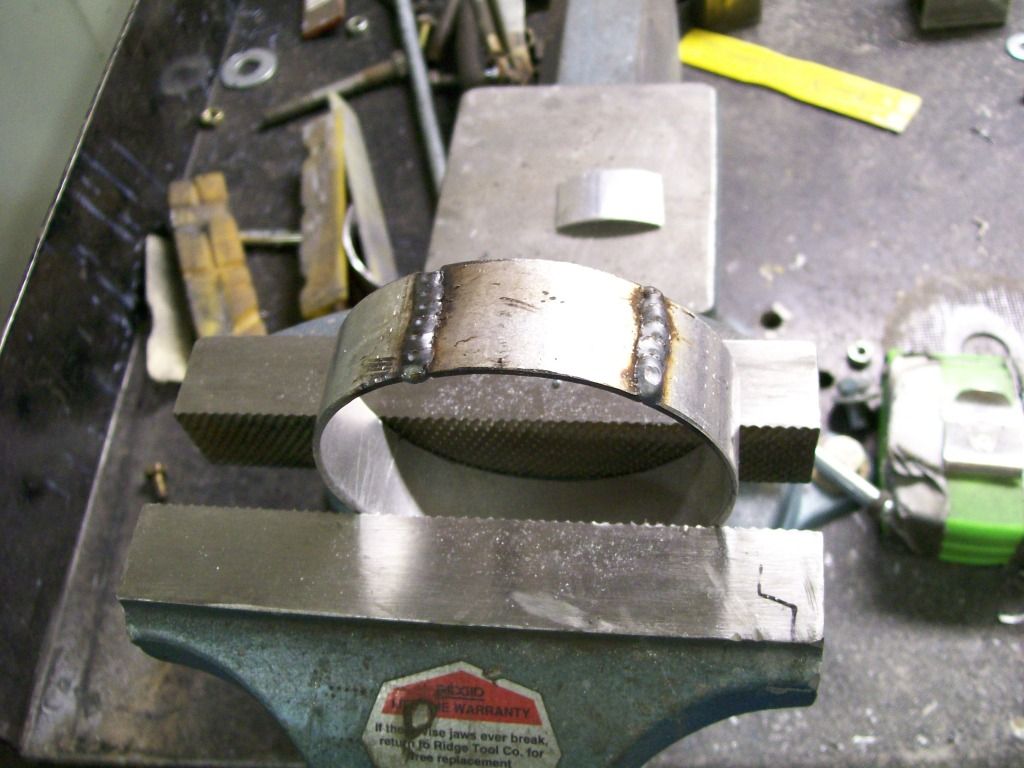 After a little grinding. 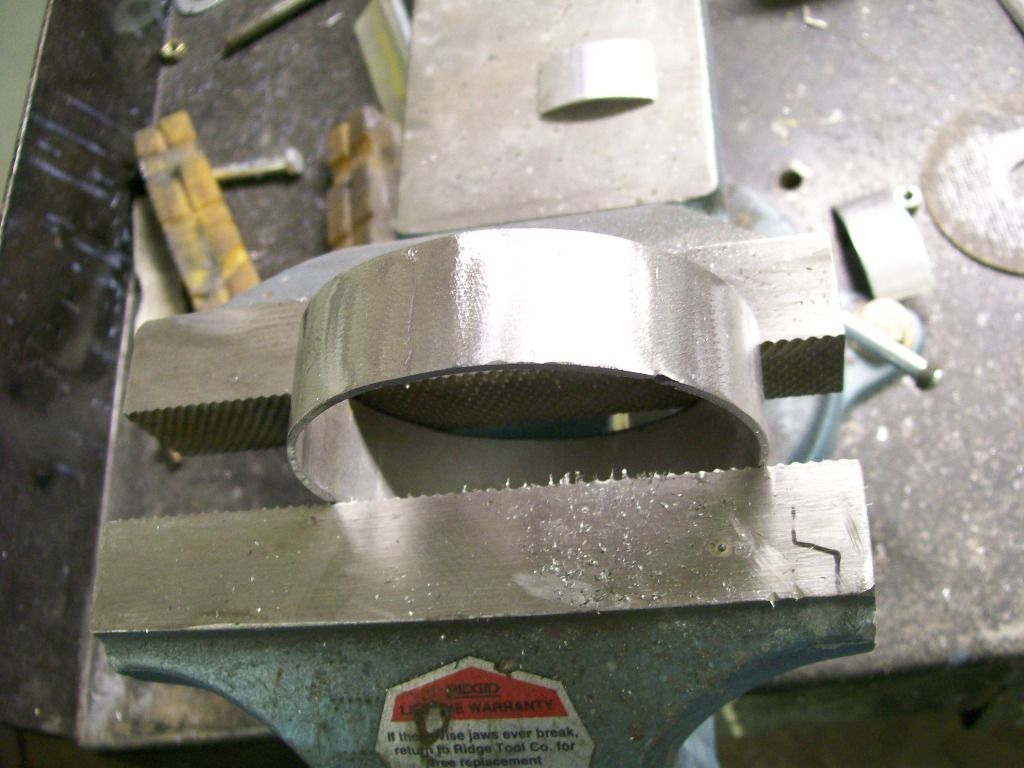 Both are made and the bezel fits great. I still have to weld the nuts inside the round pieces for the bexel screws to attach to. 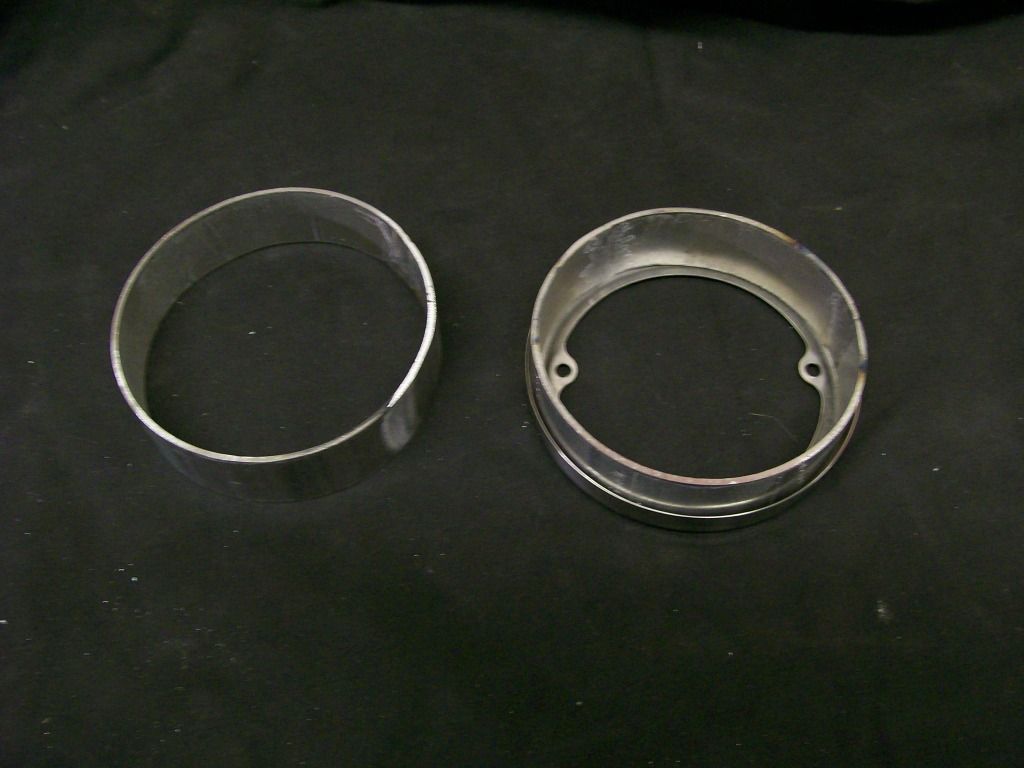 Pieces tack welded together. 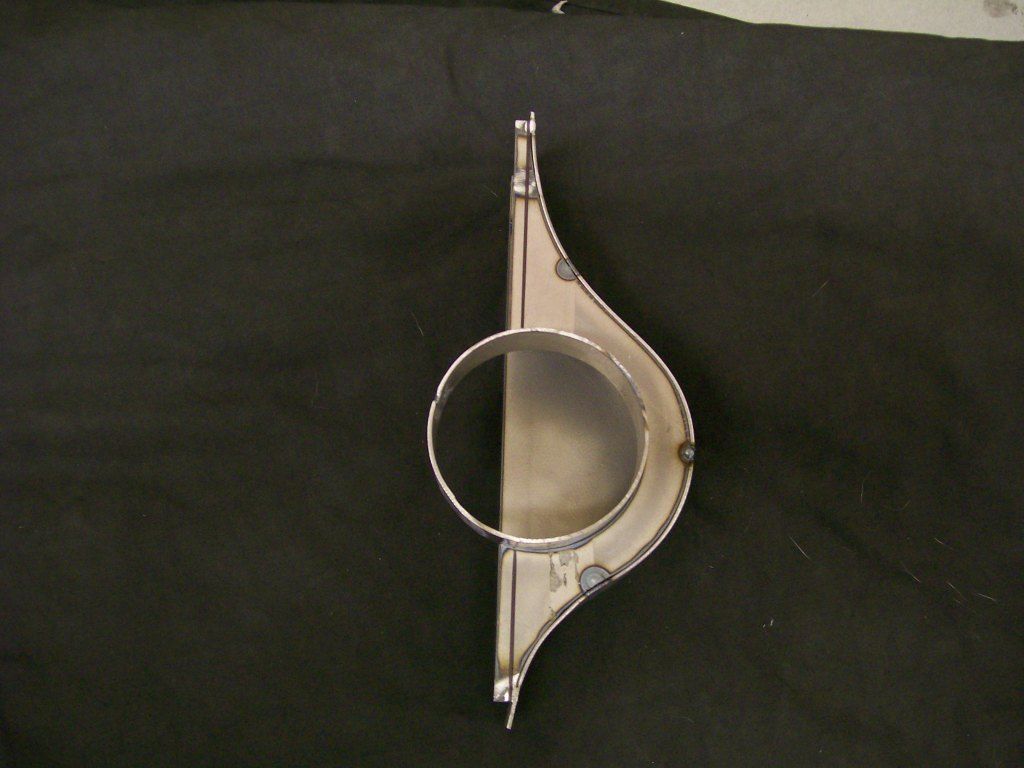 I cut with extra material so I could final fit the housings. Here is the test fit. 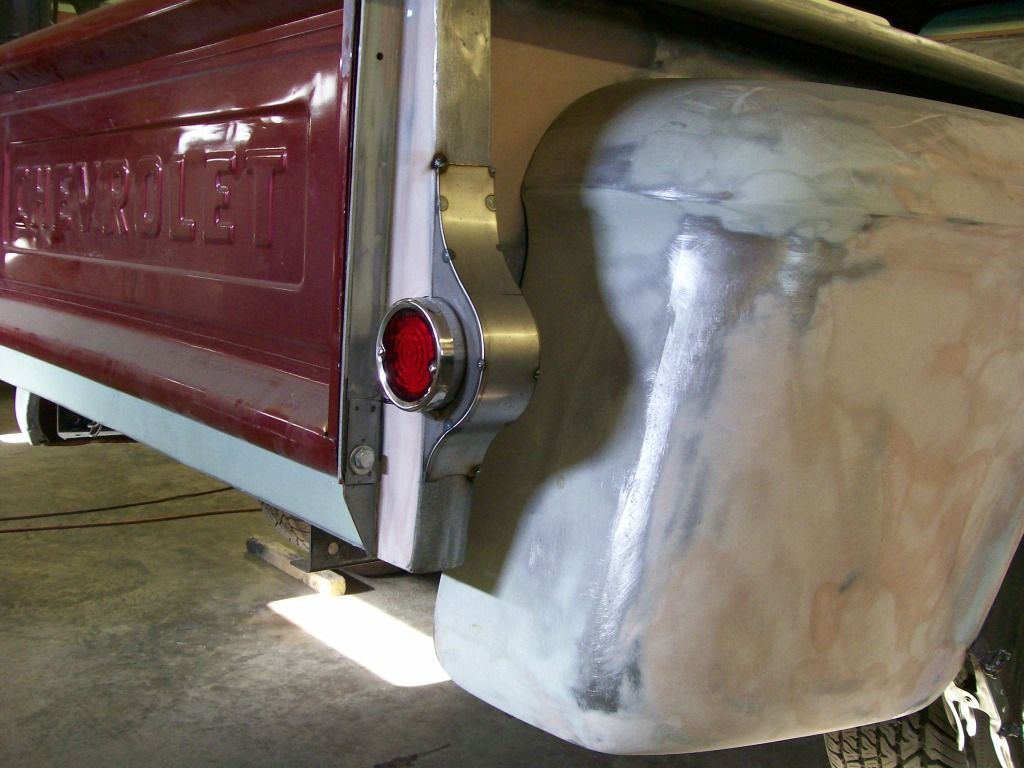 Once I got the pieces fitted, it was time for welding. 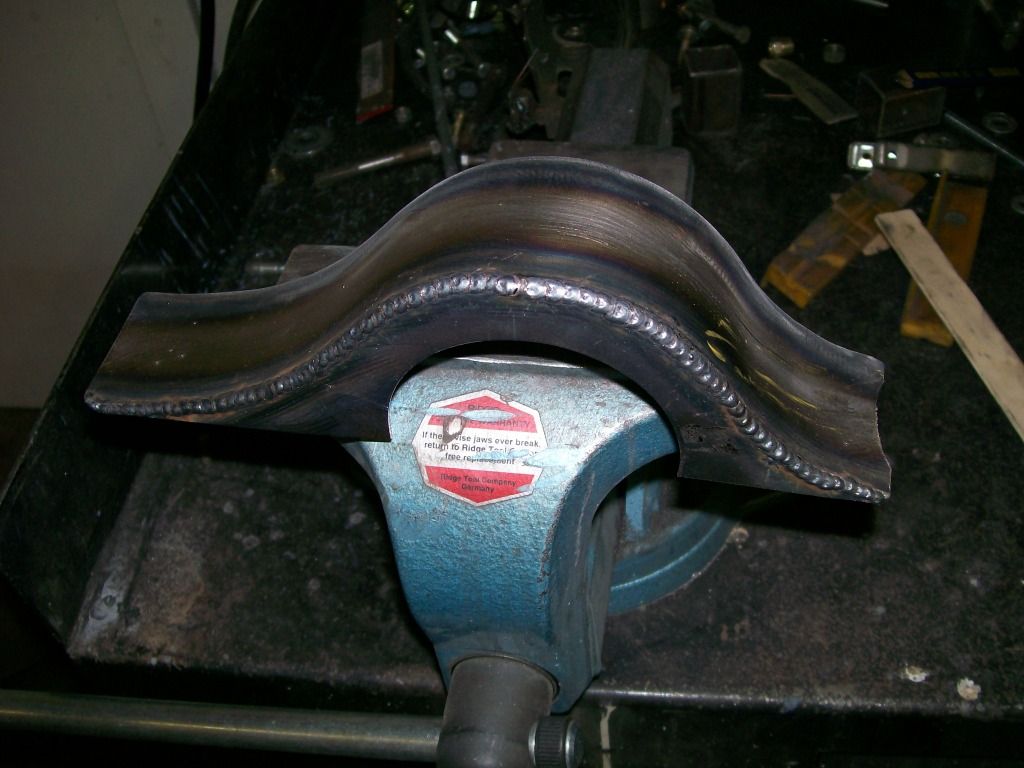 Although welded on the outside, the penetration was spot on. 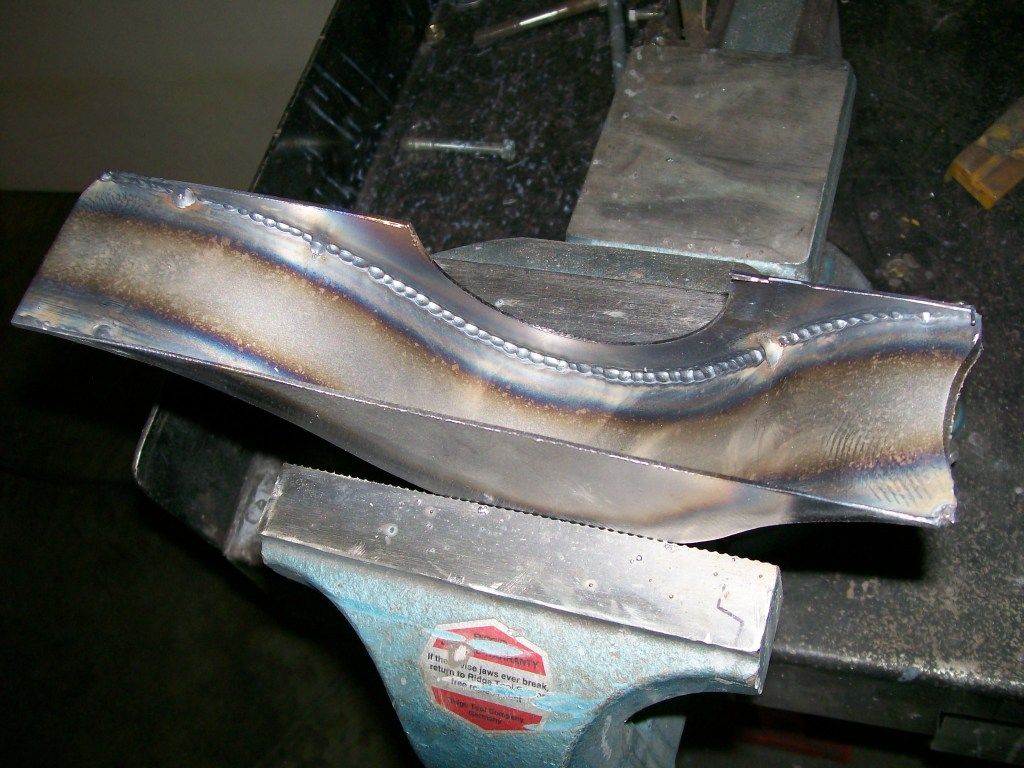 The nice part of the torchmate is the consistancy of reproducing multiple items. 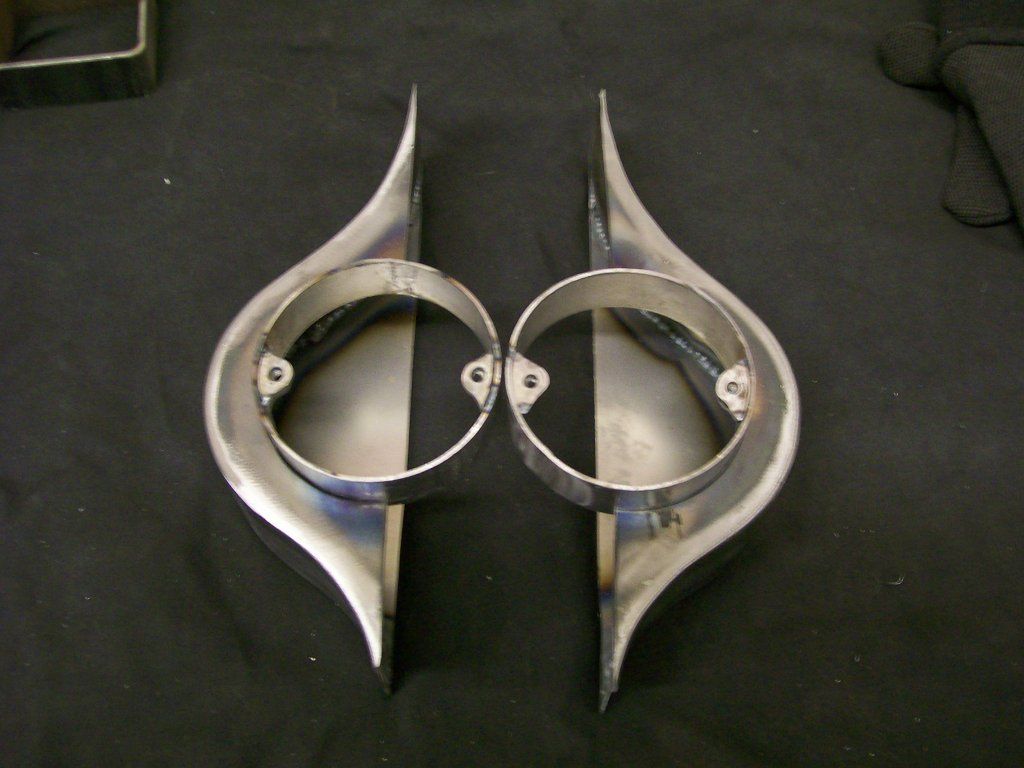 With the housings made I used them as a templet for the cut. 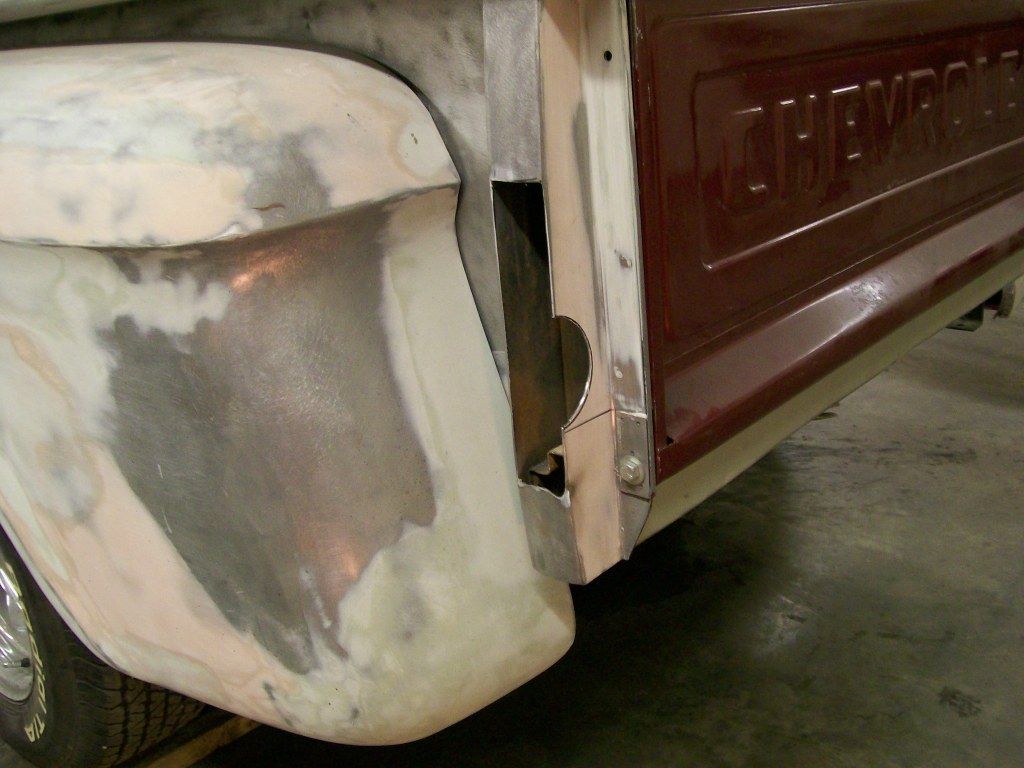 I welded the ring to the body first. There is a sheet metal ridge near the tailgate that got in the way of the welder tip if I welded it later. 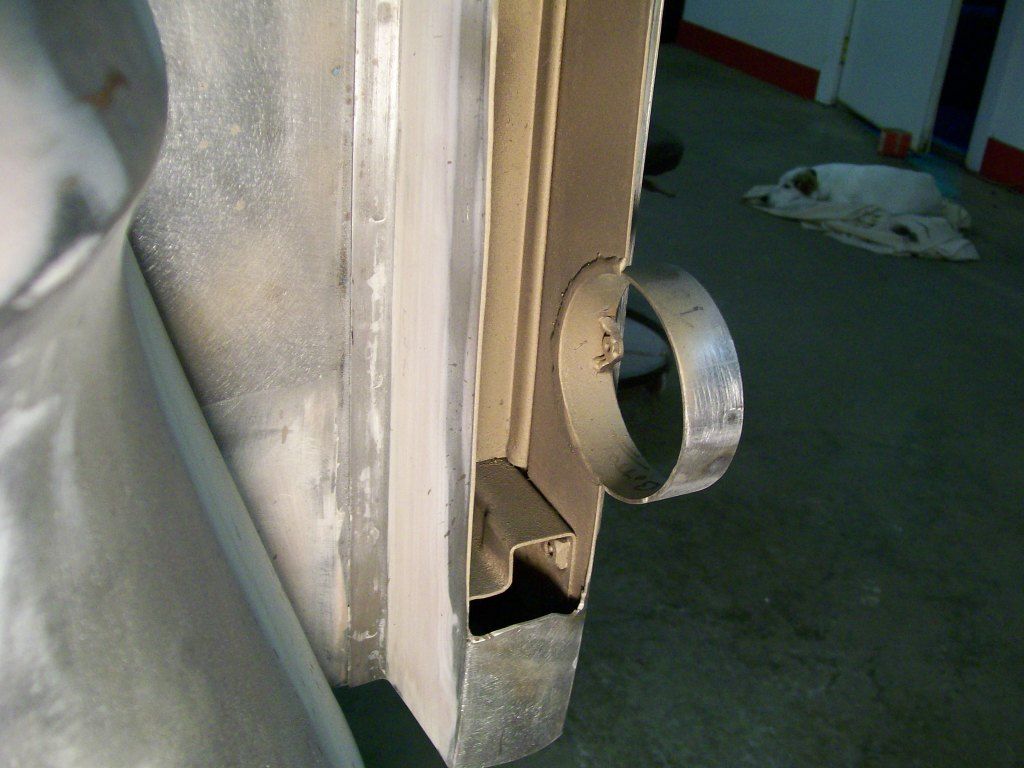 After welding and grinding. 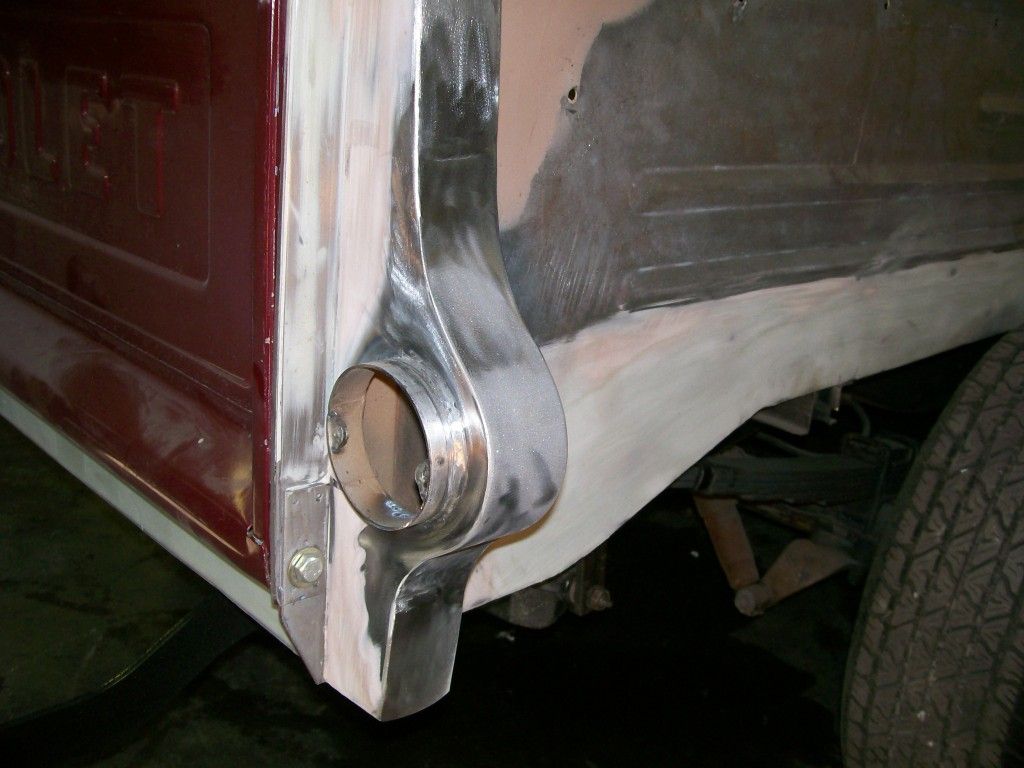 I hope that fills the picture needs for a while.  Enjoy. Enjoy.
|
|

|

|
|
09-03-2012, 11:55 AM
|
#2 | |
|
Registered User
Join Date: Jan 2012
Location: Motown
Posts: 7,677
|
Re: 1957 Chevy truck re-rebuild
Quote:
 nice tail lite mod but we've still only seen the butt of your truck
__________________
cool, an ogre smiley Ogre's 58 Truk buildhow to put your truck year and build thread into your signature shop air compressor timer |
|
|
|
|
|
09-03-2012, 01:35 PM
|
#3 |
|
Registered User
Join Date: Aug 2012
Location: Salem Mo
Posts: 647
|
Re: 1957 Chevy truck re-rebuild
I know everybody says this....but, thanks for the encouraging replies.
Most of you also have build threads and know rebuilding these old vehicles can wear on one's patience over time. Having a community with the same interests sure helps keep the momentum moving forward. I have many different projects going on, most do not involve whole truck pictures. I'll move to changing the rear springs to the one's that lower the rear end, they have a couple whole truck pictures. With the front change to independant suspension back in the 80's, the front dropped a couple inches. From what I can tell, they removed a couple leafs out of the rear to lower it to match the front. It did drop the rear but not enough for my liking. I ordered the ones advertised as a 3" drop. Don't be fooled, I looked at the picture in the catalog for a long time, I couldn't see how it was gonna happen. Plus I didn't want a full 3" drop anyway, so I figured I'd be happy with a less than3" drop. The design is great, they simple rolled the spring bushing eye the opposite direction on the rear or the leaf spring. This altered the rear of the spring a couple inches. The front of the spring stayed the same however. Since the axle is located in the middle of the bushing eyes, the the drop is only a little over an inch. The front is still at the same pivot point. 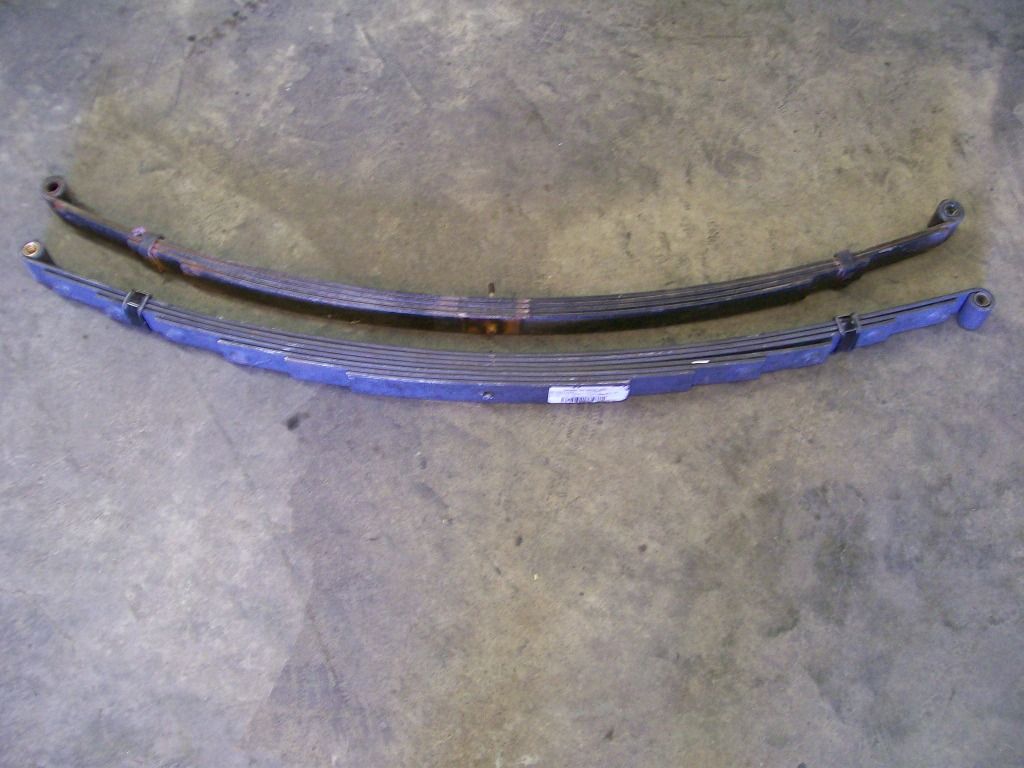 This pic is with the old springs, even with the couple of leafs missing. 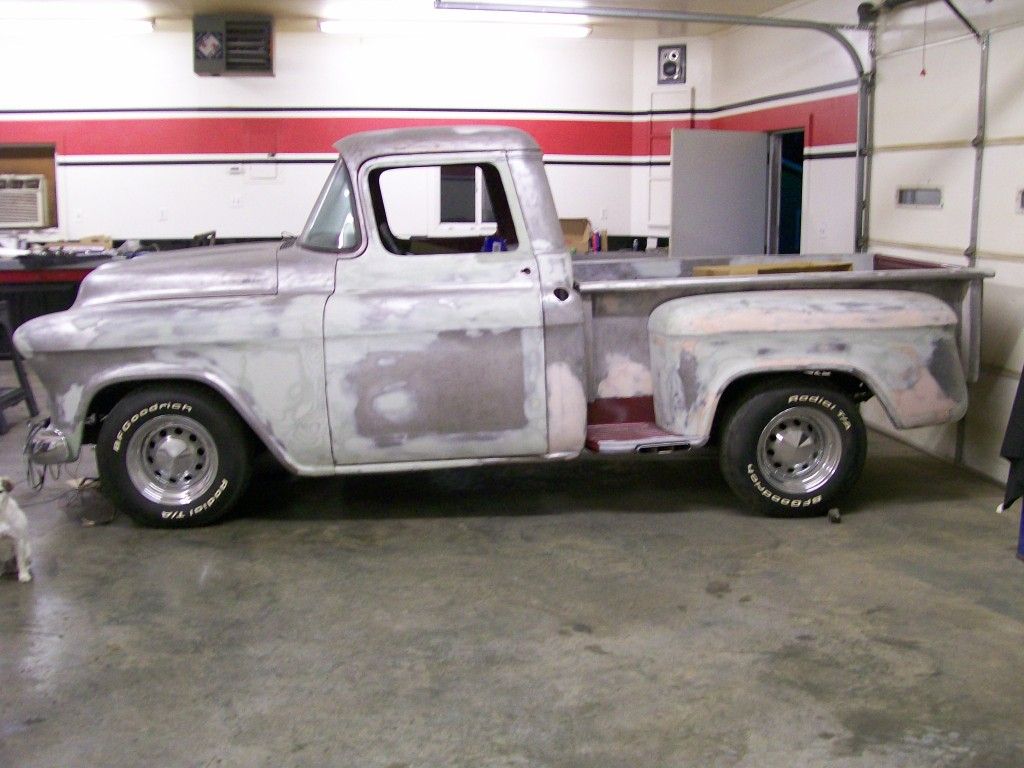 This next pic is after the spring change. Just installing the new leafs did not give me this much drop. I wanted 2 ", the new leafs gave me almost 1 1/2". Keep in mind, if the old leafs already had a couple leafs missing, the change change would be greater. I eneded up making some longer shackles to get another 5/8" further drop. Know this, in order to get 5/8" drop from the shackles, I had make them 1 1/4" longer. 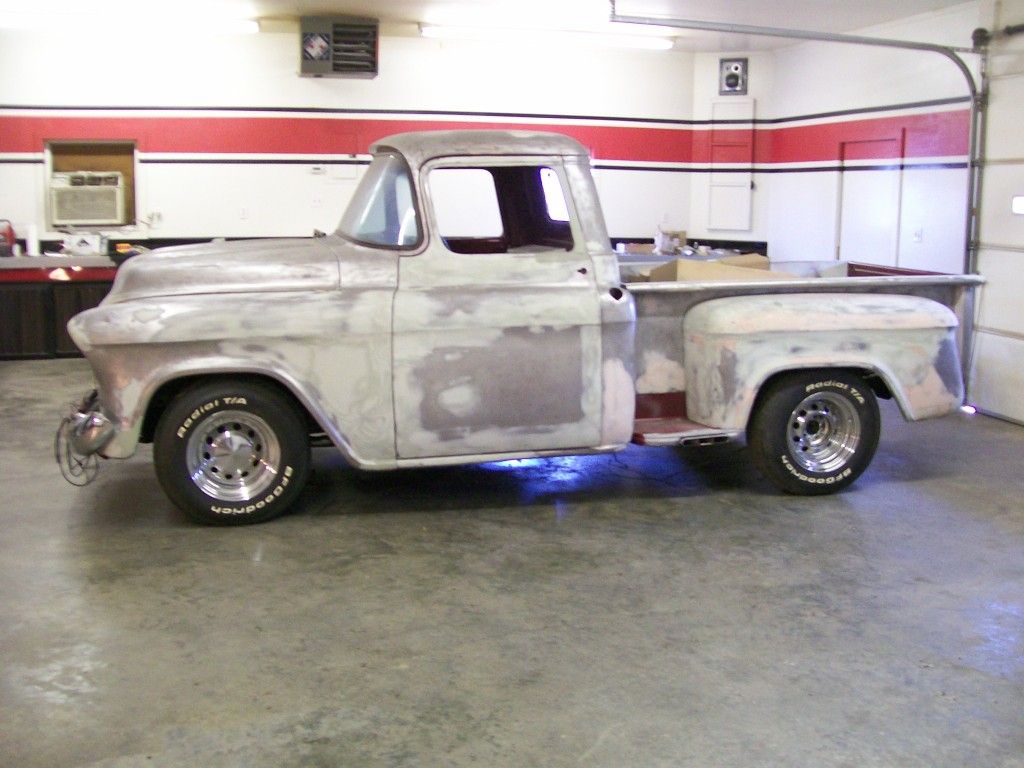
|
|
|
|
|
12-29-2014, 12:53 PM
|
#4 | |
|
Registered User
Join Date: Jul 2009
Location: Whitemud Alberta
Posts: 328
|
Re: 1957 Chevy truck re-rebuild
Quote:
What kind and size of wheels are those? |
|
|
|
|
|
12-29-2014, 02:41 PM
|
#5 |
|
A320 Pilot/USAF Retired
Join Date: Mar 2009
Location: Charleston, SC
Posts: 2,622
|
Re: 1957 Chevy truck re-rebuild
Nice job on the cover!
__________________
JJ My 1957 build: http://67-72chevytrucks.com/vboard/s...d.php?t=334552 http://www.trifive.com/forums/showthread.php?t=22037 Instagram - Chuckdriver57 |
|
|
|
|
01-02-2015, 12:43 AM
|
#6 | |
|
Registered User
Join Date: Aug 2012
Location: Salem Mo
Posts: 647
|
Re: 1957 Chevy truck re-rebuild
Quote:
I've been on and off these windows for a month now, what a pain, not so much rebuilding them but dealing with the tint and getting the correct window setting tape. On the left is what we get when we order the setting tape, 1/16" thick, no way will it will fit. On the right, e-bay order, 1/32" thick. finally after nearly 3 weeks I can assemble something.....  Well lets say it's the most usable, I assembled with it and the window is a press fit into the frame yet, I could work it back out with a little wiggling and pulling, not gonna work for me. My solution, cut and lay a single layer.  Then wrap another layer of the setting tape fully around the window for installation.  The black tape is only to keep the setting tape from being pulled sideways during installation, it'll be removed with the final trim. I will say, the setting tape I used had an excellent characteristic about it. As tight as the second installation was, as long as I kept firm even pressure on the glass, the setting tape would very slowly conform and the glass slowly sunk into the frame. Also, I set the window into the frame with the frame already installed, this way as I pushed the glass into the frame I could close the window as I got close, this way I could check how it sealed against the thin seal it closes up against. You only have about a 1/8" interference, I stopped pushing the glass into the frame when I had the right fit. With a new razor blade I removed all the excess material. Finally, all new rubber, fresh paint on the exposed trim, tinted glass and a nice tight fit.  Fast forward to how it all looks.  And yes, the front fenders are back off. Since it has the Camaro clip you pretty well throw out the original cab mounting rubber thickness on the front mounts. This gave me a chance to check all my rubber bushing fits and gather all the gaskets that seal the fenders to the cab and to the inner fenders, next time the fenders go back on, everything will be sealed and tightened. There shall be more on this whole glass/rubber/tint work to follow.
__________________
My 57 Chevy truck build.http://67-72chevytrucks.com/vboard/s...d.php?t=541132 Last edited by Stepside Jim; 01-02-2015 at 01:00 AM. |
|
|
|
|
|
01-02-2015, 01:34 AM
|
#7 | |
|
Registered User
Join Date: Jul 2009
Location: Whitemud Alberta
Posts: 328
|
Re: 1957 Chevy truck re-rebuild
Quote:
|
|
|
|
|
|
01-02-2015, 11:46 AM
|
#8 |
|
A320 Pilot/USAF Retired
Join Date: Mar 2009
Location: Charleston, SC
Posts: 2,622
|
Re: 1957 Chevy truck re-rebuild
Very nice!
__________________
JJ My 1957 build: http://67-72chevytrucks.com/vboard/s...d.php?t=334552 http://www.trifive.com/forums/showthread.php?t=22037 Instagram - Chuckdriver57 |
|
|
|
|
01-02-2015, 02:45 PM
|
#9 | |
|
Registered User
Join Date: Jun 2006
Location: Idaho
Posts: 8,800
|
Re: 1957 Chevy truck re-rebuild
Quote:
__________________
1959 Chevy Short Fleetside w/ 74 4WD drive train (current project) OrrieG Build Thread 1964 Chevelle Malibu w/ 355-350TH (daily driver) Helpful AD and TF Manual Site Old Car Manual Project |
|
|
|
|
|
01-03-2015, 01:25 AM
|
#10 |
|
Registered User
Join Date: Aug 2012
Location: Salem Mo
Posts: 647
|
Re: 1957 Chevy truck re-rebuild
More vent window work to look at tonight... OrrieG brings up a good point, as a matter of fact I was just a click of a mouse to ordering the one piece window.
Then I started thinking, I'm not running Air Conditioning so I'm gonna want to draw as much outside air through the cab as possible. I remembered the '65 Chevy car I have that has a vent window and the amount of air it pulls in when I open it up, then I remembered I have an option of a sliding rear window. With the two working together I released the mouse button and stayed with the vent window. Now for a bit of the pain it was rebuilding some of it. There is a seal that goes the length of where the window contacts the main frame. Holding the seal in are 4 rivets, once the 4 rivets are removed there is the painted tin that can be removed. I sandblasted the tin then primed and painted.  Now the fun part of dealing with the rivets. I ordered one of the tools to help install the rivets, it was a little lacking but I managed to win. The new pieces do look good once finished.  Last up is a new handle, the parts book showed a wave spring to keep it from rattling.  New handle and wave spring in place and fit and works perfectly. A view of how the spring keeps tension on the handle.  Last up is installing the felt liner that the main window goes up and down in. It comes in roll and has to be glued in place. After removing the old liner and cleaning the rail, I glued in the new one. I didn't want any issues with the liner pulling away from the rail so I cut some plywood to fit into the groove til the adhesive dried.  The vent window is rebuilt, man, am I glad that's over with, the second one did go better once I got it all figured out.
__________________
My 57 Chevy truck build.http://67-72chevytrucks.com/vboard/s...d.php?t=541132 |
|
|
|
|
| Bookmarks |
|
|


 Hybrid Mode
