
 |
|
|
#301 |
|
Registered User
Join Date: Aug 2007
Location: Corona, California
Posts: 7,998
|
Re: 1957 Chevy truck re-rebuild
Looking real nice.
Kim |
|
|

|
|
|
#302 |
|
Registered User
Join Date: Feb 2013
Location: Lakeside Ariz
Posts: 445
|
Re: 1957 Chevy truck re-rebuild
Who did you get the radiator from? I think that is the way I'll go too. Thanks Rich
|
|
|

|
|
|
#303 |
|
Registered User
Join Date: Aug 2012
Location: Salem Mo
Posts: 647
|
Re: 1957 Chevy truck re-rebuild
Thanks Kim, I stop and gaze once in a while as I'm walking by it.
 Baldeagle SR, I went through Summit. It's a story so I'll make it short. I originally ordered a Griffin aluminum radiator, mainly because they provided a picture on line of the radiator. The radiator arrived and I opened the box....oh no, it was too thick, I have space for a 3" and this is 3 1/2" thick. The listing said 3", grrrrrrrrr. I called summit, the listing was incorrect on the size and dimentions. Griffin didn't have the right one in stock. Summit called around and found this one from BeCool, sure, more expensive but exactly what I was looking for. Becool part #is 62282. Many of the listings also wanted convert this downflow to a sideflow but I wanted the same mounting for both the radiator support and the electric fan assembly so I stuck with the downflow. Hope this helps... Jim |
|
|

|
|
|
#304 |
|
Registered User
Join Date: Feb 2013
Location: Lakeside Ariz
Posts: 445
|
Re: 1957 Chevy truck re-rebuild
Thanks Jim that will help a lot.
Rich |
|
|

|
|
|
#305 |
|
Registered User
Join Date: Apr 2013
Location: LA, CA
Posts: 21
|
Re: 1957 Chevy truck re-rebuild
Hey Stepside Jim, thanks for so many ideas and details. Im finally getting my 55' project going (on a poor mans budget) Your work shows it can be done. Do you mind telling what gauge and size square tubing you used on the seat mount? Thanks bro.
|
|
|

|
|
|
#306 | |
|
Registered User
Join Date: Aug 2012
Location: Salem Mo
Posts: 647
|
Re: 1957 Chevy truck re-rebuild
Quote:
 I used 3/4" inch square tubing, it is 1/16" thick, .060. It is a thin wall tube. My goal is always to keep the weight down, yet try to focus strength where needed. For any tubing situation you can't drill trough and tighten a bolt or it will collapse. I'll get some round tube, drill the square tube, insert the round tube and weld. 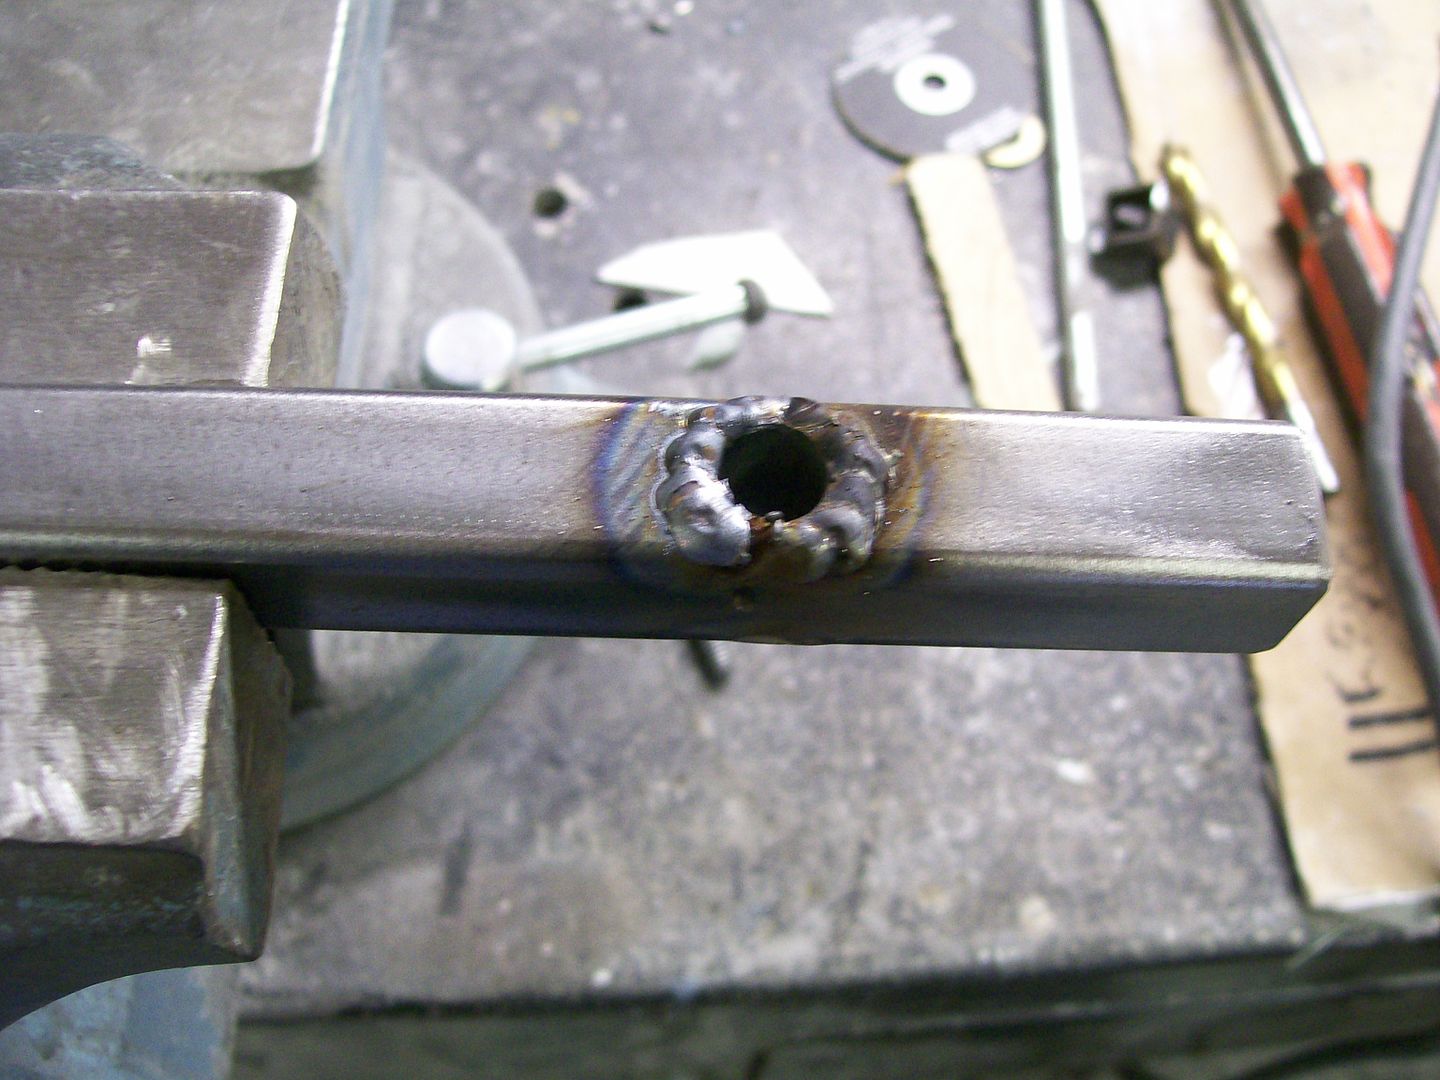 Then grind it smooth. Now I can bolt it down right through the square tube.  I finally got my seat belts in. Bolting directly to the floor wasn't a good option. Yet the thin wall tube isn't all that strong either to attach seat belt mounts. 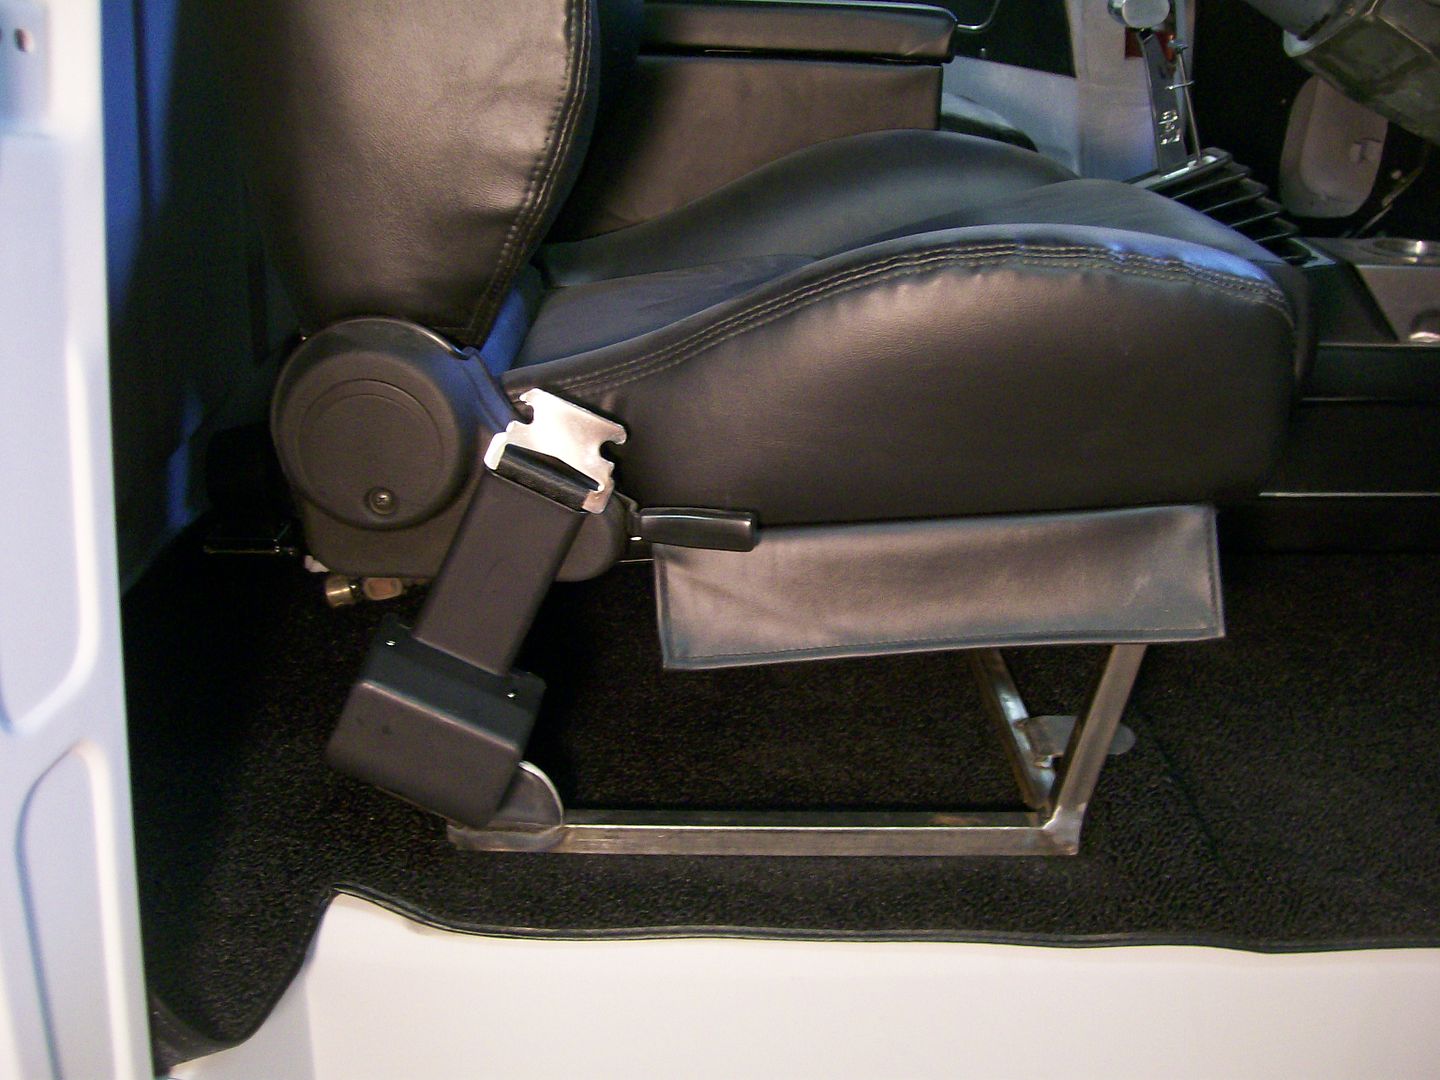 I figure as long as I tie as many pieces together, basically using the seat belt plate as a large gusset, I'll obtain some strength.  One more gusset on the inside to tie the upright tube directly to the two bolts that go directly to the floor.  Anyway.... focus the strength were need be. Good luck on your '55... |
|
|
|

|
|
|
#307 |
|
Registered User
Join Date: Apr 2013
Location: LA, CA
Posts: 21
|
Re: 1957 Chevy truck re-rebuild
Nowv thats a detailed "how to". This is my first time posting on a thread, so im impressed with the "give back" knowledge. Thanks Stepside Jim...
|
|
|

|
|
|
#308 | |
|
Registered User
Join Date: Aug 2012
Location: Salem Mo
Posts: 647
|
Re: 1957 Chevy truck re-rebuild
Quote:
 I've spent the last couple days working on a rear stabilizer bar. I plan on burn outs, donuts and sliding sideways with this truck. One thing I don't want is a bad case of body roll and over steer. Before I get into the rear stabilizer project I have two last pics for making the kick panel vent. Once again I can't say enough about the invent of flap discs, once I mastered them, my welding and blending has been spot on. Laying enough weld to be able to grind and nice edge. 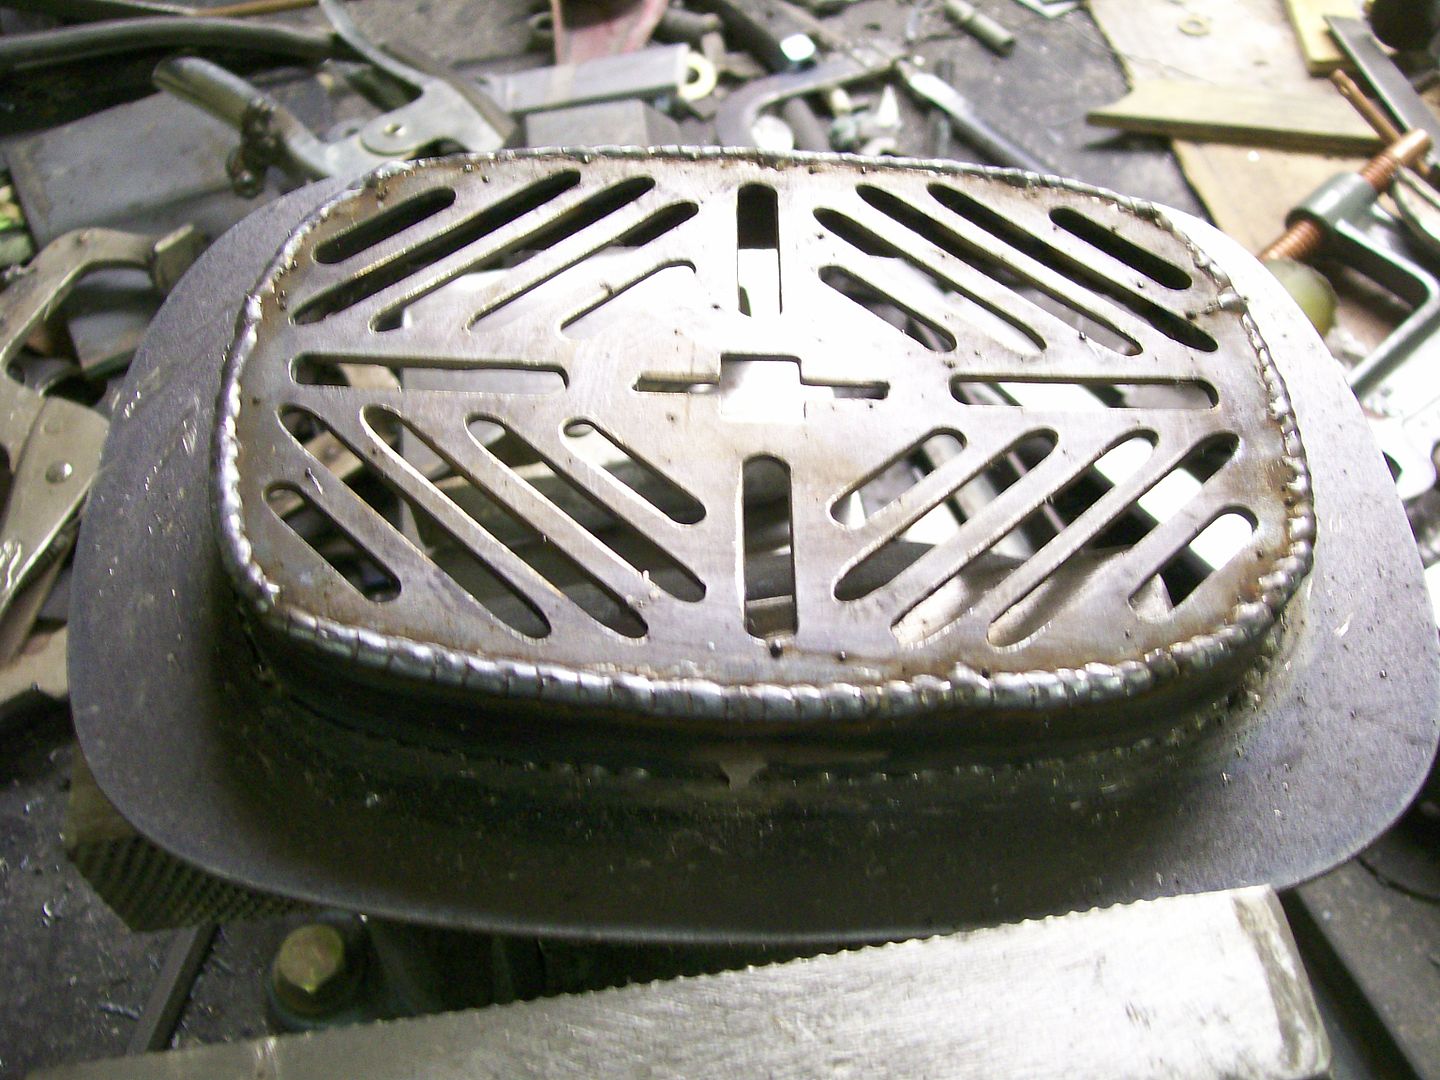 After carefully grinding away the unneeded weld material.  I bought a rear stabilizer kit for the truck. What I found was, I wasn't happy with some clearance issues. No fault of the company who built the kit, it's just after lowering the truck there isn't much clearance between the bed floor bottom and the stabilizer bar that is designed to go up over the top of the differential. A picture of the kit. 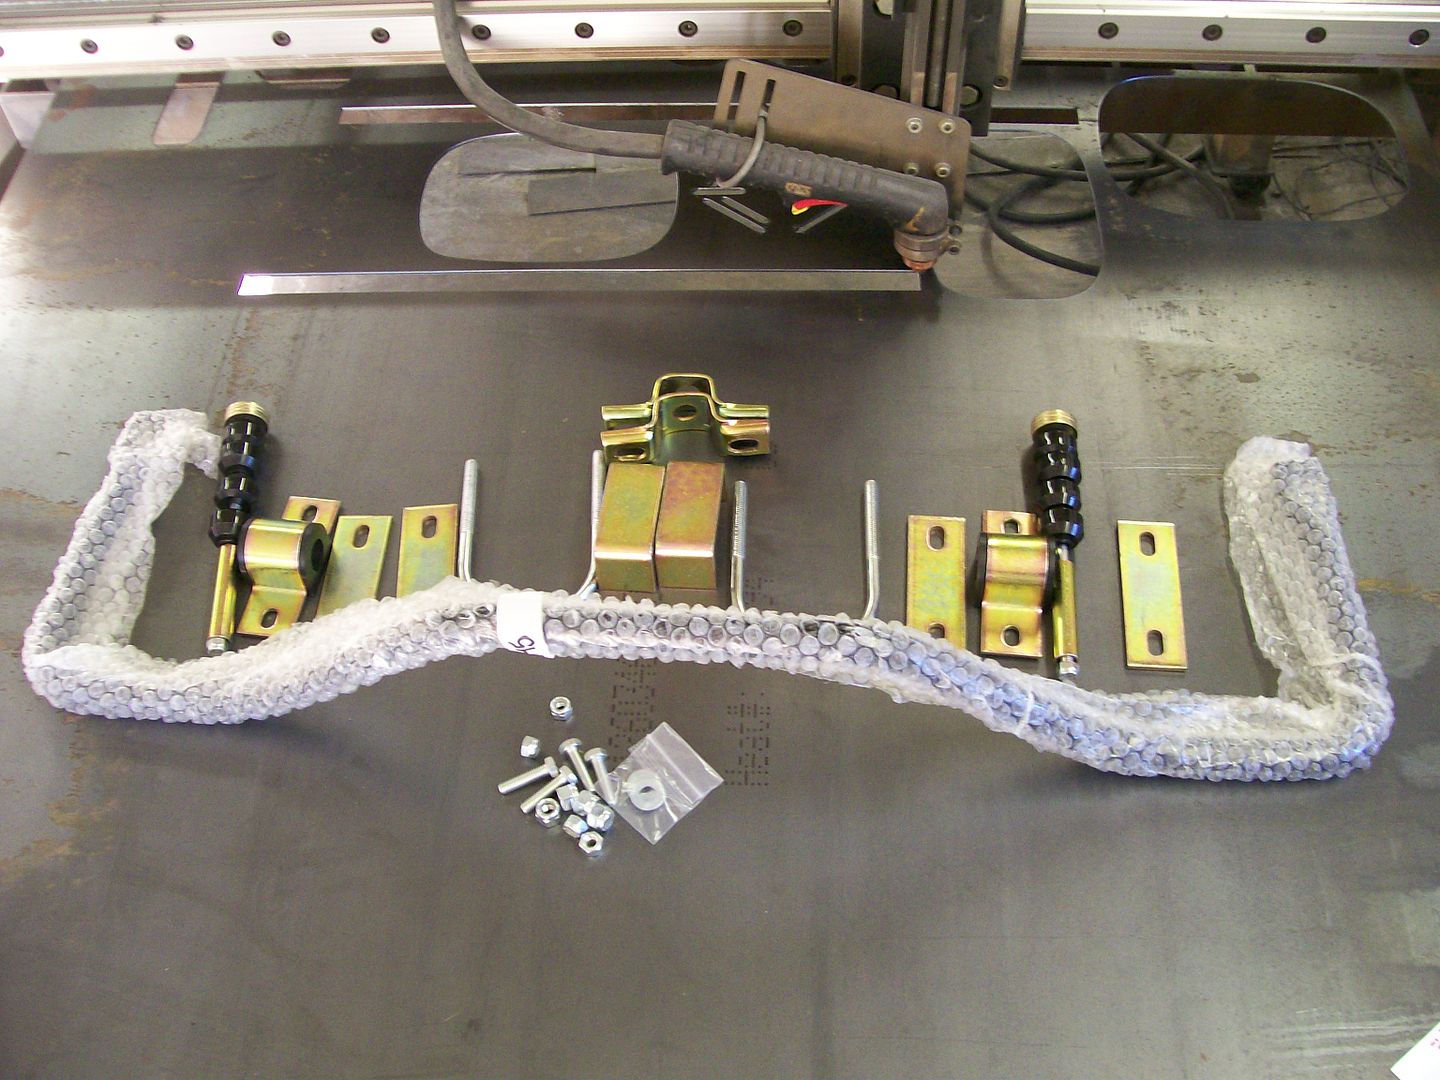 I'll end up moving the stabilizer bar about 18 inches forward and mounted it in front of the axle, more pics to follow. |
|
|
|

|
|
|
#309 |
|
Registered User
Join Date: Apr 2013
Location: LA, CA
Posts: 21
|
Re: 1957 Chevy truck re-rebuild
Nice work... Stepside Jim
|
|
|

|
|
|
#310 |
|
Registered User
Join Date: Aug 2007
Location: Corona, California
Posts: 7,998
|
Re: 1957 Chevy truck re-rebuild
Looks real nice.
Kim |
|
|

|
|
|
#311 |
|
Registered User
Join Date: Jan 2012
Location: Motown
Posts: 7,677
|
Re: 1957 Chevy truck re-rebuild
top, bottom, front, rear; the sway bar doesn't care where it's mounted, position it's in or what side is up.
the sway bar on my 3rd gen trans am rear end mounts under the axle and has a similar shape to your kit. when my suspension is on the ground the loop around the center section move up 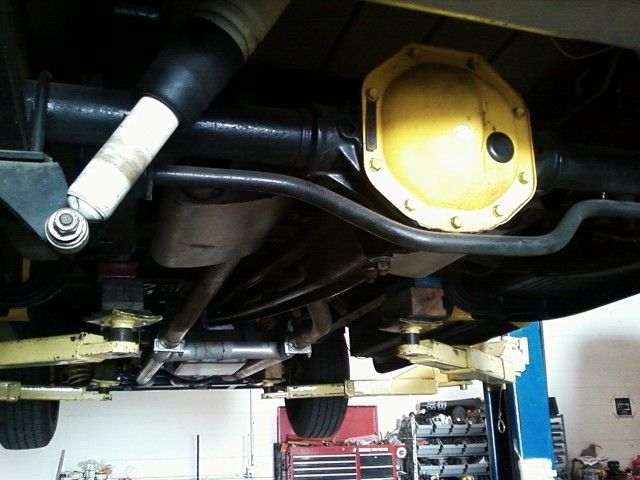
__________________
cool, an ogre smiley  Ogre's 58 Truk build Ogre's 58 Truk buildhow to put your truck year and build thread into your signature shop air compressor timer |
|
|

|
|
|
#312 |
|
Registered User
Join Date: Aug 2012
Location: Salem Mo
Posts: 647
|
Re: 1957 Chevy truck re-rebuild
_Ogre, I'm going to use the same idea as you mentioned....."the sway bar doesn't care where it's mounted". So here I go.lol
After flipping the sway bar each and every way, I settled on going to the front. The sway bar is a little too narrow to go under the axle as yours does. The shocks were in the way to come from the back. So I came from the front. The hump built into the sway bar gives plenty of clearance to go up and over the driveshaft. I also like this because once the bed floor is in place, except for the axle brackets, the whole thing is out of sight. _Ogre, Once you get your plasma cutter up and running, you'll be looking for ways to stretch your imagination.....hmmmmm, (rubbing your chin), I could just cut some plates as before, or, I could get a little imaginative. I started with the axle mounting plates. 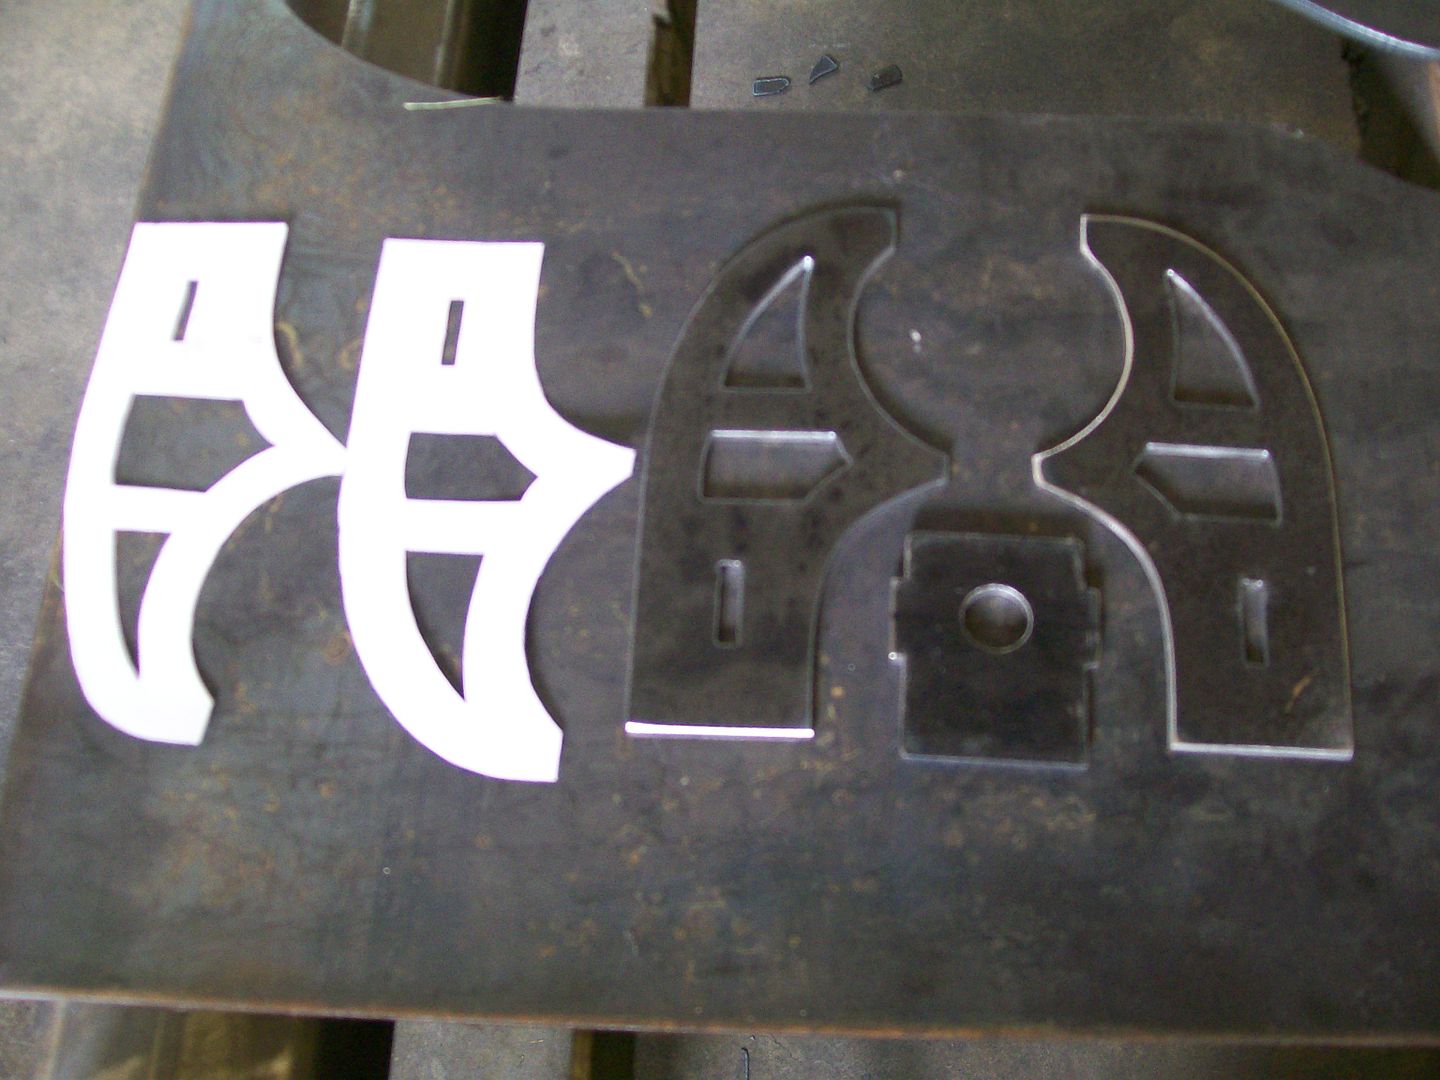 Where the fun comes in is designing the pieces so they will interlock, such as the slots cut into the side plates and the kick outs on the inner plate will all fit together. This next picture is where the pieces fit together. 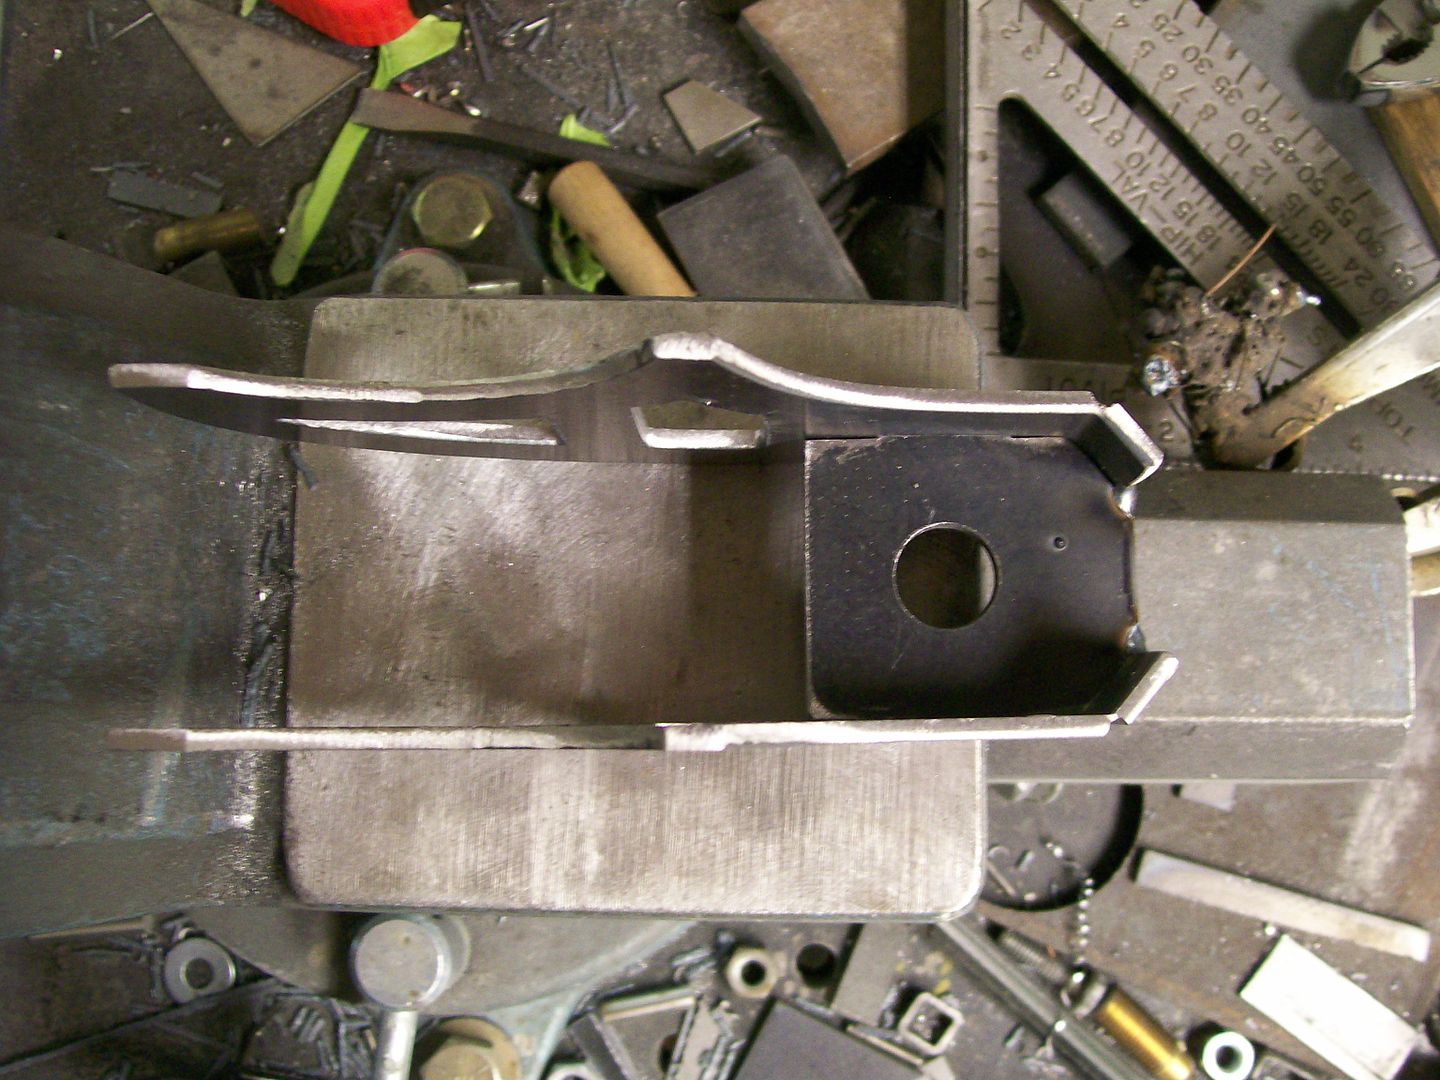 Here is how it all fit together when done.  I have many of the "how it's made" pics, I'll get those posted later. Let's see, rear stabilzer bar...... Check. One more thing off the list. 
|
|
|

|
|
|
#313 |
|
Registered User
Join Date: Aug 2007
Location: Corona, California
Posts: 7,998
|
Re: 1957 Chevy truck re-rebuild
Those re some cool sway bar mounts.
Kim |
|
|

|
|
|
#314 |
|
Registered User
Join Date: Jan 2012
Location: Motown
Posts: 7,677
|
Re: 1957 Chevy truck re-rebuild
nice work on the sway bar install, stepside.
i'm definitely getting a little plasma envy  we ordered a 4x8 bulltear table w/ powermax 65 plasma last week  i'm going to have to get a new project so i can make sh*t for it   
__________________
cool, an ogre smiley  Ogre's 58 Truk build Ogre's 58 Truk buildhow to put your truck year and build thread into your signature shop air compressor timer |
|
|

|
|
|
#315 |
|
Registered User
Join Date: Aug 2012
Location: Salem Mo
Posts: 647
|
Re: 1957 Chevy truck re-rebuild
Let's get the mounting plates made for the rear stabilizer bar.
Since I didn't use it as it was designed the width of the area where the pivot mounts were a little narrow to mount them directly to the frame, so I had to make mounting plates to attach this stabilizer to the frame. I cut some plates knowing the offset I was gonna need, so the width was figured. I also knew I wanted to drop the mounting about 1 1/2 inches so the bar was level at normal sitting height. I needed to angle the plates to get this drop. I started doing this procedure a little while back, it worked great and the bends turn out looking very professional. Get your plate, mark a line where you want the bend, use a cut off wheel and cut about 3/4 through the plate. This cut allows the plate to bend very clean and accurate. 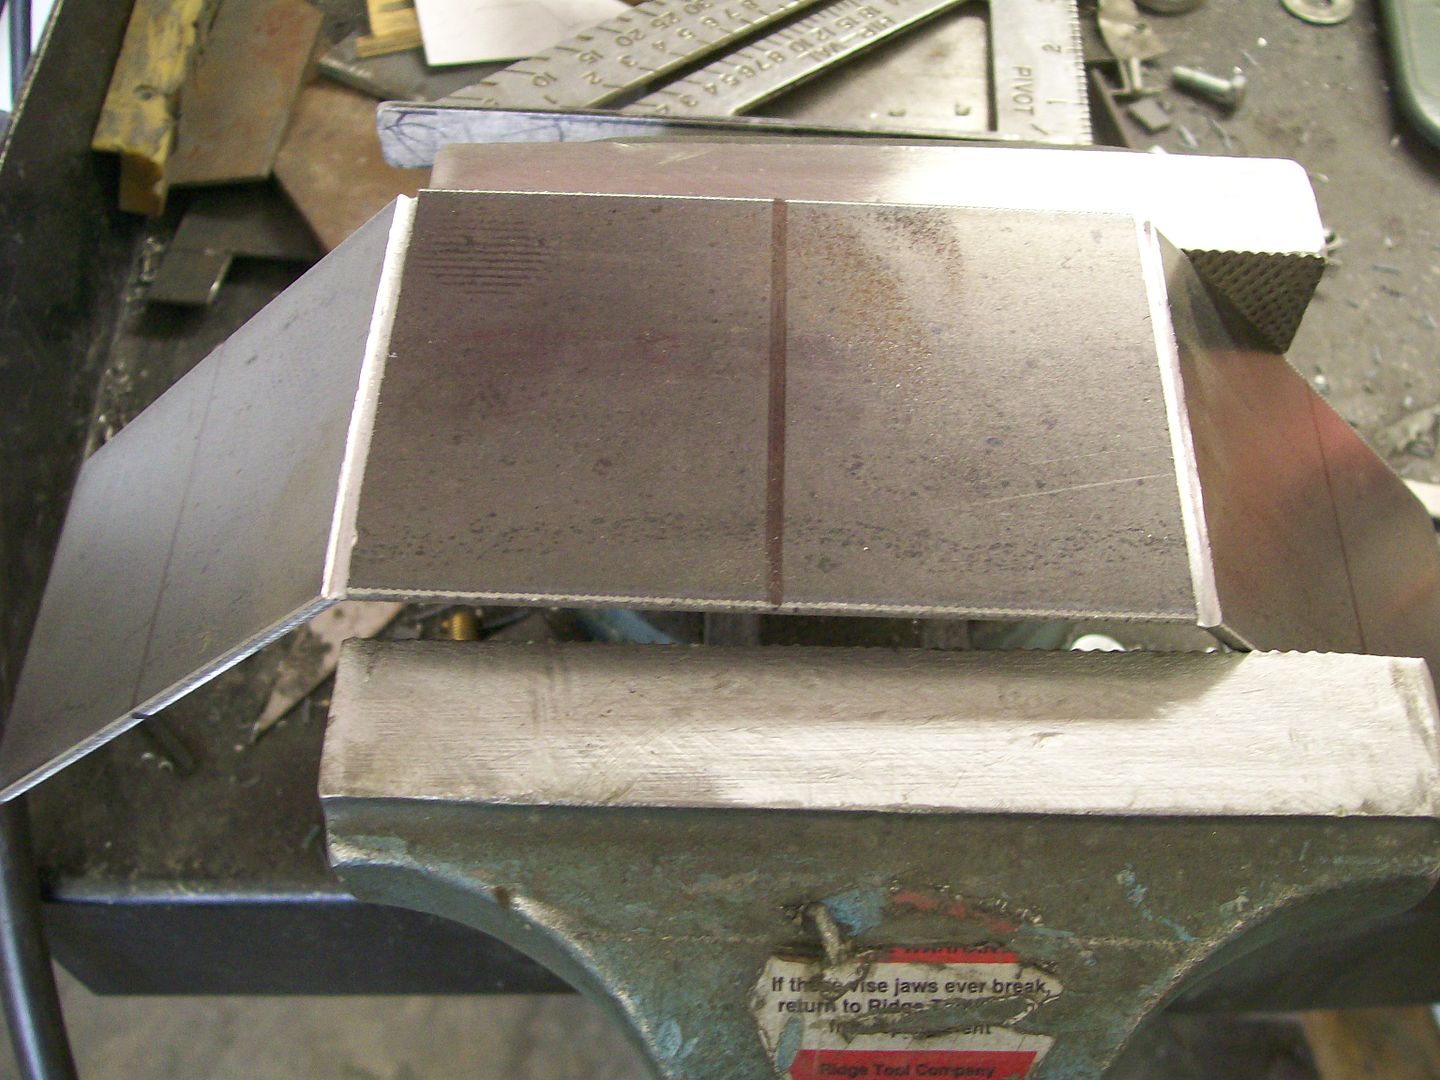 Now fill the void with a good weld. In the past posts you've seen me use a flap disc to blend the metals, when done this will look near perfect.  This added plate I've already shaped to match the contour of the frame where it will be bolted to the truck frame.  Now I want to transfer the stress of the stabilzer bar directly to the frame so I took some angle iron and crimped it tighter than the 90 degree angle it had. This way it fit nicely between the stabilizer bar mounting bolts.  A great fit, I moved the mounting points inward to fit the stabilizer bar, I also like the large contact area between the stabilizer bar and frame, and I got the drop I needed to level the bar. 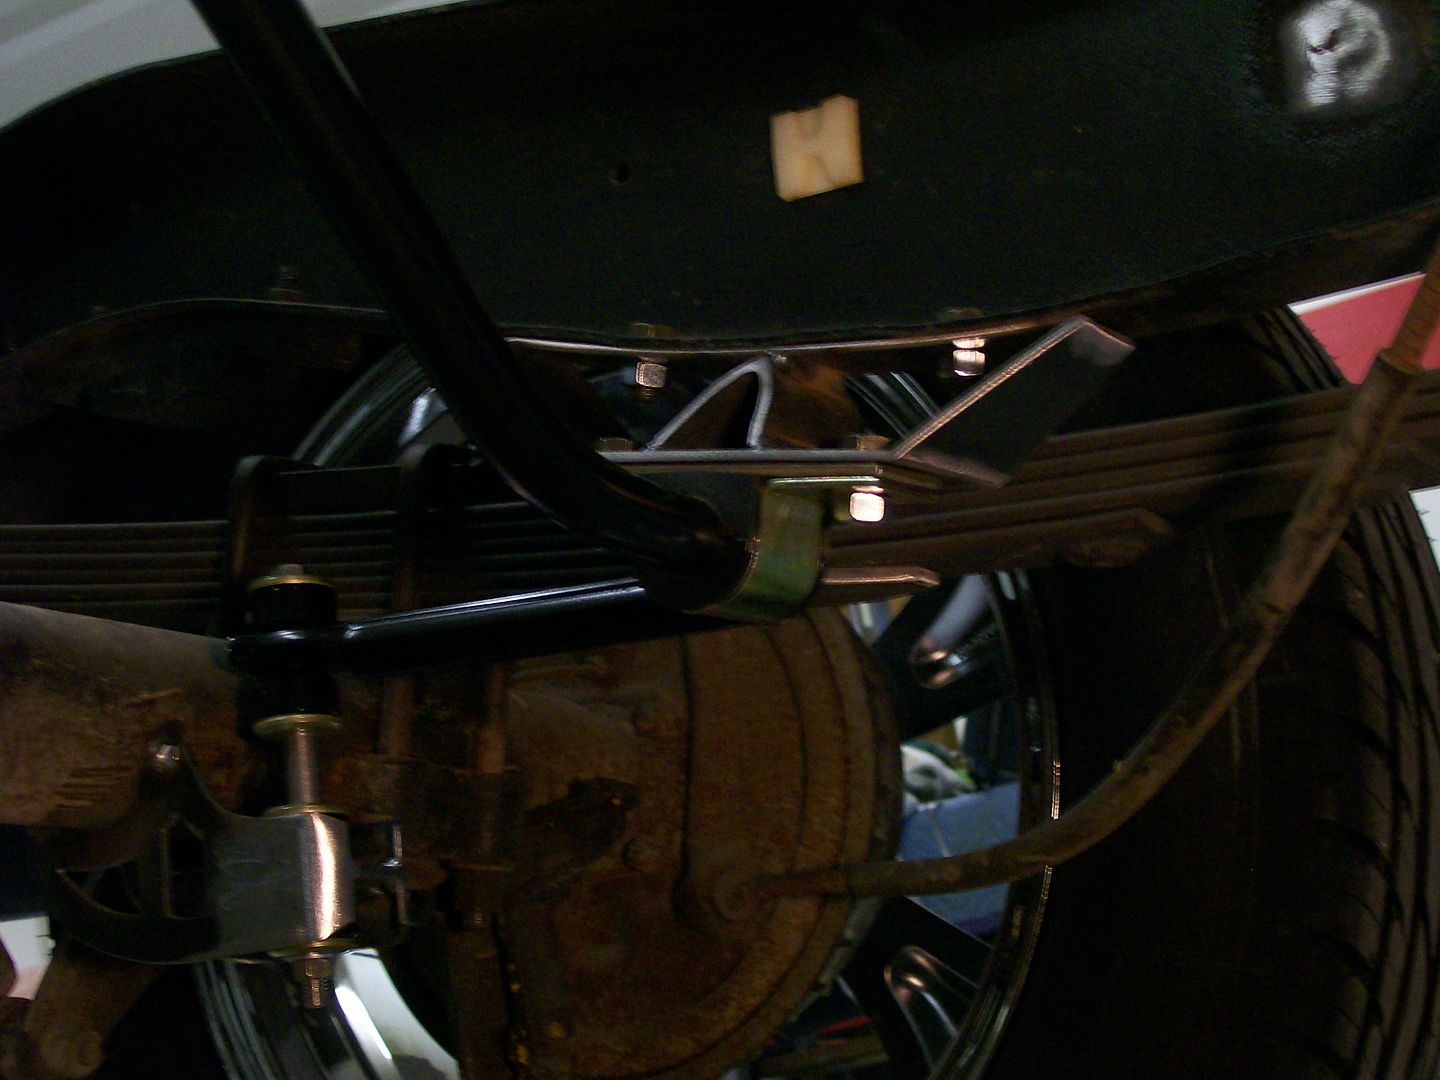
|
|
|

|
|
|
#316 |
|
Registered User
Join Date: Aug 2007
Location: Corona, California
Posts: 7,998
|
Re: 1957 Chevy truck re-rebuild
Nice work.
Kim |
|
|

|
|
|
#317 |
|
Registered User
Join Date: Feb 2013
Location: Lakeside Ariz
Posts: 445
|
Re: 1957 Chevy truck re-rebuild
That should work out nice.
Rich |
|
|

|
|
|
#318 |
|
Registered User
Join Date: Aug 2012
Location: Salem Mo
Posts: 647
|
Re: 1957 Chevy truck re-rebuild
Finishing on the rear stabilizer mounting points the axle mounts are next.
Once the sides and the middle plate was cut I wanted to slightly wrap the sides towards the front. I used the same technique by using the cutting wheel to score the metal so it would bend clean around to the front.  I prefigured to interlock the pieces together when cut. I ground the tabs down just a bit more so I could lay more weld into the void. 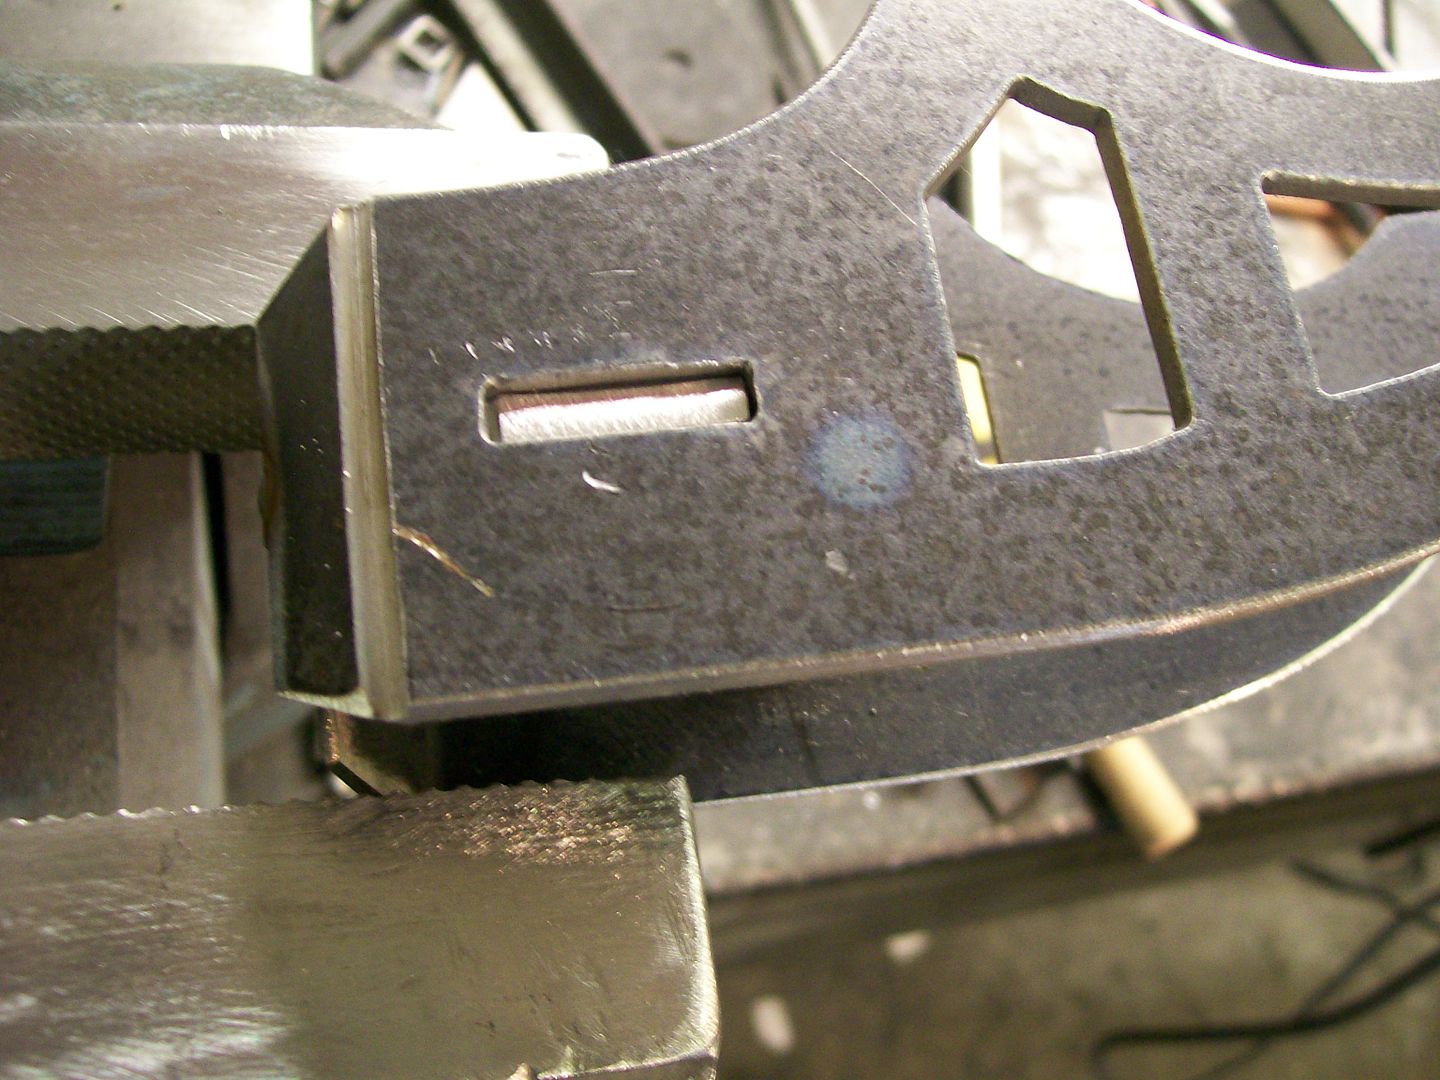 The corners are welded and filled and the mid plate is holding everything together now. 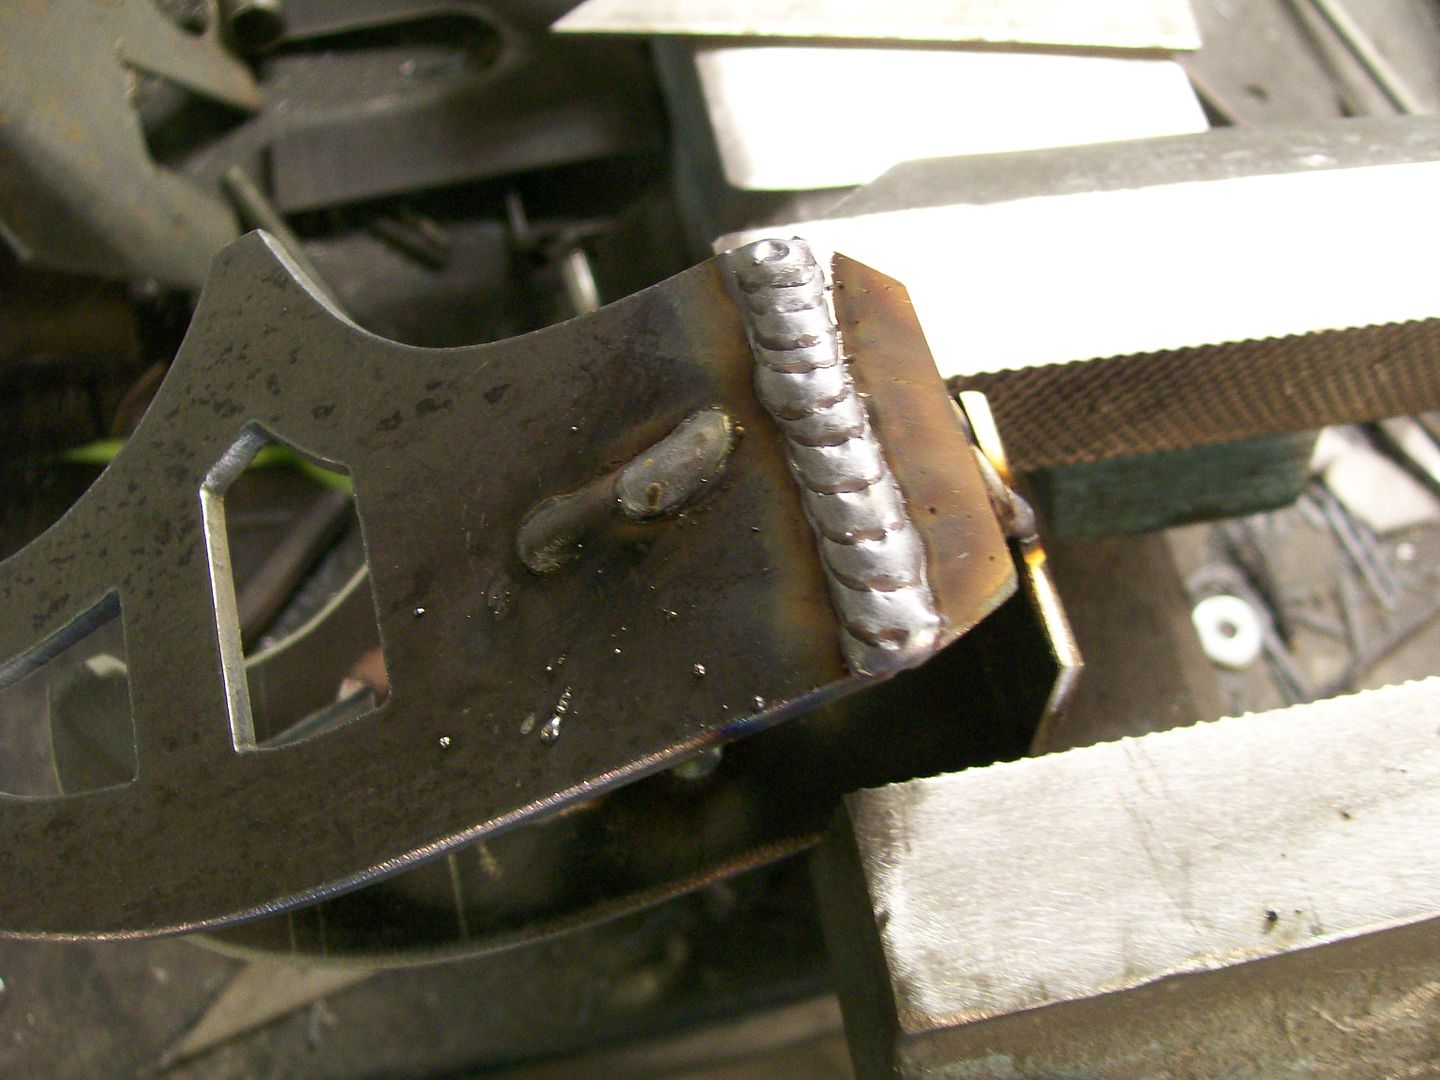 I know there will be stress on the mount so I did a full weld to ensure nothing moves later. 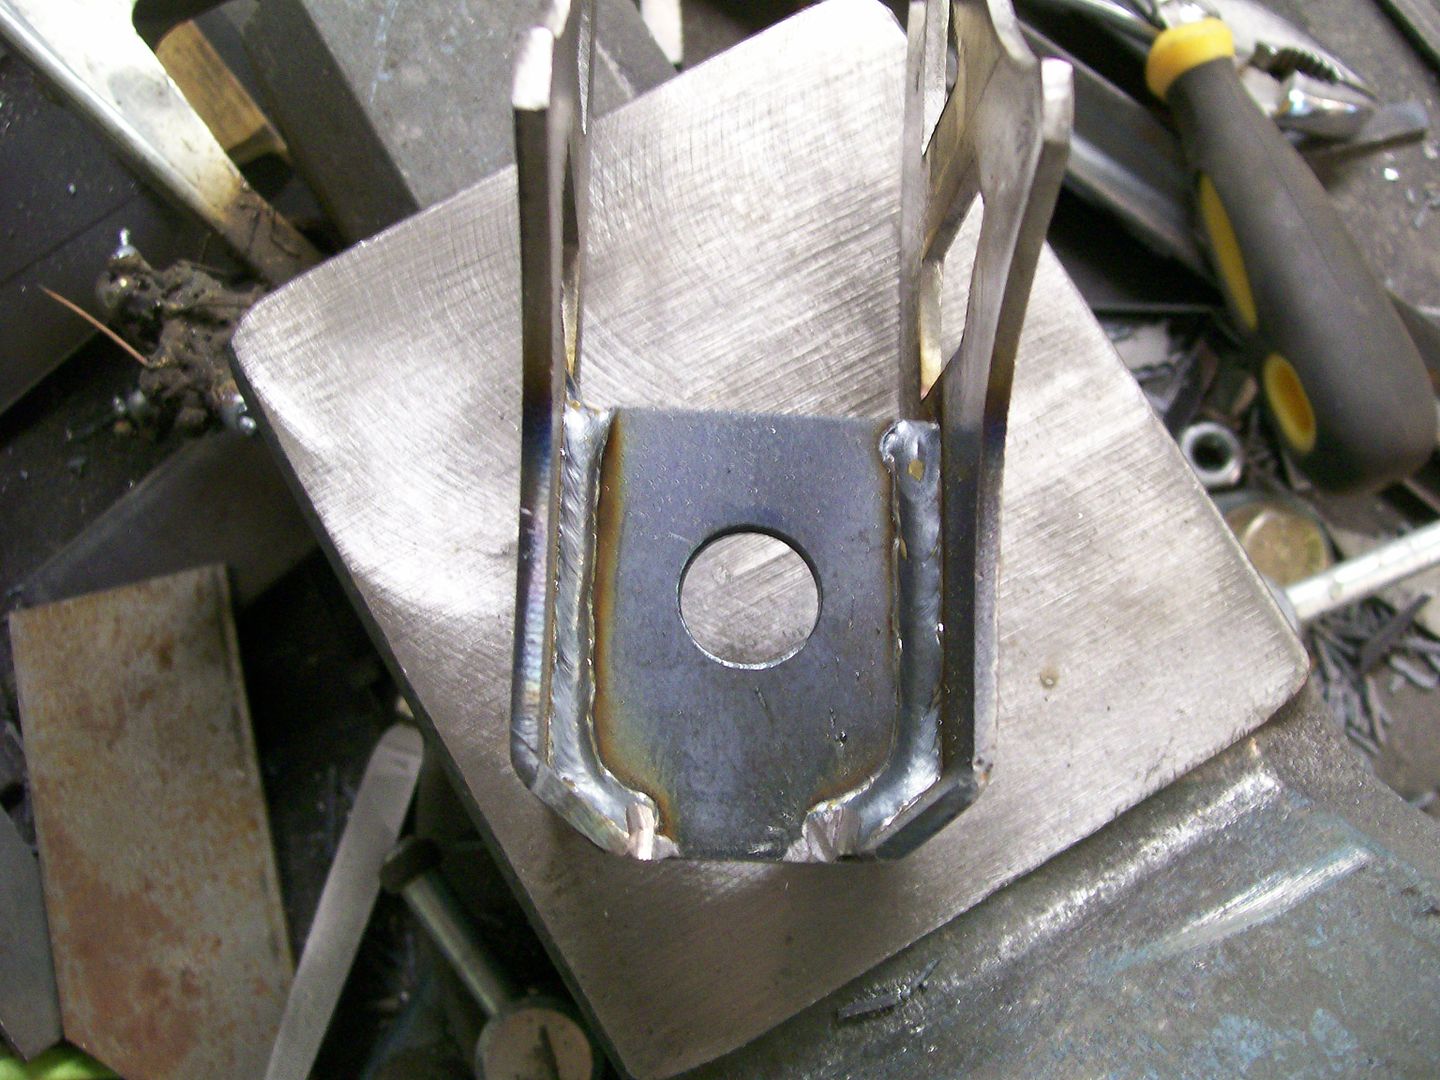 Now tack welded in place and the welds are smoothed and looking good. 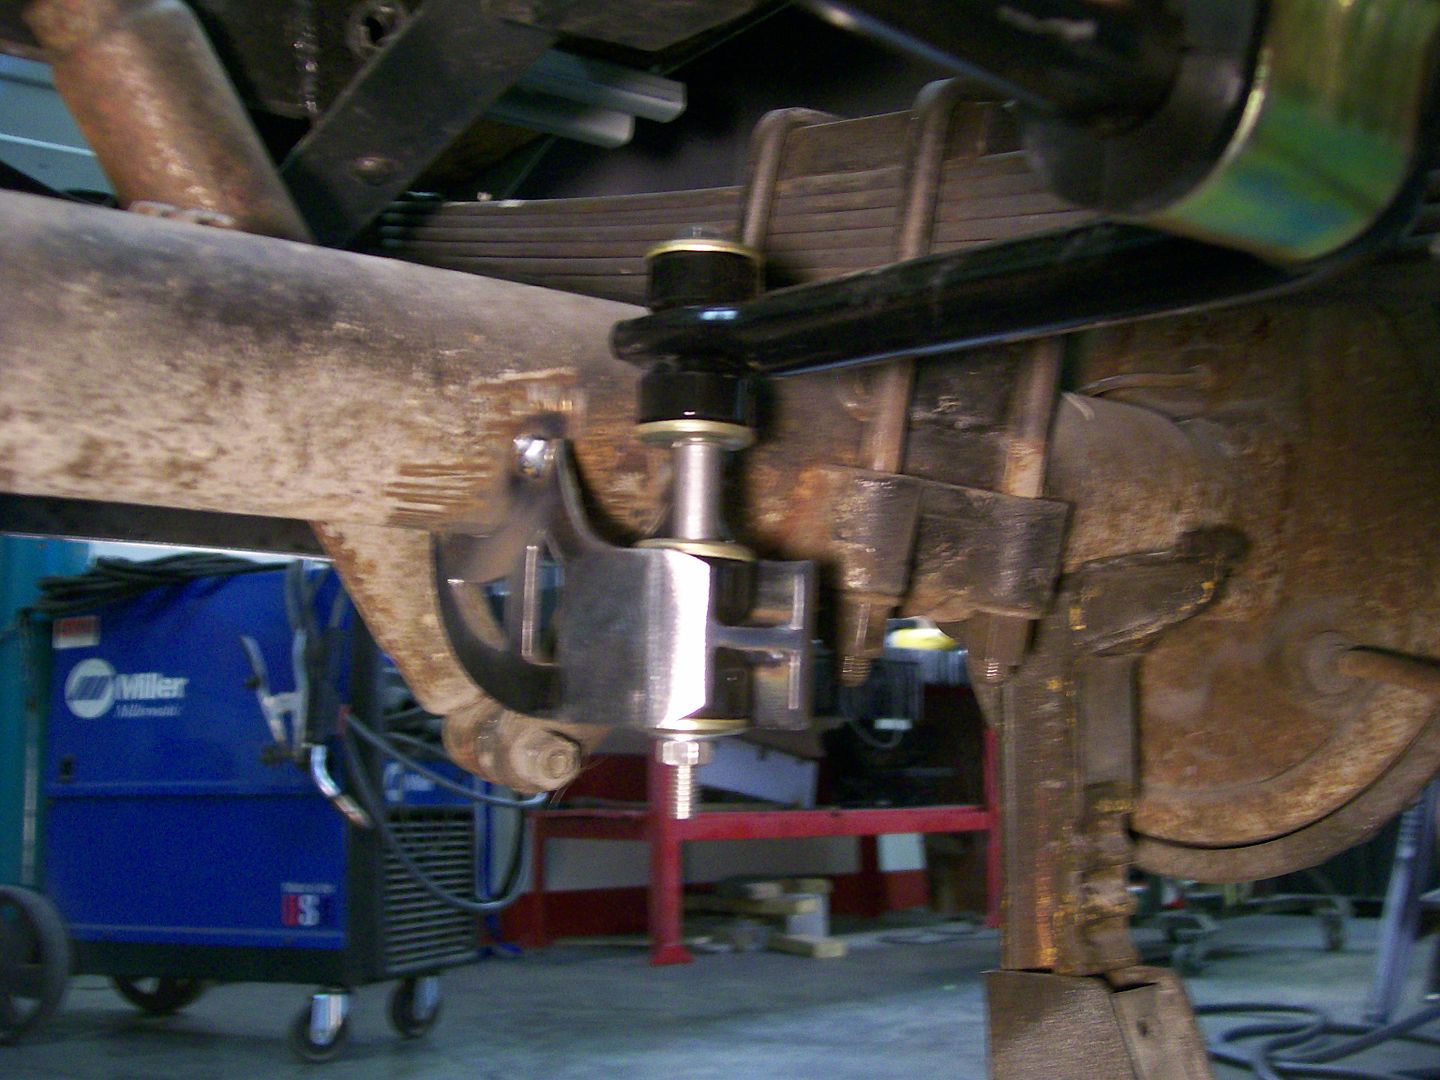 Stabilizer bar...Check. 
|
|
|

|
|
|
#319 |
|
Registered User
Join Date: Feb 2013
Location: Lakeside Ariz
Posts: 445
|
Re: 1957 Chevy truck re-rebuild
That is some nice work,
Rich |
|
|

|
|
|
#320 |
|
Registered User
Join Date: Aug 2007
Location: Corona, California
Posts: 7,998
|
Re: 1957 Chevy truck re-rebuild
Very nice.
Kim |
|
|

|
|
|
#321 |
|
Registered User
Join Date: Apr 2013
Location: LA, CA
Posts: 21
|
Re: 1957 Chevy truck re-rebuild
Nice and Clean...
|
|
|

|
|
|
#322 |
|
Registered User
Join Date: Jan 2012
Location: Motown
Posts: 7,677
|
Re: 1957 Chevy truck re-rebuild
__________________
cool, an ogre smiley  Ogre's 58 Truk build Ogre's 58 Truk buildhow to put your truck year and build thread into your signature shop air compressor timer |
|
|

|
|
|
#323 |
|
A320 Pilot/USAF Retired
Join Date: Mar 2009
Location: Charleston, SC
Posts: 2,622
|
Re: 1957 Chevy truck re-rebuild
Awesome work!
__________________
JJ My 1957 build: http://67-72chevytrucks.com/vboard/s...d.php?t=334552 http://www.trifive.com/forums/showthread.php?t=22037 Instagram - Chuckdriver57 |
|
|

|
|
|
#324 |
|
Registered User
Join Date: Aug 2012
Location: Salem Mo
Posts: 647
|
Re: 1957 Chevy truck re-rebuild
Hey, thanks everybody. I'm we've all been there... the times when we lay on the creeper looking up at our handy work, what a great feeling.
Then lay there too long then the oldness kicks in when you finally decide to get something done and your back aches from laying on a non-forgiving creeper too long. I've got just a few more items on the list then everything comes apart to get ready for paint. Unfortunately, the warm weather is fading away and it looks like most of the painting will be next spring, oh well, gives me time to get all the interior vinyl cut and glued and few other odds and ends taken care of for reassembly time. |
|
|

|
|
|
#325 |
|
Registered User
Join Date: Aug 2012
Location: Salem Mo
Posts: 647
|
Re: 1957 Chevy truck re-rebuild
I'm still working on the mock up of most of the truck. Now is the time that I see all the small things that need final fitting and shaping, I'm looking for near perfect fit so I don't have to struggle after paint and have a chance of scratching it.
I ended up with using a set of coil springs for a 80 Pontiac Grand Prix, I'm very happy with the final stance. Oh yeah......suspension ride height....Check. 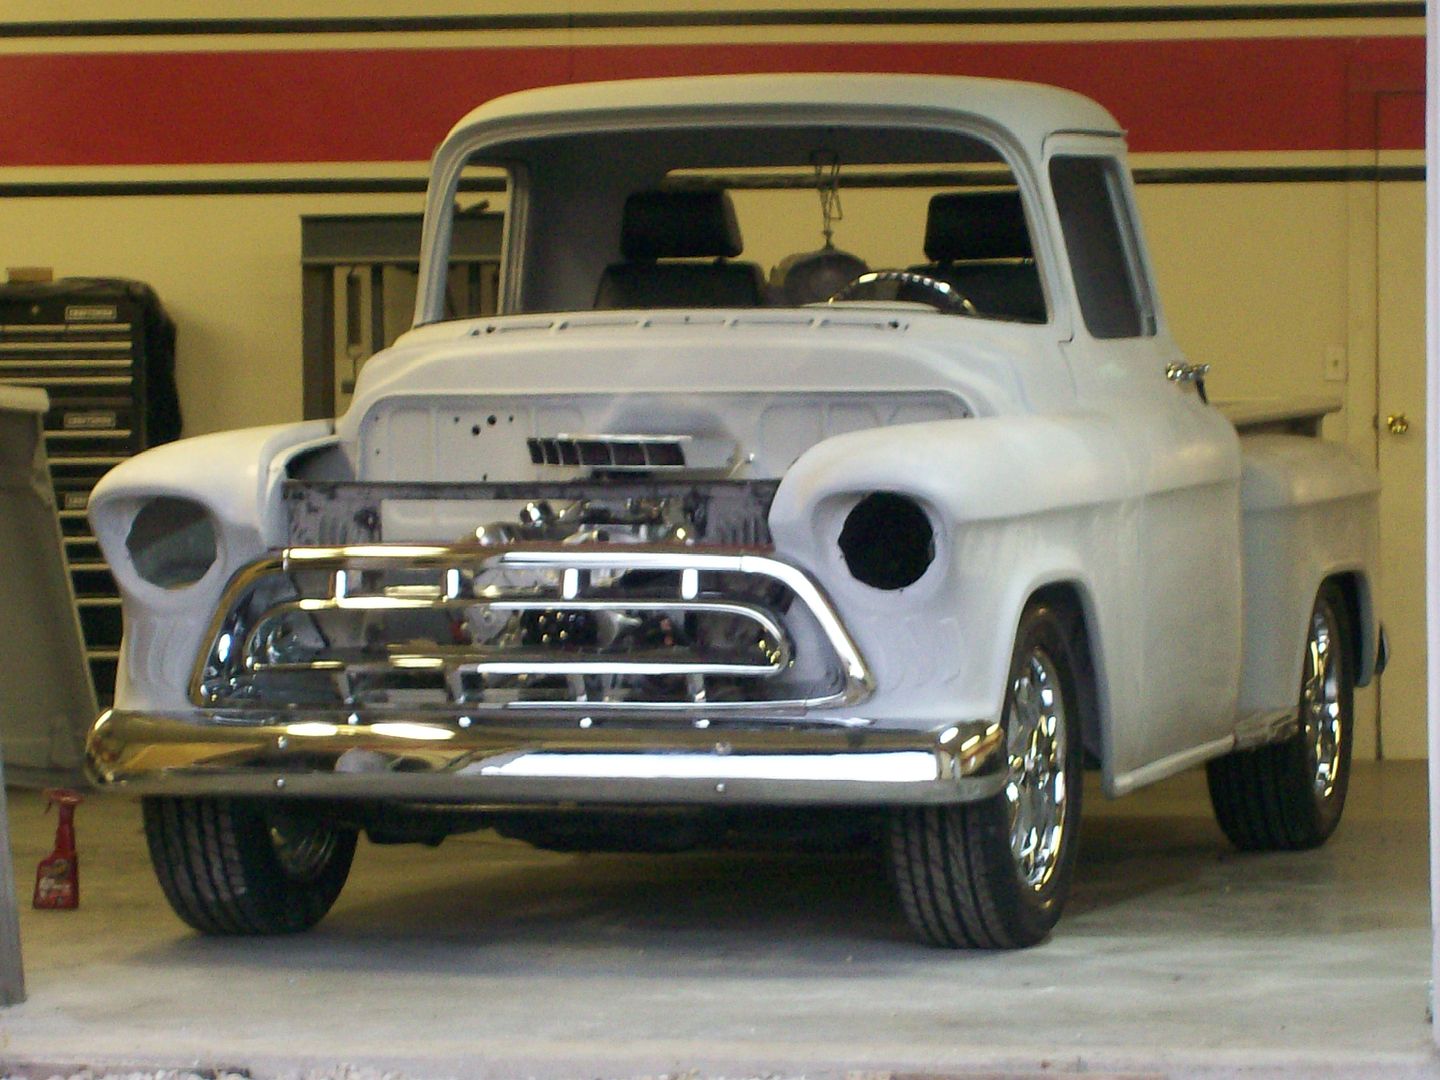  There is one place on the truck I felt was missing something. I usually noticed it when I went open the drivers door and my vision wandered into the bed. The floor looks nice, nice wood, shiny stainless strips but the 3 indentations on the inside of each bed side needed something. The inside of the bed is going to be black also, the perfect place for more stainless steel.  The digital camera likes to add lines to solid pictures, the stainless is actually smooth. The digital camera likes to add lines to solid pictures, the stainless is actually smooth.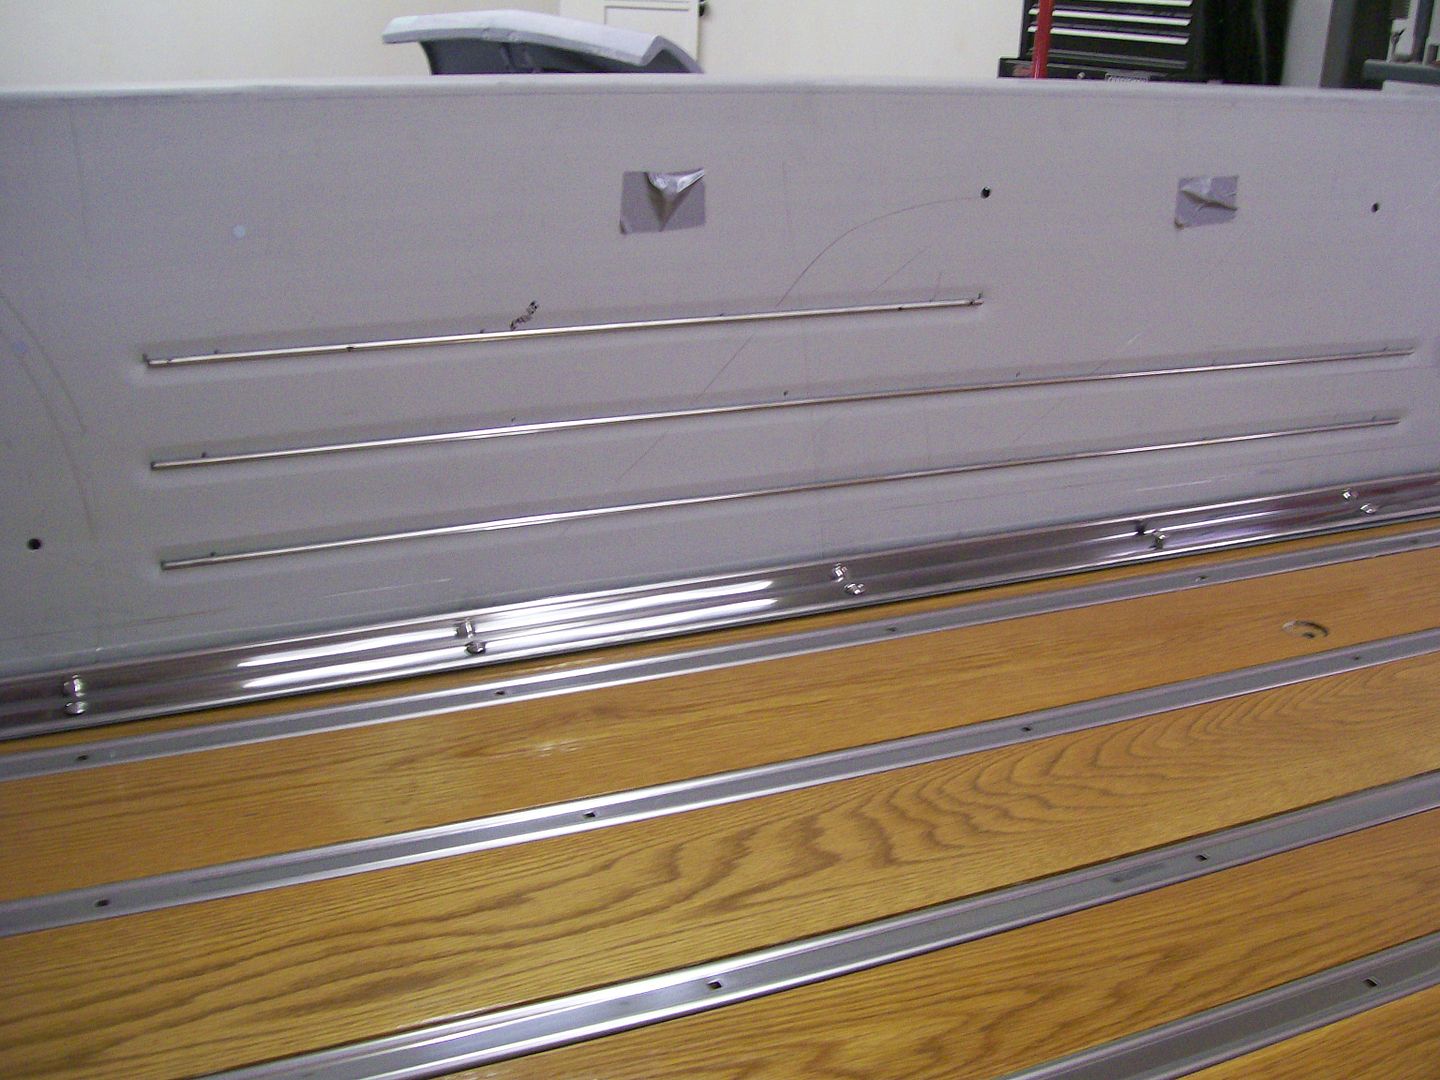 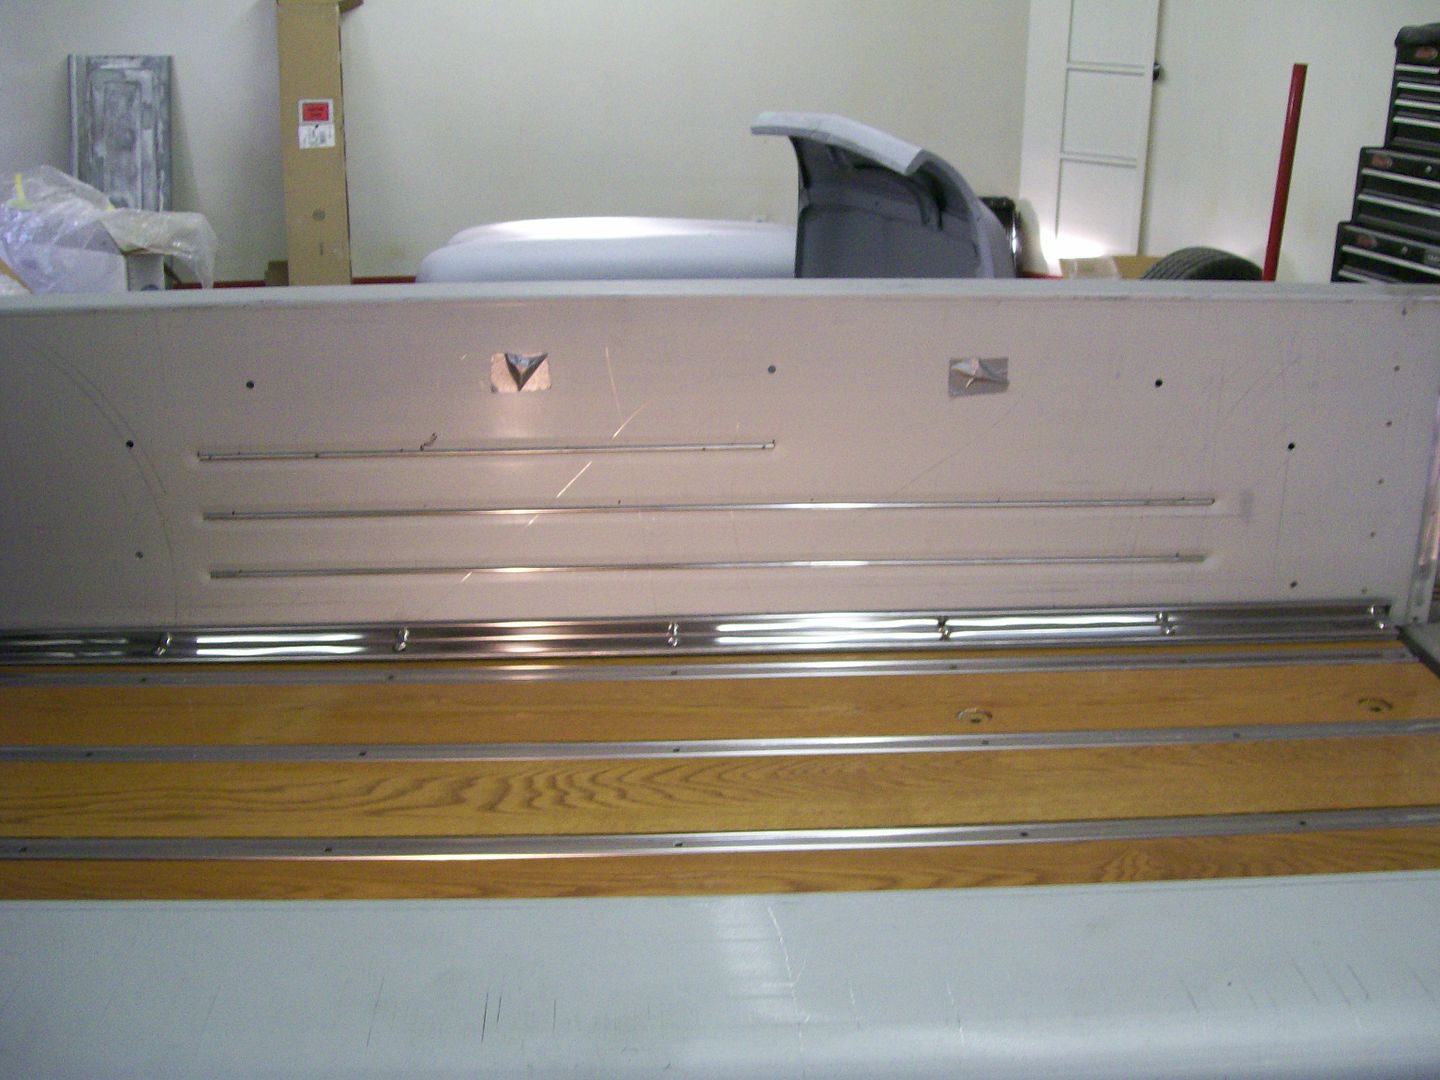 I'm enjoying seeing the truck all together, but I know it has to come apart to move forward. |
|
|

|
 |
| Bookmarks |
|
|