
 |
Register or Log In To remove these advertisements. |
|
|
|
|||||||
 |
|
|
Thread Tools | Display Modes |
|
|
#51 | |
|
Senior Member
 Join Date: Jun 2014
Location: Mocksville, NC
Posts: 1,724
|
Re: 1969 c10 build "the grinch" (gonna be pic heavy)
Quote:
__________________
Builds: Green Gus the 68 C10 ; Sullii the 72 1500 - Instagram: @dr.hewitt - C10 Concept/Development Photos: Master Thread |
|
|
|

|
|
|
#52 |
|
Registered User
Join Date: Sep 2009
Location: ottawa,canada
Posts: 4,550
|
Re: 1969 c10 build "the grinch" (gonna be pic heavy)
Damn you...

__________________
my build threads '86 C10 http://67-72chevytrucks.com/vboard/s...d.php?t=415628 '67 C10 http://67-72chevytrucks.com/vboard/s...d.php?t=635078 '63 GMC http://67-72chevytrucks.com/vboard/s...d.php?t=674682 |
|
|

|
|
|
#53 |
|
Registered User
Join Date: Mar 2011
Location: Wytheville, Virginia
Posts: 591
|
Re: 1969 c10 build "the grinch" (gonna be pic heavy)
this is a sweet build
__________________
Corey Jones Designs CoreyJonesDesigns on instagram Ole Silver- 1967 stepside http://www.hotrod.com/articles/1103c...chevrolet-c10/ http://67-72chevytrucks.com/vboard/s...d.php?t=598758 |
|
|

|
|
|
#54 |
|
Still Learning
Join Date: Jul 2009
Location: Central Oklahoma
Posts: 10,108
|
Re: 1969 c10 build "the grinch" (gonna be pic heavy)
This build is so sweet! you are killing it!

|
|
|

|
|
|
#55 |
|
Registered User
Join Date: Aug 2015
Location: Houston TX
Posts: 92
|
Re: 1969 c10 build "the grinch" (gonna be pic heavy)
This is an awesome build. Where did you get your transport wheels from? I've been looking for a set but they seem hard to find.
|
|
|

|
|
|
#56 |
|
Registered User
Join Date: Oct 2015
Location: Peoria, AZ
Posts: 67
|
Re: 1969 c10 build "the grinch" (gonna be pic heavy)
Totally forgot about this thread... gonna have to add some new stuff to it!
|
|
|

|
|
|
#57 |
|
Registered User
Join Date: Oct 2015
Location: Peoria, AZ
Posts: 67
|
Re: 1969 c10 build "the grinch" (gonna be pic heavy)
I started to make the stainless lines for the front air bags next. this was a chore in itself because I wanted them to be one piece from the airbag to the Accuair manifold mounted in the rear of the truck. Again this is my first time working with stainless tubing and it wasn't that fun. I also played arround with polishing the fuel lines to see what they would look like. (now I just added another step to the build I guess)
 You can see the difference in the inner 2 lines that are polished vs the air line on the top thats raw... |
|
|

|
|
|
#58 |
|
Registered User
Join Date: Oct 2015
Location: Peoria, AZ
Posts: 67
|
Re: 1969 c10 build "the grinch" (gonna be pic heavy)
I was also able to get the engine harness ran into the cab and the ECU mounted up under the dash.
Everything is neat and tidy and into one grommet through the firewall...  And mounted using Ironworks speed and customs ECU bracket (but turned inside out to fit)  And as you can see, Dynamat was installed after seam sealing all of the repair on the floor boards... This pictures shows the CPP Vehicle specific tilt steering column in place as well (this will have to be changed out later)  the Driveshaft tunnel was also welded in and sealed but I didnt take any pictures before the dynamat was installed |
|
|

|
|
|
#59 |
|
Registered User
Join Date: Oct 2015
Location: Peoria, AZ
Posts: 67
|
Re: 1969 c10 build "the grinch" (gonna be pic heavy)
oh... also you can see the Vintage Air system and vents installed as well.
|
|
|

|
|
|
#60 |
|
Registered User
Join Date: Oct 2015
Location: Peoria, AZ
Posts: 67
|
Re: 1969 c10 build "the grinch" (gonna be pic heavy)
Since everything was now electronic a new set of gauges were next on the list. I wanted to keep this truck looking as OEM as possible and the closest gauge faces I could find were by New Vintage USA.
Out with the old... 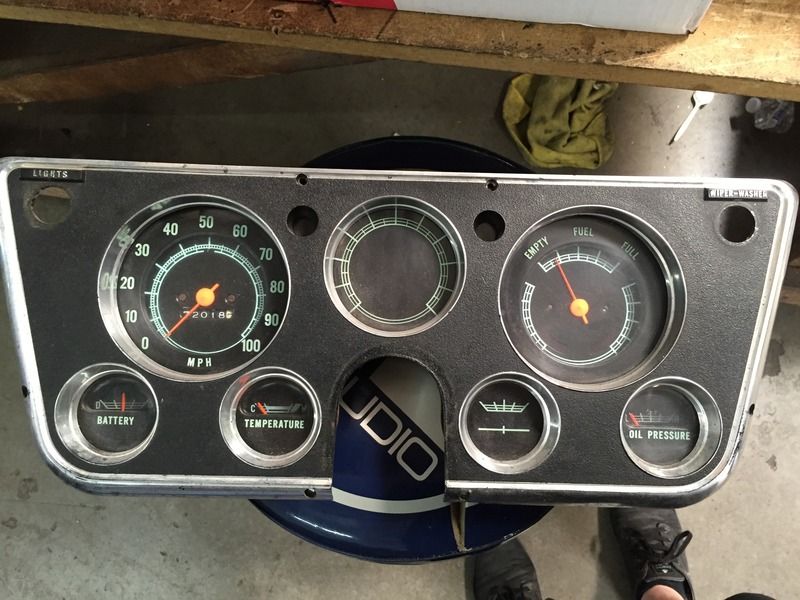 And in with the new! They really do match the OEM styling really well 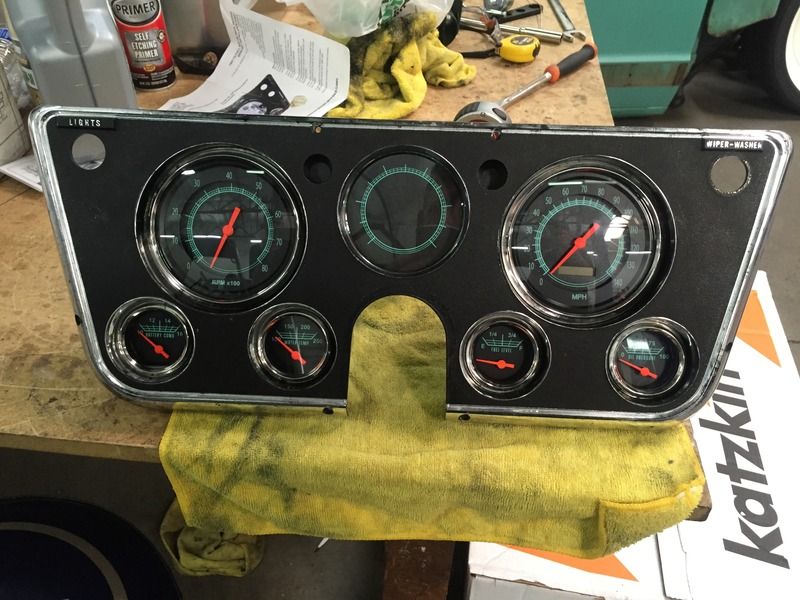 And then the fun begins! 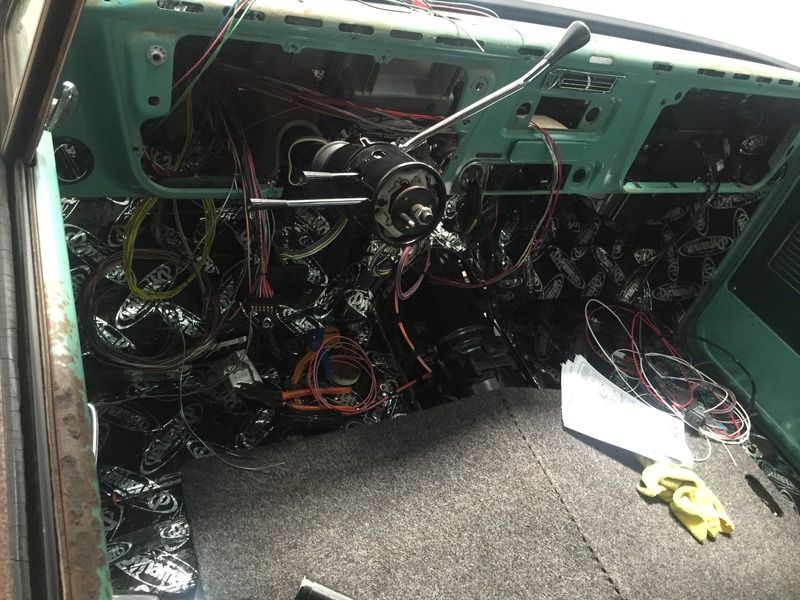 Since I am not a fan of how chevy wires everything off the starter I decided to run a very nice distribution block for the dual batteries and everything to feed off of. This one is made by Steve Meade Designs and is a 8 bay ANL fuse distribution block. Should handle the power pretty good, and I shouldn't have any power flow issues... Here is is next to a normal ATC fuse for size comparison.  Here is some of the "larger" gauge wiring going in. Actual 4ga. going to the starter in this picture, also the alternator also received its own 4ga wire as well. 
|
|
|

|
|
|
#61 |
|
Registered User
Join Date: Oct 2015
Location: Peoria, AZ
Posts: 67
|
Re: 1969 c10 build "the grinch" (gonna be pic heavy)
In the above picture you can also see the installed driveshaft tunnel. I kept the High hump trans cover remove-able in-case I needed to get to anything from the top too!
|
|
|

|
|
|
#62 |
|
Registered User
Join Date: May 2016
Location: Fayetteville, NC
Posts: 28
|
Re: 1969 c10 build "the grinch" (gonna be pic heavy)
Wow! Money well spent! Nice build!
|
|
|

|
|
|
#63 |
|
Registered User
Join Date: Oct 2015
Location: Peoria, AZ
Posts: 67
|
Re: 1969 c10 build "the grinch" (gonna be pic heavy)
Here you can see the the vintage air filler panel installed with the new low mount compressor. also you can see the CPP hydraboost was installed as well. I didn't like the look of the huge brake booster so I figured the hydraboost was the way to go!
I also used the lokar drive by cable throttle cable that you can sort of see in there as well  You can see in this picture where we installed the Accuair Ride Height Sensors. The wiring is all hidden inside the chassis... 
|
|
|

|
|
|
#64 |
|
Registered User
Join Date: Oct 2015
Location: Peoria, AZ
Posts: 67
|
Re: 1969 c10 build "the grinch" (gonna be pic heavy)
|
|
|

|
|
|
#65 |
|
Registered User
Join Date: Oct 2015
Location: Peoria, AZ
Posts: 67
|
Re: 1969 c10 build "the grinch" (gonna be pic heavy)
I received the custom boyd welding fuel tank and positioned it between the rear frame rails. I didn't take any pictures of the tank before it was installed. A friend and I built a 3/8 plate steel guard to protect the tank since it was going to be so close to the ground, and I didn't want anything to come up and smash into the tank. Here are the pictures of that installed.
Here is the cut out before we welded it up.  Here is where the fuel lines were terminated with Aeroquip black AN fittings. There will be flex lines going from them to the fuel pump on the top of the tank. 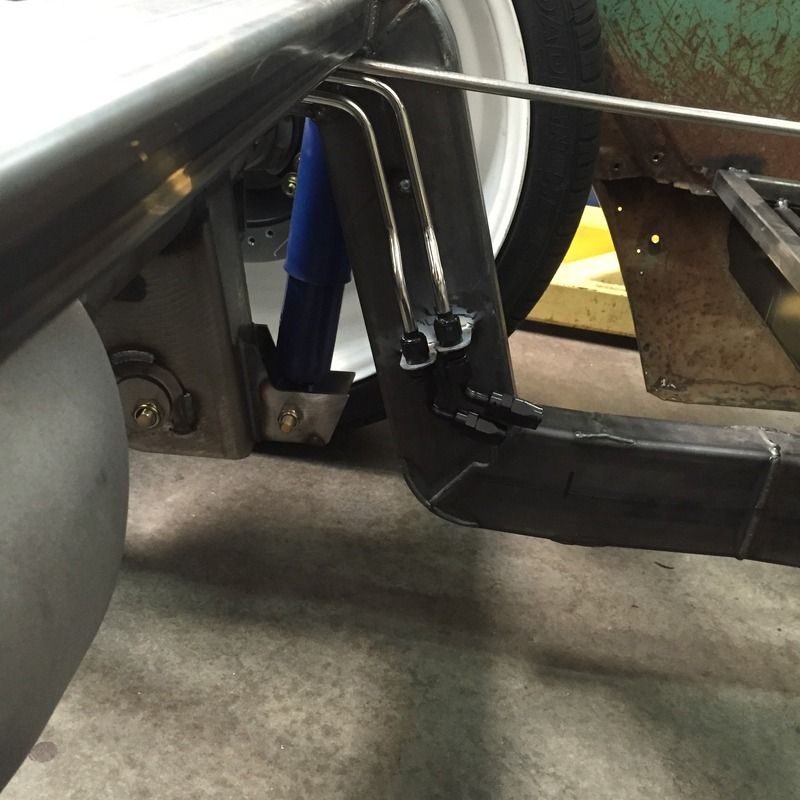 and welded up and installed.    This is what the Aeromotive intake phantom system was installed into as well. The lower tank shield is able to detach separately from the fuel tank so its not a hassle if the tank has to be removed for whatever reason.
__________________
69 C10 All new build with Patina Body |
|
|

|
|
|
#66 |
|
Registered User
Join Date: Sep 2009
Location: ottawa,canada
Posts: 4,550
|
Re: 1969 c10 build "the grinch" (gonna be pic heavy)
It's a shame to cover up that beautiful tank, but that is a cool looking guard/mount.!
__________________
my build threads '86 C10 http://67-72chevytrucks.com/vboard/s...d.php?t=415628 '67 C10 http://67-72chevytrucks.com/vboard/s...d.php?t=635078 '63 GMC http://67-72chevytrucks.com/vboard/s...d.php?t=674682 |
|
|

|
|
|
#67 |
|
Registered User
 Join Date: Dec 2012
Location: Rochester, IL
Posts: 537
|
Re: 1969 c10 build "the grinch" (gonna be pic heavy)
Very nice work on the air lines..stainless lines are great but no fun to bend and flare
__________________
__________________ Mike 70 Med Olive build http://67-72chevytrucks.com/vboard/s...d.php?t=714804 Instagram- protouring66 |
|
|

|
|
|
#68 |
|
Senior Member
 Join Date: Jun 2009
Location: Belews Creek , NC
Posts: 4,220
|
Re: 1969 c10 build "the grinch" (gonna be pic heavy)
Looking great as always
 Very nice fab work Very nice fab work 
__________________
Larry It is easily overlooked that what is now called vintage was once brand new. "Project 68" paypal.me/ldgrant |
|
|

|
|
|
#69 | ||
|
Registered User
Join Date: Oct 2015
Location: Peoria, AZ
Posts: 67
|
Re: 1969 c10 build "the grinch" (gonna be pic heavy)
Quote:
Quote:
I try. I am very picky about the stupidest small things so most of everything has to be done right or it bugs the hell out of me!
__________________
69 C10 All new build with Patina Body |
||
|
|

|
|
|
#70 |
|
Registered User
Join Date: Oct 2015
Location: Peoria, AZ
Posts: 67
|
Re: 1969 c10 build "the grinch" (gonna be pic heavy)
Next up was mounting the air ride, air tank. I used a Speciality Suspension 6" Seamless air tank. I drew up a few mounting bracket templates and ended up going with this design.
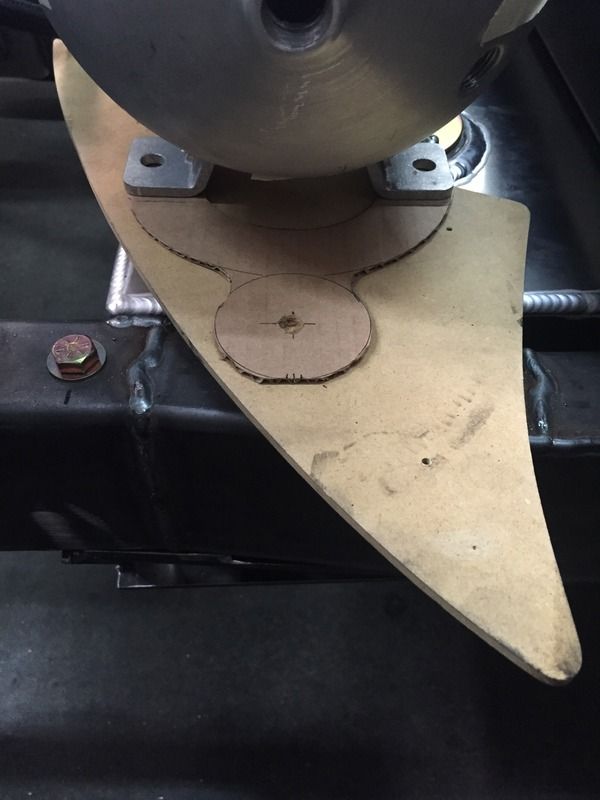 That one seemed to look the best keeping the shape of the tank in mind. From the top looking down it basically disappears. drew it up on the computer and had the plasma cut it out along with some risers to elevate it above the fuel tank/pump. Here they are all welded and smoothed. 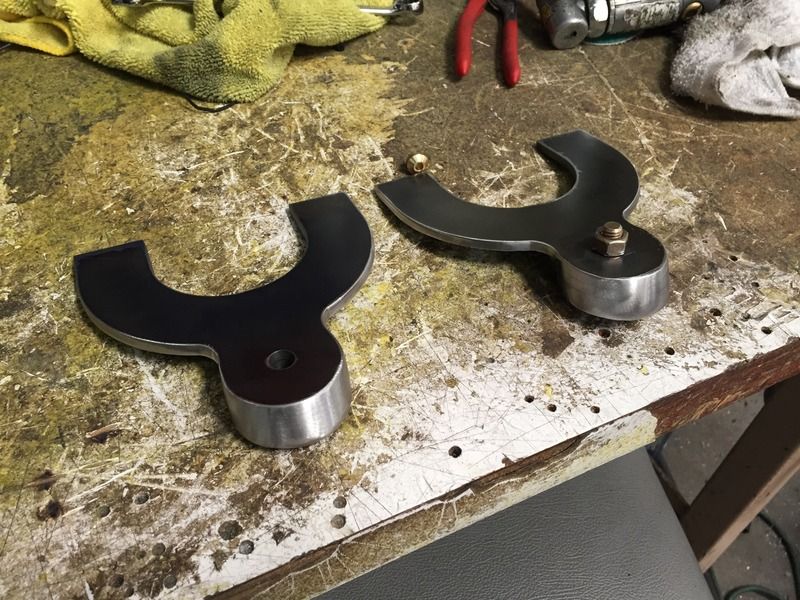 And then mounted to the chassis 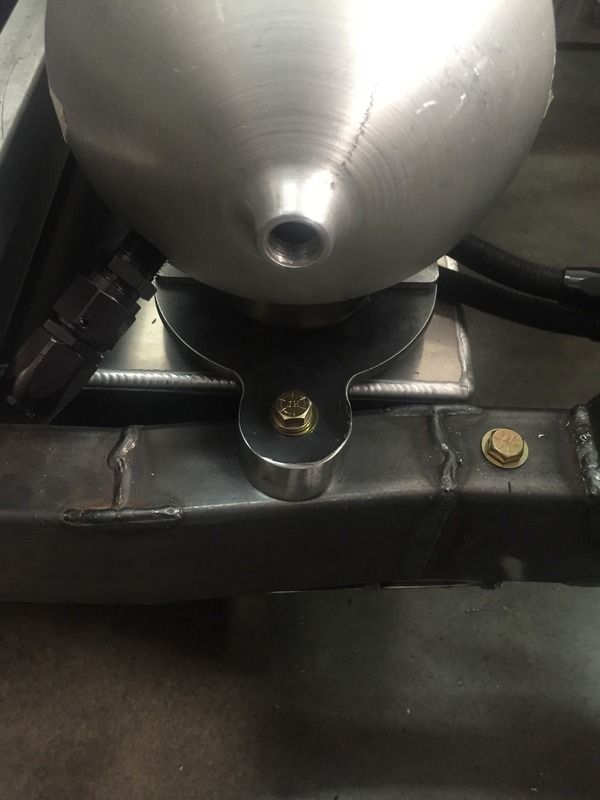 I was also able to mount the Accuair VU4 manifold just to the rear of the bridge above the tank. Here it shows the Air tank and manifold mounted along with the stainless lines very loosely sitting where they need to go into the manifold. 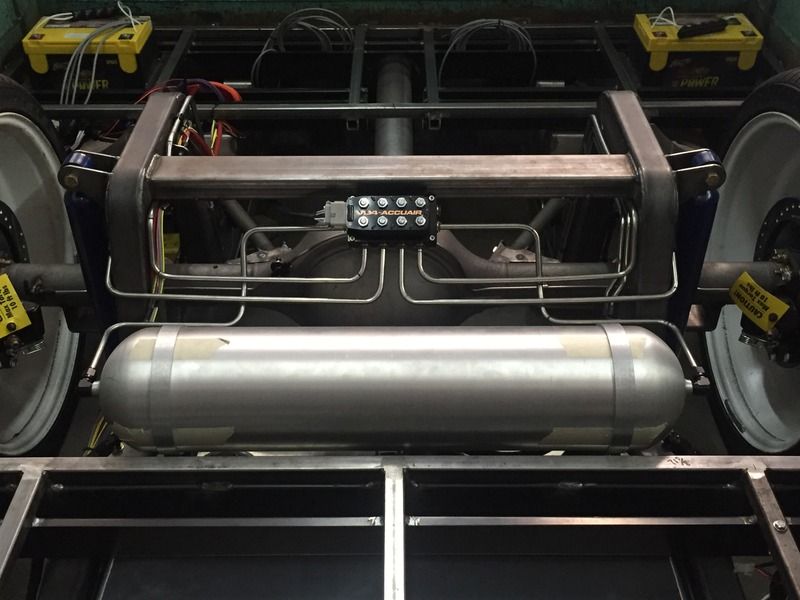 You can also see the position of the dual batteries. All of the wiring that is ran along the frame rail will be hidden inside of the chassis after its been powdercoated.
__________________
69 C10 All new build with Patina Body |
|
|

|
|
|
#71 |
|
Registered User
Join Date: Oct 2015
Location: Peoria, AZ
Posts: 67
|
Re: 1969 c10 build "the grinch" (gonna be pic heavy)
In the front end, I was able to get the Aeroquip stainless A/C lines made and installed along with the Billet Specialties line clamps to separate the two.
Also received the heater line kit from HPI Customs and installed it as well. It routed the heater lines from the water pump to the vintage air unit very nicely! and it was a very easy install. (not pictured are the braided covers that go over the heater lines. I will install them after everything is powdercoated and final assembled. 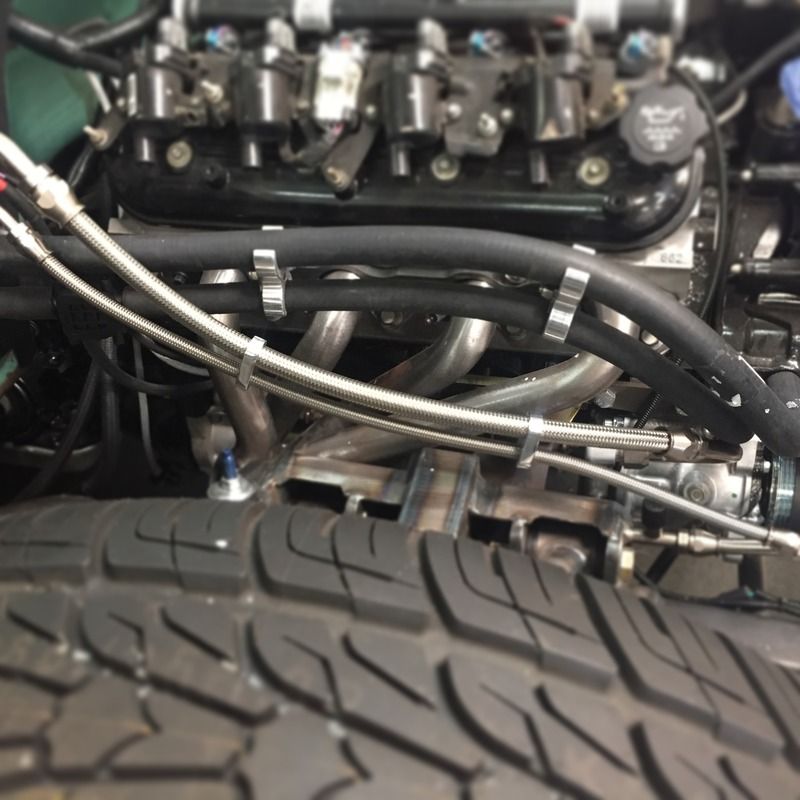
__________________
69 C10 All new build with Patina Body |
|
|

|
|
|
#72 |
|
Registered User
Join Date: Oct 2015
Location: Peoria, AZ
Posts: 67
|
Re: 1969 c10 build "the grinch" (gonna be pic heavy)
The Porterbuilt hood hinges were the next thing to be installed.
 They were a pretty easy install for the most part. I also painted inside the cab cowl black so when the cowl panel was on you really couldnt see down into the wiper area.  With cowl installed  close up  You can also see that the Hydroboost lines were installed as well. I used an OEM Silverado Hydroboost pump that has the return port built into the pump housing. That way I didn't have to "t" any of the lines for a cleaner install. Here is a picture of the 2 different pumps Regular non Hydroboost 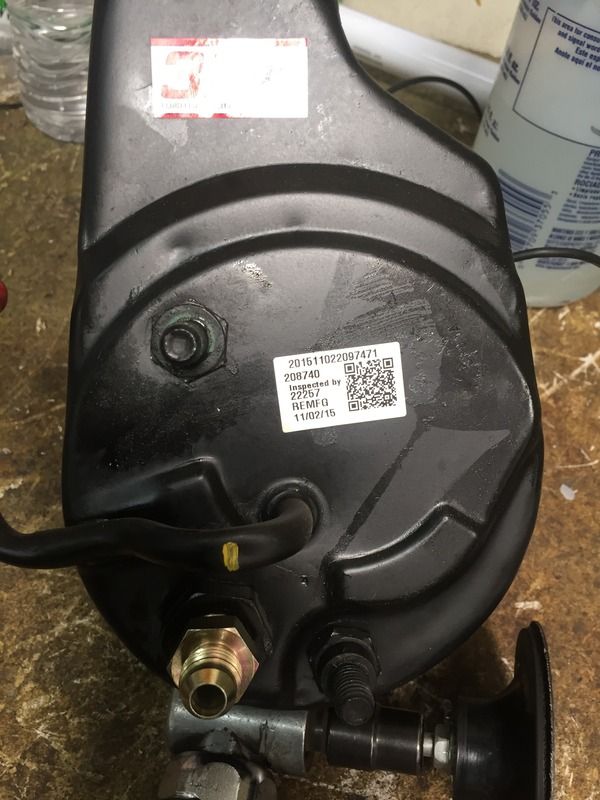 Hydroboost, Notice the return port in the center without the cap on it. 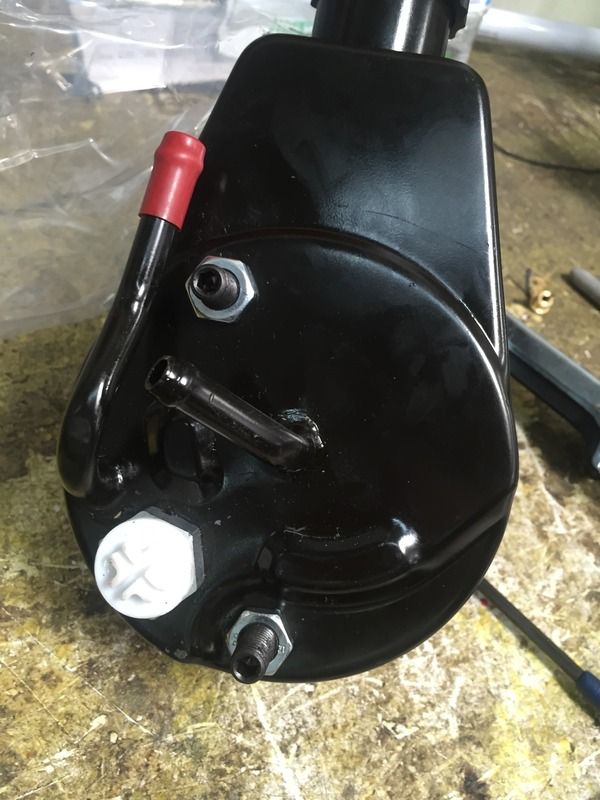
__________________
69 C10 All new build with Patina Body |
|
|

|
|
|
#73 |
|
Registered User
 Join Date: Jun 2006
Location: Tucson, Az
Posts: 705
|
Re: 1969 c10 build "the grinch" (gonna be pic heavy)
Looking Awesome
   keep up the great work keep up the great work
|
|
|

|
|
|
#74 |
|
Registered User
Join Date: Jun 2010
Location: aurora colo
Posts: 210
|
Re: 1969 c10 build "the grinch" (gonna be pic heavy)
__________________
70 c10 2wd crashed Suburban 67 c10 2wd sb truck 67 c10 4wd lb truck |
|
|

|
|
|
#75 | |
|
Registered User
Join Date: Mar 2013
Location: Manitoba
Posts: 184
|
Re: 1969 c10 build "the grinch" (gonna be pic heavy)
Quote:
|
|
|
|

|
 |
| Bookmarks |
|
|