
|
Register or Log In To remove these advertisements. |
|
|
|
|||||||
 |
|
|
Thread Tools | Display Modes |
|
|
 04-11-2016, 03:45 PM
|
#1 |
|
Registered User
Join Date: Nov 2014
Location: Oakland, CA
Posts: 114
|
Kell's Two Cents - 1946 build
Edit: I refuse to let Photobucket win and am beginning the process of updating the photos associated with this thread. I'll do my best to get the correct ones on, but in any case please enjoy
What's up world Well I've been hanging out lurking on this site for about a year now and figured I would finally put my two cents up and add a build thread. There is some real skill on this site! This is my first build and am learning a lot as I go, so I come on this site for info and ideas for the build. Chizzler's build is obviously incredible, paint man is far more meticulous than the bulk of us, and there are awesome builds on the 47-55 side. My thread will show that a regular guy with a welder and a grinder can still get a build done! Anyways, let's get into it! I was already working on a '46 and I wasn't liking the direction it was going in. It wasn't very complete, somebody had black primered over what was left of the patina, and I was losing enthusiasm over my truck choice. That's when I came across these photos on Craigslist.  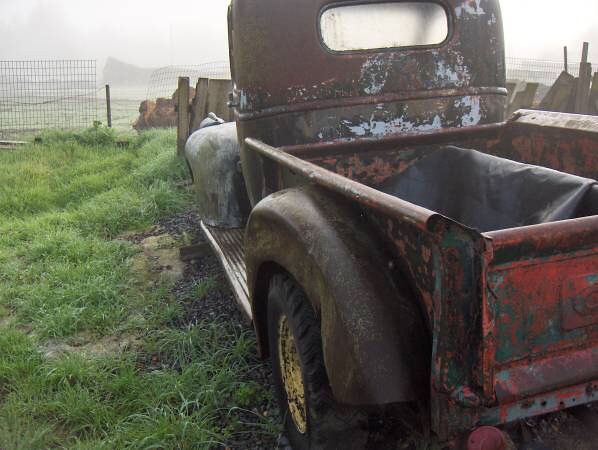   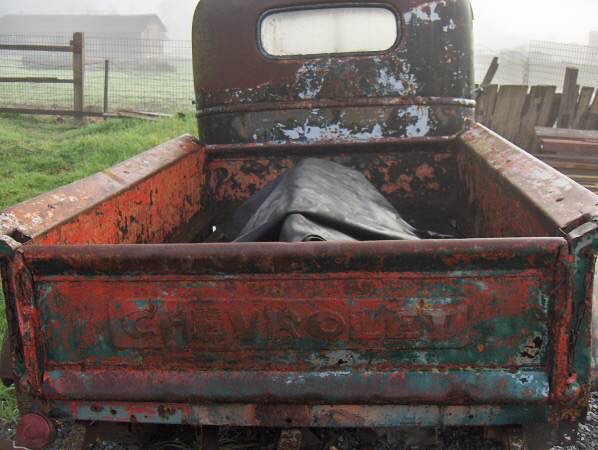 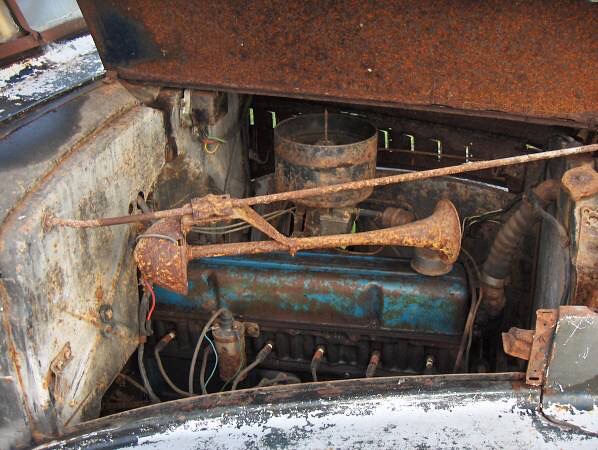 Northern California farm find, guy said it had been sitting up there 15-20 years. Totally complete and untouched with an incredible patina to go with it. I drove up the same day and gave him the deposit and returned a week later with the trailer. I was juiced! Last edited by gokellurself; 07-21-2017 at 02:03 AM. |

|

|
|
04-11-2016, 03:59 PM
|
#2 |
|
Registered User
Join Date: Nov 2014
Location: Oakland, CA
Posts: 114
|
Re: Kell's Two Cents - 1946 build
My original plan was a low and slow, low budget build with a nice patina. This being my first build I didn't want to do anything too crazy, just wanted to get it up and running and ready for the street. Of course, with lack of experience and lack of the hot rod "vision" it's actually really tough to stick to a low budget build plan, and how quickly does the build plan evolve!
As I said, I was already working on a '46 so I had a couple parts gathered already. The first truck came with an original drop I-beam, so I knew I wanted to use that. A local hot rod builder highly suggested I go the S10 frame route, but I really wanted to build an OLD truck. I didn't want an S10 with an old face. I stripped the truck and got right down to the frame. Very first thing I did was fix the broken frame horn it came with. 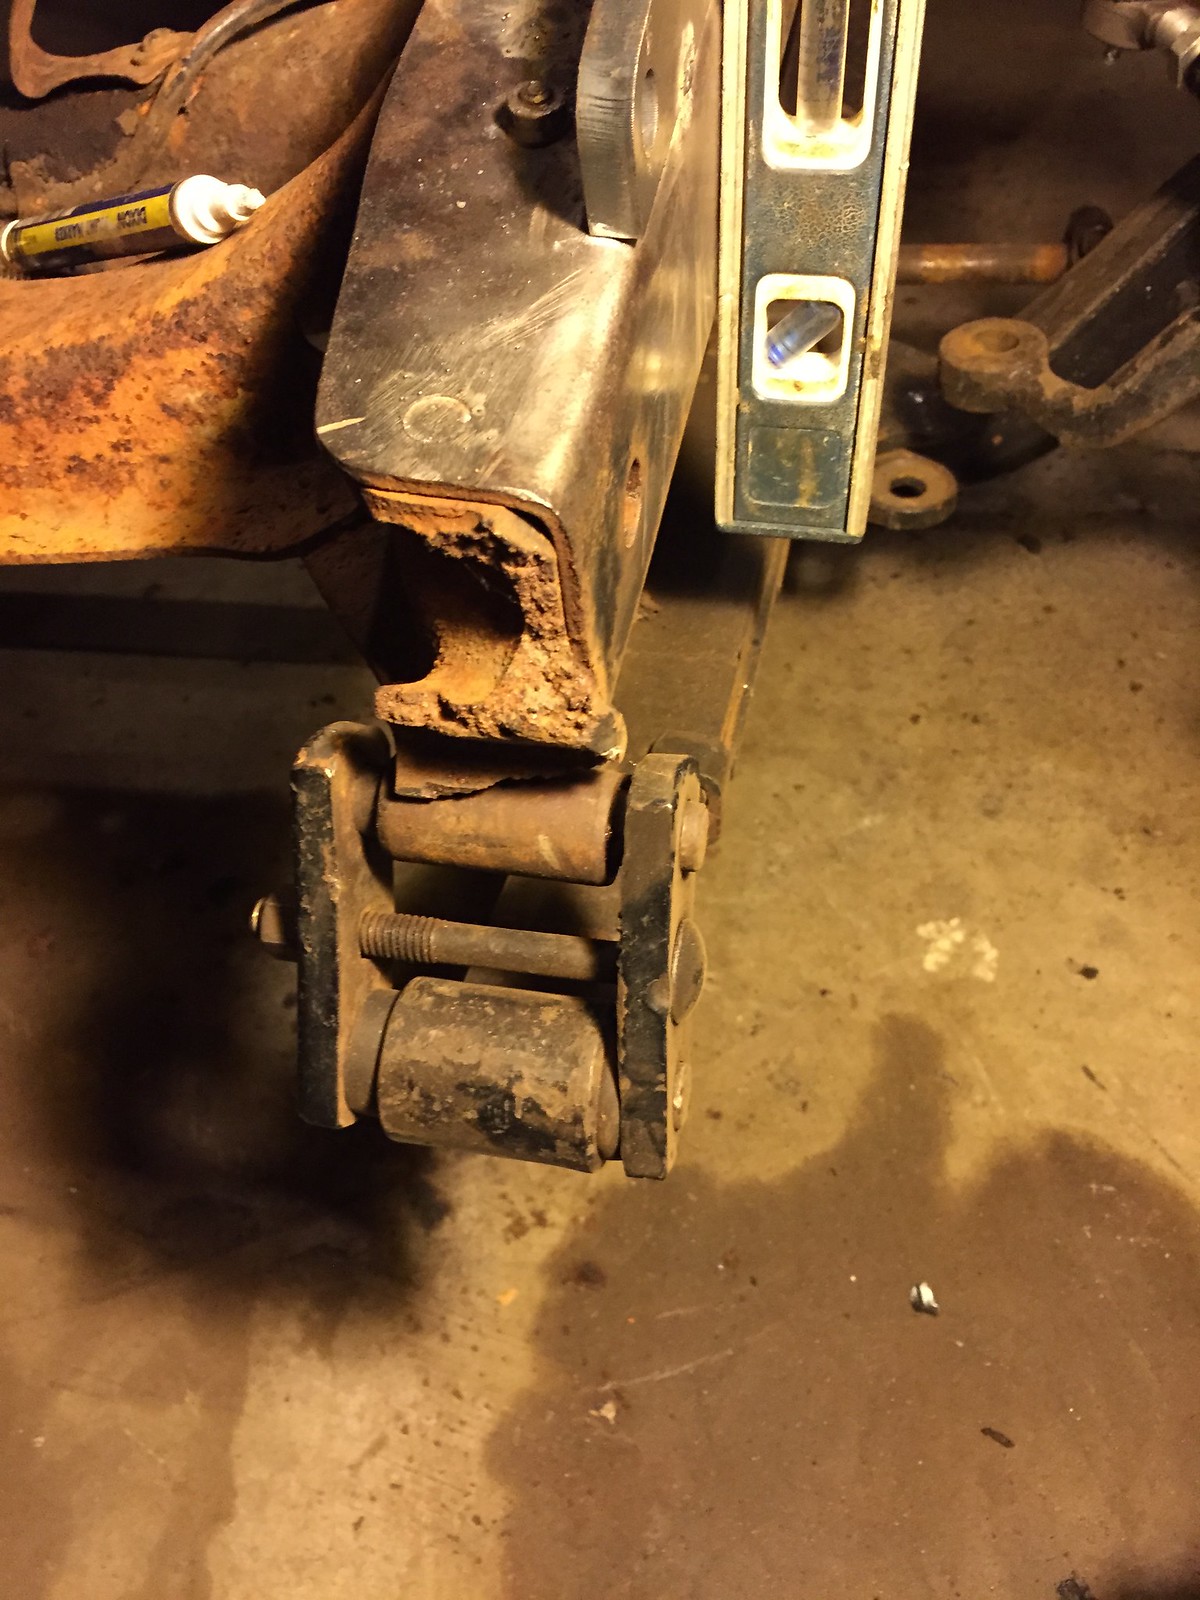 And at the same time started doing the CPP power steering kit that ends up bolting through the frame horn. 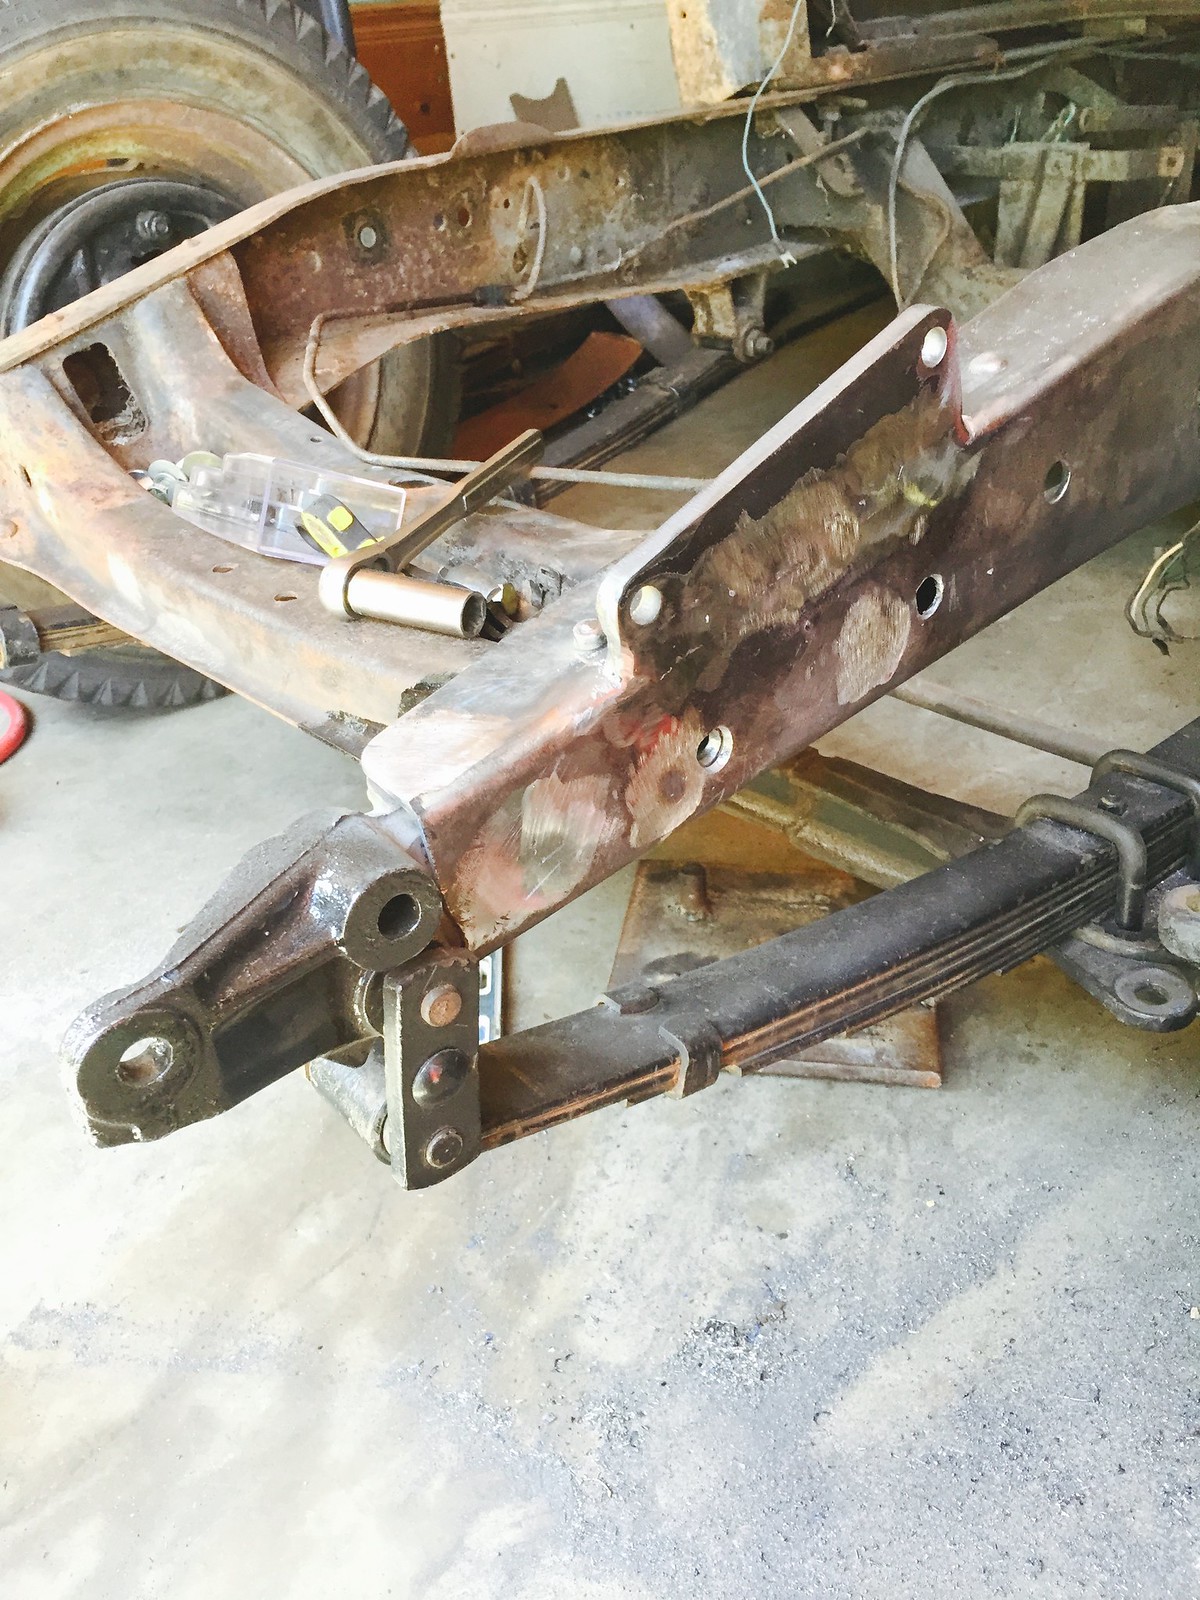 One note on the power steering kit is that it's built for 47+ trucks, and I think for 46- trucks it could use a higher mounting bracket. I got it as high as I could to try to have the steering link level and went with it. Here's the truck down to bare frame 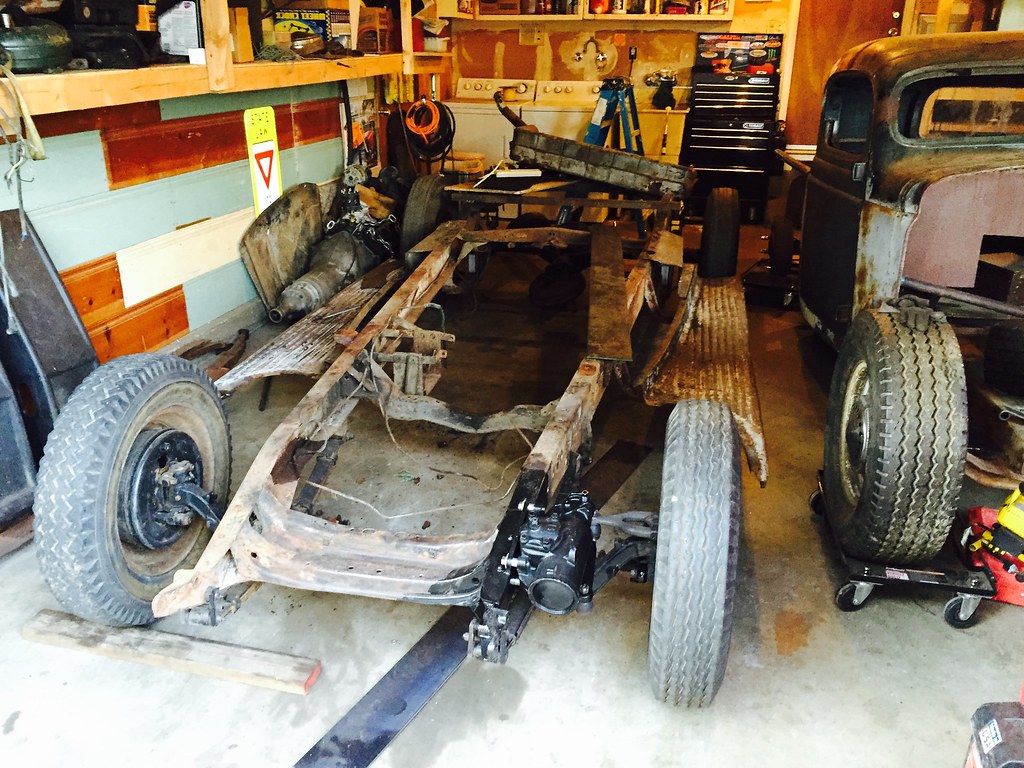 
Last edited by gokellurself; 08-20-2017 at 02:08 PM. |
|
|
|
|
04-11-2016, 04:15 PM
|
#3 |
|
Registered User
Join Date: Nov 2014
Location: Oakland, CA
Posts: 114
|
Re: Kell's Two Cents - 1946 build
You read a lot about how weak these old frames are. With the original inline 6 obviously needing work, I figured I might as well put the money into a V8. That being said, I knew I needed to beef this frame up. I couldn't believe how expensive the boxing plate kits were! I took some measurements and got some plate from my local steel shop. The whole mid section of the truck was something like 5 1/2 inches and I got the plate something like 6 feet long. Cost me $100 but took no modification to get the whole mid section boxed up.
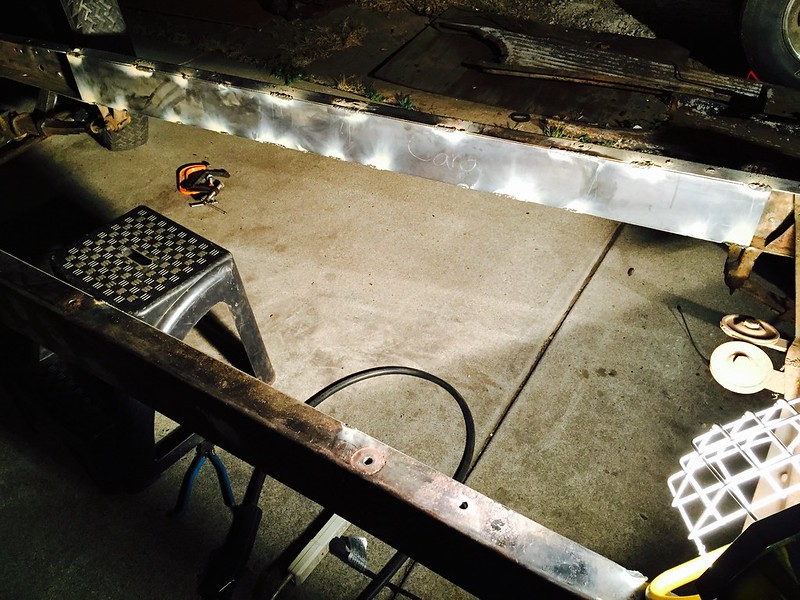 I had closed up all unnecessary holes and welded nuts to the inside where I was needing running board/body mounts. 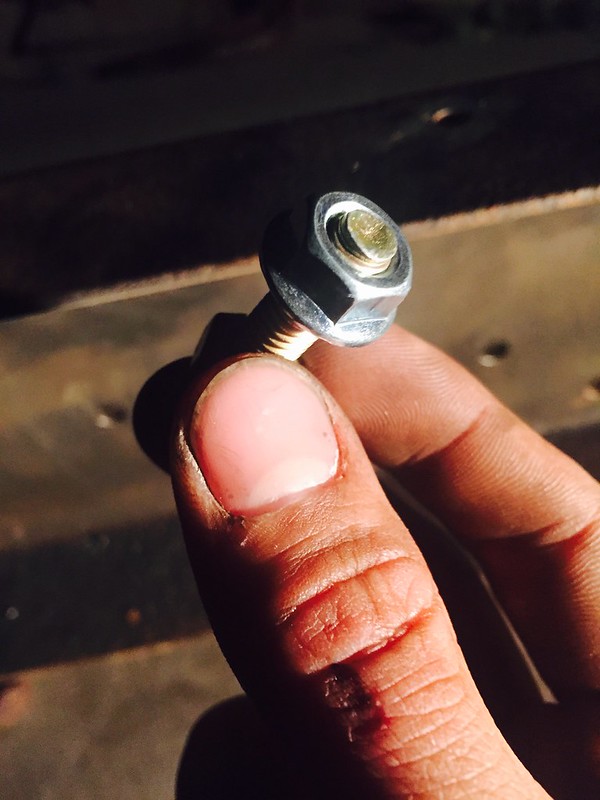 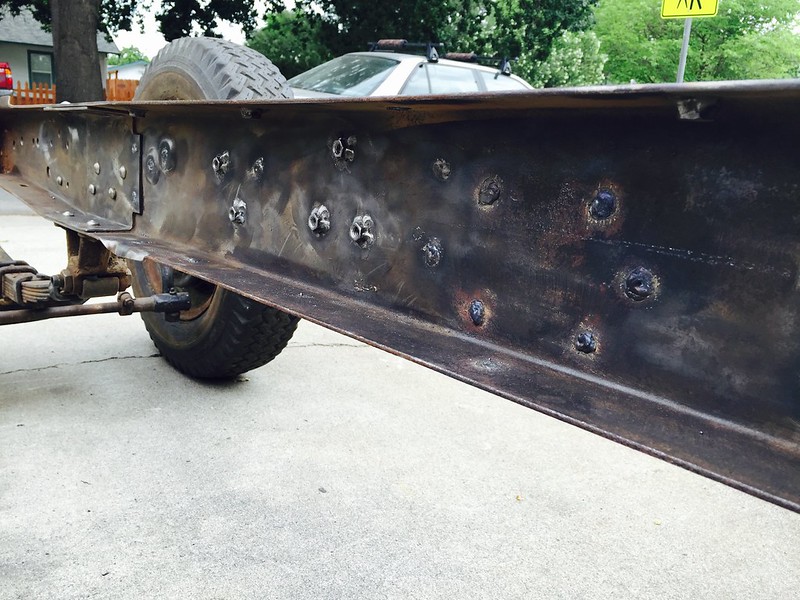 Welded the full length and ground it all smooth 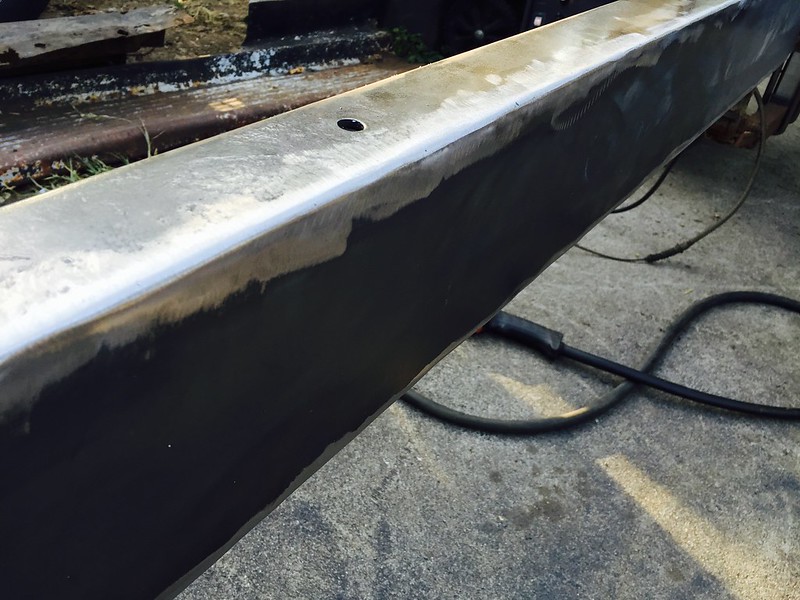 I ordered the 47-55 rear C-notch kit that came with boxing plates and was affordable 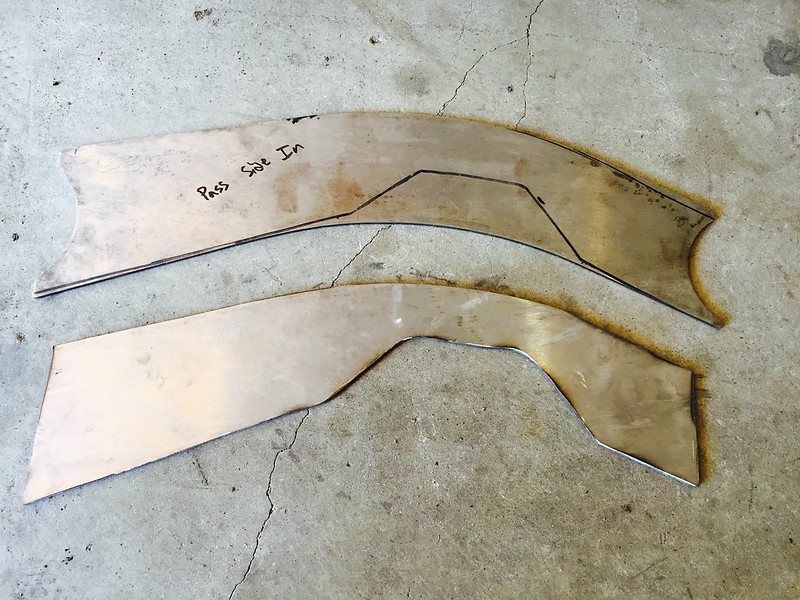 Made a template to fill in the missing section from the frame's mid section to the plate that came with the notch 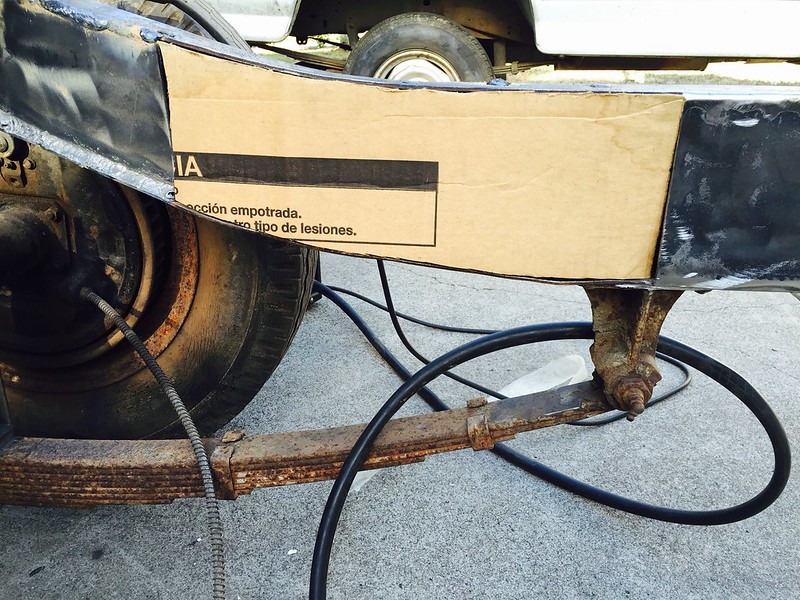 Filled it all in 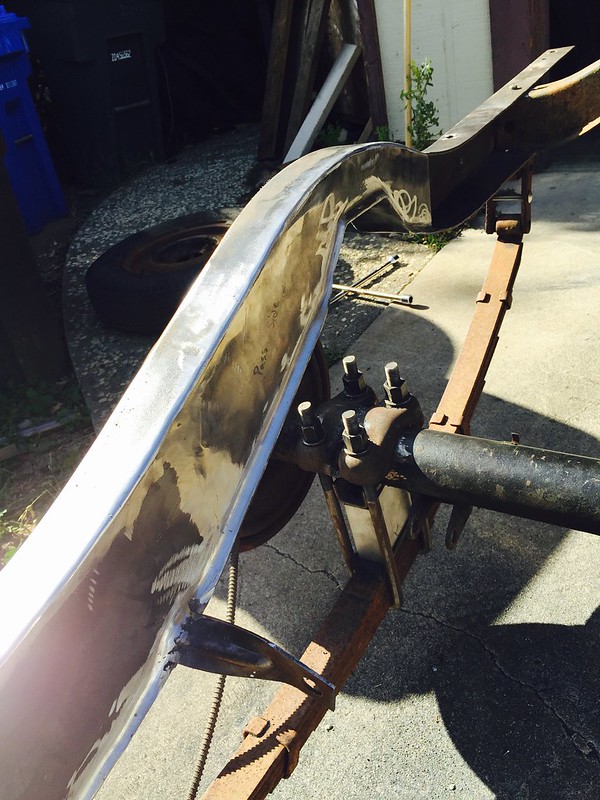 That being said I thought this notch kit was kind of hokey and I probably could have done without it. But either way, boxing was done Last edited by gokellurself; 07-21-2017 at 02:51 AM. |
|
|
|
|
04-11-2016, 04:27 PM
|
#4 |
|
Registered User
Join Date: Nov 2014
Location: Oakland, CA
Posts: 114
|
Re: Kell's Two Cents - 1946 build
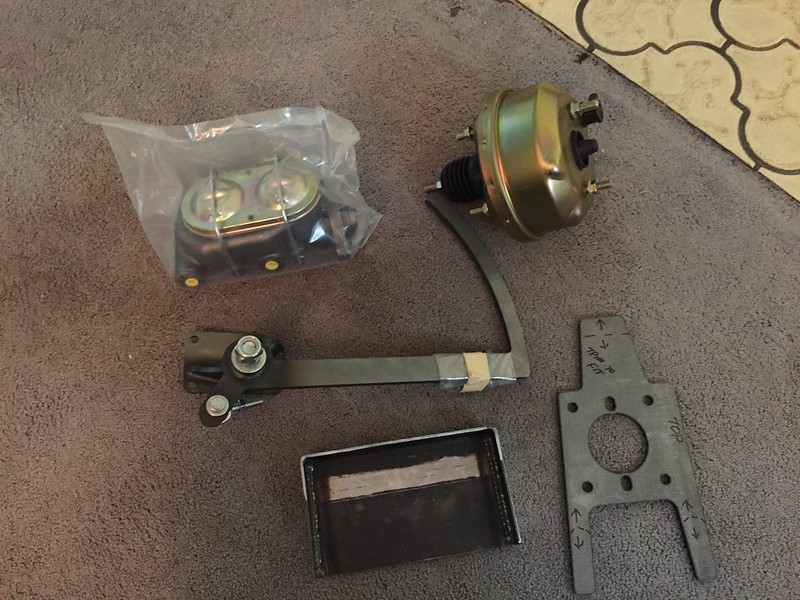
Now this is the point in time when the whole "low budget build" idea gets thrown out the window. I wanted to do new crossmembers, and lacking experience and hot rod building "vision" I came across the Progressive Automotive X-members. These things look bad ass and I really liked that it incorporates the transmission mount, brake pedal and booster. It came and I was very impressed with how simple they made it. The two sides come built and you just weld the connecting pieces together
 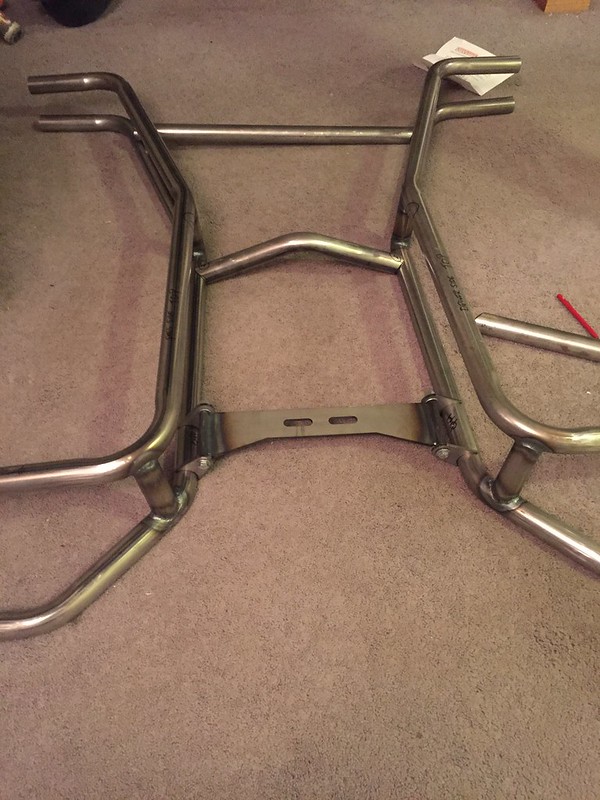 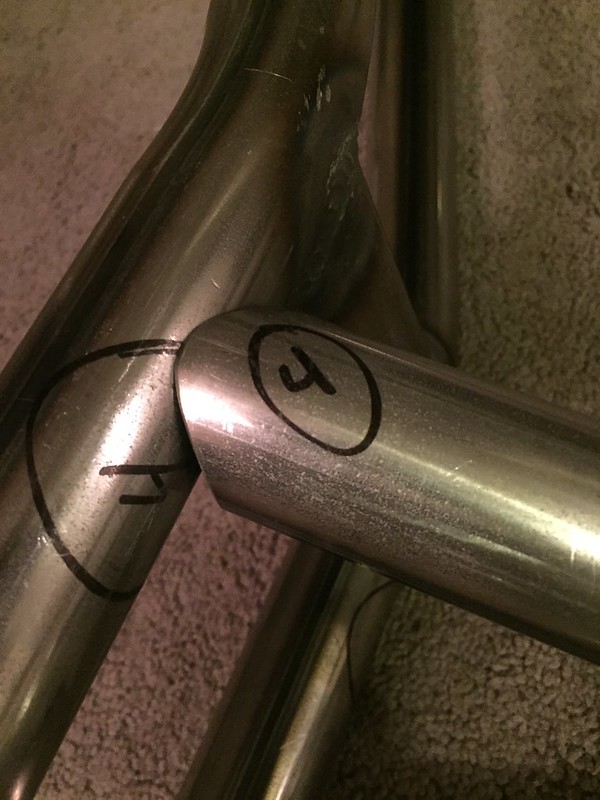 It should be noted that they actually build these for the 41-46 trucks, so you are not adapting 47+ parts to your 46 as is typical with most all parts available. I followed the detailed instructions, did the measurements, and cut only the bottom part first so I could verify my cuts on the top part 2nd. 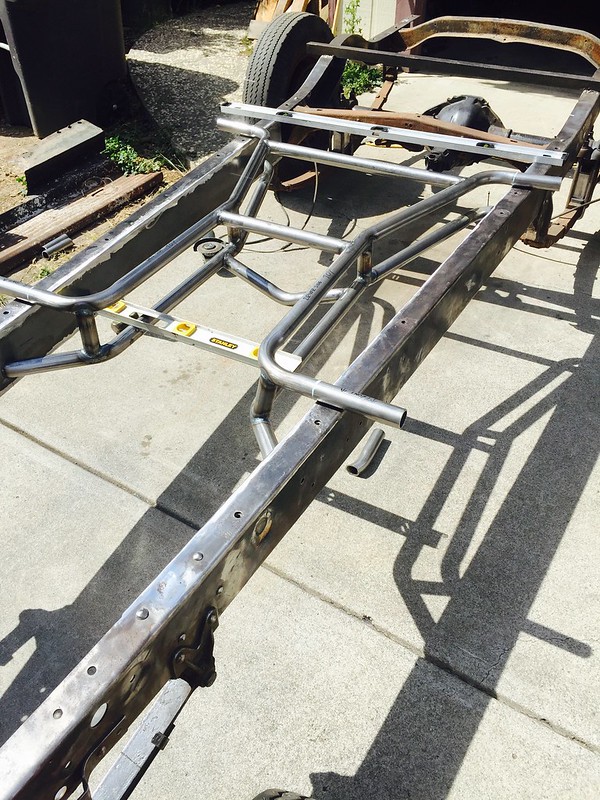 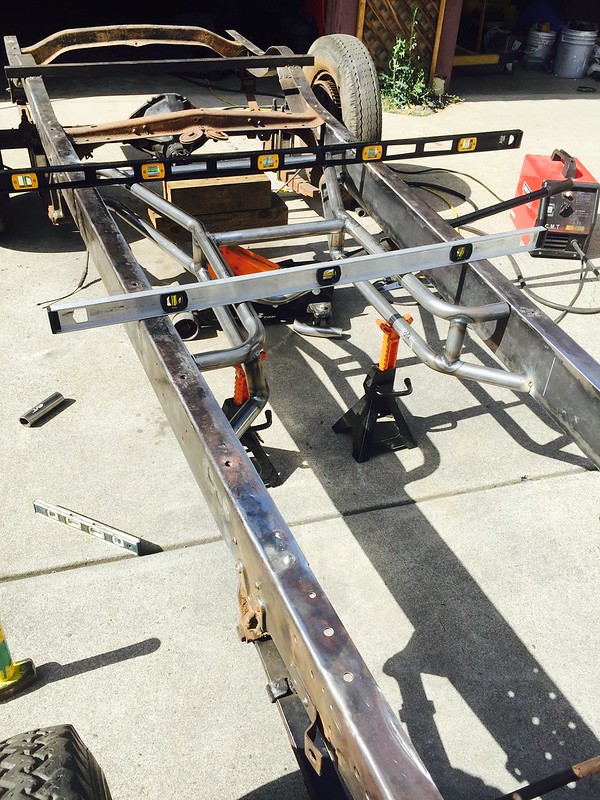 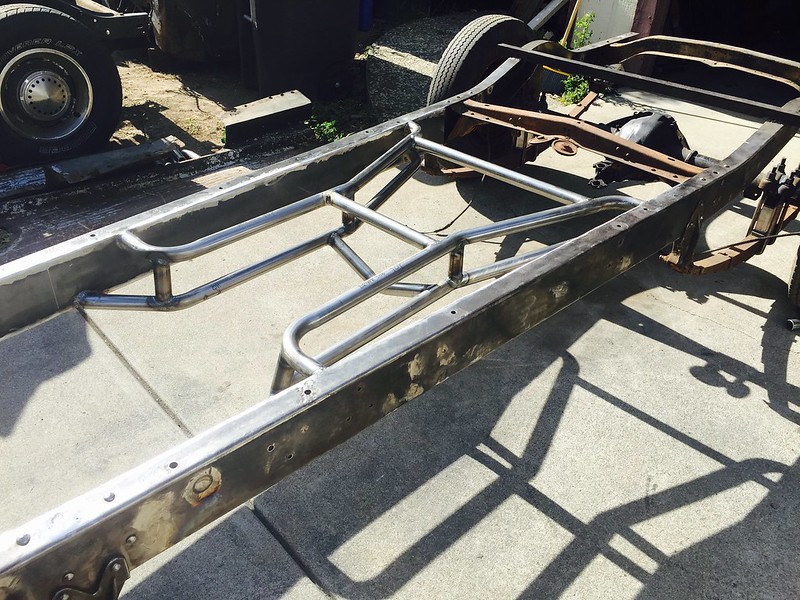 Nothing to it. Changed out the crossmember that held the e-brake lines with tube steel  [/url] [/url]
Last edited by gokellurself; 07-21-2017 at 02:57 AM. |
|
|
|
|
04-11-2016, 04:33 PM
|
#5 |
|
Registered User
Join Date: Nov 2014
Location: Oakland, CA
Posts: 114
|
Re: Kell's Two Cents - 1946 build
I put the cab back on to mock up the engine/trans mounts and this is the view from the back side.
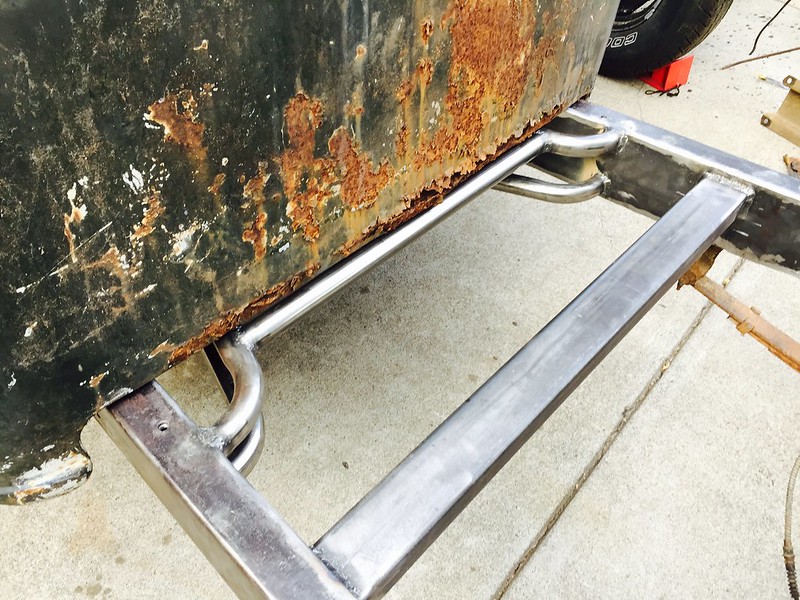 Got the V8 where I wanted it, the trans crossmember and brake booster and pedal. POR 15 the whole thing and top coats of high temp BBQ paint  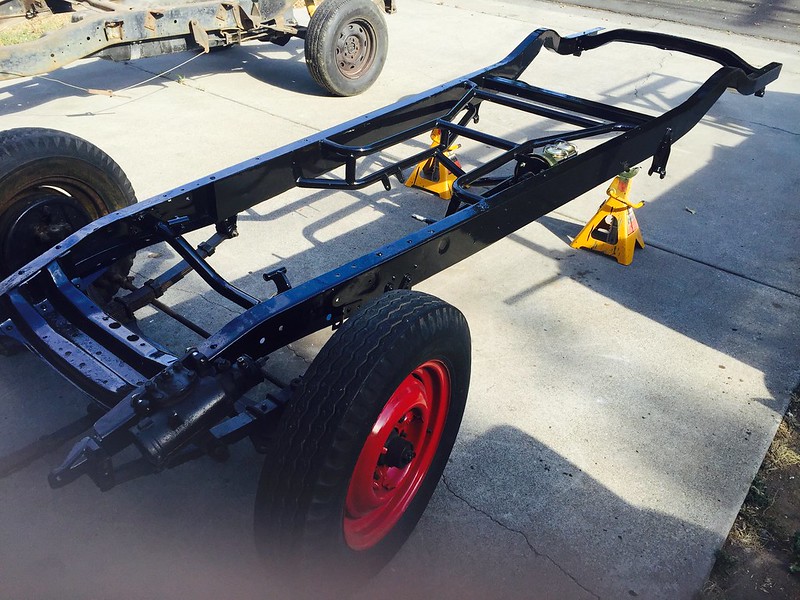 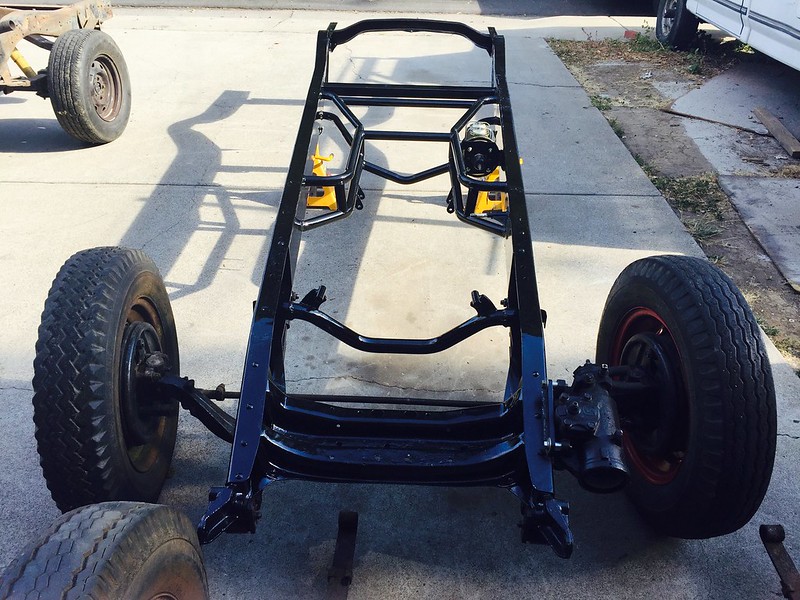
Last edited by gokellurself; 07-21-2017 at 03:01 AM. |
|
|
|
|
04-11-2016, 04:59 PM
|
#6 |
|
Registered User
Join Date: Nov 2014
Location: Oakland, CA
Posts: 114
|
Re: Kell's Two Cents - 1946 build
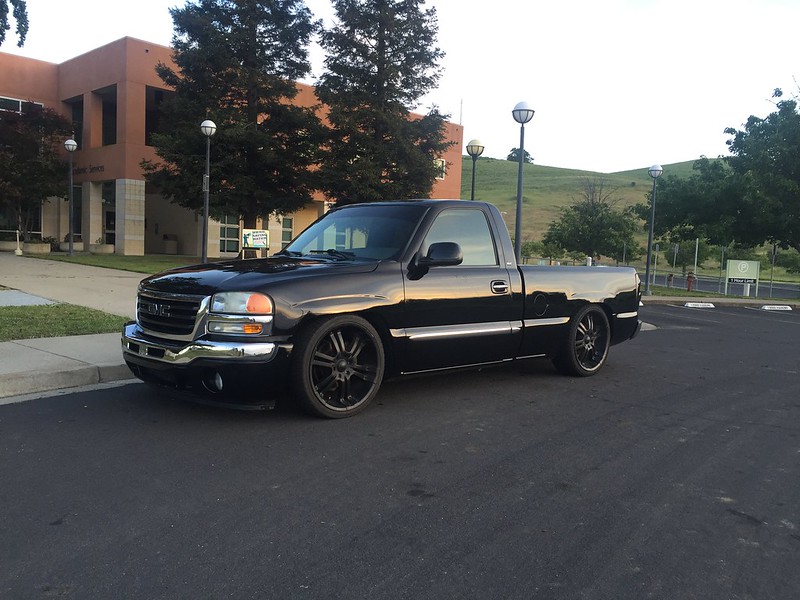
I'm the original owner of my 07' GMC and had wanted for years to lower it
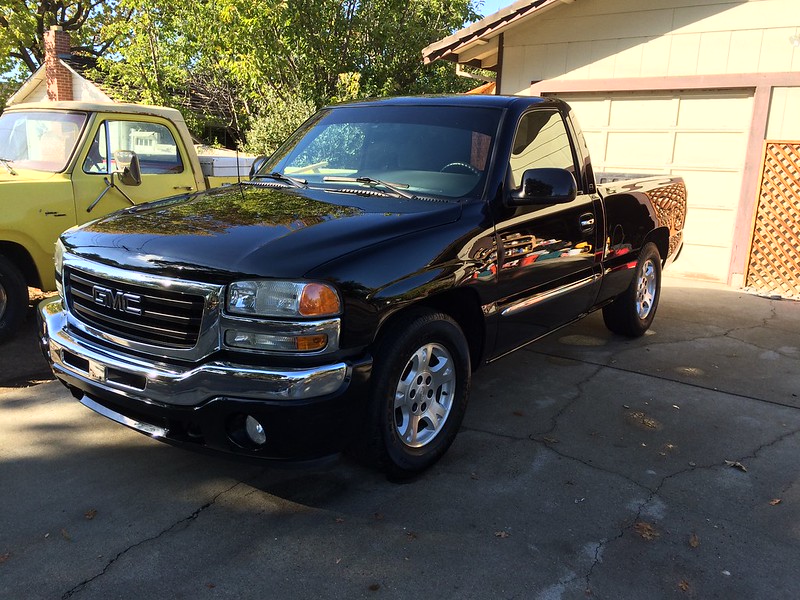 So I finally decided, before I get back to the '46, let's just get this thing how I wanted it. It ends up with a 4-7 drop, spring/spindles in the front, flip kit and shackle in the rear and I am extremely happy with how it turned out 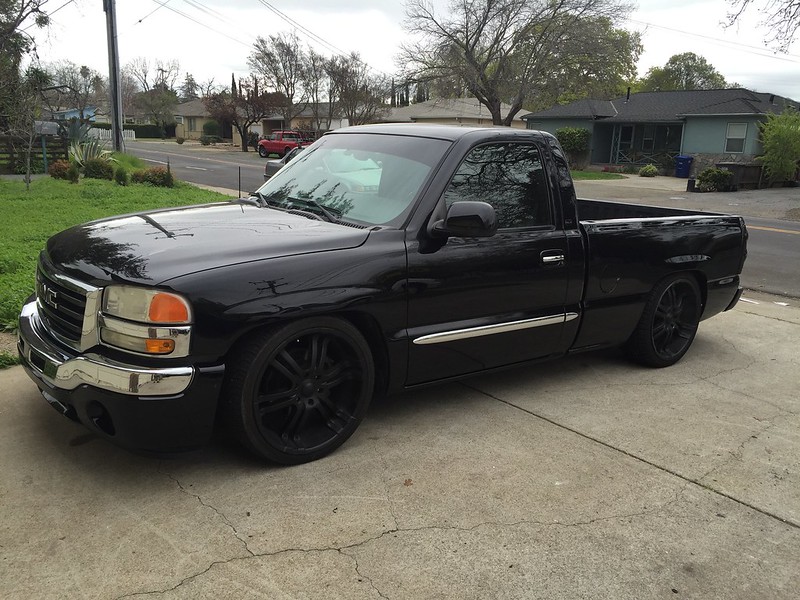  [/url]Untitled by [/url]Untitled by Now back to the 46.. Last edited by gokellurself; 07-21-2017 at 03:12 AM. |
|
|
|
|
04-24-2016, 11:19 AM
|
#7 |
|
Registered User
Join Date: Oct 2014
Location: Location:
Posts: 8,157
|
Re: Kell's Two Cents - 1946 build
.
. That '46 has some serious patina. Progress looks good. Also digging your 'after' stance on the '07. . . |
|
|
|
|
04-28-2016, 07:07 PM
|
#8 |
|
Registered User
Join Date: Nov 2014
Location: Oakland, CA
Posts: 114
|
Re: Kell's Two Cents - 1946 build
Thanks man, yeah I found a thread somewhere online of guys posting pics and all the specs for the drops they did. No conversation was allowed, just pics and specs, so it was really cool. It took a lot of the guess work out since I could find the trucks sitting exactly how I wanted and emulate their drops. Only difference was most everybody bolted in c-notches and seemed to have clearance issues. I welded in a deep C and don't even run bump stops in the back, I never hit.
|
|
|
|
|
04-28-2016, 07:28 PM
|
#9 |
|
Registered User
Join Date: Nov 2014
Location: Oakland, CA
Posts: 114
|
Re: Kell's Two Cents - 1946 build
Alright, so I'm back with some minor updates. I feel like I'm doing more running around and less actual building of the truck.. But I have began to tackle the cab a little bit.
Months ago I tried to begin disassembly on it. I ordered clutch head bits, and literally got nowhere with it. Not a single screw would come off the interior, the clutch heads just seemed to melt away. So my cab for the most part remained untouched while I had been focusing on the frame and everything else. Finally I could ignore it no longer and had to get serious on it. I went down and bought a bunch of 1/4-20 bolts and started welding them to all the interior screws. Finally they came off relatively easily, and I could grind and reuse the bolts a 2nd time. In many cases I found it easier to hold the bolt to one side of the screw head to give myself a larger welding area on the other side, as holding it dead center of the screw head doesn't give you much room on any side of it. 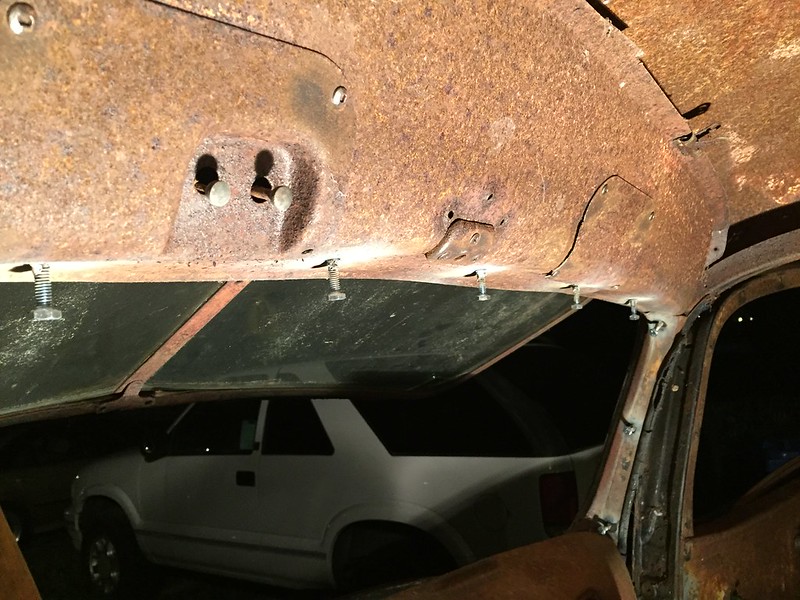 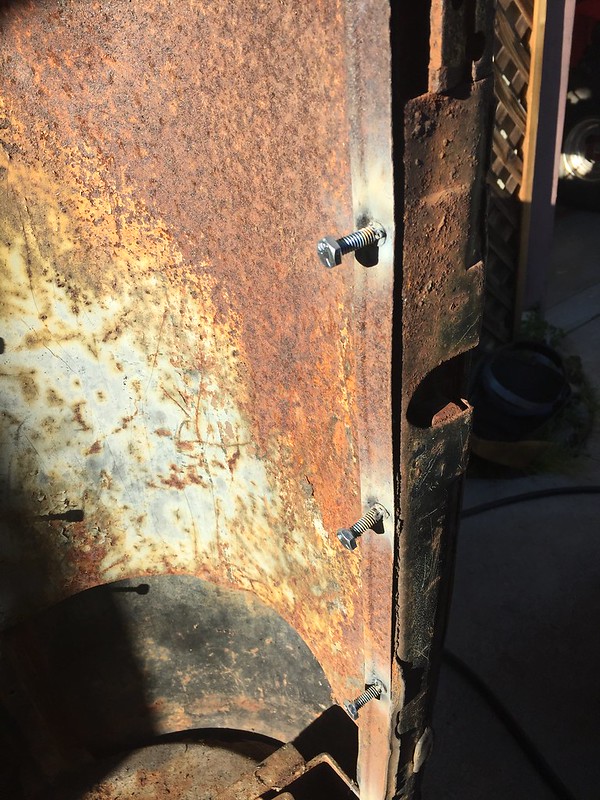 So that's how it went getting the cab pieces all taken off. I pulled the windshield and the dash, and I began stripping the interior of all the rust. Let me just say this is painstaking work, absolutely not my favorite part of this build lol If it weren't for preserving the patina, one should seriously just cash out and have their cab sandblasted. Anyways, couple photos 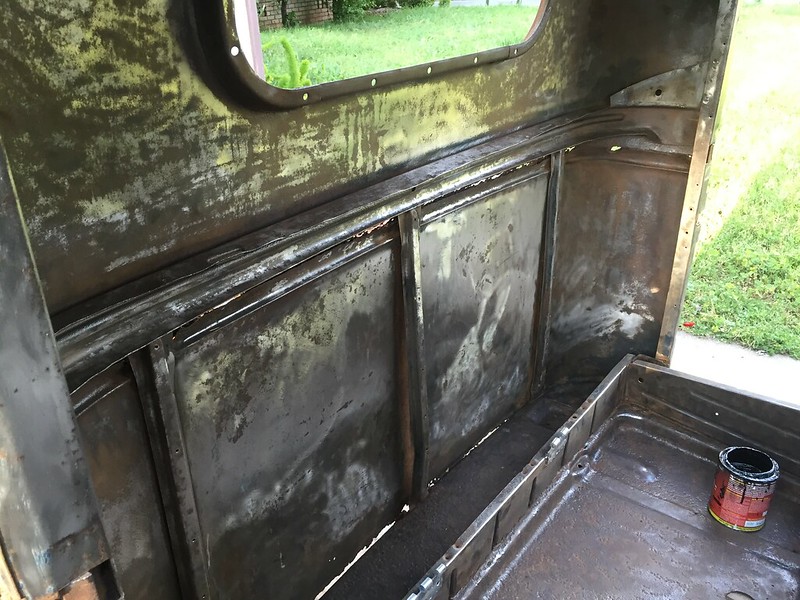 All this is just one part of one day  POR-15 all around 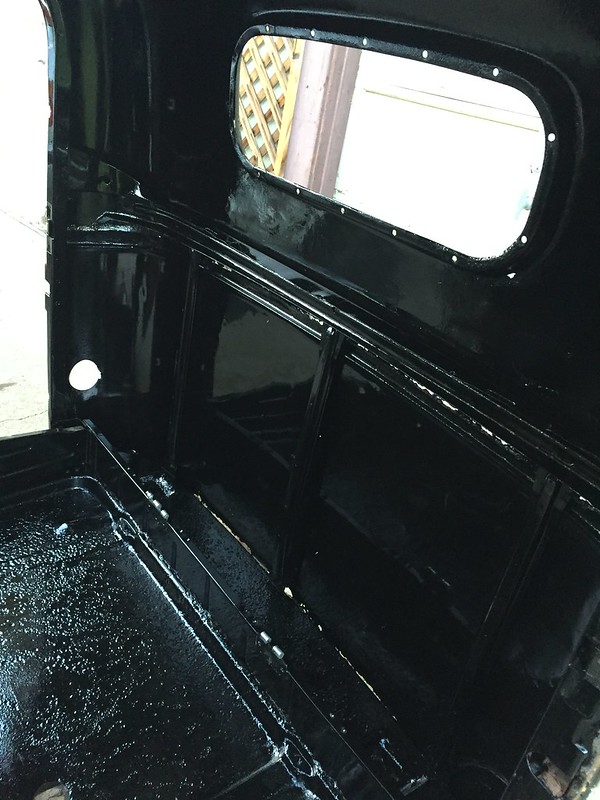  Next I flipped it up and got the bottom 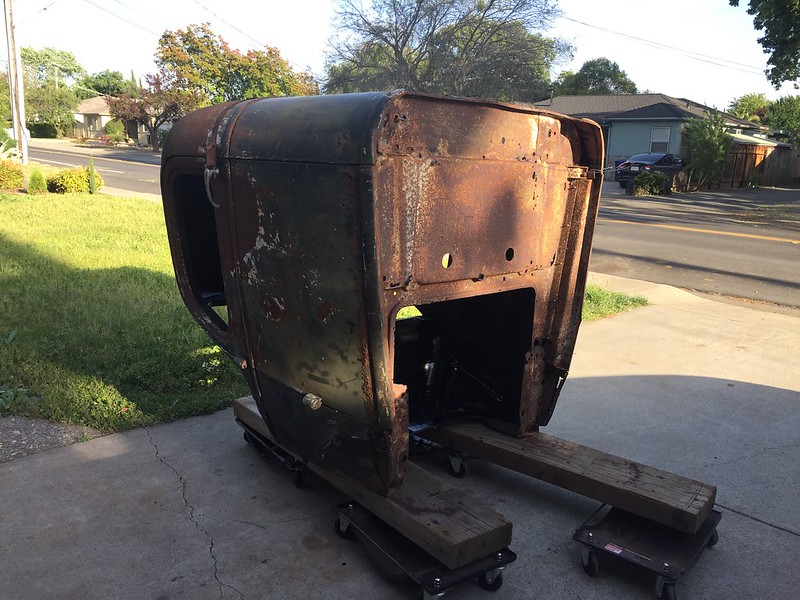 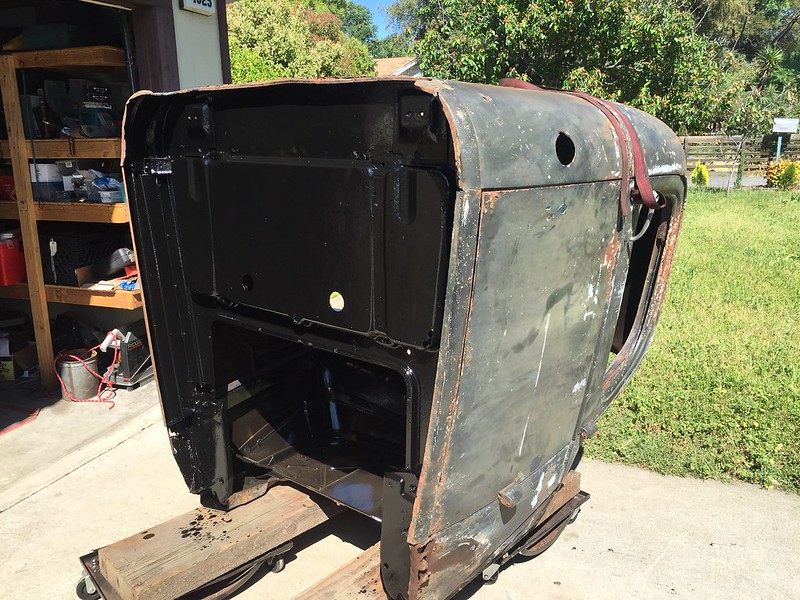 I really like the original moss on the roof 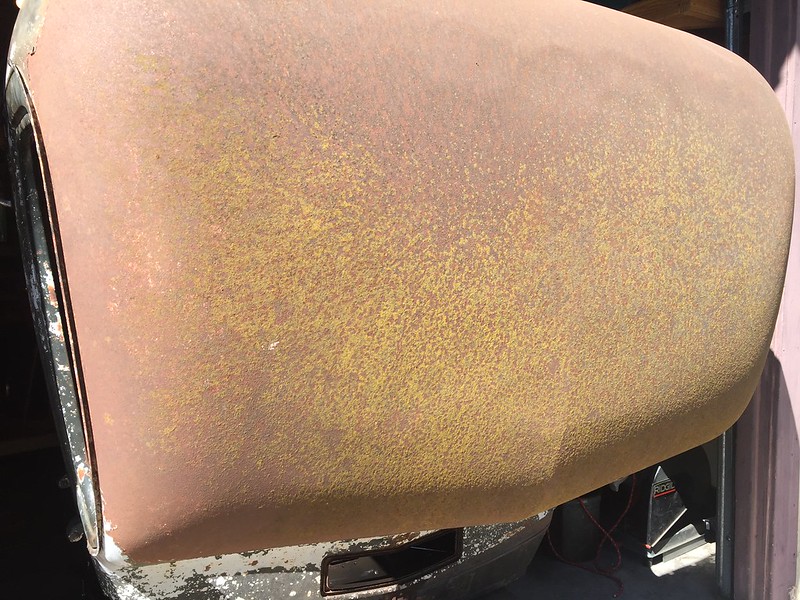 The cab is obviously in pretty bad shape. Pitting in the floor, rust through at the belt line, bottom back of the cab, cab corners, etc. I would really like the redo the floor, bottom back, and cab corners as all these area get covered up and would not show. I'll have to revisit it though, it's just not in the cards this summer Thanks guys, I'll catch ya later Last edited by gokellurself; 08-20-2017 at 02:11 PM. |
|
|
|
|
08-17-2016, 12:04 AM
|
#10 | |
|
Registered User
Join Date: Dec 2002
Location: Cactus Patch So. Az
Posts: 4,749
|
Re: Kell's Two Cents - 1946 build
Quote:
I just finished welding in a C Notch on the rear frame of our 03 GMC what a difference a few inches makes in the frame. no more THUMP !
__________________
53 TuTone Extended Cab 350 4-Spd 3:08 (SOLD) 53 Chevy Moldy pearl green ZZ-4 4L60E 9" 3:25 55 GMC 1st Black Mll (ZZ4) ZZ6 TKO 600 5 sp 3:73 62 Solidaxle Corvette Roman Red (327 340hp 4spd 3:36) C4 & C5 suspension tube chassis LS 3 4L70E 65 Corvette Coupe 327 350hp 4spd 4:11 78 Black Silverado SWB (350/350) 5.3 & 4L60E 3:42 2000 S-Type 3.0 (wife cruiser) 2003 GMC SCSB 5.3 4L60E 3:42 |
|
|
|
|
|
08-17-2016, 12:33 AM
|
#11 | |
|
Registered User
Join Date: Nov 2014
Location: Oakland, CA
Posts: 114
|
Re: Kell's Two Cents - 1946 build
Quote:
Last edited by gokellurself; 08-19-2017 at 10:04 AM. |
|
|
|
|
|
04-28-2016, 07:47 PM
|
#12 |
|
Registered User
 Join Date: Sep 2015
Location: Sioux Falls, South Dakota
Posts: 702
|
Re: Kell's Two Cents - 1946 build
Nice work so far Frames looking killer it will be a sweet truck for sure just like your 07'
I'm sticking around to the end of this one! 
__________________
"Orange Crush" |
|
|
|
|
04-29-2016, 01:15 AM
|
#13 | |
|
Registered User
Join Date: Nov 2014
Location: Oakland, CA
Posts: 114
|
Re: Kell's Two Cents - 1946 build
Quote:
 another young guy such as myself another young guy such as myself
|
|
|
|
|
|
05-03-2016, 10:25 AM
|
#14 | |
|
Registered User
Join Date: Sep 2015
Location: Sioux Falls, South Dakota
Posts: 702
|
Re: Kell's Two Cents - 1946 build
Quote:
 Us younger guys need to stick together Any updates you must have done something over the weekend 
__________________
"Orange Crush" |
|
|
|
|
|
05-04-2016, 02:18 AM
|
#15 | |
|
Registered User
Join Date: Nov 2014
Location: Oakland, CA
Posts: 114
|
Re: Kell's Two Cents - 1946 build
Quote:
Conditions were excellent however, had to hit the forest  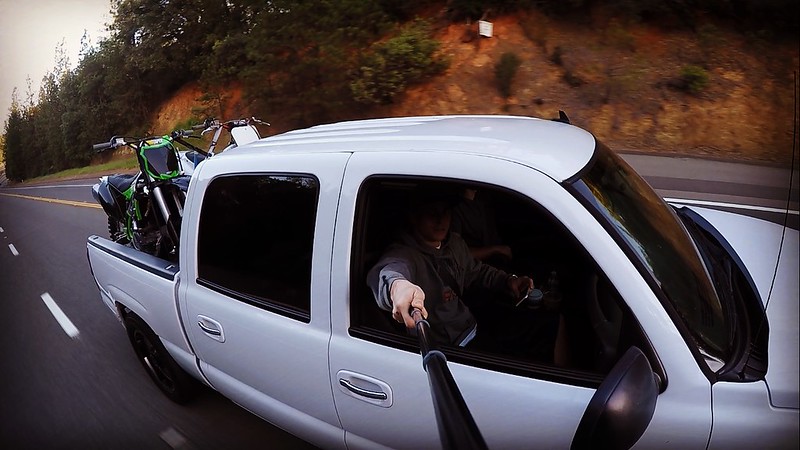
Last edited by gokellurself; 07-31-2017 at 12:07 AM. |
|
|
|
|
|
05-04-2016, 02:42 AM
|
#16 |
|
Registered User
Join Date: Nov 2014
Location: Oakland, CA
Posts: 114
|
Re: Kell's Two Cents - 1946 build
I guess I could hit a little update though, being as we finally made it to the 2nd page lol
I told you guys I had been doing a bunch of running around. I thought I had two full sets of these old wheels and was planning on using the best of the 8 and keeping a spare. By the time I had the tires pulled off I ended up with 3 misc. wheels however... 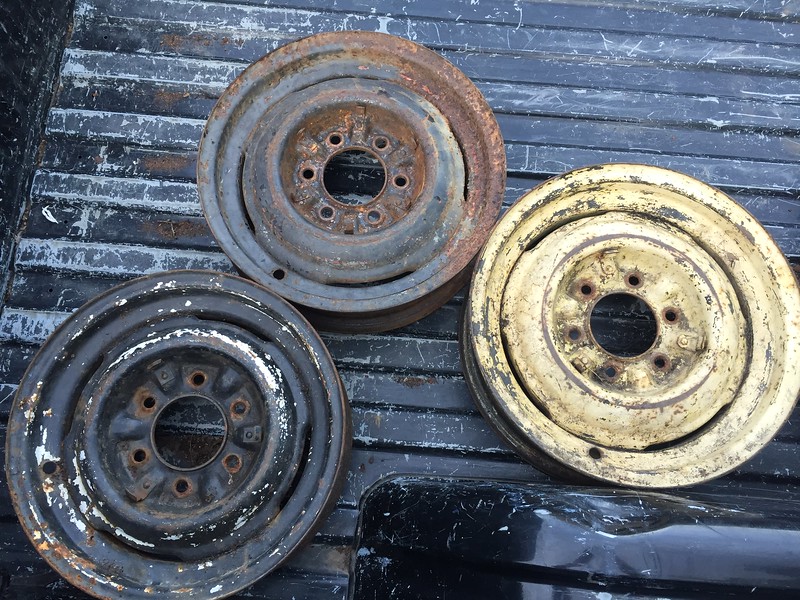 Soo oook then About a year ago I found this guy about an hour out from me who's junk yard looks like it hasn't changed in 30 years. The place is incredible, so much cool stuff I could just look around out there for hours  He's actually a huge Dodge guy, has these Dodge trucks everywhere out there.  This is the truck I got my grille and lower valance piece from probably 9 months ago. Pretty picked through but still stuff there 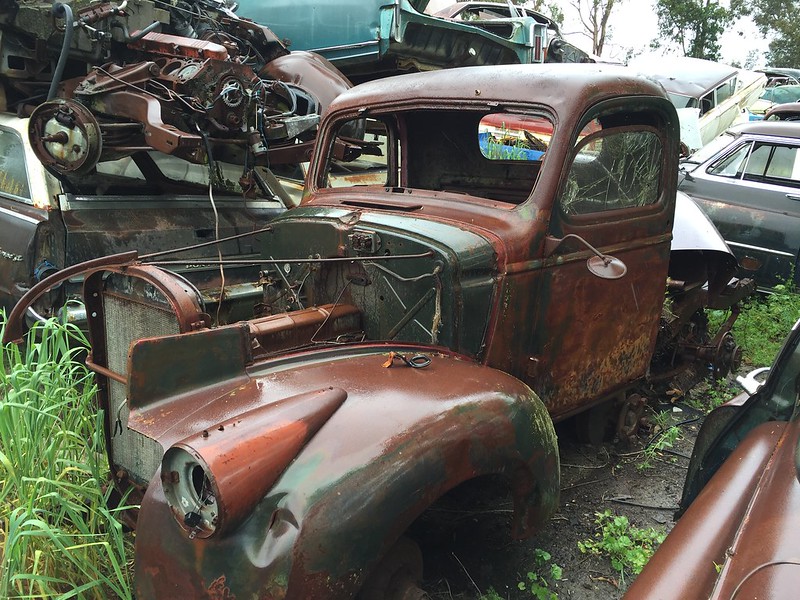 I cruised out there to see what I could find, little odds and ends but I came up kinda dry. Of all things I need some review mirror arms and wouldn't mind finding old rusted ones over some new ones. Not a single one here though He just got this thing in though, excellent condition and untouched minus the back half. I asked him how much for the grille Says he couldn't even touch the truck yet as he was still waiting on paperwork to clear. Figured I better let it be the next guy who needs the parts 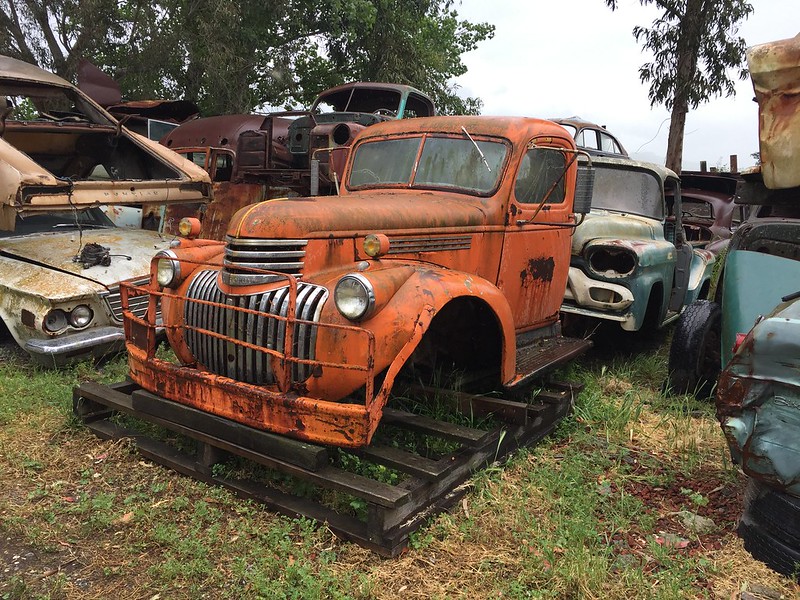 Turns out he was interested in my old wheels and we struck a deal for an old windshield frame. My metal guy thinks he can make one solid frame from two busted frames so I figured hey, might as well grab it. So now I have two busted frames and still think it might just be better to cash out for the repop one. Anybody think theres a market for rusty windshield frames? 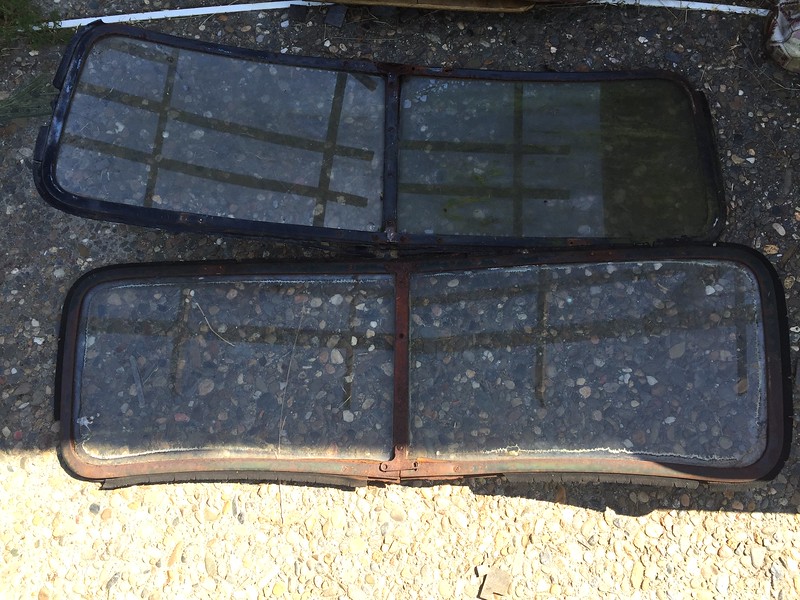 Anyways, got some stuff from the sandblasters and looking to get some color soon. Dash needs some metalwork and we'll be on our way  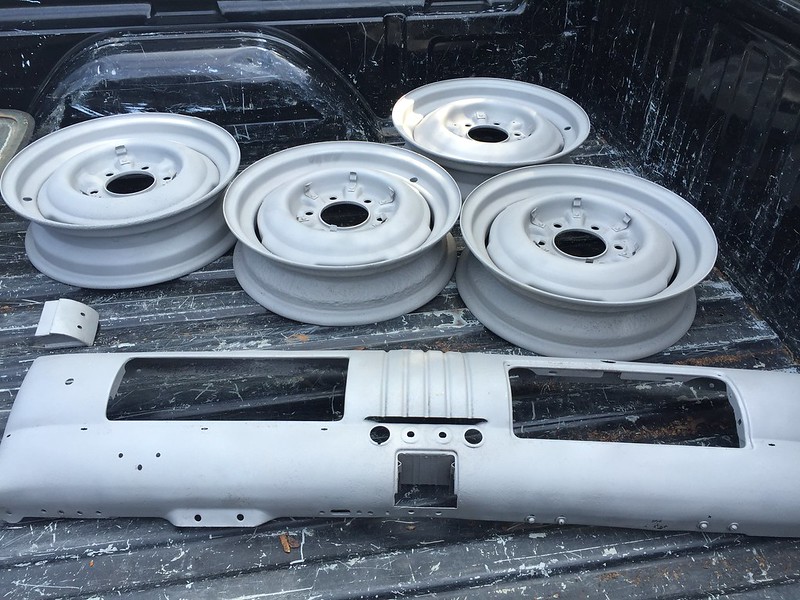 Keep wrenching out there though. Catch you guys later Last edited by gokellurself; 08-08-2017 at 02:59 PM. |
|
|
|
|
05-14-2016, 05:08 PM
|
#17 |
|
Registered User
Join Date: Jun 2010
Location: Encinitas, CA
Posts: 507
|
Re: Kell's Two Cents - 1946 build
Great Project. Excellent pics!!.
__________________
1954 GMC on 93 Silverado chassis http://67-72chevytrucks.com/vboard/s...d.php?t=408344 1942 Chevy 1/2 ton Pickup http://67-72chevytrucks.com/vboard/s...d.php?t=429494 R.I.P. TOM SEFFRON 68 FOUR DOOR http://67-72chevytrucks.com/vboard/s...d.php?t=495438 1942 Chevy that ate my brain 70 Chassis https://67-72chevytrucks.com/vboard/...d.php?t=835250 |
|
|
|
|
05-14-2016, 11:59 PM
|
#18 |
|
Registered User
Join Date: Feb 2009
Location: Southern Oregon
Posts: 1,352
|
Re: Kell's Two Cents - 1946 build
Nice truck and great work! Thats a whole lot of rubber fuel line though. Was there a reason for that? I dont mean to come off as critical. I have had bad experiences with rubber line and new ethanol blended fuels. Just my 2 cents. luv the truck and welcome to the site!
__________________
1967 C10 Suburban 454/TH400/3.07's An Average Joe and His 'Burb: http://67-72chevytrucks.com/vboard/s...d.php?t=775843 |
|
|
|
|
05-09-2016, 09:57 AM
|
#19 |
|
Registered User
Join Date: Nov 2015
Location: portage wi
Posts: 502
|
Re: Kell's Two Cents - 1946 build
I think the exhaust noise is going to drive you right out of the cab. I would think hard about extending it to the rear of the truck.
|
|
|
|
|
05-17-2016, 12:51 AM
|
#20 |
|
SAVING ONE TRUCK AT A TIME
Join Date: Feb 2010
Location: sherwood oregon
Posts: 1,141
|
Re: Kell's Two Cents - 1946 build
Thanks for the comment. Nice build you have going on. I will join in for the build.
__________________
53-suburban (99% done) 40-pick up (99.9% done) 12-cc lb dually D-max (dd) 61-crew cab D-max "PAY LESS FOR WHAT YOU NEED PAY MORE FOR WHAT YOU WANT" 53 BURBAN BARN FIND:http://67-72chevytrucks.com/vboard/s...d.php?t=404091 1940 PROJECT MOON SHINE:http://67-72chevytrucks.com/vboard/s...d.php?t=551088 1961 CREW MAX: http://67-72chevytrucks.com/vboard/s....php?p=6957999 |
|
|
|
|
05-17-2016, 10:35 PM
|
#21 | |||||
|
Registered User
Join Date: Nov 2014
Location: Oakland, CA
Posts: 114
|
Re: Kell's Two Cents - 1946 build
Hey guys, I appreciate the comments and everybody stopping in to take a look. In a way I thought of this build thread to be here for the future internet to see it, so I appreciate the guys catching it as its going down all the more.
Quote:
Quote:
Quote:
Quote:
Quote:
|
|||||
|
|
|
|
05-28-2016, 05:34 PM
|
#22 |
|
Registered User
Join Date: Jun 2010
Location: Encinitas, CA
Posts: 507
|
Re: Kell's Two Cents - 1946 build
Where is the brake pedal going to mount?
__________________
1954 GMC on 93 Silverado chassis http://67-72chevytrucks.com/vboard/s...d.php?t=408344 1942 Chevy 1/2 ton Pickup http://67-72chevytrucks.com/vboard/s...d.php?t=429494 R.I.P. TOM SEFFRON 68 FOUR DOOR http://67-72chevytrucks.com/vboard/s...d.php?t=495438 1942 Chevy that ate my brain 70 Chassis https://67-72chevytrucks.com/vboard/...d.php?t=835250 |
|
|
|
|
06-26-2016, 10:55 PM
|
#23 |
|
Registered User
Join Date: Nov 2014
Location: Oakland, CA
Posts: 114
|
Re: Kell's Two Cents - 1946 build
Hey Docrock, I apologize for the late response. The brake pedal came with the X-member set up and welds right to the frame. I hope this helps
I have a quick update about my engine mount placement and the quick-fix method that was attempted in modifying the engine mount. I was able to move it 5/8" with this solution, but I believe a full 1" to 1 1/4" would have done the full trick. It can be seen in the 2nd picture that the brake pedal arm is in fact in collision with the exhaust header bolt, which I don't think would have happened if the engine were better positioned in the first place. Similarly, I probably had room to move the brake pedal back a small amount, however this issue was unforeseen at the time. I can take a little section out of the pedal arm and get by just fine I was able to get the cab mounted permanently, but not before STILL having to trim a little off the firewall for valve cover clearance. I do believe my quick-fix attempt reduced the amount the firewall was needed to be trimmed, yet trimming it needed none the less... Rookie woes fellas, rookie woes...  Anyways, been working nonstop and haven't gotten to a major update, though things are certainly still in progress! Lots of OT, today was my 14th day straight but I should be getting back to a 4-10 schedule and have all kind of time to start really getting this thing together. Thanks for stopping by, catch y'all later   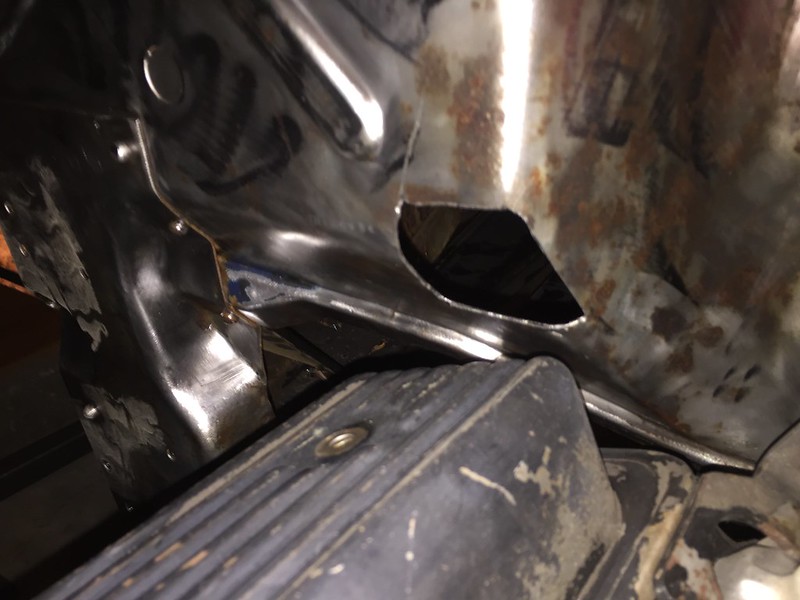 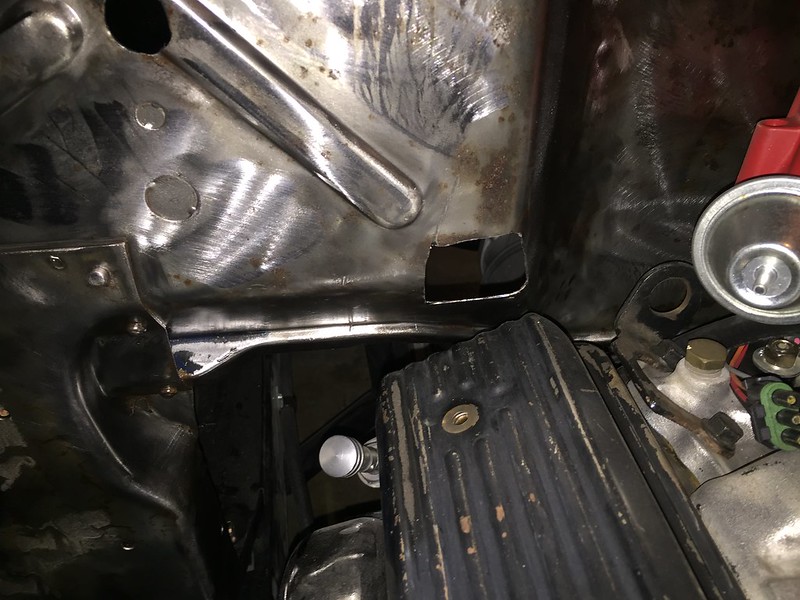
Last edited by gokellurself; 08-19-2017 at 09:36 AM. |
|
|
|
|
06-26-2016, 11:06 PM
|
#24 |
|
Registered User
Join Date: Sep 2015
Location: Sioux Falls, South Dakota
Posts: 702
|
Re: Kell's Two Cents - 1946 build
just do the wheelbarrow firewall kell that will solve all clearance problems! Until you go to put everything in the dash....
 glad to see your still on it!
__________________
"Orange Crush" |
|
|
|
|
07-29-2016, 11:02 AM
|
#25 |
|
Registered User
Join Date: Dec 2002
Location: Cactus Patch So. Az
Posts: 4,749
|
Re: Kell's Two Cents - 1946 build
Great progress, you have a vision and are following it
Take a look at your brake arm and steering column, ours is VERY close to your foot when applying the brake, now is your chance to look at it! You have covered many of the hard parts and are making great progress, keep up the good work A note for Justin at Scotts Hot Rod, take a look at the frame rails, no taper on the 46, you should update your computer program for crossmember and rear axle width.
__________________
53 TuTone Extended Cab 350 4-Spd 3:08 (SOLD) 53 Chevy Moldy pearl green ZZ-4 4L60E 9" 3:25 55 GMC 1st Black Mll (ZZ4) ZZ6 TKO 600 5 sp 3:73 62 Solidaxle Corvette Roman Red (327 340hp 4spd 3:36) C4 & C5 suspension tube chassis LS 3 4L70E 65 Corvette Coupe 327 350hp 4spd 4:11 78 Black Silverado SWB (350/350) 5.3 & 4L60E 3:42 2000 S-Type 3.0 (wife cruiser) 2003 GMC SCSB 5.3 4L60E 3:42 |
|
|
|
|
| Bookmarks |
|
|


 Hybrid Mode
