
|
|
|
 12-07-2012, 05:41 PM
|
#1 | |
|
Account Suspended
Join Date: Aug 2007
Location: USA
Posts: 1,223
|
Re: Build #2 Crusader!
Quote:

|
|

|

|
|
12-18-2012, 06:06 PM
|
#2 |
|
Registered User
Join Date: Aug 2012
Location: Northeast KS
Posts: 1,775
|
Re: Build #2 Crusader!
all i can say is wow! gives me the extra push i need to tackle the paint on my k5 this spring.
__________________
1999 GMC Suburban K2500 SLT, 454/4L80E 1991 Z/28, 6.0L/T56 1949 GMC 250, S10 Frame, 6.0L/4L80E Instagram @aceshighspeedshop |
|
|
|
|
12-19-2012, 09:21 AM
|
#3 | |
|
Account Suspended
Join Date: Aug 2007
Location: USA
Posts: 1,223
|
Re: Build #2 Crusader!
Quote:
|
|
|
|
|
|
12-19-2012, 09:41 AM
|
#4 |
|
Account Suspended
Join Date: Aug 2007
Location: USA
Posts: 1,223
|
Re: Build #2 Crusader!
Iv had this extra air filter kicking around the shop and decide i take a little break from putting wiring and and window installation so I Spent a little time making a dual snorkel air filter.
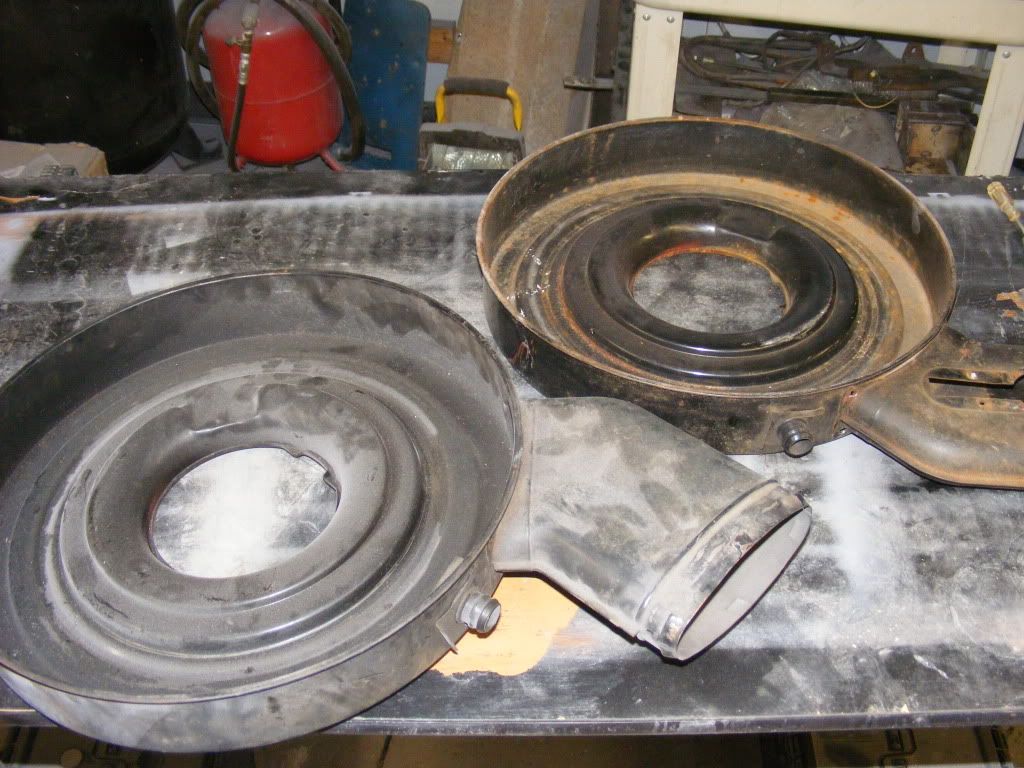 Drilled out the spot welds and removed the inlet from the doner 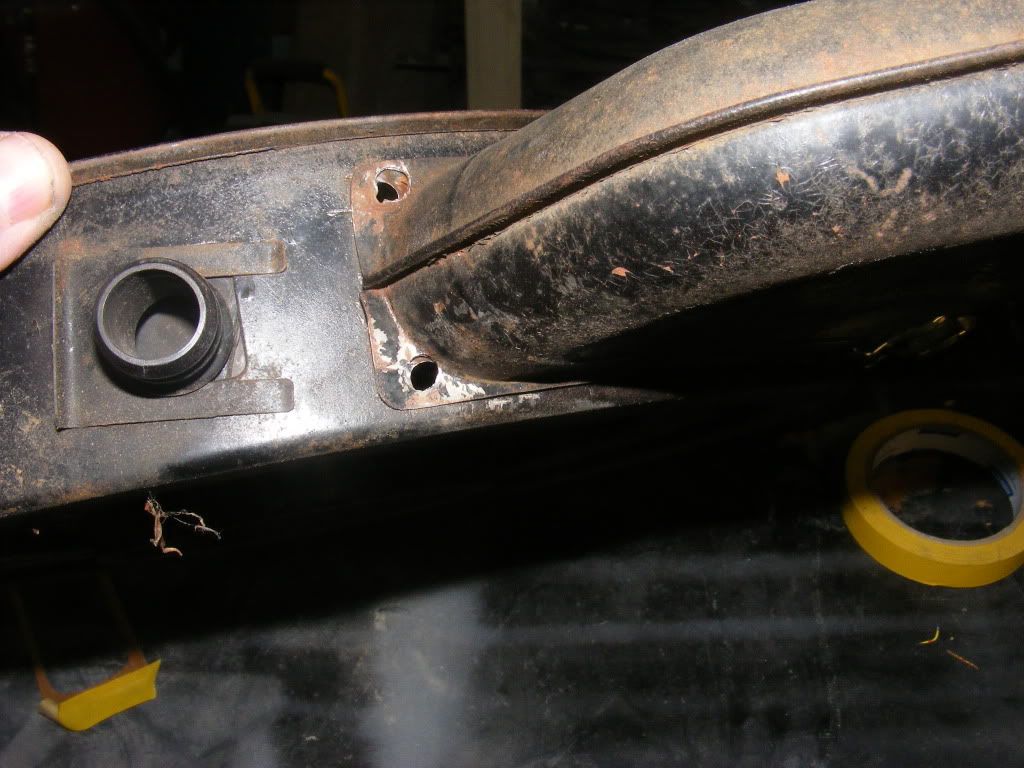 made a template and marked the housing for the air inlet  cut out the opening 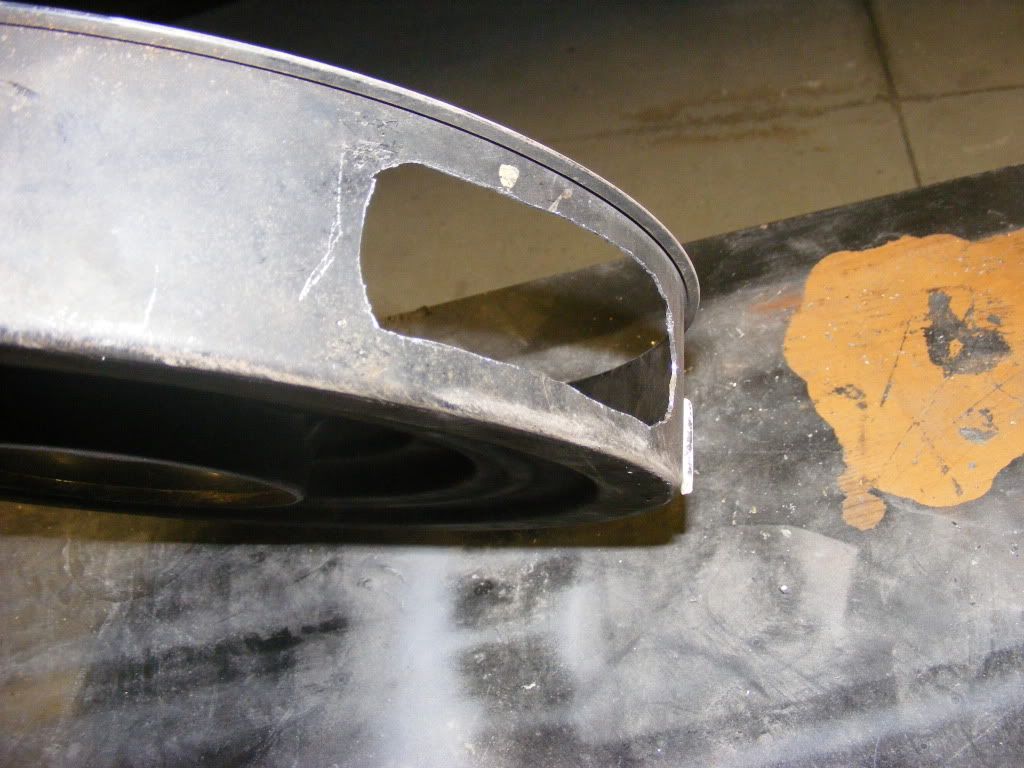 blasted both pieces to remove old paint so I could spot welded them together 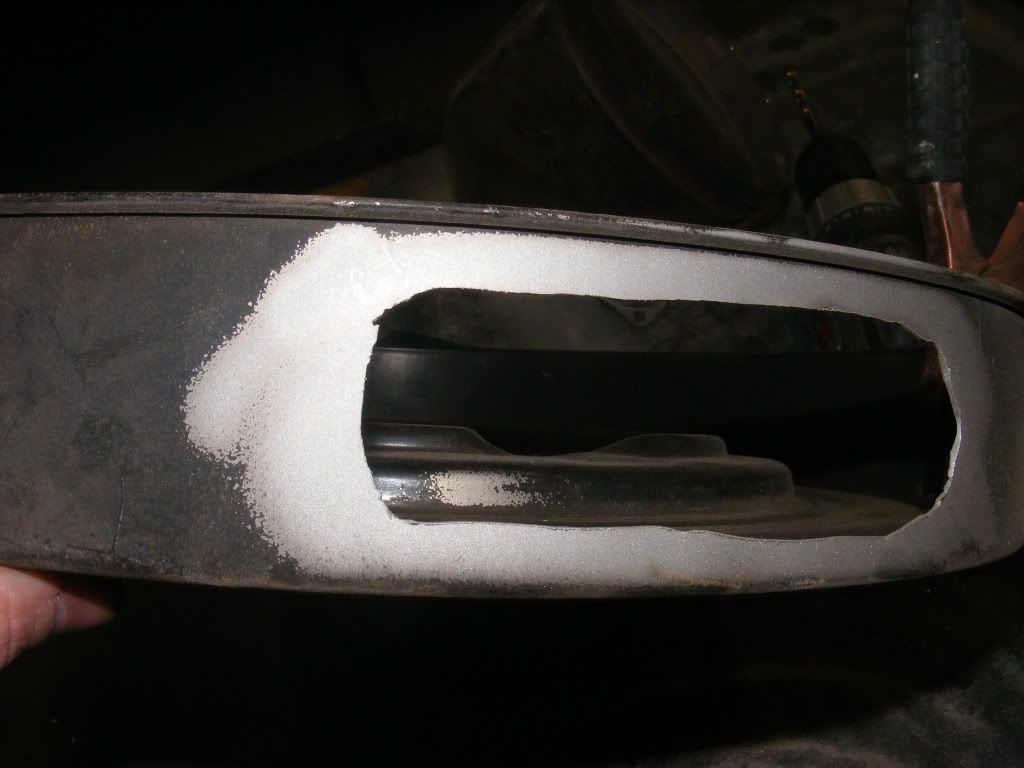 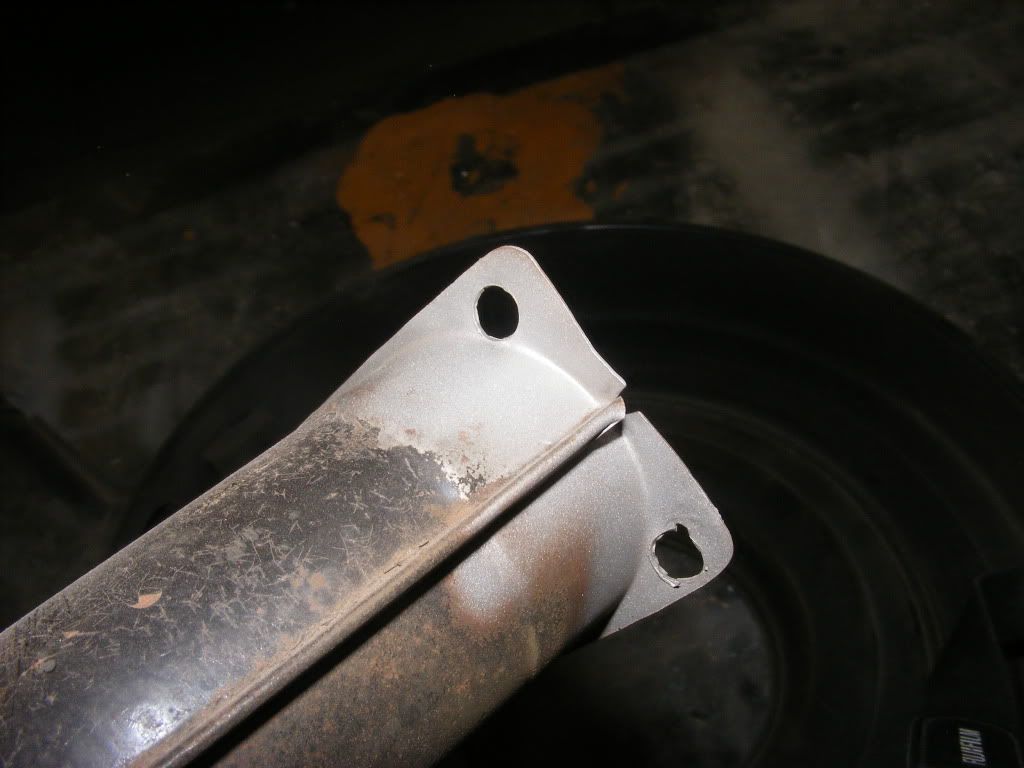 I removed the flap & the pre-heater inlet from the bottom of the doner inlet tube which left a hole. Then I blasted the whole thing getting ready for some fresh paint. 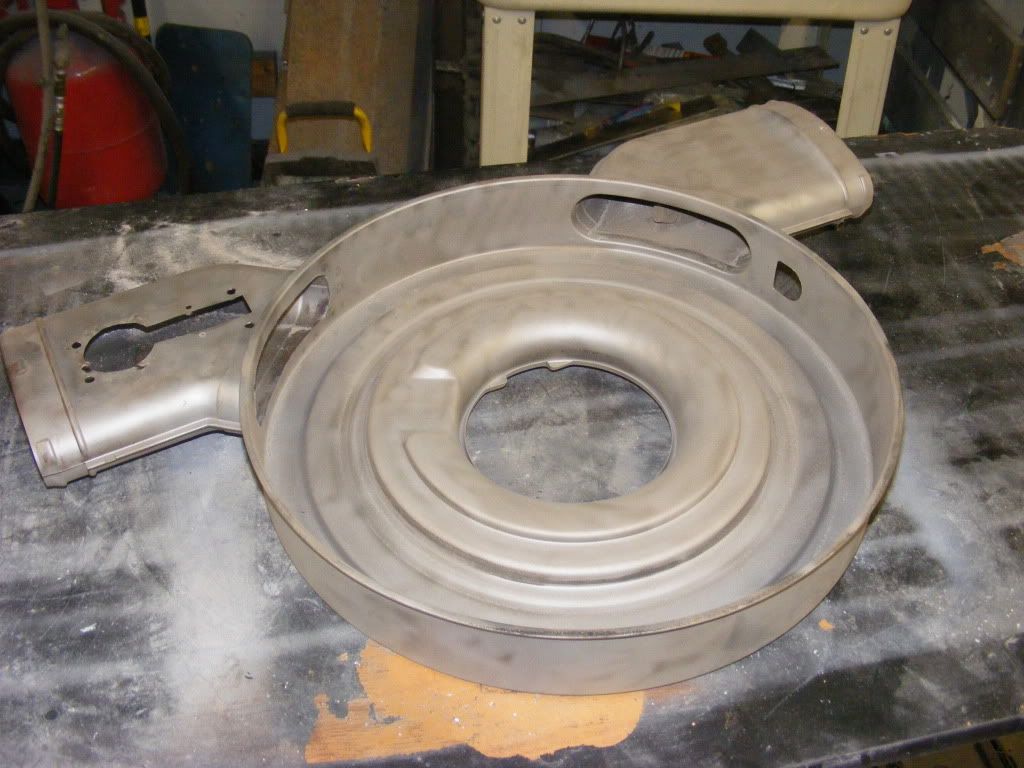 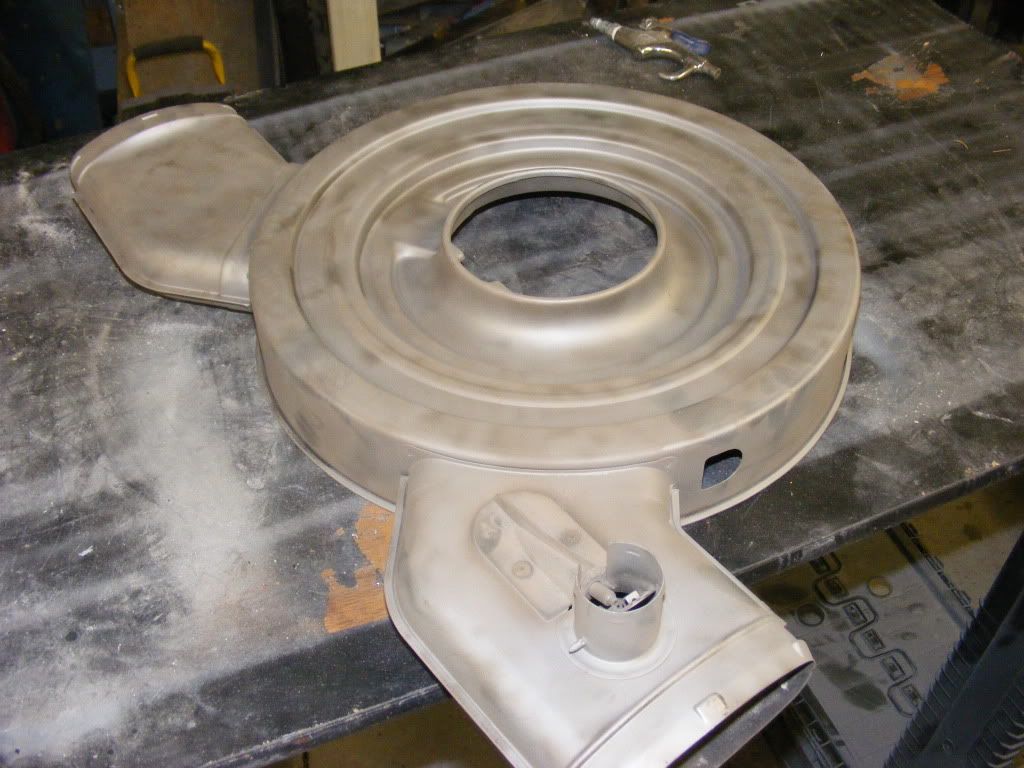 I painted it a semigloss black and made a plate to cover the hole. I used a piece of aluminum and some nice allen head bolts. I figured it would look nice with some sorta emblem or something there. I did find a old Fuel injection emblem and I just stuck it on to see what it looks like. Im thinking a nice 5.7L emblem would look cool 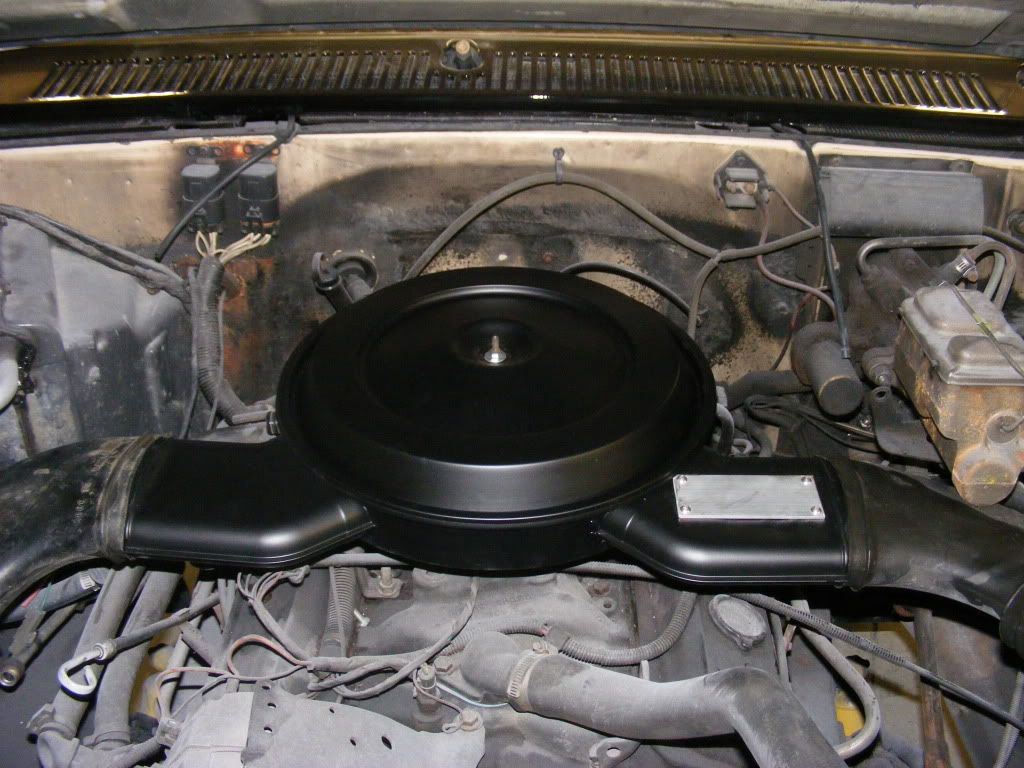 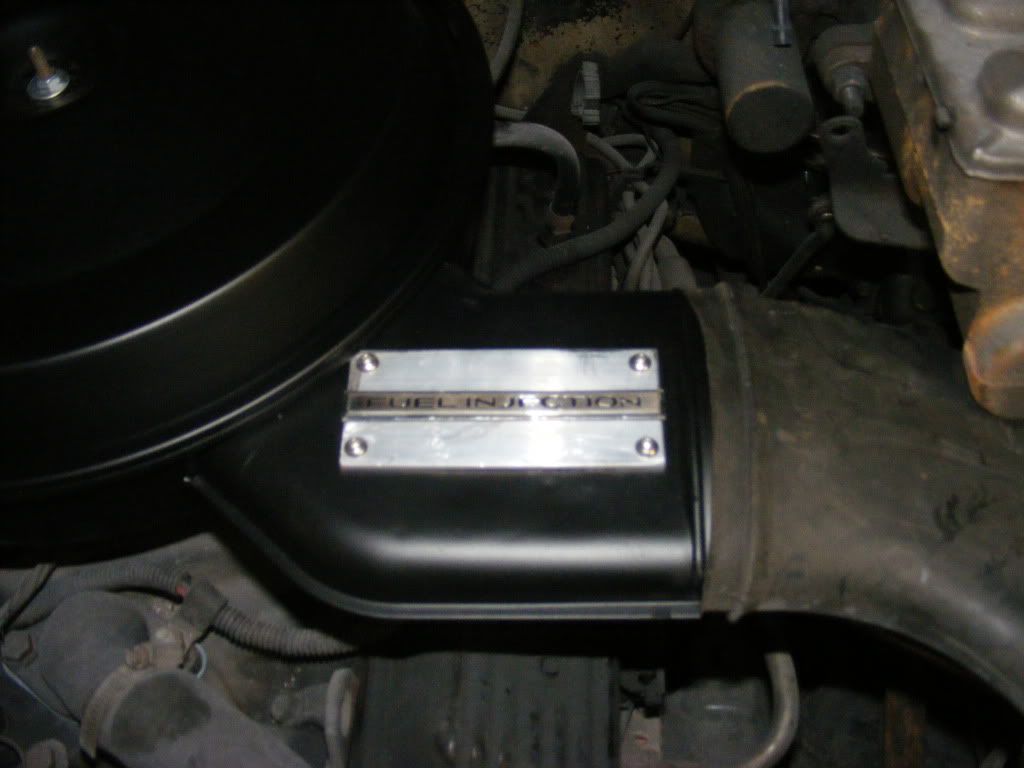 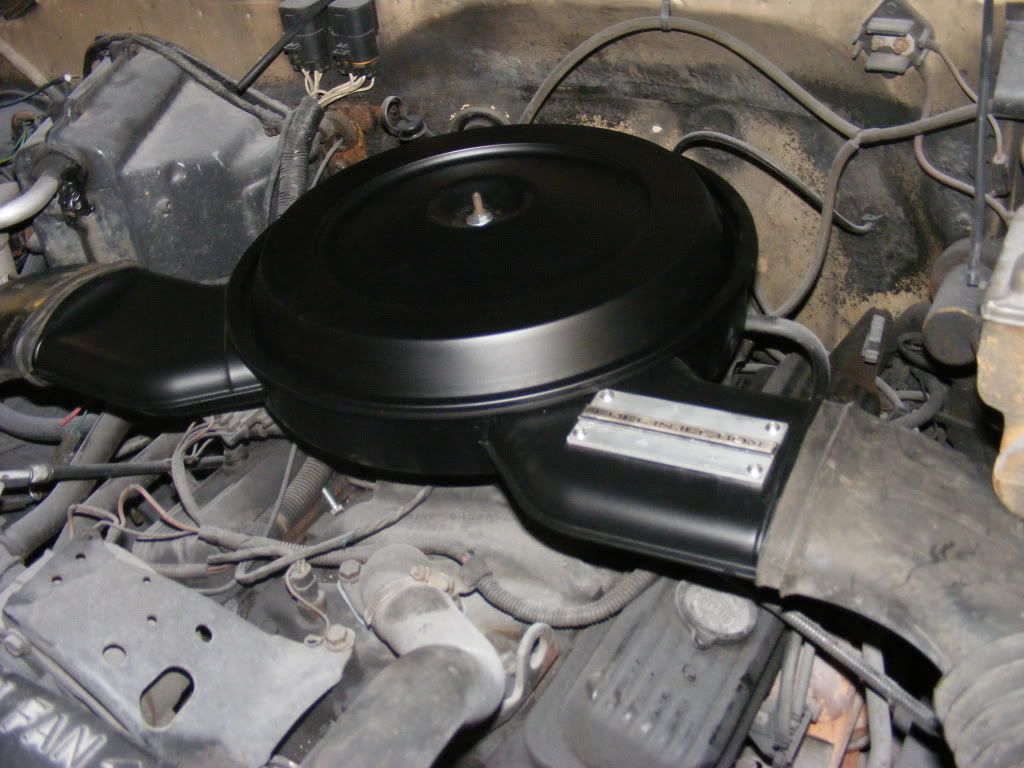 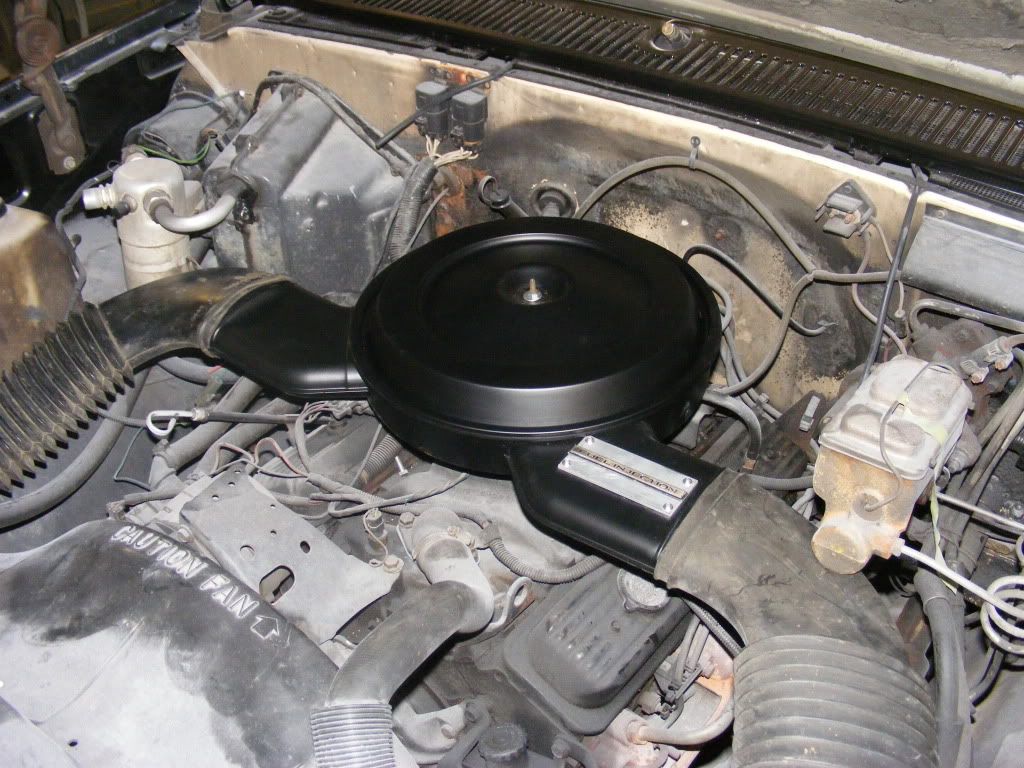 now to get the rest of the engine to look that good |
|
|
|
|
12-19-2012, 09:38 PM
|
#5 |
|
Senior Member
 Join Date: Jun 2011
Location: Washburn, IA
Posts: 600
|
Re: Build #2 Crusader!
Looks factory. I like it
|
|
|
|
|
12-21-2012, 01:43 AM
|
#6 |
|
Registered User
Join Date: Aug 2012
Location: Tennessee
Posts: 49
|
Re: Build #2 Crusader!
 drool. that paint... it's so shiny lol. That air cleaner looks awesome too. drool. that paint... it's so shiny lol. That air cleaner looks awesome too.
__________________
 Money<Time+Trucks |
|
|
|
|
12-21-2012, 01:03 PM
|
#7 |
|
Registered User
Join Date: May 2011
Location: Fort Worth, Texas
Posts: 468
|
Mike, the air filter looks so trick, only a skilled eye would know it didn't come that way from GM.
Which it should have! You rock! |
|
|
|
|
12-31-2012, 06:16 PM
|
#8 |
|
Account Suspended
Join Date: Aug 2007
Location: USA
Posts: 1,223
|
Re: Build #2 Crusader!
Iv starting a lot a little things on the truck, but nothing seams to be getting completed. As soon as I start something, I either have to stop Because I had to order something that I didnt know I needed or worse Had it, but now cant find it. (case in point: The drivers side window regulator. How in the hell do you lose one big ass window regulator). Well when this happens I move on to something else and the process starts all over again. pretty soon you end up with a lot of little project that arent getting done. I suppose it will all come together at one point. Anyway I did recolored the interior trim over the weekend, I even got deb out in the garage to help. As I mentioned in a earlier post that we spent some time gathering a bunch of interior trim pieces from several different trucks. As you can see in the pics we had some white, tan, and red pieces. Using SEM products. We followed their steps and it really turned out nice. they look like they came from the factory this way and it seams to be fairly durable.
First step was to scrub with their SEM soap. Then clean with plastic prep. Then spay each piece down with their "sand Free" Then while the "sand Free is still wet spray on the color. 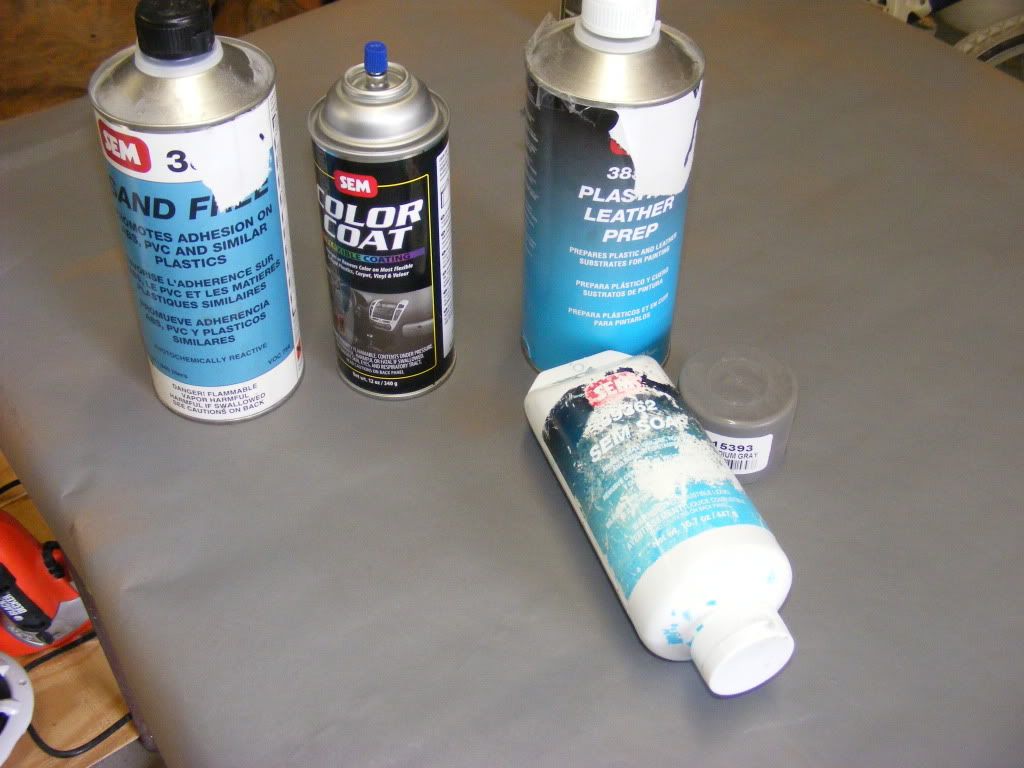 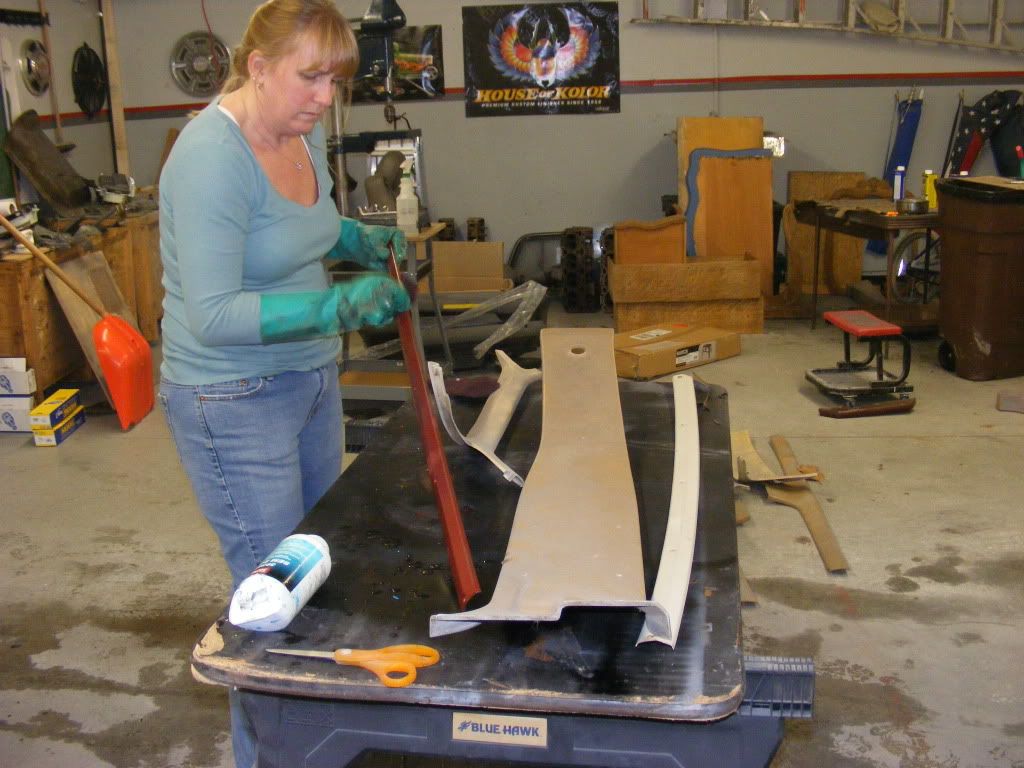  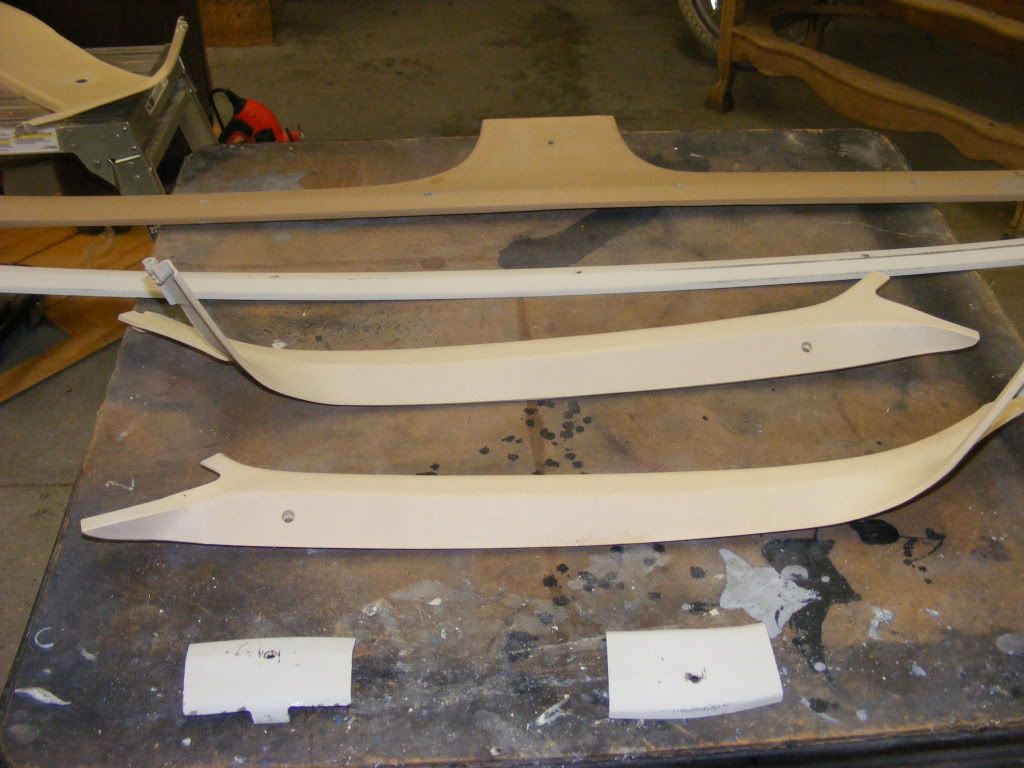 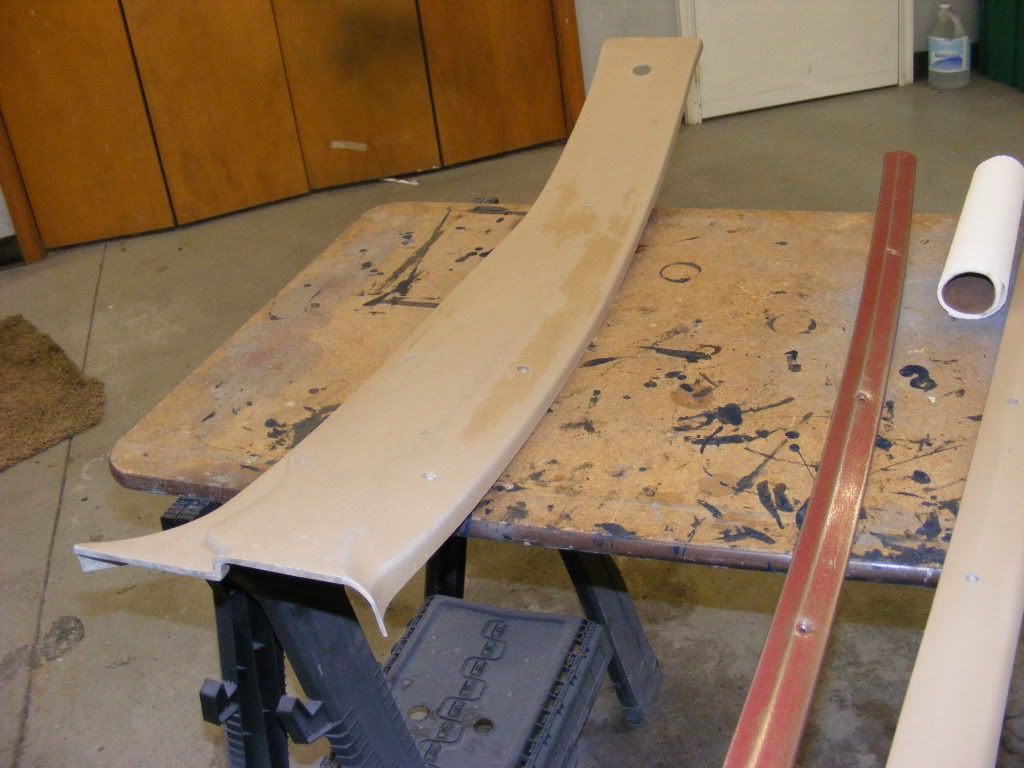  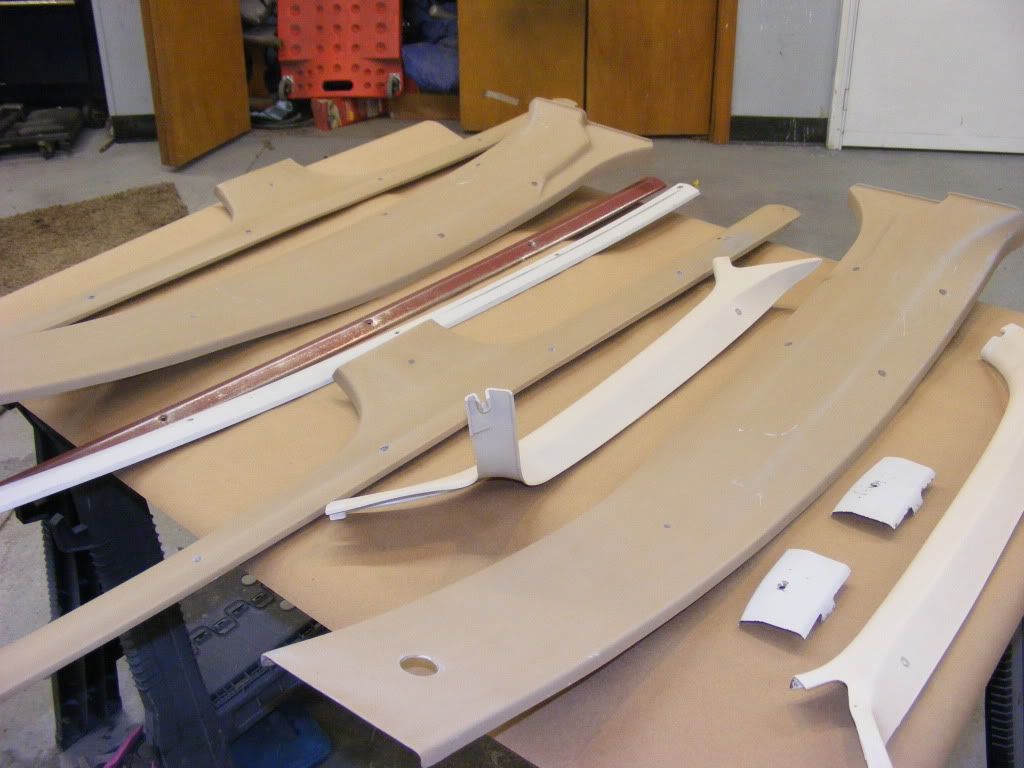  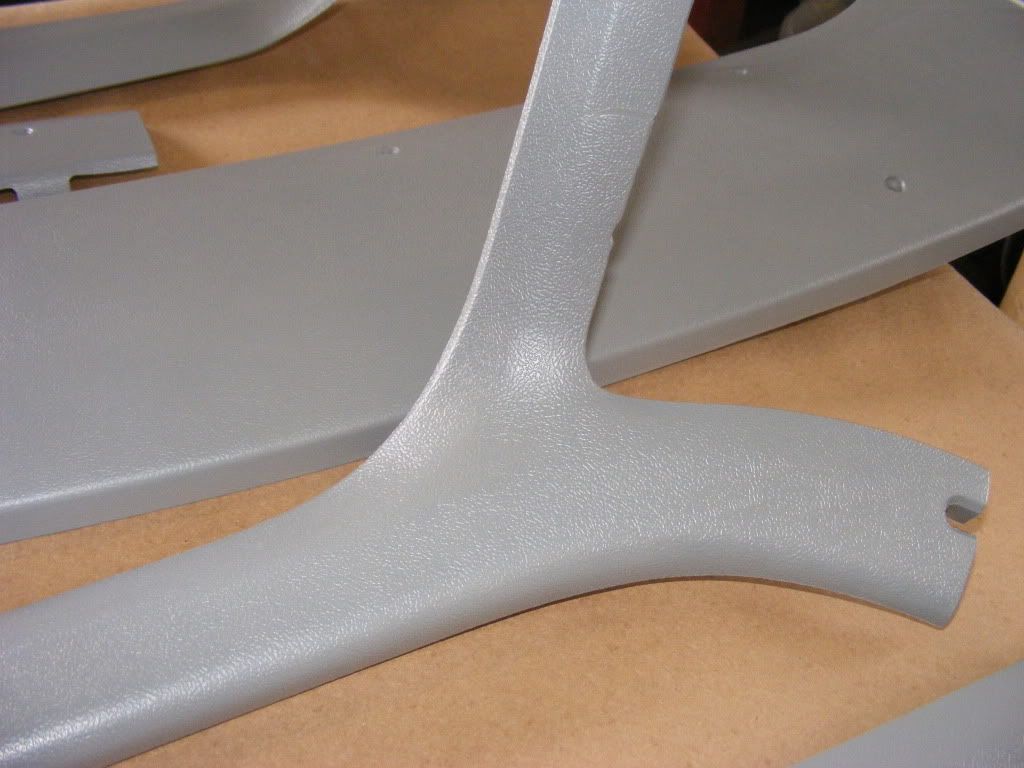 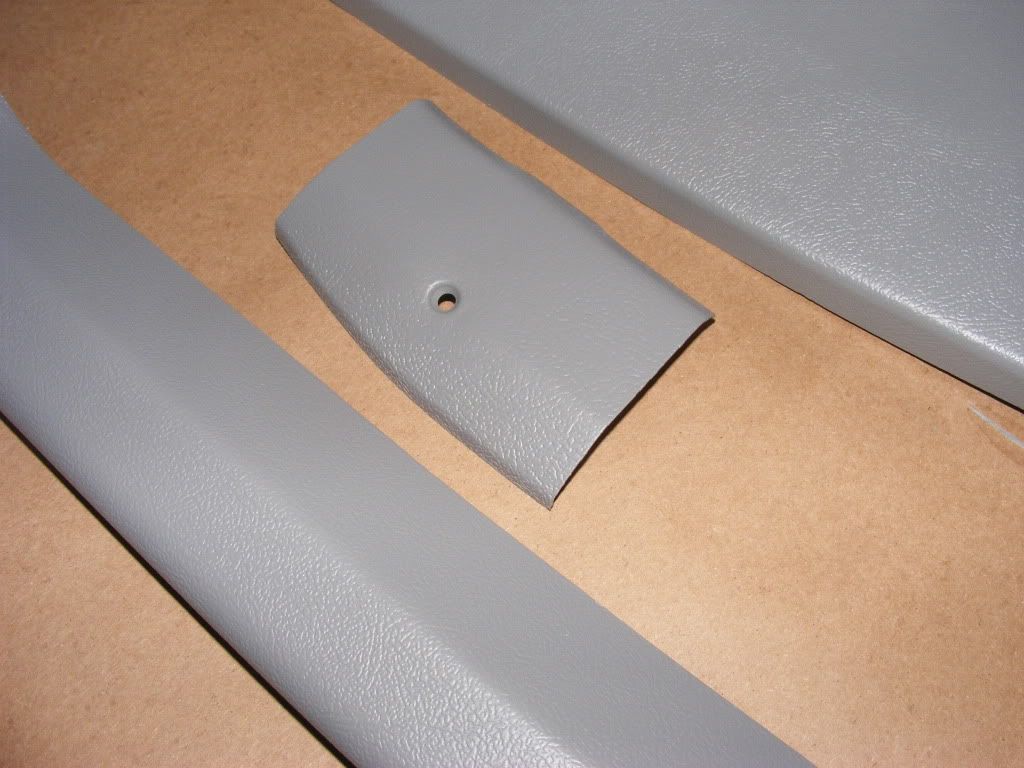 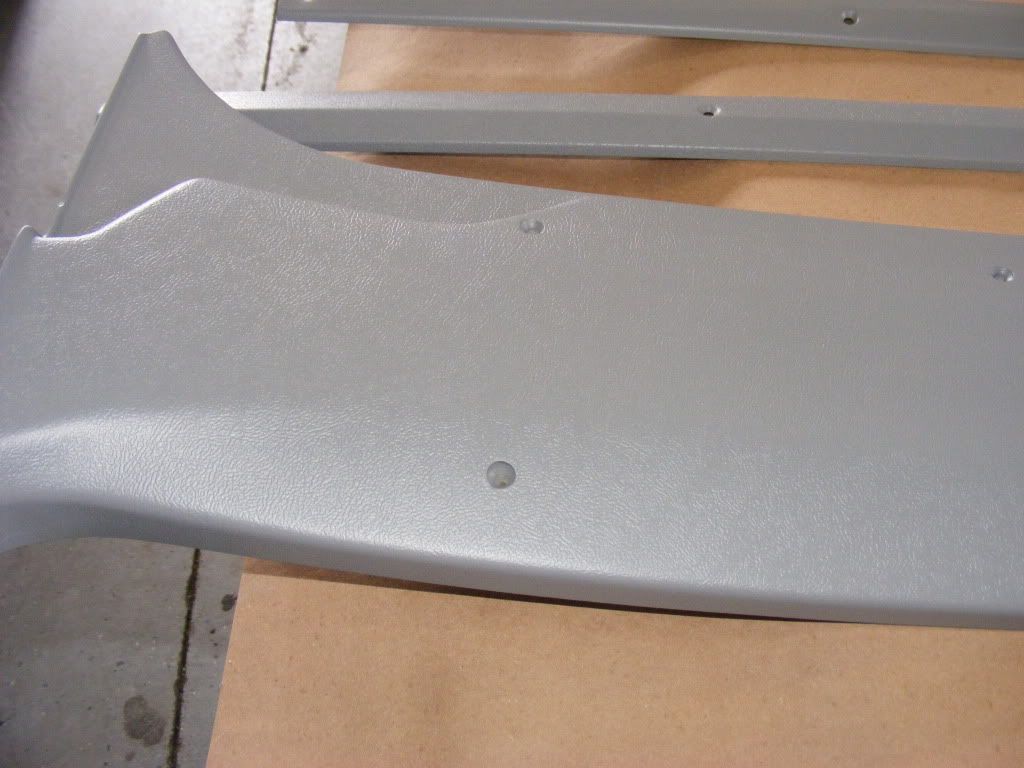   This is how it matches with the gray seat and carpet. They actually look closer then the picture shows. door panels are next. |
|
|
|
|
01-01-2013, 01:53 AM
|
#9 |
|
Registered User
Join Date: Jan 2010
Location: Brandon, Manitoba, Canada
Posts: 782
|
Re: Build #2 Crusader!
nice.....
I used that (except I sprayed mine from an HVLP gun) on my 98 to change to black interior, was also very happy with the results but I used dish soap, and wax/grease remover and scrubbed the parts at least 3 times with a coarse brush. Cannot say enuf about make sure things are clean! I also scuffed my parts with a scotch brite before washing just to be sure adhesion was optimal. Nice work...I have to do the exact same thing to my crews very shortly. One is going tan and other is going grey.
__________________
1967 K30 4x4/12v Cummins/getrag/D60/D70/355s 1967 GMC suburban 4x4/LS swap 5.3/4500/205/10 bolt/14 bolt full floater 1963 C10 reg cab long box 1970 Chevelle 1968 Biscayne 2dr post "...there is no excuse for what I am about to do, but dangit....it's gonna be fun!" |
|
|
|
|
01-01-2013, 03:03 PM
|
#10 |
|
Formerly- 1972SuperCheyenne
 Join Date: Oct 2008
Location: Wake Forest NC
Posts: 5,782
|
Re: Build #2 Crusader!
WOW!! Great work.
__________________
--Josh My Build Thread:http://67-72chevytrucks.com/vboard/s...d.php?t=799218 A good crossthread is better than Loctite any day. Life is not about what you have, but who you have to share it with. |
|
|
|
|
01-01-2013, 04:14 PM
|
#11 |
|
Registered User
Join Date: Mar 2011
Location: US
Posts: 82
|
Re: Build #2 Crusader!
Where can i get these spi products please?
|
|
|
|
|
01-01-2013, 05:50 PM
|
#12 | |
|
Account Suspended
Join Date: Aug 2007
Location: USA
Posts: 1,223
|
Re: Build #2 Crusader!
Quote:
|
|
|
|
|
|
01-01-2013, 07:15 PM
|
#13 |
|
Senior Member
Join Date: Jun 2011
Location: Washburn, IA
Posts: 600
|
Re: Build #2 Crusader!
Looks good. I always used Sherwin's interior dye it seems to be closer to the original at least for the dark grays ive done.
|
|
|
|
|
01-03-2013, 02:50 PM
|
#14 |
|
Account Suspended
Join Date: Aug 2007
Location: USA
Posts: 1,223
|
Re: Build #2 Crusader!
Got the windows tinted and the the wing vents back together with new rubber.
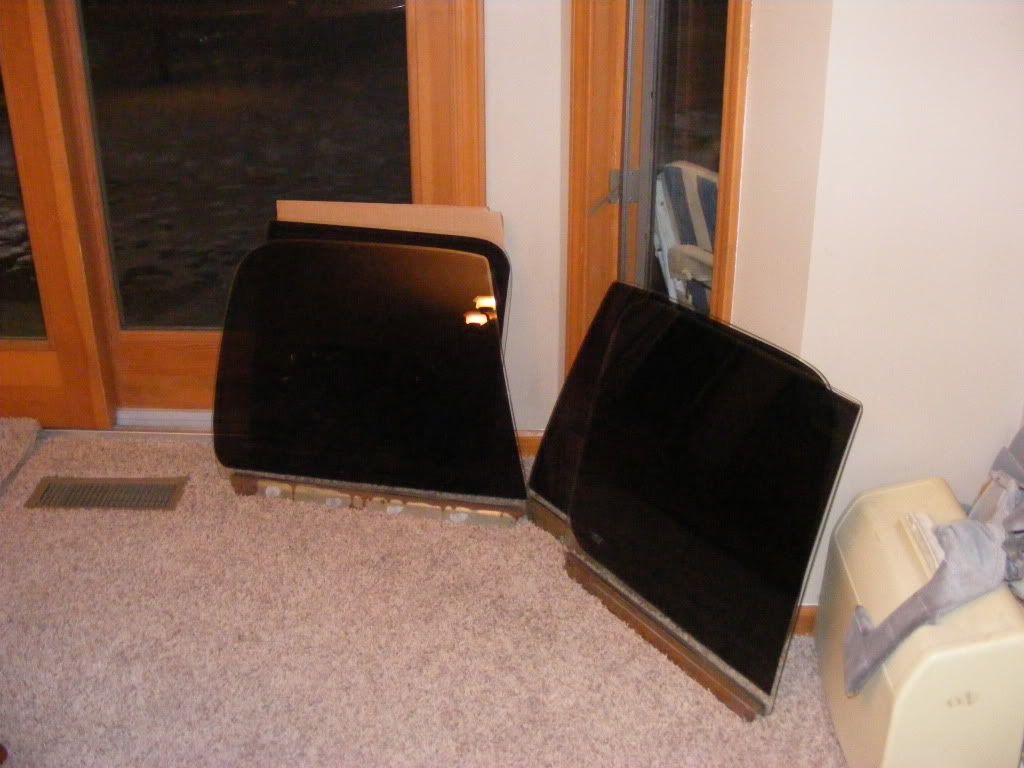 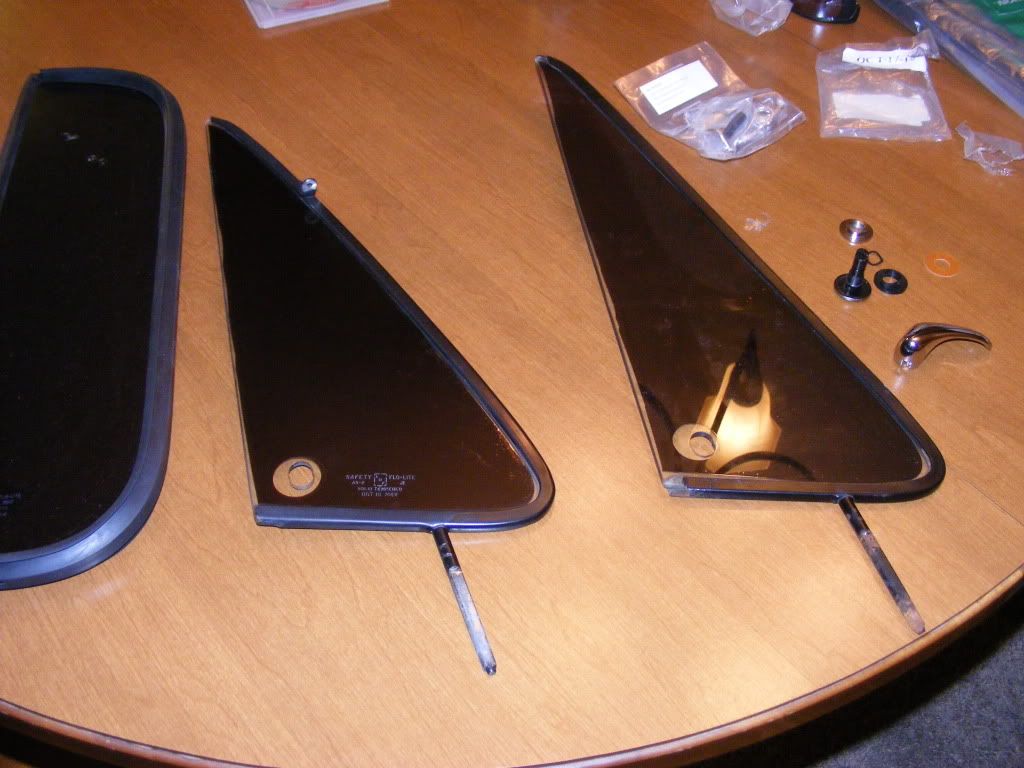 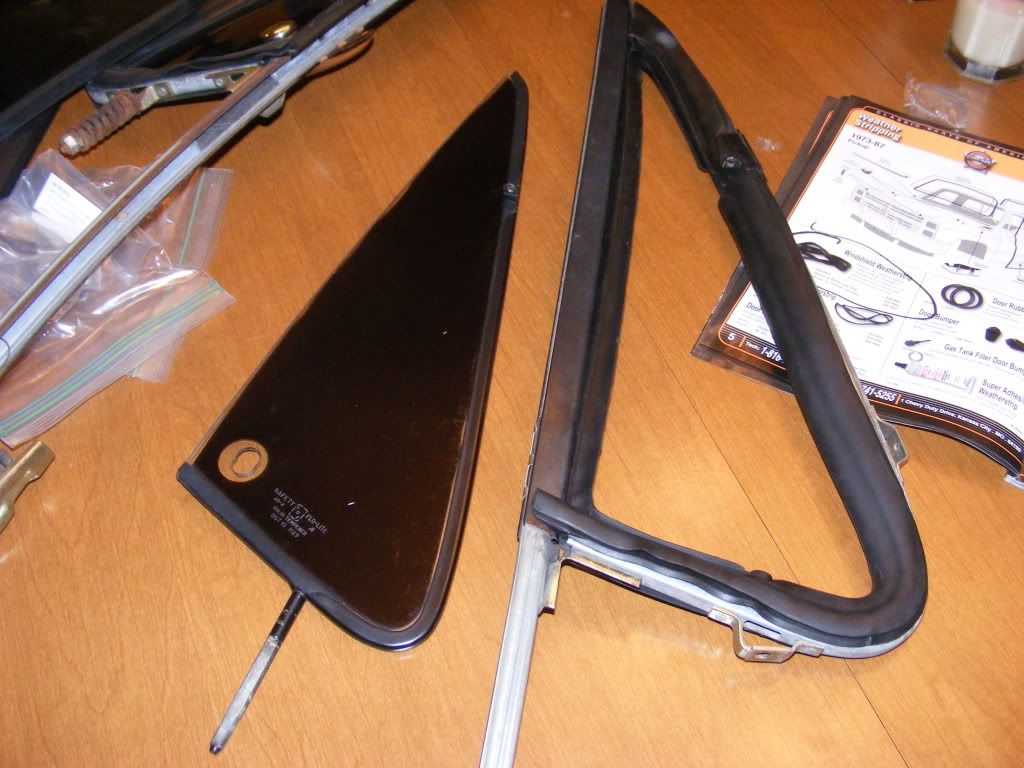 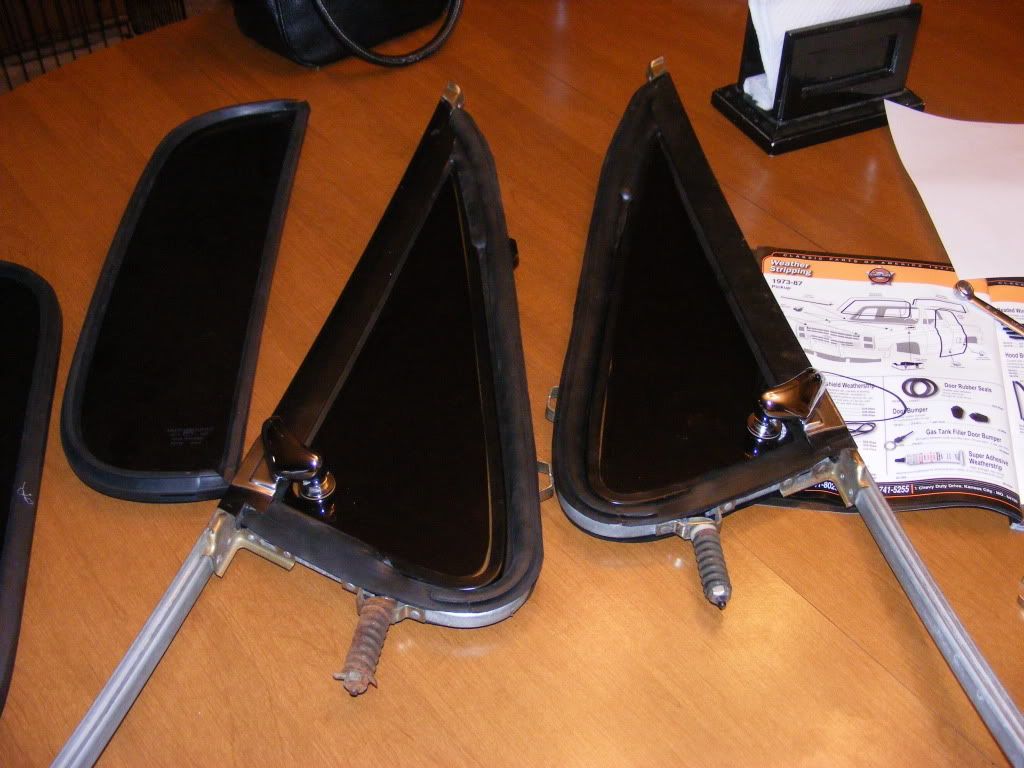 hopefully I can get them all in today |
|
|
|
|
01-09-2013, 06:26 AM
|
#15 |
|
Registered User
Join Date: Nov 2007
Location: Lincoln NE
Posts: 513
|
Re: Build #2 Crusader!
what did you use the set the rivets on the wing vent pivots?
__________________
Build thread: http://67-72chevytrucks.com/vboard/s...d.php?t=511830 |
|
|
|
|
01-09-2013, 02:34 PM
|
#16 | ||
|
Account Suspended
Join Date: Aug 2007
Location: USA
Posts: 1,223
|
Re: Build #2 Crusader!
Quote:
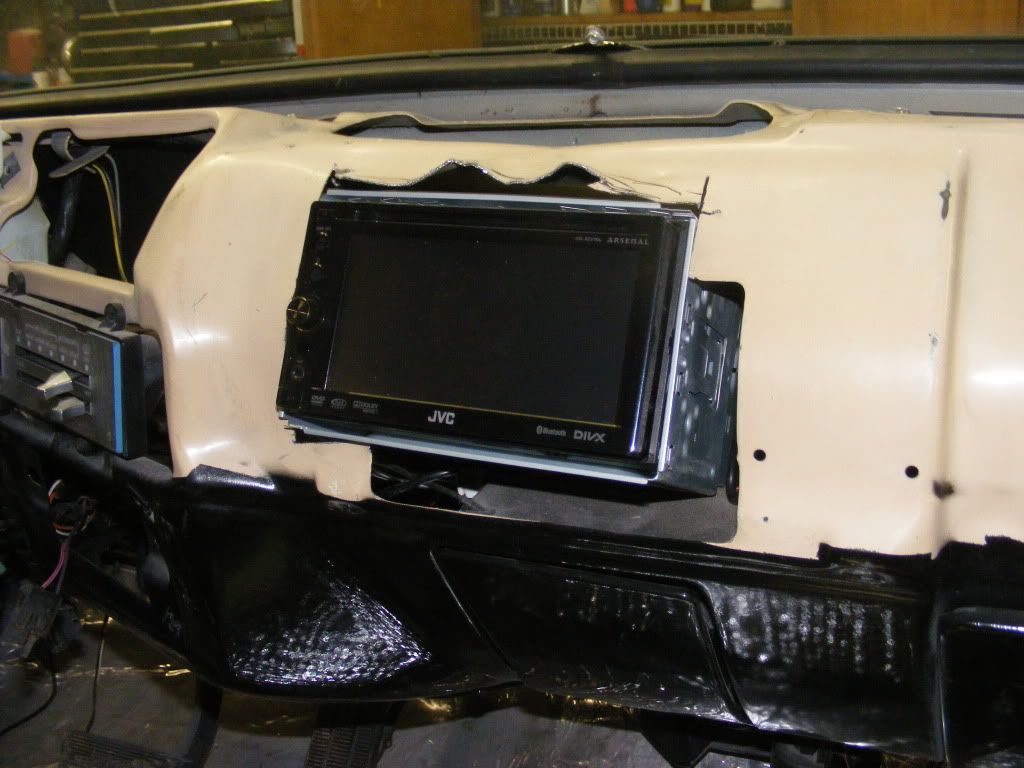
I manage to get the windows in and the weatherstrip. I am on my way to get the windshield put in today.  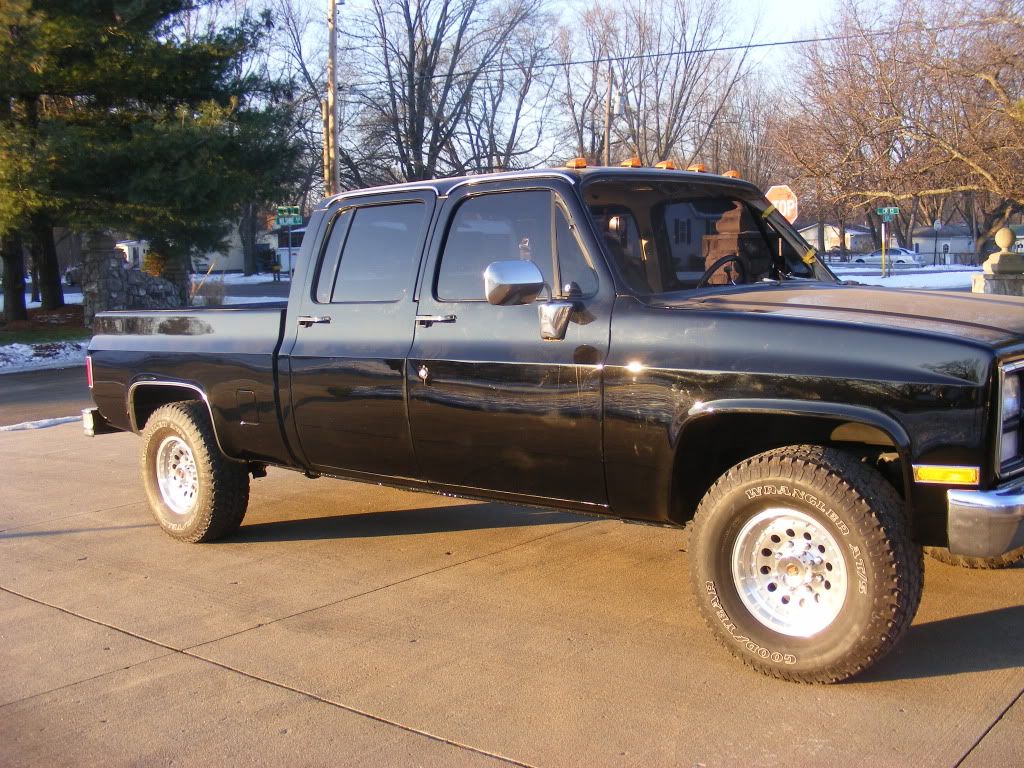 also picked up a radio 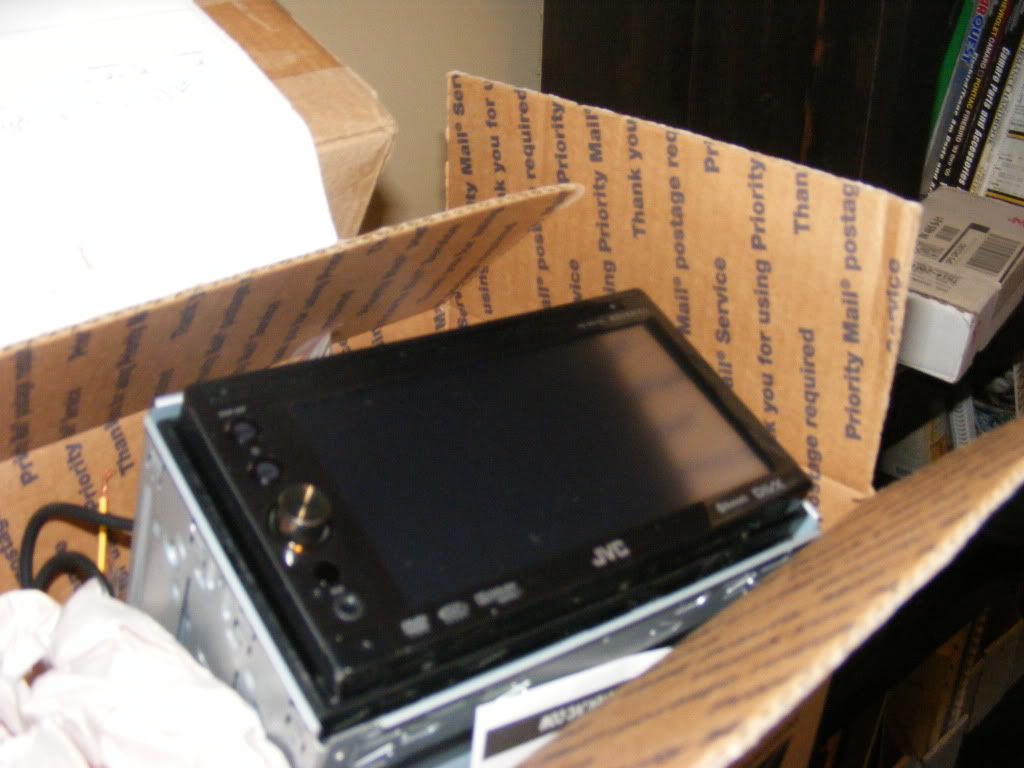 Quote:
|
||
|
|
|
|
01-09-2013, 03:13 PM
|
#17 |
|
Registered User
Join Date: May 2011
Location: Fort Worth, Texas
Posts: 468
|
Re: Build #2 Crusader!
Mike, that looks like the same radio I'm planning on using, but I'm putting in a dash out of a '66 C10 and modifiying it for a double din opening. How are you planning on popping that in your stock style dash, if you don't mind me asking. Preferrably with some pictures that you're so good at!
|
|
|
|
|
01-09-2013, 10:37 PM
|
#18 |
|
Account Suspended
Join Date: Aug 2007
Location: USA
Posts: 1,223
|
Re: Build #2 Crusader!
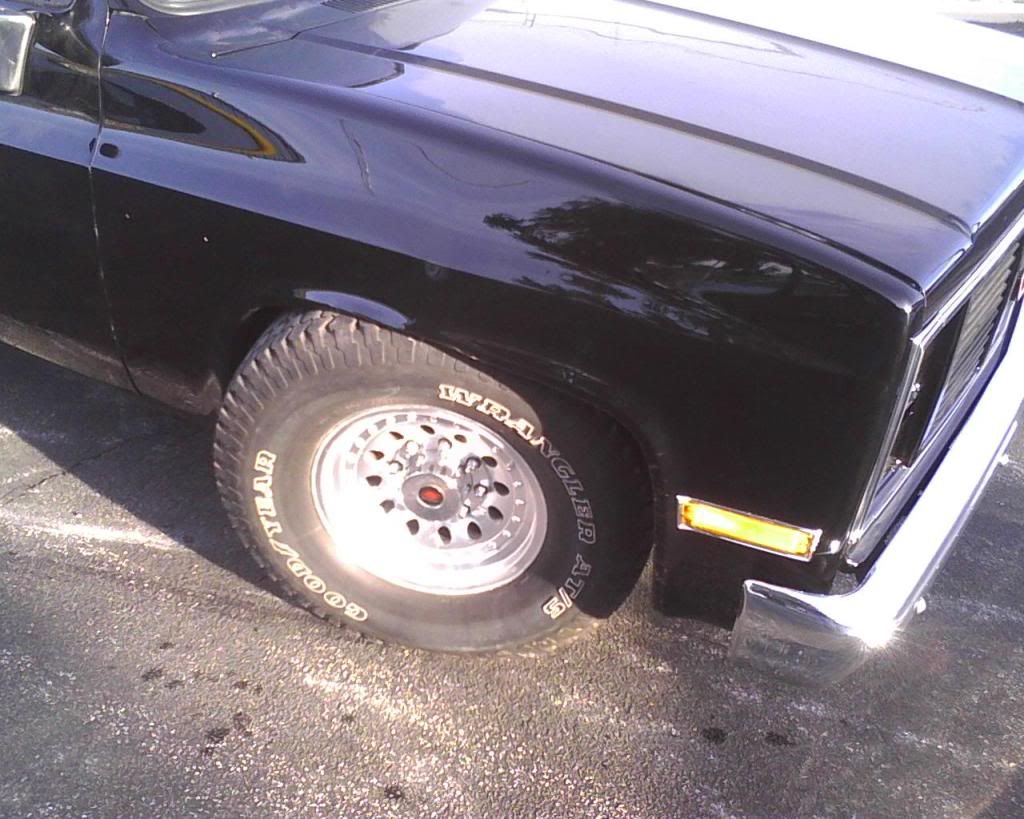
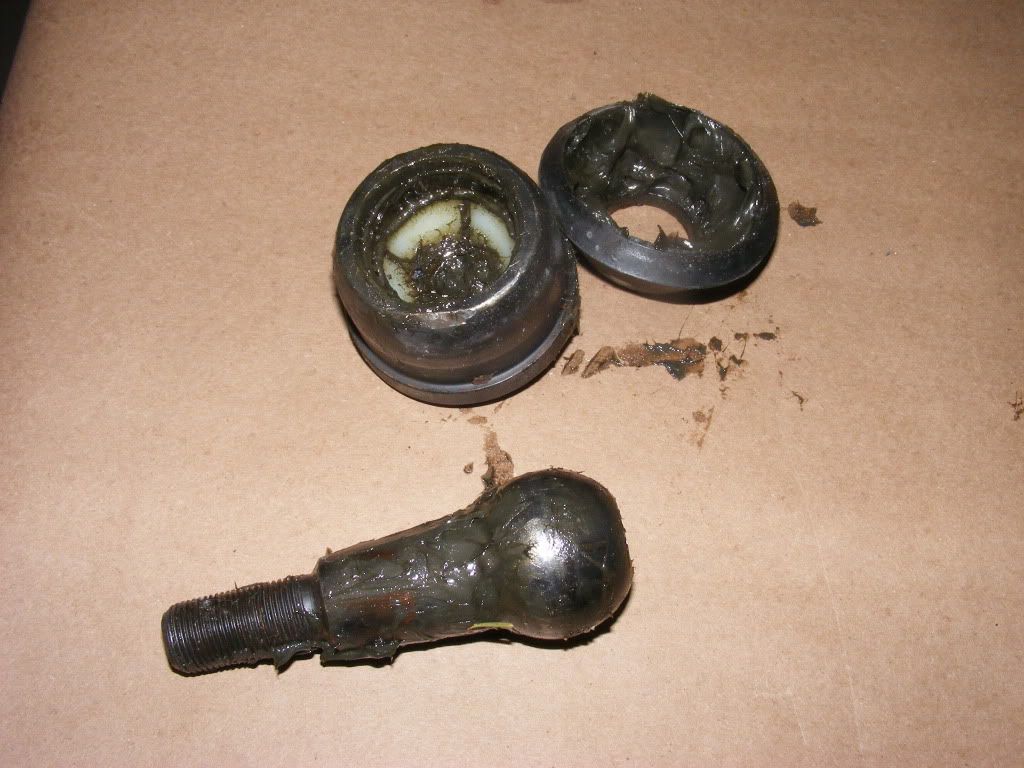
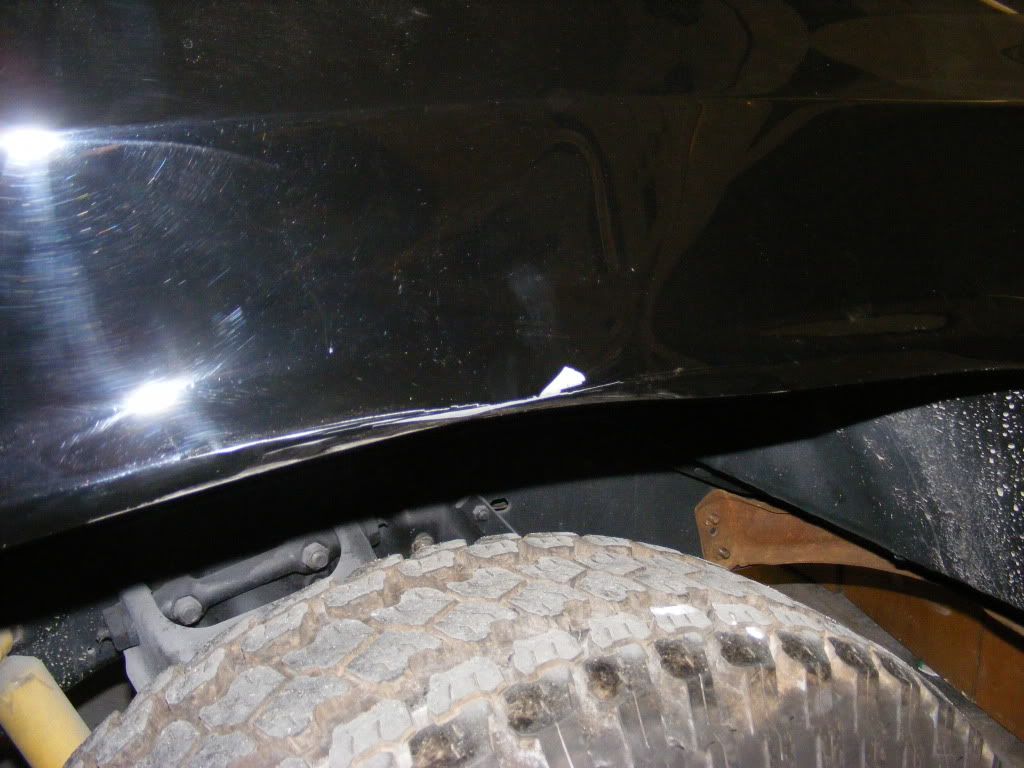
I am so ****ing pissed. I was driving the truck back from getting the windshield installed. I thought I saw a crack in the windshield so I pulled over to check it closer and just before I got stopped the lower ball joint snapped and the whole truck dropped pushing the wheel up into the fender. and slamming the lower control arm into the asphalt. luckly I was almost stopped and not running down the road at 55. That would have been ugly. I ran across the street to a Napa and pick one up, and changed in about a hour with a jack and a few sockets. ( thats gota be some kinda record) The good old RockAuto Ball joint completely separated. the ball and stud in the spindle and the socket still firmly in place on the control arm. Complete failure on the part of the manufacture. Im pissed but it could have been worse. I will be replacing all the ball joints I just cant trust them. Im so glad it didnt break with the wife driving.
|
|
|
|
|
01-15-2013, 10:59 PM
|
#19 | |
|
Account Suspended
Join Date: Aug 2007
Location: USA
Posts: 1,223
|
Re: Build #2 Crusader!
Quote:
 been waiting on a 4dr harness from another board member 1774btcrew, This guy is the worst vender ever. EVER! he will not respond to emails unless they are a week old sometimes two. I dont think he has ever responded to a pm. Iv been messing with him over a month. I paid him 3 weeks ago even sent him the damn package label. still wont send it. says he's gonna ship it out but I have my doubts. Prolly when hell freezes over when or if I ever get it I will start wiring the keyless entry/ remote start I have for this thing. Damn You know I could have made my own harness by now. |
|
|
|
|
|
01-09-2013, 01:48 PM
|
#20 |
|
Registered User
Join Date: May 2011
Location: Fort Worth, Texas
Posts: 468
|
Re: Build #2 Crusader!
Lookin' awesome Mike!
|
|
|
|
|
01-09-2013, 10:53 PM
|
#21 |
|
Registered User
Join Date: Mar 2011
Location: US
Posts: 82
|
Re: Build #2 Crusader!
Wow.....
|
|
|
|
|
01-09-2013, 11:26 PM
|
#22 |
|
Registered User
Join Date: Dec 2011
Location: Elkhart, IN
Posts: 1,308
|
Re: Build #2 Crusader!
Wow that sucks, glad your okay and the truck didn't get too much damage.
__________________
1985 Chevrolet K10 Custom Deluxe---SOLD 1997 Ram 2500 5.9 Cummins 1985 Chevrolet Camaro Z28 1987 Chevrolet K10 Silverado "The Beast" build 1987 Silverado http://67-72chevytrucks.com/vboard/s...=1#post6150257 |
|
|
|
|
01-10-2013, 09:24 AM
|
#23 |
|
Registered User
Join Date: Apr 2003
Location: Indep, MO
Posts: 5,893
|
Re: Build #2 Crusader!
At least the damage is minor. It still sucks, but at least it's not stuffed into a guardrail or something. Doesn't make it less heartbreaking. At least it's black, easy to match! Hope the fix goes easy.
__________________
Boppa's Old Yeller Truck Build, Old Yeller's New Heart! Project Buzz Bomb Flyin' Low! |
|
|
|
|
01-10-2013, 11:28 AM
|
#24 |
|
Registered User
Join Date: Nov 2007
Location: Lincoln NE
Posts: 513
|
Re: Build #2 Crusader!
you could say it was a lucky break (note i had visions of david caruso putting his sunglasses on while he said that with the csi miami theme playing and actually had a meme created but decided not to clutter this wonderful build with that nonsense). I've seen it happen at highway speeds before and the results wern't pretty. Glad you wern't injured and the repairs were minimal. on the bright side this is a great opportunity for practicing metal work and paint blending skills

__________________
Build thread: http://67-72chevytrucks.com/vboard/s...d.php?t=511830 |
|
|
|
|
01-10-2013, 01:40 PM
|
#25 |
|
Registered User
Join Date: May 2011
Location: Fort Worth, Texas
Posts: 468
|
Re: Build #2 Crusader!
Wow Mike! Talk about a bummer! I'm also glad it wasn't at freeway speeds or that your wife wasn't behind the wheel! Count your lucky stars that it wasn't worst and I hope the repairs don't drag you down too much.
Now, about that windshield? |
|
|
|
 |
| Bookmarks |
| Tags |
| black, disc, paint, seats, shortbed |
|
|


 )
)


 Hybrid Mode
