
|
Register or Log In To remove these advertisements. |
|
|
|
|||||||
 |
|
|
Thread Tools | Display Modes |
 10-06-2016, 11:59 PM
|
#26 |
|
Registered User
Join Date: Feb 2006
Location: ND
Posts: 207
|
Re: '72 Super Project: Updates!
Thank you Palf70Step
I didn't get a whole lot done last weekend other than getting the front cross member bolted on. I also removed the front cab mounts of my original '72 frame. Still need to track down a set of rear cab mounts. Picked up a nice set of trailing arms on Tuesday, and worked on stripping them down for blasting, and getting some other misc. parts ready for blasting. Yesterday, I gave ECE a call and ordered up a 4/6 drop kit, LS mounts, and some other parts. I also managed to get the last upper control arm stud that he had so I lucked out there. Stuff will hopefully roll in next week sometime. I debated buying the conversion axles and parts for my '67 rear end, but in the end I decided to take my '72 rear end and cut the leaf spring brackets off and weld on the saddles I'll be getting from ECE. My question is will I be ok matching the factory pinion angle of my '67 rear end and later using angled shims to get it where it needs to be. I know the best would be to wait until the whole weight of the truck is together and set the angle and weld eliminating the need for shims. The only issue is, I am going to be a long time from having any sort of body on this thing, and I would like to blast and paint the rear end now. Does anybody else with a 4/6 drop recall what they're using for shims and a factory rear?
__________________
1972 Chevy C-10 Cheyenne Super - Buckets, A/C, "The 17 Year Revival Project" |

|

|
|
10-17-2016, 11:57 PM
|
#27 |
|
Registered User
Join Date: Feb 2006
Location: ND
Posts: 207
|
Re: '72 Super Project: Updates!
Well, I have finally got most of the big items blasted and painted this past weekend. That was my main goal as we are getting closer to snowfall here. I'm hoping to have a rolling chassis by Thanksgiving, but we'll see how that goes. As I said before, I had ordered some parts from ECE and they showed up last week.
I think there is some unwritten rule about showing the box pile so here it is. 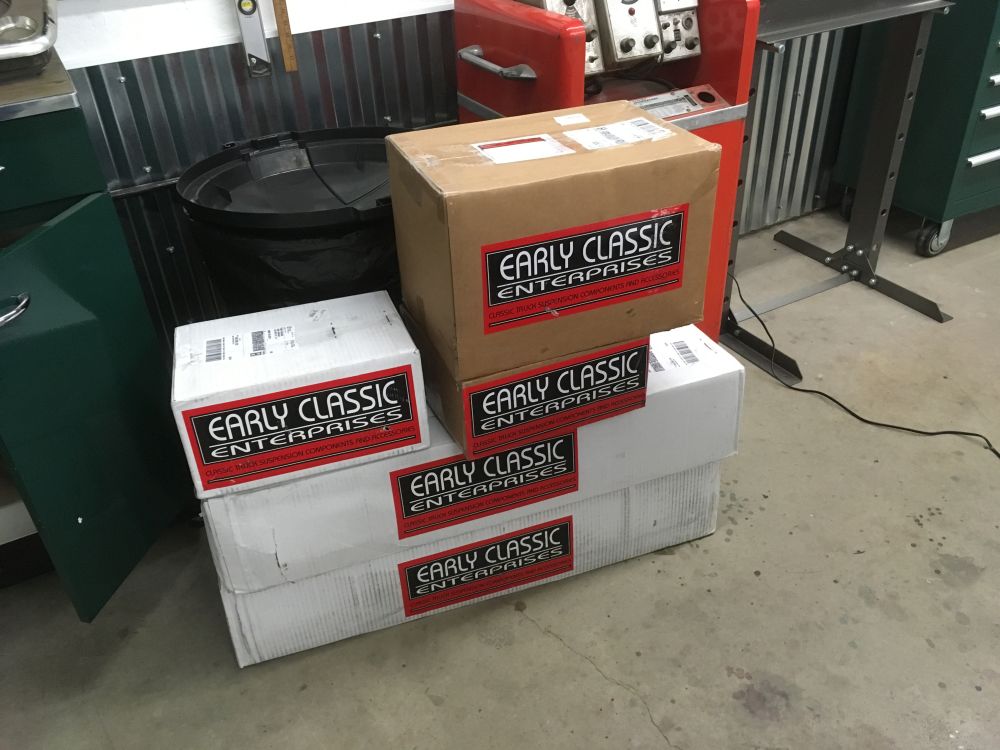 Contents Include: -4"/6" Drop Kit - 2.5" Spindles, 1.5" Front Springs, 6" Rear Springs, -Front/Rear Shocks -Shock Relocator Kit -Super Track Bar -LS Engine Mounts -Lower A-Arm U-Bolts -Swaybar bushing set w/ lowered brackets -Trailing Arm Bushings -Weld-on axle saddles -ECE Transmission Crossmember -Coil Spring Retainer Kit This stuff was all packaged very nicely into those boxes and everything was well wrapped. I thought for sure that a few boxes were missing or coming later, but it was packed into those. For anyone that has sandblasted their own parts, I'm sure you will agree with me that any future projects will be taken to somebody. I bought this pot blaster 10 years ago when I started this thing, and hadn't used it until I started this truck. It works really good, when a person is blasting. Most of the time is spent not blasting though. Time is spent setting up a catch area if you plan on reusing your media. You've got to sweep up and collect your media. You have to screen it all before you put it back in the blaster. Add in breaks for your air compressor and so forth, and you've got a lot of time wondering why you didn't hire it out. I set up this blasting "horseshoe" four times in the last couple of months and every time I do, I dread it. It works good for recollecting the media, but it is a very slow process if you are not setup for it regularly. 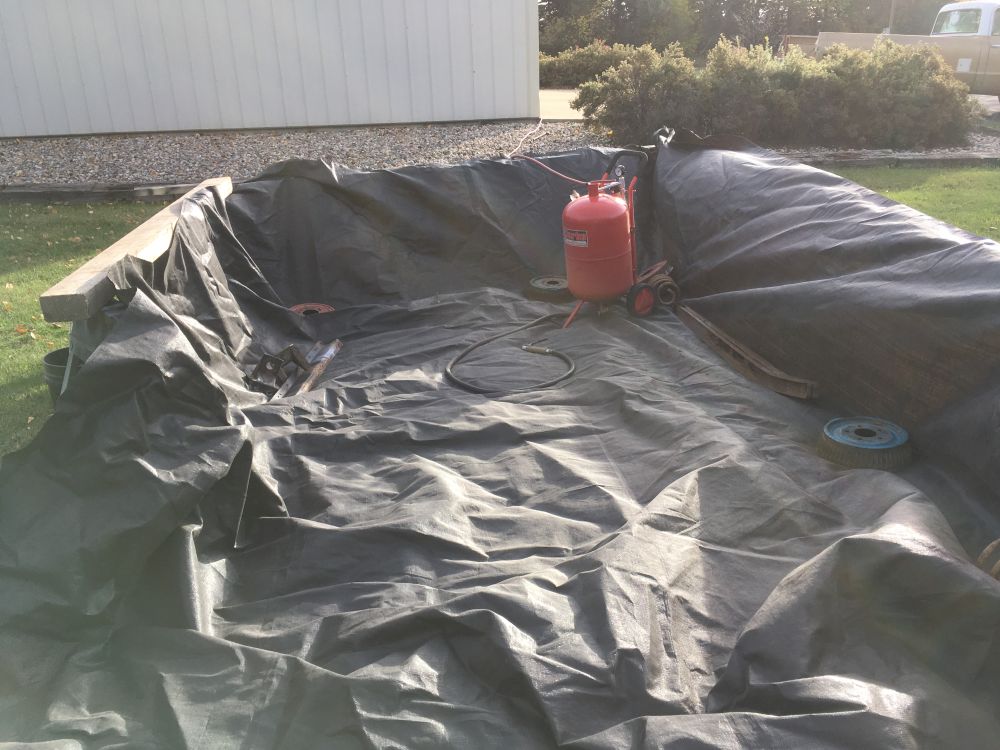 The weeekend prior to this past one, I blasted the trailing arms I picked up the week prior, the rear most crossmember, my front cab mount brackets, center link, rear brake drums, my '72 leaf spring rear end after grinding off all of the brackets, and the ends of the axles. The trailing arms I picked up were in really good shape. Probably about the best possible condition you'll find them in this state anyways. Every set I've seen have gotten small rocks wedged between the two rails and they keep collecting inside and spreading the rails further apart. These had only a slight gap but I wanted to clean them out anyways. So they were split apart and then rebolted back together after blasting, followed up by a few stitch welds on the top and bottom. 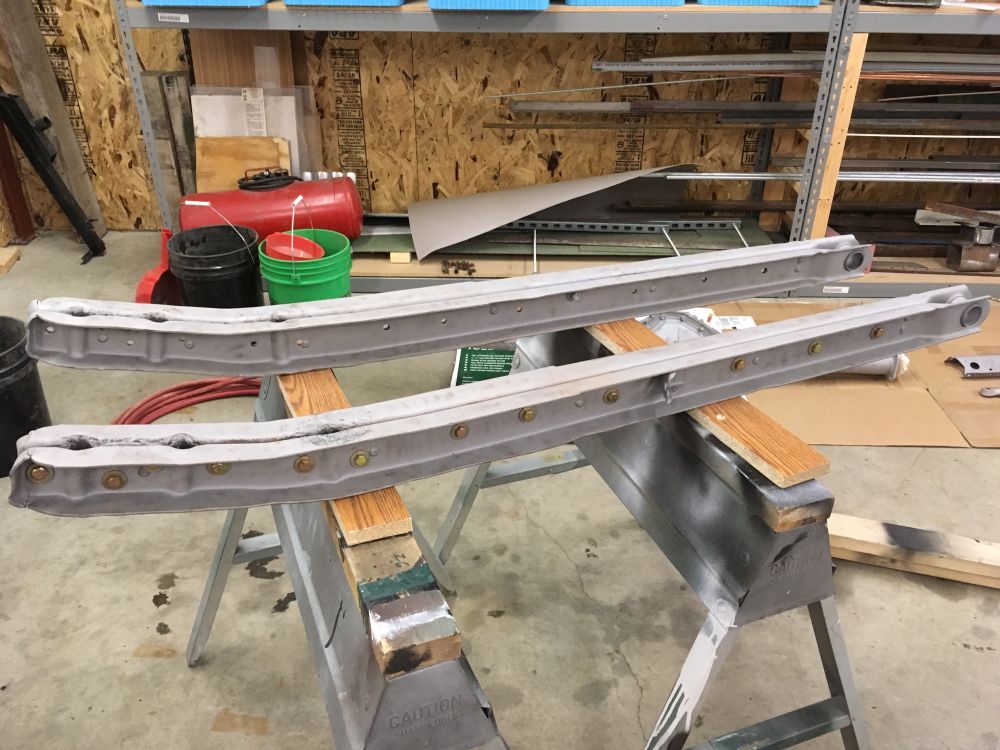  Thursday night I was able to get some paint on them and my other blasted pieces. You don't realize until you're running a brush on these arms, but there is a ton of surface area to cover, they must have take 20-30 mins each. 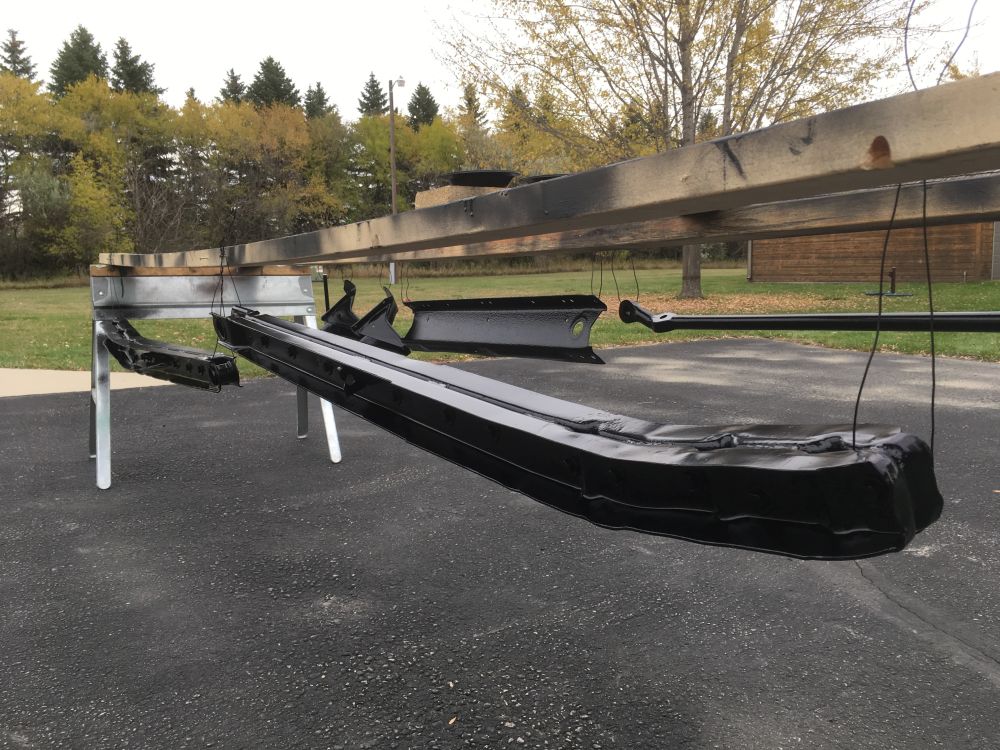 Also blasted and painted this high hump cover I picked up for $15 at the same place I picked up the trailing arms for $75 each. Pretty happy with that find. 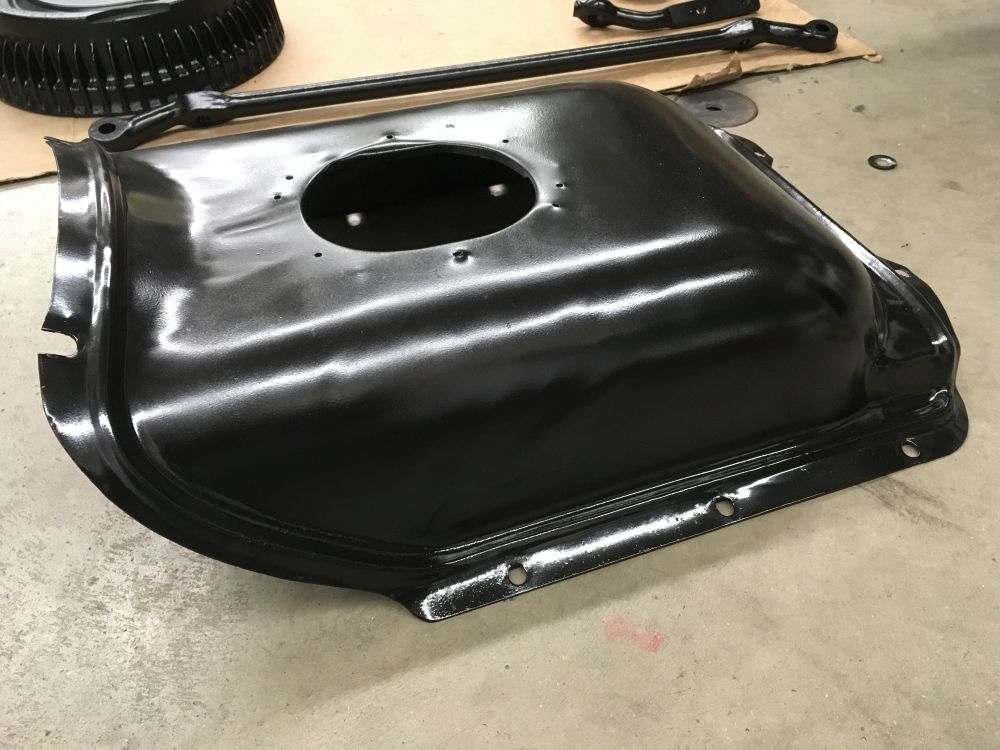 Here's the leaf spring rear end that came out the truck in the original post. This one has 3.07 gears in it compared to the 3.73's that were in the 6 lug rear I was going to use. I'm not sure how well it's going to work with the 6l80, but I guess we'll see. 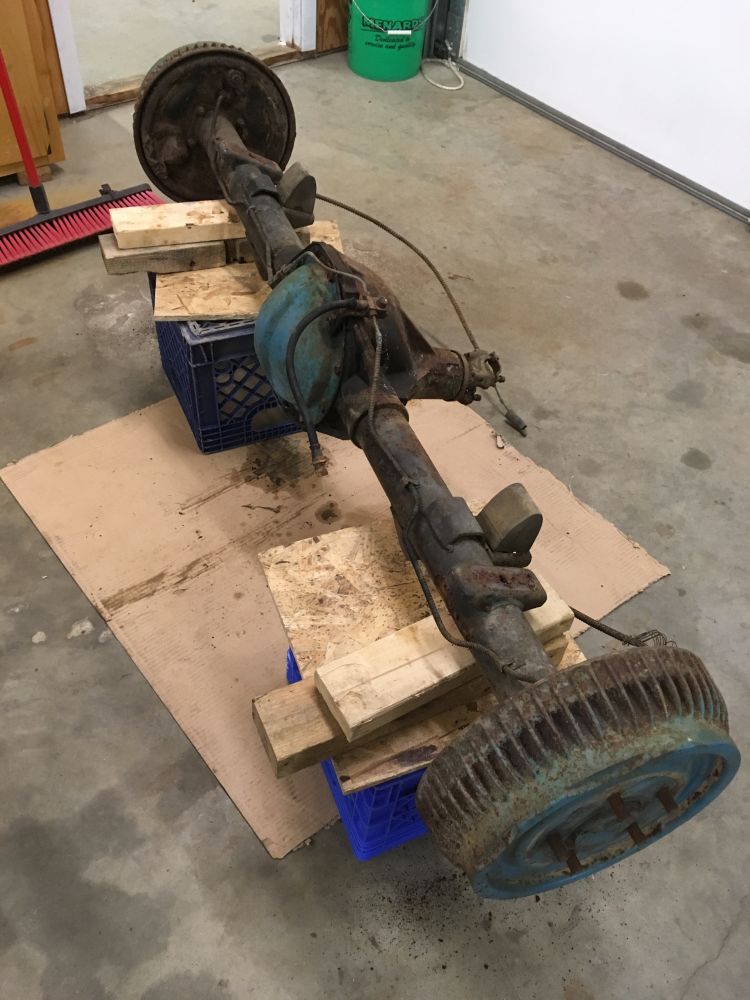 So after talking with Stan at ECE, he didn't seem to recall of having to shim rear ends for the normal drops that they offer, so I decided to match the pinion angle of the other rear end I had. I used some steel tubing and a variety of shims to set up a level work platform. I placed the factory coil spring rear end on it and took a bunch of reference measurements. Then I placed my blasted housing on the saddles, and after a couple hours of measuring, rechecking, and measuring again I placed a few tack welds on, and checked a few times more. Once I was sure it was where it needed to be, I welded the new saddles on, stitching about an inch at a time alternating between sides and letting it cool down some. 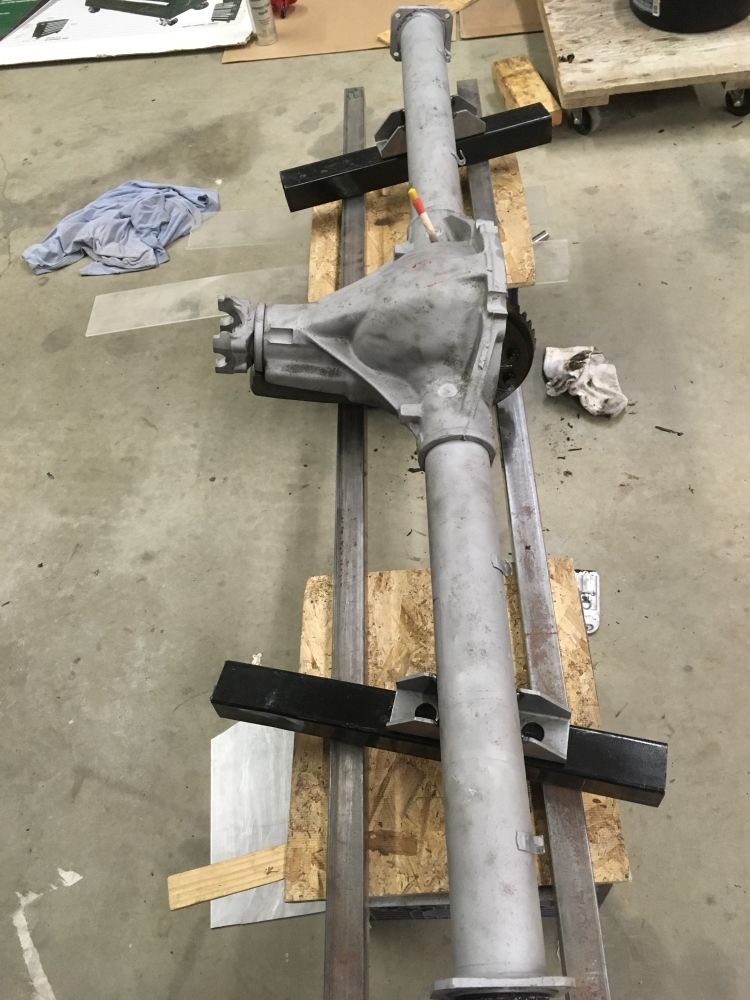 Slapped some paint on it Saturday and a few other parts and we're good to go. 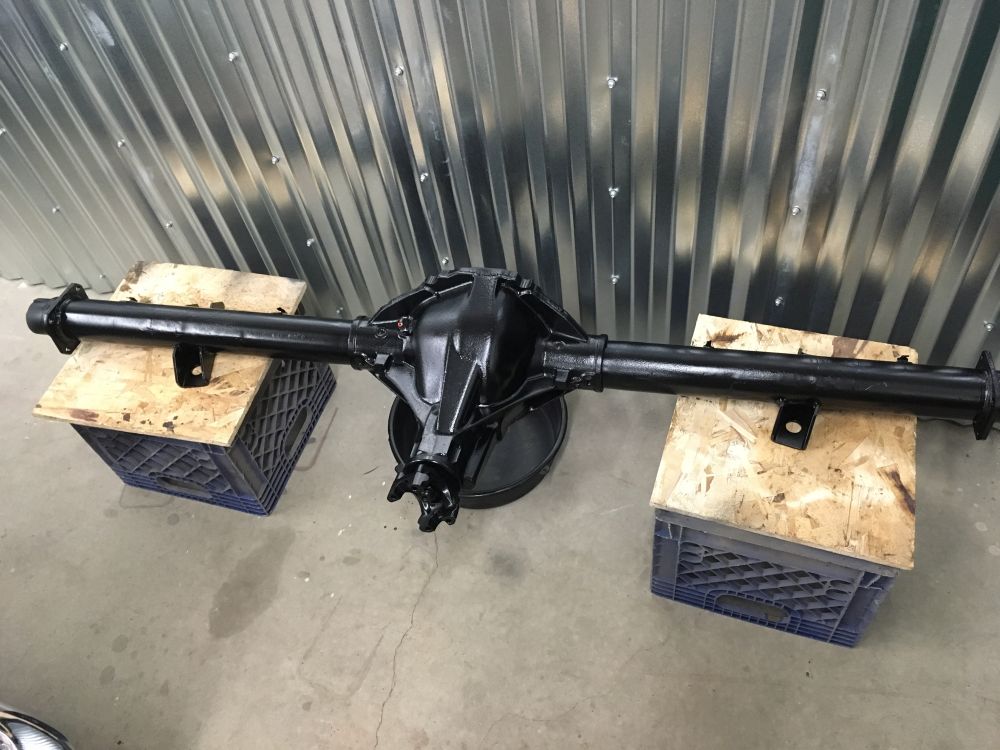 I didn't get much time yesterday to work on the truck, but at least now, the big stuff is out of the way, and I can get some work done. I mounted most of the misc. small brackets and loosely installed the trailing arms after putting the new bushings in. Put the LS engine mounts on as well. 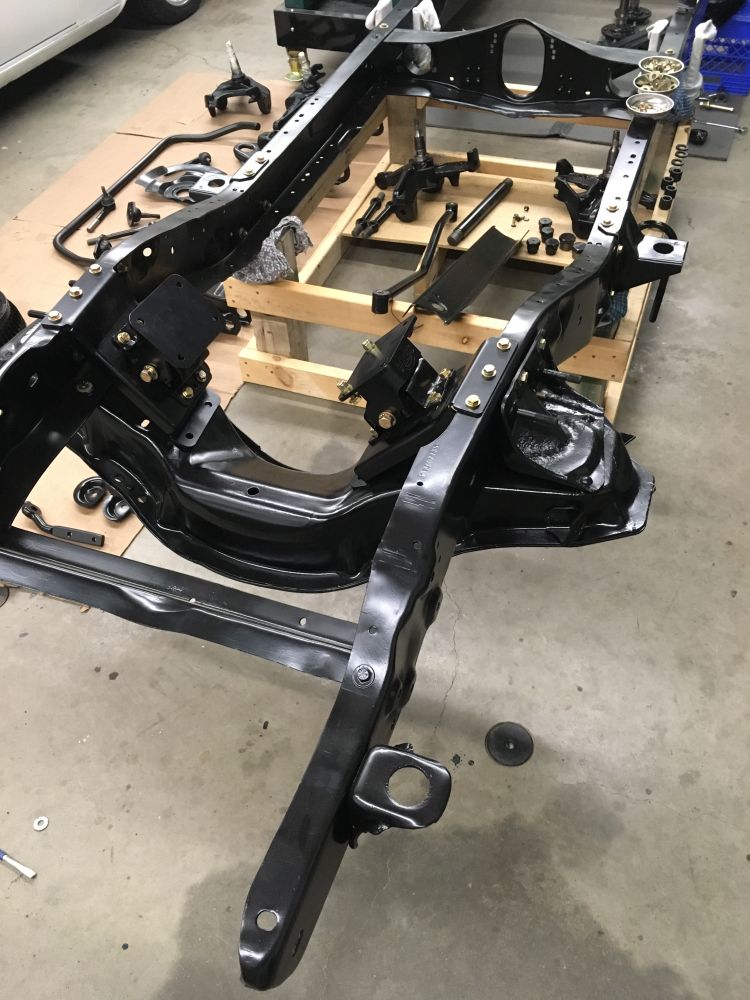 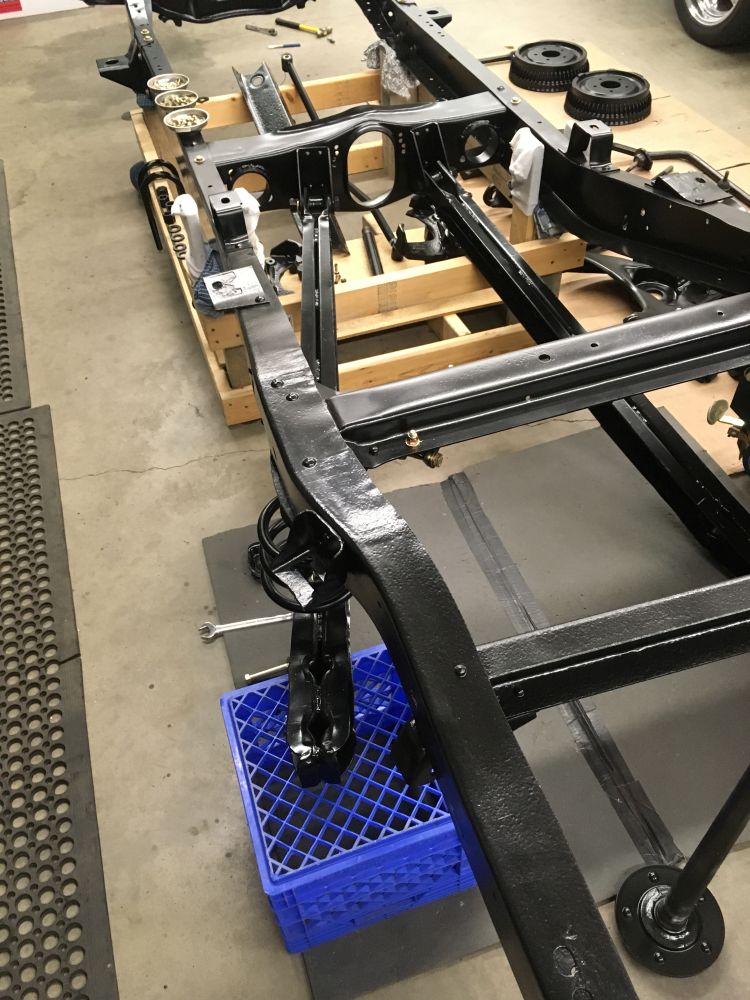
__________________
1972 Chevy C-10 Cheyenne Super - Buckets, A/C, "The 17 Year Revival Project" |
|
|
|
|
11-26-2016, 11:34 PM
|
#28 |
|
Registered User
Join Date: Feb 2006
Location: ND
Posts: 207
|
Re: '72 Super Project: Updates!
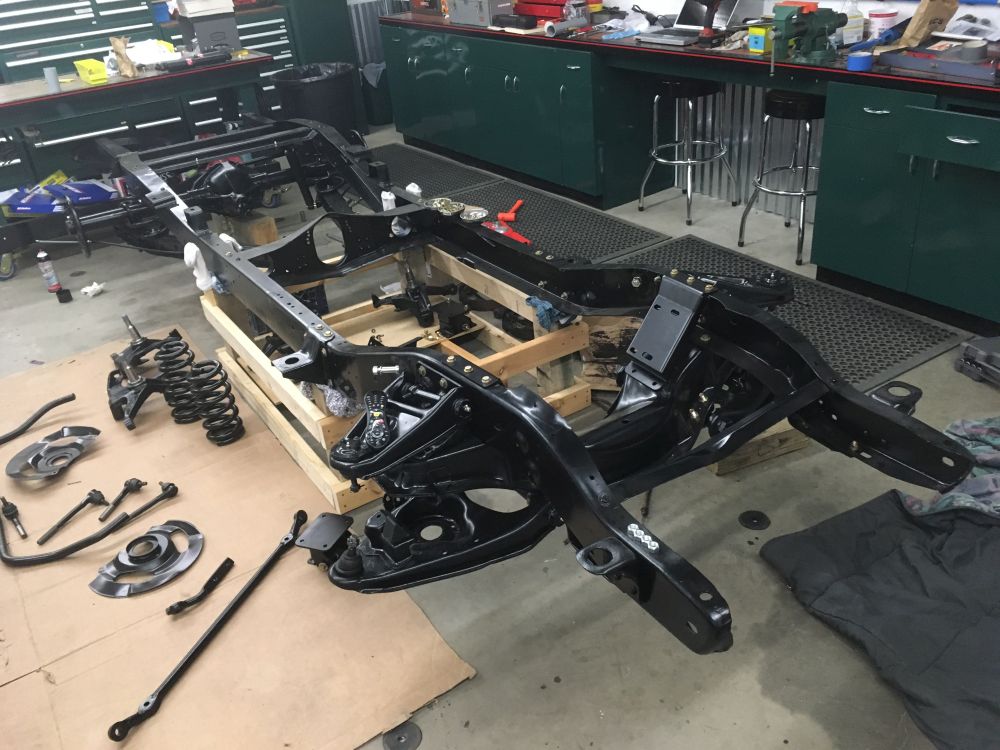
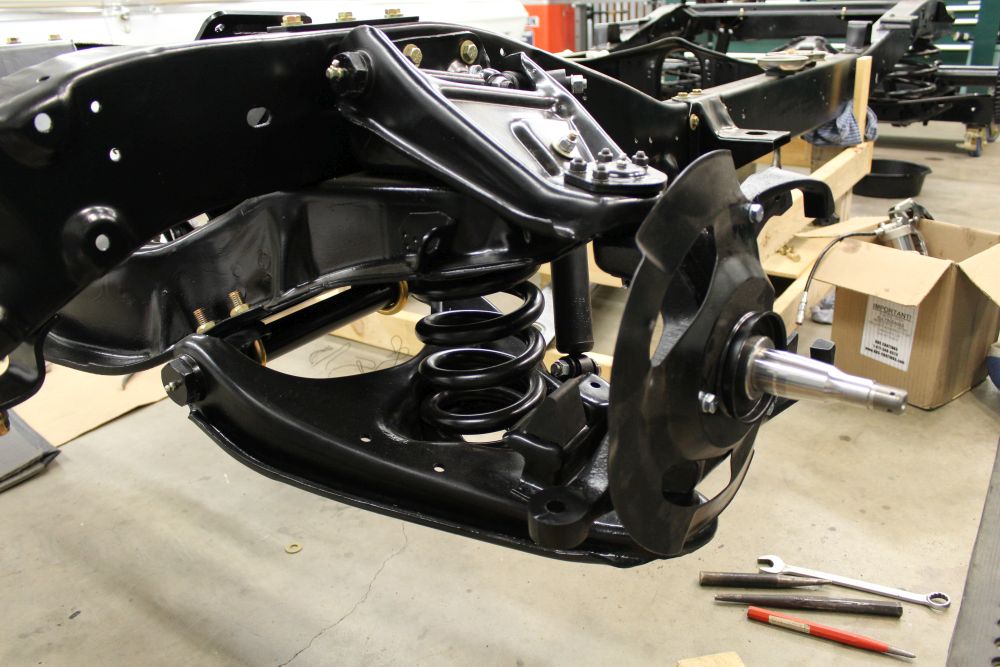
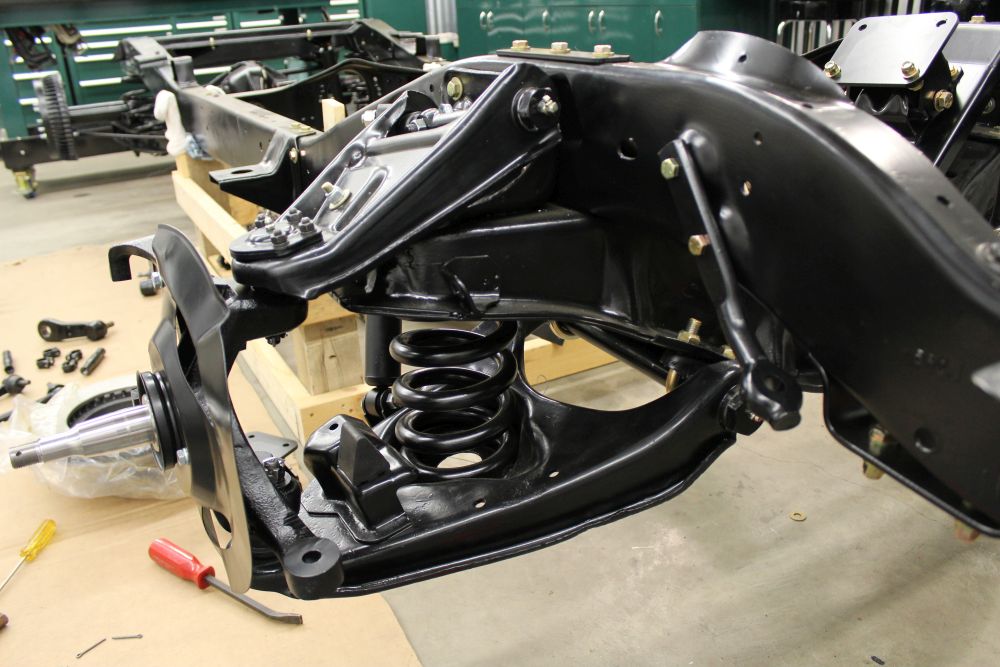
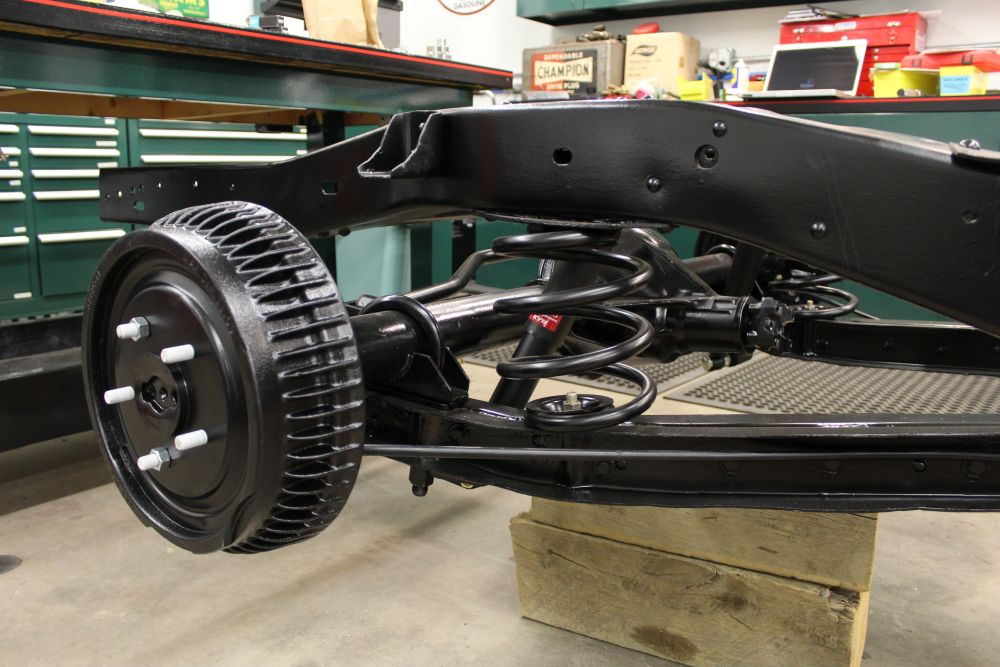
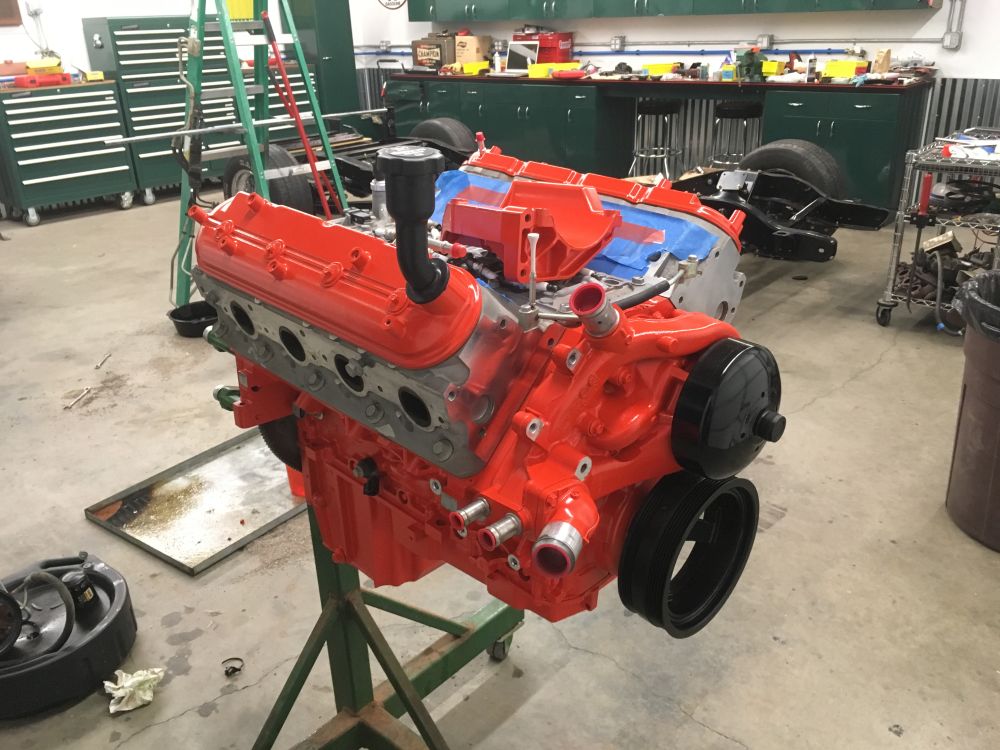
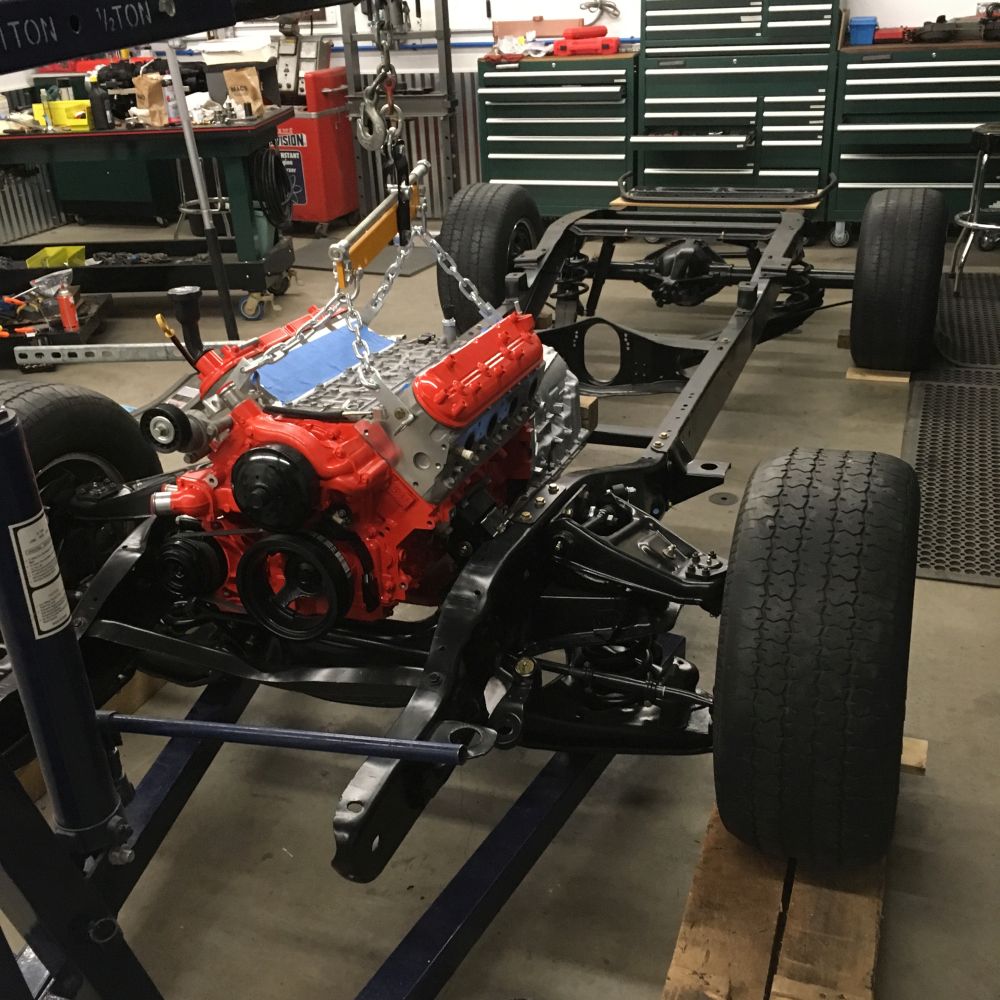
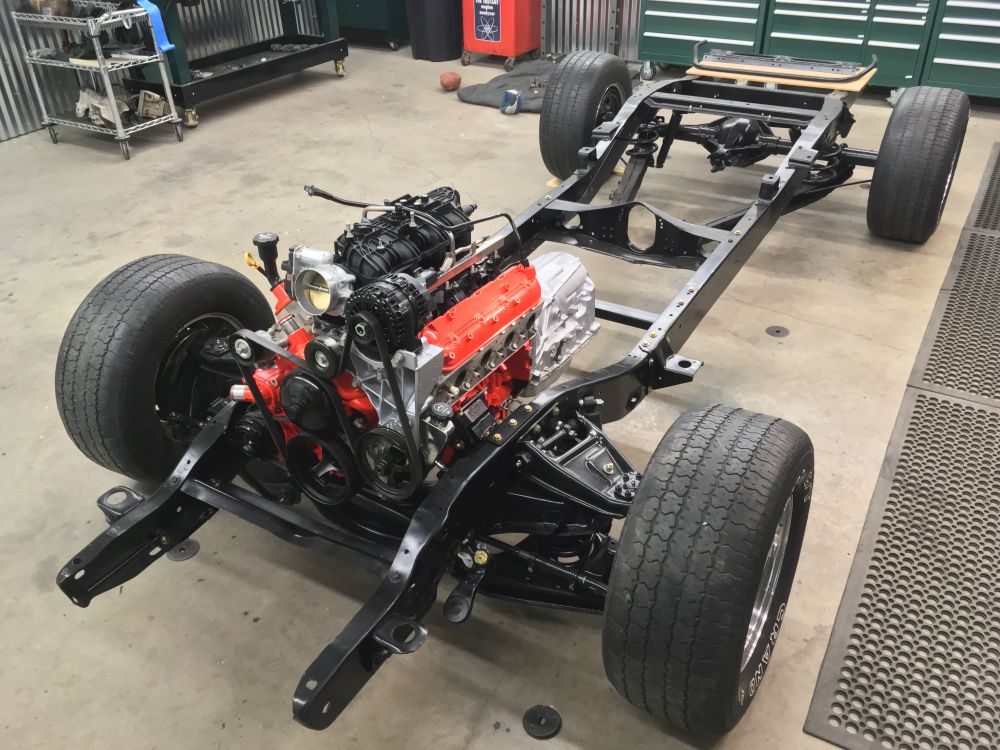
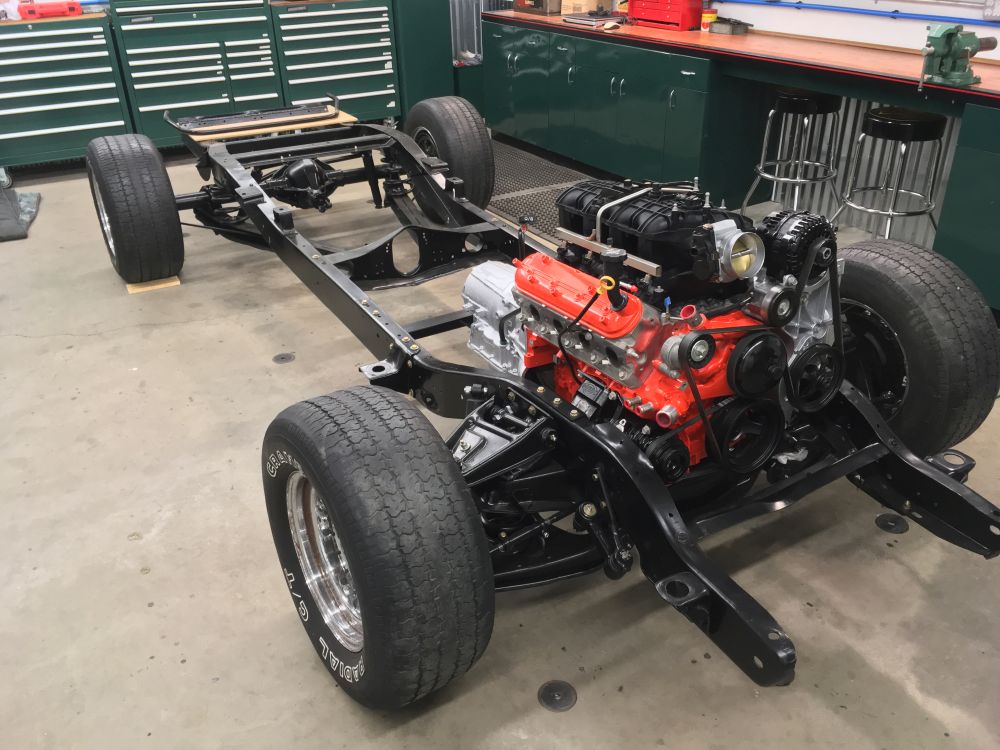
Back again with another update. I have since gotten the rearend bolted in, rear brakes done, front suspension put together, and the whole frame back on wheels for the first time in a long time for this project. I actually had the frame on wheels a week ahead of my goal so I'm track so far. Two weekends ago I disassembled the 5.3 and prepped/painted it. I think it really cleaned up good. Last weekend was spent cleaning up and painting other odds and ends. This past Wednesday night my dad and I pulled the midnight shift and got the engine and transmission mated again and setting on the frame mounts. Friday, I was able to the transmission and engine centered and set and every thing buttoned up. Now I just need to get some sheetmetal ordered up.
__________________
1972 Chevy C-10 Cheyenne Super - Buckets, A/C, "The 17 Year Revival Project" Last edited by 1972CheyenneSuper; 11-26-2016 at 11:48 PM. |
|
|
|
|
11-26-2016, 11:50 PM
|
#29 |
|
Senior Member
 Join Date: Aug 2011
Location: Reno, Nv.
Posts: 1,424
|
Re: '72 Super Project: Updates!
Nice work, looking good.
__________________
1927 Willy's Knight 24,000 original miles, 1958 Impala 283/Powerglide, 1964 C-30 383/4 speed, 1971 Monte Carlo 350/350, 1972 GMC K2500 350/350, 1976 Chev. K10 350/350, 2006 GMC Sierra 2500HD LBZ Duramax/Allison, 2006 Chev. Silverado K3500 LBZ Duramax/Allison |
|
|
|
|
11-27-2016, 08:47 AM
|
#30 |
|
Registered User
Join Date: Aug 2013
Location: Atlanta, GA
Posts: 702
|
Re: '72 Super Project: Updates!
Looks awesome. Love what you are doing.
__________________
1968 C10 292/3 spd - sold 1969 K10 350/3 spd/205 - sold 1971 K5 350/4 spd/ 205 - sold 1970 K20 350/350/205 - sold 1969 K20 396/400/205 - work in process |
|
|
|
|
11-27-2016, 09:45 AM
|
#31 |
|
Registered User
Join Date: Oct 2006
Location: Orland Park Il
Posts: 2,041
|
Re: '72 Super Project: Updates!
Looking good, sweet shop too! Where did you get the rear brake hardware kit from?
__________________
68 GMC C3500 Longhorn DRW 67 Chevy C10 LWB 90 Mustang Gt 90 Mustang Notchback |
|
|
|
|
11-27-2016, 12:16 PM
|
#32 |
|
Registered User
Join Date: Feb 2006
Location: ND
Posts: 207
|
Re: '72 Super Project: Updates!
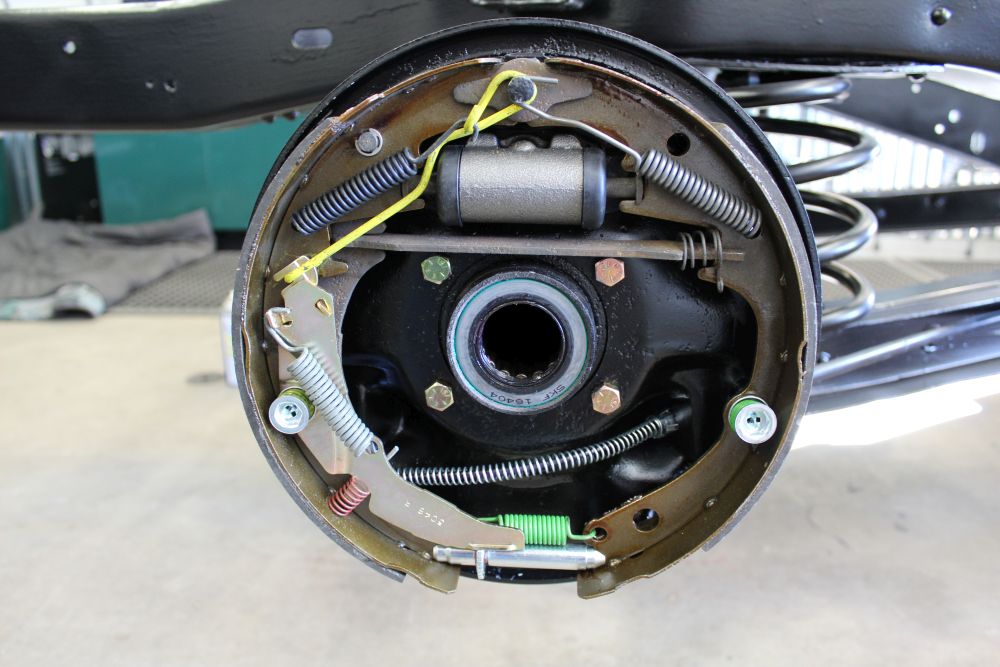
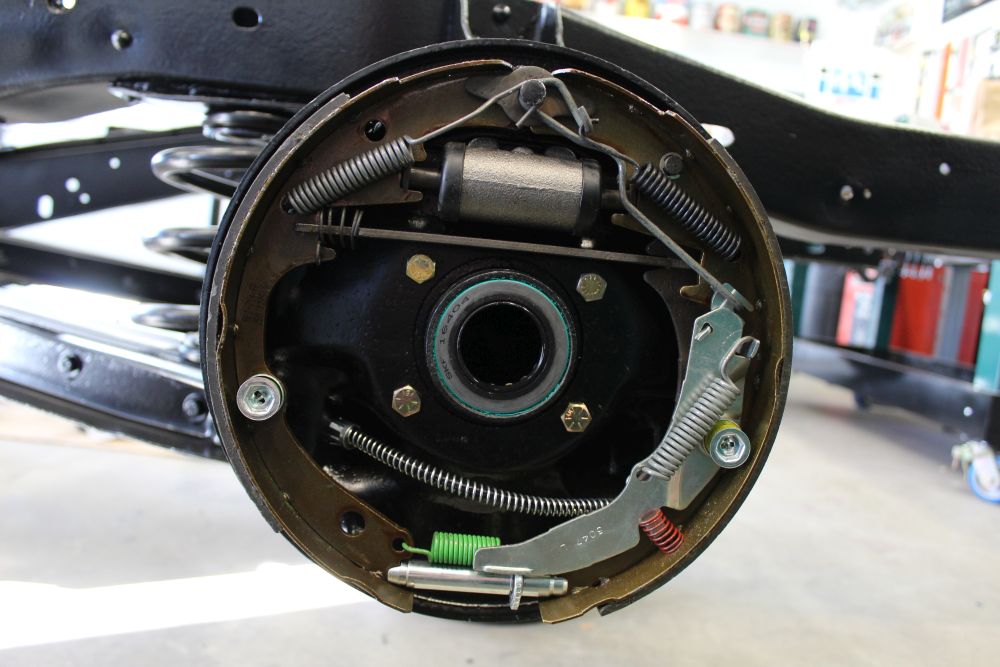
Thanks for the comments. I pieced all of the parts for the rear brakes rather than purchasing a kit.
This is what I purchased for my '72 Leaf spring rear converted to coil sprung. I don't think there is a difference between the two. But I don't know for sure, so there is my disclaimer. I was slightly disappointed upon receiving most of the Delco parts as most of it was manufactured overseas. They seem to be of decent quality, but AC Delco used to be synonymous with "Keeping your GM truck GM." The joys of a global market. Wheel Cylinders RH ACDELCO 18E1123 LH ACDELCO 18E1124 Spring/Hardware Kit - Does both sides ACDELCO 18K1597 Self Adjuster Kits RH RAYBESTOS H2509 LH RAYBESTOS H2508 Parking Brake Cables x2 ACDELCO 18P2299 Drum Shoes Raybestos 280PG
__________________
1972 Chevy C-10 Cheyenne Super - Buckets, A/C, "The 17 Year Revival Project" |
|
|
|
|
11-27-2016, 02:21 PM
|
#33 |
|
Registered User
Join Date: Oct 2006
Location: Orland Park Il
Posts: 2,041
|
Re: '72 Super Project: Updates!
Thanks for the #'s!
__________________
68 GMC C3500 Longhorn DRW 67 Chevy C10 LWB 90 Mustang Gt 90 Mustang Notchback |
|
|
|
|
12-03-2016, 10:20 PM
|
#34 |
|
Registered User
Join Date: Feb 2006
Location: ND
Posts: 207
|
Re: '72 Super Project: Updates!
Re-reading my last comments and as a side note, the part number I gave for the parking brake cable is for a trailing arm setup. I am fairly certain that a leaf spring setup would be a different piece, for anyone else using the mentioned numbers.
Haven't gotten a whole lot done this past week and weekend due to a winter storm and also the fact that I've been sick the last 4 days. But I did manage to get a little motivational poster done for myself this morning. I found a truck picture online that matched pretty closely what I have in mind and photoshopped the dark blue bottom color and the medium blue roof and a few other odds and ends. I believe these wheels on the drawing are 20's, whereas I'll probably be in the 18" range so I have a little more sidewall. There is always the chance of going rally wheels too, I haven't entirely decided. I'll be finalizing my sheet metal shopping list this weekend and getting some stuff ordered so I can get going again in a couple of weeks. I'm really looking forward to it. 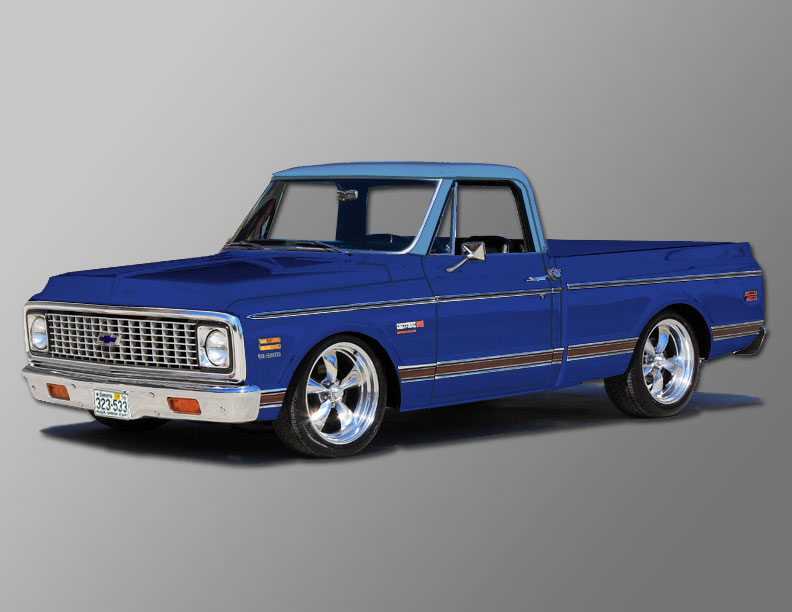
__________________
1972 Chevy C-10 Cheyenne Super - Buckets, A/C, "The 17 Year Revival Project" |
|
|
|
|
12-04-2016, 07:01 AM
|
#35 |
|
Senior Member
Join Date: Jun 2009
Location: Belews Creek , NC
Posts: 4,220
|
Re: '72 Super Project: Updates!
Real nice work
 Good to see you are back at it Good to see you are back at it 
__________________
Larry It is easily overlooked that what is now called vintage was once brand new. "Project 68" paypal.me/ldgrant |
|
|
|
|
12-22-2016, 05:56 AM
|
#36 |
|
Registered User
Join Date: Aug 2010
Location: Grande Prairie Alberta
Posts: 105
|
Re: '72 Super Project: Updates!
Subscribed
|
|
|
|
|
12-31-2016, 11:45 PM
|
#37 |
|
Registered User
Join Date: Feb 2006
Location: ND
Posts: 207
|
Re: '72 Super Project: Updates!
Well, I'm at my end of the year update. Not much in the way of progress, due to being sick for three weeks following Thanksgiving and receiving 40+ inches of snow in December, between cleaning snow and trying to stay healthy, truck time took a bit of a hit. I did order some sheet metal though and should be back on track again. I ordered a new cab floor, rockers, cab corners, front fenders, inner fenders, front/rear bumpers along with brackets, LH door shell and a RH door skin.
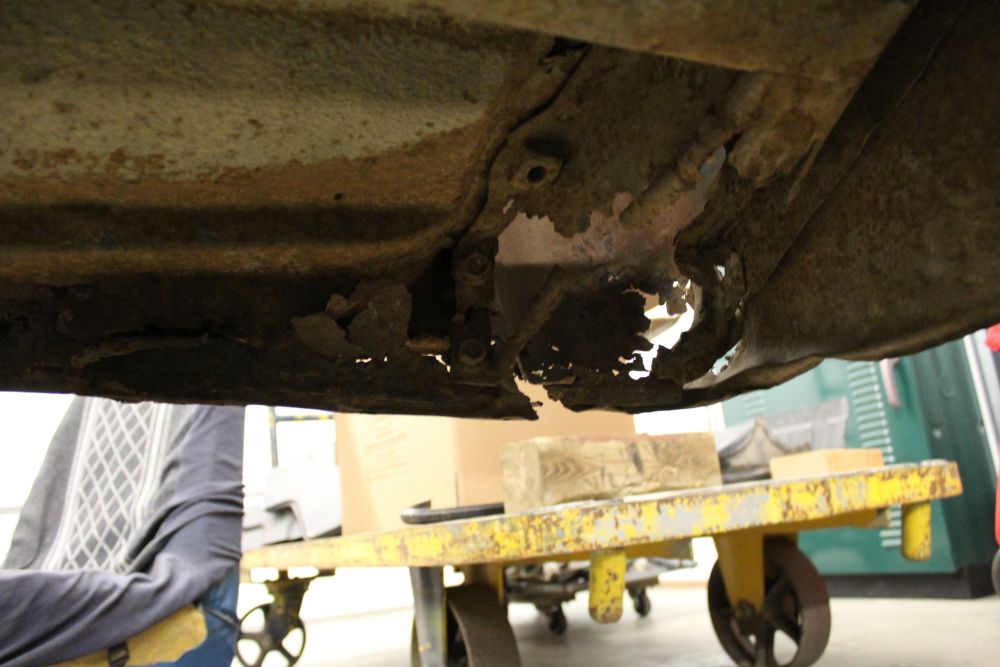
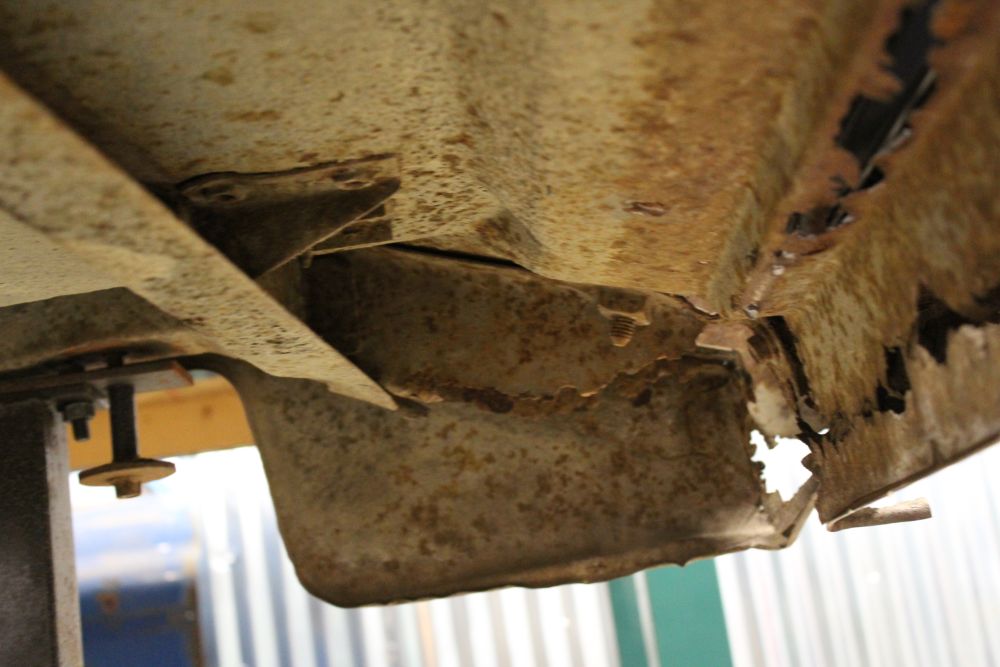
 It was advised that I test fit that door shell, before I started cutting any of the factory floor or rockers apart, due to known fitment issues. So today I mounted the drivers side shell. I'm not a body man at all, so this truck is going to be my learning curve. However out of the box, I had it bolted up and after twenty minutes or so of adjustments, I think I have it sitting relatively decent. The hinges were still bolted to the cab in the same position the factory doors were hung, so any adjustments were done on the door to hinge location. My hinges definitely need to be rebuilt though, and I know that will require more adjusting, but I think it fits decent for the most part. The only major issue I had was the top hoop hitting part of the drip rail in the dead center, but the drip rail itself was sagging in that spot, once that was clearanced, the door was able to shut fully without hitting anything else and resting on the little rubber bumpstops. The rear door to cab gap is about 1/4", I think I could slide it back a hair more, however I looked at my '69 GMC with stock doors and it had about the same gap, so maybe it's acceptable? All of my door pics can be seen HERE. The repro door discussion can be found here. 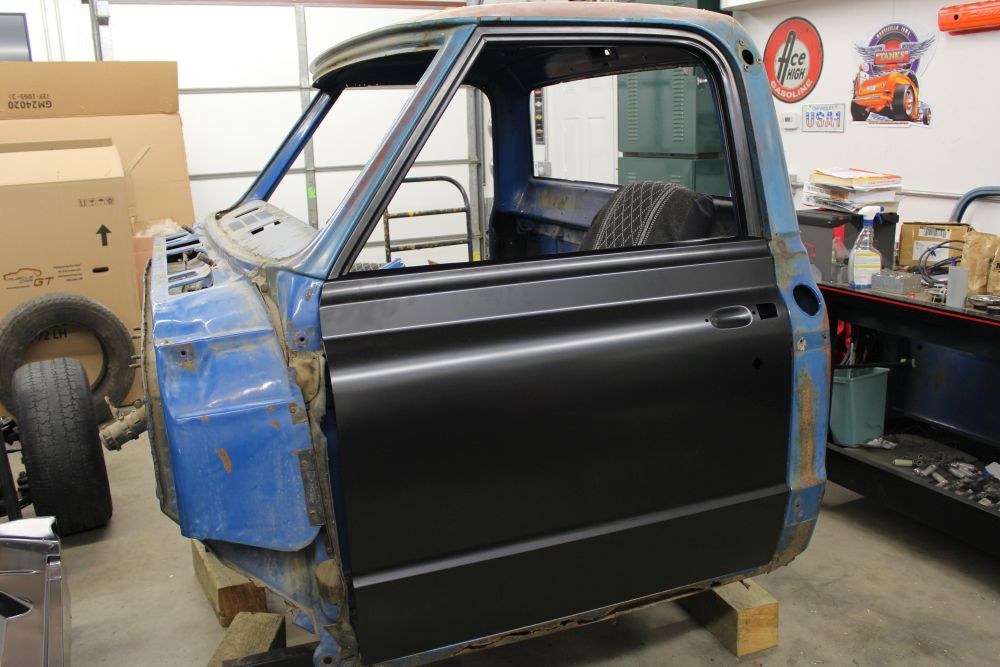  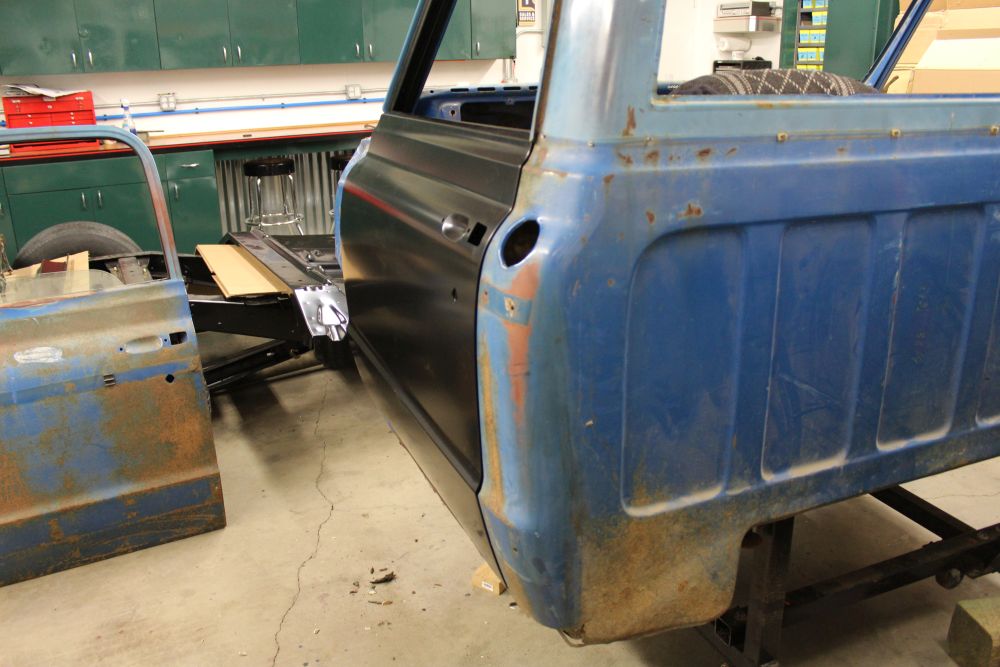 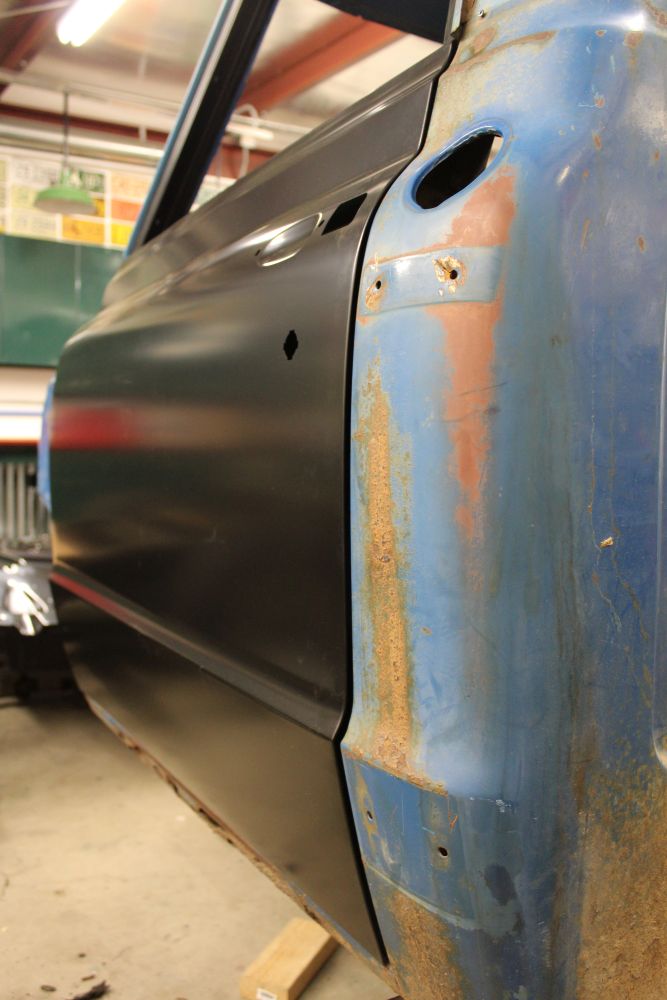 The following is the main reason I decided to go with a door shell. First and foremost is finding good original sheet metal in my region is really hard, if not impossible. The patch panels to repair this door would cost nearly two thirds what a new shell costs. Third, and probably the most important reason is, I really lack the body working skills to attempt such an endeavor. I am going to try to reskin my passenger side door, any pointers in that department would be appreciated. 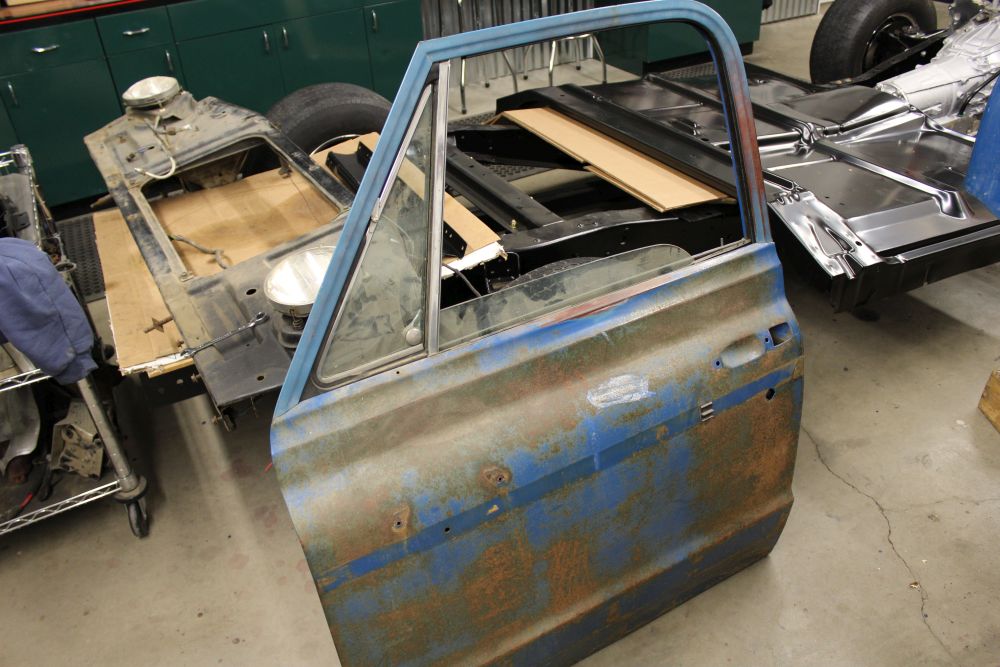 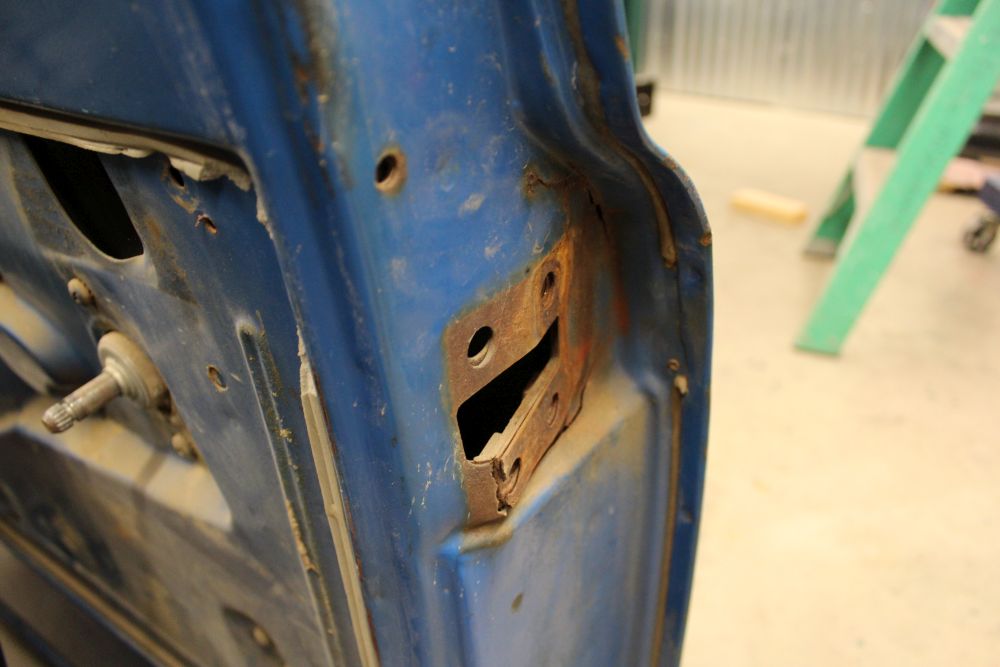 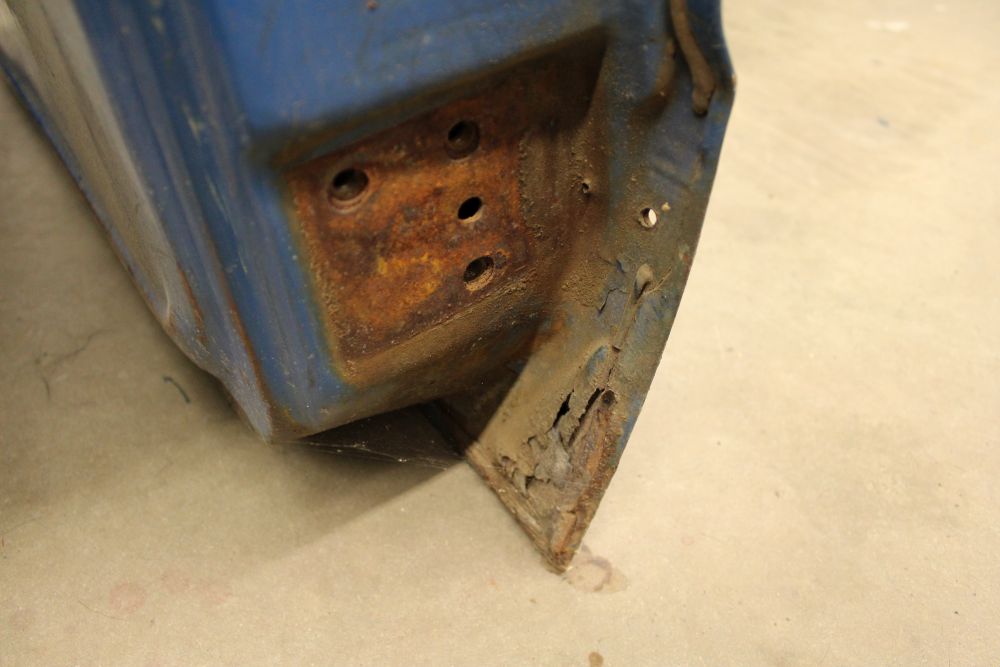 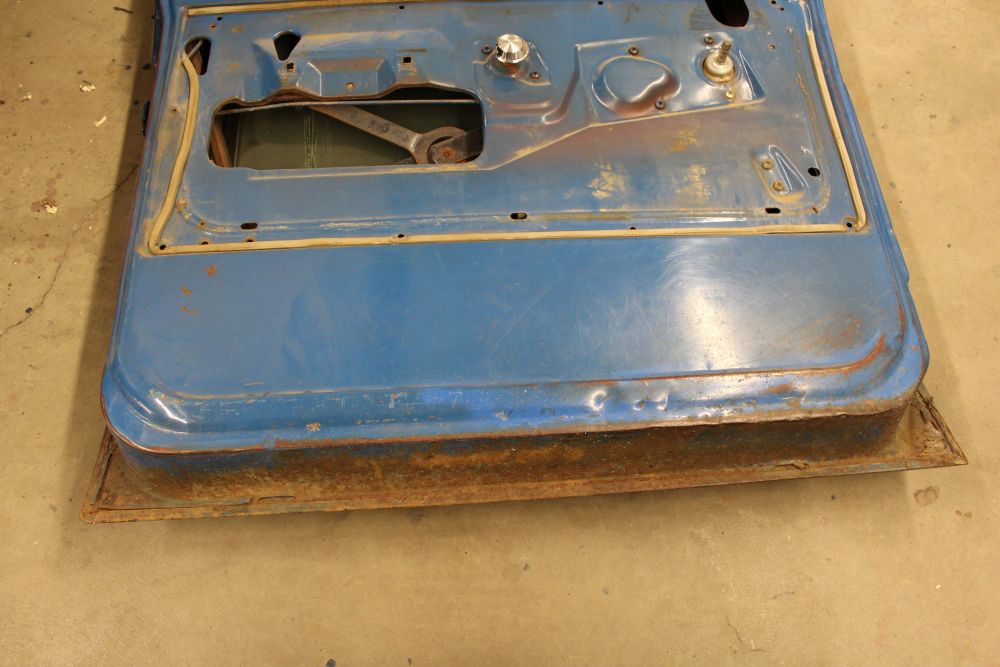 Obligatory shot of my helper. The last lab I had when I was in high school was about the same age as this pup (3 yo) when I first ripped this truck apart, so although I've never driven it since I've owned it, there is some sentiment attached to it. 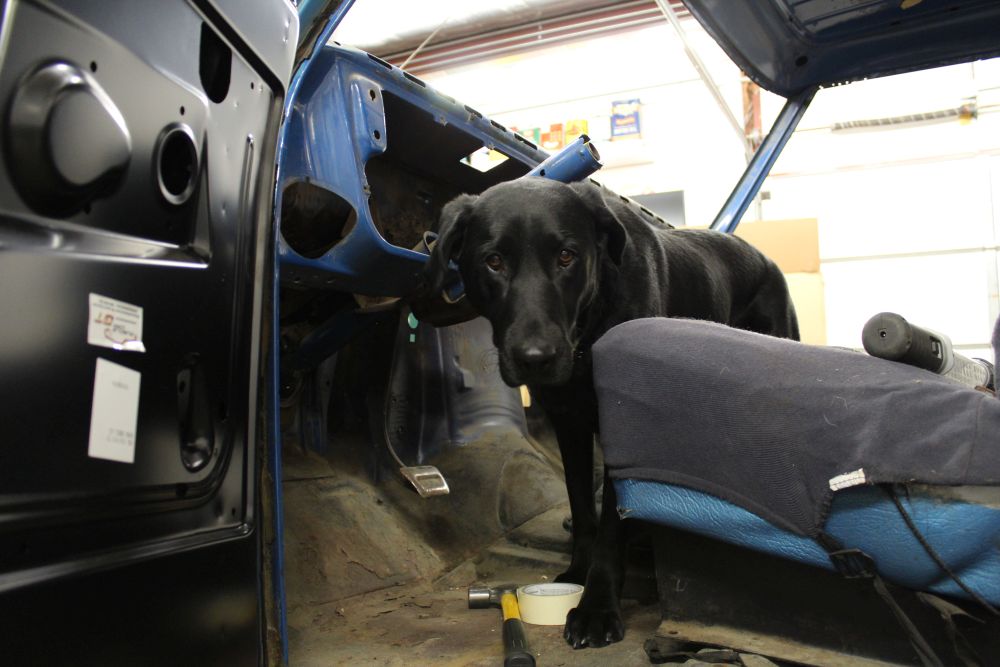 New cab floor, the high hump floors weren't in stock any time soon, so I'll be cutting this one out for my high hump cover. 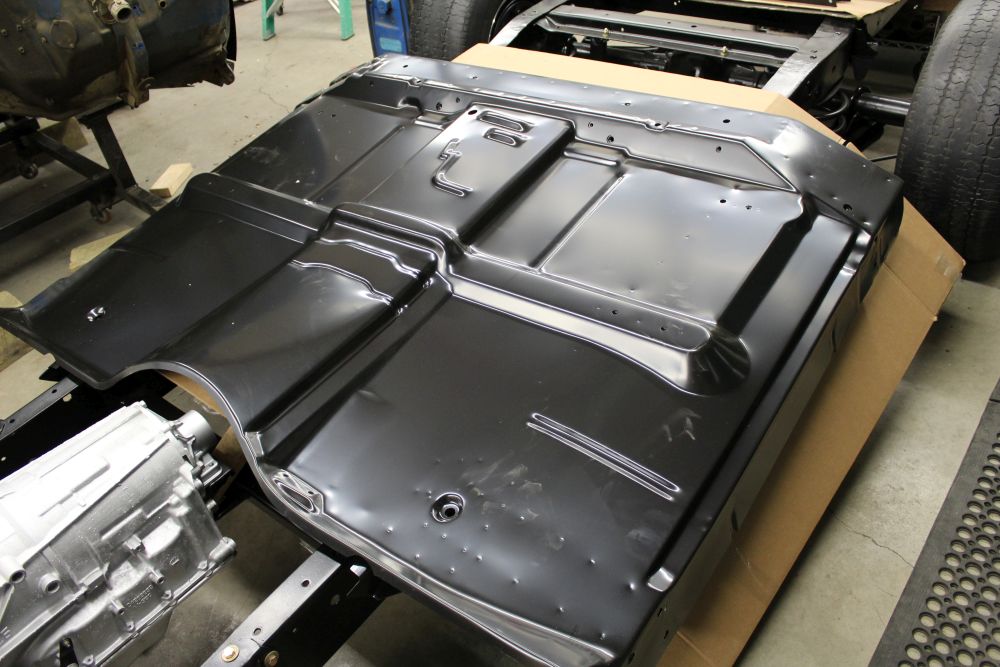 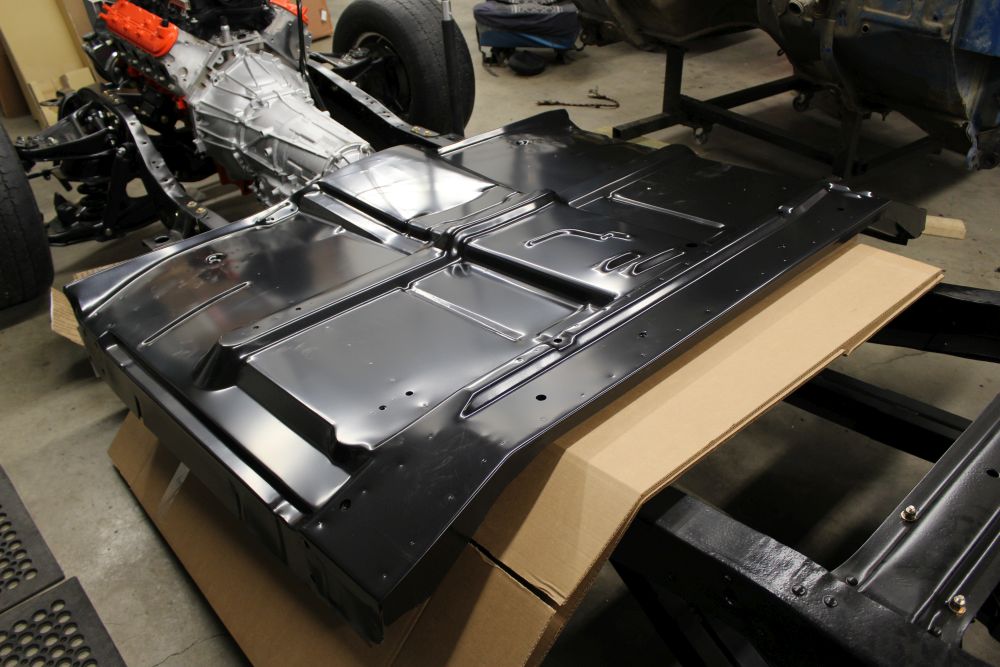 I took a few pics of my trouble spots on my cab. I know worse has been fixed before, but I'll get through this. You folks with the California cabs are not aware of how good you have it. Not only is it rusted out, it was an old farm truck, so it's had antennas mounted on it, been hit by various things, had some shoddy cab marker lights added on at some point, been out in a few hail storms, etc. I guess that's why its called a project truck. 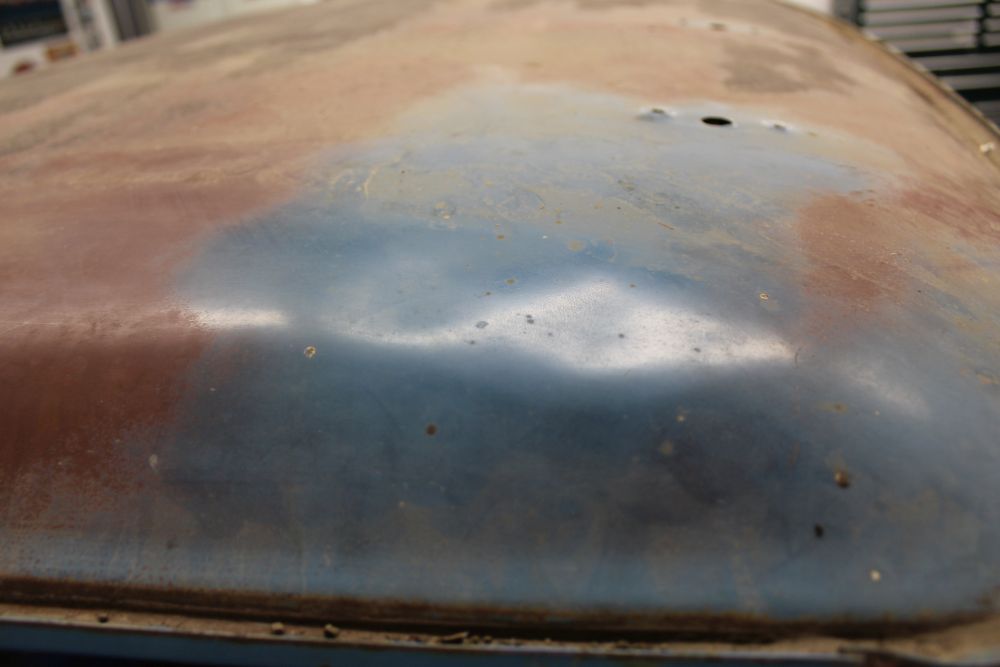 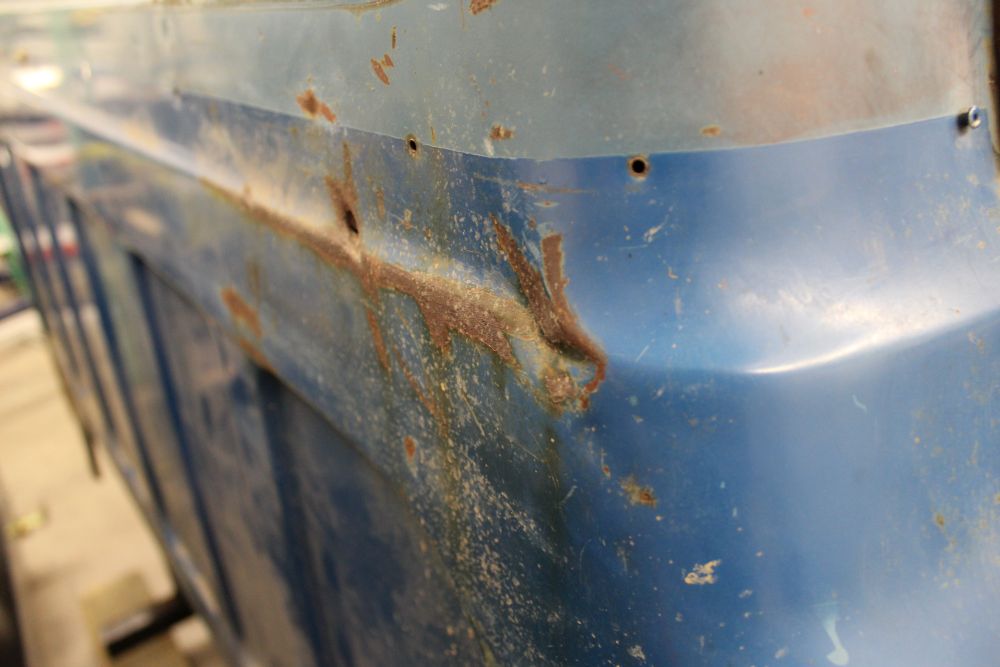 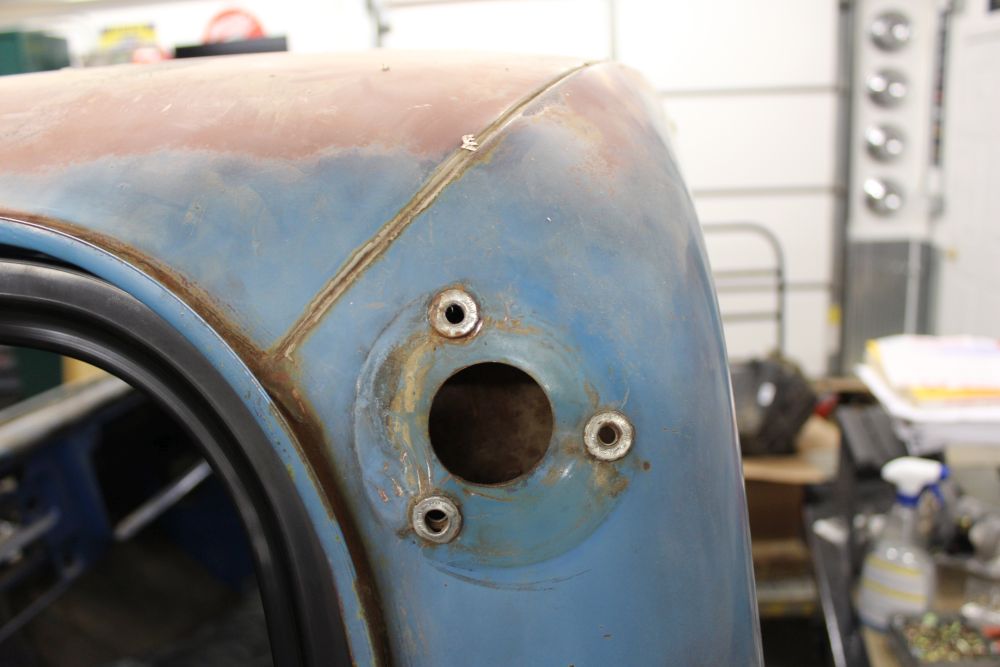 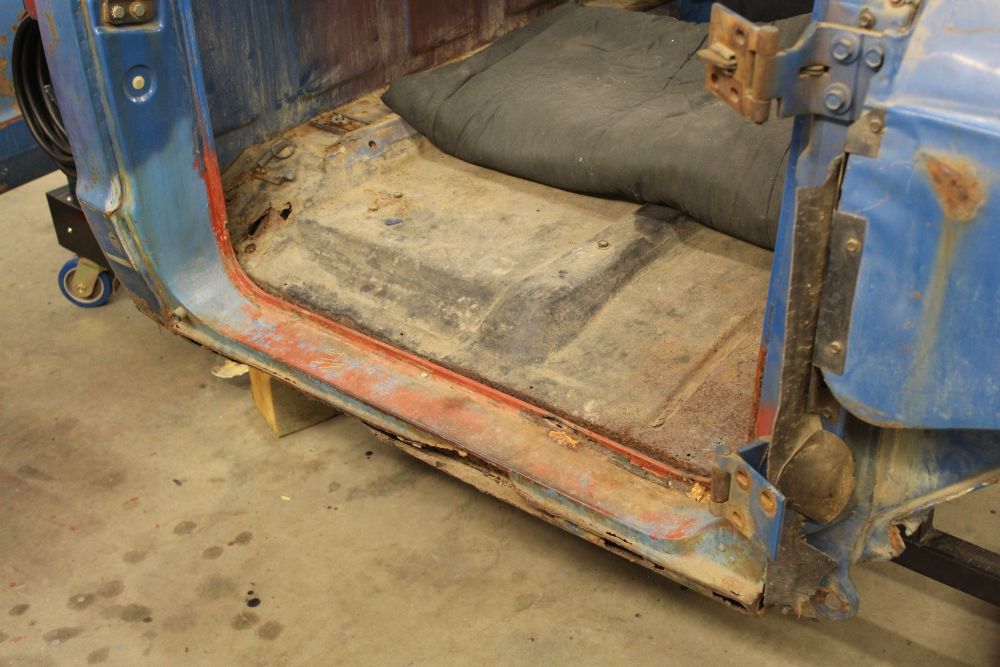 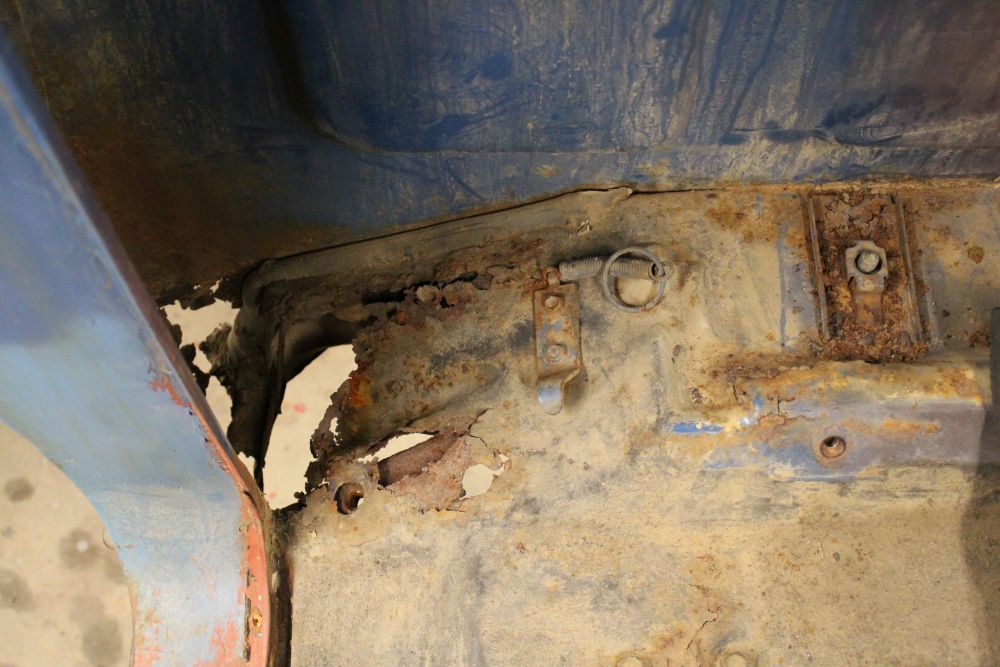 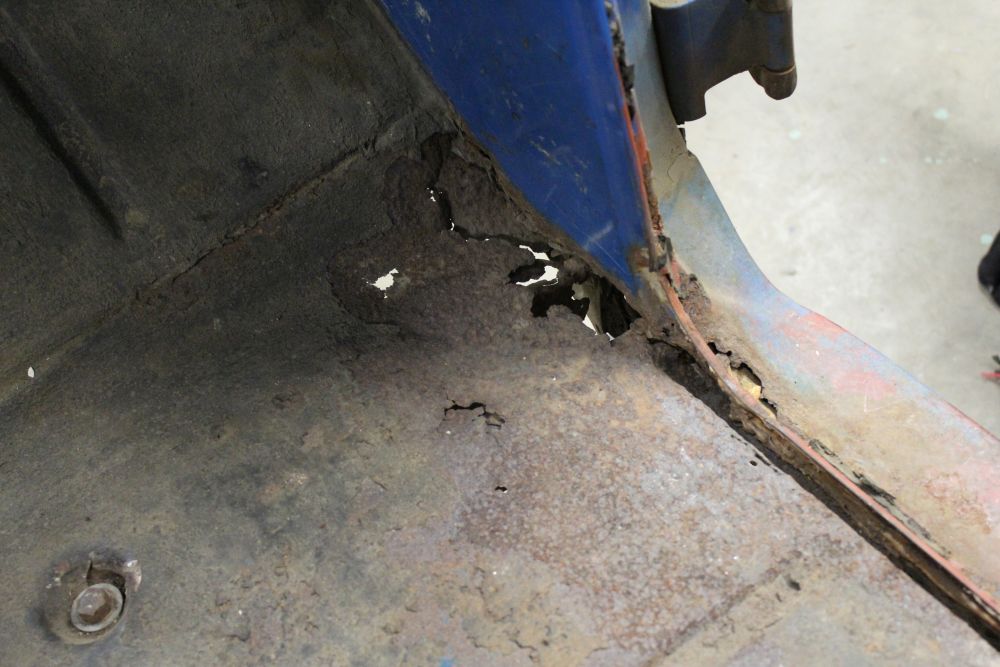 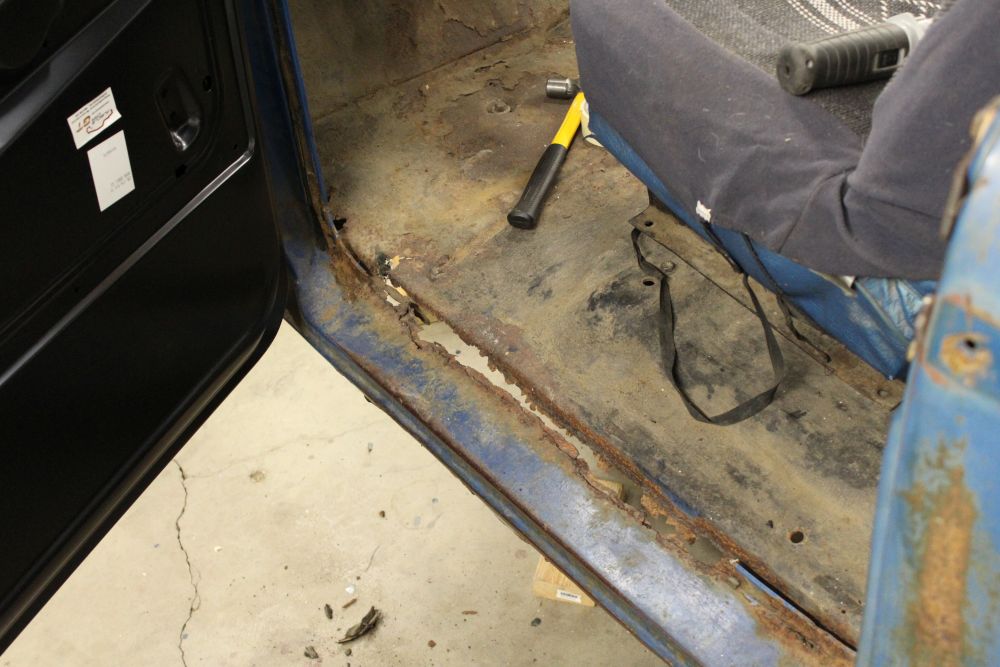 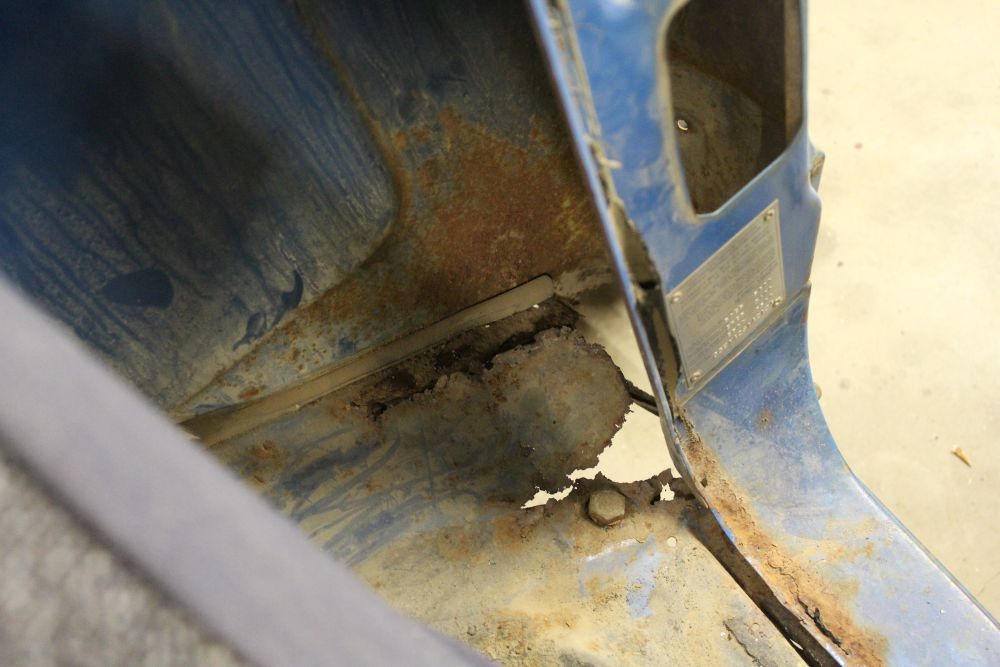
__________________
1972 Chevy C-10 Cheyenne Super - Buckets, A/C, "The 17 Year Revival Project" |
|
|
|
|
01-01-2017, 12:22 AM
|
#38 |
|
Account Suspended
 Join Date: Jul 2016
Location: Tacoma, WA
Posts: 6,873
|
Re: '72 Super Project: Updates!
Hi,
Thanks for the update on the repro doors, the pic showed me what I was wondering. The door fit looks great so maybe the newer doors have obviously been updated as they have the triangle raised portion in the front lower inside and your fit is nice. Good job and I do think it was wise to fit it up now before the floor work. I was wondering who would need a full floor....now I know...I take it for granted the trucks in WA state just need the inner and outer rocker and maybe a bit of the kick panel...Thanks again, now I have to read the first part of your long build! |
|
|
|
|
01-01-2017, 12:56 AM
|
#39 |
|
Registered User
Join Date: Feb 2006
Location: ND
Posts: 207
|
Re: '72 Super Project: Updates!
Hey, thanks for the kind words. I forgot to take pictures of the bottom of the floor. That was the main reason for replacing the floor instead of a few patches of the floor pan. All of the cab support braces are rusted through.
__________________
1972 Chevy C-10 Cheyenne Super - Buckets, A/C, "The 17 Year Revival Project" |
|
|
|
|
02-08-2024, 09:55 PM
|
#40 |
|
Registered User
Join Date: Feb 2006
Location: ND
Posts: 207
|
Re: '72 Super Project: Updates!
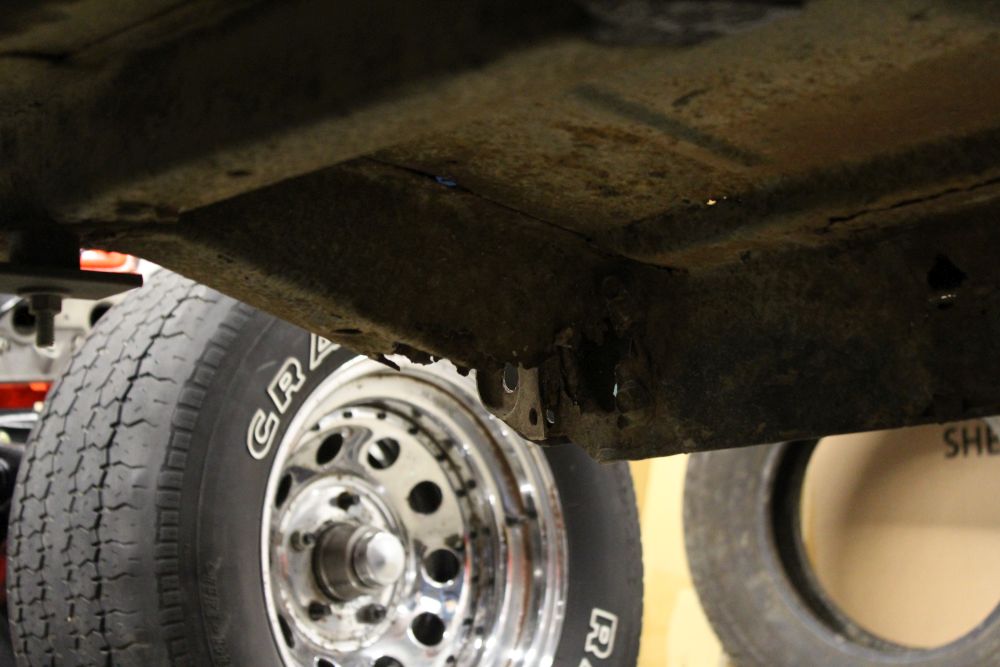
Here we are again 8 years later. I've been under the weather the last few days, so I thought I'd get this thing up to speed. Life flies by and funds limit progress like a lot of things in life, but I got back on track a few years ago. A few photo links apparently are in-op, so a few quick cliff notes are going to have to do. You can start here or go back and re-read the beginning if you want.
2007 Long story short, I bought this truck from my brothers in high school with the intention of doing a frame off restoration. College, money, life all prevented that. It sure was easy to rip apart into a million pieces though. Last picture is a 5.7 Vortec that I was going to put into this, it now resides in a '62 Impala.   P1010466 P1010466          
__________________
1972 Chevy C-10 Cheyenne Super - Buckets, A/C, "The 17 Year Revival Project" Last edited by 1972CheyenneSuper; 02-09-2024 at 02:11 PM. |
|
|
|
|
02-08-2024, 10:07 PM
|
#41 |
|
Registered User
Join Date: Feb 2006
Location: ND
Posts: 207
|
Re: '72 Super Project: Updates!
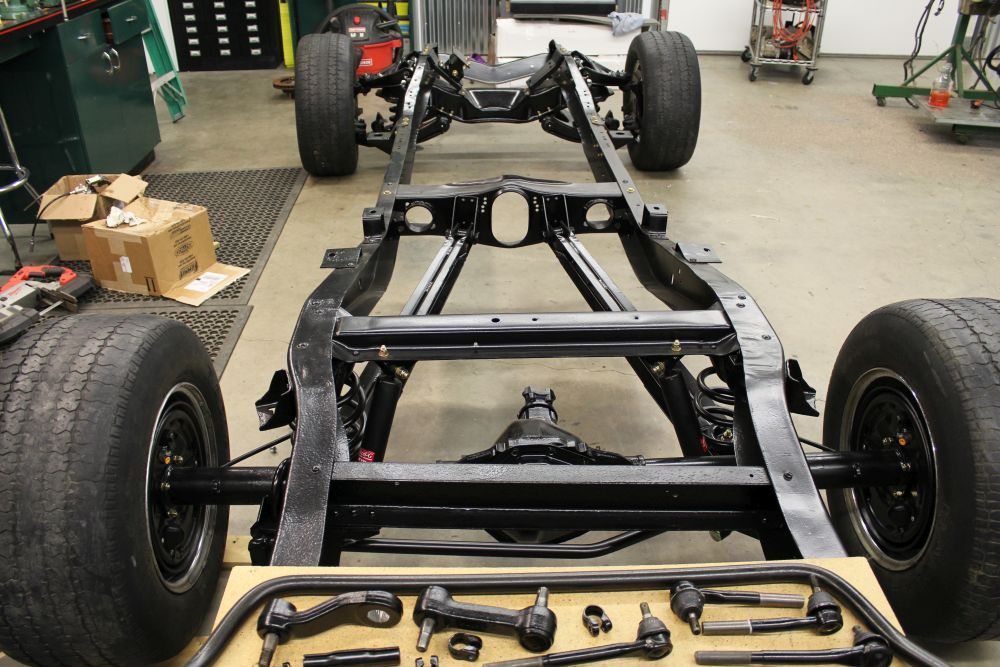
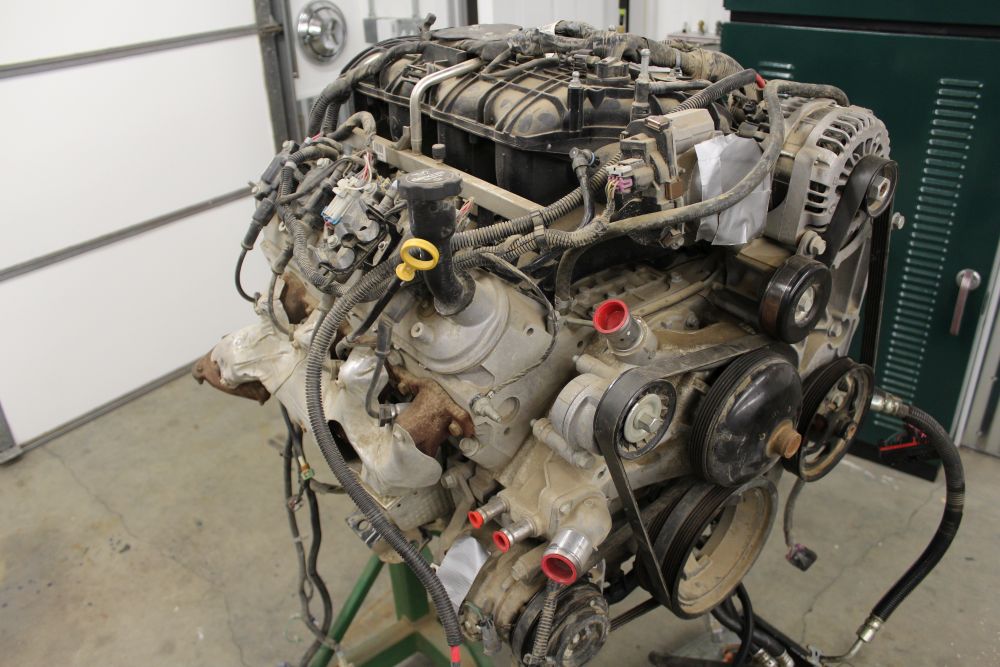
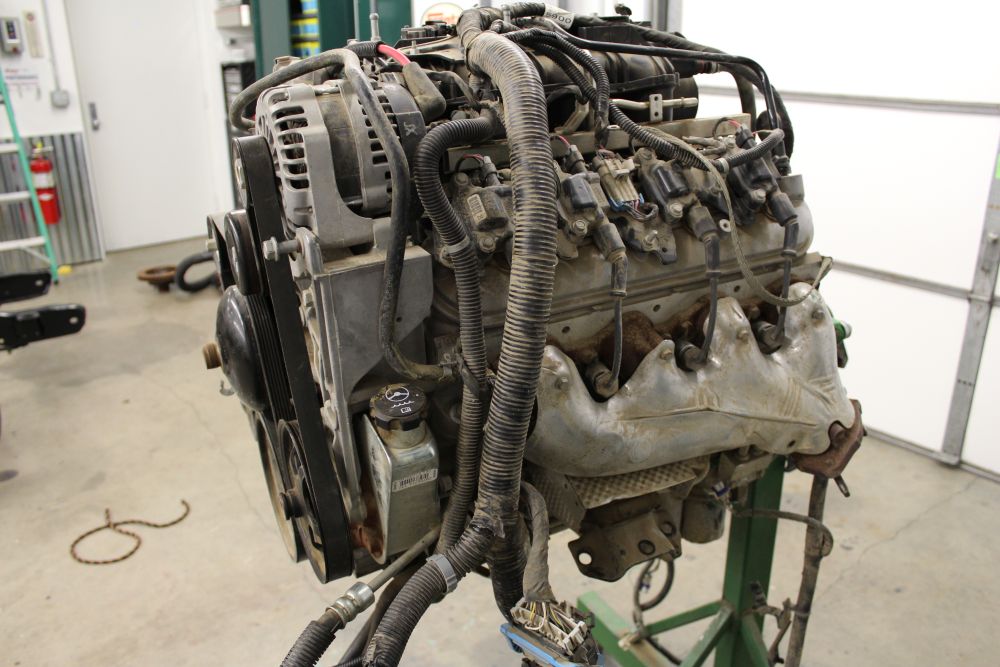
2016
Procured a trailing arm frame to create a swb frame. (I still have the intact original leaf spring frame) Cleaned up a 5.3 engine, this engine would eventually be shelved and replaced with the 6.0 that will be seen in a few posts. Suspension parts are from the now nonexistent Early Classic Enterprises who closed up shop in their prime imo.             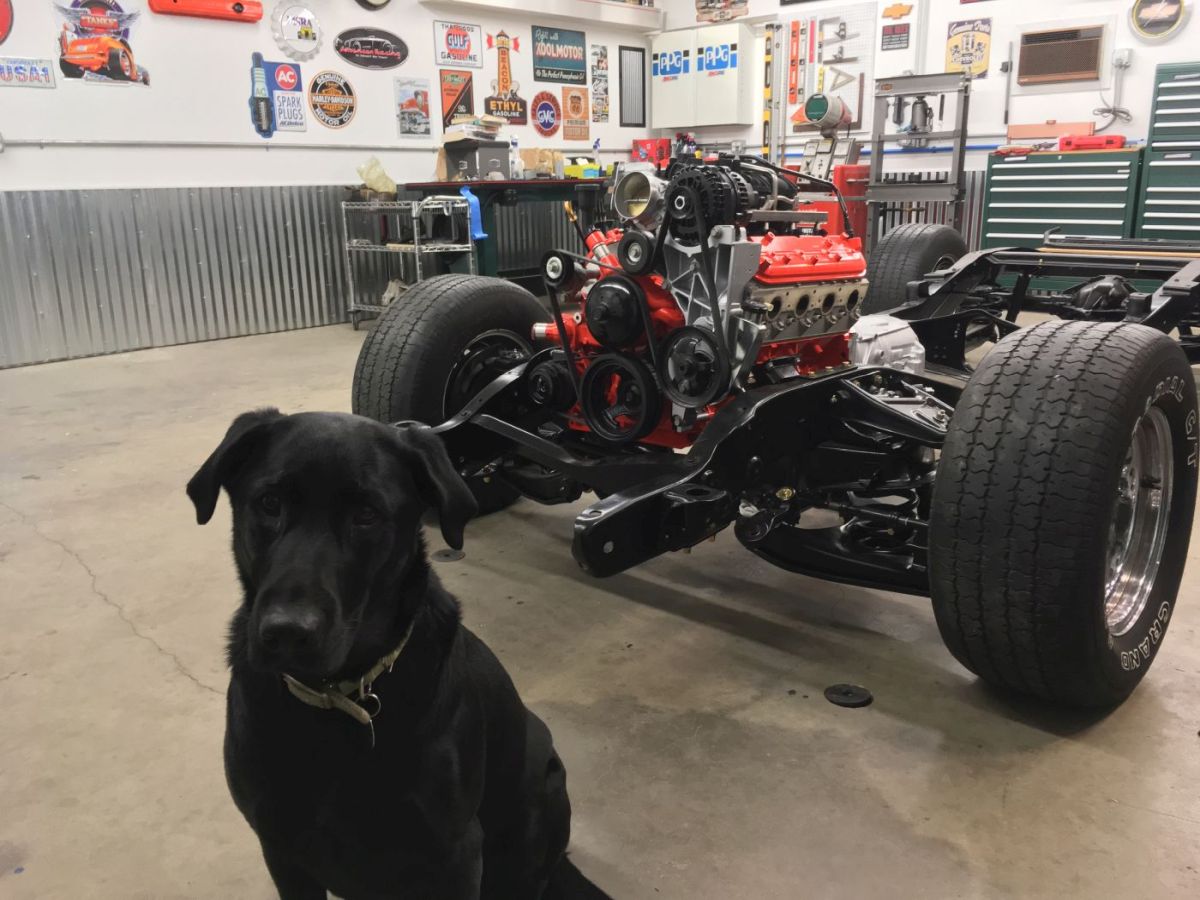 
__________________
1972 Chevy C-10 Cheyenne Super - Buckets, A/C, "The 17 Year Revival Project" Last edited by 1972CheyenneSuper; 02-09-2024 at 02:19 PM. |
|
|
|
|
02-08-2024, 10:23 PM
|
#42 |
|
Registered User
Join Date: Feb 2006
Location: ND
Posts: 207
|
Re: '72 Super Project: Updates!
2017
Come springtime '17 I started on the cab. Elected to go with a full floor due to the rot in all of the supports and floor pans.          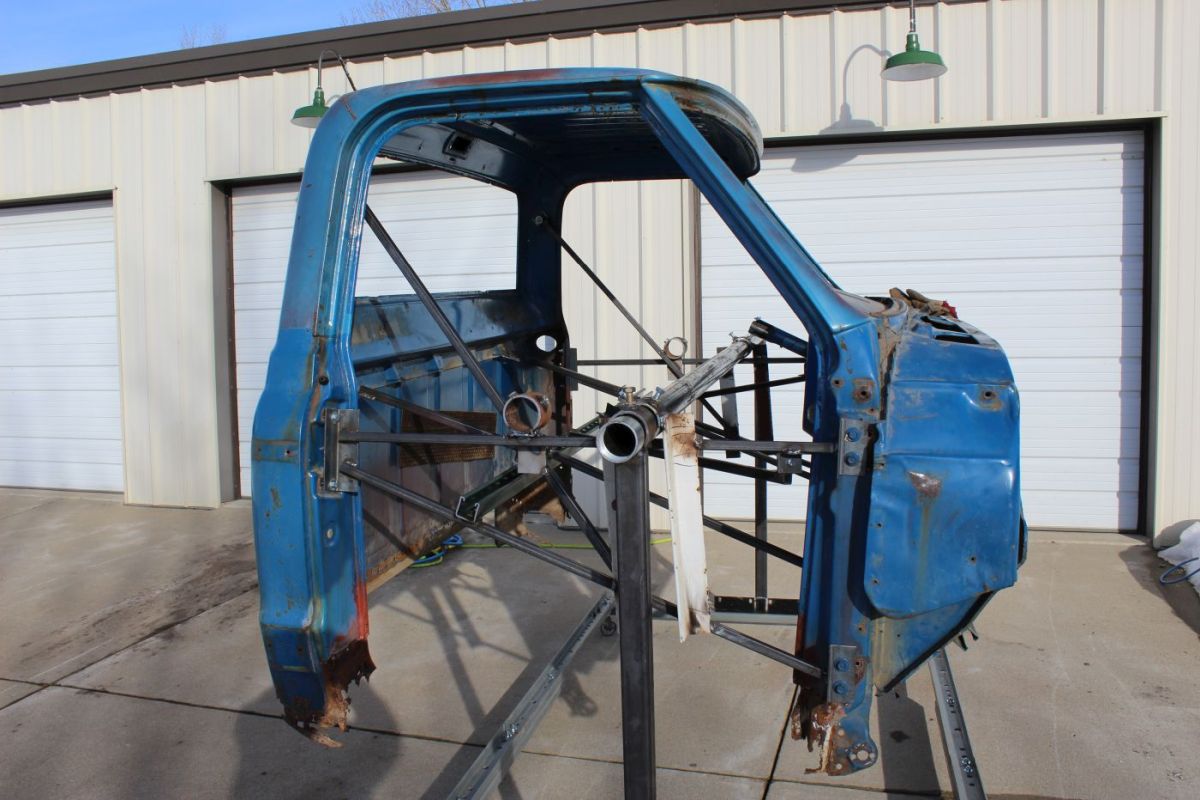    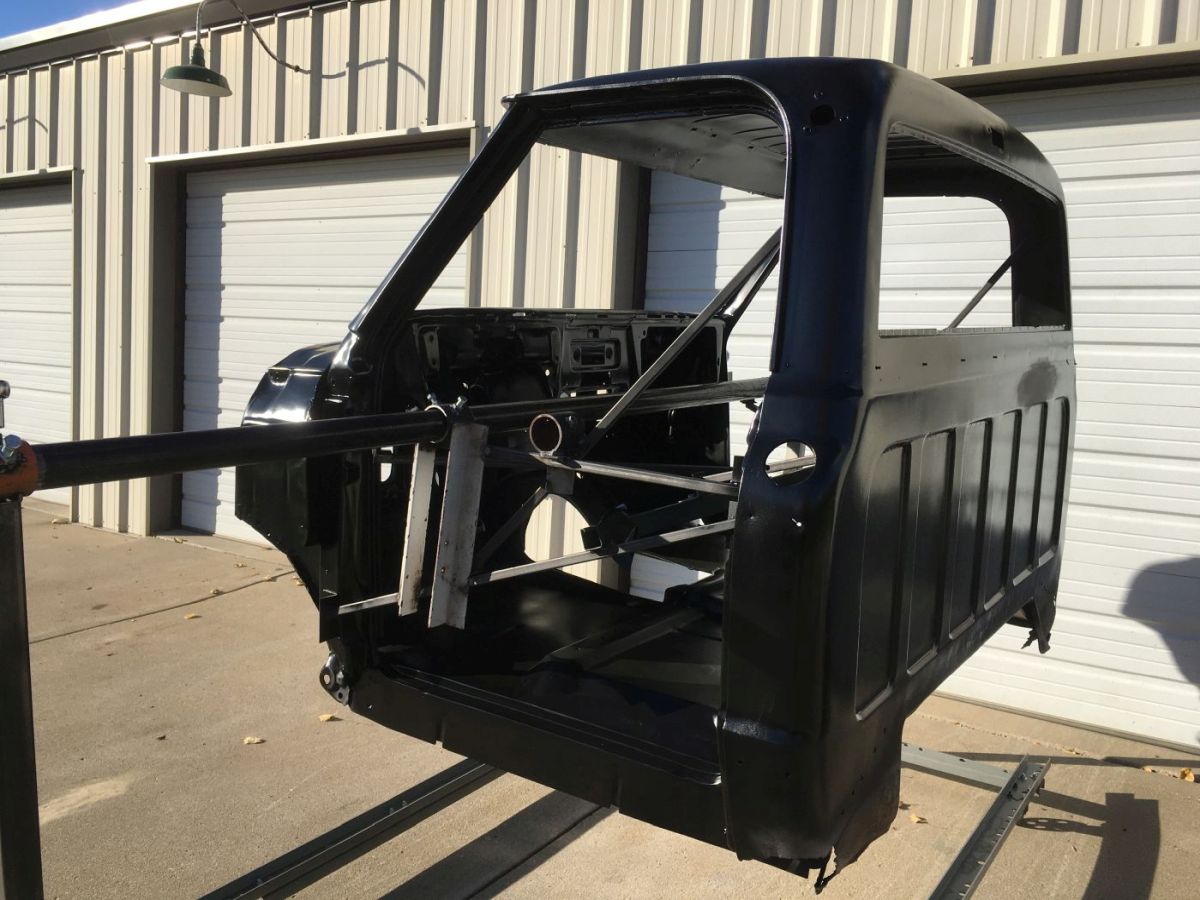
__________________
1972 Chevy C-10 Cheyenne Super - Buckets, A/C, "The 17 Year Revival Project" Last edited by 1972CheyenneSuper; 02-09-2024 at 02:25 PM. |
|
|
|
|
02-08-2024, 10:28 PM
|
#43 |
|
Registered User
Join Date: Feb 2006
Location: ND
Posts: 207
|
Re: '72 Super Project: Updates!
2018-2021
This time period was a bit of a recession, busy with a new job, and just a lot of life happening. Bought some parts, but really stalled out after getting the new floor in, just didn't quite know how to tackle the a and b pillars, rockers and cab corners, and the rest of the body work.   
__________________
1972 Chevy C-10 Cheyenne Super - Buckets, A/C, "The 17 Year Revival Project" Last edited by 1972CheyenneSuper; 02-09-2024 at 02:29 PM. |
|
|
|
|
02-08-2024, 10:46 PM
|
#44 |
|
Registered User
Join Date: Feb 2006
Location: ND
Posts: 207
|
Re: '72 Super Project: Updates!
2022
Summer of '22 is when I really started to dig back into this thing. I started with a few small instant gratification projects to boost a little confidence, before tackling the big picture stuff. 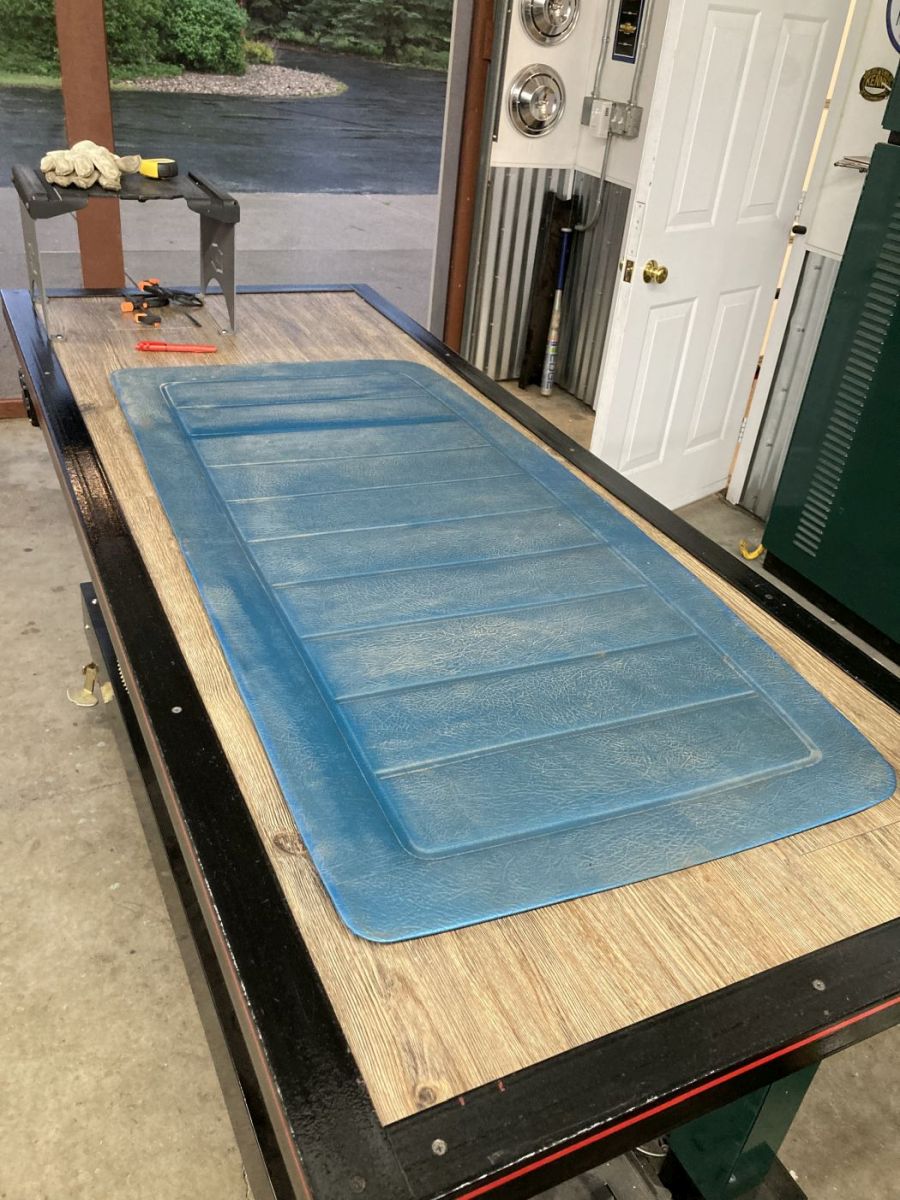 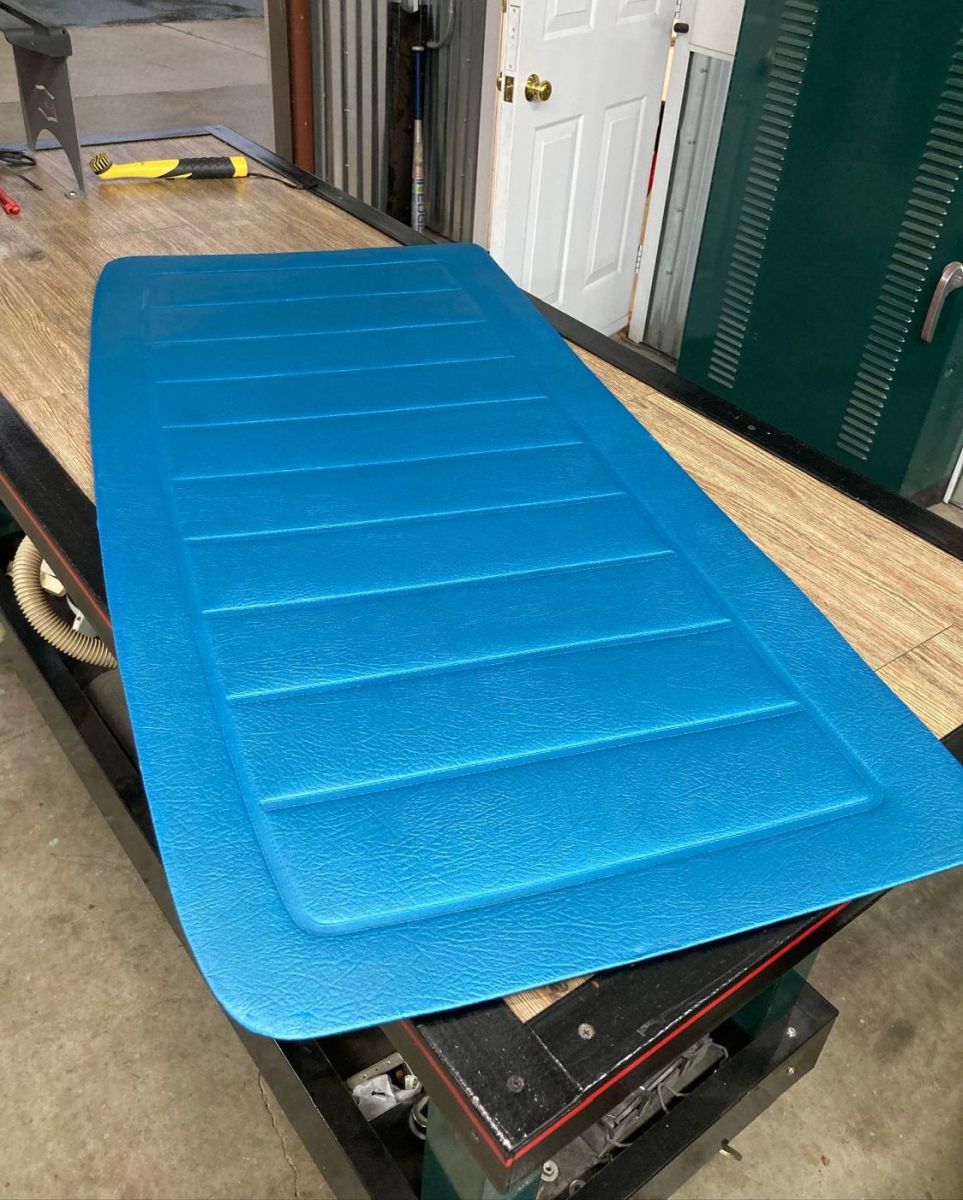 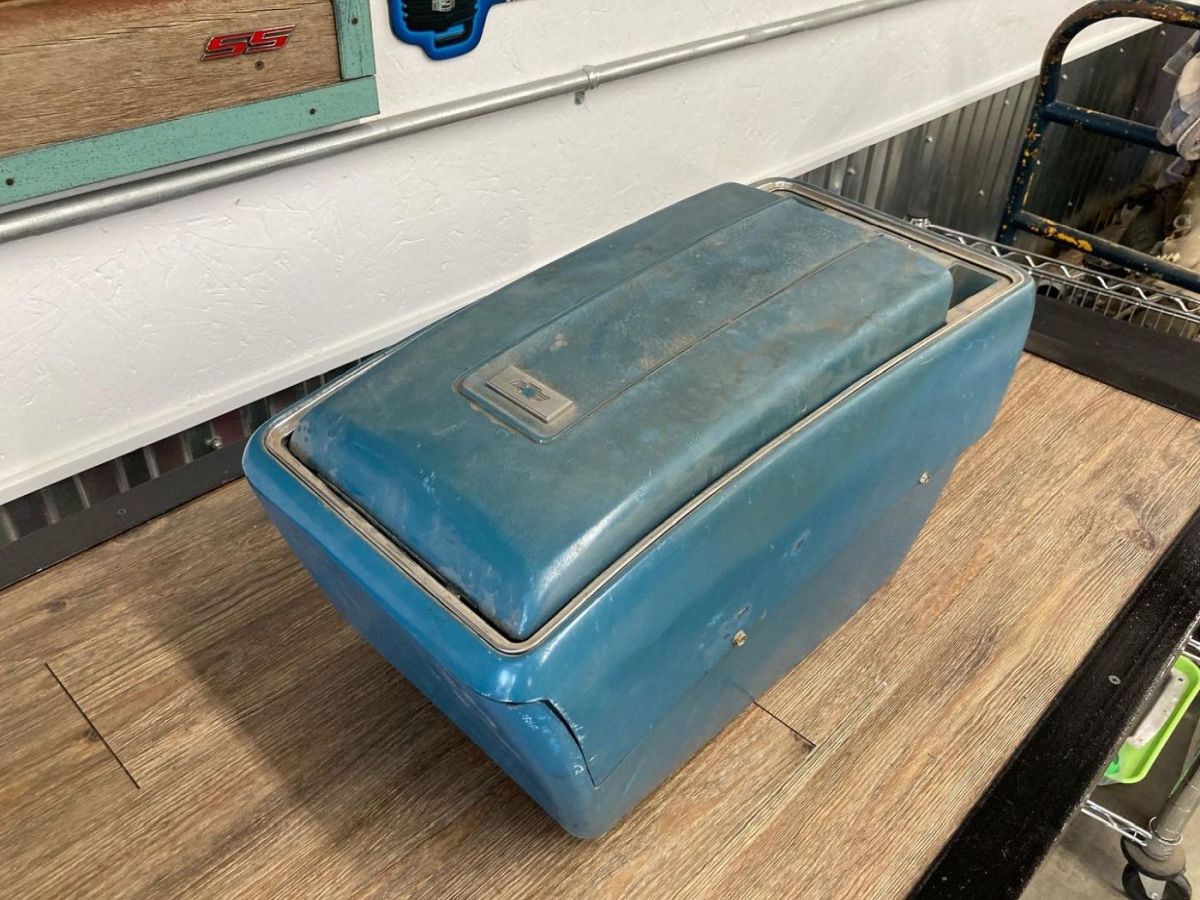        Next, I worked on the bed fill. I used a fuel door from an OBS, trying to use GM parts where possible for the custom stuff. 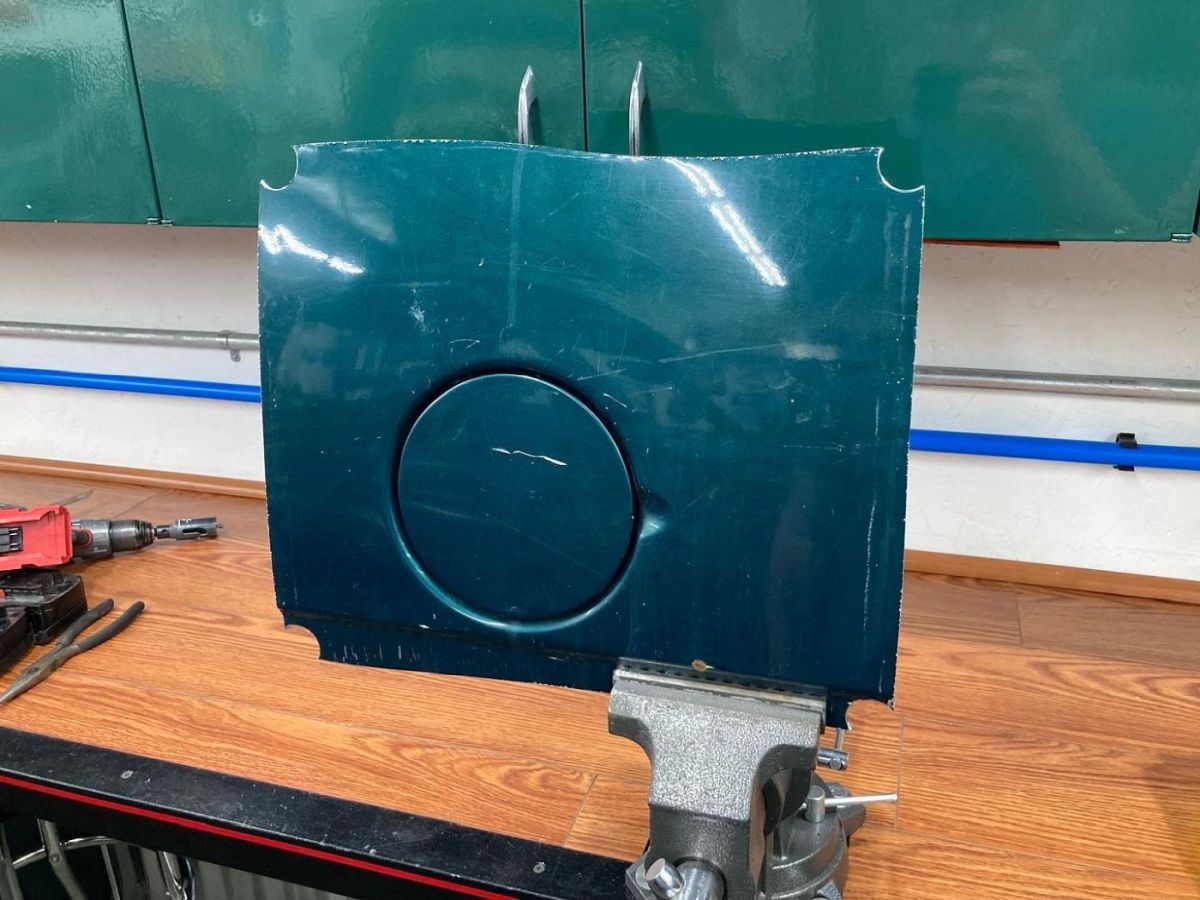      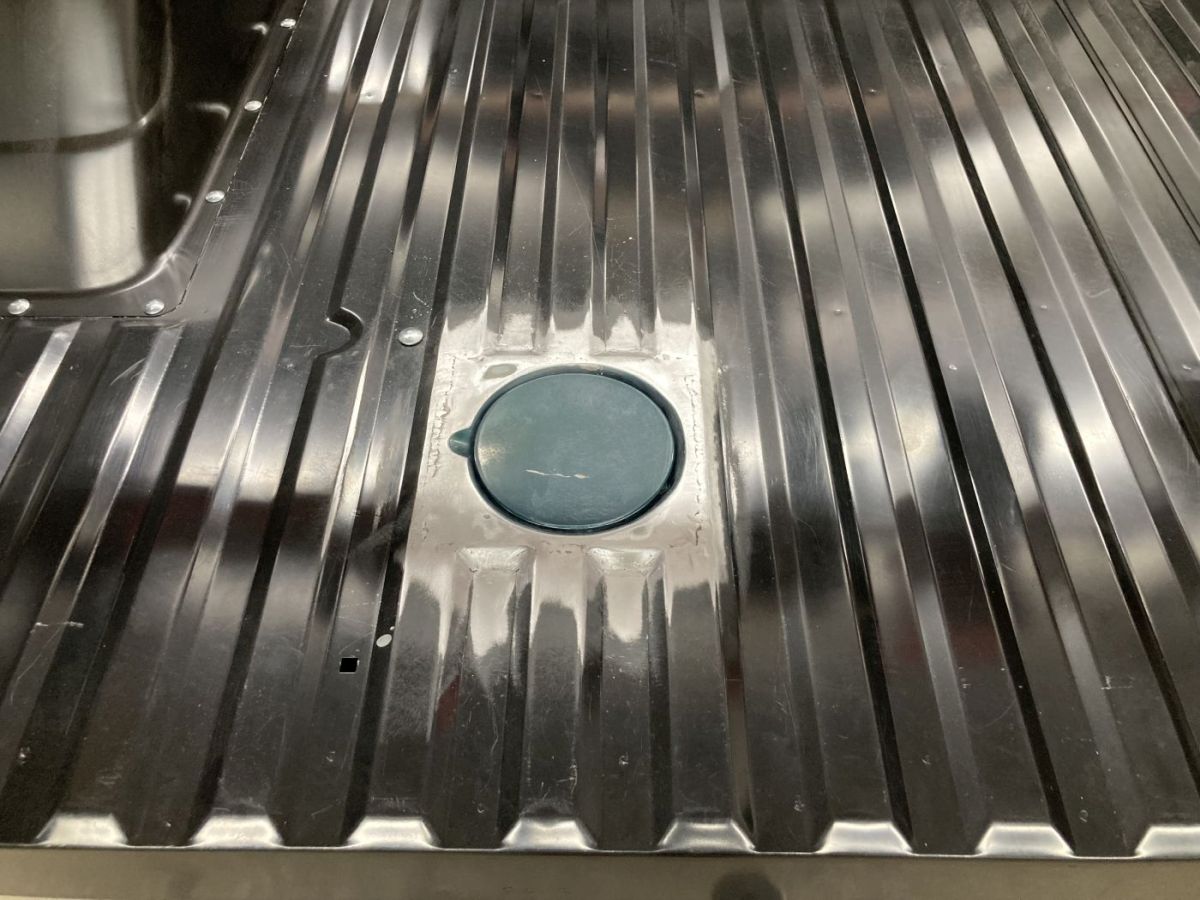   Starting to look like something. 
__________________
1972 Chevy C-10 Cheyenne Super - Buckets, A/C, "The 17 Year Revival Project" Last edited by 1972CheyenneSuper; 02-09-2024 at 02:39 PM. |
|
|
|
|
02-08-2024, 10:49 PM
|
#45 |
|
Born Psycho
Join Date: Feb 2001
Location: brentwood,cal,usa
Posts: 4,742
|
 looks really good, that was a ton of work, you should be proud of yourself looks really good, that was a ton of work, you should be proud of yourself
__________________
jerry moss 72 cheyenne super K20- tilt,tach,vacuum,speedwarning,buckets,shoulder belts,am/fm,tow hooks,bumper guards,toolbox,aux. fuel tank,posi front and rear,plus other goodies!!! SOLD 69 suburban K20-tilt,tach,vacuum,speedwarning,buckets,shoulder belts,am/fm,4 inch all spring lift,4 speed, 14 bolt full floater, dana 44 HD,warn winch,posi front and rear,tow hooks,plus other goodies. 73/80 chevy/gmc K20 SB400,turbo 400,205,tilt,a-c,gas hog. 77 K/5 cheyenne blazer-daily driver/beater. SON HAS IT NOW BRENTWOOD,CALIFORNIA |
|
|
|
|
02-08-2024, 11:01 PM
|
#46 |
|
Registered User
Join Date: Feb 2006
Location: ND
Posts: 207
|
Re: '72 Super Project: Updates!
2023
Springtime '23 came fast and I was wrapped up replacing the cylinder head on my Cruze and dealing with some rib issues. By June, I had made the decision to paint this truck myself or it was probably going to end up sitting for another twenty years. I decided to convert my detached two stall into a booth for the summer, and with that I had to make my compressor mobile to use in the shop and when painting. So May to June was spent over building this thing, but it payed off when I got to put it to the test.   Spent most of July, fitting trim, drilling holes, gapping, doing everything pre-paint I could think of or thought should be done.       My helper is getting a little grayer these days.     
__________________
1972 Chevy C-10 Cheyenne Super - Buckets, A/C, "The 17 Year Revival Project" Last edited by 1972CheyenneSuper; 02-09-2024 at 02:47 PM. |
|
|
|
|
02-08-2024, 11:26 PM
|
#47 |
|
Registered User
Join Date: Feb 2006
Location: ND
Posts: 207
|
Finally to the top of the hill, paint. My plan up until I started buying paint supplies was to go with the original color scheme, which yes, would have been unique and is not very common.
 The interior was going to be blue, as set by the pieces I had restored earlier and also due to the fact that I had bought almost everything to do the interior a couple of years ago around corona time. I was going to be using SPI products for all of my primers and I had planned on using their clear coat as well. Only real hang up was they aren't really in the paint color mixing business with about five or six total colors. Being the first thing I ever painted on this scale, my body work would have to be perfect to pull off a dark blue and I just wasn't sure about it. Over the course of the last couple of years, the new "battleship" and earth tone colors have come out which I myself quite like. So I decided to go with SPI pure white and a custom gray which is a mixture of pure white and black basecoat. This allowed me to stay in the same product line also. I ran through about twenty different samples until I found the variation I liked. Is it original? No, but we've already crossed that bridge going swb and putting an ls in it. At this point and with all the $$ and labor so far, I'm going to build my forever truck how I envision it. Nerves were high, but I'm glad I went with lighter colors as I think they are a little more forgiving. Pics..  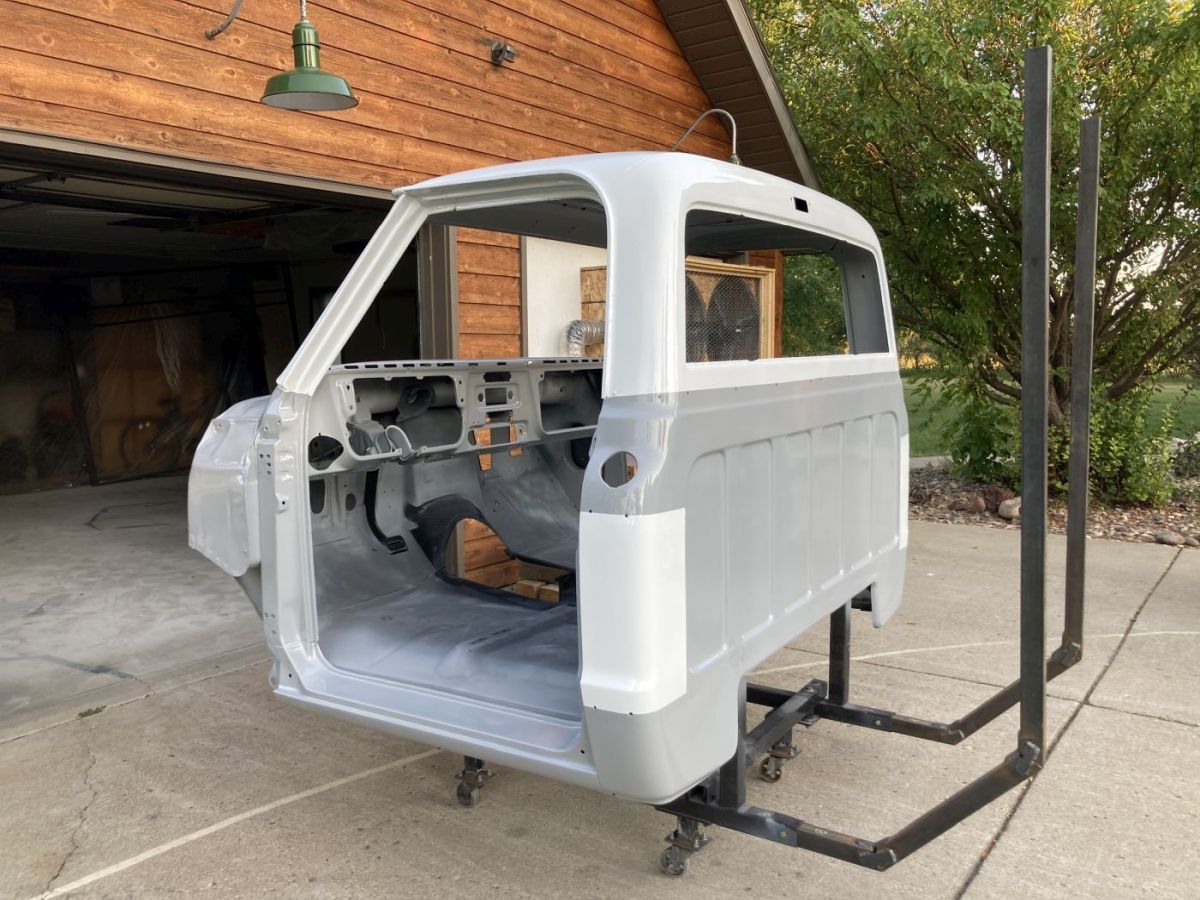   I used UPOL raptor liner for the bed, tinted with Custom Coat Aircraft Gray #36300 and it luckily is almost a dead on match.    [url=https://flic.kr/p/2pxhH7p] 
__________________
1972 Chevy C-10 Cheyenne Super - Buckets, A/C, "The 17 Year Revival Project" Last edited by 1972CheyenneSuper; 02-09-2024 at 03:13 PM. |
|
|
|
|
02-09-2024, 12:04 AM
|
#48 |
|
Registered User
Join Date: Feb 2006
Location: ND
Posts: 207
|
Re: '72 Super Project: Updates!
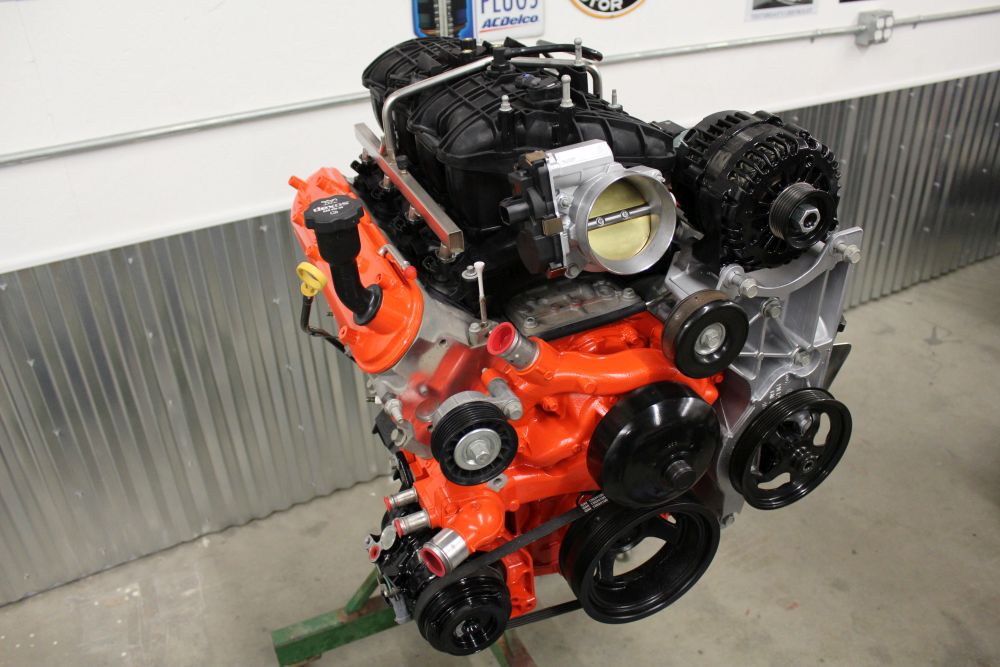
Now, we're around thanksgiving time/early December '23. I've been working on the frame stuff that's easier with the cab off. Fuel lines, brake lines, exhaust that sort of stuff. Ended up going with a Flowmaster 817654 Stainless kit. It's designed for stock type trucks as far as crossmembers go, so I didn't get to use the exhaust sleeves I put in the trailing arm crossmember. It doesn't hang egregiously low, but time will tell I guess. With some rework, I think a person could do some fabbing to get it up in that area. The manifolds are Summit SUM-G9084B, black ceramic coated. I wanted to keep the look somewhat low profile. I tossed the idea of the different ebay headers around, and speed engineering, etc. But these were what I ultimately chose, and they tied in with enough of the extra pieces the exhaust kit came with. The engine, the aforementioned 6.0L. Your typical junkyard LQ4 cleaned up. I've seen a couple of these vintage looking LS swaps and I just really sold myself on the idea. But man is it pricey. The really nice stuff is $$$, I do that when I can, but most of the time, middle of the road is where I end up. Intake is a Holley mid-rise with their fuel rails. Valve cover adapters are from Turbo Nasty. The throttle body adapter is from Delmo's. I threw a BTR cam and springs in while I had it apart. It'll all be running on a Holley Terminator X. I think I covered most of it.
    Had to do a little maneuvering around the fuel cell due to the ECE trac bar.    Black friday, brought the wheel choice to a final decision. American Racing Draft VN510's. Mulled over many options, including the traditional torque thrusts, but wanted to try something a little different. Good thing about 5x5, easy to offload and try something else is if they don't play out. I think we'll be ok though.    Got the glass in!! Glass guy being the only other human to have worked on the truck at this point, I probably could’ve have done it, but at the cost of possibly a few pieces of glass in the process. They say you can’t beat someone at their own game. Well worth it imo. 
__________________
1972 Chevy C-10 Cheyenne Super - Buckets, A/C, "The 17 Year Revival Project" Last edited by 1972CheyenneSuper; 02-09-2024 at 03:03 PM. |
|
|
|
|
02-09-2024, 12:10 AM
|
#49 | |
|
Registered User
Join Date: Feb 2006
Location: ND
Posts: 207
|
Re: '72 Super Project: Updates!
Quote:
More to come tomorrow.
__________________
1972 Chevy C-10 Cheyenne Super - Buckets, A/C, "The 17 Year Revival Project" |
|
|
|
|
|
02-09-2024, 12:29 PM
|
#50 |
|
Registered User
Join Date: Jun 2014
Location: Beaverton, Oregon
Posts: 195
|
Re: '72 Super Project: Updates!
Any photos to dump in here? Sounds great
__________________
My 1970 C10 ChassisFab LWB to SWB Build Thread |
|
|
|
|
| Bookmarks |
|
|


 Linear Mode

