
|
 05-20-2015, 01:35 AM
|
#1976 |
|
Senior Enthusiast
Join Date: Feb 2007
Location: Spokane Valley, WA
Posts: 8,356
|
Re: Markeb01 Build Thread
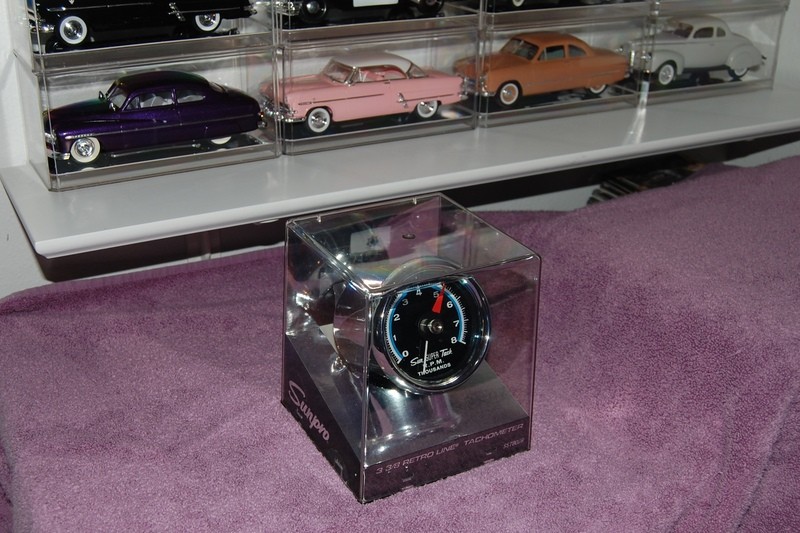
Back to something automotive for a change. For many years I obsessed about obtaining a genuine Sun FZ tachometer with the old school oval window face with the zero adjusting screw on the front, mounted in the deep NC-1 case. Five years ago I got as close as it gets for a person on a budget, and picked up one of the new FZ88R Sunpro models.
When I originally moved the tach up to the top of the dash, I had installed the requisite long cup but adapted it to hold a Mooneyes (Autometer) tach head: 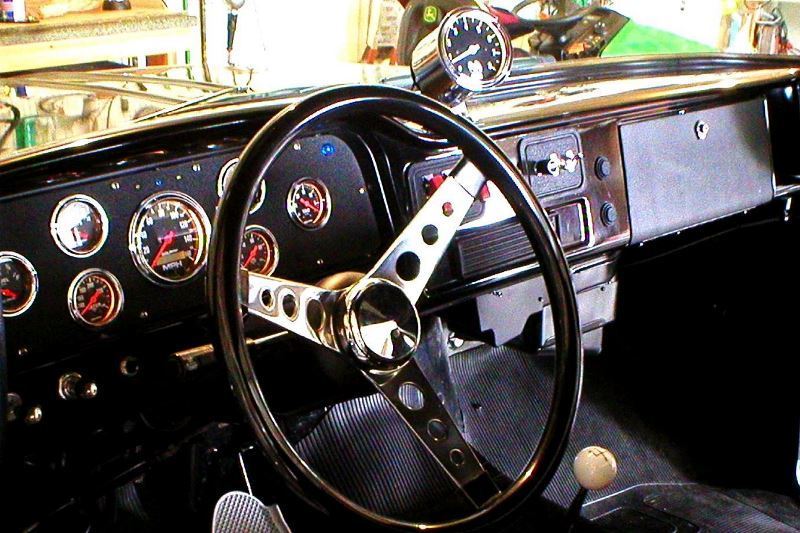 When the FZ88R hit the market, and since I also had a genuine FZ Sun tach (only good for parts) it was an easy matter coming up with the extended studs for mounting the new gauge head in the deep cup and obtaining an authentic Bakelite adjuster screw head for the front bezel. Heres what the assembled gauge looked like: 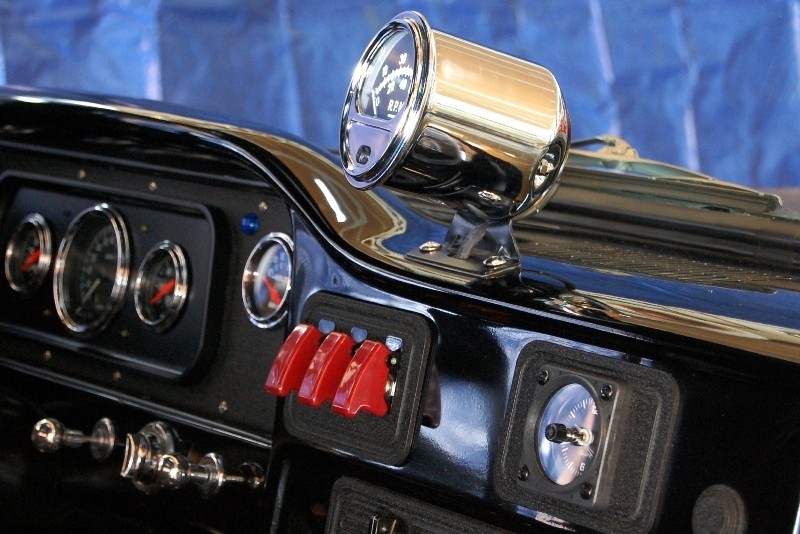 I was marginally disappointed the gauge face window was too small compared to the original, but learned to live with it. What I never really got used to however, was the loss of legibility switching from the full face sweep of the Moon/Autometer tach to the limited sweep of the oval window model. When busy accelerating hard, its hard to get an accurate reading of exactly how fast the engine is spinning simply because the numbers are so close together. In that regard the round tach was much nicer. But I never wanted to go back, as I always thought the round Moon faced gauge looked kind of goofy in the Sun cup. So Ive finally caved in and purchased one of the Sunpro SST802R tachometers. The glaring defect in these is the lack of a zero pin for the needle to rest on, so it drops to the bottom when off making the tach look broken: 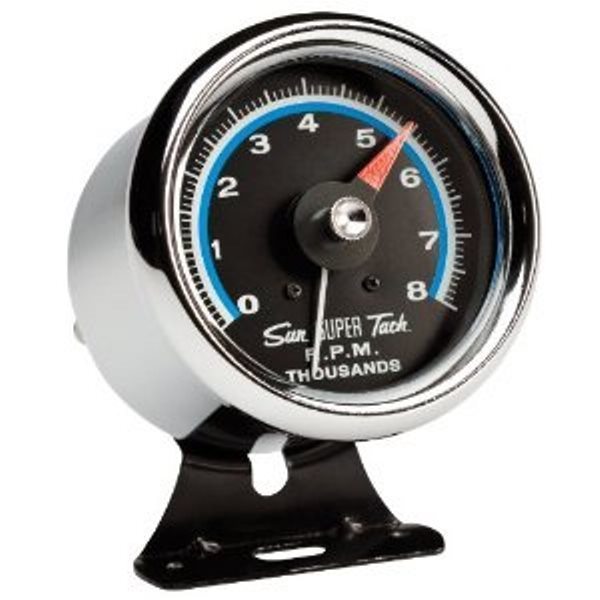 It seems many of the early originals had a red pointer, but other than that and the drooping needle the new retro tach looks identical to a comparable original:  I guess Ill learn to live with those variances as well, just like the too small face on the FZ model. The real incentive to do something now came when I realized that Sunpro has sold out to Bosch. Gone from the face of the gauge are the words Sun Super Tach as there is apparently no longer a heritage relationship with that name. This is a photo of the new/current Bosch part number FST8000: 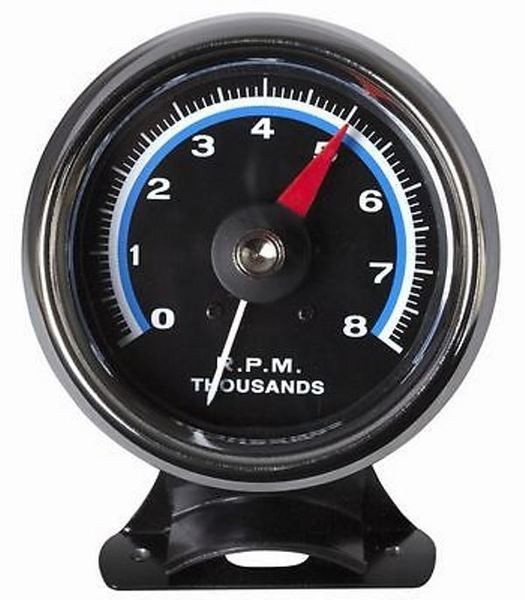 So I figured this might be the last chance to ever get one with the correct markings that at least pretends to be a genuine Sun Super Tach. If everything goes as planned, the new gauge will show up this Thursday. Ill try and remember to take some photos when I have it apart to show the screw extensions that came from the original FZ88 to fit the new gauge(s) in the deep NC-1 cup.
__________________
My Build Thread: http://67-72chevytrucks.com/vboard/s...d.php?t=444502 |

|

|
|
05-20-2015, 11:58 AM
|
#1977 |
|
Registered User
Join Date: Apr 2012
Location: Searcy, AR
Posts: 4,203
|
Re: Markeb01 Build Thread
 Looking forward to the upcoming write-up... 
__________________
DON Proverbs 27:17  US Air Force Retarded errr Retired My '65 Stepper Build:http://67-72chevytrucks.com/vboard/s...d.php?t=533920 My '60 Rusty Patina Build:http://67-72chevytrucks.com/vboard/s...66#post7402266 My '72 http://67-72chevytrucks.com/vboard/s...59#post7204359 SOLD |
|
|
|
|
05-20-2015, 09:10 PM
|
#1978 |
|
Senior Enthusiast
Join Date: Feb 2007
Location: Spokane Valley, WA
Posts: 8,356
|
Re: Markeb01 Build Thread
I was pleasantly surprised today when the new SST802R tachometer showed up ahead of schedule. It remained in its original packaging which included preformed foam insulators to suspend the plastic display box. It arrived in perfect condition:
 Everything that wouldnt be needed was quickly stripped away. Heres the backside of the head, which is virtually identical to the FZ88R head except for the model number: 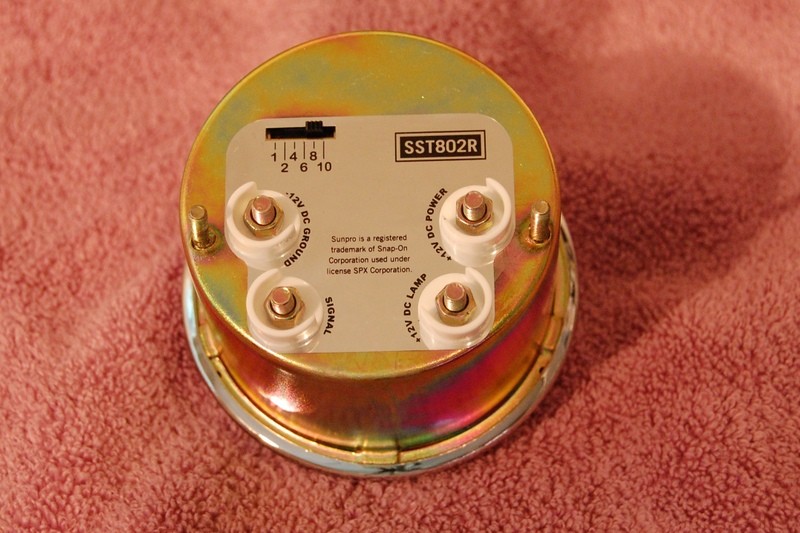 In this photo the new gauge head is hanging from the wires, highlighting the screw extensions needed to reach the back of the longer NC-1 cup. These came from an original FZ88N parts tach: 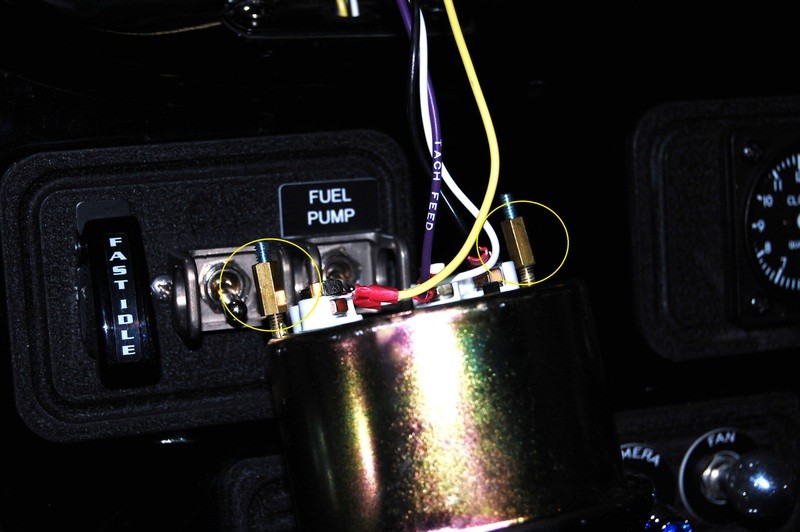 Here are a couple of shots of the finished installation. It went very quickly as the wiring and layout is identical in both tachs, so it was simply a matter of swapping the connections: 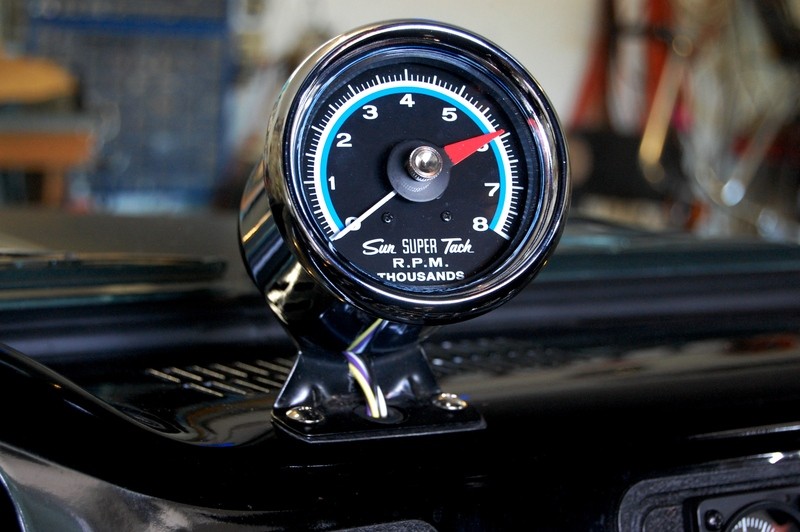 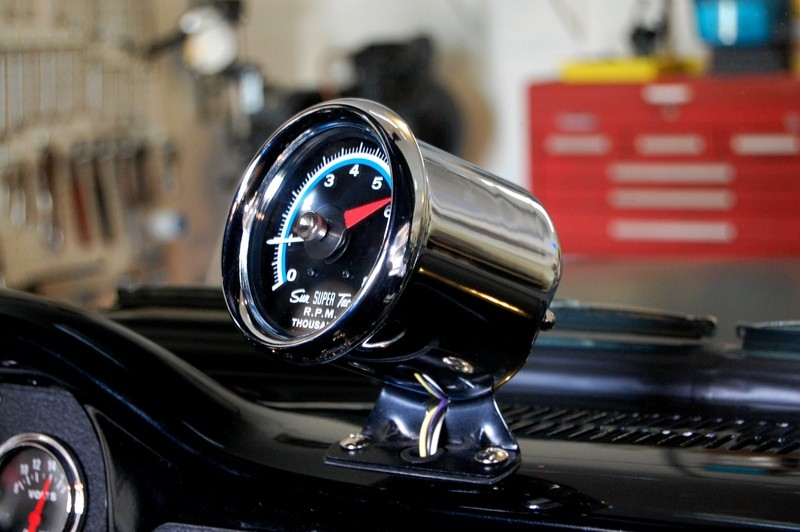 And this is the profile that I so long admired. It is accentuated by the added length of the larger rim on the front of the Super Tach:  In truth the long NC-1 cup is only ½ longer than the standard NC-5 cup provided with the new gauges. Here is an NOS example of an NC-5 by itself:  From front to back the dimension is 3 ¼. The NC-1 comes in at 3 ¾ from front to back. And finally heres a comparison shot showing a mounted NC-5 standard cup. Those with a good eye will note the picture looks a bit odd, as the latest marketing presentation attached both mounting brackets one over the other: 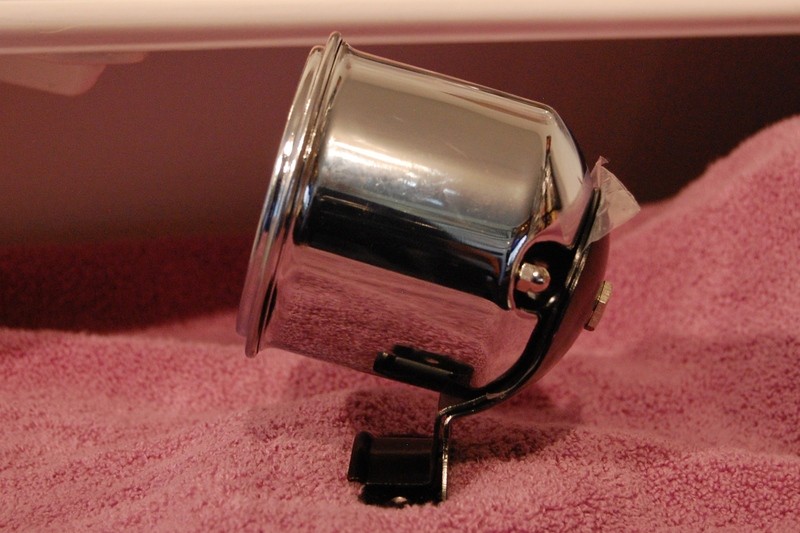 Im not sure what will become of the FZ88R, but here it is mounted in the SST802R packaging, awaiting its next assignment: 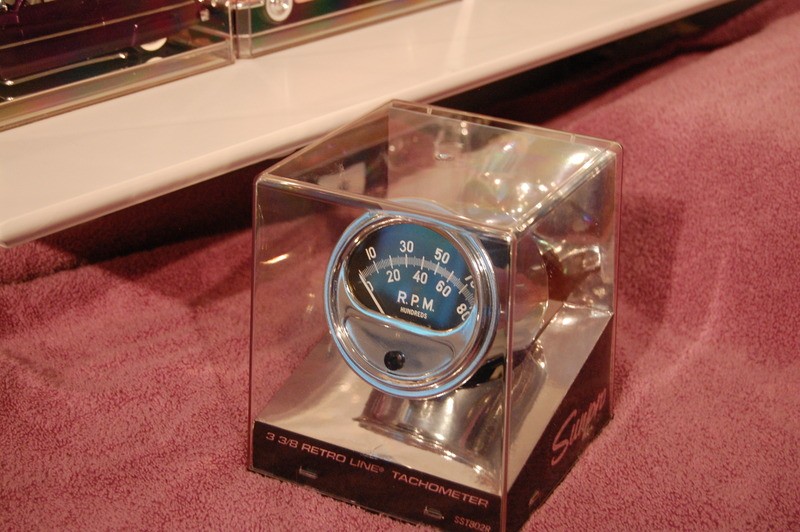
__________________
My Build Thread: http://67-72chevytrucks.com/vboard/s...d.php?t=444502 |
|
|
|
|
05-21-2015, 09:41 AM
|
#1979 |
|
Registered User
Join Date: Apr 2012
Location: Searcy, AR
Posts: 4,203
|
Re: Markeb01 Build Thread
I always enjoy checking in to see where your adventures take you...
 As I look for a tach, and consider my options, I am torn between mounting a tach in my gauge pod or on the dash...  Thanks for the write-up, this helps in my decision making process...
__________________
DON Proverbs 27:17 US Air Force Retarded errr Retired My '65 Stepper Build:http://67-72chevytrucks.com/vboard/s...d.php?t=533920 My '60 Rusty Patina Build:http://67-72chevytrucks.com/vboard/s...66#post7402266 My '72 http://67-72chevytrucks.com/vboard/s...59#post7204359 SOLD |
|
|
|
|
05-22-2015, 09:10 PM
|
#1980 |
|
Senior Enthusiast
Join Date: Feb 2007
Location: Spokane Valley, WA
Posts: 8,356
|
Re: Markeb01 Build Thread
At last a project Ive looked forward to for a long time finally bubbled up to the top of the priority schedule. Im replacing my cheap import dash cam with a GOPRO model. It is scheduled to arrive Monday, and will return to the rear window mounting location. I preferred the viewing angle from that position, but hated the way the camera stuck out so far into the cab:
 With the new arrangement, the camera should be nearly flat against the glass, and should be reasonably well concealed by the new USMC foil sticker added today: 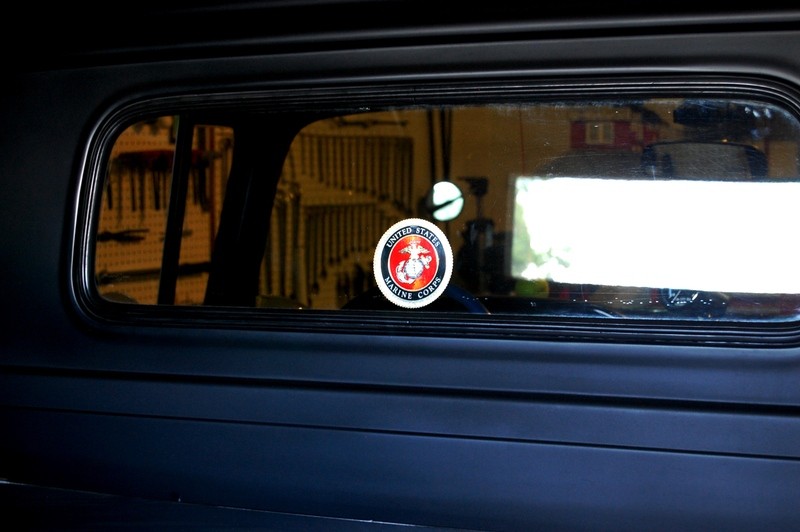 No longer needing the little stickers on the corner of the windshield: 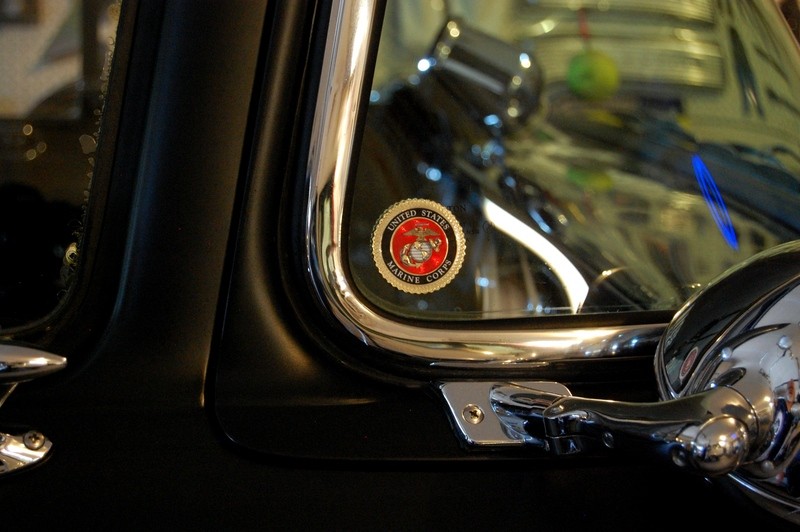 They were easily removed, starting with a razor blade and slowly peeled off: 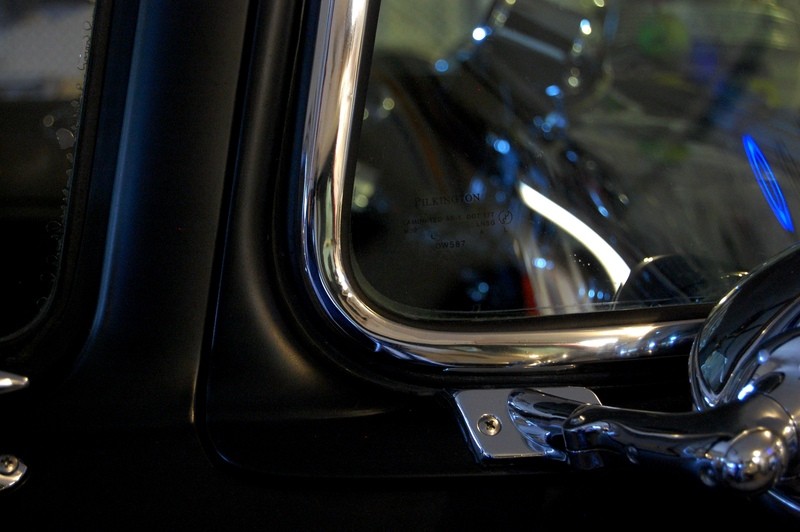 Hopefully my next post will have some magnificent coverage from the new camera.
__________________
My Build Thread: http://67-72chevytrucks.com/vboard/s...d.php?t=444502 |
|
|
|
|
05-23-2015, 09:30 AM
|
#1981 |
|
Registered User
Join Date: Jun 2012
Location: Selkirk Ontario Canada
Posts: 1,141
|
Re: Markeb01 Build Thread
you are going to love the gopro
__________________
My 63 GMC Panel Slow Build http://67-72chevytrucks.com/vboard/s...=1#post5457281 63 
|
|
|
|
|
05-23-2015, 06:58 PM
|
#1982 |
|
Senior Enthusiast
Join Date: Feb 2007
Location: Spokane Valley, WA
Posts: 8,356
|
Re: Markeb01 Build Thread
I'm sure hoping so. I think it will be even easier now that I've decided to keep the cheap import camera in place too. It's already discretely hard wired to the truck and works automatically, so I can simply install the GoPro when needed for something special and remove it for theft avoidance the rest of the time. The only thing remaining will be a small bracket on the inside of the rear window, hidden by the decal.
I've also discovered a pretty nifty power adapter to replace the existing single lighter socket I'm currently using: 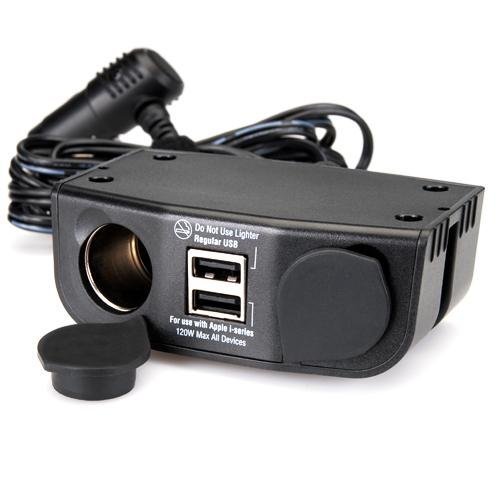 This provides 2 power sockets and 2 USB ports. Having this device in place, I can keep the existing camera wired up as it is, and connect the GoPro with a USB cable that will be routed behind the upholstery to the back wall. And if needed, we can even charge our cell phones!
__________________
My Build Thread: http://67-72chevytrucks.com/vboard/s...d.php?t=444502 |
|
|
|
|
05-24-2015, 01:57 AM
|
#1983 |
|
Senior Enthusiast
Join Date: Feb 2007
Location: Spokane Valley, WA
Posts: 8,356
|
Re: Markeb01 Build Thread
Bummer, my alternator toasted itself today. I think it might have been my fault though. Since I bought what was claimed to be a 63 amp unit, Ive added air conditioning and a dual Spal electric fan. Throw in an electric fuel pump, and a few other electrical devices like head and tail lamps and Ive probably been drawing significantly more than what the unit is capable of producing.
Ive noticed an electrical smell since installing the fans, but figured it was just new fan smell. Now Im thinking it was perhaps the alternator all along. Yesterday it started sounding noisy like bad bearings, but the bearings checked out okay. Today the sound was louder and when we pulled out of the garage, I noticed the voltmeter was reading less than 11 volts. So this afternoon I ordered up a new 100 amp Powermaster unit from Summit, which should arrive next Wednesday (a day later than normal due to the Memorial Day holiday). I guess any new videos will have to wait for a few more days!
__________________
My Build Thread: http://67-72chevytrucks.com/vboard/s...d.php?t=444502 |
|
|
|
|
05-24-2015, 08:01 AM
|
#1984 |
|
Registered User
Join Date: Sep 2012
Location: Leander, TX
Posts: 969
|
Re: Markeb01 Build Thread
Mark you will like the Powermaster. They are very good units. I have a 100 amp one on my Caprice. Made a world of difference. I like the Tach you are using but I wonder if I could modify it to fit inside my gauge cluster. I really want my interior to look stock except for the 60-66 guru would only be able to tell whats not original. I think the half sweep one you took out would probably look better in the stock dash. Will have to hunt one of those down.
Bret
__________________
64' Build Thread http://67-72chevytrucks.com/vboard/s...d.php?t=586955 |
|
|
|
|
05-24-2015, 11:39 PM
|
#1985 |
|
Senior Enthusiast
Join Date: Feb 2007
Location: Spokane Valley, WA
Posts: 8,356
|
Re: Markeb01 Build Thread
The disappointment with the new Sun/Sunpro retro tachometers is the face and case are all one piece. In the old days, the face and sides of the case were formed together, but the actual gauge itself was mounted on a Bakelite plate that simply slid into the back of the case and was held in place by two small nuts on the same studs that held the gauge in the cup. It might be that a new retro style gauge could be used, but it would require sawing it apart to find out. And this might introduce debris into the mechanism.
As for new business, imagine my surprise when a gentle knock on the door announced the arrival of the new GoPro camera on Sunday - of a holiday weekend! How cool was that!! I guess having your own delivery service allows Amazon to commit to things others cant. After spending some time getting things setup, I finally got around to installing the mounting buckle. I was originally going to center the bracket in front of the decal, but opted instead to attach it at about 10:00 when facing the rear of the truck. This compensates for the offset of the lens on the camera body, and keeps it closer to the centerline of the cab. Heres the bare bracket in position. The orientation to the decal can be seen on close study: 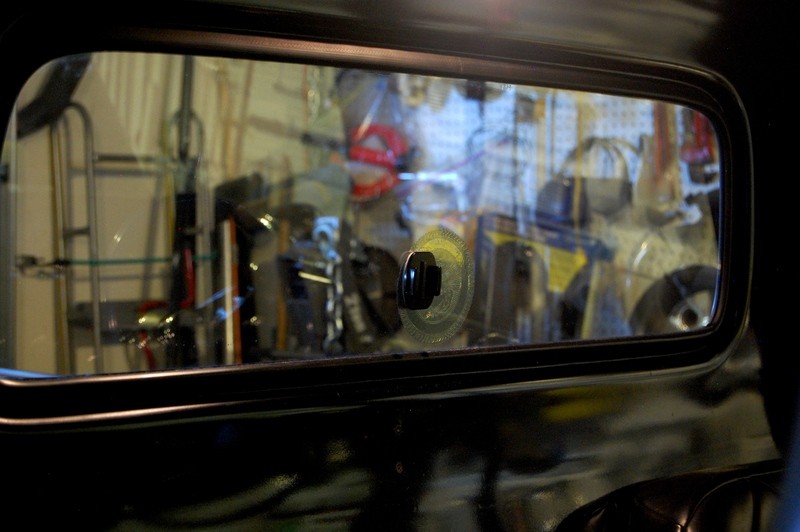 And heres the camera snapped in place. Centering the attachment point on the decal would have provided better concealment, but since I dont intend to leave the camera unattended in the truck, Id rather have the preferred lens positioning: 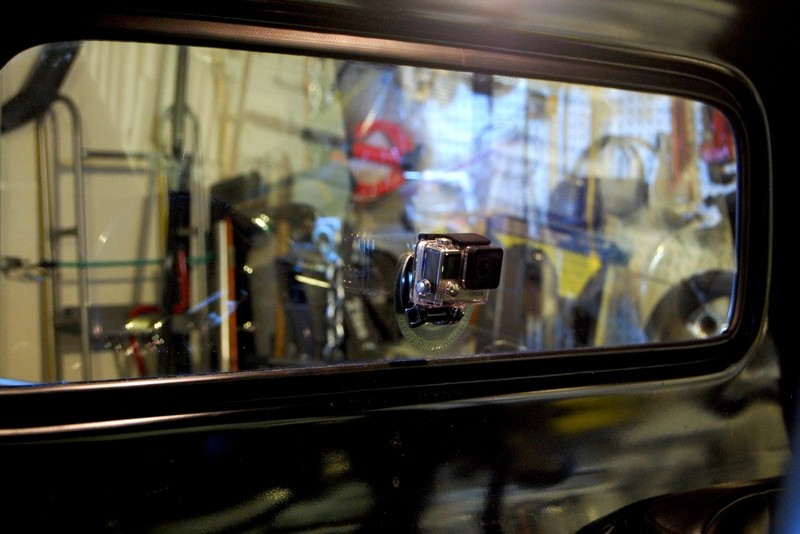 And heres a still shot of what the camera sees in video mode: 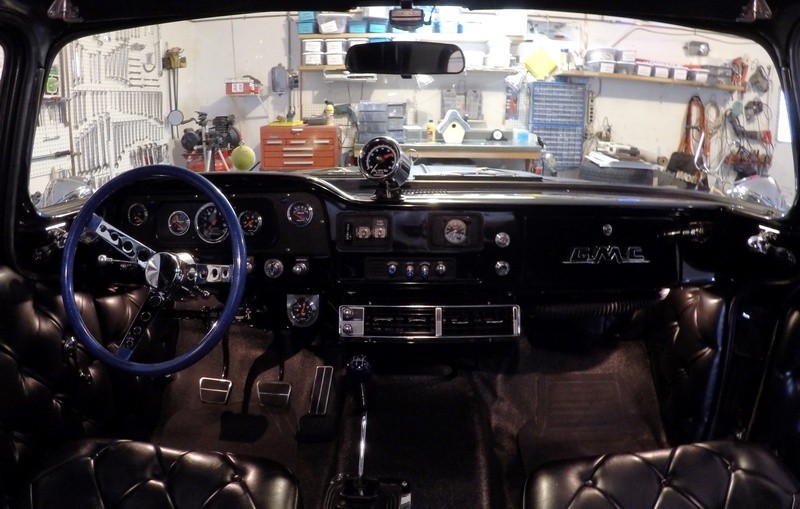 The lens is actually perfectly aligned between left and right A posts, but I had to keep fiddling around to snap the picture to keep my hand or arm from intruding in the image. It would be nice if the camera had a timer for still shots. For all I know it may have one, Im on the short end of the learning curve at this point. Im sure looking forward to the arrival of the new alternator so I can go out and have some fun with this setup.
__________________
My Build Thread: http://67-72chevytrucks.com/vboard/s...d.php?t=444502 |
|
|
|
|
05-25-2015, 08:42 AM
|
#1986 |
|
Registered User
Join Date: Apr 2012
Location: Searcy, AR
Posts: 4,203
|
Re: Markeb01 Build Thread
Awesome!
Looking forward to your upcoming videos Happy Memorial Day (as I snap to attention and salute you)  Thank You for your service...
__________________
DON Proverbs 27:17 US Air Force Retarded errr Retired My '65 Stepper Build:http://67-72chevytrucks.com/vboard/s...d.php?t=533920 My '60 Rusty Patina Build:http://67-72chevytrucks.com/vboard/s...66#post7402266 My '72 http://67-72chevytrucks.com/vboard/s...59#post7204359 SOLD |
|
|
|
|
05-25-2015, 03:13 PM
|
#1987 |
|
Senior Enthusiast
Join Date: Feb 2007
Location: Spokane Valley, WA
Posts: 8,356
|
Re: Markeb01 Build Thread
Thanks Don, and the same thought goes out from me to all veterans!
__________________
My Build Thread: http://67-72chevytrucks.com/vboard/s...d.php?t=444502 |
|
|
|
|
05-25-2015, 03:56 PM
|
#1988 |
|
Senior Member
 Join Date: May 2007
Location: Doodah Kansas
Posts: 7,747
|
Re: Markeb01 Build Thread
mark set up your gopro in time lapse mode, using 5 seconds as the interval, when you push the button it will wait 5 seconds and take the first shot, then another 5 seconds and another shot. by then you can reach in and turn it off.
alternatively, it looks like you have a hero4 silver, if that is the case, the camera has built in wifi. You can connect a smartphone or even a wifi ipod to the camera using the free gopro app, and it will display what the camera sees and you can even change settings with it to take pictures or start recording video. my brother uses a wifi ipod and it is perfect, like having the lcd backpack. if I am wrong and you dont have a wifi model, the time lapse setting will still get your picture without your arm. 
__________________
the mass of men live lives of quiet desperation if there is a problem, I can have it. new project WAYNE http://67-72chevytrucks.com/vboard/s...d.php?t=844393 |
|
|
|
|
05-25-2015, 05:56 PM
|
#1989 |
|
Senior Enthusiast
Join Date: Feb 2007
Location: Spokane Valley, WA
Posts: 8,356
|
Re: Markeb01 Build Thread
Thanks so much for the input. I have a help ticket in to Apple right now, I signed up for the Apple App Store, but they haven't sent the confirmation email that allows me to confirm the account. I do have an IPhone 5 and the setup looks super easy. And yes the model I picked is the Hero 4 Silver. It seemed like the best fit for our needs.
I wouldn't have thought about the 5 second delay feature if you hadn't pointed it out, so I'm very thankful!
__________________
My Build Thread: http://67-72chevytrucks.com/vboard/s...d.php?t=444502 |
|
|
|
|
05-28-2015, 09:59 AM
|
#1990 |
|
Registered User
Join Date: Jun 2012
Location: Selkirk Ontario Canada
Posts: 1,141
|
Re: Markeb01 Build Thread
if you have a smart phone get the gopro app which is free it will help you a lot with filming
__________________
My 63 GMC Panel Slow Build http://67-72chevytrucks.com/vboard/s...=1#post5457281 63
|
|
|
|
|
05-28-2015, 02:46 PM
|
#1991 |
|
Senior Enthusiast
Join Date: Feb 2007
Location: Spokane Valley, WA
Posts: 8,356
|
Re: Markeb01 Build Thread
I've kind of put the GoPro App download on hold the last couple of days. We determined we used my email address to set up my wife's account, and that is what was preventing me receiving the confirmation email from Apple I needed. Ill fix it in a few days, but more importantly, I started rethinking the alternator I ordered, and soon came to realize even a 100 amp unit is going to be undersized.
Even though I don't have a radio or amplifier, I've added a lot of power demanding accessories on the truck over the last couple of years. Electric fans, air conditioning, H4 E-Code headlights, electric fuel pump, halogen spotlights, etc. It all adds up more quickly than I appreciated earlier. A baseline recommendation is to size the alternator so that never more than 80% of its capacity is needed. Calculating a rough estimate on my electrical demands, it didnt take long to realize I would be drawing beyond 100% capacity from a 100 amp alternator. So last night I ordered up a 140-150 amp alternator before the 100 amp unit even arrived (due to show up later today). Returns are easy through Summit, so Ill just send the 100 amp alternator back without even opening the box. The downside being Ill have to wait until next Monday before I can get the truck back in service, but Id rather wait another couple of days rather than go through another alternator failure caused by my own lack of research. That will also give me time to double check and make sure the charge wire is big enough, and Im going to fabricate an external ground wire for the alternator that connects to the negative ground cable on the engine block. Ive seen several YouTube videos indicating grounding through the mounting bolts can cost up to 1 volt of loss from paint insulation through the mounting connections of the alternator to the engine!
__________________
My Build Thread: http://67-72chevytrucks.com/vboard/s...d.php?t=444502 |
|
|
|
|
05-29-2015, 12:02 AM
|
#1992 |
|
Senior Enthusiast
Join Date: Feb 2007
Location: Spokane Valley, WA
Posts: 8,356
|
Re: Markeb01 Build Thread
The 100 amp alternator showed up today on schedule, and was promptly turned around and labeled for the return shipment. In doing more research, I discovered my brand new Ron Francis 8 gauge charge cable (primary output cable from alternator to starter/battery) might not be sufficient with the new dynamo. Alternators from 105 amp output up to 150 amps and a charge wire 4 feet or less can get by with a 6 gauge wire. Over 150 amps they need a 4 gauge wire.
Since I had complete pieces of wire left over from a surplus kit, I took the simple way out and added a second 8 gauge wire from the alternator to the starter. The new wire is the black one, the red one came with the Ron Francis kit. This should be equivalent to at least 6 gauge: 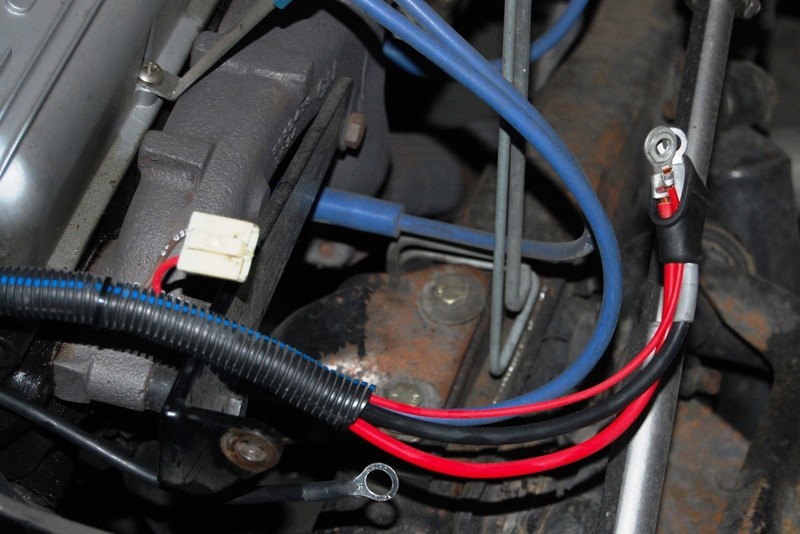 I also read where poor grounding of the alternator case itself can rob voltage, so I went ahead and built a new ground wire from the mounting bracket to the cylinder head mounting bolt where the negative battery cable connects:  The ring terminal will be squeezed between the lower alternator mounting boss and the rear bracket shown about 2.5 to the left in the above photo. The other end can be seen bolted to the head just below the upper corner of the valve cover. Also evident in the above photo, I got to try out my new drop light. It puts out 3,000 lumens and floods everything in the area with daylight! Below is a view from the backside:  Ive never had it so easy to see while under the hood or under the chassis. I can only show the front when its turned off: 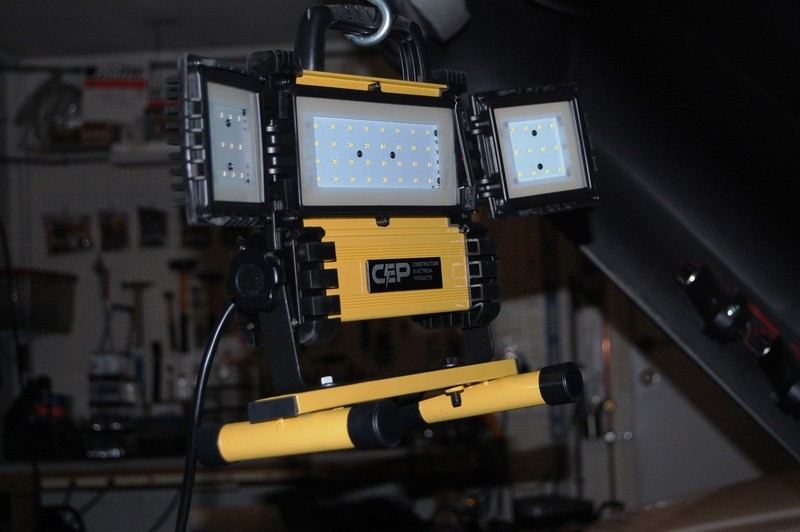 It is just too bright to photograph when illuminated. Not inexpensive, but certainly worth the investment!
__________________
My Build Thread: http://67-72chevytrucks.com/vboard/s...d.php?t=444502 |
|
|
|
|
05-29-2015, 11:39 AM
|
#1993 |
|
Registered User
Join Date: Jun 2012
Location: Selkirk Ontario Canada
Posts: 1,141
|
Re: Markeb01 Build Thread
do you have a link for that light
__________________
My 63 GMC Panel Slow Build http://67-72chevytrucks.com/vboard/s...=1#post5457281 63
|
|
|
|
|
05-29-2015, 12:52 PM
|
#1994 |
|
Senior Enthusiast
Join Date: Feb 2007
Location: Spokane Valley, WA
Posts: 8,356
|
Re: Markeb01 Build Thread
Here's one link:
http://www.acmetools.com/shop/tools/...FRSIfgod_QsA1Q There are many postings but pricing ranges up to near $200. I paid $125 for mine and thought that was high. I've been having more and more frustration using a traditional droplight, so I opted for an LED flashlight style work light and it proved worthless. I basically gave up on the drop light and have been relying on mini-LED flashlights for over a year now as they produce superior light in a given spot. But this thing takes the cake. Whether under the car or in the engine compartment, it really brings everything out, and without shadows blacking out certain spots.
__________________
My Build Thread: http://67-72chevytrucks.com/vboard/s...d.php?t=444502 |
|
|
|
|
05-30-2015, 09:01 AM
|
#1995 |
|
Registered User
Join Date: Jun 2012
Location: Selkirk Ontario Canada
Posts: 1,141
|
Re: Markeb01 Build Thread
how well do you they work in cold temps below 0.F
__________________
My 63 GMC Panel Slow Build http://67-72chevytrucks.com/vboard/s...=1#post5457281 63
|
|
|
|
|
05-30-2015, 09:46 AM
|
#1996 |
|
Rollin' Old Skool
Join Date: Jun 2007
Location: Hattiesburg, MS
Posts: 5,371
|
Re: Markeb01 Build Thread
What alternator are you going with? I just swapped in a Powermaster 165amp on my Tahoe this past December. I had Summit do a price match & saved a little over $40! I dig the GoPro & want to get one for myself one day as well.
__________________
_____________________________________________ Phillip My Build threads: 1966 Chevy C-10 "Black Betty" shortbed, fleetside, BBW, 327 V8/ Powerglide (under construction) http://67-72chevytrucks.com/vboard/s...ighlight=betty 1997 Chevy Tahoe, 2dr/2wd, mild custom (Daily driver) http://67-72chevytrucks.com/vboard/s...d.php?t=601142 Pics: '66 C-10 https://flic.kr/s/aHsjHWD4h9 '97 Tahoe https://flic.kr/s/aHsjGZ7wKP '93 C-1500 https://flic.kr/s/aHskxdpdnQ '88 S-10 Blazer https://flic.kr/s/aHsjYGx4Md Previous Rides: 1993 Chevy S-10 ext. cab, 4.3L, 4/5 drop (Sold) 1993 Chevy C-1500 short/step Retro-Rod (Sold) 1988 S-10 Blazer 2dr/2wd mild custom (Sold) |
|
|
|
|
05-30-2015, 12:57 PM
|
#1997 | ||
|
Senior Enthusiast
Join Date: Feb 2007
Location: Spokane Valley, WA
Posts: 8,356
|
Re: Markeb01 Build Thread
Quote:
Quote:
I checked the tracking this morning and it arrived in Spokane last night, so Ill definitely have it for installation on Monday. Im sure looking forward to getting the truck back into service so we can go play with the new tach and camera! We already have a 150 mile trip scheduled for later next week to give the new additions a good test run.
__________________
My Build Thread: http://67-72chevytrucks.com/vboard/s...d.php?t=444502 |
||
|
|
|
|
05-30-2015, 08:47 PM
|
#1998 | |
|
Rollin' Old Skool
Join Date: Jun 2007
Location: Hattiesburg, MS
Posts: 5,371
|
Re: Markeb01 Build Thread
Quote:
__________________
_____________________________________________ Phillip My Build threads: 1966 Chevy C-10 "Black Betty" shortbed, fleetside, BBW, 327 V8/ Powerglide (under construction) http://67-72chevytrucks.com/vboard/s...ighlight=betty 1997 Chevy Tahoe, 2dr/2wd, mild custom (Daily driver) http://67-72chevytrucks.com/vboard/s...d.php?t=601142 Pics: '66 C-10 https://flic.kr/s/aHsjHWD4h9 '97 Tahoe https://flic.kr/s/aHsjGZ7wKP '93 C-1500 https://flic.kr/s/aHskxdpdnQ '88 S-10 Blazer https://flic.kr/s/aHsjYGx4Md Previous Rides: 1993 Chevy S-10 ext. cab, 4.3L, 4/5 drop (Sold) 1993 Chevy C-1500 short/step Retro-Rod (Sold) 1988 S-10 Blazer 2dr/2wd mild custom (Sold) |
|
|
|
|
|
05-30-2015, 09:39 PM
|
#1999 |
|
Senior Enthusiast
Join Date: Feb 2007
Location: Spokane Valley, WA
Posts: 8,356
|
Re: Markeb01 Build Thread
Thanks Phillip. Im sure looking forward to heading out in it myself. I start getting antsy when I cant drive it often enough! Needing something to do, I spent a couple of hours in the garage today swapping out the single 12V power socket for the 4 way version that has two lighter sockets and two USB ports. This shot is looking through the glovebox opening, below the passenger side of the windshield:
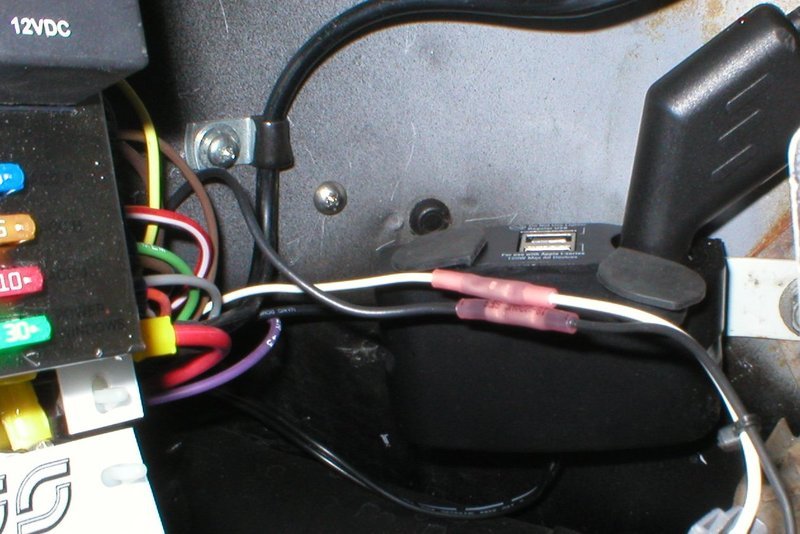 It fits nicely, is easily accessible, and is hard wired into the harness. The probe in the right hand socket powers the old dash cam above the windshield. Im going to try swapping batteries for a while rather than hard wire the camera into the truck. To support that Ill be installing a dual battery charger for the GoPro in the glovebox area, and connect it to one of the USB outlets. Im also thinking of installing one of the mounting shoes in the glove box area, so I can snap the camera in there and lock the glovebox door when I dont feel like carrying the camera around with me.
__________________
My Build Thread: http://67-72chevytrucks.com/vboard/s...d.php?t=444502 |
|
|
|
|
05-31-2015, 03:23 AM
|
#2000 |
|
Senior Enthusiast
Join Date: Feb 2007
Location: Spokane Valley, WA
Posts: 8,356
|
Re: Markeb01 Build Thread
And heres the battery charger mounted on the left side of the glovebox opening, complete with two batteries resting in their charging slots:
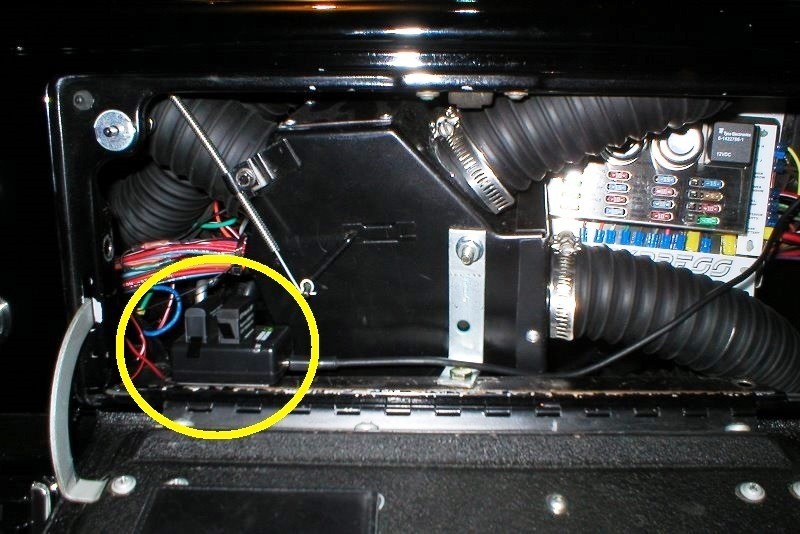 I used a length of Scotch brand exterior heavy duty mounting tape. It looks like a 3M automotive grade product, and sticks permanently. No wiggle or looseness at all. The USB cable that came with the GoPro itself was exactly the right length to reach the power adapter. No excess wire to loop, just a straight shot to the port: 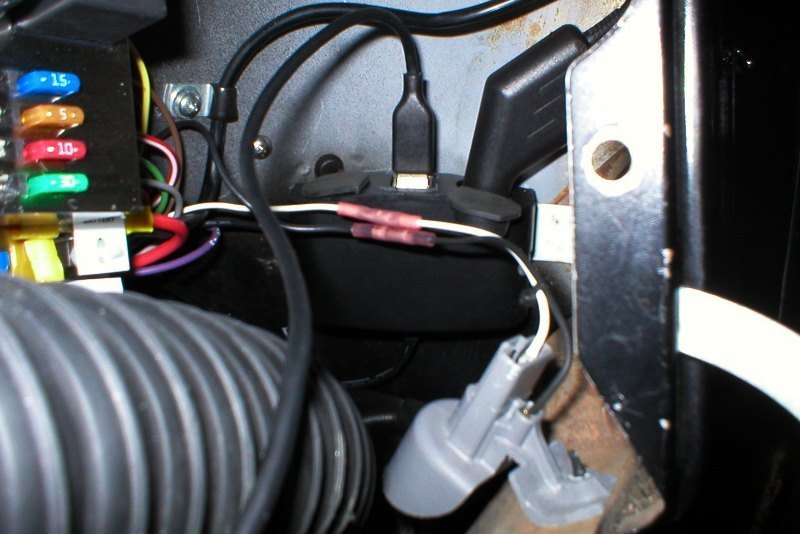 Tomorrow Ill get the storage mount for the camera installed on the glovebox door. I did a test fit and it has plenty of clearance between the heater hoses on the right side of the opening when the door is closed.
__________________
My Build Thread: http://67-72chevytrucks.com/vboard/s...d.php?t=444502 |
|
|
|
 |
| Bookmarks |
|
|


 Linear Mode

