The 1947 - Present Chevrolet & GMC Truck Message Board Network


Register or Log In To remove these advertisements.

Go Back   The 1947 - Present Chevrolet & GMC Truck Message Board Network > General Truck Forums > Paint & Bodywork

Web 67-72chevytrucks.com


Reply
 
Thread Tools Display Modes
Old 11-02-2014, 11:46 AM   #1
dhunt00c
Registered User
 
Join Date: Apr 2006
Location: Arkansas
Posts: 55
Cowl Vents - anyone repaired or covered them?

Seeking some experience or recommendations on repairing the side vents or just cutting out and welding flat sheet over them. I don't want to create a different rust or wind problem down the road.

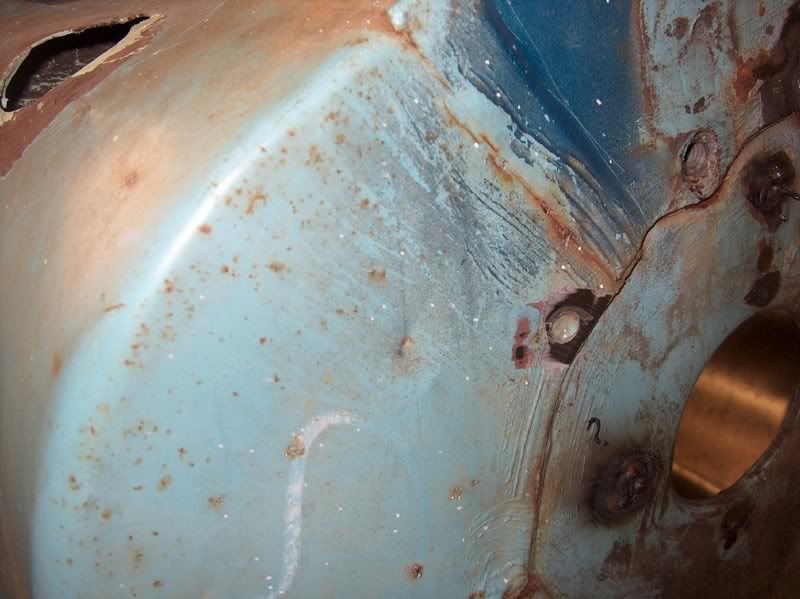
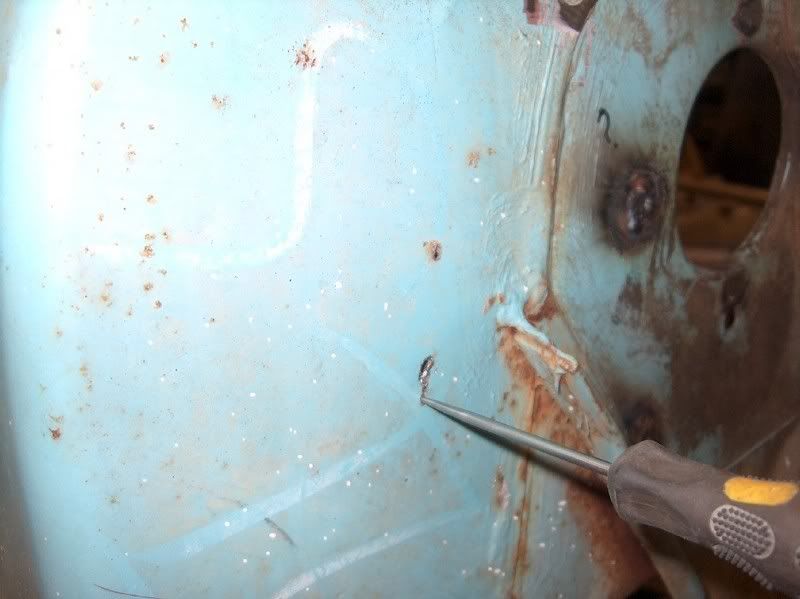
Mine are badly rusted up under the dash. Trying to decide which route to take, any advice, pictures, or threads would be greatly appreciated!

David
dhunt00c is offline   Reply With Quote
Old 11-02-2014, 02:04 PM   #2
MP&C
Registered User
 
MP&C's Avatar
 
Join Date: Jan 2013
Location: Leonardtown, MD
Posts: 1,633
Re: Cowl Vents - anyone repaired or covered them?

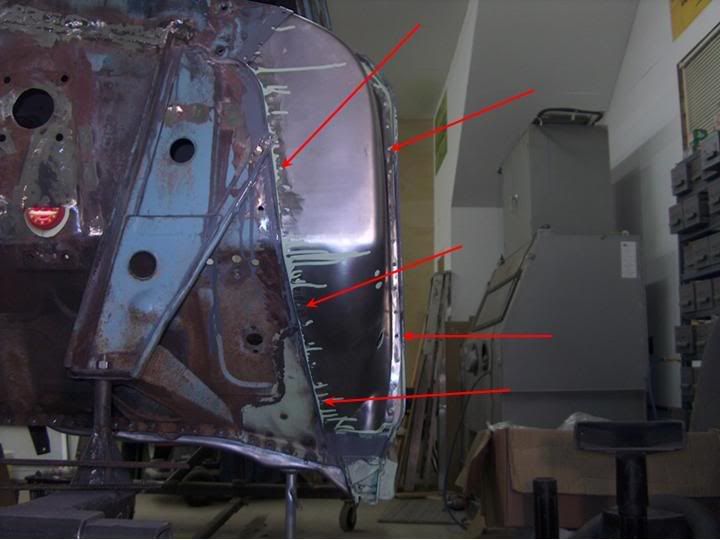
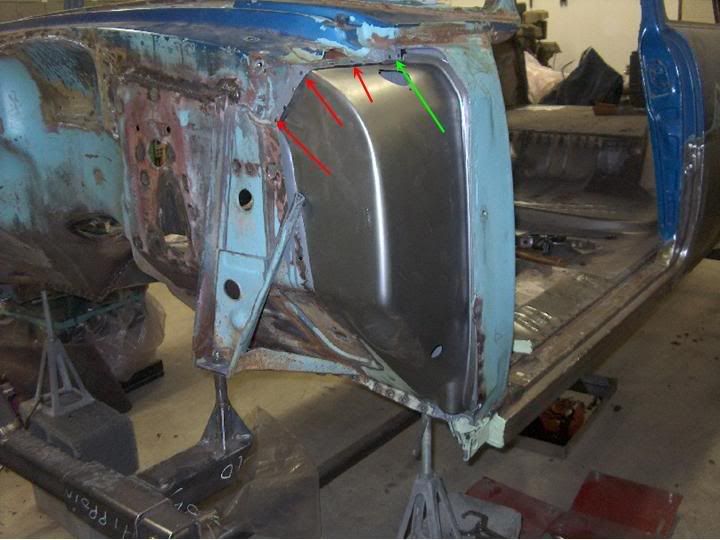
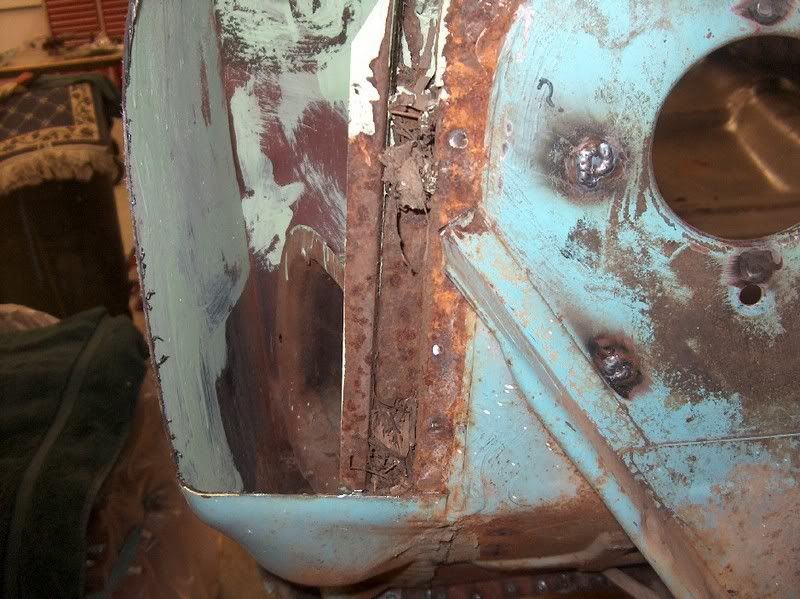
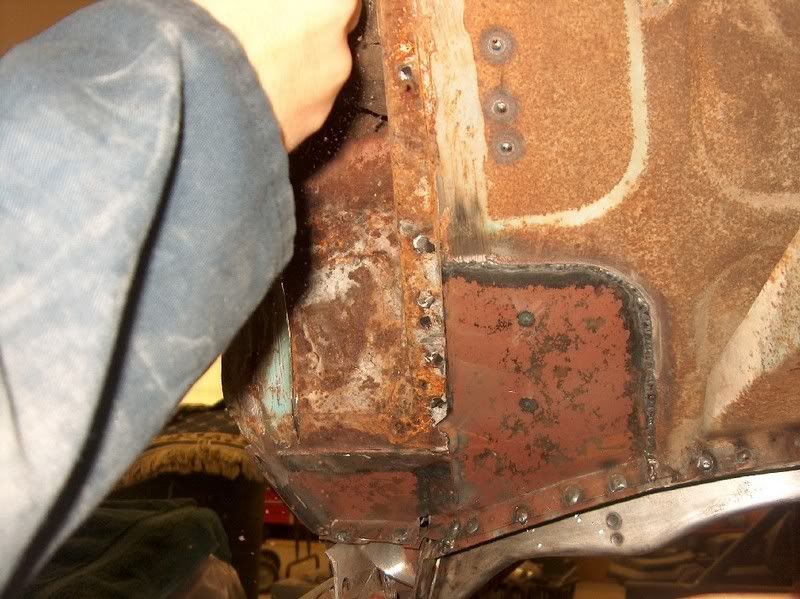
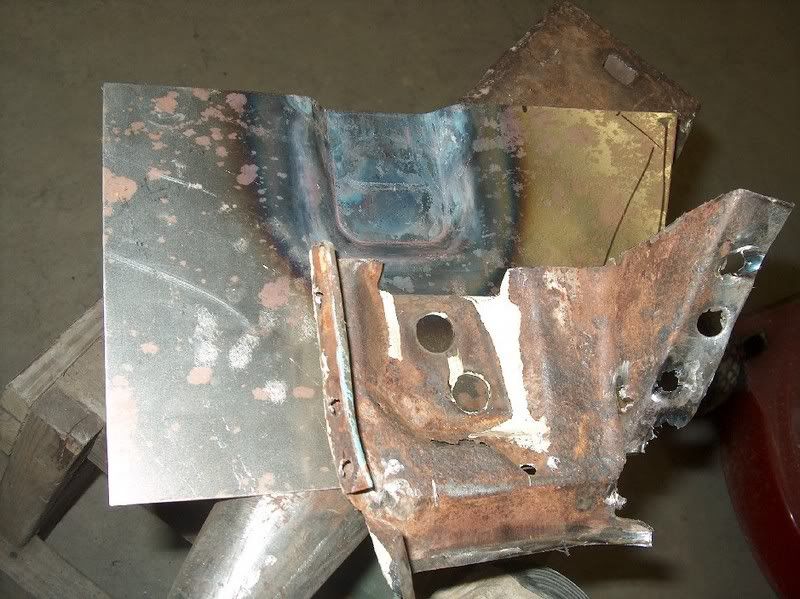
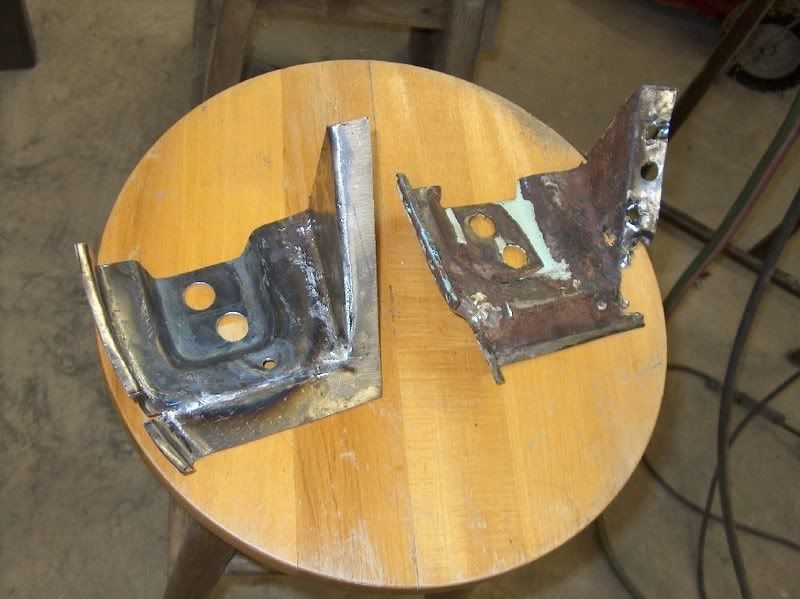
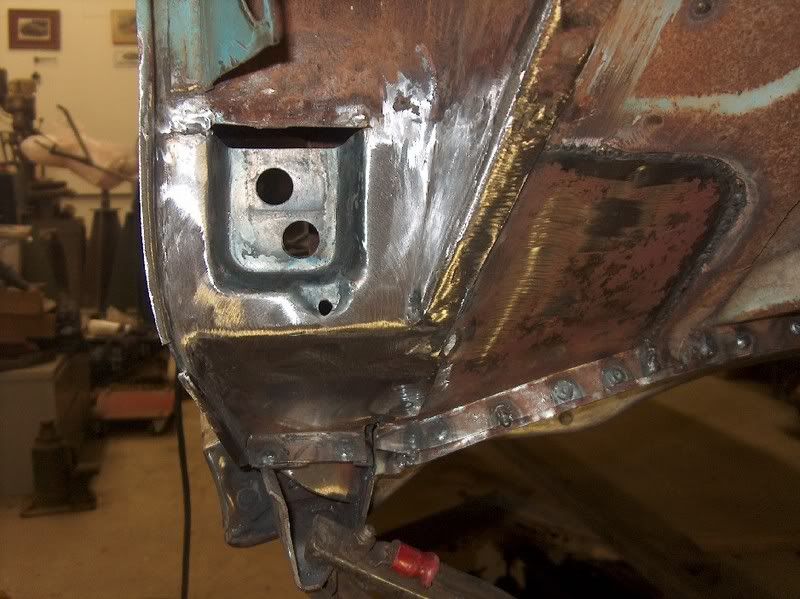
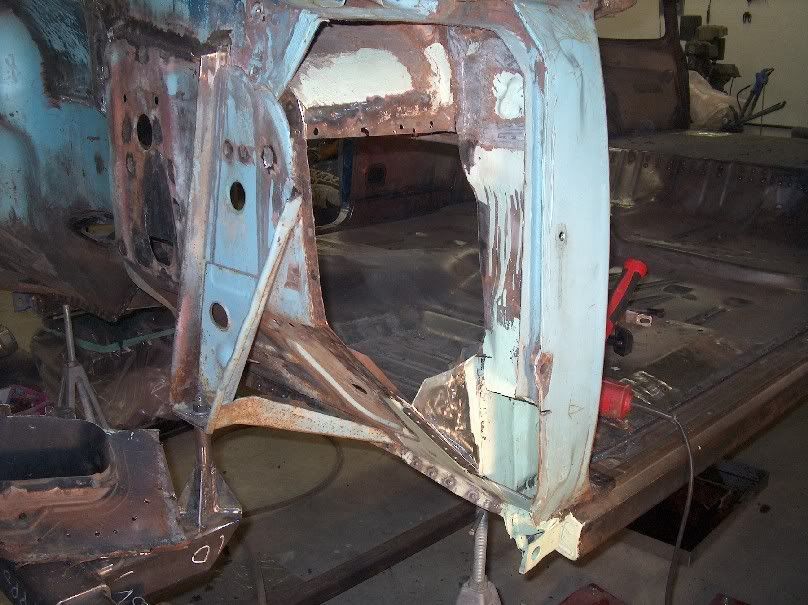
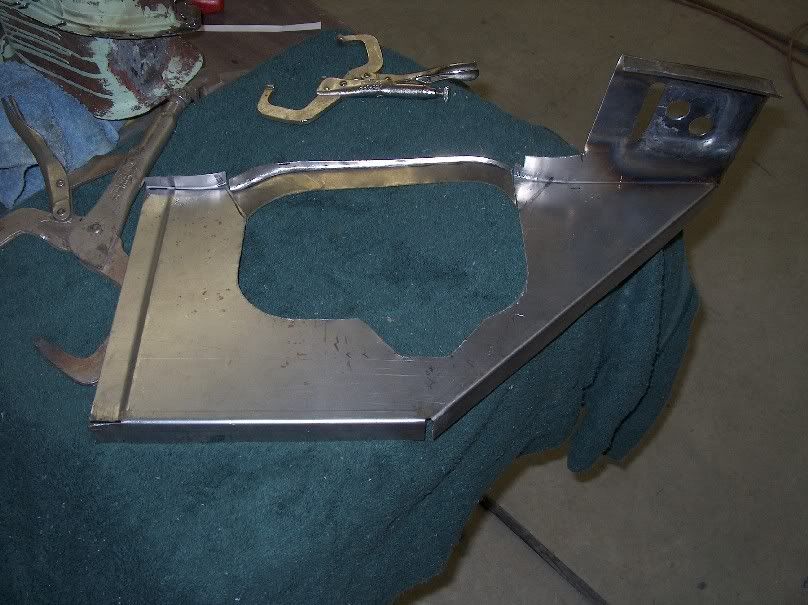
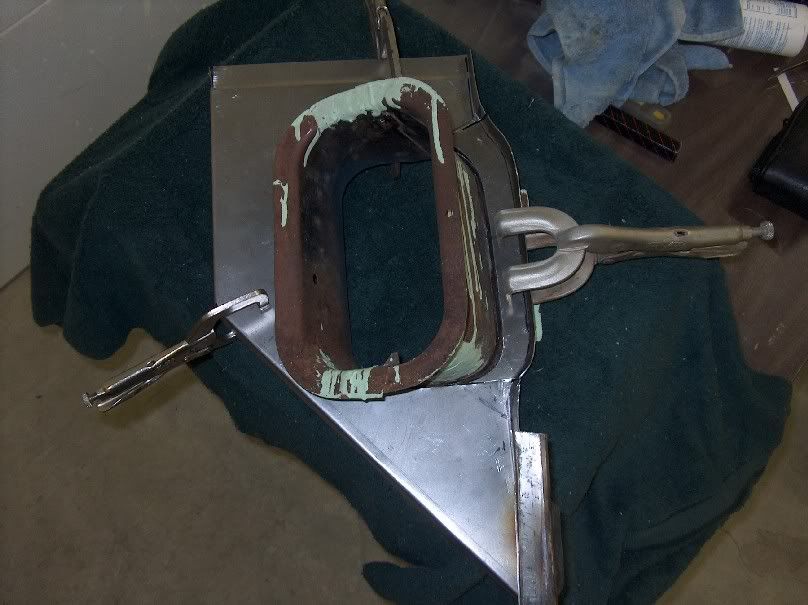
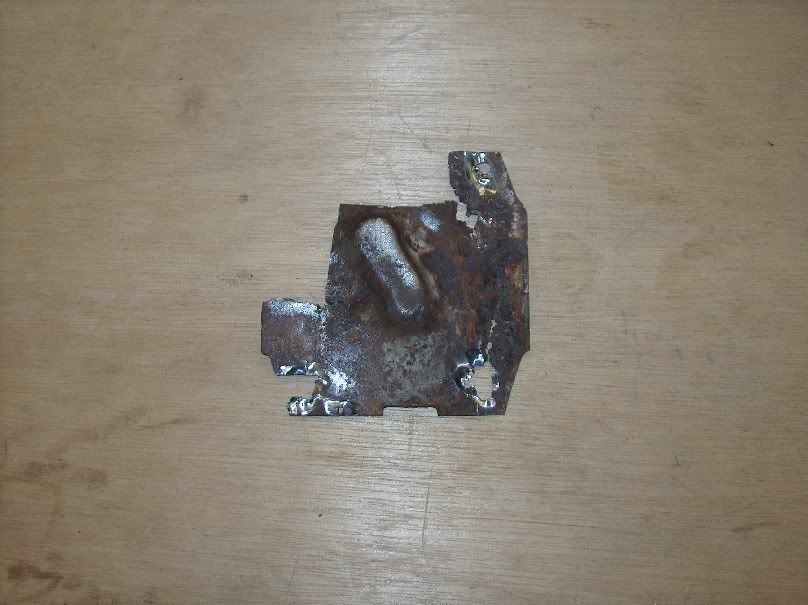
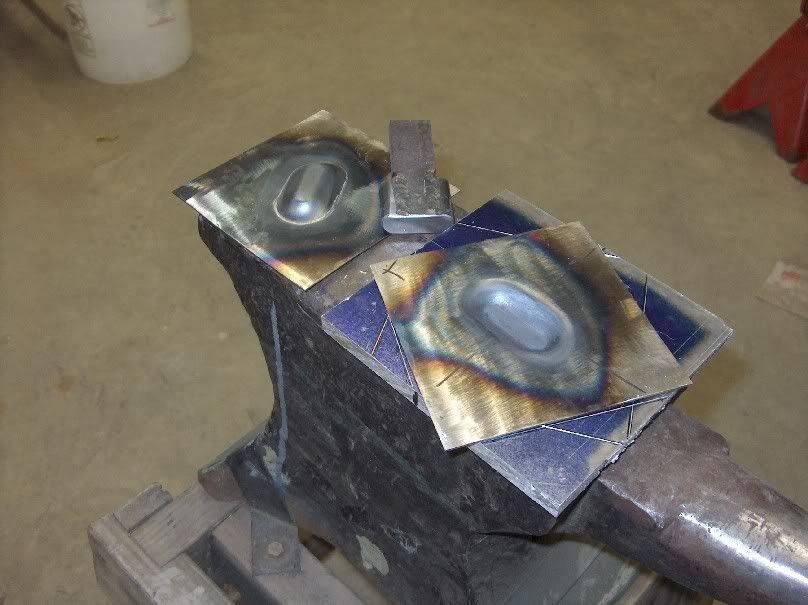
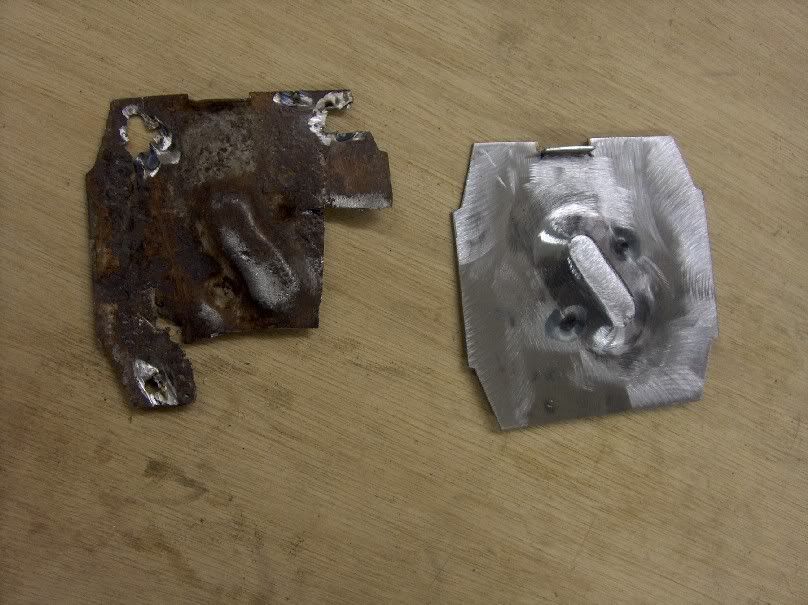
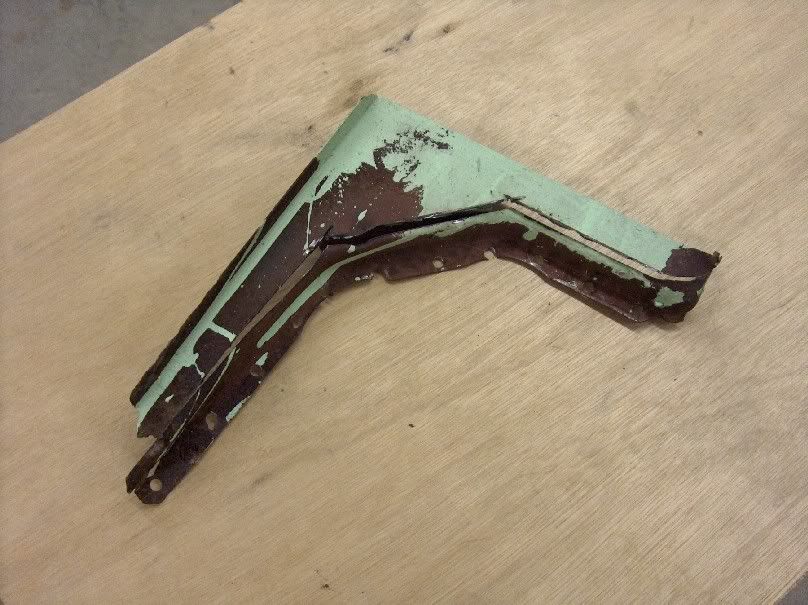
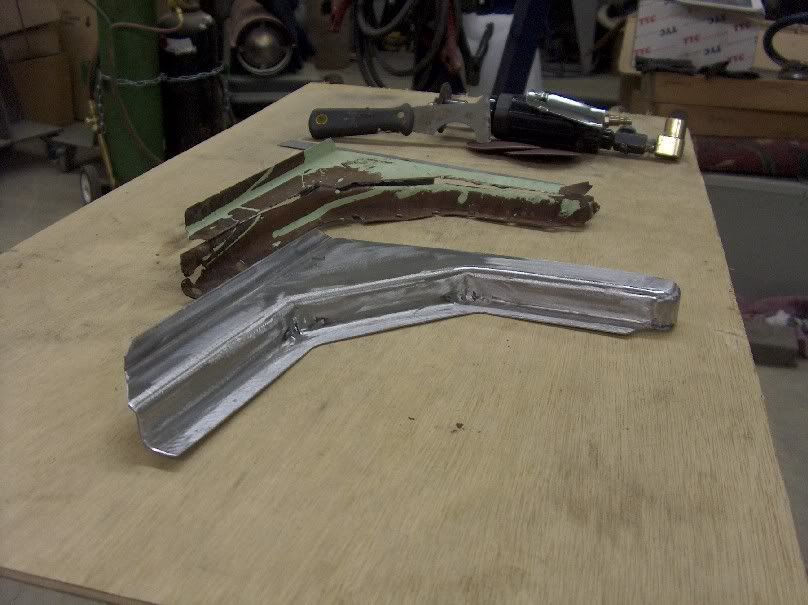
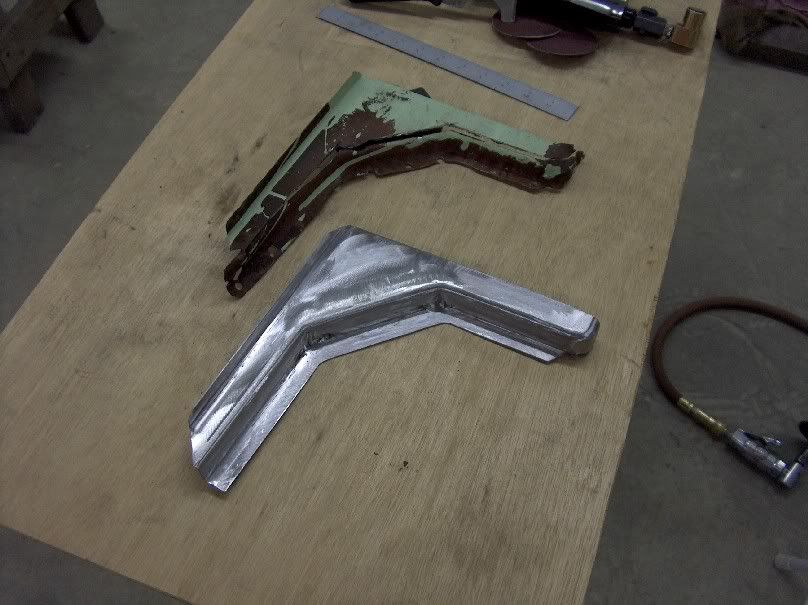
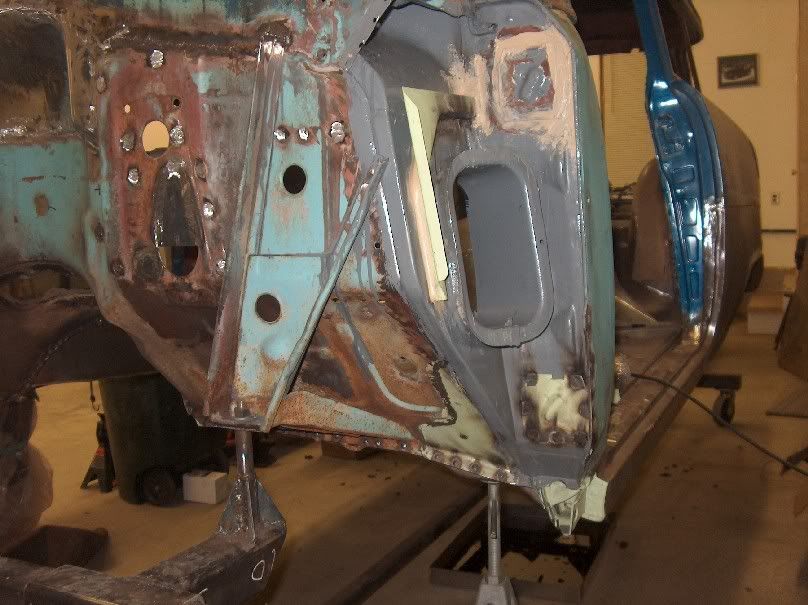
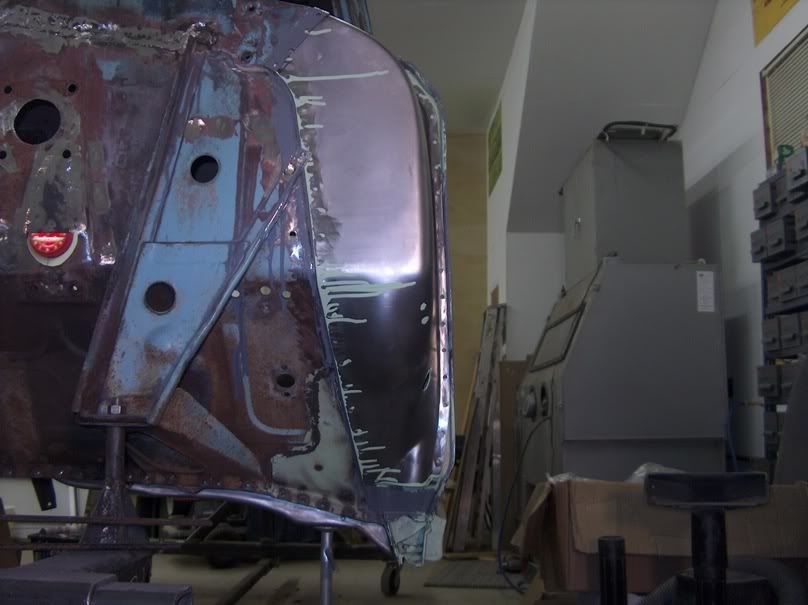
David, I've done them on a 55 car, not sure how close that is but hopefully this will point you in the right direction as they should be similar. We did use reproduction outer pieces but had to make all the innards as those were not available..

Quote:
As we’ve seen quite a bit of interest in this lately, here’s a rewrite of the lower cowl and inner hinge area repair in an attempt to lay it out in one place, and in a more logical order. These are areas often overlooked when performing rust repair, but due to their design are prone to rust damage from the inside out. The inner cowl area on the 55 and 56 provides fresh air to the kick panel vents, which also makes use of an internal gutter system in an attempt to keep your feet dry if the vents were to be open during a rain storm. Unfortunately this internal gutter normally fills with leaves and other debris, thus retaining water over the years and eventually causing rust. Telltale signs will be small circular spots of rust, and you can check if they are growing into pinholes by using an ice pick:


If removing the complete cowl for replacement, there are spot welds around the perimeter of the cowl that hold it onto the adjacent panel. If you are removing the cowl and replacing it with a new one, I would remove the spot welds shown in these areas (red arrows) using a 3" cutoff wheel to grind down to the second layer, so you won't go thru the second layer like you may if using a drill bit. On the outer section, the spot welds are recessed behind the A pillar a bit, so use a fresh cutoff wheel here, and when they just won't reach anymore, continue to use it on the inner section where it is more readily accessible. Or for those that have better luck using a spot weld cutter than I do, they may be used here to remove all the spot welds instead of the cut off wheel. Be sure to use extreme caution not to cut into the second layer, or you may be spending time repairing that before the cowl can go on. On the top section, (second picture down) the cowl has a flange that goes under the upper cowl area, so these spot welds can be simply drilled out with a drill bit to the size of your plug welds, as the new panel will tuck behind. The area pointed out with the green arrow has a flange that tucks up behind pretty far, and is the hardest part to get out, so try to leave this for last when prying it out. It will also give you the most fits putting the new one in, but it will go.


As the front of the cowl is cut open, we can see the problem area and some of the debris that caused the rust:


Now, while you're in here (if you need to be) there are plates covering the pockets which hold the floating nut plates for the hinges. The upper ones will likely be fine, but the lower ones may have rust issues as well.

Hard to see from the mud-rust-scale, but there are pin holes through the plate on the bottom:


And behind that as well:


This is the pocket that holds the inner hinge nut plate. This can be formed using a 3 x 3 square steel tubing as a female die, and a 2 x 2 square steel tubing as a punch. (leftover parts from building your own rotisserie) A relief is cut out of one side of the 3 x 3 “die” to better form a 3 sided pocket. Apply heat and dead blow hammer as needed:


Welded in, and drain hole formed:


The driver’s side was even worse as it was plagued with various pin holes around the vent area, so with either side, don’t be surprised if you end up with a hole like this to start:


Replacement laid out:


Bent up and test fitted:


Kick panel vent clamped for welding (area behind vent is welded in separately, allows you to replace kick panel vent in one piece):


Installed:


Here's what was left of the retainer plate:


We'll need another punch and die:

Two holes joined together with a dremel or drum sander (or die grinder if that's what you have). Scribed lines from the originals keep the reliefs "keyed" correctly


Two pieces of round rod welded to the rectangular "handle"


This merely provides clearance for the bolts coming through the nut plate. Again, apply heat and dead blow as before:


I don't know that the gutter is available reproduction, so I'll go through the fab process for that as well.

removed gutter:


Cut out:


Bent up:


Trimmed and fitted:


Welded up, welds dressed:


Comparison:


All parts welded in place: (the nut plate is then dropped in the pocket from inside the hinge hole)


And then all covered up for no one to see:


This post is not to overwhelm anyone, but just to show that you may run into more damage as you begin to open it up, but it can all be repaired. I didn't have a fancy press to make those parts, and anyone should be able to duplicate the same process. Those bends made in a brake can also be duplicated by hammering in a vise or over a piece of angle on the face of a work bench.
__________________
Robert
MP&C is offline   Reply With Quote
Old 11-03-2014, 09:24 PM   #3
dhunt00c
Registered User
 
Join Date: Apr 2006
Location: Arkansas
Posts: 55
Re: Cowl Vents - anyone repaired or covered them?

Wow! Very impressive and thank you for taking the time. Mine are similar and you gave me some great ideas in terms of making parts. I'm just getting into this fabrication stuff and learning as i go!

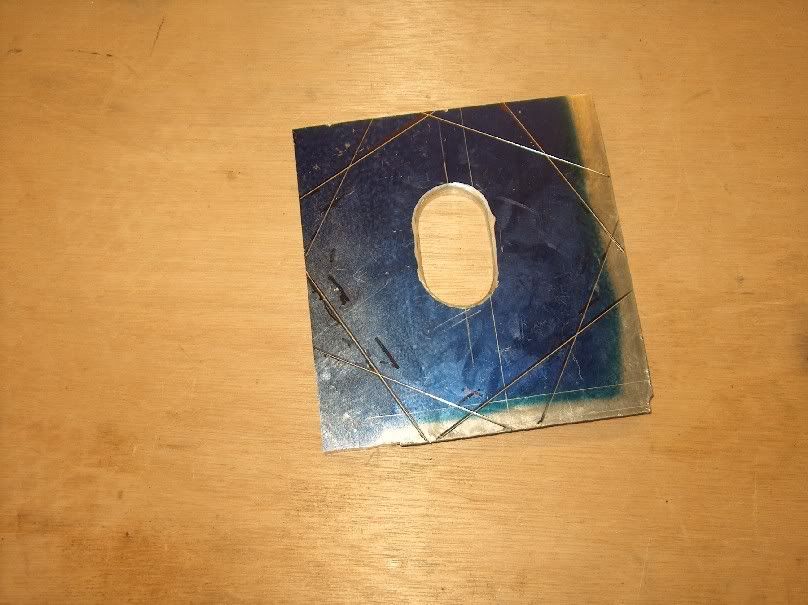
Any tips on how to make the radius that goes outward (from inside cab) that is also the oval part of the vent. I can reconstruct the vent tunnel i think, but its that radius that i'm stewing over. I may not have the right tools, but you seem pretty creative. Maybe i can get a picture, but think of a flat piece of steel with an oval cut in it (the vent), and a radius or "lip" all the way around that oval versus a straight 90 degree.... make any sense?

Love your ideas on making some of the parts and dimples and such. Gives me hope and motivation to create myself!

Thanks again!
dhunt00c is offline   Reply With Quote
Old 11-03-2014, 09:59 PM   #4
MP&C
Registered User
 
MP&C's Avatar
 
Join Date: Jan 2013
Location: Leonardtown, MD
Posts: 1,633
Re: Cowl Vents - anyone repaired or covered them?

Look through this thread, especially starting on post 2..

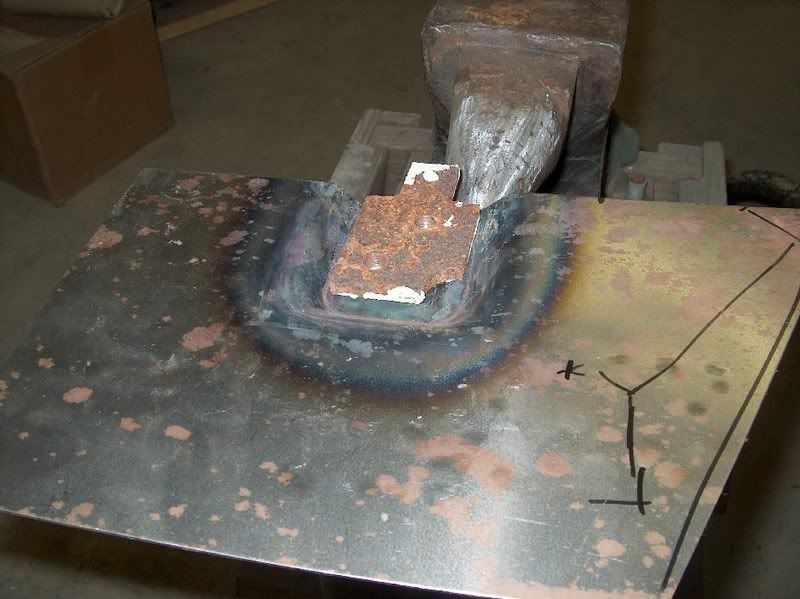
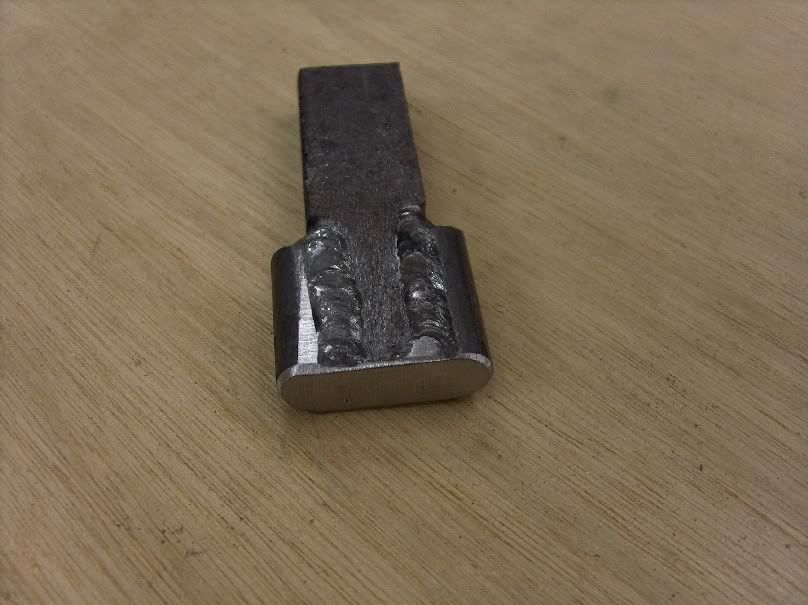
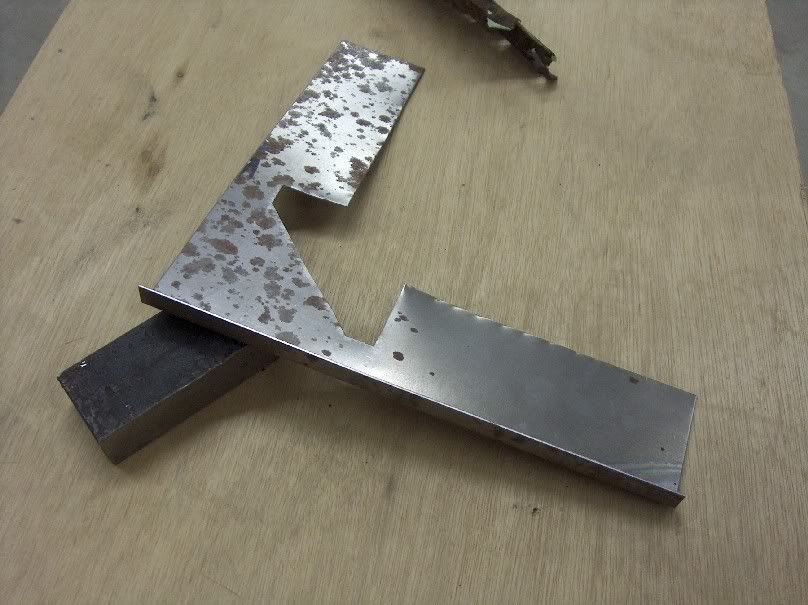
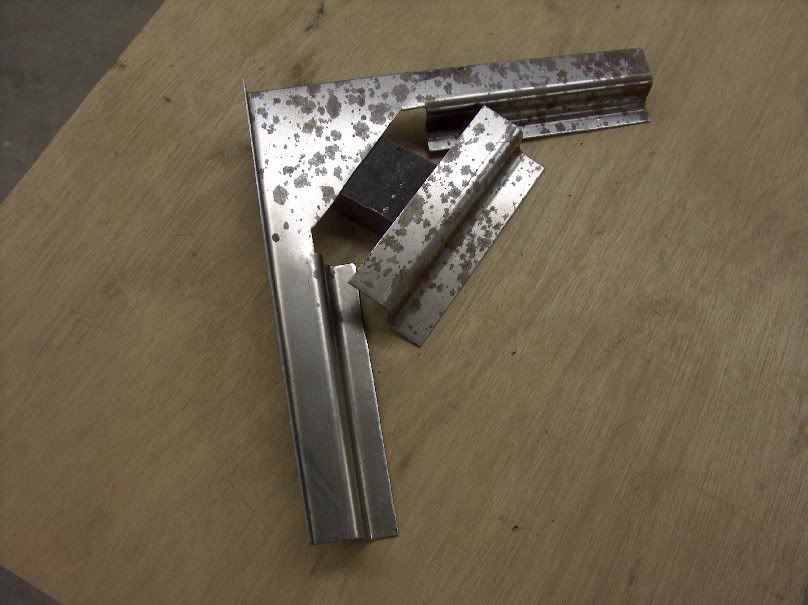
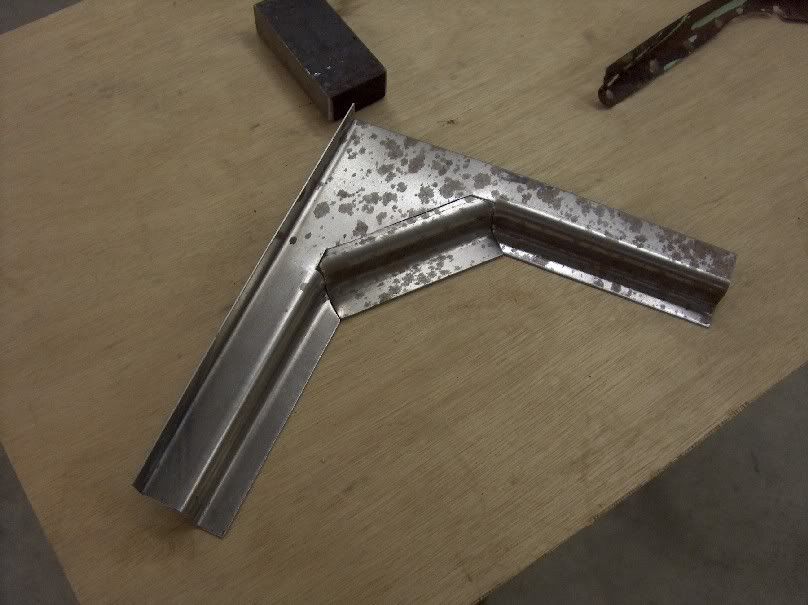
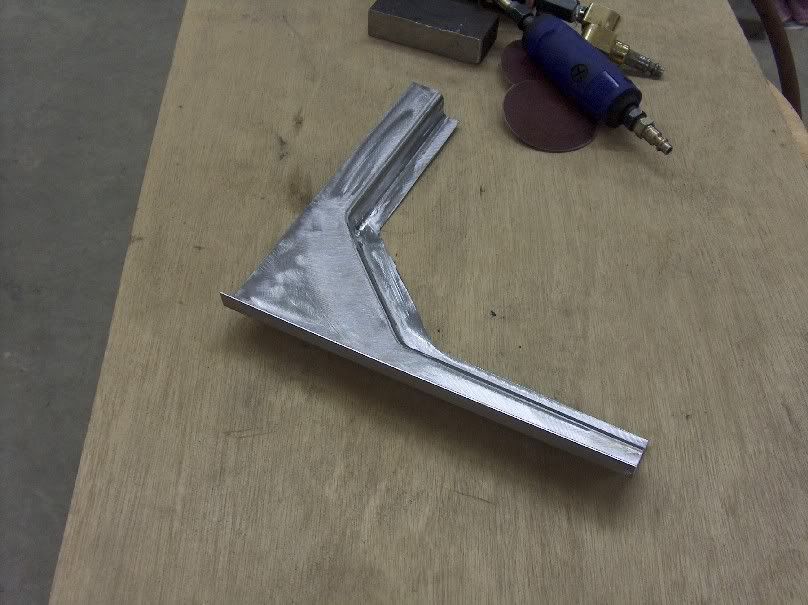
http://67-72chevytrucks.com/vboard/s...d.php?t=568891


It shows how I made some "tubes" using a bead roller, but you could do similar wrapping a piece of sheet metal around a pipe. Weld the side seam and tip the flange. Where I again used the bead roller to tip the flange, you could use a simple home-made tool like this:


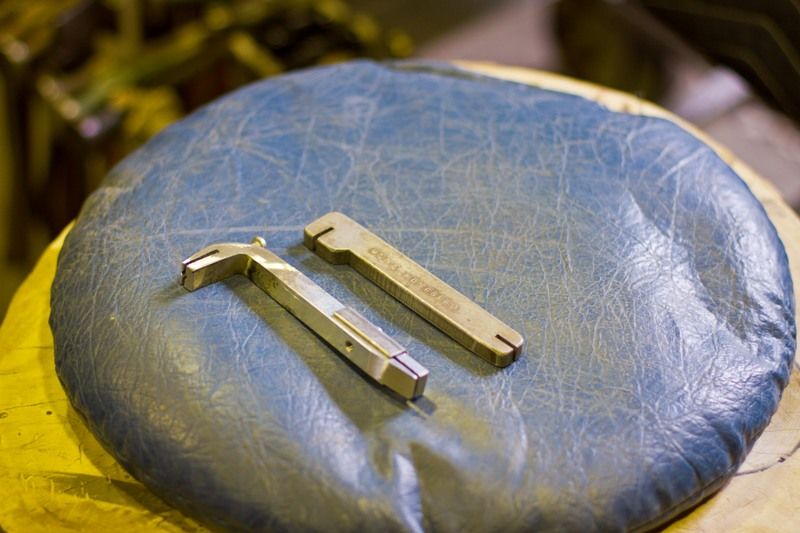
For wider flanges, you may have to do a bit of planishing along the outer perimeter of the flange to add some stretch...
__________________
Robert
MP&C is offline   Reply With Quote
Old 11-05-2014, 04:01 AM   #5
BigDan3131
Registered User
 
BigDan3131's Avatar
 
Join Date: Jun 2006
Location: Maple Valley, WA
Posts: 1,913
Re: Cowl Vents - anyone repaired or covered them?

The only other thing I can add to the above is mask off about 2" from the edge on the outer vent section before you weld it in place. Then shoot it with undercoating and the same with the cab. We don't want to have to do it again...
__________________
Custom Painter/Restoration Specialist

1965 GMC 3/4 Ton LB SOLD?
1964 Chevy El Camino in full restoration
1991 Chevy S10 288K+ miles 2nd Owner SOLD

2020 RAM 1500 Warlock
BigDan3131 is offline   Reply With Quote
Old 11-28-2014, 08:15 AM   #6
redtailboa
Registered User
 
Join Date: Sep 2014
Location: Coldwater ,Canada
Posts: 13
Re: Cowl Vents - anyone repaired or covered them?

Nice work . I like seeing people fabricating there own stuff
redtailboa is offline   Reply With Quote
Reply

Bookmarks

Tags
air vent, cowl, vent


Posting Rules
You may not post new threads
You may not post replies
You may not post attachments
You may not edit your posts

BB code is On
Smilies are On
[IMG] code is On
HTML code is Off

Forum Jump


All times are GMT -4. The time now is 05:42 AM.


Powered by vBulletin® Version 3.8.11
Copyright ©2000 - 2024, vBulletin Solutions Inc.
Copyright 1997-2022 67-72chevytrucks.com