
|
 07-29-2013, 05:41 PM
|
#26 |
|
Registered User
Join Date: Jun 2013
Location: Nashville
Posts: 82
|
Re: 66 C10 Project SWB
Finished the sand blasting of the frame. Its not prefect but my main goal was to knock off the loose stuff and etch the metal.
 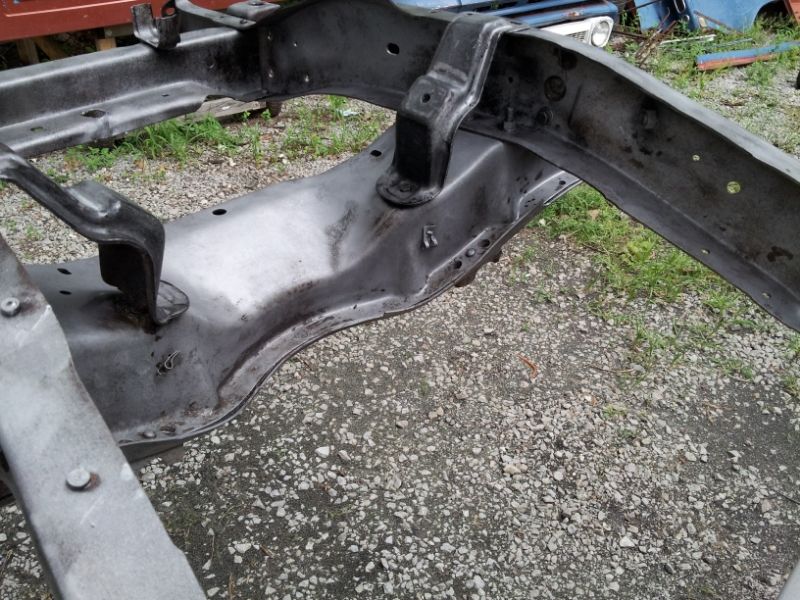 Primed it: 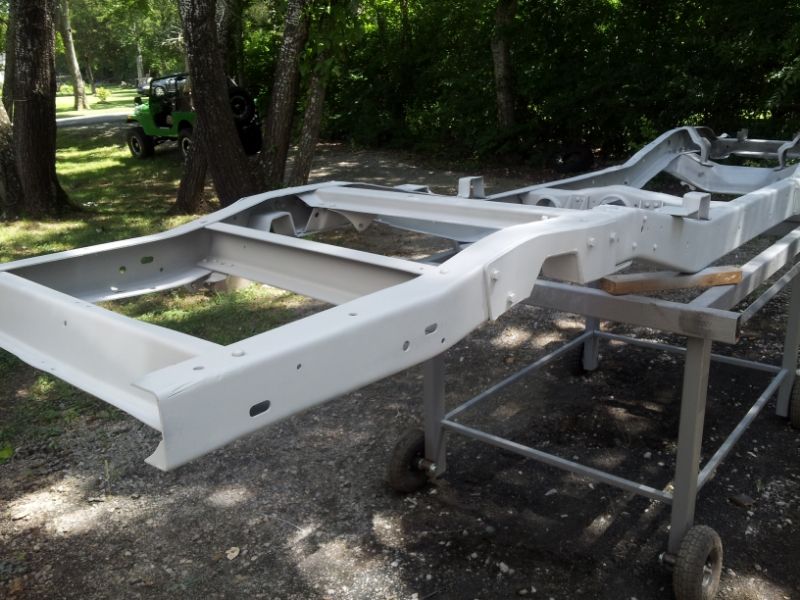 Started painting. 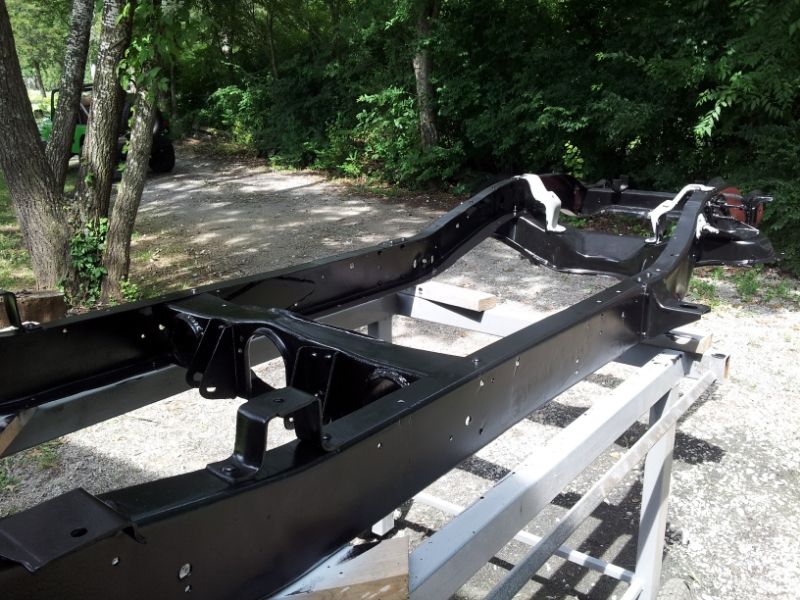 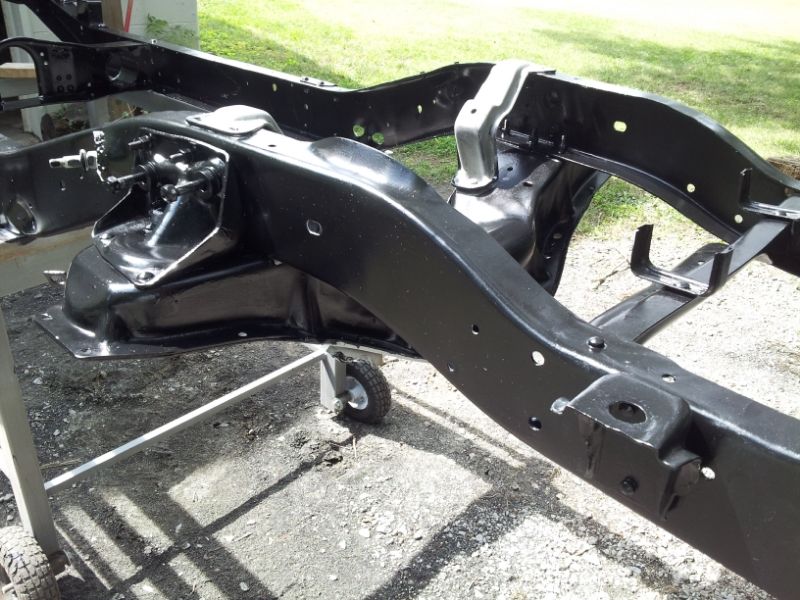 I ran out of paint and didn't get the under side all that well. Ill pick up some more this week. I'm looking forward to putting on the suspension. |

|

|
|
07-30-2013, 09:12 AM
|
#27 |
|
Registered User
Join Date: Apr 2012
Location: CT
Posts: 265
|
Re: 66 C10 Project SWB
Nice work on the frame and nice Jeep. I like your style
__________________
http://67-72chevytrucks.com/vboard/s...d.php?t=742865 66 SWB, C4 Dropmember timmytimm3 on IG "If you don't have time to do it right the first time, when will you?" -Dad |
|
|
|
|
07-31-2013, 10:46 PM
|
#28 |
|
Registered User
Join Date: Feb 2013
Location: Mill Creek Washington
Posts: 127
|
Re: 66 C10 Project SWB
good job man, the frame looks great!
|
|
|
|
|
08-01-2013, 10:54 AM
|
#29 | ||
|
Registered User
Join Date: Jun 2013
Location: Nashville
Posts: 82
|
Re: 66 C10 Project SWB
Quote:
Quote:
|
||
|
|
|
|
08-05-2013, 12:01 PM
|
#30 |
|
Registered User
Join Date: Apr 2011
Location: .
Posts: 3,104
|
Re: 66 C10 Project SWB
Like what ya got going on so far.
Sub'd |
|
|
|
|
08-05-2013, 01:02 PM
|
#31 |
|
Registered User
Join Date: Apr 2003
Location: Indep, MO
Posts: 5,893
|
Re: 66 C10 Project SWB
Gotta see where this goes- Got a motor yet?
__________________
Boppa's Old Yeller Truck Build, Old Yeller's New Heart! Project Buzz Bomb Flyin' Low! |
|
|
|
|
08-05-2013, 09:15 PM
|
#32 |
|
Registered User
Join Date: Jun 2013
Location: Nashville
Posts: 82
|
Re: 66 C10 Project SWB
Got a lot done this weekend. Finished painting the frame and got it back on jack stands. Started putting on the suspension components that was rebuilt a while back. The disk brake suspension is off of a 87 Chevy truck. 3" drop spindles with slam specializes SS7. I like these because they use an internal bump stop. Air ride is a first for me so its going to be a learn as I go kind of an event.
 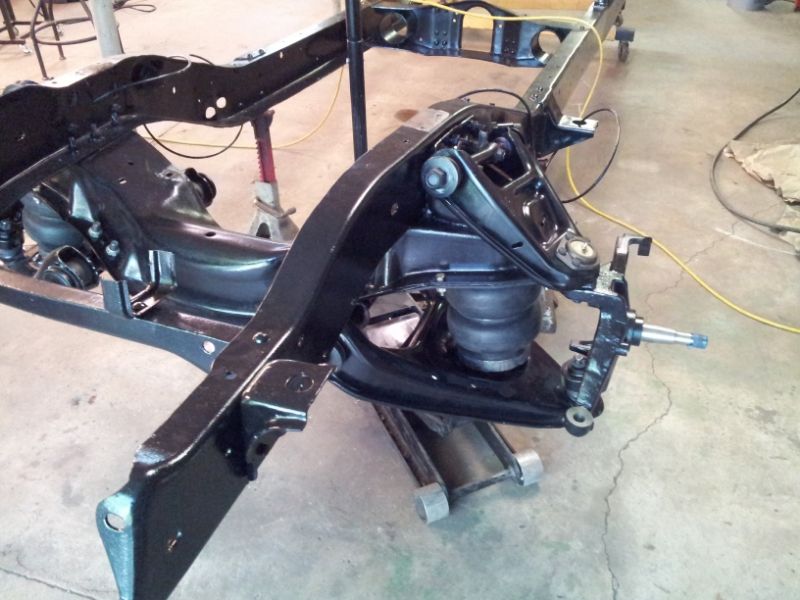    Aired out... Sits pretty low. Not exactly what I was going for but I like it. The bracket kit I got for the front had cups that bolted to the bottom of the bag and sits in the lower control arm spring pocket. They looked too tall at first so i took about two inches out of the 3 inch cup. That may have been a mistake because it looks like the air bag's lower bellow is making contact with the sides of the control arm spring pocket. I'm going to weld back on what I cut off and see where that lands me. |
|
|
|
|
08-05-2013, 09:36 PM
|
#33 |
|
Registered User
Join Date: Jun 2013
Location: Nashville
Posts: 82
|
Re: 66 C10 Project SWB
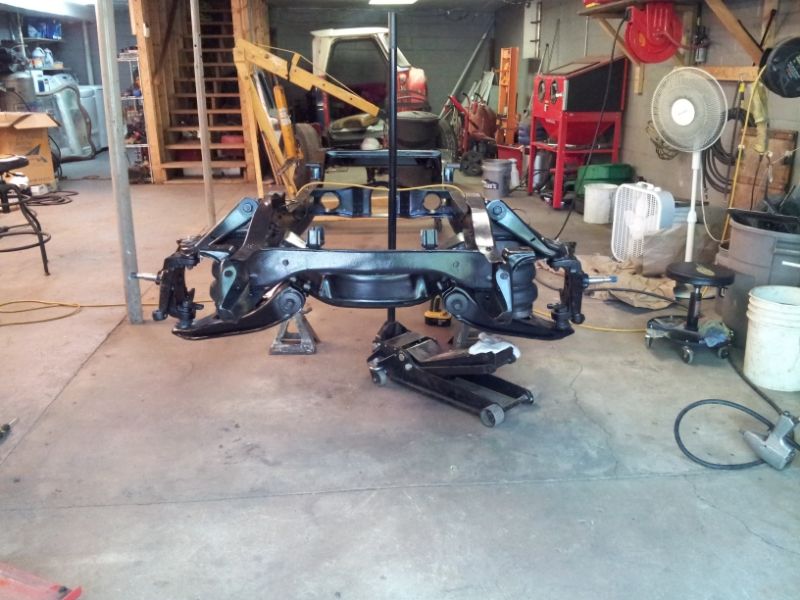
Got my second wind and started putting together the rear suspension. The rear end is out of a 72 Chevy truck with new seals and outer bearings. The rear trailing arms were cleaned up and painted. Installed new poly bushings. Air bags are the same SS7s like the front.
  Used a cup bracket at the top of the air bag to bolt to the frame. I ended up taking it out and seeing what the lower looked like. After the front... I like it lower, it still has a nice rake. 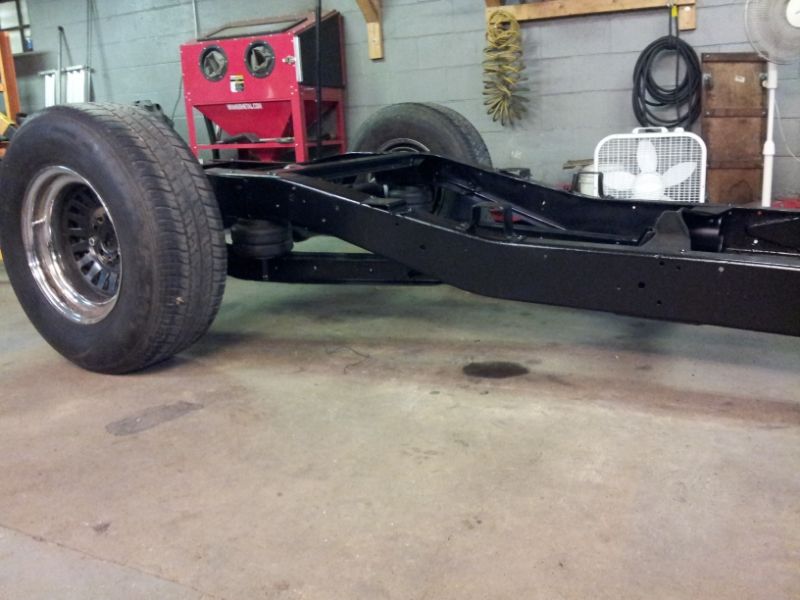 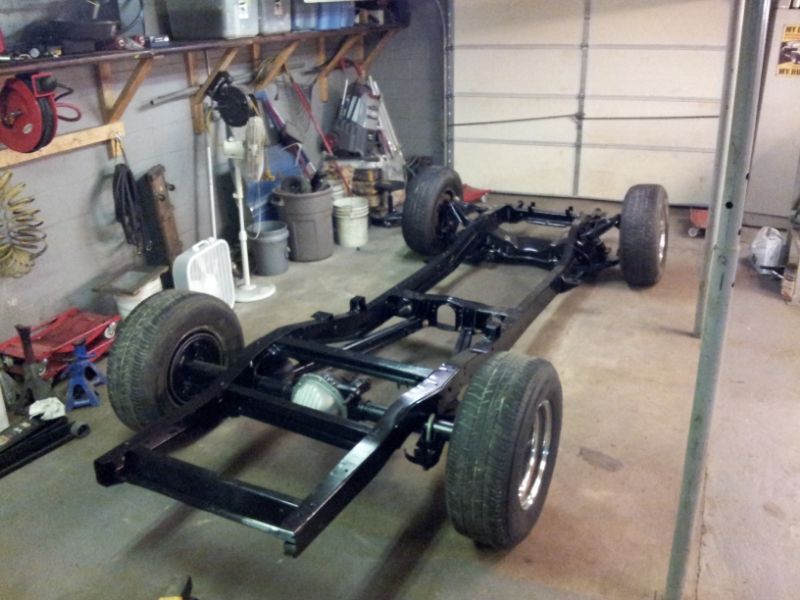  I may have a problem running a track bar. The diff cover its a bit too far. Anybody run into this problem? |
|
|
|
|
08-05-2013, 09:47 PM
|
#34 | ||
|
Registered User
Join Date: Jun 2013
Location: Nashville
Posts: 82
|
Re: 66 C10 Project SWB
Quote:
Quote:
Anyone have any better ideas on the transmission? |
||
|
|
|
|
08-26-2013, 05:21 PM
|
#35 |
|
Registered User
Join Date: Jun 2013
Location: Nashville
Posts: 82
|
Re: 66 C10 Project SWB
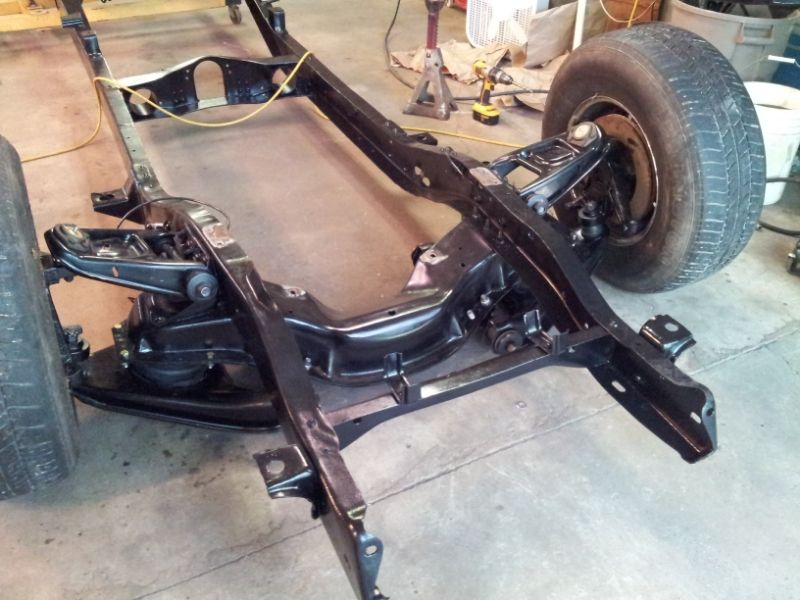
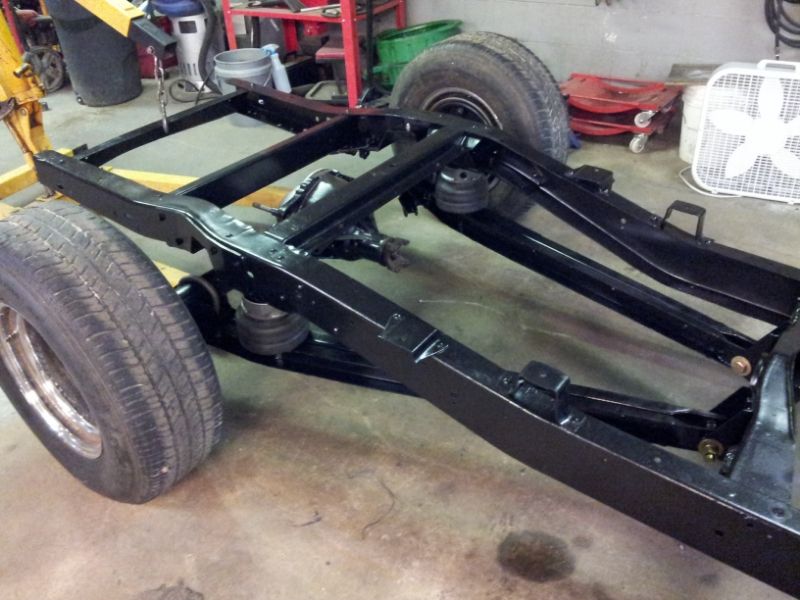
Been working with the mistress on and off over the last few weeks. Picked up a sway bar at the local pick a part and waiting on the frame brackets to show up. Installed all new steering components and bushings.
Everything is torqued and lock tied with the exception of the control arm bushings. Anyone know how those are suppose to be torqued. They seem like if I tighten then down it'll clamp down on the bushing making them squeak and fail prematurely. Any thoughts? 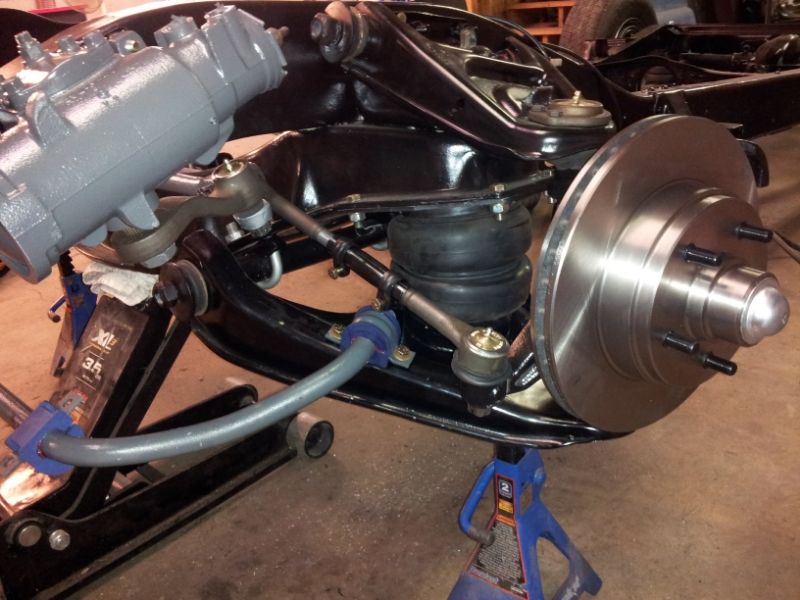 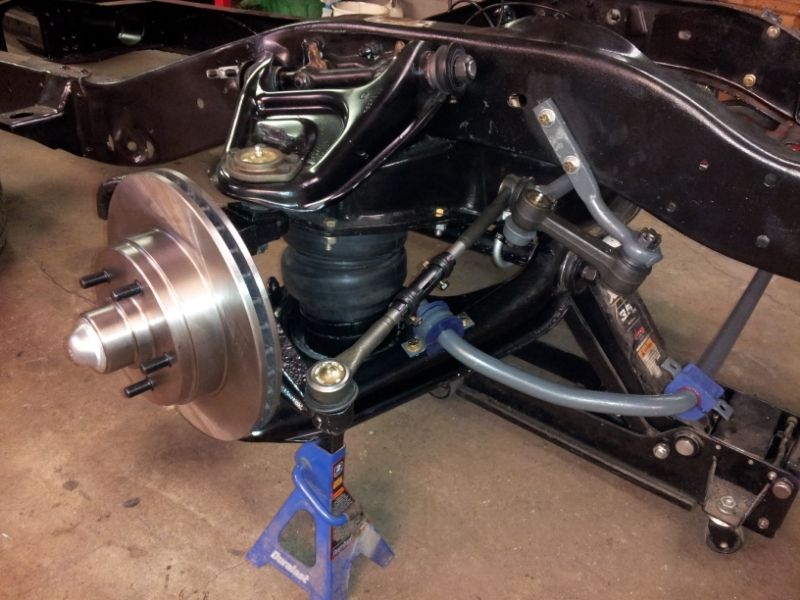 Took it out for some sun. 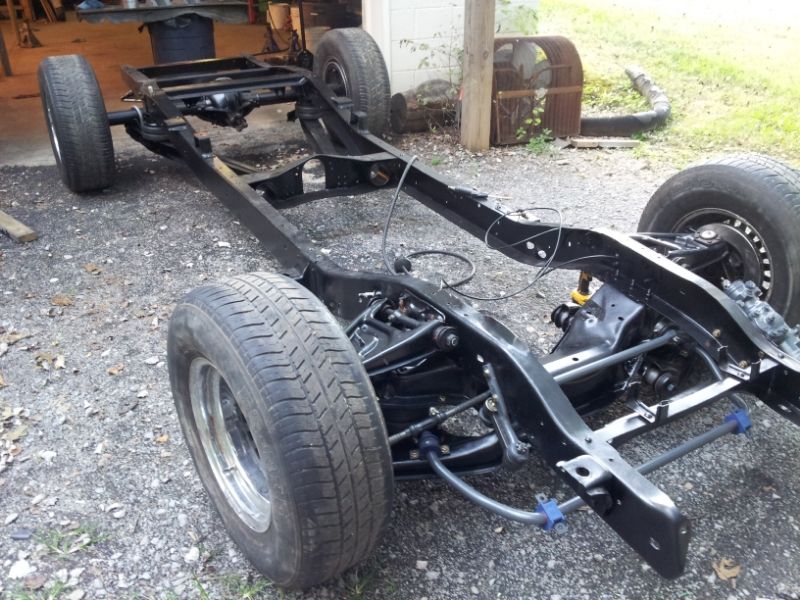 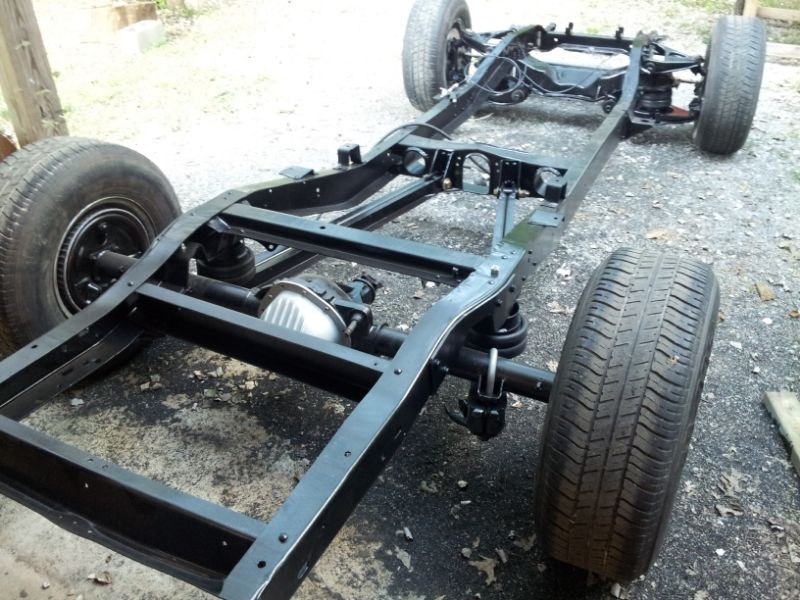 Ordered a panhard bar from CPP. Its the bent one for over sized differential covers. Not sure if it'll work but it may be a good starting point and then just modify it. I also welded back on the front bag cups that I cut in half. It raised it pretty good but now I want it lower again. Anyone got any good pics or links of theirs lowered about where mine is? I looked through the bagged pics section but they are all extreme modified frames with laying frames. |
|
|
|
|
08-26-2013, 10:58 PM
|
#36 |
|
Registered User
Join Date: Feb 2013
Location: Mill Creek Washington
Posts: 127
|
Re: 66 C10 Project SWB
Frame looks good! My set up is really similar to yours, but I'm running tubular control arms.
http://67-72chevytrucks.com/vboard/s...d.php?t=587028 |
|
|
|
|
08-27-2013, 06:34 AM
|
#37 |
|
Registered User
Join Date: Aug 2012
Location: Smithfield rhode island
Posts: 722
|
Re: 66 C10 Project SWB
Cool truck and Nice progress man! For some reason I couldn't see your earlier pics. Nice how just a bare frame looks cool. I remember sitting there staring at mine on more than one occasion
 not sure how low you are trying to go butIf you wanted to go a hair lower you could cut an inch off the front lower cups and add 2 inch lowering blocks in the back. Just a suggestion.Can't wait to see more and welcome to the addiction not sure how low you are trying to go butIf you wanted to go a hair lower you could cut an inch off the front lower cups and add 2 inch lowering blocks in the back. Just a suggestion.Can't wait to see more and welcome to the addiction Posted via Mobile Device
__________________
My frame Layin 63 short bed project  http://67-72chevytrucks.com/vboard/s...d.php?t=551353 |
|
|
|
|
08-28-2013, 09:48 AM
|
#38 | ||
|
Registered User
Join Date: Jun 2013
Location: Nashville
Posts: 82
|
Re: 66 C10 Project SWB
Quote:
Quote:
I may go with blocks in the back and just do a lca cup in the front. Seems pretty straight forward. As far as how low...not really looking to tub or raise the bed floor but I'm not against it. I think lowering it any more that what it is now will involve both as well as notching the driver's uca for the steering shaft. Not looking to lay frame but at the height that it is air out is just a little lower than I wanted at ride height. So from what I understand its better to have as more air in the bags rather than just a little. I figured if I can get it to go lower aired out it'll ride better at ride height. I may not do anything right now until I get the body bolted back on. See how it looks. I could mock it up the body on frame but Sneaky has the engine hoist and is being a lazy ass and not swapping out the engine he was needing it for. J/P I shouldn't complain since Ive been "borrowing" it for the last 10+ years. |
||
|
|
|
|
09-02-2013, 06:00 PM
|
#39 |
|
Registered User
Join Date: Jun 2013
Location: Nashville
Posts: 82
|
Re: 66 C10 Project SWB
Pushed the frame out of the garage and started on the bed. Its in great shape but it does have its problems. No real rust but it does have some panel damage. This is the worse.
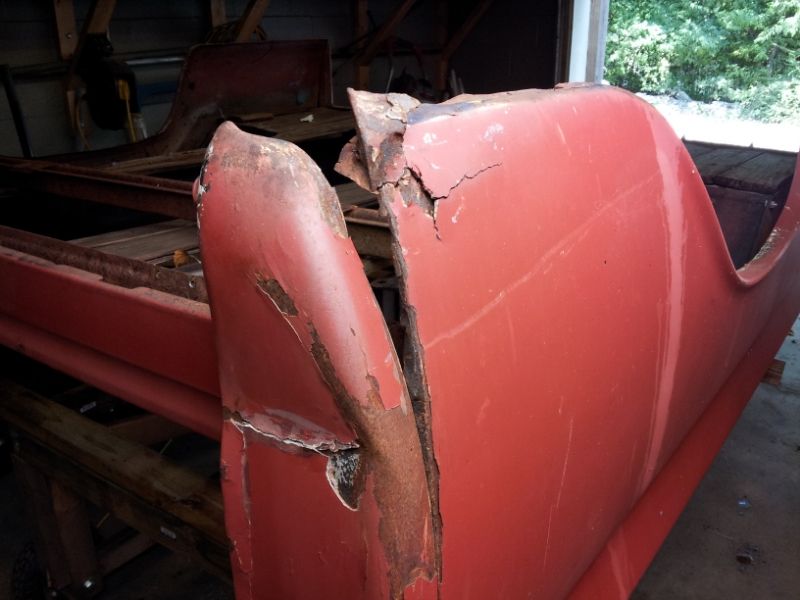  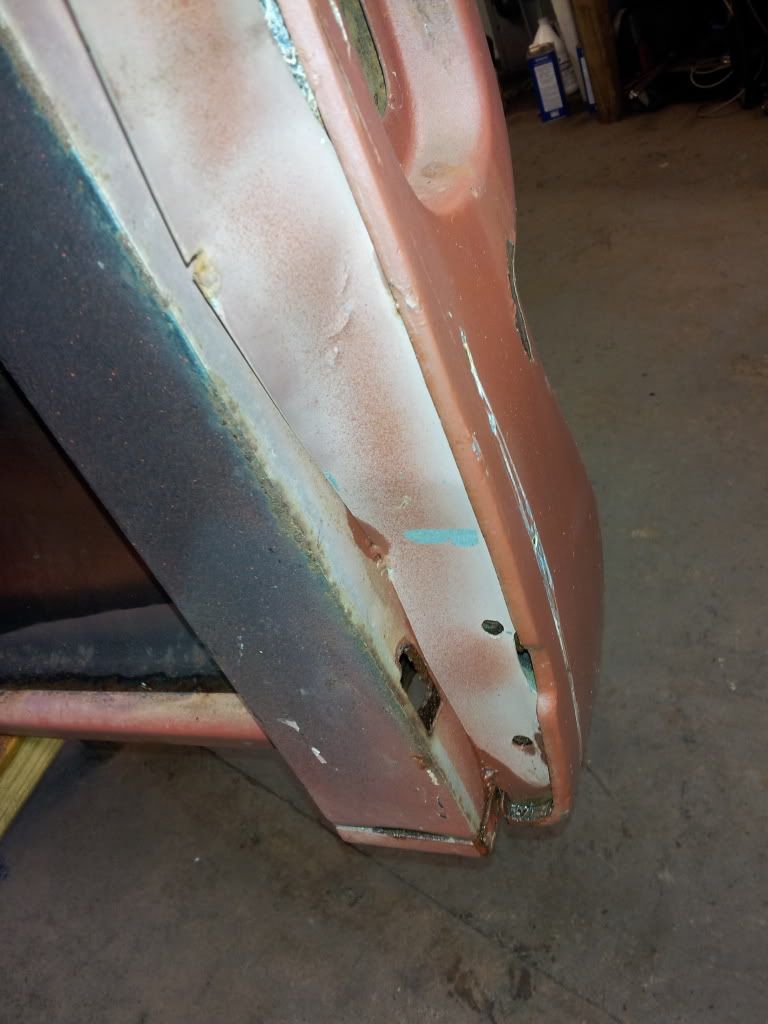 Pulled this strip of metal off and this is what is under it. 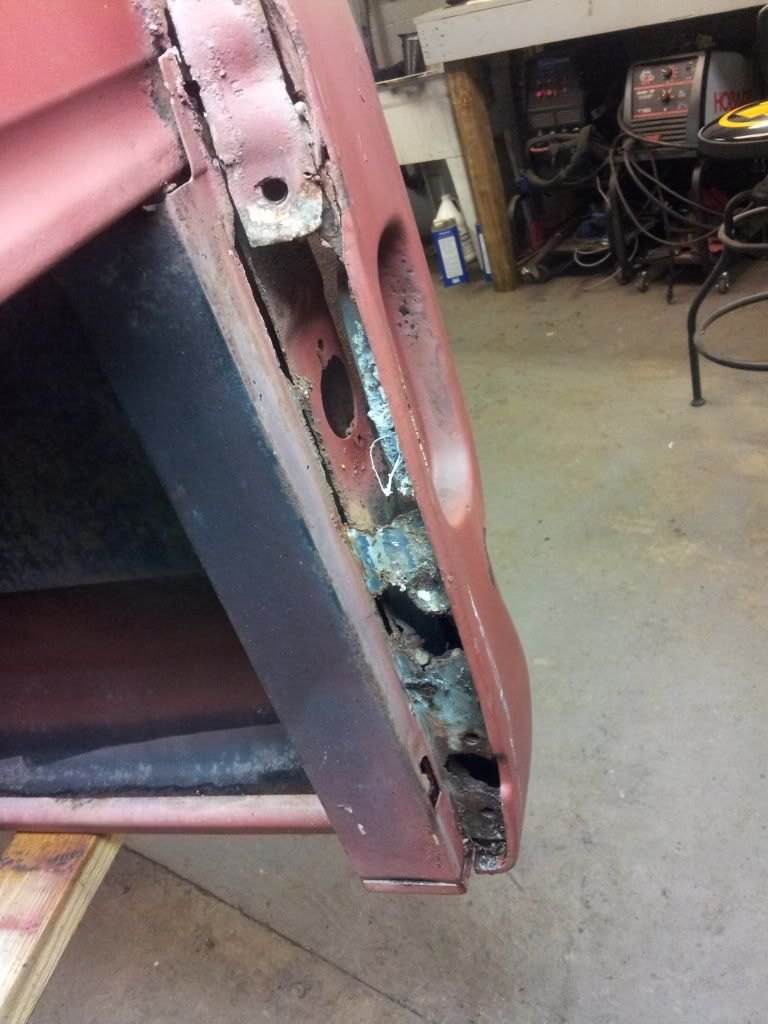 Oh well on no rust |
|
|
|
|
09-02-2013, 06:21 PM
|
#40 |
|
Registered User
Join Date: Jun 2013
Location: Nashville
Posts: 82
|
Re: 66 C10 Project SWB
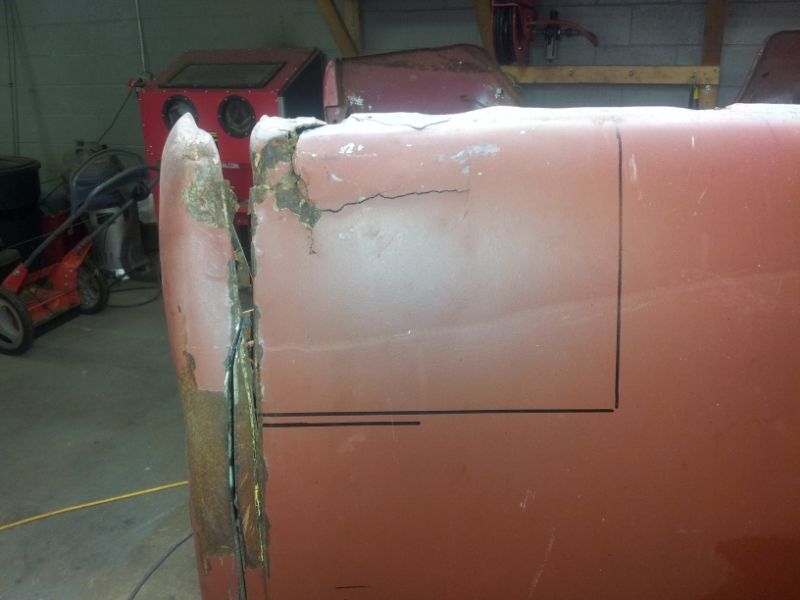
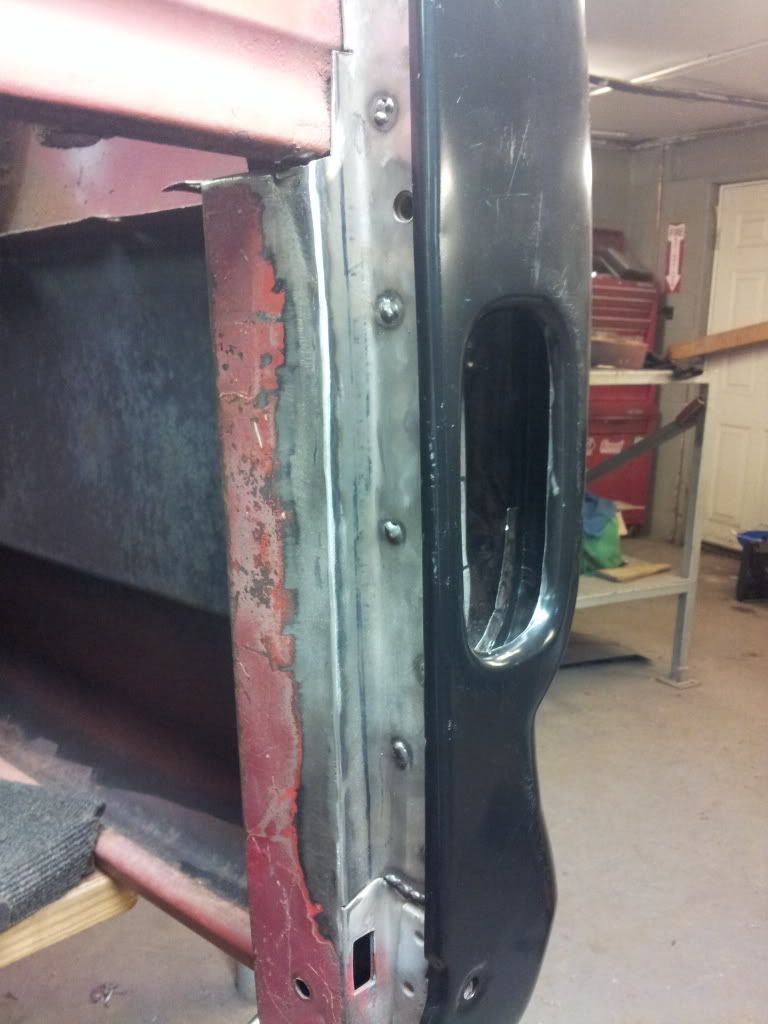
Got some replacement panels from Top Banana. I highly recommend them. Prices were super cheap compared to everyone else and the shipping was reasonable. I ordered the rear tail light section and the lower bed panel. Looks like they were drop shipped from Keyparts and they sent both tail light sections and no lower bed panel. One phone call and they had it resolved...quickly. Good people, no complaints from me.
Started cutting away and welded in a new lower bed panel. 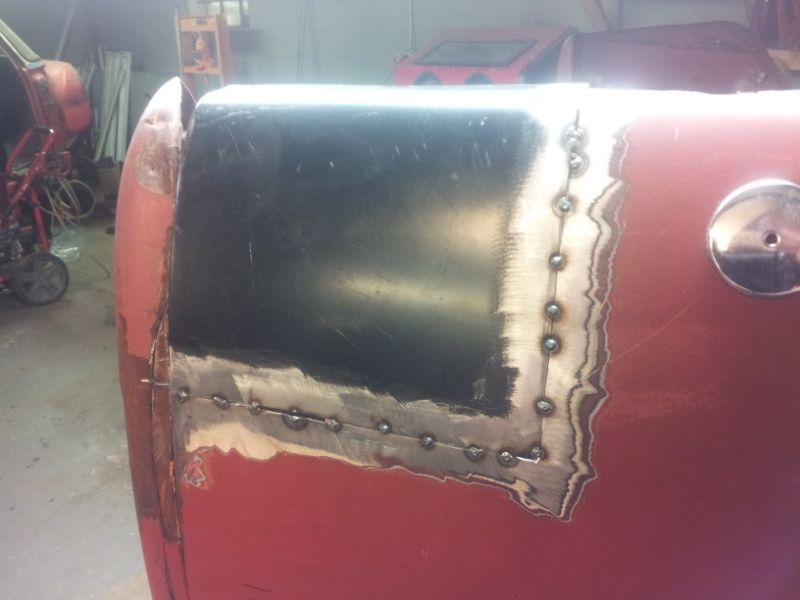 Cut the tail section off and as the story goes....found more rust 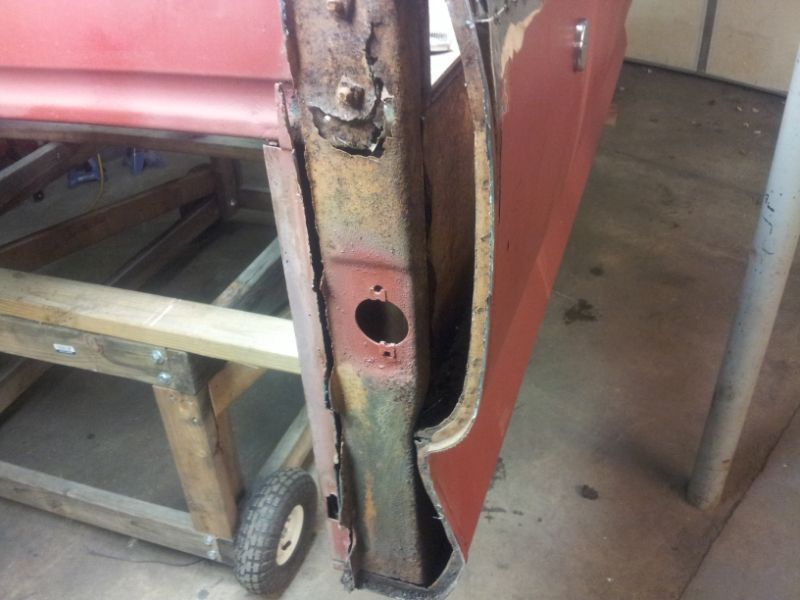 The more I looked at this inner structure the more I just wanted to replace it all. I looked at the original lwb bed and its rear section looked pretty good. It had some rust in the same spots but not near as bad. Mainly the same strip where the tailgate would line up is also rusted. But very repairable. 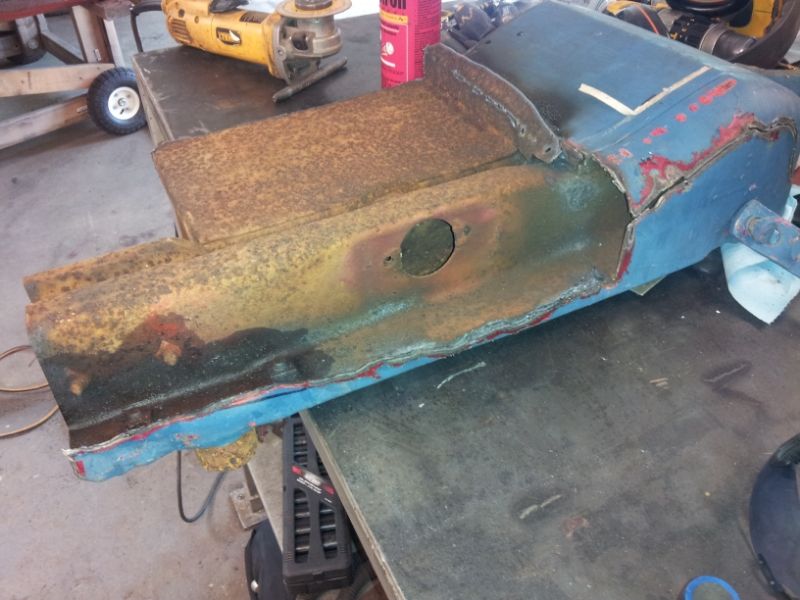 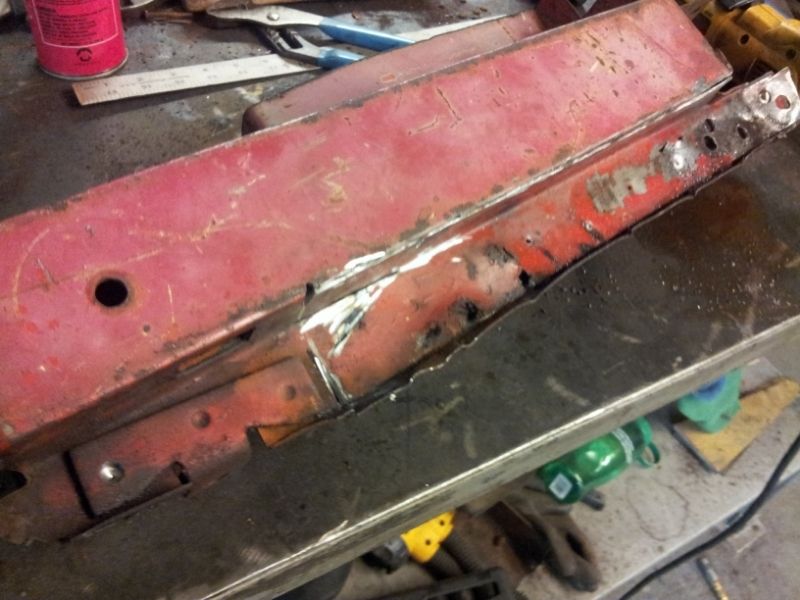 Cut it out  Weld thru primer 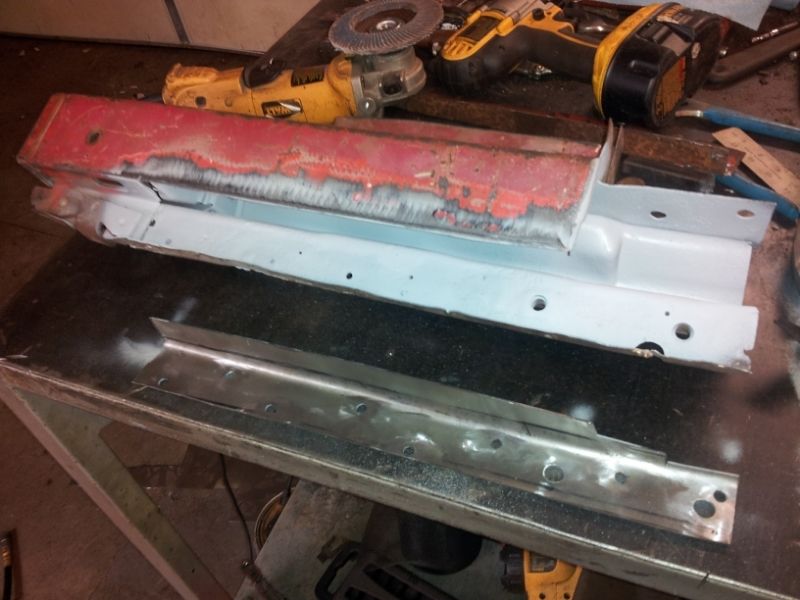 And replaced 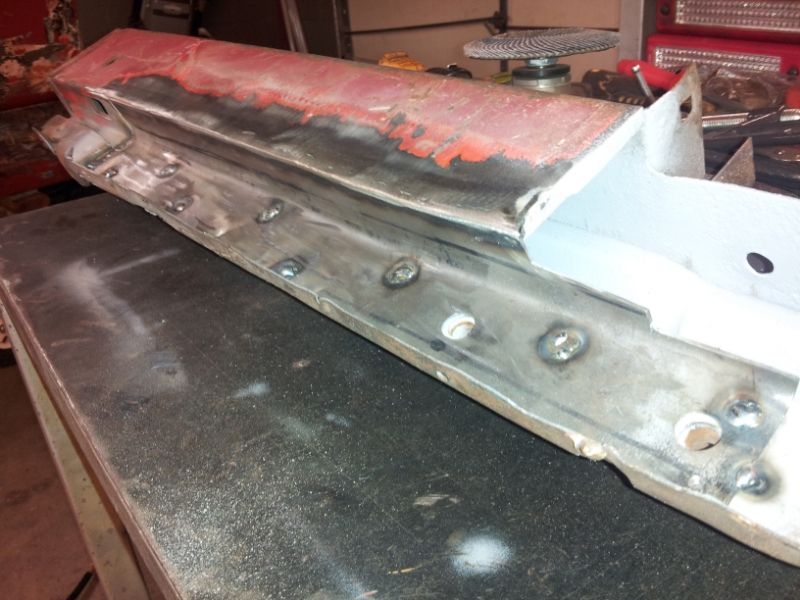
|
|
|
|
|
09-02-2013, 06:44 PM
|
#41 |
|
Registered User
Join Date: Jun 2013
Location: Nashville
Posts: 82
|
Re: 66 C10 Project SWB
So with the new inner structure cleaned up and ready to weld in, I decided that I would like to try and do something Ive seen others do to the 67-72 tail lights. Hide the gas filler be hide it. I was wanting to do this from the beginning but I scratched the idea. But since I was doing all this other stuff with the tail light section I decided to give it a try.
Went to the local u pull lot and looked at a crap ton of gas doors. I was looking for a usable spring loaded hinge that can be adapted to work. Most of the designs were exactly the same. The one that I went with though was a 98 Blazer for the gas door hinge and mid 90s Chevy truck filler neck. I also picked up a mid 80s Chevy truck door hinge just because it was different. I thought it would be wise to experiment with the original inner structure before cutting it out. That would give me the chance to hack it up and not worry about how it looked and more on the functionality. First attempt 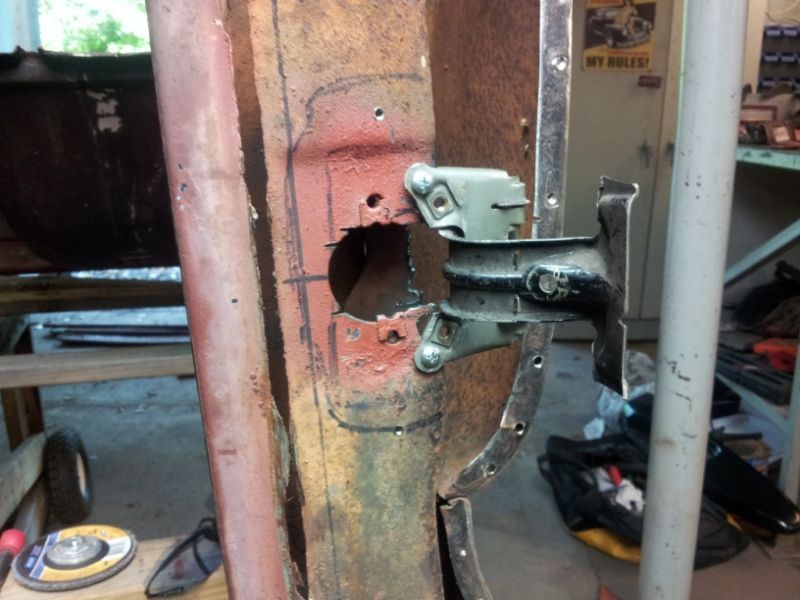 Second attempt 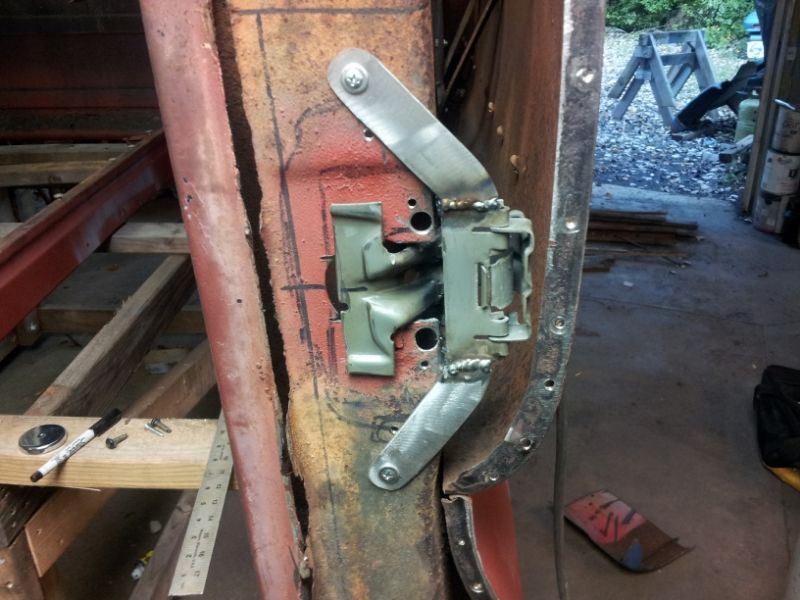 Third attempt 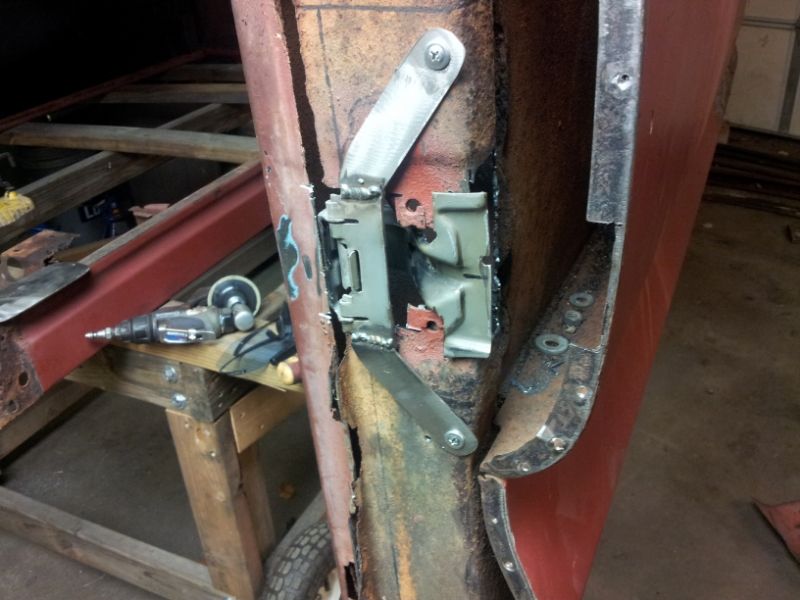 Final attempt 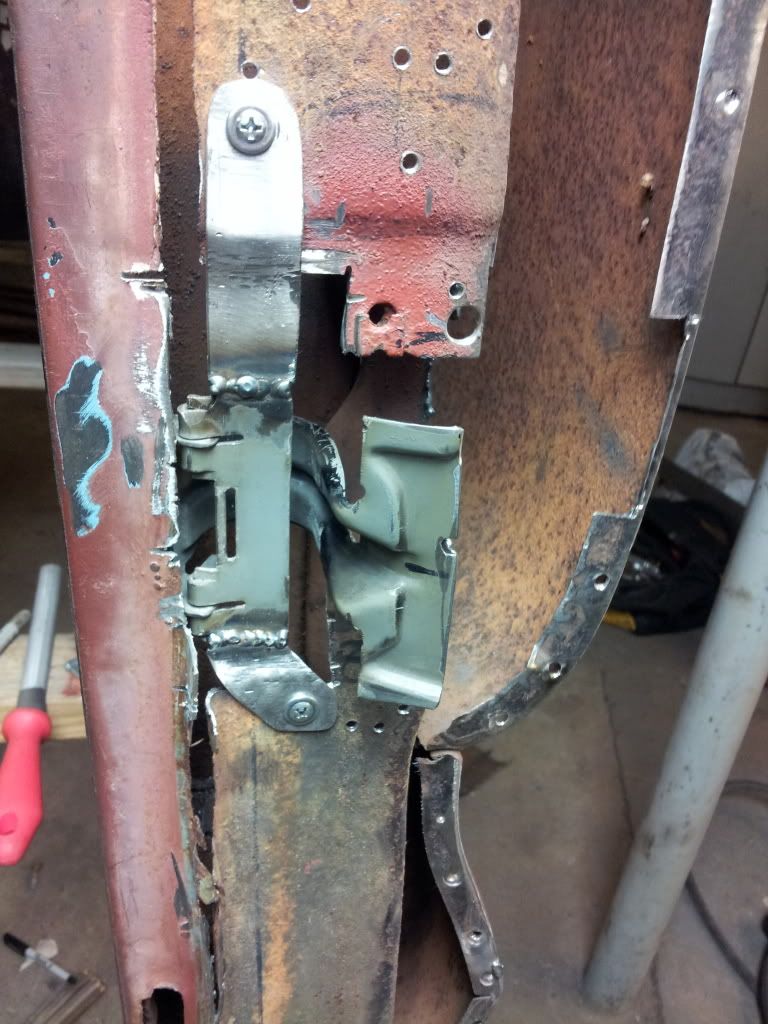
|
|
|
|
|
09-02-2013, 06:57 PM
|
#42 |
|
Registered User
Join Date: Jun 2013
Location: Nashville
Posts: 82
|
Re: 66 C10 Project SWB
I had a hard time test fitting using the old bent up parts. Figured it was time to start cutting on the new metal. Made a template of what needed to be cut and transferred it to the new piece. Also had to cut out the tail light pocket for more room.
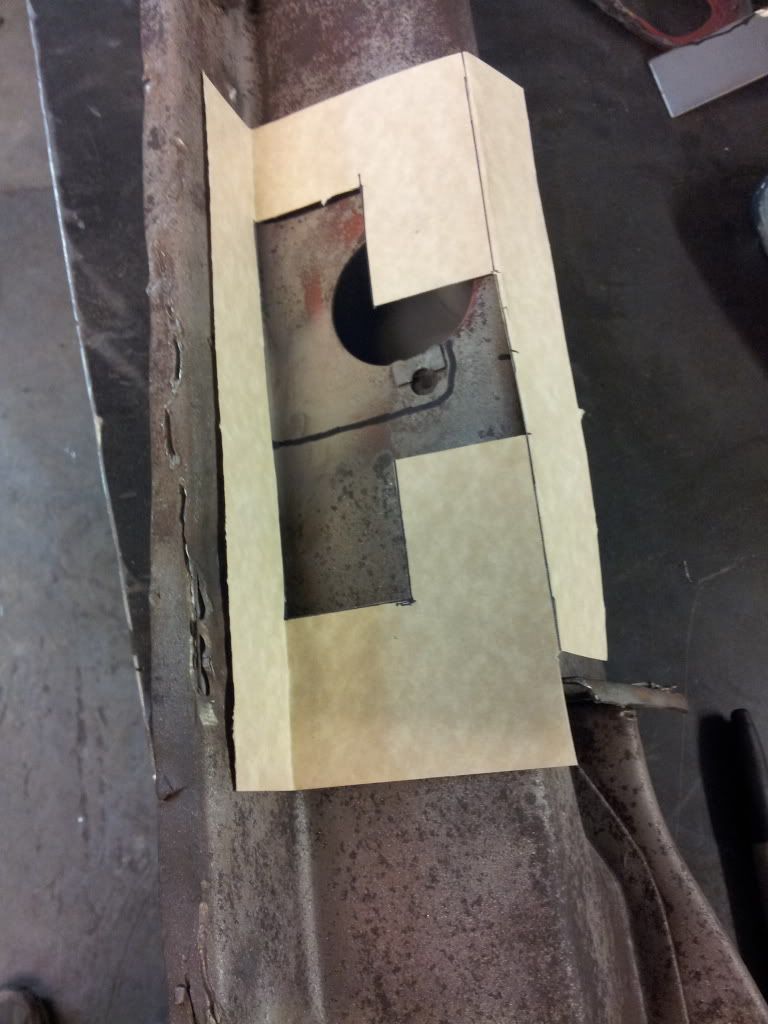  Cut out the old inner structure. Cleaned it up a bit. Had a few dents that needed hammered out. 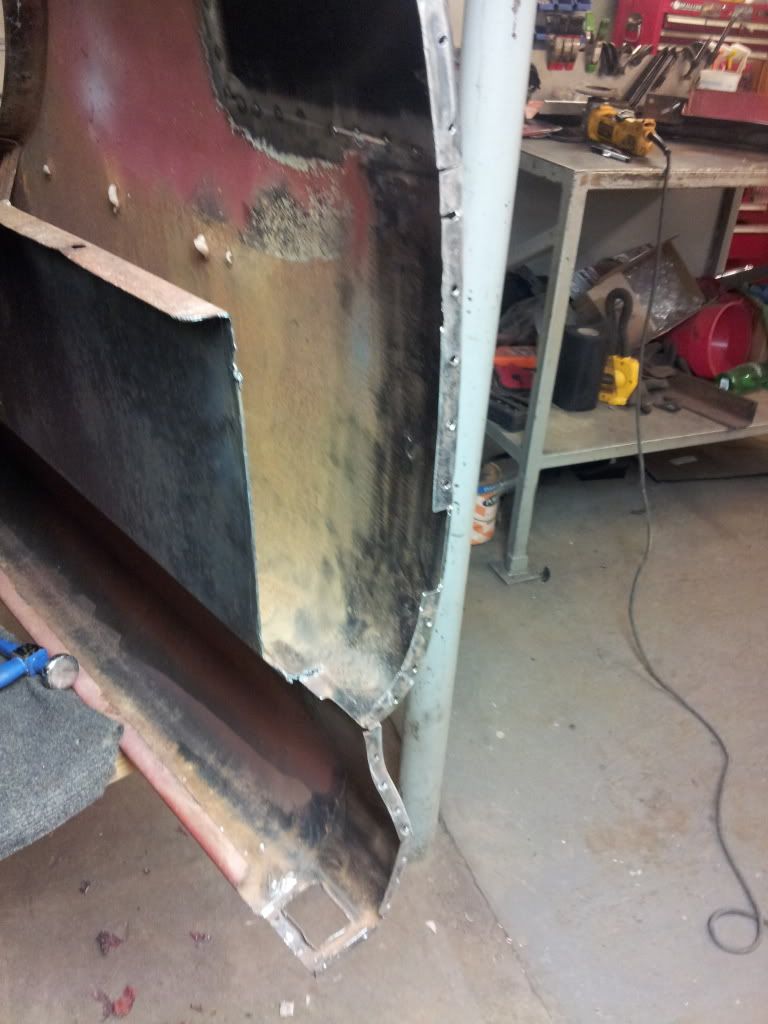 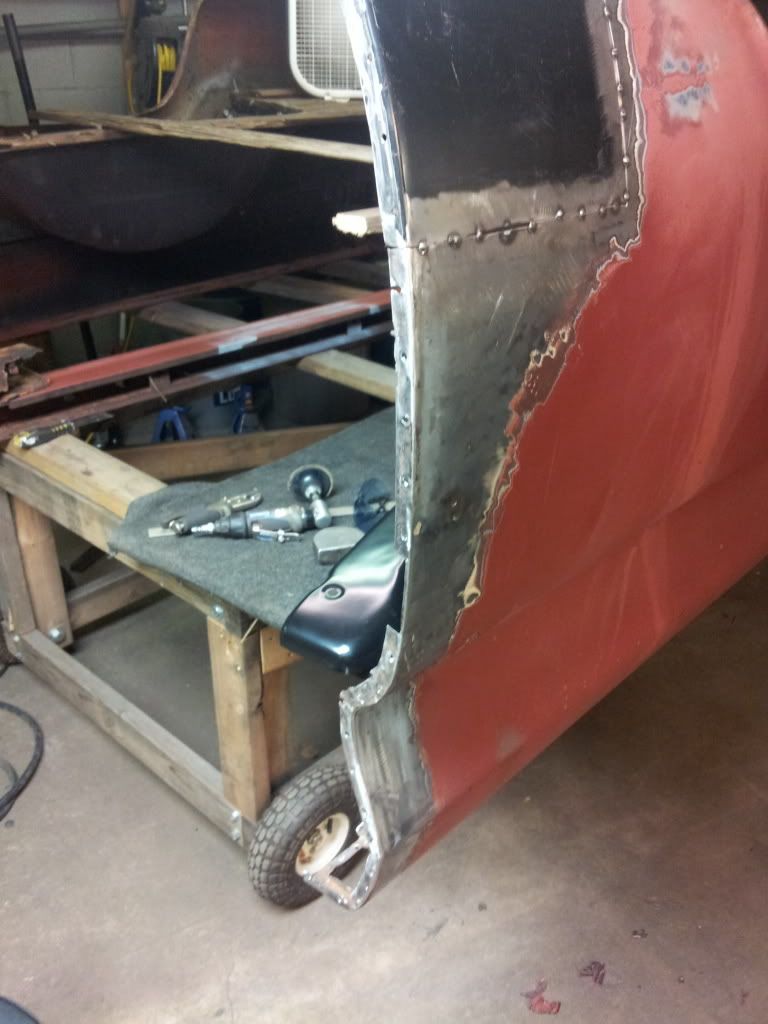 I tack welded the tail section in place so I could test fit the door properly. Welded it from the outside so it'll be easy to remove. 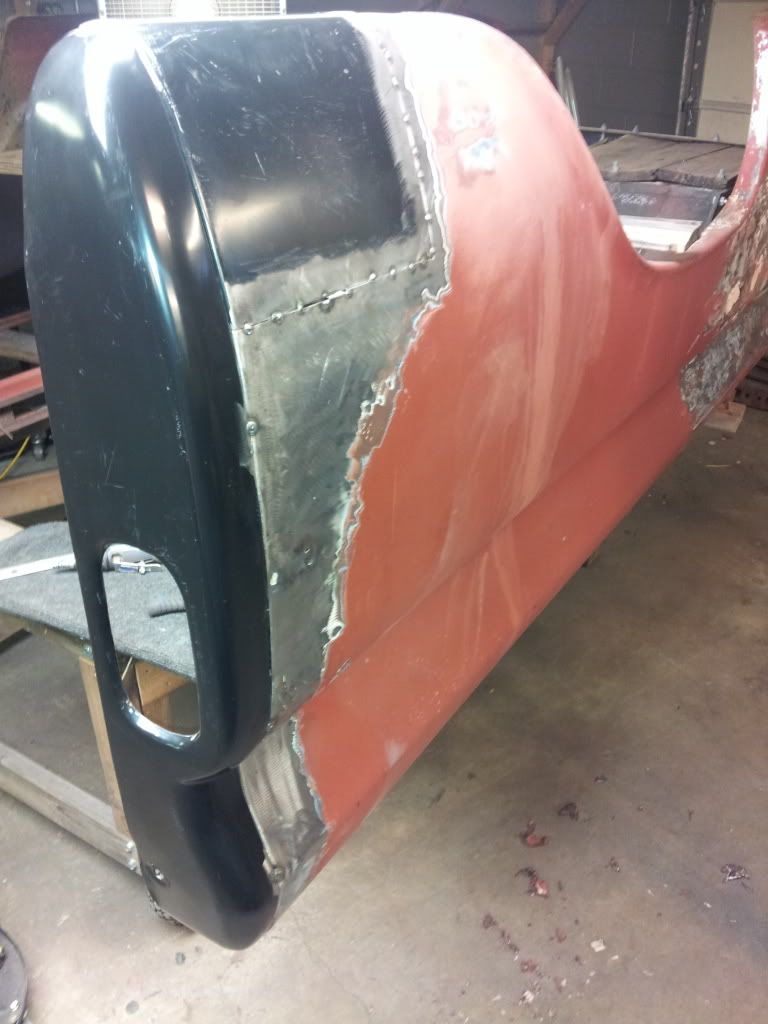 It fit pretty decent at the top and bottom but the middle body line is a bit off. Its fixable but not today. |
|
|
|
|
09-02-2013, 07:29 PM
|
#43 |
|
Registered User
Join Date: Jun 2013
Location: Nashville
Posts: 82
|
Re: 66 C10 Project SWB
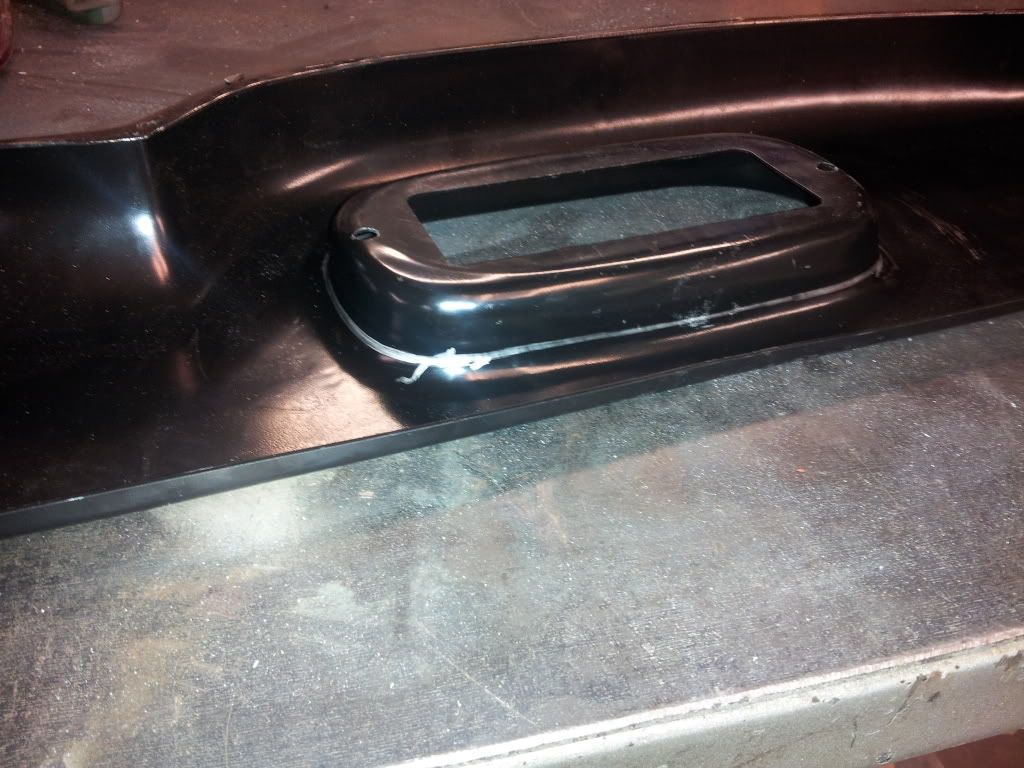
With the tail light section in place it was kind of a tight fit to insert the inner structure. Fits real well.
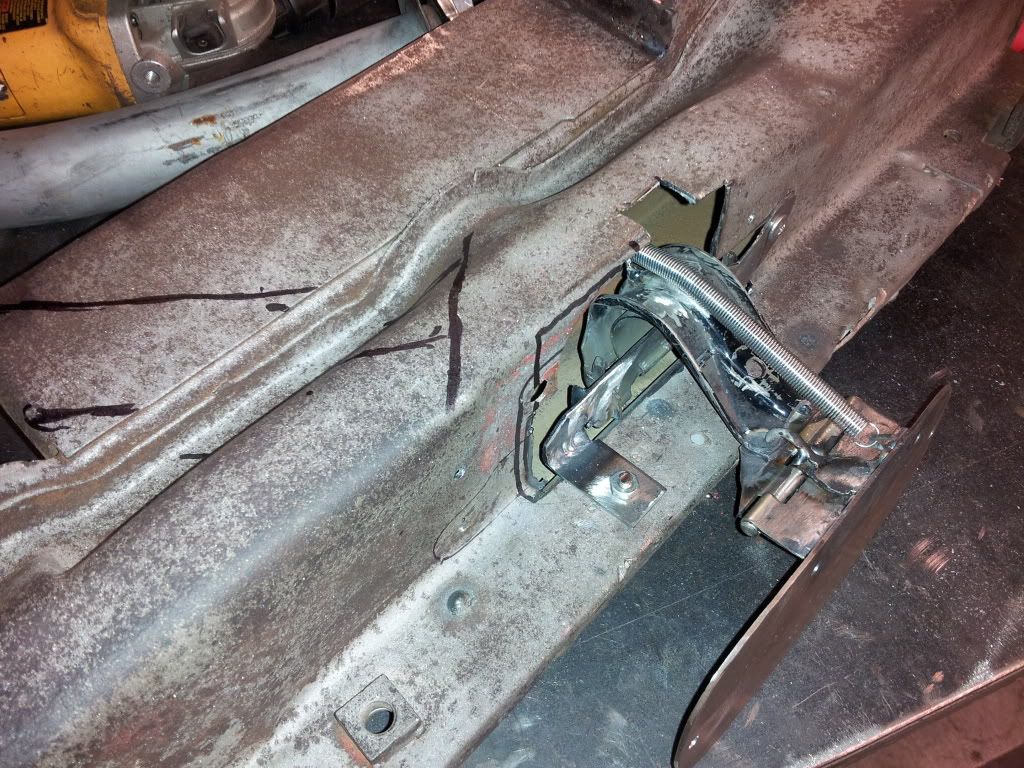
 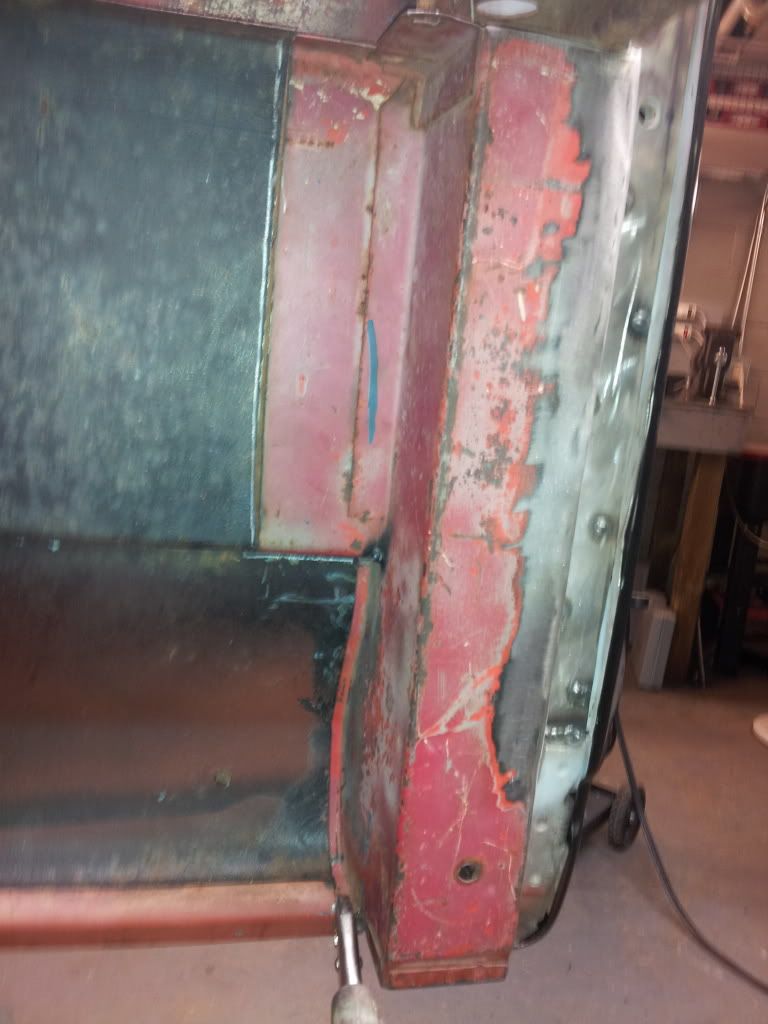 Left a few inches of the inner bed side on the replacement piece. The original bed side has some rust right at the corner where the end panel was spot welded on. 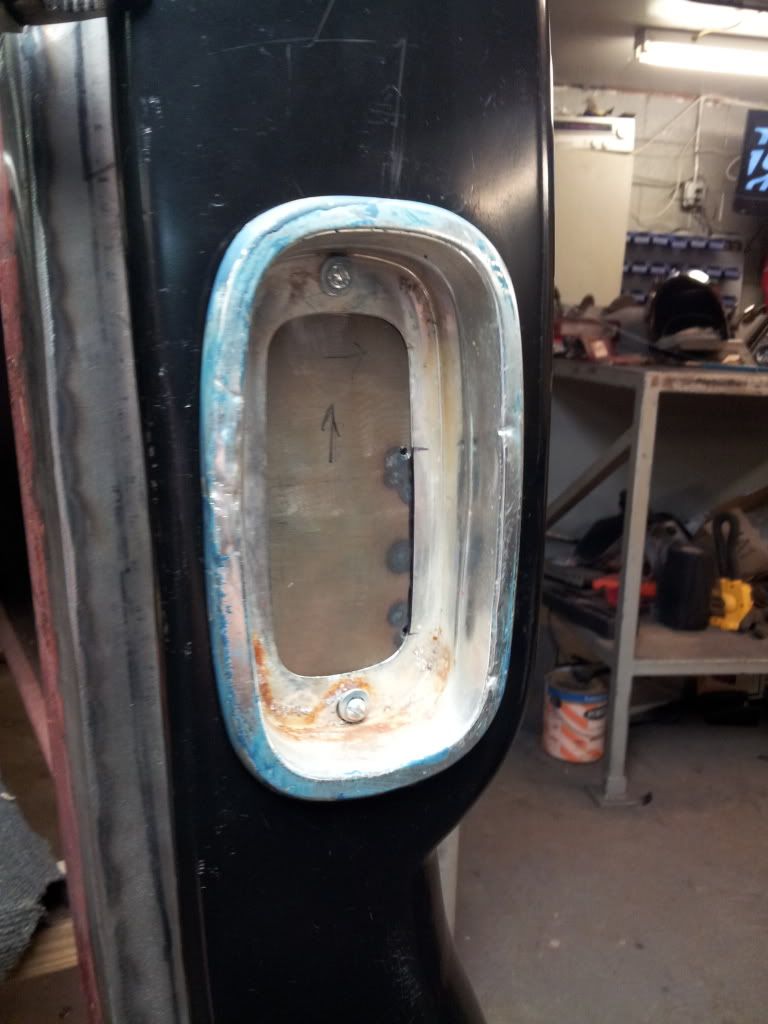 This is with the old tail light bezel. Ive ordered two new ones as well as the gaskets and I will have to use LED tail lights since there isn't any space for the original light buckets. I planned on using LEDs anyways so it wasn't a big deal. 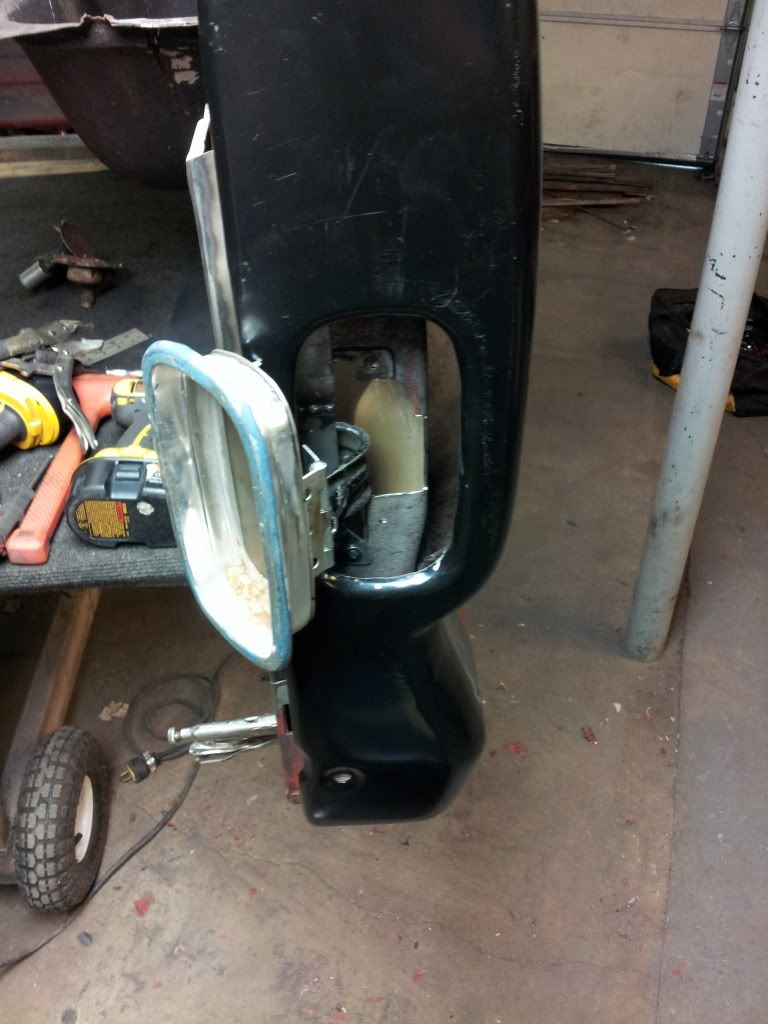 I had to put a hinge between the mounting plate and the door arm for two reasons. One because I needed the spacing and two it would allow the light assy to swing around giving more room to get to the filler neck. It still needs to be cleaned up and made to look decent. But right now it works great. The spring loaded hinge holds the light bezel against the body. Ill have to add something to keep the bezel from scratching that paint. Maybe the gasket will protect where it lands on the tail section but there's spots where it could hit as it swings around. 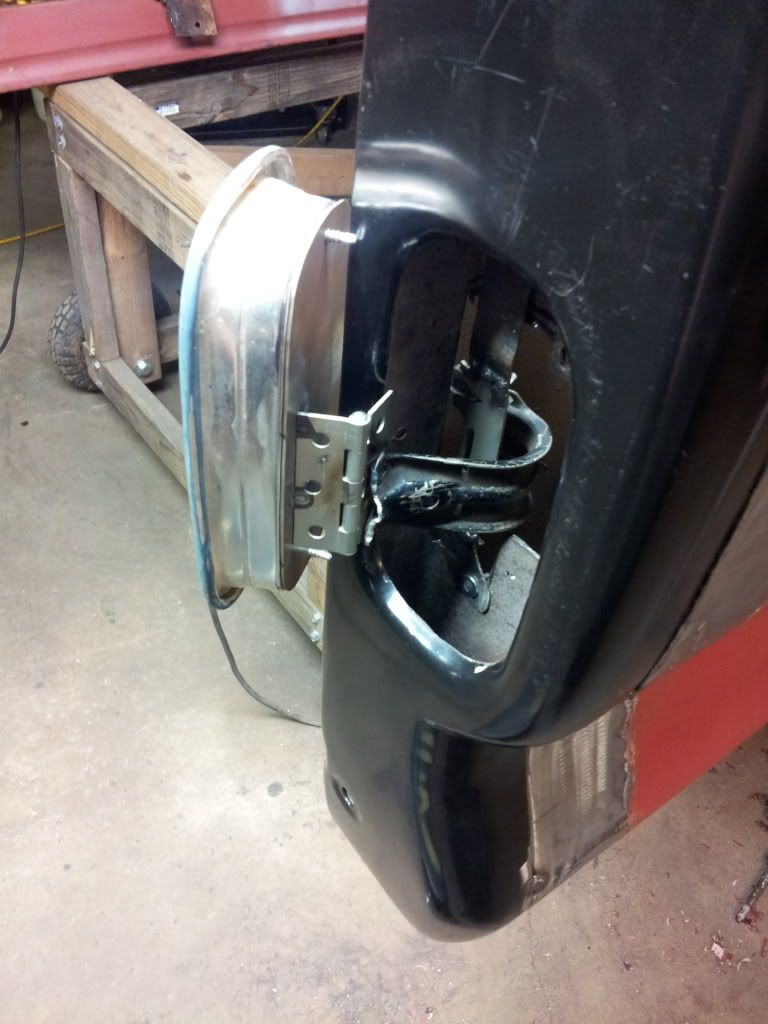 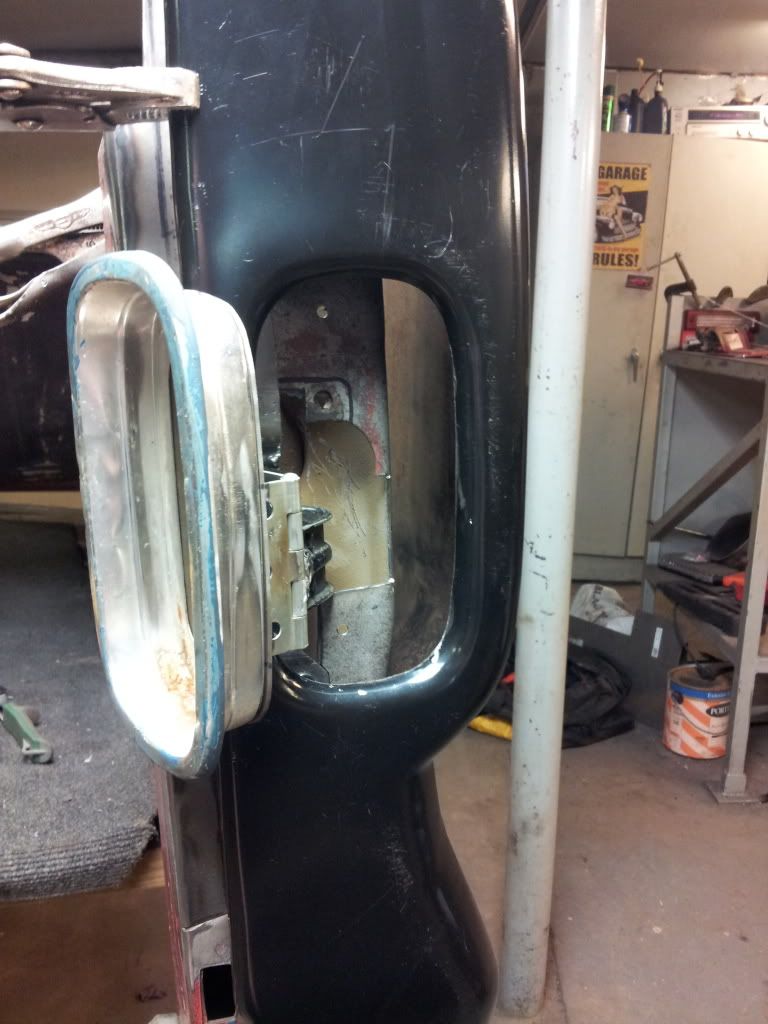 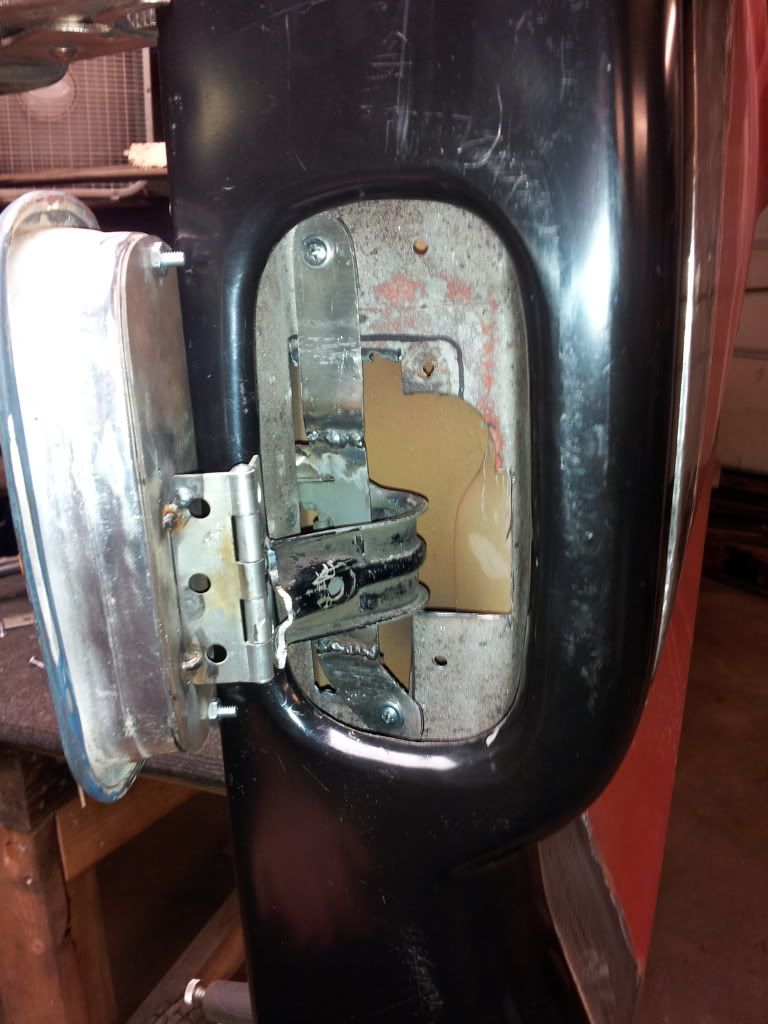 Definitely needs cleaning up. Next is the filler neck. Thanks for looking |
|
|
|
|
09-03-2013, 11:16 PM
|
#44 |
|
Registered User
Join Date: Dec 2010
Location: Strathmore, Alberta
Posts: 470
|
Re: 66 C10 Project SWB
Now that is a cool idea. Good stuff.
|
|
|
|
|
09-04-2013, 08:54 AM
|
#45 |
|
Registered User
Join Date: Dec 2011
Location: Donaldsonville, La.
Posts: 1,024
|
Re: 66 C10 Project SWB
I like what you did, waiting to see how it turns out running the inlet
|
|
|
|
|
09-04-2013, 11:33 AM
|
#46 |
|
Registered User
Join Date: May 2012
Location: murfreesboro, TN
Posts: 743
|
Re: 66 C10 Project SWB
Very cool idea with the taillight and filler
Keep up the good work Posted via Mobile Device
__________________
 "its not a hobby, It's a Lifestyle" "its not a hobby, It's a Lifestyle". bagged and soon to be bodied 70 longbed http://67-72chevytrucks.com/vboard/s...d.php?t=564028 |
|
|
|
|
09-04-2013, 08:57 PM
|
#47 |
|
Registered User
Join Date: Jun 2013
Location: Nashville
Posts: 82
|
Re: 66 C10 Project SWB
Thanks for the comments. I think I have an idea on how im going to clean it up. The way it looks now the more I look at it the more it bugs me. The filler neck I picked up last weekend could work buts its a 2 inch diameter and I know I saw 1 1/2 when I was at the u pull yard. Going to bring a saw-all next weekend and source one out. Also think there maybe a way to add a spring on the light plate to make it more fluid like opening and closing. It may not work but we'll see.
|
|
|
|
|
09-04-2013, 09:20 PM
|
#48 |
|
Registered User
Join Date: Mar 2005
Location: Fairfield Maine
Posts: 1,759
|
Re: 66 C10 Project SWB
Nice work cant wait to see this one done!
|
|
|
|
|
09-04-2013, 11:59 PM
|
#49 |
|
Registered User
Join Date: May 2012
Location: murfreesboro, TN
Posts: 743
|
Re: 66 C10 Project SWB
What about a small spring for a carb and a shock from an RC car as a strut?
Posted via Mobile Device
__________________
"its not a hobby, It's a Lifestyle". bagged and soon to be bodied 70 longbed http://67-72chevytrucks.com/vboard/s...d.php?t=564028 |
|
|
|
|
09-06-2013, 11:19 PM
|
#50 |
|
Registered User
Join Date: Jun 2013
Location: Nashville
Posts: 82
|
Re: 66 C10 Project SWB
Started cleaning everything up. Added a spring that helps hold the tail light from flopping around. Also helped with opening and closing. Pick up a smaller filler neck. Not sure what its off of, I forgot to look. Its small in diameter, small cap but longer.
 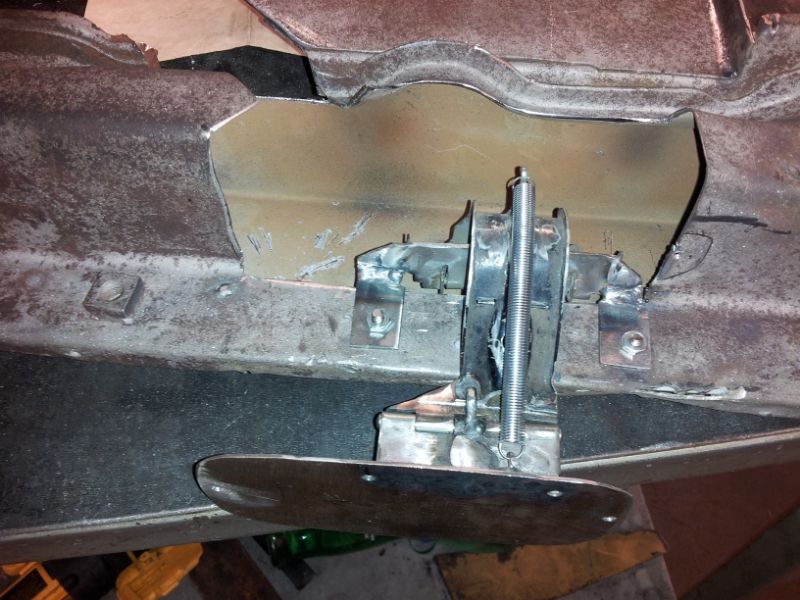 Changed he mounting location of the hinge once again. This gives more room for the filler neck. 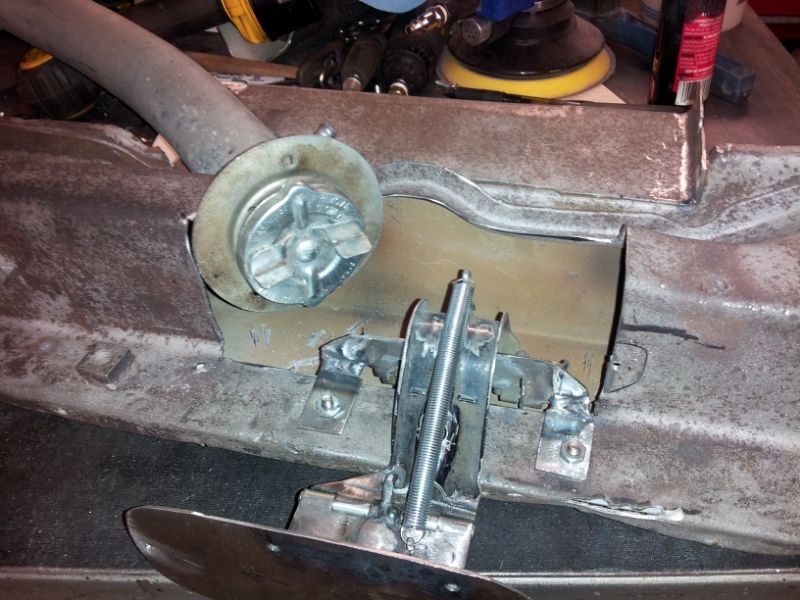 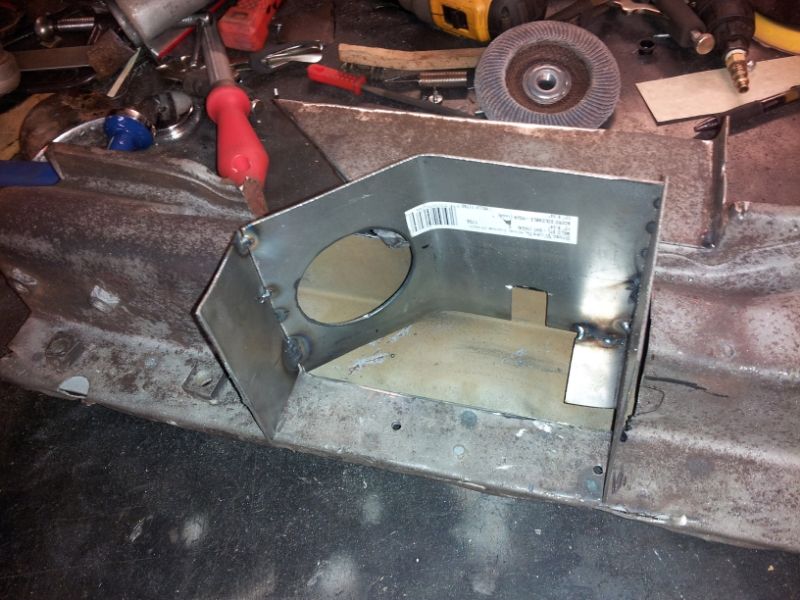 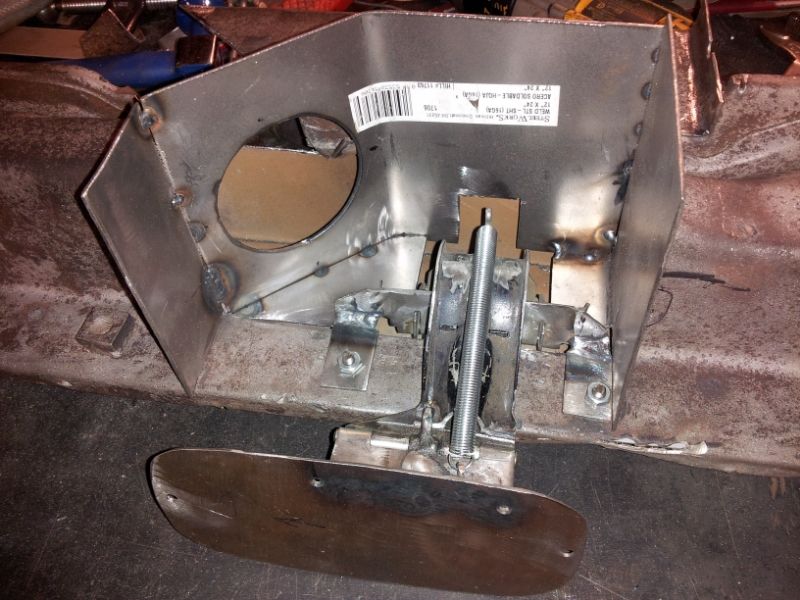 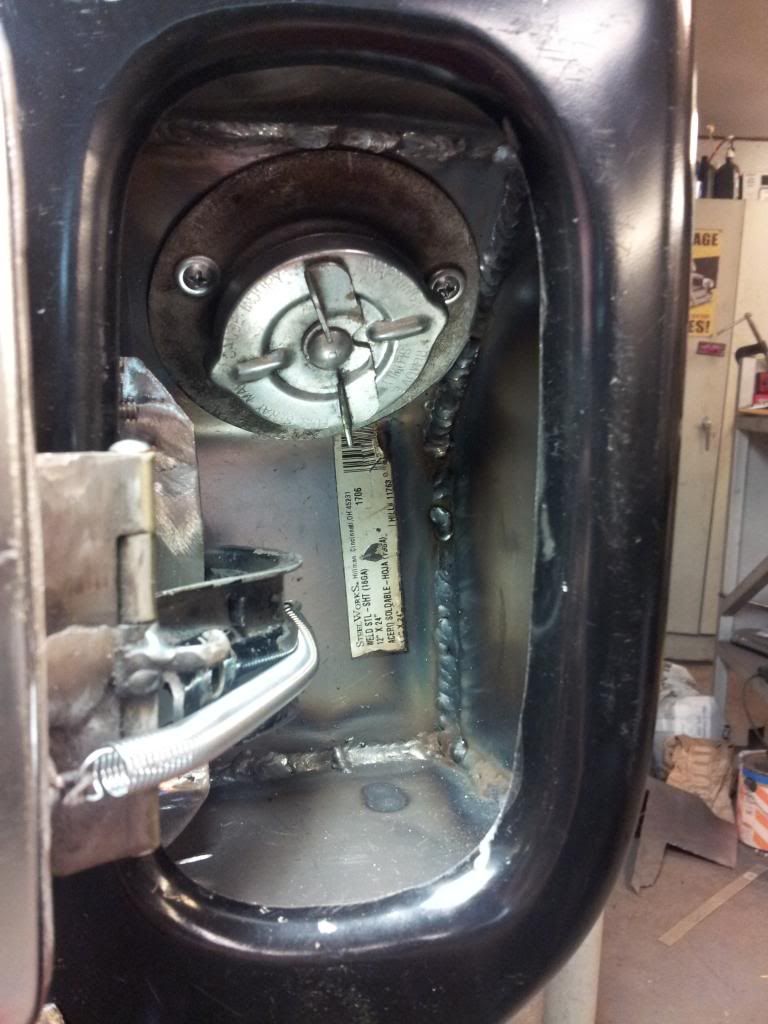 Also got new tail light bezels. 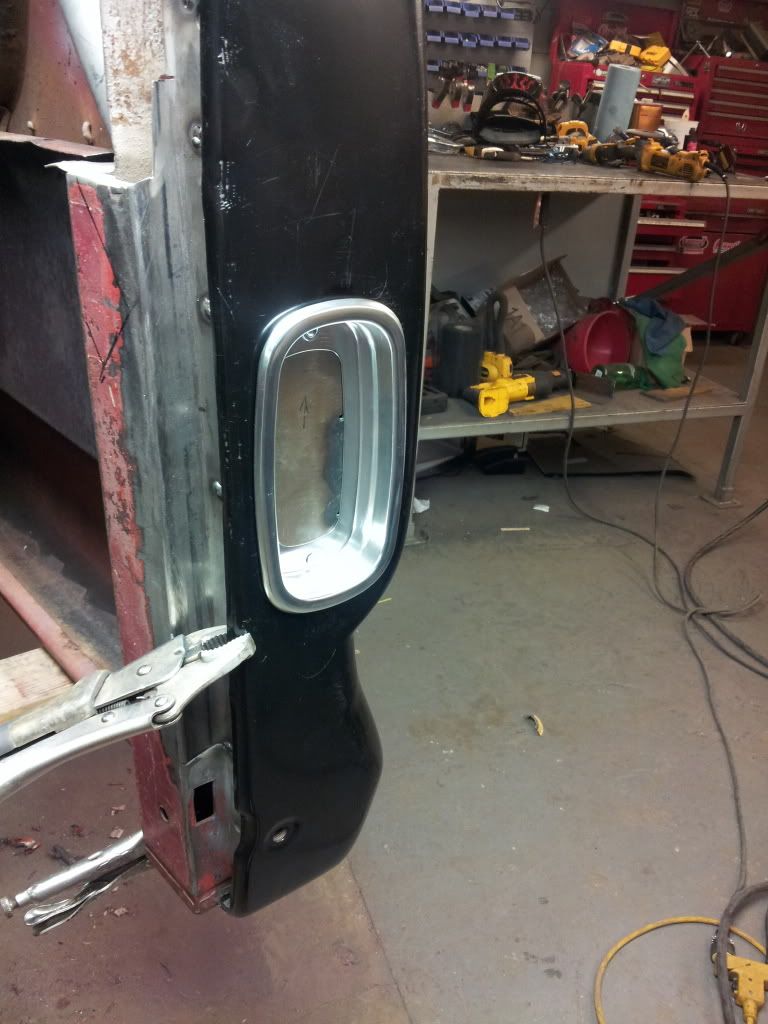 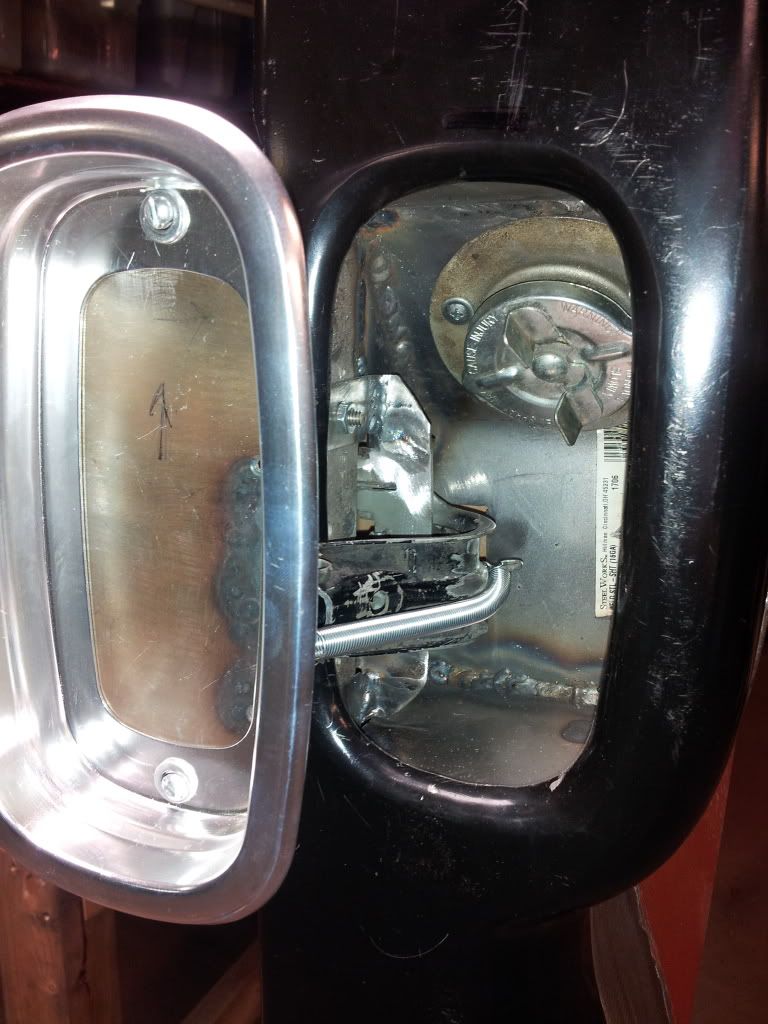 Very little coming through in the bed area. Shouldn't be hard to hide. 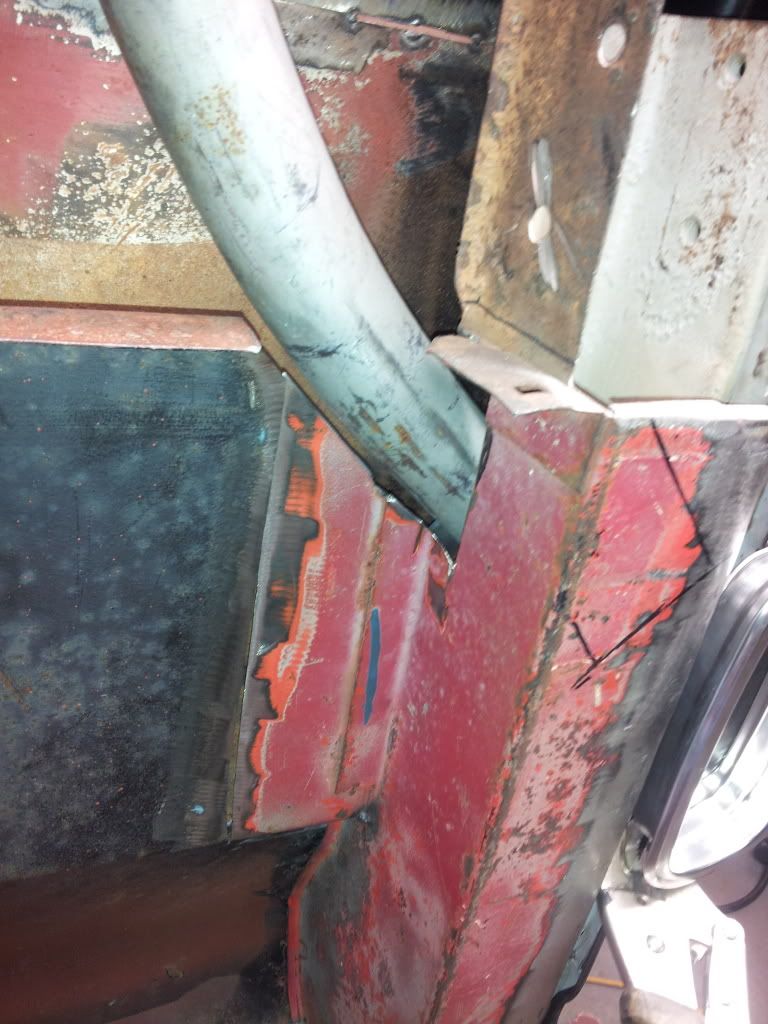 It all worked out pretty good. There's plenty of hand room to remove the cap. Once its sand blasted and painted up its should look real nice. |
|
|
|
 |
| Bookmarks |
|
|


 Linear Mode

