Well, a week or so ago I added some pictures showing the dash all cleaned up, along with the unfinished gauge cluster. In the left corner of the cluster, I had temporarily mounted a vacuum gauge from a '66 Oldsmobile 442, and promised that I would post up more shots when I had the vacuum gauge finished. Here's a step-by-step pictorial showing what I did:
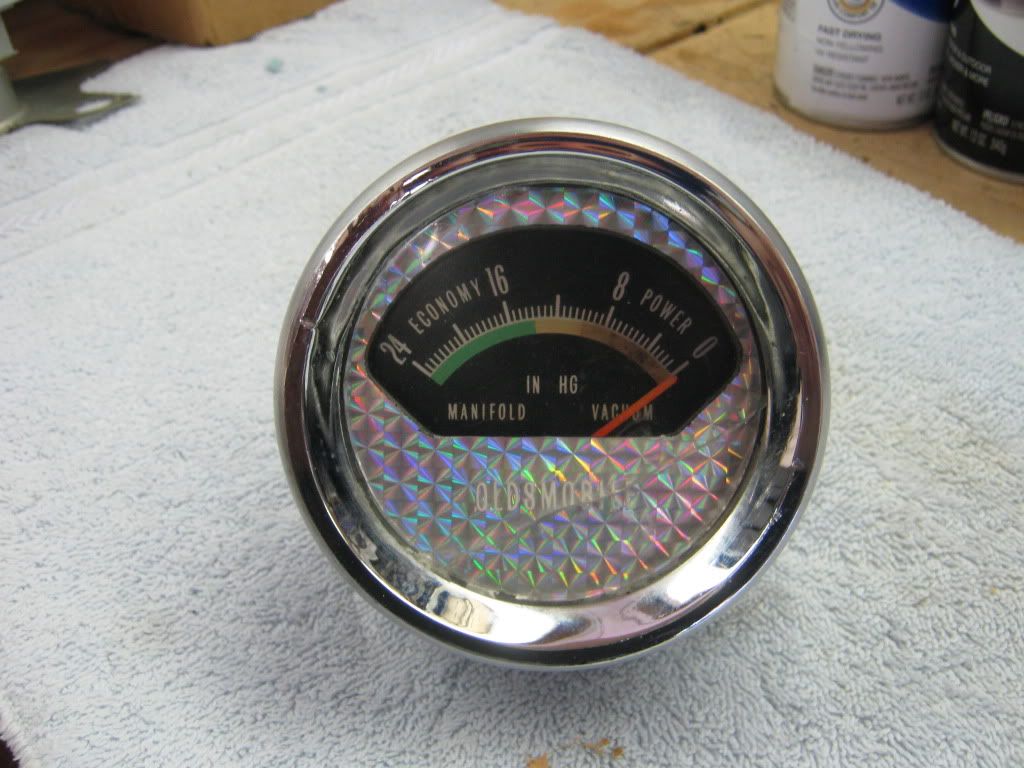
I love the look of the gauge clusters when they're fully optioned with the tach and vacuum gauges, but finding those gauges can be an expensive endeavor. As the title of the thread proudly proclaims, I'm building this truck on the cheap, so I had to put my thinking cap on to figure how I can duplicate this look without throwing down a lot of dough. I started going on ebay and looking at all the GM vacuum gauges, and the prices were all over the board. The Chevy truck gauge was seemingly impossible to find, and the car gauges were pretty spendy. The beauty of GM stuff is that a lot of it will interchange, and I was taking a gamble on whether it would all fit. On ebay, I started watching one gauge in particular, one from a '66 Olds 442. It was thrashed, and it seemed like nobody was interested. The seller proclaimed that it worked, and that was good enough for me, so I placed a bid with 20 seconds left in the auction, and got it for $28, which is a steal. The housing was nicked up, the chrome was flaking, somebody had put a prisma decal on it, the clear bezel was cracked, but I didn't care because I wasn't going to use any of that stuff. Here it is. Trust me, it looks nicer than it really is:
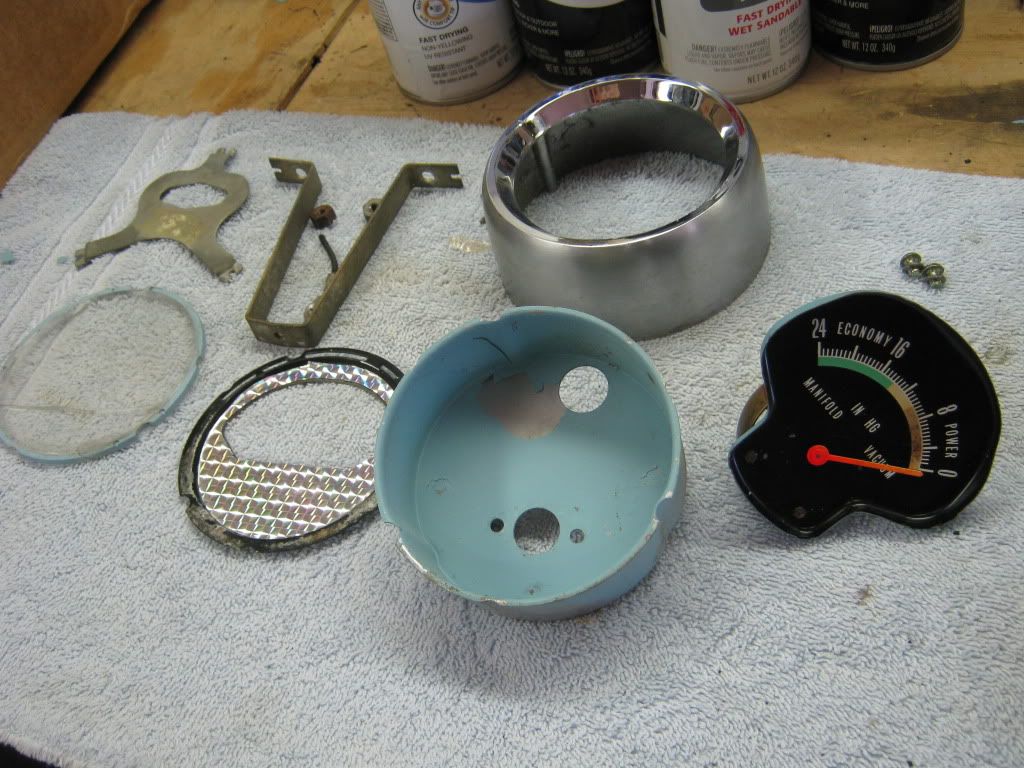
Here it is all disassembled, pretty simple:
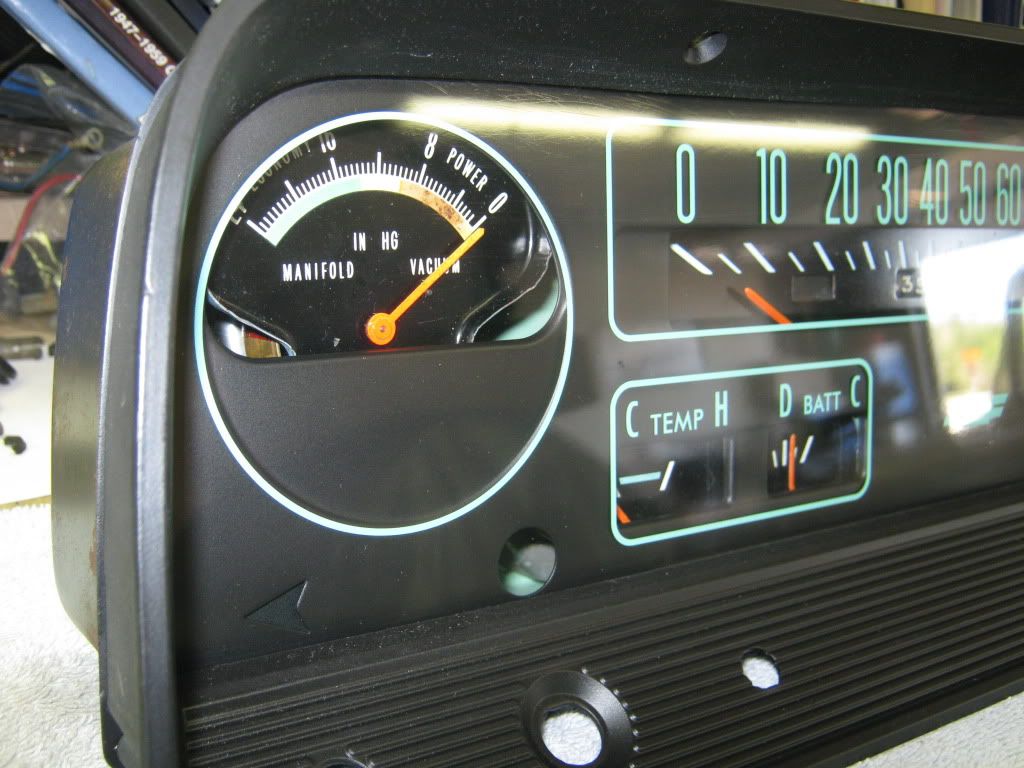
I took the gauge itself and held it up to the truck's cluster and the mounting holes were identical to the ones in the truck's gauge cluster (gotta love GM!) and I bolted it in to see if it would work. It was about 1/2" too high and didn't look right. Plus the font wasn't identical and wasn't the sea-green color of the rest of the gauges:
So I started researching what the factory gauge looked like, and lo and behold, I discovered that the faceplate of the vacuum gauge was exactly the same shape and size as the truck's block-off plate. Now I was on to something. If I could use the block-off plate as the gauge face, then a huge part of the puzzle could be solved.
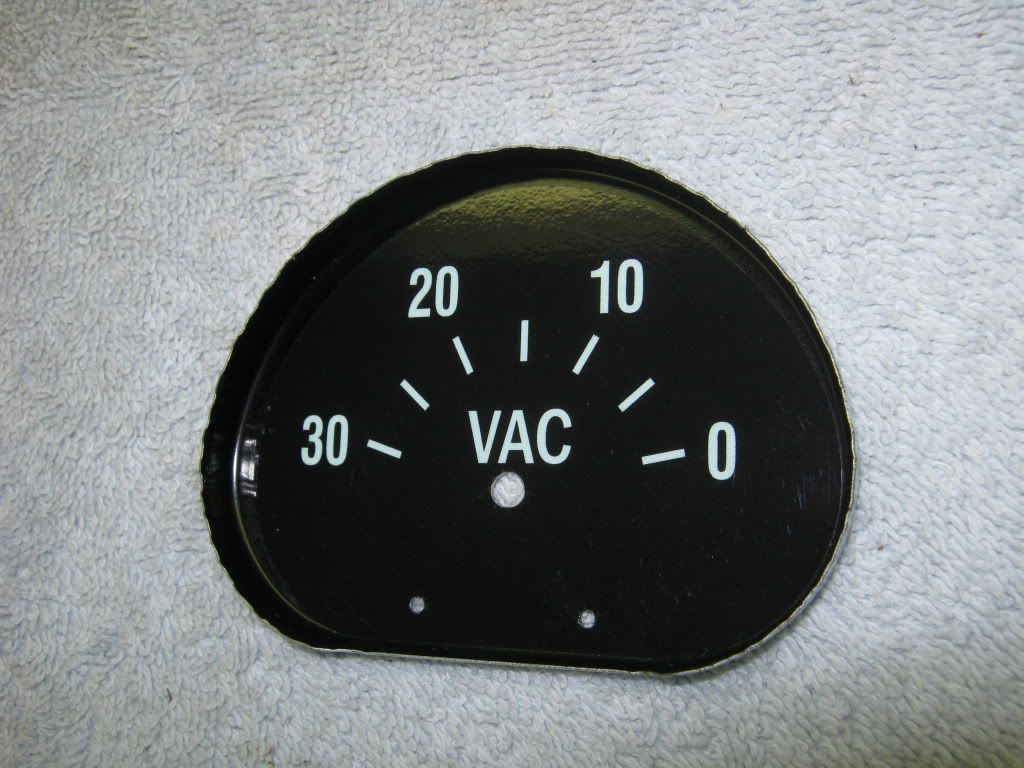
The block-off has two tiny rivets that secure it to a sheetmetal tab that bolts itself to the mounting plate. I made some measurements on the center-to-center spacing of those rivets and compared it to the tiny bolts that secured the faceplate on the Olds vacuum gauge, and they were identical. So I carefully drilled out the rivets and removed the tab from the block-off plate. I also made some measurements of where the hole needed to be for the needle to protrude through and drilled that with a 11/64" bit.

Now came the tricky part, the fonts for the gauge. I had been in contact with a well-known gauge company and had sent them a pdf file showing the decal I wanted them to make. They agreed that they could make it, and I was about 5 minutes from pulling the trigger when I went on the site and saw the thread that Parklane410 posted concerning the gauge overlay kit he was selling. I immediately bought the overlay kit. It was like it was meant to be. Here's what Jason's kit looks like, minus a couple of the overlays for the little gauges that I already installed before I took this picture:
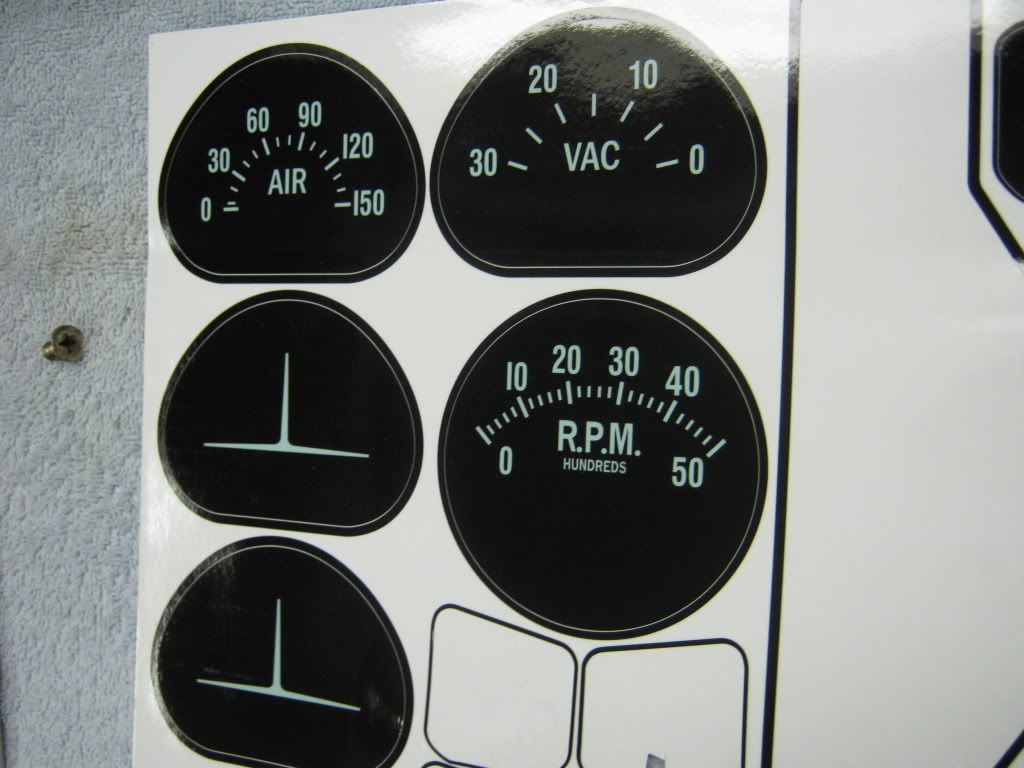
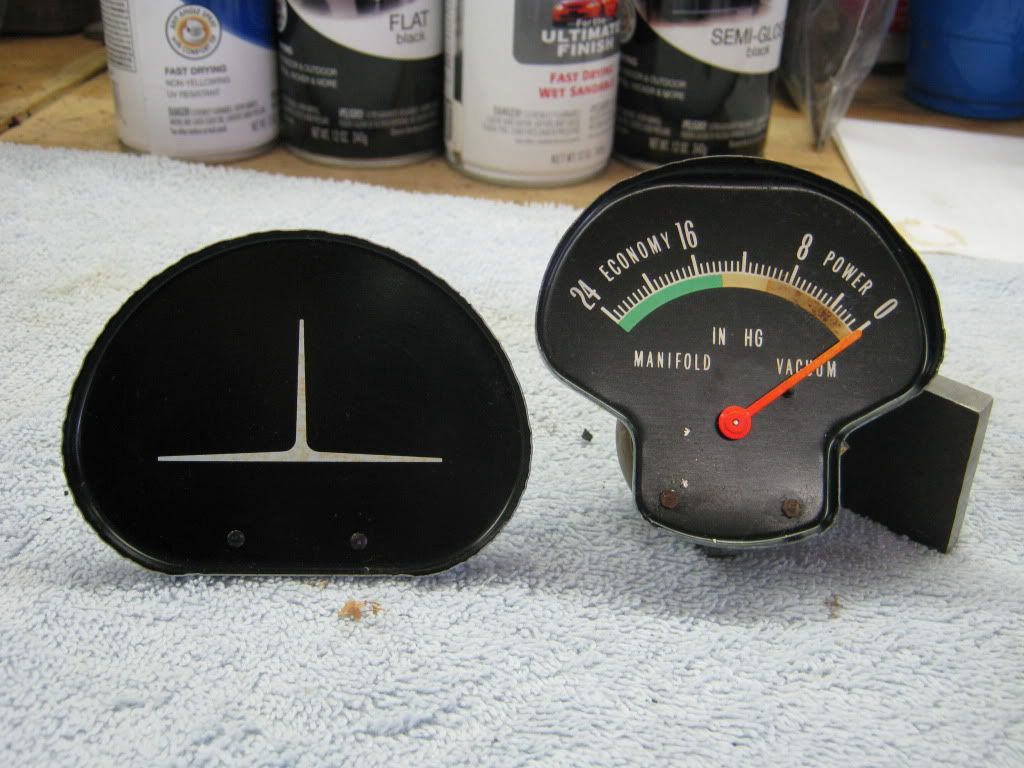
Here's what the old cover plate looks like with the holes drilled and the overlay installed:
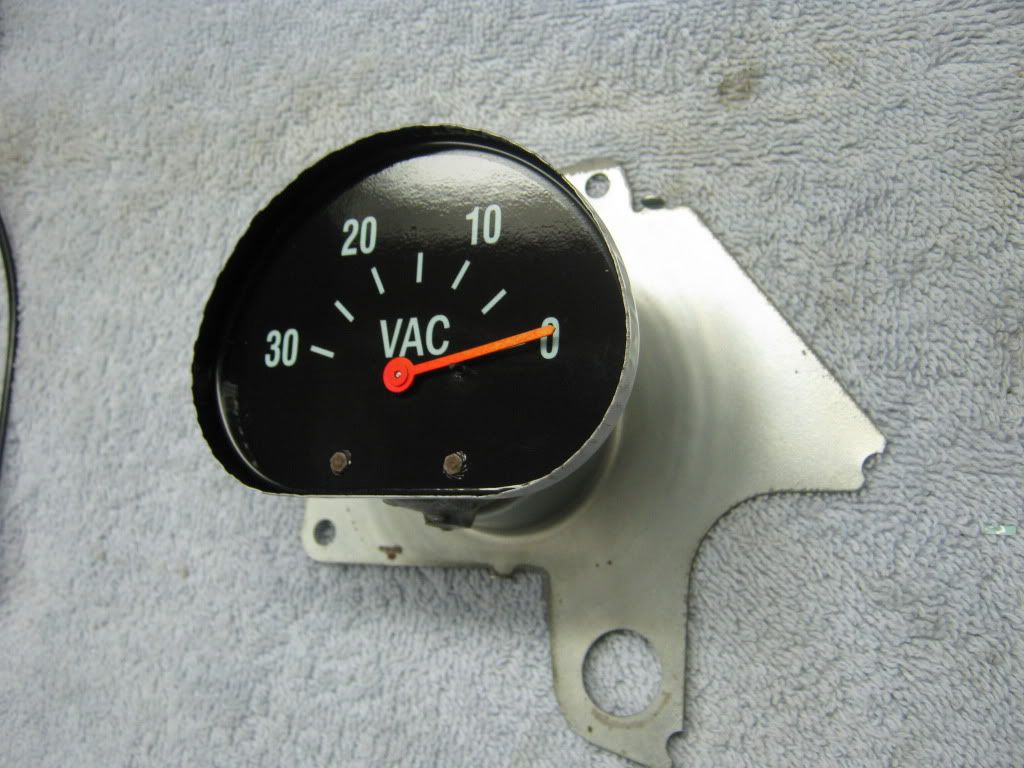
Here it is installed to the truck's original mount plate, using the
tiny faceplate mounting screws from the Olds gauge. I also removed the needle stop from the Olds gauge and drilled a tiny hole and super-glued in on the new faceplate. I also determined where zero Hg location was on the gauge and pressed the needle in place. I have yet to paint the needle, but it will be painted.
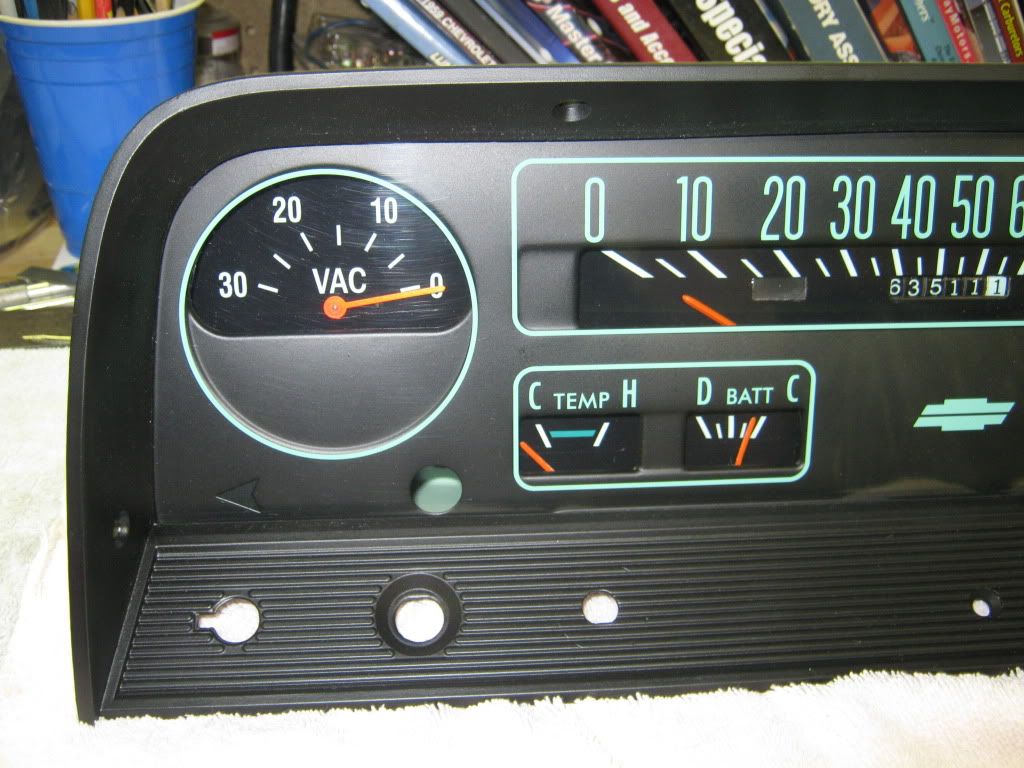
Here it is, installed in the cluster. It looks 100% factory. I figure that I have about $33 invested in it when you consider the ebay price and the overlay price. I wound up overlaying all of the gauges, so the vacuum gauge overlay price was 1/7th of the total cost of the overlay set ($35). That's a heck of a lot cheaper than some of the $200 gauges I was seeing on ebay.
Next step, tach! Stay tuned for more
cheap-ass adventures!