HVAC (4 OF 6)
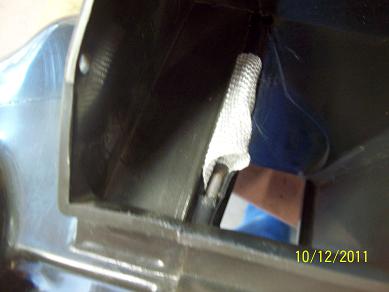
I first cleaned all the epoxy contact areas on the door with acetone. I applied a small amount of synthetic grease to the two rubber/duct contact points and set the door into place in the duct. I inserted the hinge rod ensuring that it passed through the fiberglass cloth loop, and then applied the epoxy in four steps.
1. I filled the gaps at the corners where the plastic had disintegrated with a mix of epoxy and fiberglass.
2. I applied a generous amount of epoxy into the loop and onto the hinge rod and then snugged up the loop.
3. I applied epoxy with a small squeegee to saturate the cloth against the flat side of the door.
4. I applied epoxy with a small squeegee to saturate the cloth against the cage side of the door.
I trimmed the fiberglass cloth as best I could after the epoxy set up but before it hardened.
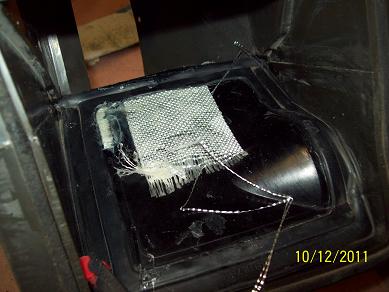
After the epoxy cured, I went at it with a Dremel tool using a diamond grinding bit. I dressed up the excess epoxy and fiberglass so the assembly moved freely in the duct.
Hard to say how well this repair will hold up but it works good now and for a lot less money than a whole new box at $90.
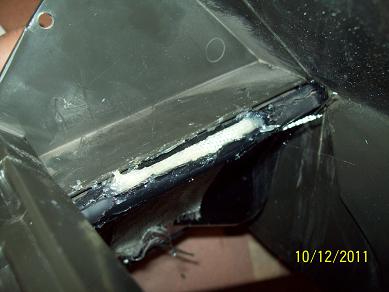
PROBLEM 5: The S-shaped duct is cracked at one corner and is missing part of the flange at one attaching hole.
SOLUTION: I repaired the damage with fiberglass and epoxy. A new duct would run around $25.
PROBLEM 6: One hole in the diverter box is stripped and wont hold a screw.
SOLUTION: I filled the hole with epoxy and drilled it to size. Now it will hold a screw.
PROBLEM 7: The outlets cable and the heater/defroster cable are kinked.
SOLUTION: I straightened out the kinks. The cables resistance to movement was noticeably less afterwards.
PROBLEM 8: The floor outlet/defroster door is hard to move.
SOLUTION: I cleaned the interior of this metal duct and lubricated the metal-to-metal contact points. The door has a spring loaded detent on one side and a small sliding shoe on the other. I straightened the control cable as described in Problem 7.
PROBLEM 9: The air ducts are brittle and break easily.
SOLUTION: I repaired a torn defroster duct with fiberglass and Black RTV. The driver side AC duct disintegrated at both ends, so I bought a new set of four AC ducts. Ill install the two lower ducts that go to the ball vents and save the uppers for another time.
Engine Compartment and Cowl
PROBLEM 10: There is a lot of debris around the cowl vent door
SOLUTION: I removed the cowl and cleaned the exposed areas. I removed the door and washed it with soap and water, then reinstalled it.
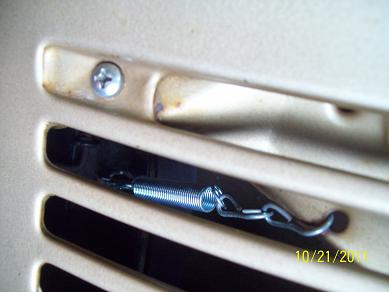
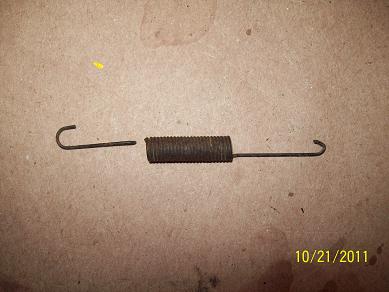
PROBLEM 11: The return spring on the cowl vent door is broken.
SOLUTION: I installed a new spring. I couldnt find one exactly like the orignal, so I made one up with a shorter spring of about the same K and used chain link at both ends to make up the difference.