Thanks for all the comments and replies on Part 1 guys! Here goes Part 2!
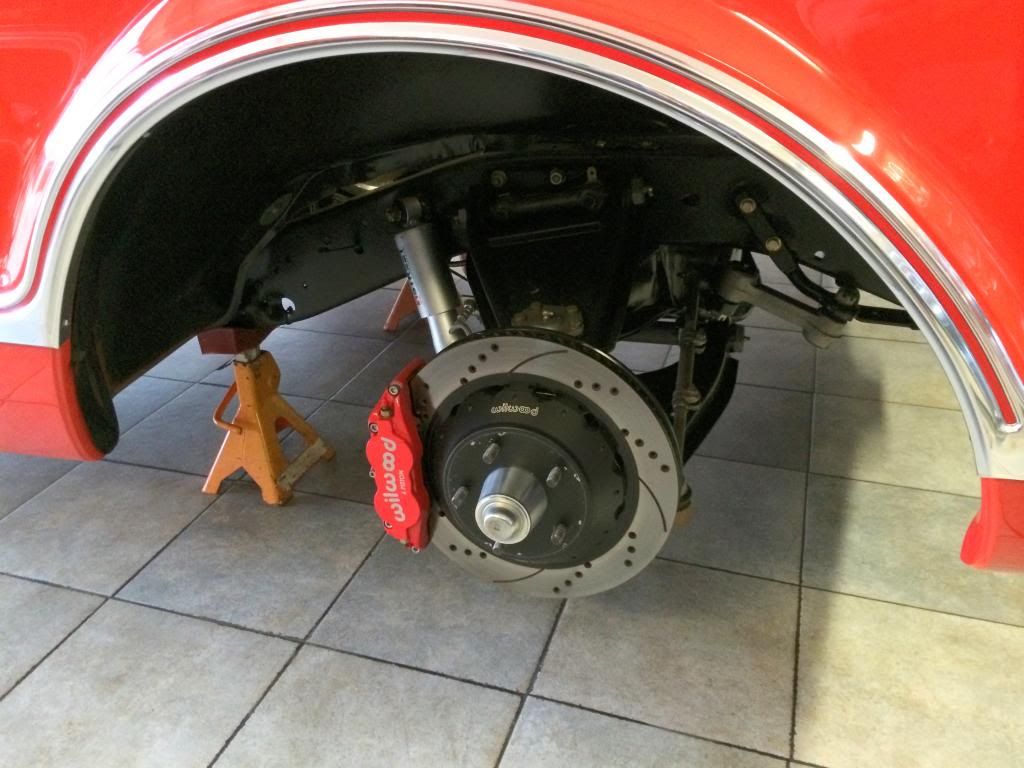
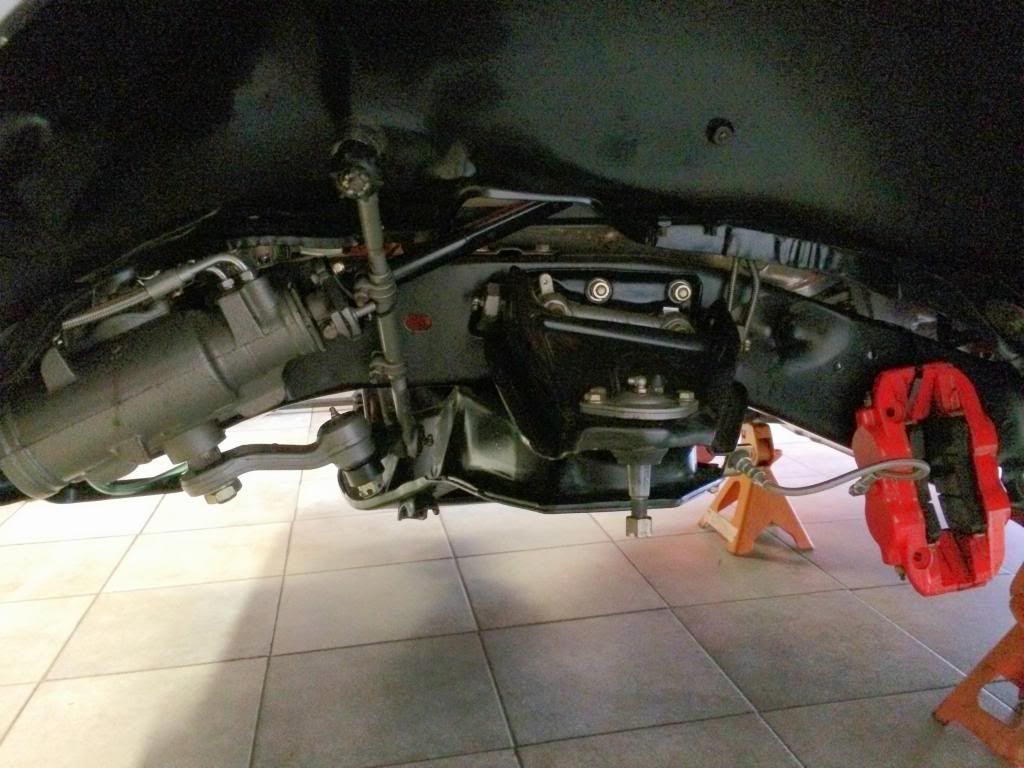
On to the front! OEM control arm setup CPP 2 inch drop spindles(to accomodate the Wilwood brakes), ECE 3 inch drop springs and BellTech shocks. Note: It helps to specify the type of spindle you are running when ordering the arms so that the correct ball joints are sent with the new arms~
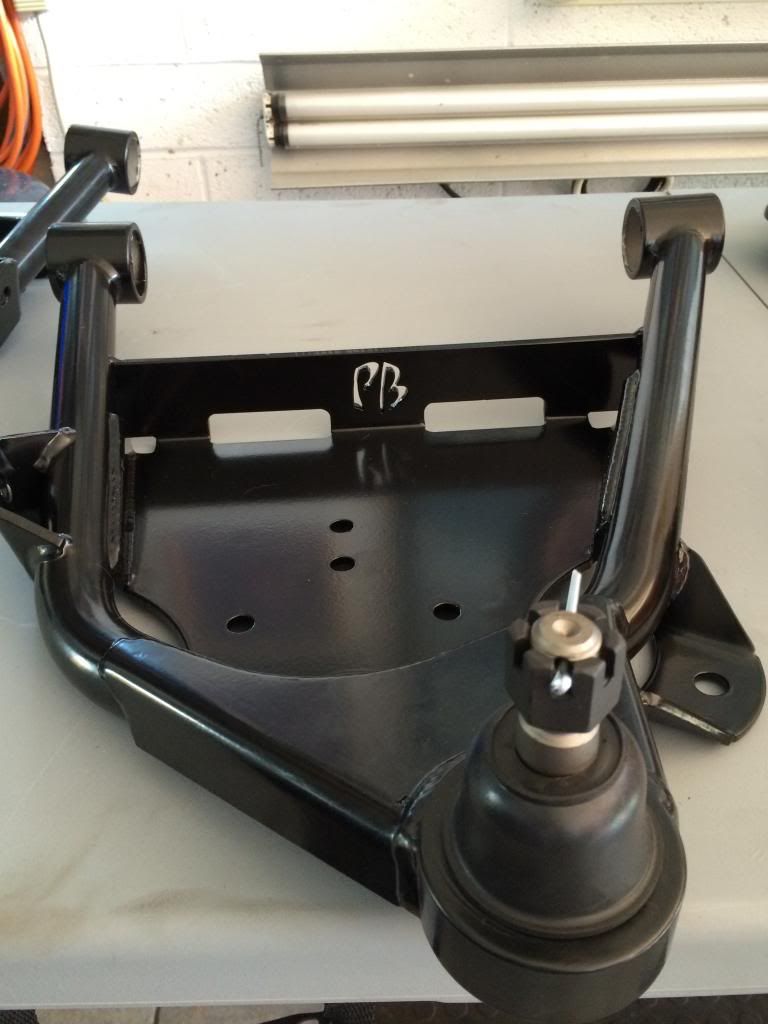
Out with the old and in with the new Porterbuilt Inch forward Lower Control Arms. All parts were powdercoated Satin black to match my frames coating. The PB parts are works of art and would look just as good unfinished or pc'd ~
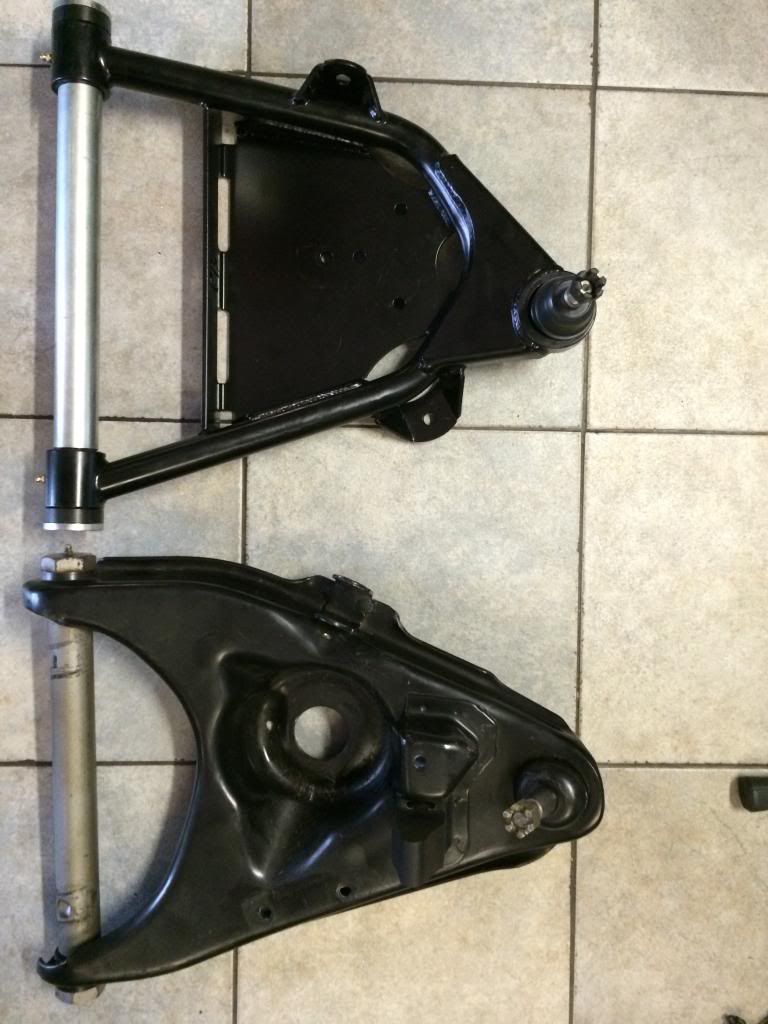
Side by side comparison with OEM lower arm~
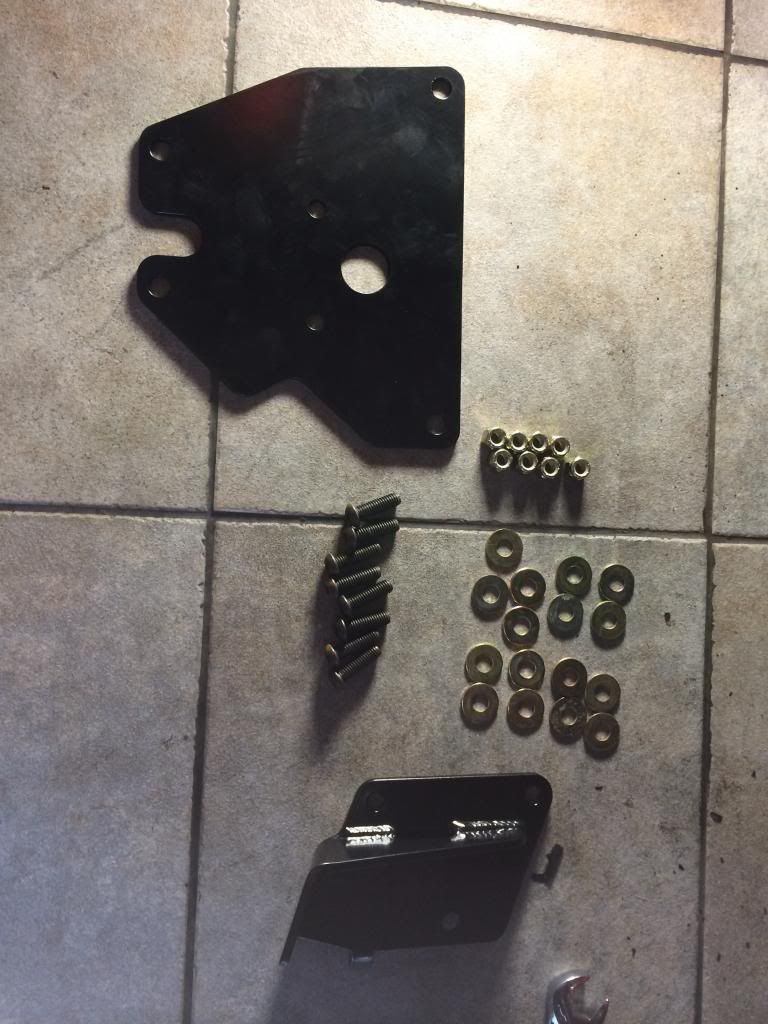
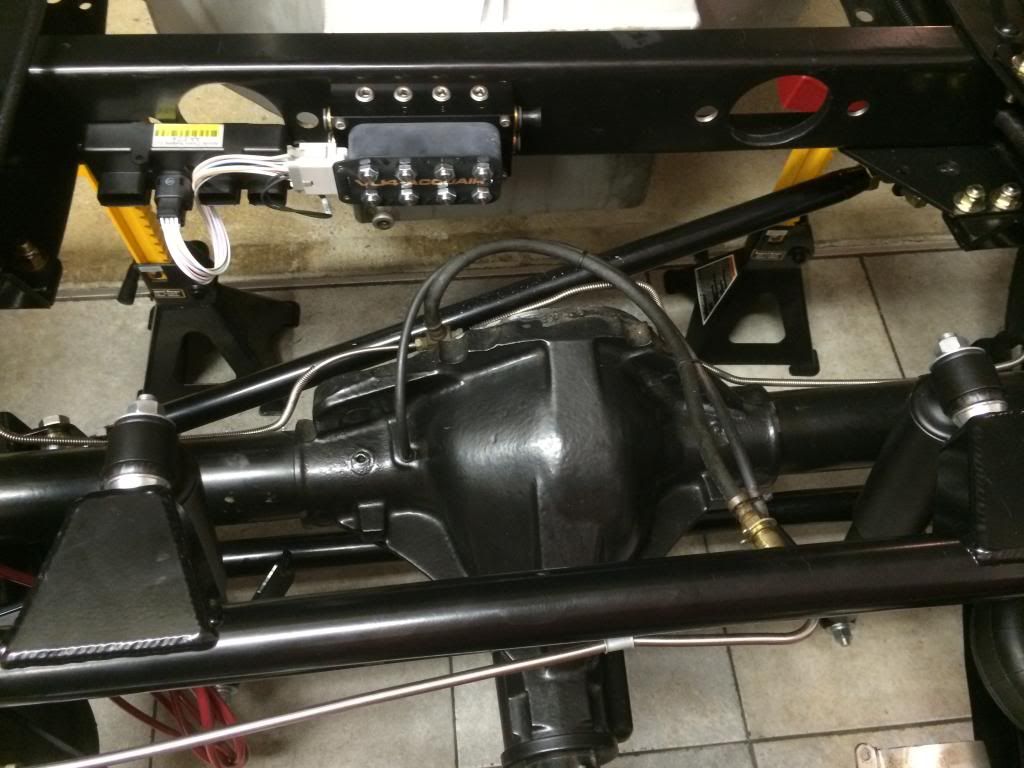
Front Airbag mounting plate to be attached to front x-member(covers the OEM spring pocket to accomodate the airbag) and the new front shock relocator bracket. More drilling! ~
Lower Control Arms removed~
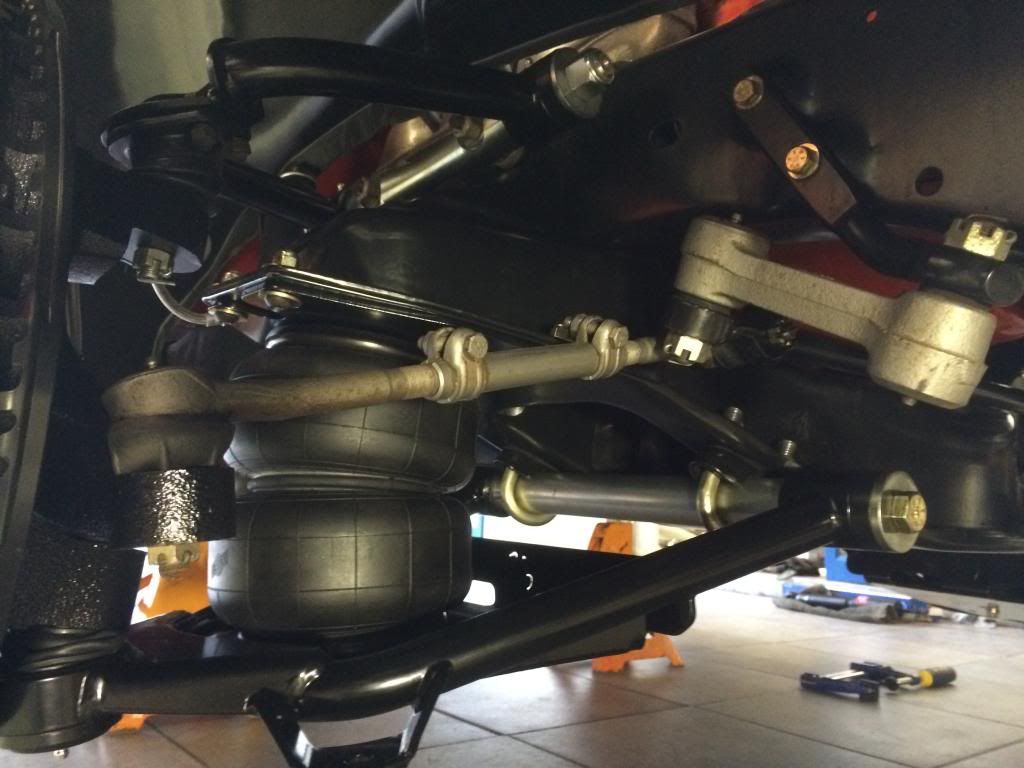
Upper Control Arms installed. I reinstalled the alignment shims to the OEM settings but I think the alignment values will be significantly different with the new arms anyway so it isn't critical to replace the shims as they were. I've seen a thread where someone found that the PB arms didn't clear the OEM x-members hump between the two pivot points and the cross shaft was hitting and preventing it from being attached but I found no such issues with my install. There is enough of a a gap to go without any shims temporarily till a new alignment can be done~
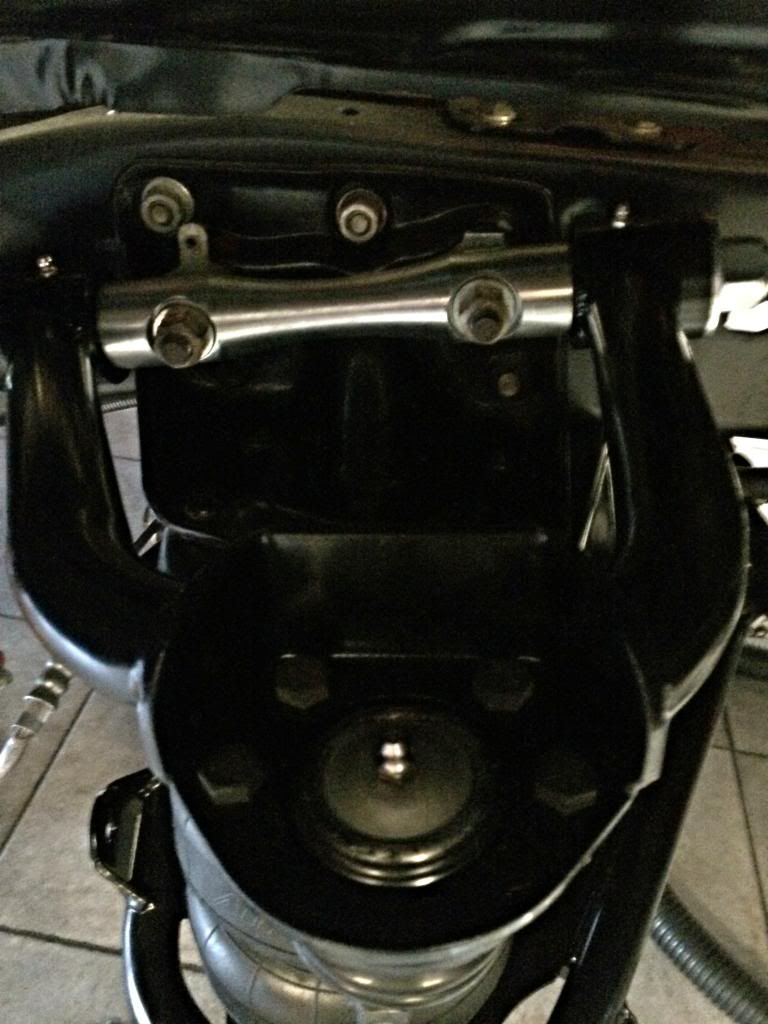
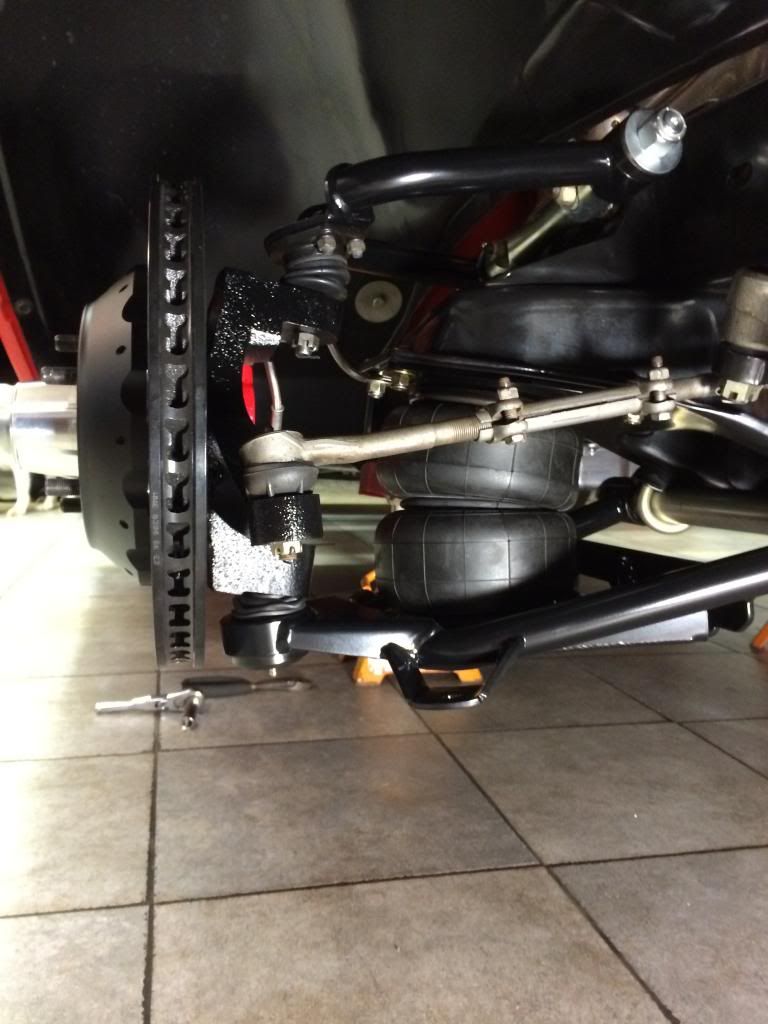
Airbag and Upper plate mounted up. Ready for the spindle and brakes to go back on~
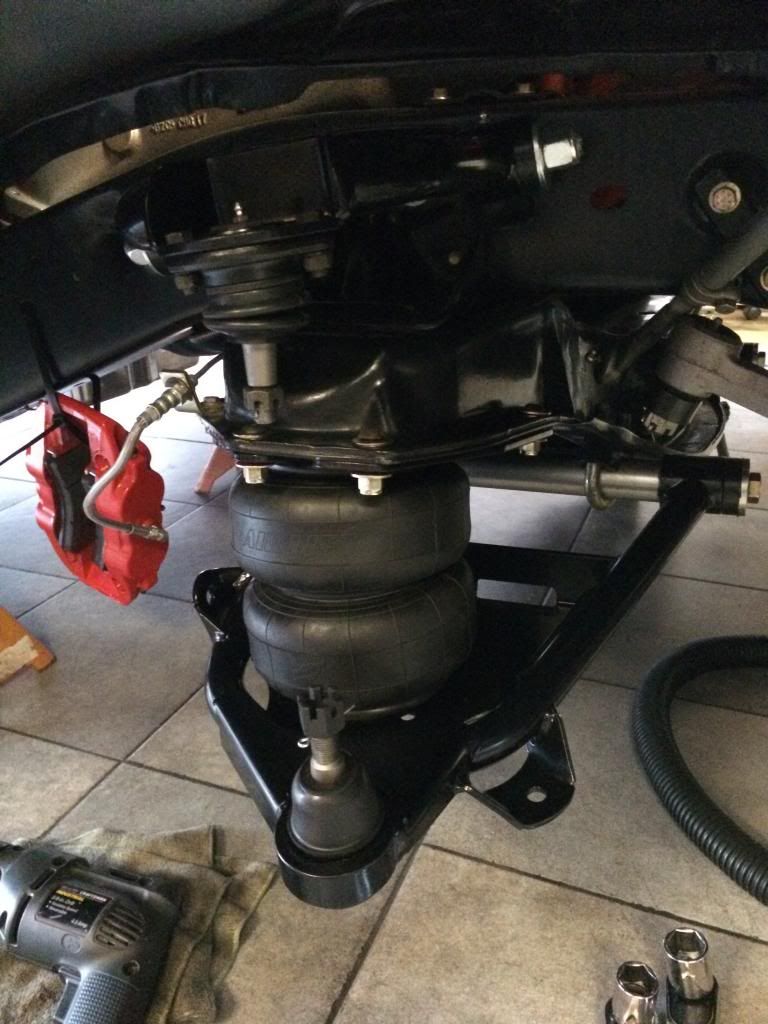
Quick note: In this pic you can see the upper bag plate mounting bolts with the button head on top, nut on bottom.
This must be flipped around. Be sure to face the heads of the button head bolts down toward the bags with the nuts on top so that it reduces the risk of cutting into the bags. I flipped mine around after it was all mounted up just for peace of mind(and probably because that's the correct way to do it). There's quite a bit of clearance around the circumference of the bag so technically it would've been fine as is, but there's probably a good reason they provide smoother button head bolts for this part of the application~
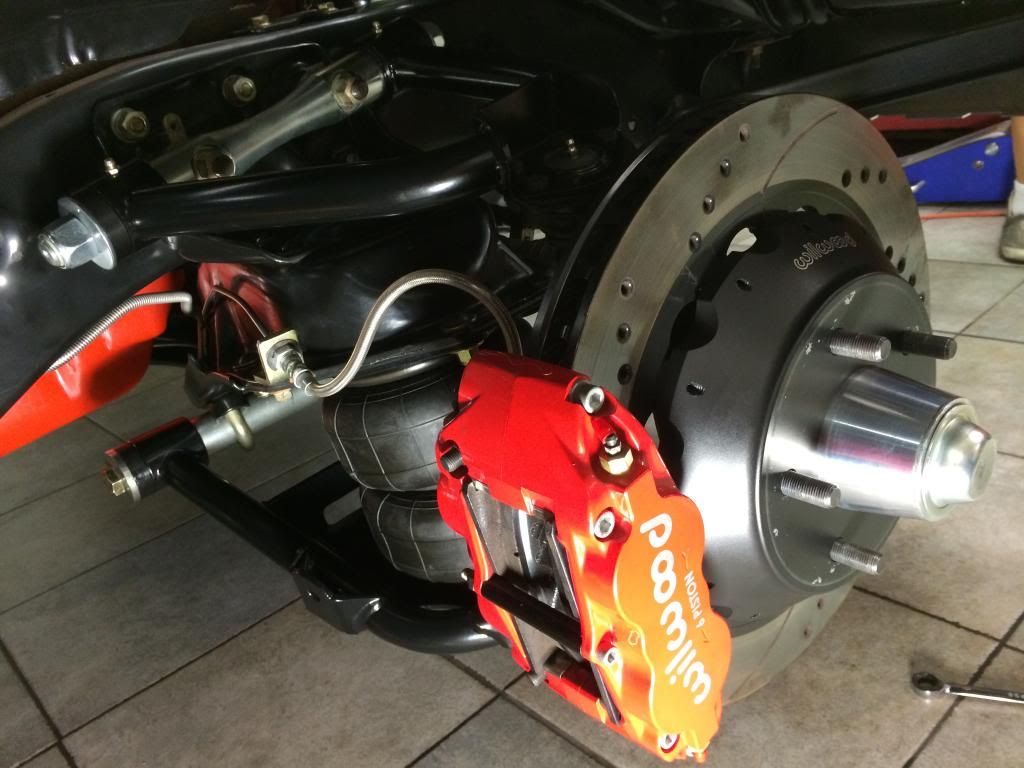
Spindle and brakes installed. At this point it might be a good idea to adjust the steering arm to correct the toe. I found that the new arms gave a severe toe-in position so I eye balled both sides to get the rotors as straight as possible ~
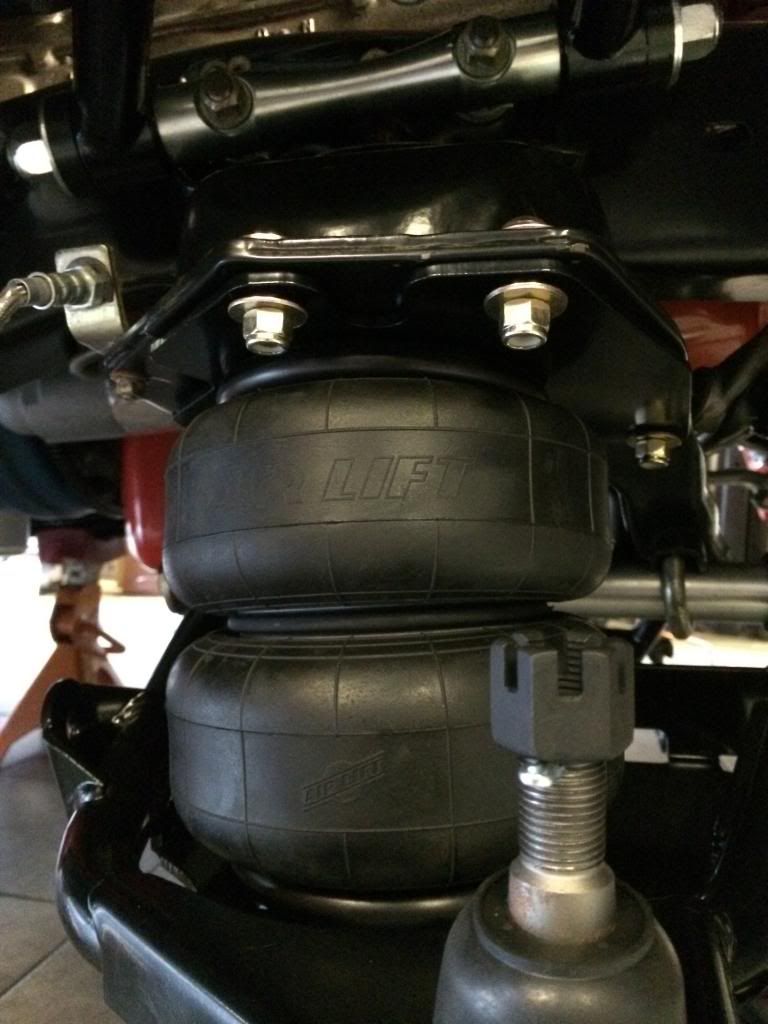
Correct installation of the aforementioned upper bag plate mounting hardware(button head down towards bags)
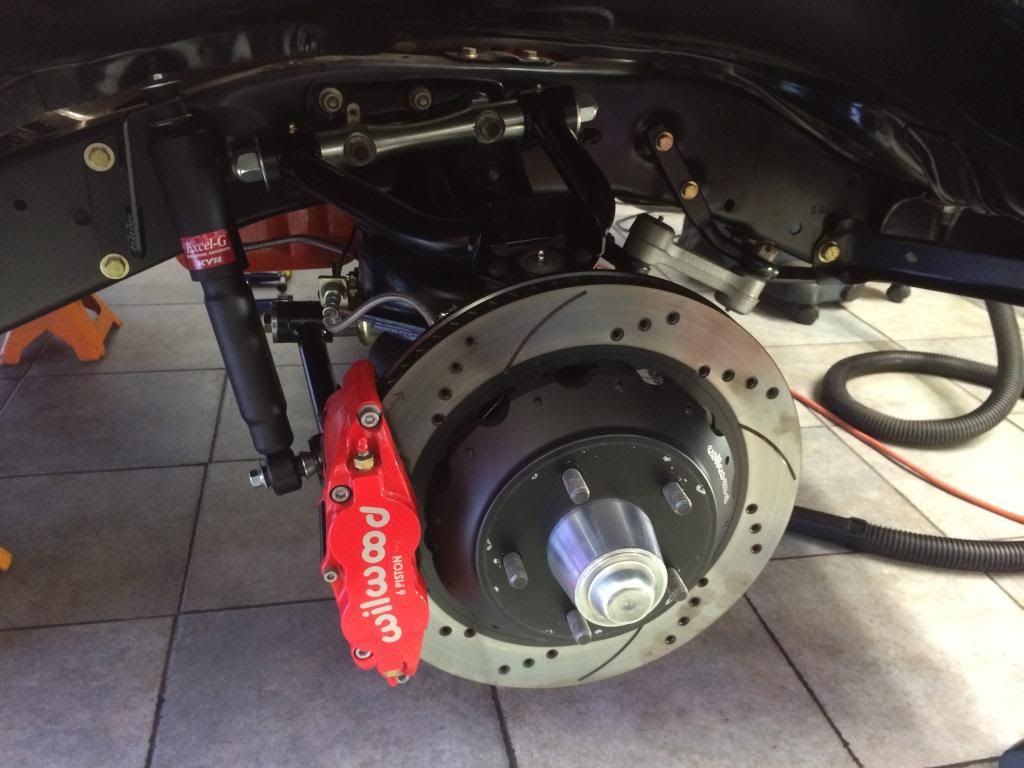
Completed front with new KYB Excel G shocks installed. Ride impression of these vs. the previous Belltech and KYB GR2's to come~
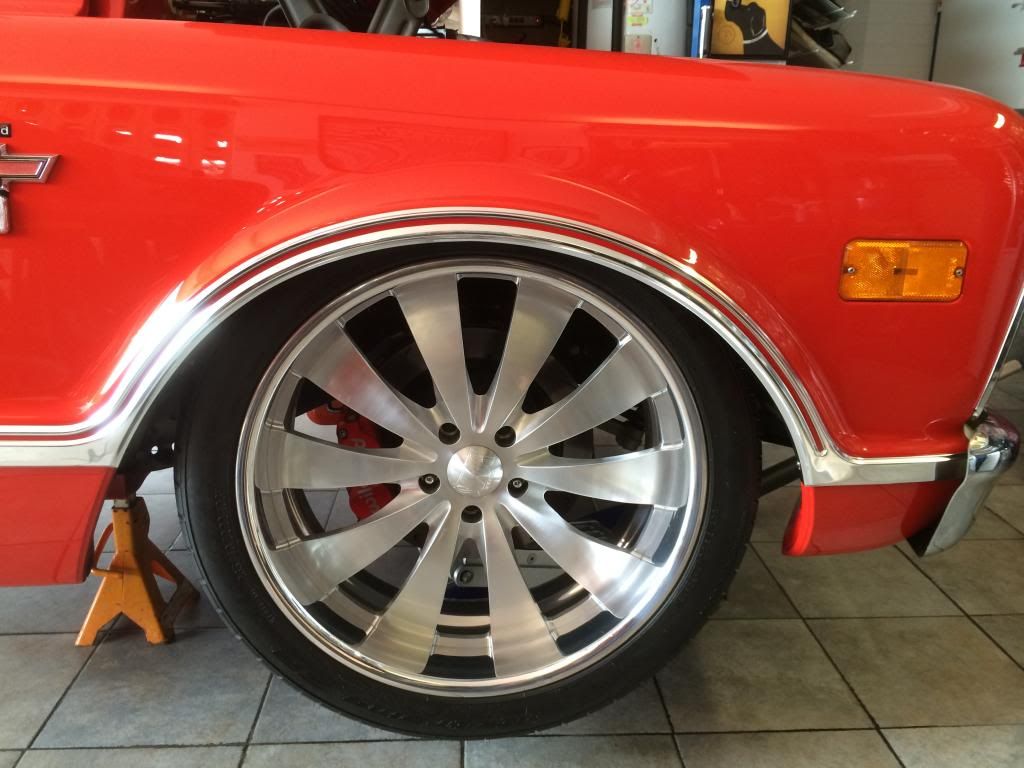
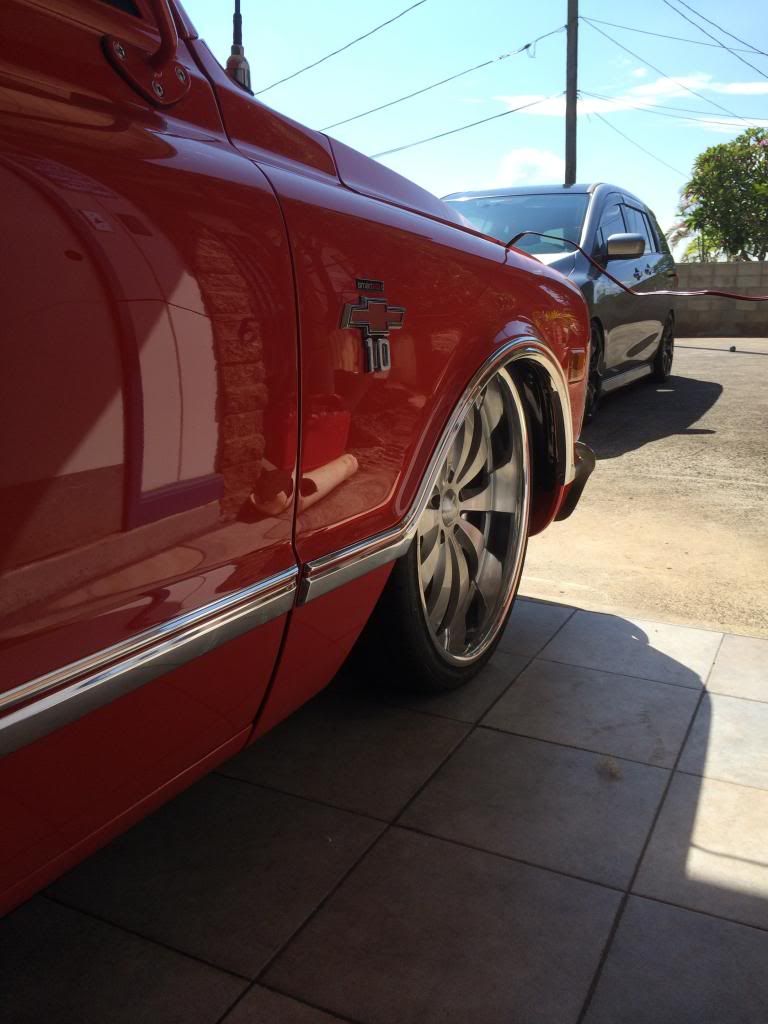
Since the airlines were not hooked up yet at this time, the first trial fit of wheel to fender clearance was done using a jack to lift the arm/wheel into the fender. Just as a side note, this is the stance and tire clearance with a 265/40/22 tire. It is sitting on the tire and this is the max drop that can be achieved with the stock fender. It is just shy of tucking the rim. More on this later...~
 Air management: ACCUAIR eLEVEL system installation~
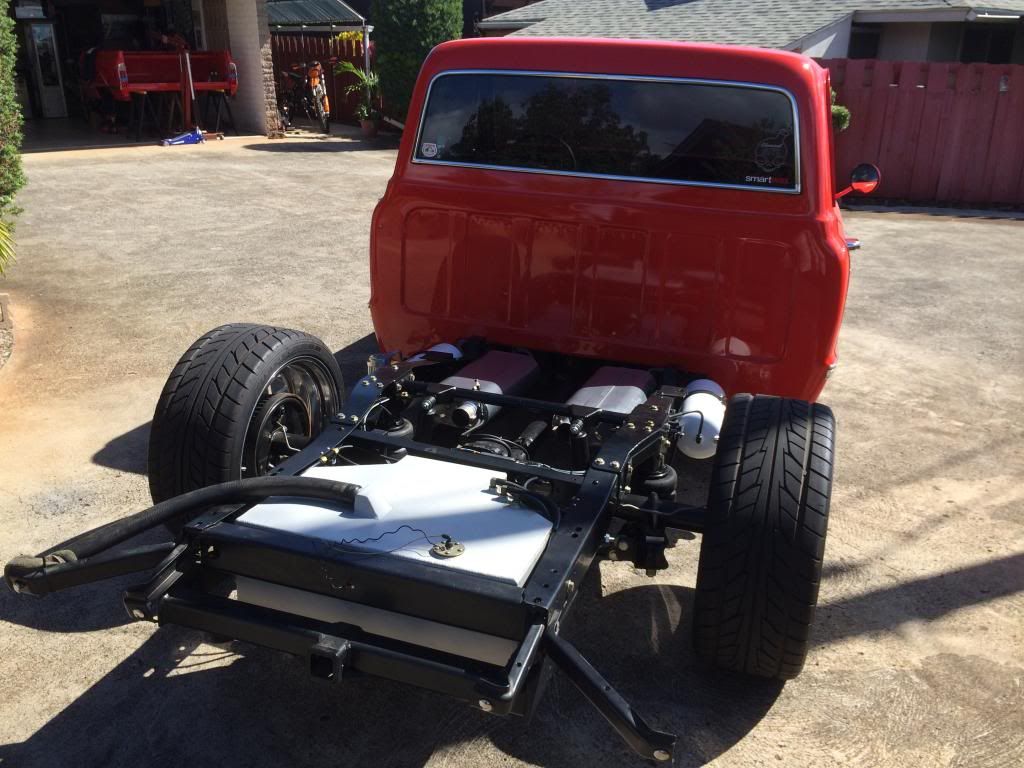
VU4 and eLevel CPU mounted on rear crossmember. Nice thing about trucks and having the bed off is all the space and access you get to play with. The only down side is I have to lose the tail pipes going out and over the axle and it leaves big gaping holes in the rear x-member. Unless I do a full rear dropmember and run the pipes along the same shape as the notch to get the tail pipe out to the rear, having a tail pipe is out of the question due to axle clearance issues and leaves me with the one option of doing a simple turn down tip right out of the mufflers. Turns out it actually sounds kinda nice!

~
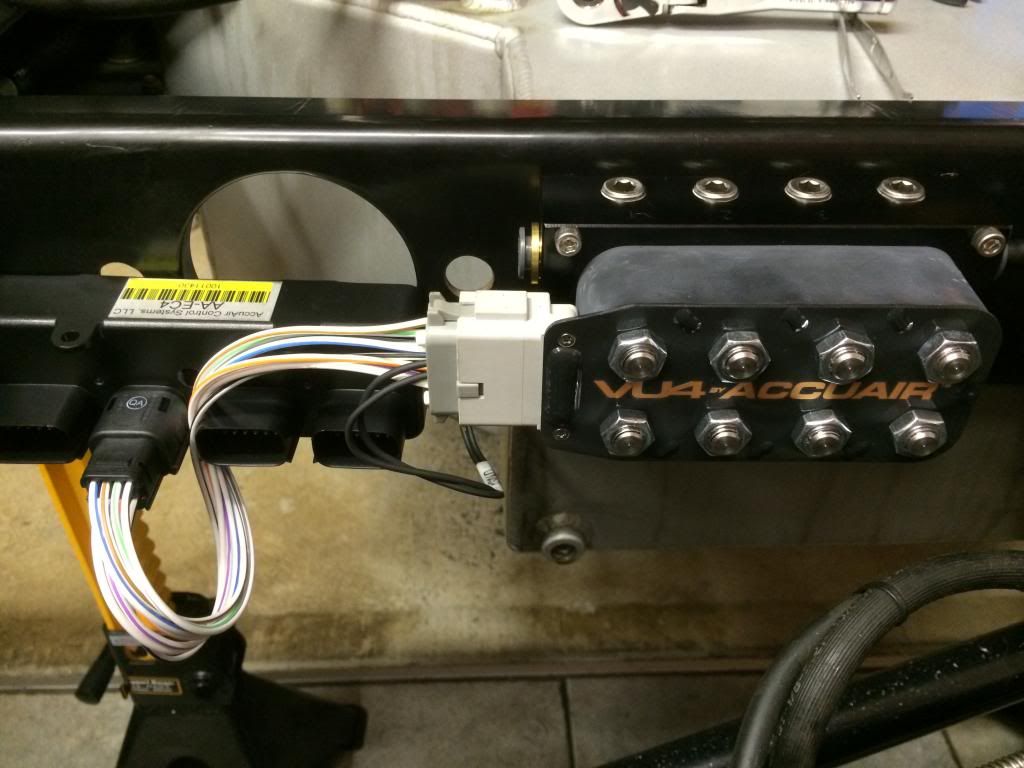
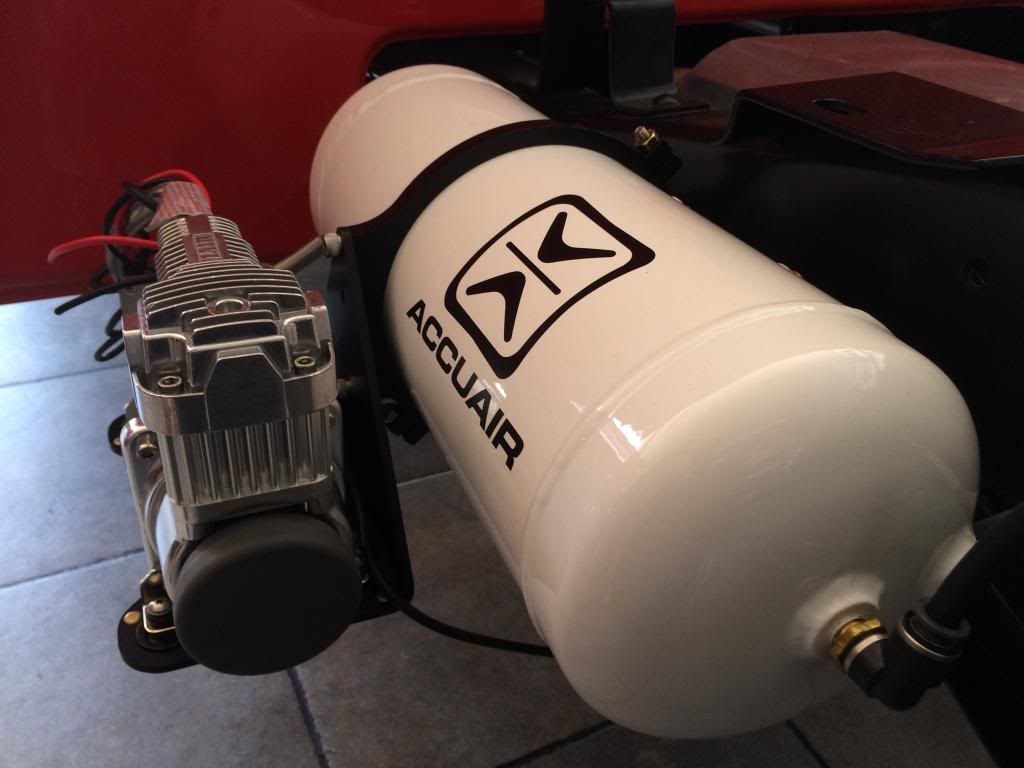
Dual 3 Gallon tanks with dual Viair 400c compressors mounted with eXo mount system~

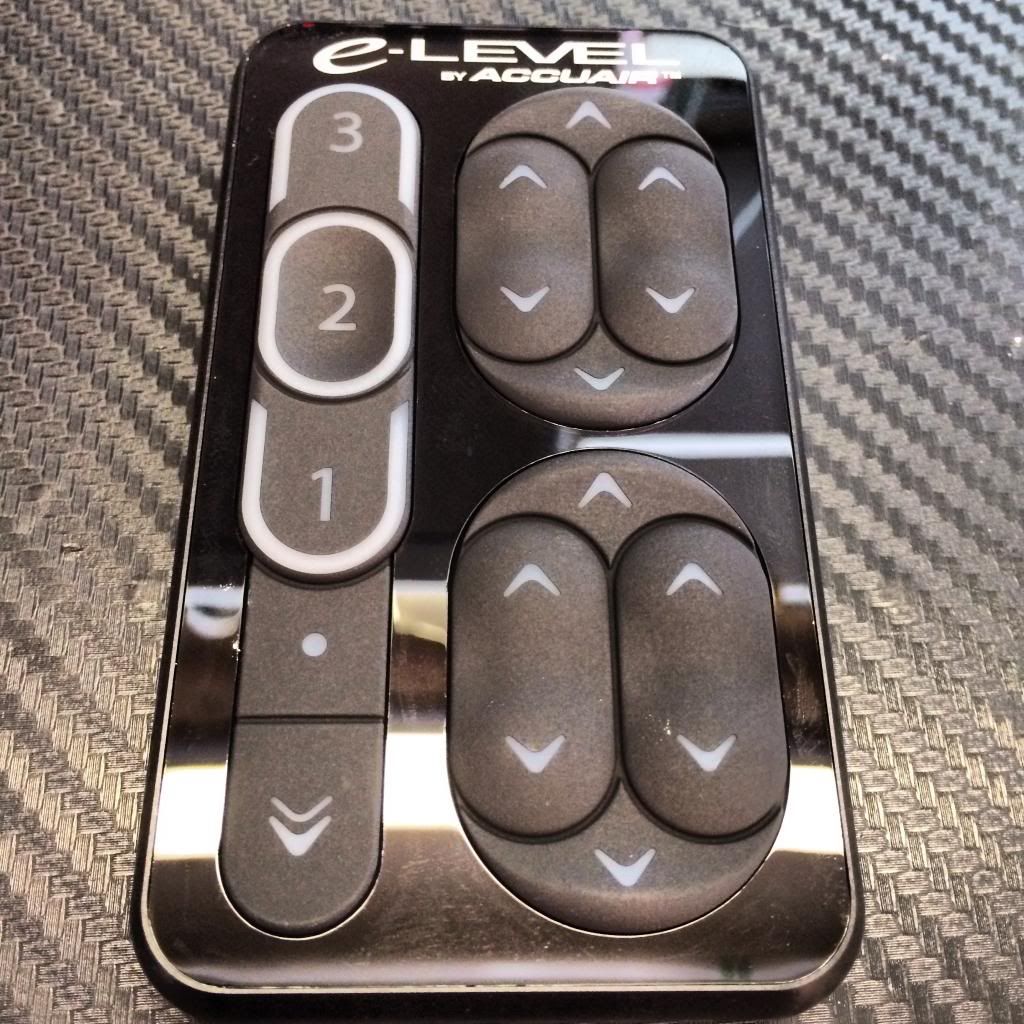
The magic keypad!~
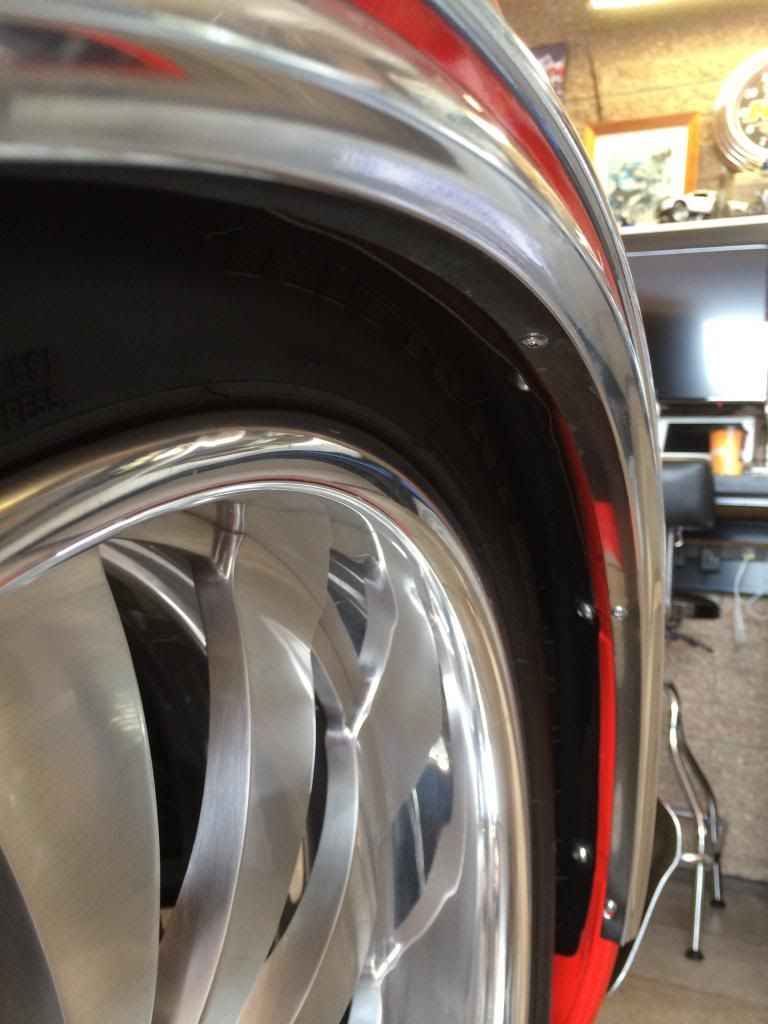
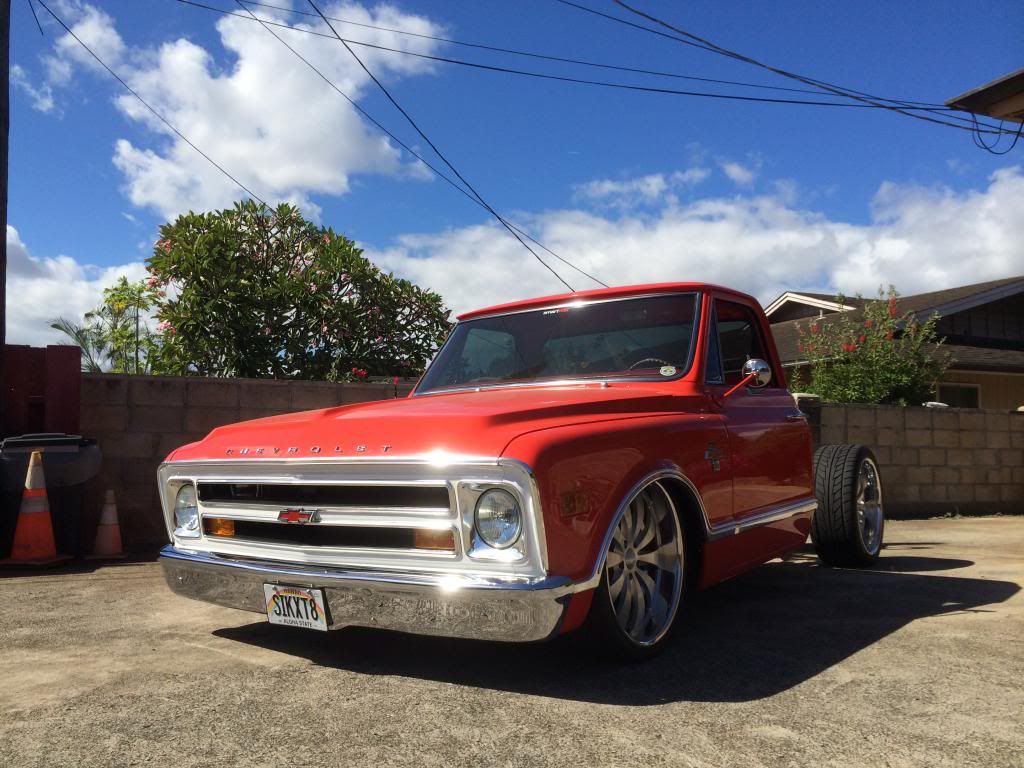
Now with everything finally hooked up and air lines run, wiring connected, the only thing left to do was to address the little issue of gaining another 10mm in drop height. How? Remember the tire in front...? My easy fix was to replace the 265/40 with a 255/30. Here's the difference in how much more it tucks...

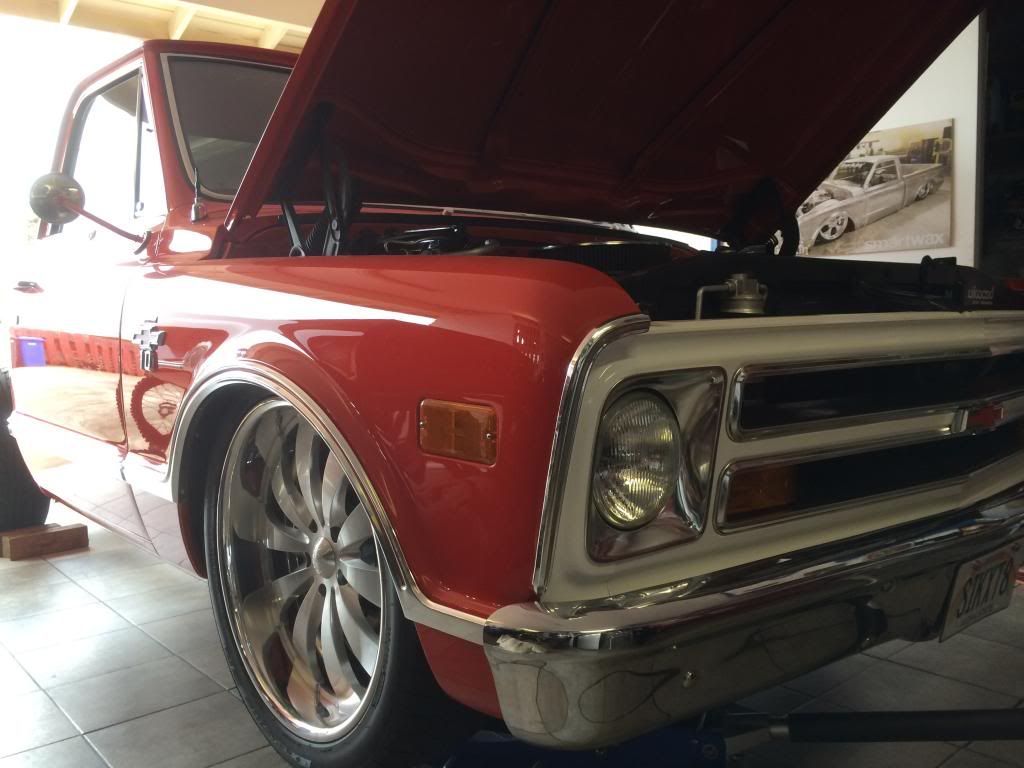
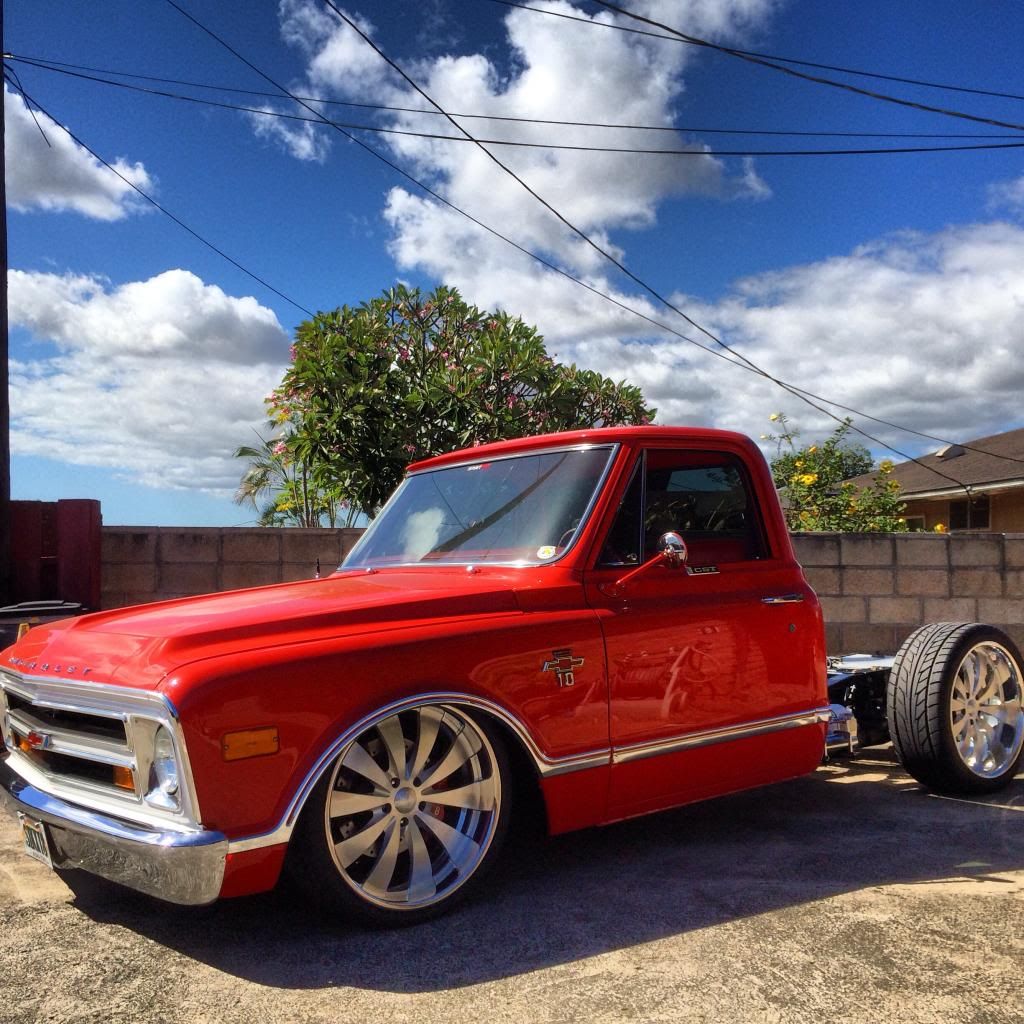
And to give you a better idea of how this all translated into the final stance, as promised, Ruby as she sits currently sans bed~
One of the things I didn't include in this thread is the details on the installation of the AccuAir ride height sensors and their placement/wire routing etc. As many of you have probably seen or experienced, there are a myriad choices and preferences for where the 'best' mounting points are. It really is preference and is also the beauty of the AccuAir system for allowing a ton of flexibility and choice on how it is installed and set up.
I just didn't want to end up including too much about the AccuAir components in a Porterbuilt parts thread but I'd be happy to post up pics or answer any questions on that area as well. Dave Porter sent me a couple of great pics to help give me ideas on how others have set up their sensors and it helped me out tremendously. Ultimately, though, you can get as creative as you want with it. As long as it is in its optimum working parameters, the AccuAir eLevel system is pretty darn bulletproof too!
As for initial driving impressions based on a quick loop around the block, I have to say the ride on bags is amazing. It is in no way 'airy' or 'floaty' like most may think. It is a nice firm ride, similar to how a quality drop spring would feel but with a little more give. I have yet to play with the drive height settings and determine how much pressure/height would be best for everyday driving but based on my first impression of my first spin, it is an exceptional ride. I don't see any issues regarding any loss of handling or performance either. Plus its always great to have the peace of mind of having quality components under your ass and knowing you can drive with complete confidence!
If you've made it through the whole thread and you're still here; thanks! Hopefully this thread so far has been helpful(or at least slightly entertaining to those who like to look at pics). I'll be happy to answer any questions or post up more pics at your request and help out in any way I can.
Looking forward to hearing feedback and comments from you guys. I'll keep updating this thread with the rest of my non-Porterbuilt related parts of the project as it comes along as well.