Well, 2 weeks later and not a whole lot has been done... I have been laying floor as a side job, that's always a fun gig. But, spent some time last night working on getting the radiator all buttoned up. Thank you to user
calvin78612 for the upper brackets. They were perfect. He even delivered them to work for me. Can't ask for better than that.

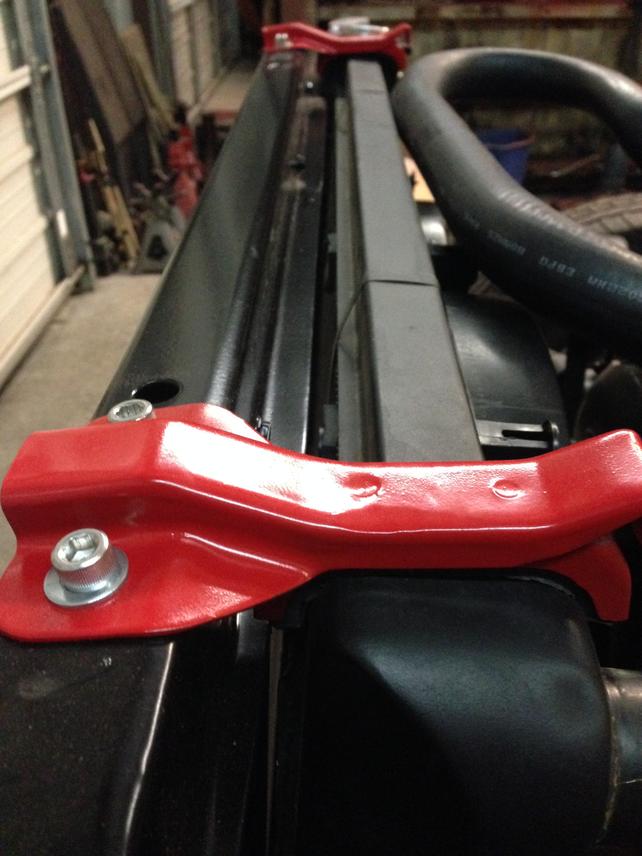
Used 4 3/8 x 18 Stainless socket cap head bolts and they are in.
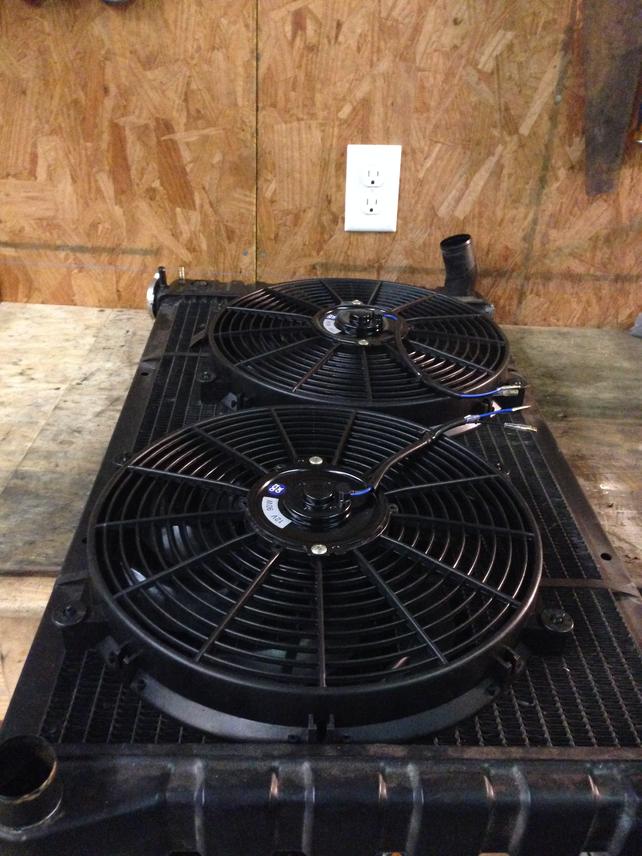
I pulled the rad back out to put the fans on it. I ordered these from amazon for $18.00 each. the shipping was a bit high, but it's still a better deal than if i had ordered another model.
 Amazon.com: PROCOMP 14" INCH ELECTRIC...
If you order the fans, they come with mounting hardware. I didn't know that so I ordered the mounting kit too. I'm glad I did, I ended up needing them, because I broke one of the disks.
Amazon.com: Derale 13001 Plastic Rod Mounting...
I had to trim just a bit off the side of one fan where the shrouds interfered. Just ground them down about 3/4 of an inch and they fit "like a glove" in a staggered pattern. Really happy with the way they fit in the truck too.


I left the hoses hanging because I ordered some sleeving for them that should be in in the next couple of days. It feels nice to see all of this coming together. I just hope i did it all correctly.
NOW on to the Drive Shaft... This thing has been a pain in my @## If you have read though my build, you know I can be very "frugal" Sometimes it works, Sometimes it bites me in the tush. This time wasn't so great. So... I started off by thinking, "Hey, I have a 2 piece shaft that I can reuse. I have the parts and just need the work done." So I bought $100 worth of U-joints and a Carrier Bearing. The shortening and total balance will cost me $80. That leaves me at $120 cheaper than a new single piece shaft. If I ever decide to go lower, I already have the shaft taken care of too!
Cool, Great, Awesome. Here is where it gets fun. I picked up the shaft from the shop and it looked great, I was very happy. Get it home... and its the wrong length. I Gave the shop the right length, but I got mixed up on the reference points. The front shaft ended up being 7" to long!!!

So I took it back and they took the 7 inches out and re balanced it. This time they had to replace the weld in peace "connects u-joint to actual shaft" so this time it was $100. Now I'm up to $280 and I still have the original shaft.... Oh well, you live and learn.
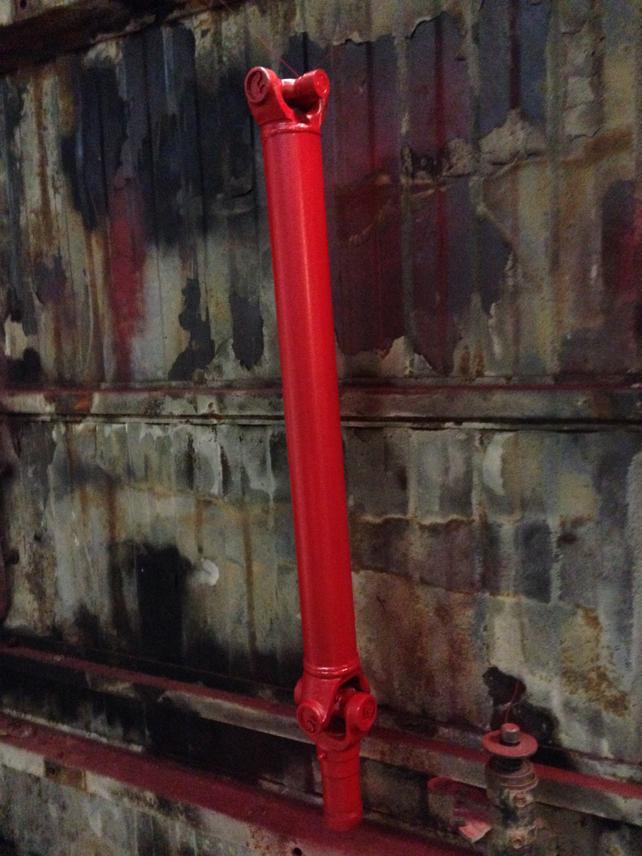
Here is the back shaft painted. Hanging on my high tech, high dollar, spray rack.

I'll finish the painting and hopefully get it installed tonight. We shall see. Yes, I test fitted it this time to make sure it fit before I painted it.