Next on my list of electrical stuff was the heater/blower. I had ordered a simple on/off switch with a knob that I hoped matched the headlight switch knob (turns out it didnt). My blower motor is a leftover part from my 56 Chevy wagon build, and even at full blast those old motors put out nothing like the modern ones that come in the S10 (they used a 10 amp fuse rather than todays 30 amp). I dont often use the heater, so a single speed blower is just fine with me. As a result, the wiring for this was painfully simple. I simply used the brown S10 wire that feeds the HVAC control panel (it has more power available than my blower motor will ever need).
Next came the hoses that feed the defrost outlets at the bottom of the windshield. This is where I ran into a problem, because some complete idiot had installed the steering column, brake assembly, wiring harness, etc etc etc, thus totally obscuring access to those defrost outlets. I spent a miserable half day doing a couple of simple things that would have taken a few minutes in an empty dash. Lesson learned
Even in a spot where I thought access was OK, I was wrong. It was relatively easy to push/twist those defroster duct hoses onto the outlets of the heater box when I tested this outside of the truck, but once installed I just couldnt do it (too tight a spot to be able to wrap my hand around the hose). I eventually got annoyed, ripped the heater box out (yet again) and made a couple of collars that fit inside both the hose and the outlet of the heater box:
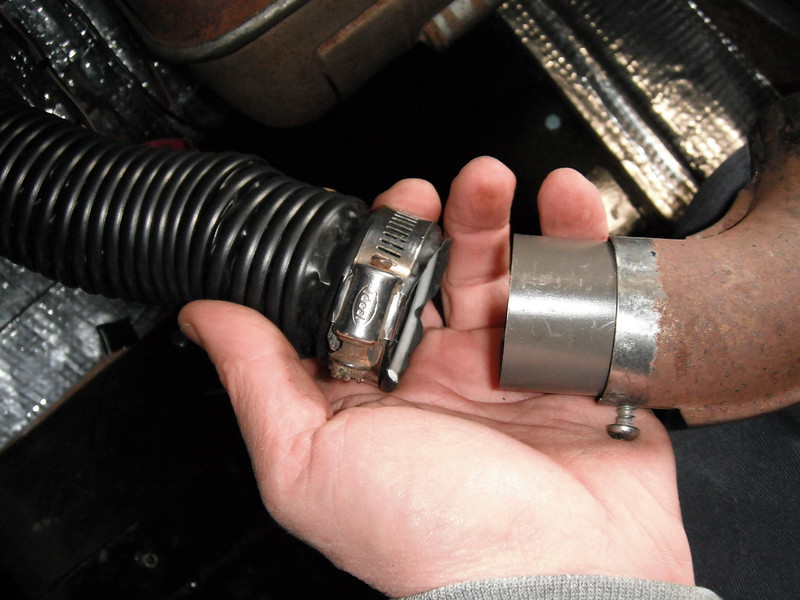
Now I could attach the hose to the collar in comfort, and then slide the collar into the heater box where a self tapping screw secures it in place.

Again, lesson learned. Sure hope I remember this on my next build.
After finishing the vent hoses I finally got at the steering shaft. I have a history of taking precise measurements that later turn out to be wrong, so Im very careful when I cut something that will cost me money if I screw up. The Double D steering shaft fit into this category, so I cut a ¾ inch strip of wood and hit the ends with a die grinder so that it would fit into the u-joints.

Once I tested it in place and was happy with the length, I made the cut on the steel DD shaft and installed it.
With the column in its final position it was time to weld up the brake pedal. I had formed it to shape using the old slice & dice method, and I had to now weld up all them slices. I seriously need to invest in big oxy/acetylene tanks. I only have one of those mini kits, and it takes nothing to empty those tanks.
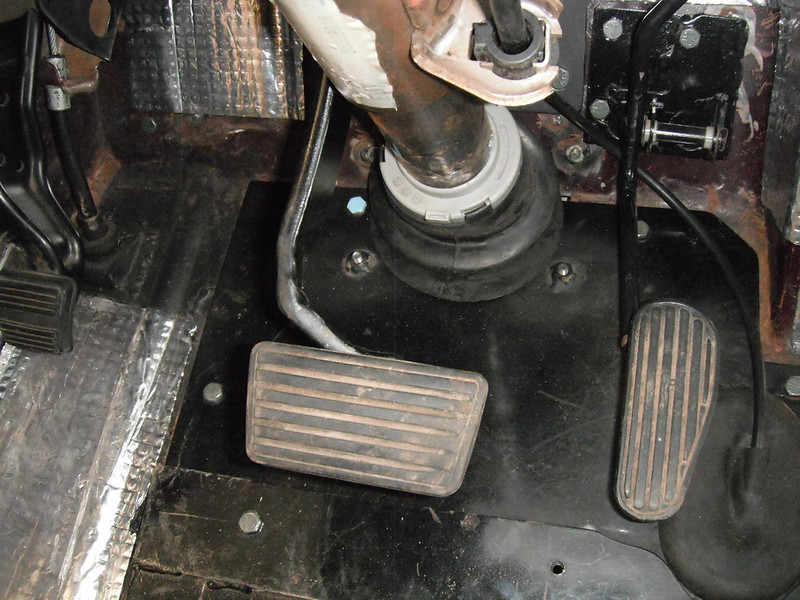
I am not all that thrilled with the sharp bends in the pedal (the slice & dice works nicer on thin stuff), so once I finally get a full size torch kit I will use the pedal from my parts Blazer to create something a little more elegant. With the brake pedal now welded up, my better half gave me a hand with bleeding the system. This went quite well, and it felt good at this point.
Next I had some fun with a rear bumper. My Fargo didnt come with one, and I needed something from that same era so I headed off to my local wrecking yard. Its a funny comment on life out here in the sticks: my local yard has zero S10s, but I was easily able to find a bumper from a 40s era truck! I didnt even have to unbolt it as it was sitting loose in the bed of a 43 Ford. I brought it home & fabbed up some brackets that I hope looked somewhat period correct:


Of course once you have a bumper, youd be crazy not to put the tailgate on. The problem was that the tailgate hinges are on back-order, with absolutely no estimated time of arrival (like so many other things right now). They are however fairly simple things, so I quickly fabbed up a temporary pair that would allow me to have a tailgate until things get back to normal and stuff starts arriving. Heres one of the temporary hinges:

And now I finally had a tail end that looked somewhat complete!


Next came a test fire to confirm some clearances between the steering column and the engine when the engine twists under acceleration. I checked the wires, hooked up the battery, hopped in and turned the key. It cranked, but wouldnt fire. I also did not hear the fuel pump come on, so the debugging began. Zero fuel pressure and no sound from the pump. I debugged all the way to the pump, but of course the final connections to test are on top of the pump, squeezed in below the bed. Dropping the tank from below is something I hate doing, so instead I just removed the rear fenders and bedsides, and slipped the floor back 2 feet. Of course after I had done all this, a light bulb went off in my head. Remember that rear bumper I just installed? I had unhooked a ground that was in the way while doing that and forgot to reconnect it, and that was of course the fuel pump ground. I felt like a complete idiot at that point, but realized that this was an opportunity to do something useful. I had forgotten to slip some thin rubber pads between the bed and the frame mounts, so I did this now. Im not sure how much they will help cut down noise and vibration as they are fairly thin, but it certainly wont be worse than steel bolted to steel.
Before any further running of the engine I installed a coolant overflow tank. Space is at a premium, so I used a small aluminum tank I got for 30 bucks on Amazon, after fabbing a bracket that tucked it into a little available corner (and yes, that horrible glow-in-the-dark orange hose it came with will be replaced with a black hose and routed properly!)

I now realized how close I was to being able to test this thing out. I have the hood and front fenders off to allow easy access to the engine. I spent a couple of hours checking bolt tightnesses, hose connections, fluid levels, wiring connections, etc etc etc, and then I was ready to fire it up and run it up to temp.
I crossed my fingers and fired it up and let it run, while monitoring the coolant temp with a laser temp tester (I had reset the coolant temp gauge needle while fitting the S10 gauges into this truck so god only knows how accurate it is right now). I had to add a surprising amount of tranny fluid (I had lots puke out of the tailshaft while fooling around with the driveshaft), and had to top up other fluids as all the air worked its way out, but other than that it went well. The electric fan system kicked on automatically just as it should (thanks for the tech advice, Skymangs!) and the engine ran smooth and cool. Everything was going just fine until I looked up and saw a thin stream of green fluid squirting straight up about 4 feet into the air. The coolant overflow tanks breather hole is tiny and on the top, so that excess juice shot straight up in the air. That tank only has a capacity of 800ml (less than a quart) and I guess the overflow as the system heated up was more than that. The stock S10 overflow tank has a far greater capacity so Im not sure if I can continue using my spiffy new aluminum tank, or if I will have to find a place to mount a bigger tank. Other than that little hiccup, it went well. It starts instantly, idles smooth and responds crisply to throttle inputs. I decided that was a good point to quit while I was ahead.
More to follow!