PorterBuilt's
DropMember Hood Hinges
How-To
LFD style
So I have been killing my self setting my hood on and off during my 72 Tahoe build. With a 30.5" tall front tire little things like hood hinges kind of get in the way. So my thoughts are that since Nate from
PorterBuilt street rods is the reason I am so low and can not run a stock hinge that he should be the one to fix the problem as well! And now he has!!
What Nate has come up with is a cowl mounted Hinge kit that really works. Not like the others that only let your hood open half way or the $1K scissor type that are hard to set up right then they still are not real stable (side to side) when they are up.
This install took me about 4 hours to complete and the results are out standing. Easy to install with basic tools (plus a welder), the hood opens up 7" higher then stock hinges, way more solid and firm then any hoods I have dealt with. Also since these are a single pivot point style hinge un-like the factory hinges you will not have to push the rear of the hood down for it to close all the way. It will line up the same way every time you open or close the hood. Their were a few snags and we will get to that as they come up in the install. Lets get to it!
Ok first thing to do is remove the hood, cowl and stock hood hinges. Then you need to find the center point of the front of the cowl area and put a piece of masking tape their that you can write on. Then from this center mark you will go left and right 23" each way so the hinges will be 46" from center to center. I used masking tape to make all my marks on so it is easy to change if you make a mistake and also it will help protect the paint for the painted guys. Ok so once you make your two hinge marks 46" apart from each other you are ready to make a templet so you can transfer the hinge mounting holes and center slot.
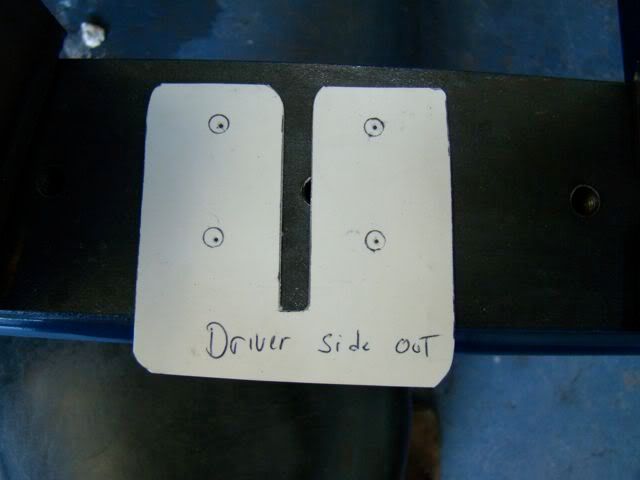
So the first step is to mark the hinges for Passenger and Drivers side. Take the hinge box's and set them side by side so the top of the box's are touching like in the pic and not the bottoms. Once you have done this put a
P on the left one for Passenger and a
D on the right one for Drivers side.
[IMG]

[/IMG]
Take one of the hinges and place it face down on a piece of poster board and trace the out line of the hinge box, center slot and the 4 mounting holes.
Now their is a P and a D to this templet as well so put a mark showing what is what. After I cut this out I placed the box back over it and used a transfer punch to get exact centers for the holes.
[IMG]
[/IMG]
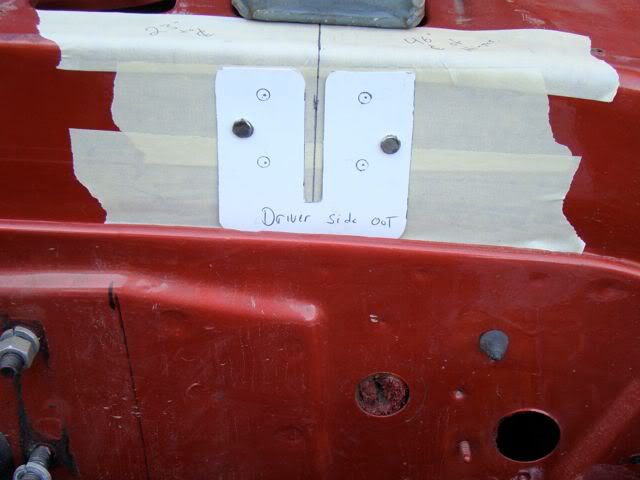
Then take the templet and place it so the 46" marks you made are in the center of the slot you cut out and that the bottom of the templet is tight to the bottom of the wire gutter. I used 2 small magnets to holt it in place while I transferred the mounting holes with a center punch. and marked the slot with a pen.
[IMG]
[/IMG]
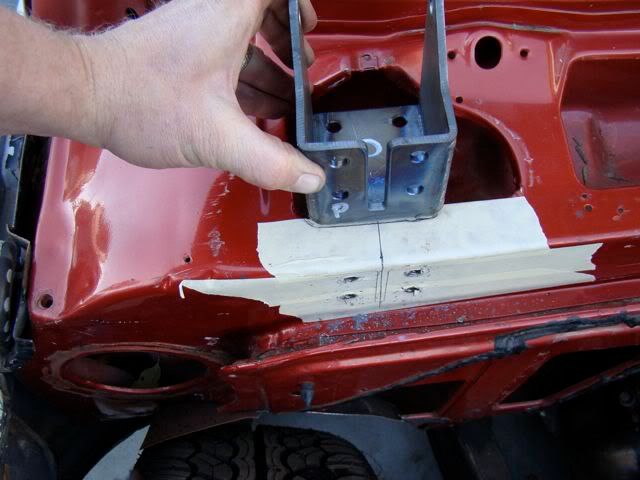
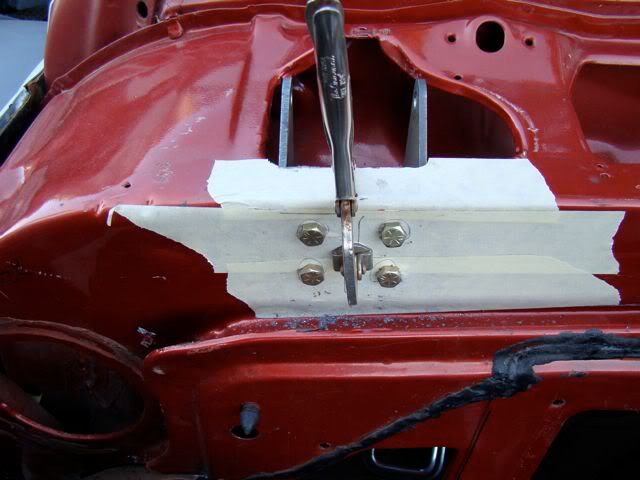
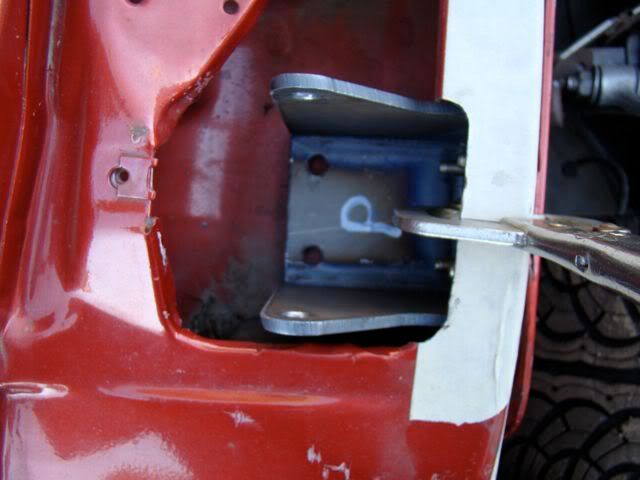
Then I drilled out the the 4 mounting holes with a 5/16" bit but I did not cut the slot out yet. First I set the Passenger side box over the area where it will go and marked out the area I needed to remove so it could slide into the cowl. Only remove as little as you have to so it will fit. Then slide it into place and install 4 bolts just to locate it in the correct spot. It should be sitting flat to the bottom of the cowl at this time. I then used a C clamp to hold it tight so I could mark and drill the 2 bottom holes that will go through the cowl in to the cabin.
Note!
At this point I chose to use regular hardware for all my mock up because SS is great but does not lend it self well for going in and out too much. So I will keep the SS in a bag and when I am ready for final assembly I will set it all with the regular hardware, tighten it all down and then when I am happy with it I will remove 1 bolt at a time and install the SS with a bit of anti-sieze.
[IMG]
[/IMG]
[IMG]
[/IMG]
[IMG]
[/IMG]
[IMG]
[/IMG]
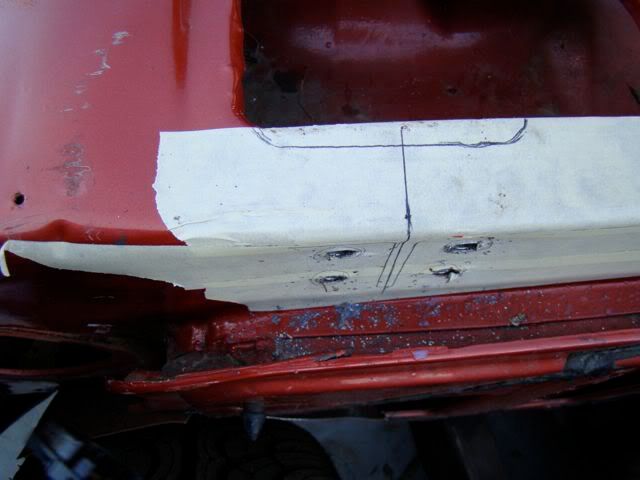
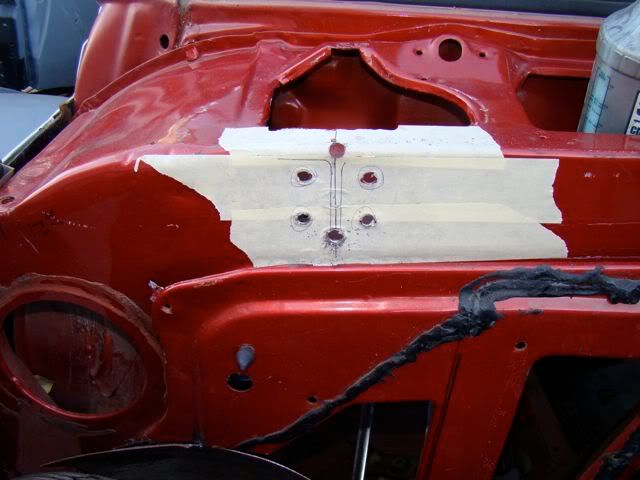
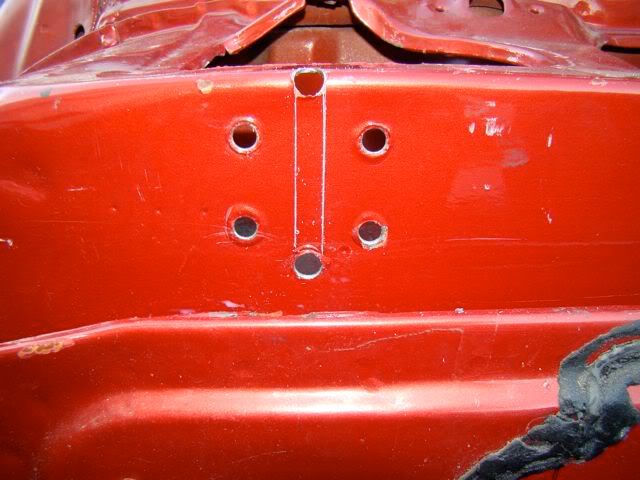
Then I marked for the (2) 3/8" holes for the center slot. The first one went at the bottom of the marked out slot but 1/4" up. The top hole will be for now right on the corner of the top of the cowl. After they are drilled I removed the tape and scribed 2 lines from top to bottom of each hole. I marked mine just inside the lines of where I thought it would end up then I cut out the section. I then clamped the box back in place using the bolts to align it once again. I then took a die grinder and gently remove the rest of the metal around the slot until it was just flush with the slot cut in the box. By doing it this way you end up with a very clean hole that just looks right.
[IMG]
[/IMG]
[IMG]
[/IMG]
[IMG]

[/IMG]
Kevin
LFD Inc.