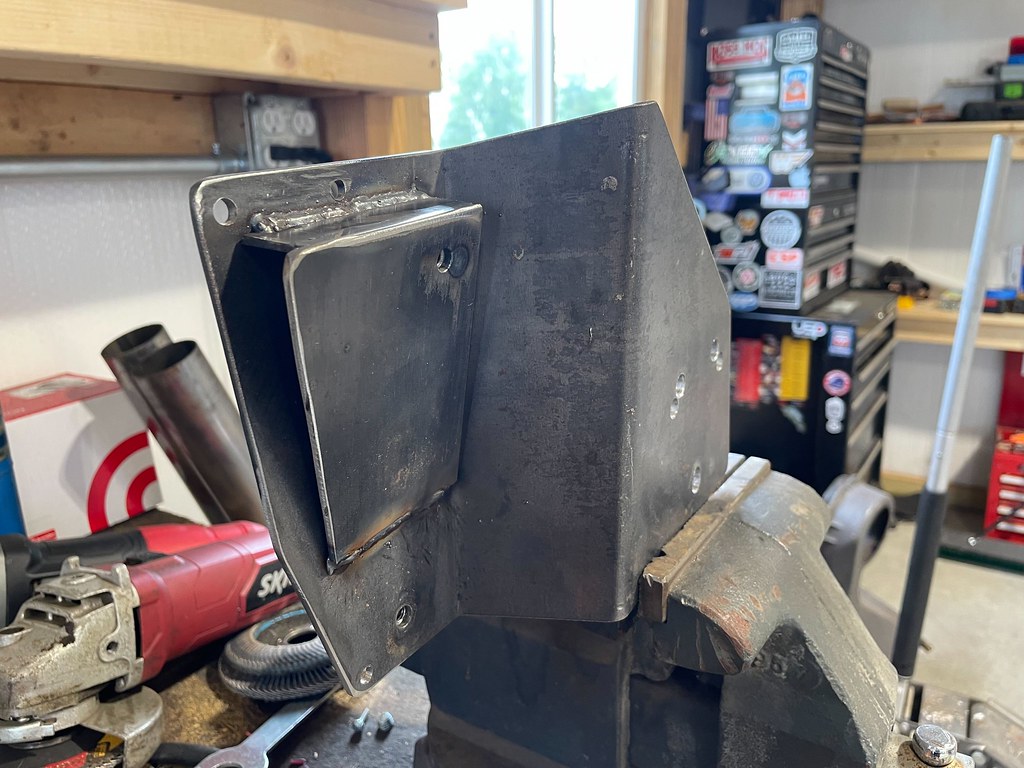
This next round of updates is a big milestone for me. It's when I finally get to put some power to the electrical system and make some things move! But before we get to that, I had to finish up my throttle pedal. I bought a 5.3 DBW throttle pedal mounting plate specifically made for 67-72 trucks from a board member here. I wanted to like this plate, I really did (esp for the price), but it just did not work that well. The mounting holes didnt line up, the hardware it came with was terrible, and it put the pedal in an awkward position. It was very high off the ground and made it hard to push the pedal. It was designed to get "full pedal travel", which technically it did. However, these DBW sensors reach wide open throttle at about 50% travel, so you really could move the pedal closer to the floor. With that in mind, I ended up making an angled mounting surface attached to the original plate I bought. With the original bracket the pedal mounting surface was vertical. After modification, it was at about 75 degrees. This got the pedal in a much more comfortable position.


Now that I had a throttle pedal, it was time to have some fun! At this point, everything was in place to turn the key and see if things would power up. For this test, I just ran a temporary battery cable from my battery to my starter, and another from starter to my firewall bulkhead. Cautiously, I turned the key and I could hear the fuel pump relay switching which was a good sign. Next, I hit the throttle and sure enough the throttle body sprung into action. I know this is just a photo but I promise that throttle body is actuated by my daughter holding the throttle wide open from inside the cab! We were able to get a full wide open throttle body with the pedal mashed to the floor, which is exactly what I wanted with the modified bracket.

Next test was to turn the key a little further and see if the starter would come alive. I don't have photographic proof, but the engine did indeed start to turn over. I removed the spark plugs to make this task easier on the starter. After a few seconds, the oil pressure jumped up to a solid 30 psi. I think at cranking speeds this is acceptable for now. We will see where it ends up once the motor is running. This really just confirms for me that the oil pump is working, I installed the new barbell correctly, and the new oring on the oil pickup is properly in place!

With all that excitement out of the way, it was time to do a compression test. This is where things start to get serious. I followed all the recommended steps for this test. Throttle wide open, coils disconnected, spark plugs out, and crank with starter for several compression cycles. My results are shown below. They ranged from 60 psi up to 170 psi. When I first saw the 60 psi my heart sank. After some reading, I tried a common test which is to put a bit of oil in the cylinder and retest. For cylinder #2, that brought the compression from 60 psi up to 145 psi. At this point, I feel like I'm at a crossroads with this motor. I can either keep pressing on, or pull it back out and try to dig deeper into these compression results. I think the fact that this motor sat for 2 years before I could get it to this point may have contributed to these poor compression readings. If I can start the motor and quite literally "knock the rust off" it may bring these readings back to acceptable values. I wonder if there's anything I could hurt by trying to start a motor if it has bad compression...
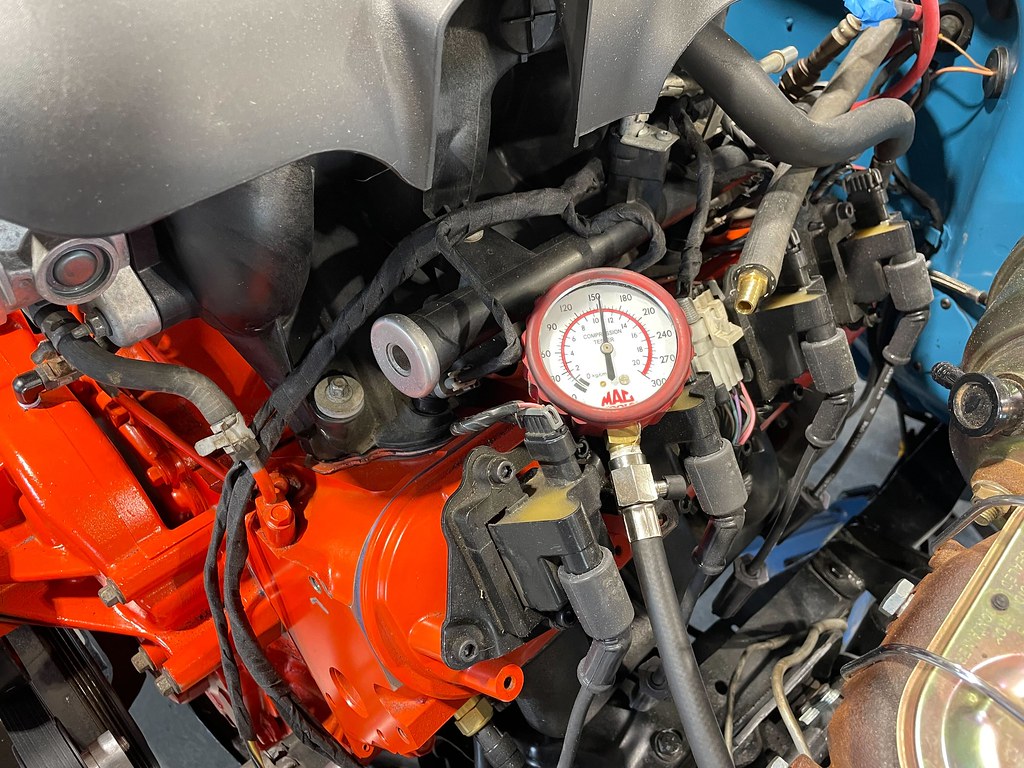

Side note, I did not mess with cylinder 8 because I could not tighten down the compression test fitting in the spark plug port due to poor clearance with the firewall, so this result may not be accurate. All other cylinders had a good seal on the fitting.
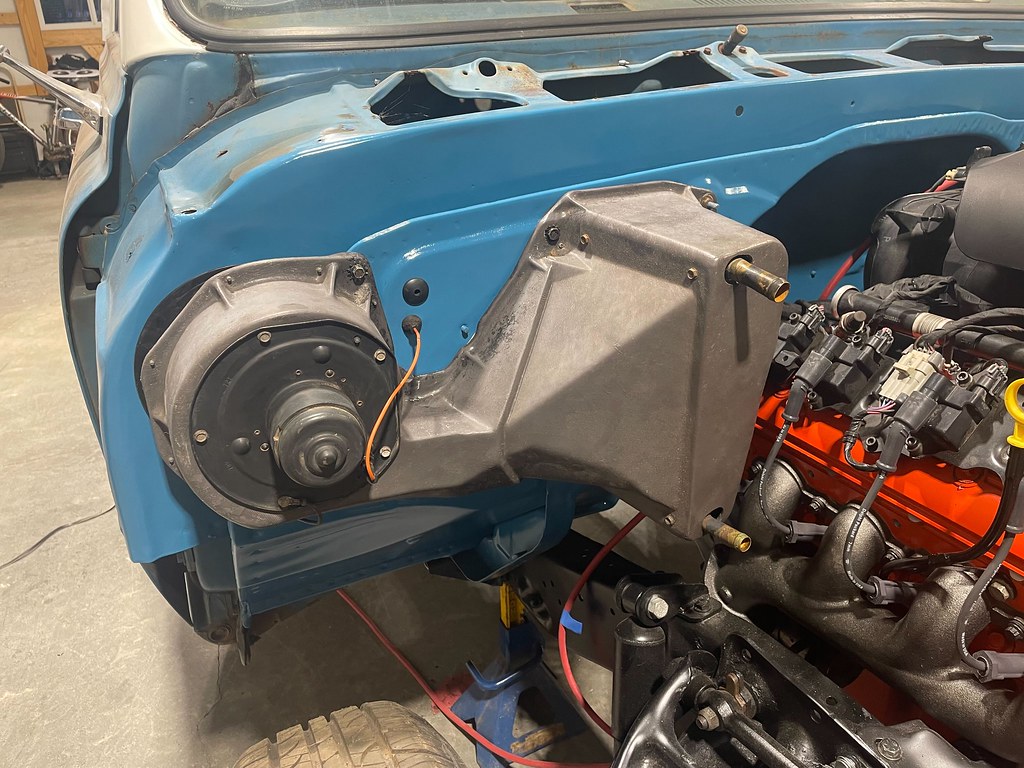
With this new dilemma to ponder, I decided to take care of a simple task on my checklist. Reinstalling the heater box was simple enough with a new seal kit. Originally I was going to paint this box black, but after cleaning it up I kinda liked the original grey against the blue. A little turn of the key and slide of the air control demonstrated that the blower motor still works properly. Don't forget to reinstall the little ground strap on the motor!
Oh what to do about my poor compression results... These numbers are going to haunt me until I either decide to pull the motor for further investigation, or just fire it up and see what happens.