RIGHT
TIME FOR A GROUP HUG
OK, just pulling your communal dip sticks.
After removing the glass and sealant etc from the Land Rover screen, I decided to measure it for the holes, of course.
Stepping away and looking at it the basic look was good.
Texting @glenanderson about screen sealant or the original fitting putty for want of a better word, he reminded me that in the dark distant past I had also mentioned chopping the screen down a bit to enhance the whole lowered look.
I had forgotten about that mostly as more important things were getting done.
But seeing as he has now poked the hornets nest, or is that poking the Grizz? I may as well investigate and look at these options again.
I am sure the likes of @rich @admin @westbay @pauly @atomman @grenade @jamesd1972 @peteh1969 @pistonpopper @jimi @v8 @kevins @spacekadett @mr2fc @turbom @quickrack1 and many others will help here with confusing me, but ultimately pointing the way to go.
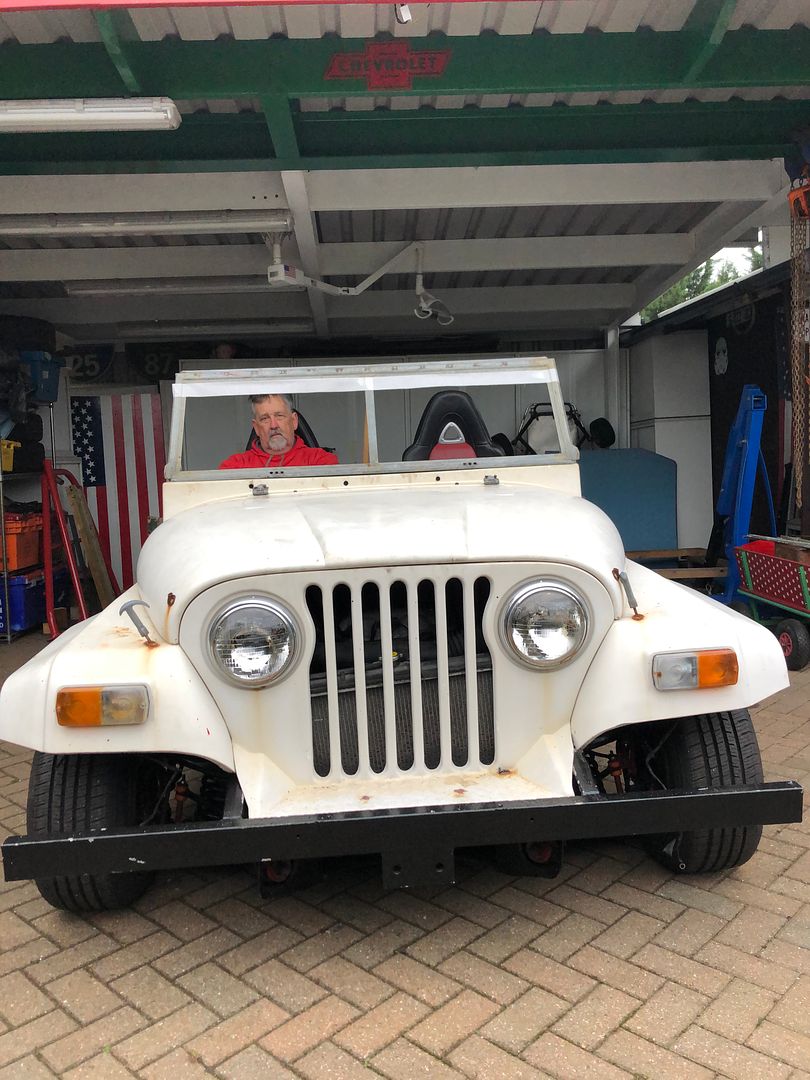
So I placed the screen in the position it should finally be fixed in.
This is to ensure maximum contact, stability once bolted down on the scuttle as it should never be accessible once the rest is built into the dash, steering, electrics, clocks etc.
Here you go.
Stock standard.

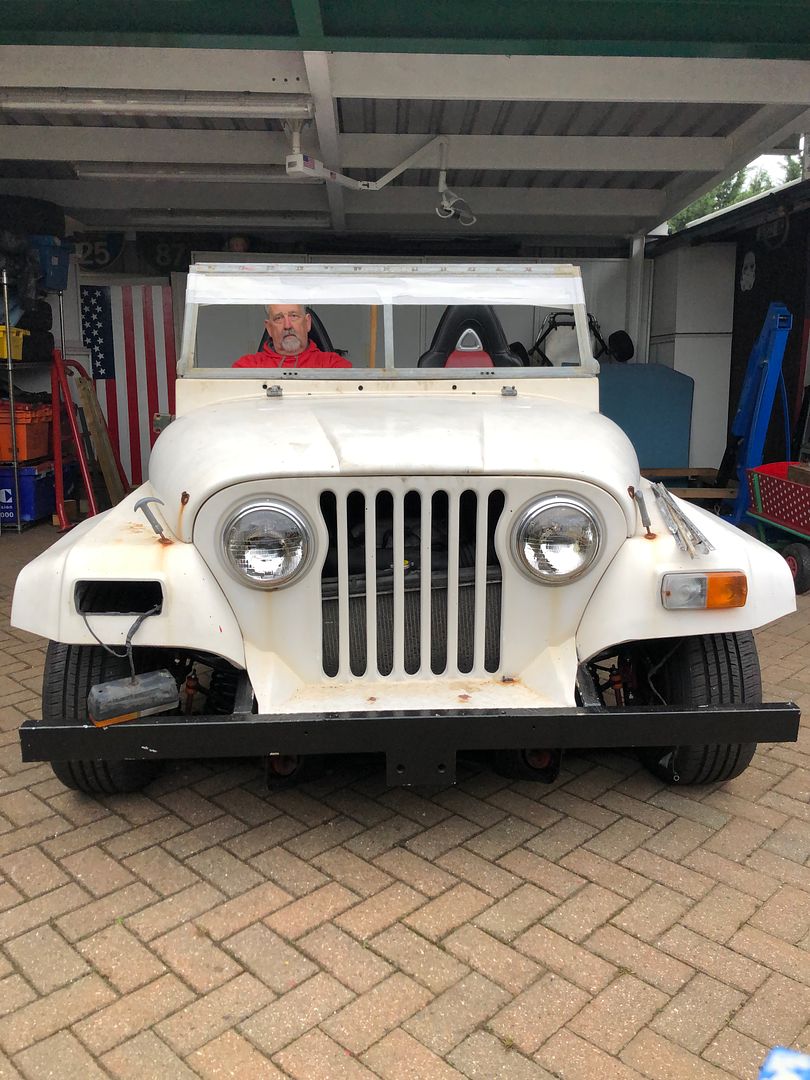
Now, for those who read the actual words and text I then took 50mm or 2 wide masking tape and added a new top of the screen below the existing top frame.
You need your virtual, or imaginative glasses on now.
Imagine the masking tape is the new frame, forget about the existing frame, it will be cut and welded lower, as will the glass, hopefully.
Sitting in the driving seat, my vision did not feel encumbered in any way having lost the 50mm of horizon.
I did try get the pics from the same position on a timer, mounting the phone in a roll of ductape on a ladder.
50mm or 2 chopped.
After this I added another 50mm or 2 of tape and got back inside.
Remember, when it is cut down, only the bottom line of tape represents the actual frame to be mounted on the car.
My horizon was slightly impaired at 4 100mm chop, so not ideal.
I did not do a 3 75mm version, but suspect I will be able to live with that if the collective feels the 50mm is not worth the effort.
100mm or 4 chop
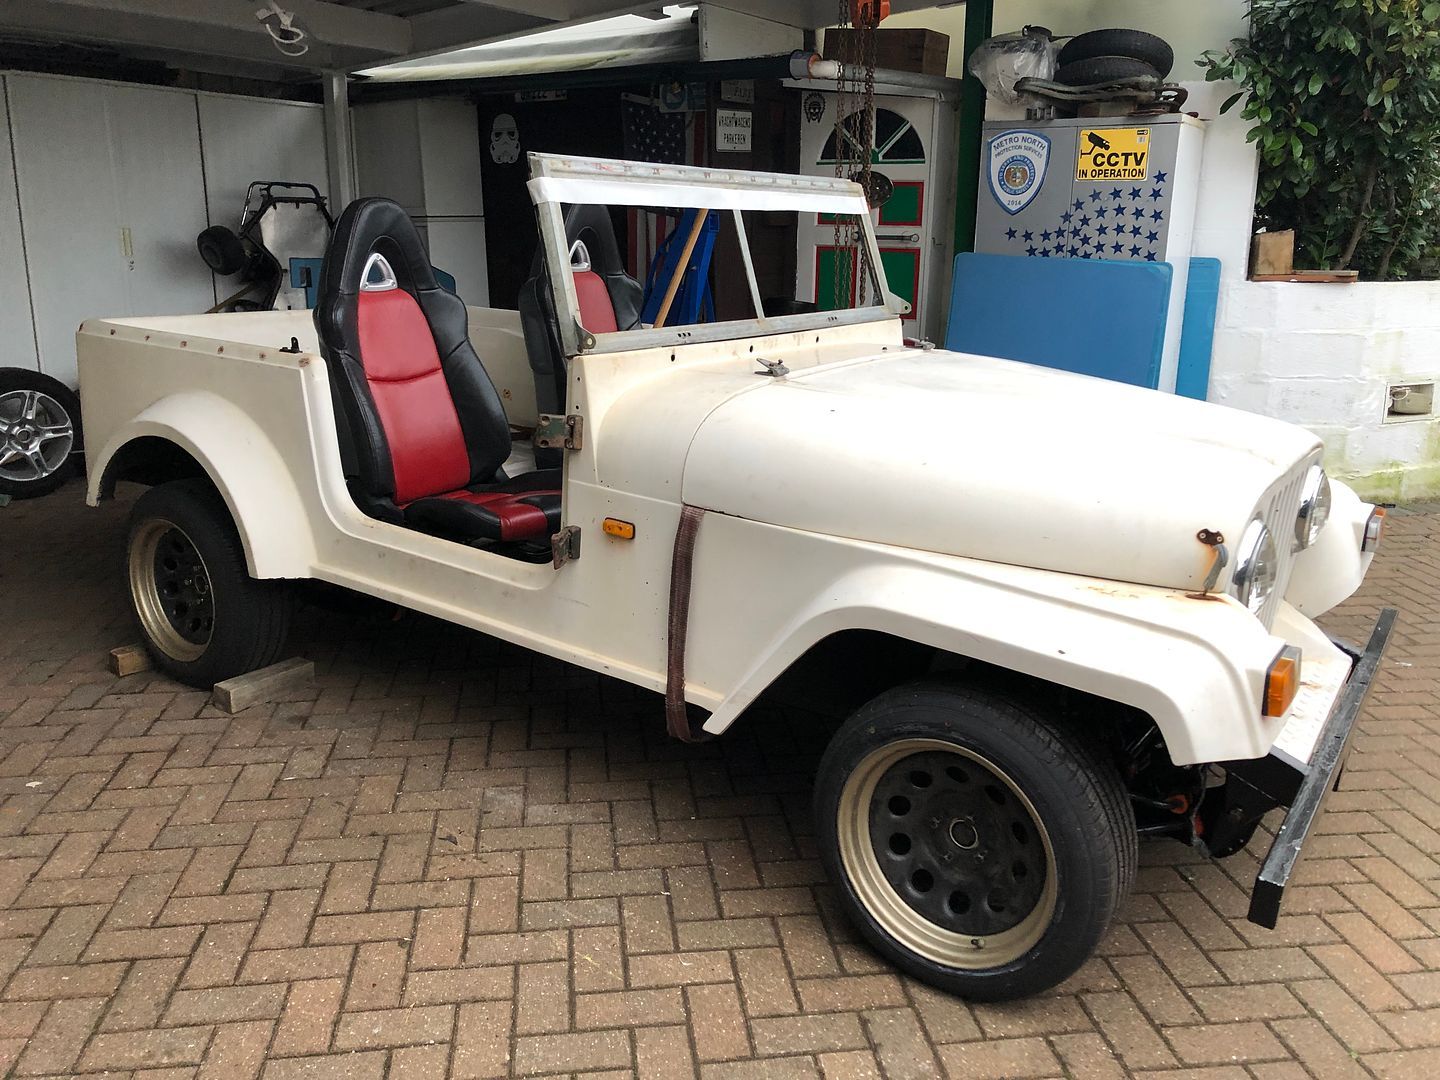
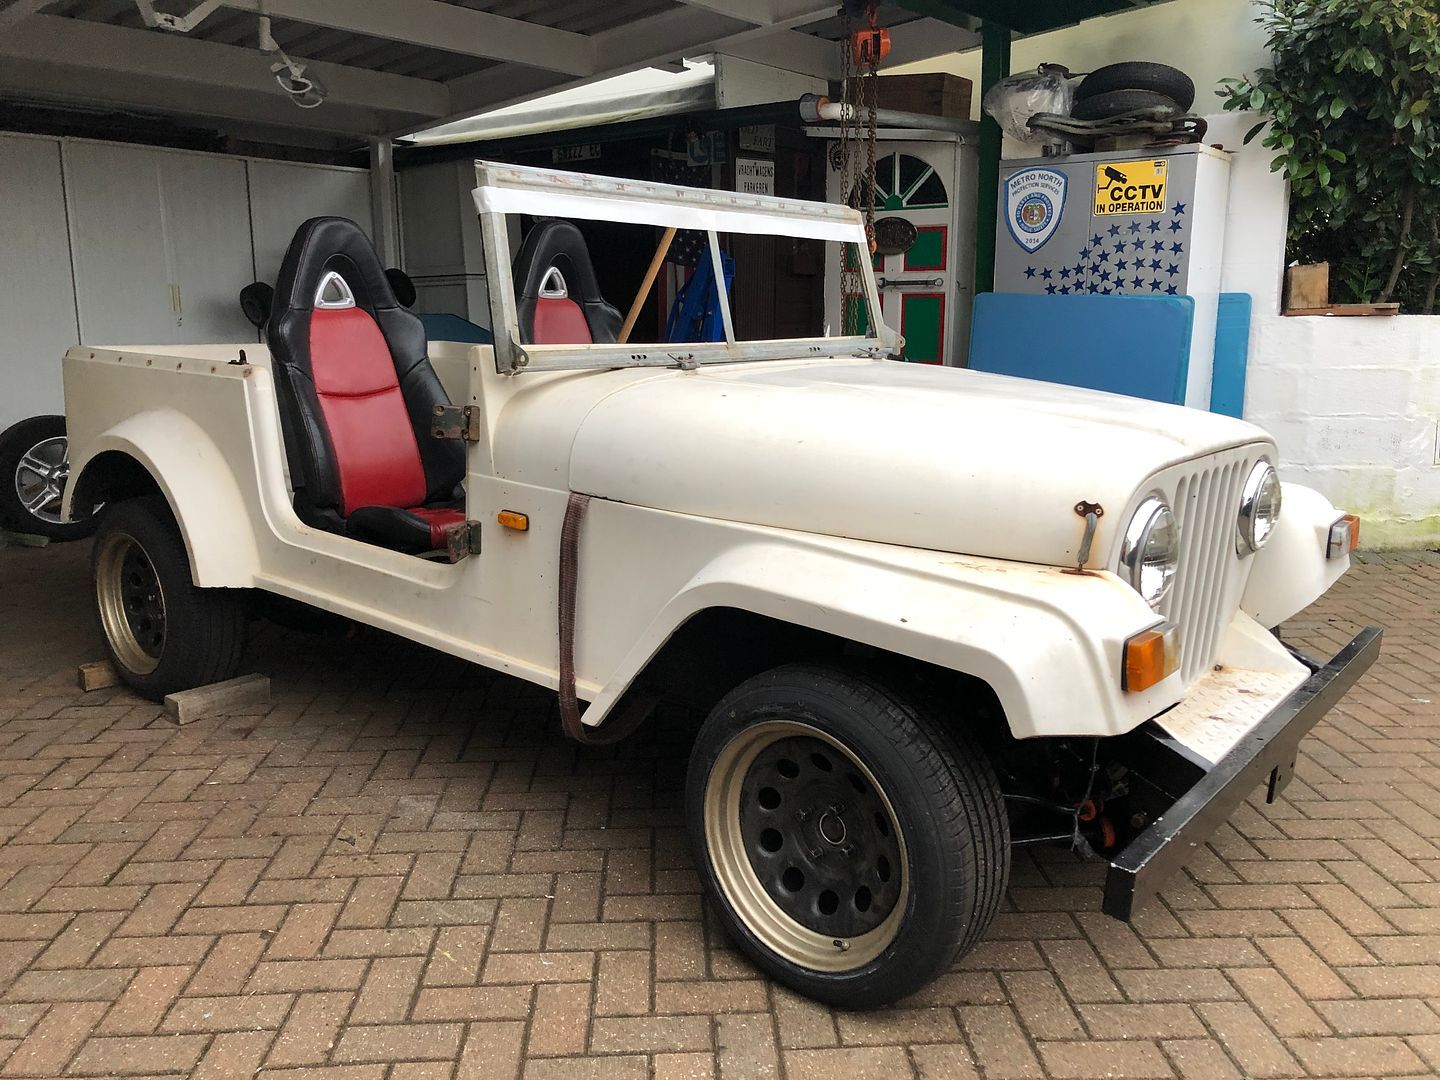
Next, I took two photos of the 50mm chop from 1/4 side front view.
You have to visualise what it all will look like chopped, along with the body lowered as it stands.
Deducting the existing top of frame and seeing only the masking tape as the new screen top.
Can you see it?
Then, just to really mess with my own, and you guys minds
.
I put the screen flat in front of where it will be mounted, again, just to create the illusion to help me think, but at this point I was struggling to really see it.
At this point you need to actually look at the original top of the screen to see where 50mm would be relative to the body, or is]f you screw your eyes up, maybe the masking tape will show where 100mm would land, though it would suck to drive, like a chopped rat rod may be.
Thank you all for your interest, input and opinions, advice etc.
The glass will need to be cut as well, so where to cut and shorten the frame comes into play.
I have no idea what sort of money new glass may be.
Off we all go
.