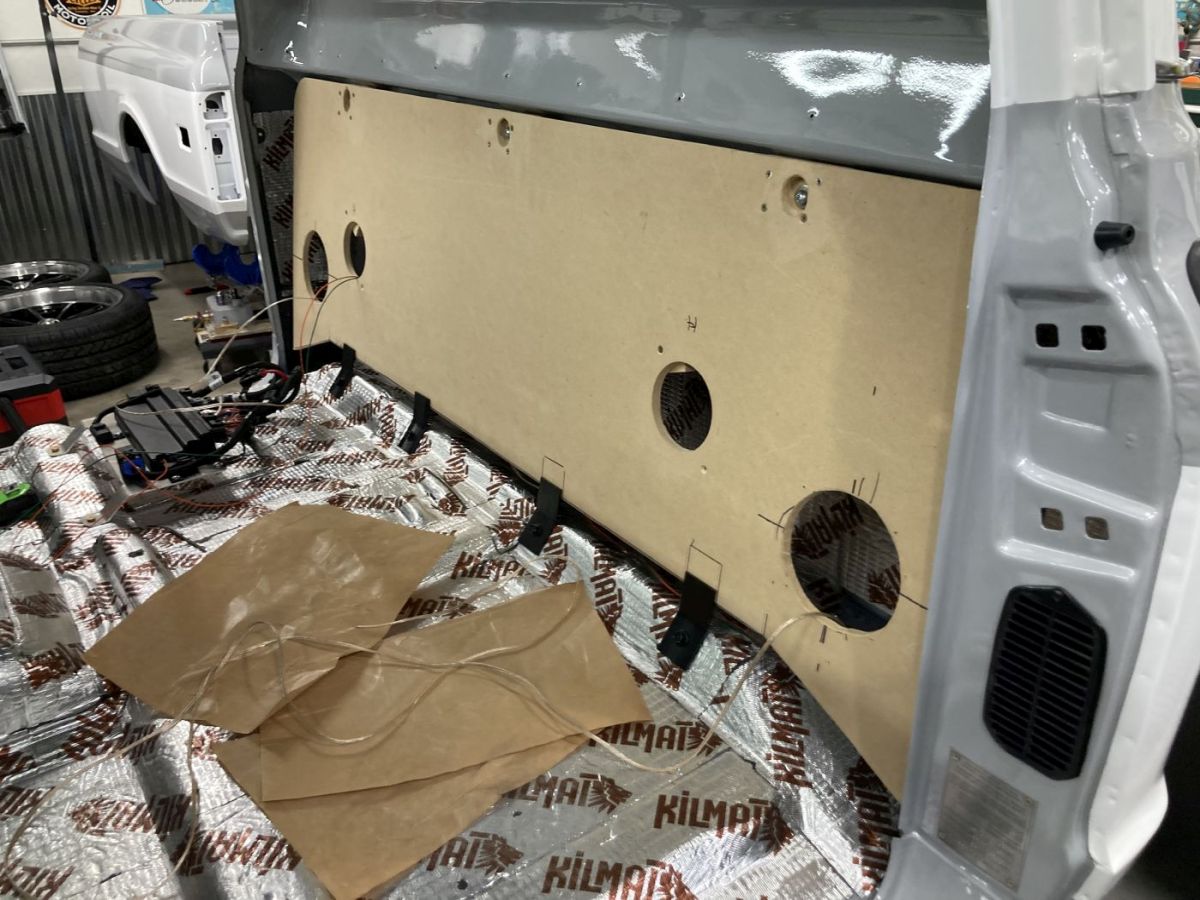
Since I wasn't going to be running an in cab fuel tank, I thought maybe I would hack one up to have a space to install wiring, future air ride stuff, or whatever. Either way, I needed something with some structure to attach the rear carpet too. Hindsight being what it is, all of the new replacement carpets aren't made to attach to the factory metal below the window, but rather with some sort of hanging cleat system. That's a problem for another day, but I ended up making a back panel out of mdf board. I fit the old tank to see what the factory angle looked like and decided to match the angle of the rear window ledge. I should gain a little room behind the seats. I hadn't planned on doing much of a sound system, but we're here and everything is out in the open and the painless harness came with speaker wires back here, so here we go. The larger holes will be for speakers and be somewhat hidden by the seats with the small holes being handholes for reaching in. They have wooden plugs to seal back up. I wanted to raise the panel up enough to be able to pass a few more wires and hoses underneath and be able to tuck the carpet into. I made some small brackets out of bent flat iron with a welded angle to accomplish this. These bolt into the factory gas tank holes. The top is mdf stacked on the back to acheive the desired angle with a countersunk hole matching up to the factory holes as well.


Found out a 60-66 filler neck is available as a separate piece as they have a short piece of rubber connecting to the tanks on those trucks. It seems to have plenty of friction on the gasket and the collar will keep it from receding.


Next up, the infamous Counterpart dashpads. I did hit mine with the matching colorbond paint I used on my other interior pieces as the color that it came in was a very solid bright blue. It needed to be a hair darker with a hint of metallic. After a little research, I learned that having to slot the screw holes is par for the course with these things, and a couple of hours of tedious filing, we installed. I tightened the bottom screws first and then slowly worked the top studs/nuts with frequent checking from the front to make I wasn't distorting the metal plate and causing it to get wavy. I think it looks as good as it can for being a reproduction piece and having a dozen attachment points.


I don't have any photos of the AM radio restoration, but just a run of the mill ebay acquisition. Dissassembled, cleaned and polished up best as possible. It happens to work so I bought a cheap speaker and will have it functional, but nothing much more to say about that. Will be adapting wiper knobs to fit because the stereo knobs are ridiculously priced imo.