
|
Register or Log In To remove these advertisements. |
|
|
|
|||||||
 |
|
|
Thread Tools | Display Modes |
 12-24-2008, 09:51 PM
|
#1 |
|
Registered User
Join Date: Jun 2008
Location: Honolulu, Hawaii
Posts: 82
|
Newbie Build, 69 fleetside
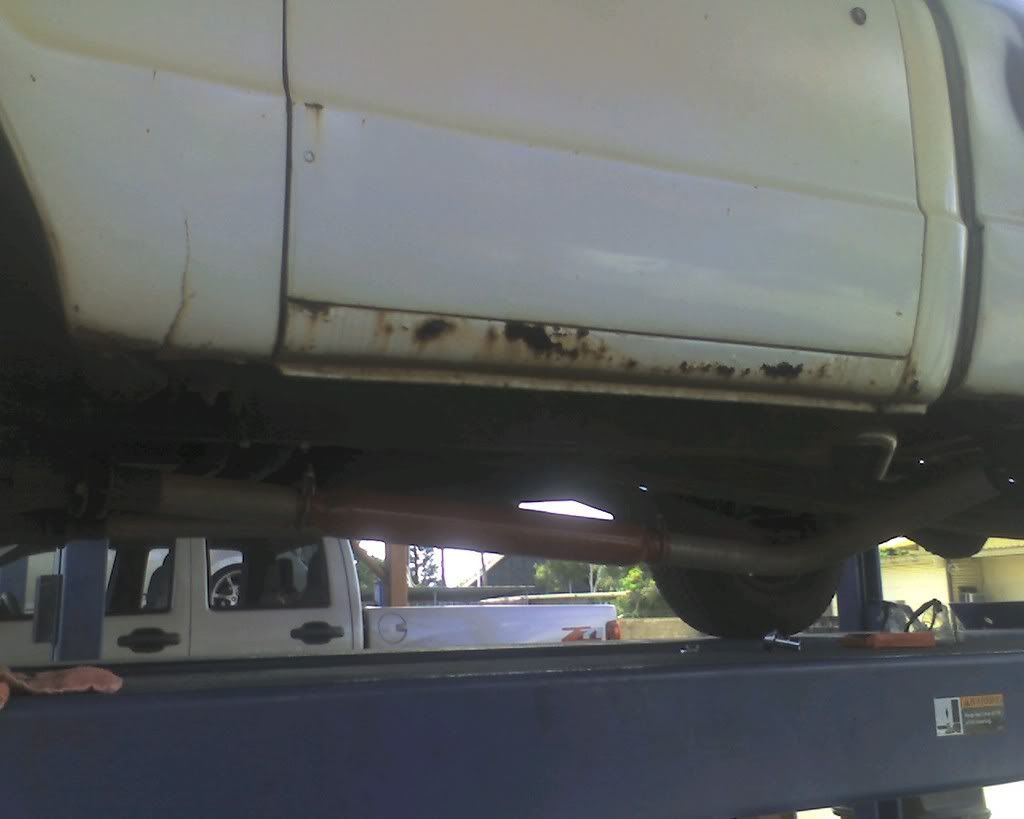
well since my first thread got out of hand, i might as well make one more with some progress picture, this truck was in such bad condition after stripping paint and layers of bondo where there shouldnt have been, that im going to be satisfied that its going to end up in omaha orange and driving nice at the end of the day.. also running out of time because i rent a stall to work on it in, and i leave for yet another deployment at the end of january.
this is my first time doing any kind of bodywork, and i usually read up on a lot of everything and practice by doing things, so the work im doing isnt the greatest and i expected that, but if i didnt do anything, this truck would have surely ended up being just a donor truck later to some other guy, and been one less on the road. so heres the pics i have so far. theres some more i havent uploaded yet, of the rear window repair, but it gives a good idea. you can see the rust in the back corners of the rear window, it was rusted trough on both sides, inside and out, so ended up stripping it, cutting out the rust and using the sheetmetal brake at the shop area to make a new piece for both sides 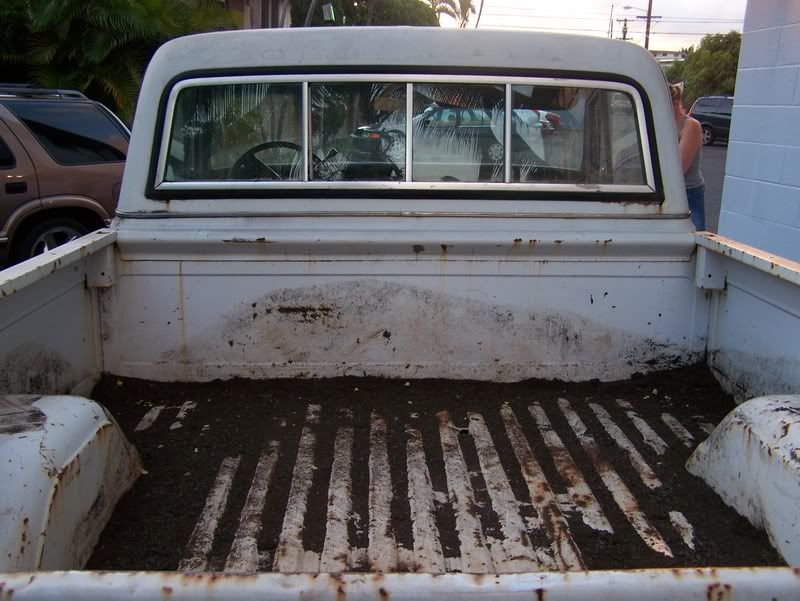 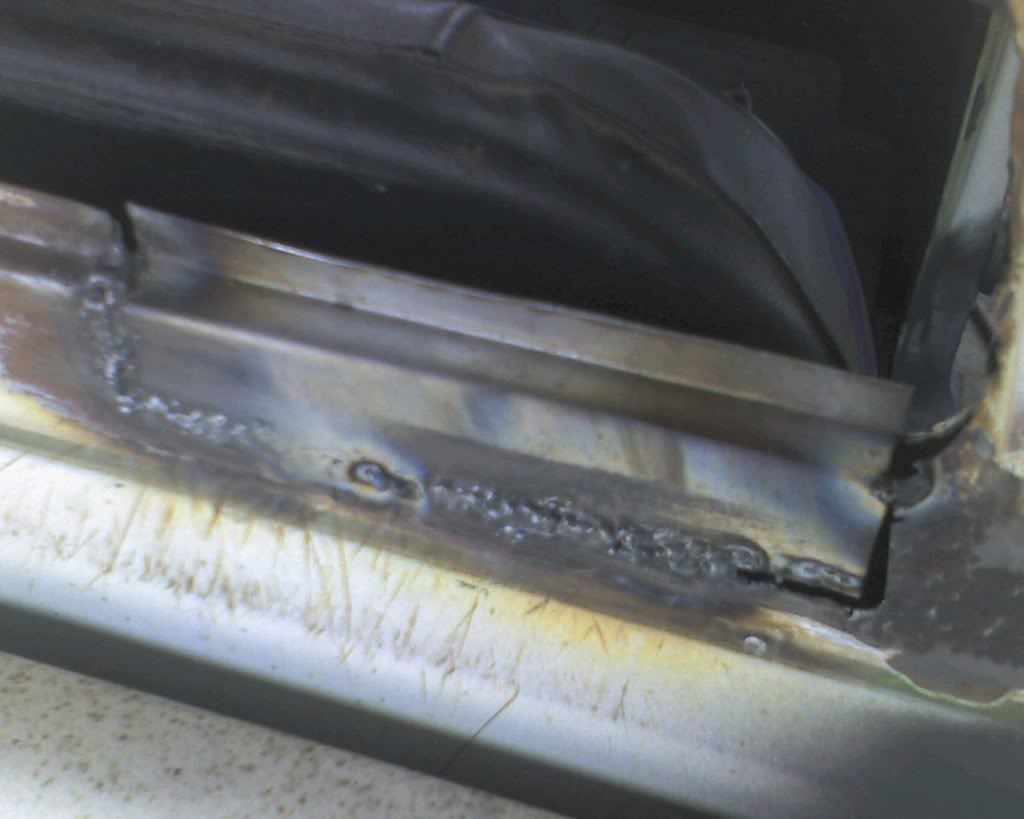 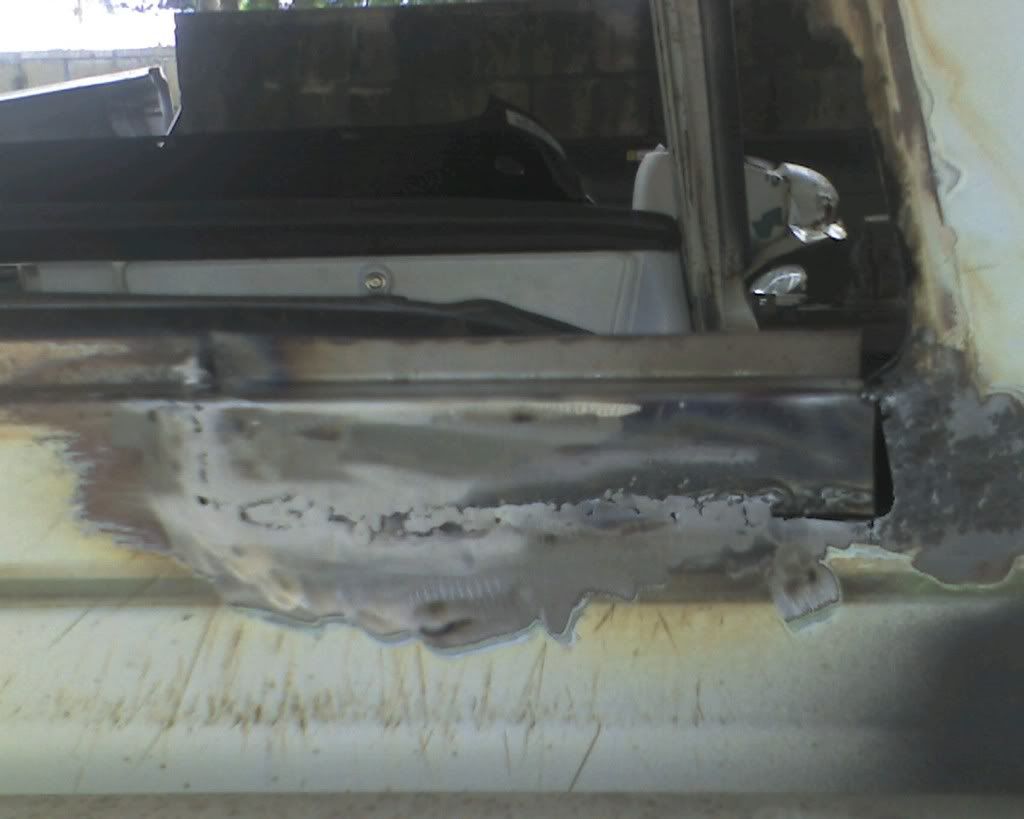 couple more welding of small spots after these two and filling in and i finished it up... bad? first time lol. and the backside before i put another piece of fitted metal and cutout in place to match up to the other repair piece.. kinda fuzzy, bad camera phone 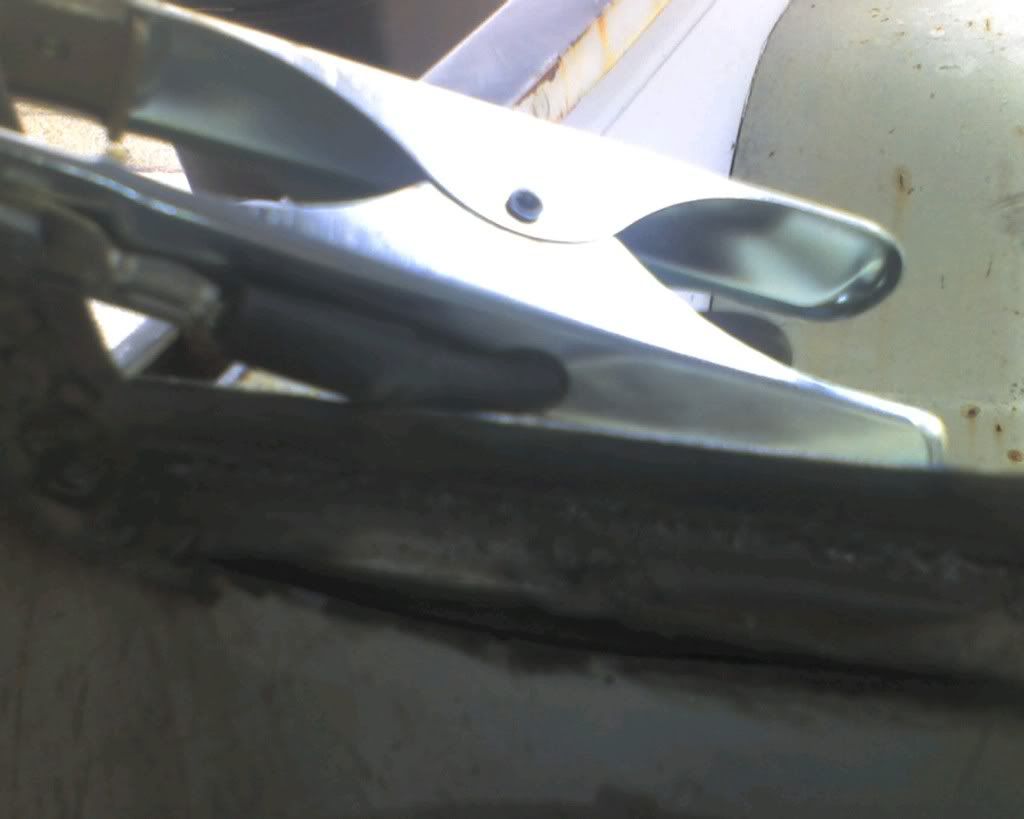 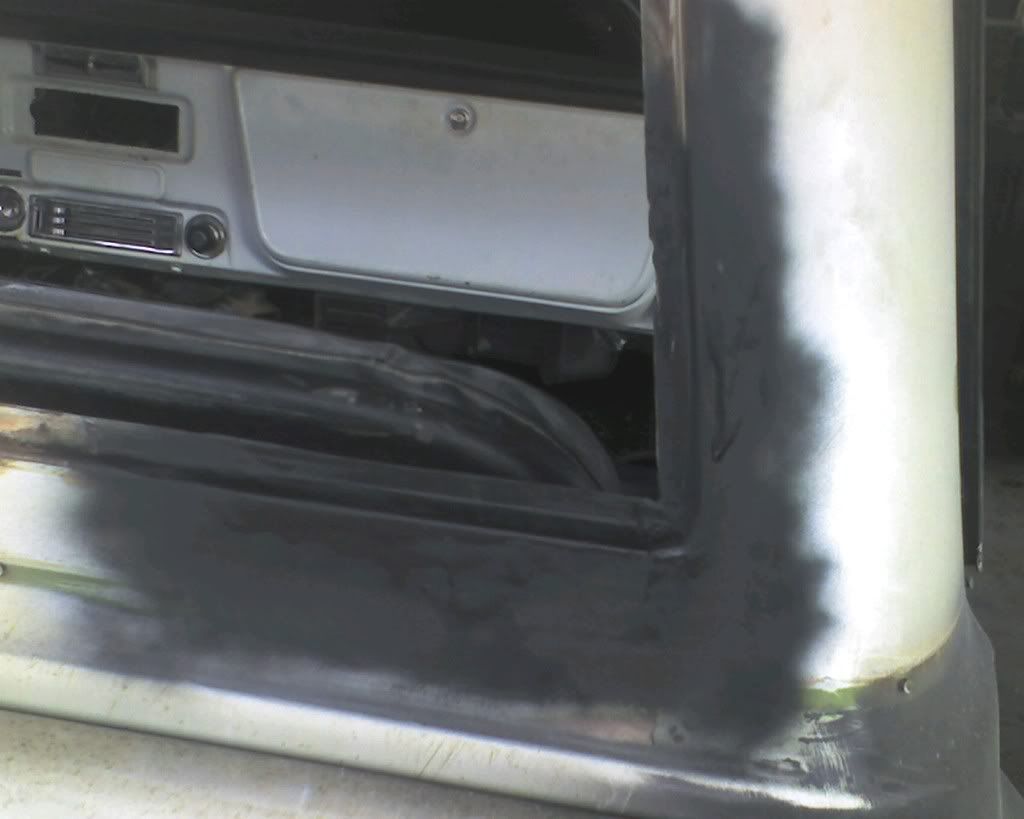 and here is the repaired backside 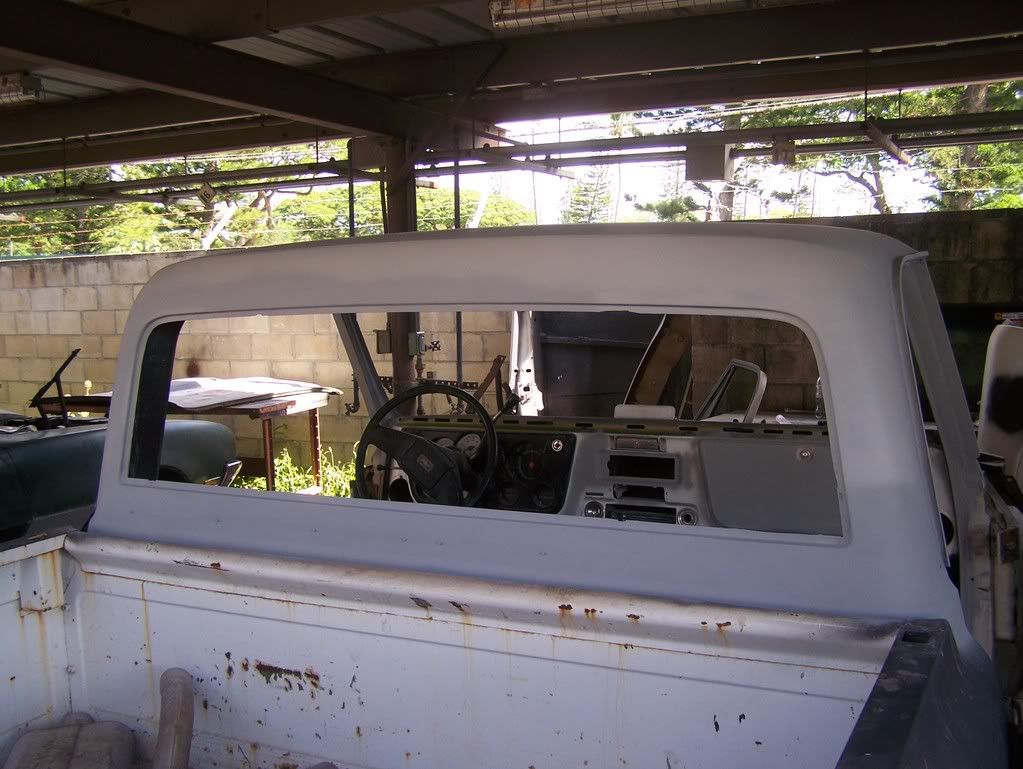 another shot from inside at the corner that was repaired with new metal 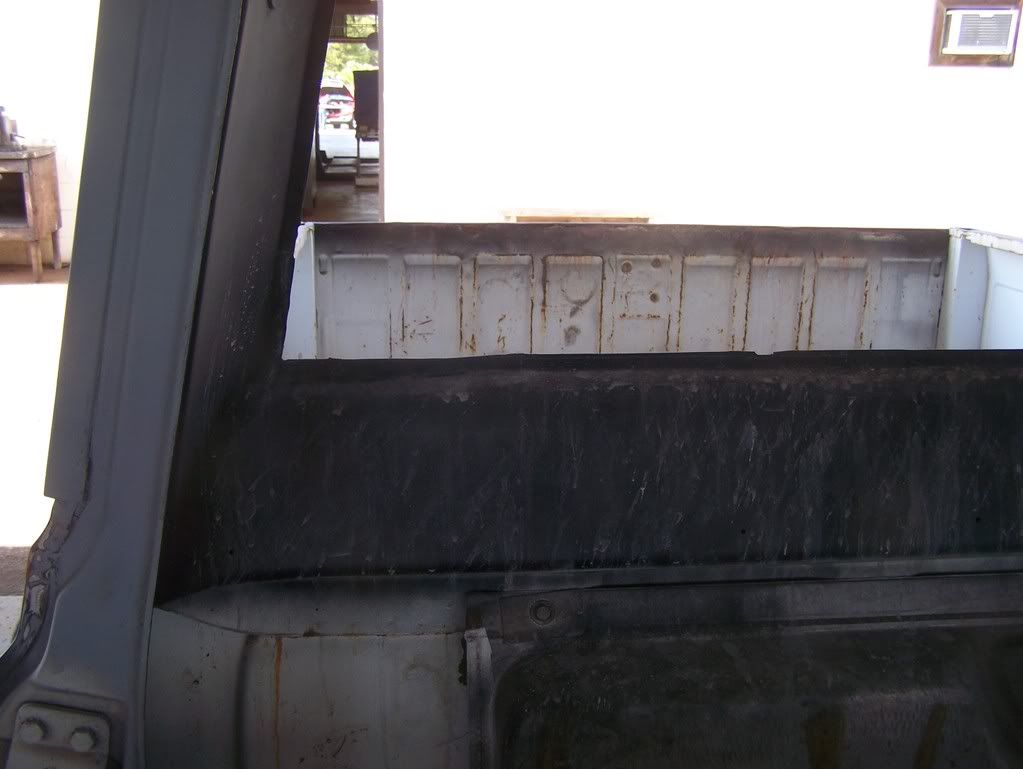 Here the drip rail was rusted through all the way, i had to strip it all the way down, treated with rust converter for the areas that were harder to reach (it was only small pocked areas that were treated, the rest was ground down to good metal), and then patched with small patch panels then smoothed out... sorry i wasn't too good to remember to take pics throughout the process i did things 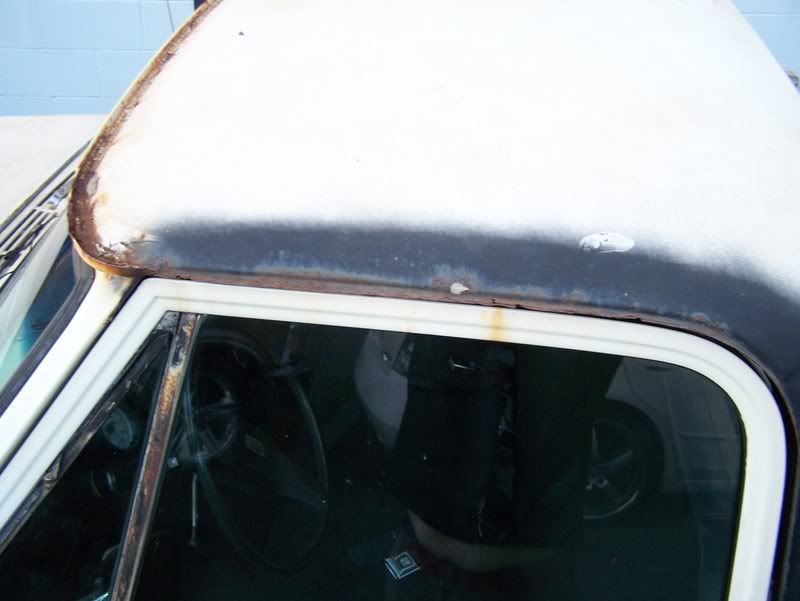 and here is what it looked like after i was done with it, almost completely done with it, but needs to be blocked still, also the front right corner looks weird because the previous over had ground down the drip rail in a couple areas.. i guess in an attempt to fix it early on or alleviate water aches at the corners so it was no longer standing water.... 
|

|

|
|
12-24-2008, 09:53 PM
|
#2 |
|
Registered User
Join Date: Jun 2008
Location: Honolulu, Hawaii
Posts: 82
|
Re: Newbie Build, 69 fleetside
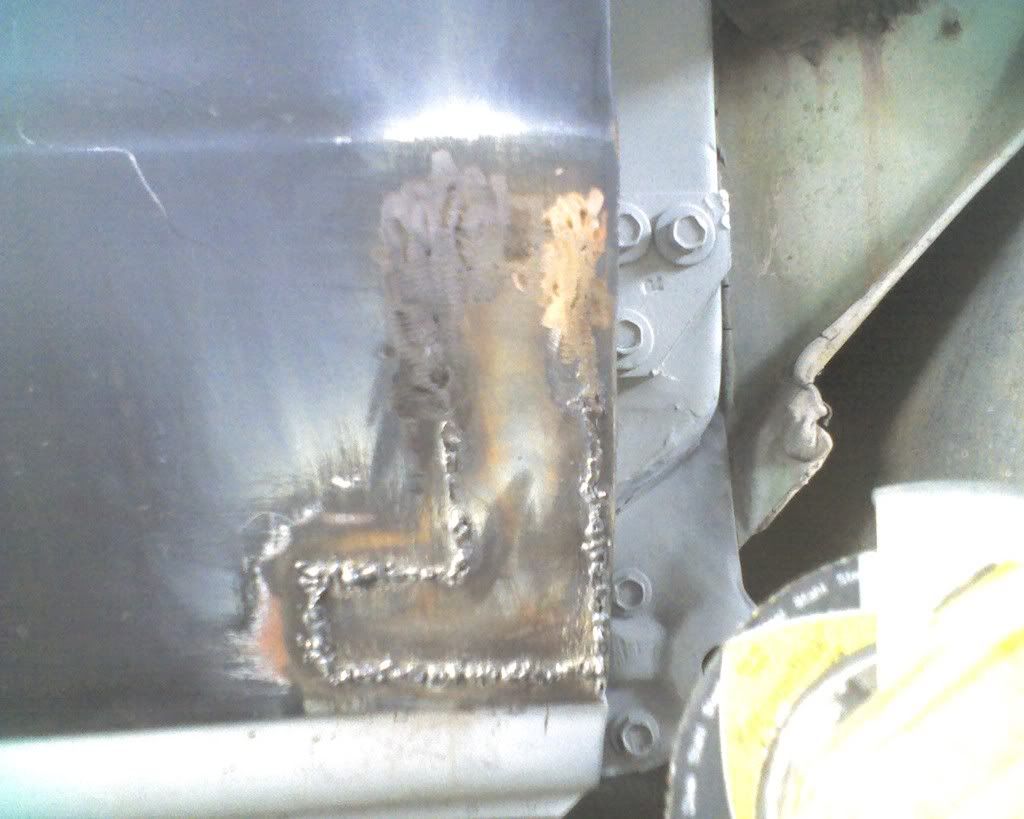
the rockers on both sides were completely gone, and were so bad that they had to be cut out.. drilling spot welds sure got rid of the spot welds, but the rest of the metal was fused together through the powers of rust
 here is the progress. didnt take any as per finished photos or progress through the whole process though lol, but im sure everyones seen enough go off and come on 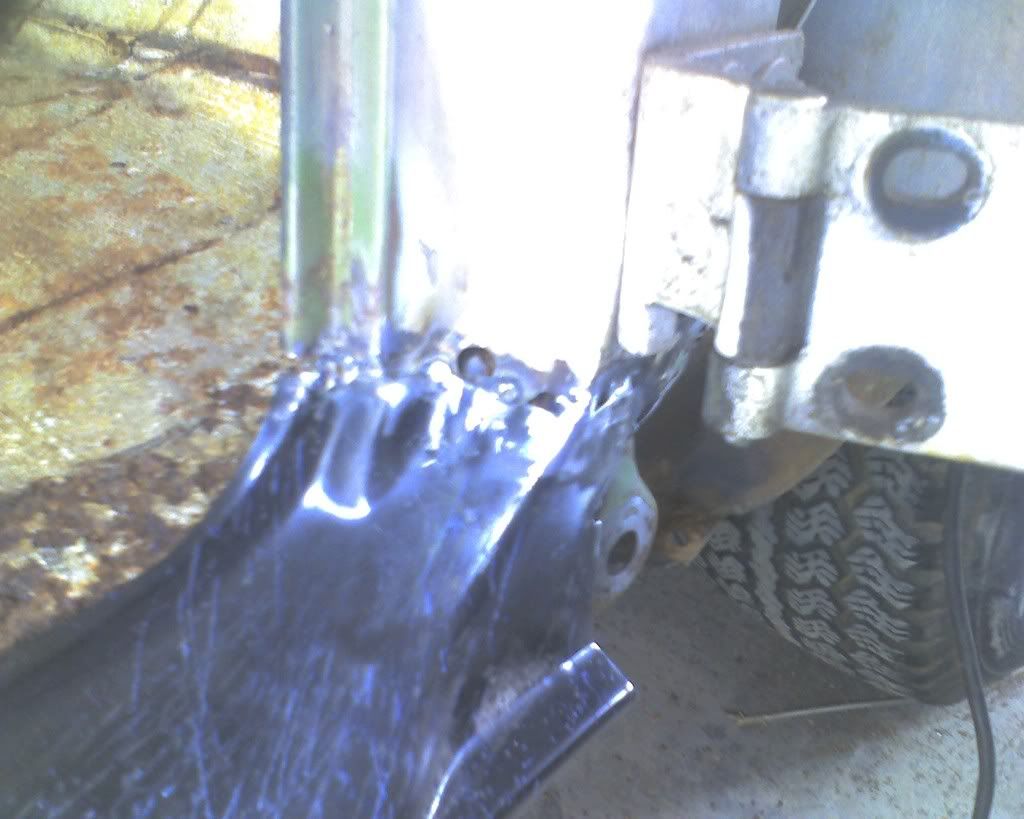 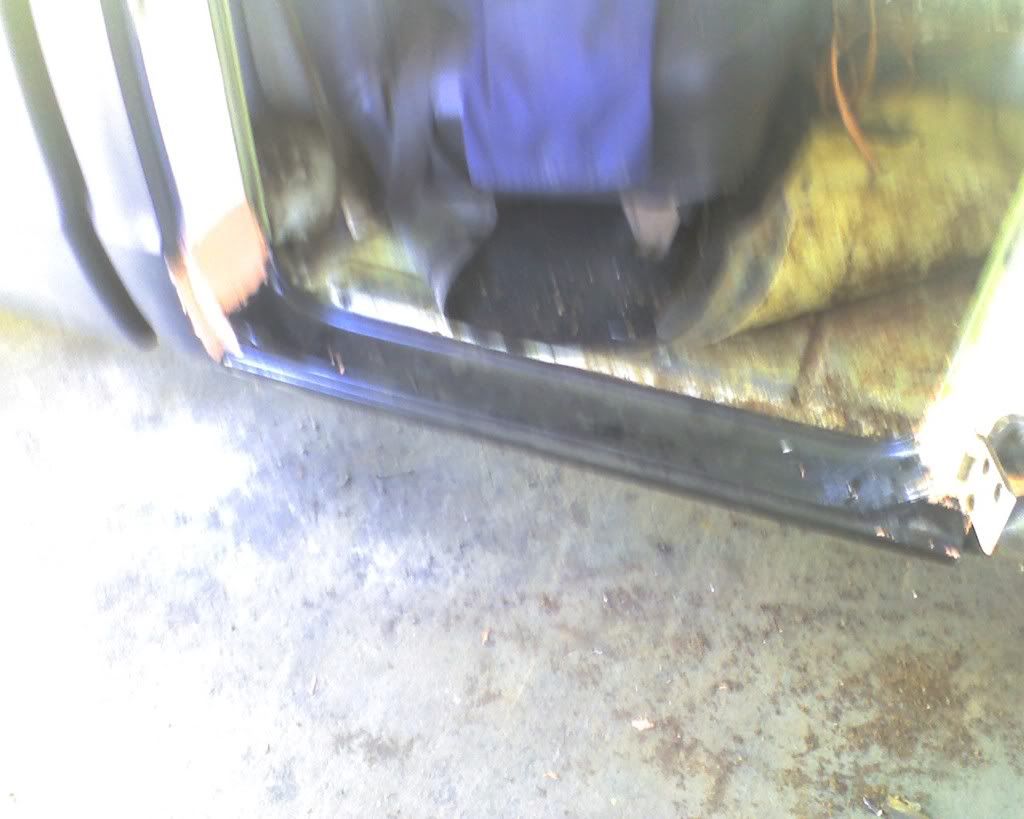 wish i had a pic of it right now, after most of the thin layer of bondo was sanded away, its pretty smooth and stock looking, its not completely molded in, so i still have that lip that the truck has stock where the rocker connects through spot welds. the overhead in the truck was pretty messed up, the entire head panel was rusted through so much, that the guy was driving it i guess loved rust falling in his face as he drove... i had a literal bucket of rusted metal fall through the overhead after cutting it out to replace 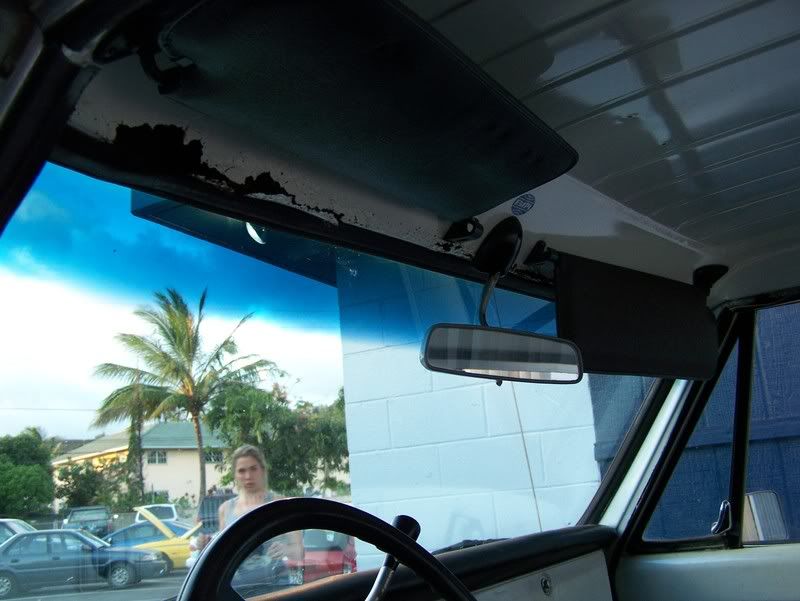 i couldnt get the patch panel to get in without having to severely bend it for the life of me. so i cut my losses....in half  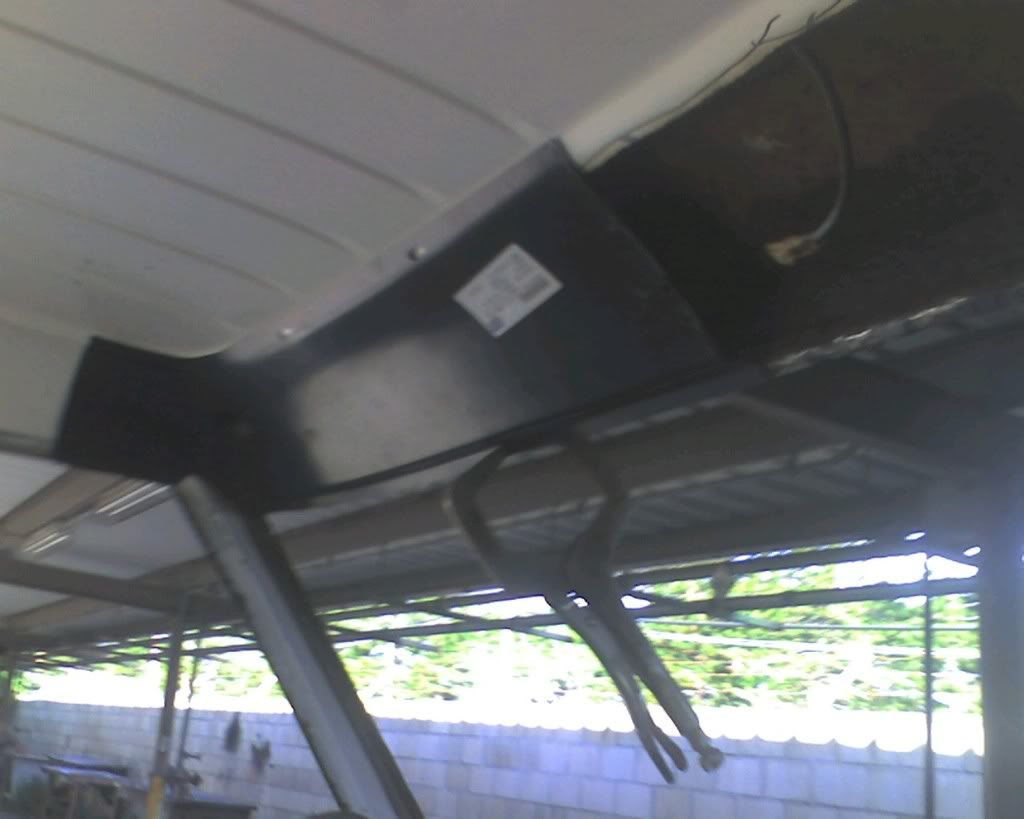 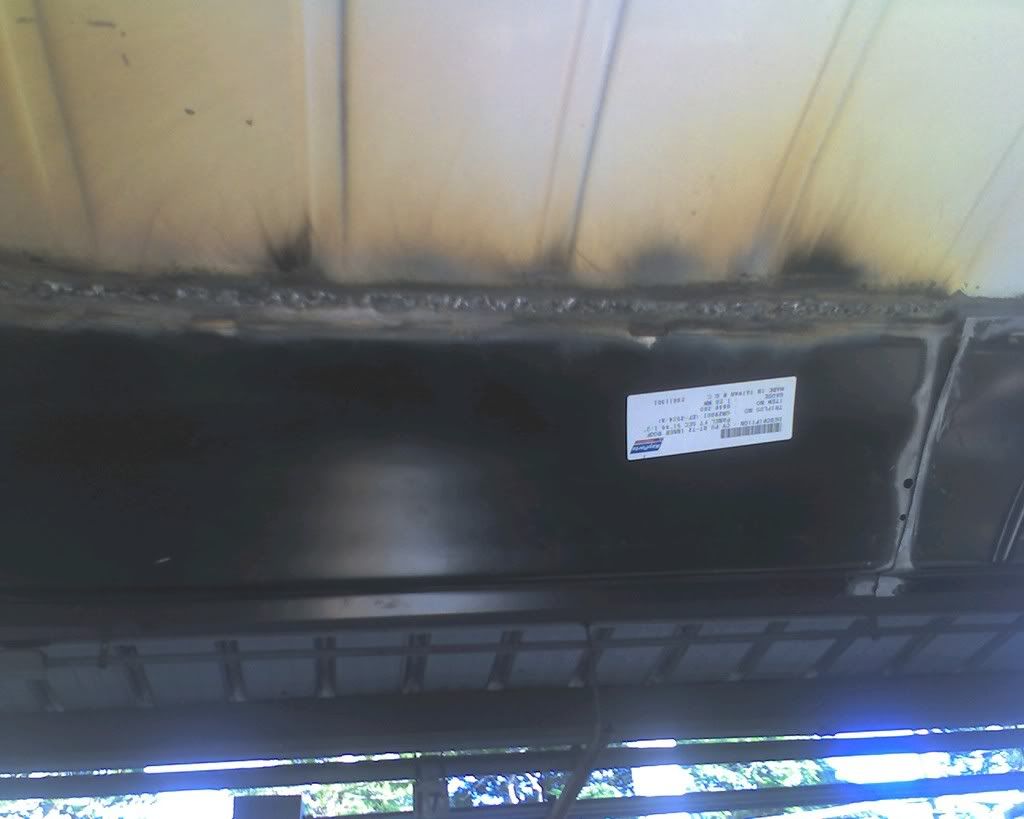 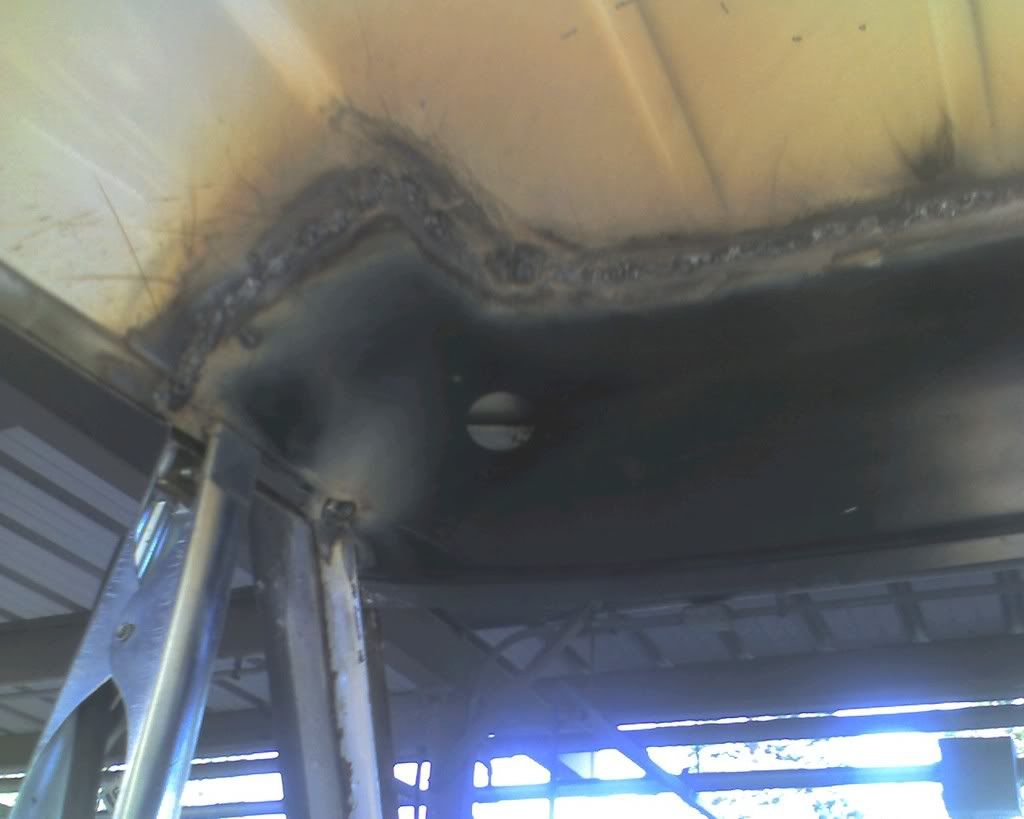 i know, i know, prettiest welds youve ever seen from a 200 dollar home depot wire feed mig special huh..... if you havent noticed, still learning on this too... and heres proof that the angle grinder is my best friend 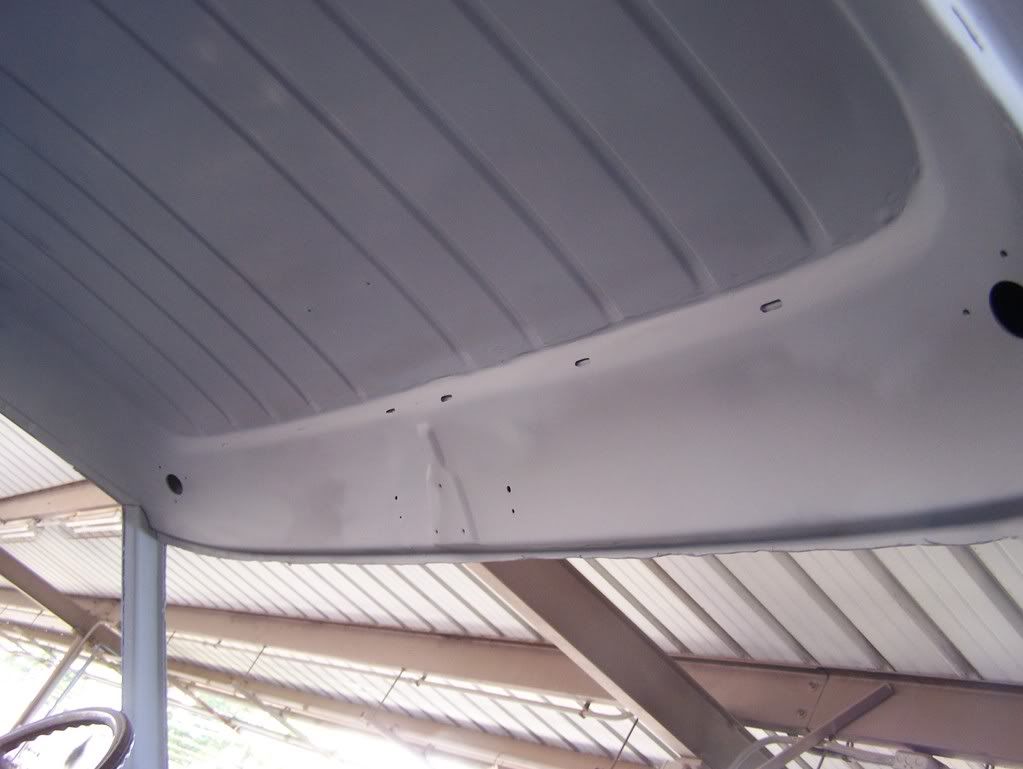
|
|
|
|
|
12-24-2008, 09:53 PM
|
#3 |
|
Registered User
Join Date: Jun 2008
Location: Honolulu, Hawaii
Posts: 82
|
Re: Newbie Build, 69 fleetside
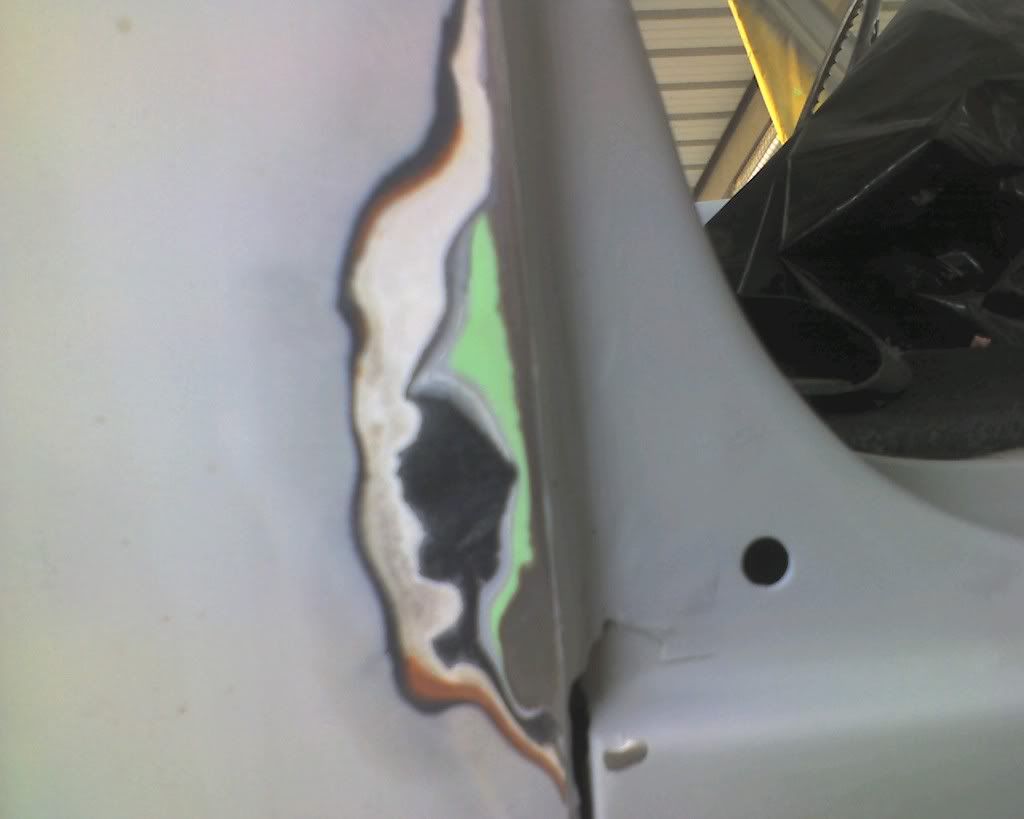
every adjacent area to the overhead was rusted out, after the drip rail failed and leaked water in, everything rusted where water got to, the head panel, the tops of both pillars, the bottoms of the pillars, even the upper part of the door frame was completely rusted out, i cut it out in a nice long rectangle and replace with another piece of metal, it warped a little bit because i wasnt spot welding and jumping from place to place like i shoulda been, but it turned out ok after enough wacking with a hammer and smoothing.
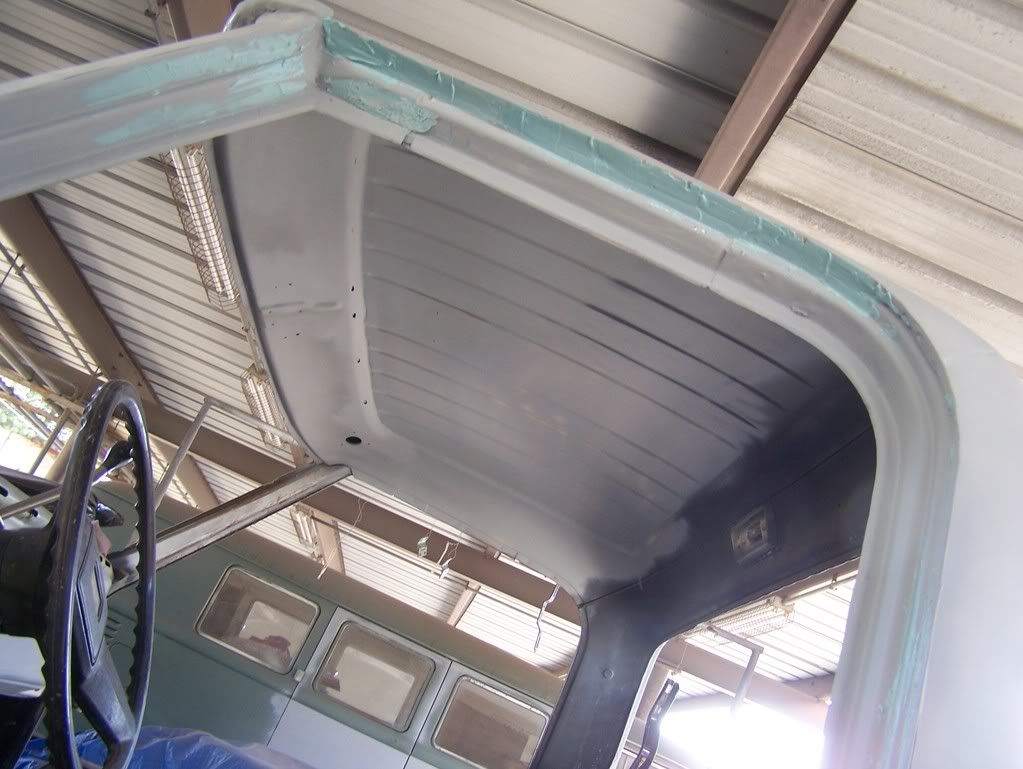 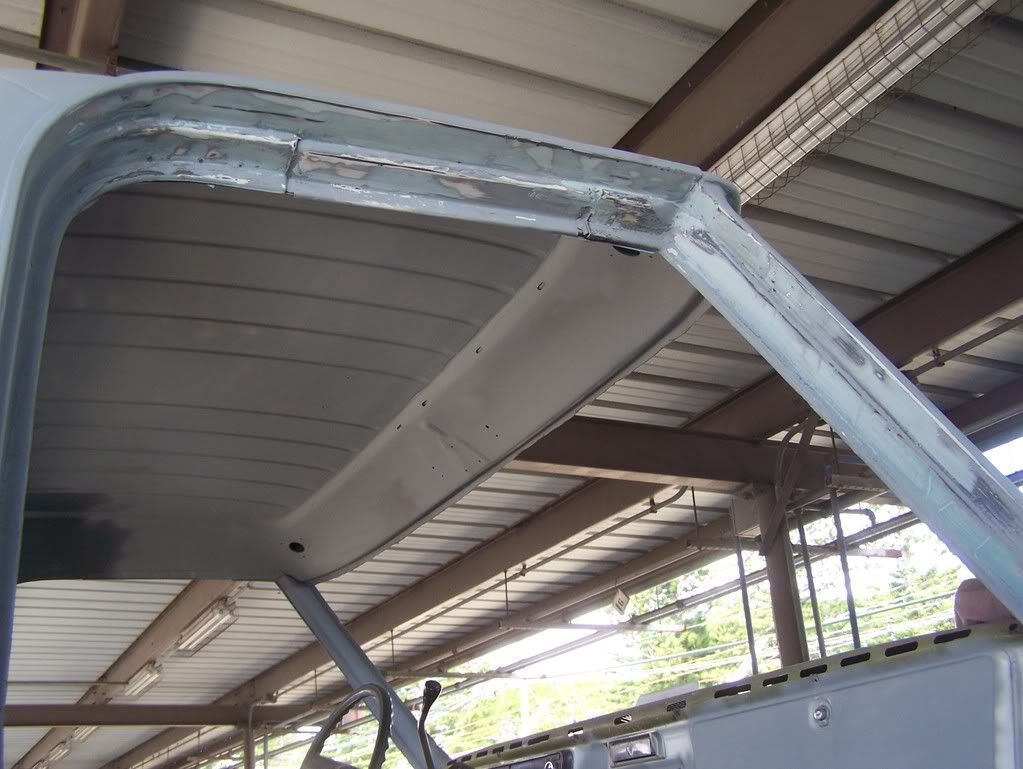 ill have some finished pictures of this area later. this pic here shows the front a little, you can see the tops and bottoms of the pillars and see the repairs... i didnt put in replacement metals though, i ended up grinding out everything and since it was so pitted i had about a quarter size piece of metal and then had to fill in the rest since it was such a curved surface and it was all i could do at the time, turned out good and its still new metal. 
|
|
|
|
|
12-24-2008, 09:59 PM
|
#4 |
|
Registered User
Join Date: Oct 2007
Location: Sherwood Oregon
Posts: 1,908
|
Re: Newbie Build, 69 fleetside
Looks good, must be interesting building one of these in hawaii. What are the plans after you get the rust taken care of?
|
|
|
|
|
12-24-2008, 10:19 PM
|
#5 |
|
Registered User
Join Date: Jun 2008
Location: Honolulu, Hawaii
Posts: 82
|
Re: Newbie Build, 69 fleetside
just planning to make it driveable and look nice, after rust ill finish lowering it (i put 6" drop spring sin back when i got it) and do the paint myself (learning on that too hah), still have to be able to sell it when i get off the island, i dont have the time to take it off the frame or anything, and mostly its alot of practice for when i get out of the military and go home to omaha, neb and find a decent swb stepside to do up, completely stripped, off the frame and everything.. but id rather take some complete junkers and get better at patching and welding first before hacking up a good truck by accident lol.
Last edited by Kracin; 12-24-2008 at 10:20 PM. |
|
|
|
|
12-28-2008, 10:06 PM
|
#6 |
|
Registered User
Join Date: Sep 2008
Location: CASA GRANDE AZ
Posts: 4,276
|
Re: Newbie Build, 69 fleetside
Looking good
|
|
|
|
|
12-28-2008, 10:17 PM
|
#7 |
|
Tot Roddin'
Join Date: Apr 2005
Location: Mid-MO
Posts: 24,461
|
Re: Newbie Build, 69 fleetside
You are really coming along w/ this project. How difficult was the interior panel above the windshield? When I get to rebuild my '72 I will have to start on this area, and it has always worried me.
Good luck with the rest of the build!
__________________
-Nate  1969 CST SWB - Project Blank Slate (4.5/6" ECE Static Drop, 6-lug disc brake upgrade (manual), Billet Specialties Vintec 20x8.5 255/40 (F) 20x10 295/40 (R), 250 I-6) 1960 AMF Skylark - Tot Roddin' (Lowered with custom frame; soon to include custom push bar and interior) 2008 Silverado CrewCab 1LT (5.3L, 3:73, 4x4, LT1, Z-71, Towing Package) |
|
|
|
|
12-28-2008, 10:24 PM
|
#8 |
|
Registered User
Join Date: Jan 2006
Location: Garland, TX
Posts: 970
|
Re: Newbie Build, 69 fleetside
where did you find the inside sheetmetal for the roof?
__________________
'84 swb chevy '69 swb chevy '68 swb chevy '95 Impala ss-sold '89 chevy crew cab dually 3+3 |
|
|
|
|
12-29-2008, 02:29 AM
|
#9 |
|
Registered User
Join Date: Jun 2007
Location: Saskatoon, Saskatchewan,:
Posts: 2,901
|
Re: Newbie Build, 69 fleetside
looking good so far, she sure had some rust on here. And welcome from canada
__________________
James 1968 GMC "HAVOC" 1986 GMC "Frank" J.J.R.H. Design & Consulting My 68`Rebuild "HAVOC": http://67-72chevytrucks.com/vboard/s...d.php?t=316300 A 58' chev build thread: http://www.67-72chevytrucks.com/vboa...d.php?t=311238 1969 Camaro Pro Touring http://67-72chevytrucks.com/vboard/s...61#post3513361 Swiss Cheese: http://67-72chevytrucks.com/vboard/s...d.php?t=384390 Adjustable Trailing Arm How-To: http://67-72chevytrucks.com/vboard/s...d.php?t=321100 1968 Ford Farm Truck: http://67-72chevytrucks.com/vboard/s...=1#post6555587 |
|
|
|
|
12-29-2008, 05:13 AM
|
#10 | |
|
Registered User
Join Date: Jun 2008
Location: Honolulu, Hawaii
Posts: 82
|
Re: Newbie Build, 69 fleetside
Quote:
for the other reply, i got the panel from LMC, its in their magazine under the replacement panels section for the cab, i believe its called the inner header panel? 100 bucks from lmc. apparently its such a popularly rusted place they made a replacement panel for it hah. and thanks for the kind replies on this, im never feelin to great about the build, but its good to hear that some people think its goin good. |
|
|
|
|
|
12-29-2008, 09:00 AM
|
#11 |
|
Champagne Taste on Beer Budget
Join Date: Dec 2008
Location: High Ridge, Missouri
Posts: 2,190
|
Re: Newbie Build, 69 fleetside
Yeah its about what I have to start working with myself.
Keep us updated as its coming along nicely.
__________________
Coming Soon: Project 1970 Country Truck |
|
|
|
|
01-03-2009, 03:11 AM
|
#12 |
|
Registered User
Join Date: Jun 2008
Location: Honolulu, Hawaii
Posts: 82
|
Re: Newbie Build, 69 fleetside
 another patch panel goes in, this should be my last patch panel needed for this project. also did patches for the drivers side cab corner, and the drivers side front fender corner (bottom) the usual rot spots, and had some fun trying my hand at sheetmetal shaping without a sand bag of any kind hah, but had dollies and hammers so i went to town and came out with a patch that worked out pretty well i think now i just need to sort out the bed of the truck, i want to do a bed liner but don't know which one is the best one for a beat up bed with some bad rust areas.. hah |
|
|
|
|
01-05-2009, 12:21 AM
|
#13 |
|
Registered User
Join Date: Jun 2008
Location: Honolulu, Hawaii
Posts: 82
|
Re: Newbie Build, 69 fleetside
ok so more done today, quite a bit more at that, i took the time yesterday to go ahead and coat the entire bed in a whole jug of aircraft paint stripper....and that jelly stuff works awesome! and doesnt have nearly the smell that the spray type does.
after the stripper was applied and set for a bit, i made a deal with the guys at the autoport to be able to pressure wash the back of the truck to remove the paint i couldnt get off with the stripper. after pressure washing the back, the whole floor of the bed was good to go and the sides were a little sketchy, so i ended up sanding with a 40 grit disc all around the edges, after sanding i used naval jelly on the bed to take care of the surface rust, some spots were REALLY bad, so i had to make due with what i could and ground down the bad areas as much as i could before the jelly was applied. washed it all clean with orange cleaner degreaser and air blasted the back until the surface was dry and clear for prep. used Acetone to wipe down the surface and prep for the herculiner (chose herculiner after seein the other options and prices for th eoptions and this seemed like the best idea for now). here is a pic of before in the bed 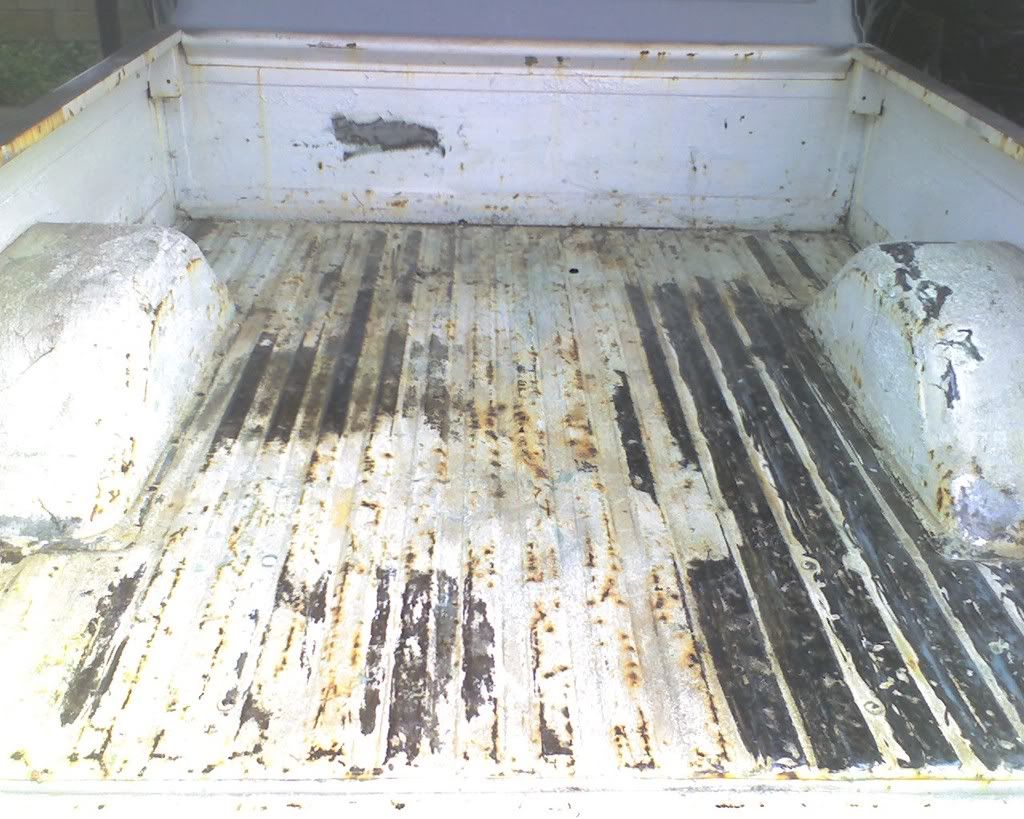 its worse than it looks in this picture, there was a ton of rust forming under the paint, and after stripping it, the back left and mid left were so pitted with rust im sure it would ave made many more holes in just another couple months of exposure... and the right side is where i spent a good 2 hours of grinding with a flap disc to get down to metal and take out as much rust as i could in the bad area there. my back was gettin tight so i sent the wife to grab some stripper! here is the bed before i was almost ready to start the coating, it looks bad but all the paint was solid and all the rust was as taken care of as i could go without cutting out huge areas and trying to find a good amount of metal to patch with, this bed is a junker bed anyway and isn't worth the effort to save, would be so much easier to get a new bottom for it, but ill use some elbow grease and less than 10% of that cost to fix as much as i can to make it look good. 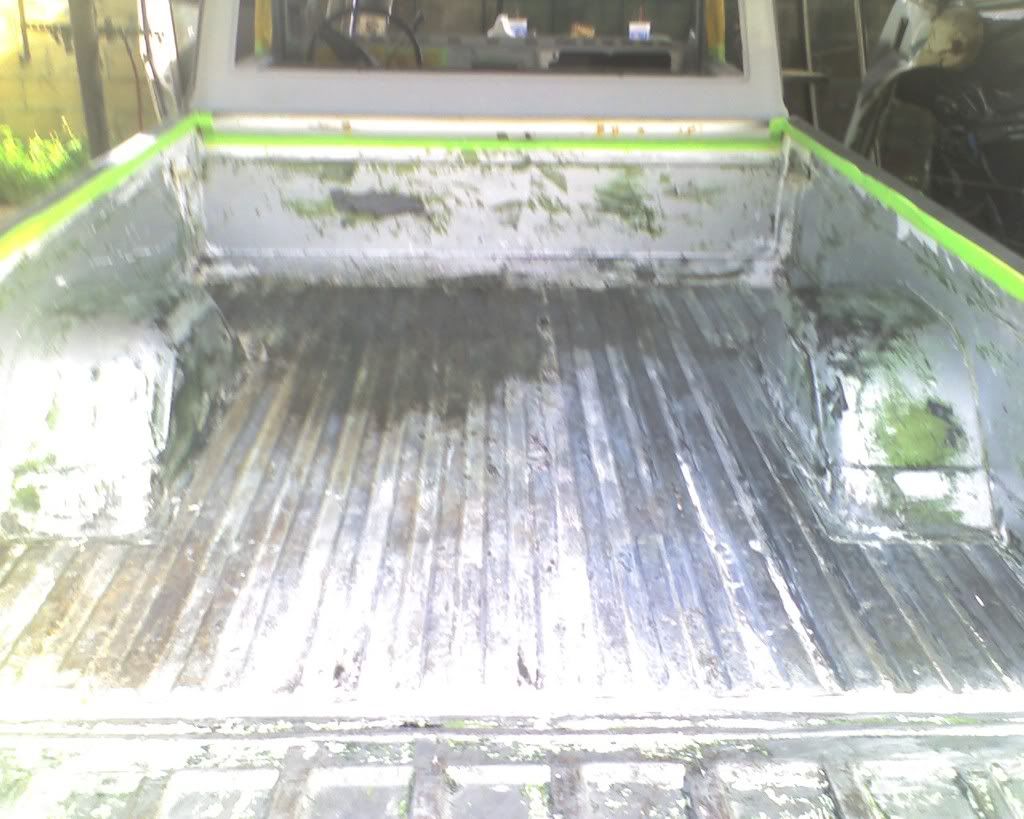 this next one is after the first coating of the herculiner, looks decent so far and is covering well and isnt having a problem sticking to any surface in the bed so im confident that the prep was good enough for the liner 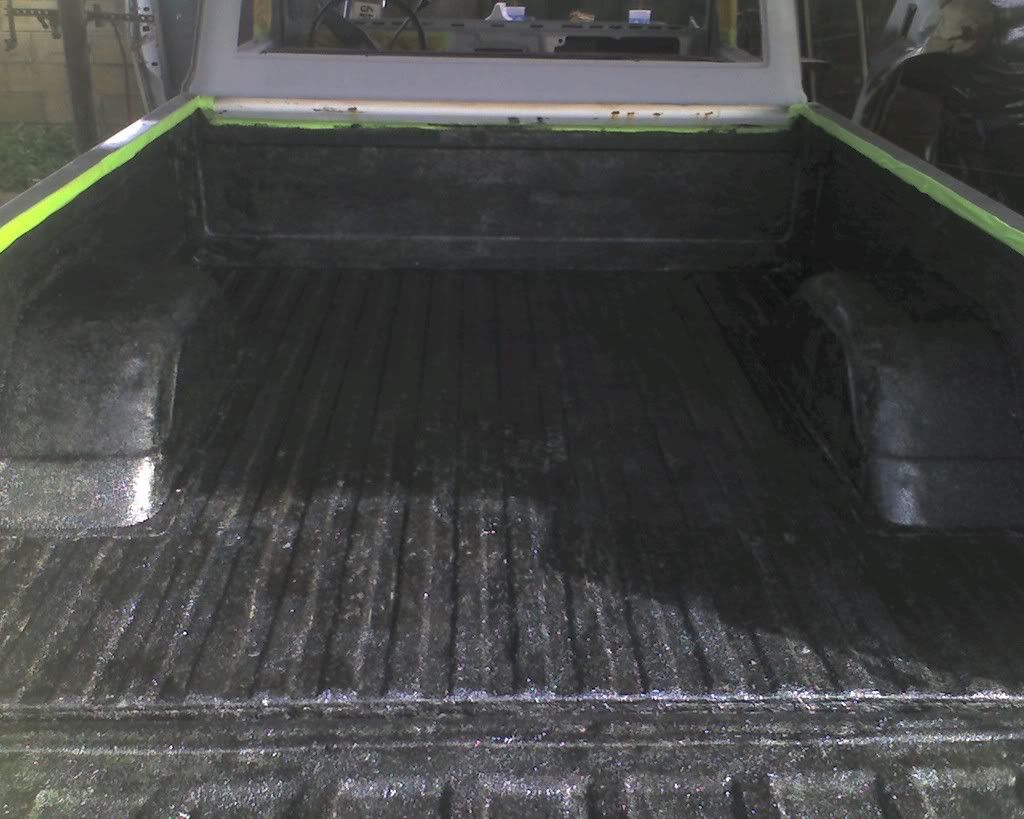 and here is the final product, im wishin i had more time (the autoport was closing in 5 minutes) and another quart to give it one more pass just to make sure its a thick enough coating and i also saw a couple spots that you could barely tell that it needed more, but i can always add more later if i find that it needs to be strenghtened. 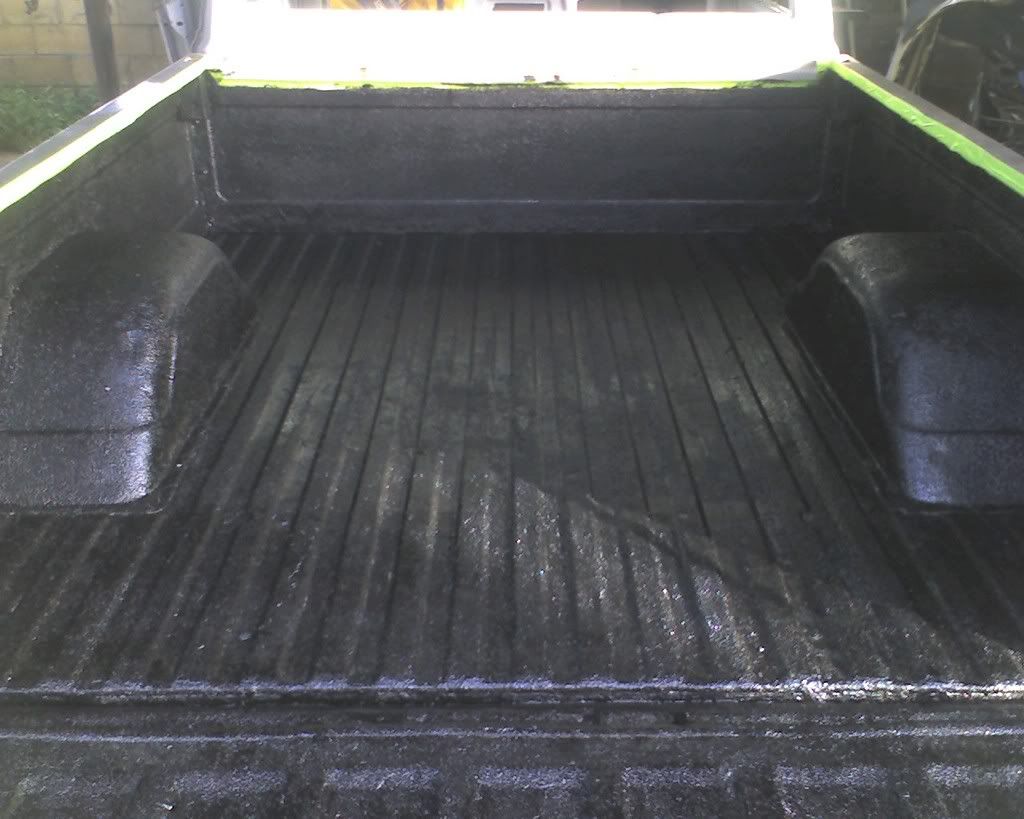 overall im satisfied for 100 dollars worth of materials and 8 hours of stripping and prep work and application. |
|
|
|
|
01-05-2009, 12:55 AM
|
#14 |
|
Hittin E-Z Street on Mud Tires
 Join Date: Nov 2004
Location: Greenville, SC
Posts: 23,090
|
Re: Newbie Build, 69 fleetside
I remember the first thread...
You should be VERY proud of yourself!! Not only did you tackle the DIFFICULT overhead panel replacement, but you're fixing all the rust the right way! Good job man  The Herculiner looks good, I've been thinking about getting it for my trucks.
__________________
Jesse James 1967 C10 SWB Stepside: 350/700R4/3.73 1965 Ford Mustang: 289/T5-5spd/3.25 Trac-Loc 1968 Pontiac Firebird: Project Fire Chicken! 2015 Silverado Double Cab 5.3L Z71 2001 Jeep Wrangler Sport 4.0L 5spd 2020 Chevrolet Equinox Premium 2.0L Turbo 2011 Mustang V6 ~ Wife's ride  American Born, Country by the Grace of God  1967 CST Shop Truck Rebuild! My 1967 C-10 Build Thread My Vintage Air A/C Install Project "On a Dime" Trying my hand at Home Renovation! 1965 Mustang Modifications! Last edited by 67ChevyRedneck; 01-05-2009 at 12:55 AM. |
|
|
|
|
01-05-2009, 01:06 AM
|
#15 | |
|
Registered User
Join Date: Jun 2008
Location: Honolulu, Hawaii
Posts: 82
|
Re: Newbie Build, 69 fleetside
Quote:
so hopefully this cruiser will be done in another 2 weeks after i get my parts from lmc (5 weeks and counting now waiting on parts from lmc). |
|
|
|
|
|
01-05-2009, 01:10 AM
|
#16 |
|
Registered User
Join Date: Jun 2008
Location: Honolulu, Hawaii
Posts: 82
|
Re: Newbie Build, 69 fleetside
oh, and for reference, i think this truck has been painted about 4 different times... it started originally as a green machine (decent color, too bad they changed it)
 the rings on the tree tell the tale. and ill be going with a sunburst orange metallic for paint, which ill be attempting myself as well with some pointers from a friend of mine who basically runs a body/repair shop for european cars (Specialty).
__________________
Active Duty Navy / Part time wanna be hot rodder? 89 Cressida w/ 408hp/674tq (with lots of wiggle room)  69 C-10 Project http://67-72chevytrucks.com/vboard/s...=1#post3066994 Last edited by Kracin; 01-05-2009 at 01:39 AM. |
|
|
|
|
01-06-2009, 02:50 AM
|
#17 |
|
Registered User
Join Date: Jun 2008
Location: Honolulu, Hawaii
Posts: 82
|
Re: Newbie Build, 69 fleetside
ok so i finally got my parts from LMC, not much, just a fender and door sill plates!! and i was so excited to finally have a good fender that i had to try and get out of work on time to get pick it up, the shipping place closed at 330, and i got out of work at 310, and got to my car about 317 (yeah its a long walk for parking on base...). and had to get through rush hour traffic in time to get there, luckily had a good guy working there that was waiting outside with my box at 336! had a hell of a time putting it in my cressida, but got it after removing it from the box and cutting the huge box to pieces so put in the trunk.
heres a picture of the fender on the truck 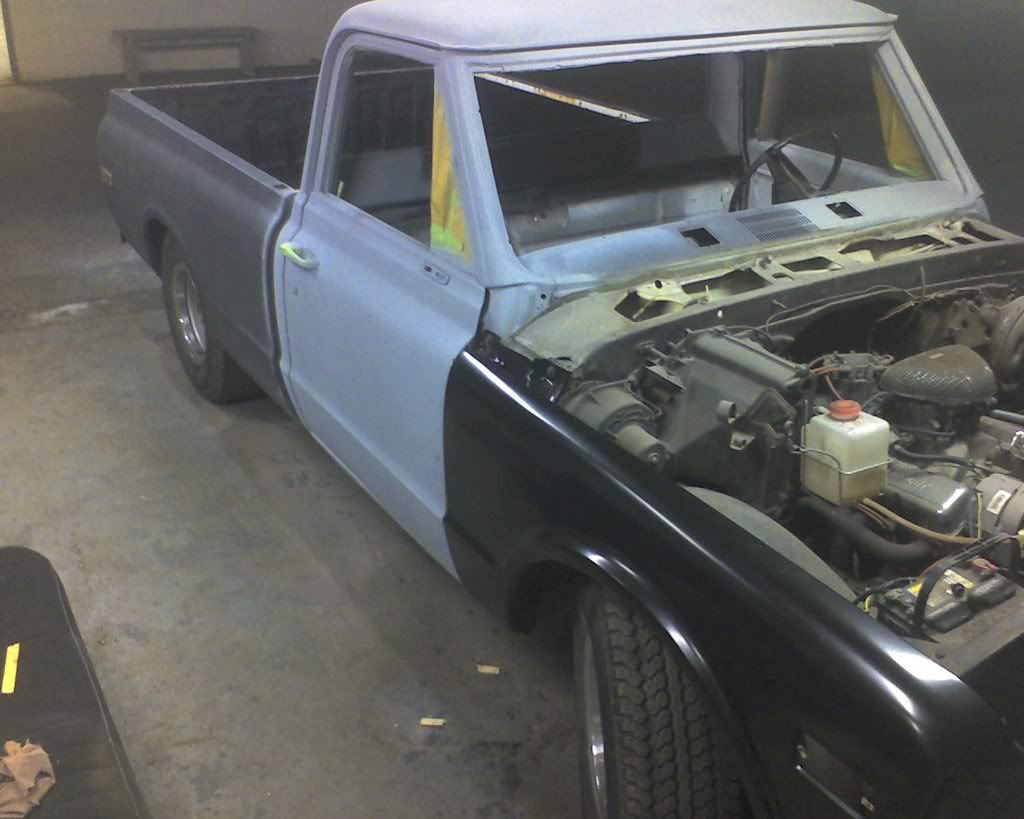 it almost fits perfect... i was excited and then noticed that the bottom left corner (on the door side) was overlapping slightly over the rocker, and then after looking at both rockers i saw that my right rocker was about 1/8th of an inch longer than my door!!!??? and my left side rocker was the same size as the door, i couldnt believe it, and knew i should have done the rocker fitment with the fender on, but unfortunately this is my first build and this is just one mistake i wont make again.. so i have a couple of options now and will try some of them tomorrow to get it to fit (hopefully widening the two top bolt holes will allow me to get it on there and then i can get the rest to line up with it attached to the wheel well. heres a pic of the lineup, sorry for the fuzzy pic, was nighttime and my camera on my phone, you can see the gap just a little wider than 1/16th next to the door, and then its overlapping by about that much on the rocker.  and of course the door sills! gonna help finish it off a bit with those on later, the ones that were on the truck when i got it were completely rusted out! argh! 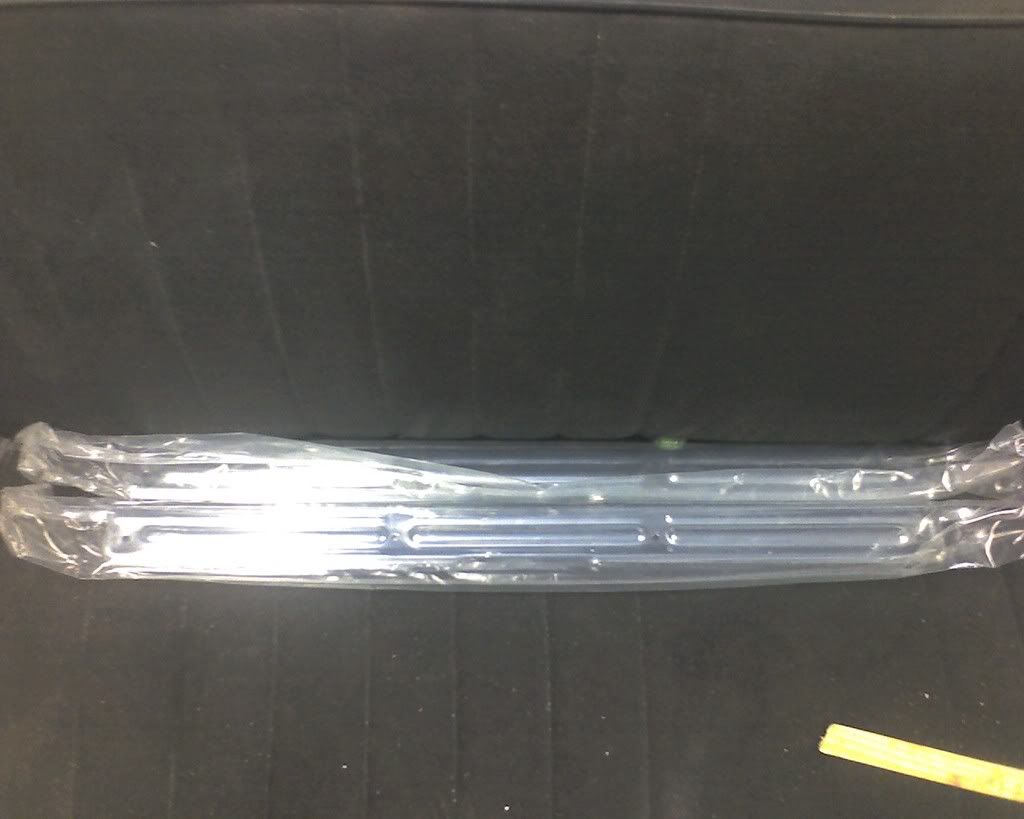
__________________
Active Duty Navy / Part time wanna be hot rodder? 89 Cressida w/ 408hp/674tq (with lots of wiggle room) 69 C-10 Project http://67-72chevytrucks.com/vboard/s...=1#post3066994 |
|
|
|
|
01-06-2009, 03:11 PM
|
#18 |
|
Registered User
Join Date: Oct 2005
Location: Dover Delaware
Posts: 270
|
Re: Newbie Build, 69 fleetside
Looking at your pics I noticed you are missing your outter drip rail on the driver side. Did you replace that to?
|
|
|
|
|
01-06-2009, 05:28 PM
|
#19 | |
|
Registered User
Join Date: Jun 2008
Location: Honolulu, Hawaii
Posts: 82
|
Re: Newbie Build, 69 fleetside
Quote:
the original owner had cut off the driver side drip rail only, i figured for rust reasons and an attempt to repair it since it was primered black when i got it.
__________________
Active Duty Navy / Part time wanna be hot rodder? 89 Cressida w/ 408hp/674tq (with lots of wiggle room) 69 C-10 Project http://67-72chevytrucks.com/vboard/s...=1#post3066994 |
|
|
|
|
|
01-07-2009, 03:15 AM
|
#20 |
|
Registered User
Join Date: Jun 2008
Location: Honolulu, Hawaii
Posts: 82
|
Re: Newbie Build, 69 fleetside
ok, so i got my fender to fit properly tonight after work, took a little bit of grinding, but i got it to fit after attaching the fender to the wheel well itself first, and completely removing all the bolts holding the wheel well in place, positioned it, ground the excess metal away to a good edge with a good amount of space in between the door and the fender. and resulted with a fitting panel, moving on to wet sanding soon.
this is the before and after, in the before you can see how the rocker extended past, since taking it off and moving it to the left more was out of the question (already lined up perfectly on the left side), i just held a curved piece of metal against the rocker and bumped the right side of it until it was even with the door, had some marks on it and some bad scratches so i had to fill in and sand away all the puddy, dont have any finished looking pic sorry 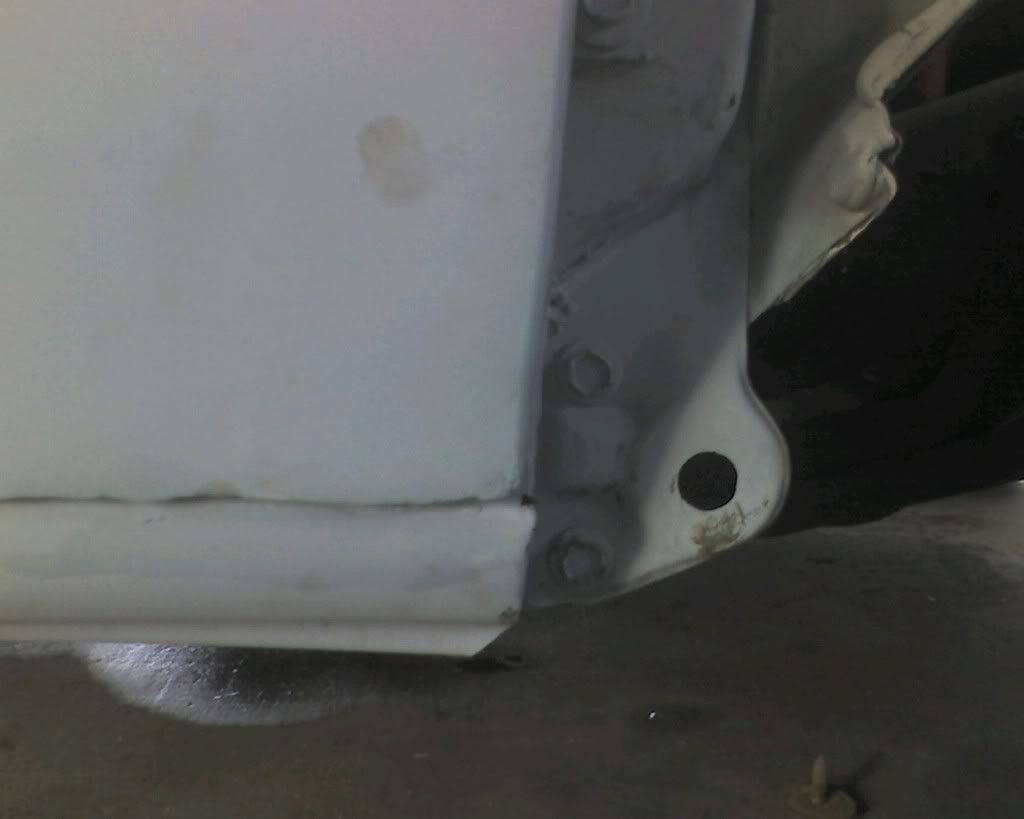 and this is after with the fender on 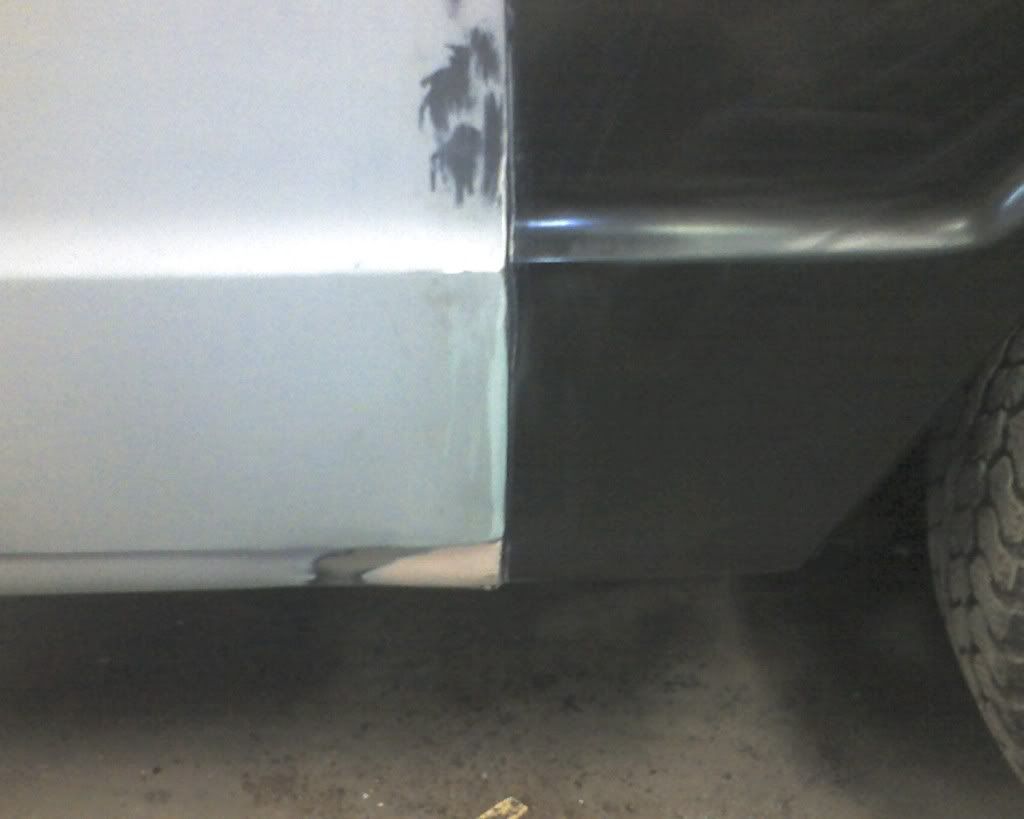
__________________
Active Duty Navy / Part time wanna be hot rodder? 89 Cressida w/ 408hp/674tq (with lots of wiggle room) 69 C-10 Project http://67-72chevytrucks.com/vboard/s...=1#post3066994 |
|
|
|
|
01-07-2009, 03:34 AM
|
#21 |
|
Registered User
Join Date: Oct 2007
Location: Sherwood Oregon
Posts: 1,908
|
Re: Newbie Build, 69 fleetside
That is looking great man. And I like your idea of practicing on a real junker, so you don't have trouble with a nicer one! I'll have to try that.
|
|
|
|
|
01-19-2009, 05:28 AM
|
#22 |
|
Registered User
Join Date: Jun 2008
Location: Honolulu, Hawaii
Posts: 82
|
Re: Newbie Build, 69 fleetside
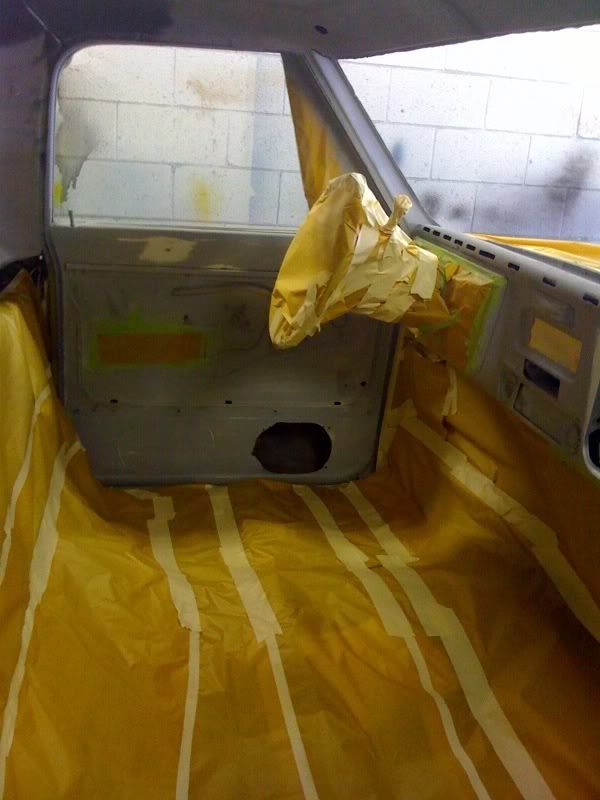
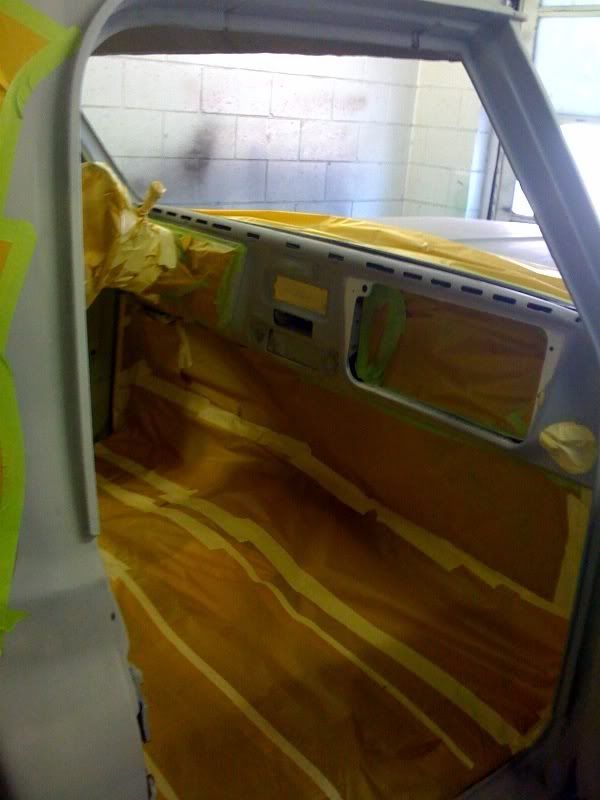
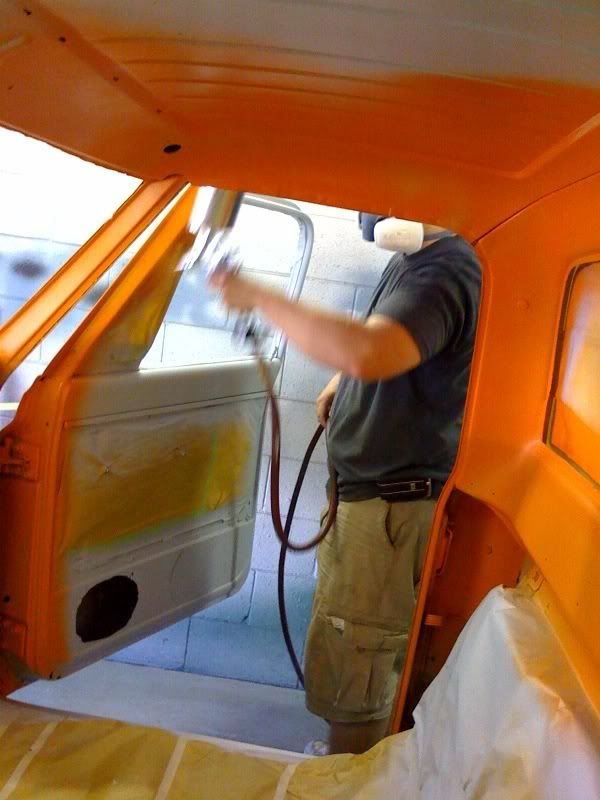
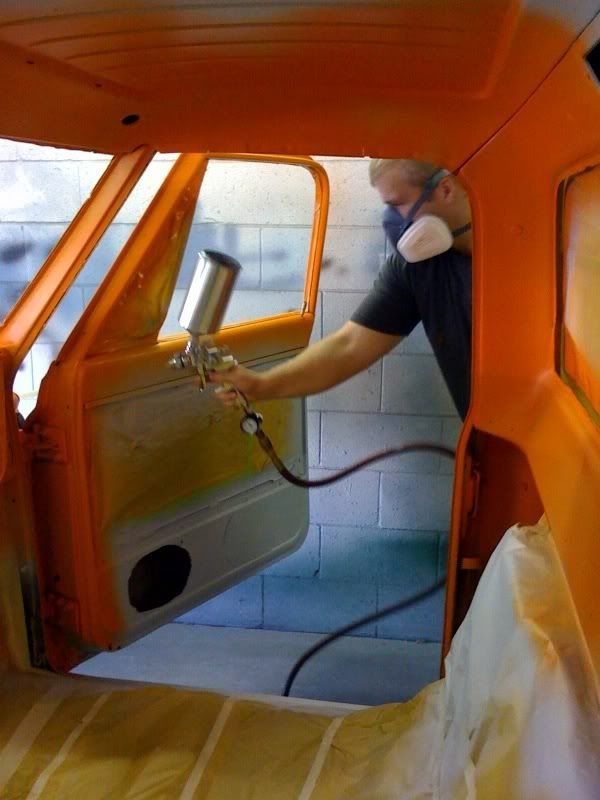
finally got around to painting the inside of the cab!! a friend got me a real good deal on paint and supplies since he buys for his collision repair jobs from the same place, so 15% discount, and ended up paying 650 for all of the paint and chemicals.
2 qts omaha orange + 1 gal chromabase basemaker 2 qts off white 4:1 sealer + 2 1/2pt 4:1 activator 1 gal select clear clearcoat + 1 qt select clear coat activator not to mention surface cleaners, laquer thinner, tack cloths, wash cloths, a breather mask (the nicer 60 dollar one with the softer rubber) and even threw in some free shoot suits. so overall it was a great deal to have a friend who could help me pick the right materials to get the job done. only bad thing was having a small amount of time to prep and shoot, and ended up spraying the whole inside of the cab and door jams in 2 hours from sealer to base to clear. this was my first time doing any paint as well, so i ended up touching a few areas with the feed can lol, and there were some runs, but painting inside the cab was real difficult, especially getting all the little cracks and crevices, and making sure to hit all angles without overspraying....which was probably the hardest part, but the few runs i did have will be hidden by the back of the bench seat thank god hah. and hopefully i can end up buffing out some of the peal in a few days, or i may just wait to buff it all at one time, but not sureabout the best amount of time to wait before buffing to remove orange peal. i know the exterior should turn out much better though, now that i know how to shoot a bit better and how to lay each layer down better...first time paint job, i think it came out ok, and my friend who does it for a living said it came out decent for a first shoot. here are the pics. dont mind the overhead in the car, that peal is seeminly unavoidable from the angle you need to keep the gun at in order to spray, point too straight up and you get no paint coming out at all lol 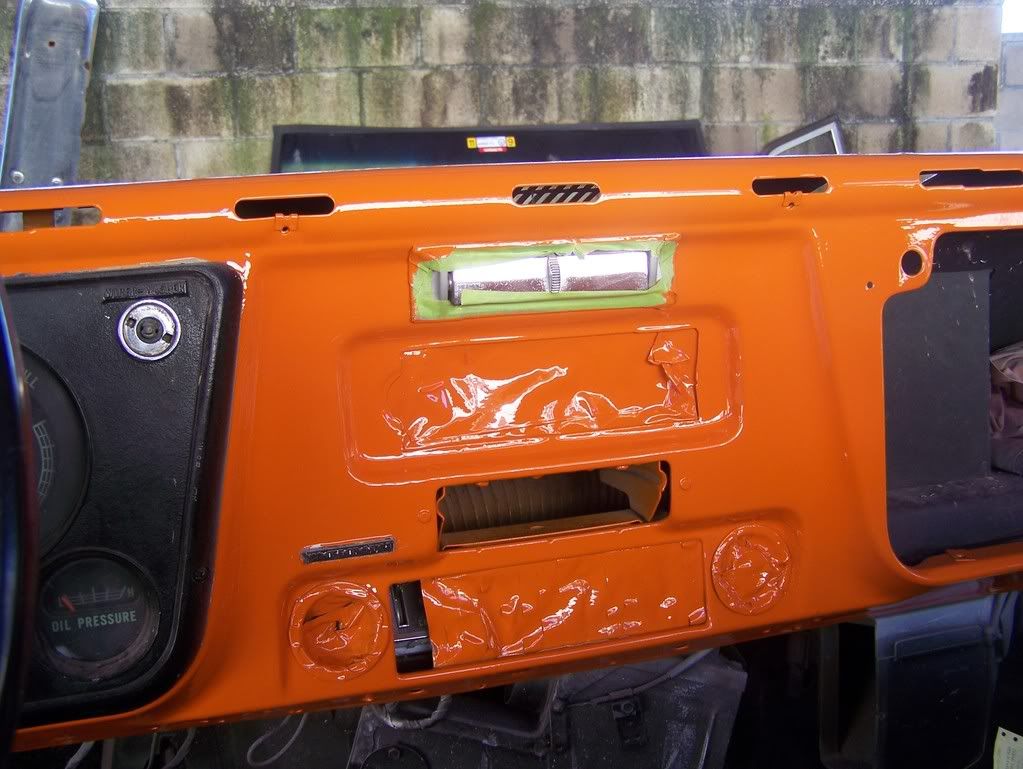 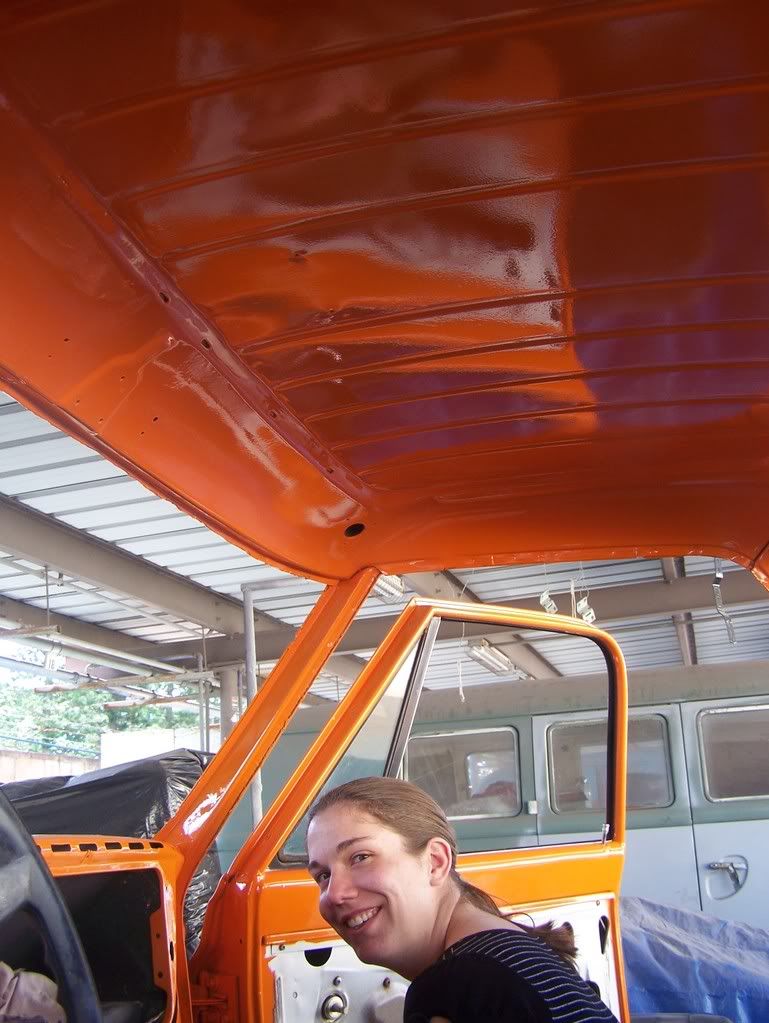 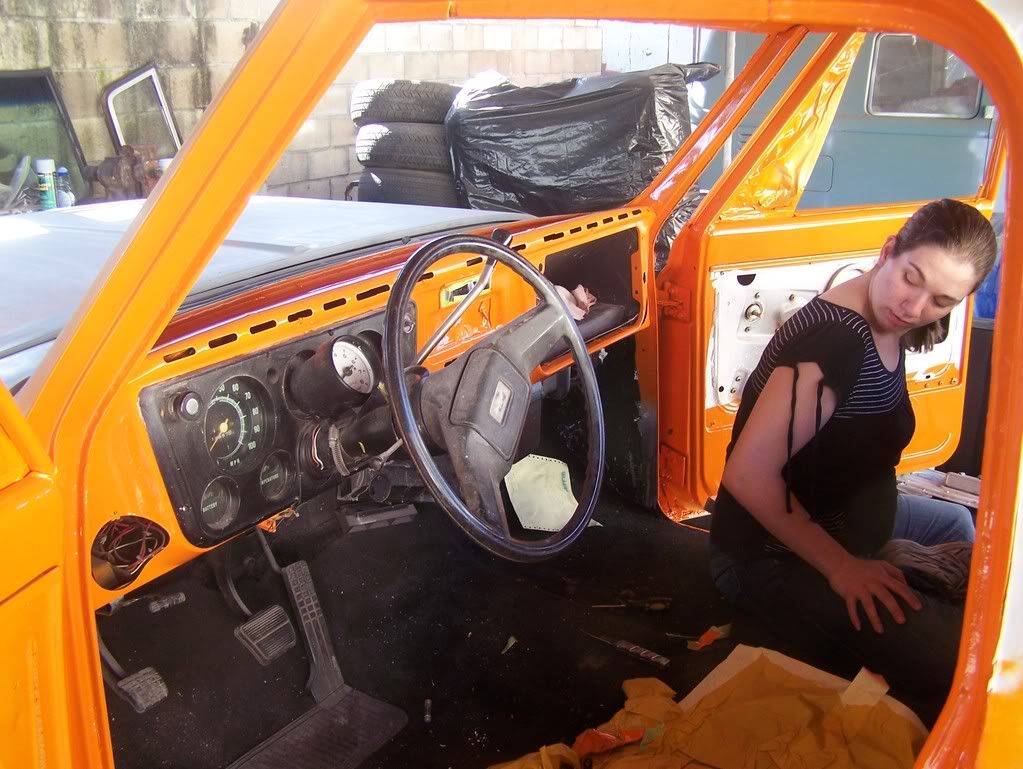 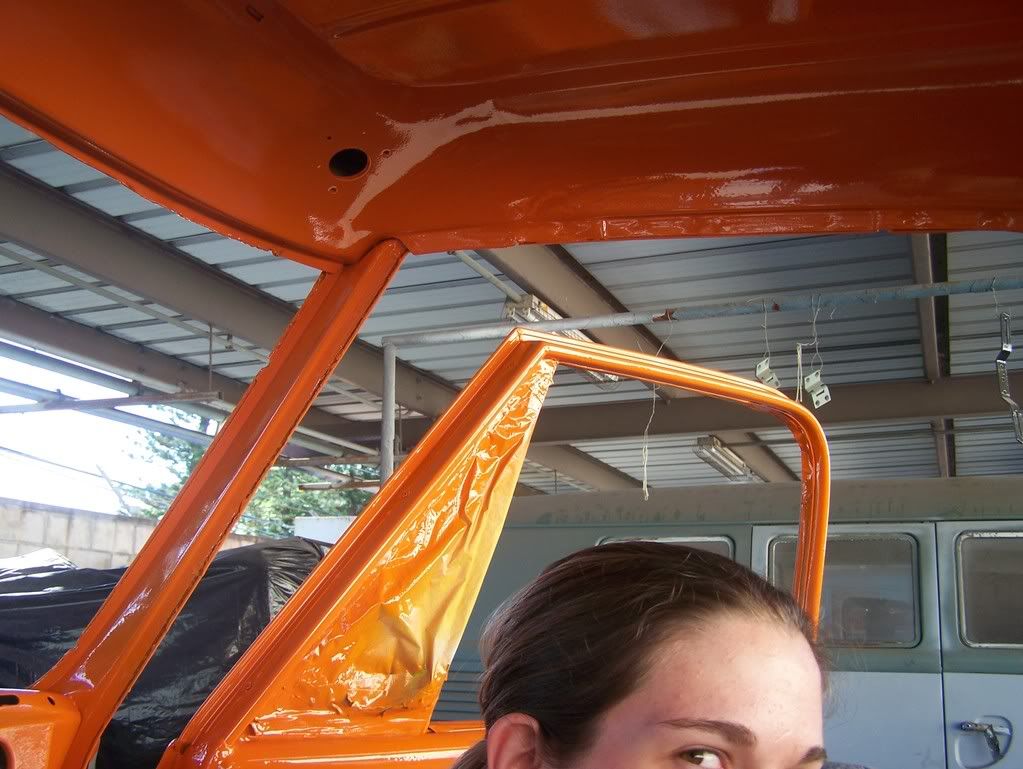 the flash was on for these, it shows how much peal is on the surface (excluding overhead of course) but kinda throws off the color 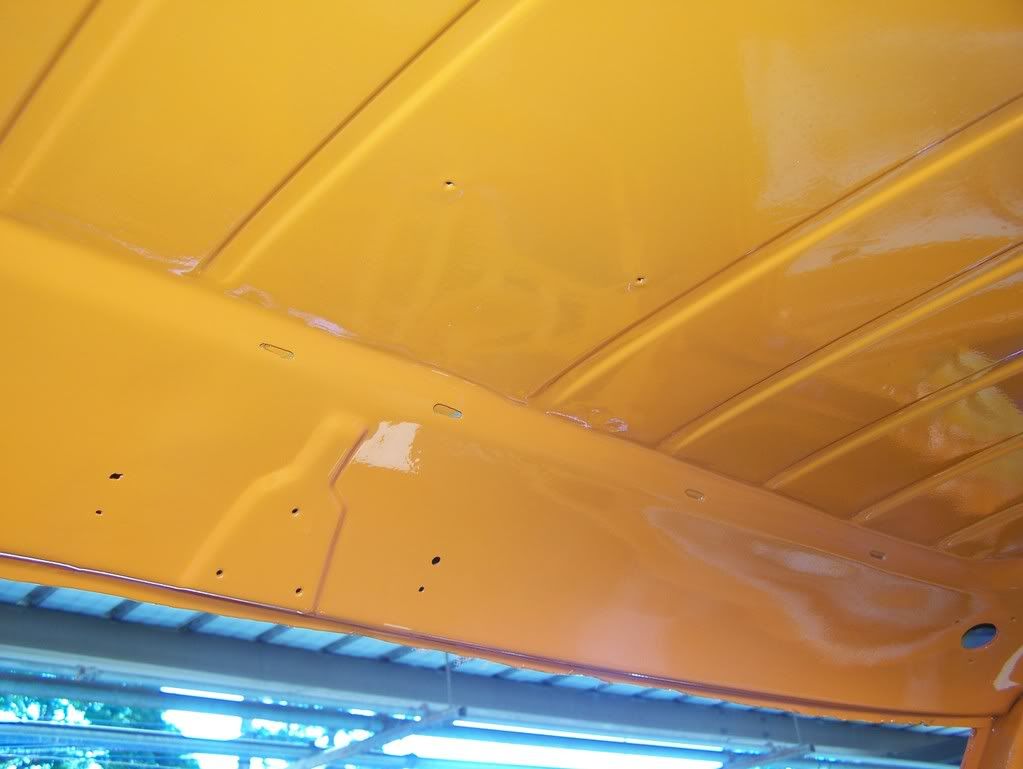 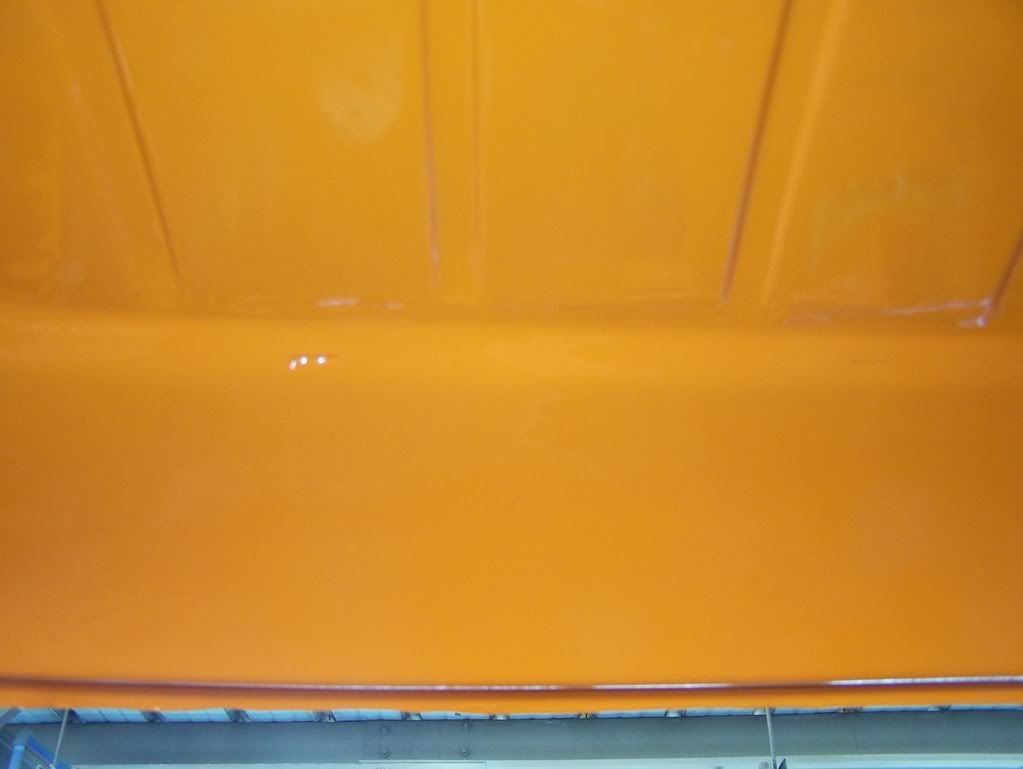
__________________
Active Duty Navy / Part time wanna be hot rodder? 89 Cressida w/ 408hp/674tq (with lots of wiggle room) 69 C-10 Project http://67-72chevytrucks.com/vboard/s...=1#post3066994 Last edited by Kracin; 01-19-2009 at 05:32 AM. |
|
|
|
|
01-19-2009, 05:30 AM
|
#23 |
|
Registered User
Join Date: Jun 2008
Location: Honolulu, Hawaii
Posts: 82
|
Re: Newbie Build, 69 fleetside
and heres just a few pics from the day out with a group of friends, pics from MCBH, kaneohe.
was a great day so had to take pics of part of the cruise/get together 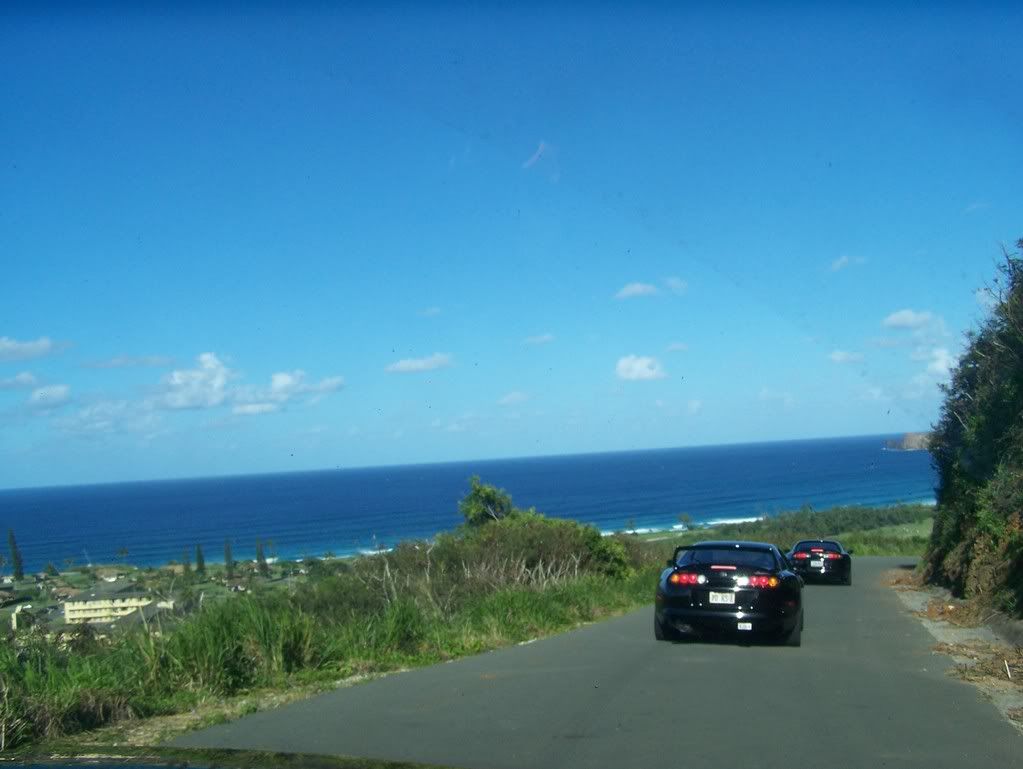  
__________________
Active Duty Navy / Part time wanna be hot rodder? 89 Cressida w/ 408hp/674tq (with lots of wiggle room) 69 C-10 Project http://67-72chevytrucks.com/vboard/s...=1#post3066994 |
|
|
|
|
01-21-2009, 10:50 PM
|
#24 |
|
Registered User
Join Date: Jun 2008
Location: Honolulu, Hawaii
Posts: 82
|
Re: Newbie Build, 69 fleetside
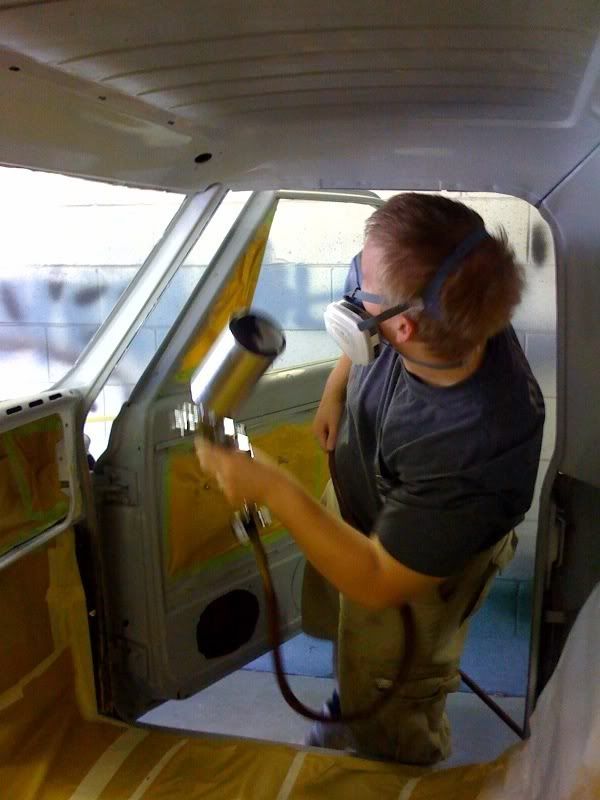
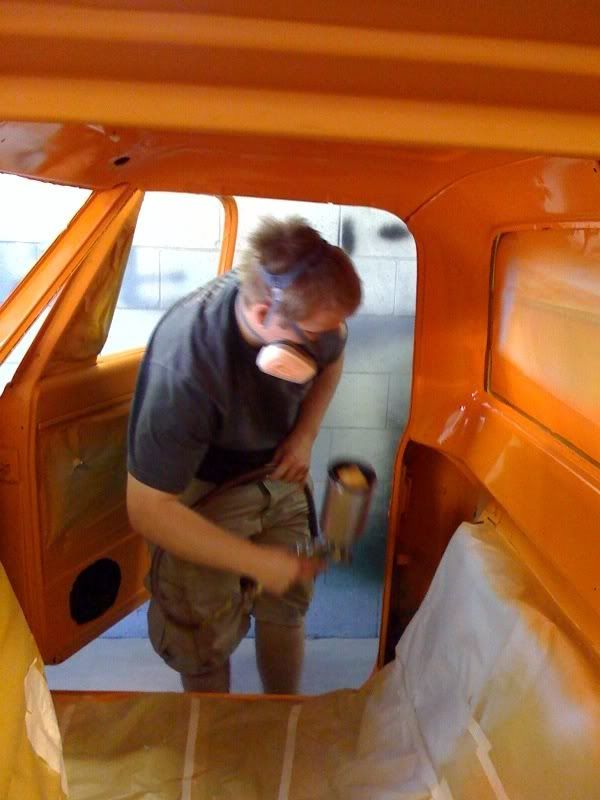
finally got some more photos of me spraying from my friend that was there to help out
__________________
Active Duty Navy / Part time wanna be hot rodder? 89 Cressida w/ 408hp/674tq (with lots of wiggle room) 69 C-10 Project http://67-72chevytrucks.com/vboard/s...=1#post3066994 |
|
|
|
|
03-29-2009, 11:28 PM
|
#25 |
|
Registered User
Join Date: Jun 2008
Location: Honolulu, Hawaii
Posts: 82
|
Re: Newbie Build, 69 fleetside
well its been a while since i posted anything...... so heres the finished(ish) product. i still need to find out how to change the ignition lock since i grabbed a whole new lock set and did all the others already, and i also need to find someone with a rivet gun so i can go ahead and replace my triangle window seals, and thats a bout it.... oh and before anyone says anything about the sign on it, dont worry im not tryint o sell on the board lol, theres no hawaii members on here that ive seen and i doubt anyone would pay 2k to ship this truck off the island and then pay more to have it driven to them lol..
so not bad for a guy who has no garage, 3 boxes of tools and only the weekends to work huh?  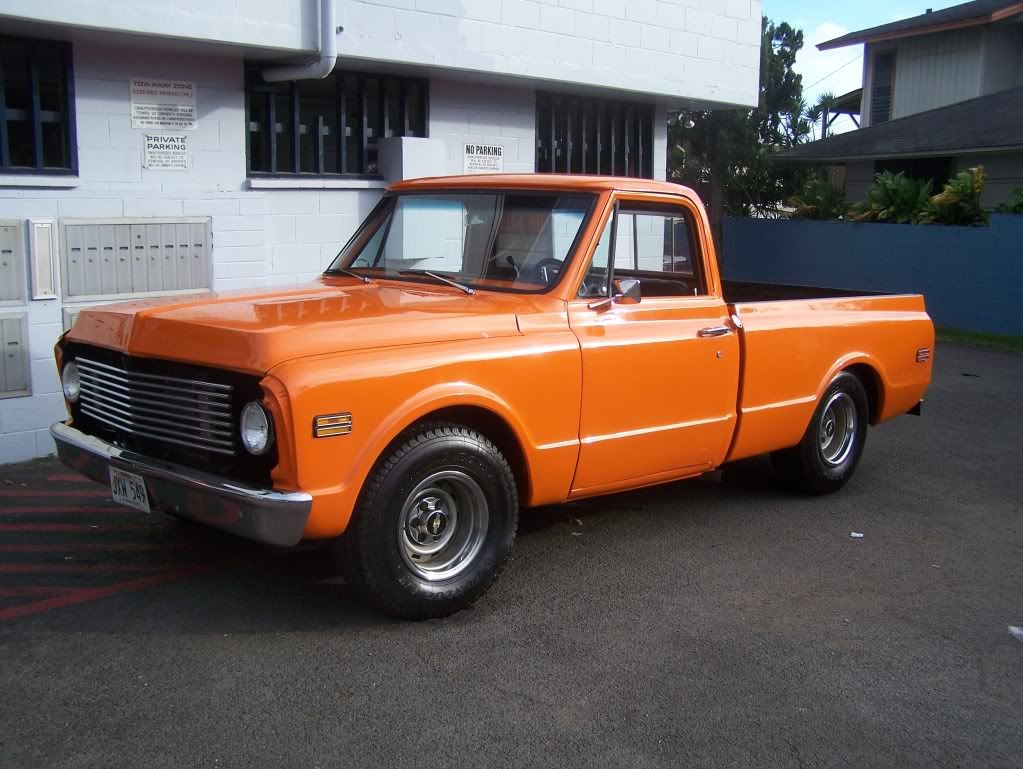 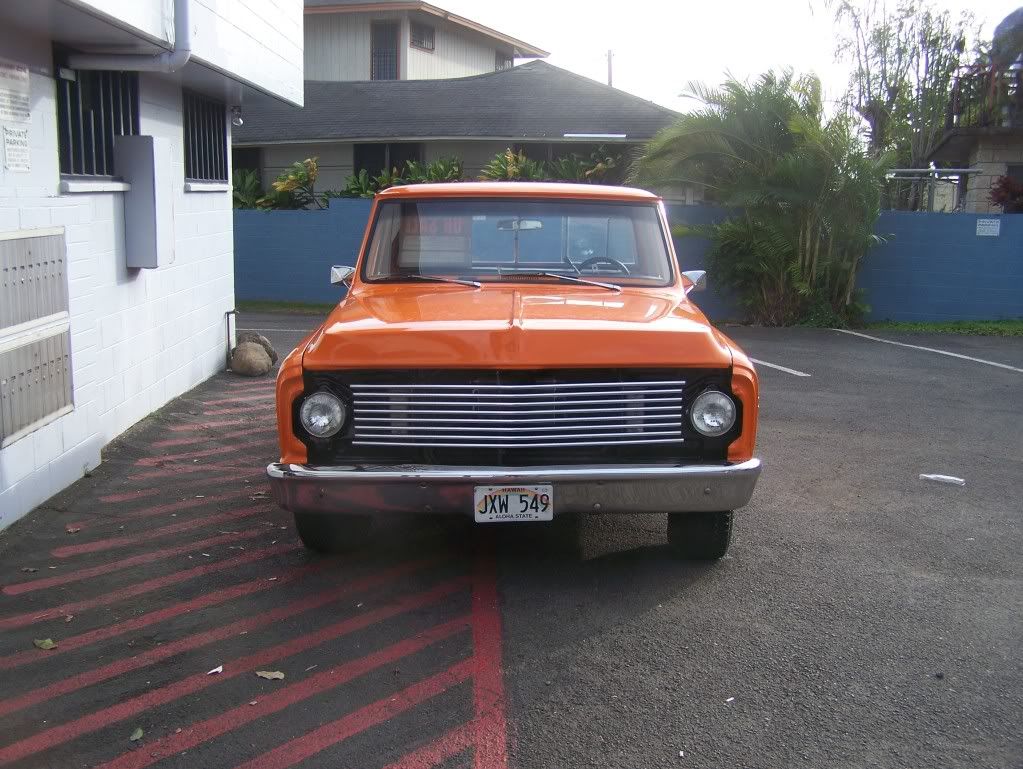   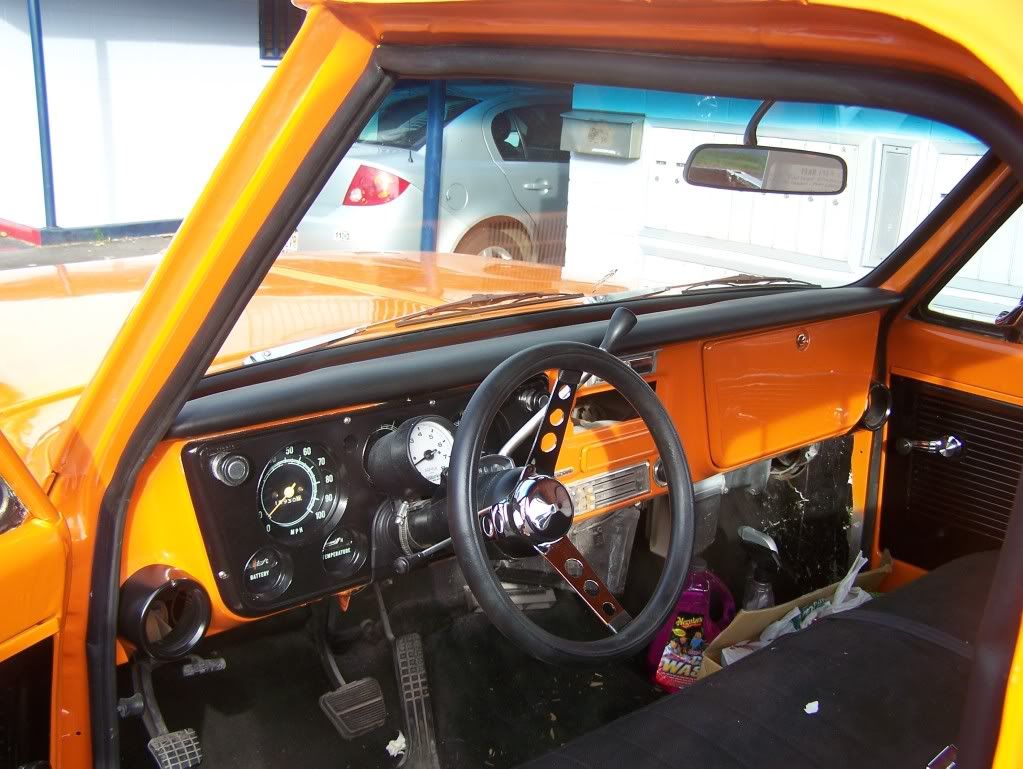 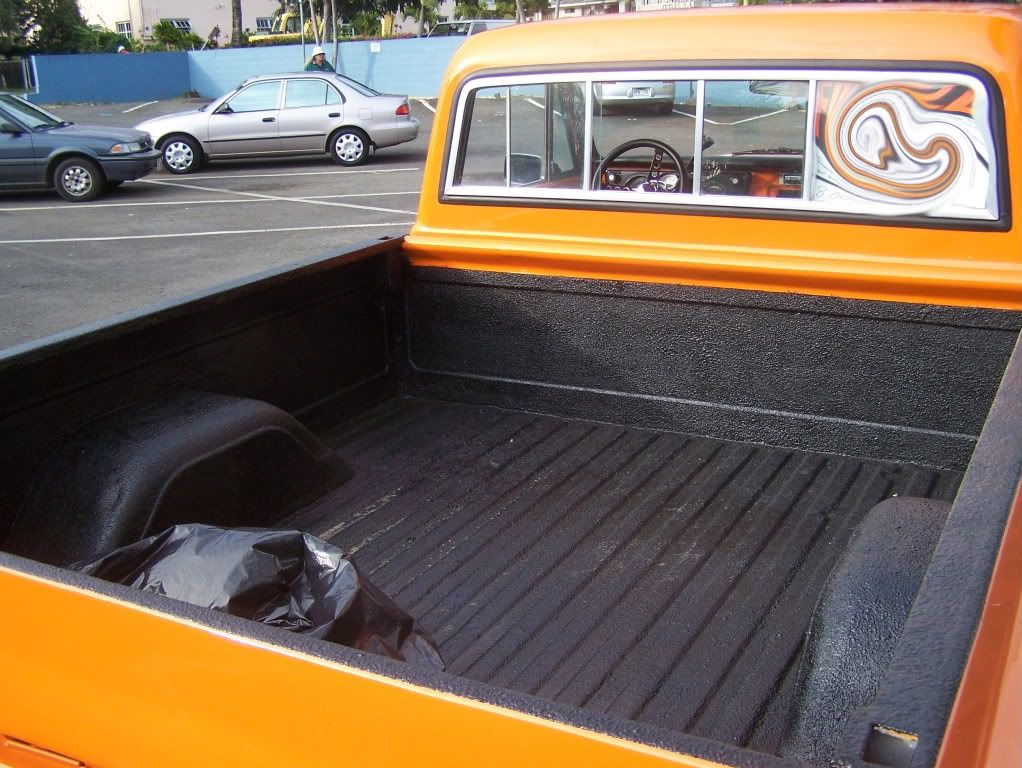
__________________
Active Duty Navy / Part time wanna be hot rodder? 89 Cressida w/ 408hp/674tq (with lots of wiggle room) 69 C-10 Project http://67-72chevytrucks.com/vboard/s...=1#post3066994 |
|
|
|
|
| Bookmarks |
|
|


 Linear Mode

