
|
|
|
 09-23-2015, 08:30 AM
|
#1 |
|
Registered User
Join Date: Aug 2010
Location: colorado
Posts: 14
|
Re: 46 pickemup in NJ "the Rebuild"
Very nice!
|

|

|
|
09-23-2015, 05:20 PM
|
#2 |
|
Registered User
Join Date: Dec 2002
Location: Cactus Patch So. Az
Posts: 4,749
|
Re: 46 pickemup in NJ "the Rebuild"
You are doing a excellent job!
__________________
53 TuTone Extended Cab 350 4-Spd 3:08 (SOLD) 53 Chevy Moldy pearl green ZZ-4 4L60E 9" 3:25 55 GMC 1st Black Mll (ZZ4) ZZ6 TKO 600 5 sp 3:73 62 Solidaxle Corvette Roman Red (327 340hp 4spd 3:36) C4 & C5 suspension tube chassis LS 3 4L70E 65 Corvette Coupe 327 350hp 4spd 4:11 78 Black Silverado SWB (350/350) 5.3 & 4L60E 3:42 2000 S-Type 3.0 (wife cruiser) 2003 GMC SCSB 5.3 4L60E 3:42 |
|
|
|
|
09-27-2015, 07:35 PM
|
#3 |
|
Registered User
Join Date: Dec 2010
Location: washington NJ
Posts: 766
|
Re: 46 pickemup in NJ "the Rebuild"
Almost done! Just have the top of the hood to do in the Mango Tango. I think the running boards will be black.
Still kicking around the idea of painting the grill and windshield surround in gloss white. In a perfect world, I would chrome them but I don't feel like dropping $1,000. 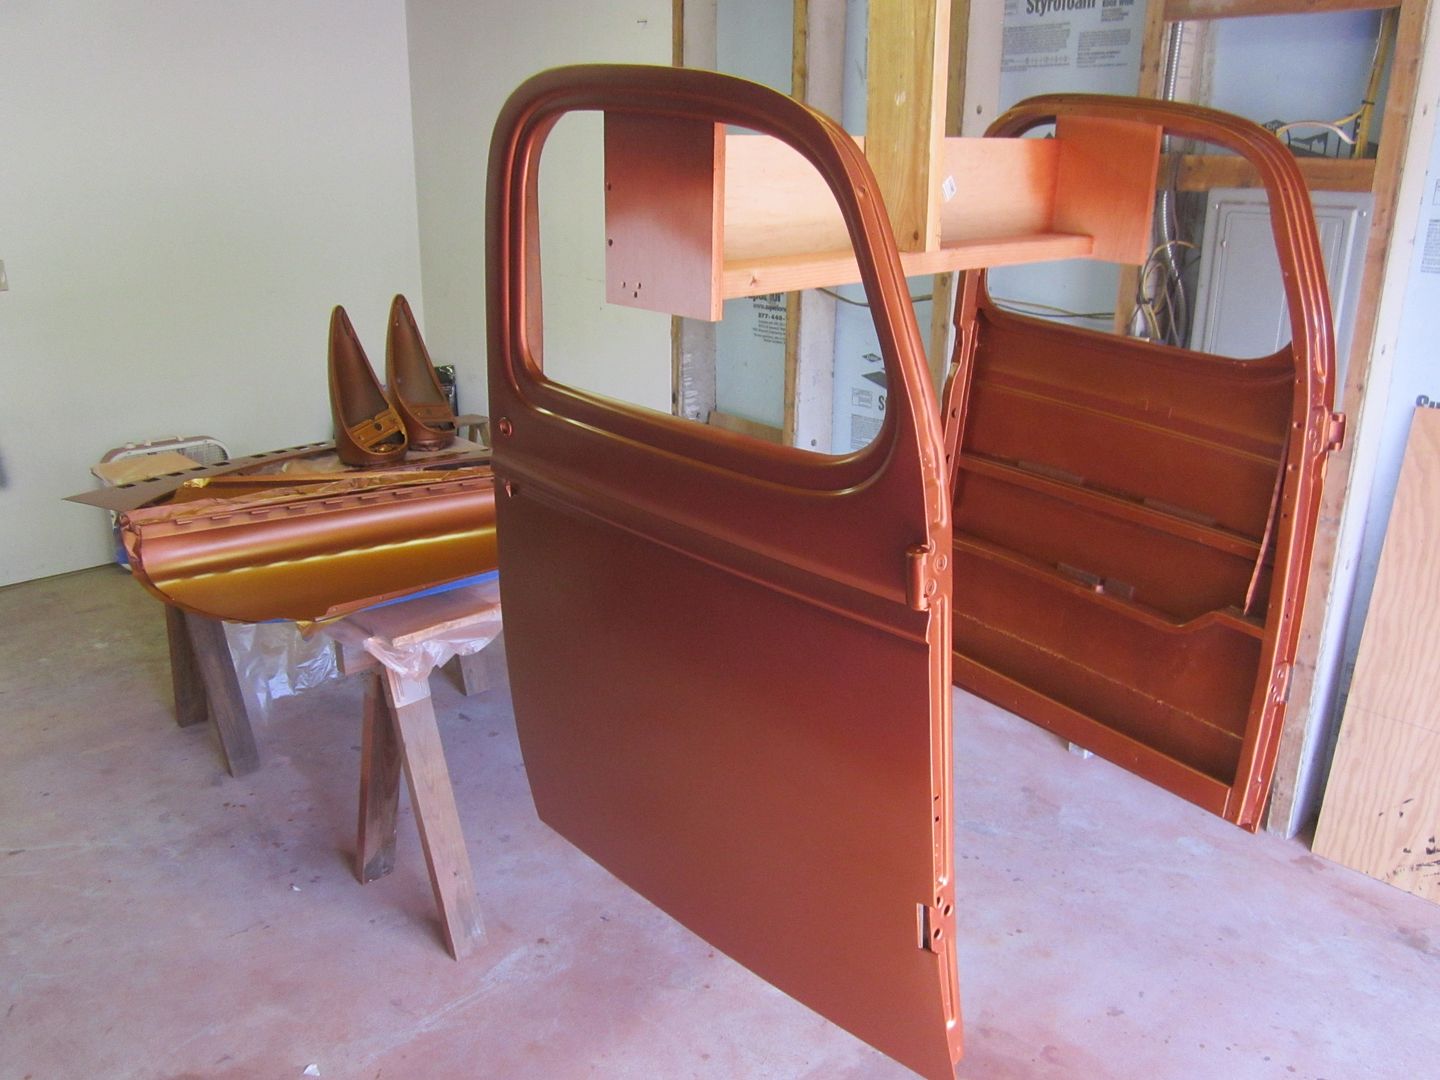 [/URL] [/URL]It's amazing how much different this color looks in different angles of light. Sometimes it looks like burnt copper, other times it almost looks like an orangey gold. I'm diggin it! 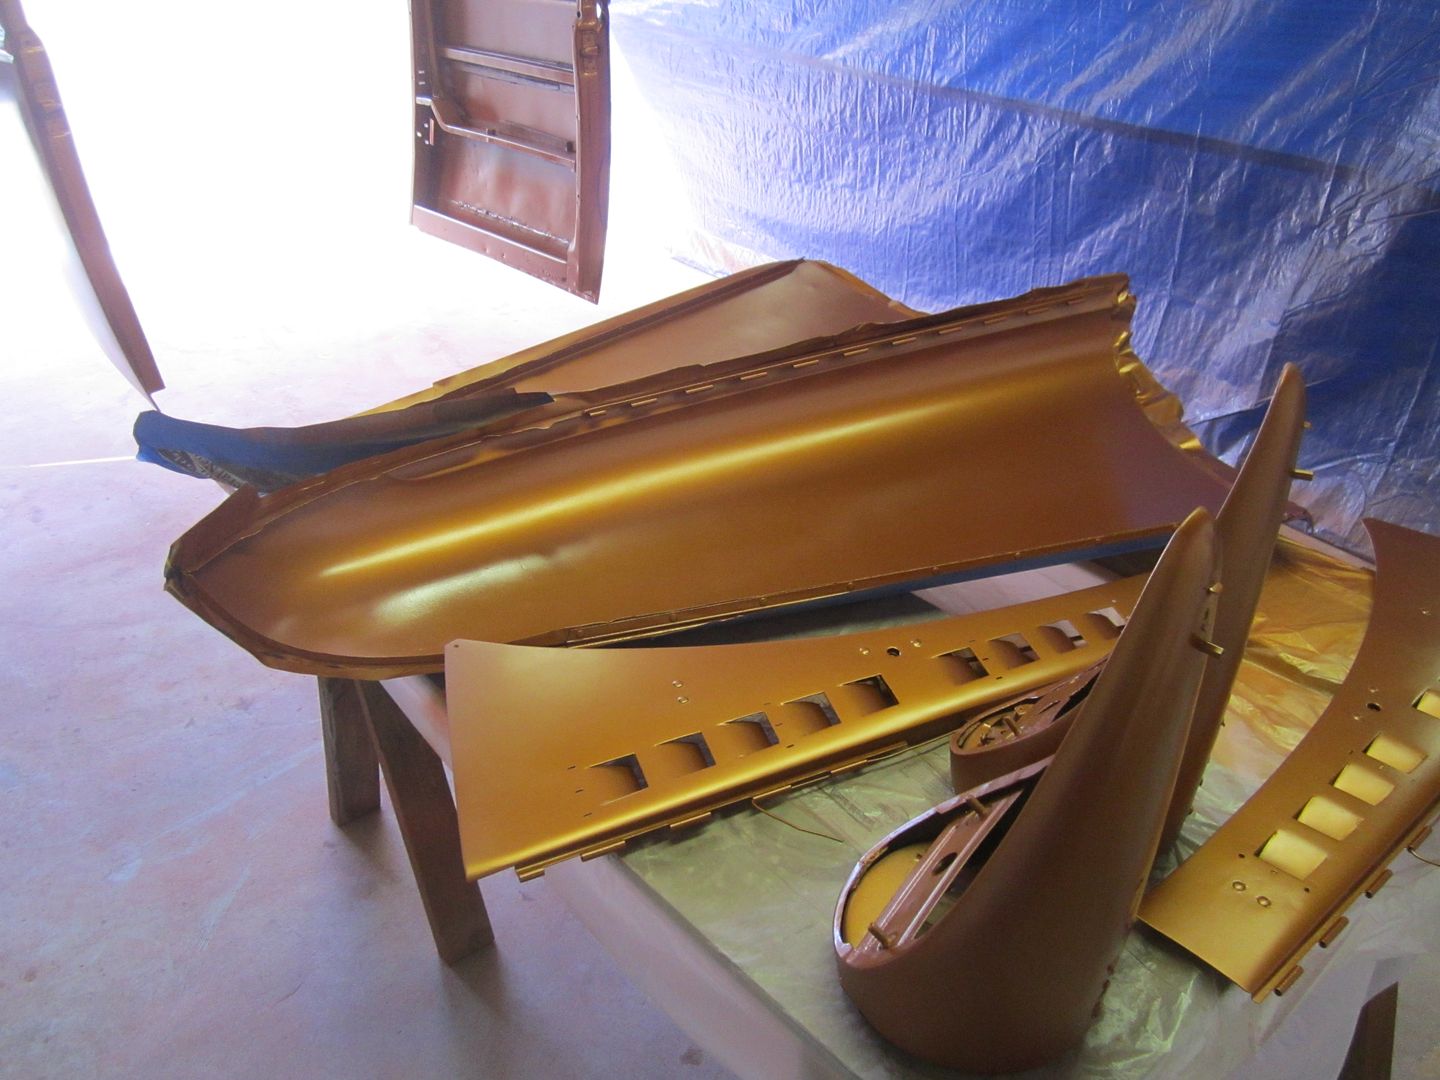 [/URL] [/URL]
|
|
|
|
|
10-07-2015, 10:28 PM
|
#4 | |
|
Registered User
Join Date: Mar 2013
Location: Waco, Texas
Posts: 411
|
Re: 46 pickemup in NJ "the Rebuild"
Quote:
Tonight I bought a used Iwata paint rig with the regulator for $45. Did not figure I needed to spend a bunch of money on a brand new gun. I also felt like a used Iwata would be better than a cheap gun in trying to get good results. Thanks for sharing. |
|
|
|
|
|
10-08-2015, 07:16 PM
|
#5 | |
|
Registered User
Join Date: Dec 2010
Location: washington NJ
Posts: 766
|
Re: 46 pickemup in NJ "the Rebuild"
Quote:
I don't see how a rank amateur would spray any better using a high priced gun. I'm sure there are some body shop snobs that would look at my truck and pick apart the paint job, but I could care less. I think it looks just fine for what I am doing. |
|
|
|
|
|
10-14-2015, 05:48 PM
|
#6 |
|
Registered User
Join Date: Dec 2010
Location: washington NJ
Posts: 766
|
Re: 46 pickemup in NJ "the Rebuild"
Small update..........spent the last few days buttoning up the underside before I throw the cab back on. I got the front side of my pipes mounted to the tranny cross member via some slick clamps with bearings in them. Also got my E-brake brackets figured out. I tried to use the ones supplied from Lokar but just couldn't figure out a good way to mount them. Drivers side was getting a little busy so I ended up making my own brackets and mounted them to the passenger side of the tranny and tail shaft.
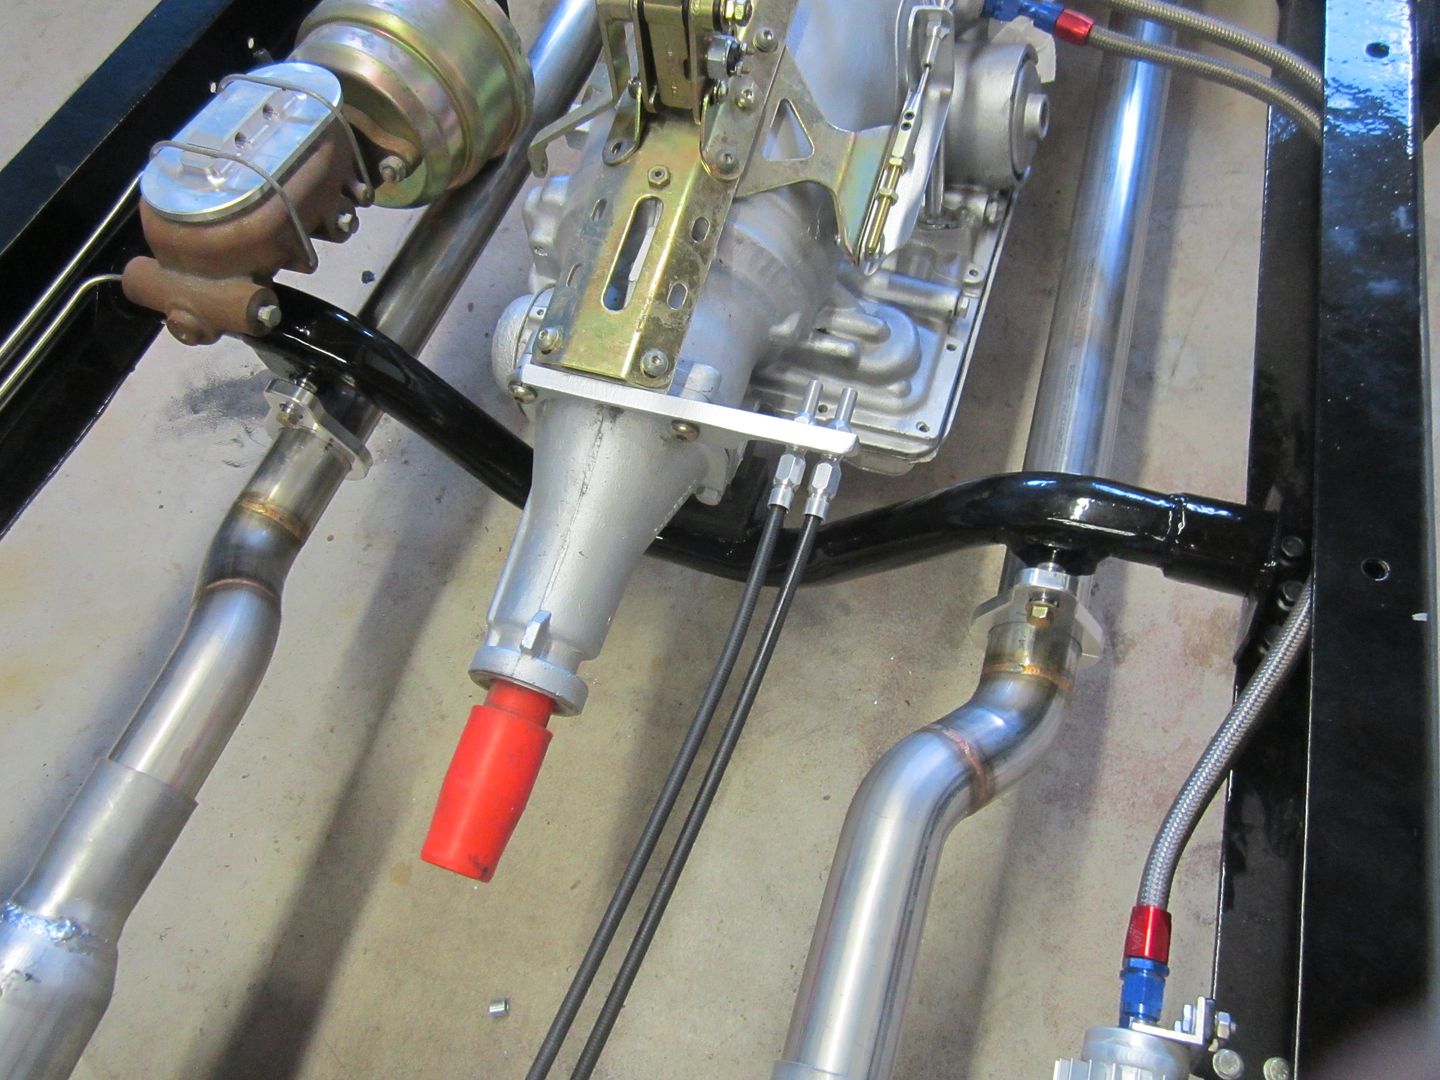 [/URL] [/URL]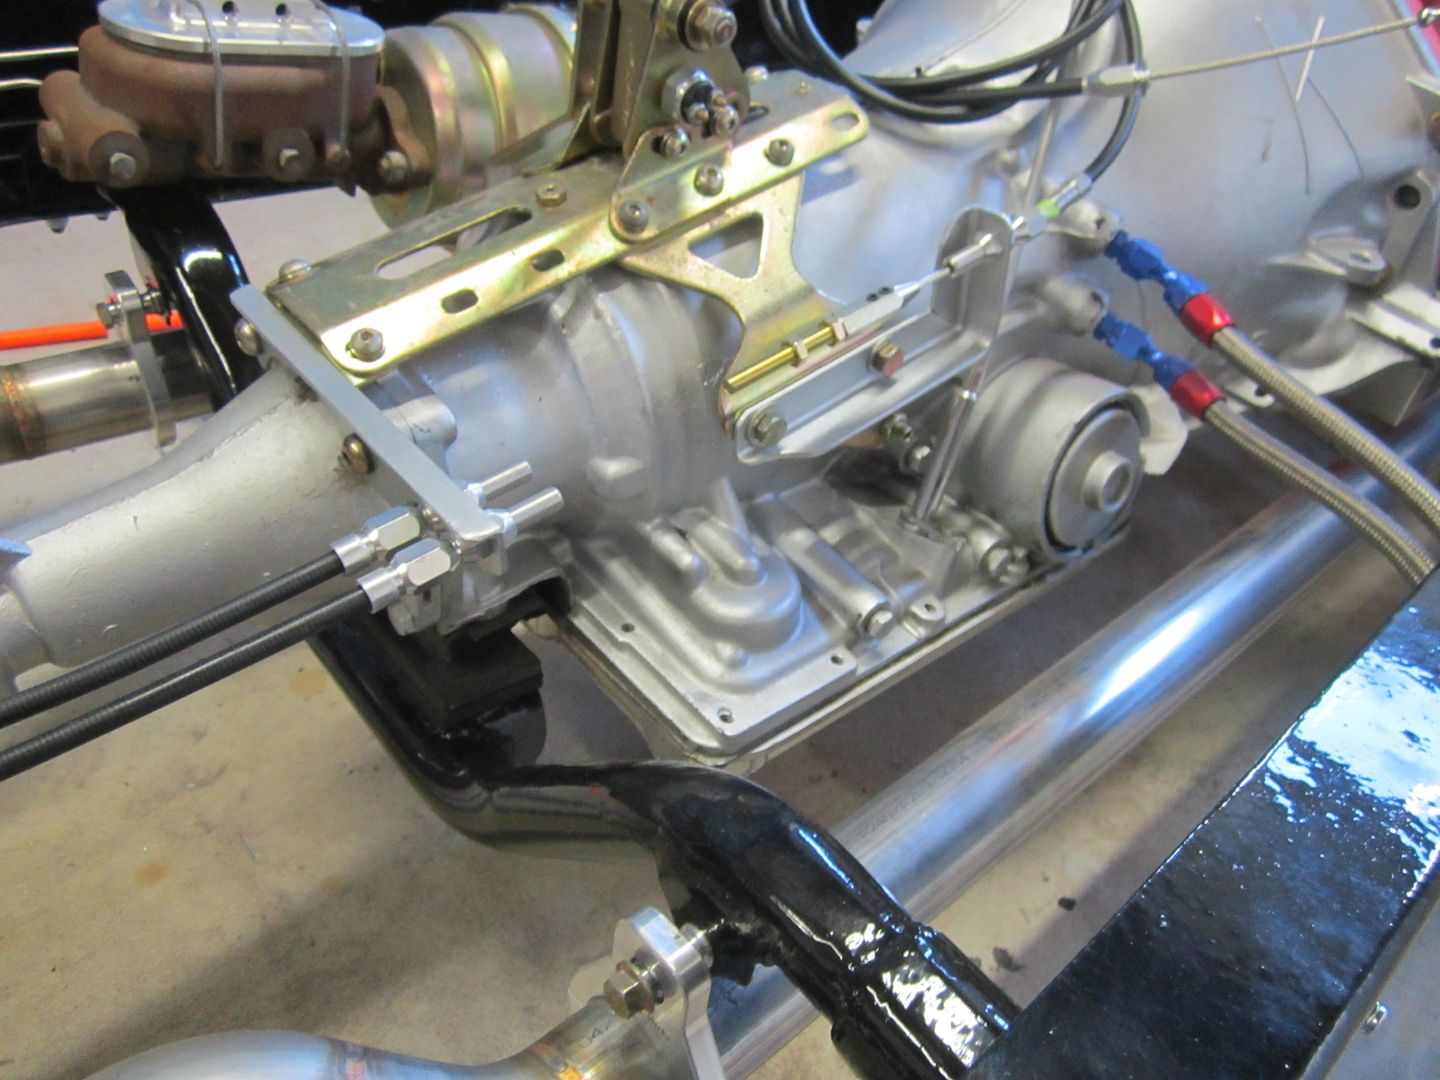 [/URL] [/URL]Got my glass packs, 17" Brockman Mellowtones. I just have to decide what goes behind them. Either tailpipes over the rear and out the back or........I think I might cheap out for now and do some turn downs just in front of the rear. 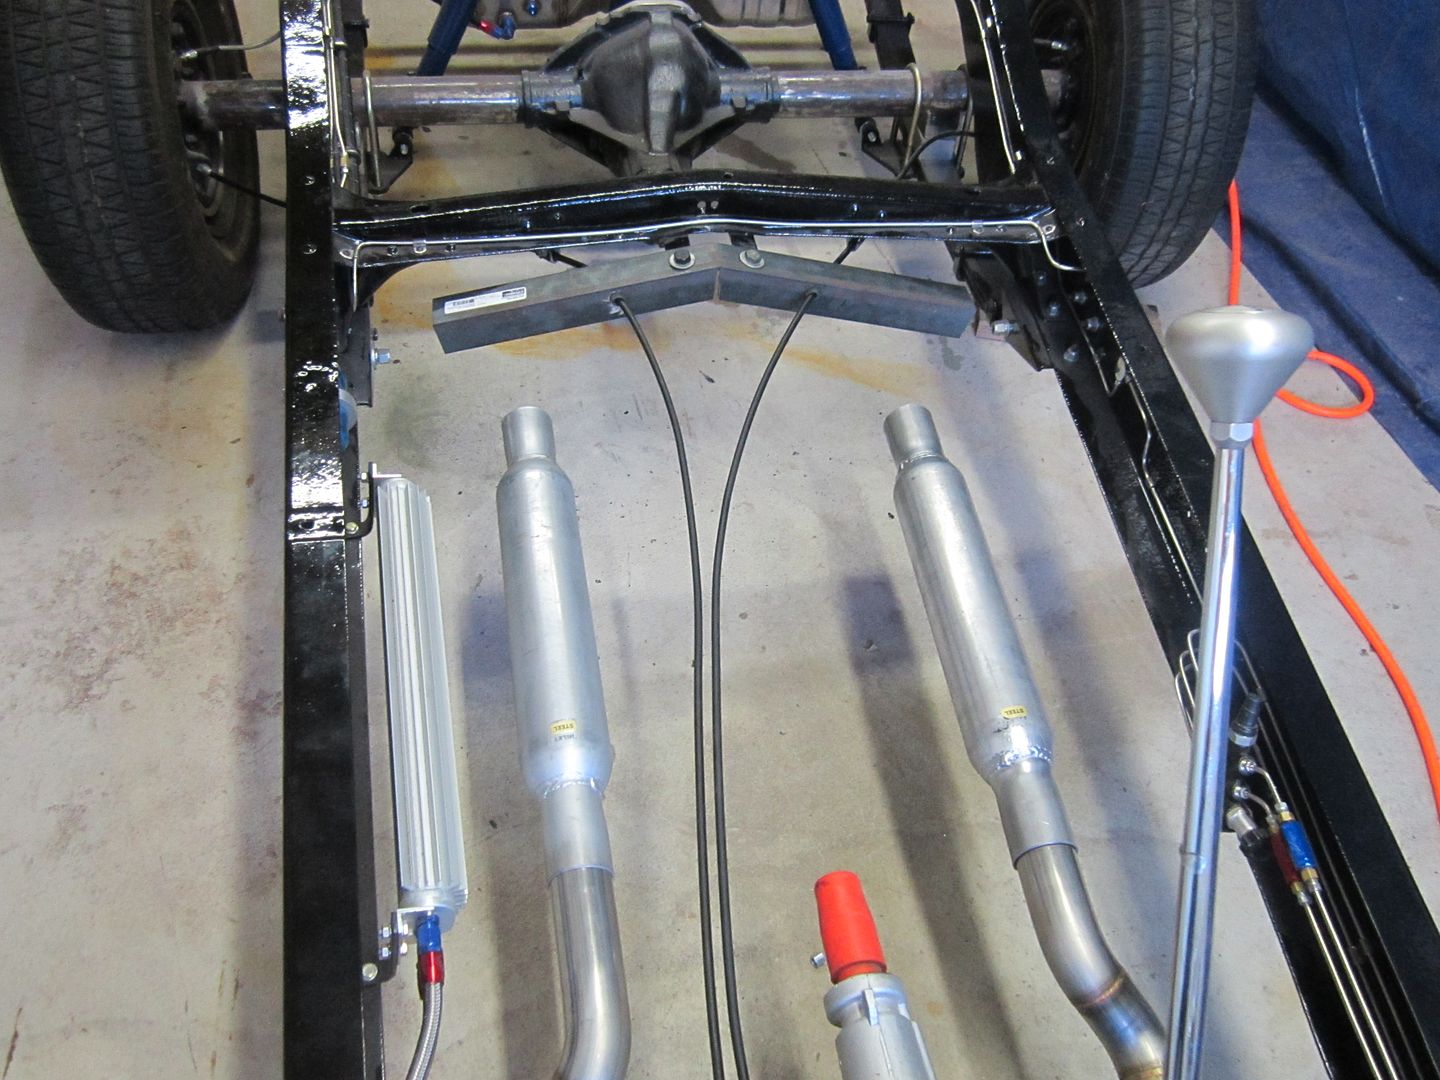 [/URL] [/URL]I made up a small bracket and mounted it to the old original pulley holes. This will act as another mounting point for the pipes and guides for the E-brake cables. If you look close I was able to re-use (with one hell of a twist), the 2 original cable keepers mounted to the underside of the frame cross member. 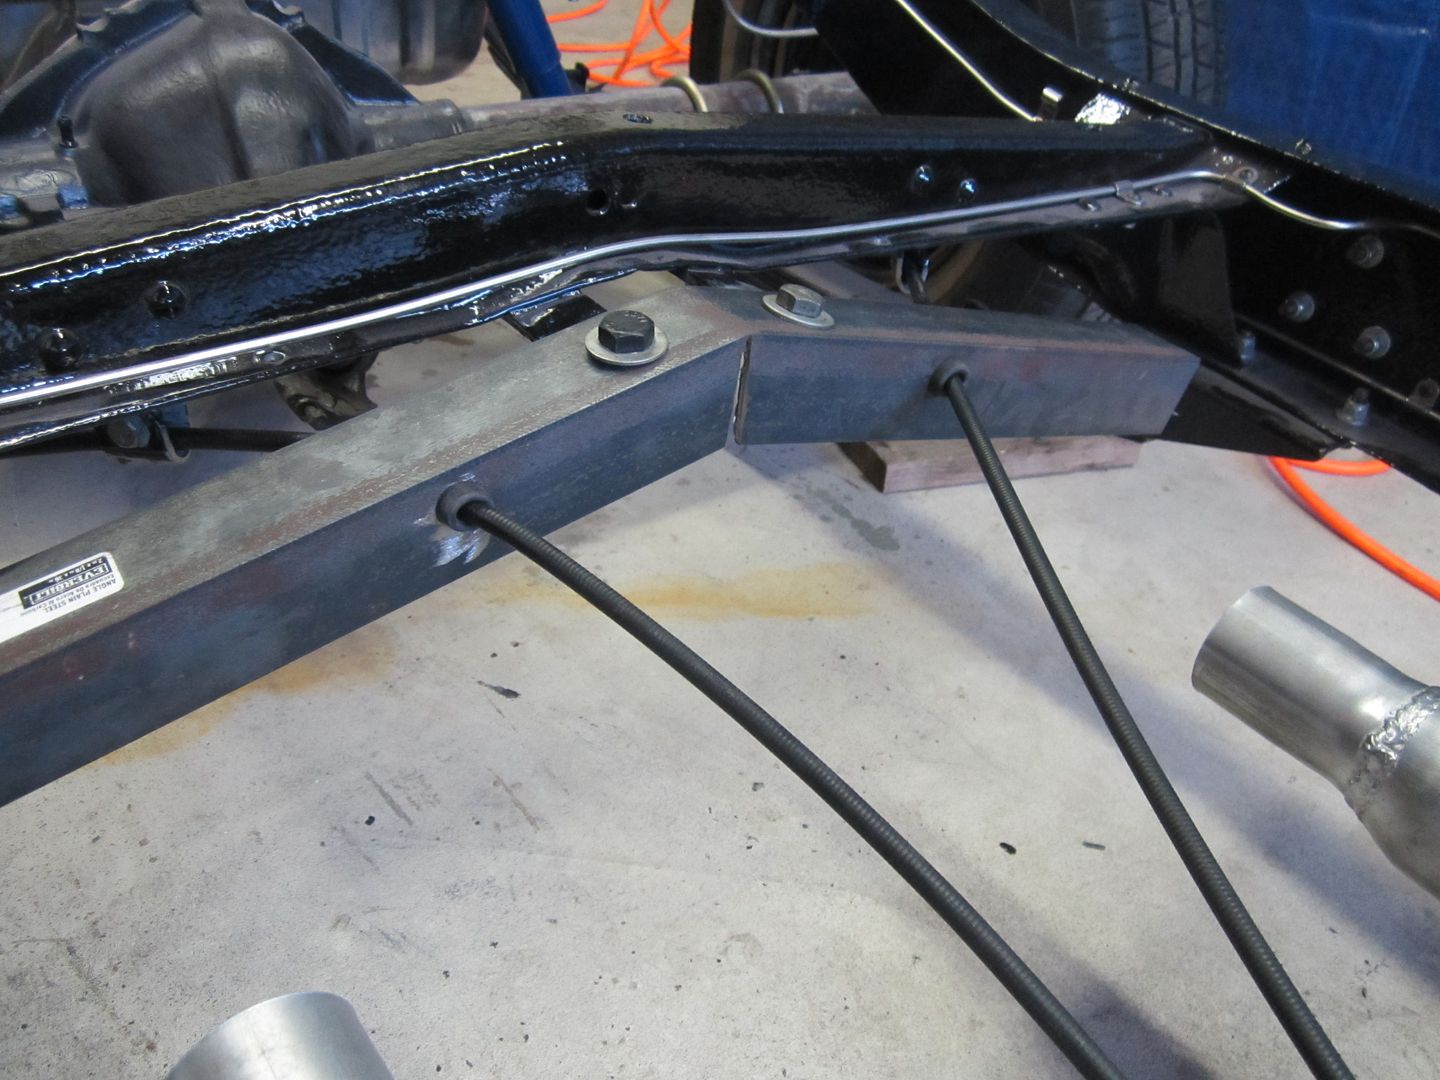 [/URL] [/URL]
|
|
|
|
|
09-27-2015, 08:10 PM
|
#7 |
|
Registered User
Join Date: Nov 2011
Location: Winnipeg, Manitoba
Posts: 164
|
Re: 46 pickemup in NJ "the Rebuild"
Looks nice!!
|
|
|
|
|
10-14-2015, 08:44 PM
|
#8 |
|
Senior Member
 Join Date: Jul 2012
Location: Oblong, Illinois
Posts: 7,017
|
Re: 46 pickemup in NJ "the Rebuild"
Looking really good! Nice clean brake line bends and routing too.
|
|
|
|
|
11-04-2015, 10:34 PM
|
#9 |
|
Registered User
Join Date: Dec 2010
Location: washington NJ
Posts: 766
|
Re: 46 pickemup in NJ "the Rebuild"
Still plugin along with all the little stuff I can get done on the cab. It's nice having it up on the stand, a lot easier to work on things. Because I have a lot of back trouble and can't stay bent over and contorted for long periods of time,
I decided to mount my fuse box under the seat. I didn't want to pop on a $900 flip up seat from Glide, so I built a slide out tray to mount the box to. Still trying to pick a harness I think I am leaning towards a Ron Francis unit. It's a lot easier working with wood instead of metal. At least for me. Mounted a 3/4 piece of plywood inside the seat riser. I then mounted a drawer glide to it and sexed up a little tray that slides in and out. Open...... 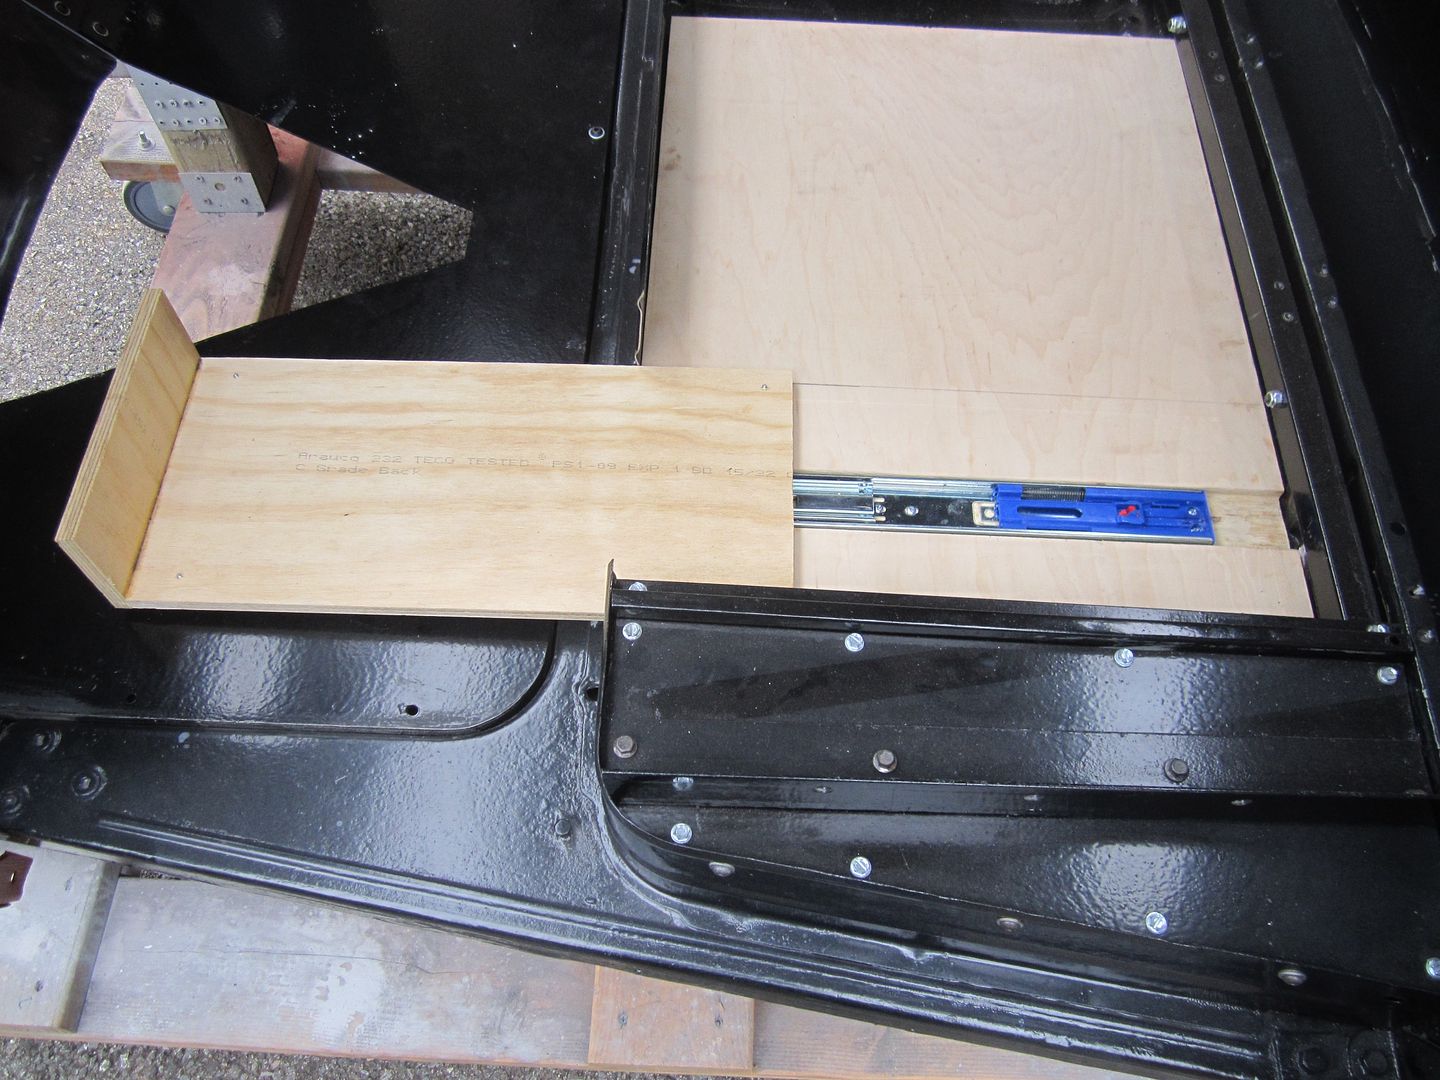 [/URL] [/URL]Closed...... 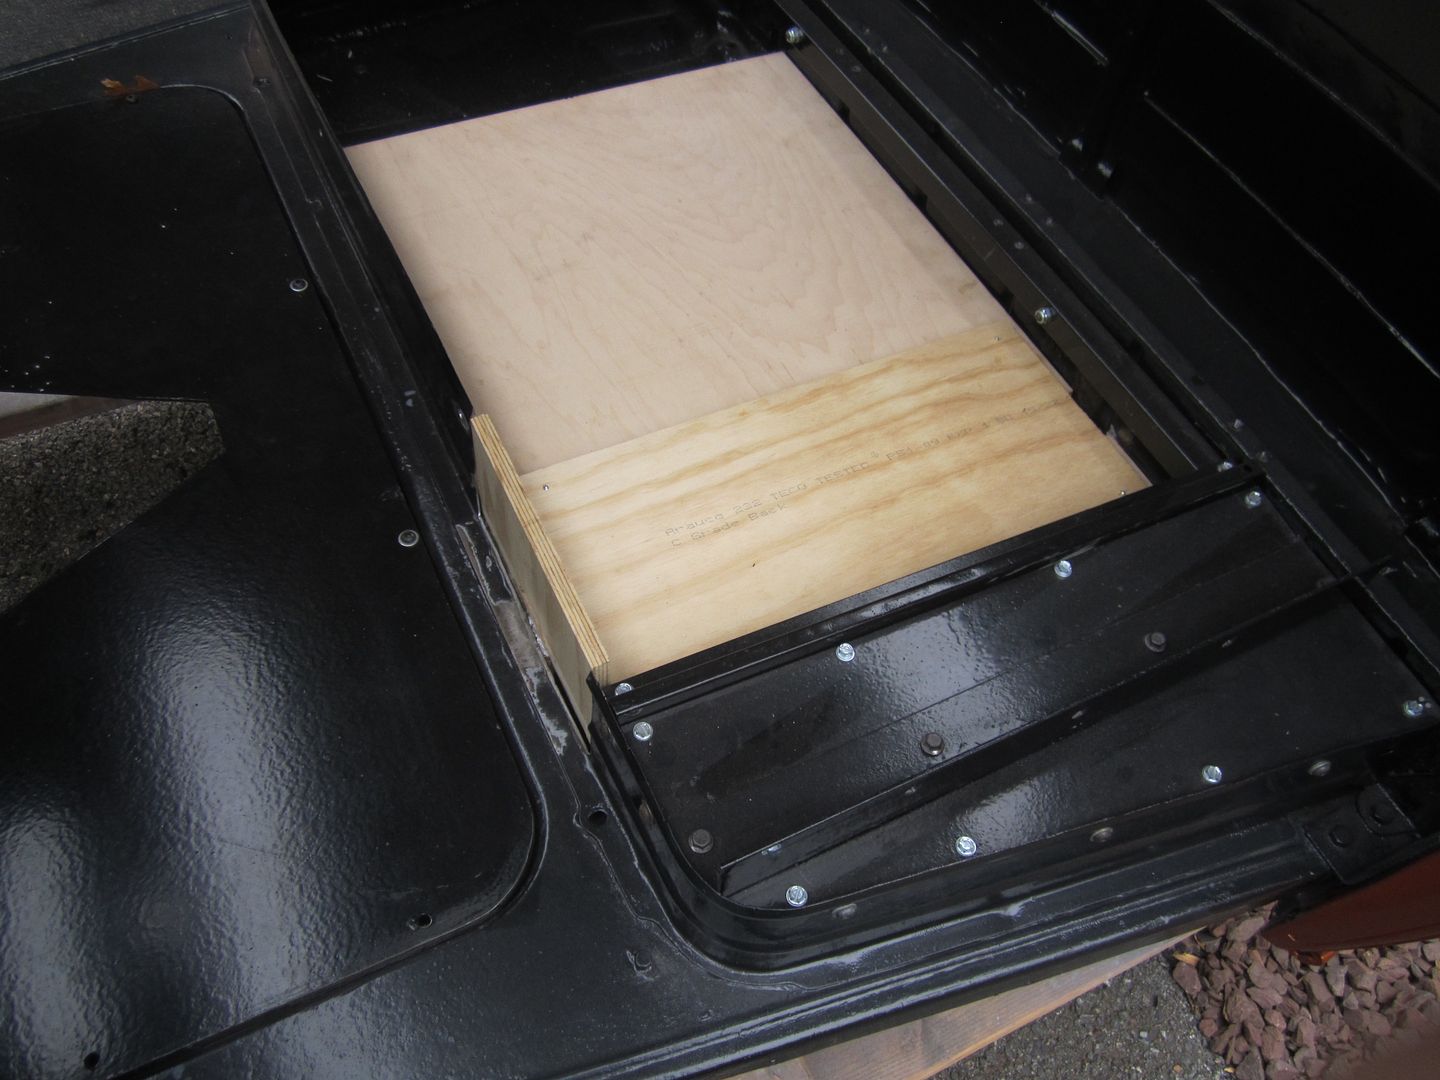 [/URL] [/URL]Also decided to close all the holes on the dash and start fresh. Mainly because whoever cut the last holes either used a chain saw or bazooka. For those of you who have been following along.....I lost my father awhile back thanks to cigarettes. So just to piss him off, I closed up the ash tray! 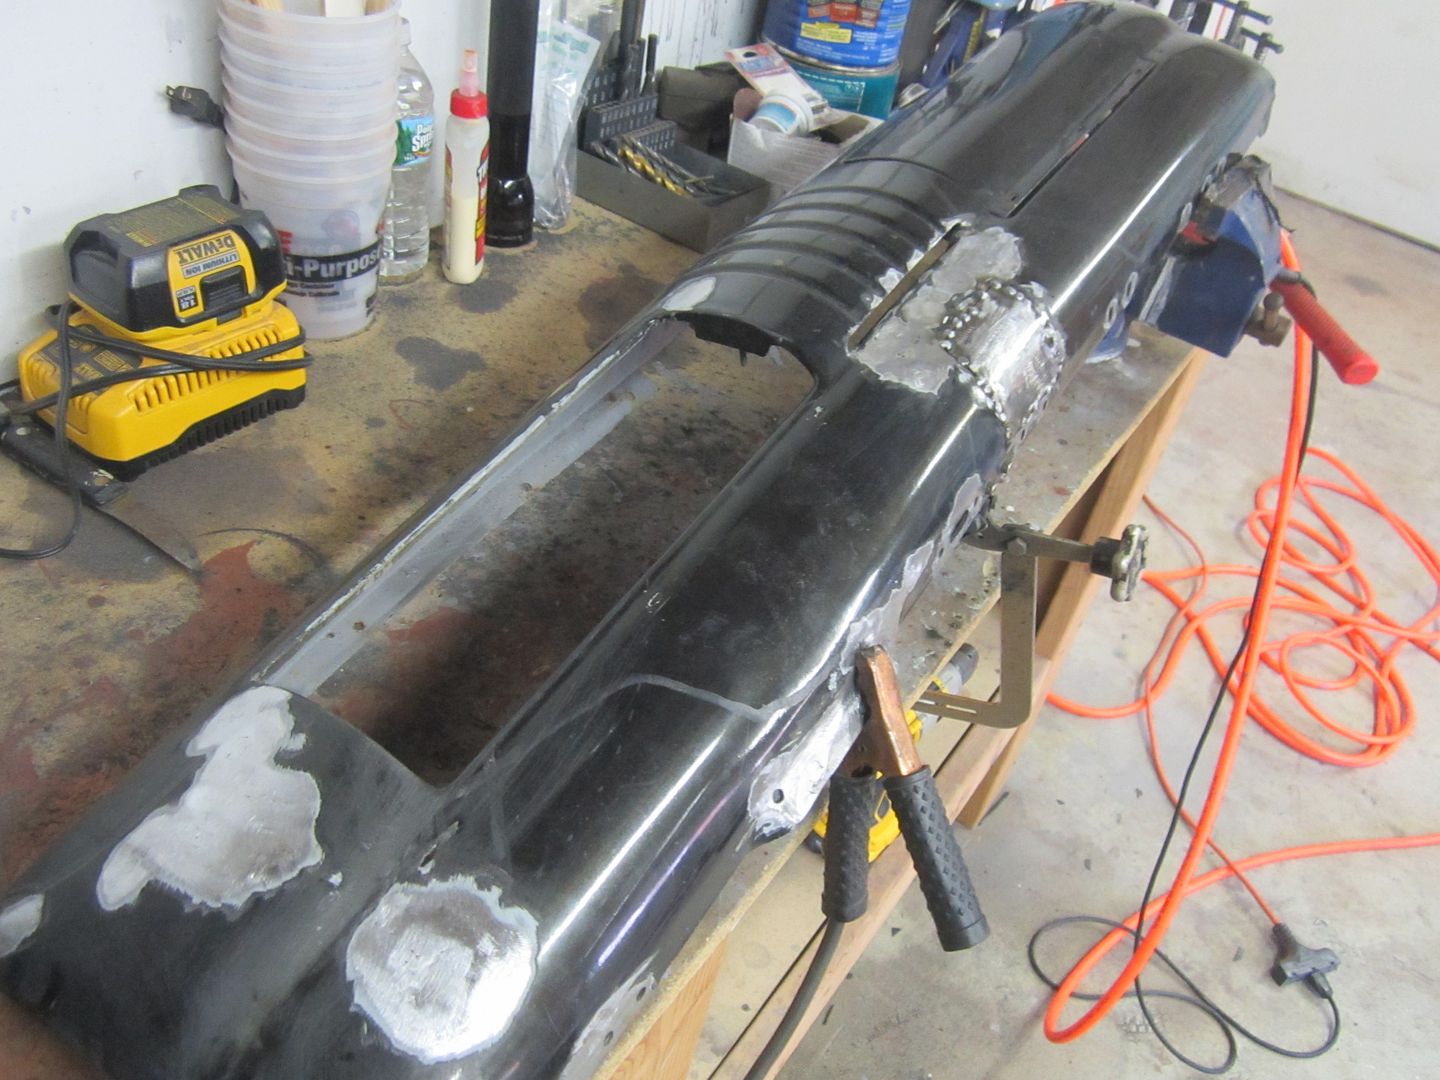 [/URL] [/URL]
|
|
|
|
|
11-04-2015, 11:14 PM
|
#10 |
|
SAVING ONE TRUCK AT A TIME
Join Date: Feb 2010
Location: sherwood oregon
Posts: 1,141
|
Re: 46 pickemup in NJ "the Rebuild"
Lookin good.
__________________
53-suburban (99% done) 40-pick up (99.9% done) 12-cc lb dually D-max (dd) 61-crew cab D-max "PAY LESS FOR WHAT YOU NEED PAY MORE FOR WHAT YOU WANT" 53 BURBAN BARN FIND:http://67-72chevytrucks.com/vboard/s...d.php?t=404091 1940 PROJECT MOON SHINE:http://67-72chevytrucks.com/vboard/s...d.php?t=551088 1961 CREW MAX: http://67-72chevytrucks.com/vboard/s....php?p=6957999 |
|
|
|
|
11-05-2015, 09:43 PM
|
#11 |
|
Registered User
Join Date: Dec 2010
Location: washington NJ
Posts: 766
|
Re: 46 pickemup in NJ "the Rebuild"
Couple other things the Paintman has been futzin around with is the supply lines for the heated manifold. After much banter over on inliners.org I decided to do it like this.............
water supply from block 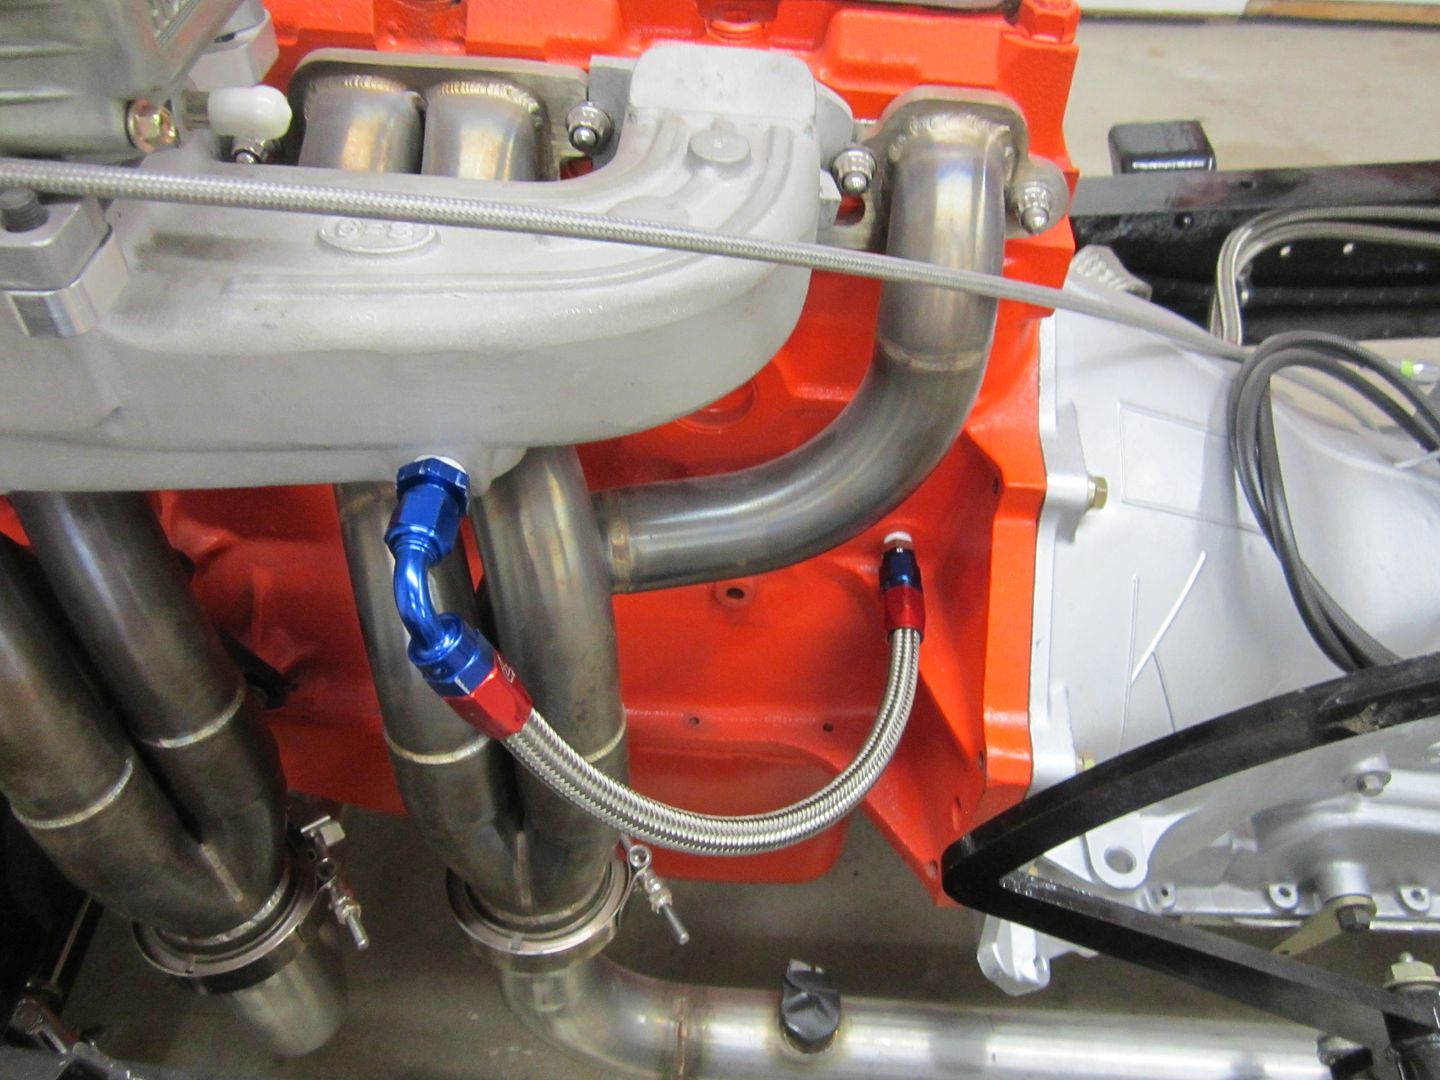 [/URL] [/URL]Water return to Tstat housing 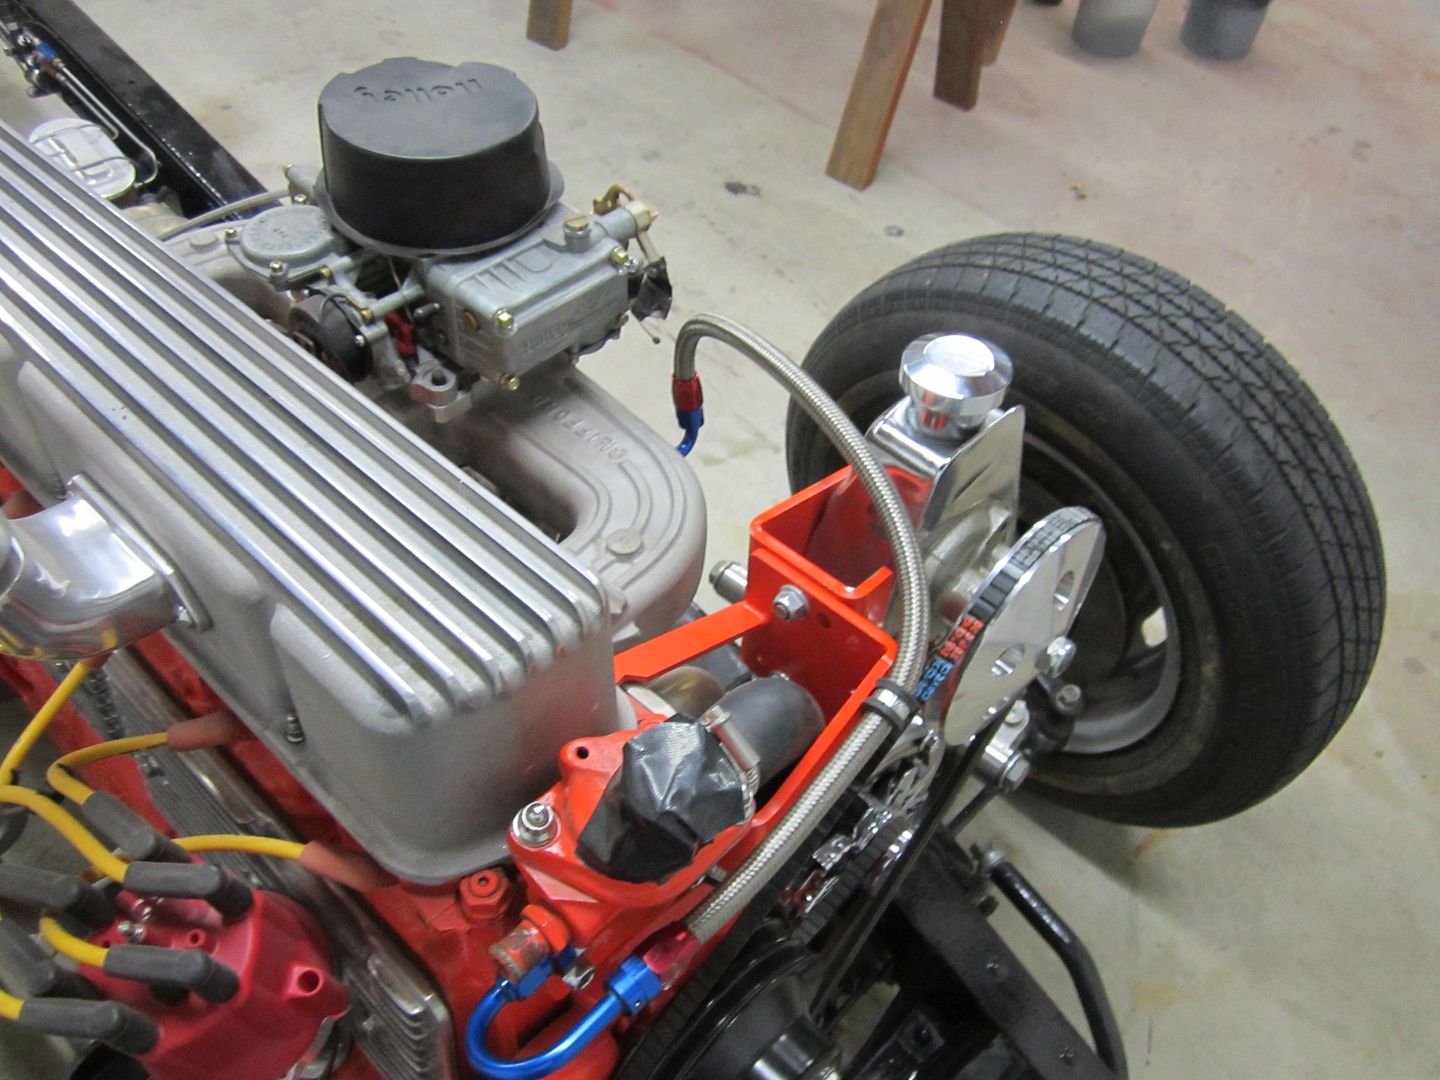 [/URL] [/URL]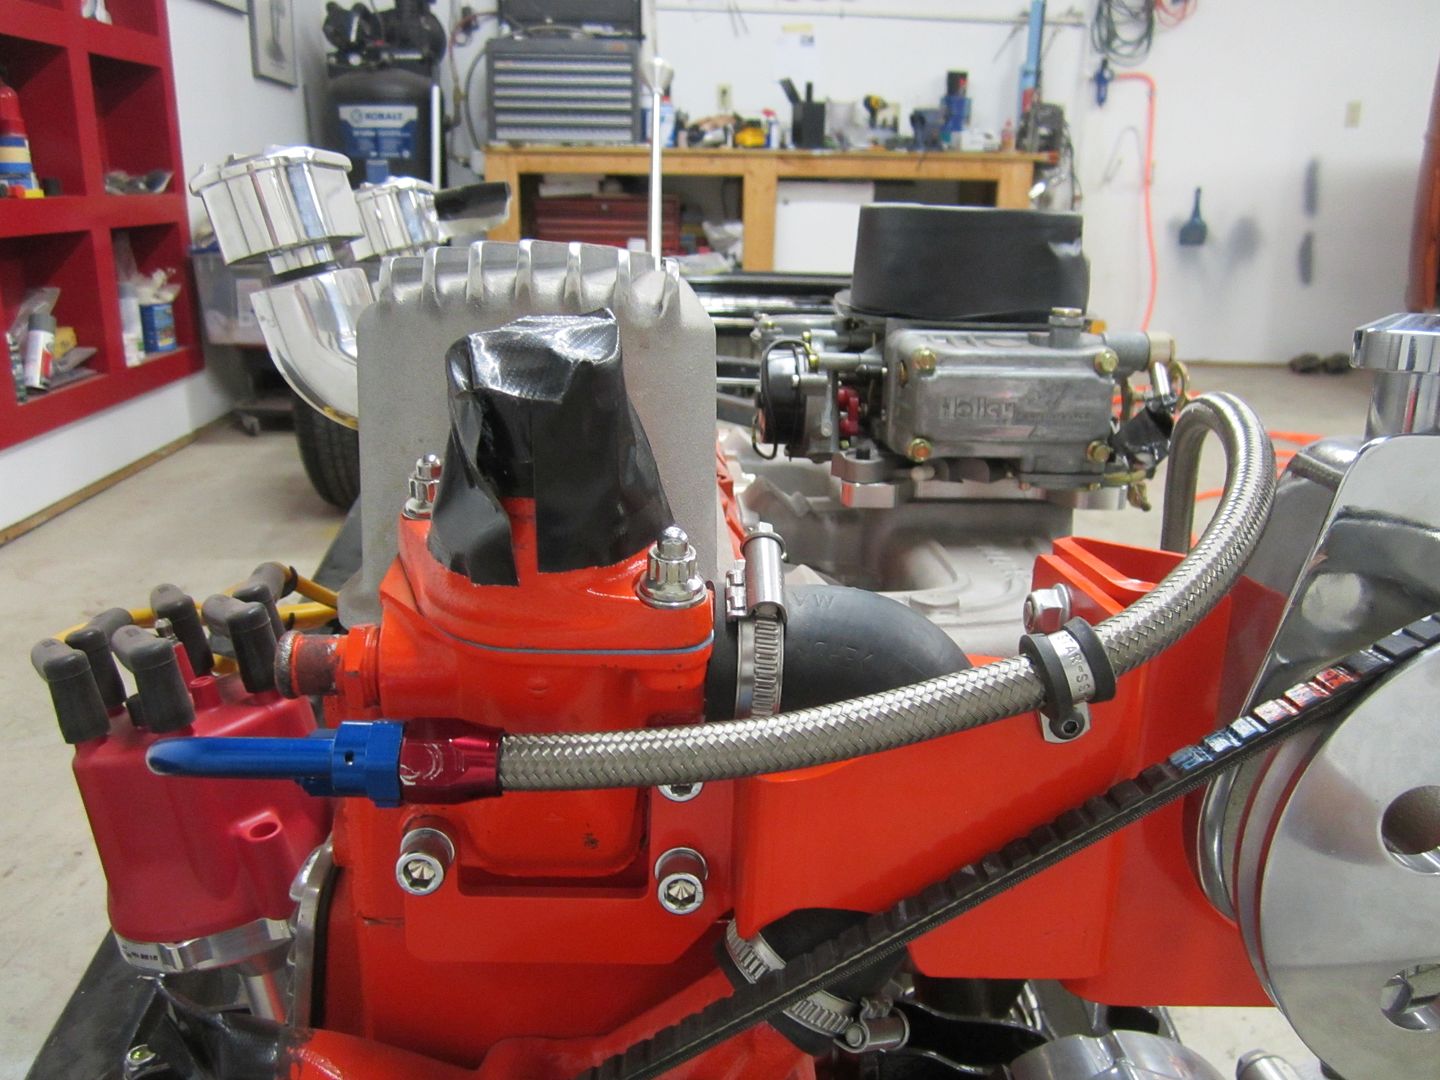 [/URL] [/URL]Started doing some of the ground wires. I have one ground (2 guage) running from each side of the motor to spuds i welded to the motor perches. And another one from the tranny (0 gauge) to the frame. 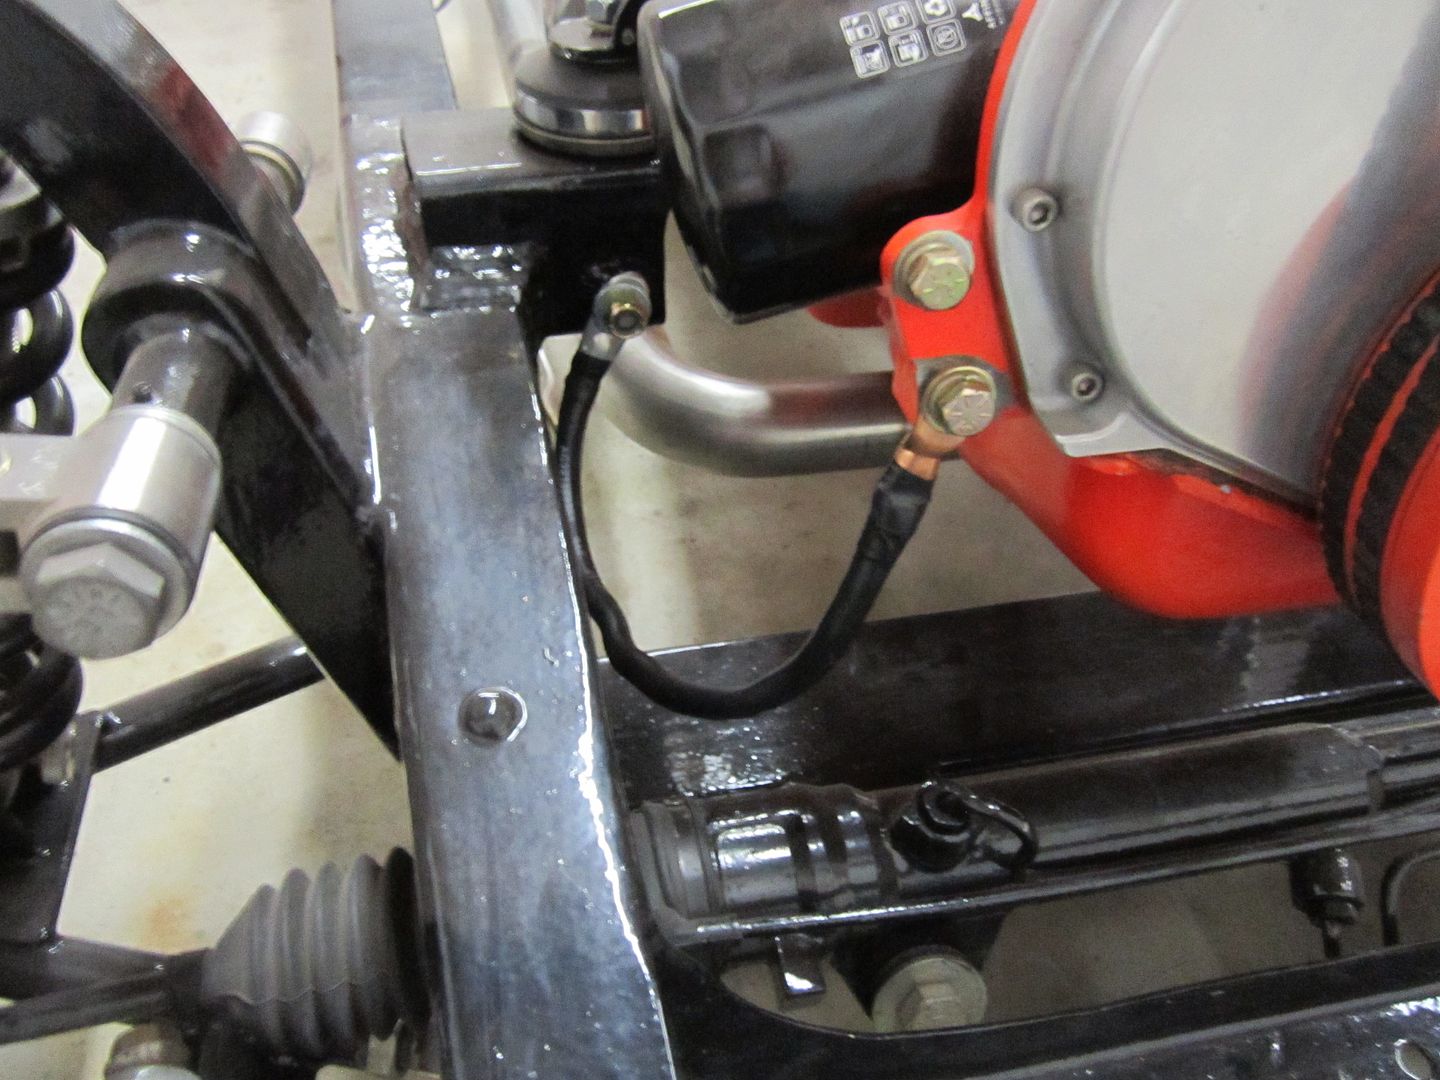 [/URL] [/URL]Kind of hard to see it here but it bolts to the block just to the left of the Alt bracket runs under to the motor perch. 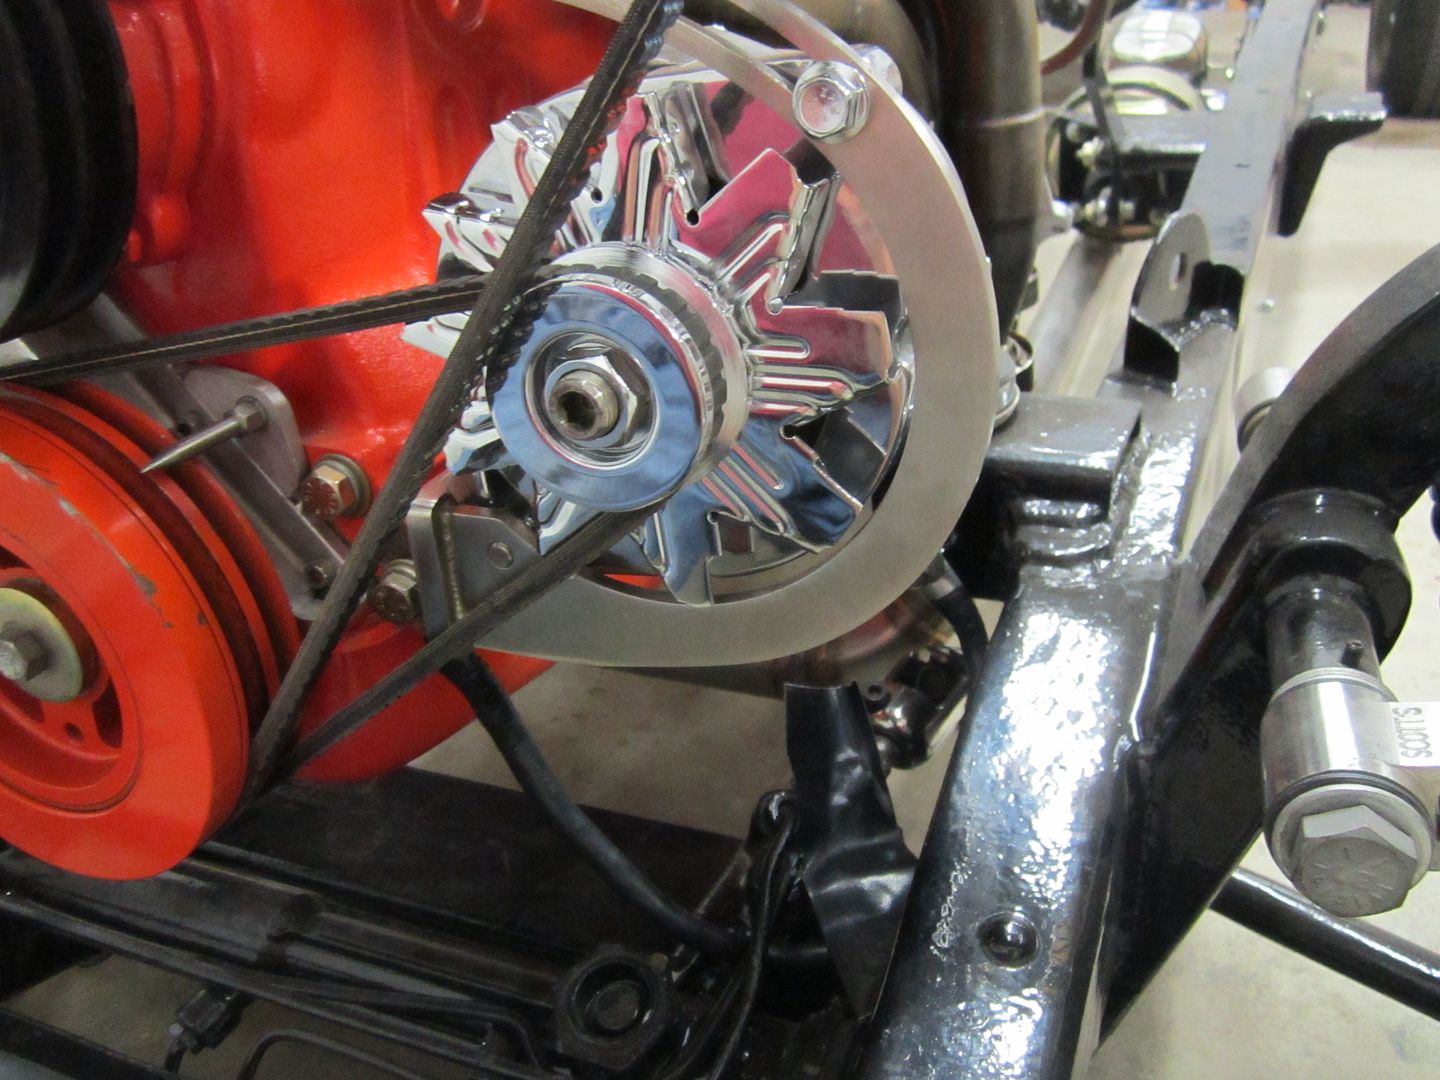 [/URL] [/URL]And then one big honking ground wire from the tranny to another spud welded to the frame. 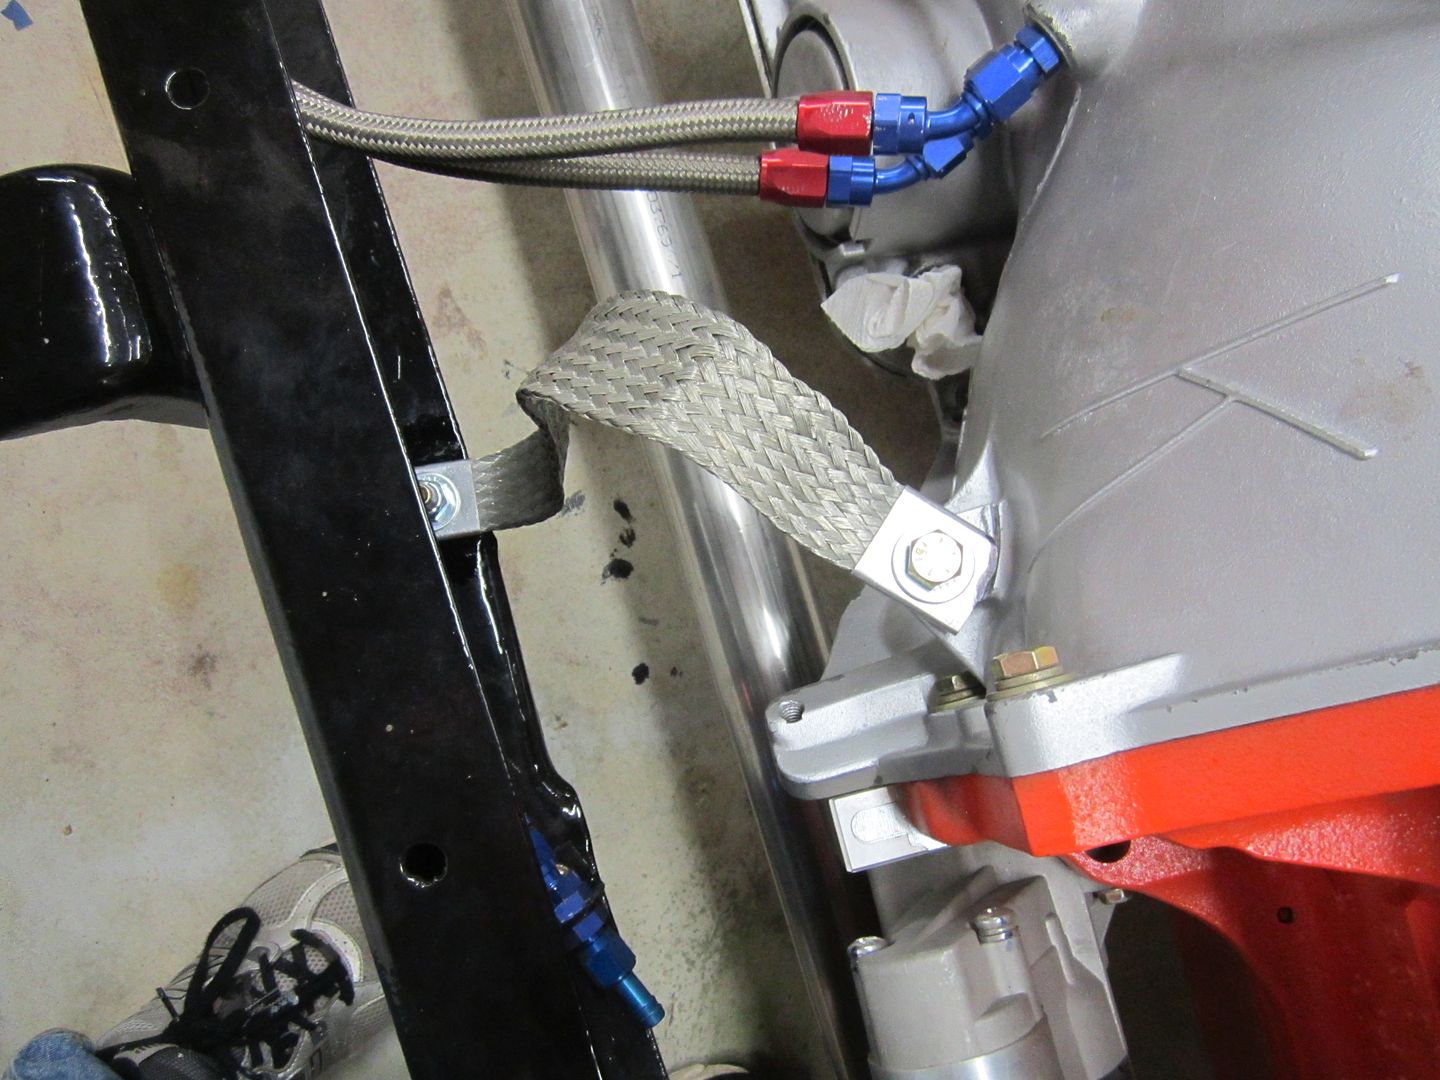 [/URL] [/URL]Next on the list is hitting the inside of the cab with some insulation. I decided to go with FatMat. Nice thing about being a painter is you also have all the tools for hanging paper. It's great working on my papering table with a nice long straight edge for cutting. Finally something I can do on this truck that I actually know what I am doing! Yea me!  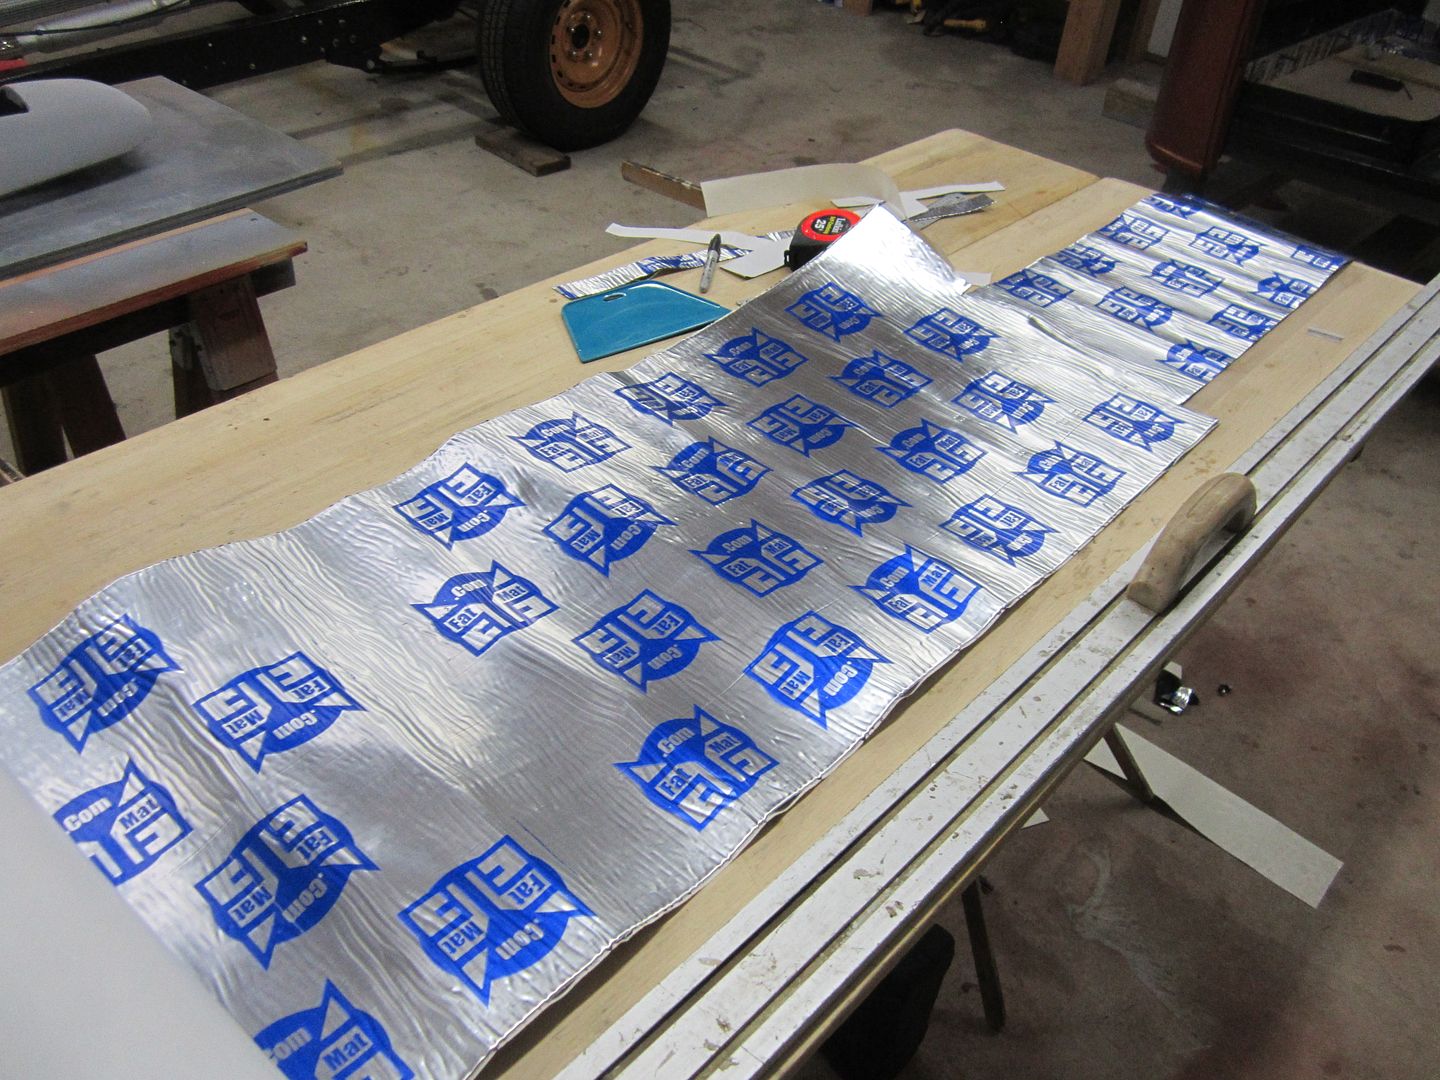 [/URL] [/URL]
|
|
|
|
|
11-05-2015, 09:45 PM
|
#12 |
|
Post Whore
Join Date: Mar 2013
Location: Southern Oregon
Posts: 10,384
|
Re: 46 pickemup in NJ "the Rebuild"
Looks good!
__________________
1966 Chevy C10 "Project Two Tone" http://67-72chevytrucks.com/vboard/s...d.php?t=596643 1964 GMC "Crustine" semi-build:http://67-72chevytrucks.com/vboard/s...d.php?t=665056 My youtube channel. Username "Military Chevy": https://www.youtube.com/channel/UC_h...fzpcUXyK_5-uiw |
|
|
|
|
11-05-2015, 09:56 PM
|
#13 |
|
Registered User
Join Date: Dec 2010
Location: washington NJ
Posts: 766
|
Re: 46 pickemup in NJ "the Rebuild"
While we are shooting the breeze here, some of you may notice an issue I have with my Alt bracket. As you can see in the pic I have used up all the adjustment I have on the slider and still have a loose belt. I have tried using the next size smaller belt which gives me enough room to tighten the belt but makes the power steering belt then rub the bolt on the Alt pulley. So I think I have only 2 options.
1. try and find someone with a machine shop who can extend the channel on the bracket. 2. Use the smaller belt and put a double groove pulley on the Alt and let the power steering belt ride on that pulley as well. 3. Put a couple of 1" spacers between the block and the Alt bracket thus moving the entire unit out further from the power steering belt. Anybody got any other ideas??????? [/URL]
|
|
|
|
|
11-08-2015, 12:19 PM
|
#14 |
|
Registered User
Join Date: Oct 2014
Location: belgium
Posts: 3
|
Re: 46 pickemup in NJ "the Rebuild"
keep it up
love the work you did, its immaculate!!! starting a 46 for a customer in 2 weeks |
|
|
|
|
11-08-2015, 03:22 PM
|
#15 |
|
Registered User
Join Date: Oct 2012
Location: Beaumont Ca.
Posts: 48
|
Re: 46 pickemup in NJ "the Rebuild"
Hey Paintman, Where did you mount your trans. cooler and any pictures of cooler?
|
|
|
|
|
11-08-2015, 08:20 PM
|
#16 | |
|
Registered User
Join Date: Dec 2010
Location: washington NJ
Posts: 766
|
Re: 46 pickemup in NJ "the Rebuild"
Quote:
with pics of my shiny new stainless turn downs to finish up the exhaust. 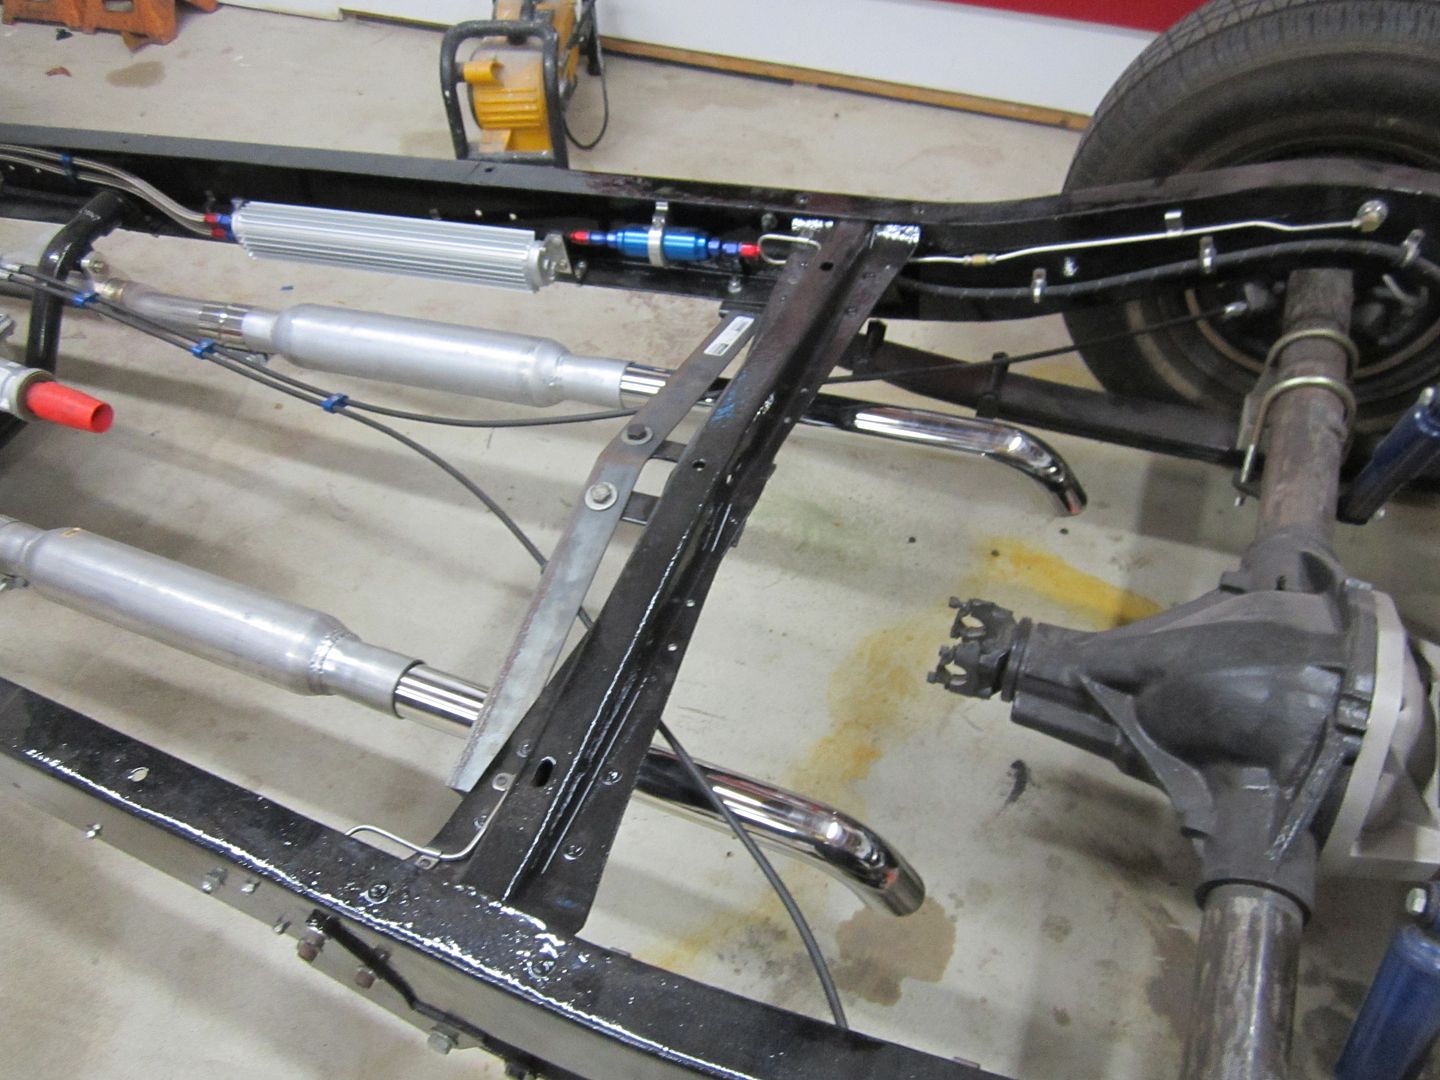 [/URL] [/URL]Still kicking around the idea of mounting a second cooler (pancake style) up in front of the radiator. 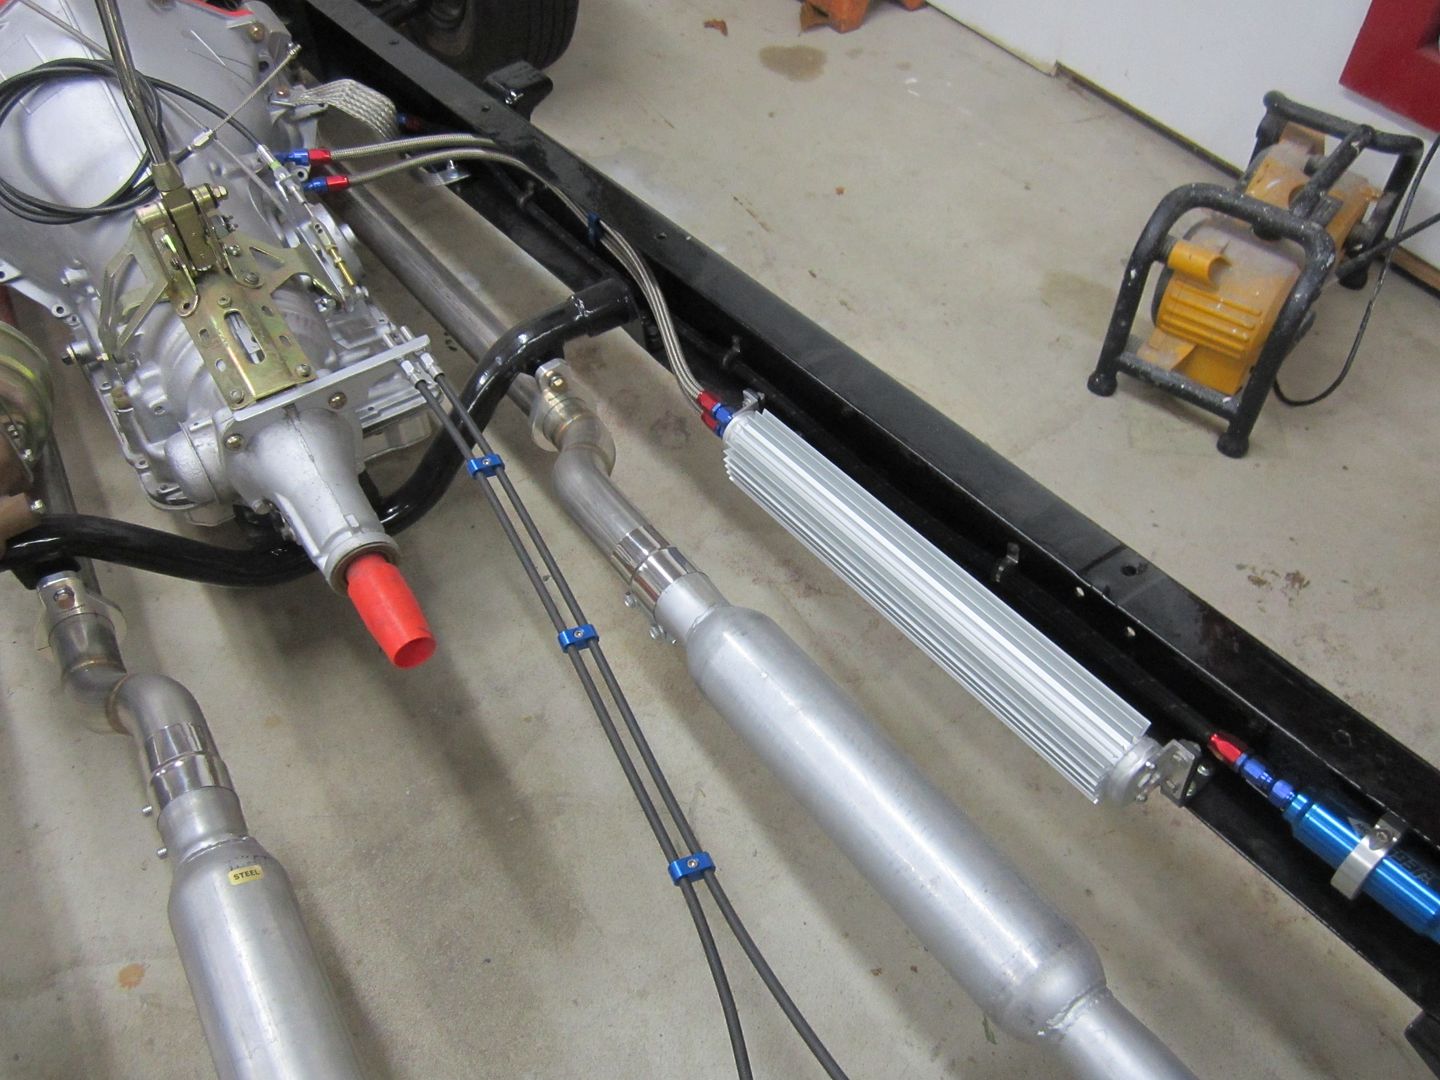 [/URL] [/URL]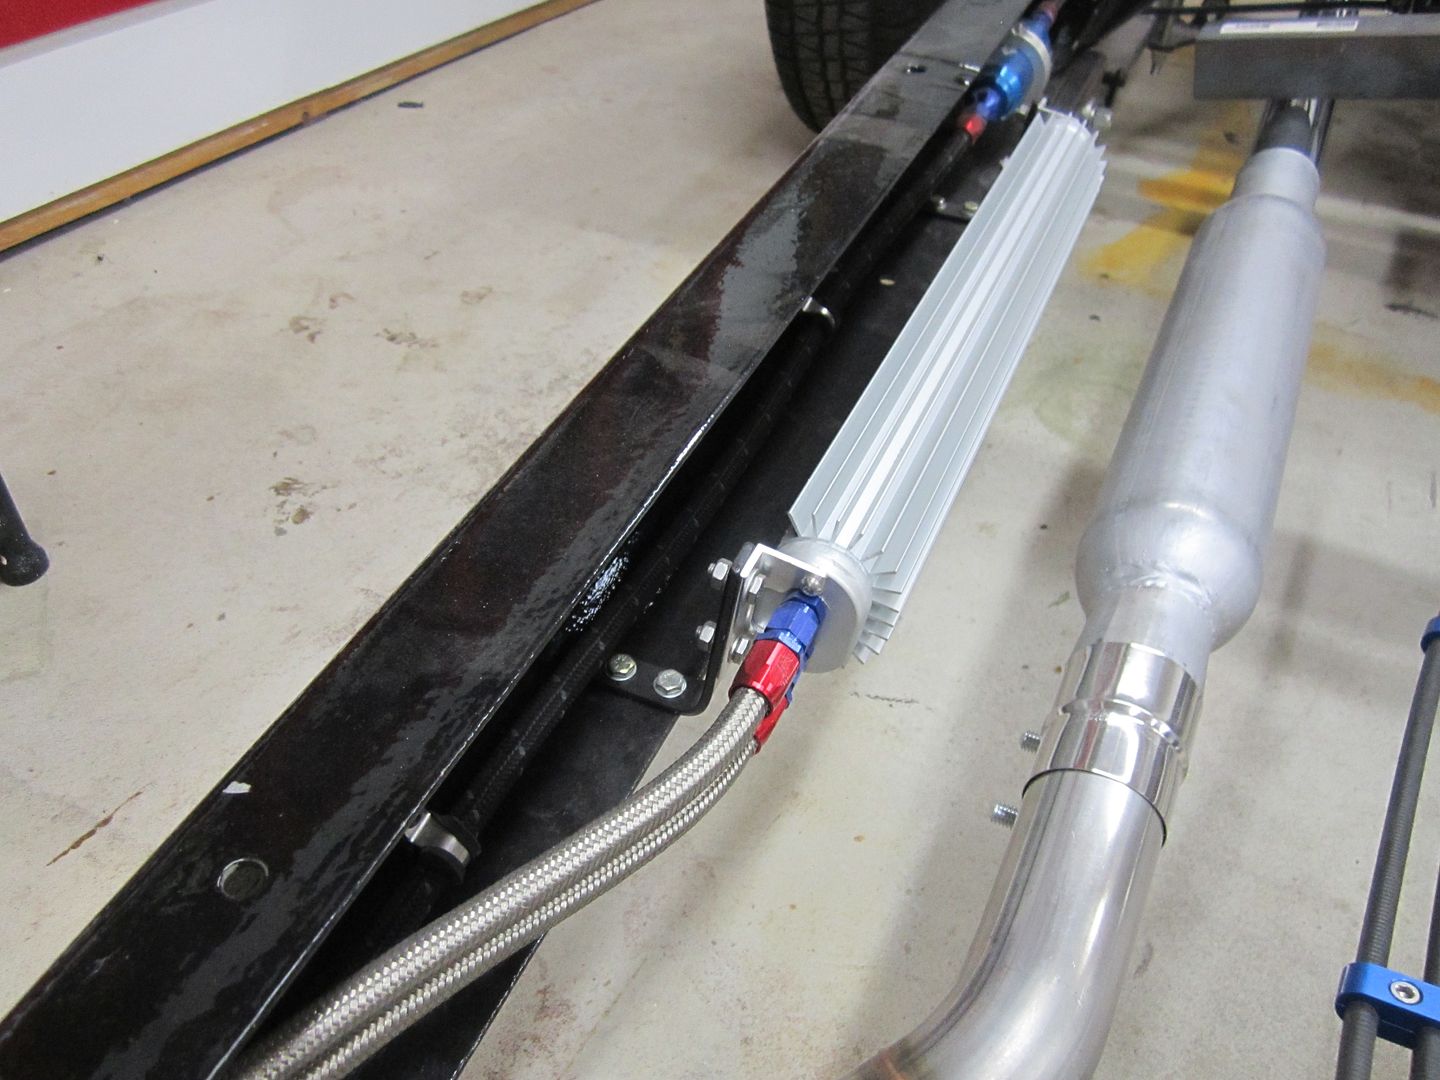 [/URL] [/URL]
|
|
|
|
|
|
11-29-2015, 08:38 PM
|
#17 |
|
Registered User
Join Date: Dec 2010
Location: washington NJ
Posts: 766
|
Re: 46 pickemup in NJ "the Rebuild"
Never in my wildest dreams did I ever think I would see this day!!!!!!!!!!!!!!!
All you need is a bunch of "Rent a Sons" plus an old school buddy and his son! 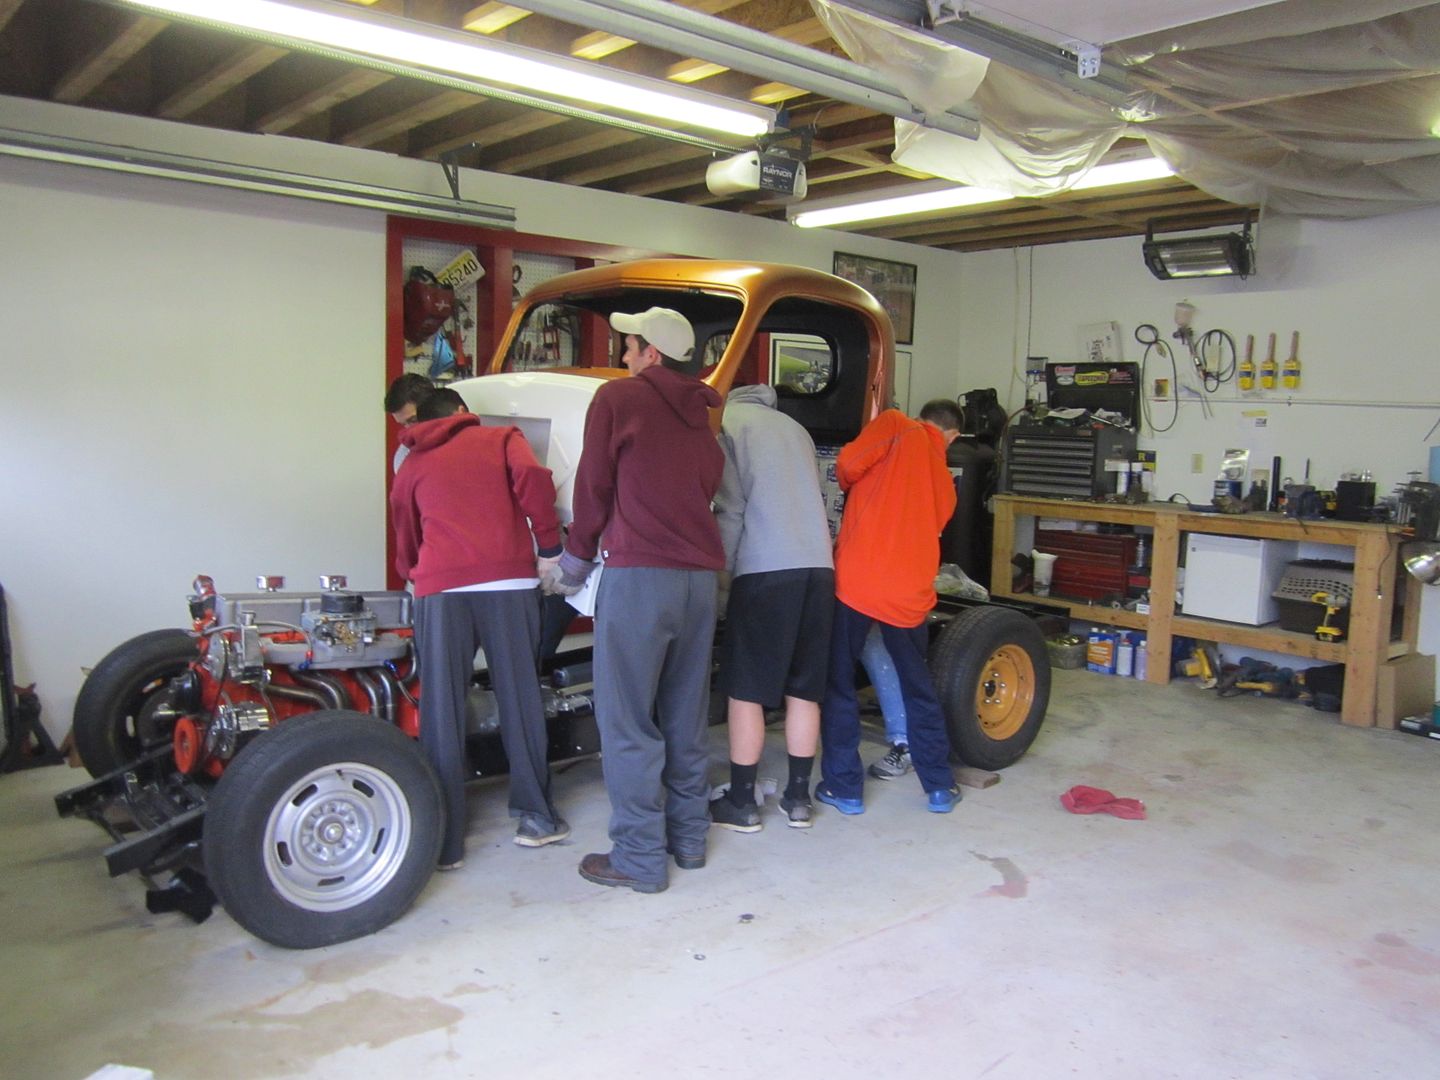 [/URL] [/URL]The best part is my wife gets her side of the garage back  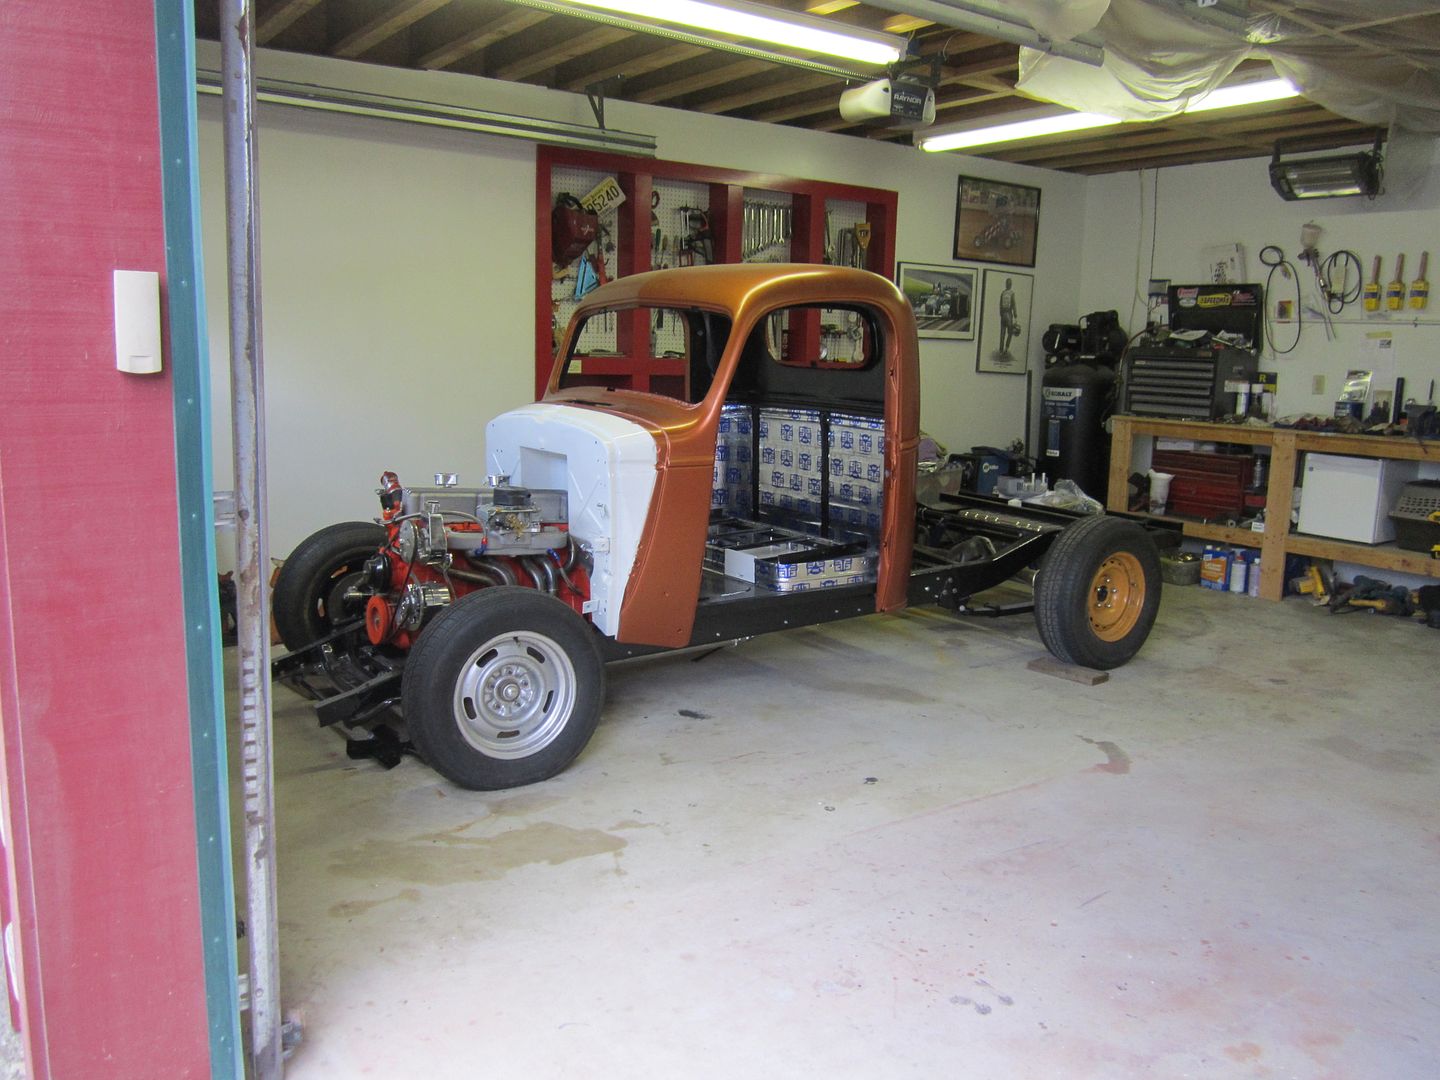 [/URL] [/URL]Yup, I think I can live with that. 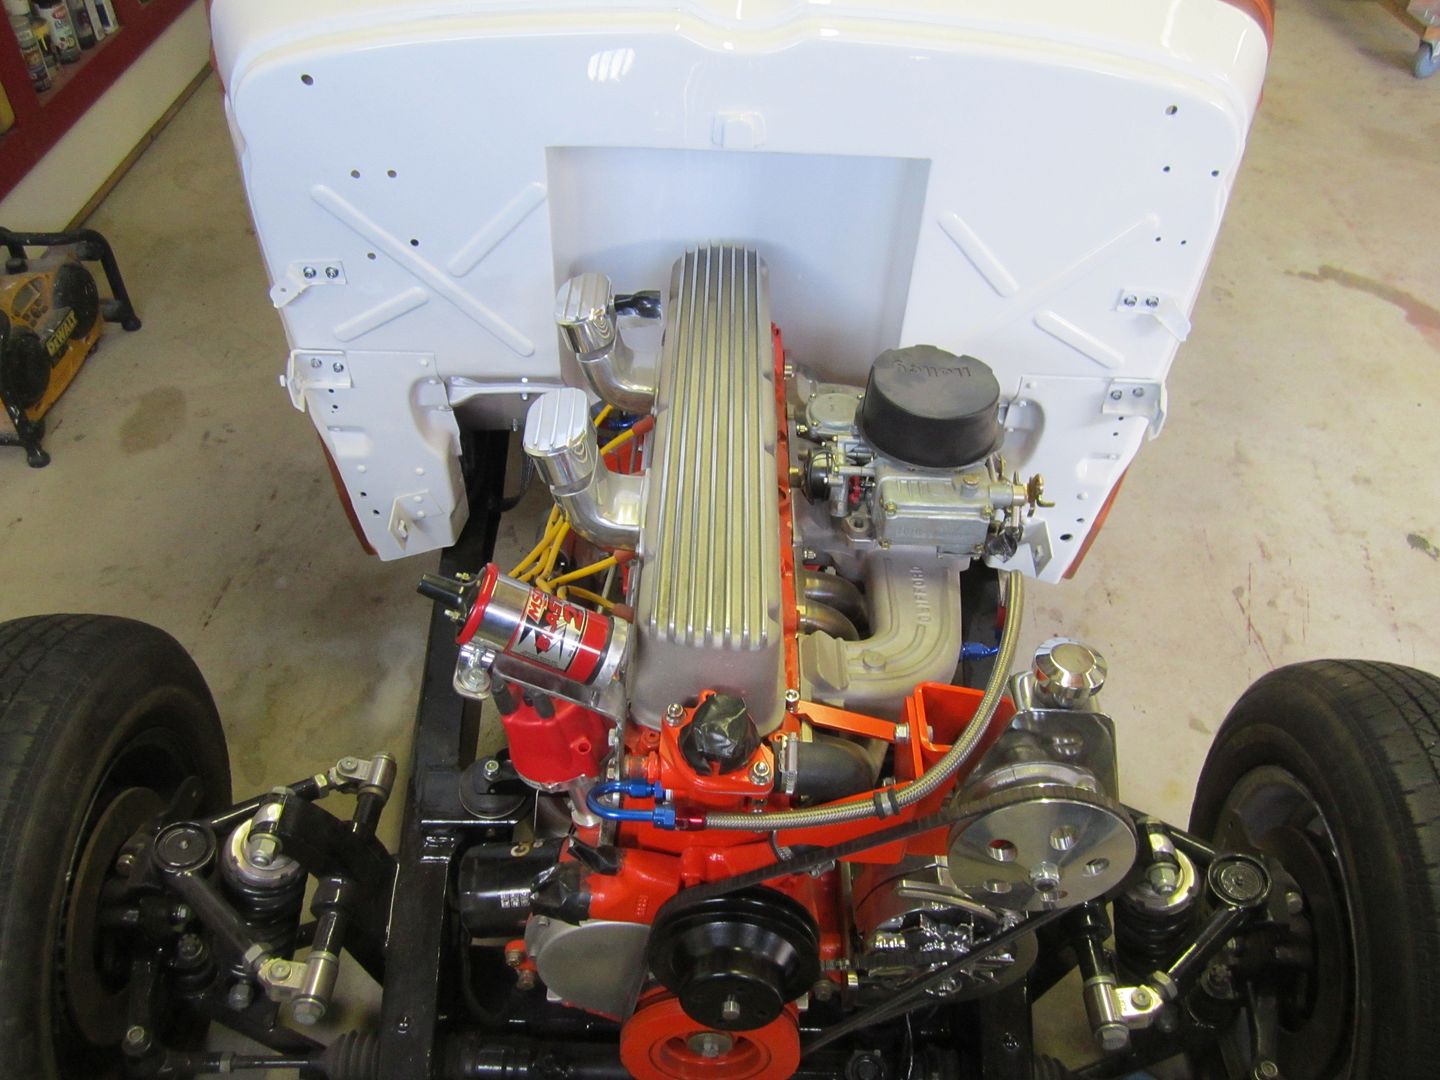 [/URL] [/URL]Nothing left to do now except everything else...................stay tuned. |
|
|
|
|
12-02-2015, 07:14 AM
|
#18 |
|
Registered User
Join Date: Aug 2010
Location: Lafayette In.
Posts: 252
|
Re: 46 pickemup in NJ "the Rebuild"
Looking very good. Looks like if you extend the bolt channel, your alt will hit the bracket. Can you extend the bracket at the mounting bolts a inch or so to gain some more clearance?
|
|
|
|
|
12-24-2015, 01:40 PM
|
#19 |
|
Registered User
Join Date: Dec 2010
Location: washington NJ
Posts: 766
|
Re: 46 pickemup in NJ "the Rebuild"
Ok still pluggin along at this with some updates as to what's been going on. I figured I would try an wrap up the engine bay by doing all the hoses, fuel line etc.
I wanted to have heat in the cab but after looking around on the web for a heater unit that would fit I just couldn't find anything. Vintage Air has a unit that they say is 9 1/4" wide but they don't calculate the width of the unit with the hose fittings on it. So I was thinking with the fittings it would be at least 10" wide. Well I only have about 9 3/4" between the recessed portion of the firewall and the side of the cab, so I had to come up with another plan. I decided to try an re-use the old heater that came with the truck. That posed all kind of problems because the heater core was no good. I think I wasted the better portion of a week searching the internet trying to find just the right size core that would fit the housing. Frustrating part was when I found a core that would fit, it didn't have the right size, or proper location of the hose bungs. I finally gave up and decide to try and cram an oversized square into a round hole. Here's the heater as I got it.  [/URL] [/URL] Here's the heater nos with the new core. this was the smallest core I could find with the bungs in a location that I like. As you can see I had to hack the side out of the housing to squeeze the core in. I think once I pull it back out for final painting it will look fine tucked up under the dash. Maybe in the waaaay distant future I will just make my own housing that will fit in the tight space I have. 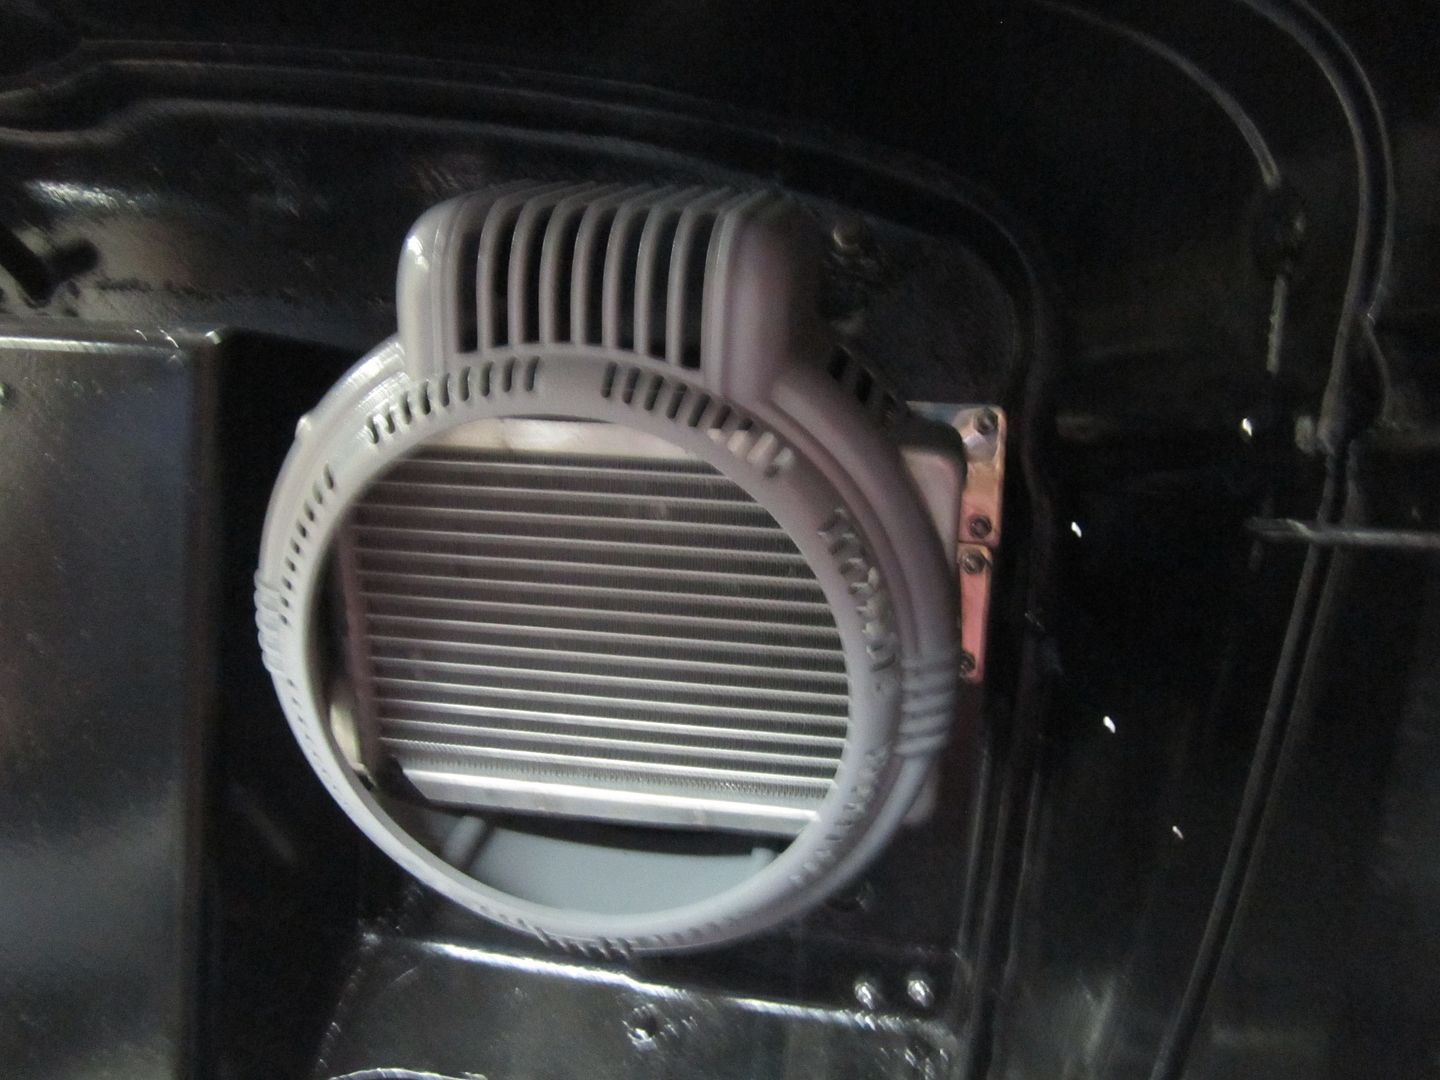 [/URL] [/URL]
|
|
|
|
|
12-24-2015, 02:12 PM
|
#20 |
|
Registered User
Join Date: Dec 2002
Location: Cactus Patch So. Az
Posts: 4,749
|
Re: 46 pickemup in NJ "the Rebuild"
That has to be the most expensive heater I have seen, but I am sure it will heat the cab very good
Keep up the good work
__________________
53 TuTone Extended Cab 350 4-Spd 3:08 (SOLD) 53 Chevy Moldy pearl green ZZ-4 4L60E 9" 3:25 55 GMC 1st Black Mll (ZZ4) ZZ6 TKO 600 5 sp 3:73 62 Solidaxle Corvette Roman Red (327 340hp 4spd 3:36) C4 & C5 suspension tube chassis LS 3 4L70E 65 Corvette Coupe 327 350hp 4spd 4:11 78 Black Silverado SWB (350/350) 5.3 & 4L60E 3:42 2000 S-Type 3.0 (wife cruiser) 2003 GMC SCSB 5.3 4L60E 3:42 |
|
|
|
|
12-24-2015, 02:48 PM
|
#21 | |
|
Registered User
Join Date: Dec 2010
Location: washington NJ
Posts: 766
|
Re: 46 pickemup in NJ "the Rebuild"
Quote:
But I look at it this way............I've worked my ass off for the last 30 years, I have more days behind then ahead of me, and when I am gone at least my daughters won't have to worry about the heater hoses, just everything else I have done half assed
|
|
|
|
|
|
12-24-2015, 03:44 PM
|
#22 |
|
Registered User
Join Date: Dec 2002
Location: Cactus Patch So. Az
Posts: 4,749
|
Re: 46 pickemup in NJ "the Rebuild"
Not to worry that truck will out live all of you !!
You could have had real expensive rad and had the cap end up under the bracket. Take it out now and have the filler neck removed and placed where you want it to be, this is just another step in exercise of WTF, why can't the do it right the first time
__________________
53 TuTone Extended Cab 350 4-Spd 3:08 (SOLD) 53 Chevy Moldy pearl green ZZ-4 4L60E 9" 3:25 55 GMC 1st Black Mll (ZZ4) ZZ6 TKO 600 5 sp 3:73 62 Solidaxle Corvette Roman Red (327 340hp 4spd 3:36) C4 & C5 suspension tube chassis LS 3 4L70E 65 Corvette Coupe 327 350hp 4spd 4:11 78 Black Silverado SWB (350/350) 5.3 & 4L60E 3:42 2000 S-Type 3.0 (wife cruiser) 2003 GMC SCSB 5.3 4L60E 3:42 |
|
|
|
|
12-24-2015, 03:53 PM
|
#23 |
|
Registered User
Join Date: Dec 2002
Location: Cactus Patch So. Az
Posts: 4,749
|
Re: 46 pickemup in NJ "the Rebuild"
The 37 Chevy I had, had the same problem with the filler neck, it hit the core brace.
I had to remove the rad and have the neck "tilted" to the right so I could fill the rad. Moving right along!
__________________
53 TuTone Extended Cab 350 4-Spd 3:08 (SOLD) 53 Chevy Moldy pearl green ZZ-4 4L60E 9" 3:25 55 GMC 1st Black Mll (ZZ4) ZZ6 TKO 600 5 sp 3:73 62 Solidaxle Corvette Roman Red (327 340hp 4spd 3:36) C4 & C5 suspension tube chassis LS 3 4L70E 65 Corvette Coupe 327 350hp 4spd 4:11 78 Black Silverado SWB (350/350) 5.3 & 4L60E 3:42 2000 S-Type 3.0 (wife cruiser) 2003 GMC SCSB 5.3 4L60E 3:42 |
|
|
|
|
12-24-2015, 05:39 PM
|
#24 |
|
Registered User
Join Date: Dec 2010
Location: washington NJ
Posts: 766
|
Re: 46 pickemup in NJ "the Rebuild"
I think the best thing to do is just lower the hole radiator by moving the holes that attach it to the core support. I figure by the time I send it all the way back to CA and hope the dope smoker thats in charge of fixing actualy does it right, and then have it shipped back with all the goons at UPS throwing it around, it will be 4 weeks before I get it back.
I certainly have plenty of room to drop it lower into the core support. almost 4" under the bottom of the radiator I really only need 1 1/2 to get the cap off  [/URL] [/URL] 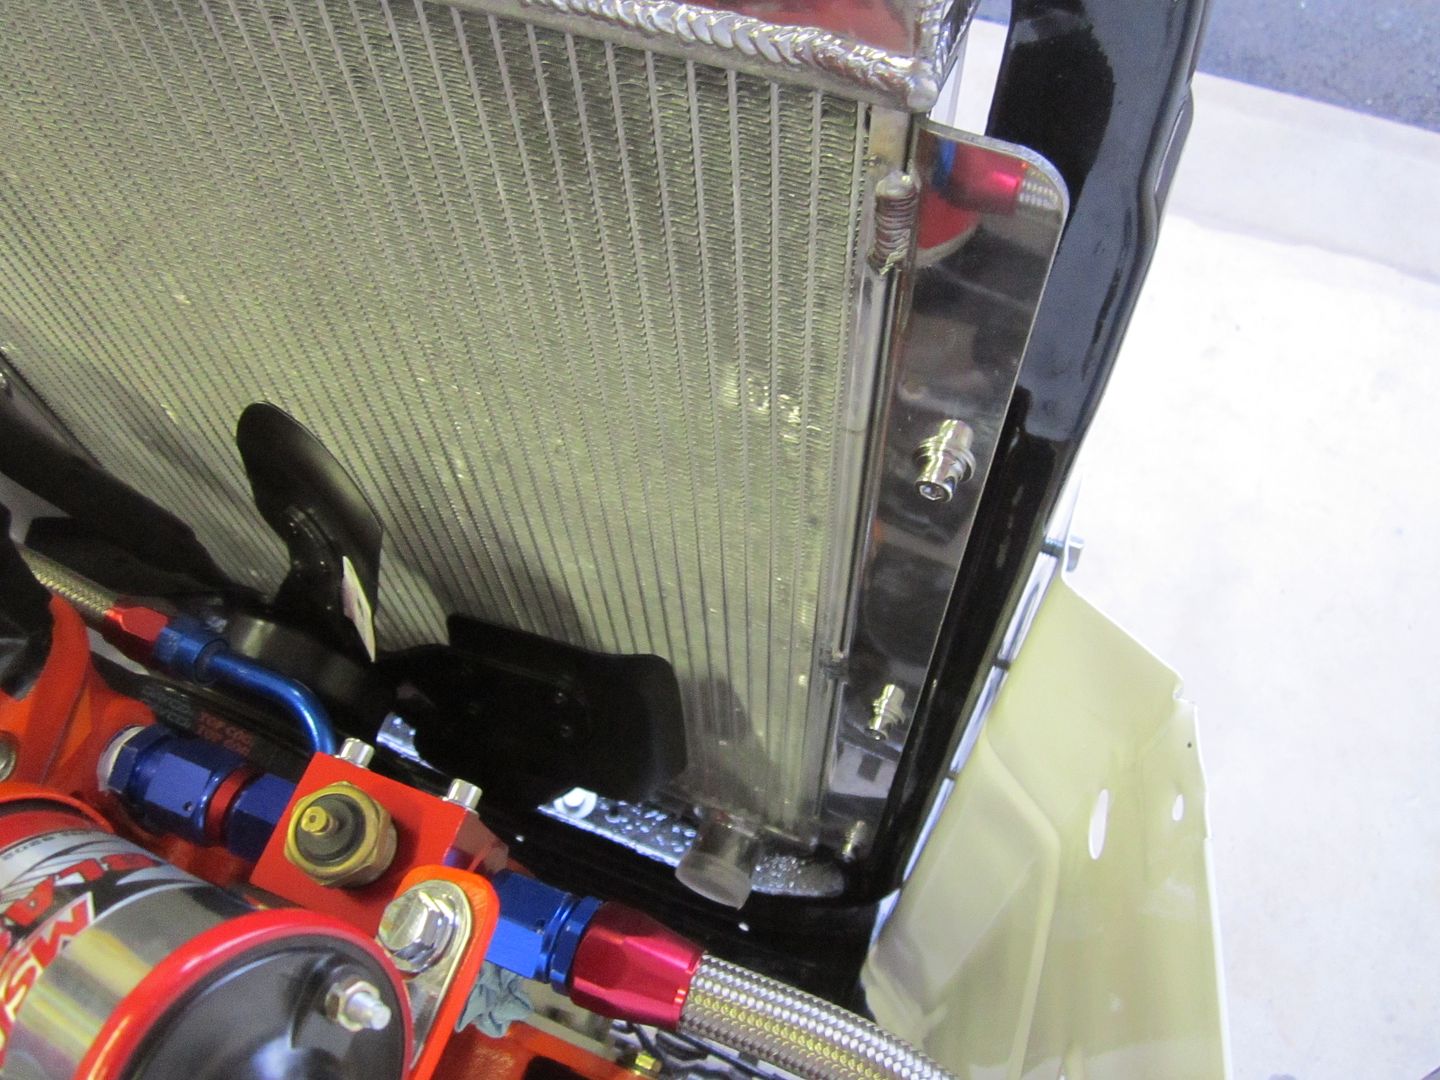 [/URL] [/URL]By the way does anybody know what the hell these little "U" tabs are for on the face of the radiator? Looks like tabs to hold some kind of hose in place. 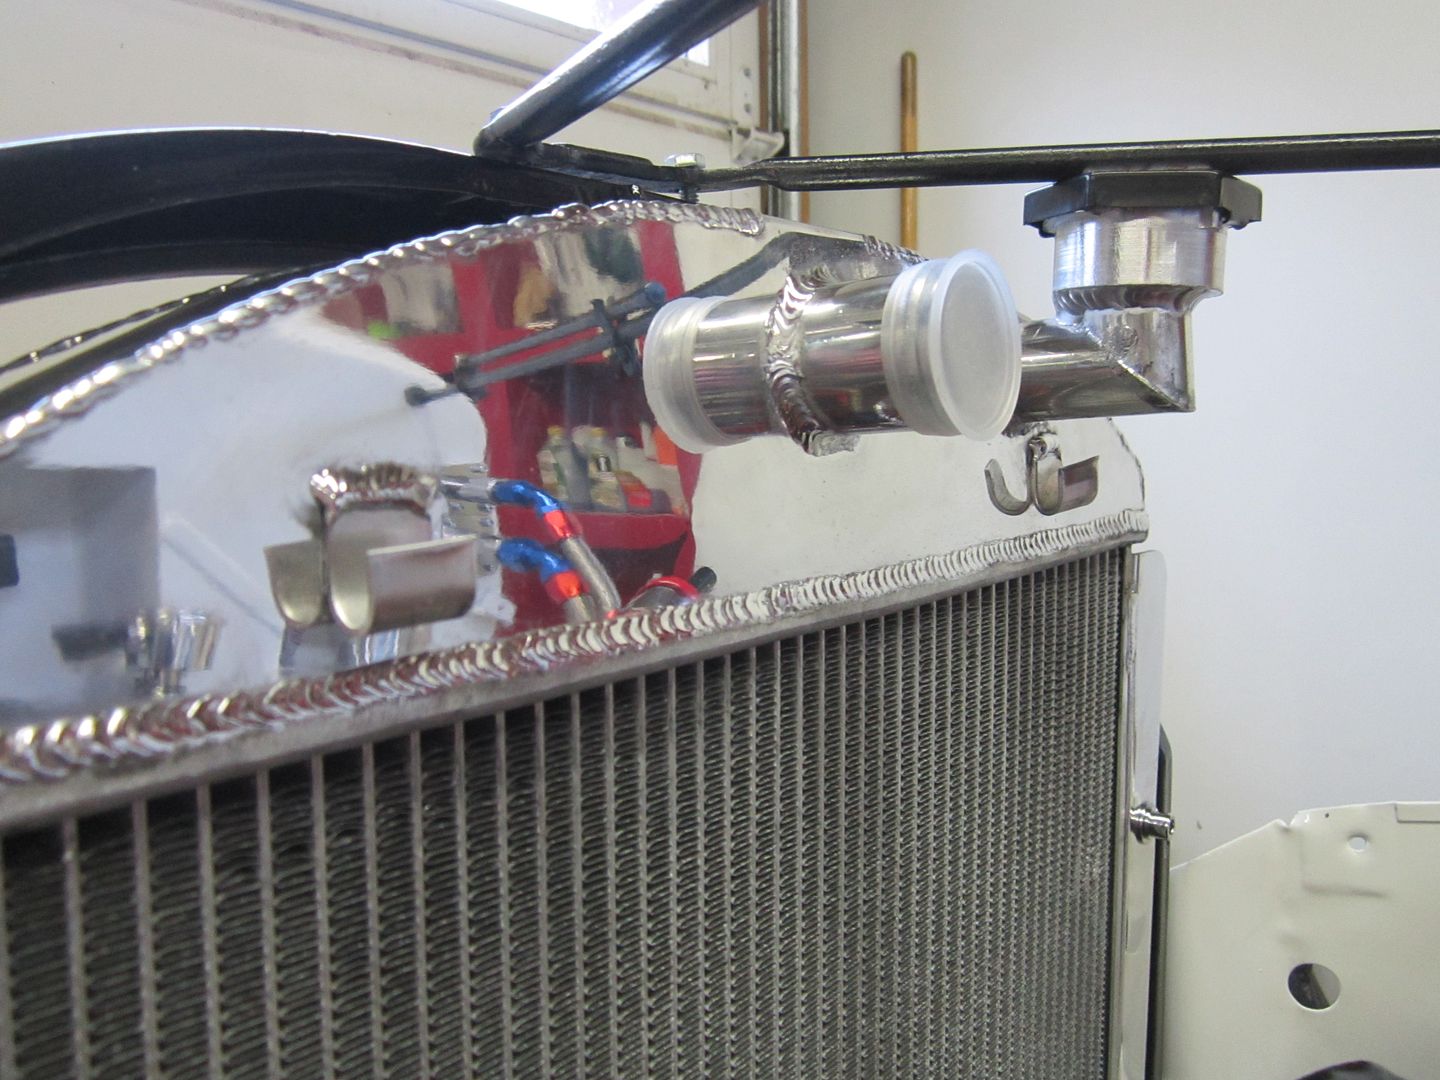 [/URL] [/URL]
|
|
|
|
|
12-24-2015, 06:20 PM
|
#25 |
|
Registered User
Join Date: Nov 2013
Location: Antioch, Ca.
Posts: 447
|
Re: 46 pickemup in NJ "the Rebuild"
Maybe to hang a shroud? Or dress wires from a electric fan?
__________________
Take Care Troy |
|
|
|
 |
| Bookmarks |
| Thread Tools | |
| Display Modes | |
|
|


 Hybrid Mode
