
|
Register or Log In To remove these advertisements. |
|
|
|
|||||||
 |
|
|
Thread Tools | Display Modes |
 06-04-2008, 11:20 PM
|
#26 |
|
Senior Member
Join Date: Jul 2005
Location: Winters Ca. 95694
Posts: 4,843
|
Re: American Revolution 2nd time around 2wd Blazer
Finlay I have something to report!! I have been out with a bad back so progress was stopped for a bit. Lucky for me the owner is in no real hurry and is very understanding. That being said lets get back to it.
I put in a few hours last weekend completing the front suspension and ran the air line Through the cross member over to the pass side were it will meet the pass side line and run down the frame to the control valve. I did not want any future problems with the lines so I picked up 25' of cheap 3/8" ID vacume line and ran the 1/4" air line Through that for added wear protection. So right now the front is complete except for the height switches because I want to set those once the ride height is decided on. Today I spent some time out in the shop working on the rear rust issues with the floor. It was worse than I thought but still not that bad and is easily fixable at this point so I am glad we are not waiting to do this down the road. A month or so ago I picked up a real spot weld drill set for about $60 or so and boy is it worth the money. I started by slicing the rear floor into sections down the middle of the ribs so I am only dealing with 1 or 2 spot welds at a time. Once I find the spot weld I just center punch it and drill it out. Simple as that. Once the back section was removed I cut out the rust that was hiding in the rear sill header and made sure I went past the rust into good metal. I will simply brake some 16ga to patch these areas before cleaning and prepping and installing the new floor. I then trimmed down the new floor section so it was at least one rib wider than the hole in the floor. Once I am happy with the fit I will screw down the rear sill and just take my cut off wheel and slice Through the two over lapping ribs to make a clean but weld cut. Well this is it for now I plan on just doing a few hours a day until my back is back in motion. Here are a few pics to follow along with my rambling  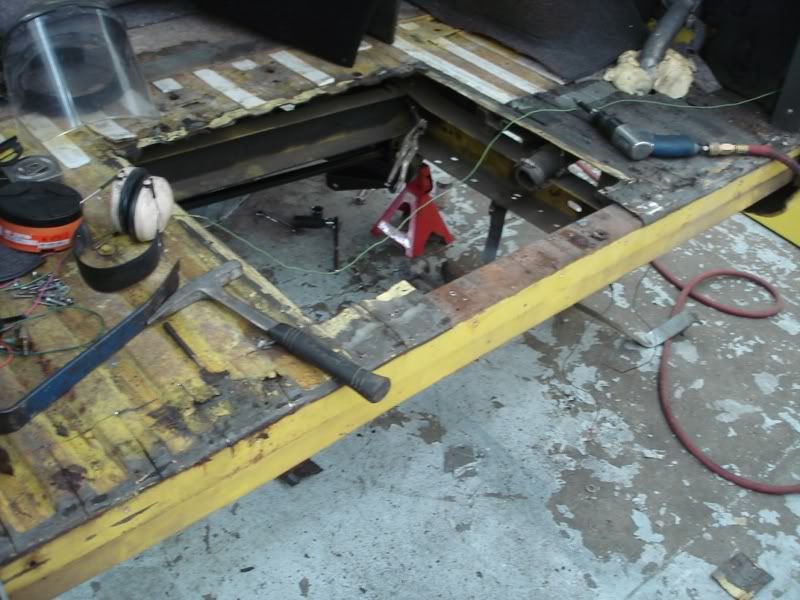 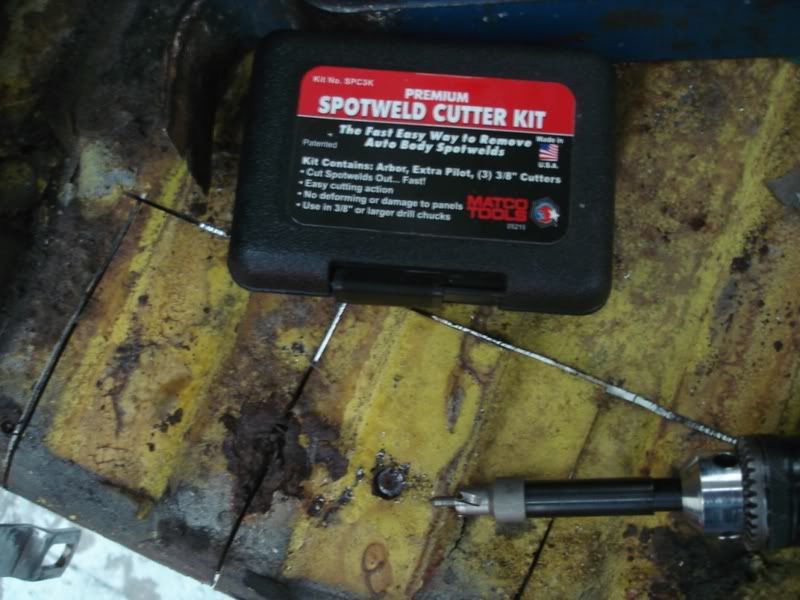 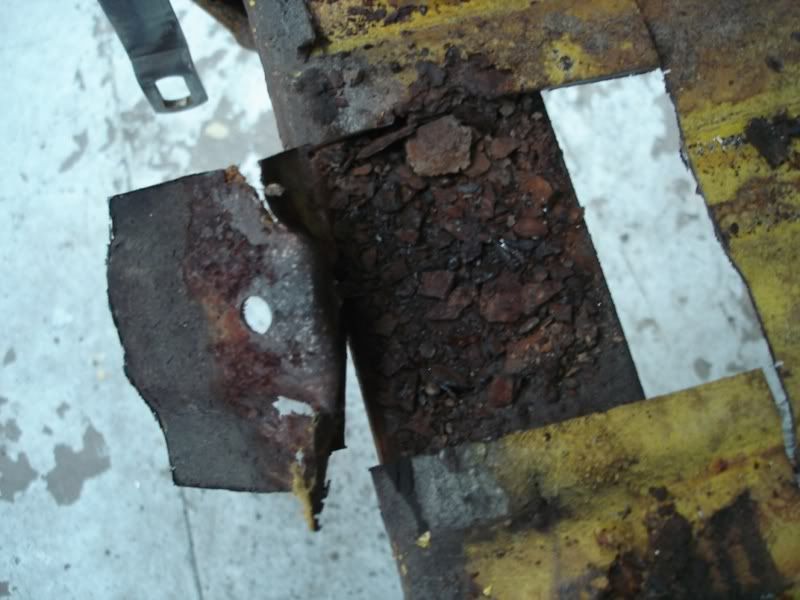 Love the bondo filler patch! 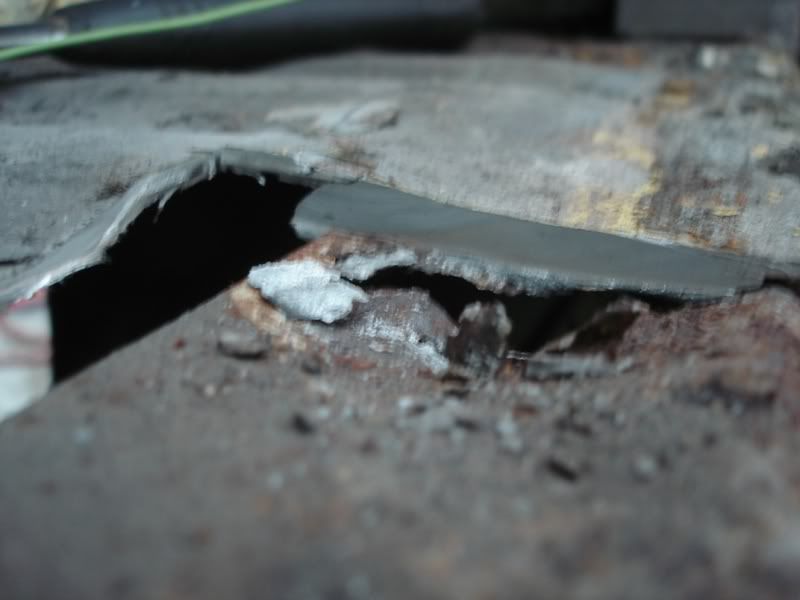 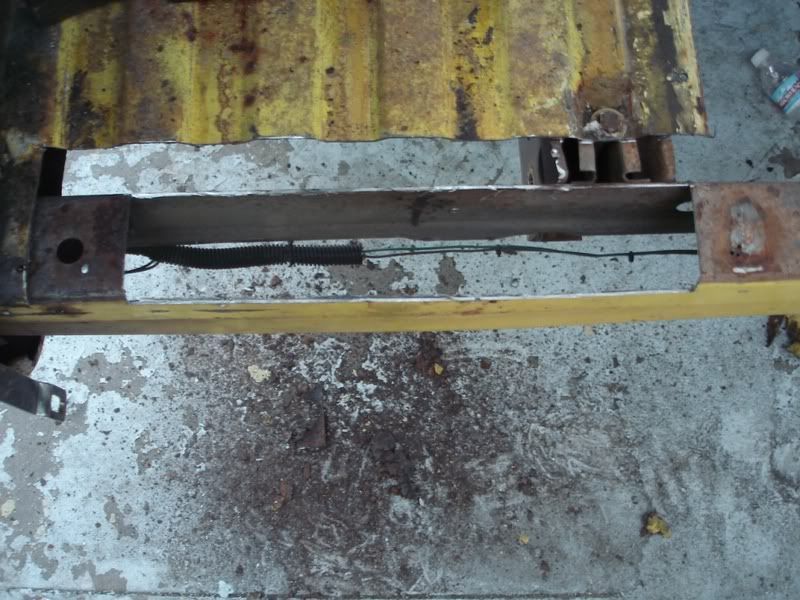 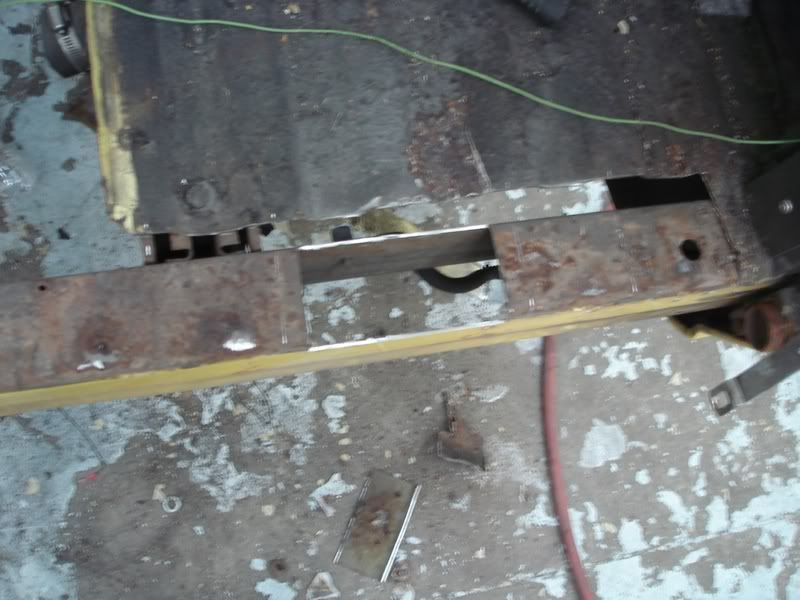 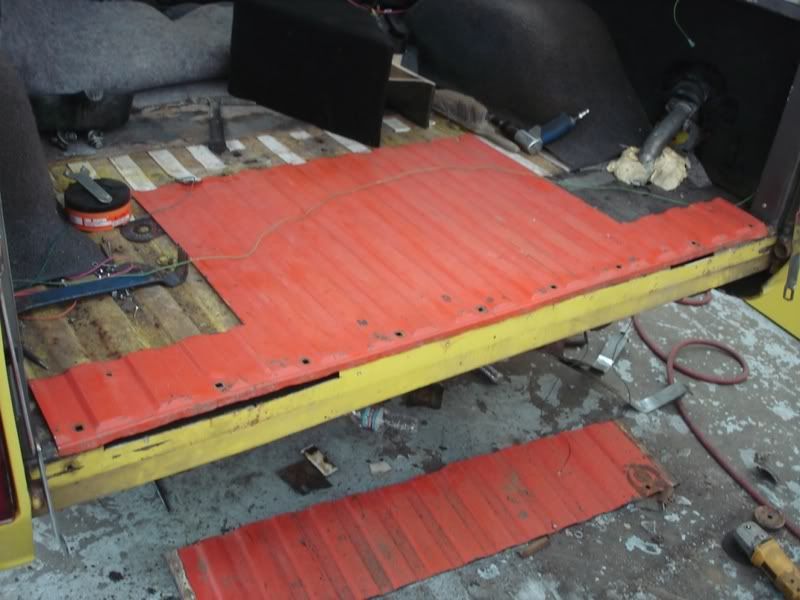 Kevin LFD Inc. |

|

|
|
06-05-2008, 09:35 AM
|
#27 |
|
Registered User
Join Date: Mar 2008
Location: Waukee, Iowa
Posts: 1,608
|
Re: American Revolution 2nd time around 2wd Blazer
What do you have for a sheetmetal brake that you're using? I'm looking for one, but don't know what type I'd be happy with. Thanks.
__________________
build threads: 86 Suburban 88 Jeep 6.0 swap 49 Chevy truck 54 Chevy wagon 86 Suburban lowered 4/6 54 Chevy wagon 49 Chevy/s10 mix 88 Jeep Wrangler rockcrawler |
|
|
|
|
06-05-2008, 11:30 AM
|
#28 | |
|
Senior Member
Join Date: Jul 2005
Location: Winters Ca. 95694
Posts: 4,843
|
Re: American Revolution 2nd time around 2wd Blazer
Quote:
Kevin LFD Inc. |
|
|
|
|
|
06-15-2008, 08:12 PM
|
#29 |
|
Senior Member
Join Date: Jul 2005
Location: Winters Ca. 95694
Posts: 4,843
|
Re: American Revolution 2nd time around 2wd Blazer
Had some time today while my wife and son were out food shopping so I did what any guy would do. Went in the shop and welded stuff
Got the rear floor patch finished and now I am just waiting on one more floor cup for the new rear seat I am going to install. Then I will put on the new body mounts and start wiring up the ART computer, get the new exhaust put in and do an alignment. 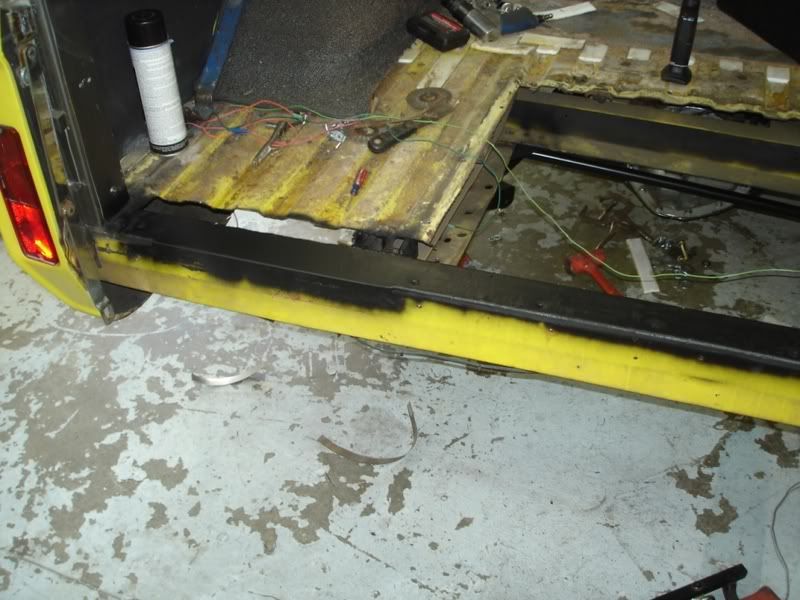 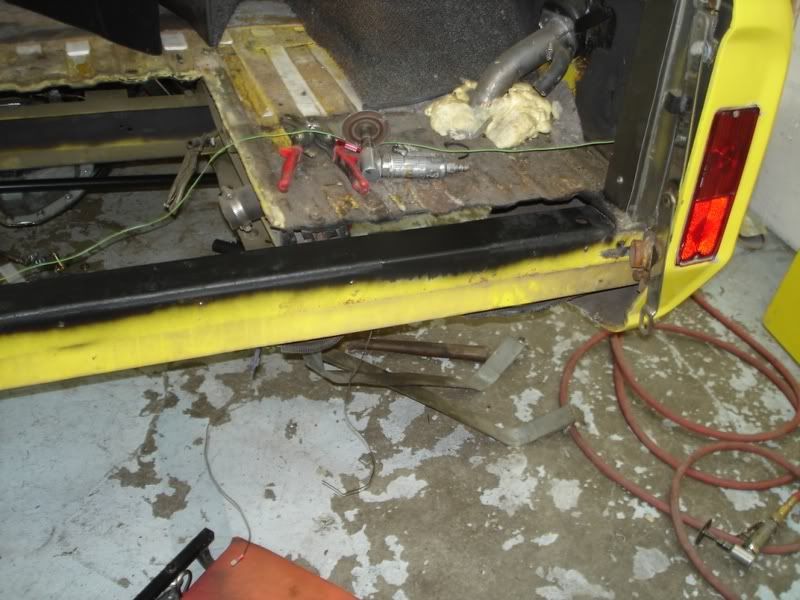 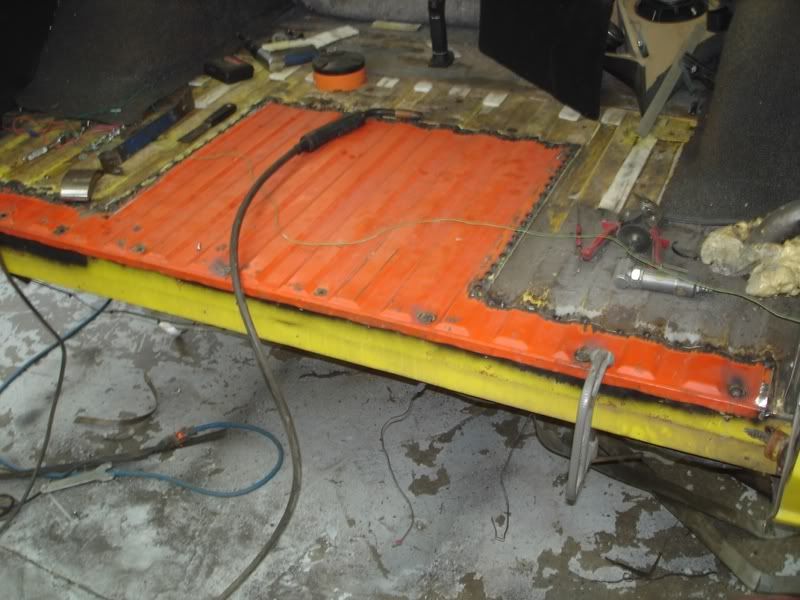 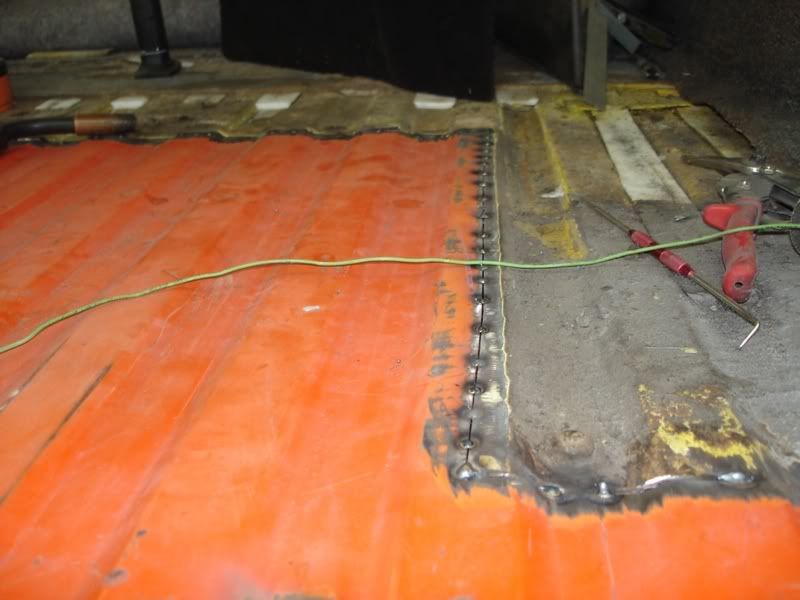 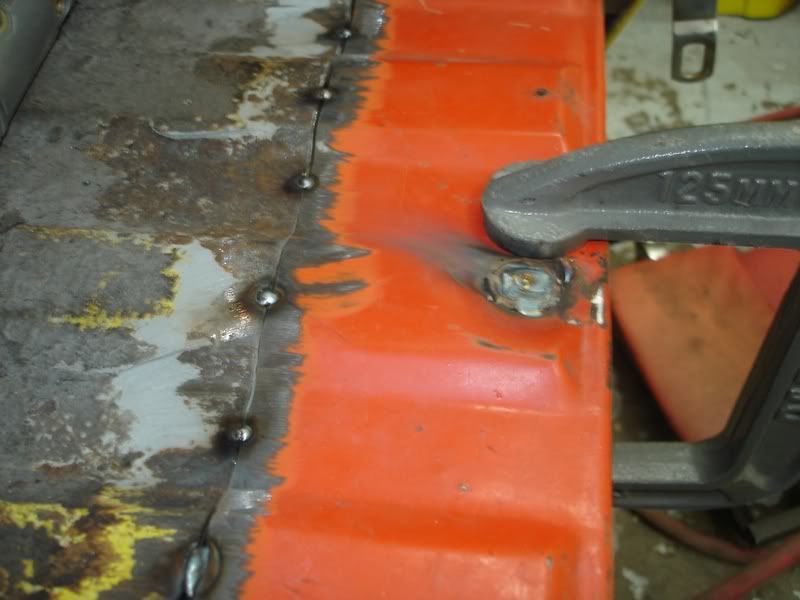 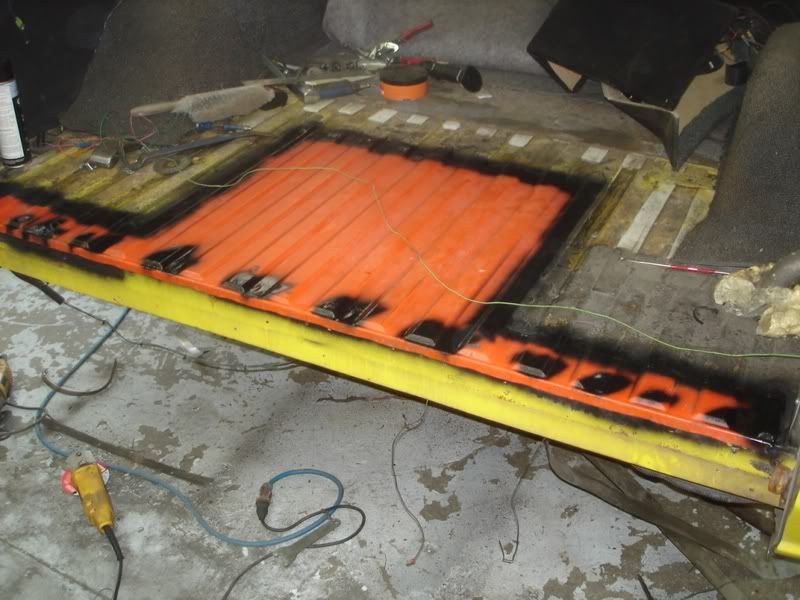 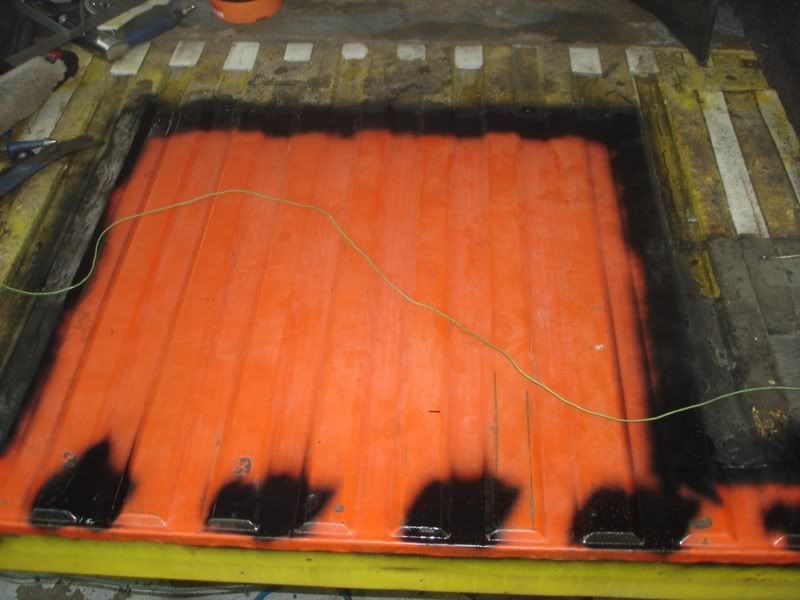 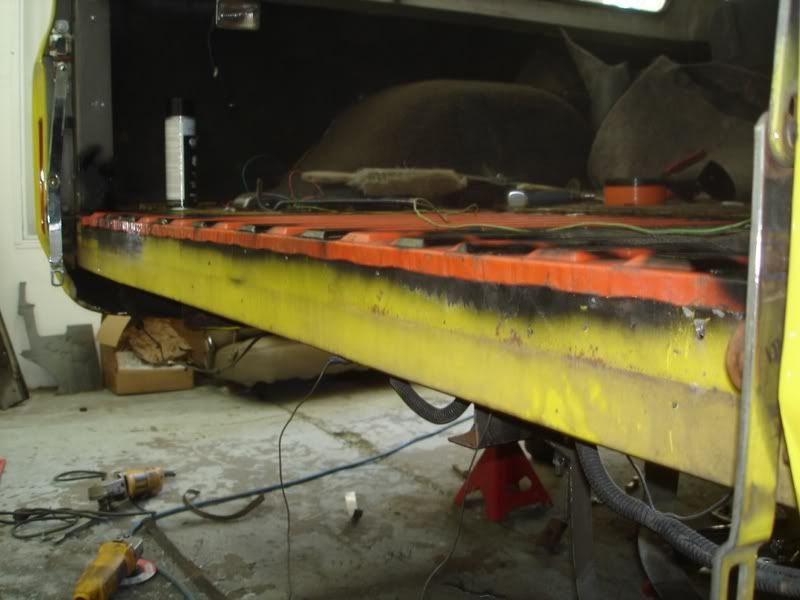 Kevin LFD Inc. |
|
|
|
|
06-15-2008, 08:46 PM
|
#30 |
|
State of Confusion!
  Join Date: Jul 2002
Location: Gulfport, MS USA
Posts: 46,720
|
Re: American Revolution 2nd time around 2wd Blazer
It's coming along real nice Kevin.
__________________
Bill 1970 Chevy Custom/10 LWB Fleetside 2010 Toyota Tacoma PreRunner SR5 Double Cab - DD Member of Louisiana Classic Truck Club (LCTC) Bill's Gallery Life isn't tied with a bow, but it's still a gift. Live simply. Love generously. Care deeply. Speak kindly. Leave the rest to God! |
|
|
|
|
06-15-2008, 10:35 PM
|
#31 |
|
On the fast track to nowhere..
Join Date: May 2006
Location: Splendora, Texas
Posts: 5,316
|
Re: American Revolution 2nd time around 2wd Blazer
Looks good! But you really didn't need to hear that from me did you
__________________
-Mike Owen- Norwood, Houston, Cecilia, Jackson, Monroe and counting |
|
|
|
|
06-15-2008, 11:19 PM
|
#32 |
|
Registered User
Join Date: Nov 2007
Location: riverside, ca
Posts: 147
|
Re: American Revolution 2nd time around 2wd Blazer
Kevin, very nice work as usuall. One questions, have you though about mounting the rde height sensor for the front on the rear side on the crossmember? i believe another member has them mounted this way, i wanna say its the incredible hulk build. Seems like it would be alittle easier then in the front, wih the steering and sway bar and all.
Please dont take that in a negative way just trying to offer a suggestion. Great Work as always and look forward to viewing more of your builds. Phil |
|
|
|
|
06-15-2008, 11:27 PM
|
#33 |
|
Registered User
Join Date: Nov 2007
Location: riverside, ca
Posts: 147
|
Re: American Revolution 2nd time around 2wd Blazer
Kevin, this picture is from 68 short step build thread, hopefully he doesnt mind me posting it!!! ride heoght sensor mount on rear of front crossmember near shock mounts.
|
|
|
|
|
06-15-2008, 11:35 PM
|
#34 | |
|
Senior Member
Join Date: Jul 2005
Location: Winters Ca. 95694
Posts: 4,843
|
Re: American Revolution 2nd time around 2wd Blazer
Quote:
And never worries about me taking any input Negative, heck you are taking the time to read my posts and give your input. So even if I do not agree with the input or want to do it a different way thanks for taking the time. None of us are perfect and we can all use a second set of eye's on these projects. Heck I have a crew of guys (my hot rod friends and my Wife) that come over and I run ideas by then from time to time on builds that can not be posted due to being a new show car or what not and they always give other ways to do things and it works great. Kevin LFD Inc. |
|
|
|
|
|
06-15-2008, 11:43 PM
|
#35 | |
|
Senior Member
Join Date: Jul 2005
Location: Winters Ca. 95694
Posts: 4,843
|
Re: American Revolution 2nd time around 2wd Blazer
Quote:
 Kevin LFD Inc. Last edited by Rokcrln; 06-15-2008 at 11:50 PM. |
|
|
|
|
|
06-15-2008, 11:56 PM
|
#36 |
|
.....I am working on it.....
Join Date: Jul 2007
Location: Anaheim Hills, Ca
Posts: 960
|
Re: American Revolution 2nd time around 2wd Blazer
WOW! And you say I do nice work???? You got the skills. Looks good. Nice project. I may be able to steal some ideas from you.

|
|
|
|
|
06-16-2008, 12:03 AM
|
#37 | |
|
Senior Member
Join Date: Jul 2005
Location: Winters Ca. 95694
Posts: 4,843
|
Re: American Revolution 2nd time around 2wd Blazer
Quote:
 Kevin LFD Inc. |
|
|
|
|
|
07-13-2008, 07:56 PM
|
#38 |
|
Senior Member
Join Date: Jul 2005
Location: Winters Ca. 95694
Posts: 4,843
|
Re: American Revolution 2nd time around 2wd Blazer
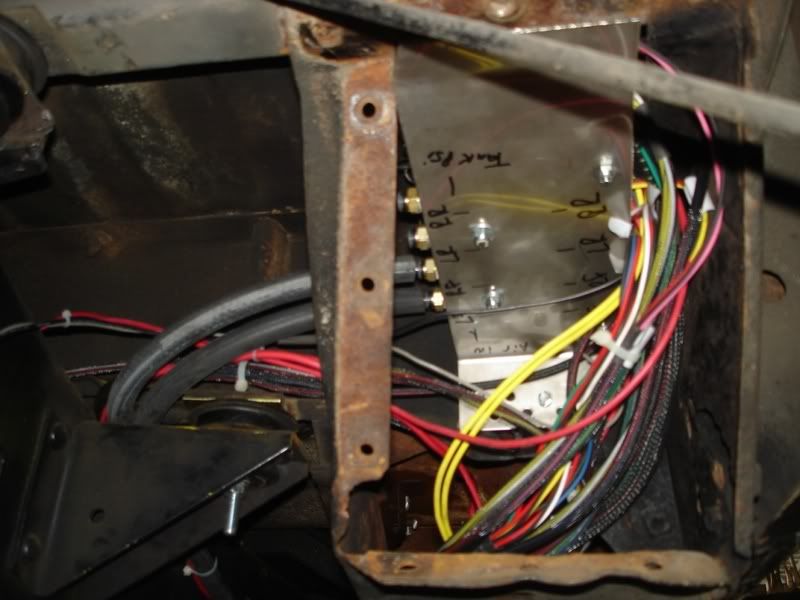
Well after over a month of staying out of the shop due to my back being out I was finally feeling no pain so I put in a 10hr day in the 103* heat
 I got tons of work done and was real happy with my progress. I started by replacing the body mounts and all hardware. One of the PO's thought it would be a good idea to weld in all the bolts. So I started by grinding the heads loose then removed what was left of the few body mounts that were even their. I then put in the new ones and tightened things down nice and snug. This kit came from ECE and they had all the mounts, bolts, washers, sleeves and nuts all pre-assembled so their was no guess work as to what goes were. One thing I find to be a real time saver is to tack weld the square washers to the bolts for the front radiator support mounts so they can not spin or lift out when you are installing them. Then I moved to the rear diff floor bump. The C-notches are larger then normal on this Blazer so in order to use all the travel and get it as low as possible I did a 2" diff floor hump for the diff to pop up into. This let the rear end go 3" lower then before because it was also hitting a floor brace that I re-worked as well. I then started to run all the computer harness's for the AIR RIDE kit through the floor and into the passenger side rocker box. I also mounted the two air compressor's that came in the kit. Next I will run the rear air lines, connect all the fittings and figure out a good ride height so I can install and set the height sensors. Also last week I put in the rear seat floor mounts so I guess it has not been a full month but I was not suppose to be out their so don't tell my wife Kevin LFD Inc. Last edited by Rokcrln; 07-13-2008 at 08:08 PM. |
|
|
|
|
07-13-2008, 08:00 PM
|
#39 |
|
Senior Member
Join Date: Jul 2005
Location: Winters Ca. 95694
Posts: 4,843
|
Re: American Revolution 2nd time around 2wd Blazer
Here are the rest of todays pic's
Kevin LFD Inc. |
|
|
|
|
07-13-2008, 09:04 PM
|
#40 |
|
On the fast track to nowhere..
Join Date: May 2006
Location: Splendora, Texas
Posts: 5,316
|
Re: American Revolution 2nd time around 2wd Blazer
Glad you back was feeling good enough to make some progress. Looks awesome, as usual
__________________
-Mike Owen- Norwood, Houston, Cecilia, Jackson, Monroe and counting |
|
|
|
|
07-20-2008, 08:30 PM
|
#41 |
|
Senior Member
Join Date: Jul 2005
Location: Winters Ca. 95694
Posts: 4,843
|
Re: American Revolution 2nd time around 2wd Blazer
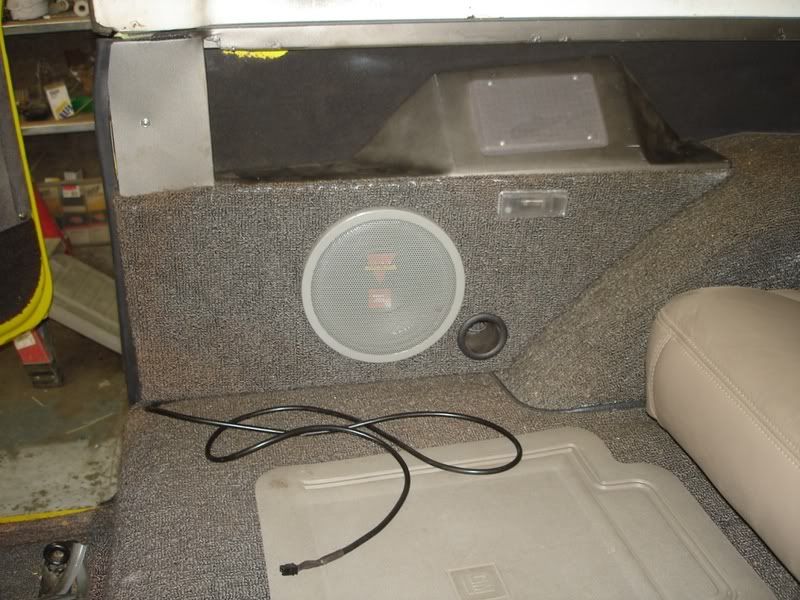
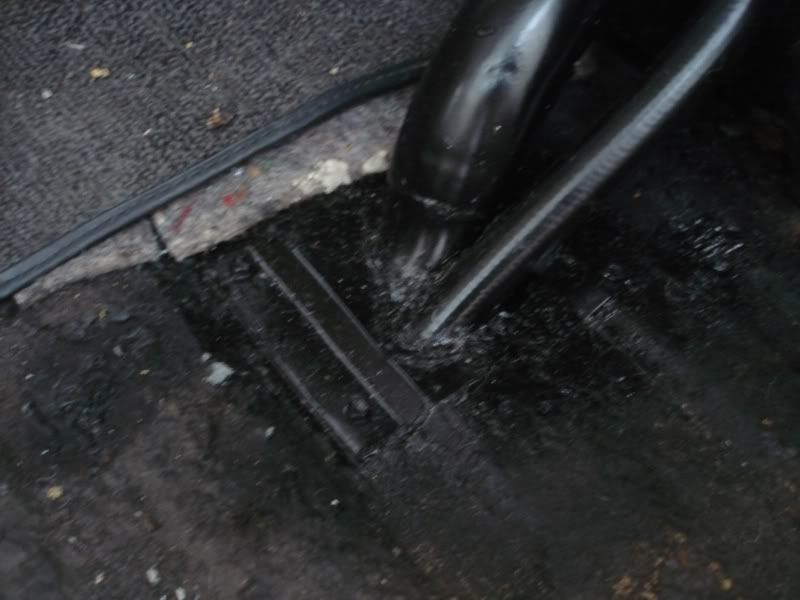
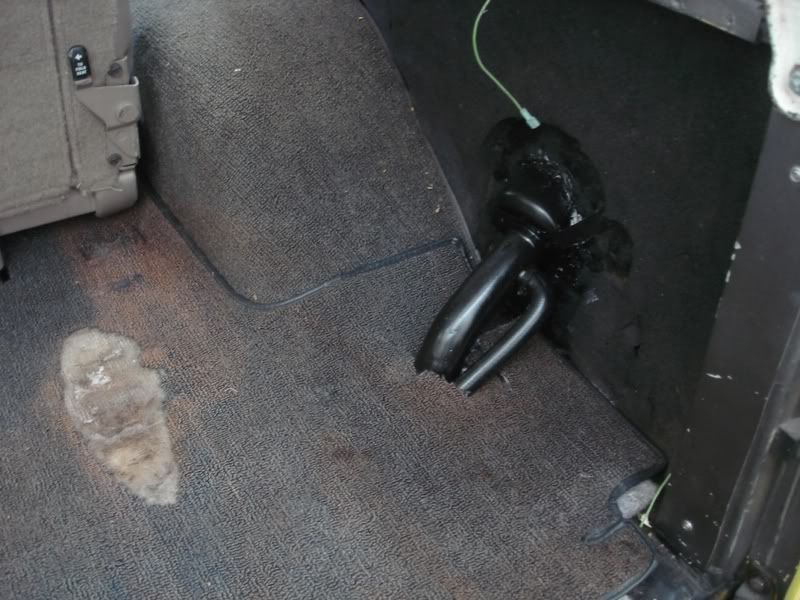
Here is this weekends progress. I completly re-did the gas tank filler, vents, filters and also the floor opening around the fill neck to get rid of the great foam job. Then I installed the bumper brackets, bumper and lic plate holder. Who ever did the leaf spring conversion reall screwed up the rear frame horns and they needed a bit of work to get right. I then put the carpet back in, instaled the speaker boxes, tailgate and rear seat. The inside is now all finished being torn apart for other fixes so it is a big step in the completion of this rig. I mounted the two air compressors, rear storage tank and I wired everything up inside the rocker box. For splices I soldered and heat shrank everything to make sure it will perform for many years to come. Here are a few pics of the work.
         Kevin LFD Inc. |
|
|
|
|
07-20-2008, 09:53 PM
|
#42 |
|
On the fast track to nowhere..
Join Date: May 2006
Location: Splendora, Texas
Posts: 5,316
|
Re: American Revolution 2nd time around 2wd Blazer
Do you know how many gallons that tank is Kevin?
__________________
-Mike Owen- Norwood, Houston, Cecilia, Jackson, Monroe and counting |
|
|
|
|
07-20-2008, 11:26 PM
|
#43 |
|
PROJECT 7DEUCE
Join Date: Dec 2002
Location: GRANTS PASS OR
Posts: 21,590
|
Re: American Revolution 2nd time around 2wd Blazer
Looks like a 20 gallon poly tank replacement for blazers... Wheres the filler at on the passengerside?
__________________
GO BIG GREEN  GO DUCKS GO DUCKSMEMBER #6377 72 k-5 daily driver 6'' lift 35'' 350-350-205 slowly getting rust free. Project "7DEUCE" check out my build http://67-72chevytrucks.com/vboard/s...d.php?t=267665 Tim Powell..R.I.P EastSideLowlife..... R.I.P.. |
|
|
|
|
07-21-2008, 06:18 AM
|
#44 | |
|
Senior Member
Join Date: Jul 2005
Location: Winters Ca. 95694
Posts: 4,843
|
Re: American Revolution 2nd time around 2wd Blazer
Quote:
Kevin LFD Inc. |
|
|
|
|
|
07-21-2008, 08:58 AM
|
#45 |
|
On the fast track to nowhere..
Join Date: May 2006
Location: Splendora, Texas
Posts: 5,316
|
Re: American Revolution 2nd time around 2wd Blazer
My bad
 I meant the air tank. Sorry. I meant the air tank. Sorry.
__________________
-Mike Owen- Norwood, Houston, Cecilia, Jackson, Monroe and counting |
|
|
|
|
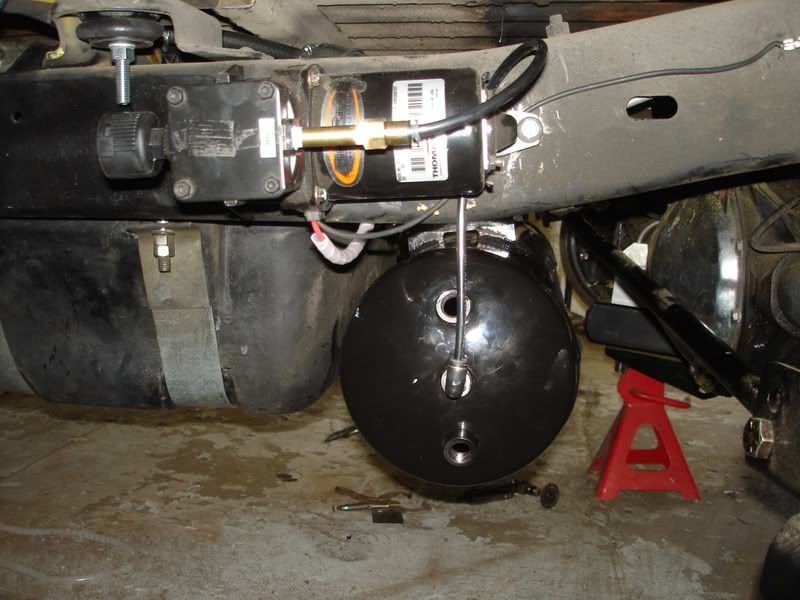
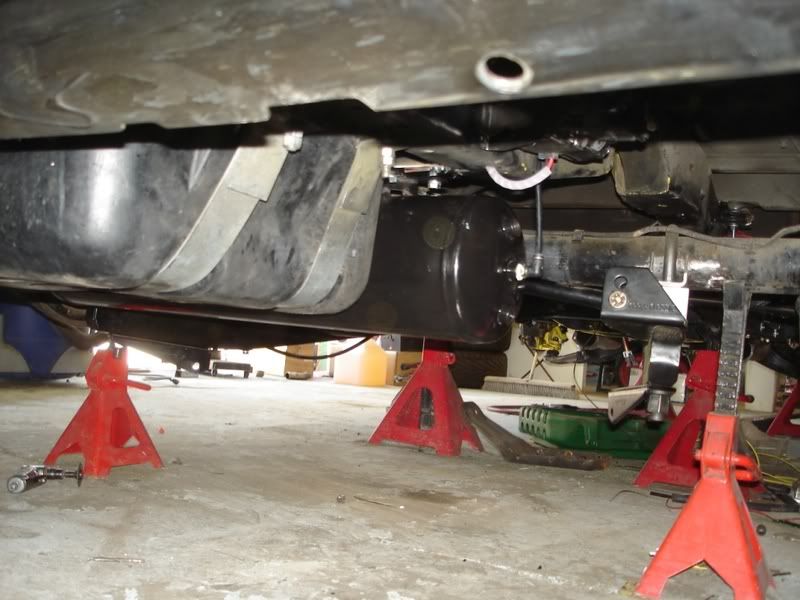
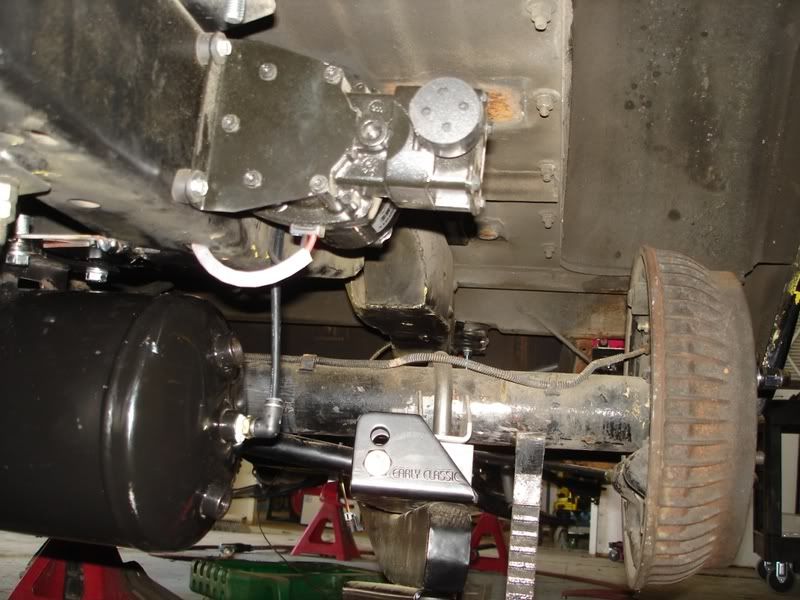
08-10-2008, 03:58 PM
|
#46 | |
|
Senior Member
Join Date: Jul 2005
Location: Winters Ca. 95694
Posts: 4,843
|
Re: American Revolution 2nd time around 2wd Blazer
Quote:
Here are a few more pics. I have the air tank all finished up and filled. The twin pumps do a nice job of keeping up. I fixed the rear shock mounts, mounted the shocks, centered the rear diff at full drop so it can still roll and not rub. Re- placed the rear brakes, set the pinion angle and welded in the perches. Put in the new ECE headers and had to make a few mods for then to clear since the old full length headers were wider and things fit different. I still have several things left to do but that is for another day. Right now only the front bags are working because I had to order two fittings for the rear bags. Kevin LFD Inc. 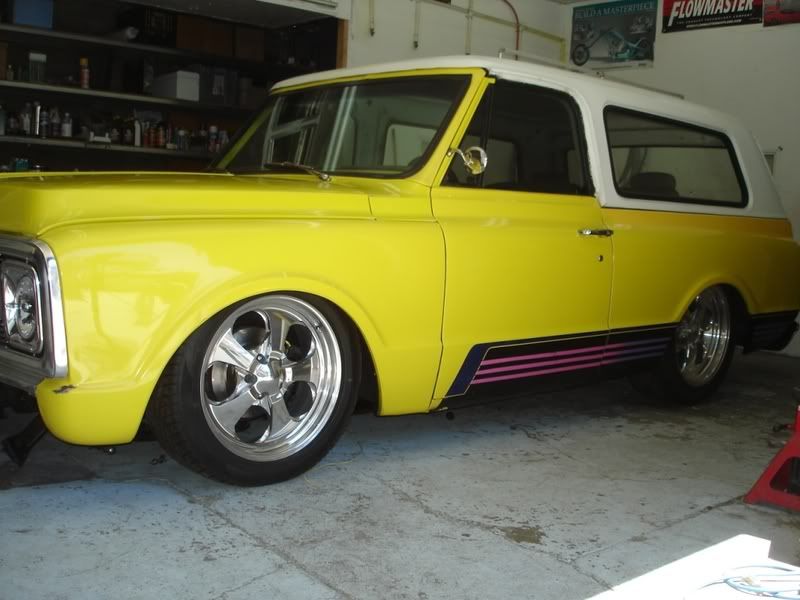 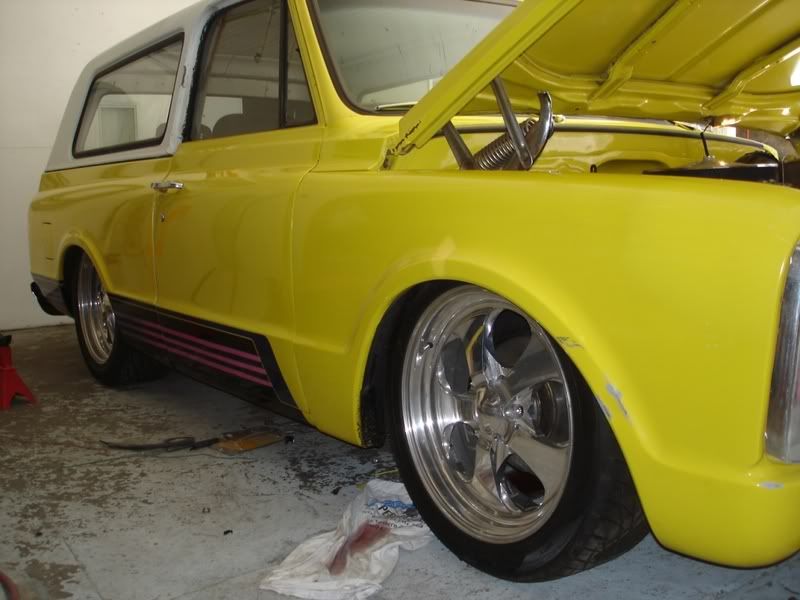 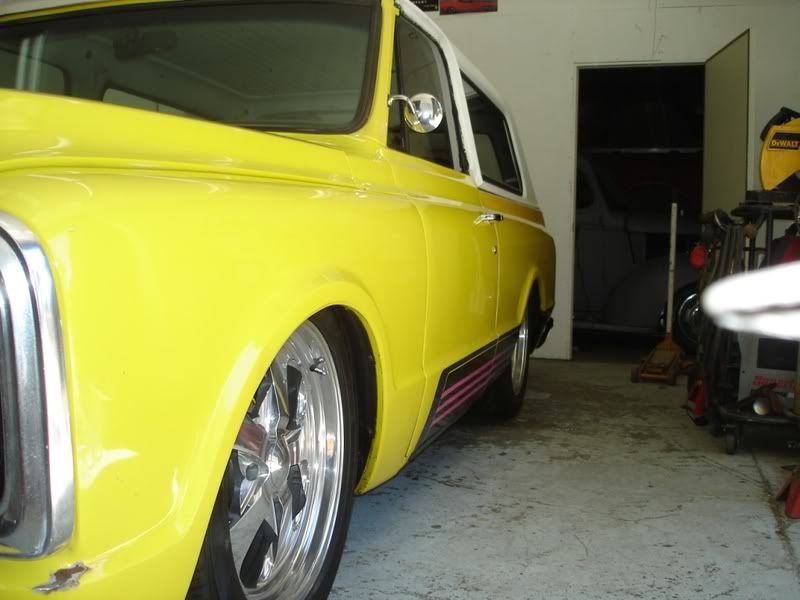 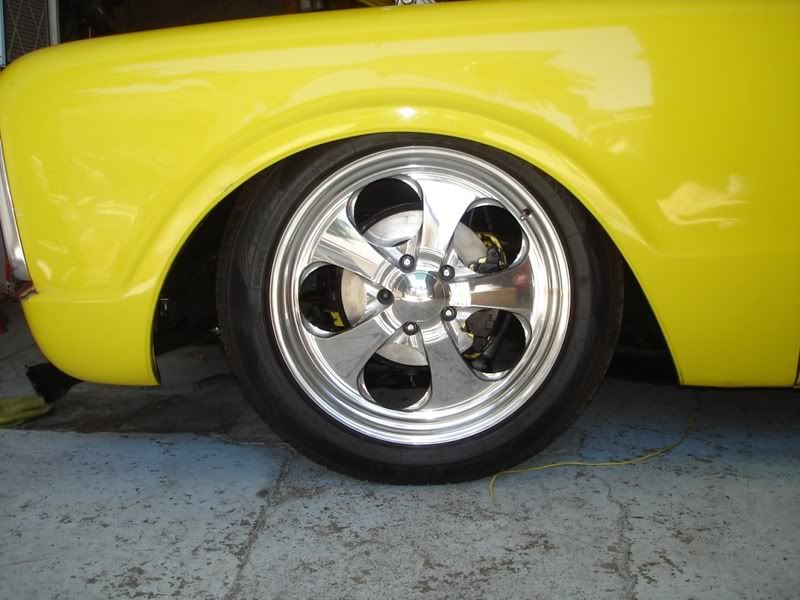 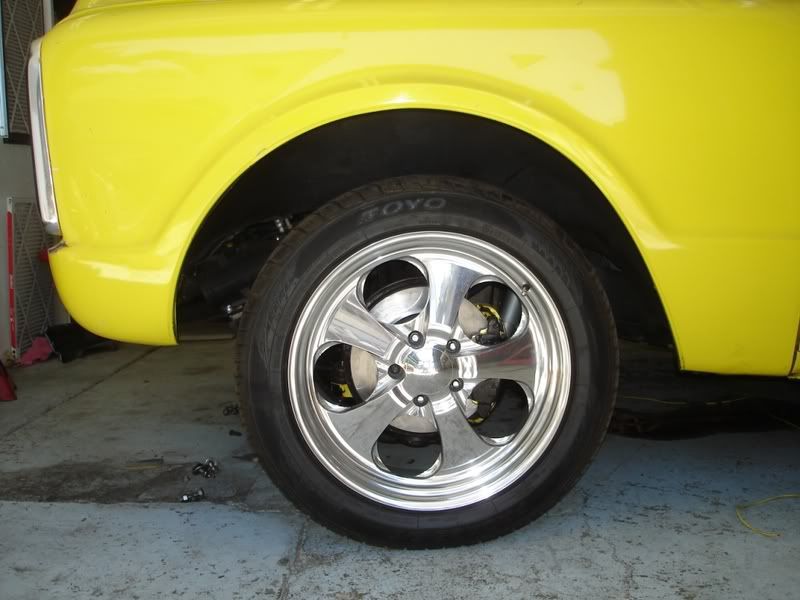
|
|
|
|
|
|
08-10-2008, 04:26 PM
|
#47 |
|
Registered User
Join Date: Apr 2004
Location: Sacramento
Posts: 3,737
|
Re: American Revolution 2nd time around 2wd Blazer
FYI - Sacramento hose and fitting has every fitting you will need in stock if you wanted to make the drive.
__________________
'72 2wd blazer, bagged w/ watts link & EDC '72 C10 "Lowered Farm Truck" STOLEN 5-18-11 '66 impala ht |
|
|
|
|
08-10-2008, 10:02 PM
|
#48 | |
|
Senior Member
Join Date: Jul 2005
Location: Winters Ca. 95694
Posts: 4,843
|
Re: American Revolution 2nd time around 2wd Blazer
Quote:
Kevin LFD Inc. |
|
|
|
|
|
08-21-2008, 10:40 PM
|
#49 |
|
Senior Member
Join Date: Jul 2005
Location: Winters Ca. 95694
Posts: 4,843
|
Re: American Revolution 2nd time around 2wd Blazer
Loaded up and going for exhaust Friday morning and if time allows alignment as well. Here are a few pic's.
Kevin LFD Inc. 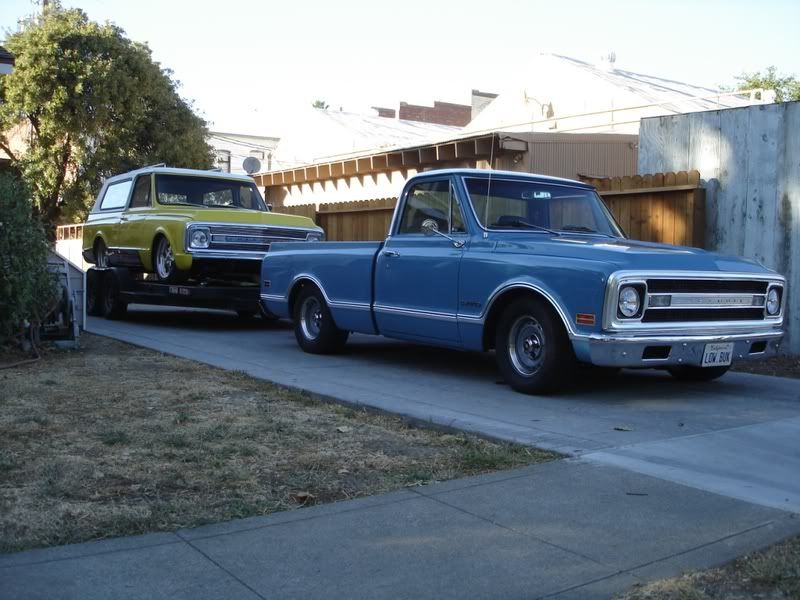 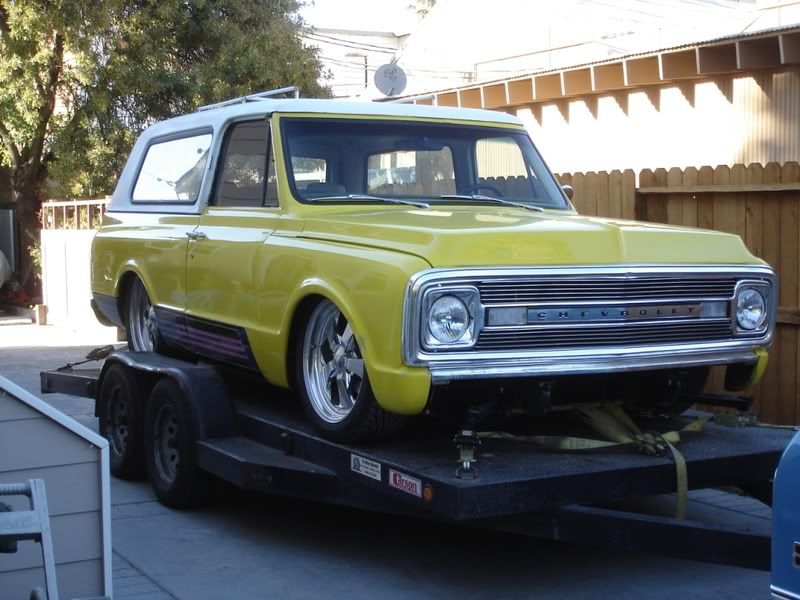 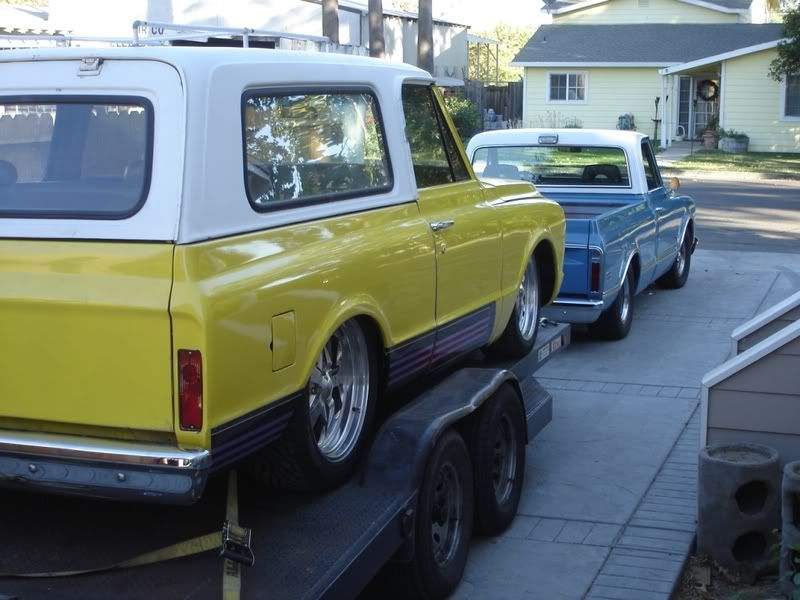
|
|
|
|
|
08-22-2008, 12:44 AM
|
#50 |
|
Senior Member
Join Date: Aug 2005
Location: tulsa OK
Posts: 3,070
|
Re: American Revolution 2nd time around 2wd Blazer
cool pics...glad to see you're useing low buck
|
|
|
|
|
| Bookmarks |
|
|


 Linear Mode

