
|
Register or Log In To remove these advertisements. |
|
|
|
|||||||
 |
|
|
Thread Tools | Display Modes |
|
|
 07-16-2015, 08:17 PM
|
#1 |
|
Registered User
Join Date: Sep 2003
Location: Rayne, LA
Posts: 2,782
|
Re: Another way to skin the cat; the High Torque 292 LS swap
So how did the A/C turn out? Any pics?
__________________
Steven "If dogs don't go to heaven, when I die I want to go wherever they went." -- Will Rogers R.I.P. Oscar R.I.P. Ratchet 1967 Pontiac GTO - Dad was the Original Owner 1970 Chevy 2wd SWB "Oscar's Truck" 1970 Chevy 2wd Blazer "Ratchet's Blazer" 2013 Chevy 2500HD Crew Cab Duramax/Allison Z71 LTZ "Brown Sugar" 2017 Chevy Suburban "BDB" 2020 Chevy Blazer Premier "Foxy" Member of Louisiana Classic Truck Club (LCTC) Shop Build |

|

|
|
07-17-2015, 12:05 AM
|
#2 | |
|
Senior Member
 Join Date: Jul 2009
Location: Athens, AL
Posts: 499
|
Operation: Snowballs
Quote:
Notice in this pic that the bracket extends behind the compressor by a couple of inches. That's important because it interfered with the engine mount. 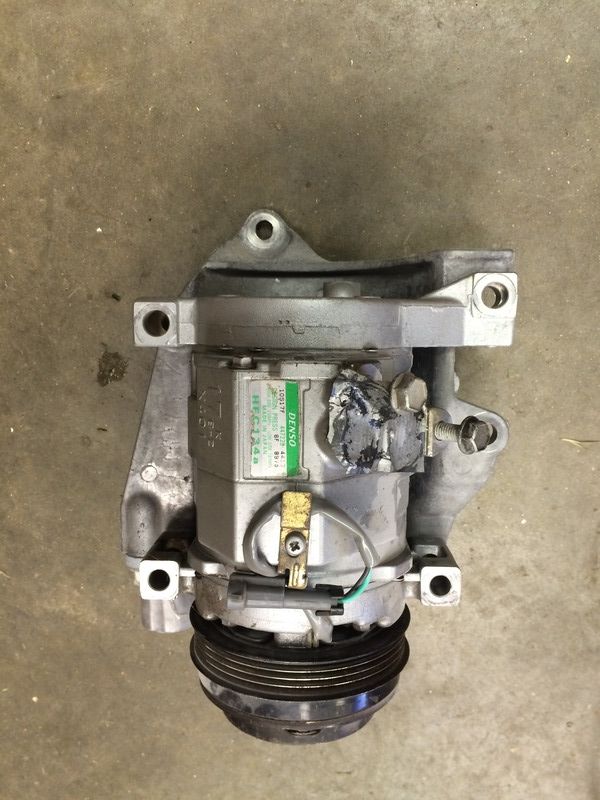 So, I marked the bracket even with the back of the compressor and cut it off: 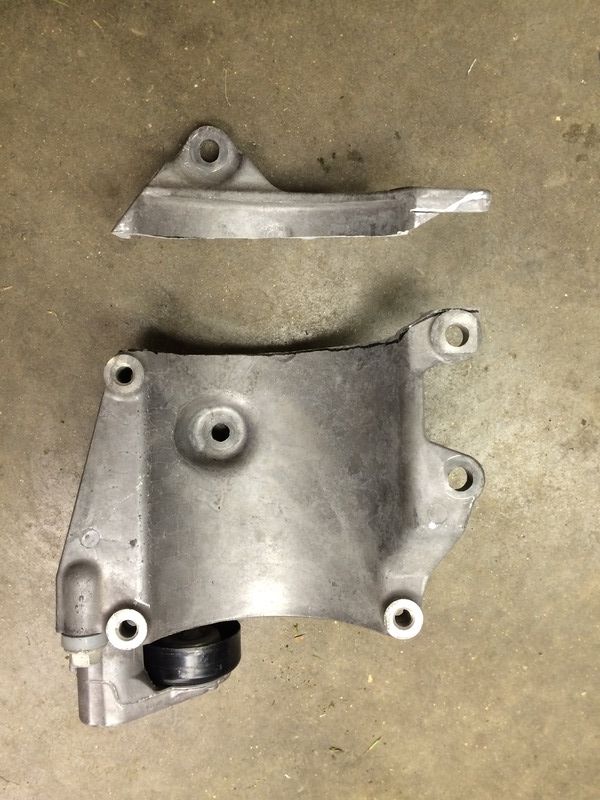 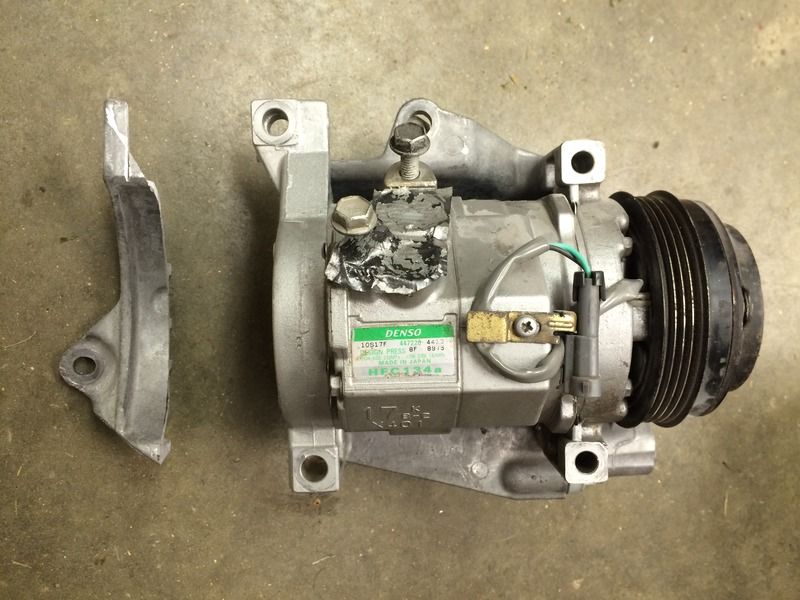 Here's the fit of the trimmed bracket: 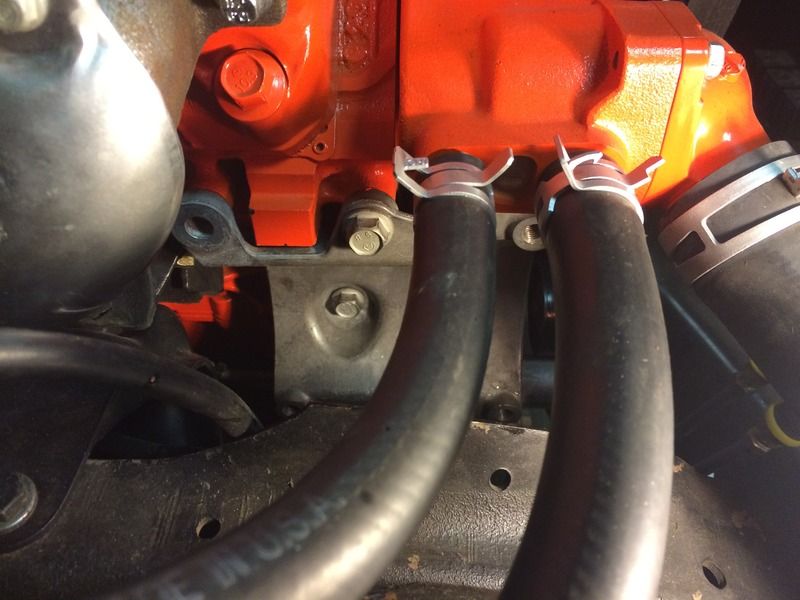 And the compressor: 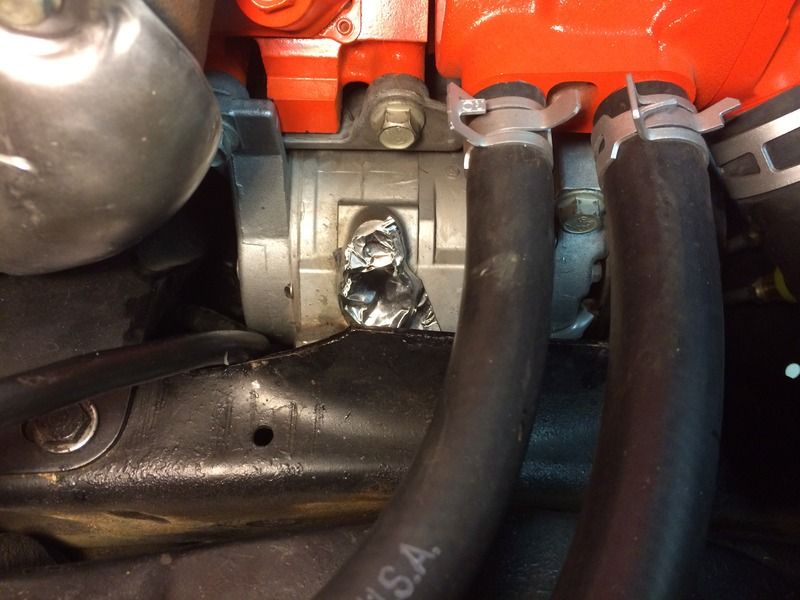 A little paint:  And bolted up for good: 
|
|
|
|
|
|
07-17-2015, 12:15 AM
|
#3 |
|
Senior Member
Join Date: Jul 2009
Location: Athens, AL
Posts: 499
|
Operation: Snowballs
I bought a universal 14" x 24" parallel flow condenser on eBay. I made a three bracket mounting system as well as a bracket for the receiver/drier:
 I called Vintage Air and ordered the 3 hard lines that are used in their condenser kits to mount the receiver drier and run through the core support and under the battery. Here it is mounted.: 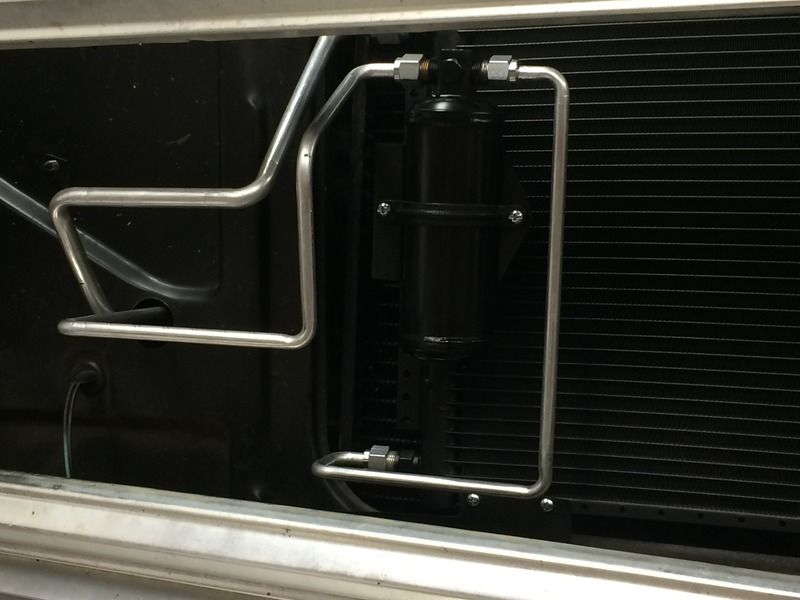 I made this simple bracket: 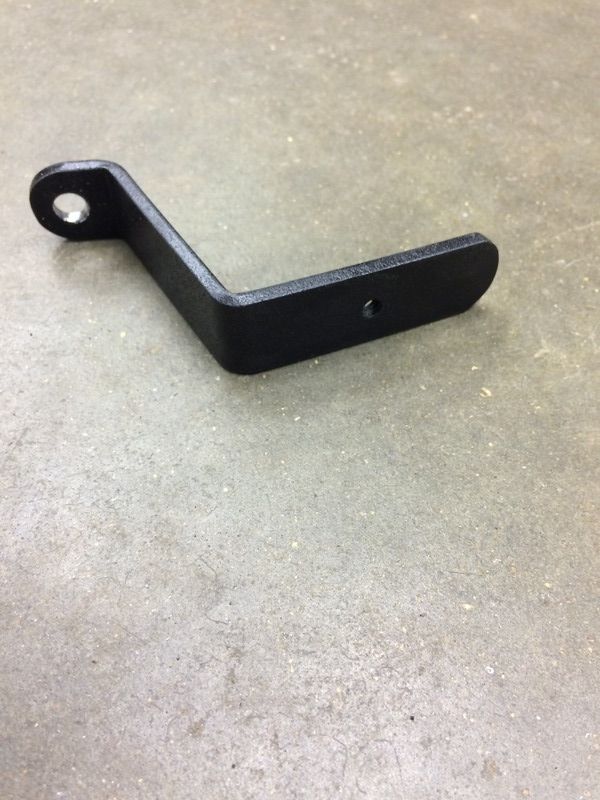 To hold the end of the hard lines under the battery box: 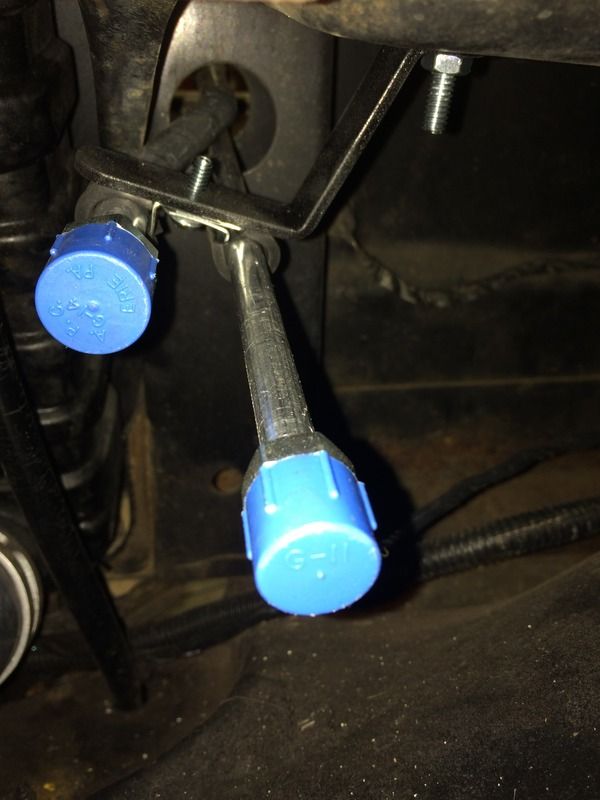 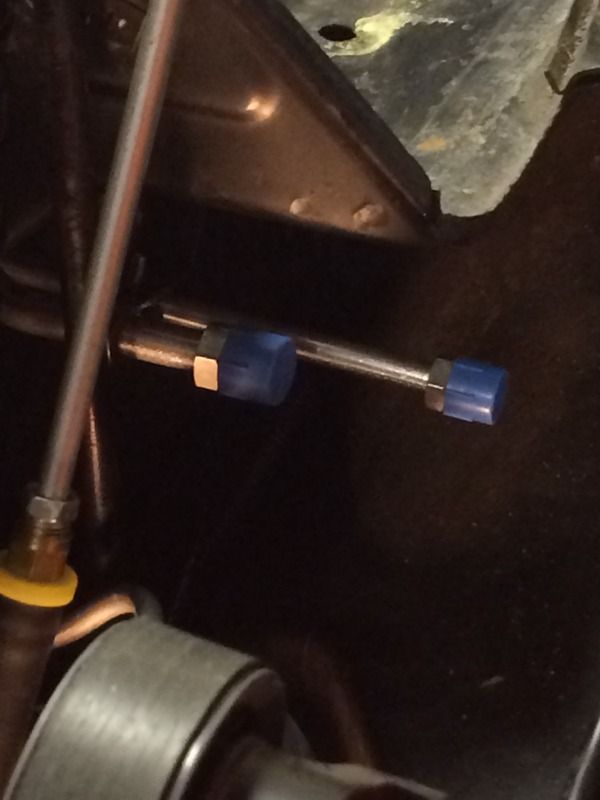
|
|
|
|
|
07-17-2015, 12:25 AM
|
#4 |
|
Senior Member
Join Date: Jul 2009
Location: Athens, AL
Posts: 499
|
Operation: Snowballs
The last major component of the system is the evaporator. I bought a universal under dash unit off eBay. Here are a couple of pictures of it mounted:
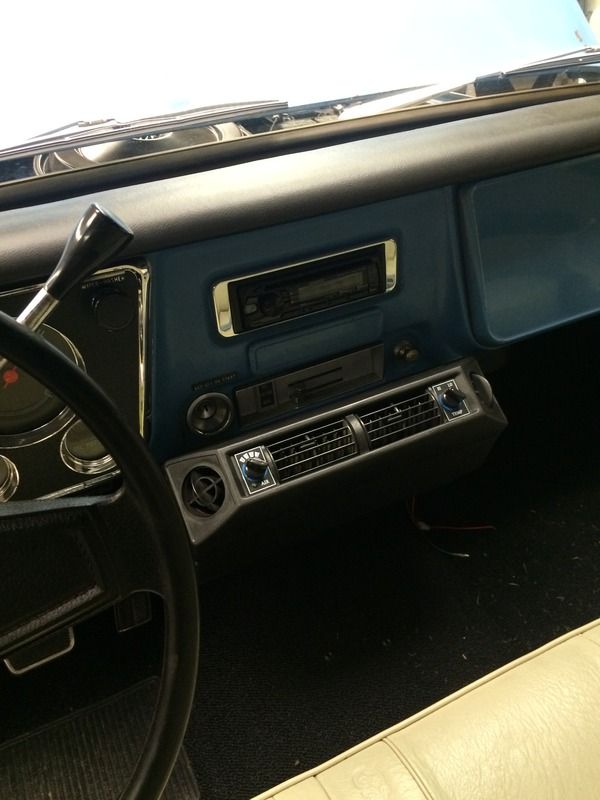 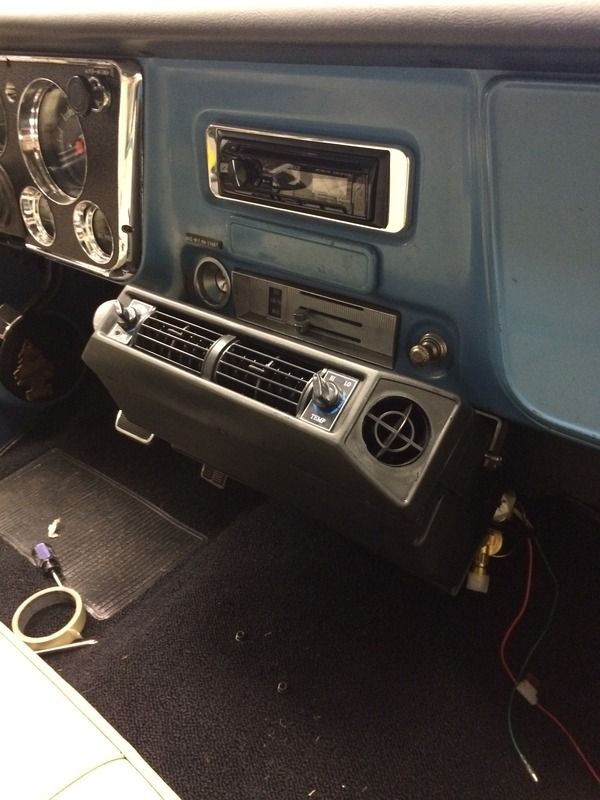 In case someone tries to duplicate my setup, there was a major problem with the evaporator unit as delivered. It moved very little air through the core. Upon inspection, I noticed that the blower motor was rotating the wrong direction! Since it's a DC motor, that's a simple fix. Just swap the positive and negative leads going to the bower motor. That made things much,much better but I made one more "improvement". I swapped the blower motor fan blades side for side. This result is that it reversed the slope of the blades. A squirrel cage fan will move a higher volume of air with reverse pitched blades than with forward pitched blades. |
|
|
|
|
07-17-2015, 12:44 AM
|
#5 |
|
Senior Member
Join Date: Jul 2009
Location: Athens, AL
Posts: 499
|
Operation: Snowballs
The last part of the system is the lines. I already mentioned that I used hard lines from Vintage Air on the condenser.
The discharge line from the compressor to the condenser required some fabrication. I started with the end of a condenser line from a 2000 Tahoe that picked up from the salvage yard. I bent it up as needed and added a M10 switch port fitting and a weld on bead lock fitting. Here is is before welding: 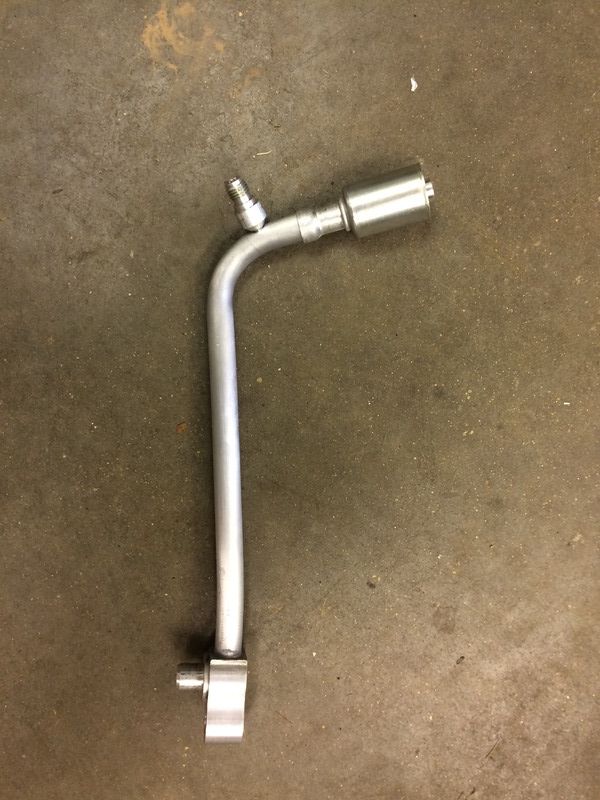 And a closer pic of the joints to be welded: 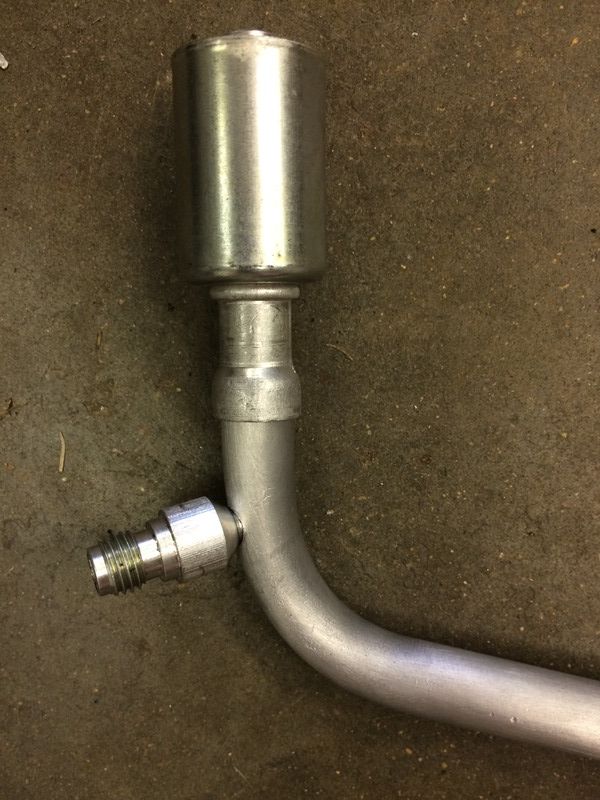 Here it is finish welded and crimped: 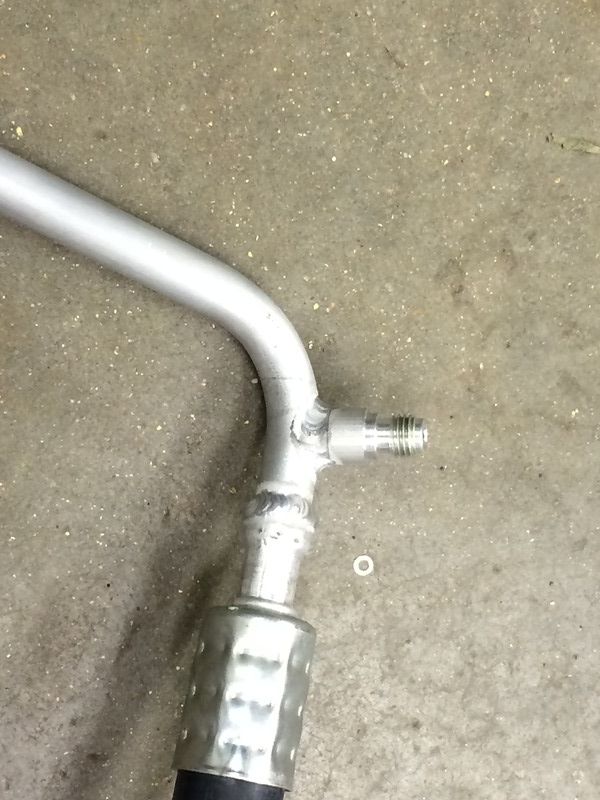 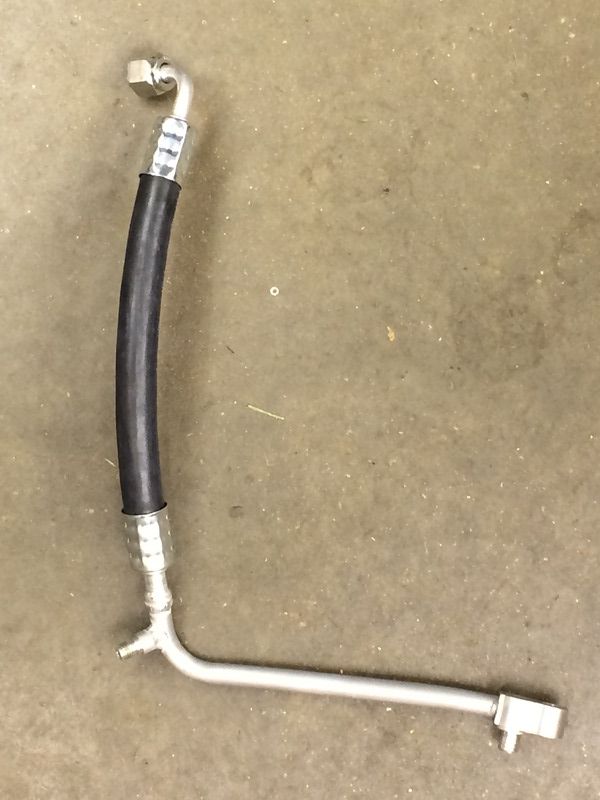 Here's the compressor suction line: 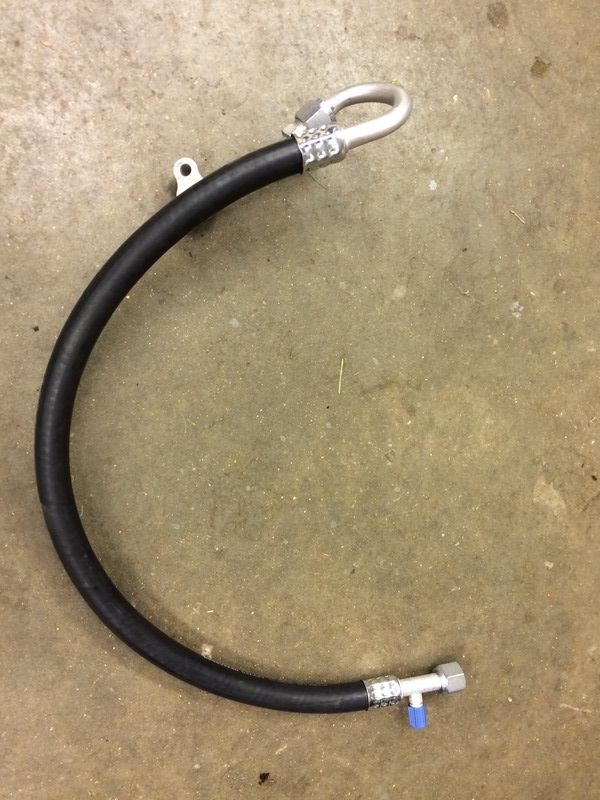 And a better pic of the compressor end: 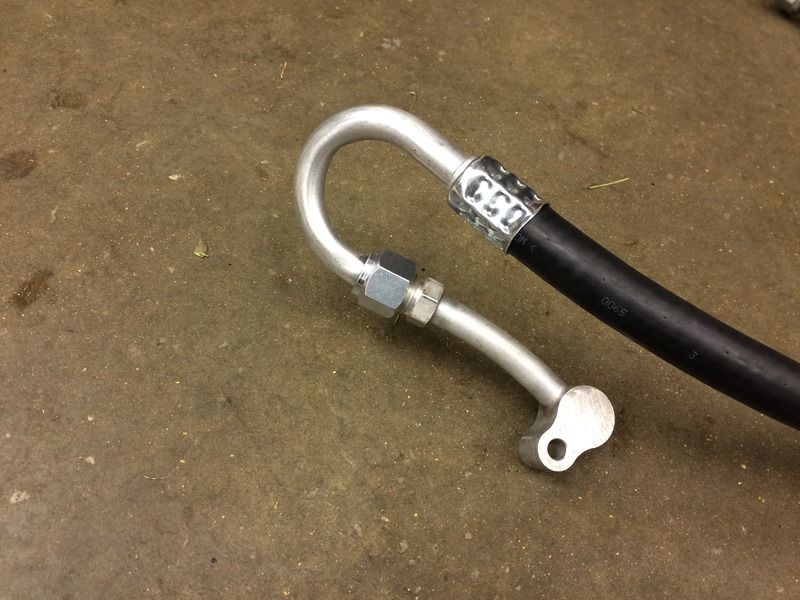 And here are the evaporator hoses that go inside the cab: 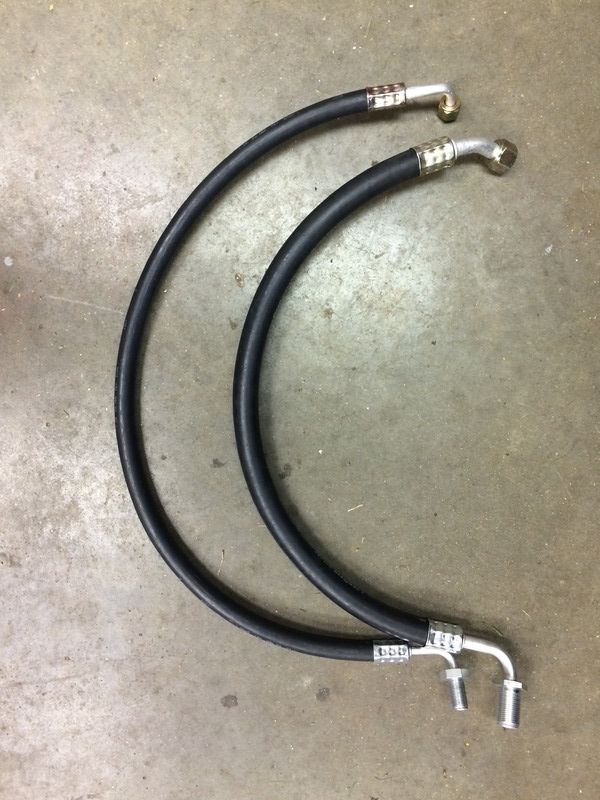 The bulkhead fittings on the end of the evap lines exit the cab just above the heater box: 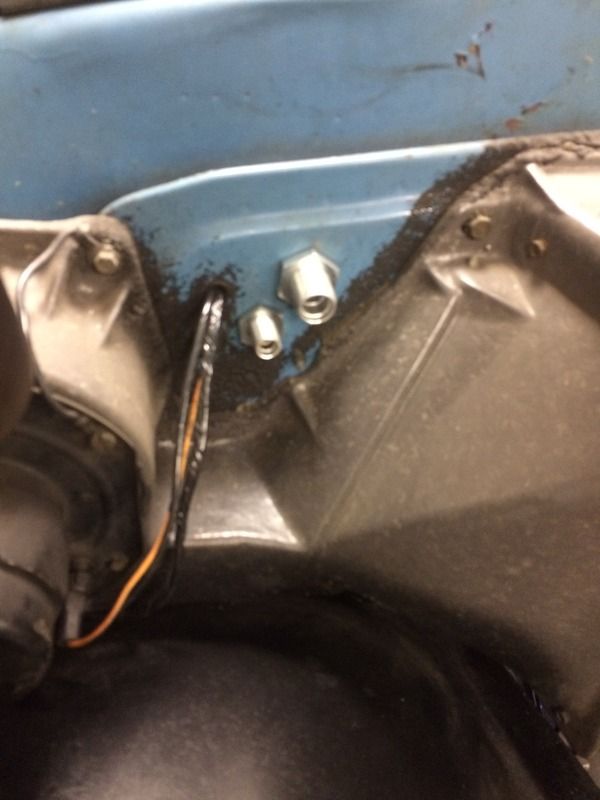 Here's an overall shot of the lines: 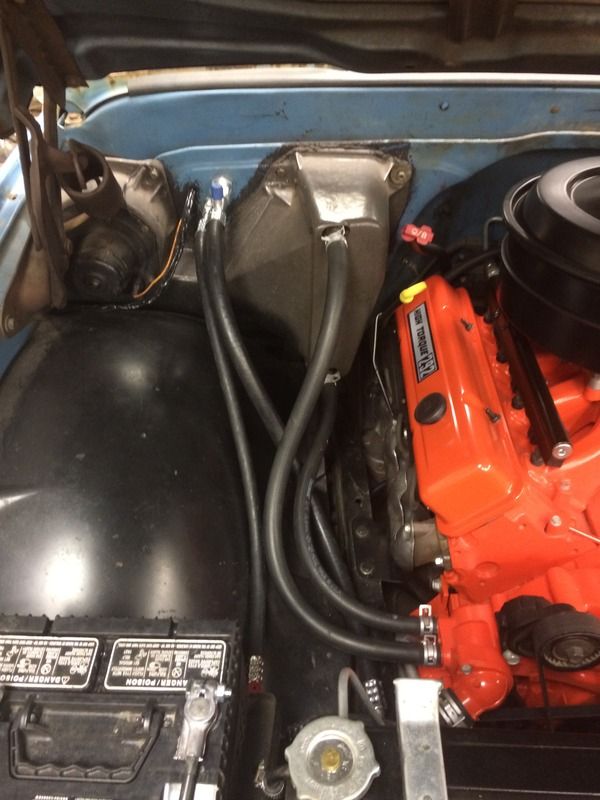 At the firewall: 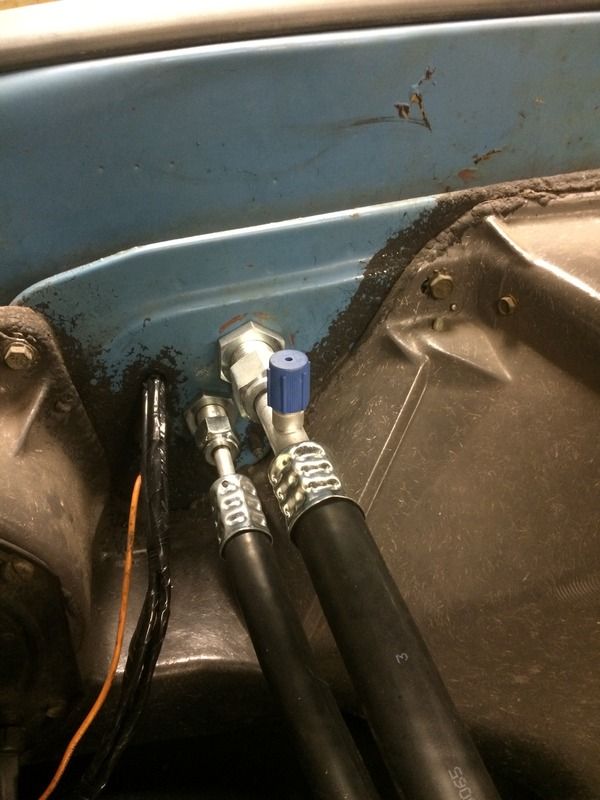 The compressor: 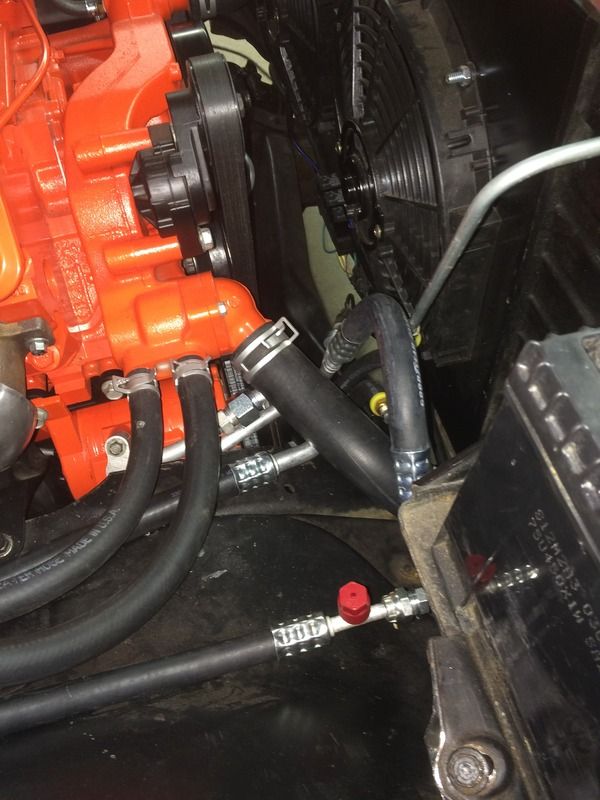 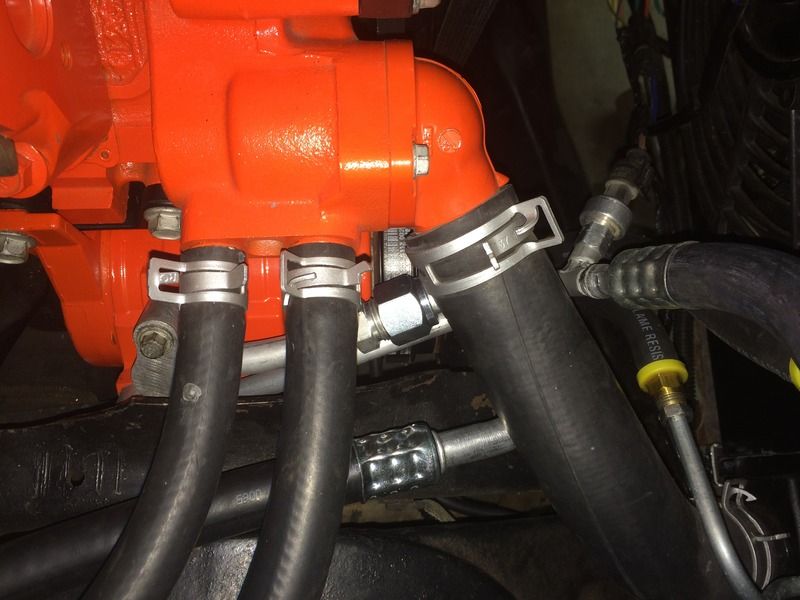
|
|
|
|
|
07-17-2015, 12:51 AM
|
#6 |
|
Senior Member
Join Date: Jul 2009
Location: Athens, AL
Posts: 499
|
Operation: Snowballs
The result:
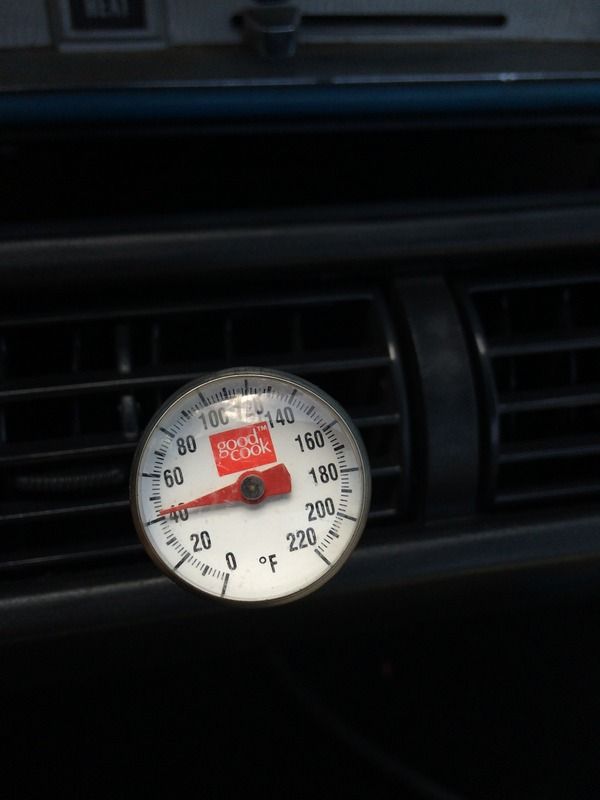 That's at idle. Moving down the road, the vent temp drops to about 37/38*. The A/C compressor came with my motor, so the components that I had to buy are: A/C Belt 19.31 Evaporator 69 Condenser 57 Hard Lines 71.19 Drier 12.99 Switch Port 5.2 Fittings/Hose 114.95 Misc (bolts/sheet metal/etc) 20.18 O-rings 5.44 PAG oil 8.99 134a 24.98 Total: $409.23 So, was it worth it? It works pretty well. We've had a few days in the high 90s lately and the A/C has kept me comfortable but it didn't turn it down, either. I think it could use a larger condenser and evaporator, but, for the price, I'd do it again. Last edited by dayj1; 07-17-2015 at 01:00 AM. |
|
|
|
|
| Bookmarks |
| Thread Tools | |
| Display Modes | |
|
|


 Hybrid Mode
