
|
 04-04-2015, 10:33 PM
|
#401 |
|
Registered User
Join Date: Jan 2013
Location: Leonardtown, MD
Posts: 1,636
|
Re: 55 Wagon Progress
As Kyle was going through the interior trim pieces the last couple weeks he did find one that had a few pits...
 So we got a used replacement from the Stainless Shoppe in Seymour WI. A shame to paint this one  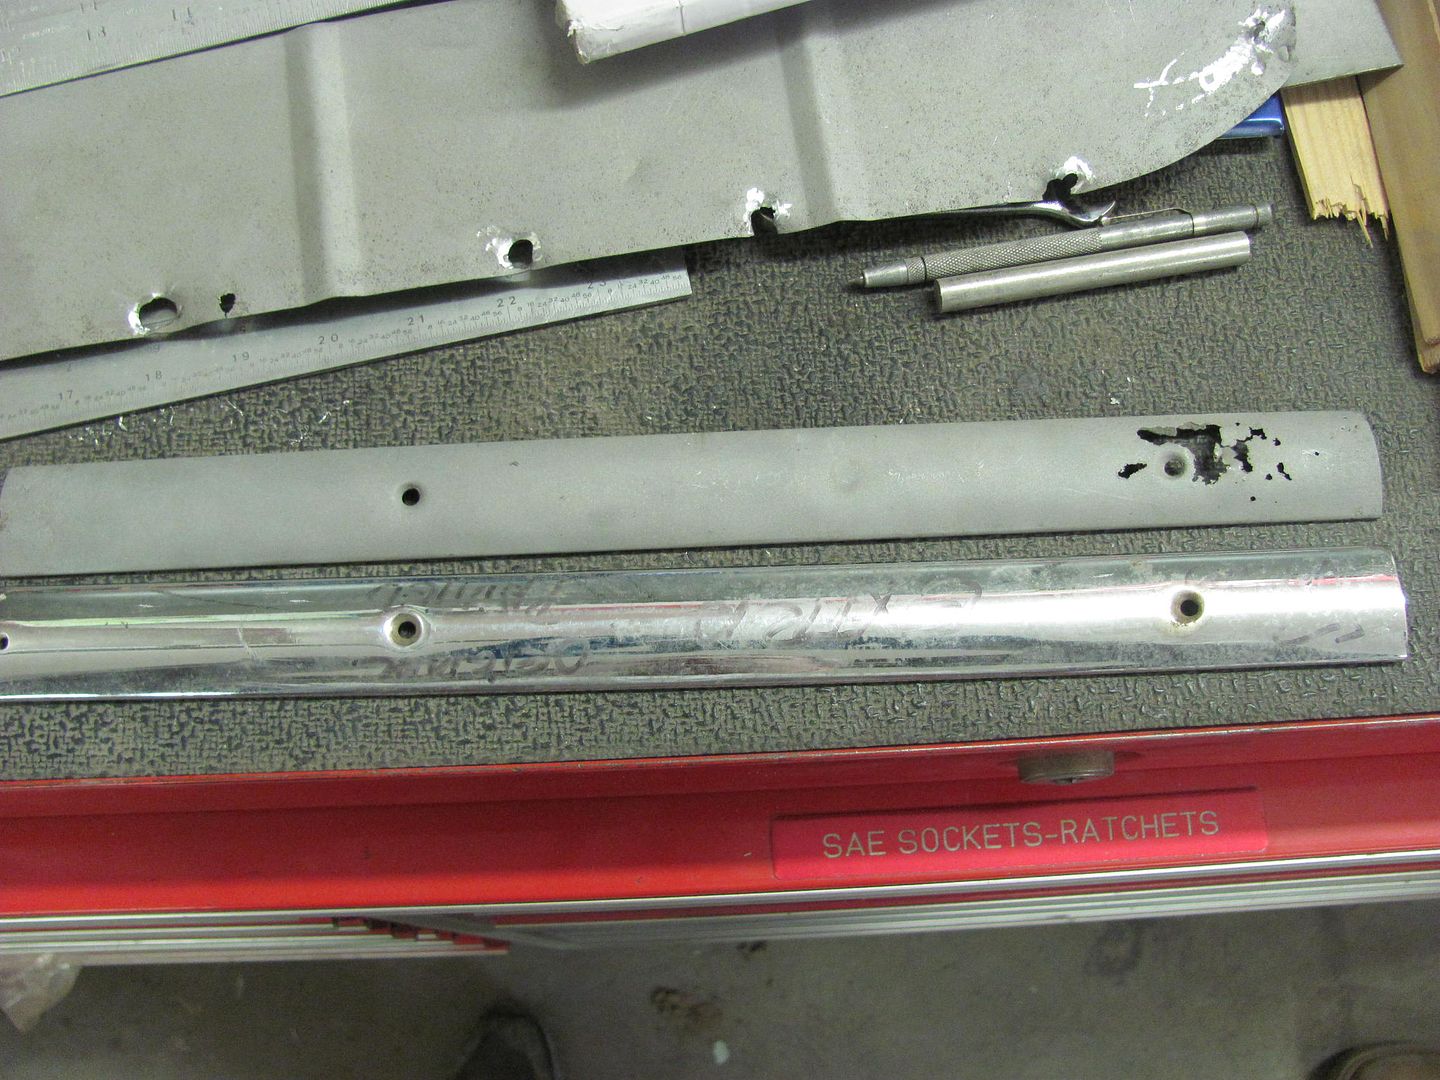 As I was getting the next batch of parts ready for epoxy, Kyle was setting up the bead roller for making the lower baffle of the core support. But looking at the center bead, the Fasti didn't have quite the reach... 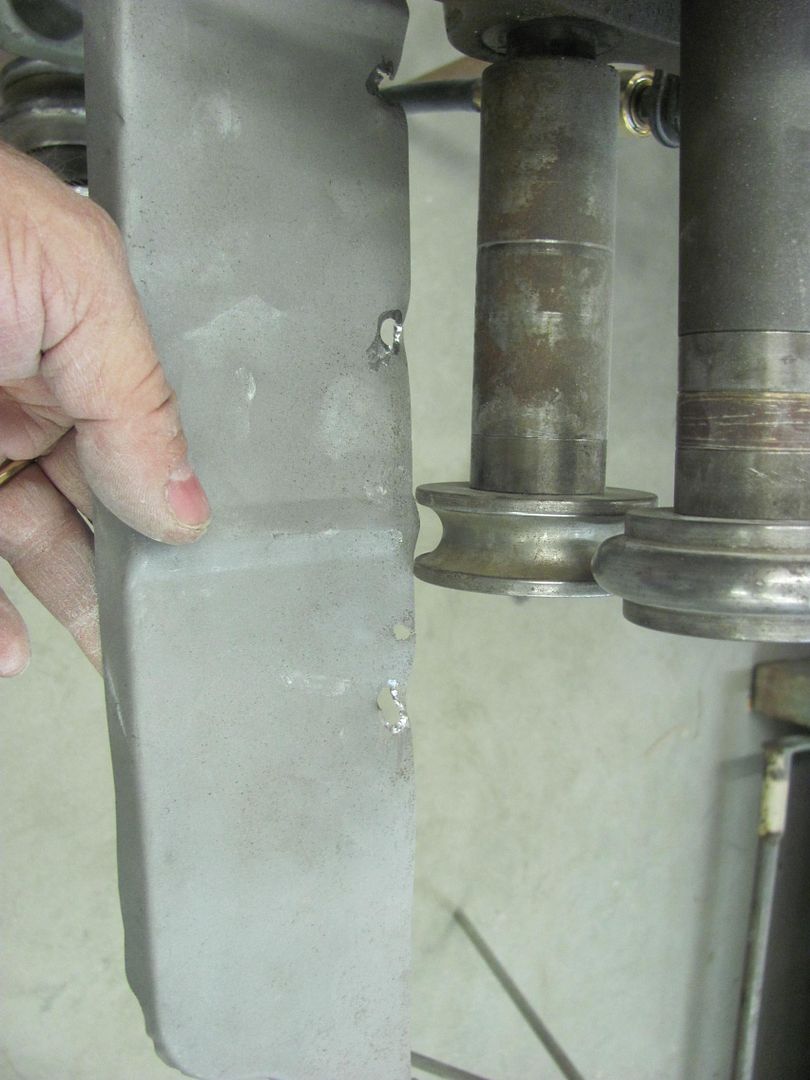 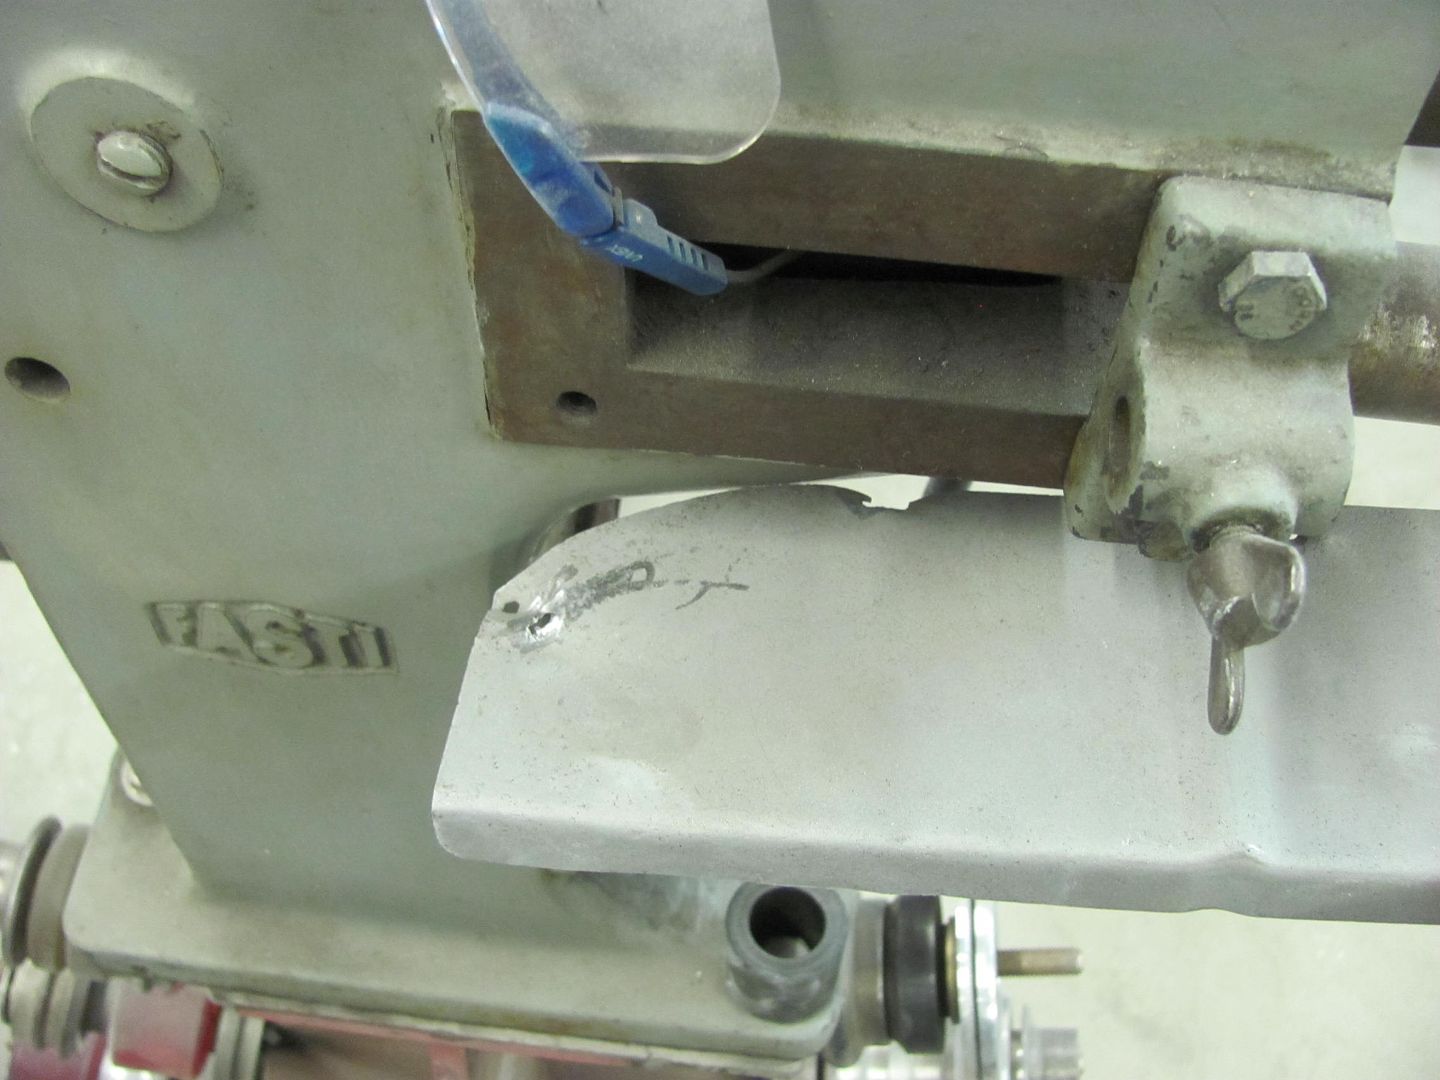 I had wanted to make axles for the bead roller dies to fit the English wheel, so today was as good a day as any. This will give Kyle some practice on the South Bend.. 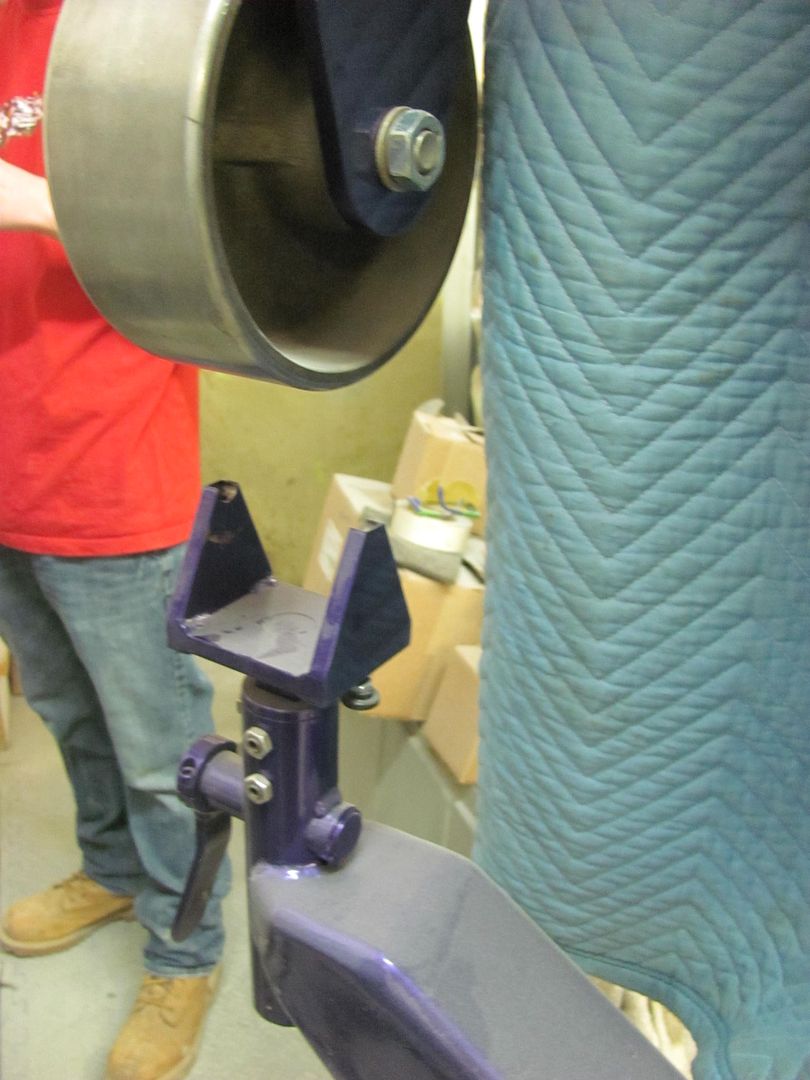 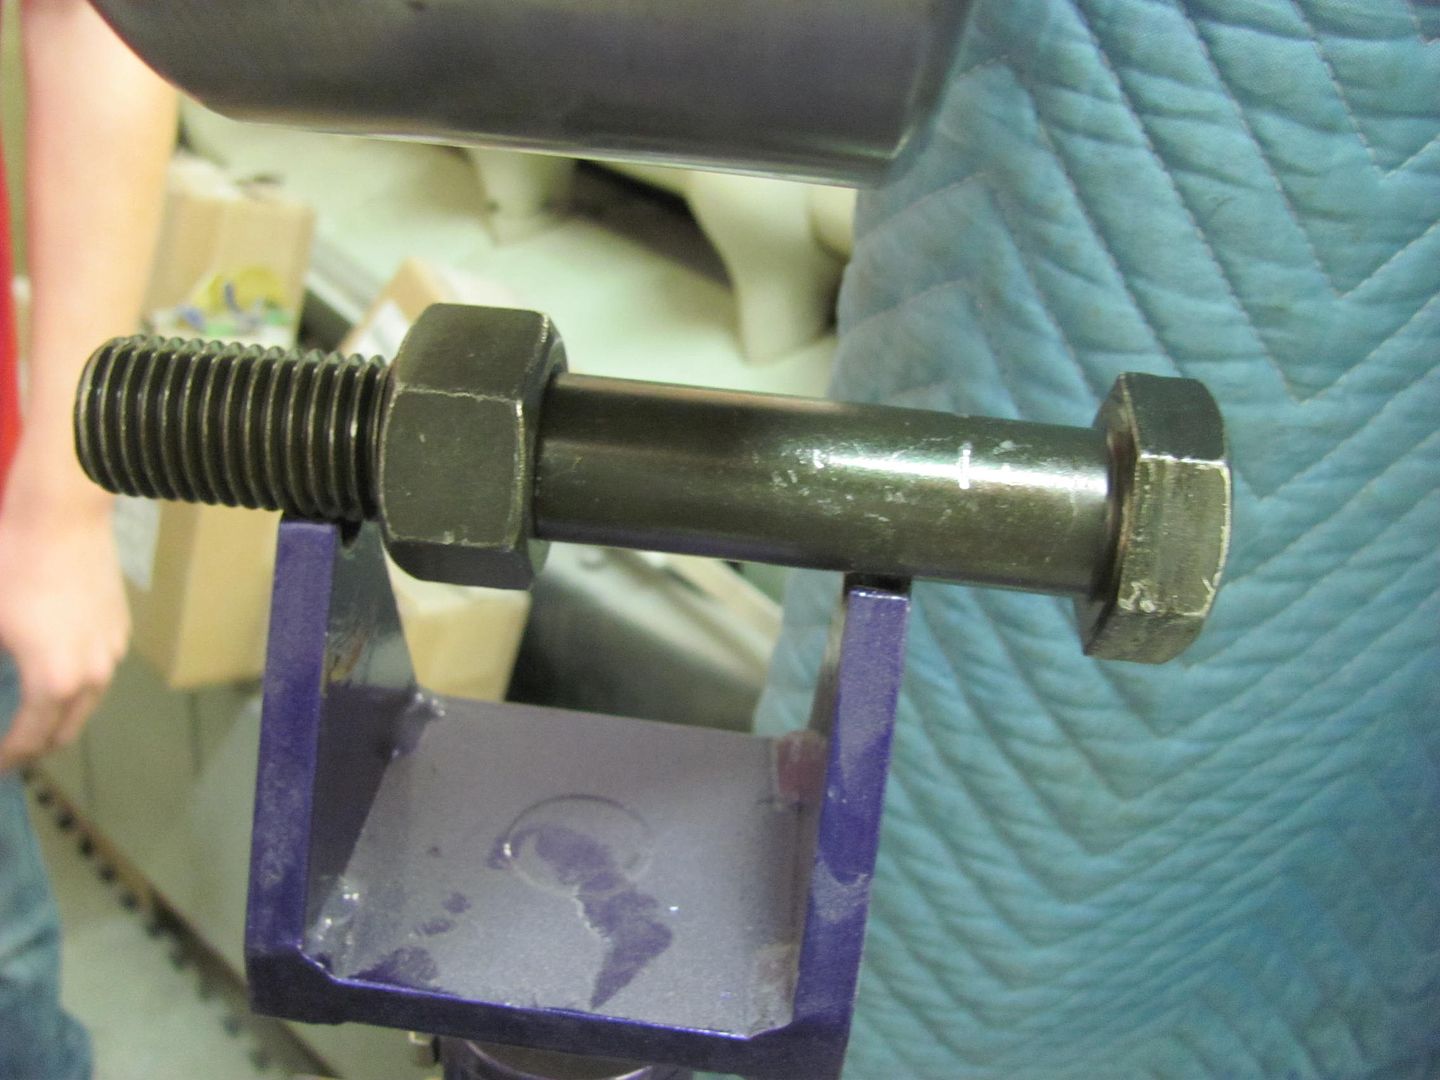 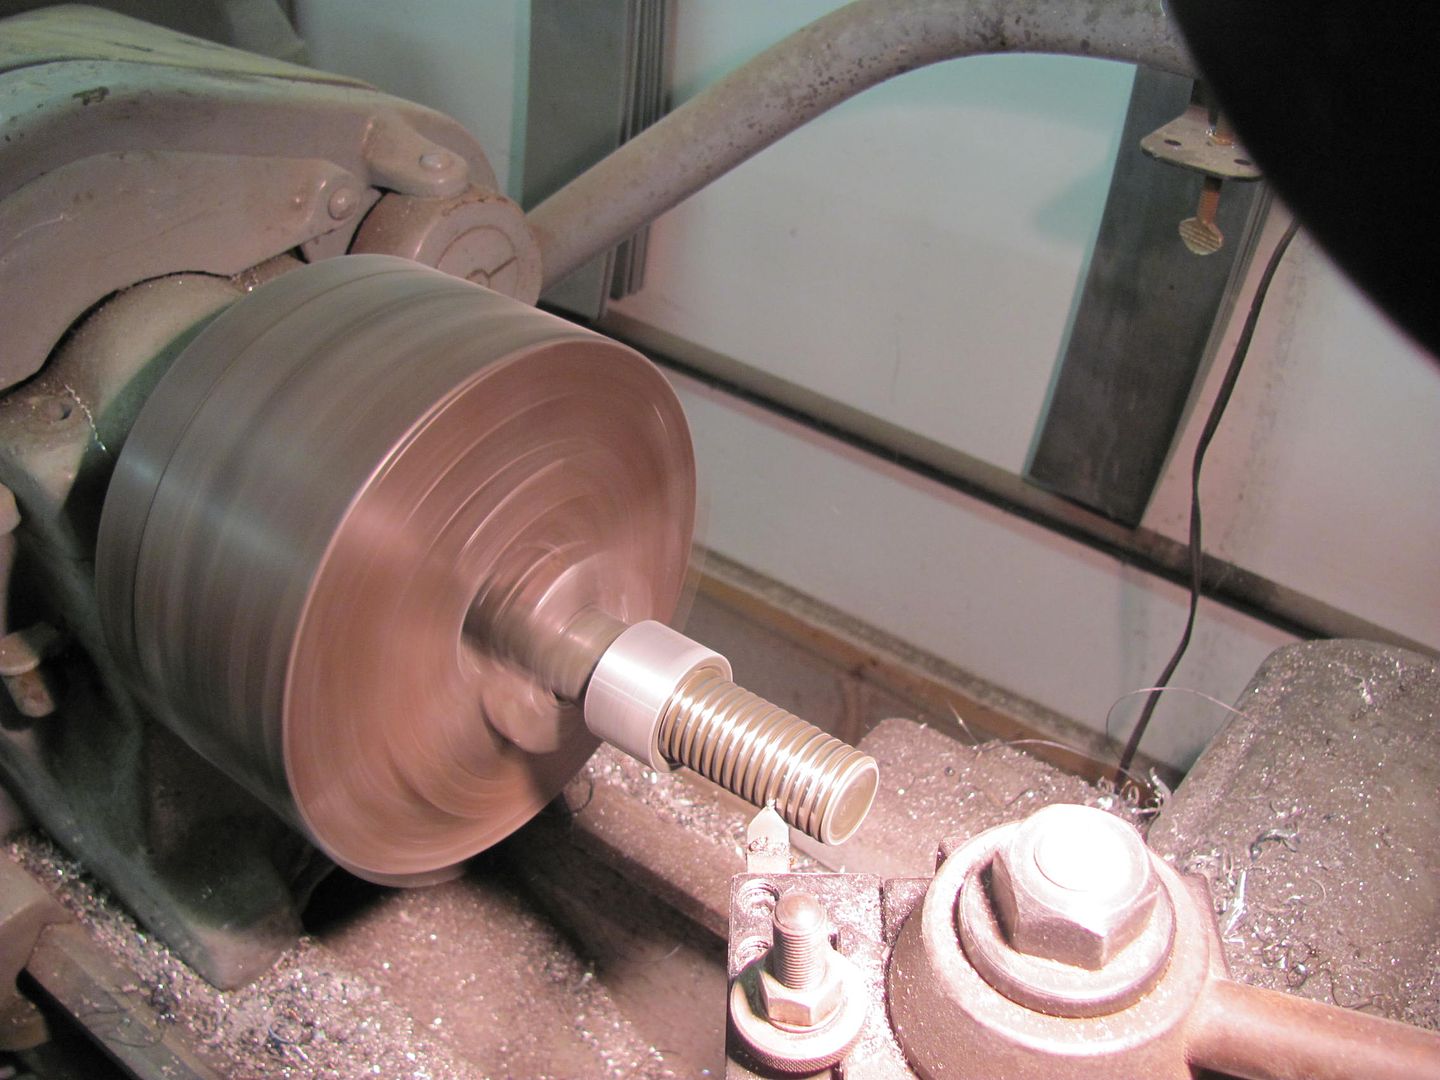 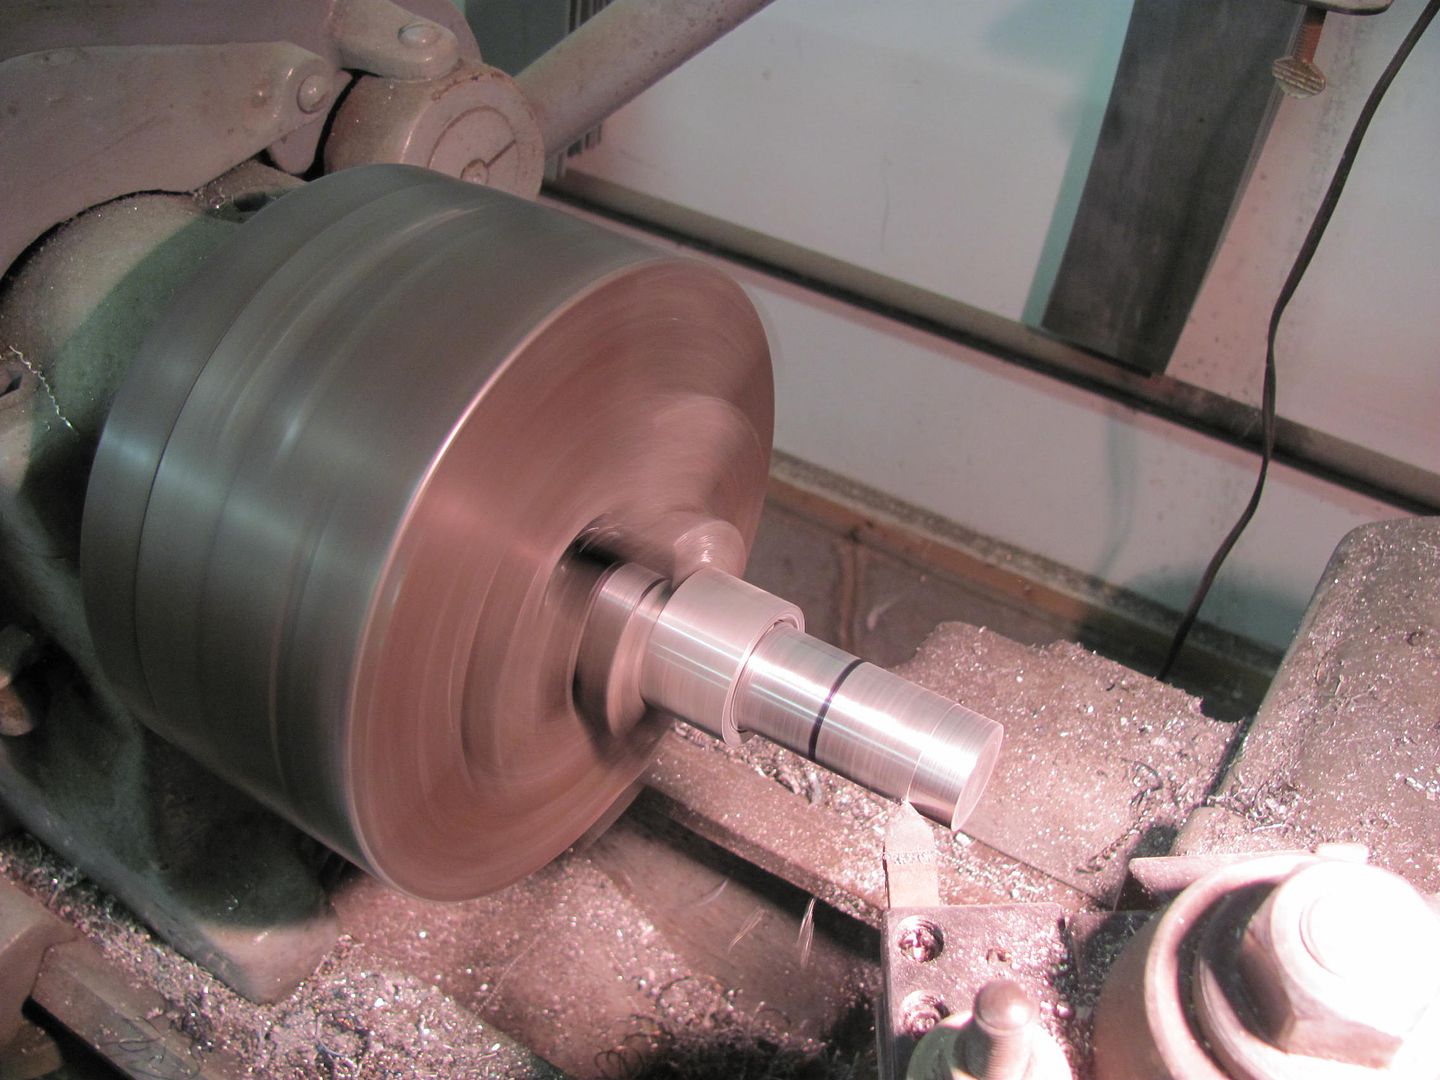 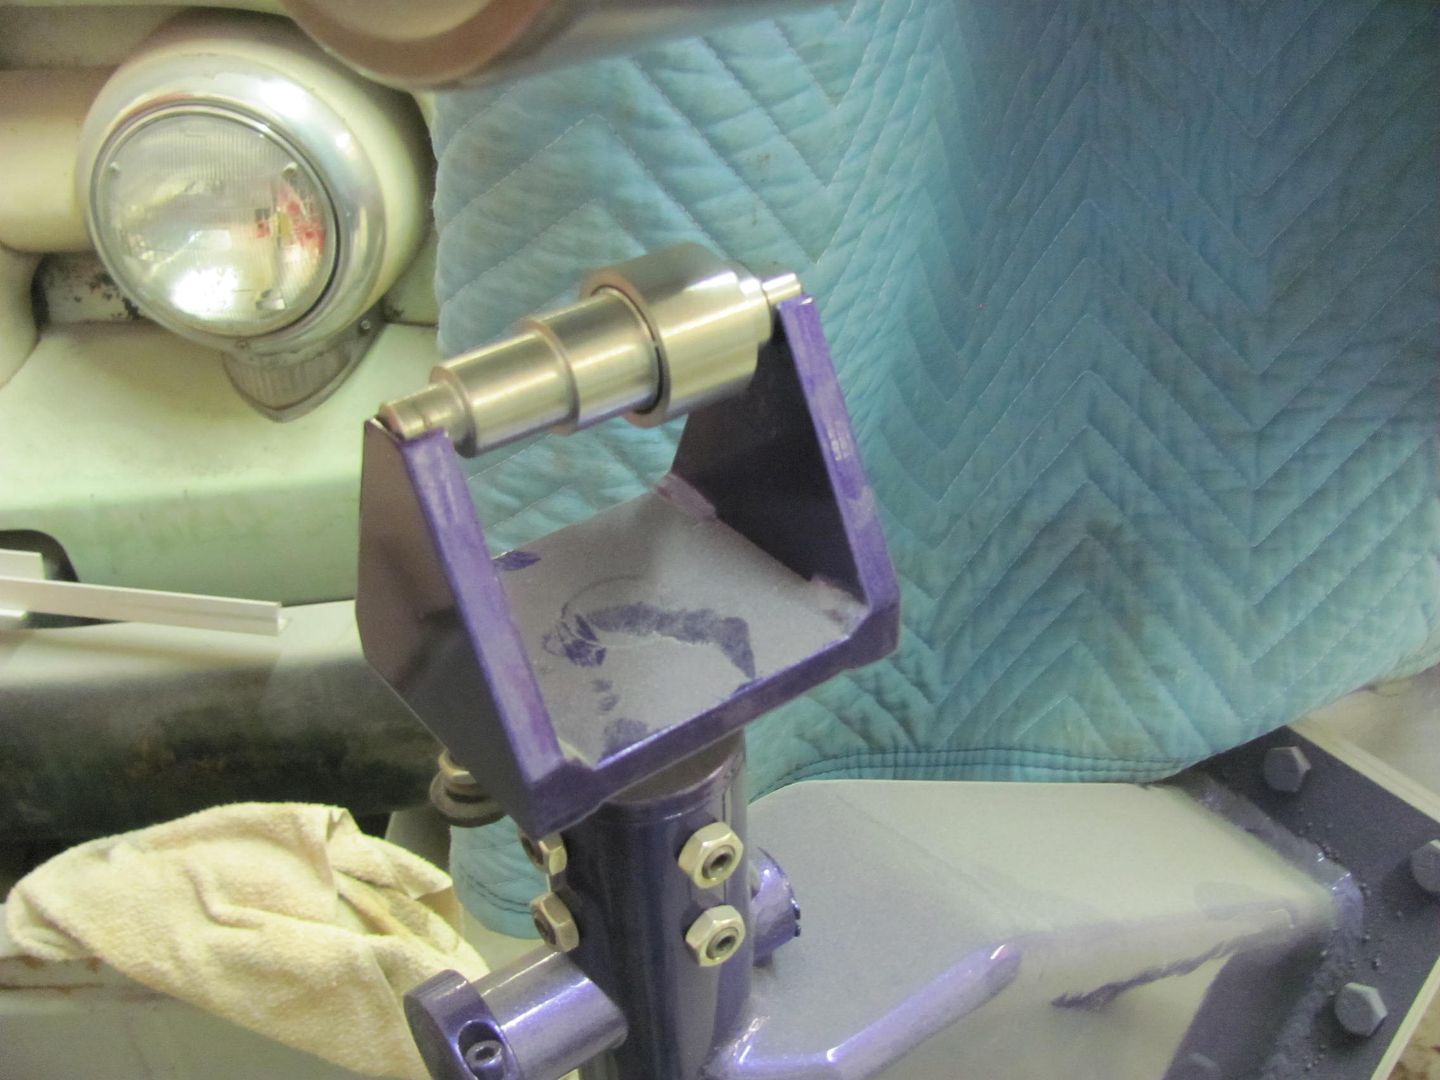 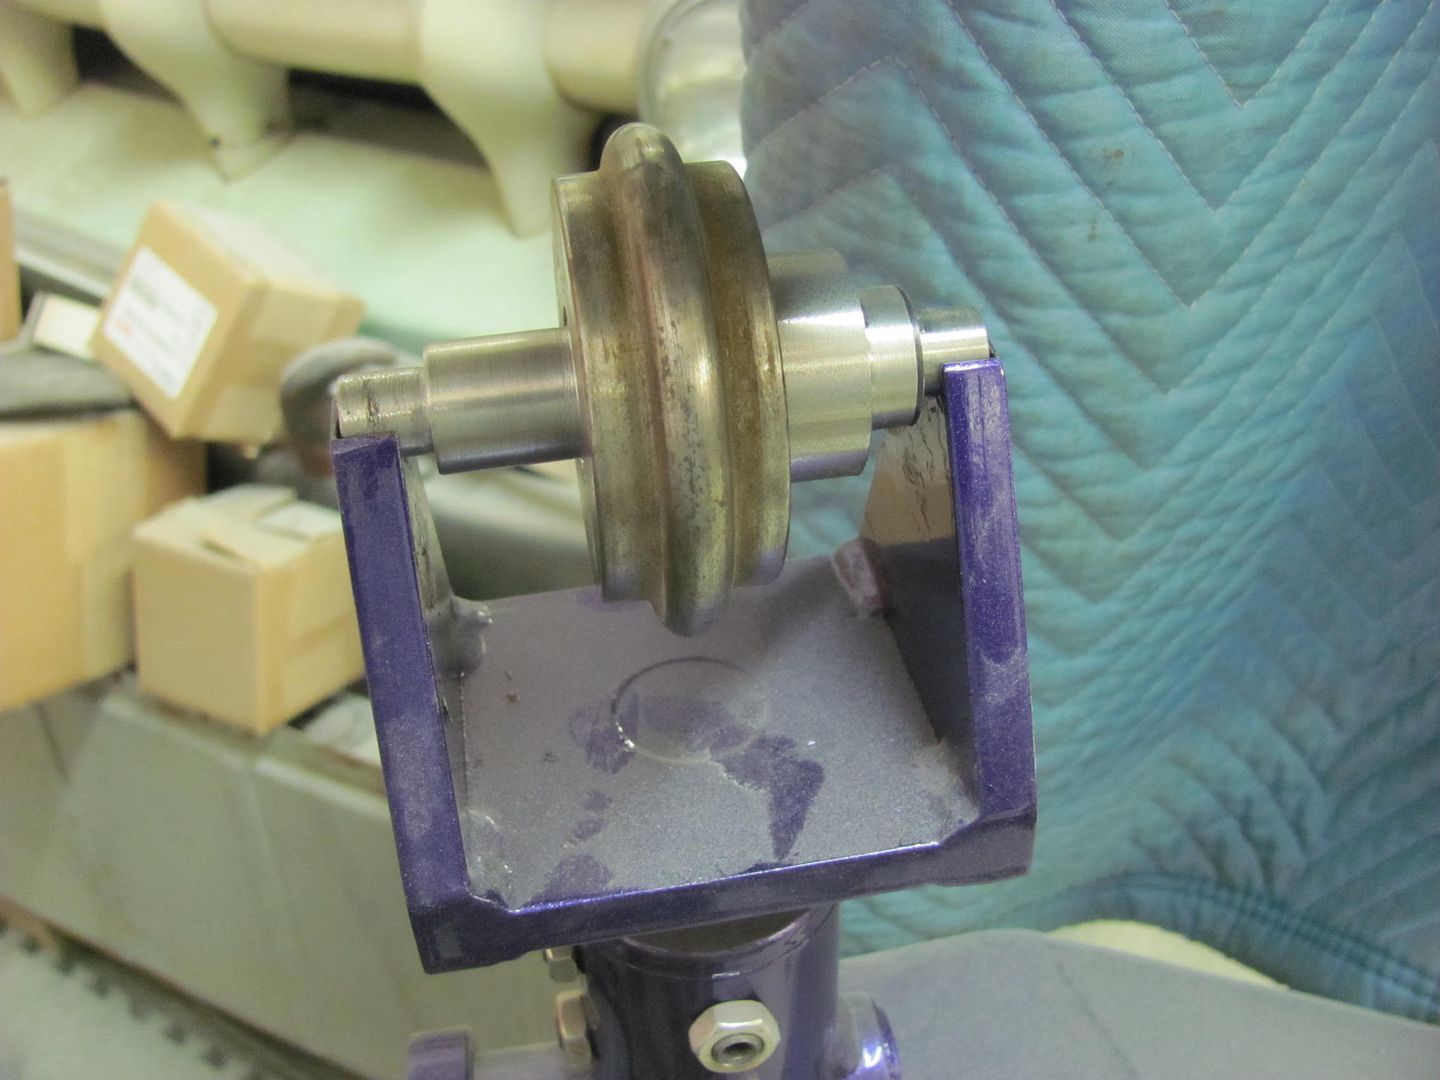 And my accomplishments for today...    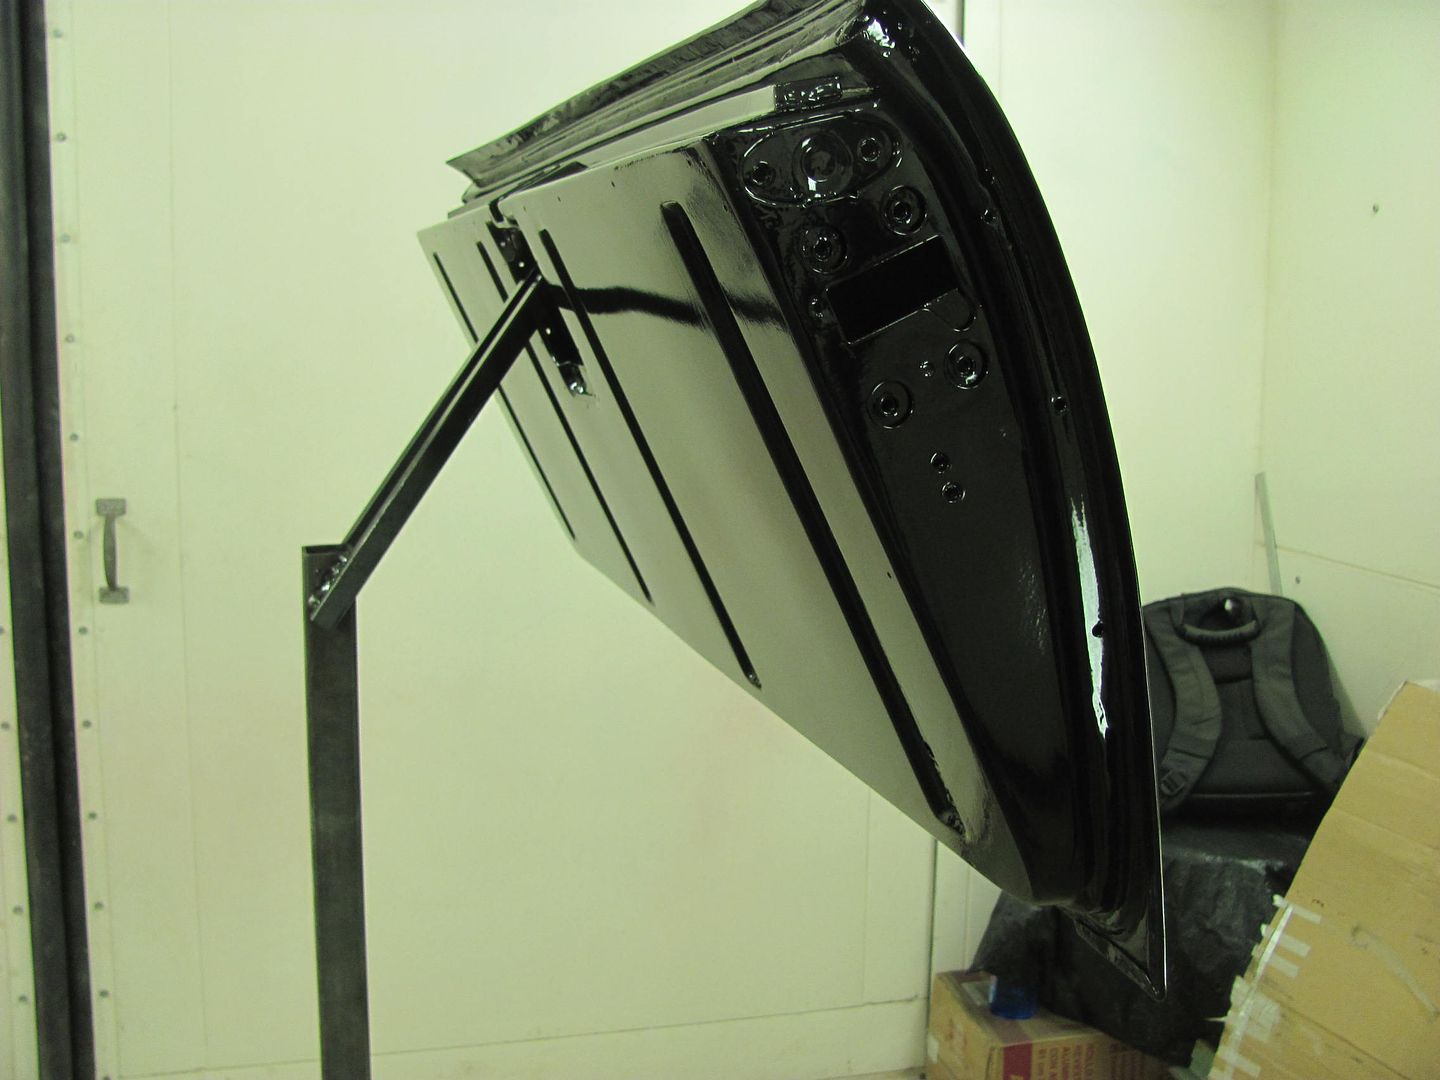 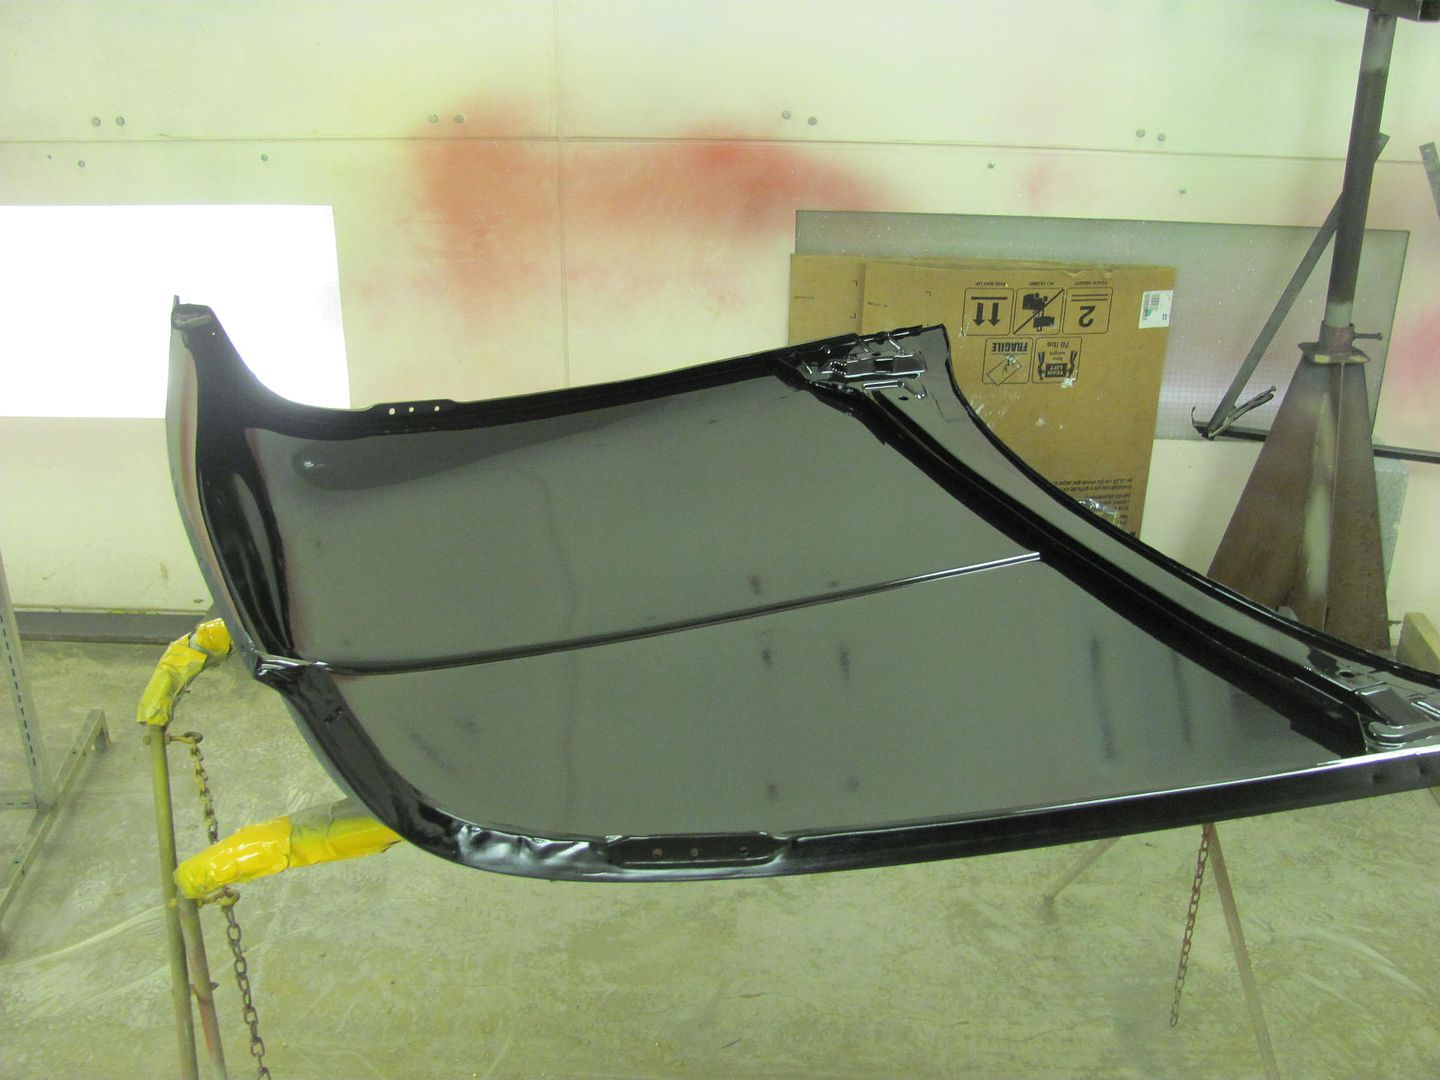  And as I had a bit of epoxy left over, time to seal the inner door to the door skin.. Both had been primed before assembly... 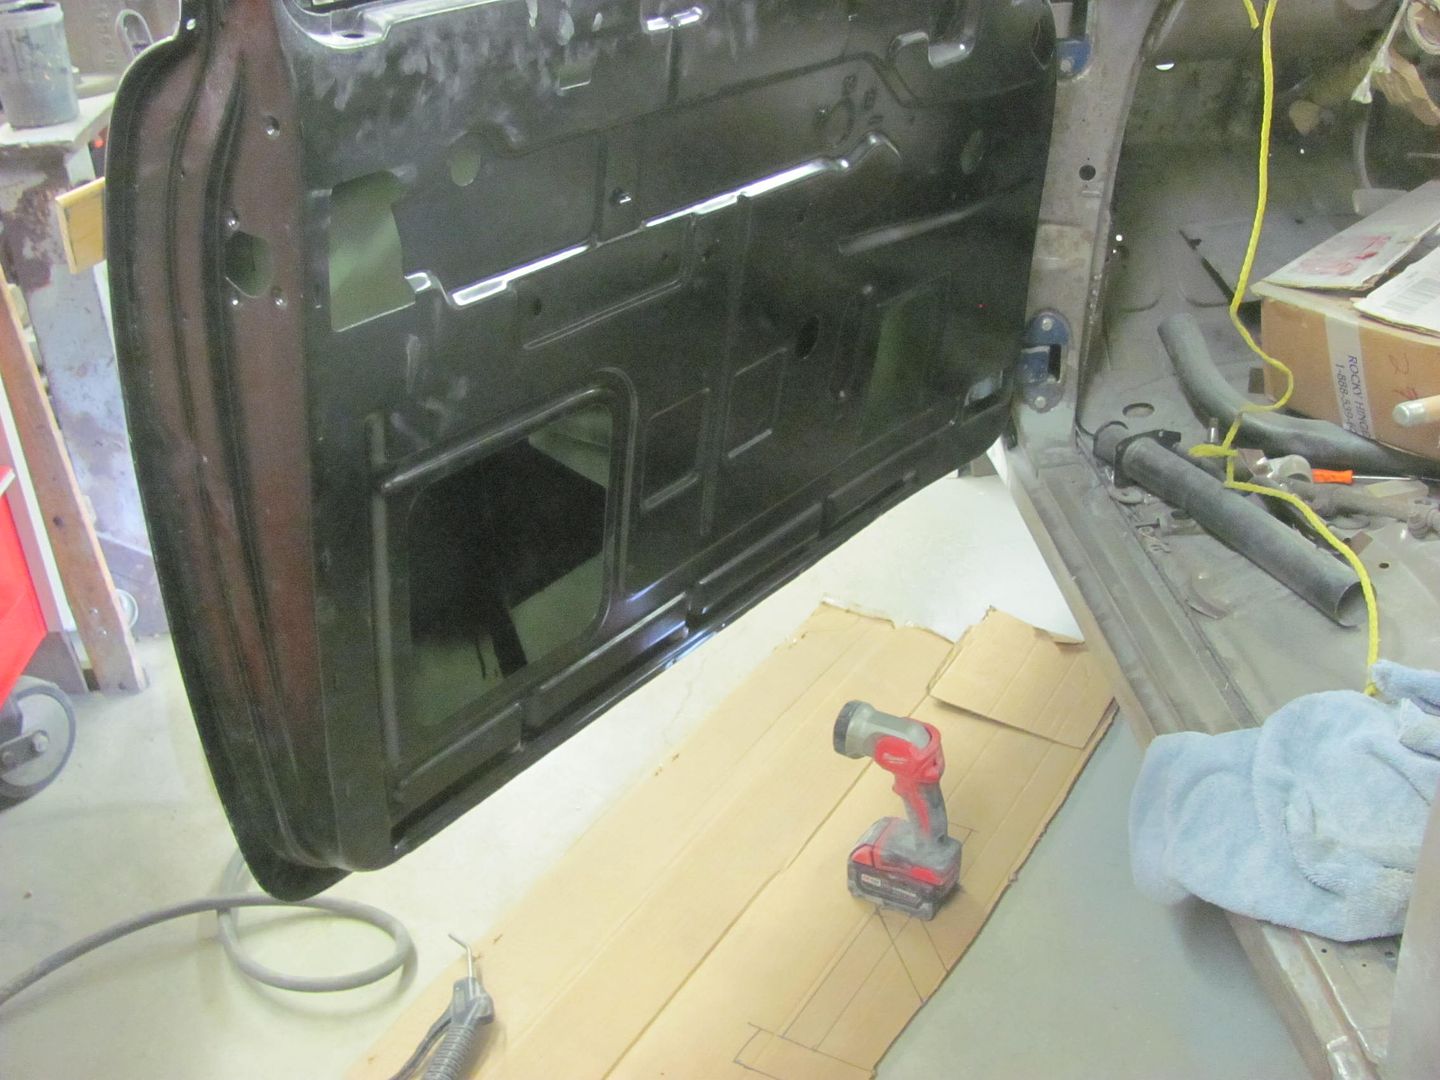  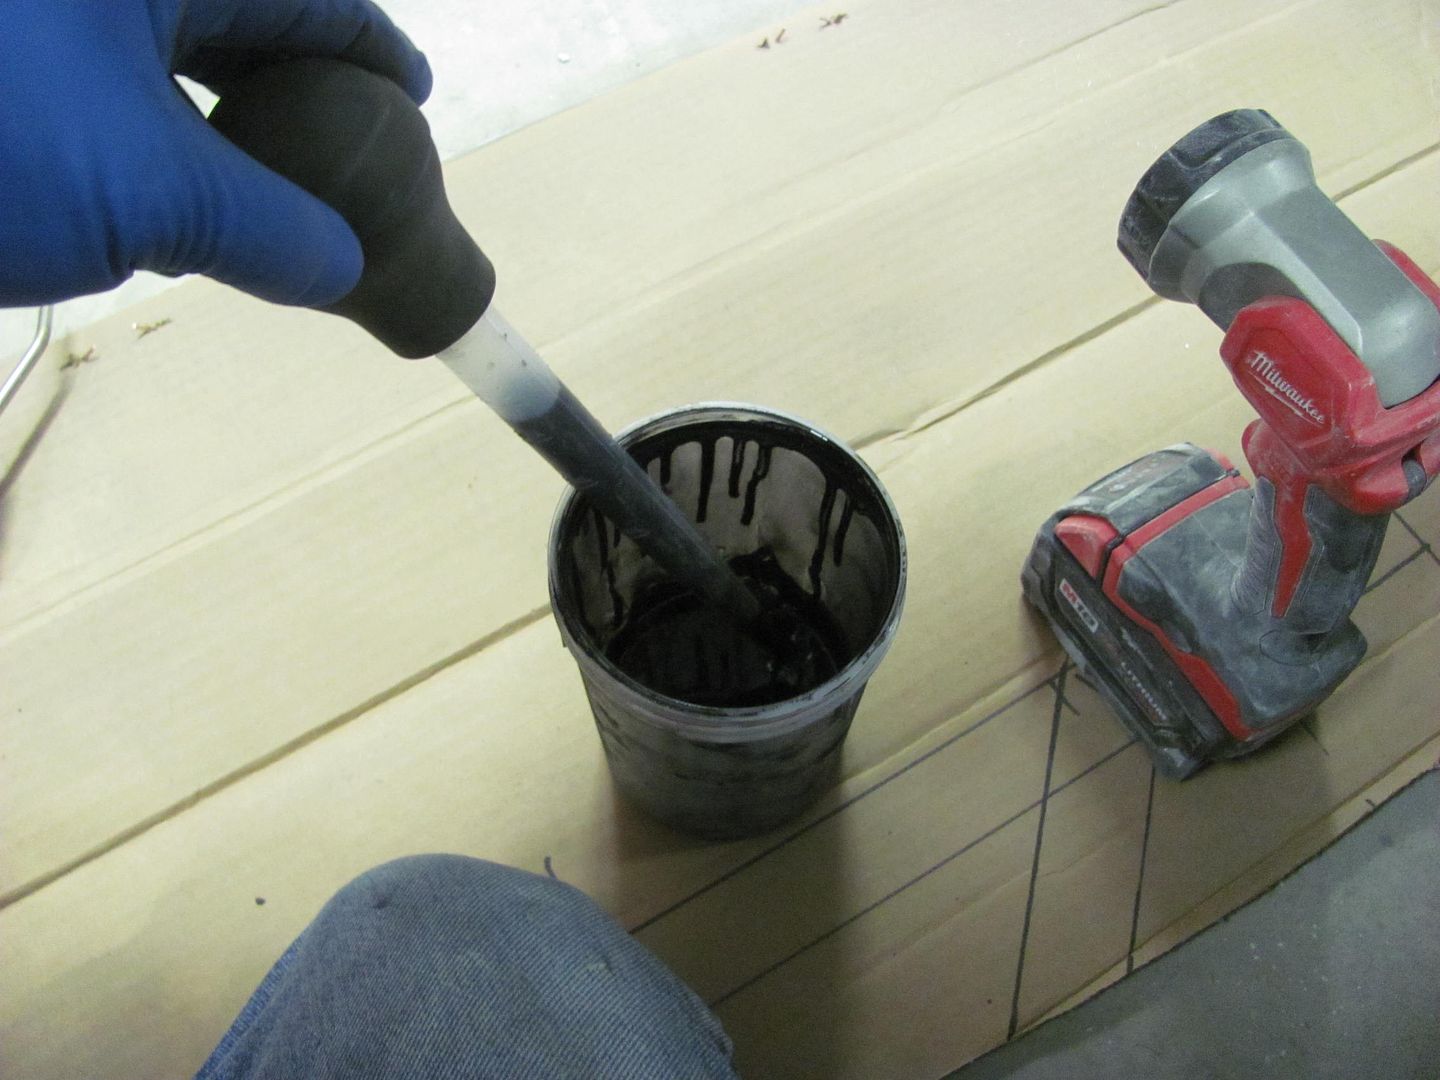 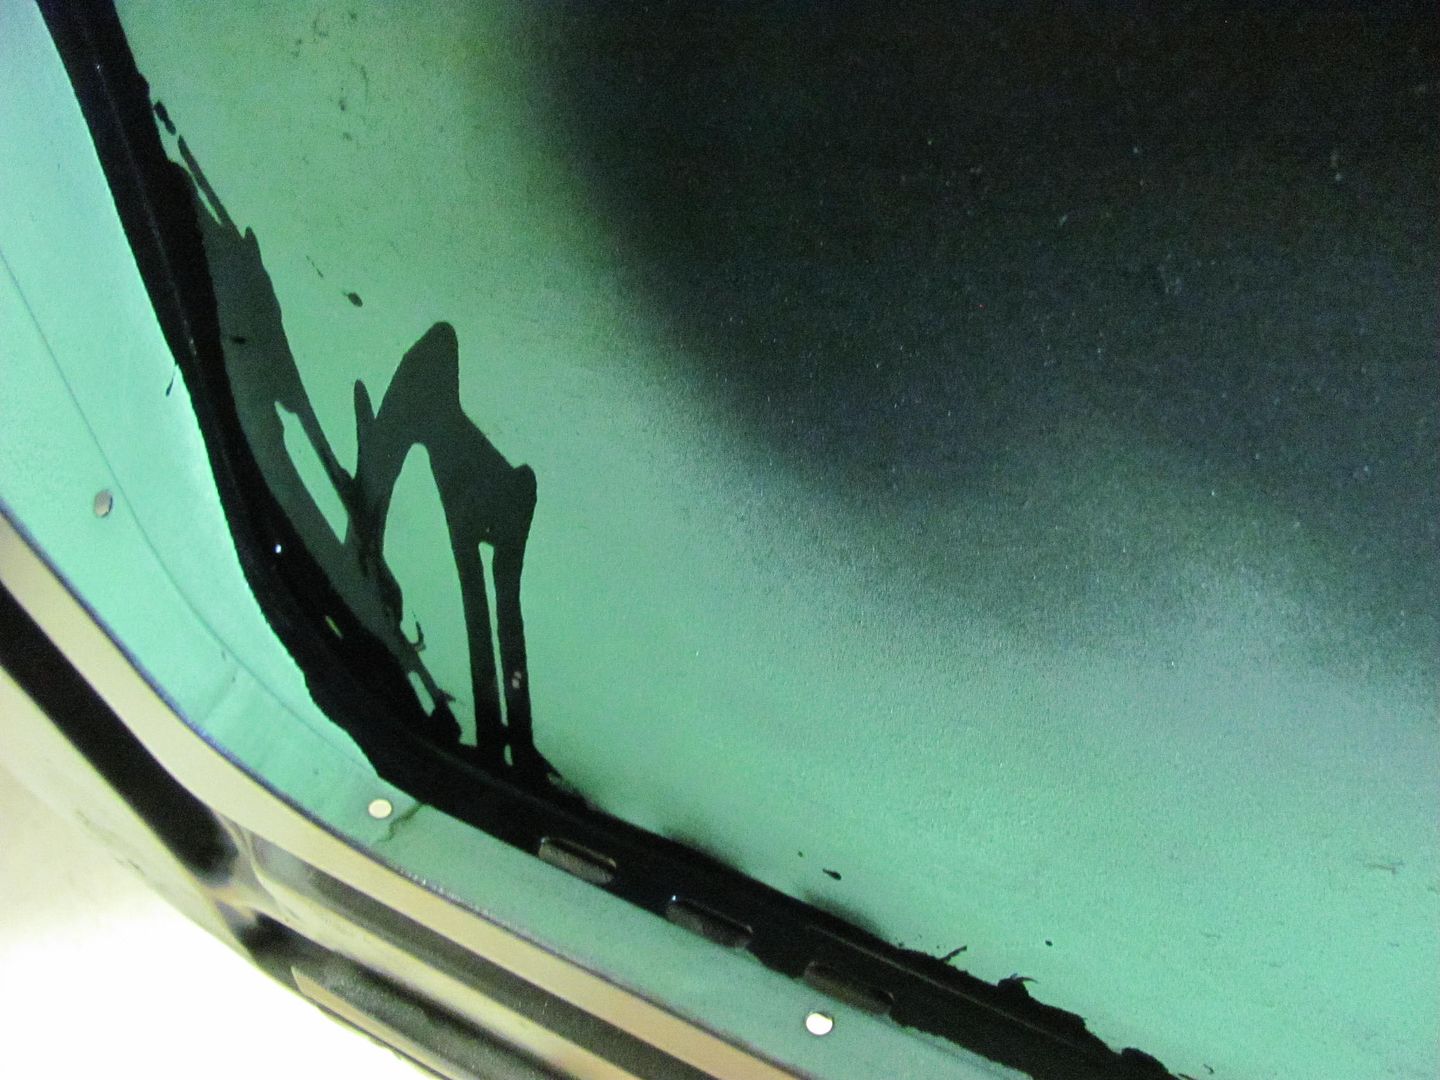 Definitely want to cover the floor in doing this... 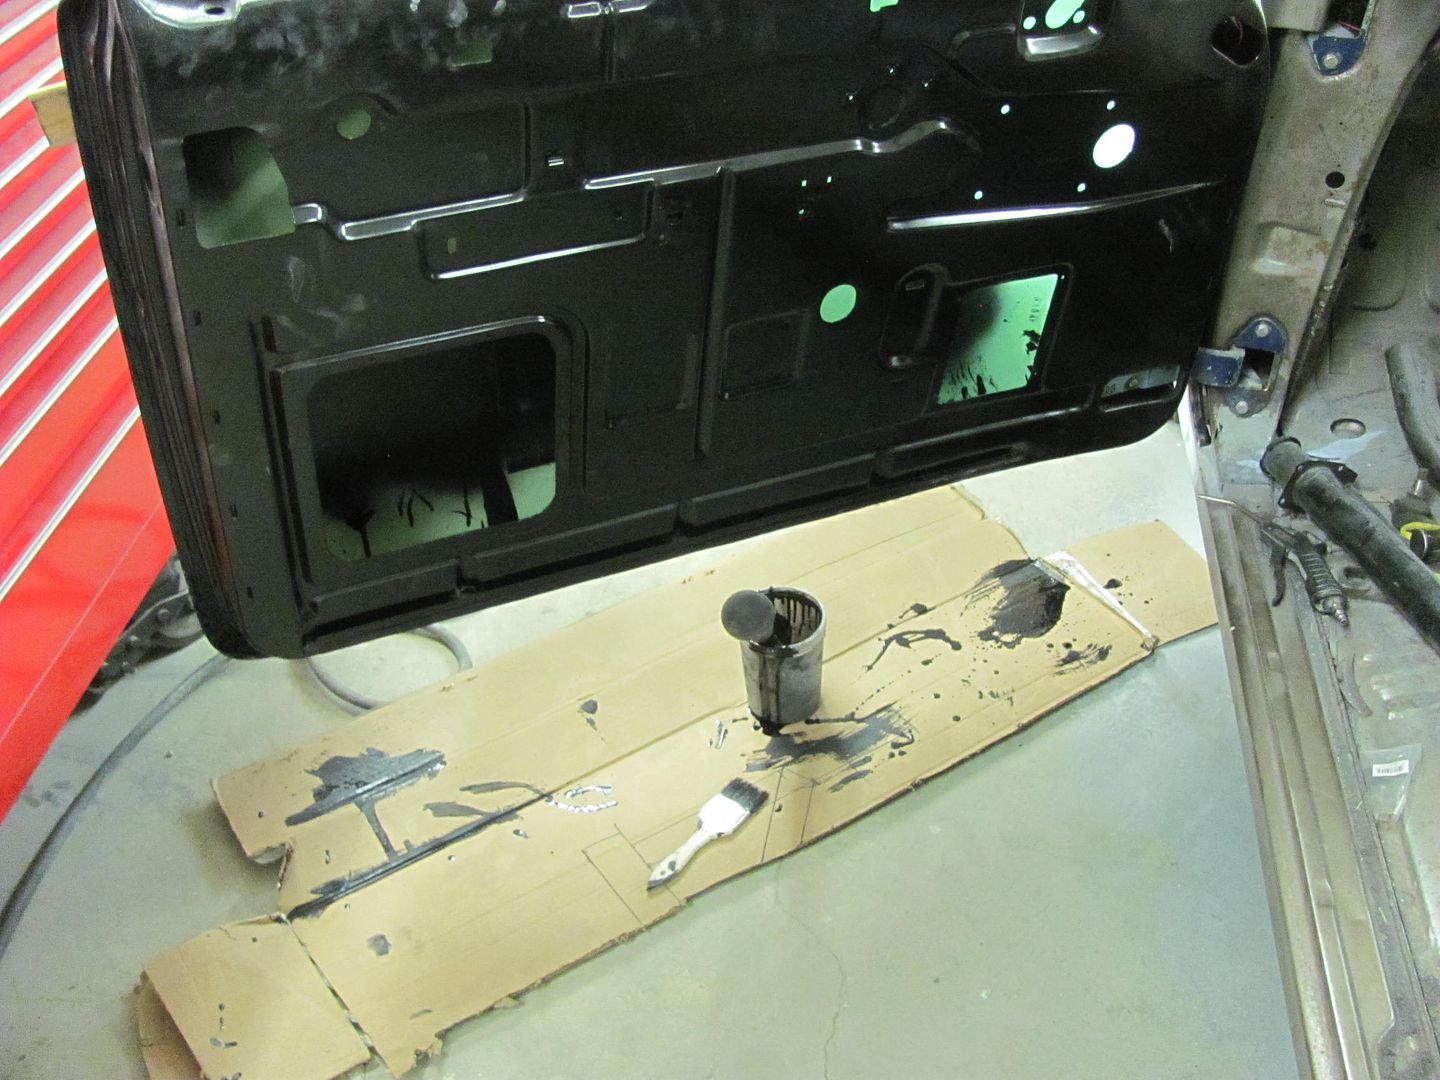 Had enough to do both doors, should keep the rust bugs gone for a long time to come..
__________________
Robert |

|

|
|
04-04-2015, 11:05 PM
|
#402 |
|
Registered User
Join Date: Jun 2013
Location: Somewhere
Posts: 3,057
|
Re: 55 Wagon Progress
I see some welds look pretty large diameter in comparison to the vise-grip next to them. Using a circular motion or? I'm just admiring the nice flat welds. Mine come out smaller and more proud.
You grind welds with a thin cutting wheel? Any advice for straightening a 67-72 front bed wall bowed forward a bit from junk hitting it over the years? |
|
|
|
|
04-04-2015, 11:48 PM
|
#403 |
|
Senior Member
 Join Date: Mar 2011
Location: West Plains, Missouri
Posts: 7,555
|
Re: 55 Wagon Progress
Wow, the inside of the hood looks better that a lot of top sides...Jim
__________________
my build thread: http://67-72chevytrucks.com/vboard/s...d.php?t=459839 Jimbo's long bed step build:http://67-72chevytrucks.com/vboard/s...t=464626<br /> |
|
|
|
|
04-07-2015, 11:07 PM
|
#404 | ||
|
Registered User
Join Date: Jan 2013
Location: Leonardtown, MD
Posts: 1,636
|
Re: 55 Wagon Progress
Quote:
Quote:
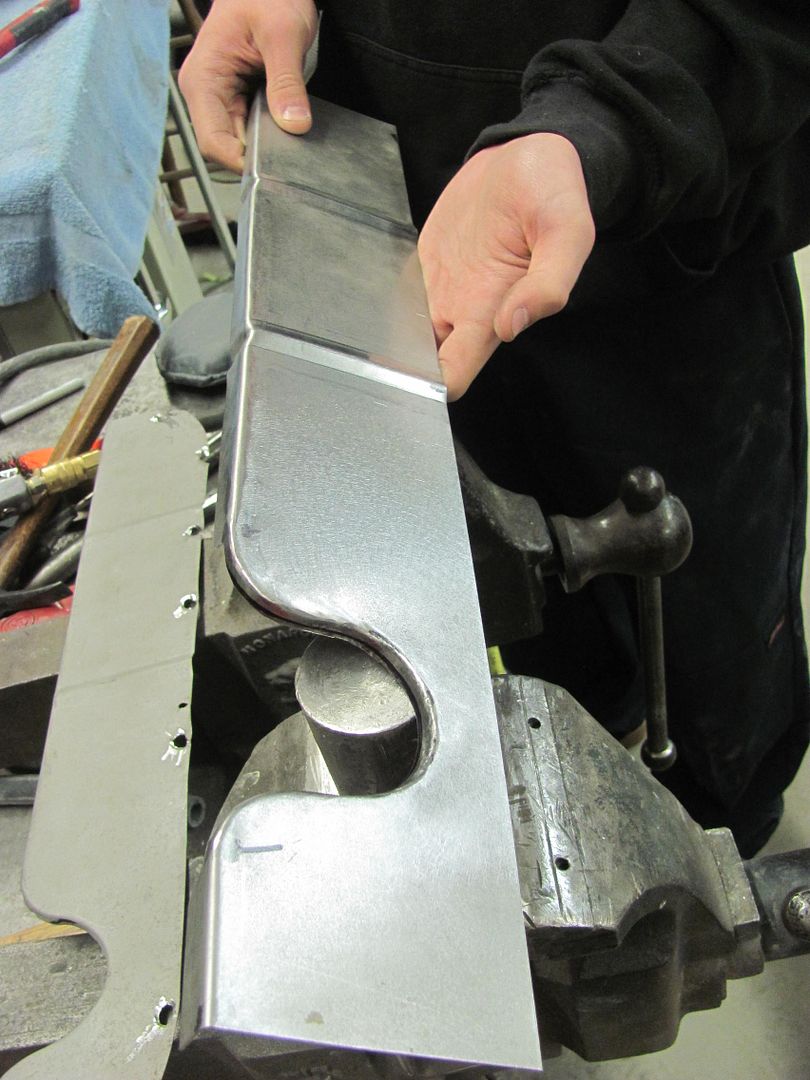
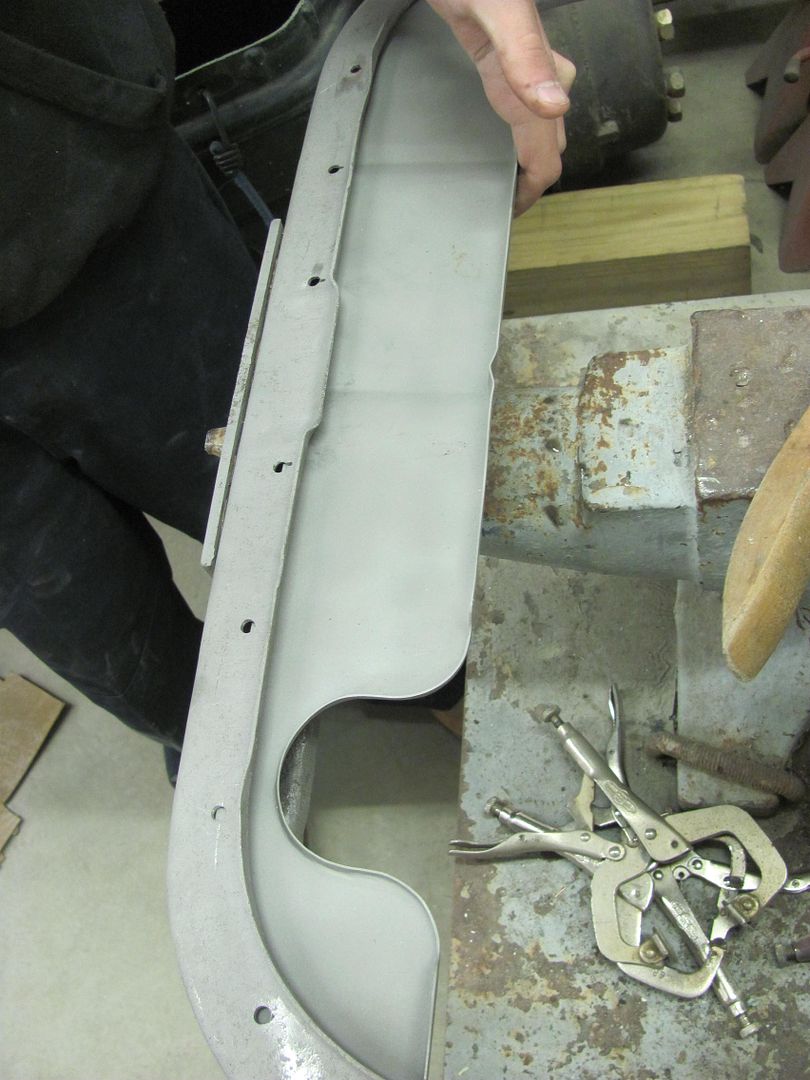
Thanks Jim, the semi gloss is nice for showing any remaining defects.. Well it was taking a little longer on the English wheel adapter kit than I thought, and since that is on the shop's dime, I thought we'd try something that we could get done a little quicker. So the other machine with plenty of throat was the Lennox, so let's make some dies for it..... Also got in some more block sanding while Kyle was cutting out pieces for the dies. 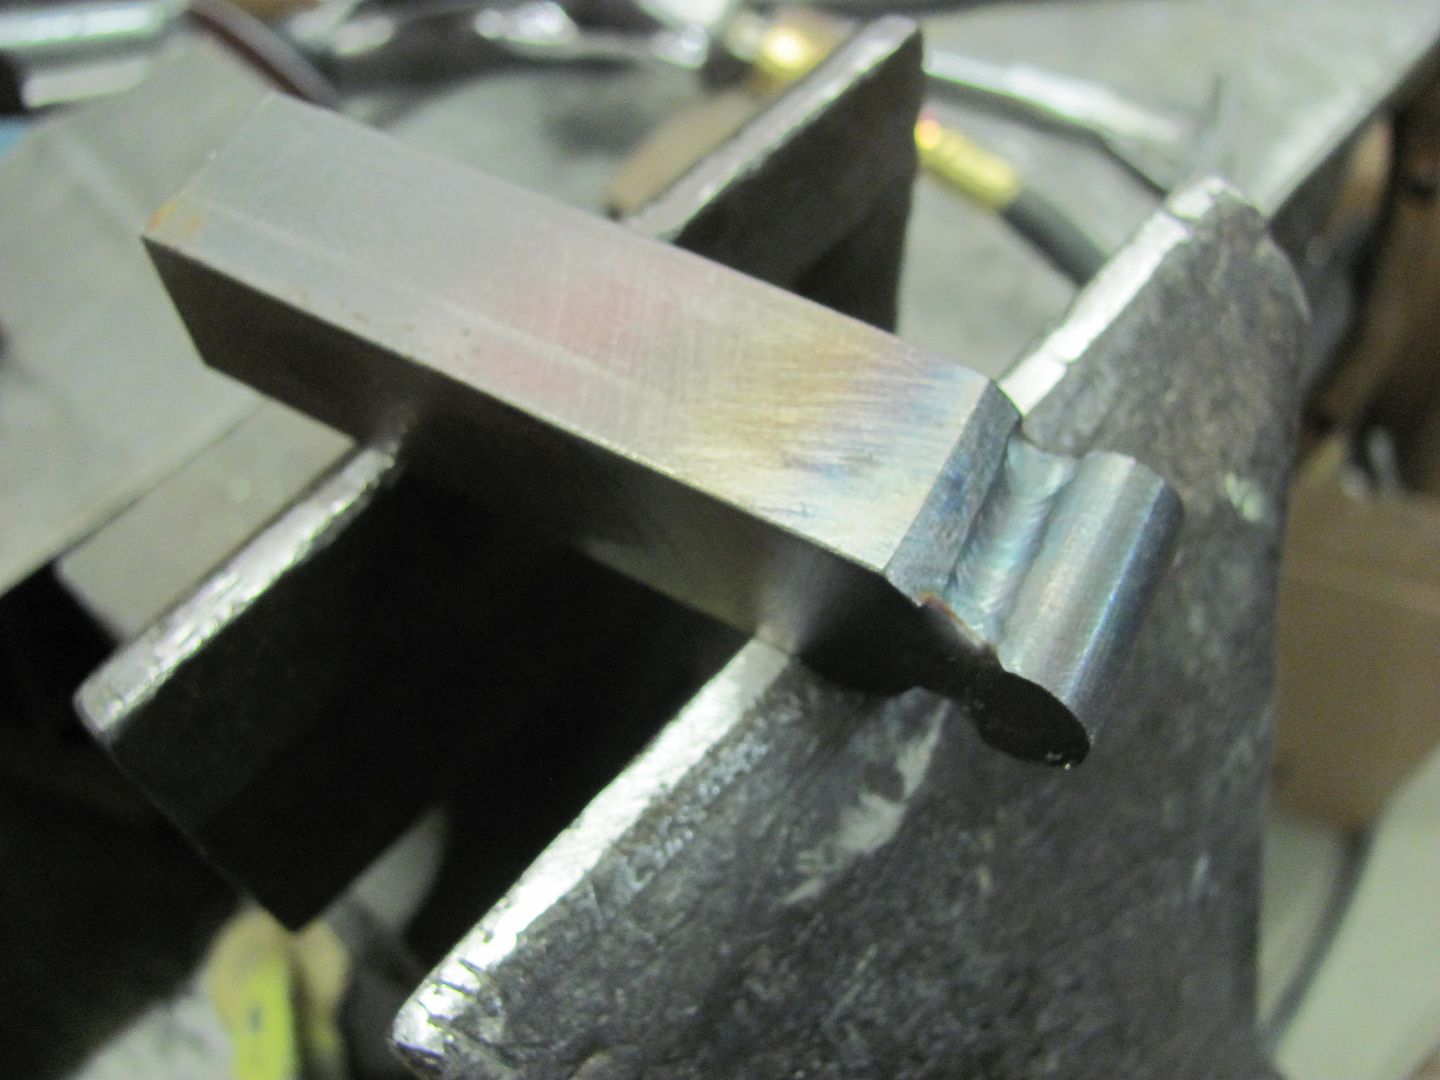 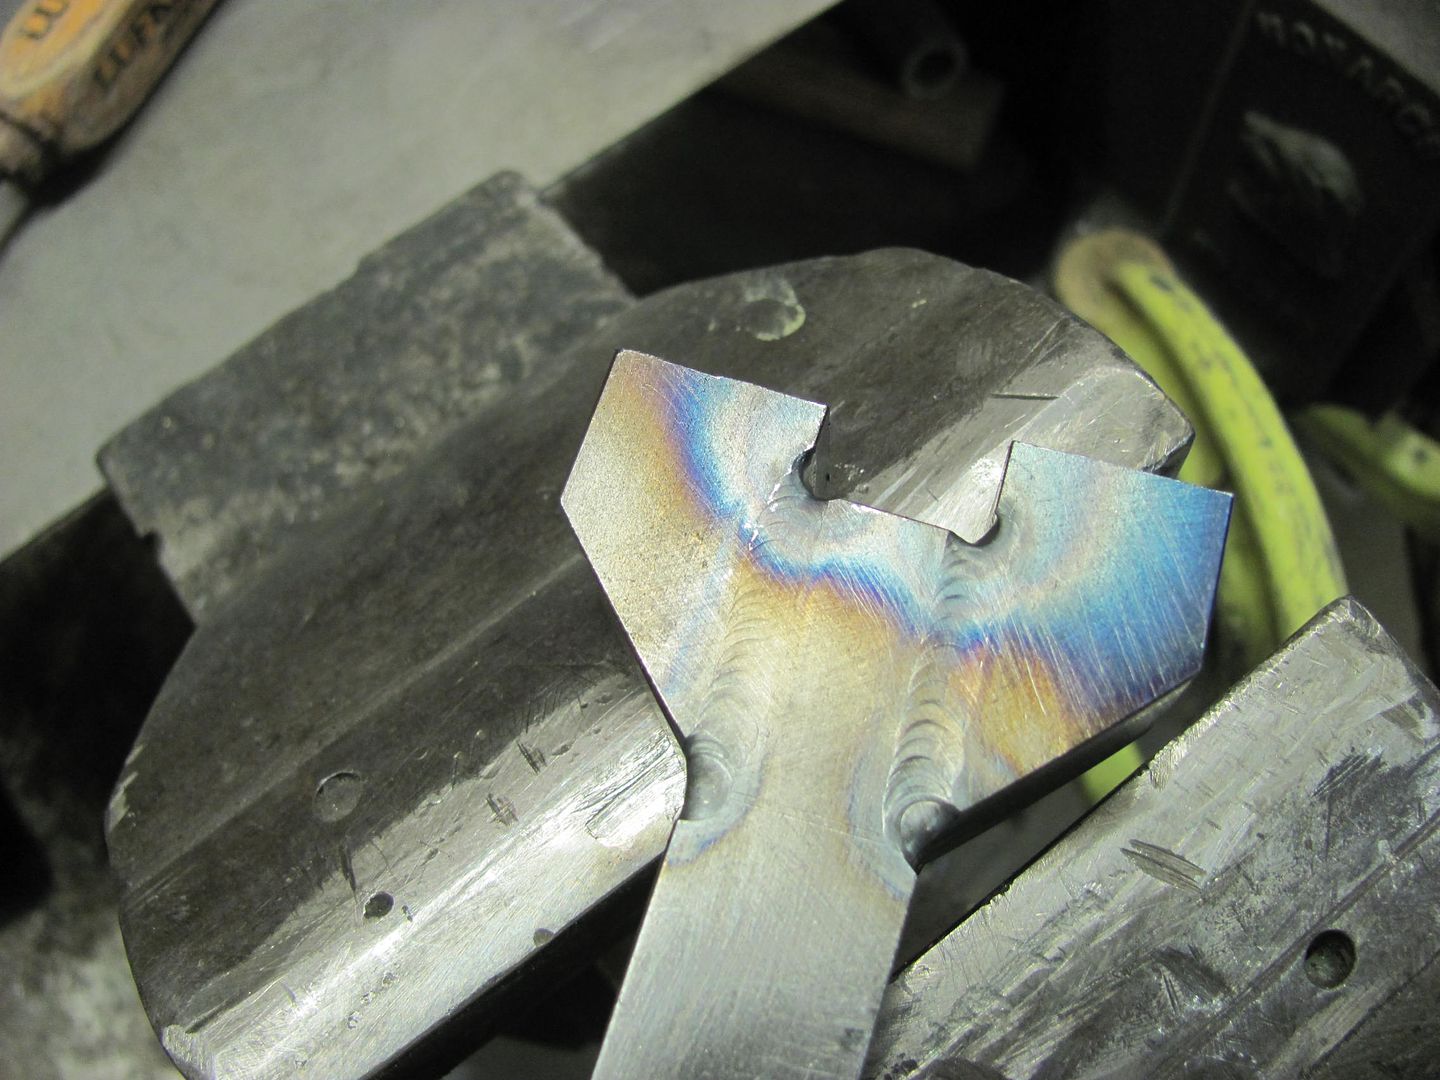 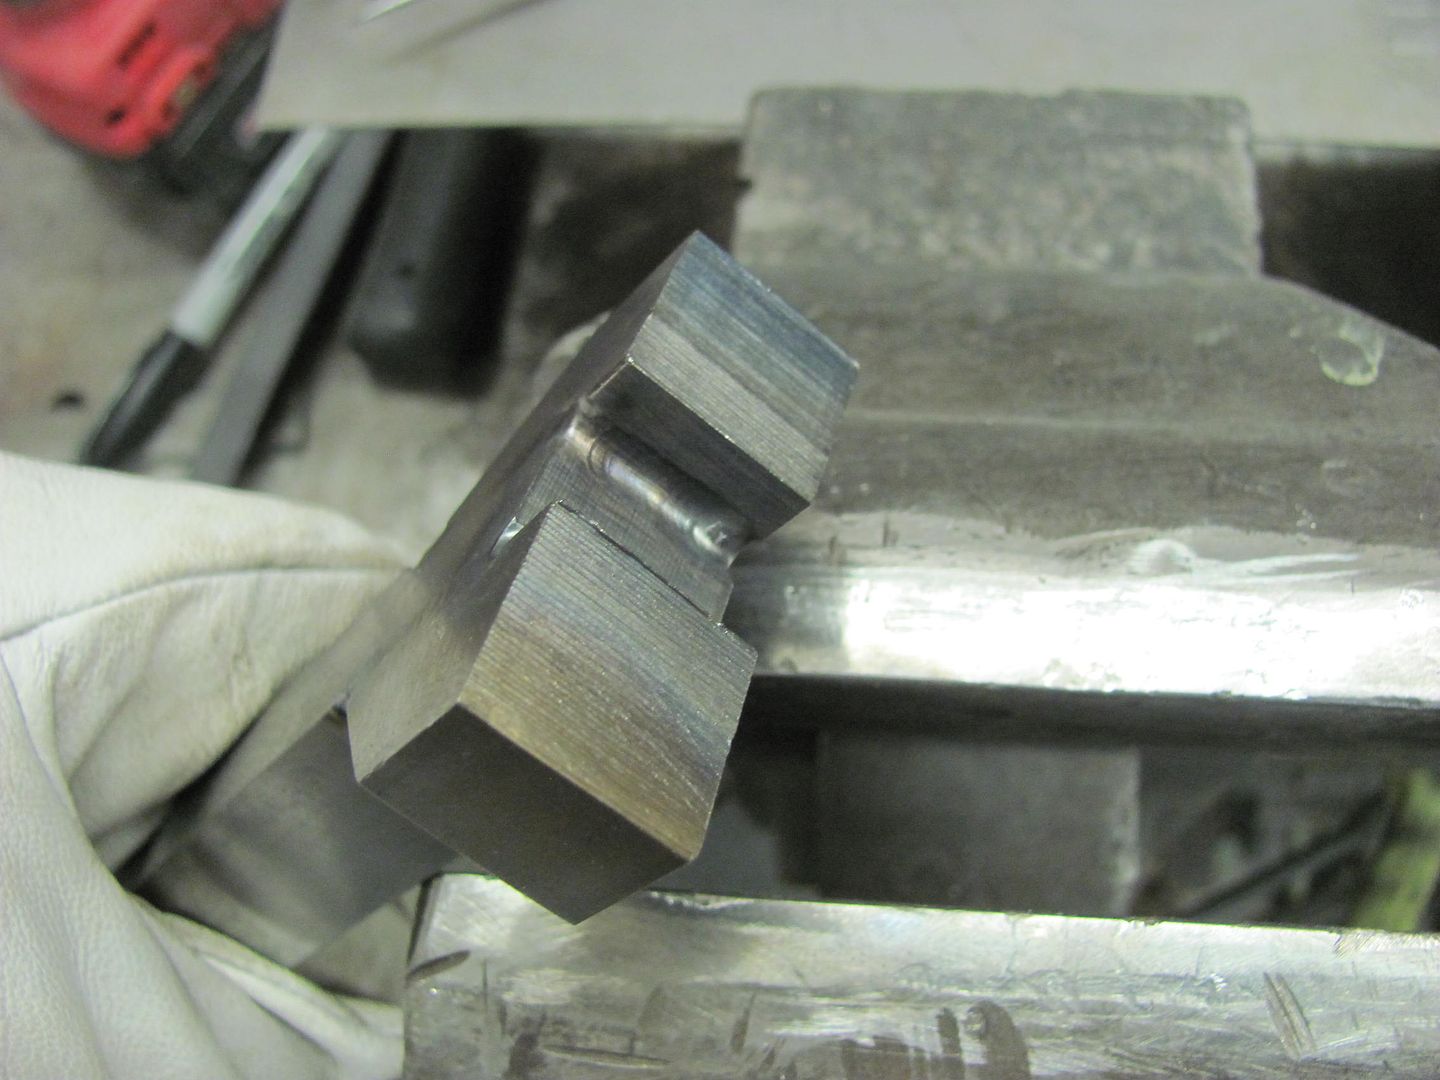 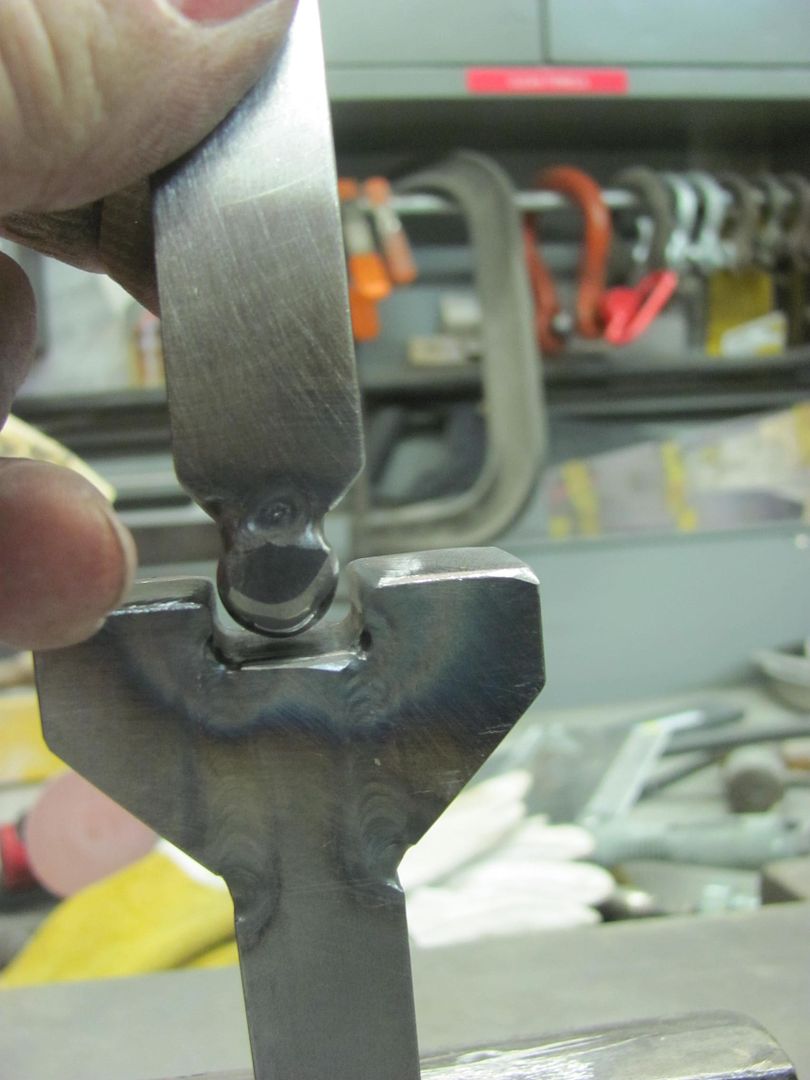 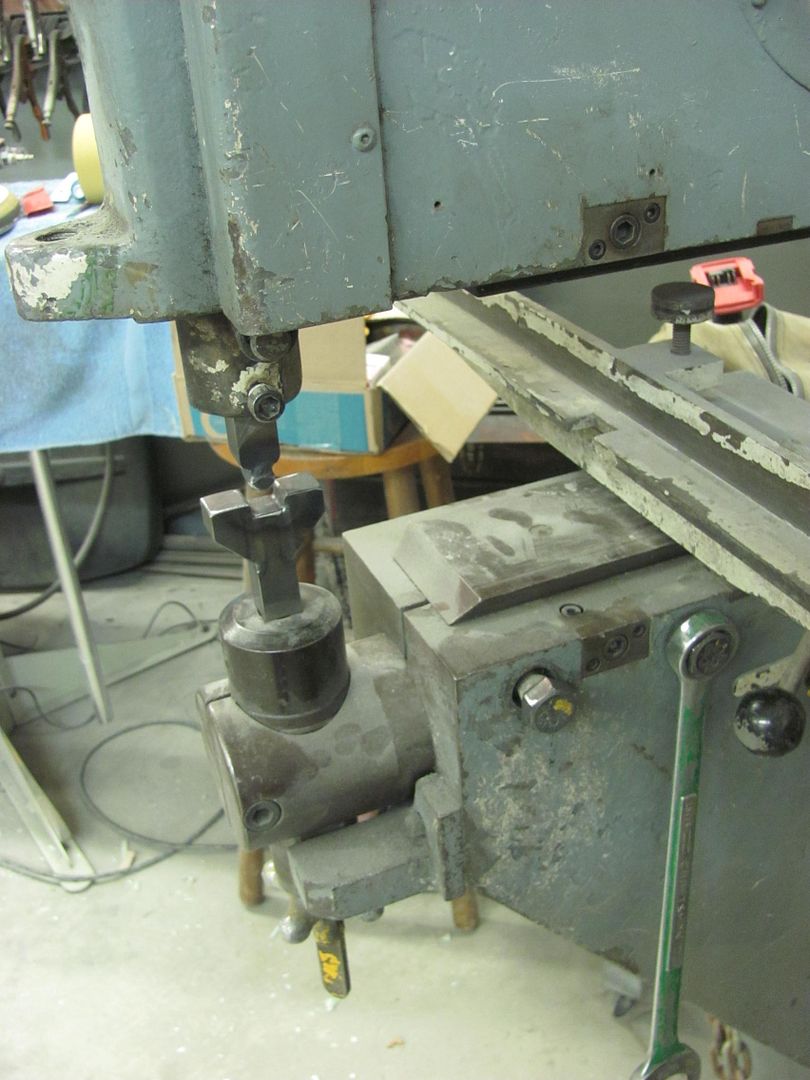 Pre-stretching the bead areas of the baffle... 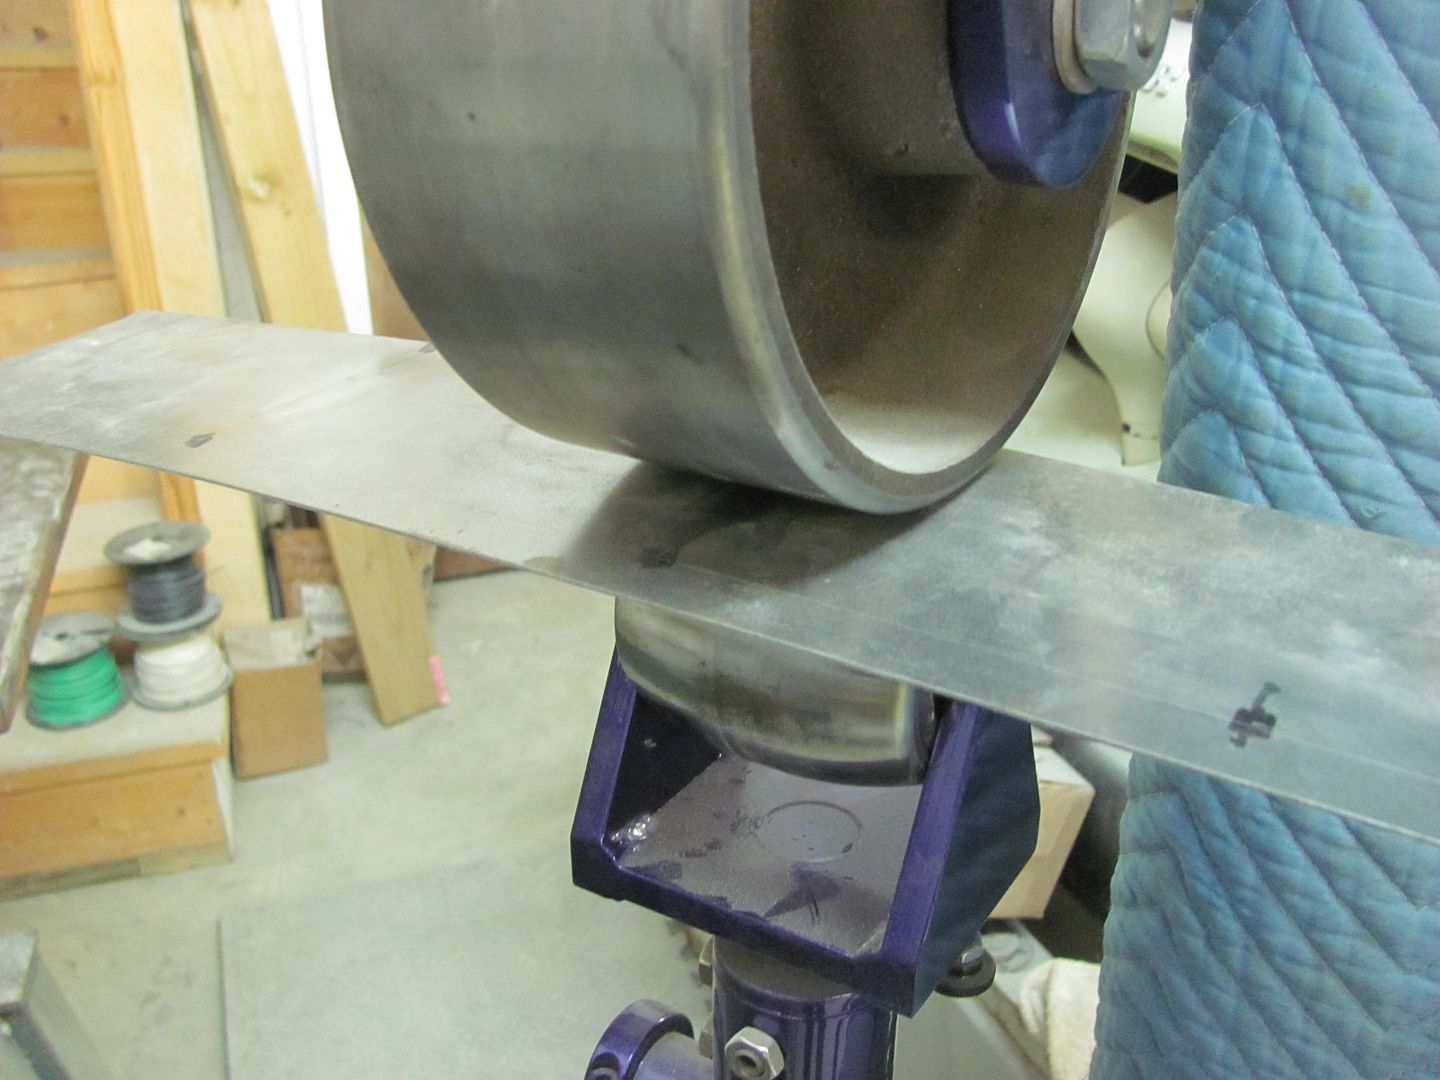  Adding the bead, using the backstop... 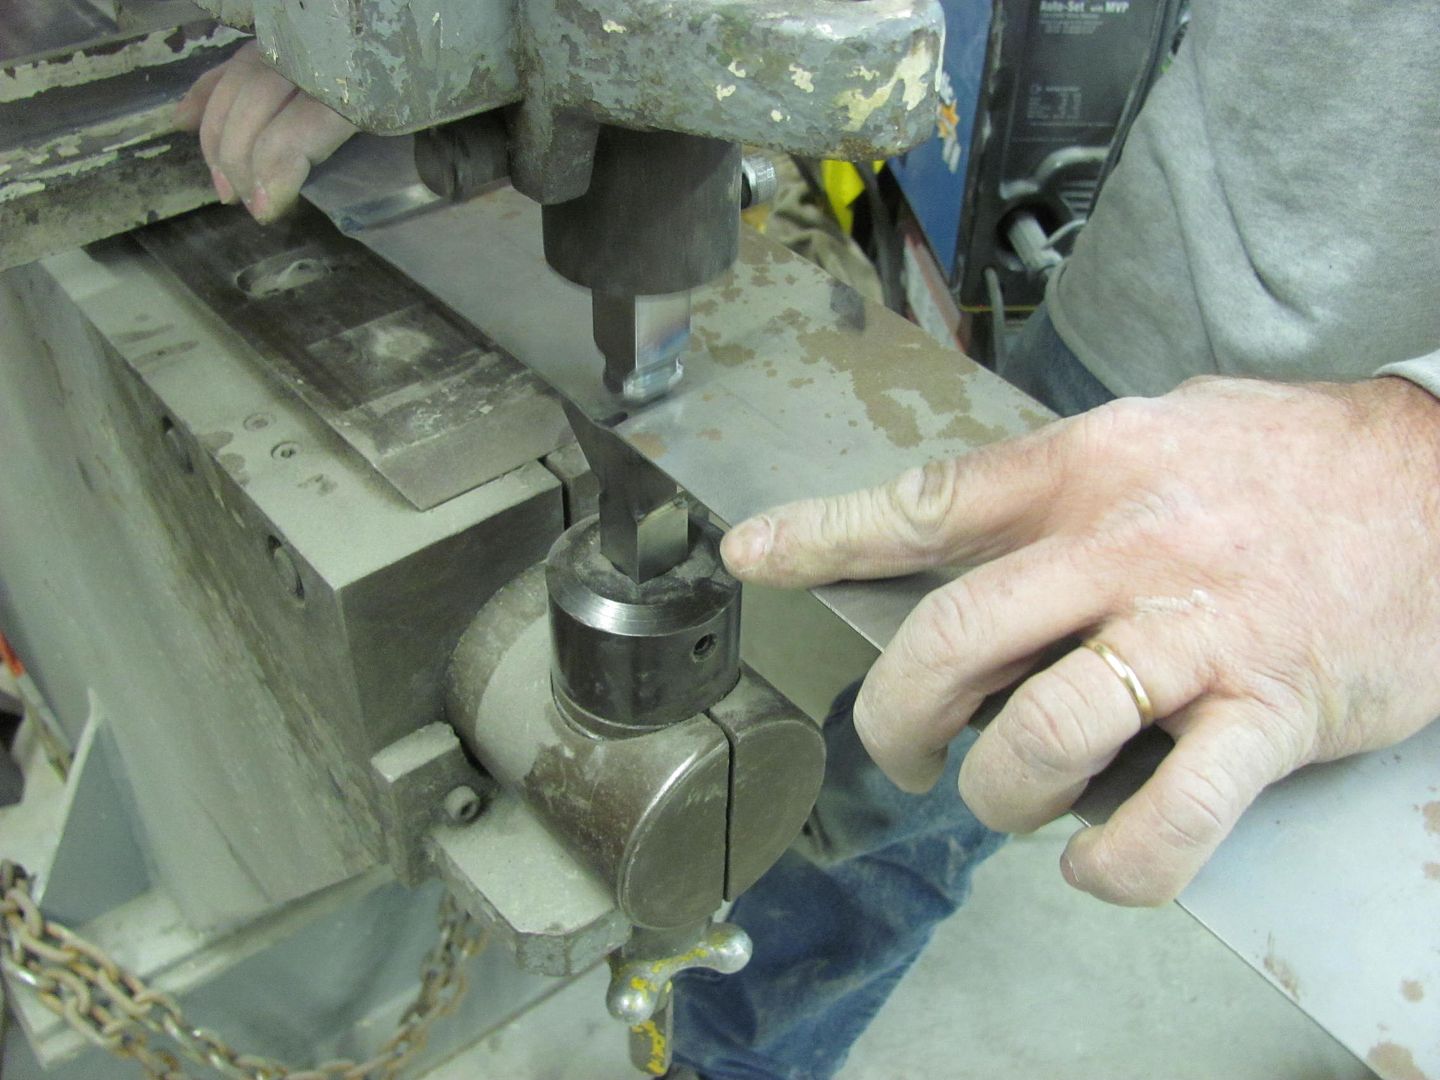  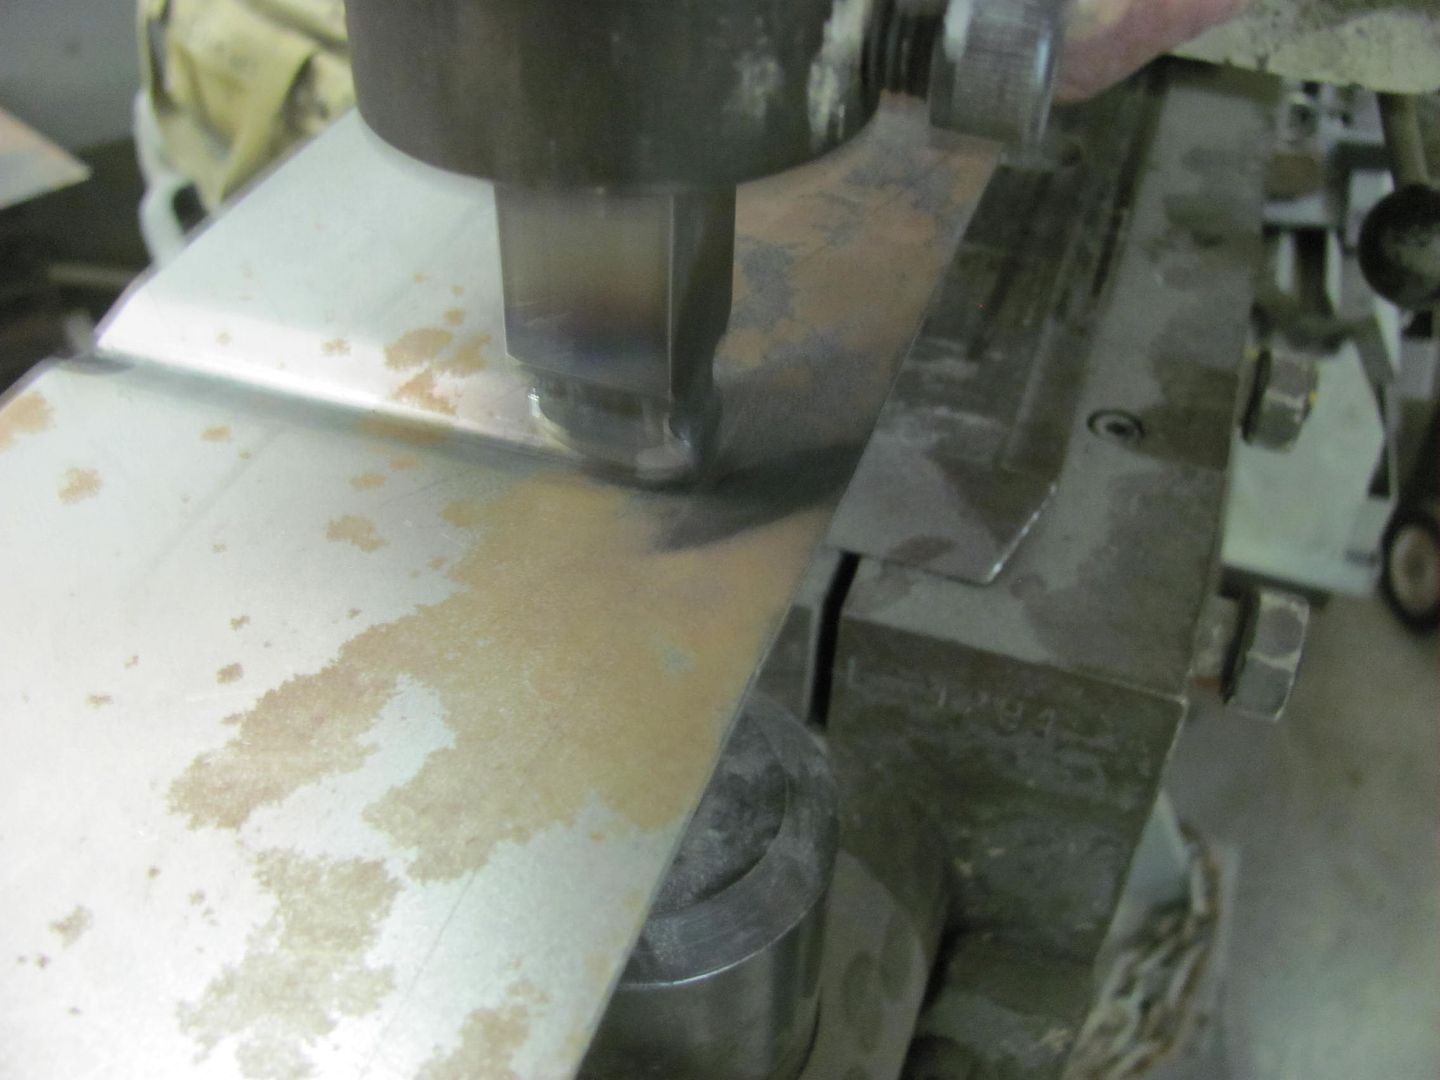 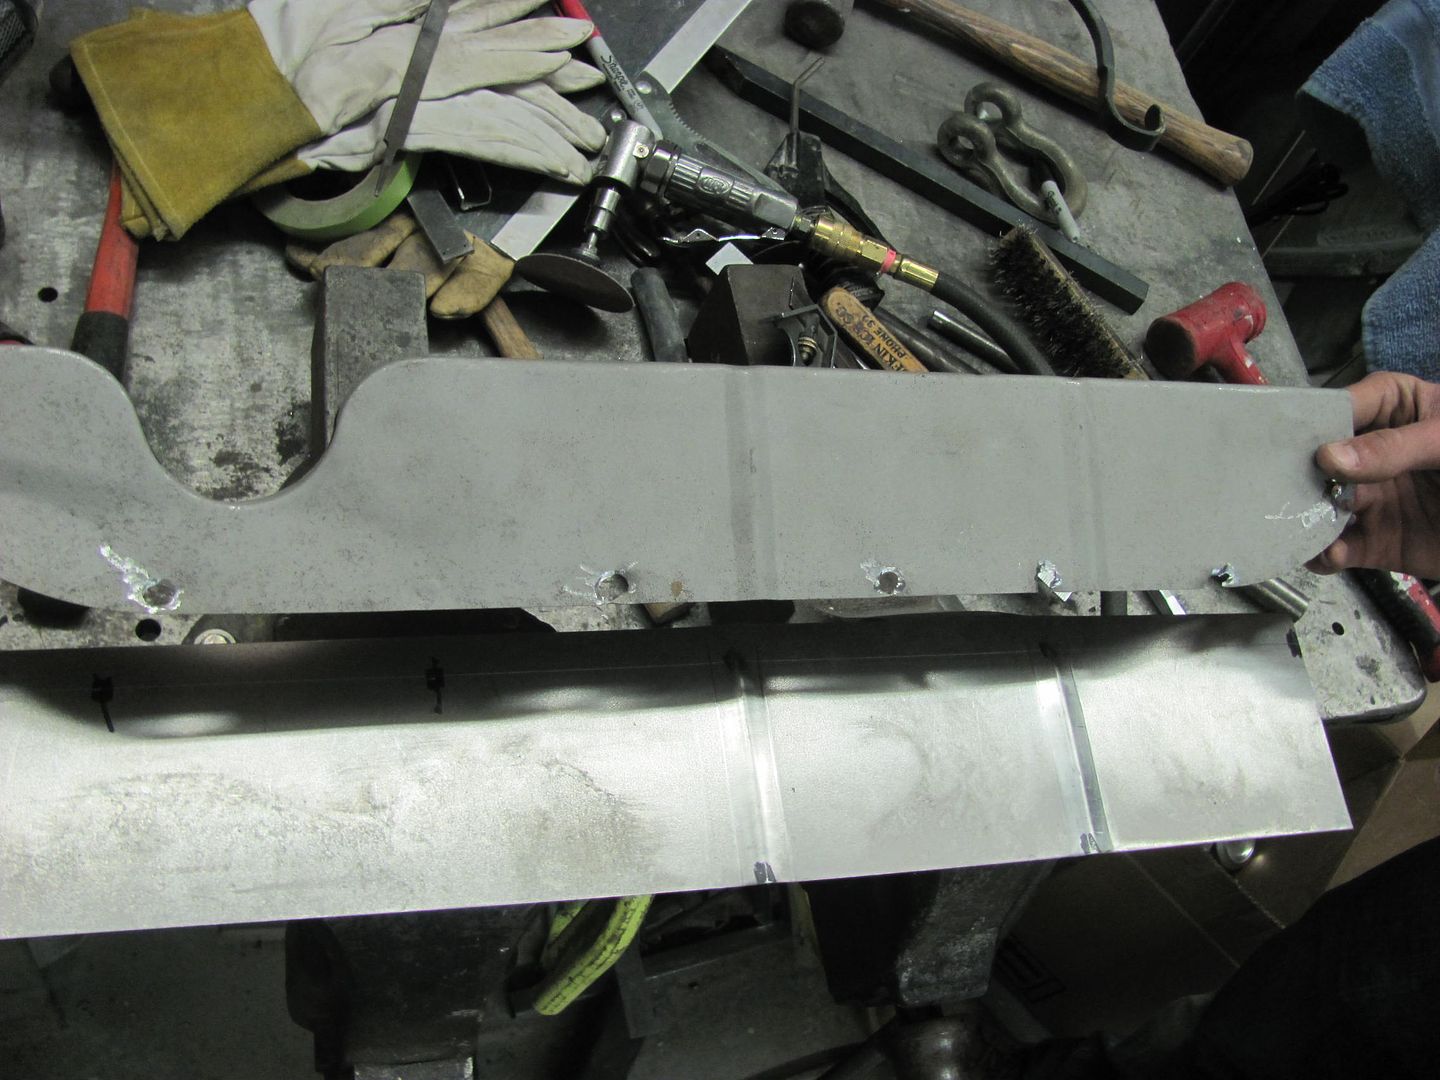 Laying out the petcock recess. This is about a 1/2" lower than the factory to alleviate the clearance issue.. 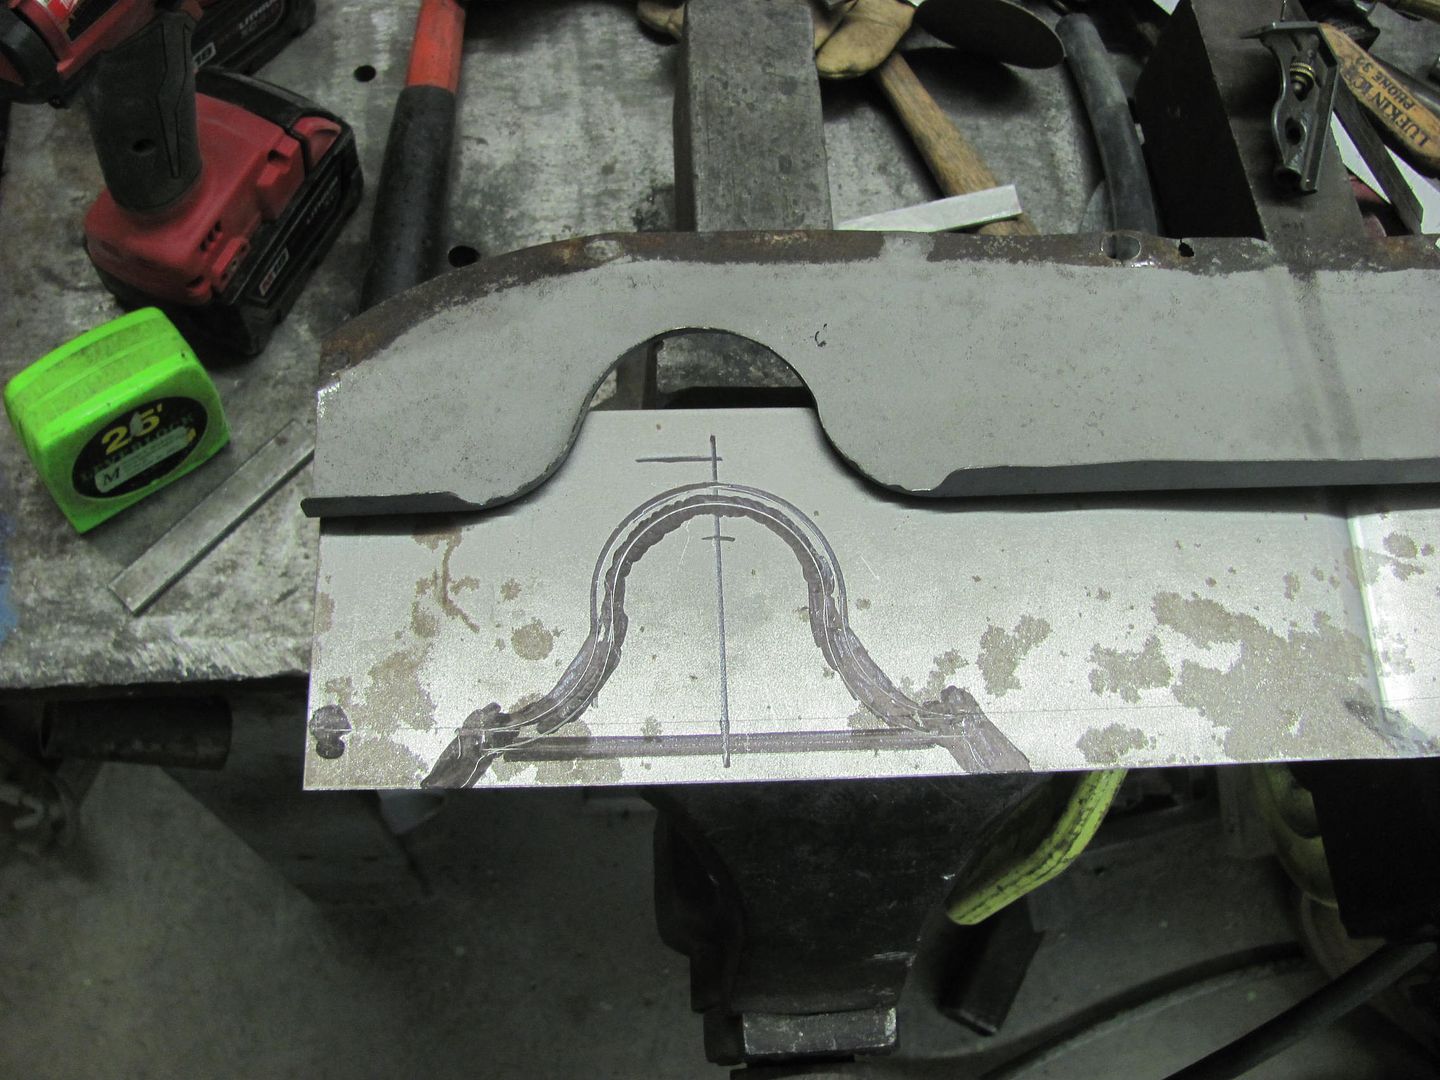 The tipping and skateboard wheels are used to "trace" the bend line to make any hammering a bit easier to locate the correct "edge"..... 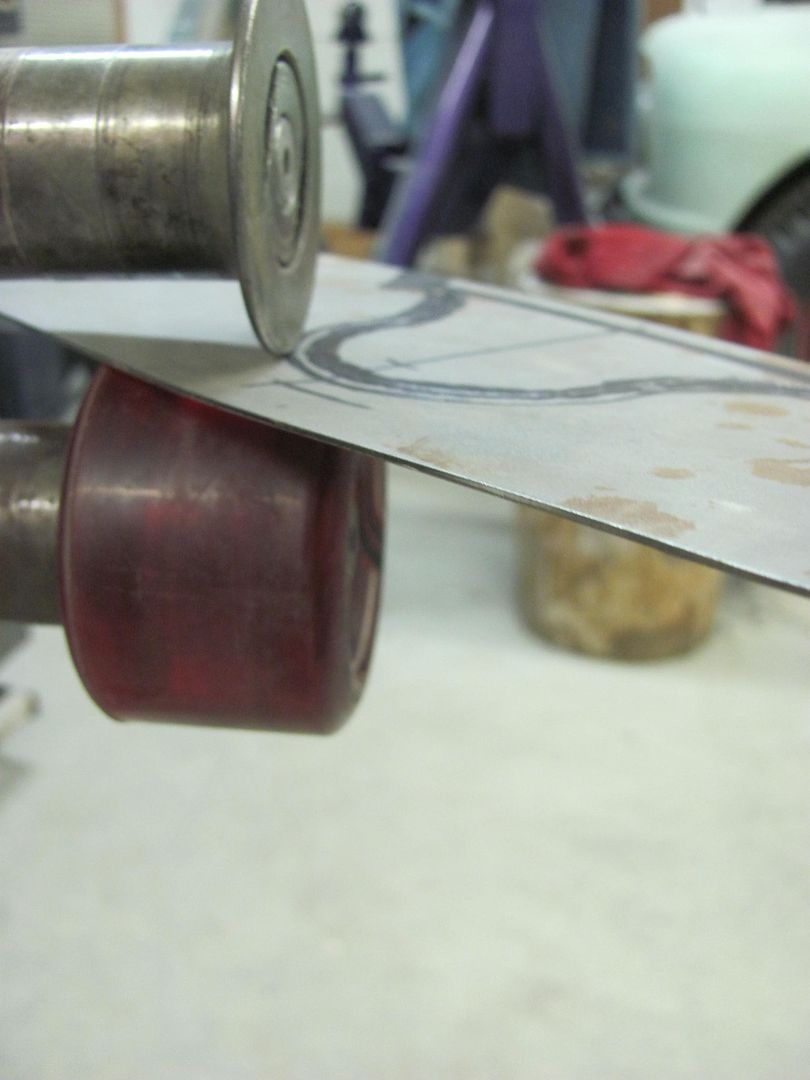 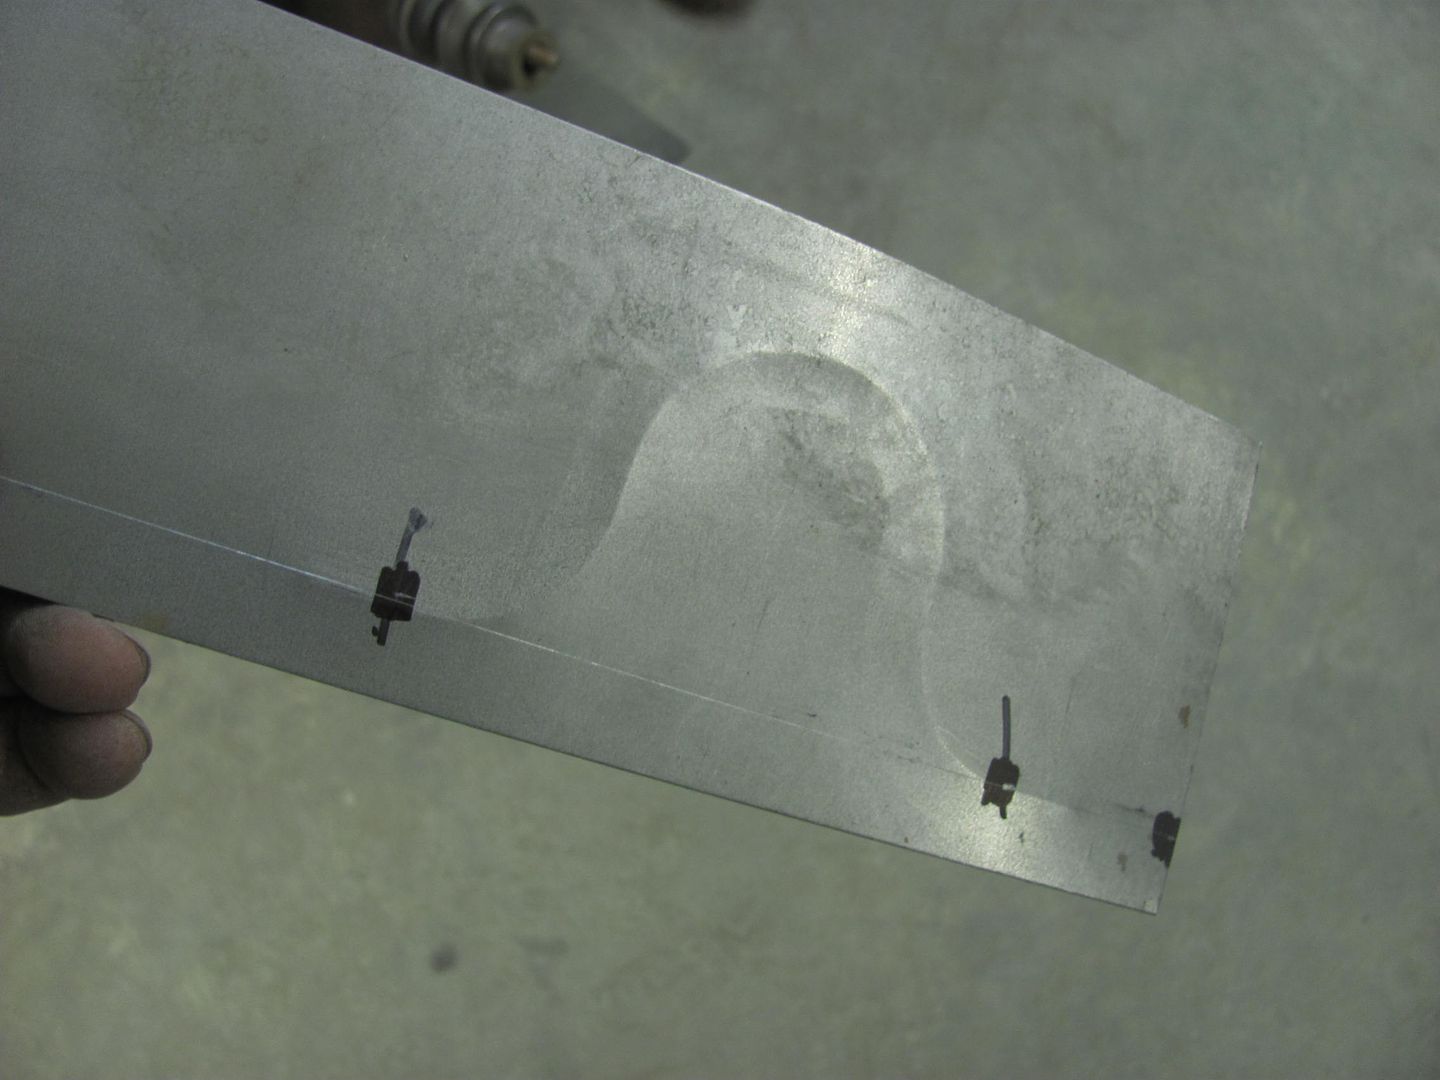 Relief trimmed, ready to make the folds.... 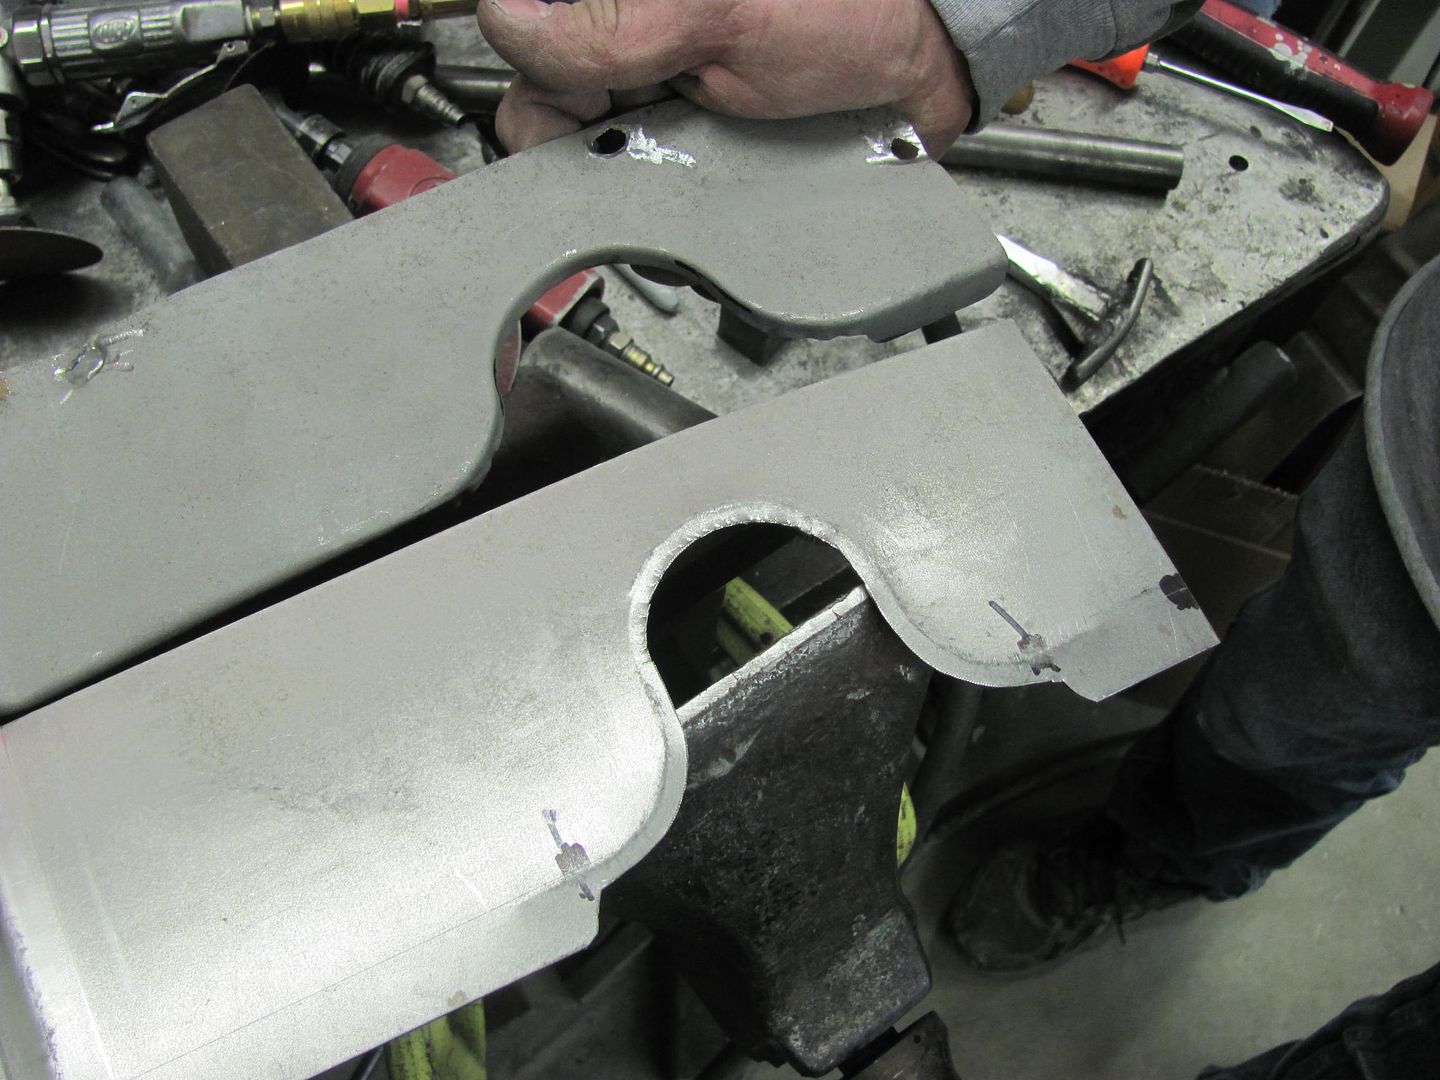 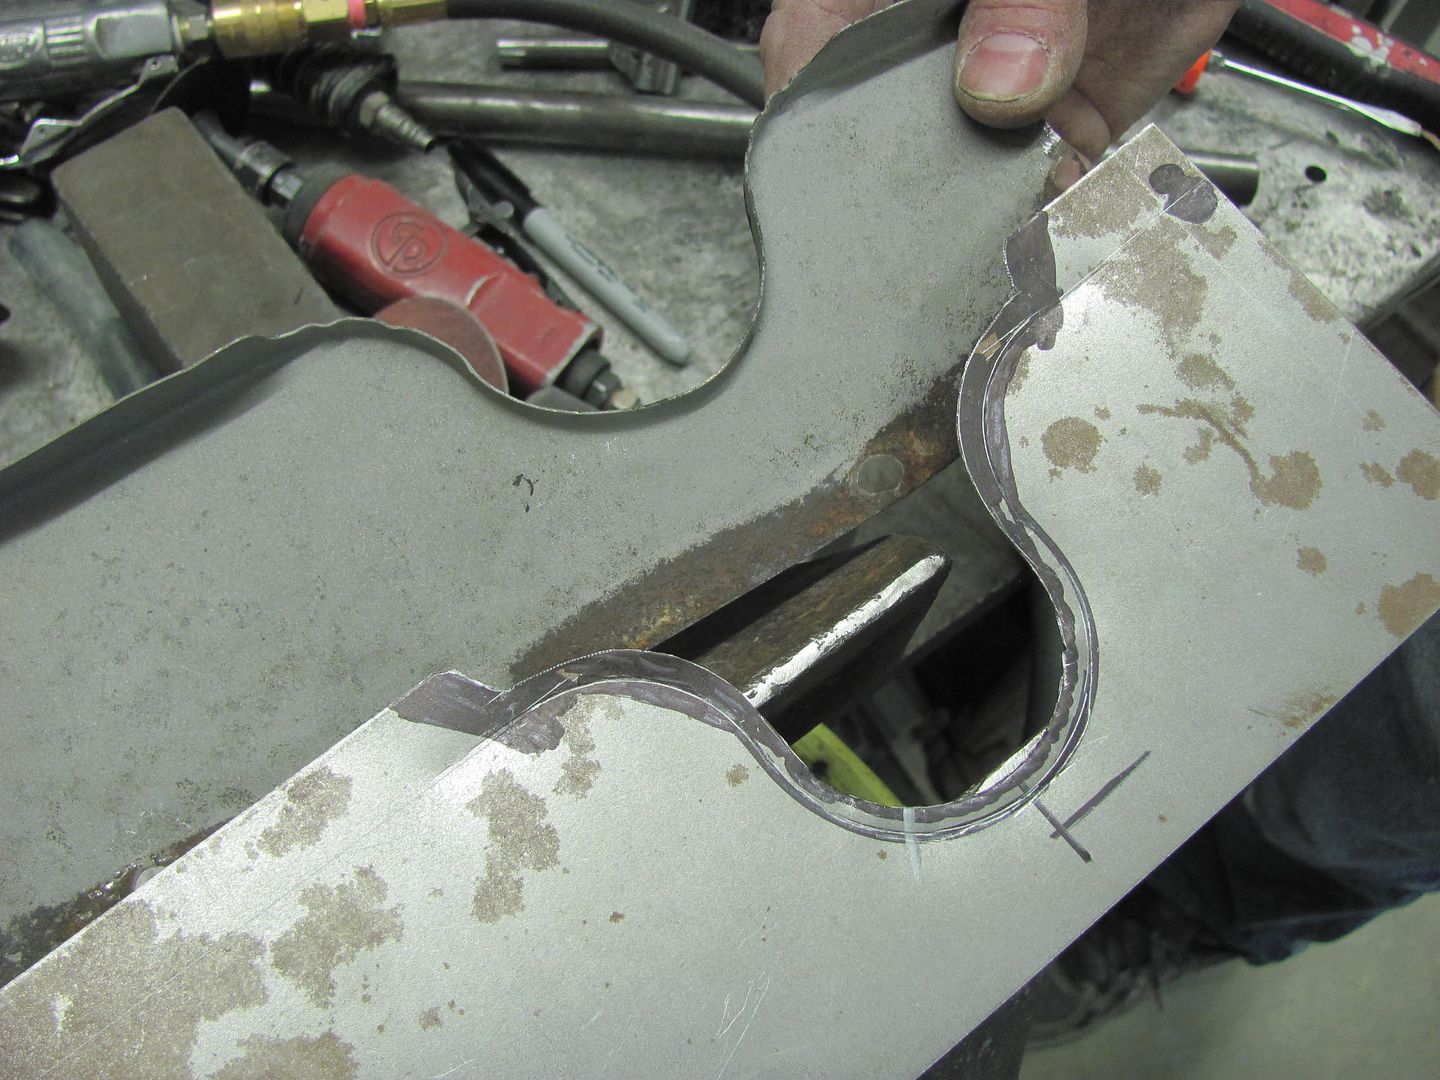
__________________
Robert |
||
|
|
|
|
04-08-2015, 11:09 PM
|
#405 |
|
Registered User
Join Date: Jan 2013
Location: Leonardtown, MD
Posts: 1,636
|
Re: 55 Wagon Progress
Tonight we got the recess finished on the baffle plate.
  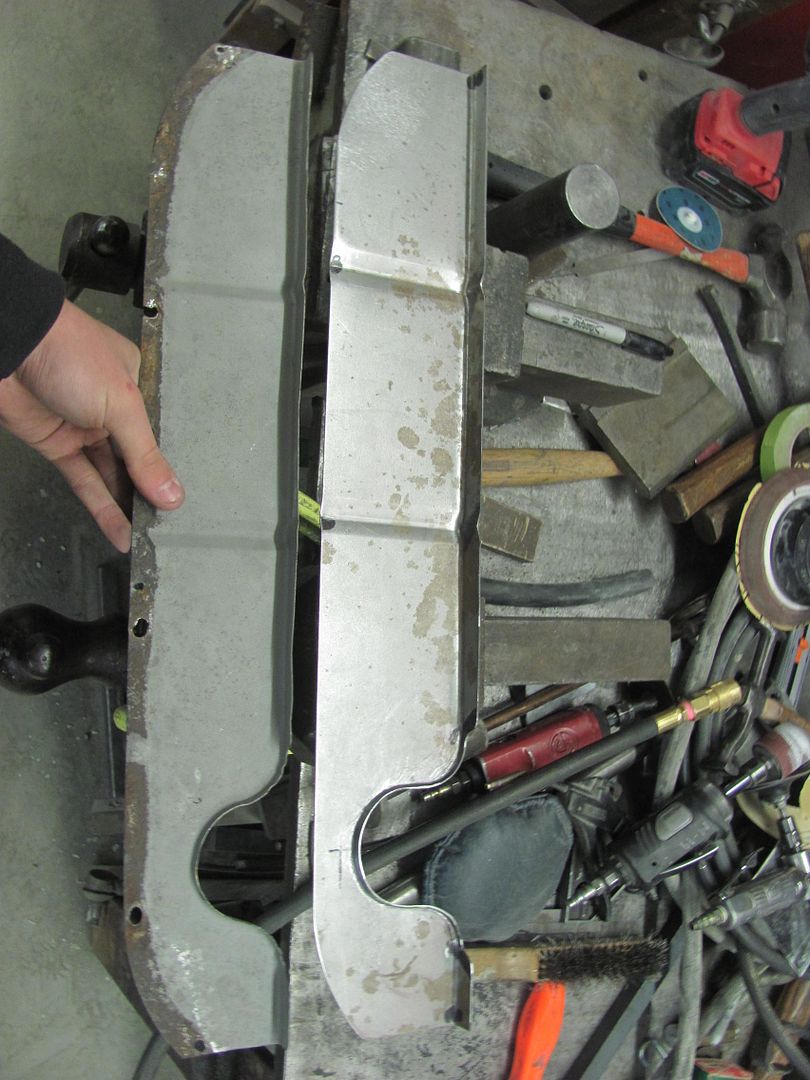 Test fitted... 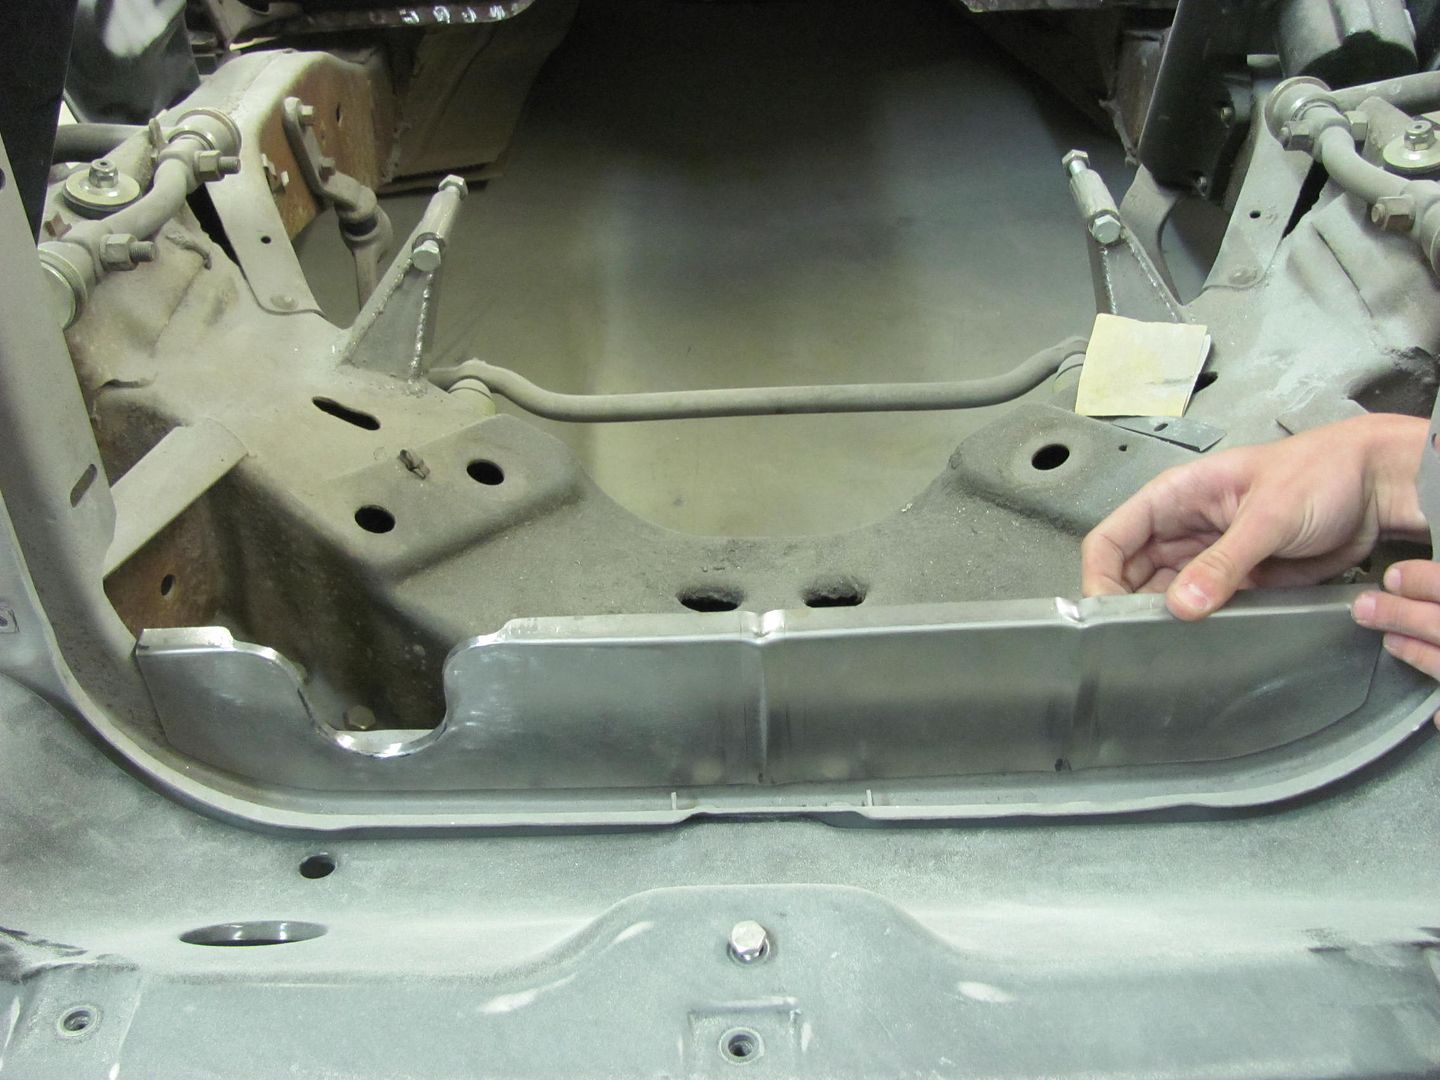 Media blasted, ready to install.... 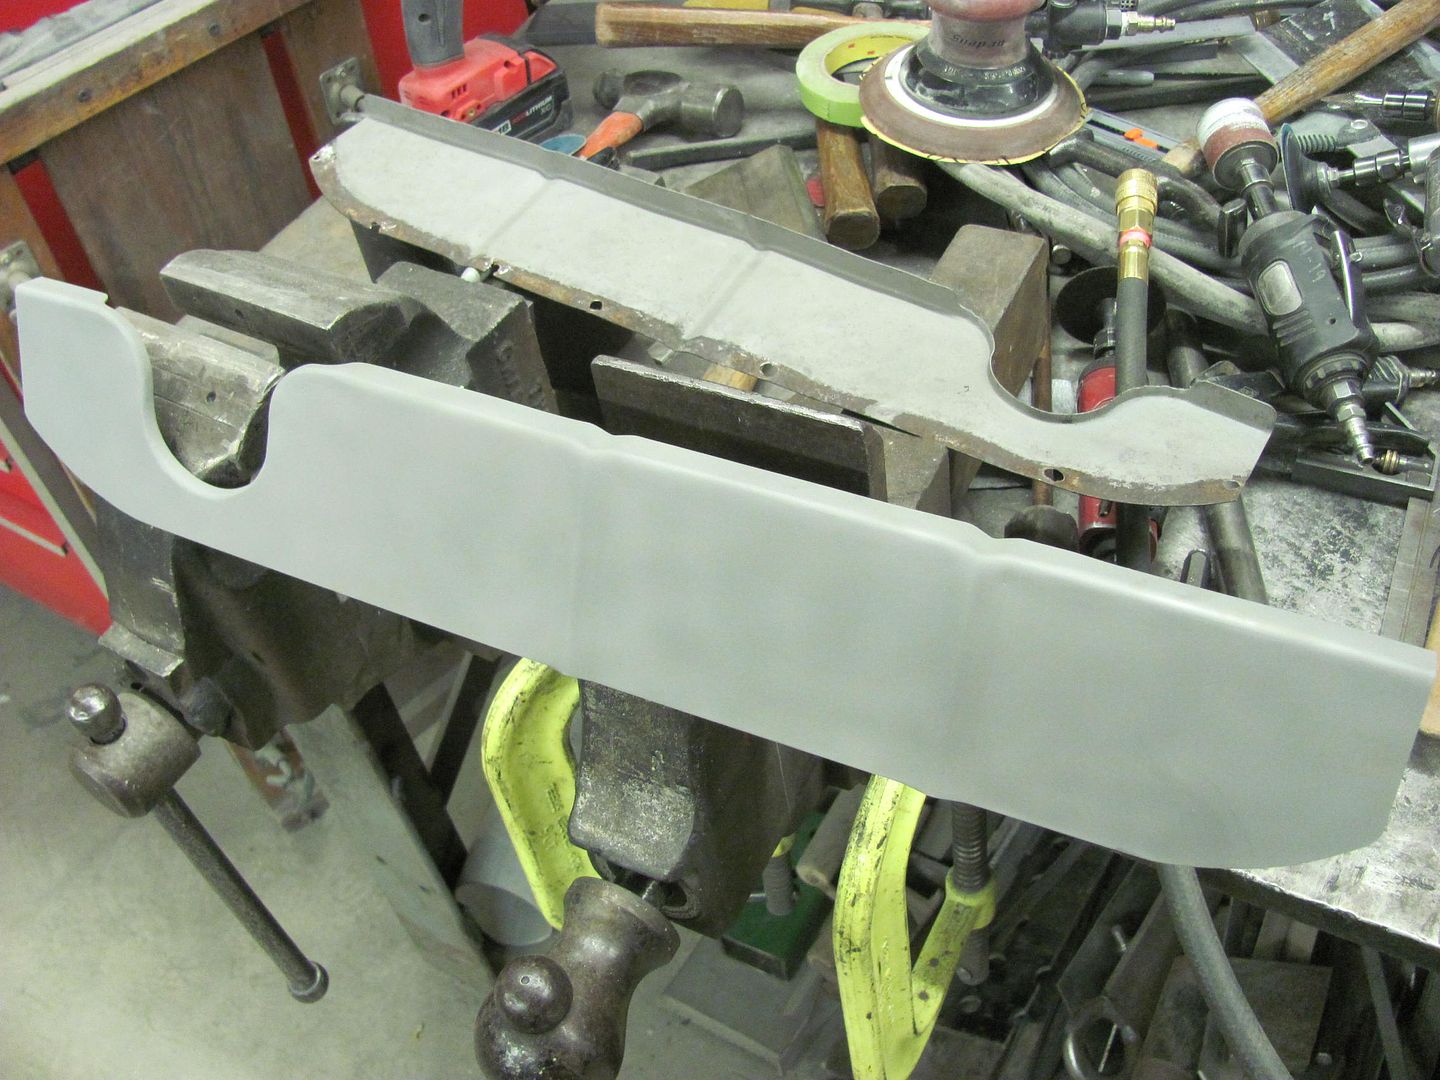 Then Kyle removed the splash pan so he could clean up the core support prior to welding it in.... 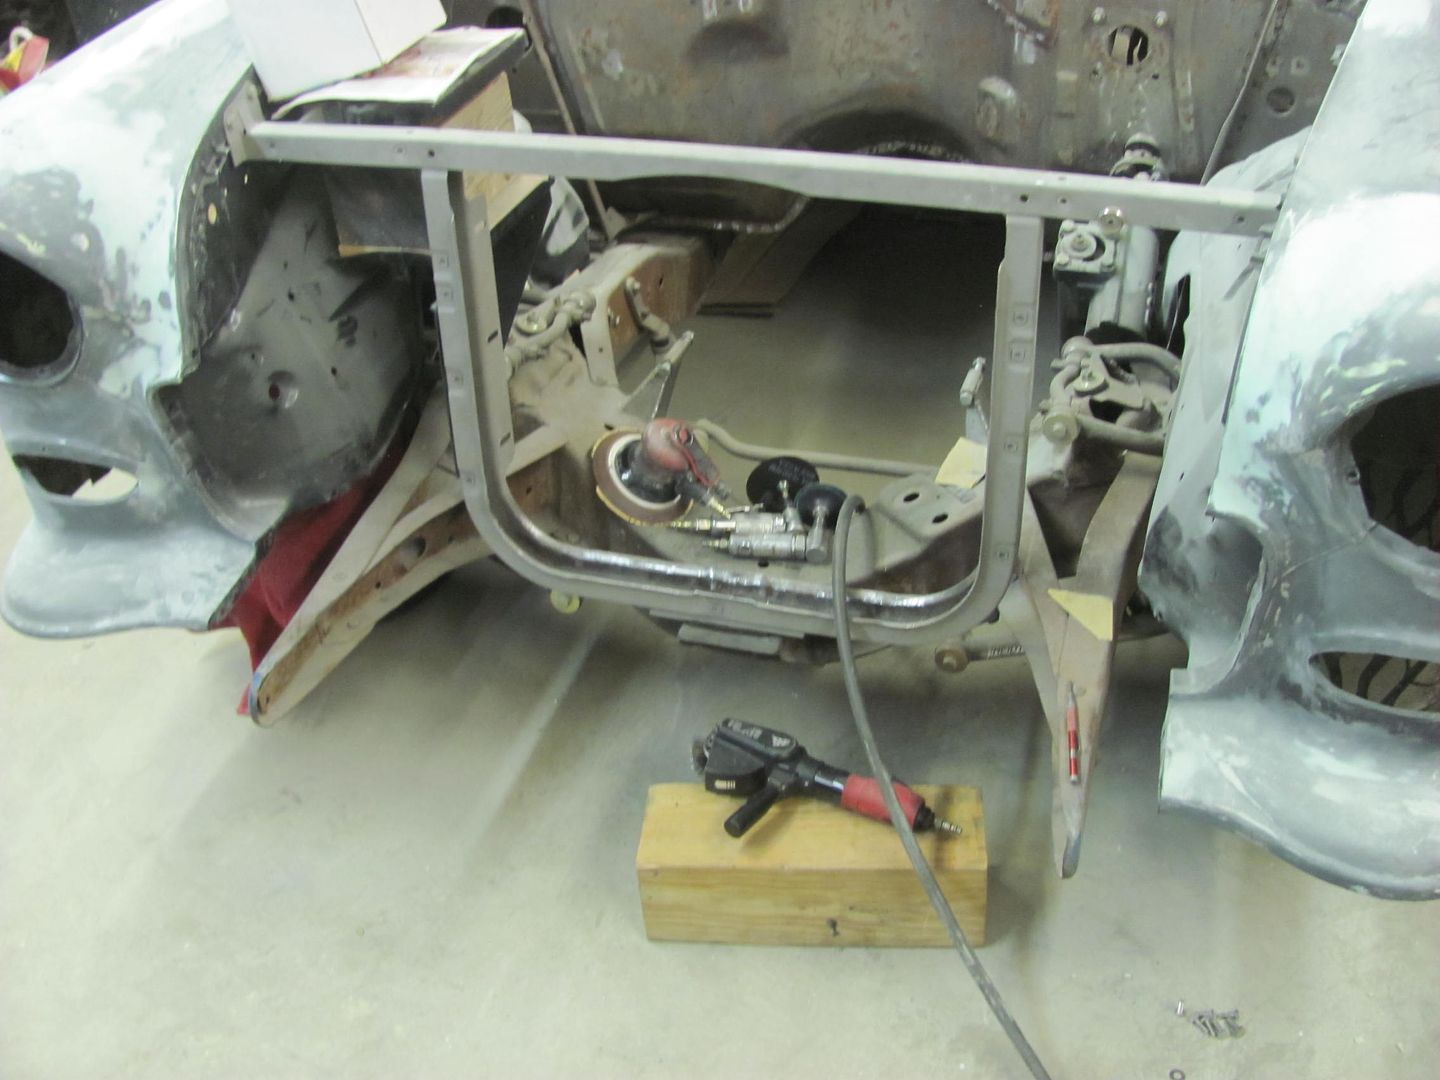 We also got started on some blocking of the parts sprayed last week. 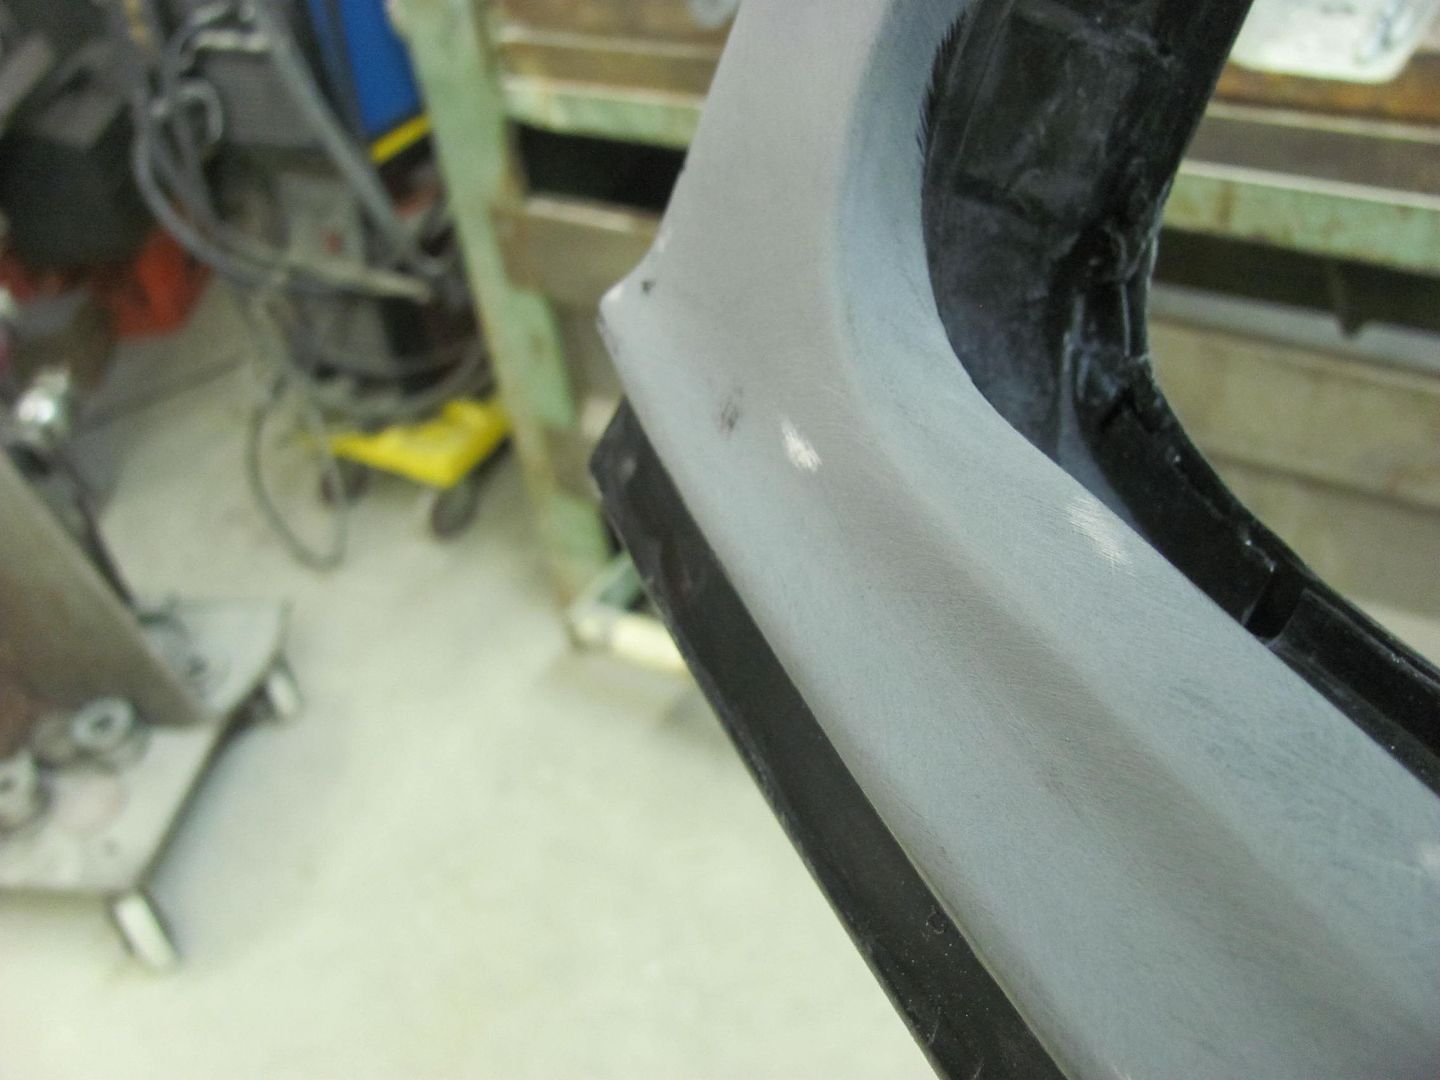 
__________________
Robert |
|
|
|
|
04-09-2015, 07:41 AM
|
#406 |
|
Registered User
Join Date: Jan 2012
Location: Eastern Ontario, Canada
Posts: 1,041
|
Re: 55 Wagon Progress
Nice work! Mind stopping by my place and banging some of my sheet metal into shape...........
__________________
1952 Canadian Chevy 1300 C4 IFS & D44 IRS 5.3 HO L33 My Build: http://67-72chevytrucks.com/vboard/s...d.php?t=632938 
|
|
|
|
|
04-09-2015, 08:20 AM
|
#407 |
|
Registered User
Join Date: Jan 2013
Location: Leonardtown, MD
Posts: 1,636
|
Re: 55 Wagon Progress
Sid, are you going to the Hogtown meet? See the events listed on allmetalshaping...
__________________
Robert |
|
|
|
|
04-09-2015, 10:44 AM
|
#408 |
|
Registered User
Join Date: Jan 2012
Location: Eastern Ontario, Canada
Posts: 1,041
|
Re: 55 Wagon Progress
Probably not. My daughter has a swim meet that weekend. I've been in the past. Awesome talent there. Learned quite a bit.
__________________
1952 Canadian Chevy 1300 C4 IFS & D44 IRS 5.3 HO L33 My Build: http://67-72chevytrucks.com/vboard/s...d.php?t=632938
|
|
|
|
|
04-09-2015, 01:40 PM
|
#409 |
|
Registered User
Join Date: May 2007
Location: Deale Md
Posts: 4,663
|
Re: 55 Wagon Progress
Are you going to the coming out show in Charlotte Hall.
__________________
James 63 GMC V6 4speed carryall 65 chevy swb bbw V8 auto 68 K20 327/4 speed, buddy buckets 2002 GMC CC Dually Duramax 64 GMC lwb 3/4 V6 4speed SOLD 66 GMC swb bbw buddy buckets SOLD IG duallyjams The only thing that stays the same is constant change! |
|
|
|
|
04-09-2015, 10:37 PM
|
#410 |
|
Registered User
Join Date: Jan 2013
Location: Leonardtown, MD
Posts: 1,636
|
Re: 55 Wagon Progress
Not bringing anything (everything in pieces) but will be there to see the sights. If you see a bright yellow t-shirt with
< < This on the back, then give me a holler... <
__________________
Robert |
|
|
|
|
04-11-2015, 09:30 PM
|
#411 |
|
Registered User
Join Date: Jan 2013
Location: Leonardtown, MD
Posts: 1,636
|
Re: 55 Wagon Progress
Today the baffle got welded into the core support, here with the plug weld holes drilled.
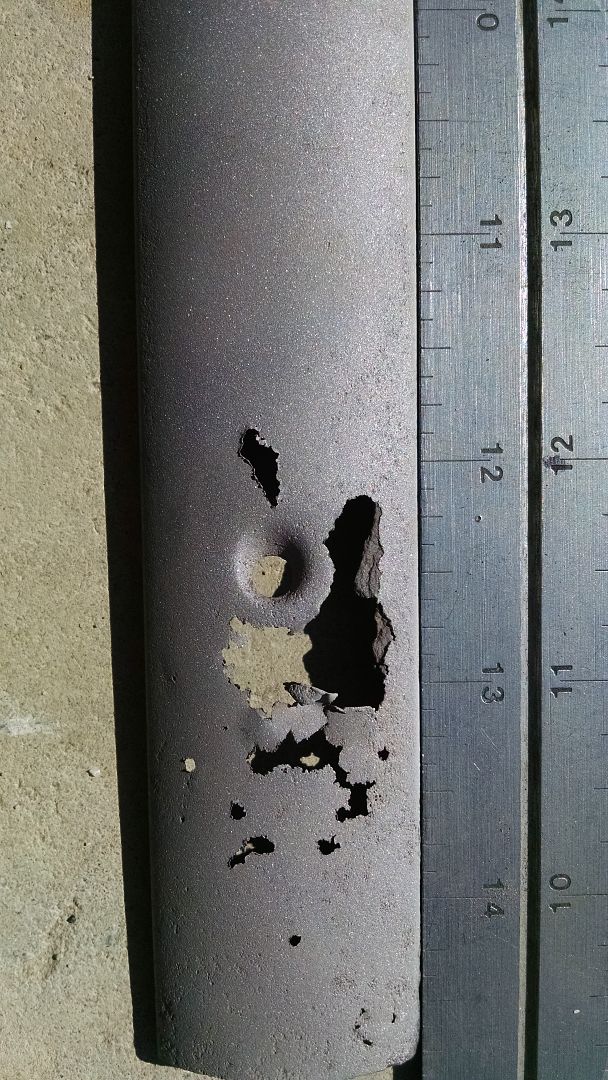
 The modified relief we fabricated shows to be about as low as we could have made it.. 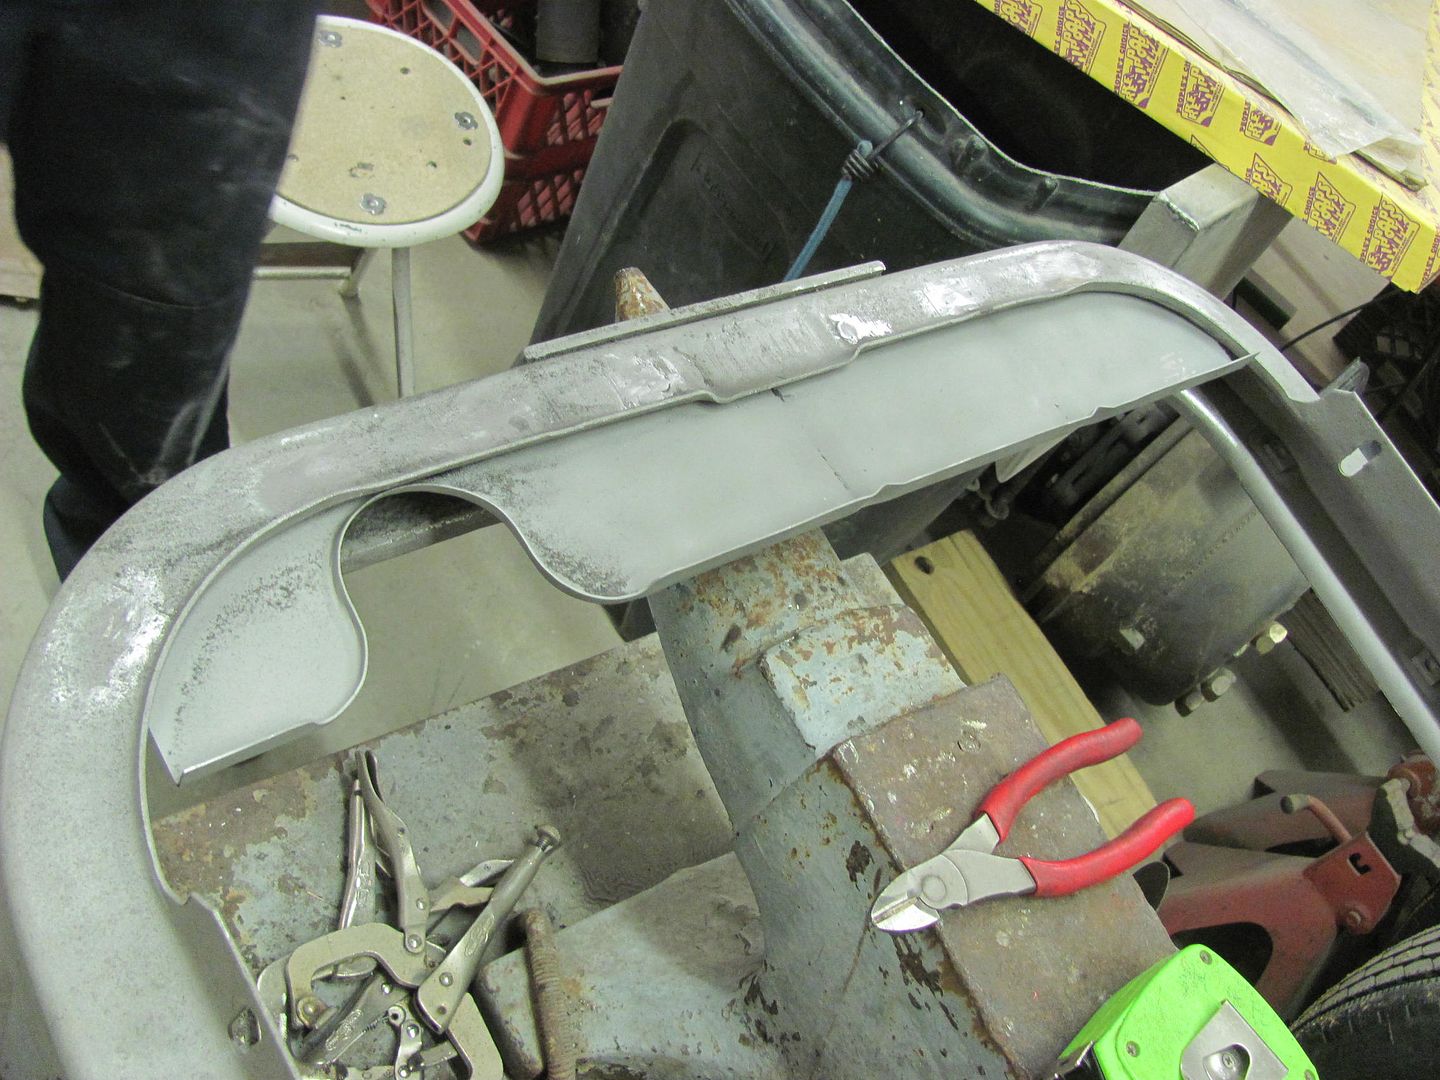 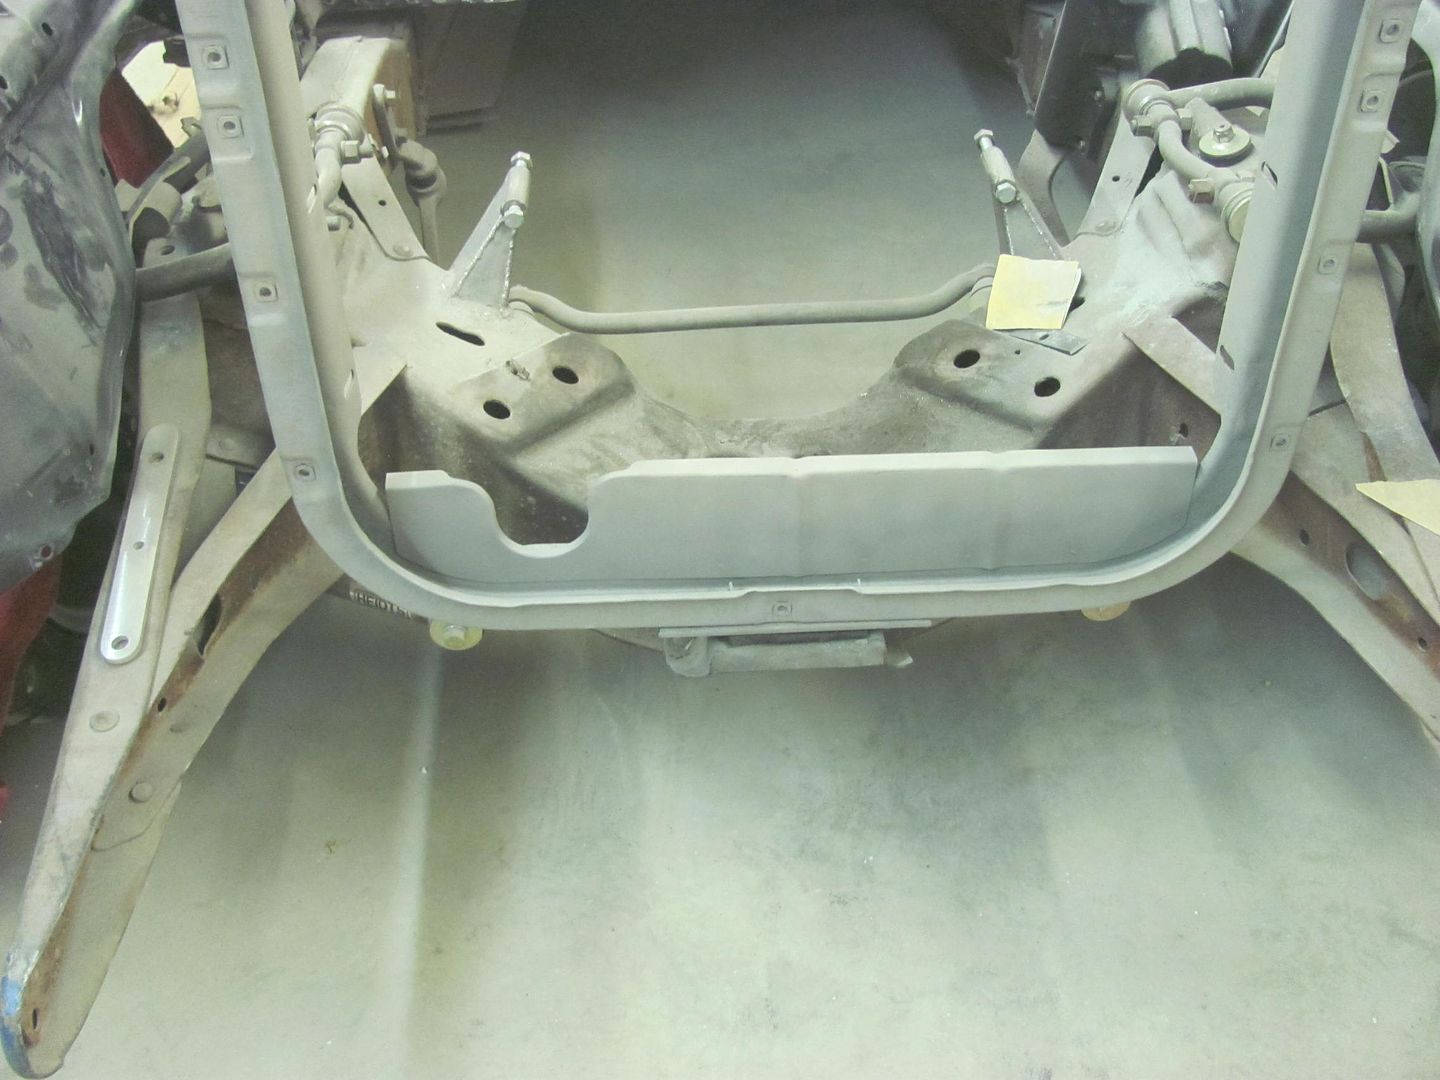 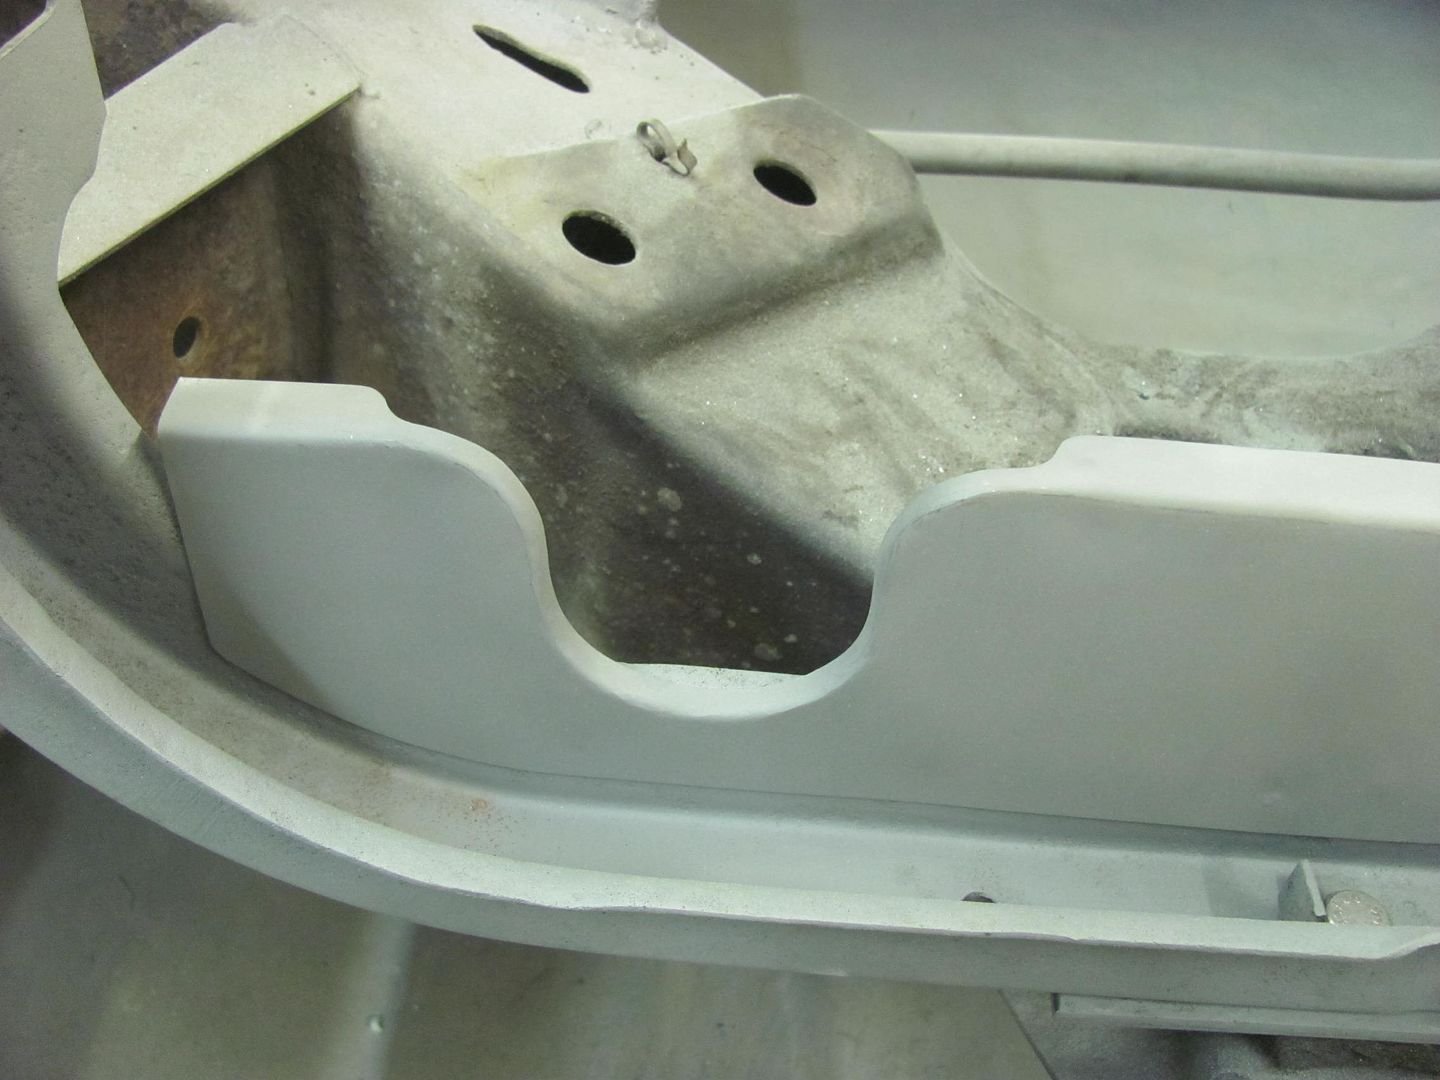 Then attention was turned to the rear quarter on the passenger side where we had shaved the lead seam.. 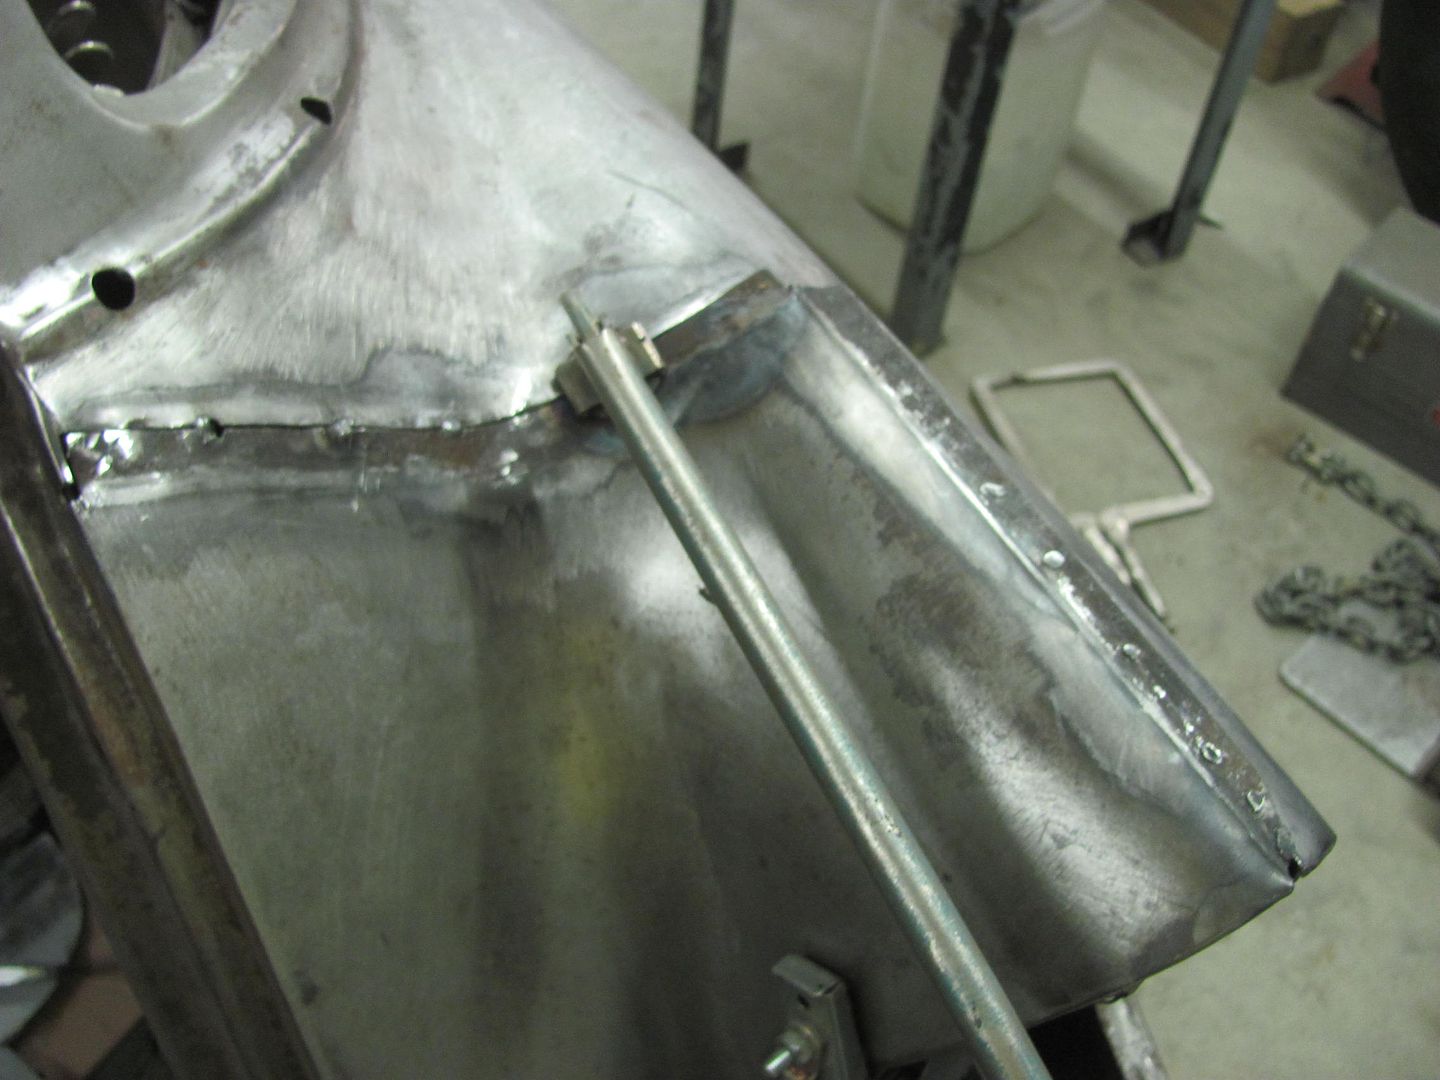  We had held off on the tail light opening as we wanted to fit the opening to the light bezels. We had received the reproduction chrome light bezels a couple weeks ago, and gave them a protective layer to keep the chrome nice and shiny.. 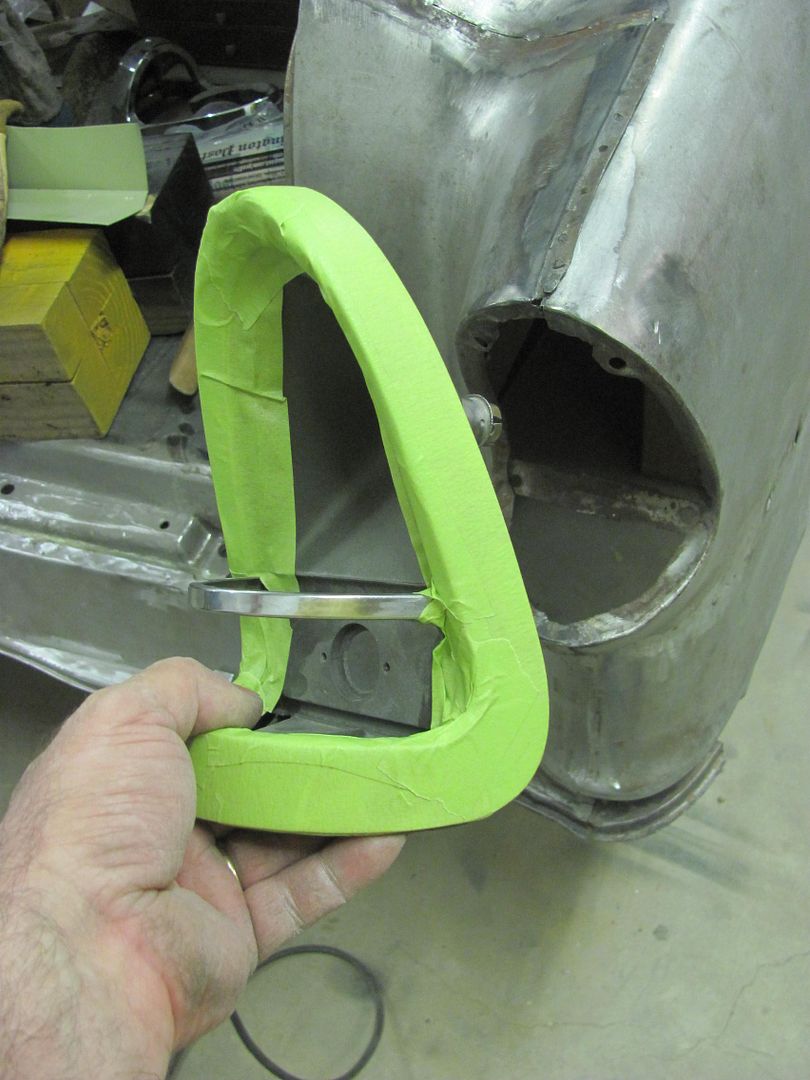 The light opening seemed all out of sorts, with a bulge protruding out past the corner of the bezel here.... 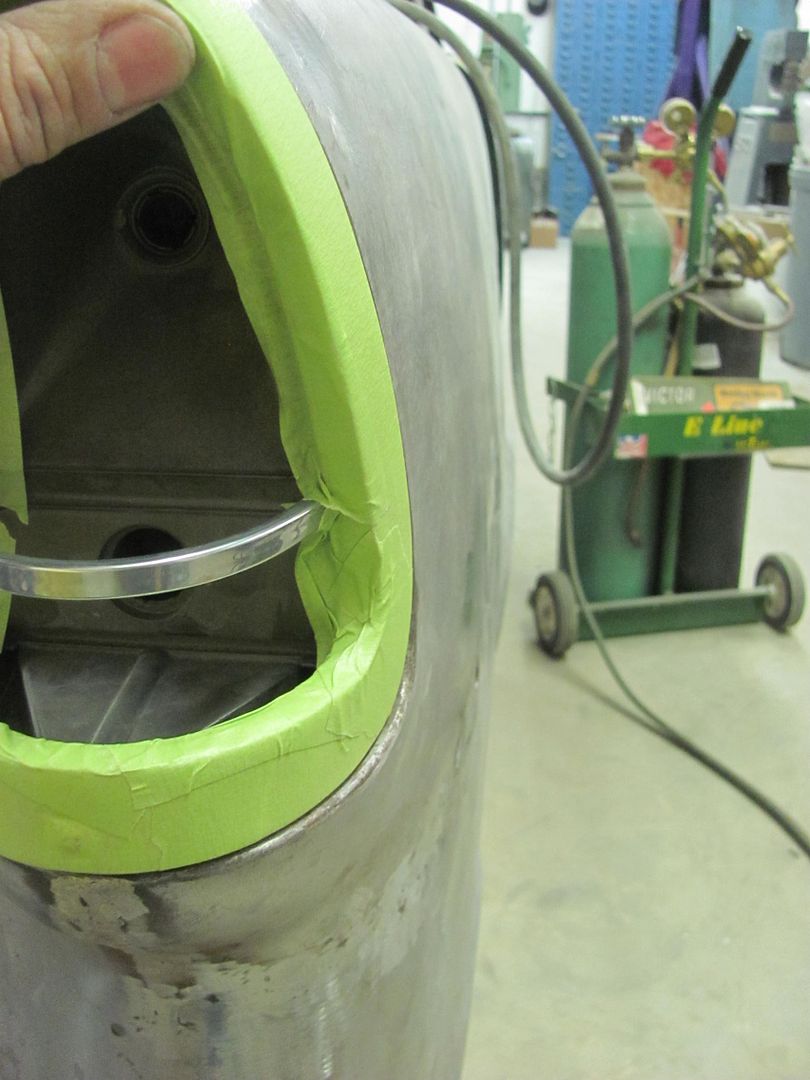 Let the modifications begin! 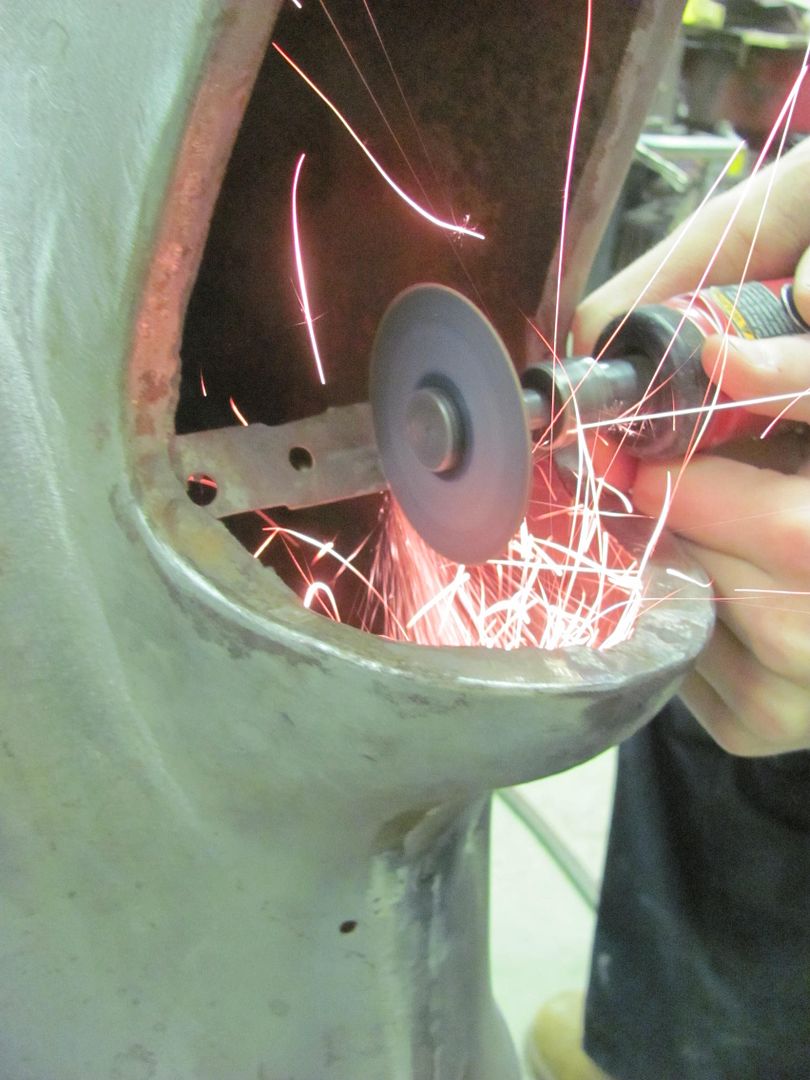 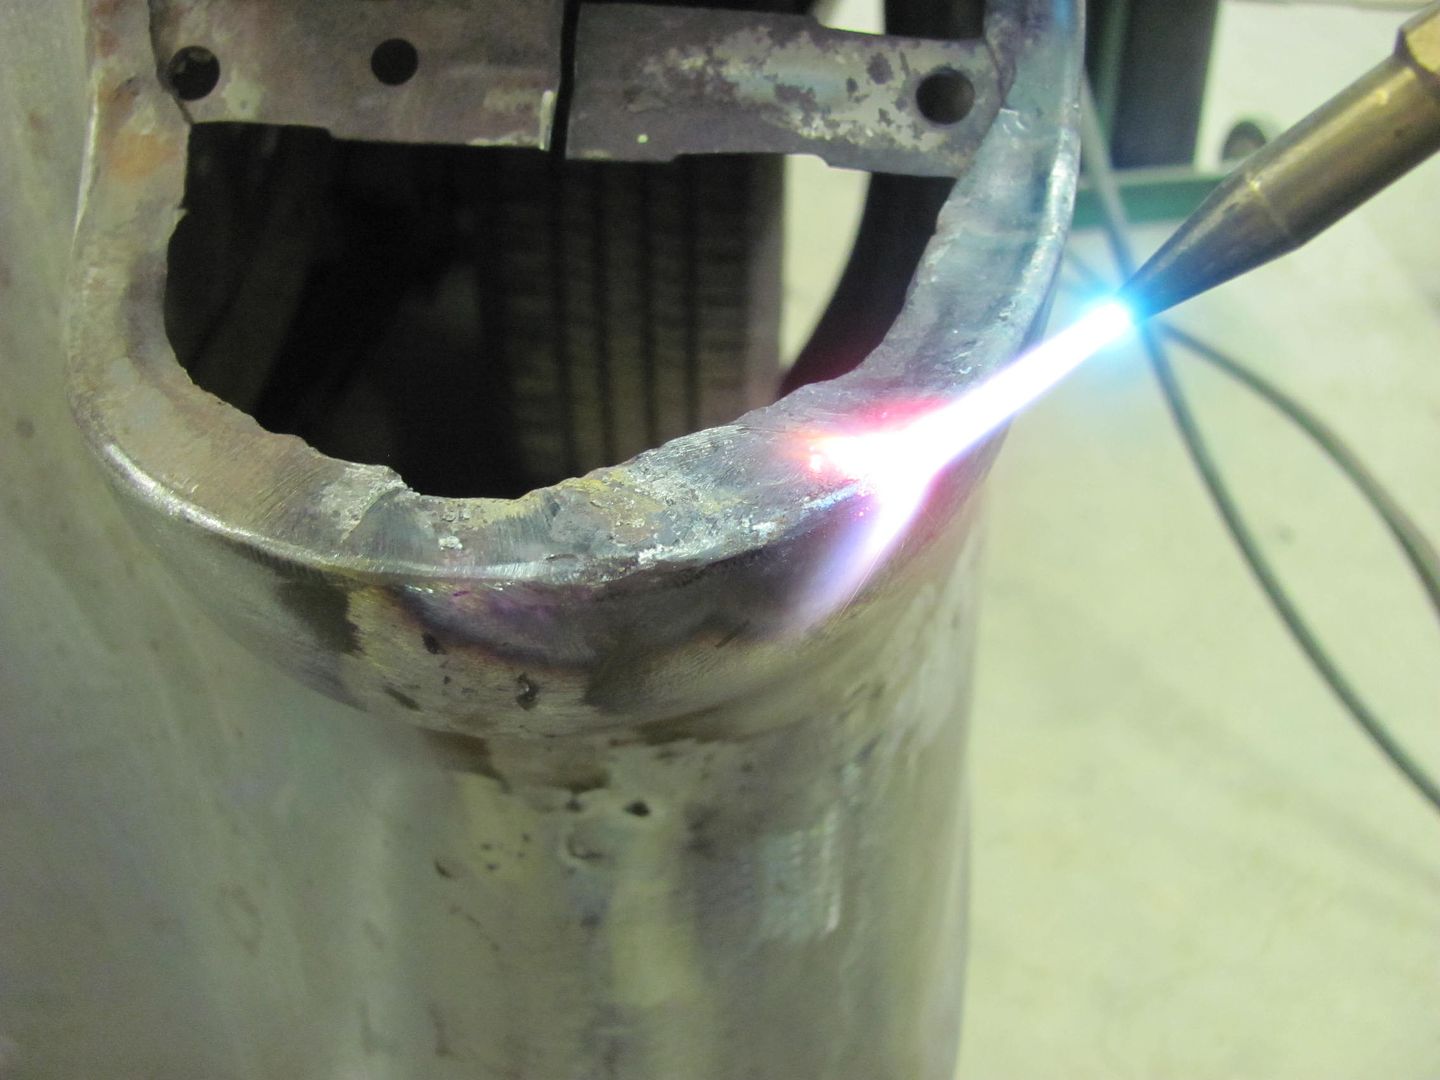 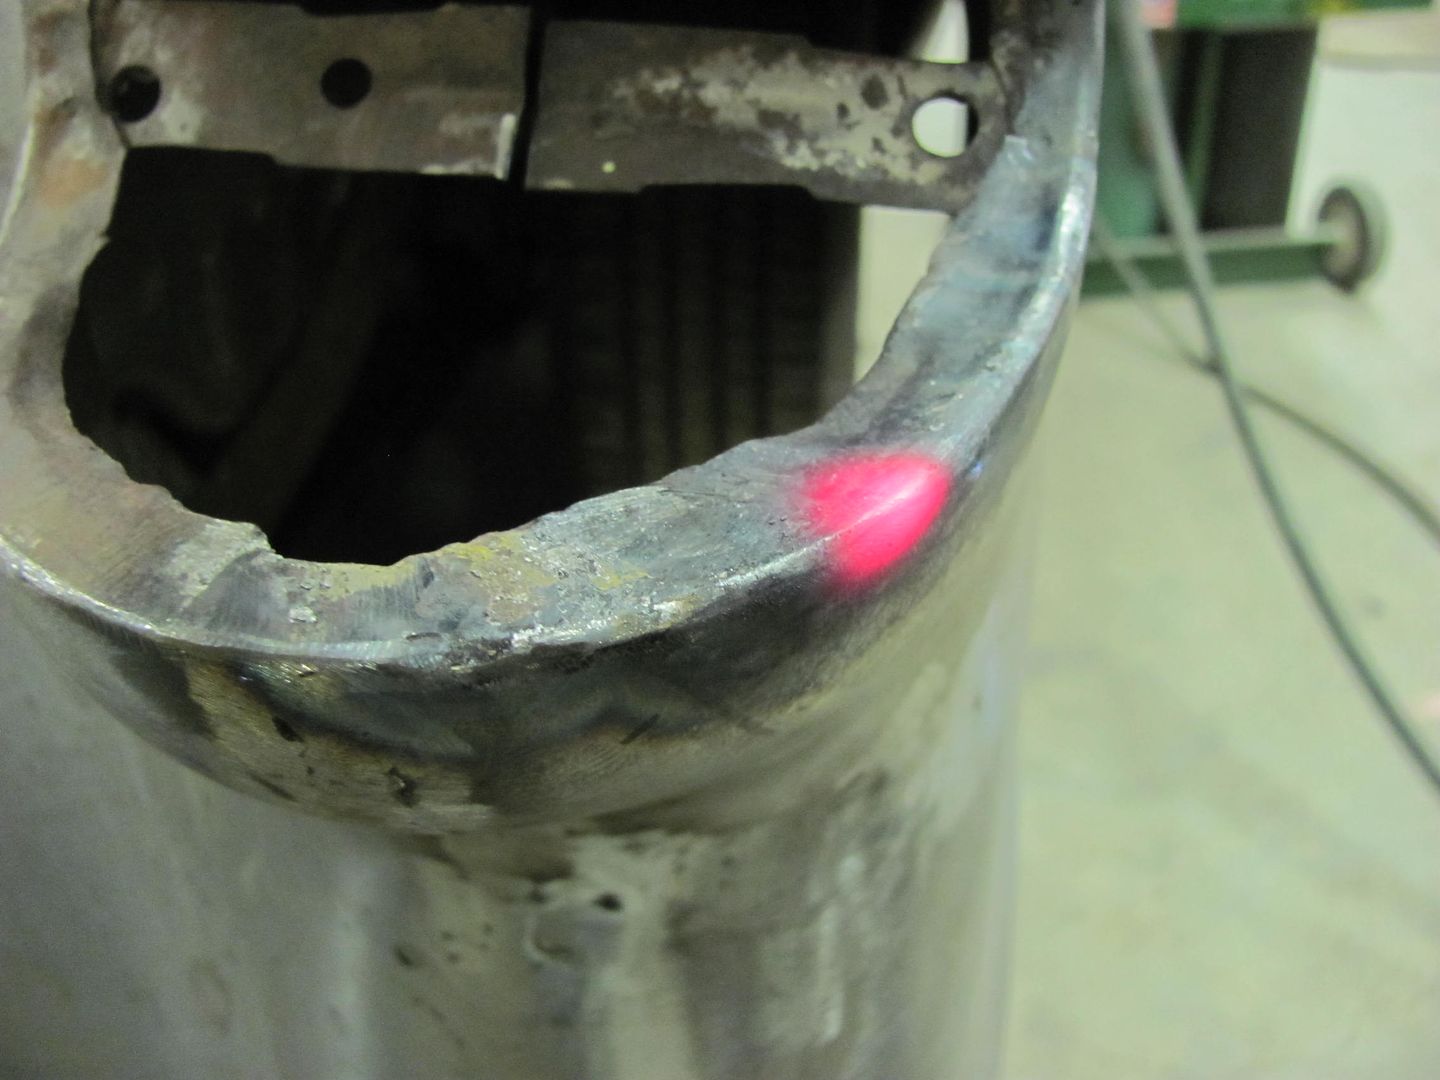 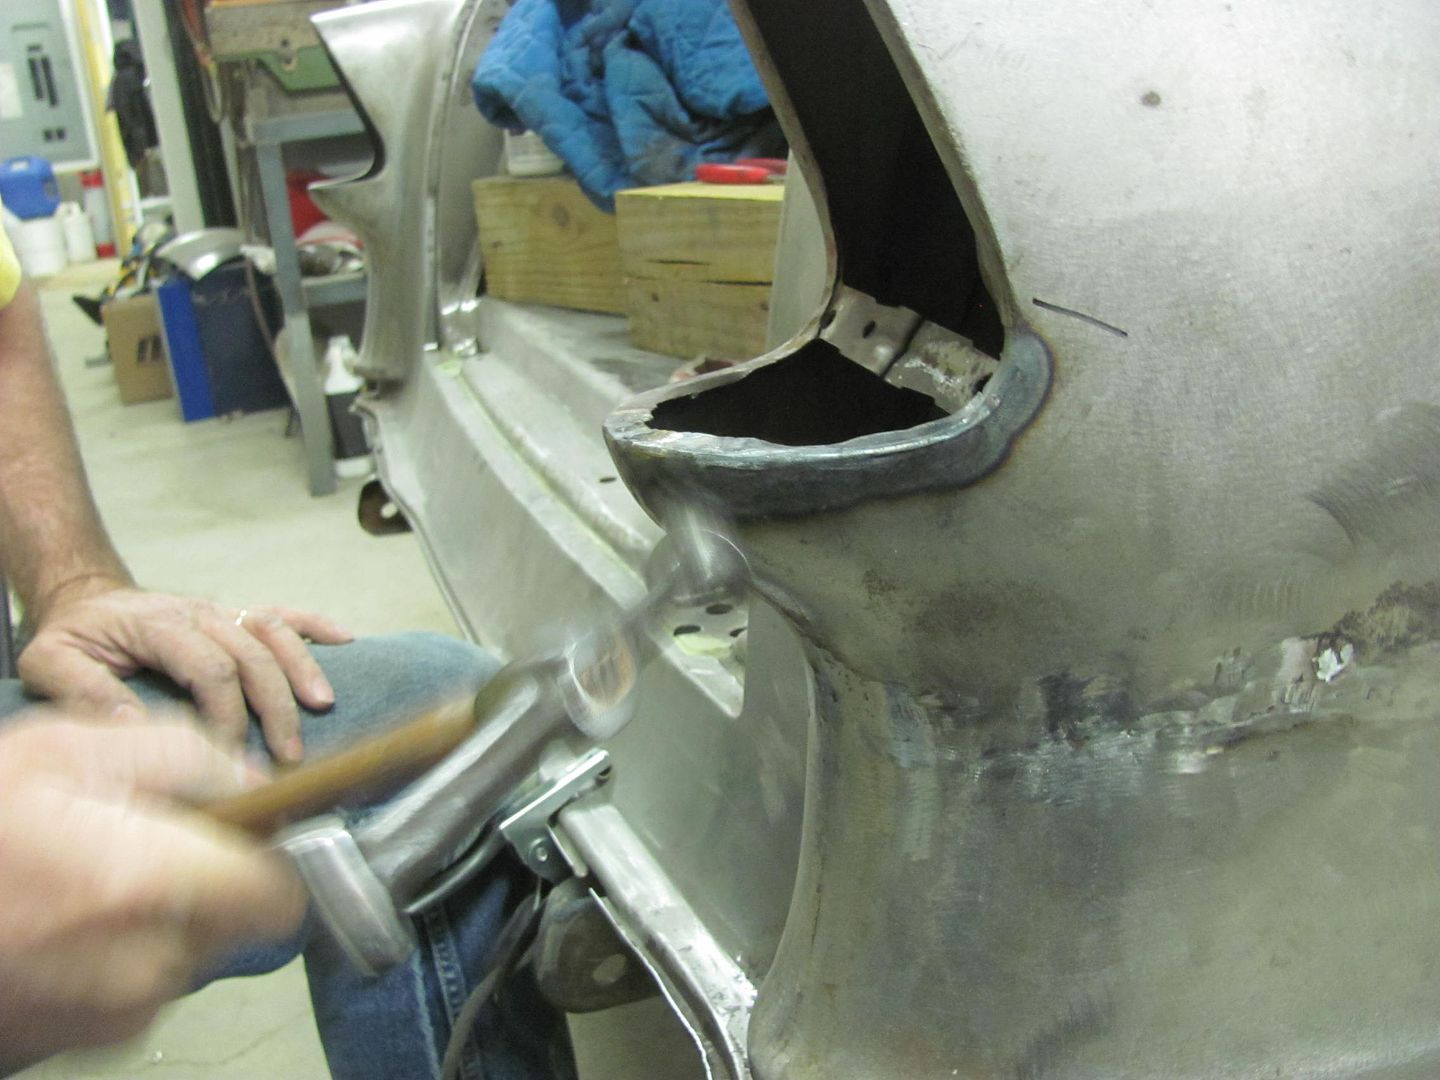 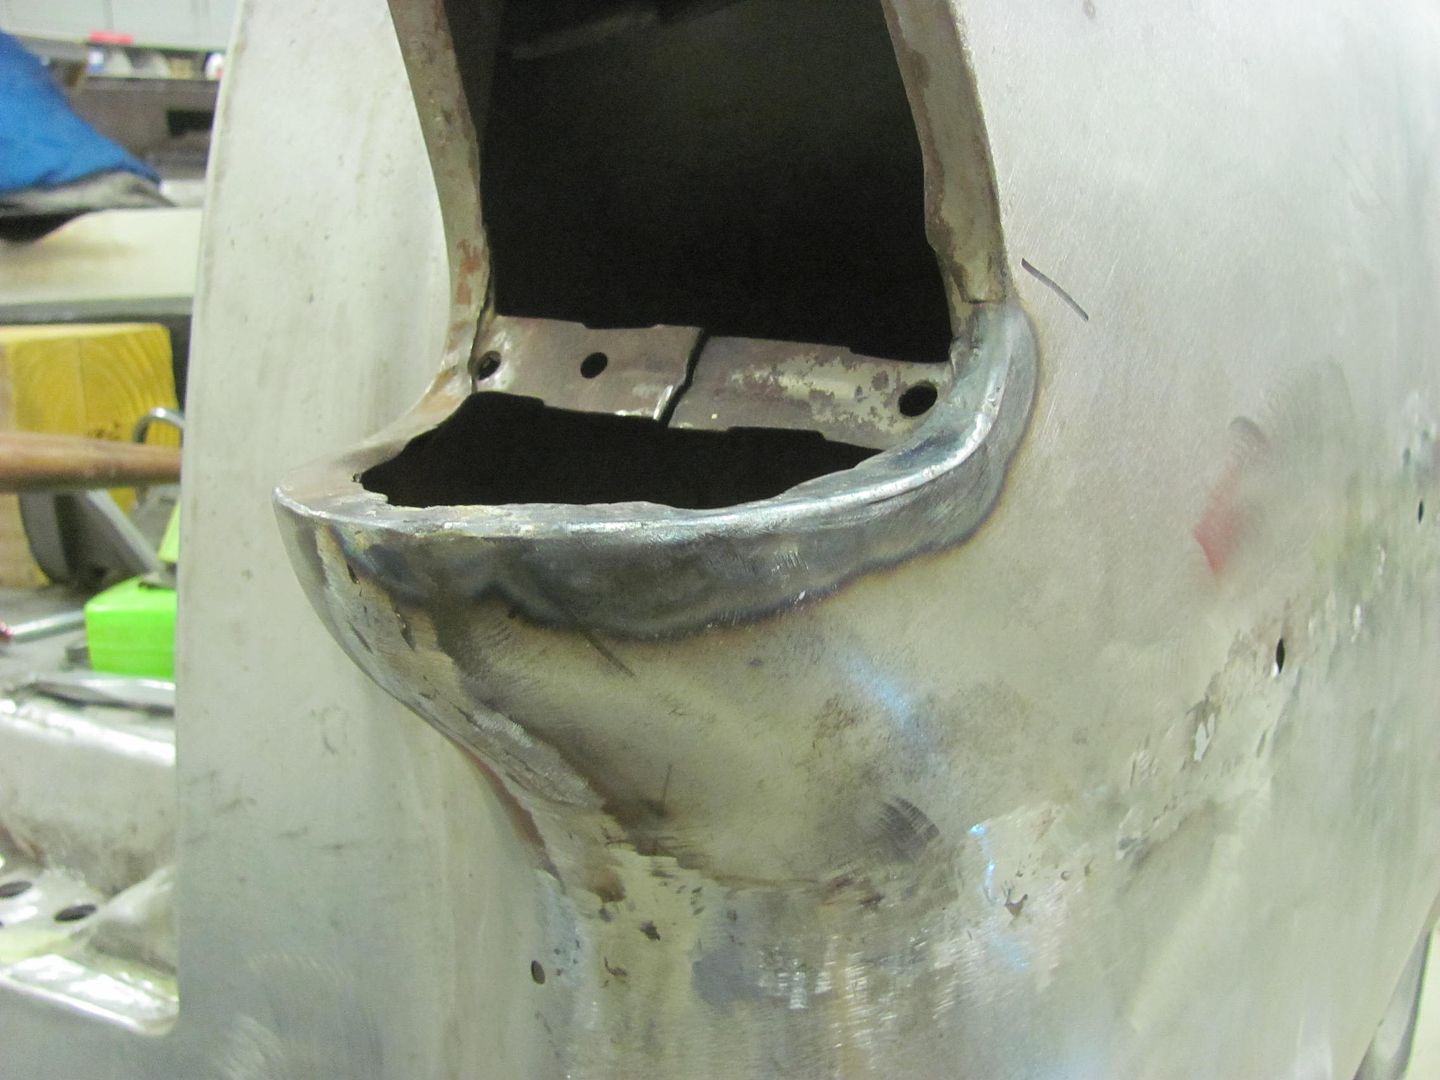 And we had the opposite problem on the inner side... 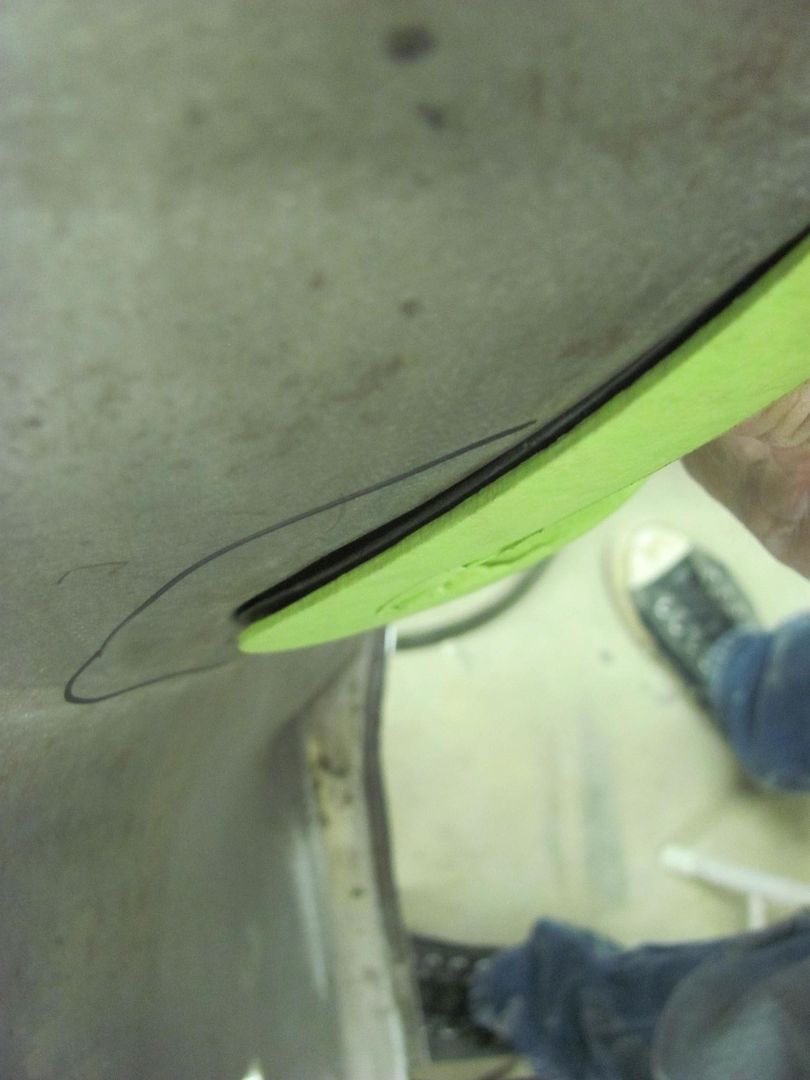 The vise grip dent puller and the special hook was used to spread the opening... 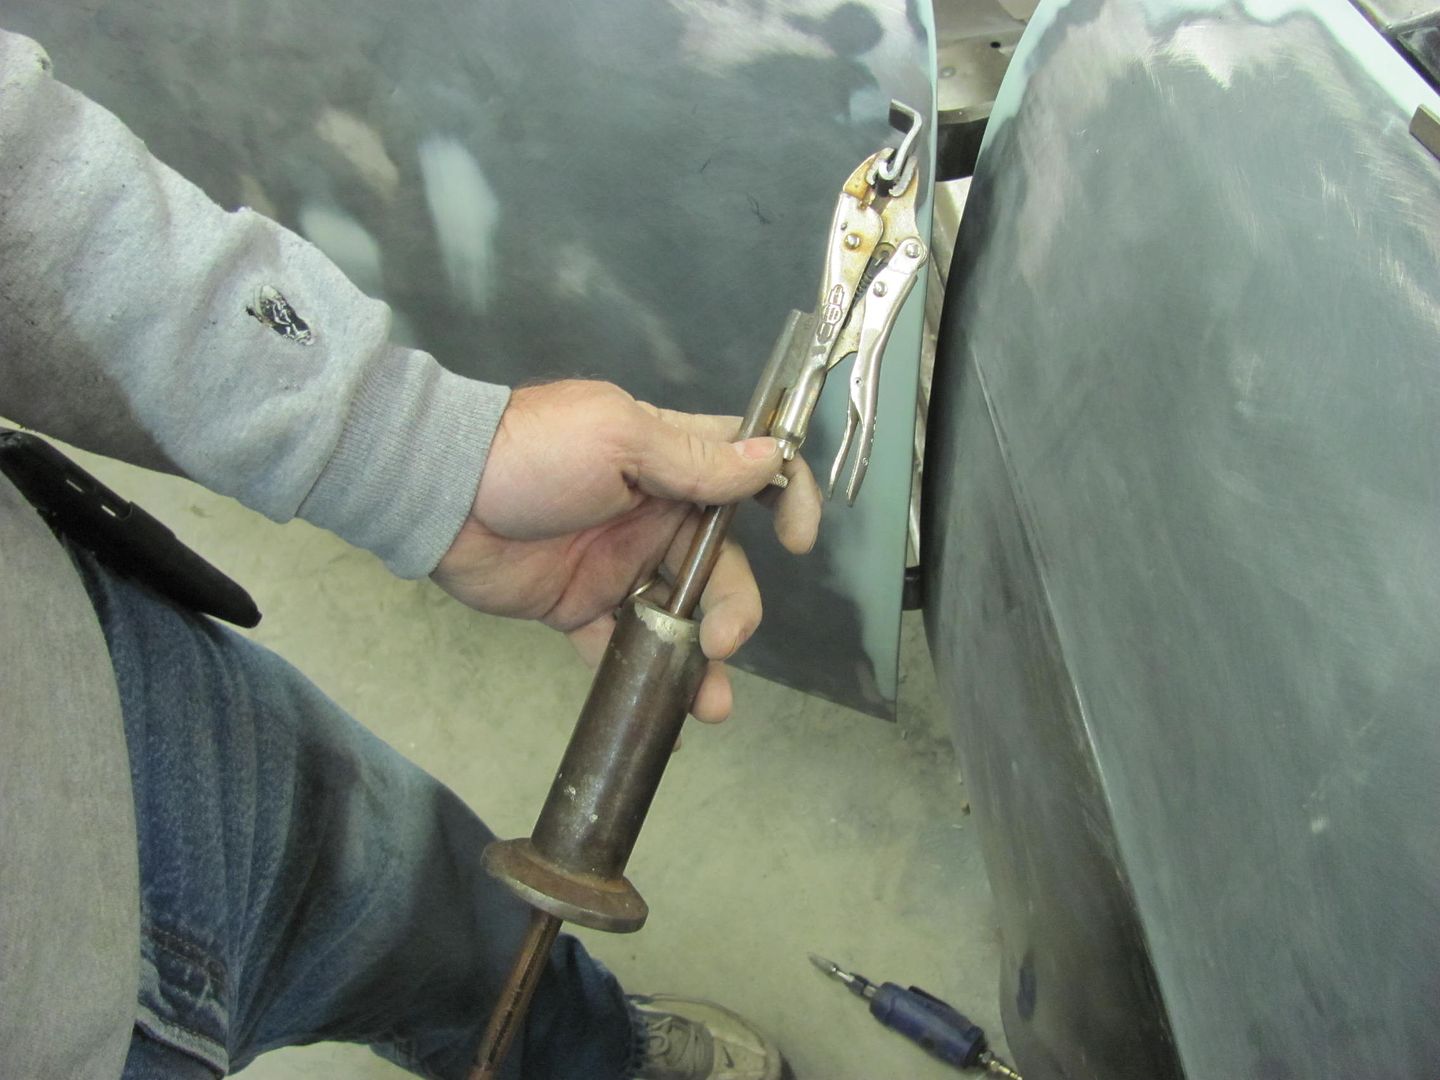 A bit better.....  ...and the tail light bracket is welded back together.. This mod seemed to make the attaching holes align better as well.. 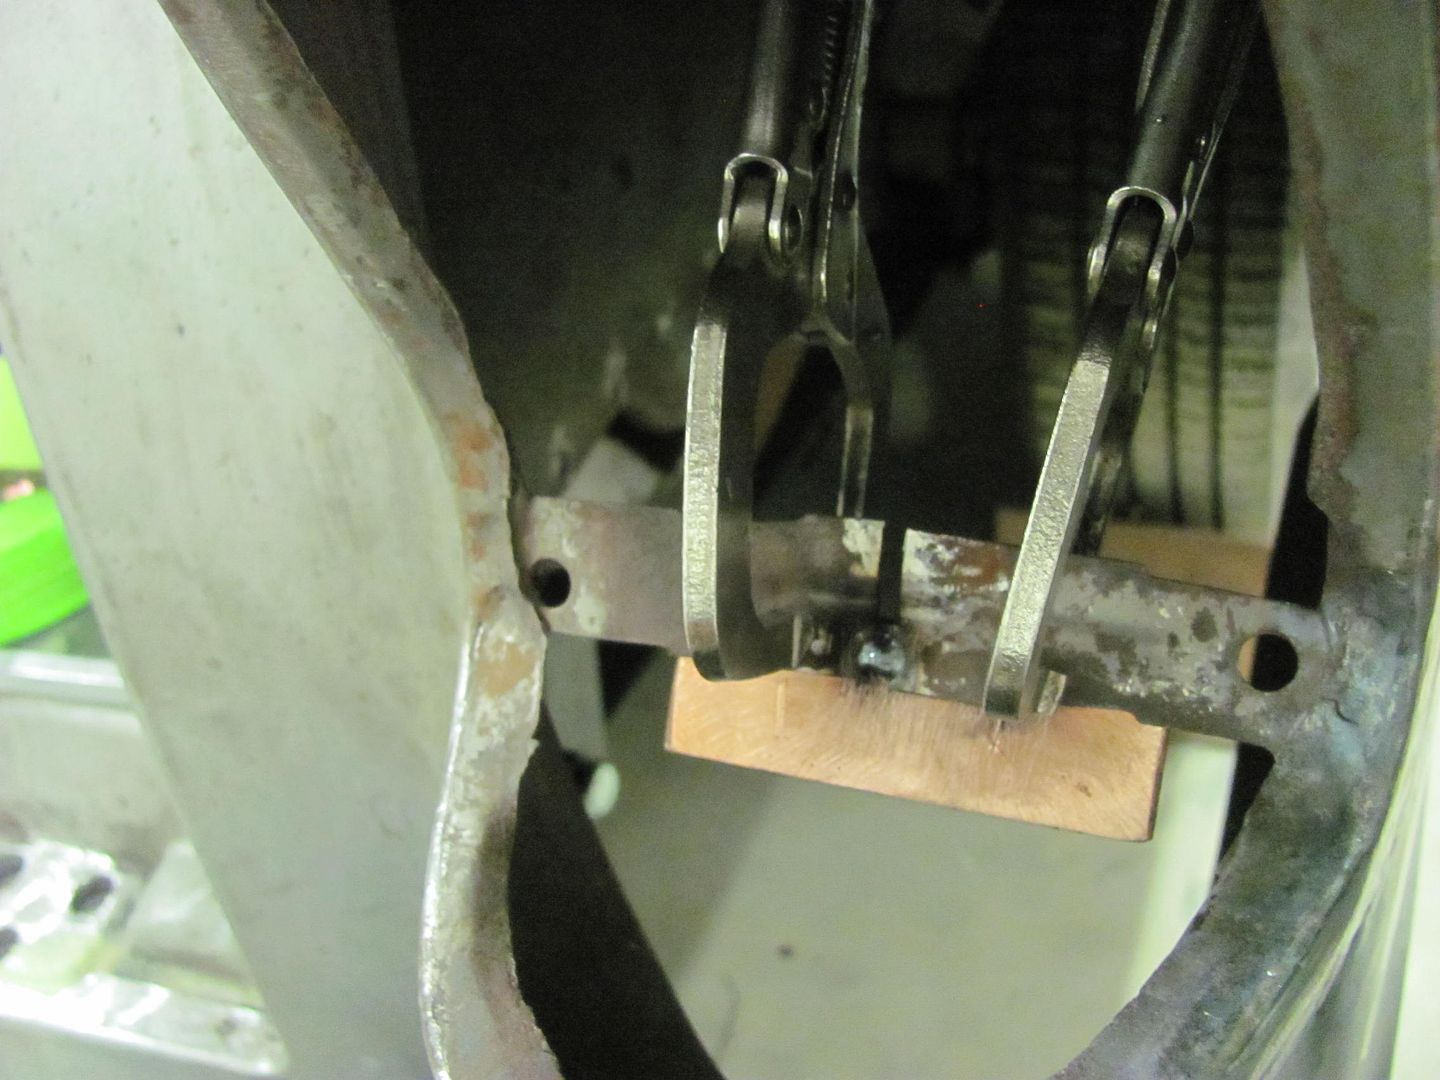 And Kyle continues to finish up the seam and we'll fine tune the opening once more when the welding and planishing is complete. 
__________________
Robert |
|
|
|
|
04-11-2015, 10:37 PM
|
#412 |
|
Senior Member
Join Date: Jul 2012
Location: Oblong, Illinois
Posts: 7,017
|
Re: 55 Wagon Progress
Wow, that is some nice detail fitting of the housing. Great work!
|
|
|
|
|
04-12-2015, 11:02 AM
|
#413 |
|
Senior Member
Join Date: Mar 2011
Location: West Plains, Missouri
Posts: 7,555
|
Re: 55 Wagon Progress
Nice work on the modification...Jim
__________________
my build thread: http://67-72chevytrucks.com/vboard/s...d.php?t=459839 Jimbo's long bed step build:http://67-72chevytrucks.com/vboard/s...t=464626<br /> |
|
|
|
|
04-13-2015, 09:49 AM
|
#414 |
|
Registered User
Join Date: Nov 2011
Location: West Plains Missouri
Posts: 2,088
|
Re: 55 Wagon Progress
Nice attention to the small details..
__________________
http://67-72chevytrucks.com/vboard/s...d.php?t=645774 Project Orangepeel 52 A.D. http://67-72chevytrucks.com/vboard/s...d.php?t=653337 John's LS 49 dodge http://67-72chevytrucks.com/vboard/s...d.php?t=655780 Blake's 67 GMC LS stepside http://67-72chevytrucks.com/vboard/s...d.php?t=690527 Reed 78 FJ40 Rebuild http://67-72chevytrucks.com/vboard/s...d.php?t=733259 Barger's 78 FJ40 |
|
|
|
|
04-13-2015, 01:15 PM
|
#415 |
|
Registered User
Join Date: Oct 2014
Location: a beer can ..
Posts: 925
|
Re: 55 Wagon Progress
looking good ..
loving the update(s) and the progress being made .. =0)
__________________
dont want to hear excuses, i want to hear solution(s) |
|
|
|
|
04-15-2015, 06:50 AM
|
#416 |
|
Registered User
Join Date: Jan 2013
Location: Leonardtown, MD
Posts: 1,636
|
Re: 55 Wagon Progress
Thanks for all the comments!
Well, it's that time of year again, and the local Arby's Wednesday night car shows are in full swing, so we've changed the shop nights from Mon & Wed to Tues & Thurs so that we'd have Wednesday free to stop by the shows. We plan on taking Brad's Fairlane (the last shop project) to a couple of the events this year, Arby's is just over a mile away from the shop, so his 4 gallon tank may just make the trip..   This is one of those cars that you'll feel and hear well before you see it, so it should draw a nice crowd Last night's shop progress had me doing more block sanding, and Kyle continued on the rear quarter seam shave. The top weld is about done (except at the edge), other than final bumping and planishing. The weld through the middle of the mounting bracket was dressed out. The final weld seam that travels over to the gate opening will be addressed once the body is on the rotisserie, the planishing is a bit cumbersome working around a corner, so with the car up on it's side it will make the task a bit easier. 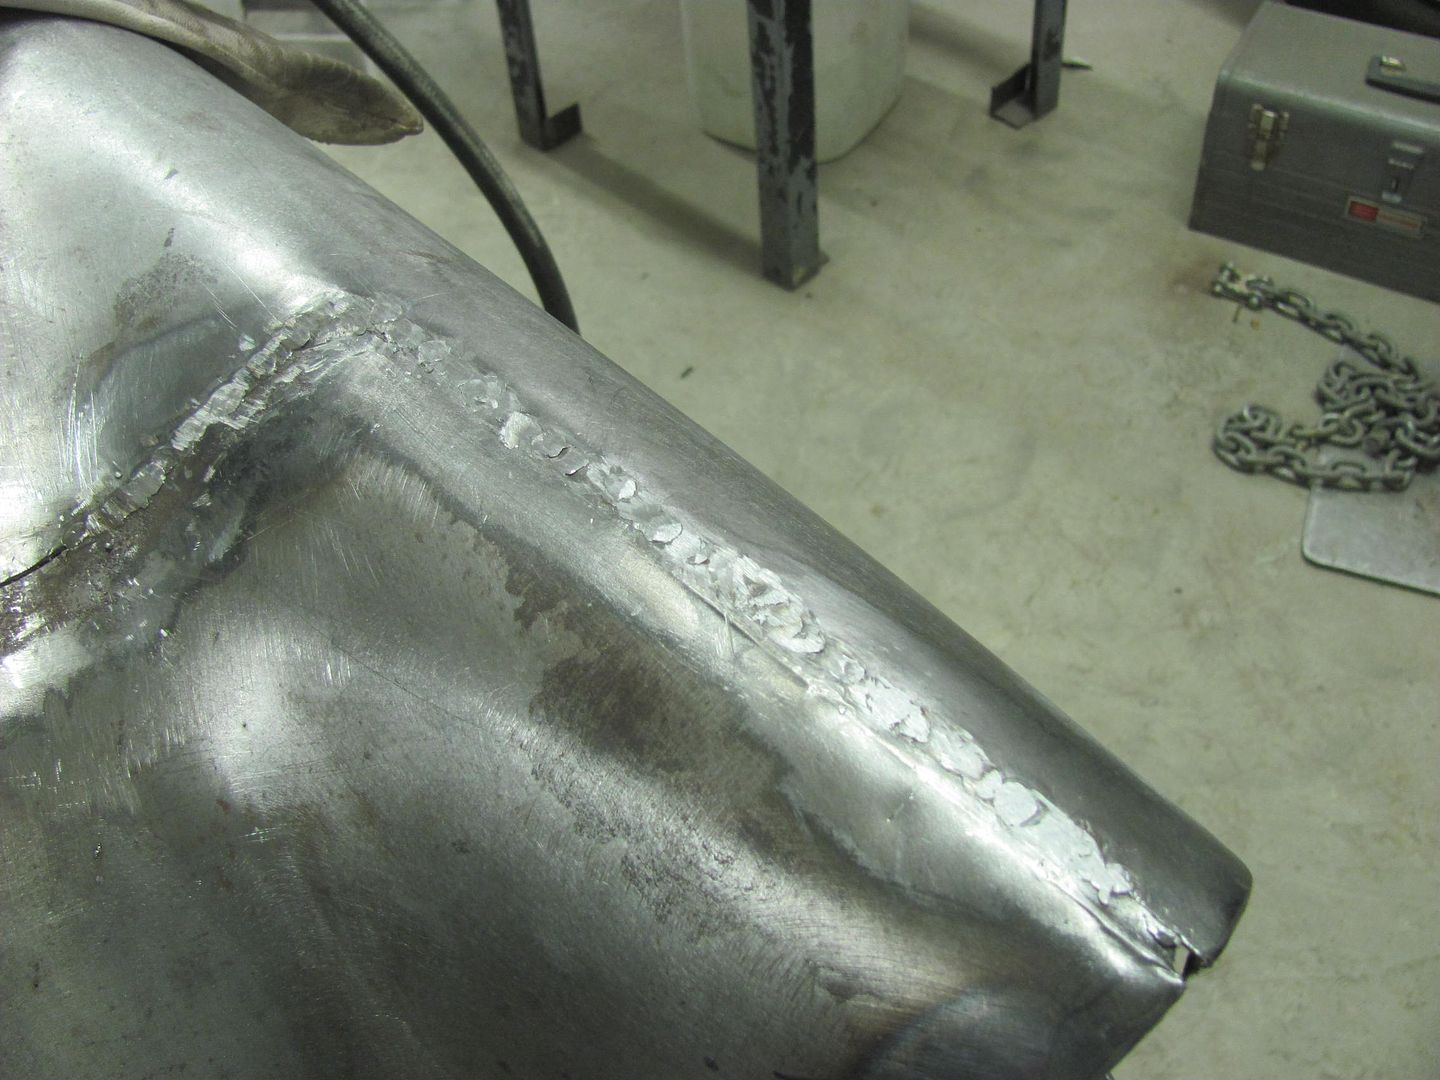  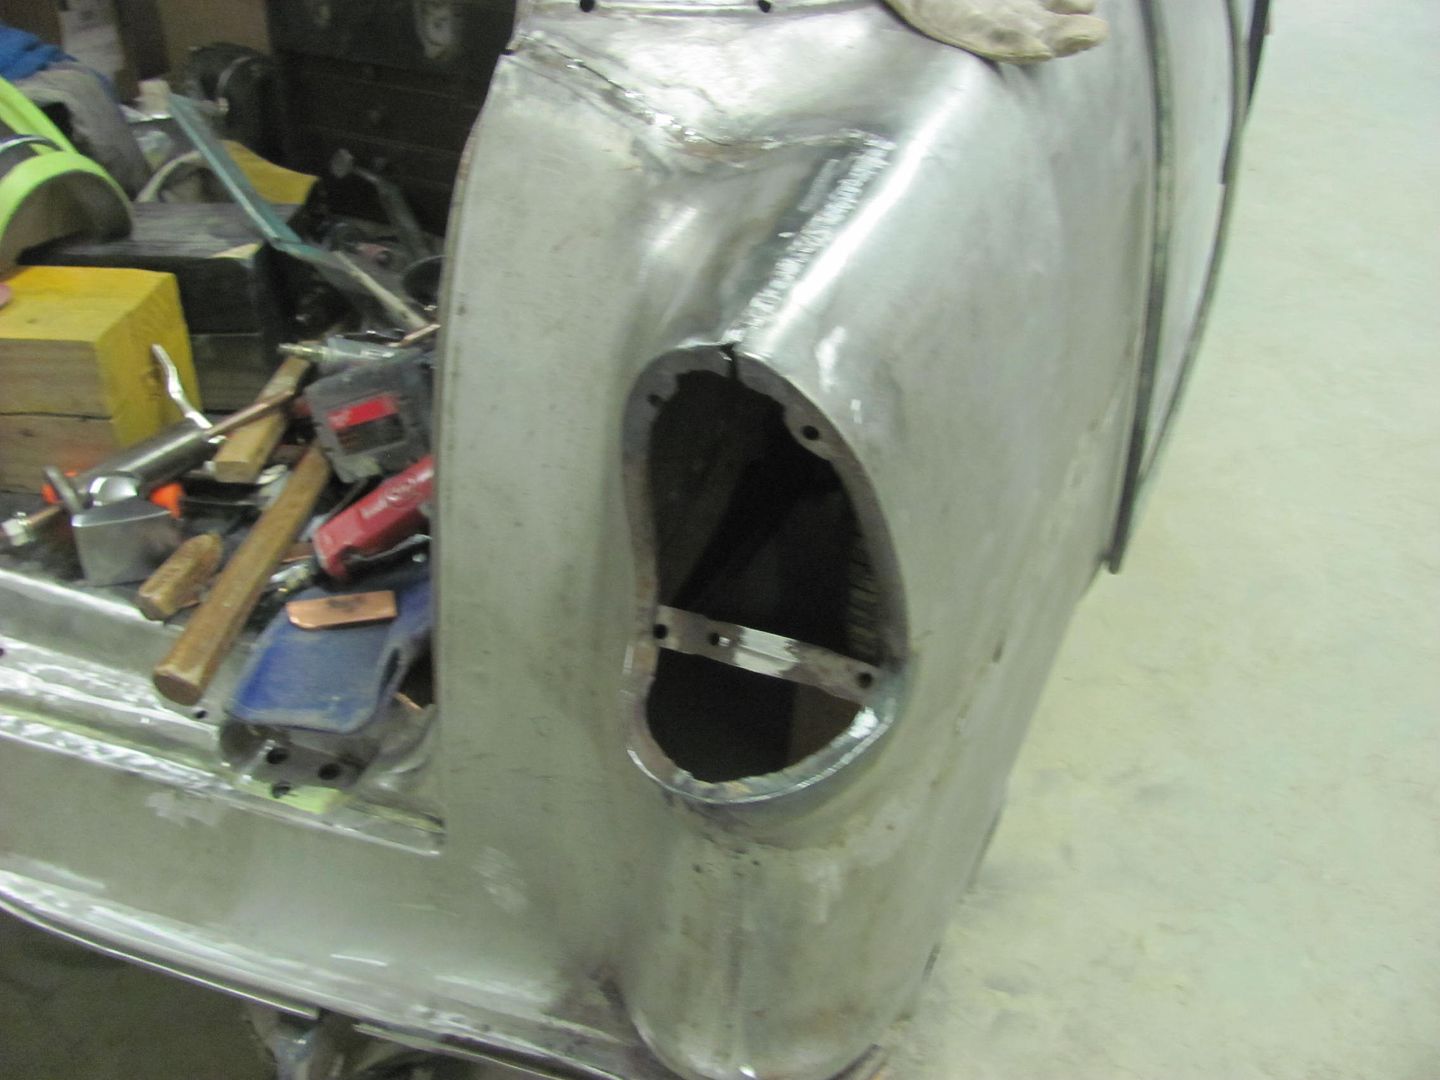 The tail light fits much better but some final tweaking will be done after the gap at the top edge is completed.. 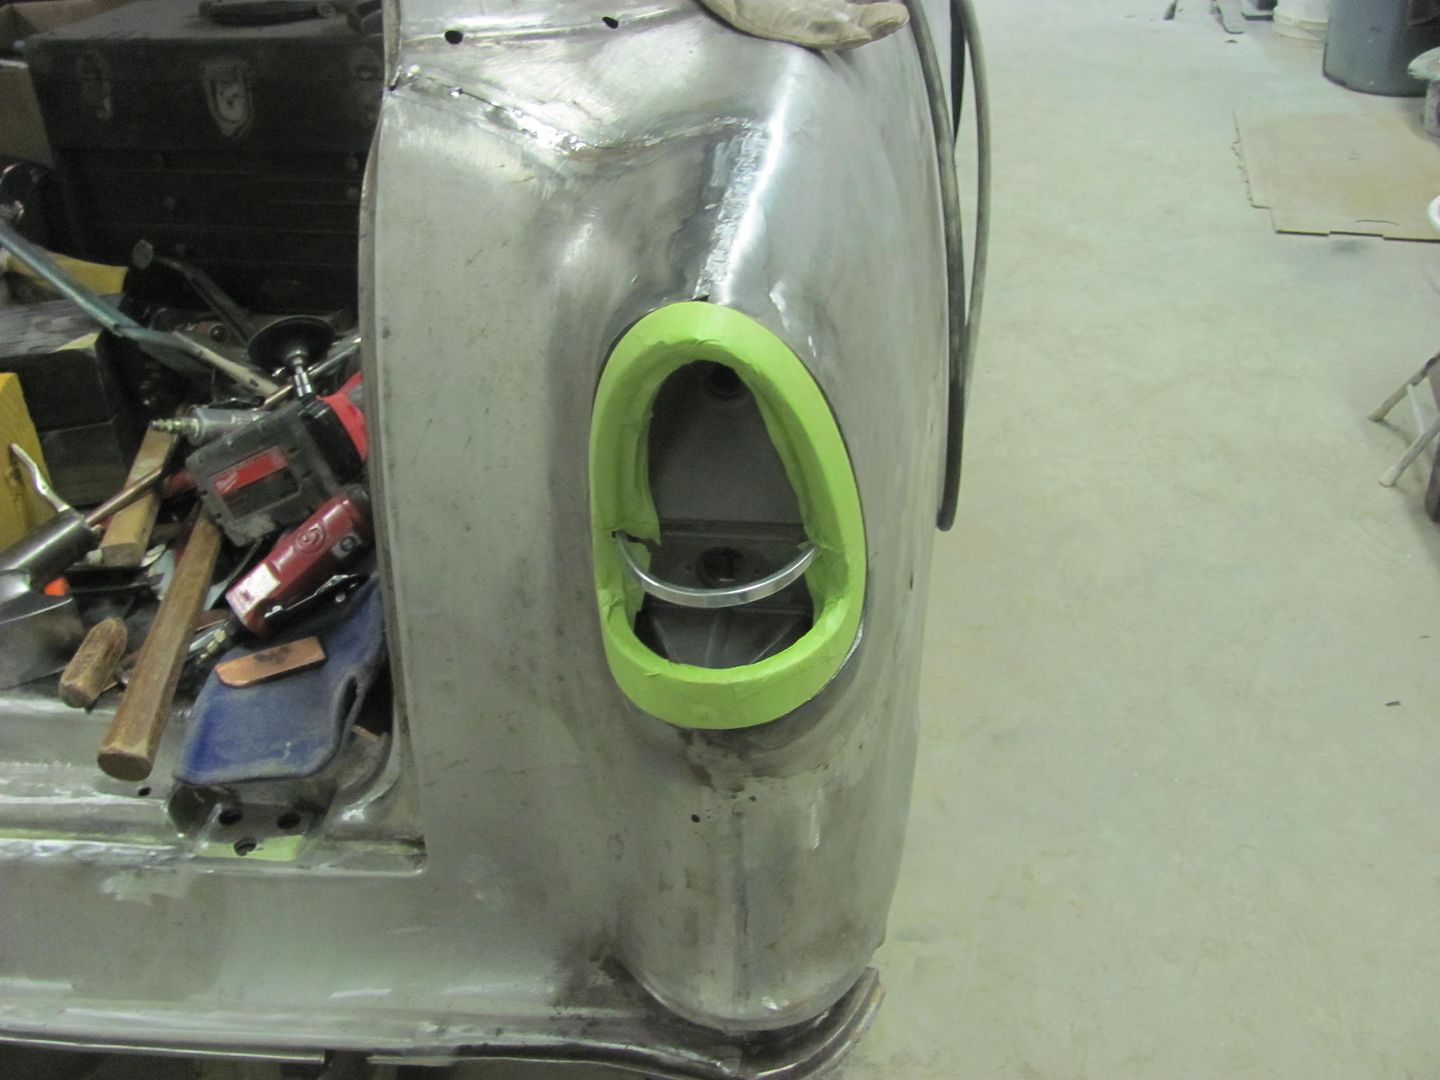
__________________
Robert |
|
|
|
|
04-15-2015, 08:33 PM
|
#417 |
|
Registered User
Join Date: May 2007
Location: Deale Md
Posts: 4,663
|
Re: 55 Wagon Progress
We need to see some pics from Arby's
__________________
James 63 GMC V6 4speed carryall 65 chevy swb bbw V8 auto 68 K20 327/4 speed, buddy buckets 2002 GMC CC Dually Duramax 64 GMC lwb 3/4 V6 4speed SOLD 66 GMC swb bbw buddy buckets SOLD IG duallyjams The only thing that stays the same is constant change! |
|
|
|
|
04-15-2015, 09:38 PM
|
#418 |
|
Senior Member
Join Date: Jul 2012
Location: Oblong, Illinois
Posts: 7,017
|
Re: 55 Wagon Progress
More nice work...I wanna go to Arbys!
|
|
|
|
|
04-16-2015, 04:43 PM
|
#419 |
|
Registered User
Join Date: Dec 2012
Location: Rochester, KENT
Posts: 10,492
|
Re: 55 Wagon Progress
I just sit and smile.
Thank you.
__________________
MY BUILD LINK: http://67-72chevytrucks.com/vboard/s...585901]Redneck Express - 1966 C10 Short Fleetside MY USA ROADTRIPS http://forum.retro-rides.org/thread/...2018-humdinger IF YOU CAN'T FIX IT WITH A HAMMER, YOU'VE GOT AN ELECTRICAL PROBLEM MATE. |
|
|
|
|
04-16-2015, 10:36 PM
|
#420 |
|
Registered User
Join Date: Jan 2013
Location: Leonardtown, MD
Posts: 1,636
|
Re: 55 Wagon Progress
Thanks for the comments guys. Brad is still waiting on his carburetor, he gets it rebuilt every spring, so it may be a couple weeks before we get to take it down to Arby's. But we'll get some pictures when we do..
Well since Kyle has the top weld all the way back to the tail light opening, we checked the top crown and found a low spot by the 90* in the weld seam. We had to change the hoop on the Watervliet but since this one fit in the tail light opening so well, this will make short work of raising the low area.. 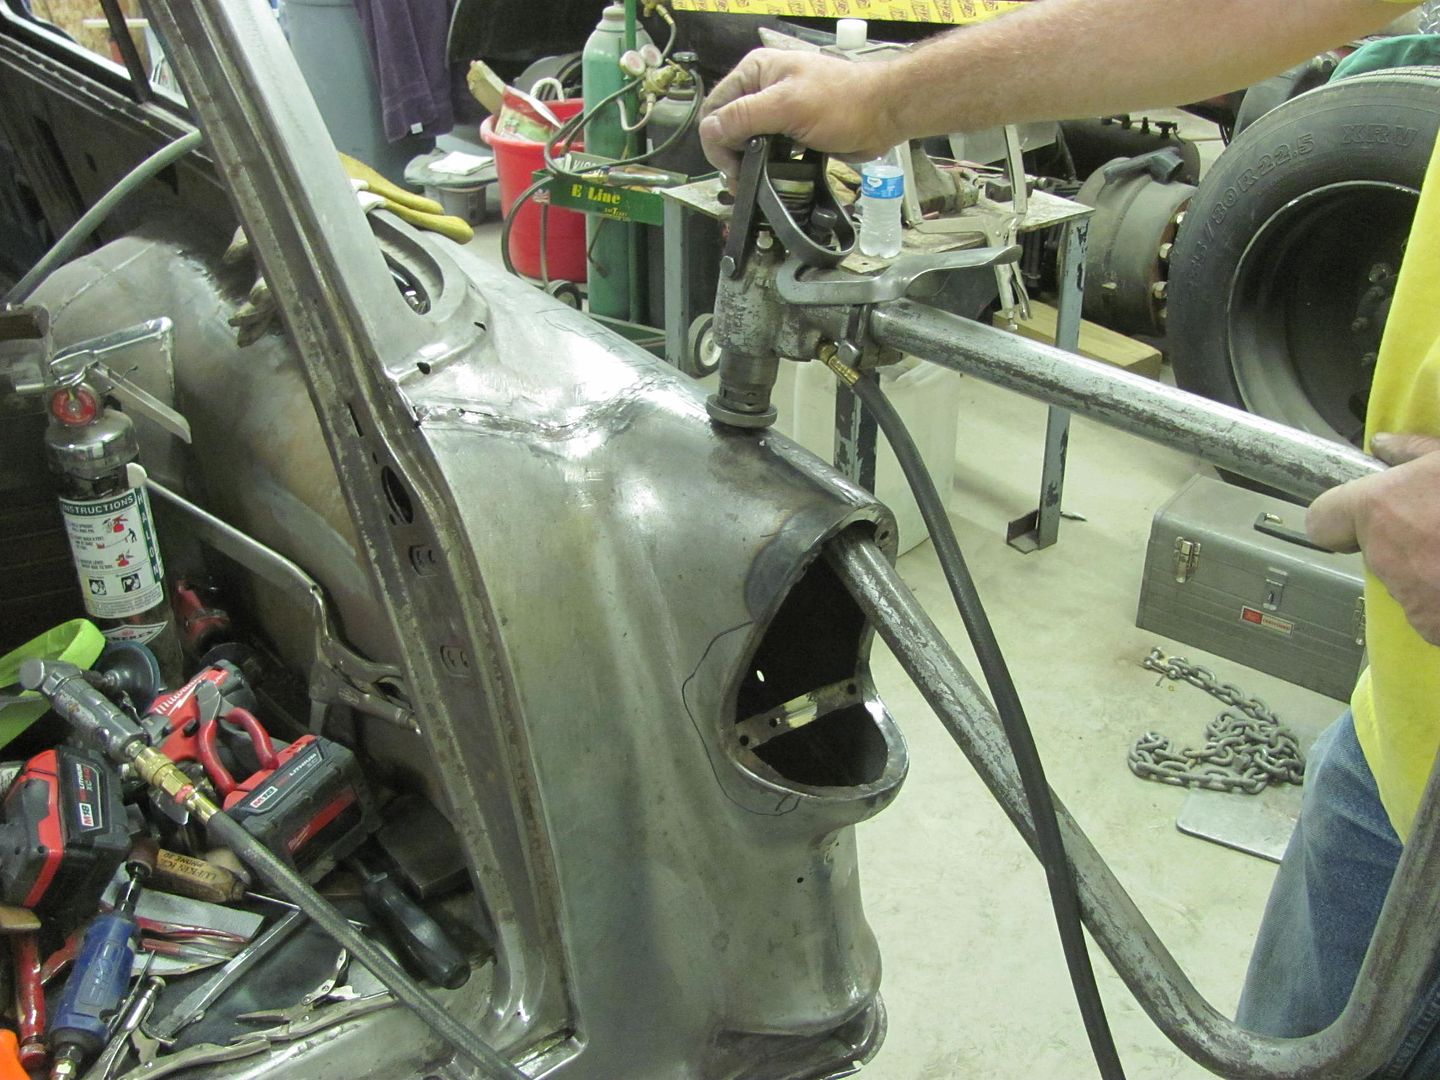  We decided to go ahead and work on the opening a bit more, it was wide in spots as shown here... Some "friendly" persuasion... 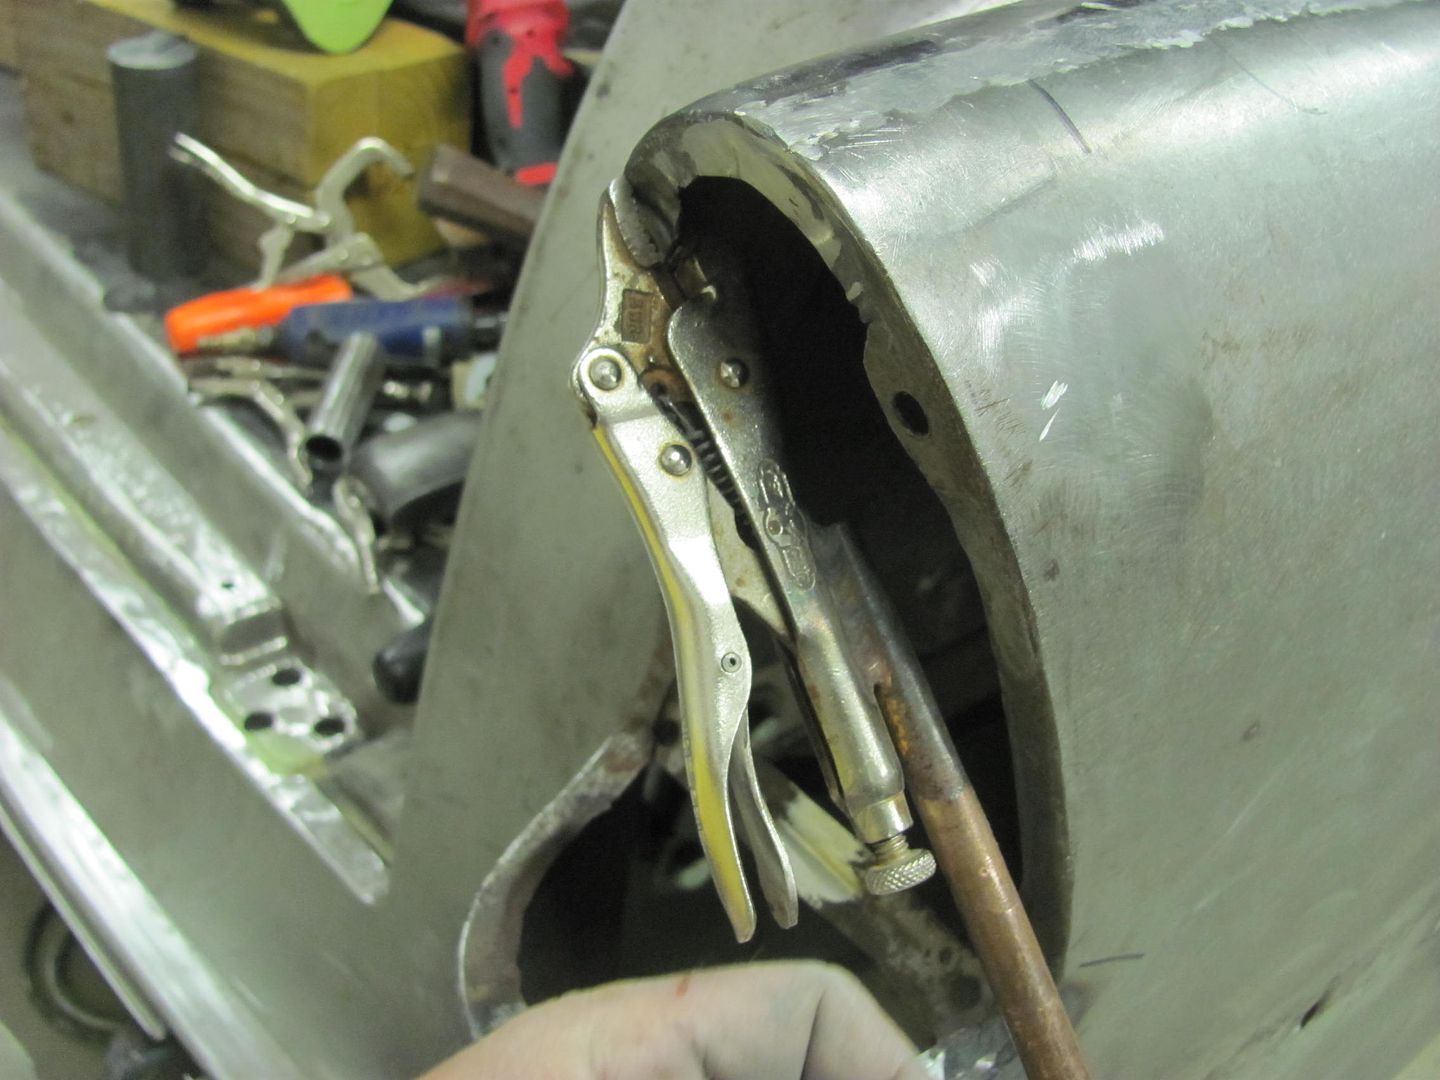 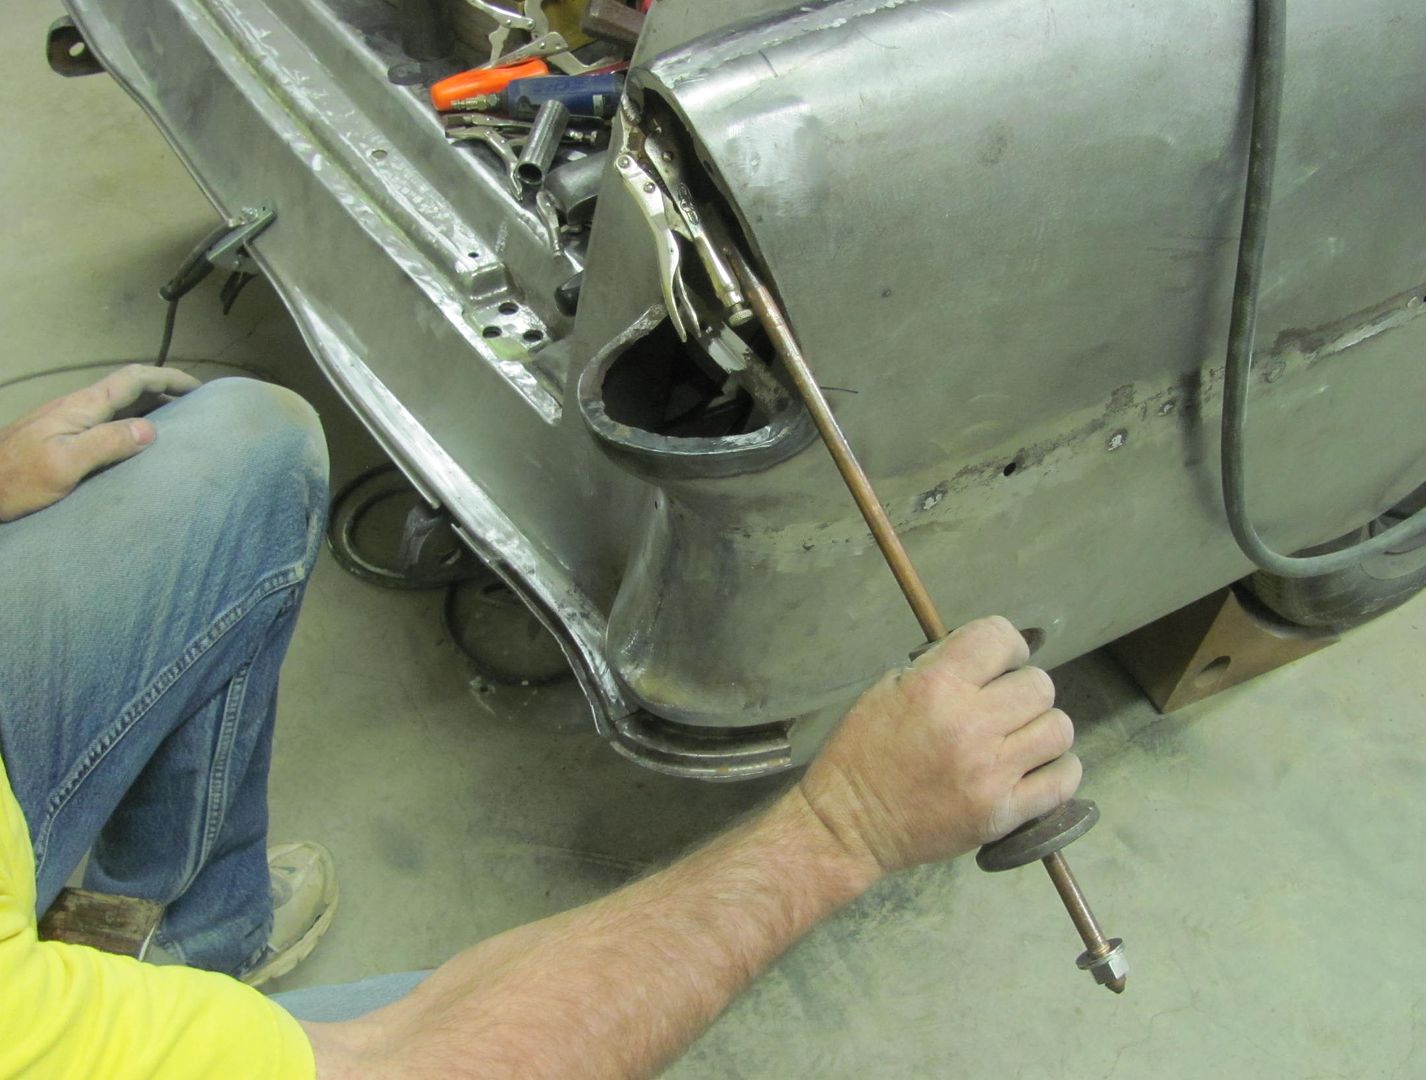 Much better fit....   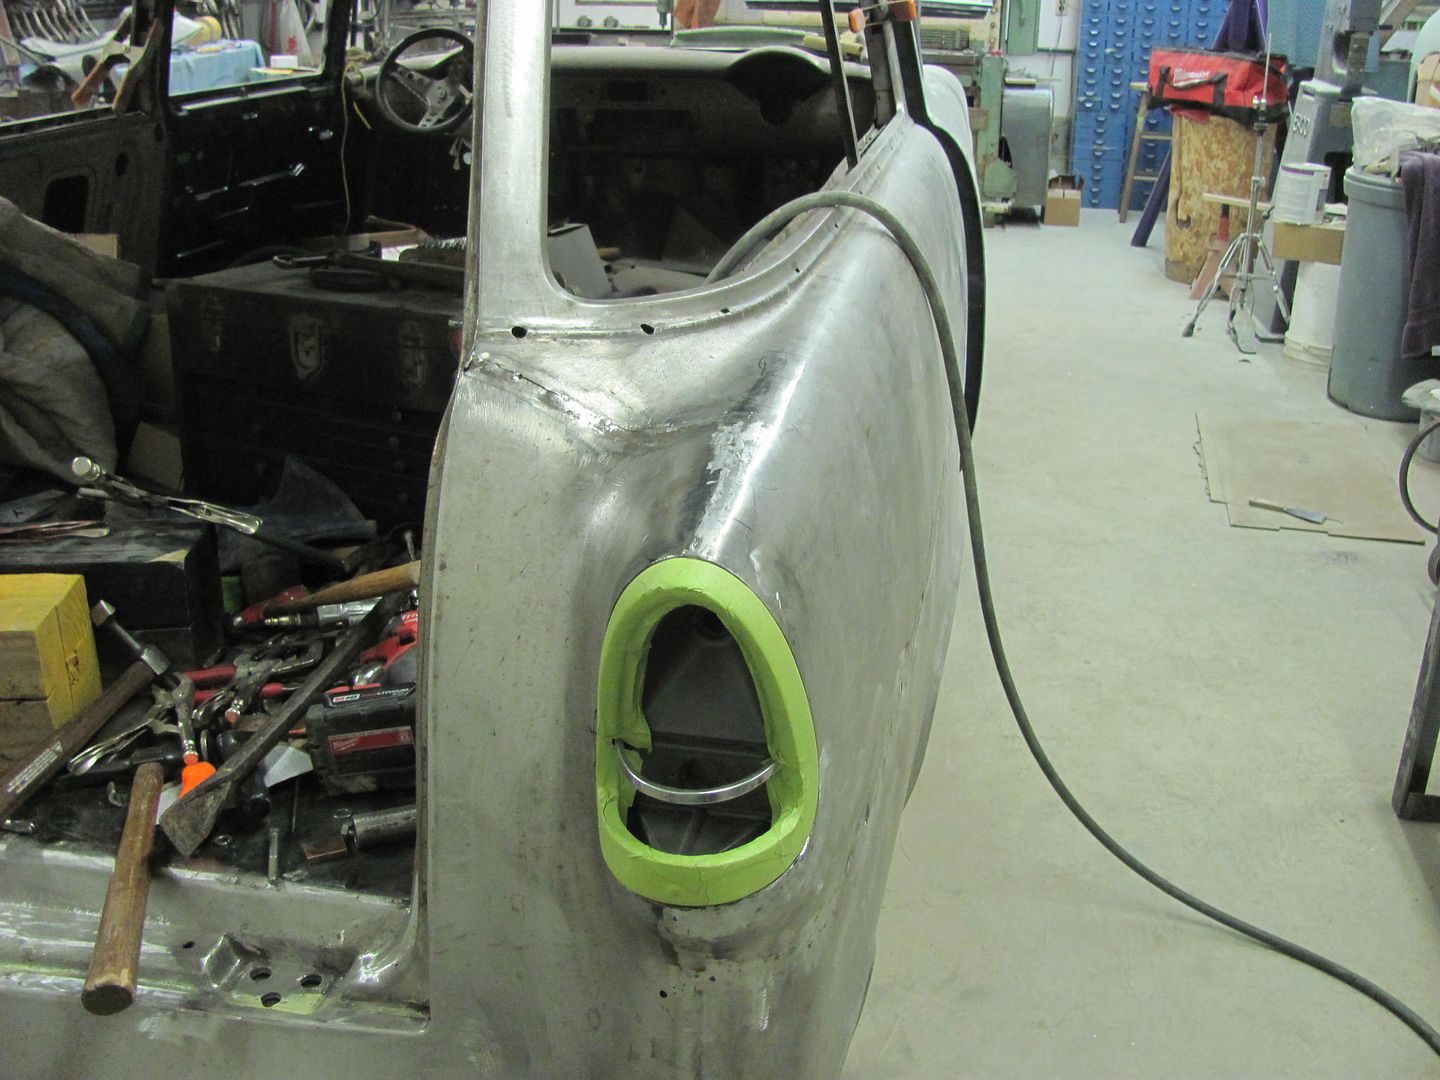
__________________
Robert |
|
|
|
|
04-16-2015, 11:22 PM
|
#421 |
|
Senior Member
Join Date: Mar 2011
Location: West Plains, Missouri
Posts: 7,555
|
Re: 55 Wagon Progress
Damn nice work guys, as usual...Jim
__________________
my build thread: http://67-72chevytrucks.com/vboard/s...d.php?t=459839 Jimbo's long bed step build:http://67-72chevytrucks.com/vboard/s...t=464626<br /> |
|
|
|
|
04-17-2015, 06:28 AM
|
#422 |
|
Registered User
Join Date: Nov 2014
Location: Omaha
Posts: 558
|
Re: 55 Wagon Progress
Man I'd kill to have you work on my truck....ugh such quality and nice work. That kid is lucky
|
|
|
|
|
04-17-2015, 09:50 AM
|
#423 |
|
Registered User
Join Date: Nov 2011
Location: West Plains Missouri
Posts: 2,088
|
Re: 55 Wagon Progress
More Fine details!!! Love it Robert..
__________________
http://67-72chevytrucks.com/vboard/s...d.php?t=645774 Project Orangepeel 52 A.D. http://67-72chevytrucks.com/vboard/s...d.php?t=653337 John's LS 49 dodge http://67-72chevytrucks.com/vboard/s...d.php?t=655780 Blake's 67 GMC LS stepside http://67-72chevytrucks.com/vboard/s...d.php?t=690527 Reed 78 FJ40 Rebuild http://67-72chevytrucks.com/vboard/s...d.php?t=733259 Barger's 78 FJ40 |
|
|
|
|
04-18-2015, 11:33 PM
|
#424 |
|
Registered User
Join Date: Jan 2013
Location: Leonardtown, MD
Posts: 1,636
|
Re: 55 Wagon Progress
Thanks for the comments guys!
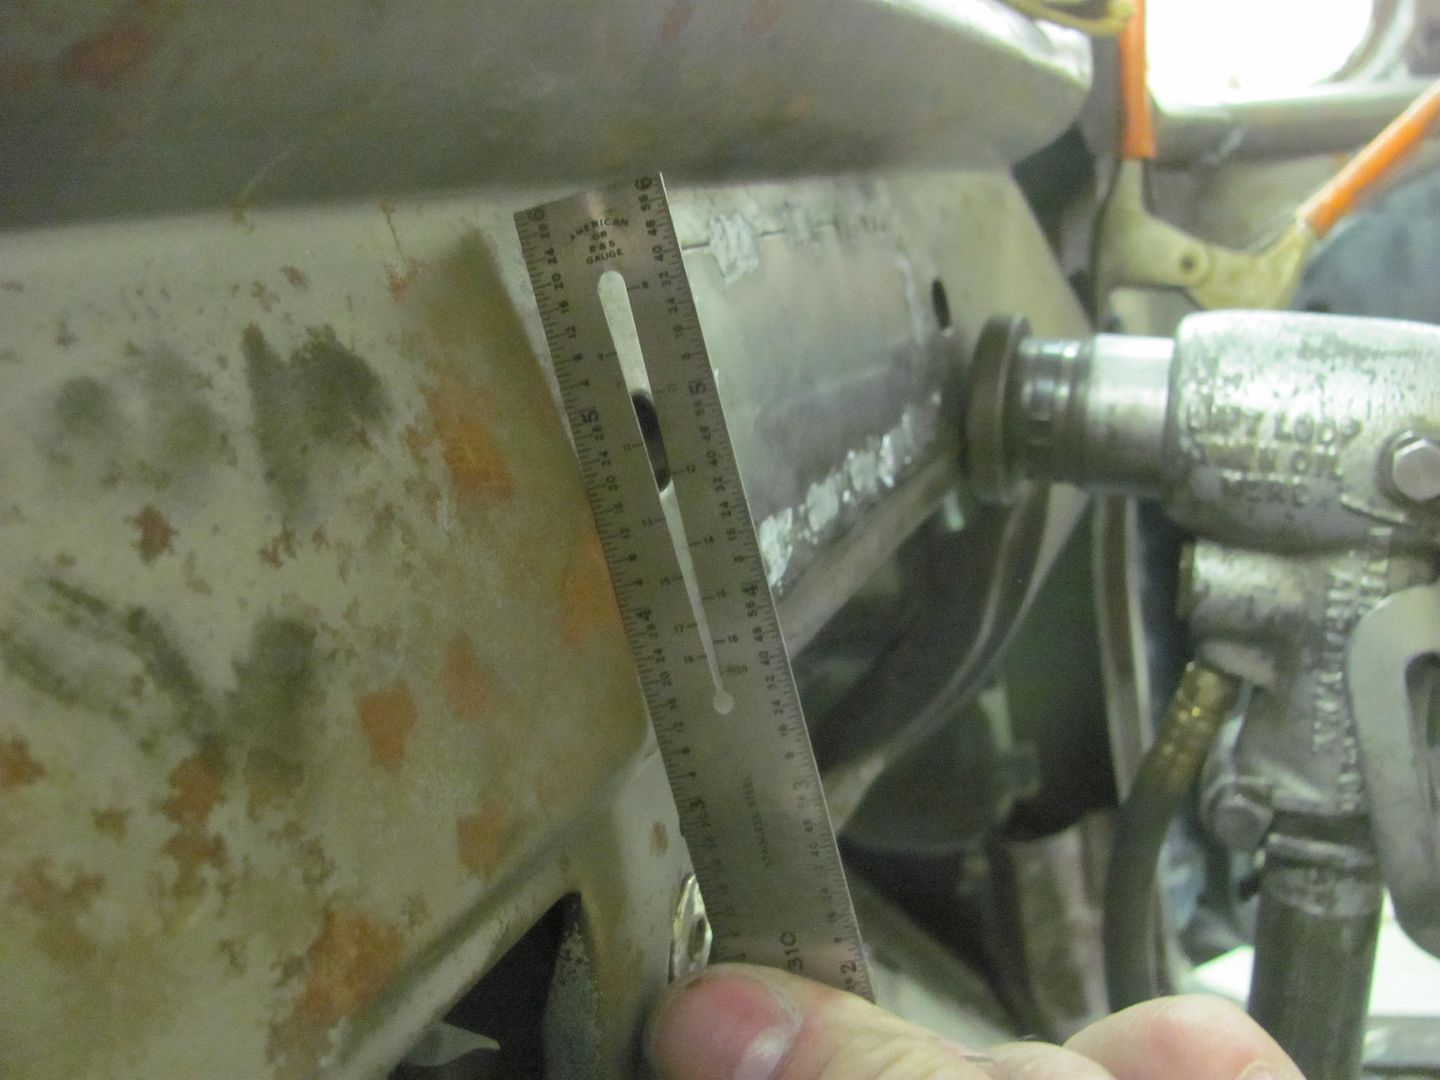
Got a care package in the mail yesterday, we had the hood hinges rebuilt at Wilson's Antique Car Parts....  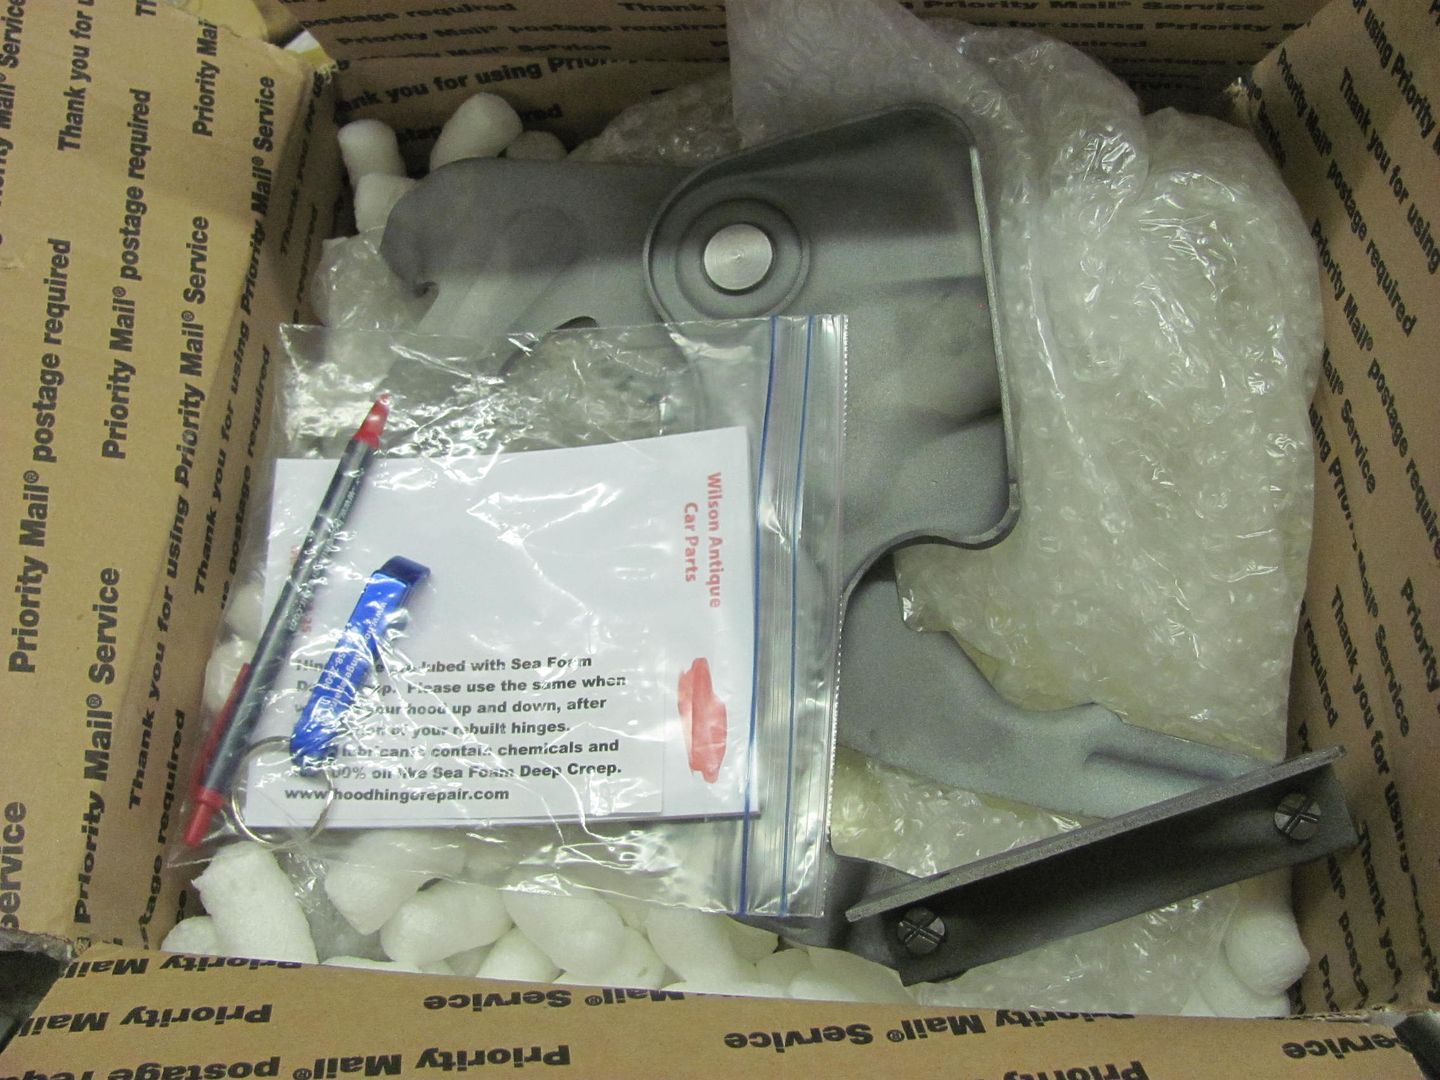 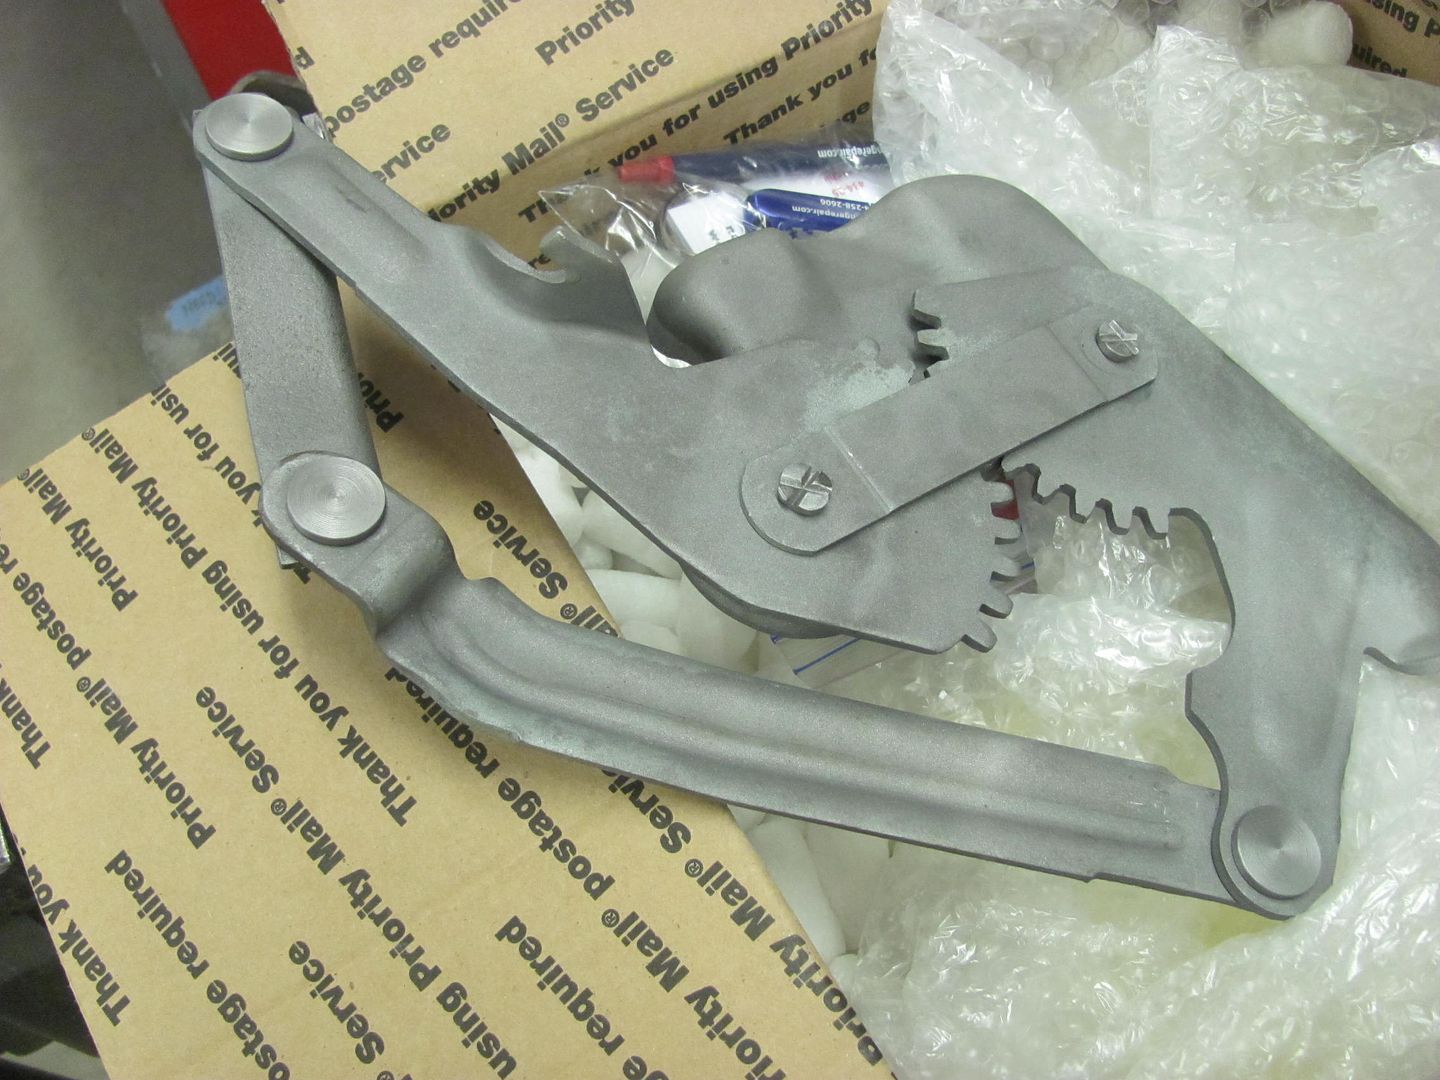  I had talked to a couple dealers about the reproduction hinges and did not hear good things, they indicated they had replaced a few sets due to the gears jumping teeth from being too loose. A member on one of the forums had recommended Wilson's rebuilding service, and I gotta say, this is top notch work. If you're having hood hinge issues, I highly recommend their services.. 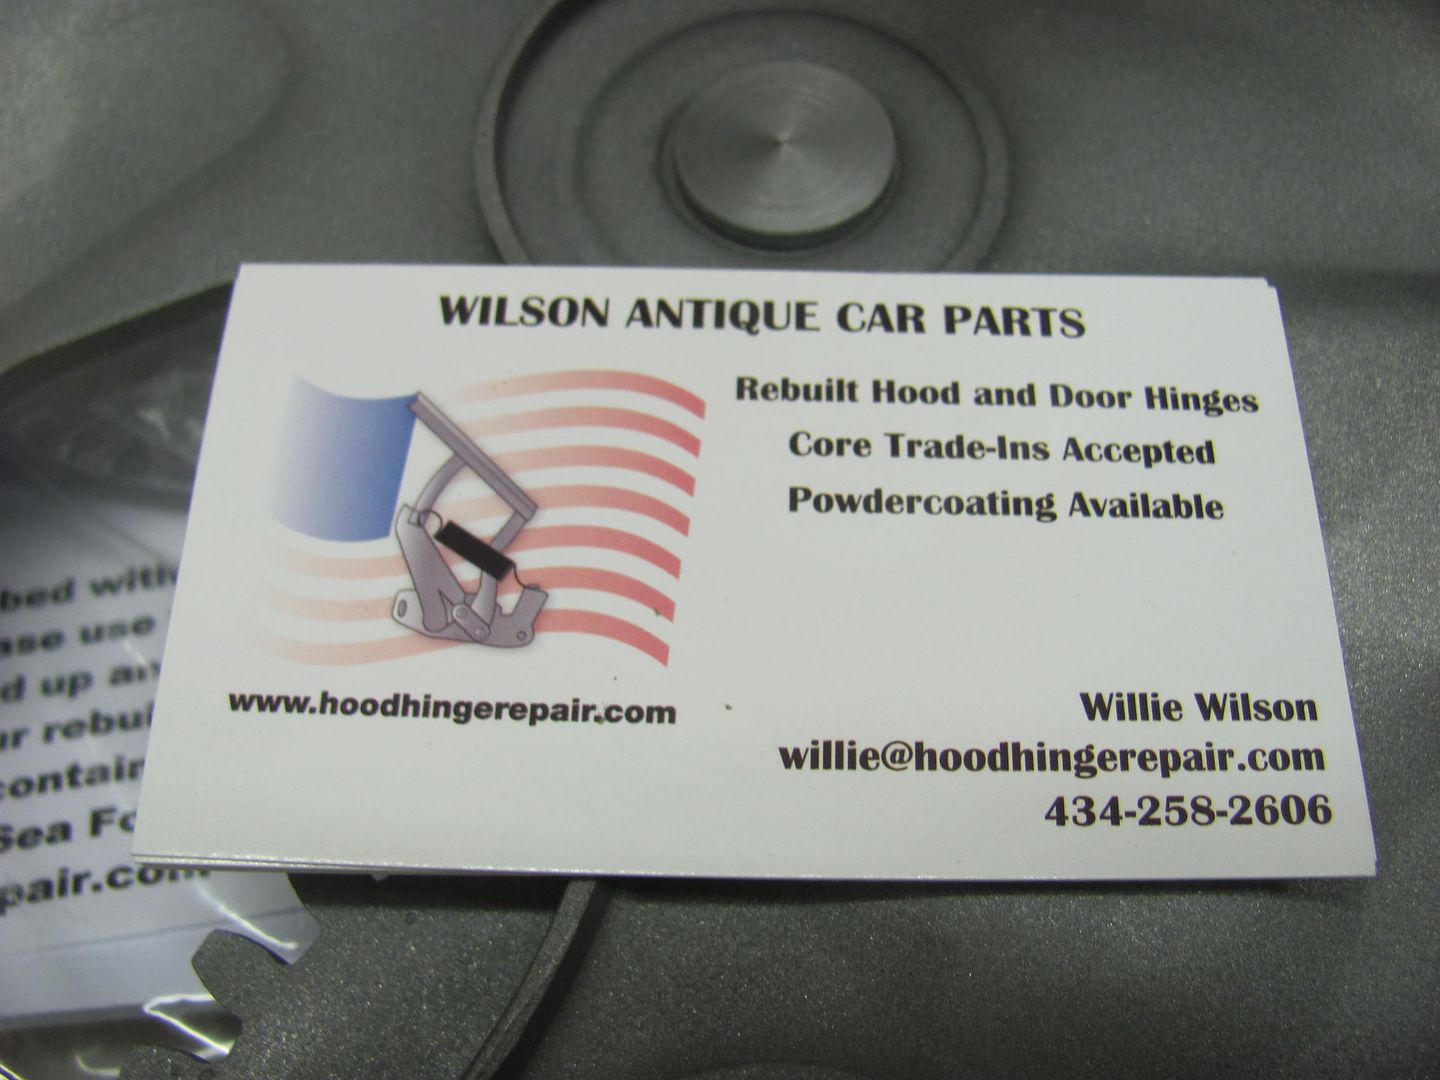 Kyle was looking for something else to weld, so on to the dash. Here he's prepping for welding the seam, bumping the panels a bit for better alignment before welding....  Checking across the gap using a 6" rule... 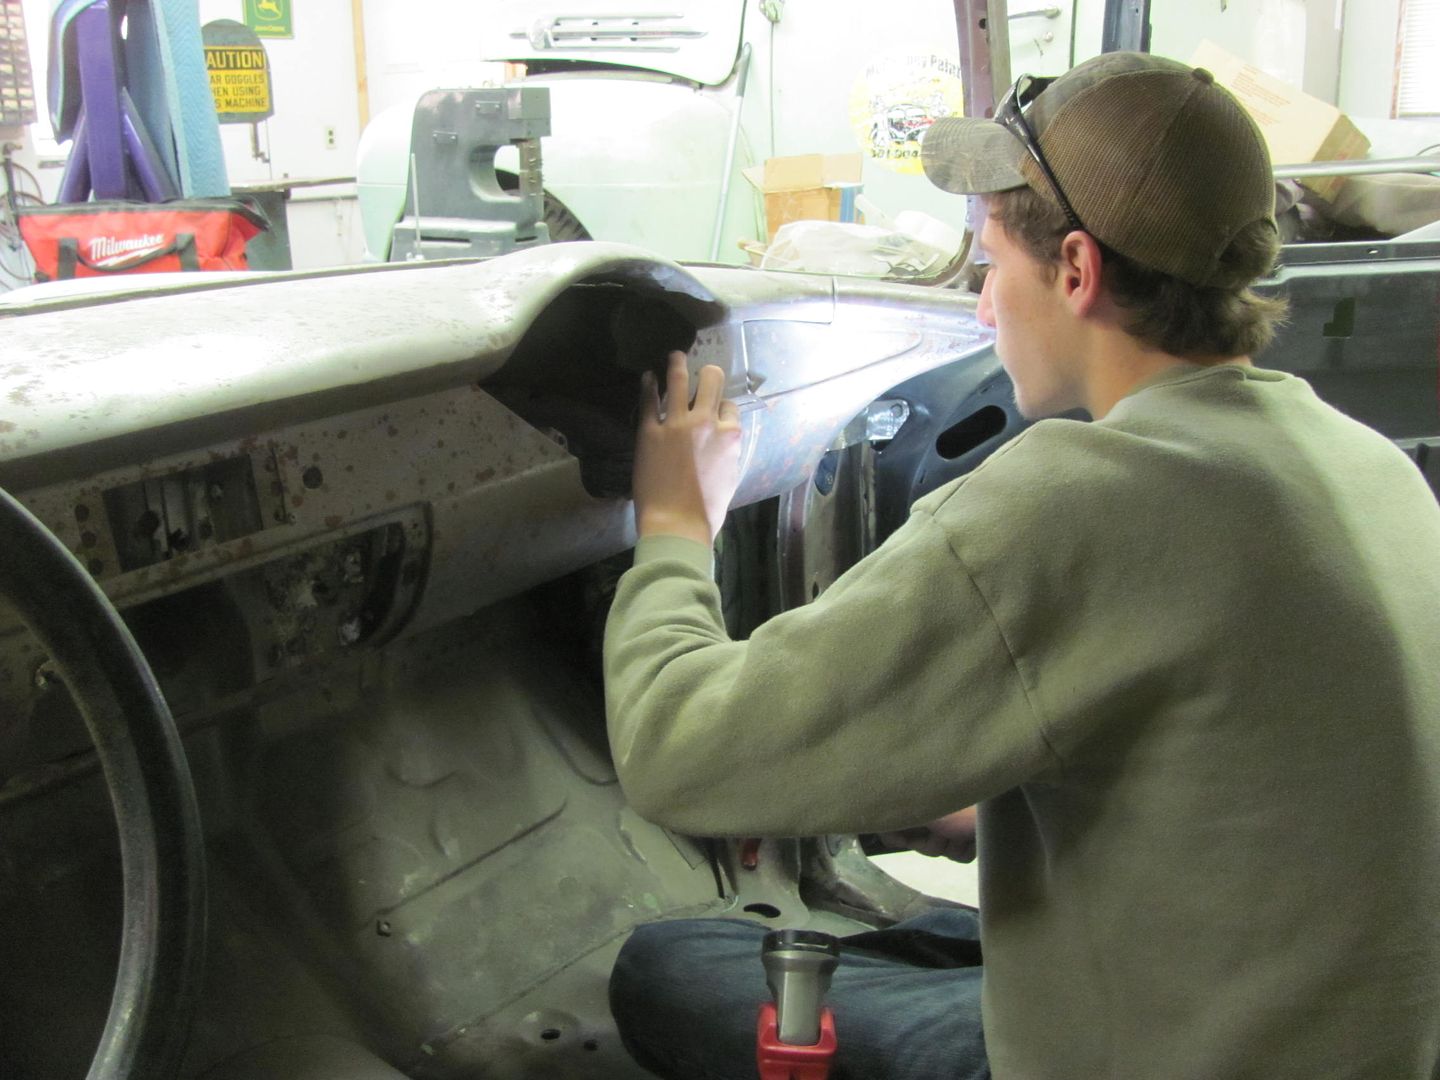 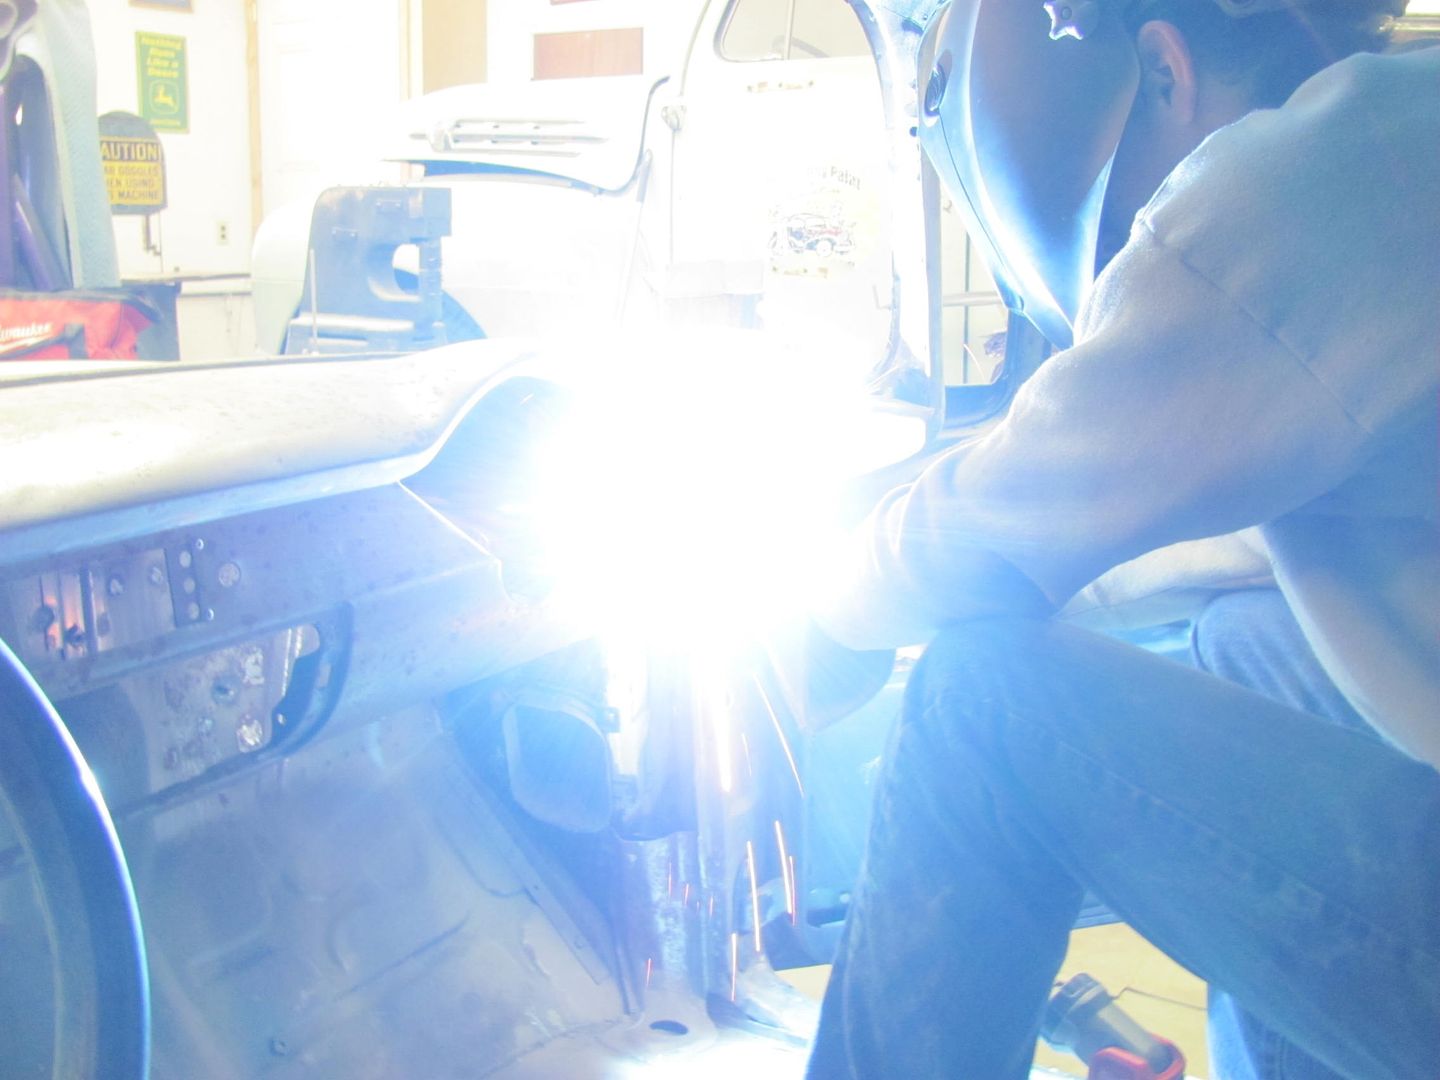 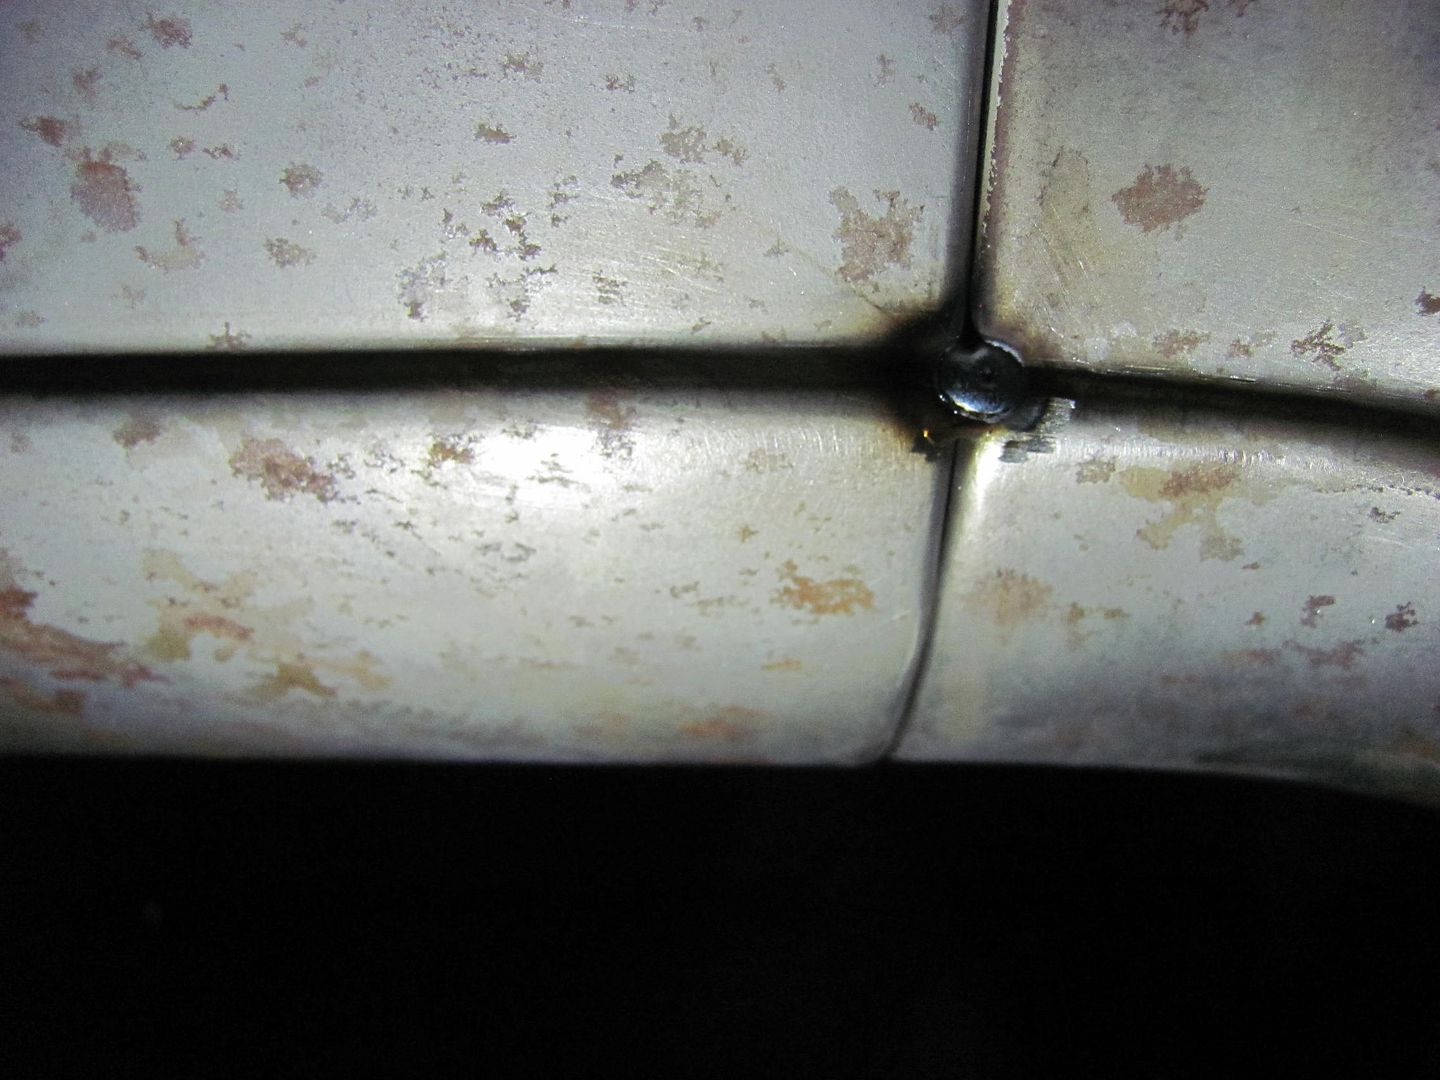 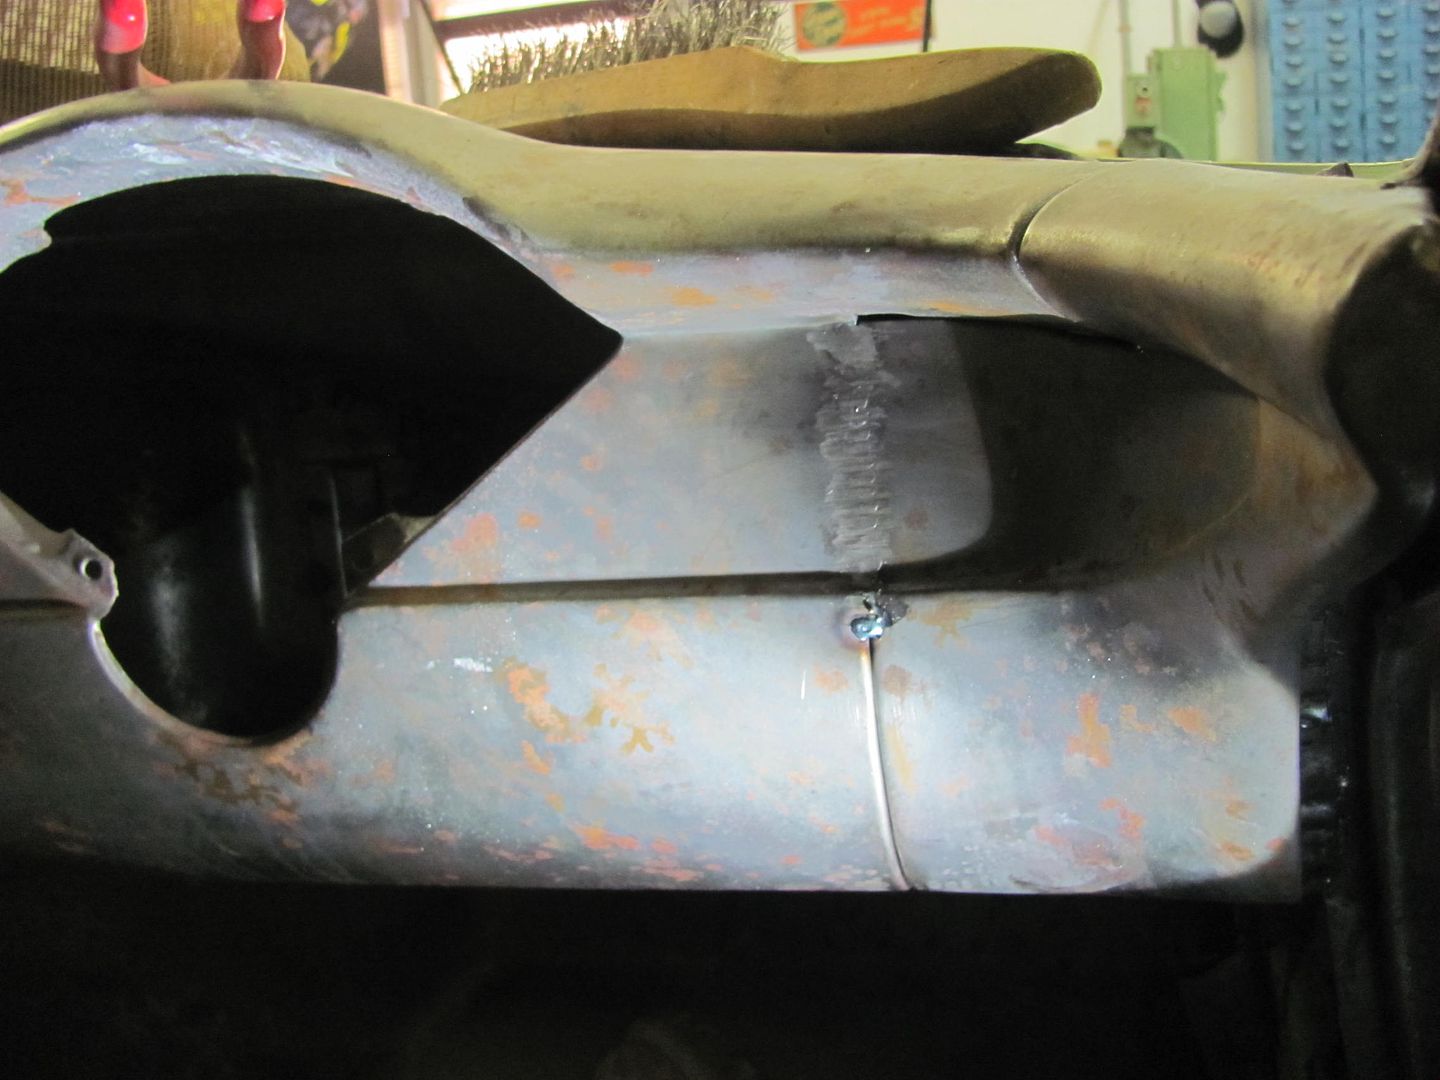 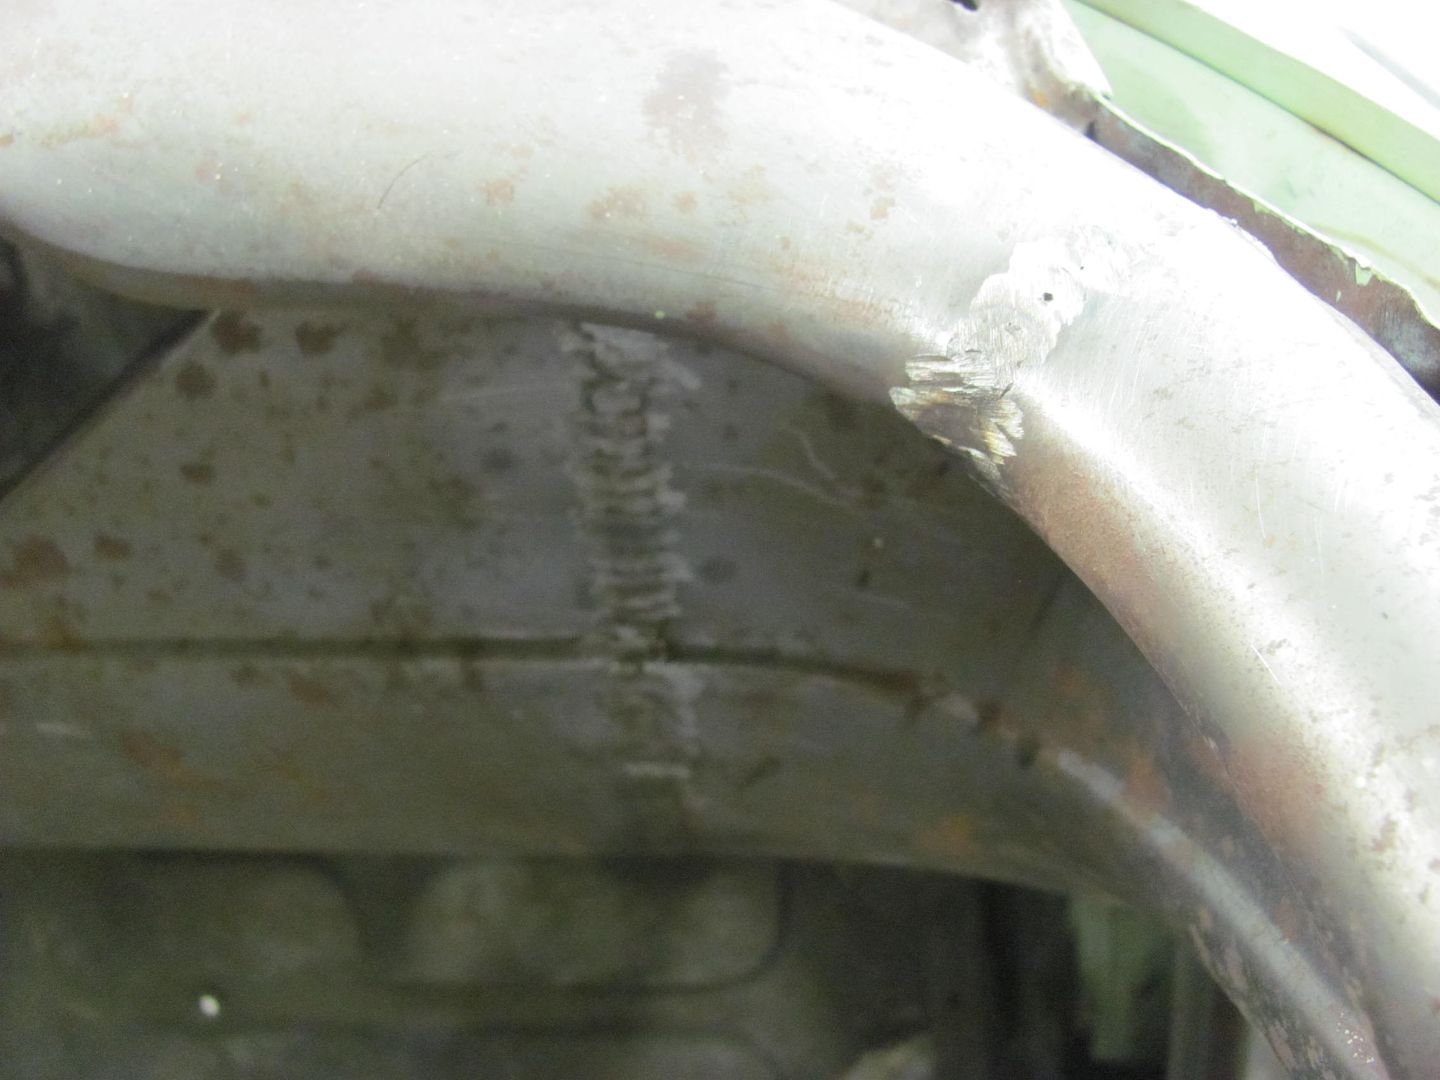 Next on the agenda was to shave the radio holes... 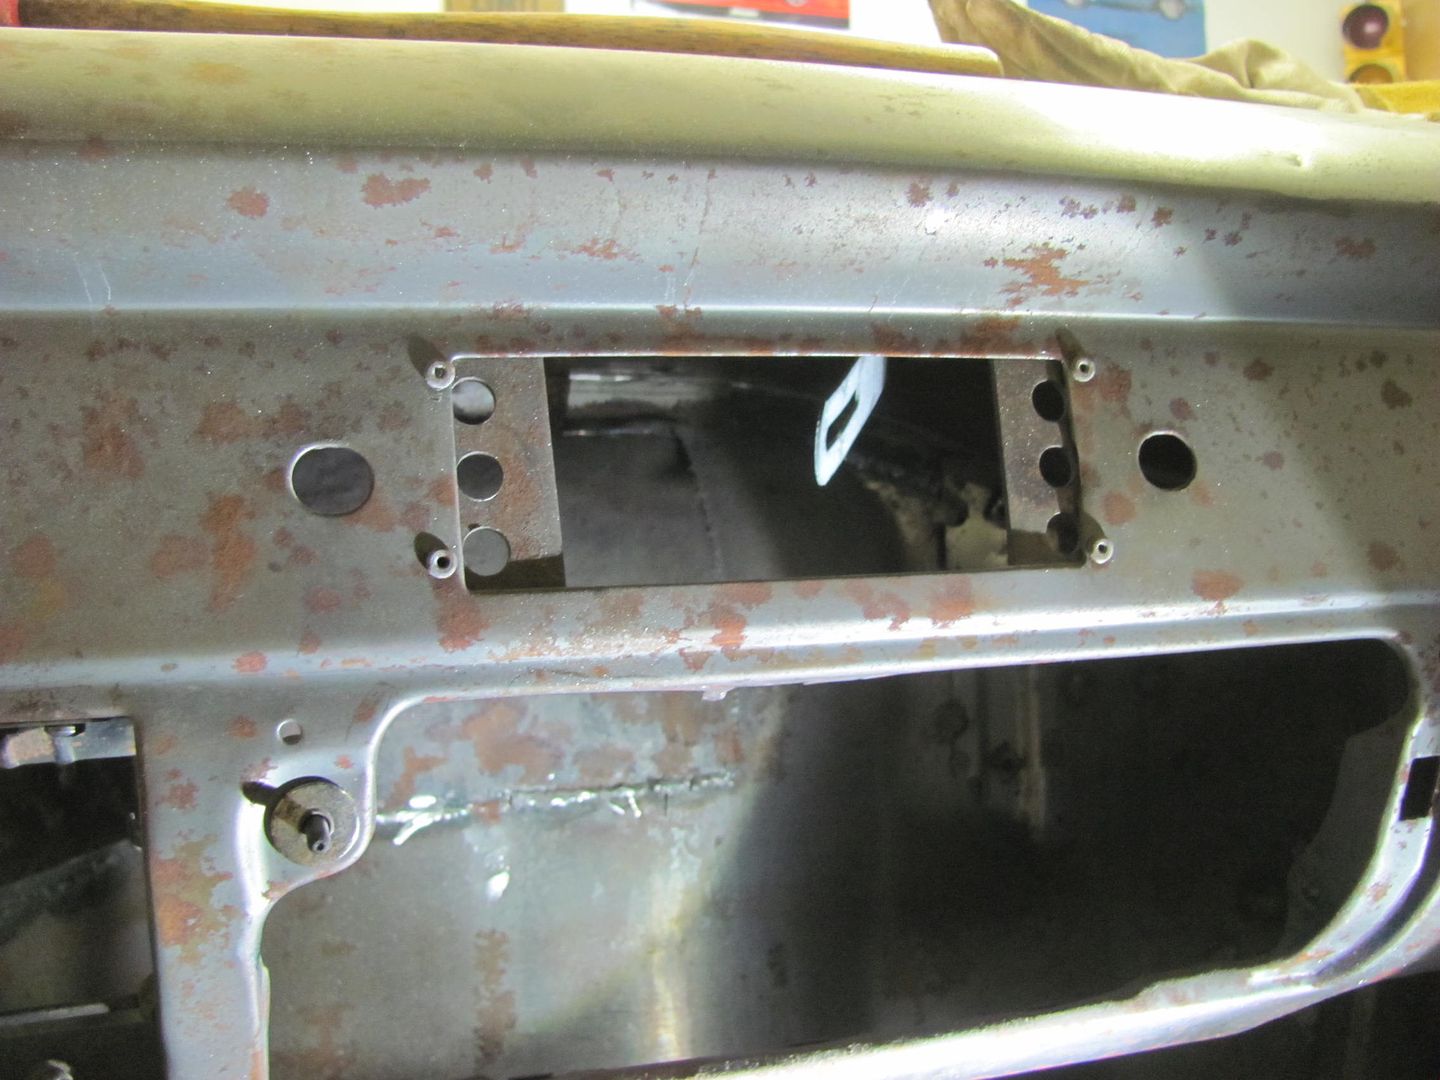  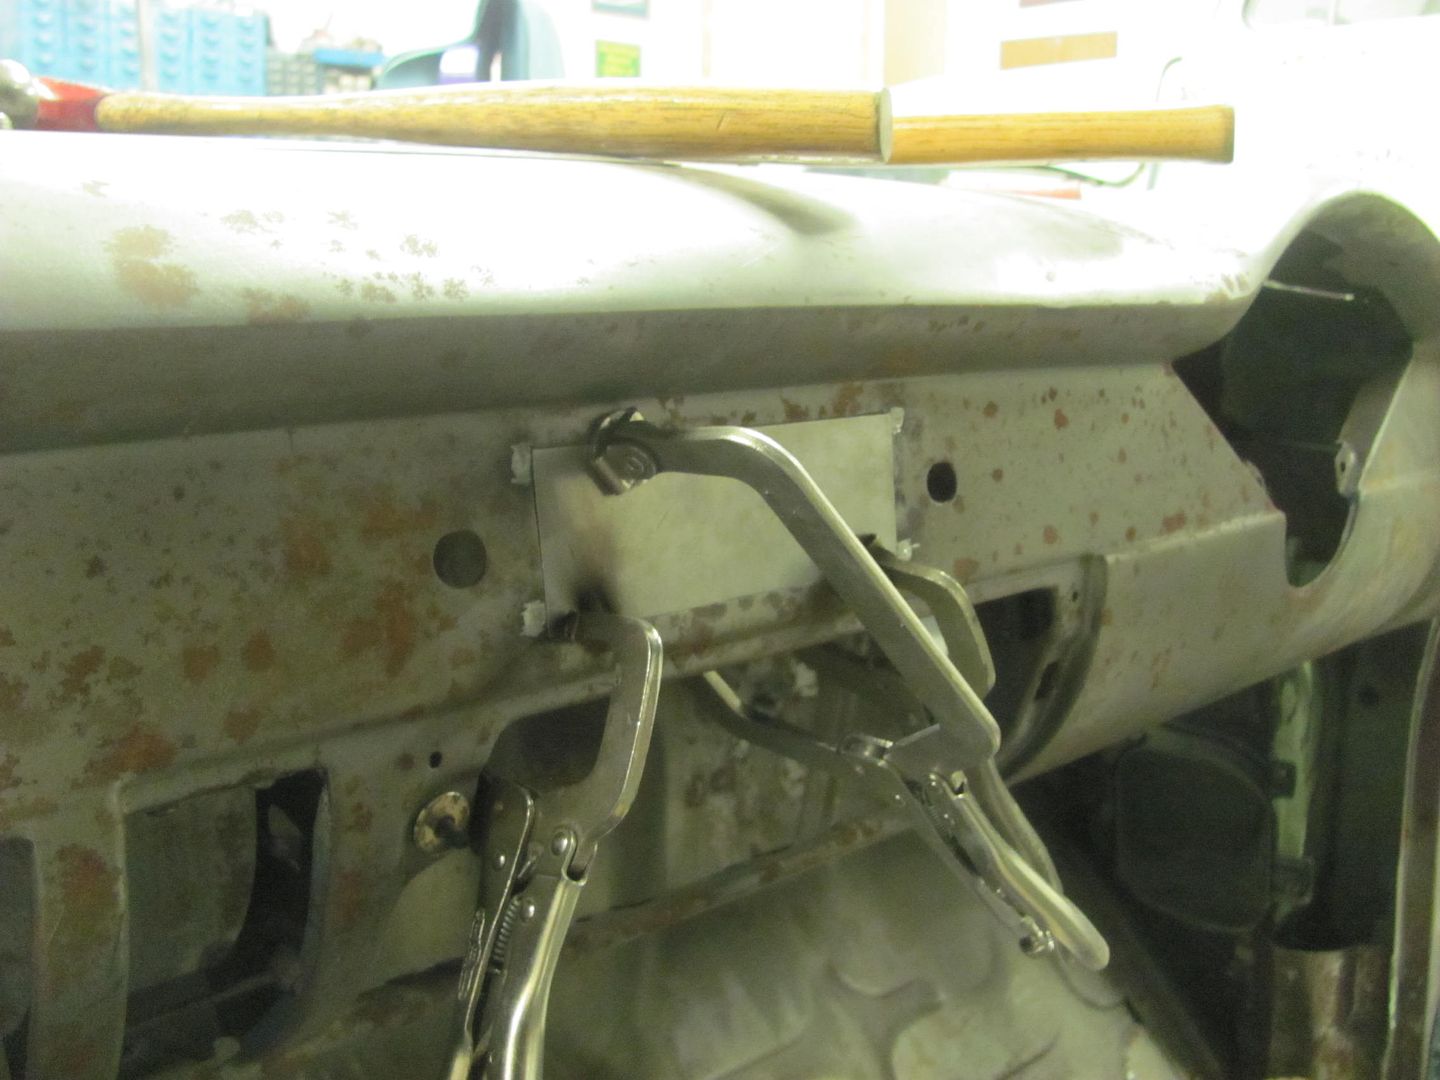 Weld, planish, grind, repeat... 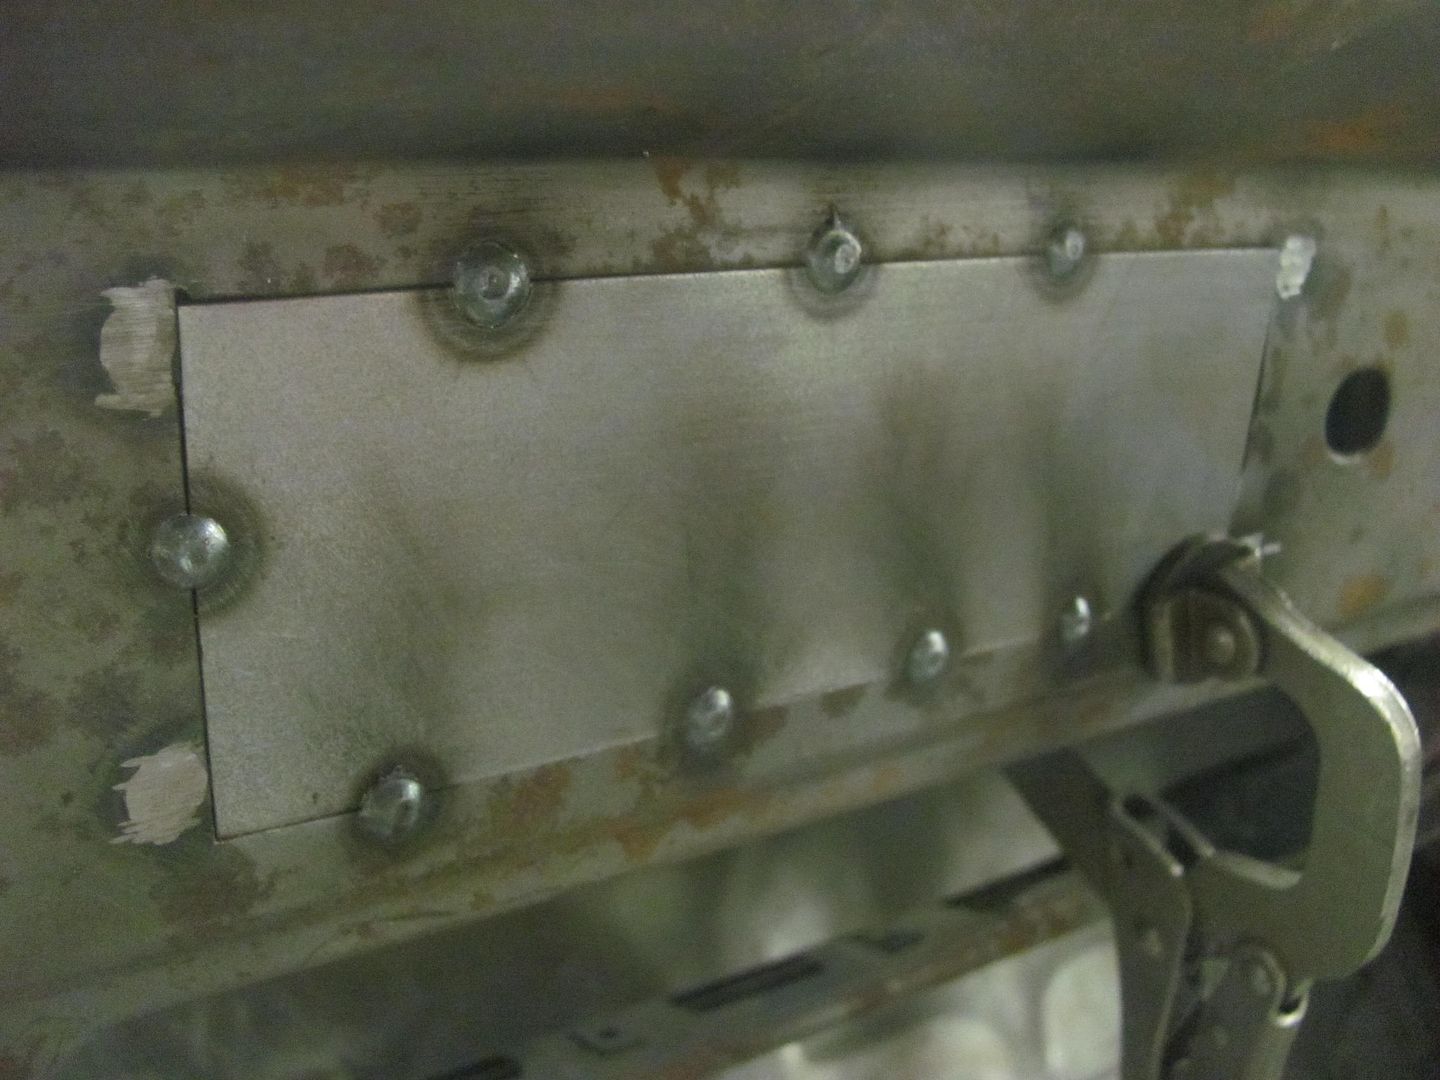 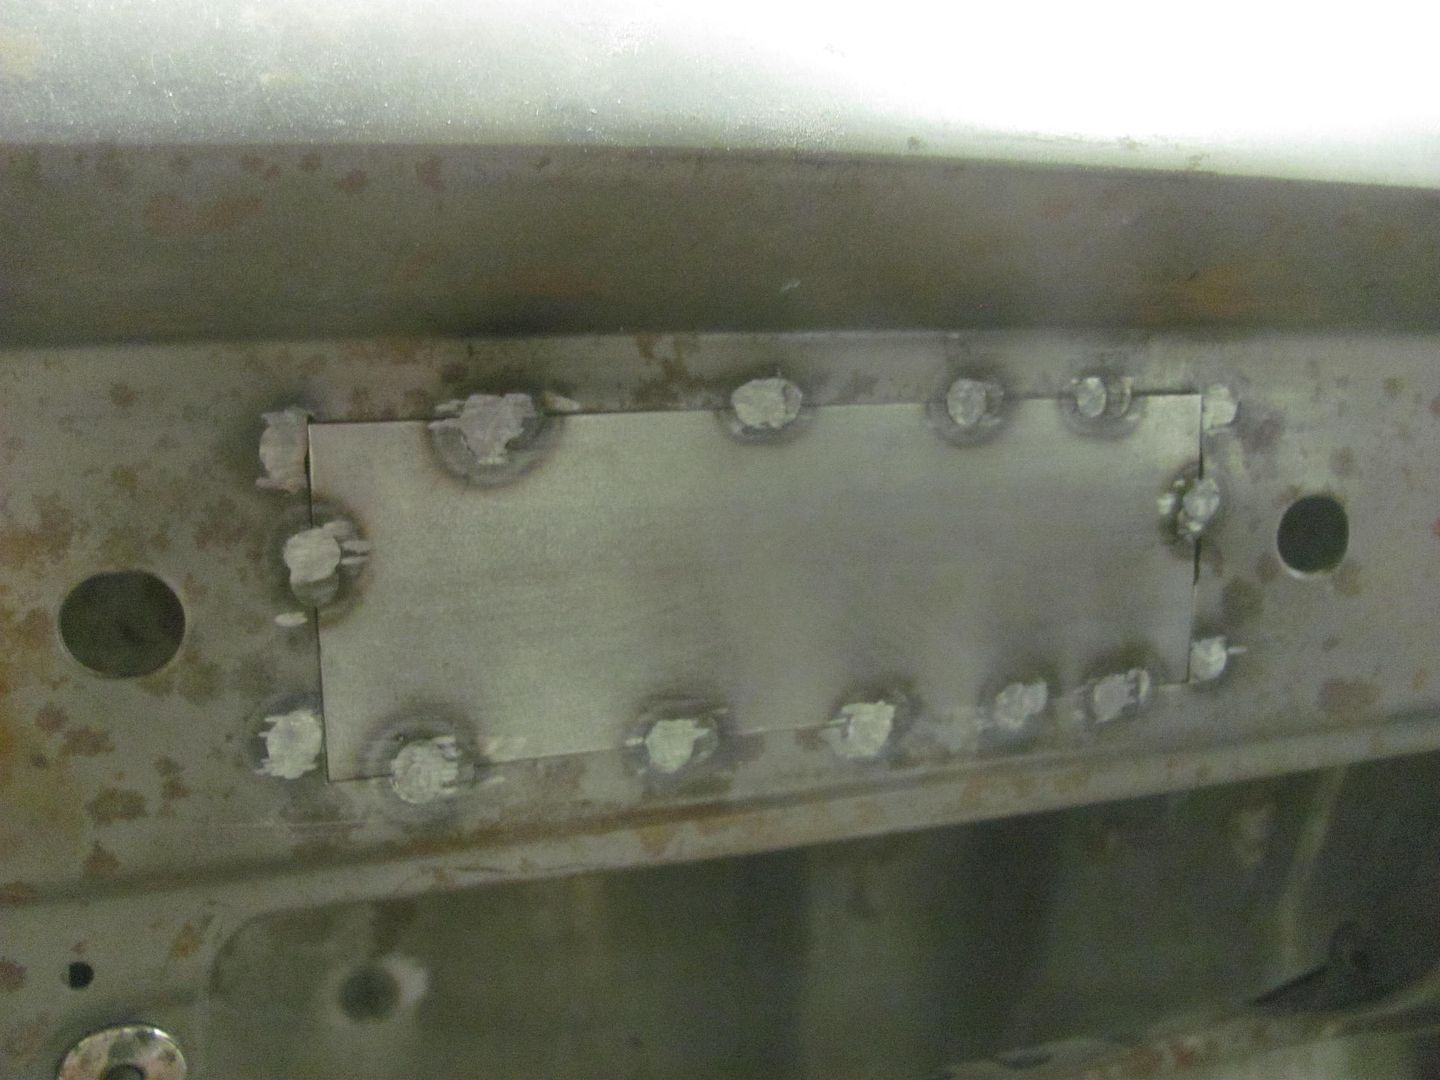
__________________
Robert |
|
|
|
|
04-21-2015, 10:57 PM
|
#425 |
|
Registered User
Join Date: Jan 2013
Location: Leonardtown, MD
Posts: 1,636
|
Re: 55 Wagon Progress
Kyle got some more welding done and we noticed the patch he made didn't quite have the same crown as the dash next to it. He had left the patch flat, so the difference was becoming more noticeable the more it was welded.
 So the Watervliet planishing hammer was used to add some crown to the panel, and also to planish some of the weld while we were at it.. An 8" radius lower die worked nicely to duplicate the crown: 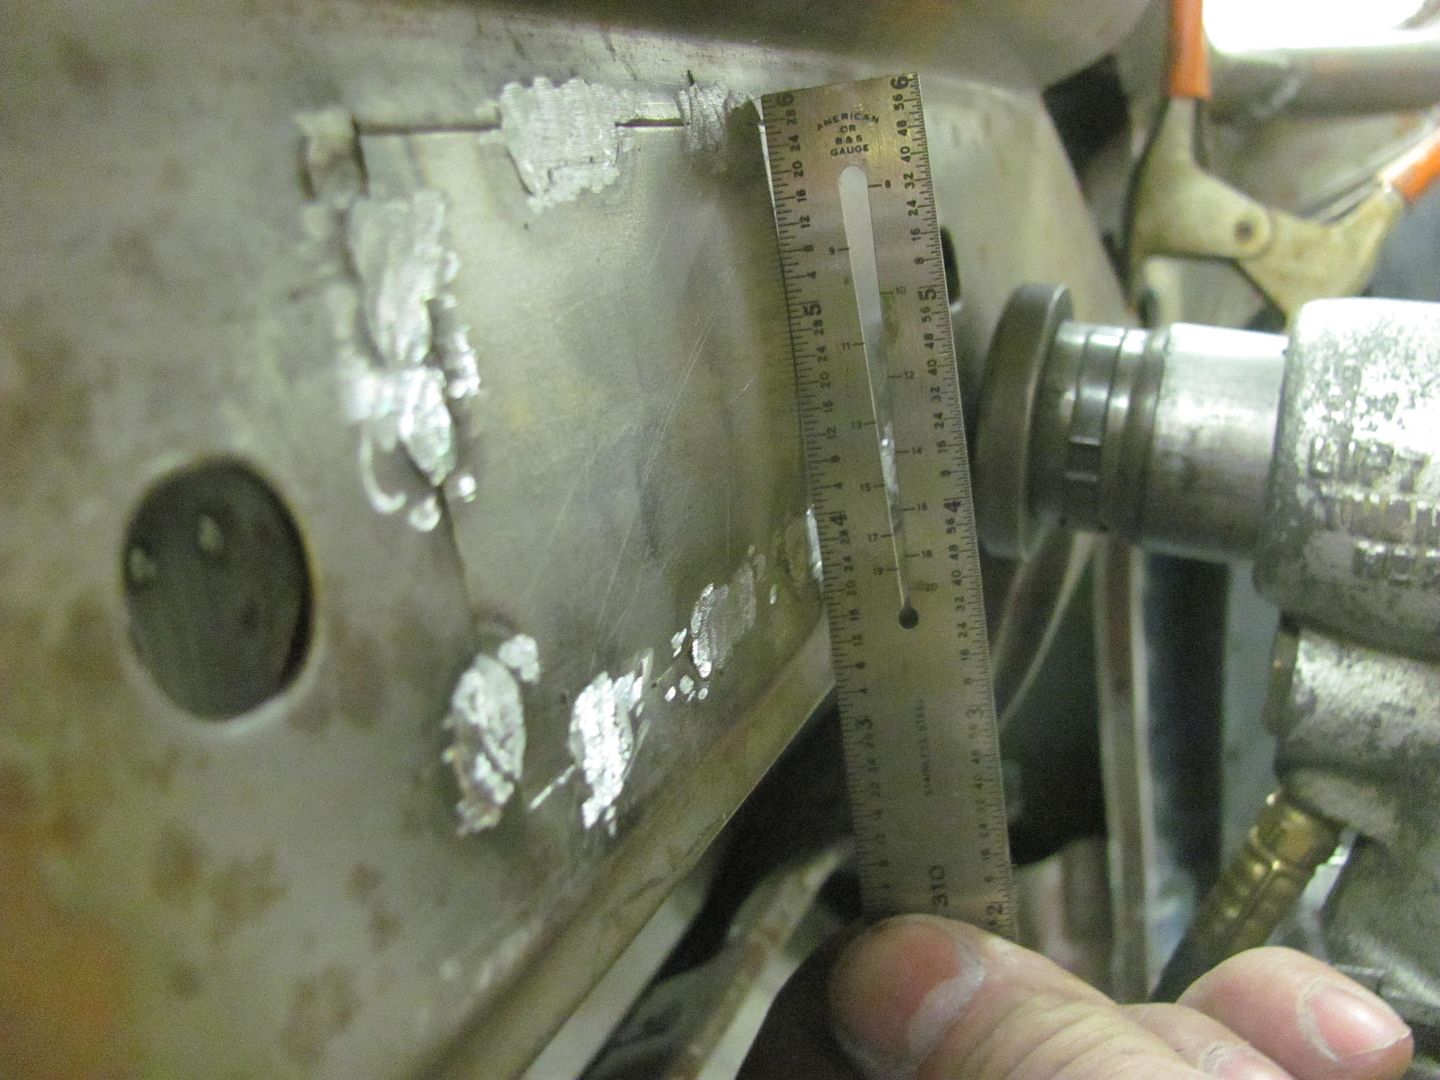 Planishing welds... https://youtu.be/fAnfqtw-C6I Two holes to go.. 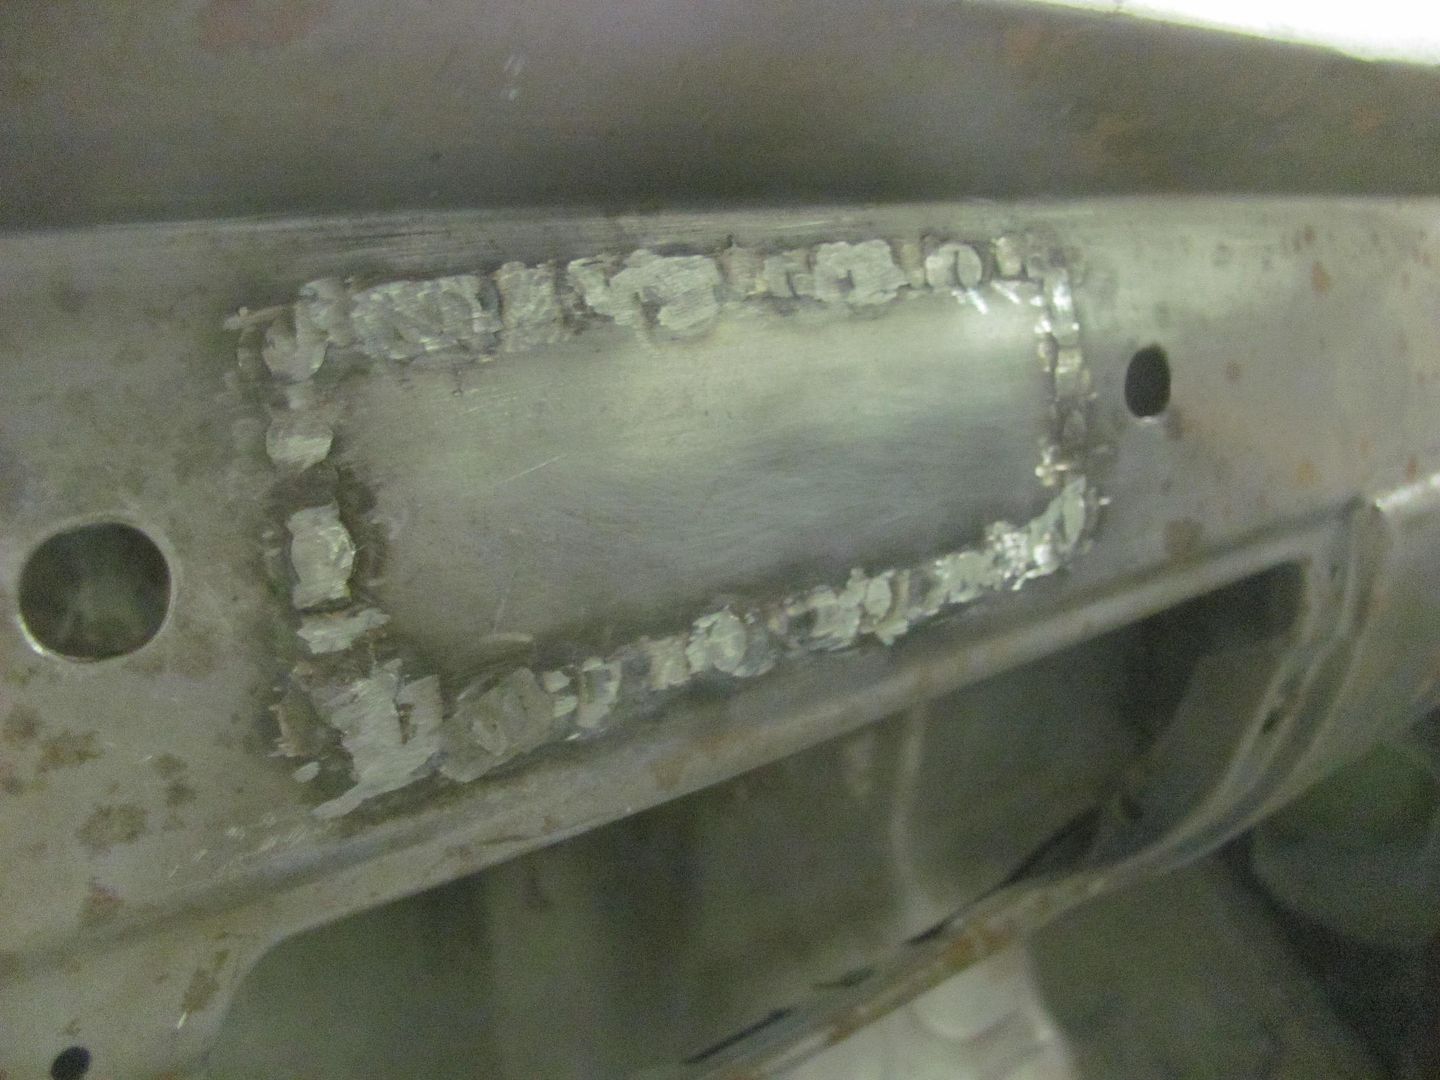 rear view... both sides still need sanding with the roloc, we'll get that once the radio knob holes are done and ready for sanding as well. 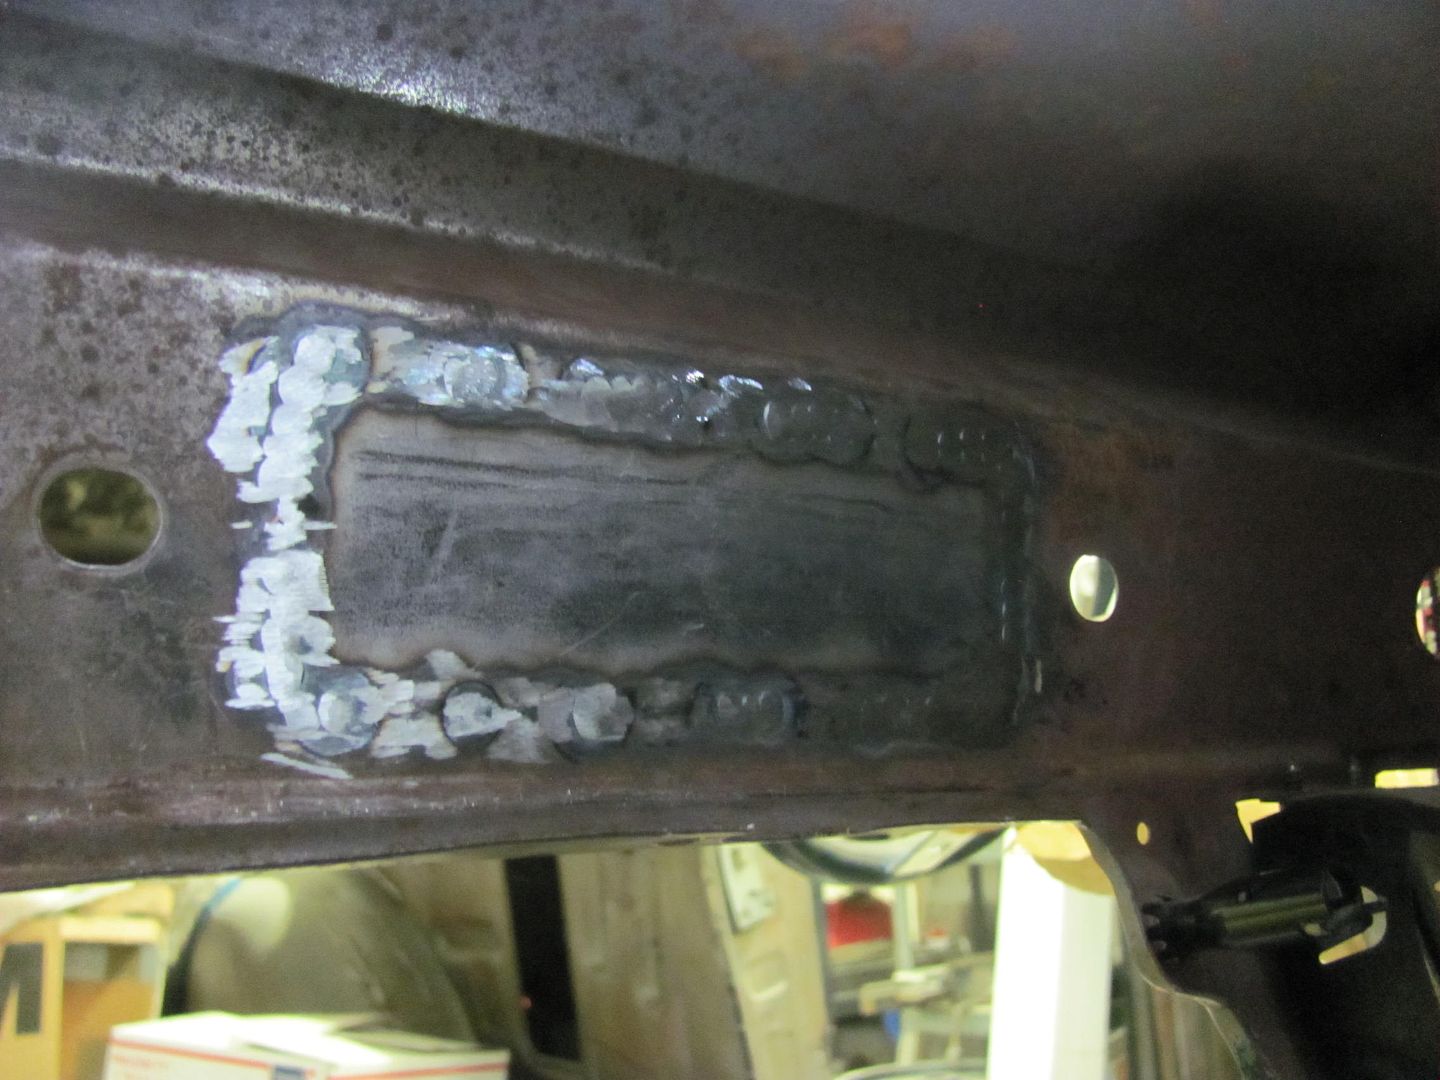 Tailgate is blocking out pretty nice, did have a few low spots to address that still need feathering out.... 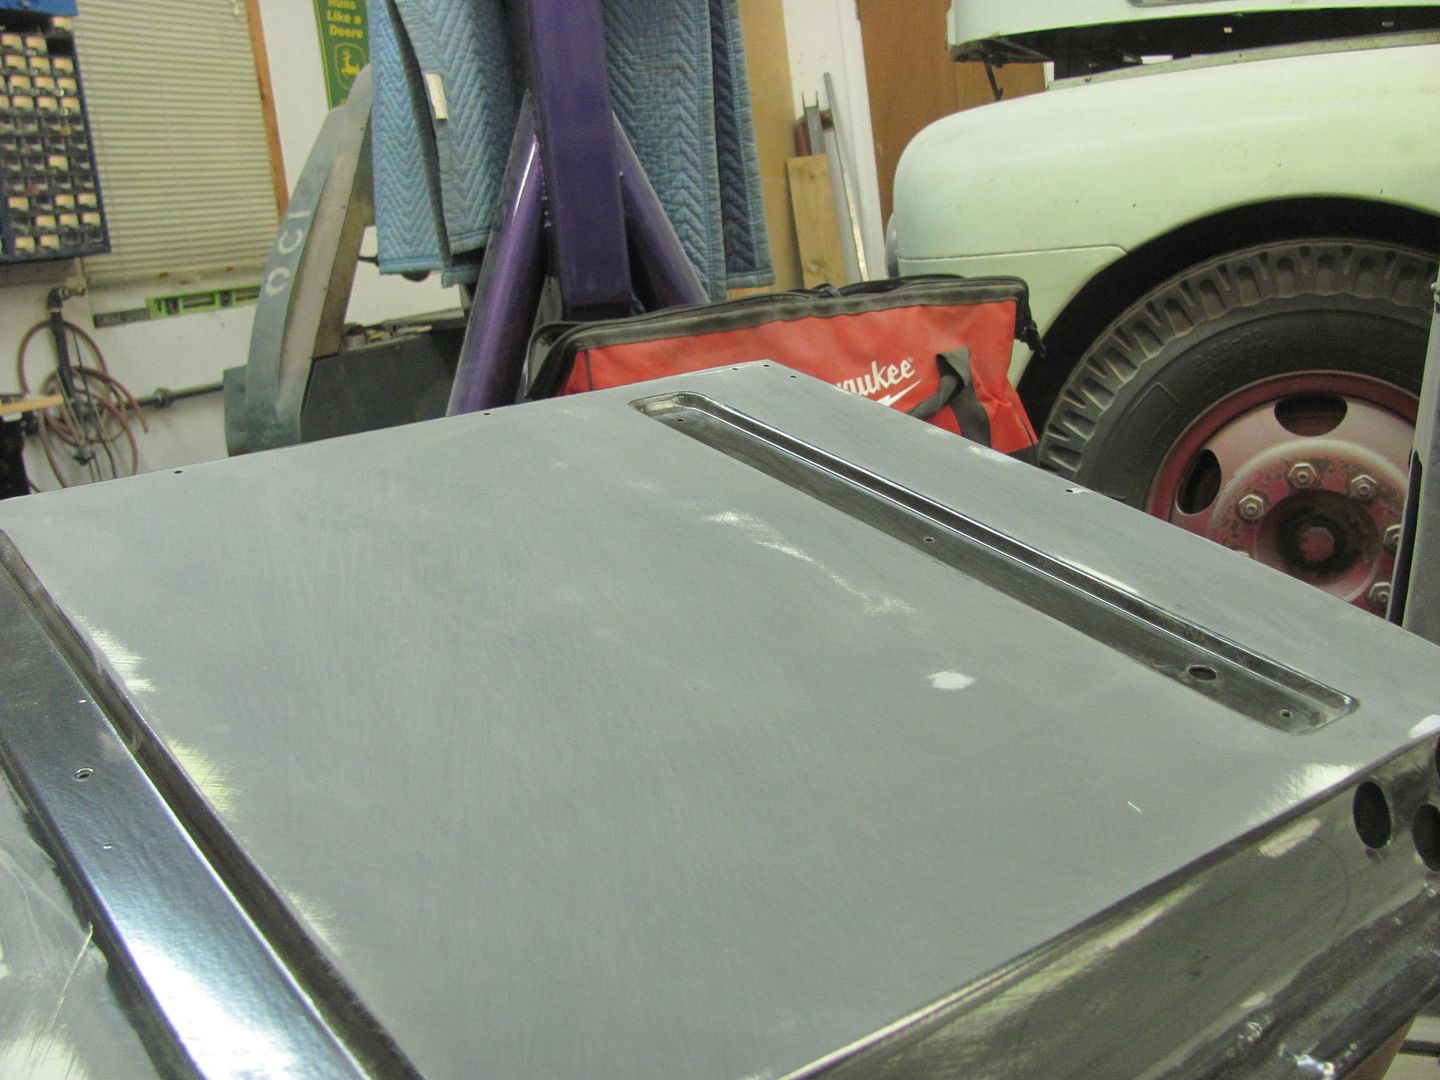 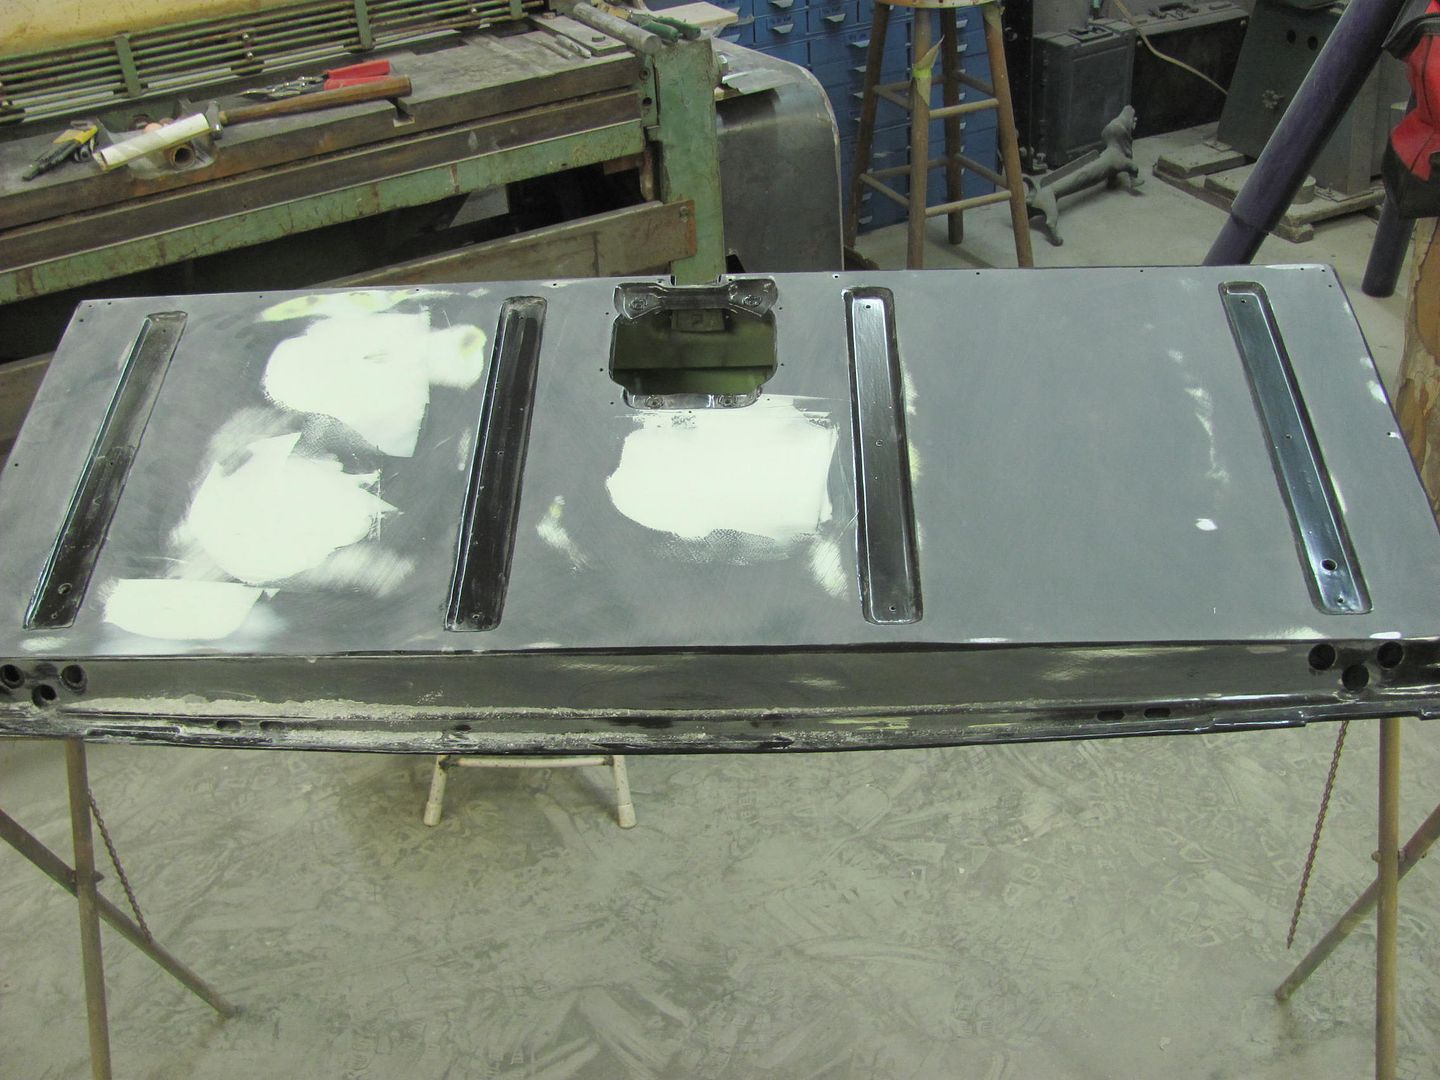
__________________
Robert |
|
|
|
 |
| Bookmarks |
|
|


 Linear Mode

