
 |
Register or Log In To remove these advertisements. |
|
|
|
|||||||
 |
|
|
Thread Tools | Display Modes |
|
|
|
|
#1 |
|
GEARHEAD
Join Date: Aug 2003
Location: MN
Posts: 6,120
|
Re: HG's Bigass Farm Truck
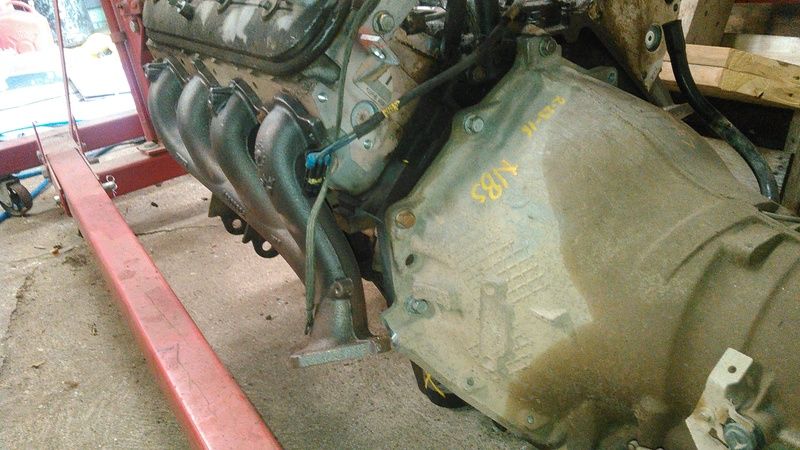
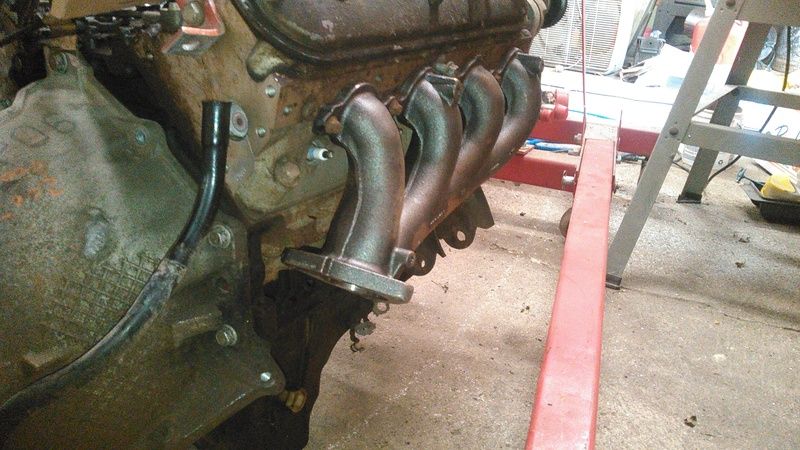
The trail blazer exhaust manifolds are here. I had the trim a corner off the transmission to clear it on the driver side. They really tuck in close.
  I haven't tried to set it in the truck yet. I'll need some help around here to do that. Last night I pulled out the old gas tanks. Still need to pull out the old fuel lines and stuff. I think the donor truck poly gas tank may fit. Length and width are very close but it's about 5" taller. 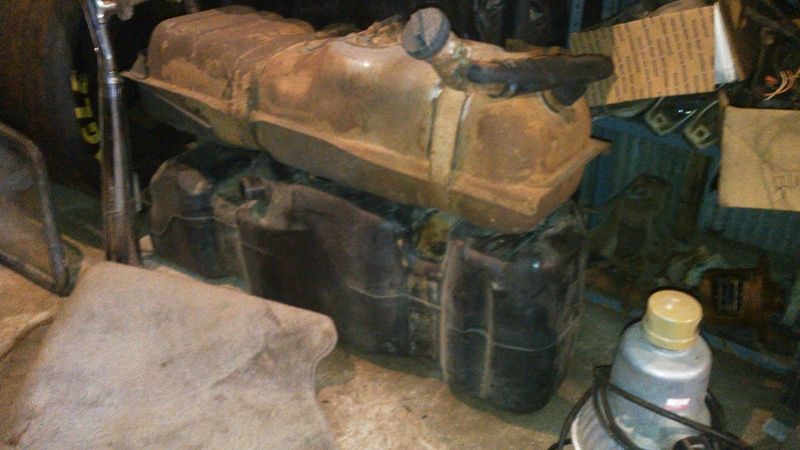 My helpers. Momma was gone for the night so they followed me around. 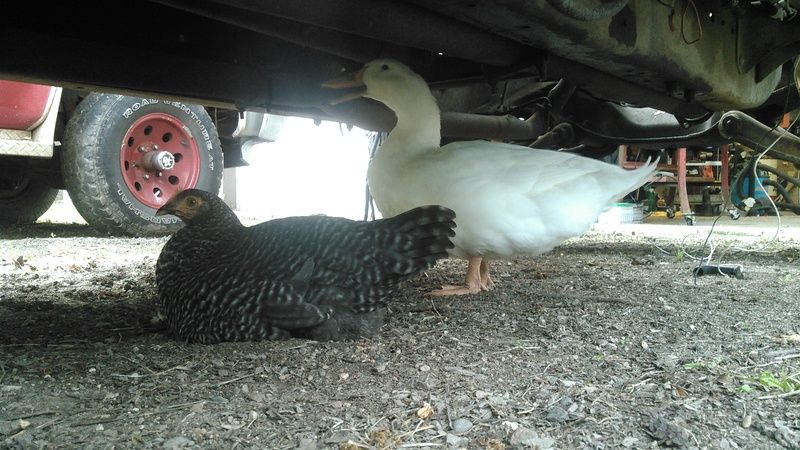 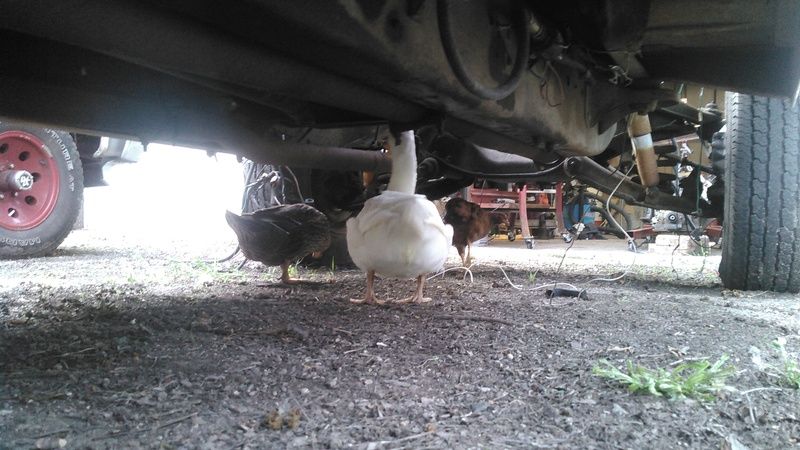
__________________
If no one knows what you're doing, they can't tell you you're doing it wrong HG's Dream Car Build - Shelby Cobra Kit Build your own adjustable track bar 71  Long Fleet C/10 Long Fleet C/10 72  Jimmy 4x4 (Junkyard Jimmy) Jimmy 4x4 (Junkyard Jimmy)HG's Plow Truck '78  K35 Dually K35 DuallyBigass Farm Truck HG's thread of miscellaneous stuff |
|
|

|
|
|
#2 |
|
GEARHEAD
Join Date: Aug 2003
Location: MN
Posts: 6,120
|
Re: HG's Bigass Farm Truck
Been busy but the engine isn't any closer to going in. So what have I been up to? Sold the big 4wd crewcab a couple weeks ago. Got engaged. Waiting for my old house in town to close, which has been delayed twice. And parting out the 1990 suburban for parts to be used on this truck (electronic speedo helps a bunch). Once I get the old house sold I'll have some money for buying what I need to fire the engine. The plan (subject to change) is that we get the truck running again this fall. Then the cab will be removed from the frame and set on blocks in the garage for body repairs. The truck is too long to work around in the garage. Once it's in primer we'll get it back on the frame and take the bed off and in the shop for body work. If all goes well, paint next spring/summer and roadtrip it somewhere. Hot Rod Power Tour possibly, if it's ready by then.
__________________
If no one knows what you're doing, they can't tell you you're doing it wrong HG's Dream Car Build - Shelby Cobra Kit Build your own adjustable track bar 71  Long Fleet C/10 Long Fleet C/10 72  Jimmy 4x4 (Junkyard Jimmy) Jimmy 4x4 (Junkyard Jimmy)HG's Plow Truck '78  K35 Dually K35 DuallyBigass Farm Truck HG's thread of miscellaneous stuff |
|
|

|
|
|
#3 |
|
Registered User
Join Date: Apr 2003
Location: Indep, MO
Posts: 5,893
|
Re: HG's Bigass Farm Truck
Good workin'! Didn't know you had this thread going. Hope the old house closes soon for ya.
__________________
Boppa's Old Yeller Truck Build, Old Yeller's New Heart! Project Buzz Bomb Flyin' Low! |
|
|

|
|
|
#4 |
|
GEARHEAD
Join Date: Aug 2003
Location: MN
Posts: 6,120
|
Re: HG's Bigass Farm Truck
This thread doesn't have much going on yet. House is supposed to close on the 14th. Fingers crossed. Once it does I'll probably buy the harness I need and get the ECU programmed and do what needs done to fire this thing up.
__________________
If no one knows what you're doing, they can't tell you you're doing it wrong HG's Dream Car Build - Shelby Cobra Kit Build your own adjustable track bar 71  Long Fleet C/10 Long Fleet C/10 72  Jimmy 4x4 (Junkyard Jimmy) Jimmy 4x4 (Junkyard Jimmy)HG's Plow Truck '78  K35 Dually K35 DuallyBigass Farm Truck HG's thread of miscellaneous stuff |
|
|

|
|
|
#5 |
|
GEARHEAD
Join Date: Aug 2003
Location: MN
Posts: 6,120
|
Re: HG's Bigass Farm Truck
As usual, everything is taking longer than I ever expected, but am never surprised by. Since the last post, my old house finally was officially sold. I got married. Since I finally got out from under the second house payment I bought enough steel to do the roofs on all 3 garages and finished doing that a couple weeks ago. Started getting house windows replaced even though winter finally decided to make an entrance. In a big way too. I finished parting out the 90 burb and traded the empty husk for a vortec cylinder head (I bought the 2nd one).
And another bit of big news... The previous owner of this place finally finished removing all of his stuff, so as of 12/4/16 everything that is on the property is mine. No more sharing. As you can imagine, there wasn't much time for car/truck stuff. But I did add to my collection of miscellaneous vehicular projects in the midst of this hurricane of activity. A guy I used to work with needed to clean out one of his sheds and I ended up with a 1979 kawasaki KZ1300, 1983 Datsun 280zx, 1969 (I think) Honda 90, a car dolly and then a 2000 Jeep Cherokee. The last one was his wifes daily and had a good title. The rest of it will take me a couple months to get registered. As for this project, I had been accumulating the parts to mount the engine and connect it to the truck controls, but mainly it sat in front of the garage. With a winter storm brewing and me being tired of being a part time carpenter, the boy and I dropped the engine/tranny into the truck. It fit, but I have to work on the mount alignment and nothing is connected to it. 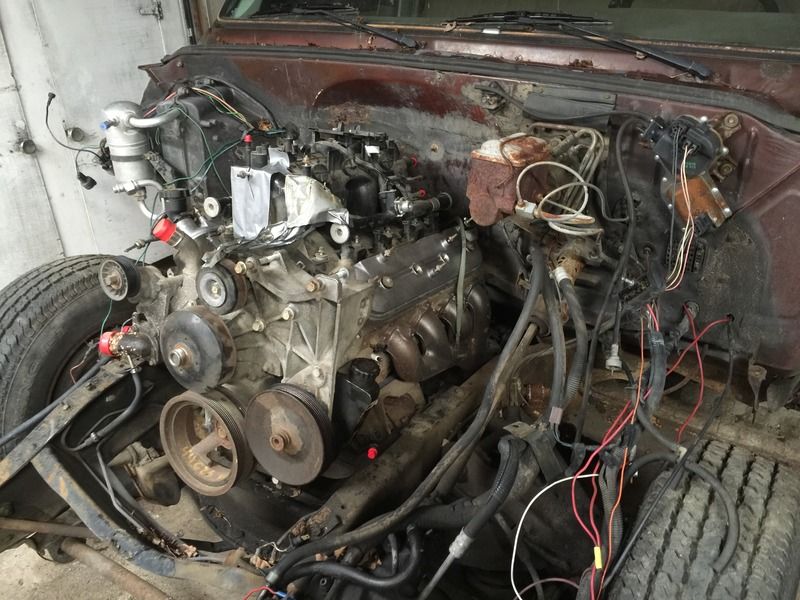 Then I took my 71 out of the 1 car garage that has been its home the past year and moved it to the machine shed. We did a quick clean out of some of the junk in that garage so the 22' behemoth would fit inside. We used the plow truck to pull and push the farm truck into the garage for the first time in only God knows how long. 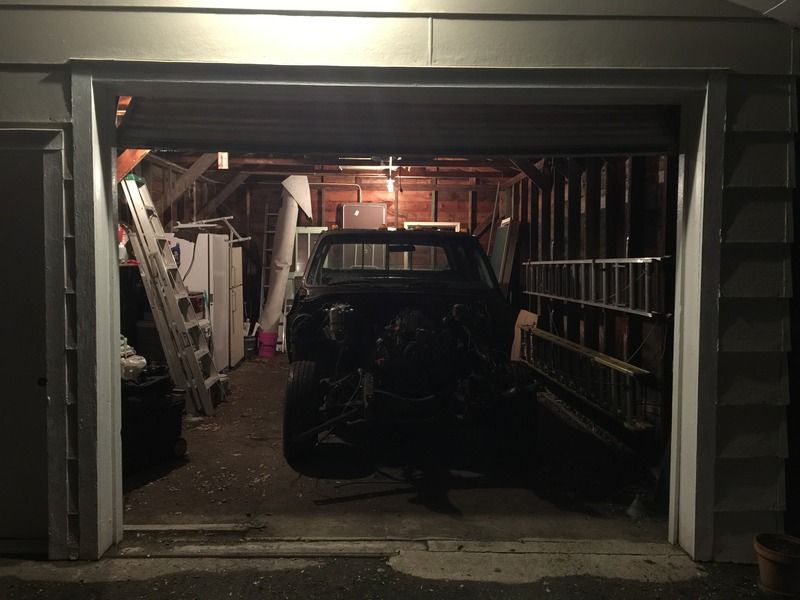 It's not ideal, but it fits and I have room to work on it. That garage has power and lights but no heat or insulation. I'm attempting to change that. I bought a heater the other day. I still need to get a propane tank moved to this garage and hooked up, and I ordered a blower fan for it to help. If it can't keep up like this I'll have to get some insulation in there. 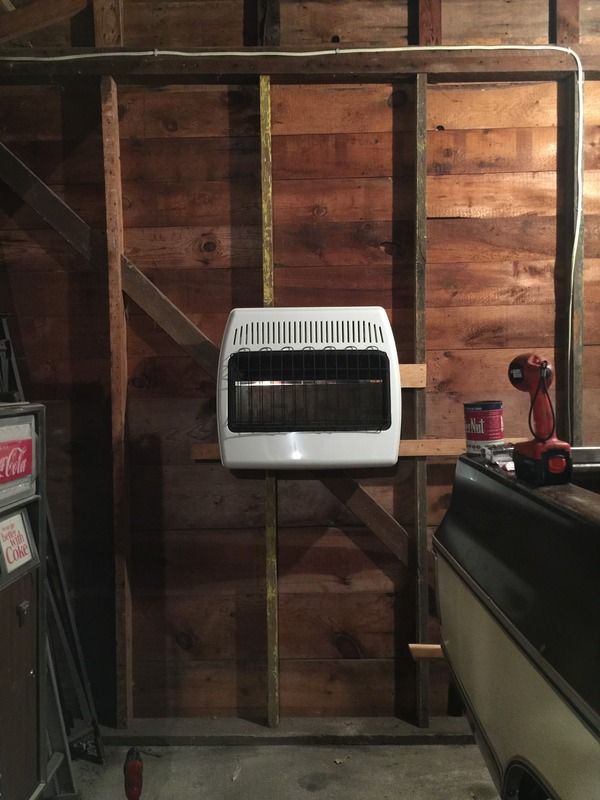 I do have a propane fired bullet heater that works alright too. I bought a couple more lights to brighten the place up. I bought a shelf/workbench to use in there. This will be better than many people have to work with or in. Hopefully I'll get the time to do something more than a quarterly update. I still want to drive it and have it painted by early summer.
__________________
If no one knows what you're doing, they can't tell you you're doing it wrong HG's Dream Car Build - Shelby Cobra Kit Build your own adjustable track bar 71  Long Fleet C/10 Long Fleet C/10 72  Jimmy 4x4 (Junkyard Jimmy) Jimmy 4x4 (Junkyard Jimmy)HG's Plow Truck '78  K35 Dually K35 DuallyBigass Farm Truck HG's thread of miscellaneous stuff |
|
|

|
|
|
#6 |
|
Registered User
Join Date: Oct 2015
Location: PNW
Posts: 3,545
|
Re: HG's Bigass Farm Truck
Wow hgs, I feel like I lived half a lifetime in your last few posts. Good work man. New wife, new job, new house, new roofs, new trucks, new ducks, and a few other new projects. Same dog? Cool gig you got! I look forward to watching your truck project come together along with anything else you're working on. Hope you update us on it all. I'm intrigued by the 47 Olds. Great angle on it in the picture you took. I don't know Olds well til the 1960s, but I'm a fan. Cool building it's in too. I like the way the building it's in shows the ribs and sheathing.
|
|
|

|
|
|
#7 | |
|
GEARHEAD
Join Date: Aug 2003
Location: MN
Posts: 6,120
|
Re: HG's Bigass Farm Truck
Quote:
https://www.youtube.com/watch?v=gwh8...&feature=share Mine is stored at my new step sons place. It is a cool shed. I'll probably drag it home next summer. This is where I found it... 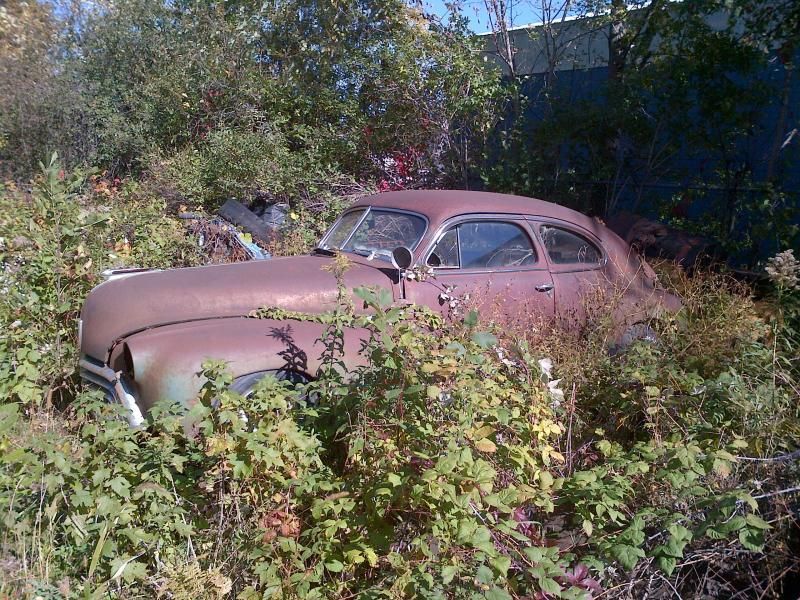
__________________
If no one knows what you're doing, they can't tell you you're doing it wrong HG's Dream Car Build - Shelby Cobra Kit Build your own adjustable track bar 71  Long Fleet C/10 Long Fleet C/10 72  Jimmy 4x4 (Junkyard Jimmy) Jimmy 4x4 (Junkyard Jimmy)HG's Plow Truck '78  K35 Dually K35 DuallyBigass Farm Truck HG's thread of miscellaneous stuff |
|
|
|

|
|
|
#8 |
|
GEARHEAD
Join Date: Aug 2003
Location: MN
Posts: 6,120
|
Re: HG's Bigass Farm Truck
I eventually got the heater hooked up to the propane tank and got it fired up. I ordered a little fan that fits the back of the heater but it really doesn't do much. I would have been money ahead just setting a small box fan on top of the heater. But it does work. The garage isn't insulated and the main door was crap but it still managed to warm it up with outside temps around zero.
To improve things the boy and I stapled a layer of plastic to the bottom of the rafters. It keeps the heat down lower. Cheap and effective. 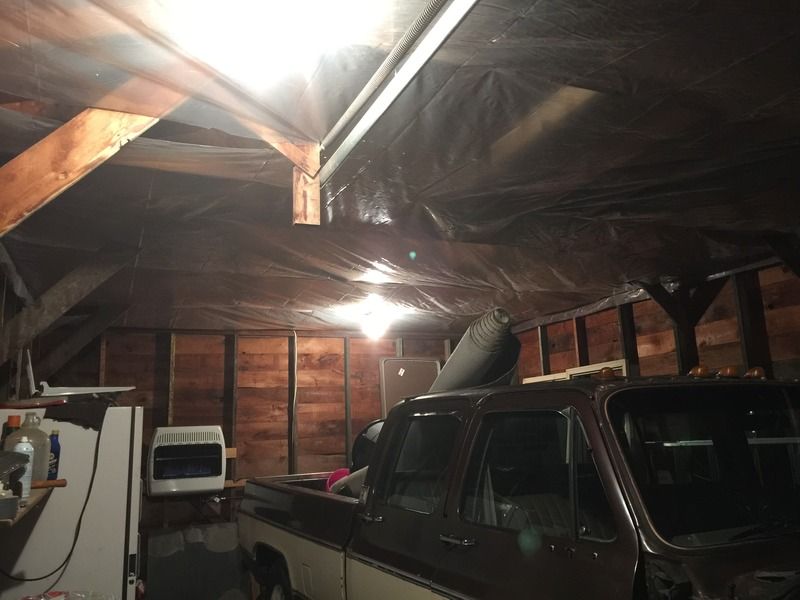 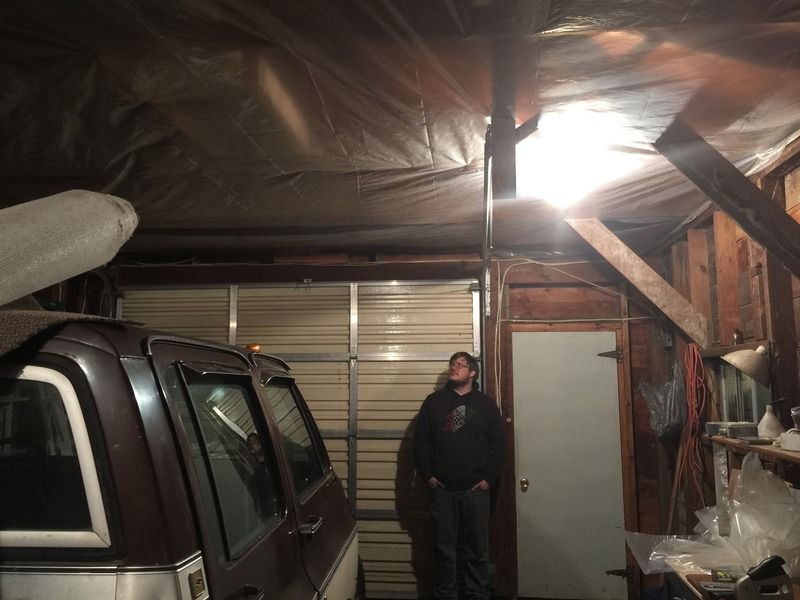 I also found a great deal on a really nice insulated garage door on craigslist. We painted it to match the garage and I got it installed a couple weeks ago. 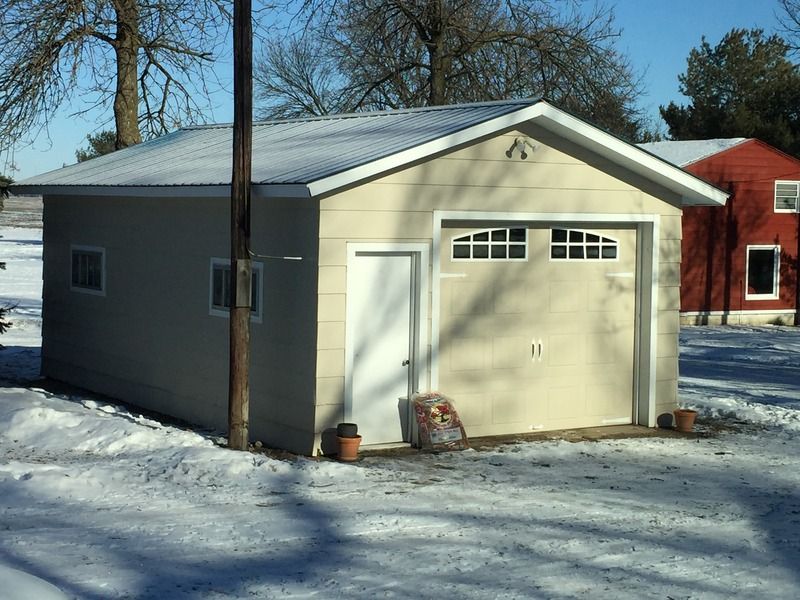 And I did put a box fan on top of the freezer in there to circulate the air. Makes a big difference. So now we can work in relative comfort. My son pulled the passenger side doors off last week. Yesterday I pulled out the seats and seatbelts on that side and lifted the carpet out of the way. The rear door opening looks alright. Just needs the outer rocker, unless we find something after we cut that out. The front replacement rocker I picked up will work good to patch the rear door rocker so that eases my concern for that. 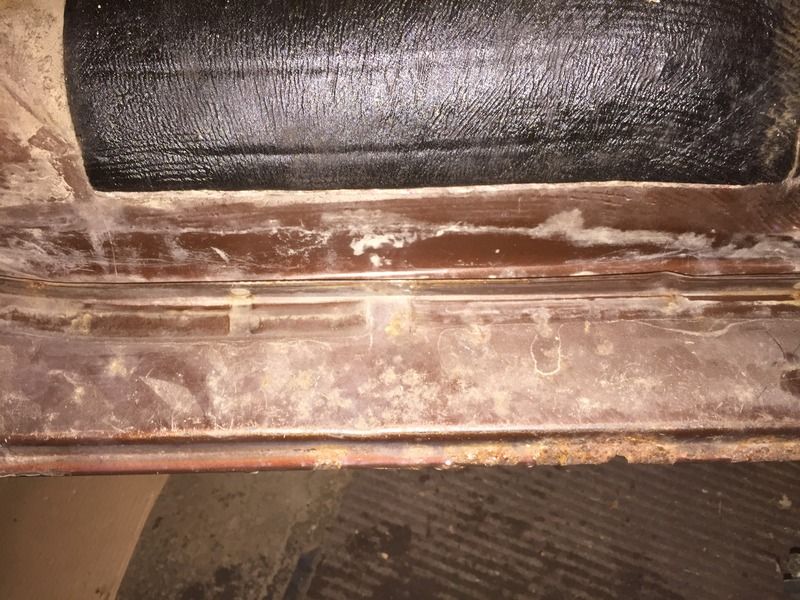 The front rocker and floor were a bit worse. Looks like I'll have to do the inner and outer rocker and a little bit of floor under the seat by the door. 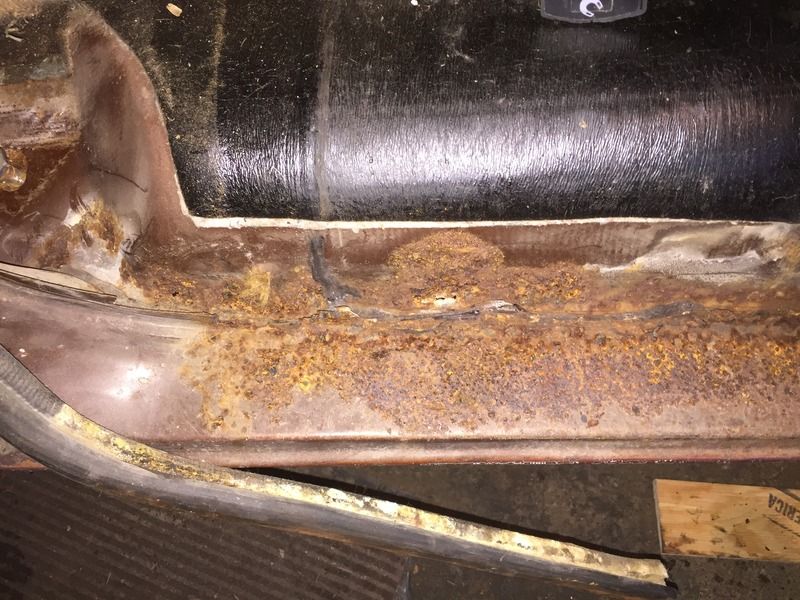 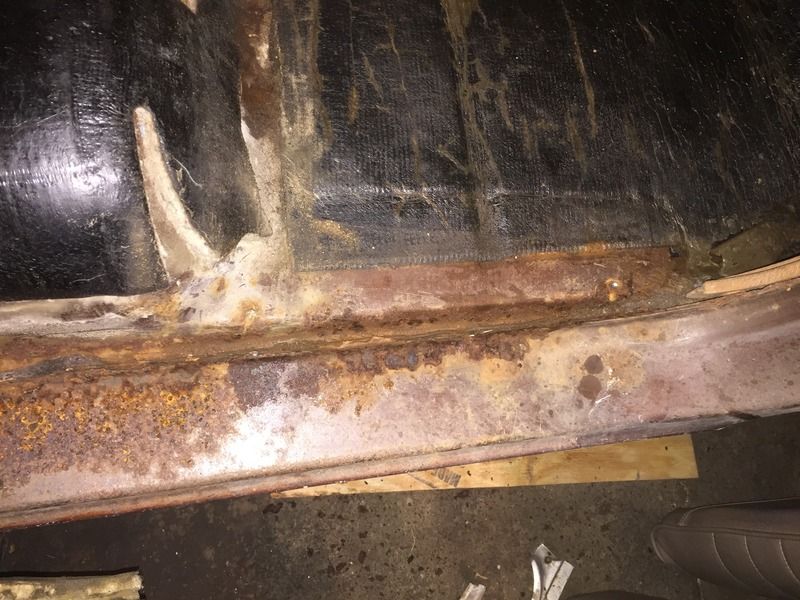 I started working on the engine mounts but called it a day before I really completed anything with those. The other night I met up with another board member I've become good friends with. We have been batting around the idea of a road trip for a while now. The subject came up again. We want to go out west with a classic truck. He's got a 68 stepper and a late 80's suburban. I've got my 71 which will have a new engine in the spring, but this is the one I'd like to take. We don't really care if it's finished completely as long as it's running dependably. So I want to keep working on it and get it going by spring. If we can get the rust on the cab done there isn't much other rust to fix. The replacement doors might need a little work. I have good fenders and a hood for it. So maybe just get it in primer and go. It's still a ton of work though, so we could end up taking our pickups. No sweat. So mentioned going to Bonneville for speedweek and I'd love to, but it's in August and it's usually pretty busy around here then. So he mentioned a microbrew tour. My son just turned 21 also. I found a name for the farm truck when he brought this up. Meet the Brewcab.    
__________________
If no one knows what you're doing, they can't tell you you're doing it wrong HG's Dream Car Build - Shelby Cobra Kit Build your own adjustable track bar 71  Long Fleet C/10 Long Fleet C/10 72  Jimmy 4x4 (Junkyard Jimmy) Jimmy 4x4 (Junkyard Jimmy)HG's Plow Truck '78  K35 Dually K35 DuallyBigass Farm Truck HG's thread of miscellaneous stuff |
|
|

|
|
|
#9 |
|
GEARHEAD
Join Date: Aug 2003
Location: MN
Posts: 6,120
|
Re: HG's Bigass Farm Truck
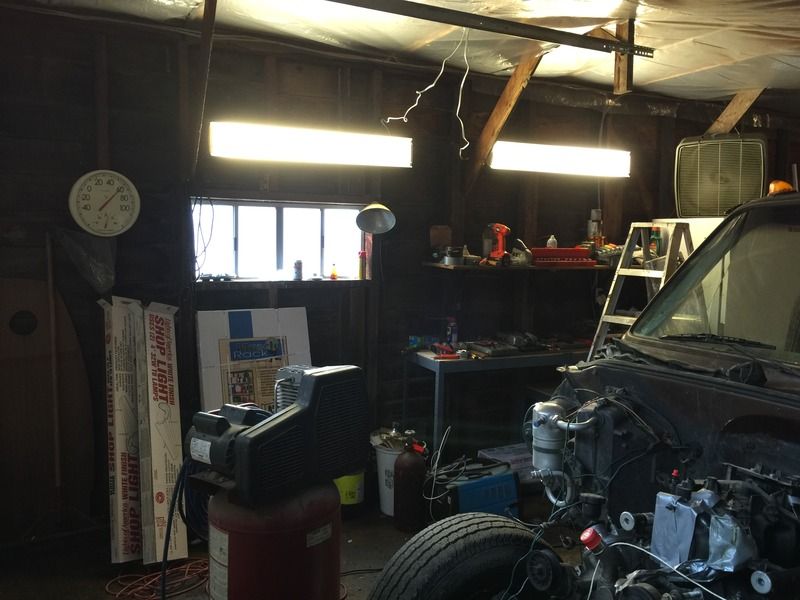
I started out by upgrading the lighting in the garage a bit. Makes a huge difference.
 Today I wanted to get the motor mounts figured out. There was a significant amount of misalignment. I tried loosening everything up from the frame towers to the adapter plates but there wasn't enough give. I double checked the replacement mounts part numbers and they are the same from BBC to SBC. So I started looking at the frame towers and the bracket to the adapter plates. I compared them with the ones on my 76 plow truck and they are different, but that is also a 4x4. So I found a set of mounts taken from the suburban 350 and compared them to the ones off the BBC. Found the culprit... 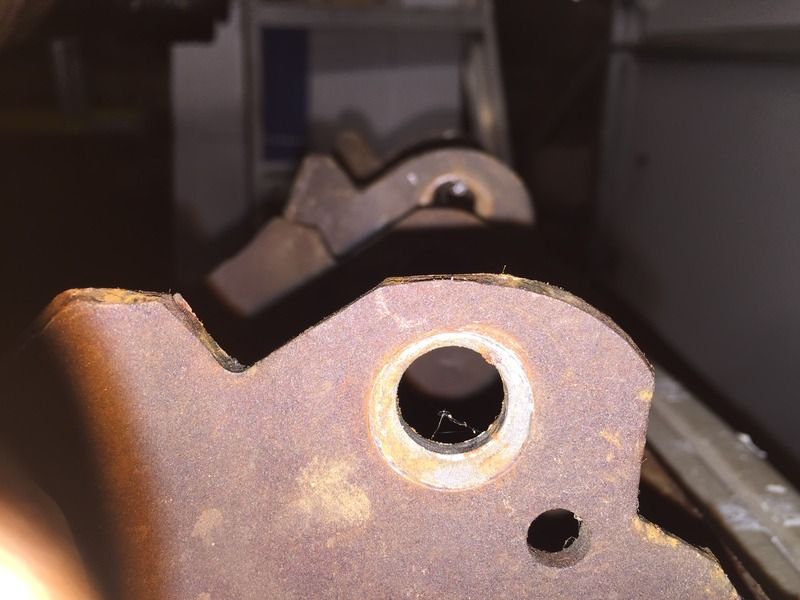 The holes from the BBC bracket are about 3/8" further from the engine. The adapter plates are designed for SBC mounts. I didn't know until today they were different. Also, the center section of that bracket is punched out a bit and interferes with the adapter plates, so I had to cut the centers out of the plates. I'm sure they are still plenty strong. So anyway, the motor mounts are in and I just need to tighten all the bolts back up. I need to get the tranny mount in and after that I can start hooking up everything else. The boy got the driver side doors off and we got a closer look at the rockers on the other side. Looks worse on the front rocker but it's basically the same amount of work. I told him to start cutting and I'll pick up the patch panels. Front... 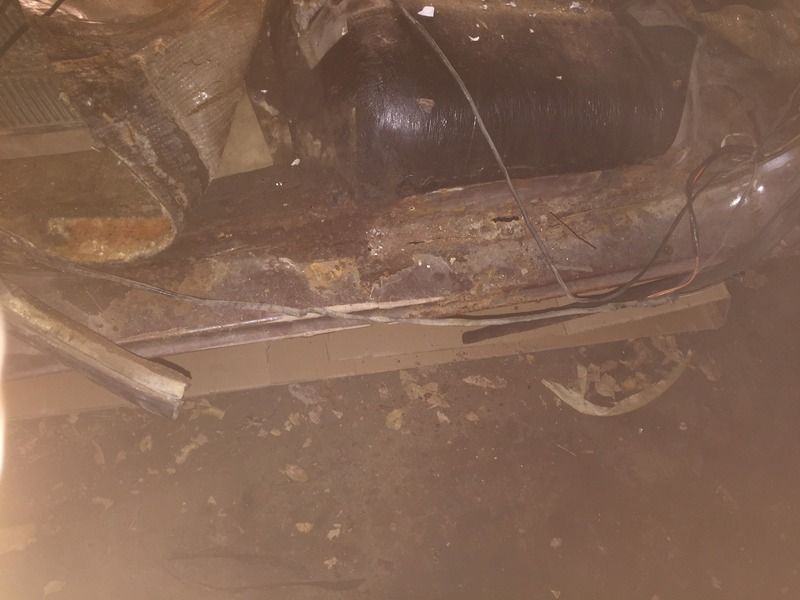 Rear... 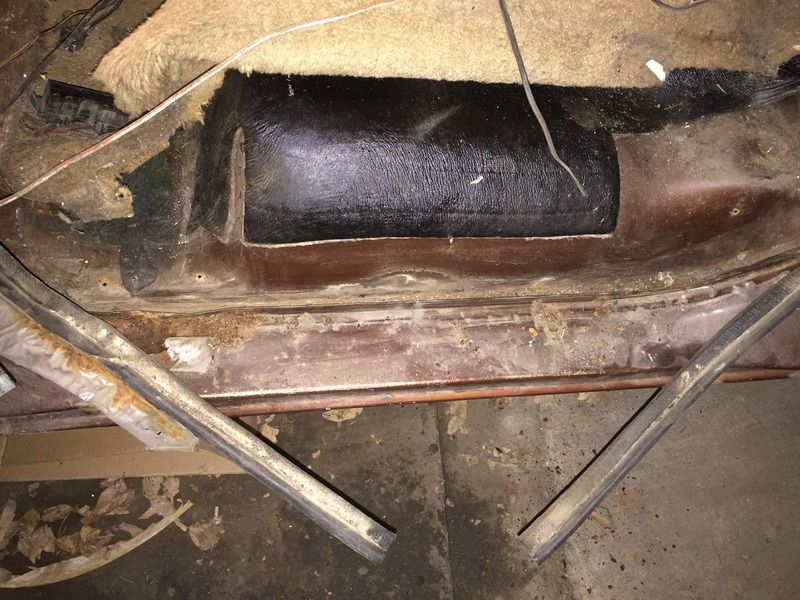
__________________
If no one knows what you're doing, they can't tell you you're doing it wrong HG's Dream Car Build - Shelby Cobra Kit Build your own adjustable track bar 71  Long Fleet C/10 Long Fleet C/10 72  Jimmy 4x4 (Junkyard Jimmy) Jimmy 4x4 (Junkyard Jimmy)HG's Plow Truck '78  K35 Dually K35 DuallyBigass Farm Truck HG's thread of miscellaneous stuff |
|
|

|
|
|
#10 |
|
Registered User
Join Date: Nov 2015
Location: Smethport, PA
Posts: 1,213
|
Re: HG's Bigass Farm Truck
I'm loving the olds.
__________________
85 K30 crew cab dually - Project http://67-72chevytrucks.com/vboard/s...d.php?t=694939 87 Wrangler Rock Crawler - Reason for the project http://www.wranglerforum.com/f330/da...ld-122601.html 04 1500 crew cab http://67-72chevytrucks.com/vboard/s...d.php?t=786514 |
|
|

|
|
|
#11 | |
|
Registered User
Join Date: Oct 2015
Location: PNW
Posts: 3,545
|
Re: HG's Bigass Farm Truck
Quote:
|
|
|
|

|
|
|
#12 |
|
GEARHEAD
Join Date: Aug 2003
Location: MN
Posts: 6,120
|
Re: HG's Bigass Farm Truck
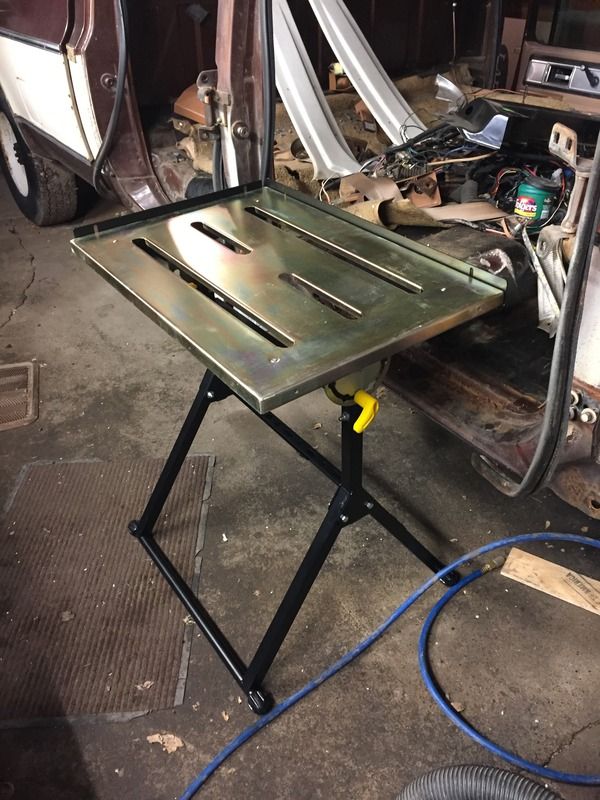
Not a lot of progress the past couple days. I've been distracted with some new toys. Got a new portable welding table...
 Got a new saw for all my fancy trim work on the house. 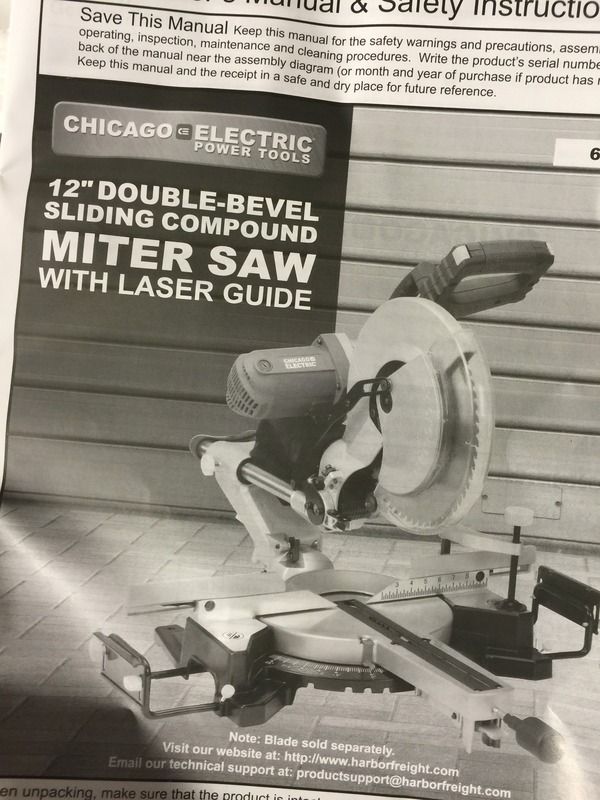  As for the truck, I got the transmission mount bolted up. I didn't need to move the crossmember. I just drilled a new hole. It's not directly centered in the crossmember. It's back about an inch but I really don't think it'll be a problem. 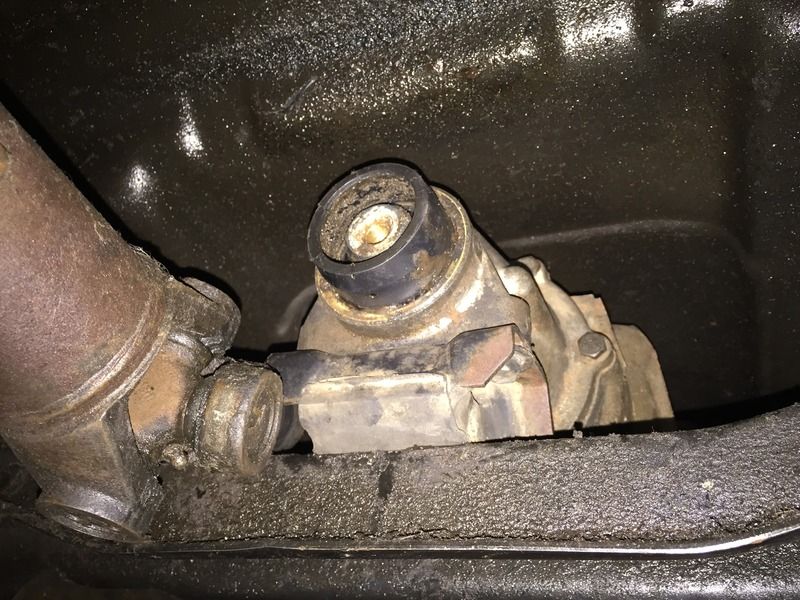 You can see that the driveshaft is looking a little too long, and I had hoped it wouldn't but there it is. 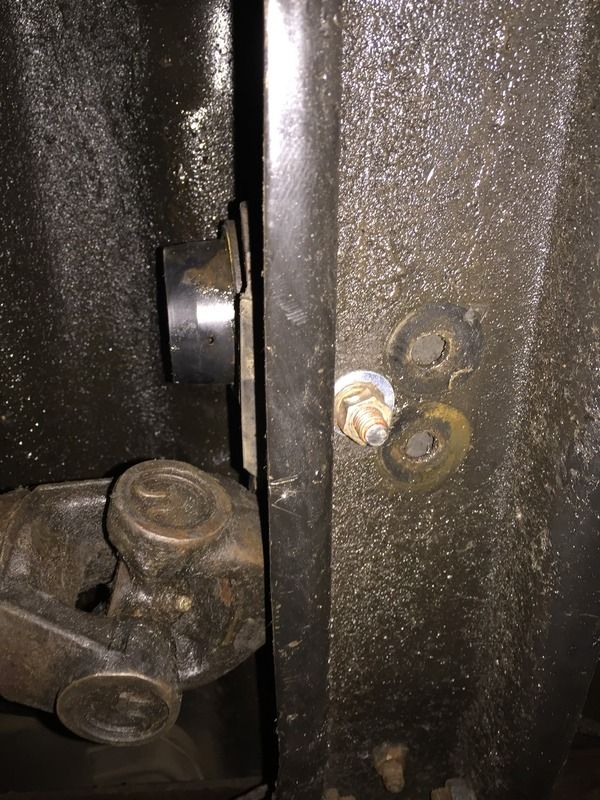 I have a couple options on the driveshaft and won't really be able to do anything until the truck is lowered. I'm planning about a 4-5" drop in the rear. There is a shackle and hanger kit for a 4" drop plus I plan on removing a leaf or two from the spring pack. That will help smooth out the ride a bit and drop it a little more. Once that's done I'll see where the axle is sitting in the wheelwell. I may need to slide the axle back an inch or so, which will maybe take care of the driveshaft length issue. If that works all I have to do is slide back or redrill the crossmember for the hanger bearing.
__________________
If no one knows what you're doing, they can't tell you you're doing it wrong HG's Dream Car Build - Shelby Cobra Kit Build your own adjustable track bar 71  Long Fleet C/10 Long Fleet C/10 72  Jimmy 4x4 (Junkyard Jimmy) Jimmy 4x4 (Junkyard Jimmy)HG's Plow Truck '78  K35 Dually K35 DuallyBigass Farm Truck HG's thread of miscellaneous stuff |
|
|

|
|
|
#13 |
|
GEARHEAD
Join Date: Aug 2003
Location: MN
Posts: 6,120
|
Re: HG's Bigass Farm Truck
I was trying to figure out how I was going to build the fuel system for this truck. I had the tank, pump and hoses from the donor truck, which would have been awesome to use. While the tank is similar in length and width, it is about 4-1/2" taller, which would make it hang down under the bed too far, so that idea was scrapped.
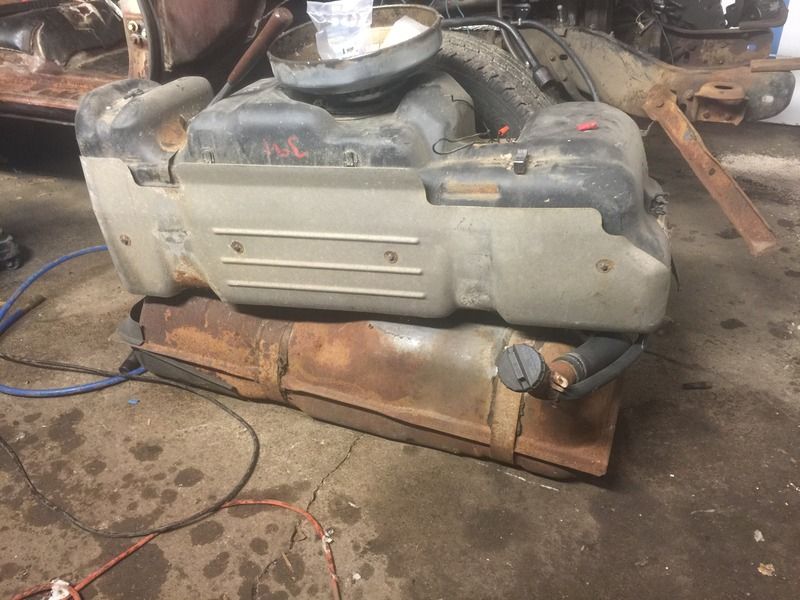 The original 16 gallon tank is a bit small and was corroded pretty bad on the outside. I had a 20 gallon saddle tank and I could use it as is with an inline fuel pump, but it would be kinda noisy and it's not baffled inside to keep fuel around the pick up tube, which isn't a huge problem when you're running a carb with float bowls to hold fuel, but is a problem with EFI. So I'm going with a new tank for an 87 but will get an aftermarket pump for the 60 psi needed for the LS. BTW, the TBI systems run at around 12 psi so the stock 87 style pump wouldn't work. It bothered me to not use parts I already had though, so I came up with a plan to use the old saddle tank as a reserve tank. The low pressure electric fuel pump that used to fill the carb will now be used as a transfer pump to the main tank. So if fuel is getting low and I don't feel like stopping I can flip a switch and pump gas from the passenger side to the driver side tanks. I could put a full dual tank set up but that would cost quite a bit more to do and isn't really needed. Aux fuel tank... 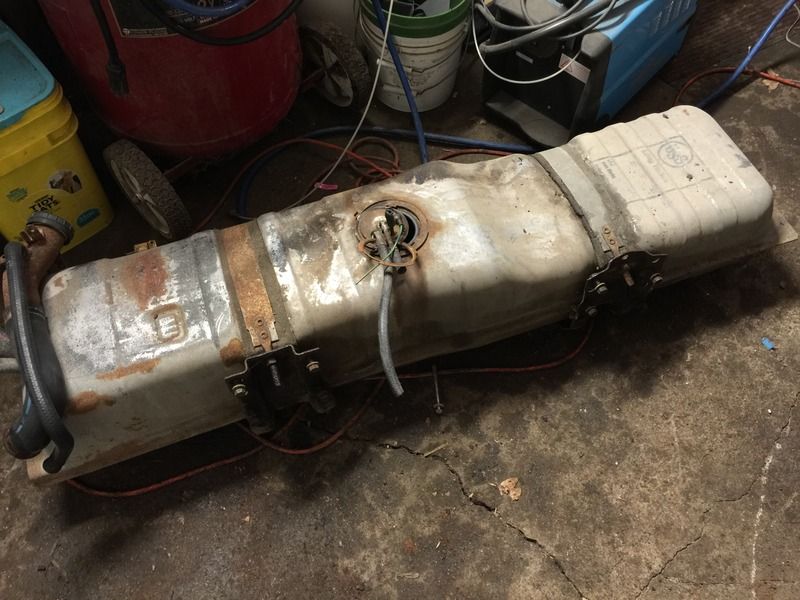 One of yesterday projects was taking out broken exhaust manifold bolts. One was sticking out far enough to get a vise grips on it and was easy to pull. The other was broke off about an 1/8" inside the head and has been a tough mother to fix. I tried welding a nut, but it wasn't working. These are fairly small diameter and the weld just kept jumping to the side and not sticking to the bolt. Then I tried drilling but wasn't getting the center. So I used the manifold as a guide, but the holes are much larger diameter than the bolts so you can't use it as a guide as is. I found a 7/16" bolt that fits the manifold hole tight, cut off a piece and drilled that centered to use as a guide. 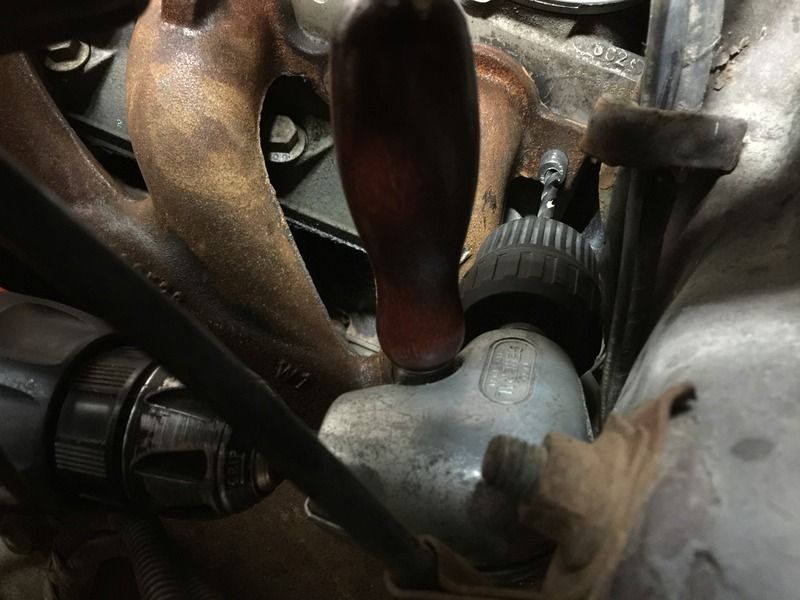 Still not done though. It's kind of a PITA because you have to drill the plug out to size for each stage then drill the head. As the bits get bigger, they also get longer and even with my angle drill head adapter thingy I'm running out of room. You may be asking why I didn't fix this BEFORE putting the engine in and that is what I keep asking myself while dicking around with this.  Anyway, I'll probably have to drill and tap it out to the next bigger size. While I was doing that, the boy started doing rust repair. I think he was hesitant because he doesn't have much experience. Went to school and is working in a shop but not really cutting and welding much. So I'm guiding him from my vast experience (only slightly more than his  ). ). The front rocker is cut out... 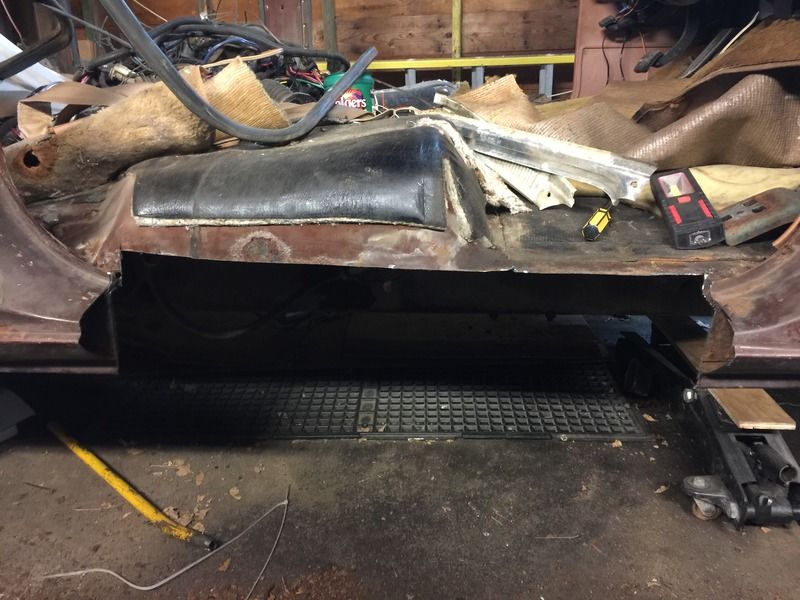 The rear is cut out and the patch is starting to get fit into place... 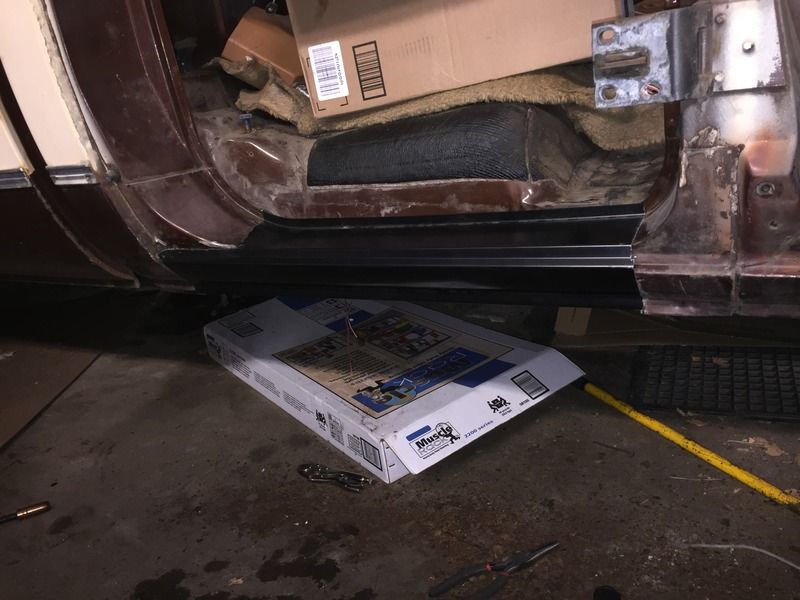 I should be picking up the new tank this week. I'll hopefully get the broken bolt fixed tonight, but might have to pull the engine at least part way out to fix it, or cut off a drill bit shorter. I need to get some inner rocker patch panels and another pair of outers. Next unsolved mystery is the AC pump. I have a pump but no bracket. And from what I've read the truck bracket probably wouldn't work anyway.
__________________
If no one knows what you're doing, they can't tell you you're doing it wrong HG's Dream Car Build - Shelby Cobra Kit Build your own adjustable track bar 71  Long Fleet C/10 Long Fleet C/10 72  Jimmy 4x4 (Junkyard Jimmy) Jimmy 4x4 (Junkyard Jimmy)HG's Plow Truck '78  K35 Dually K35 DuallyBigass Farm Truck HG's thread of miscellaneous stuff |
|
|

|
|
|
#14 |
|
Registered User
Join Date: Apr 2003
Location: Indep, MO
Posts: 5,893
|
Re: HG's Bigass Farm Truck
It's 62 degrees in there! Nice!
__________________
Boppa's Old Yeller Truck Build, Old Yeller's New Heart! Project Buzz Bomb Flyin' Low! |
|
|

|
|
|
#15 |
|
Registered User
Join Date: Aug 2016
Location: Mount Carmel Illinois
Posts: 1,321
|
Re: HG's Bigass Farm Truck
following.
__________________
1994 k1500, Oldredz71(ext shorty 4x4 6 in lift) 1998 S10ZR2 2005 Silverado 2500hd(tow pig) Made in the USA, just like my trucks 
|
|
|

|
|
|
#16 |
|
6>8 Plugless........
 Join Date: Sep 2007
Location: Prairie City, Ia
Posts: 17,140
|
Re: HG's Bigass Farm Truck
Nice work on the garage and I'm glad things are getting back on track for you. Maybe I can meet up with you on Power Tour this year. I'm wanting to take my 40, but if that project turns to mush, I'll take the 72.
__________________
Ryan 1972 Chevy Longhorn K30 Cheyenne Super, 359 Inline 6 cylinder, Auto Trans, Tilt, Diesel Tach/Vach, Buckets, Rare Rear 4-link and air ride option Build Thread 1972 GMC Sierra Grande Longhorn 4x4 1972 Chevy Cheyenne Super K20 Long Step side tilt, tach, tow hooks, AC, 350 4 speed 1972 C10 Suburban Custom Deluxe 1969 Chevy milk truck 1971 Camaro RS 5.3 BTR STG3 Cam Super T10 1940 Ford 354 Hemi 46RH Ford 9" on air ride huge project Tired of spark plugs? Check this out. |
|
|

|
|
|
#17 | |
|
GEARHEAD
Join Date: Aug 2003
Location: MN
Posts: 6,120
|
Re: HG's Bigass Farm Truck
Thanks, that's gonna be a fun project.
But it's a damp heat. Enjoy. Quote:
 I don't know if I'll do any of power tour this year. Might just go to the beginning to meet up with some people, but who knows. I'll probably take my 71 if I go to that.
__________________
If no one knows what you're doing, they can't tell you you're doing it wrong HG's Dream Car Build - Shelby Cobra Kit Build your own adjustable track bar 71  Long Fleet C/10 Long Fleet C/10 72  Jimmy 4x4 (Junkyard Jimmy) Jimmy 4x4 (Junkyard Jimmy)HG's Plow Truck '78  K35 Dually K35 DuallyBigass Farm Truck HG's thread of miscellaneous stuff |
|
|
|

|
|
|
#18 |
|
Registered User
Join Date: May 2016
Location: South Williamsport
Posts: 174
|
Re: HG's Bigass Farm Truck
Following!
|
|
|

|
|
|
#19 |
|
GEARHEAD
Join Date: Aug 2003
Location: MN
Posts: 6,120
|
Re: HG's Bigass Farm Truck
Made some progress yesterday. I got the new valve cover gaskets installed. Then got the water temp adapter installed.
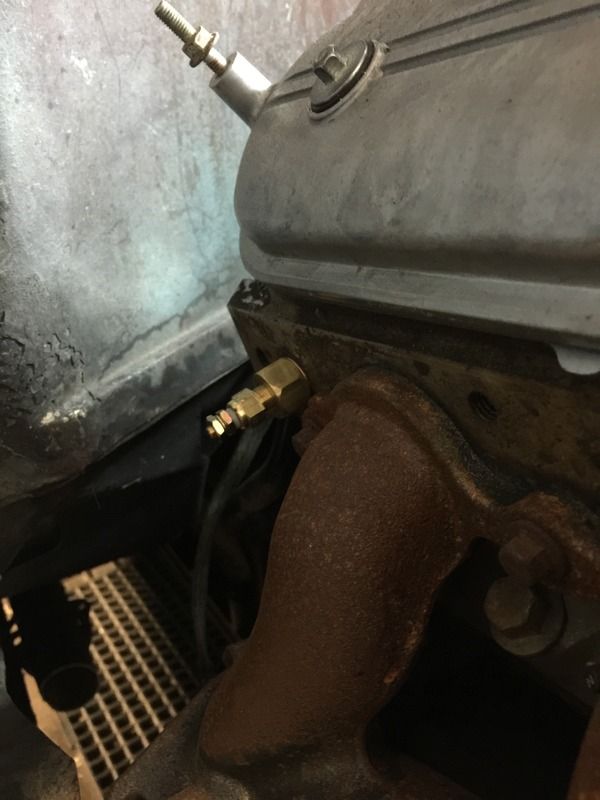 I have the oil pressure adapter also, but need a special socket to get the factory one out, so it'll have to wait a bit. I could also install the oil pressure sending unit down by the oil filter, but I'll do it the other way. So instead I worked on the shifter linkage. I bought the Lokar one, same as what I have on my 71 C-10. It was rubbing on a pinch weld on the firewall. First I used a flapper disc on my angle grinder to cut that back. And I put a slight bend in the shifter rod. And I also found a longer bolt for where it mounts to the column and used a nut as a spacer. Just an extra 1/4" helped a lot. 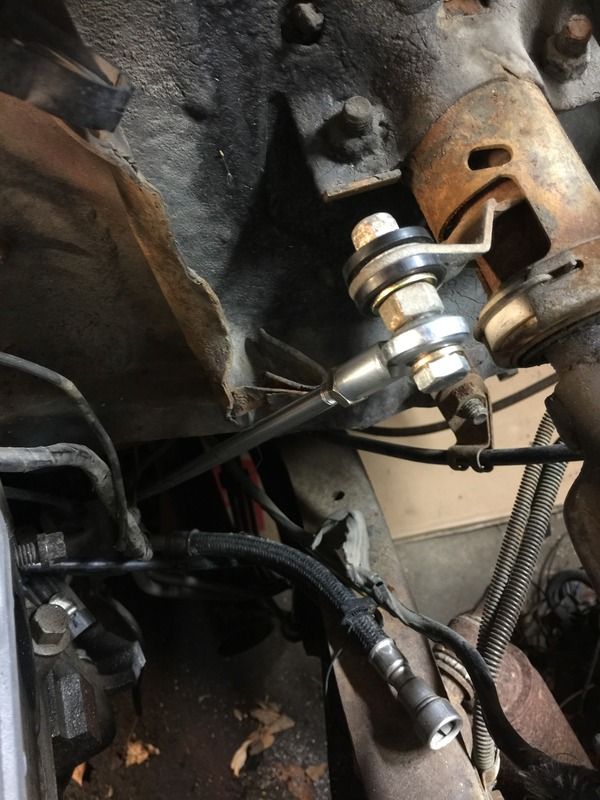 No real issues on the bottom end. But I did need to change the position of the transmission arm a bit. The instructions said to mount that at the 8:00 position but when I had it there it didn't want to shift into the lowest gear. So mine is set closer to 9:00. If this was a non-OD tranny it probably would have been ok at 8:00. 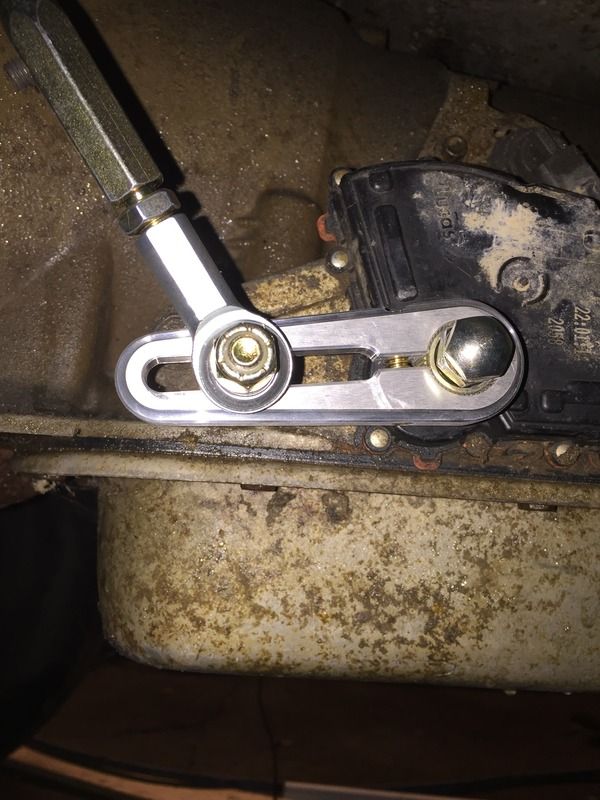 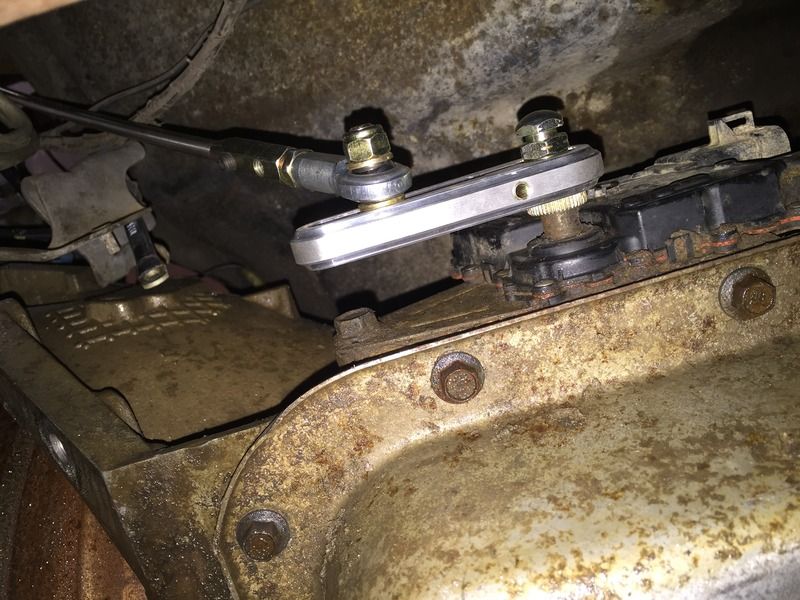 It'll need to be detached when I replace the tranny mount and likely need more adjustment once I actually get this pig running, but it's in and works. My son worked on the right rear rocker patch and said he's got it fit up and ready to weld in. So he can start on the right front inner rocker next. I'll probably keep working on the underside stuff. Need to get the fuel system together and mounted, replace the tranny mount, finish installing the torque converter bolts, and I have tranny cooler line adapters to install.
__________________
If no one knows what you're doing, they can't tell you you're doing it wrong HG's Dream Car Build - Shelby Cobra Kit Build your own adjustable track bar 71  Long Fleet C/10 Long Fleet C/10 72  Jimmy 4x4 (Junkyard Jimmy) Jimmy 4x4 (Junkyard Jimmy)HG's Plow Truck '78  K35 Dually K35 DuallyBigass Farm Truck HG's thread of miscellaneous stuff |
|
|

|
|
|
#20 | |
|
Senior Member
 Join Date: Jul 2000
Location: North Texas
Posts: 3,449
|
Re: HG's Bigass Farm Truck
Quote:
https://www.summitracing.com/parts/fkb-cf5y
__________________
Mike 1969 C10 LWB -- owned for 34 years. 350/TH350, 3.08 posi, 1st Gen Vintage Air, AAW wiring harness, 5-lug conversion, 1985 spindles and brakes. 1982 C10 SWB -- sold 1981 C10 Silverado LWB -- sold, but wish I still had it! 1969 C10 (not the current one) that I bought in the early 1980s. Paid $1200; sold for $1500 a few years later. Just a hint at the appreciation that was coming. Retired as a factory automation products salesman. Worked part-time over the years for an engine builder and a classic car repair shop. Member here for 23 years! This is the very first car/truck Internet forum I joined. I still used a dial-up modem back then! |
|
|
|

|
|
|
#21 | |
|
GEARHEAD
Join Date: Aug 2003
Location: MN
Posts: 6,120
|
Re: HG's Bigass Farm Truck
Quote:
__________________
If no one knows what you're doing, they can't tell you you're doing it wrong HG's Dream Car Build - Shelby Cobra Kit Build your own adjustable track bar 71  Long Fleet C/10 Long Fleet C/10 72  Jimmy 4x4 (Junkyard Jimmy) Jimmy 4x4 (Junkyard Jimmy)HG's Plow Truck '78  K35 Dually K35 DuallyBigass Farm Truck HG's thread of miscellaneous stuff |
|
|
|

|
|
|
#22 |
|
GEARHEAD
Join Date: Aug 2003
Location: MN
Posts: 6,120
|
Re: HG's Bigass Farm Truck
Yesterday went ok. Simple tasks made harder by finicky bolts, etc, but progress made. I removed the old AC condenser because it was set up for a driver side AC compressor. I have a passenger side one from the 90 burb parts truck.
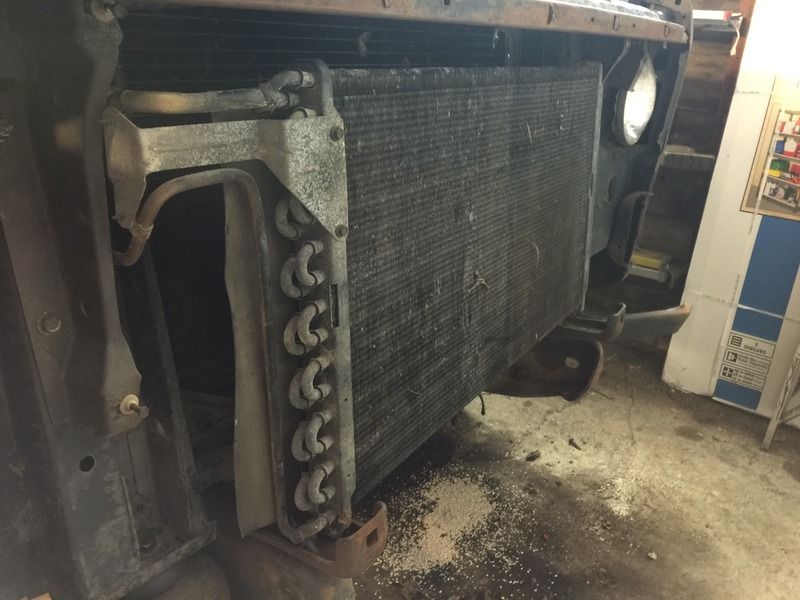 I need to cut a hole for the tubes to go through on that side. The radiator was very loose in the support. Found out one of the rubber mounts underneath it was missing and the other one was in bad shape. I found a couple rubber mounts from an old set in my parts locker that worked. Once I got those in and tightened the bolts for the hold down plate on top it clamped it in there good. Then I ran a tap through the nuts on the firewall for the rear end of the inner fenders. Couldn't get a bolt in otherwise. So they got mounted properly. We got the driver side fender on with just a couple bolts so the radiator support would be in the correct position. I wanted to see how the original fan shroud would fit. Should work fine. 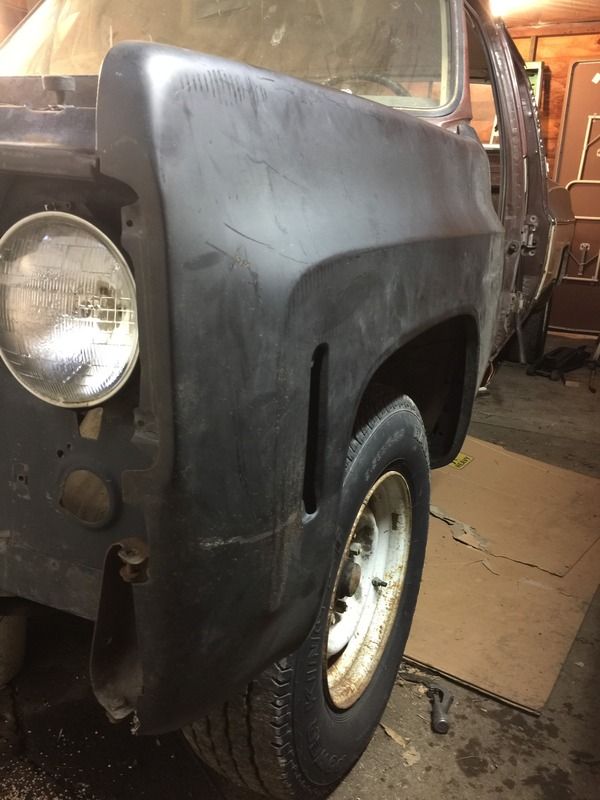 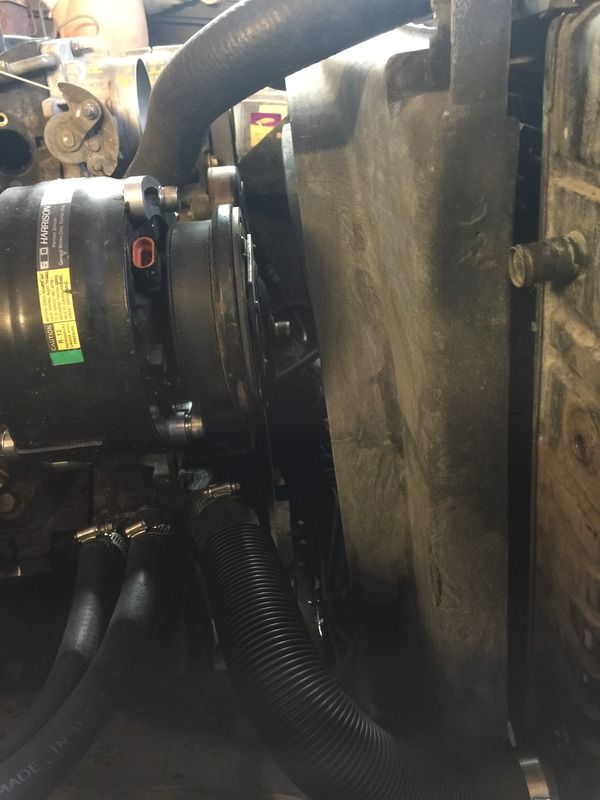 I read about this electric fan set up several years ago. I bought a ford taurus fan from the junkyard back then to use on my jimmy but never installed it. I think it will work great on this project. 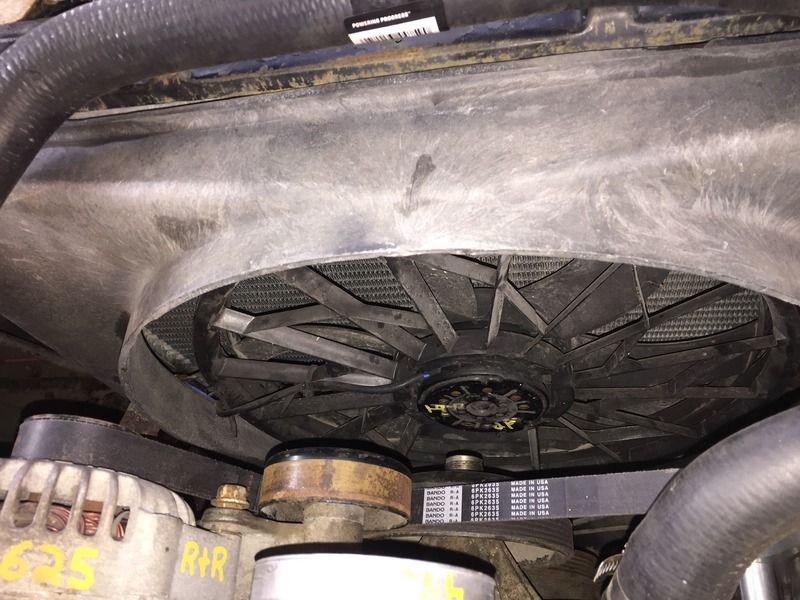 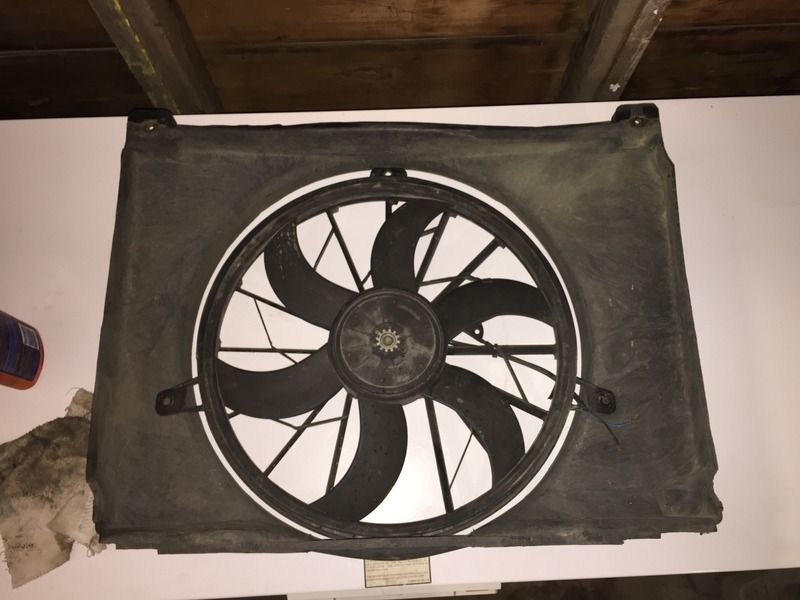 It's a little smaller than the fan opening. Two of the mounting tabs will work good by just drilling a hole in the shroud and using a couple bolts. The 3rd tab will work once I make a small metal bracket. We reinstalled the coil packs and put on the new plug wires... 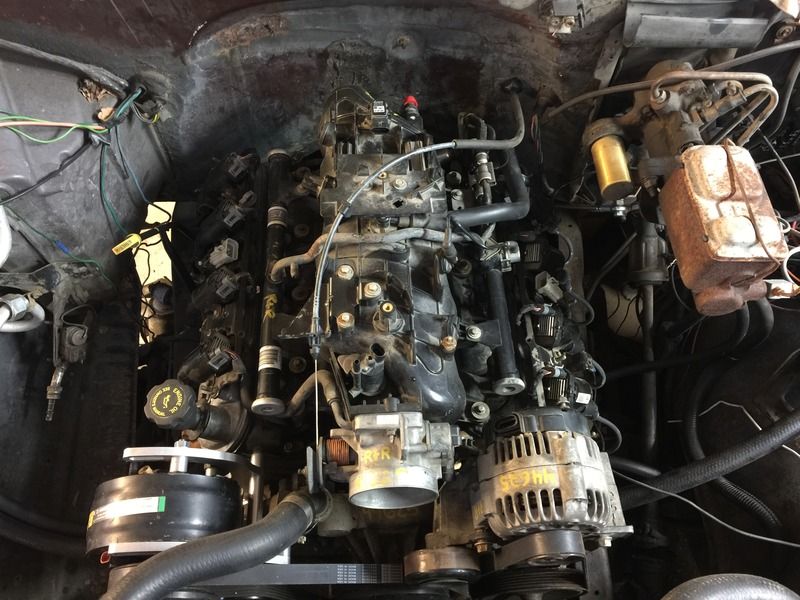 After a dinner break I went back out and got the fuel lines run from the tank forward. The filter is installed and all that's left is to clamp the lines down to the frame. We are inching closer to light off. 
__________________
If no one knows what you're doing, they can't tell you you're doing it wrong HG's Dream Car Build - Shelby Cobra Kit Build your own adjustable track bar 71  Long Fleet C/10 Long Fleet C/10 72  Jimmy 4x4 (Junkyard Jimmy) Jimmy 4x4 (Junkyard Jimmy)HG's Plow Truck '78  K35 Dually K35 DuallyBigass Farm Truck HG's thread of miscellaneous stuff |
|
|

|
|
|
#23 |
|
GEARHEAD
Join Date: Aug 2003
Location: MN
Posts: 6,120
|
Re: HG's Bigass Farm Truck
Baby steps fellas. With my previous builds I found that any progress is good no matter how small. All the little steps eventually get the entire job done.
Got the new fuel pump on the new sending unit and installed in the new tank. I just didn't feel like laying underneath it tonight. I'll have to figure out how to get the fuel lines routed and connected to the sending unit. Will probably have to buy a few things to get it all together, but that's expected. I think I might go spend a pile of money tomorrow and get my wire harness ordered. 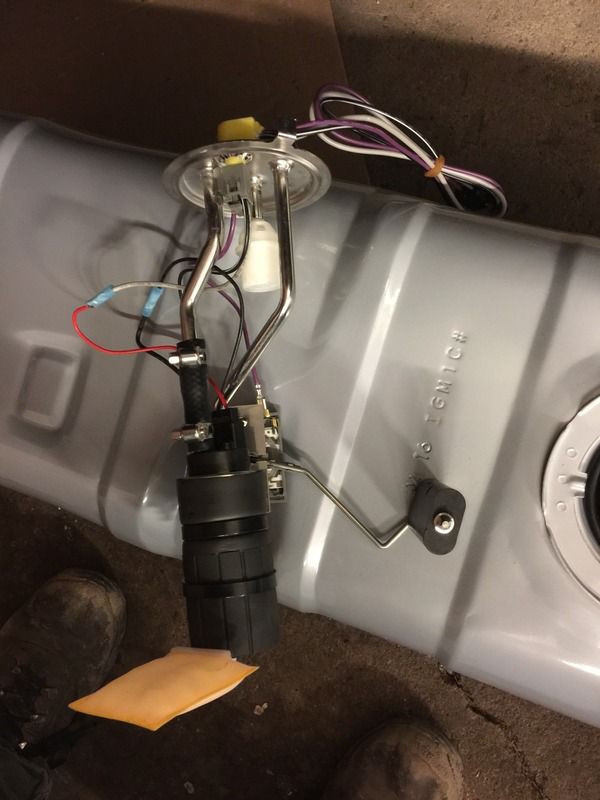
__________________
If no one knows what you're doing, they can't tell you you're doing it wrong HG's Dream Car Build - Shelby Cobra Kit Build your own adjustable track bar 71  Long Fleet C/10 Long Fleet C/10 72  Jimmy 4x4 (Junkyard Jimmy) Jimmy 4x4 (Junkyard Jimmy)HG's Plow Truck '78  K35 Dually K35 DuallyBigass Farm Truck HG's thread of miscellaneous stuff |
|
|

|
|
|
#24 |
|
Registered User
Join Date: Apr 2003
Location: Indep, MO
Posts: 5,893
|
Re: HG's Bigass Farm Truck
Good workin'! D's coming right along!
__________________
Boppa's Old Yeller Truck Build, Old Yeller's New Heart! Project Buzz Bomb Flyin' Low! |
|
|

|
|
|
#25 |
|
GEARHEAD
Join Date: Aug 2003
Location: MN
Posts: 6,120
|
Re: HG's Bigass Farm Truck
Yes he is. Gotta build up his experience and confidence. Once he get's this stuff done he'll be doing the same to his little stepper.
Last night I got the oil pressure sending unit from the 90 burb on and bolted down the intake manifold. I still need to get it torqued correctly. Don't let me forget. 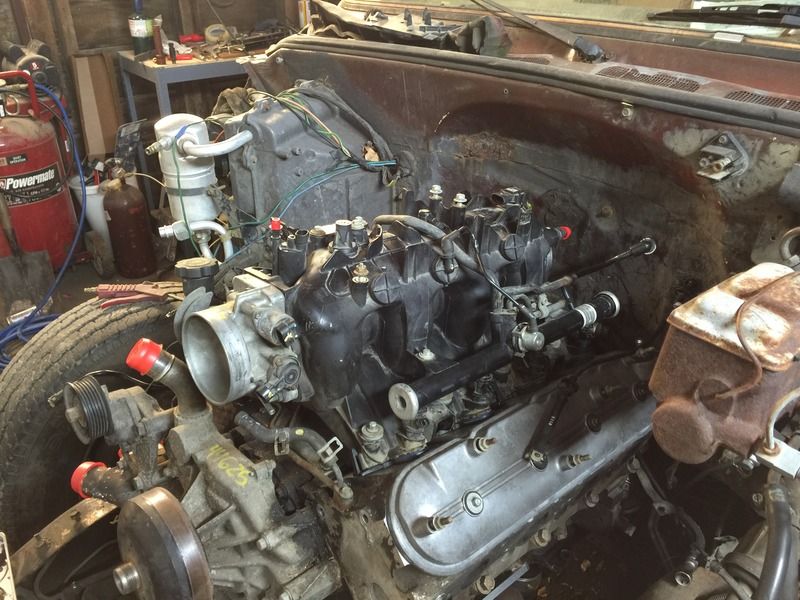 Then I started getting the power steering set up figured out. I've got the old pump from the 454 still connected to the hoses. I've got the donor truck pump. Standard vs metric and which way do I want to go? I had a strong feeling the the mounting holes in both pumps would be the same and they are... 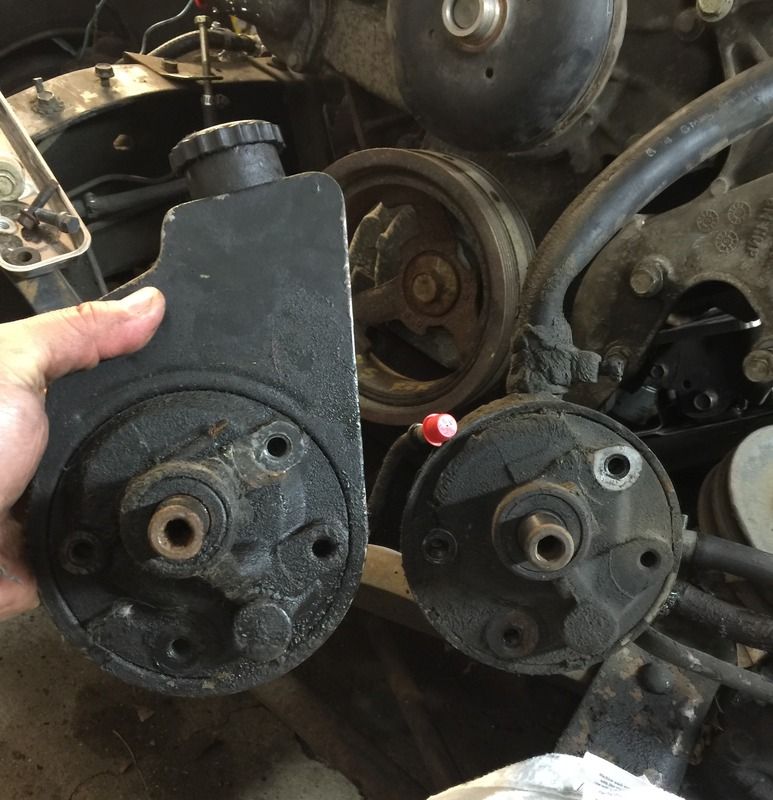 The problem I ran into using the old pump is the direction of the hose connections. I couldn't get it into position without kinking the hoses. I tried bending the supply line steel tubing with moderate success (broke my tube bender) but it just wasn't going to be enough. Look at this crazy design... 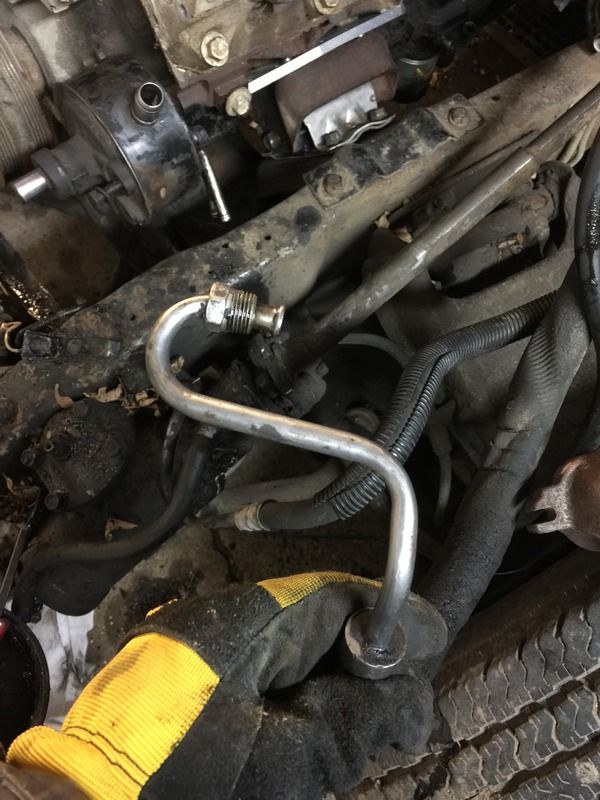 So I cut off the U bend and re-flared it... 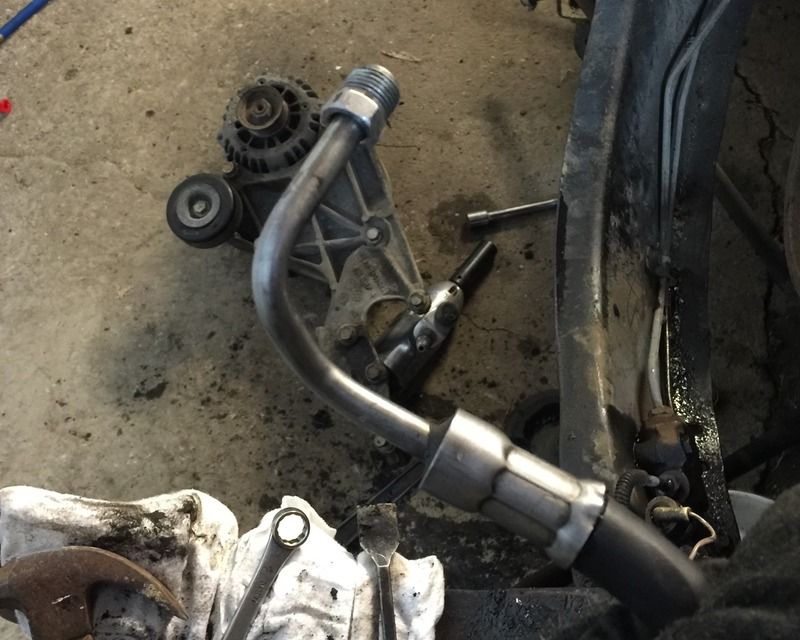 So now the pump sits in the mount just fine. The pulley from the newer pump should work. I need to find some longer pump mount bolts though because the standard ones are a little shorter than the metric ones due to the extra thickness of that big aluminum mount. 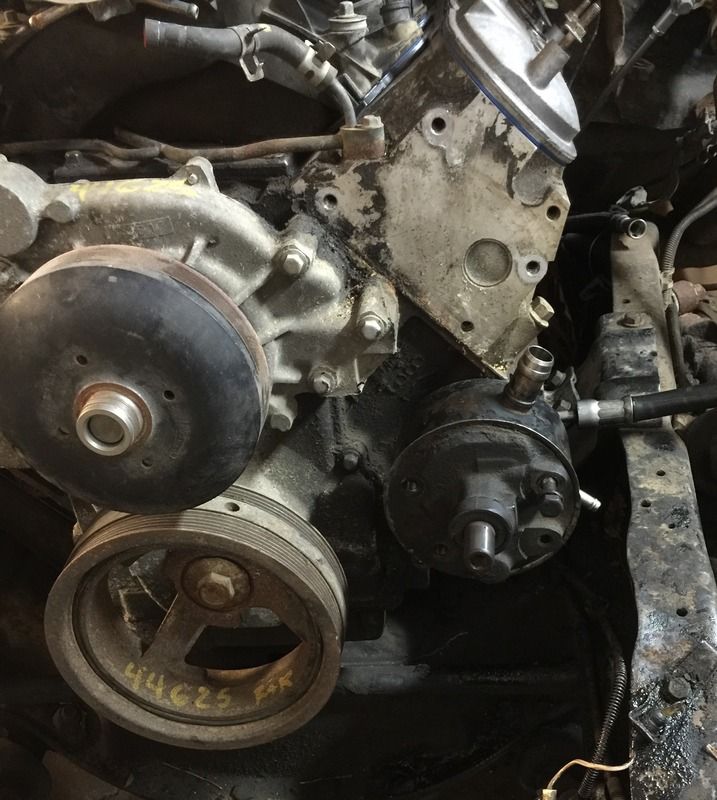 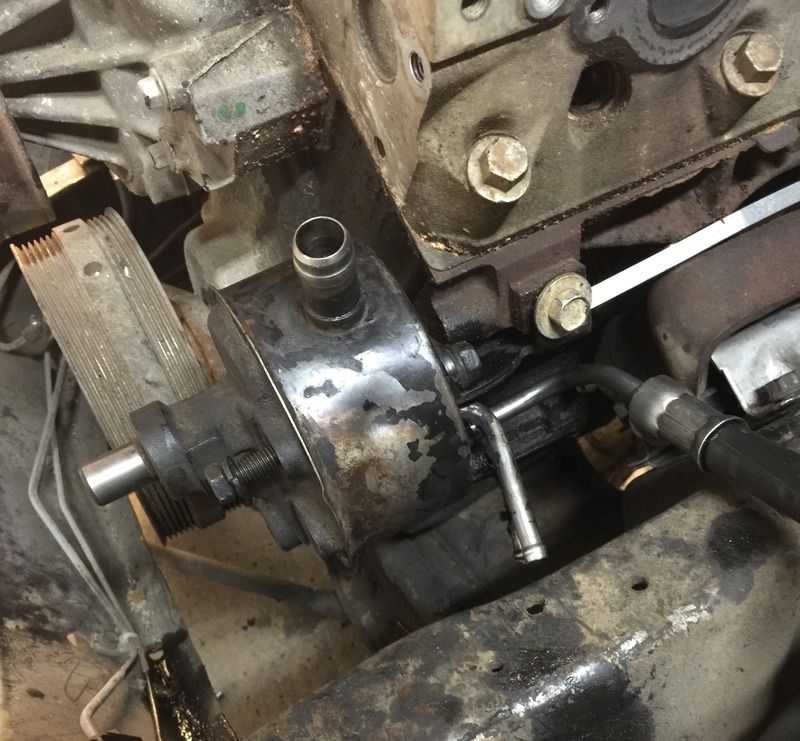 I'm going to pick up a couple small 90* elbows for the return lines and some new hose. Ideally I'd replace the supply hose also but I'm going to have to find the right application or re-flare another brand new one. I'm not sure what I'll do today, but I'll get something done. I did order the wire harness yesterday.
__________________
If no one knows what you're doing, they can't tell you you're doing it wrong HG's Dream Car Build - Shelby Cobra Kit Build your own adjustable track bar 71  Long Fleet C/10 Long Fleet C/10 72  Jimmy 4x4 (Junkyard Jimmy) Jimmy 4x4 (Junkyard Jimmy)HG's Plow Truck '78  K35 Dually K35 DuallyBigass Farm Truck HG's thread of miscellaneous stuff |
|
|

|
 |
| Bookmarks |
|
|