
 |
|
|
#76 |
|
Registered User
Join Date: Sep 2014
Location: Fremont, NE
Posts: 154
|
Re: Dunce's 59 Fleetside build
|
|
|

|
|
|
#77 |
|
Registered User
Join Date: Aug 2007
Location: Corona, California
Posts: 7,998
|
Re: Dunce's 59 Fleetside build
Real nice.
Kim |
|
|

|
|
|
#78 |
|
Senior Member
 Join Date: Mar 2011
Location: West Plains, Missouri
Posts: 7,559
|
Re: Dunce's 59 Fleetside build
Very nice repairs...Jim
__________________
my build thread: http://67-72chevytrucks.com/vboard/s...d.php?t=459839 Jimbo's long bed step build:http://67-72chevytrucks.com/vboard/s...t=464626<br /> |
|
|

|
|
|
#79 |
|
Registered User
Join Date: Sep 2014
Location: Fremont, NE
Posts: 154
|
Re: Dunce's 59 Fleetside build
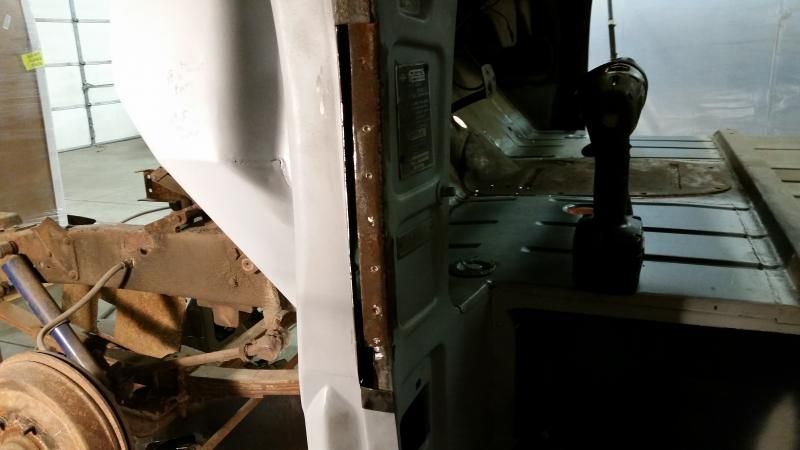
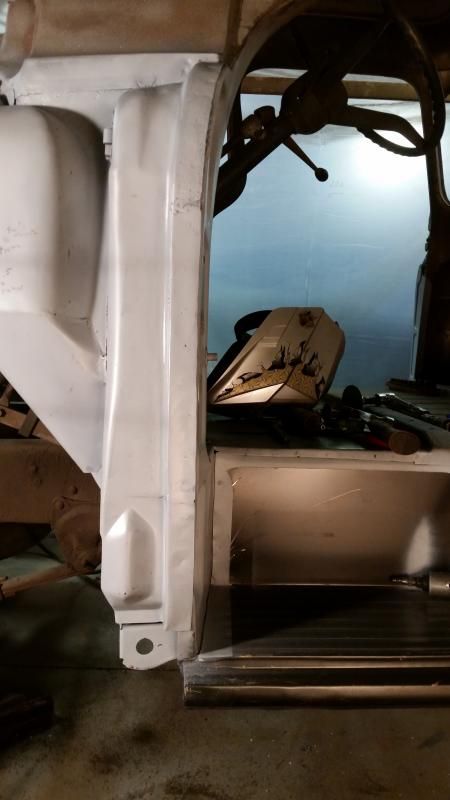
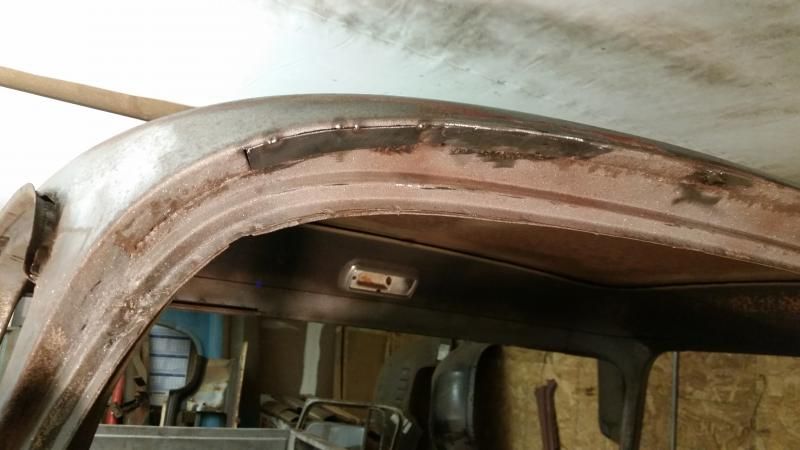
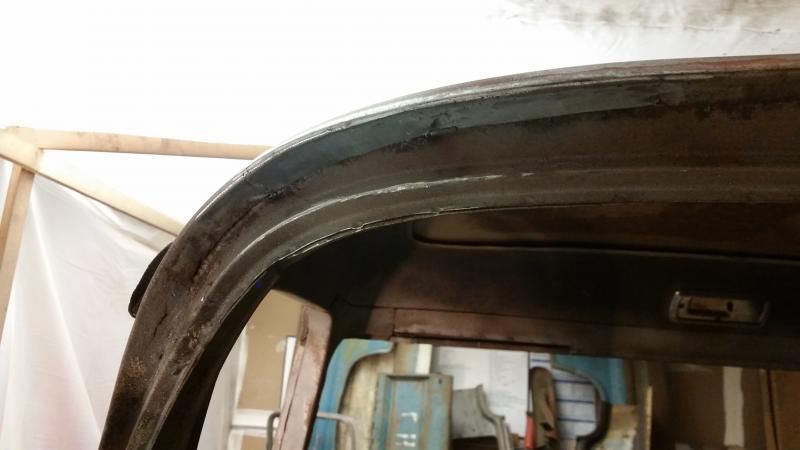
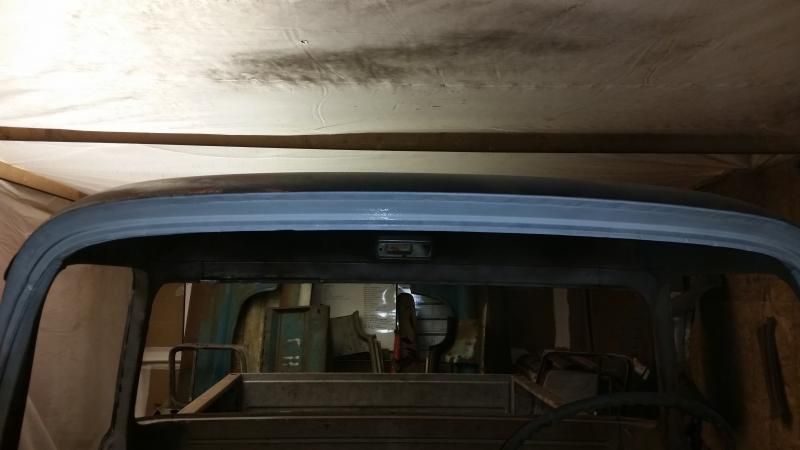
Did a little work on driver cowl to door pillar area and then fixed a few small holes in the brow of the cab. Going to try repairing a small section of the passenger side roof to drip rail seam next before doing the entire rear cab panel replacement. I'm also going to try Eastwood's interal frame coating and shoot up inside the brow of the cab to coat between the roof and the inner structure and seal that pinch weld.
|
|
|

|
|
|
#80 |
|
Registered User
Join Date: Aug 2007
Location: Corona, California
Posts: 7,998
|
Re: Dunce's 59 Fleetside build
You're doing a nice job on the repairs.
Kim |
|
|

|
|
|
#81 |
|
Registered User
Join Date: Sep 2014
Location: Fremont, NE
Posts: 154
|
Re: Dunce's 59 Fleetside build
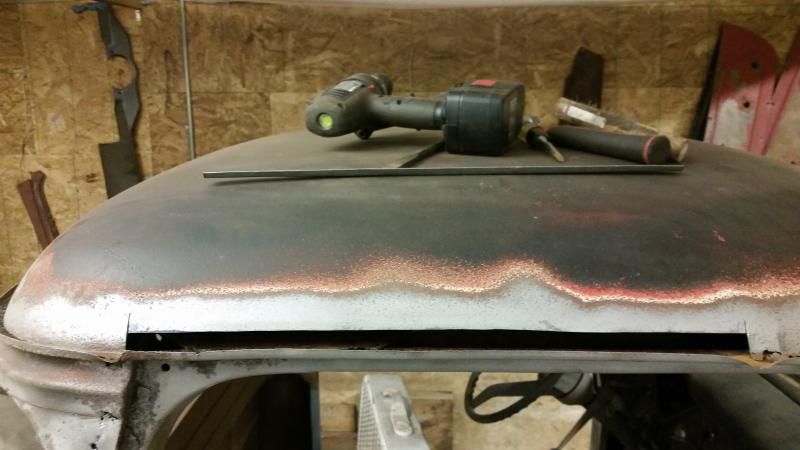
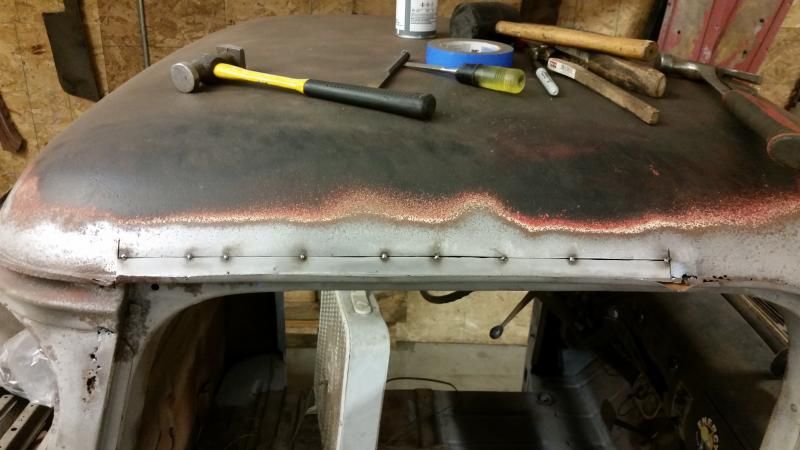
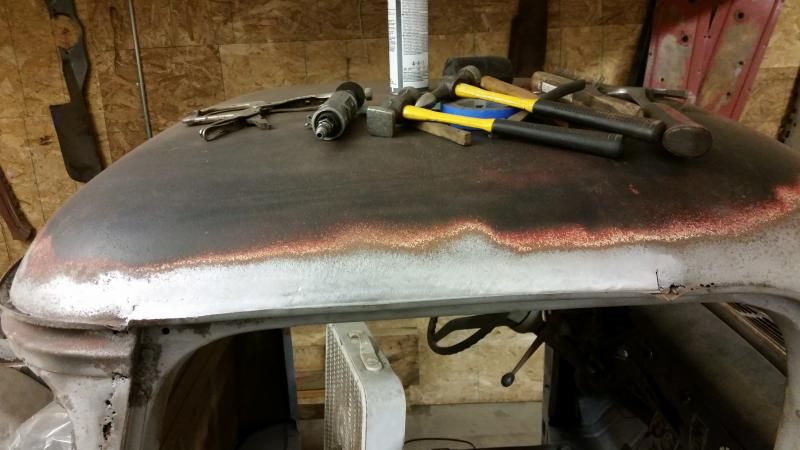
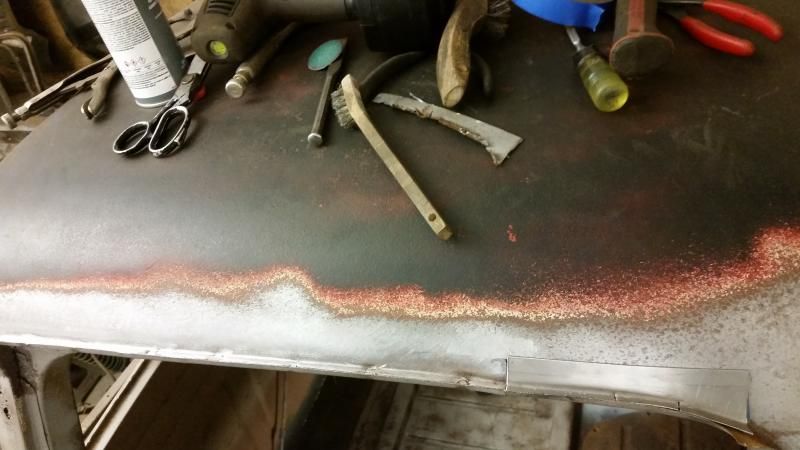
Worked on a passenger side of the roof to drip rail rust damage I had. Was a little concerned about this as I didn't really want to have to replace the roof panel if this went poorly but so far, so good. Have a small patch to finish up towards the front and then its on to replacing the entire rear cab panel.
|
|
|

|
|
|
#82 |
|
Registered User
Join Date: Aug 2007
Location: Corona, California
Posts: 7,998
|
Re: Dunce's 59 Fleetside build
Nice job on the repair.
Kim |
|
|

|
|
|
#83 |
|
Registered User
Join Date: Sep 2014
Location: Fremont, NE
Posts: 154
|
Re: Dunce's 59 Fleetside build
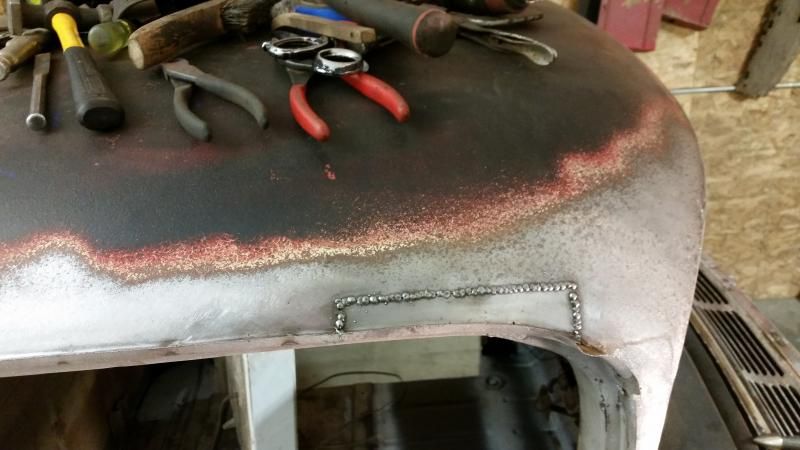
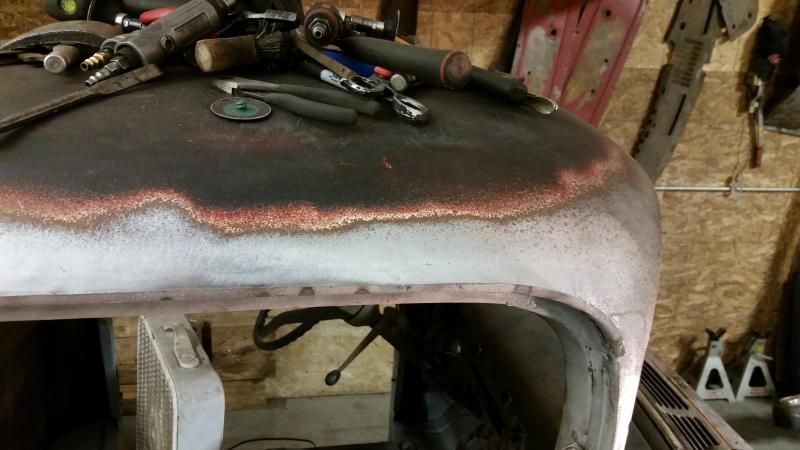
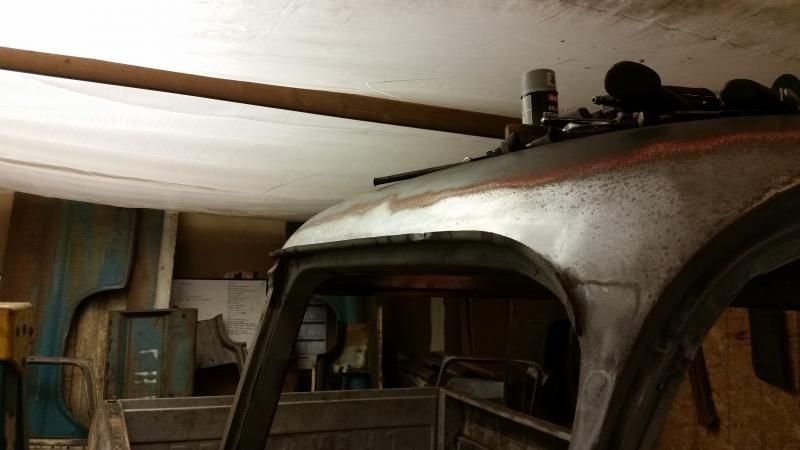
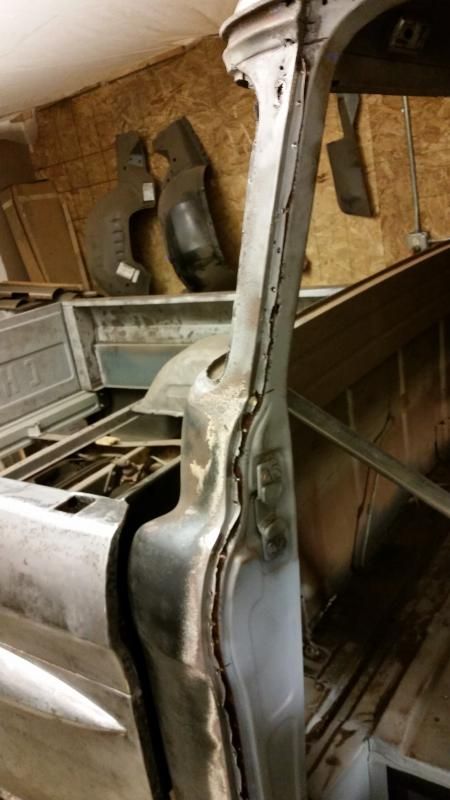
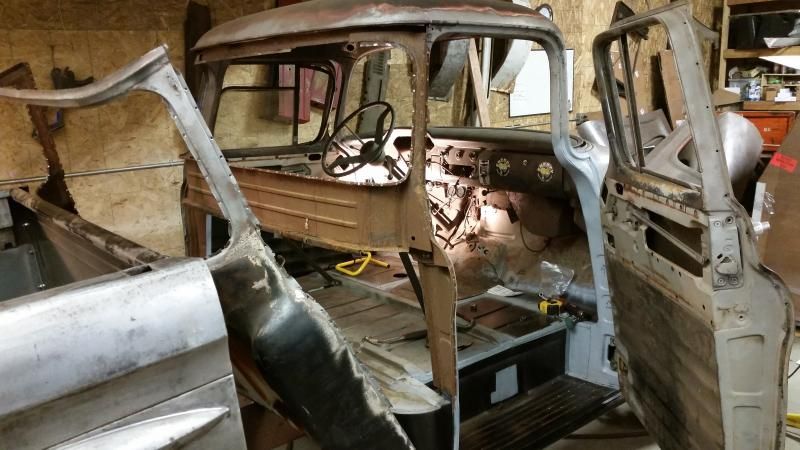
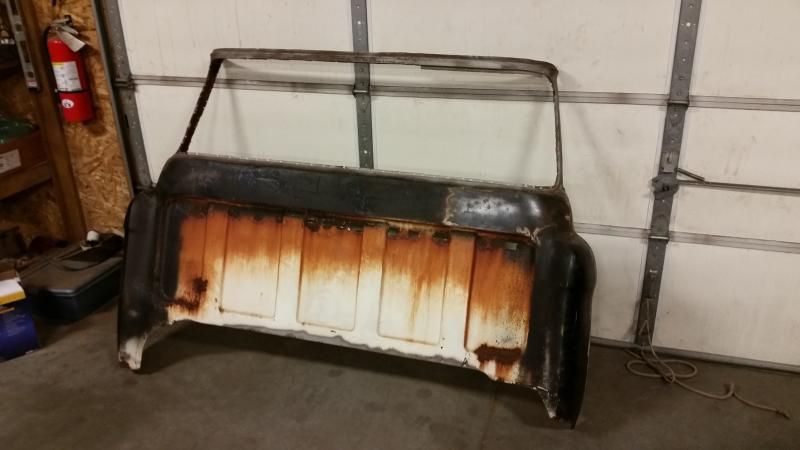
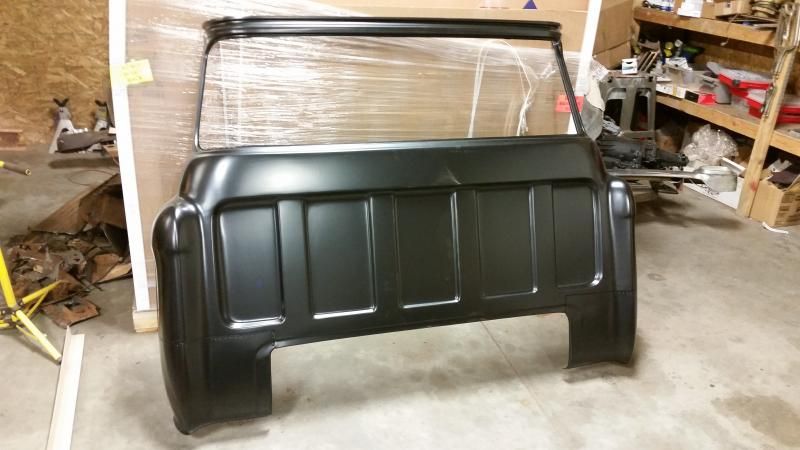
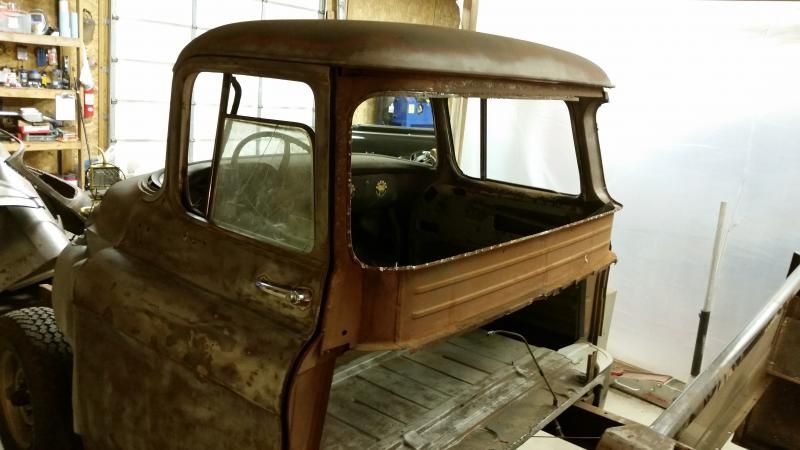
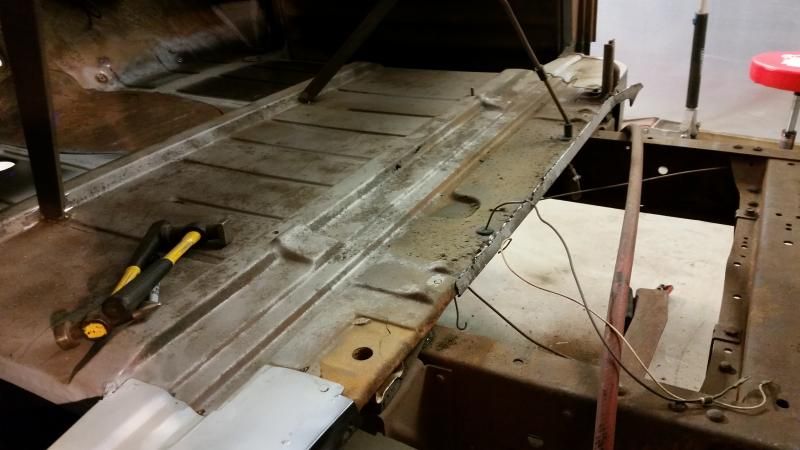
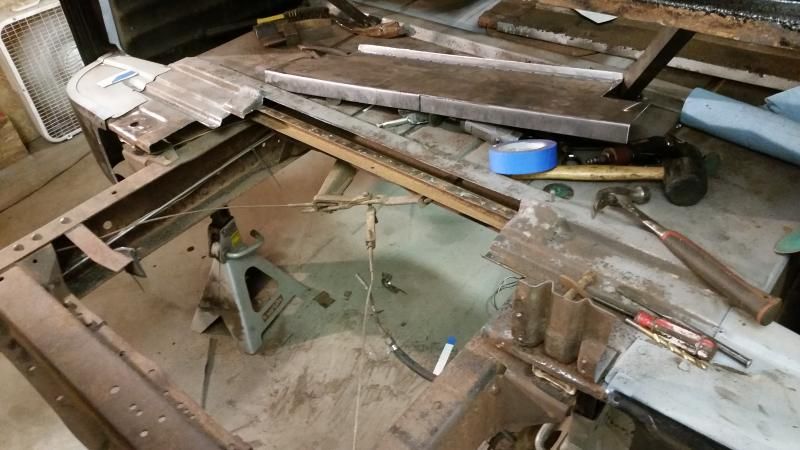
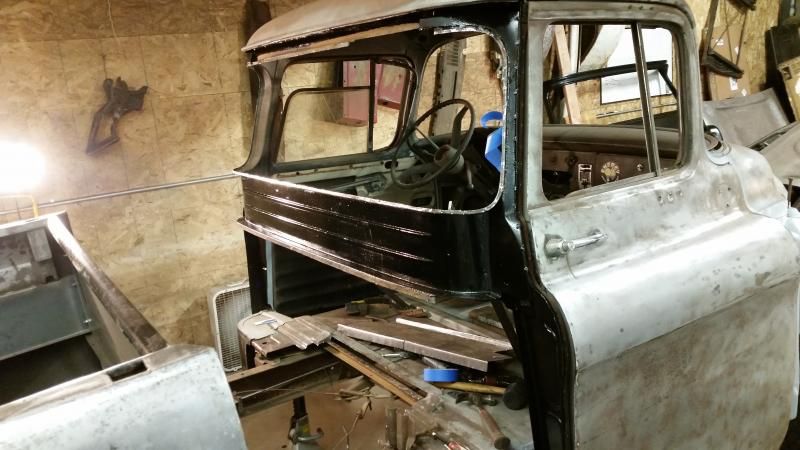
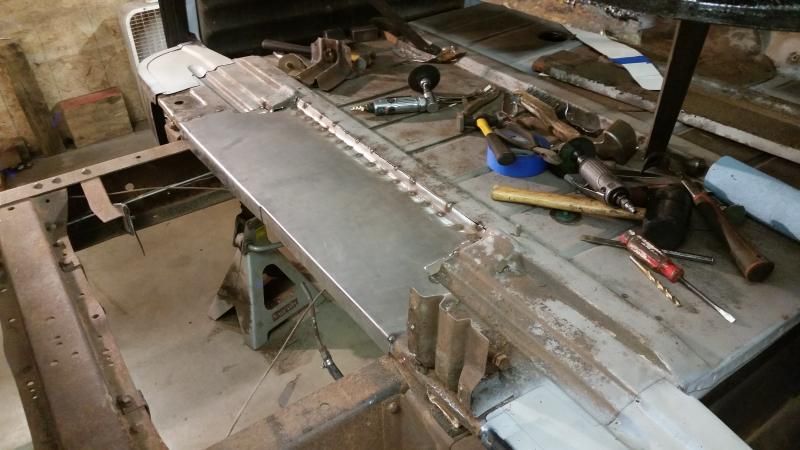
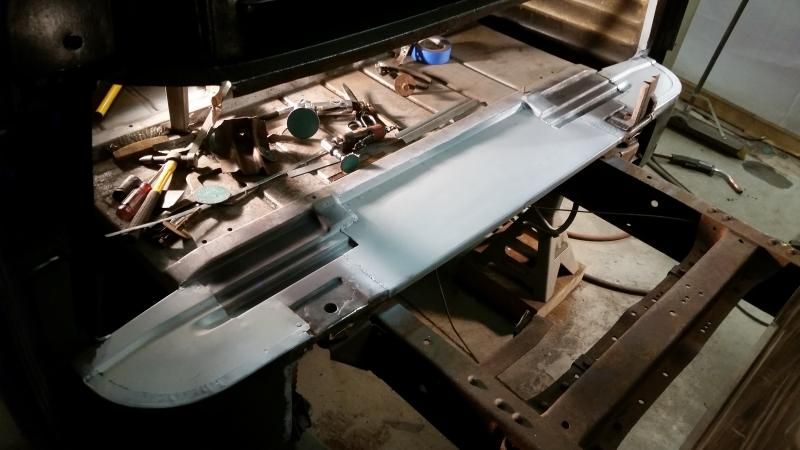
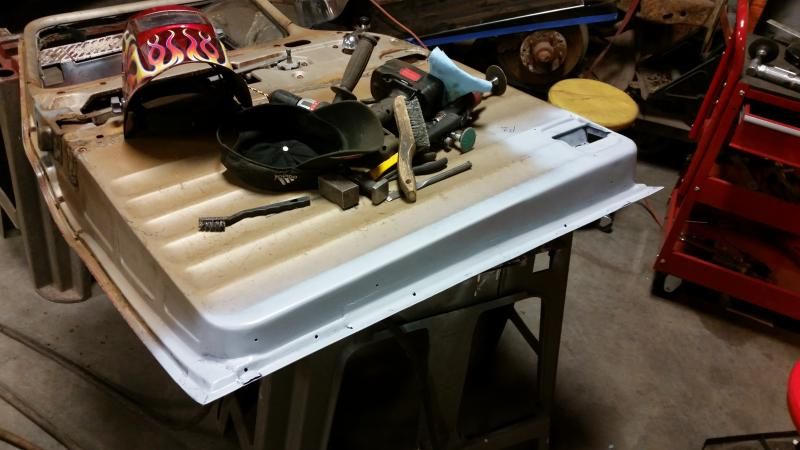
Finished up the repair on the passenger side roof/drip rail section and finally took the plunge in removing the rear cab panel. Fixed a bad section of the floor, cleaned up the seams and now I'm fixing the inner rear cab panel window channel on top. Once thats done I will remove whats left of the drip rail around on the back of the roof and begin test fitting the rear panel.
|
|
|

|
|
|
#84 |
|
Senior Member
 Join Date: Mar 2011
Location: West Plains, Missouri
Posts: 7,559
|
Re: Dunce's 59 Fleetside build
Nice job on all your repairs, new panel looks nice hope it fits good...Jim
__________________
my build thread: http://67-72chevytrucks.com/vboard/s...d.php?t=459839 Jimbo's long bed step build:http://67-72chevytrucks.com/vboard/s...t=464626<br /> |
|
|

|
|
|
#85 |
|
Registered User
Join Date: Aug 2007
Location: Corona, California
Posts: 7,998
|
Re: Dunce's 59 Fleetside build
That's some nice progress you're making.
Looks real good. Kim |
|
|

|
|
|
#86 |
|
Registered User
Join Date: Mar 2008
Location: Waukee, Iowa
Posts: 1,608
|
Re: Dunce's 59 Fleetside build
Nice work. Truck is looking good!
__________________
build threads: 86 Suburban 88 Jeep 6.0 swap 49 Chevy truck 54 Chevy wagon 86 Suburban lowered 4/6 54 Chevy wagon 49 Chevy/s10 mix 88 Jeep Wrangler rockcrawler |
|
|

|
|
|
#87 |
|
Registered User
Join Date: Dec 2013
Location: Purmerend, Netherlands
Posts: 1,657
|
Re: Dunce's 59 Fleetside build
That is some nice metalwork you're showing us!!
__________________
Cheers!! Kees. 1959 Chevy Fleetside Longbed My build: http://67-72chevytrucks.com/vboard/s...d.php?t=643426 Kool Guyz CC Instagram: _King_Kustom_ |
|
|

|
|
|
#88 |
|
Registered User
Join Date: Sep 2014
Location: Fremont, NE
Posts: 154
|
Re: Dunce's 59 Fleetside build
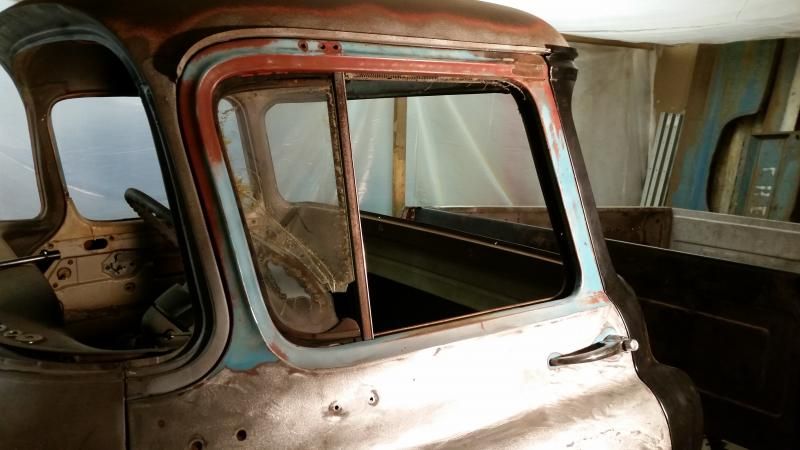
Just the first fit and about 4 hours of slowly tweaking it. The drip rail section near the door on both sides is not formed just right and will take some work to get it so that the door edge gap is right on top (currently just a little wide). My gaps are a little wide at the bottom at this point too but I think I can work that out. Overall the panel isn't bad. Like all aftermarket stuff, nothing is as sharp as the original but it beats what was there.
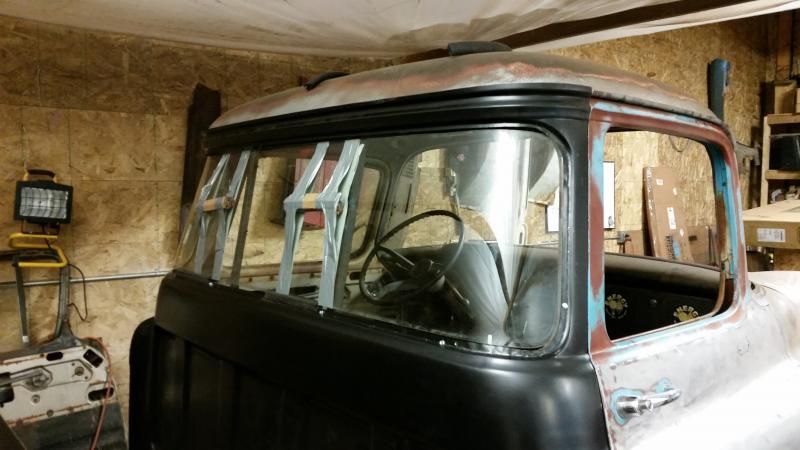
I replaced a section of the inner panel window channel on top, about 12 inches at a time to avoid changing anything and the new panel opening lines up well with the inner panel, so that's encouraging. I ordered another window rubber gasket that I can cut pieces out of to check the window fit without the whole thing installed. I may even try installing the whole window once.. not sure yet. At this point I'm letting it sit before I go back and fit a better set of doors and add the front fenders. Plan is to get the gaps as good as i can before I pull the back panel off to prep it for spot welding back in. Going to spot weld it everywhere and use some 3m drip chek sealer on the drop rail when done. Then I'll fine tune the gaps. I've had good luck adding rod to door edges on another project to close gaps where necessary so I think I'll aim to have wider gaps in some spots if it means fixing areas where its just too tight. (bottom of door edge on passenger side is loose from rust damage) 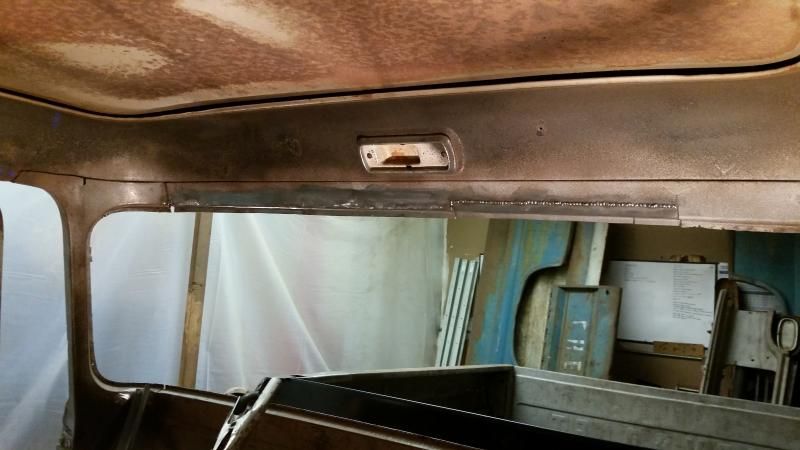 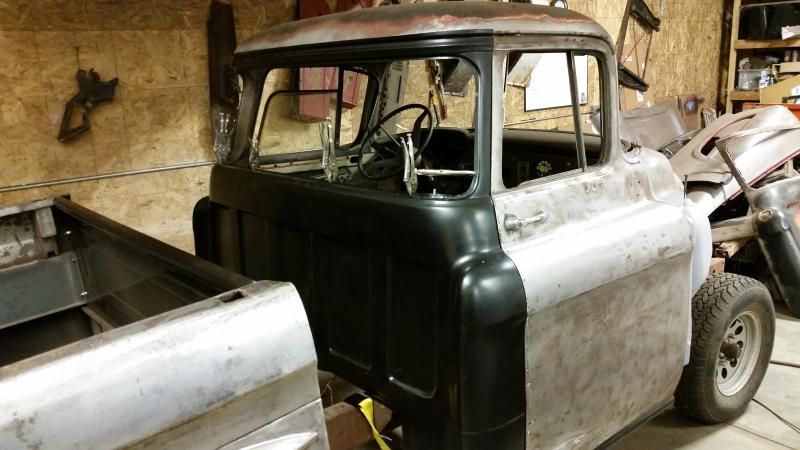 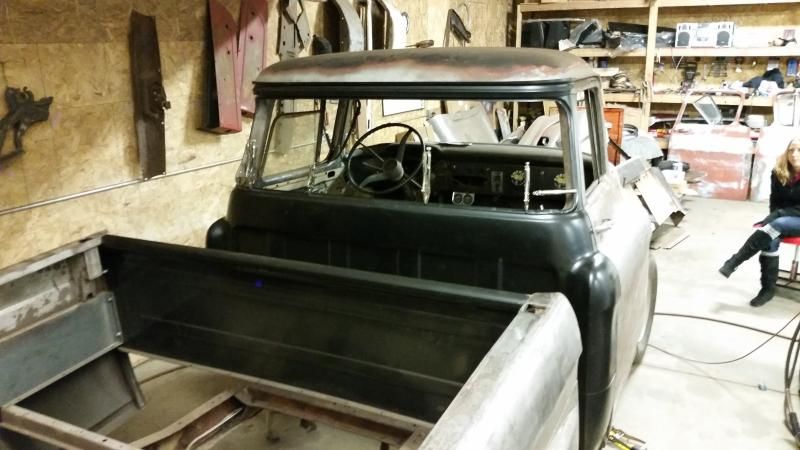 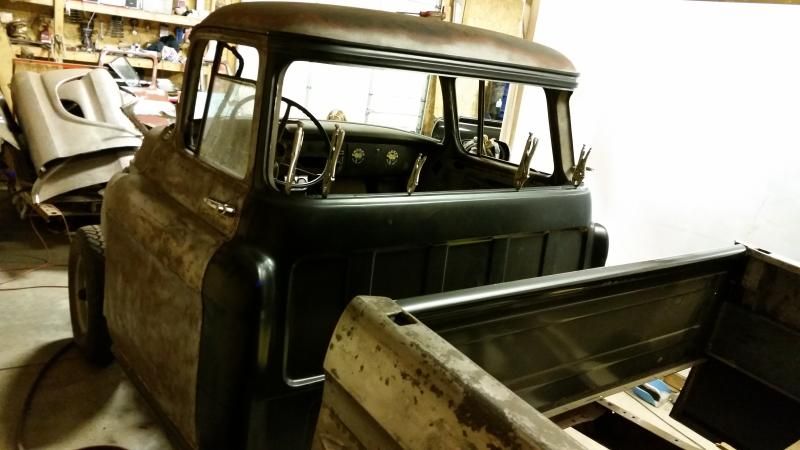 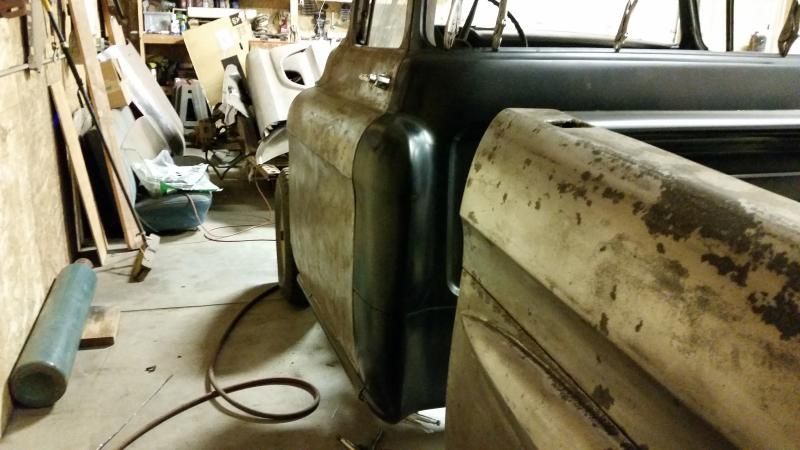 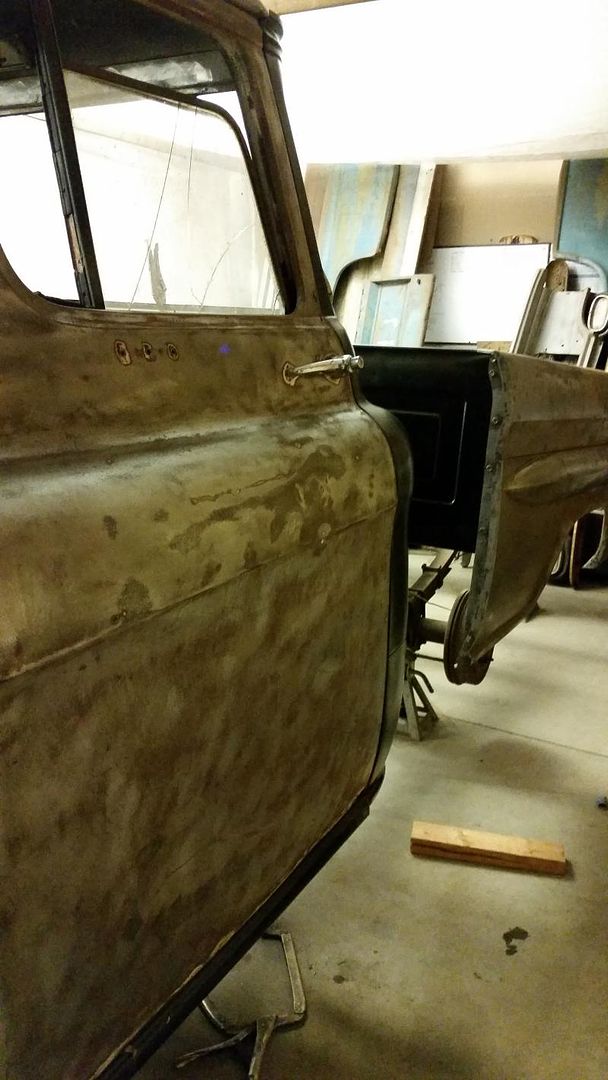 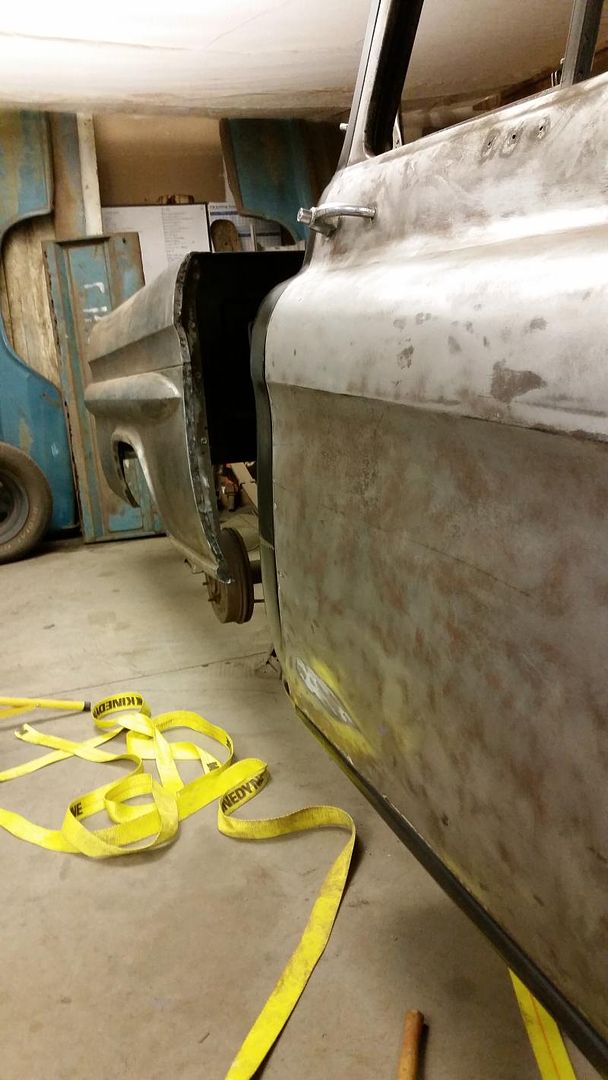 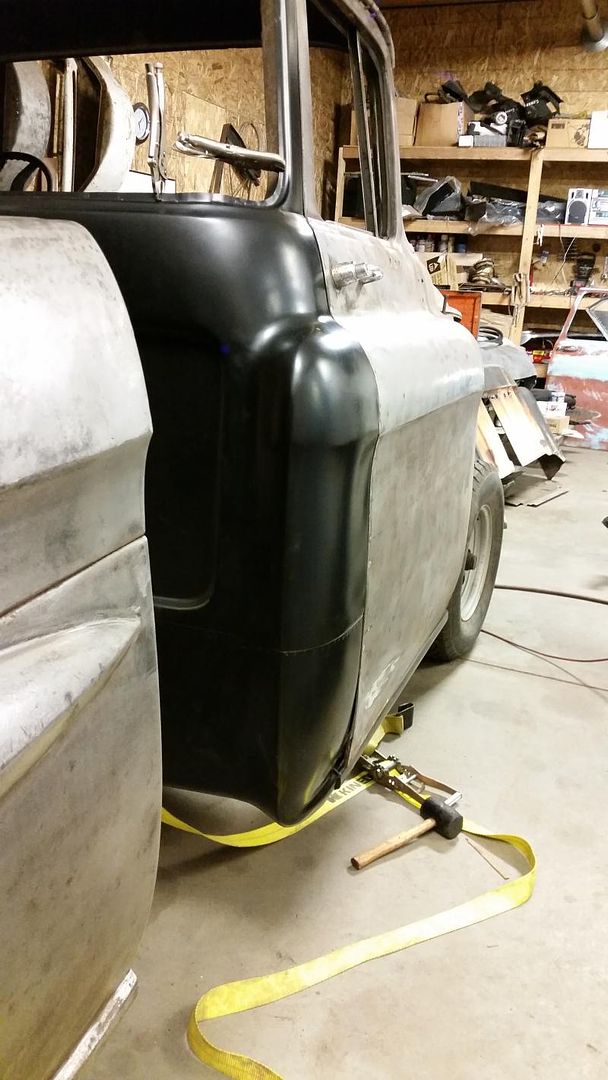 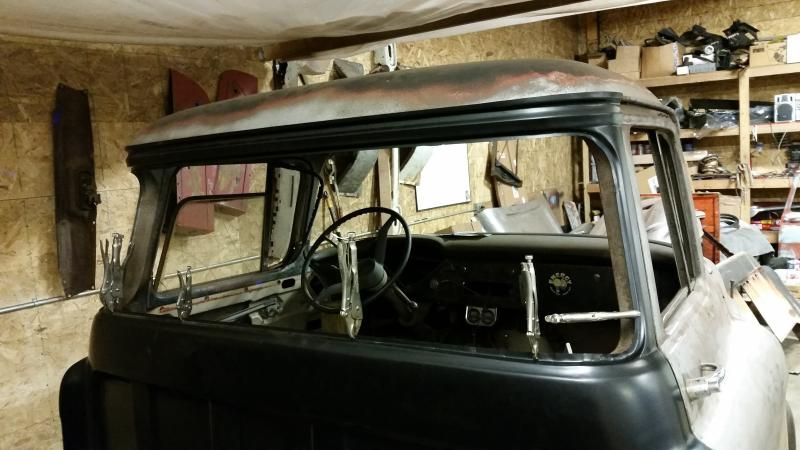 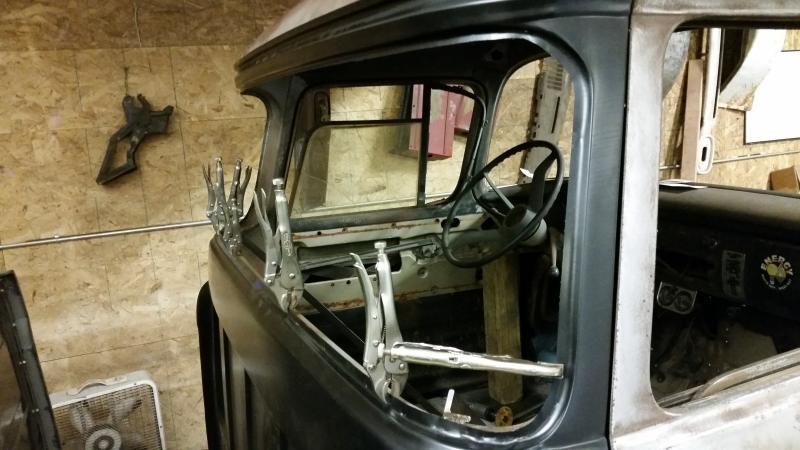 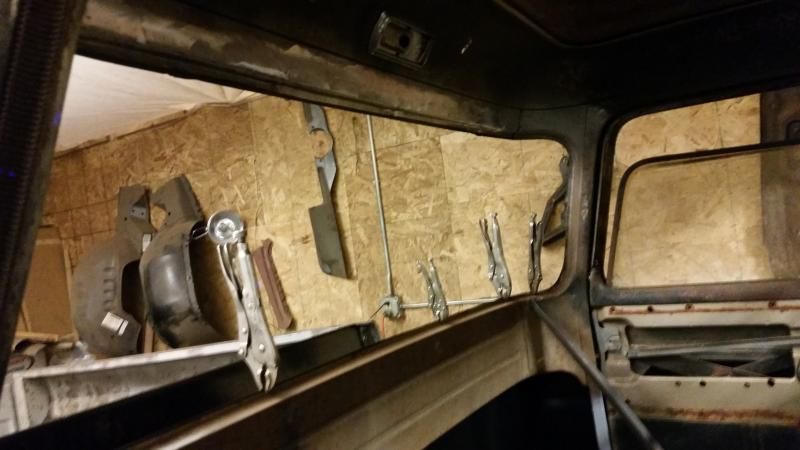
|
|
|

|
|
|
#89 |
|
Senior Member
 Join Date: Mar 2011
Location: West Plains, Missouri
Posts: 7,559
|
Re: Dunce's 59 Fleetside build
That's a big job, but you are doing a great job, everything seems like it's lining up fairly nice...Jim
__________________
my build thread: http://67-72chevytrucks.com/vboard/s...d.php?t=459839 Jimbo's long bed step build:http://67-72chevytrucks.com/vboard/s...t=464626<br /> |
|
|

|
|
|
#90 |
|
Registered User
Join Date: Aug 2007
Location: Corona, California
Posts: 7,998
|
Re: Dunce's 59 Fleetside build
Looks like it's going to turn out real nice.
Kim |
|
|

|
|
|
#91 |
|
Registered User
Join Date: Sep 2014
Location: Fremont, NE
Posts: 154
|
Re: Dunce's 59 Fleetside build
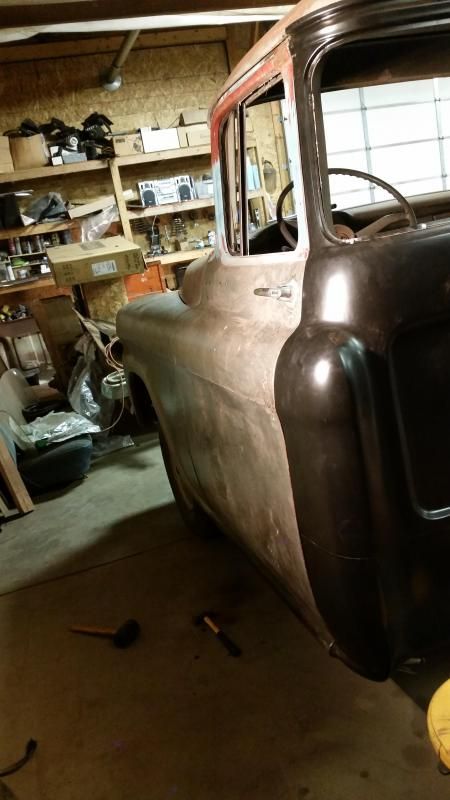
Started working on a better set of doors. They both need a small portion of the inner bottom structure replaced (I know, shocking isn't it?). I tacked a patch in and decided to fit the door to the cab before welding it solid. Good thing too because despite my best effort, I lost the correct dimensions of the door bottom so the front portion of the door edge sticks out just a bit too far past the rocker with everything else lined up. So I'm going to slice out a small section and tack in place with the door on the truck to get it right before finishing that up.
Also had to repair the hinge pocket - nuts ect were completely ripped/rusted out of it. I made some holes in the hing pocket before removing it so I could line it back up. But somehow its mounting pad depth was completely off which led to ---> I spent a whole day fighting that door.. trying to get it to line up just right. I finally had to shim the bottom hinge on the door side to bring the top of the door in -I had no more adjustment left otherwise. With everything I've done its not surprising. I also had to use a jack to expand the distance between the door pillars in the middle.. by about 1/8 of an inch.. maybe a touch more. Same thing on the driver side. Doors were just too tight otherwise. Something happened to this cab at some point -original doors fit the same way, even ignoring the edge of the new rear panel. But finally just before I was ready to throw in the towel for the day I shut the door and it was dead nuts on. Put in the door catch and with just the slightest touch, she clicks into place and all is well. Now that was satisfying. Loosely hung the inner fenders, core support and passenger fender to see how that was looking. Not bad there either. I have to weld in the fender brace patch and fold over the fender edge yet. So from here its wrapping the up the pass door/fender, then do the passenger side door/fender before I go back to tweaking on the rear panel. I've noticed the replacement rockers need to have their outer edge twisted down a bit to look like factory.. once I do that they should line up well with the new rear panel and fender lines. Its not terrible now but with everything in place I can see whats going on there now. Fender needs another shim to bring it up just a bit... 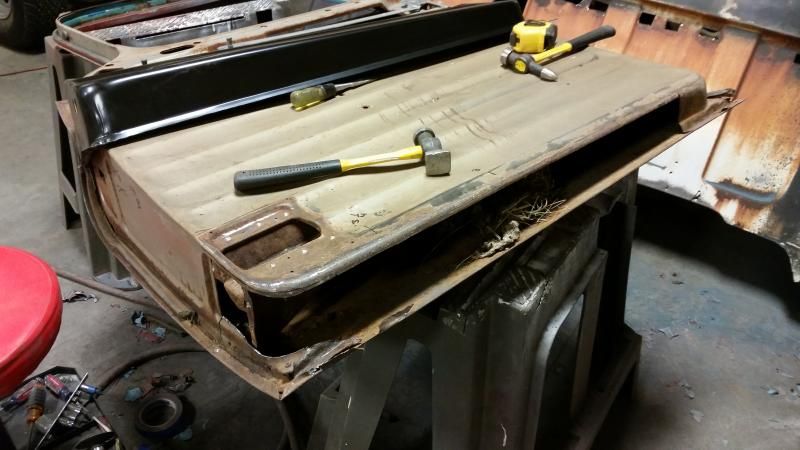 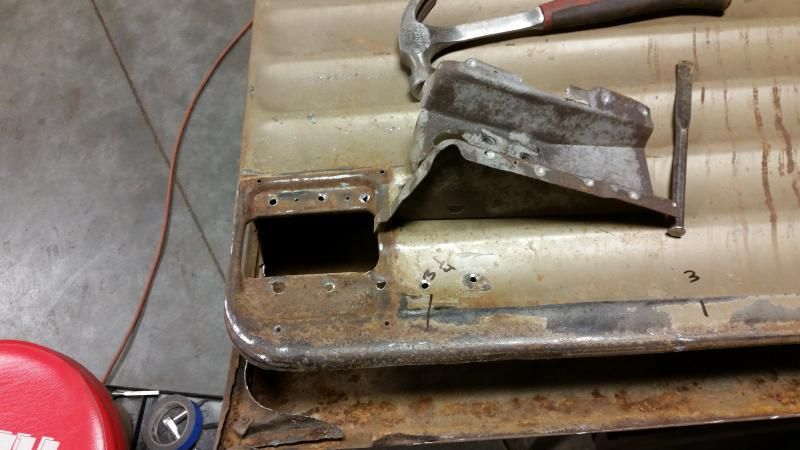 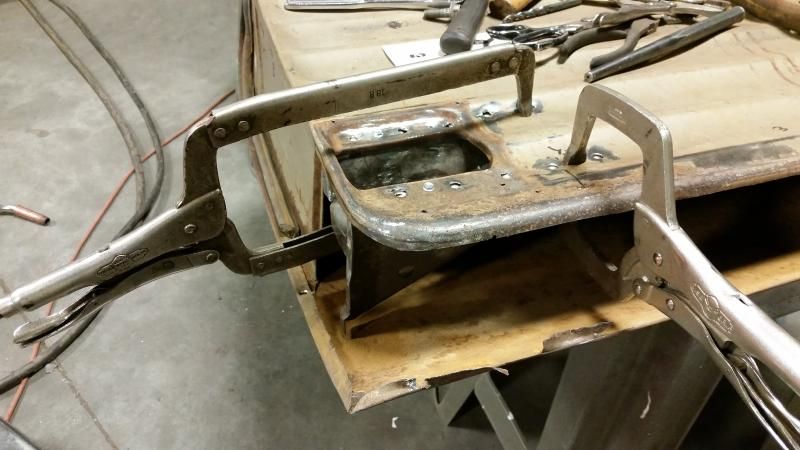 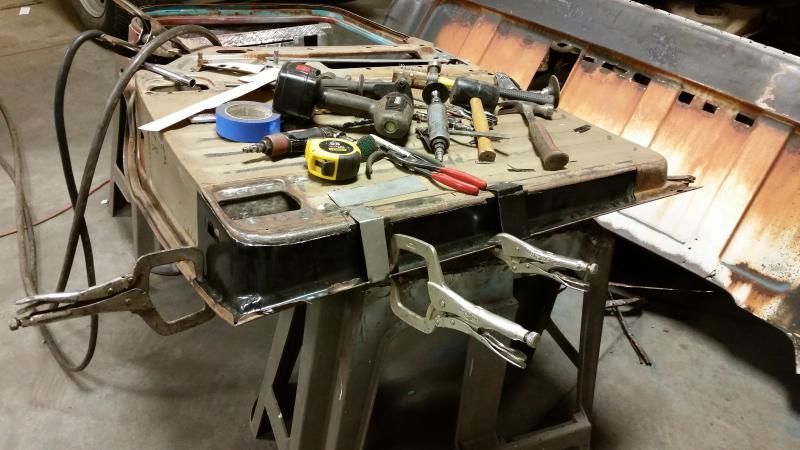 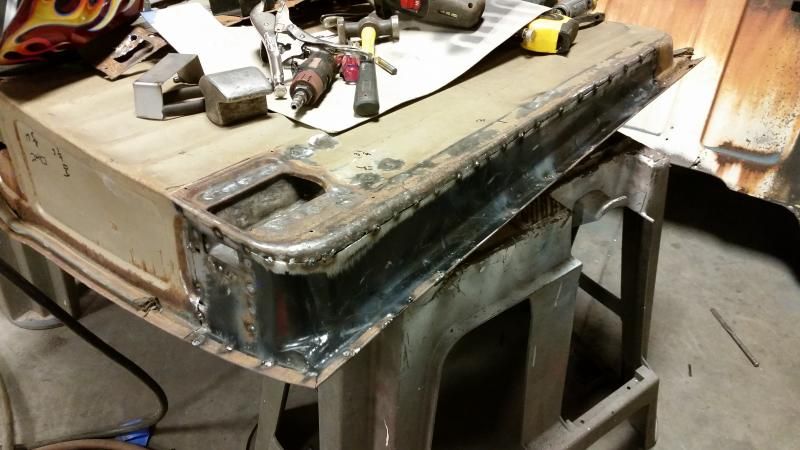 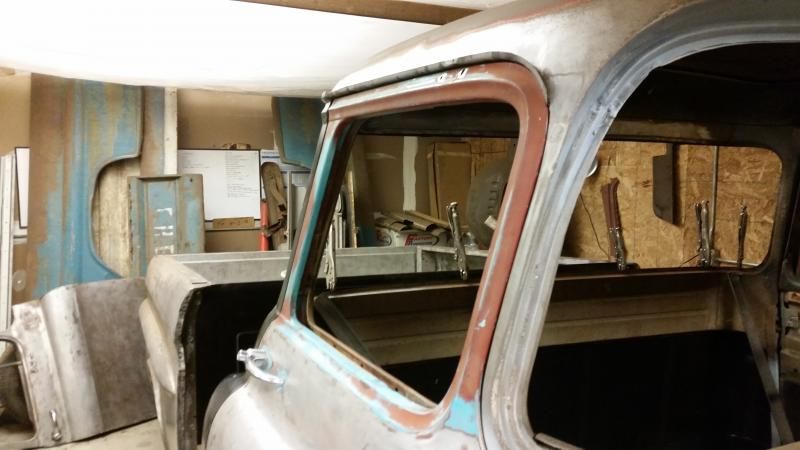 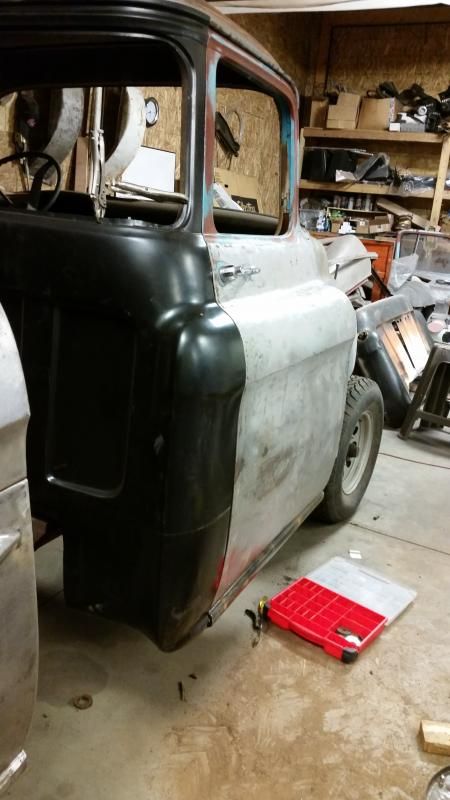 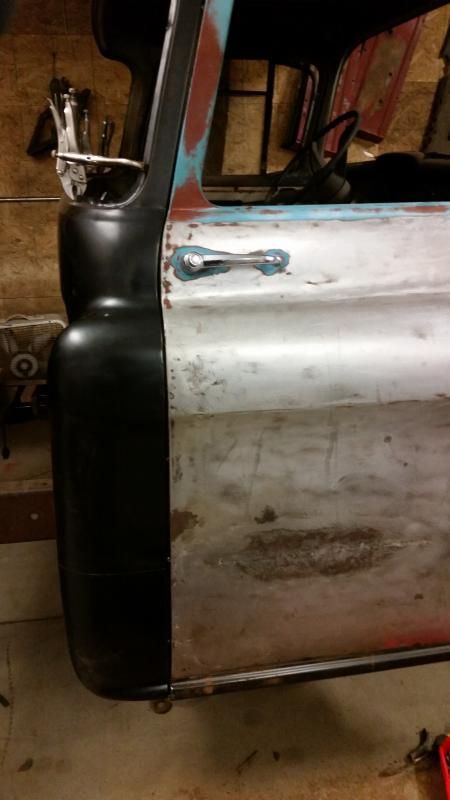 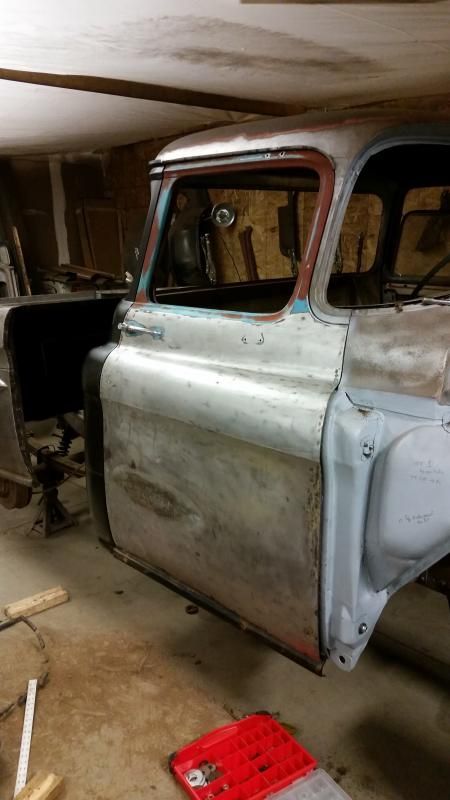 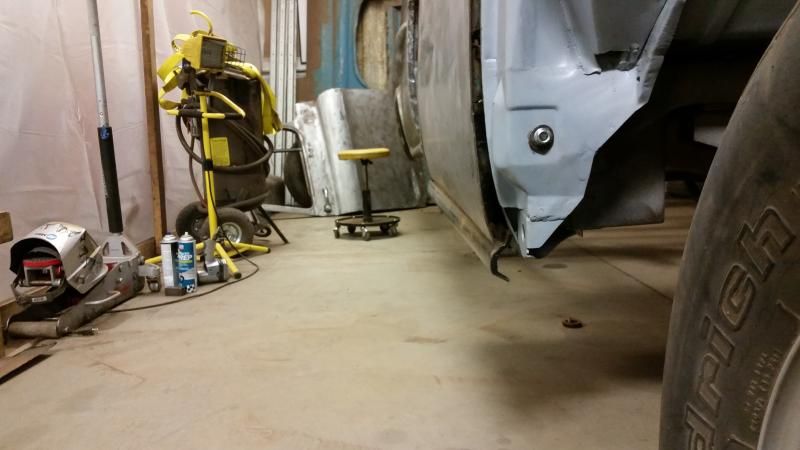 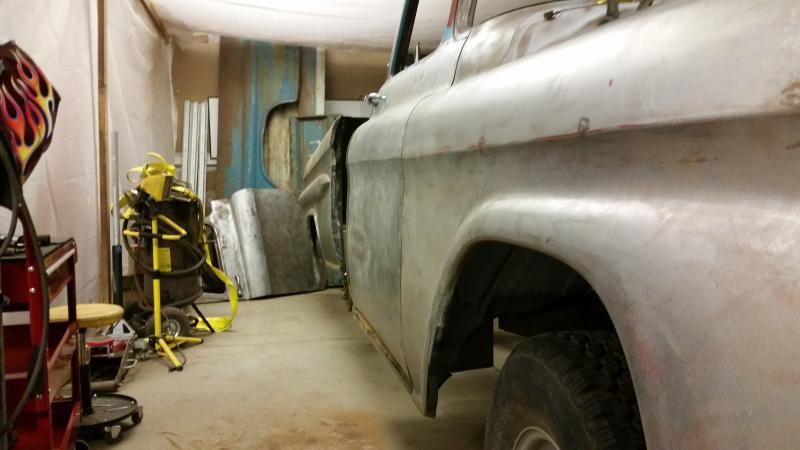 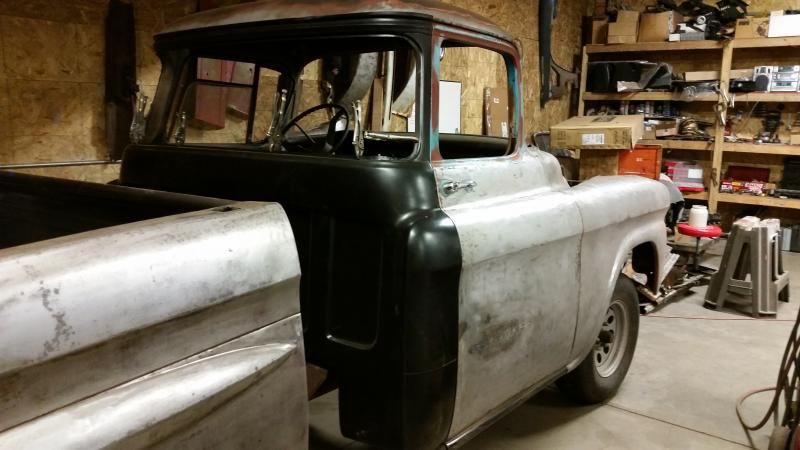
|
|
|

|
|
|
#92 |
|
Senior Member
 Join Date: Mar 2011
Location: West Plains, Missouri
Posts: 7,559
|
Re: Dunce's 59 Fleetside build
You've been a busy little camper, and doing some great repair work, nice job...Jim
__________________
my build thread: http://67-72chevytrucks.com/vboard/s...d.php?t=459839 Jimbo's long bed step build:http://67-72chevytrucks.com/vboard/s...t=464626<br /> |
|
|

|
|
|
#93 |
|
Registered User
Join Date: Feb 2012
Location: Memphis, TN
Posts: 285
|
Re: Dunce's 59 Fleetside build
Man you are killing it! That last picture (passenger side) is great - and thanks for taking the time to post pictures of all your metalwork. At the rate the metal work is going, you are going to have to settle on a drivetrain soon!
__________________
Rick's 55 TF/Fleetside/LSx build 1958 Corvette LS1/T56 Build 1966 GTO LQ9/T56 Restomod |
|
|

|
|
|
#94 |
|
Registered User
Join Date: Aug 2007
Location: Corona, California
Posts: 7,998
|
Re: Dunce's 59 Fleetside build
You're doing a great job on the repairs.
Looks real good. Kim |
|
|

|
|
|
#95 |
|
Registered User
Join Date: Sep 2014
Location: Fremont, NE
Posts: 154
|
Re: Dunce's 59 Fleetside build
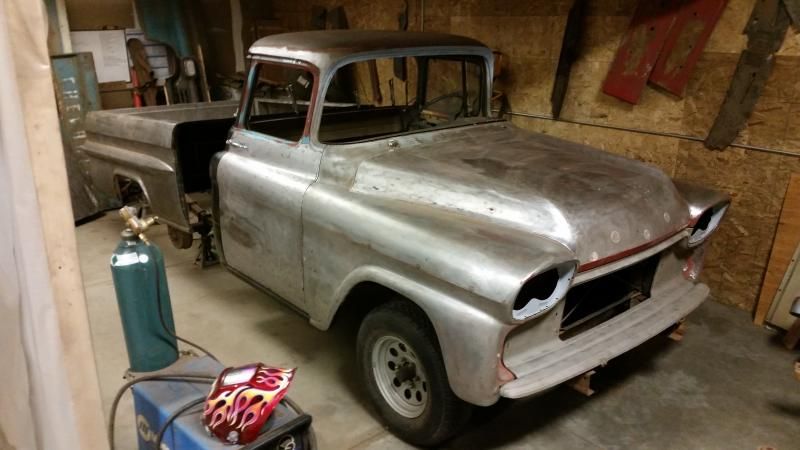
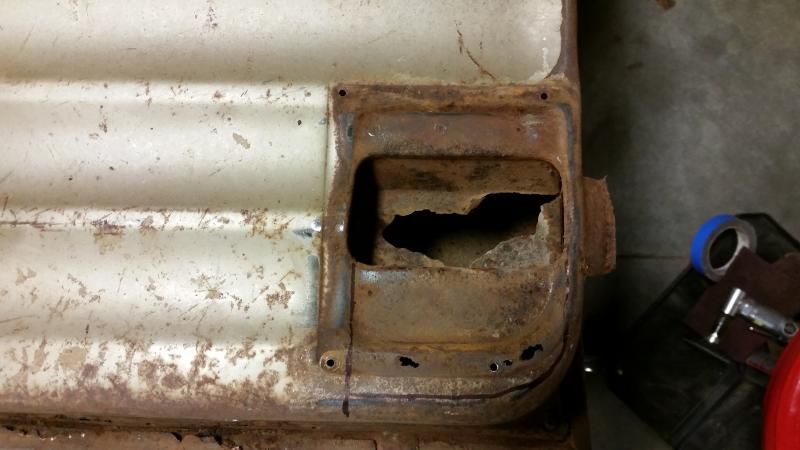
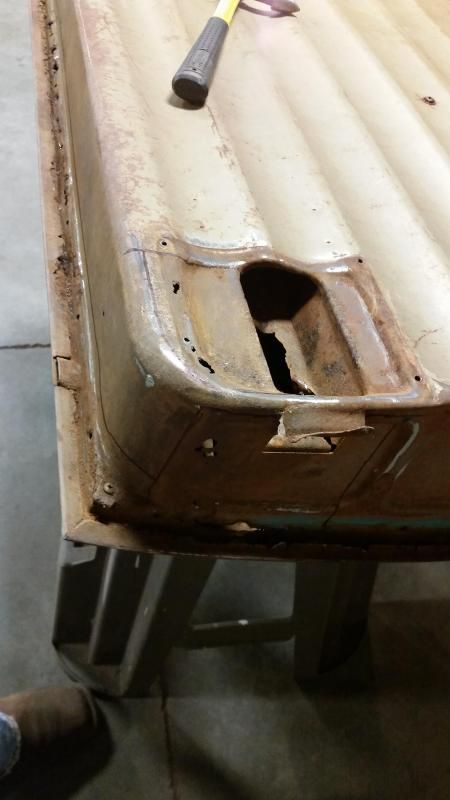
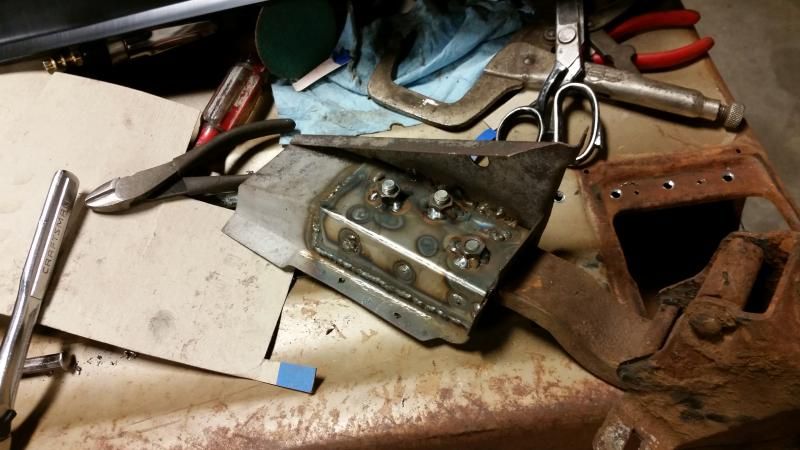
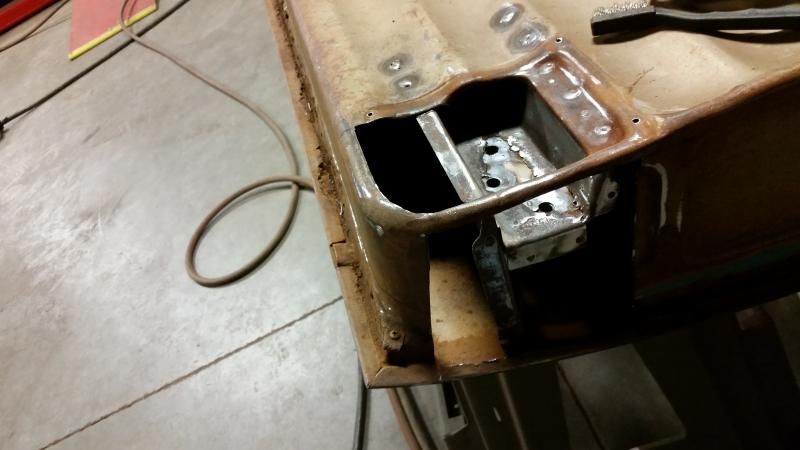
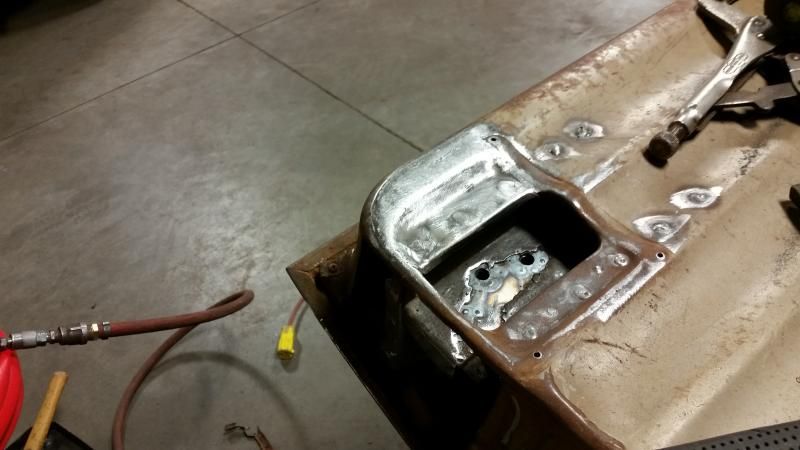
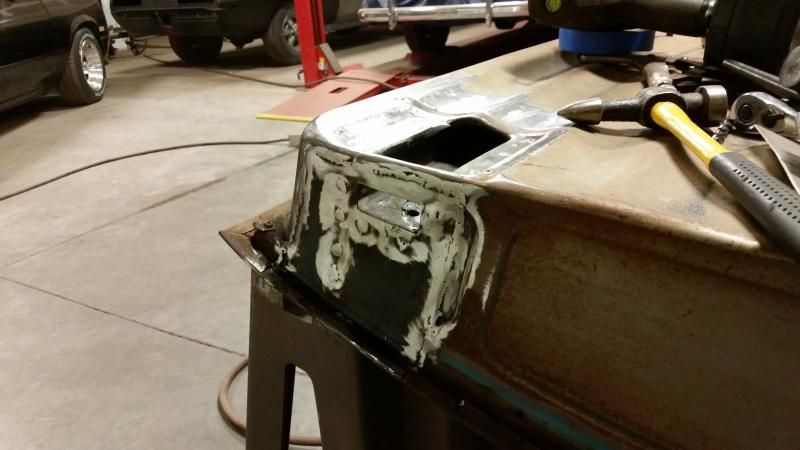
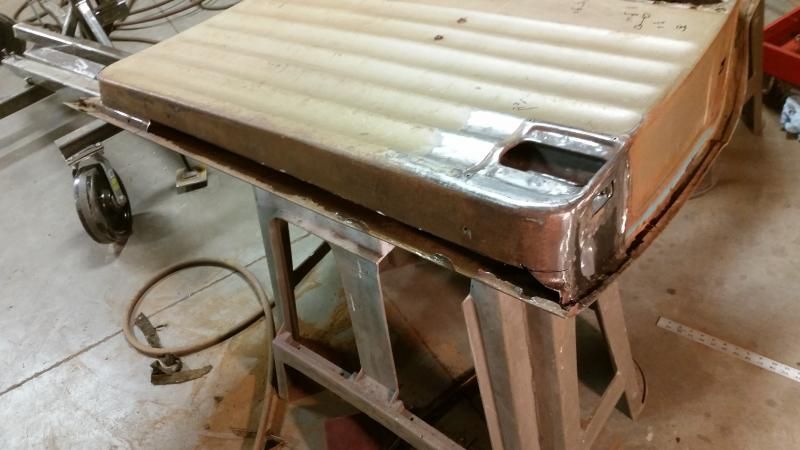
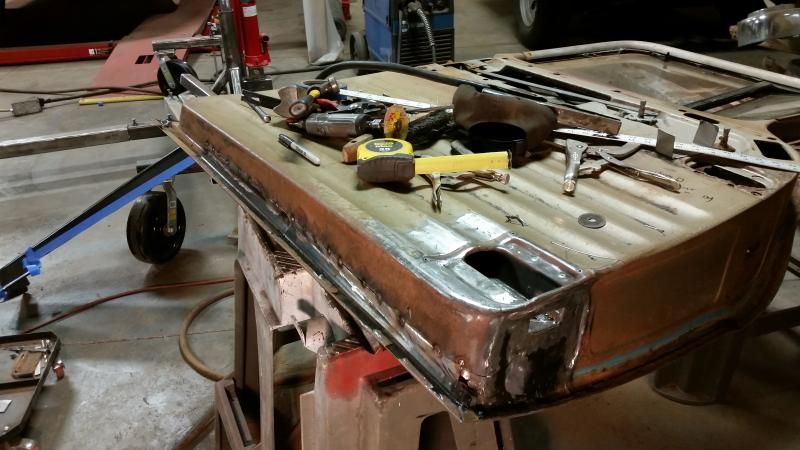
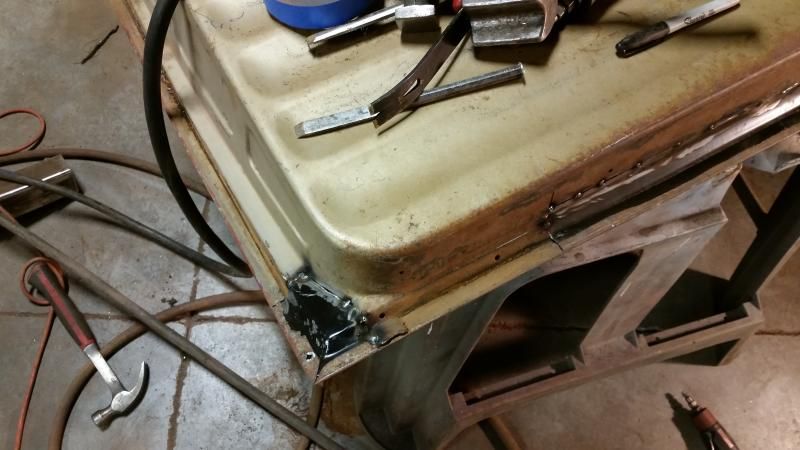
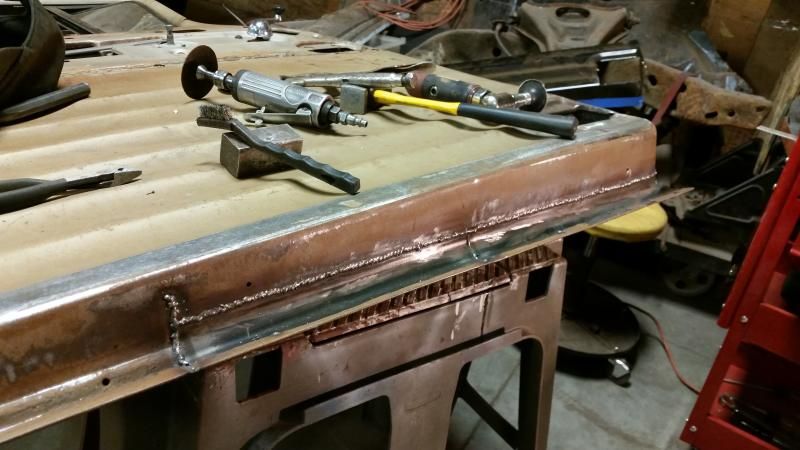
Did a rough fit of the front sheet metal, repaired and mounted the driver door and now i'm fitting the rear window. So far so good. The Window looks like its going to fit fine with some minor adjustment to the top of the panel. Once the rear panel is in for good I'll make some minor adjustments to the rockers so the body lines flow correctly. Bout time to get going on suspension and drivetrain.. whoohoo!
|
|
|

|
|
|
#96 |
|
Senior Member
 Join Date: Mar 2011
Location: West Plains, Missouri
Posts: 7,559
|
Re: Dunce's 59 Fleetside build
Nice repairs to the door. Everything looks like it's lining up good, nice job...Jim
__________________
my build thread: http://67-72chevytrucks.com/vboard/s...d.php?t=459839 Jimbo's long bed step build:http://67-72chevytrucks.com/vboard/s...t=464626<br /> |
|
|

|
|
|
#97 |
|
Registered User
Join Date: Aug 2007
Location: Corona, California
Posts: 7,998
|
Re: Dunce's 59 Fleetside build
Looks real good.
Kim |
|
|

|
|
|
#98 |
|
A320 Pilot/USAF Retired
Join Date: Mar 2009
Location: Charleston, SC
Posts: 2,629
|
Re: Dunce's 59 Fleetside build
Looking good!
__________________
JJ My 1957 build: http://67-72chevytrucks.com/vboard/s...d.php?t=334552 http://www.trifive.com/forums/showthread.php?t=22037 Instagram - Chuckdriver57 |
|
|

|
|
|
#99 |
|
Registered User
Join Date: Jan 2015
Location: Santa Monica
Posts: 264
|
Re: Dunce's 59 Fleetside build
You've done some fantastic work on this truck... almost like building a new one!
Good on you. Subscribed 
__________________
Déjà vu. It's that feeling you get when you hit your thumb with the hammer a second time '59 Chevy 3100 Stepside |
|
|

|
|
|
#100 |
|
Registered User
Join Date: Sep 2014
Location: Fremont, NE
Posts: 154
|
Re: Dunce's 59 Fleetside build
a bit more progress with a small setback...
-Fixed drivers door top corner that was mashed in -Cut the front frame section off in preparation for the camaro (73 firebird) subframe only to find that my sub frame (passenger rail) is bent. Working on getting that fixed. -So in the mean time I removed the rear suspension and mocked up the Fat Bar 4 link -set the truck down on the rear suspension, front on jack stands to get an idea of ride height ect. From the pix I would say down another inch or two but its not bad. -took some measurements for rear wheel tire combo, got that locked in. Can't wait to order those after getting the fronts figured out. -Pulled the 12 bolt rearend out to get a posi put in and 5 lug axles installed With my rear end out and front clip getting fixed I'm left with a long list of misc stuff I need to do until I can get back to the major items. What do you guys think of how the wheel is centered in the rear? From stock it moved back about 1/4 inch with the 4 link install but I have some adjustment there if needed. 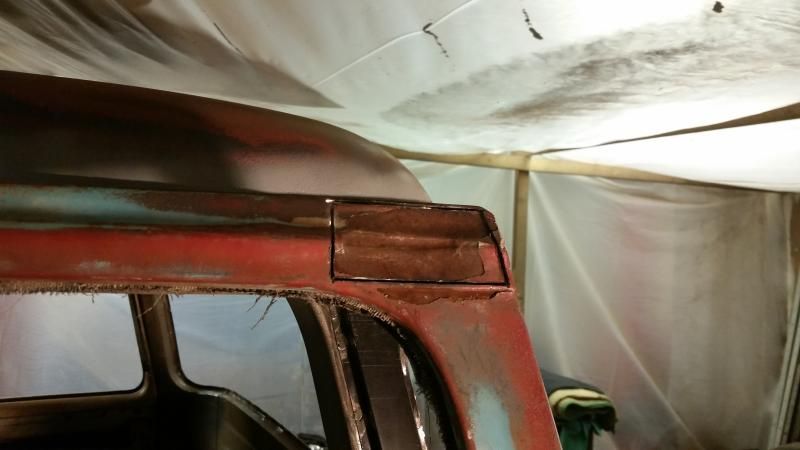 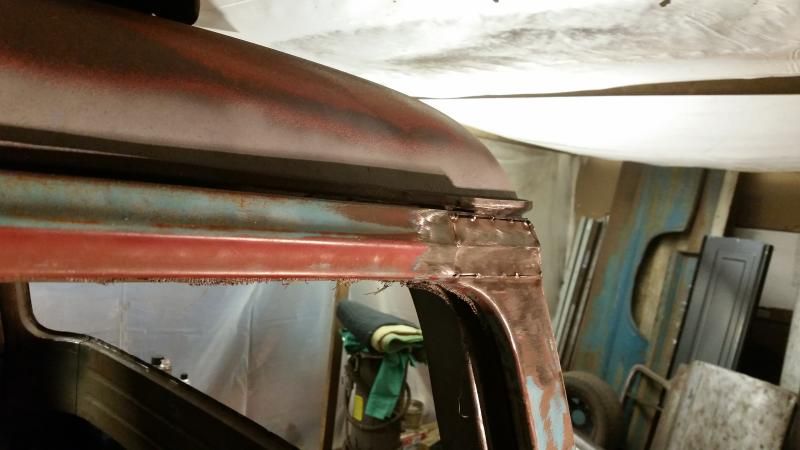 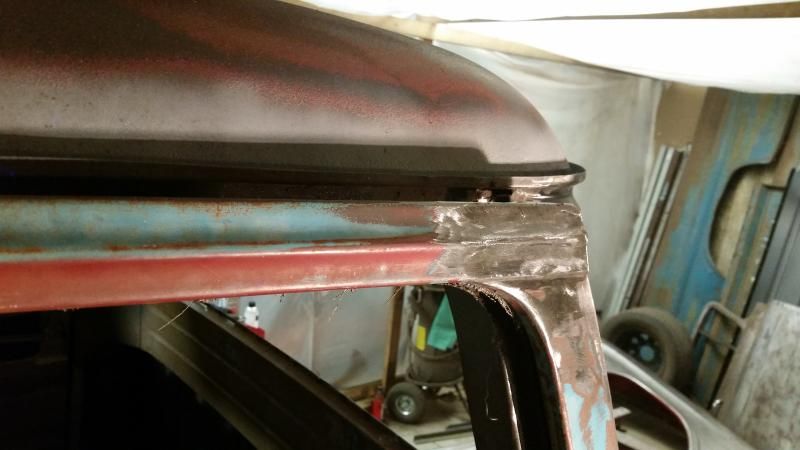 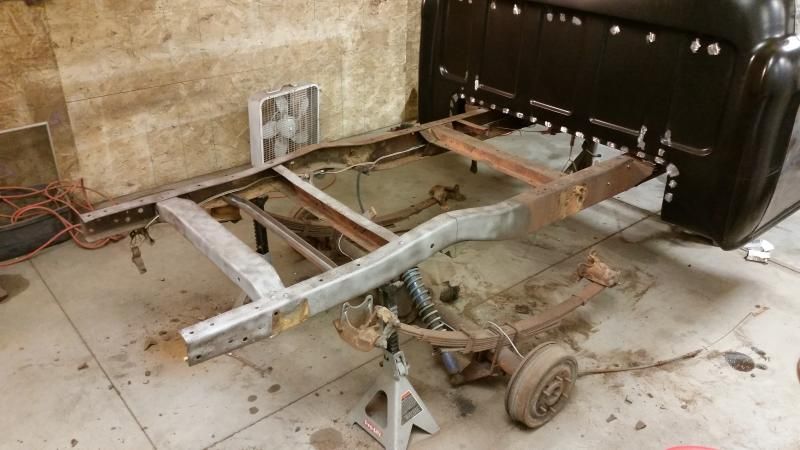 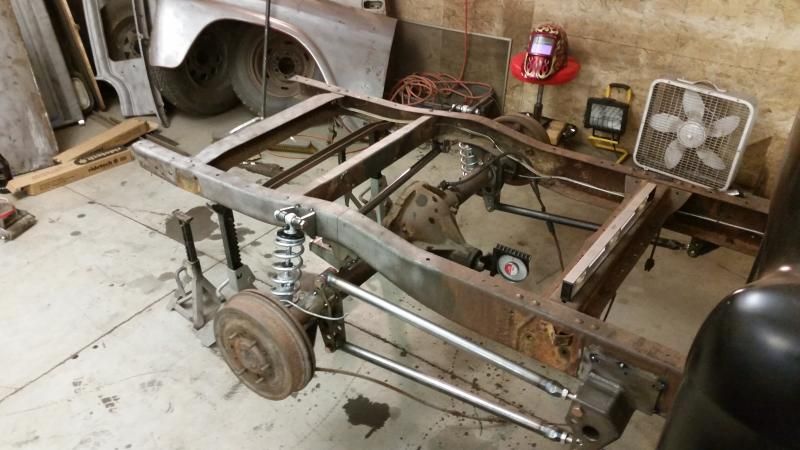 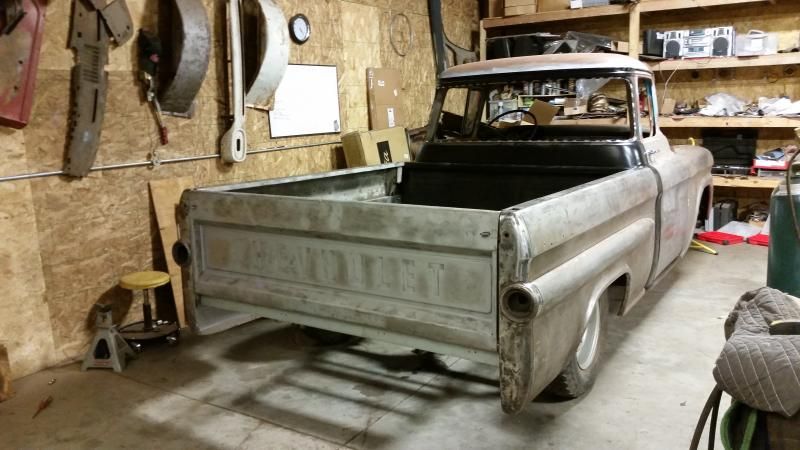 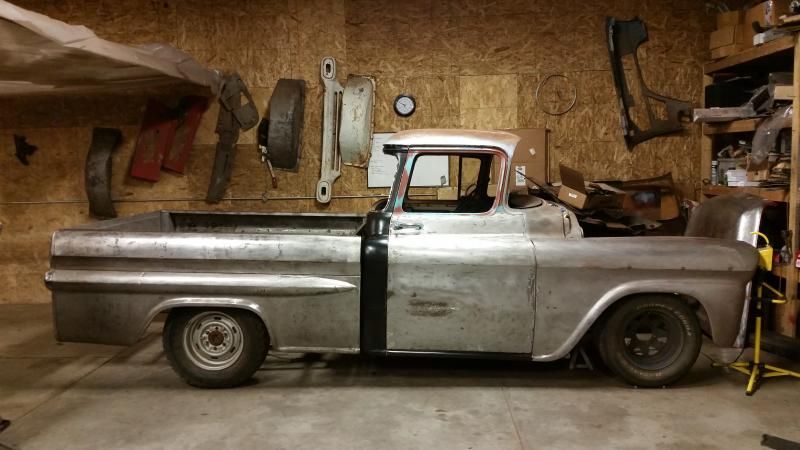 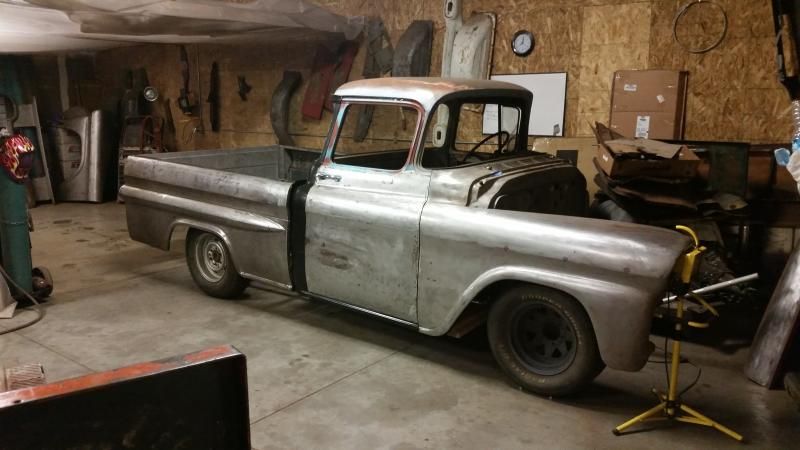 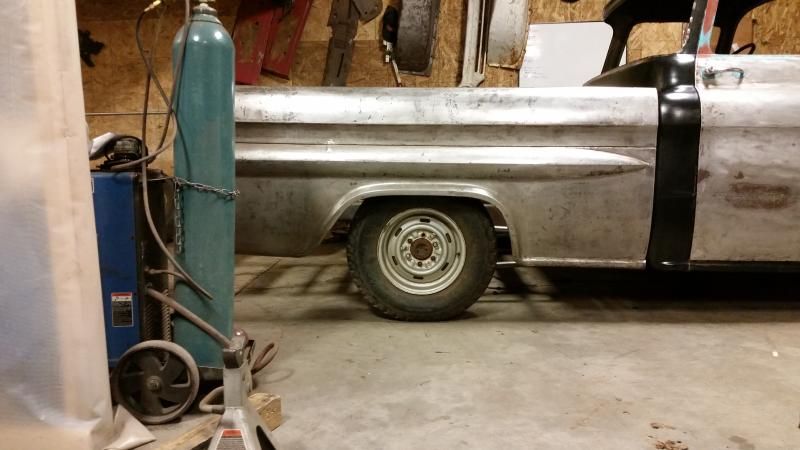 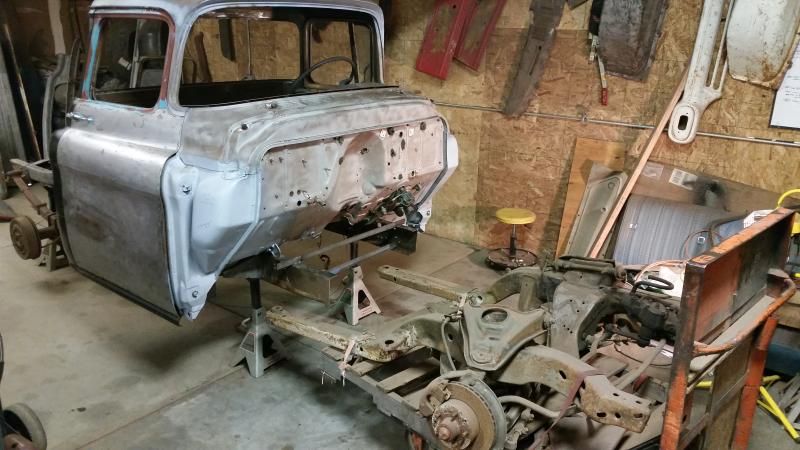
|
|
|

|
 |
| Bookmarks |
|
|