
|
 01-12-2022, 01:53 PM
|
#1276 |
|
Post Whore
  Join Date: May 2015
Location: Alabama
Posts: 14,583
|
Re: 55 Wagon Progress
Wow...that artwork on the Lennox..!!!!!!!
Is that what they call technical illustration artwork?
__________________
Mongo...aka Greg RIP Dad RIP Jesse 1981 C30 LQ9 NV4500..http://67-72chevytrucks.com/vboard/s...d.php?t=753598 Mongos AD- LS3 TR6060...http://67-72chevytrucks.com/vboard/s...34#post8522334 Columbus..the 1957 IH 4x4...http://67-72chevytrucks.com/vboard/s...63#post8082563 2023 Chevy Z71..daily driver Last edited by mongocanfly; 01-13-2022 at 02:16 PM. |

|

|
|
01-13-2022, 11:05 AM
|
#1277 |
|
Senior Member
Join Date: Mar 2011
Location: West Plains, Missouri
Posts: 7,553
|
Re: 55 Wagon Progress
Great work, that painting on the equipment will be off the chart...Jim
__________________
my build thread: http://67-72chevytrucks.com/vboard/s...d.php?t=459839 Jimbo's long bed step build:http://67-72chevytrucks.com/vboard/s...t=464626<br /> |
|
|
|
|
01-30-2022, 01:31 PM
|
#1278 |
|
Registered User
Join Date: Jan 2013
Location: Leonardtown, MD
Posts: 1,633
|
Re: 55 Wagon Progress
Thanks guys!! Greg, I believe it is a form of Steampunk...
More blocking, then more epoxy...     Another hurdle in the way of running our wiring under the dash, we need to address the defrost vents for the Vintage Air unit. What they send is cheesy at best, and given they only send two vents where Chevy installed 4, we're going to go another route.. https://www.youtube.com/watch?v=gUiF-2vXe8E The factory piece does take up quite a bit of real estate, and now interferes with the raingear wiper system and the VA heater box.  So all things considered, we plan on using the original vent top portion and adapt tubing in the equation to make use of a more flexible hose arrangement. The VA has two 2" outlets at the top for defrost, so we will use a 2" tube to feed the center two vents, and 1-1/4" tubes to feed to the outer vents. 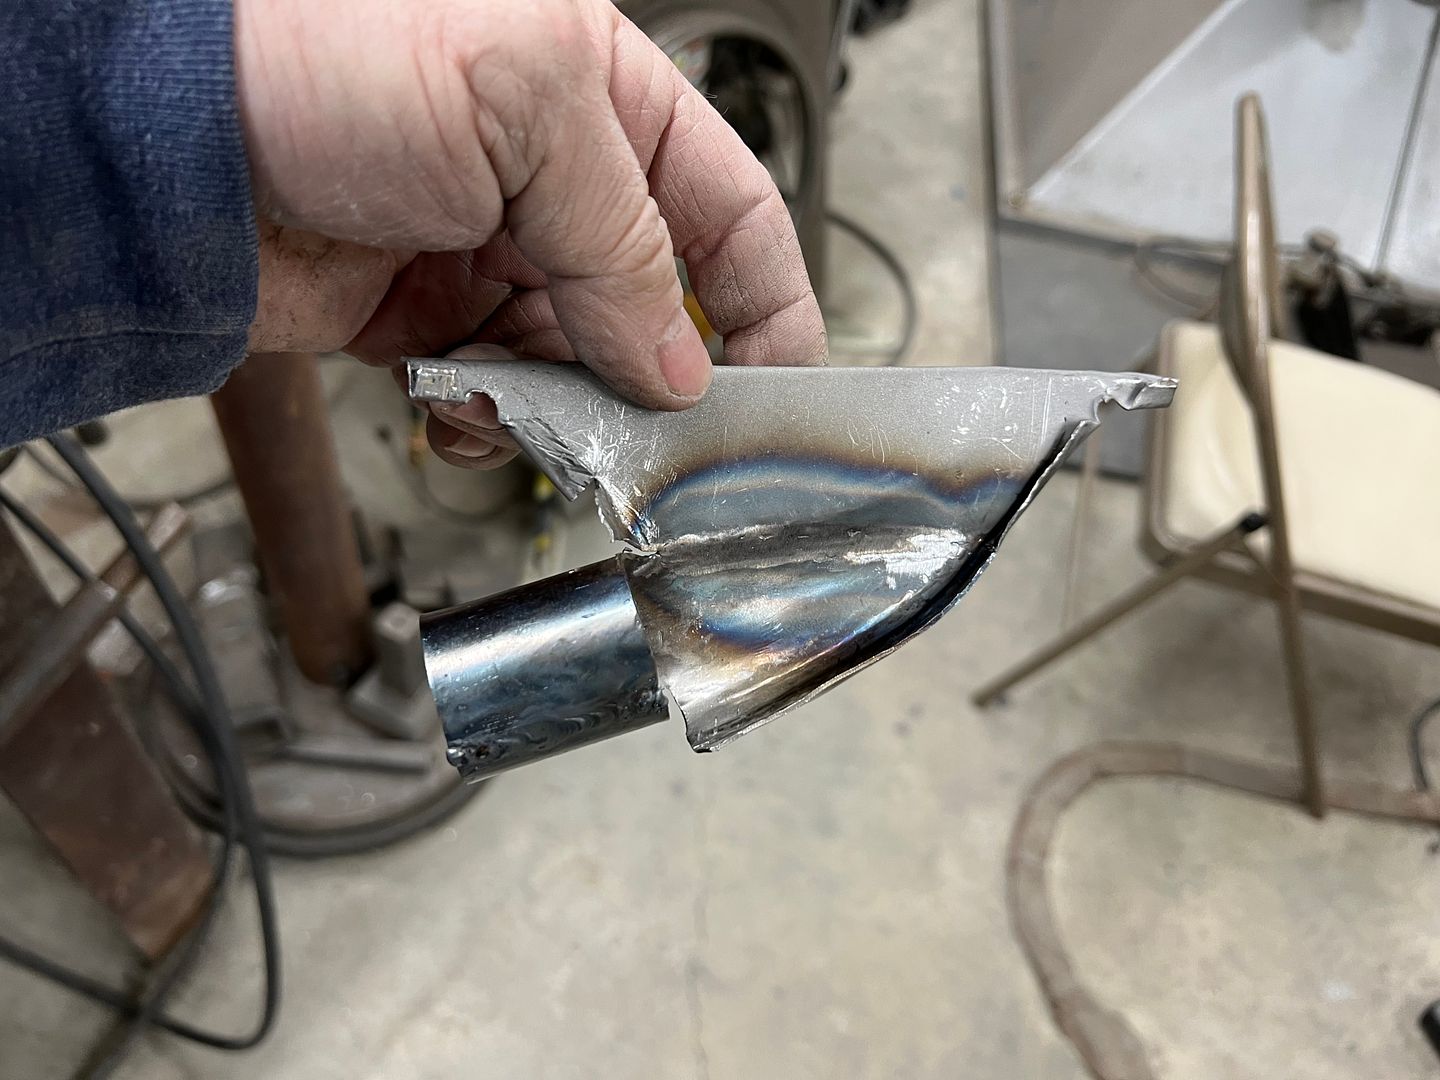 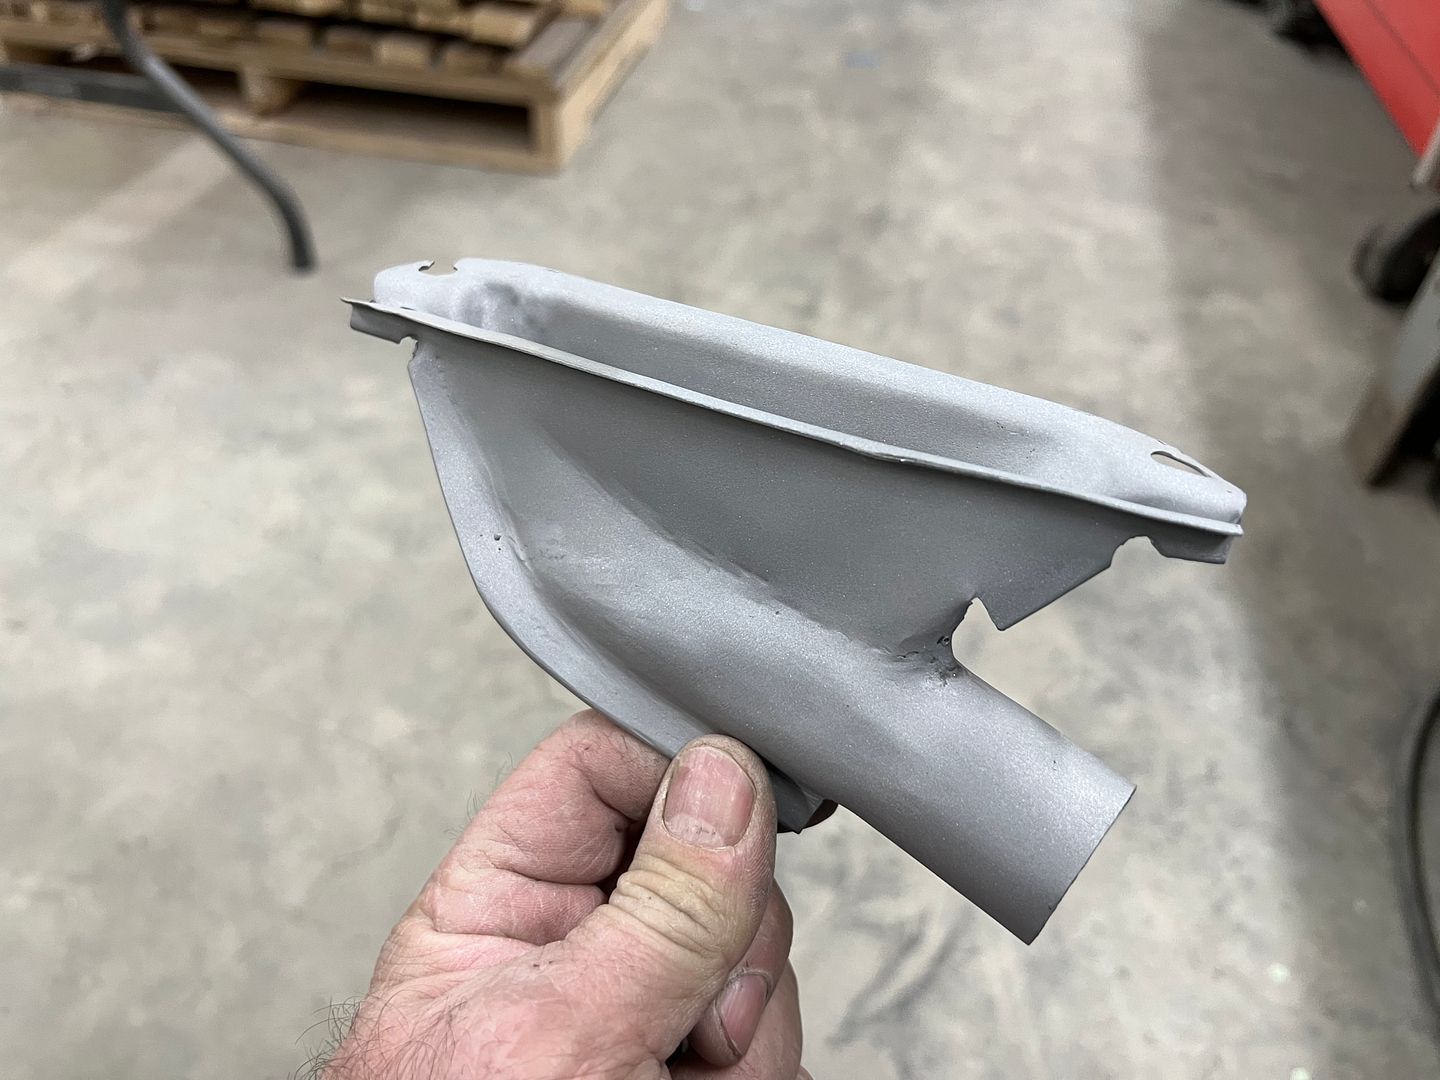 Missed some of the details with that one, a bit more for the center vent.. 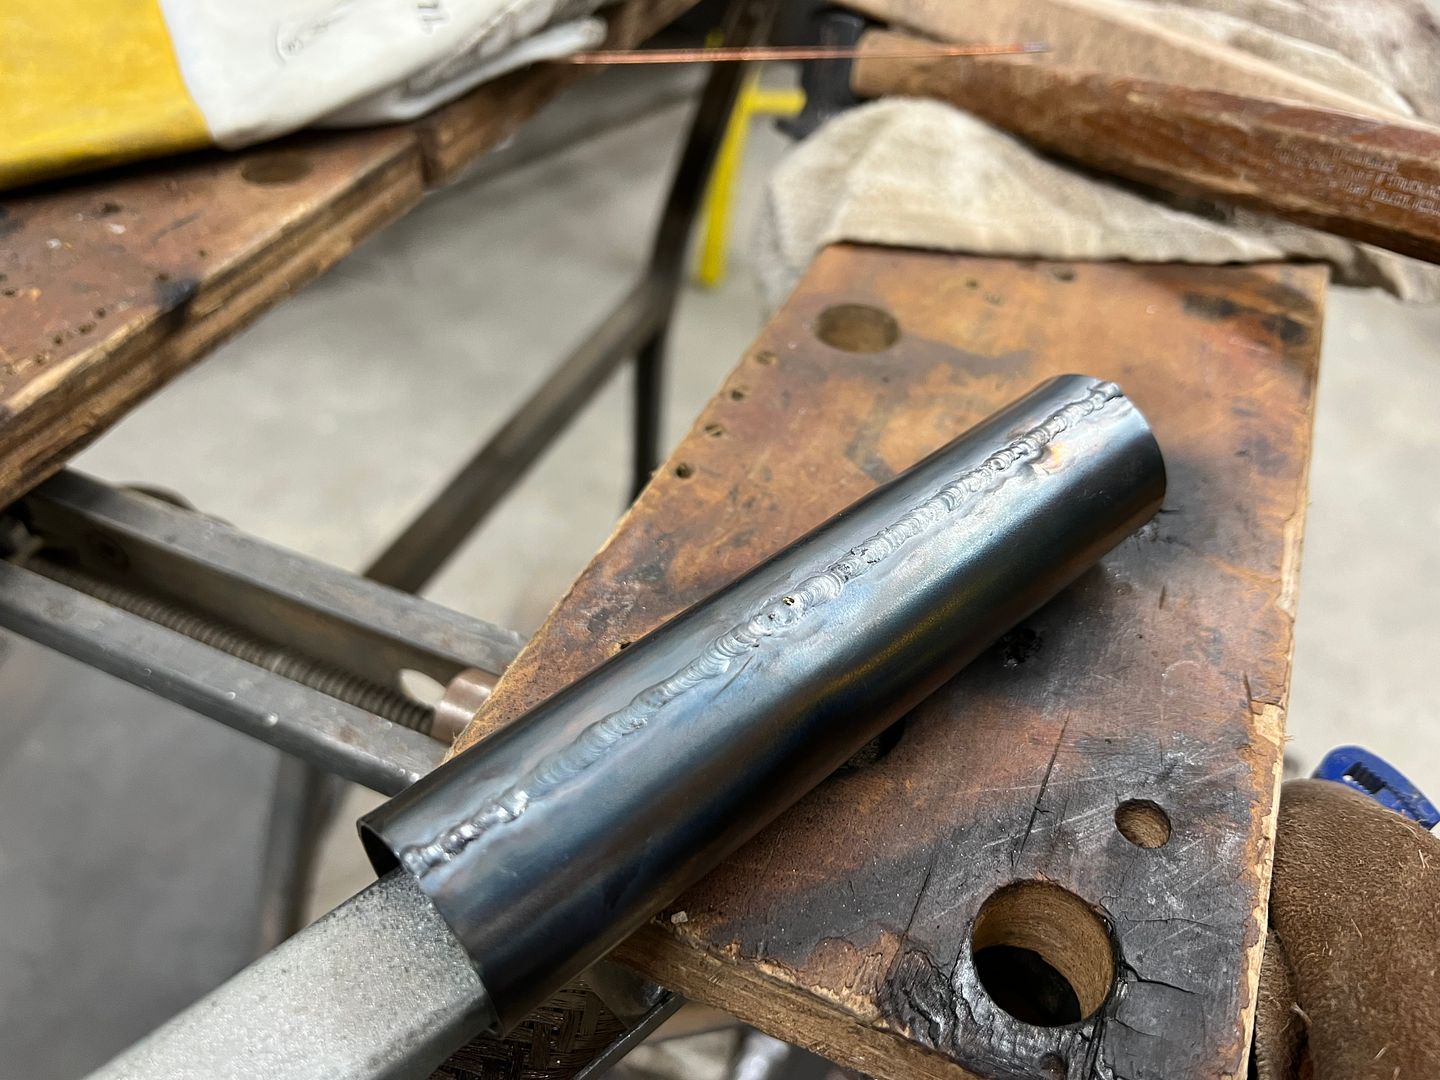 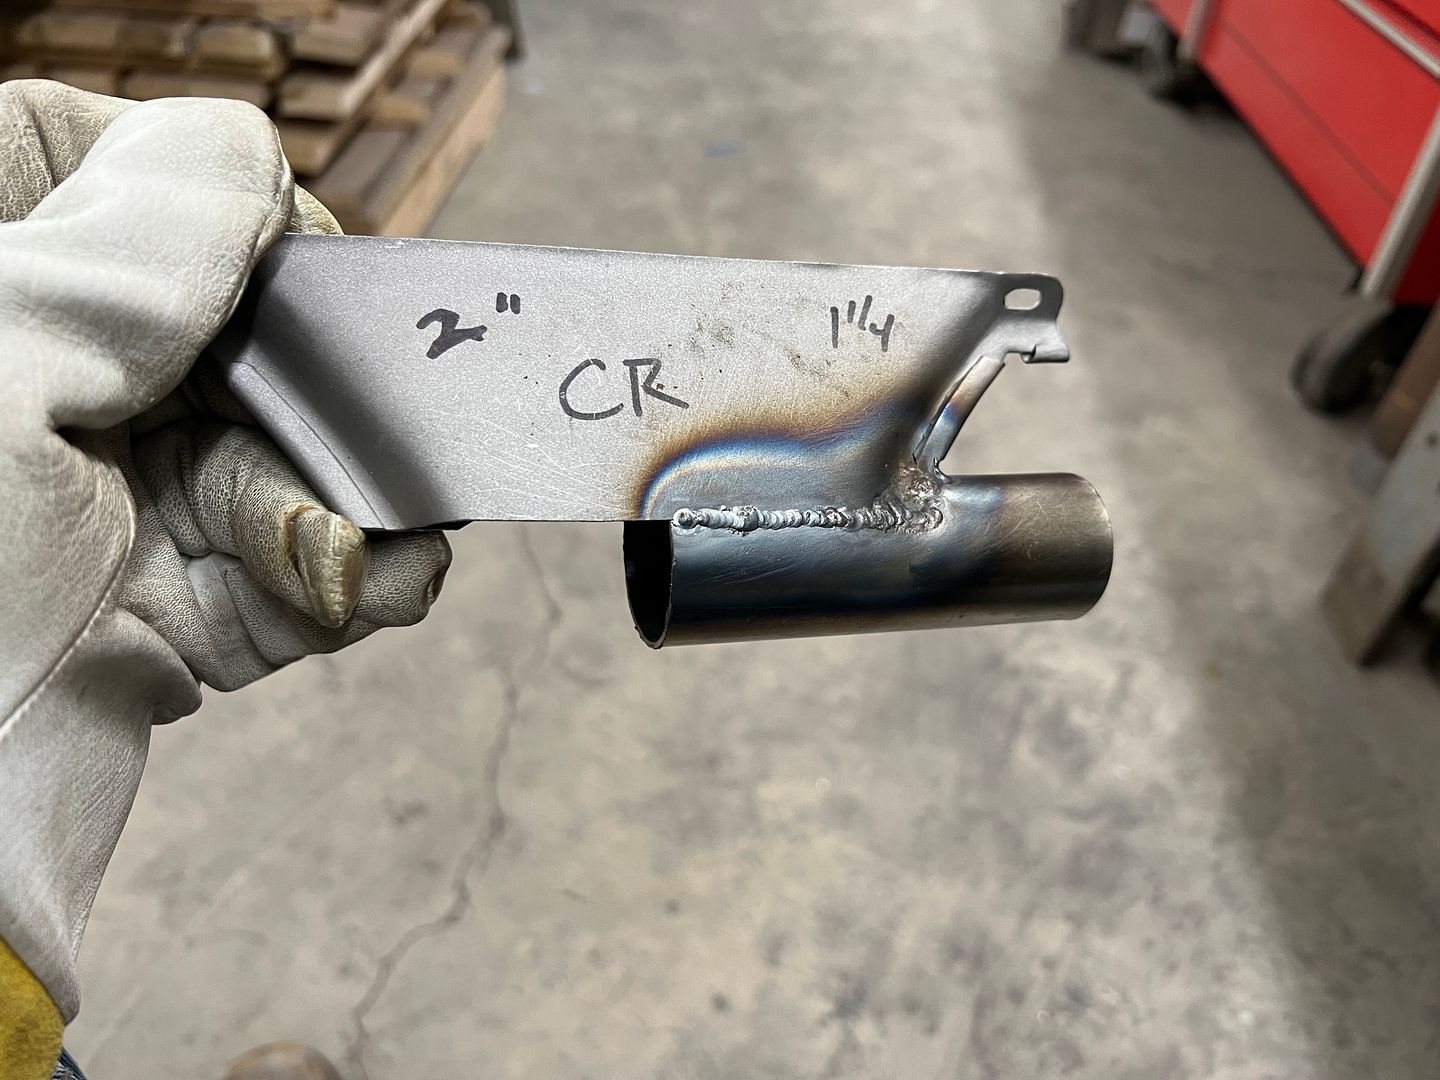 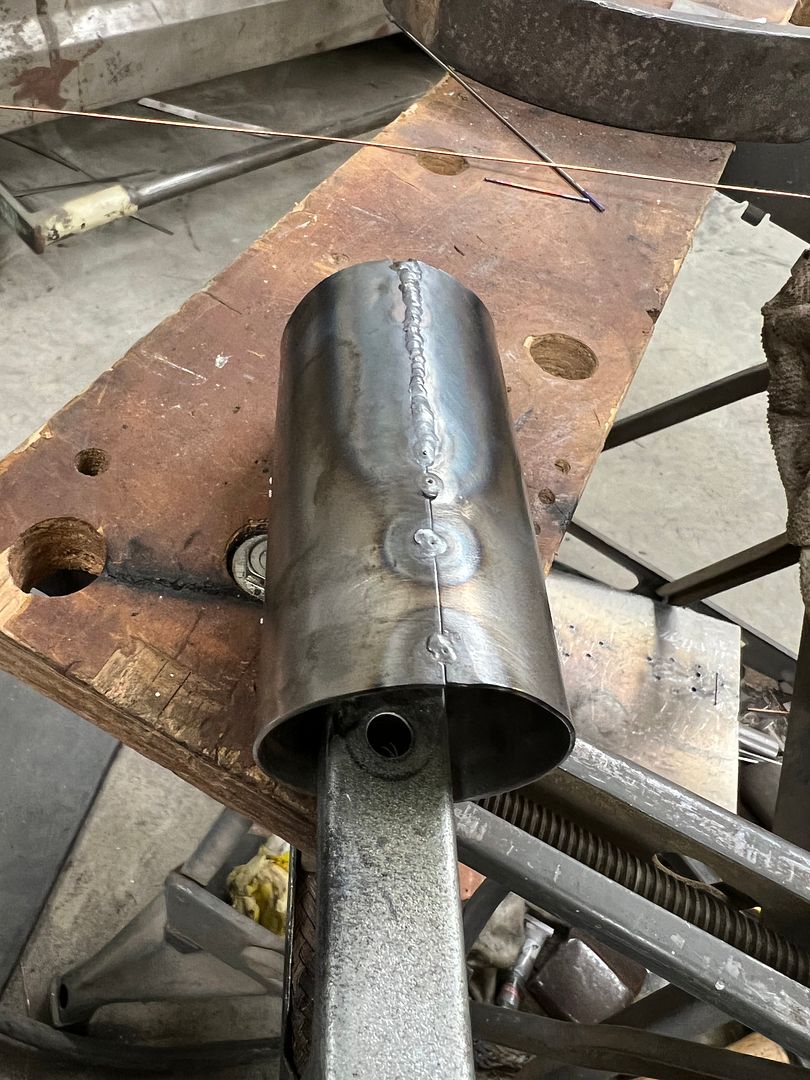 Forming our transition from 2" to 1-1/4"..... https://www.youtube.com/watch?v=4sGqSA0eKwc https://www.youtube.com/watch?v=dIpSo-T6c4o 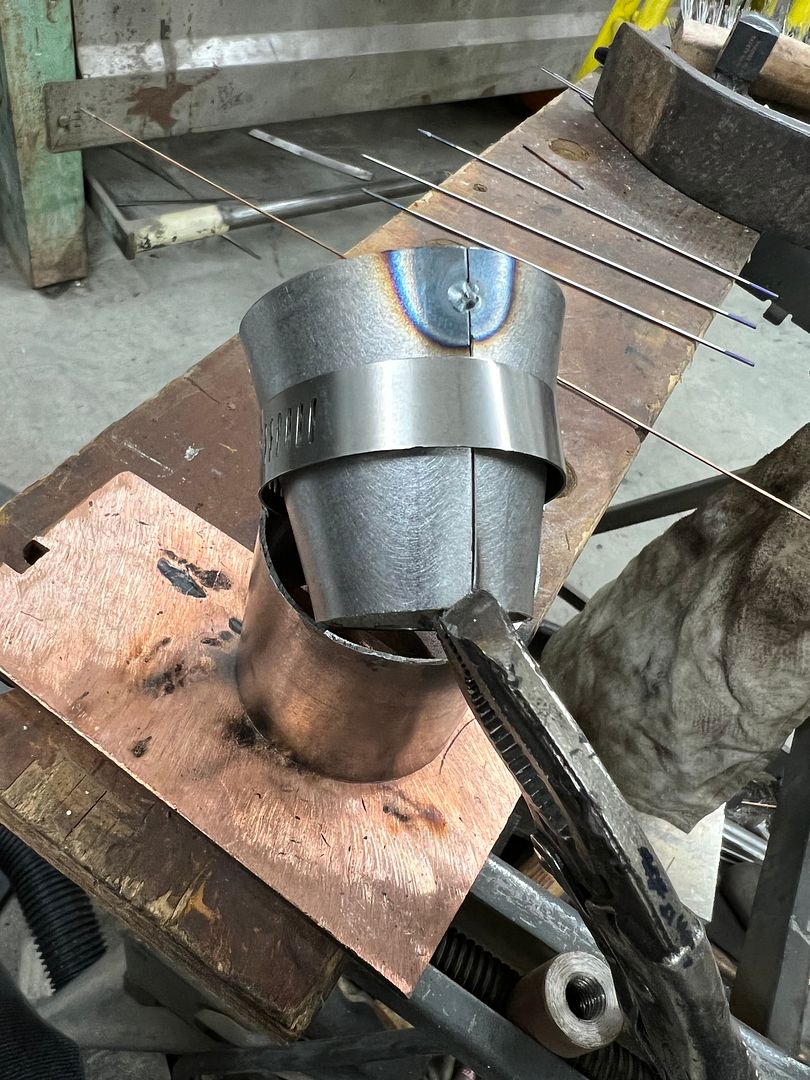 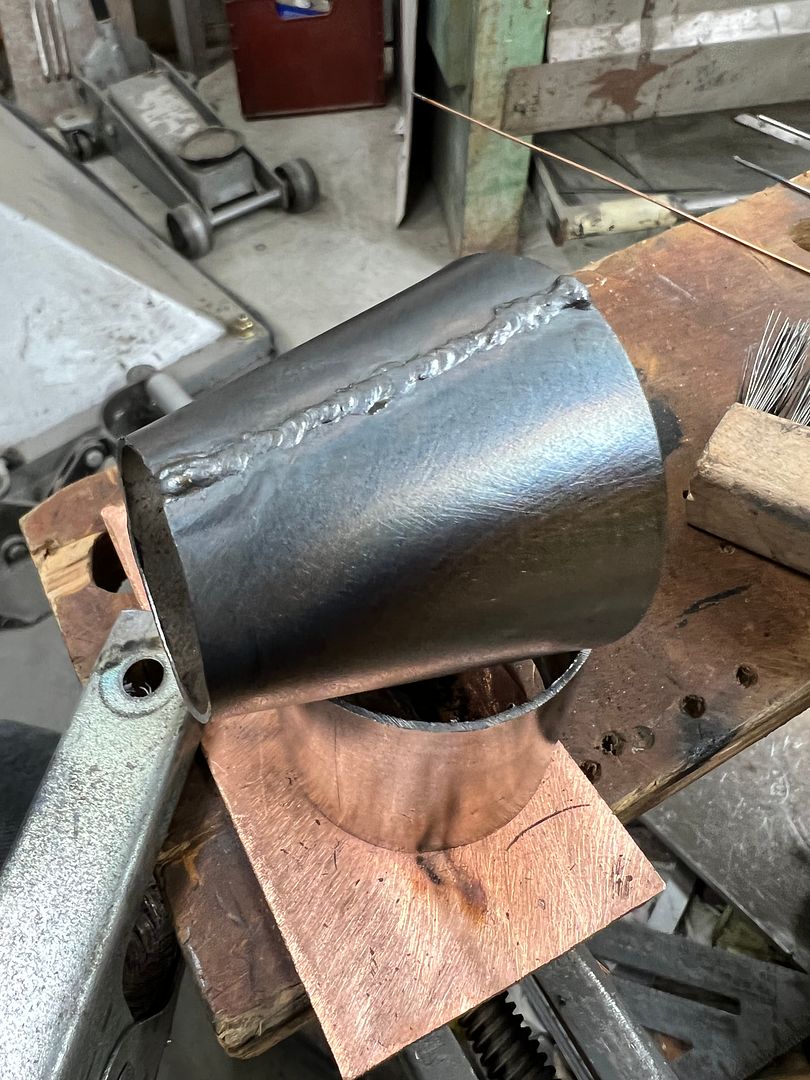 .JPG) As the ports from the VA point almost straight up, the 2" tubes were welded at a slight incline to remove any sharp bends in the supply hose. 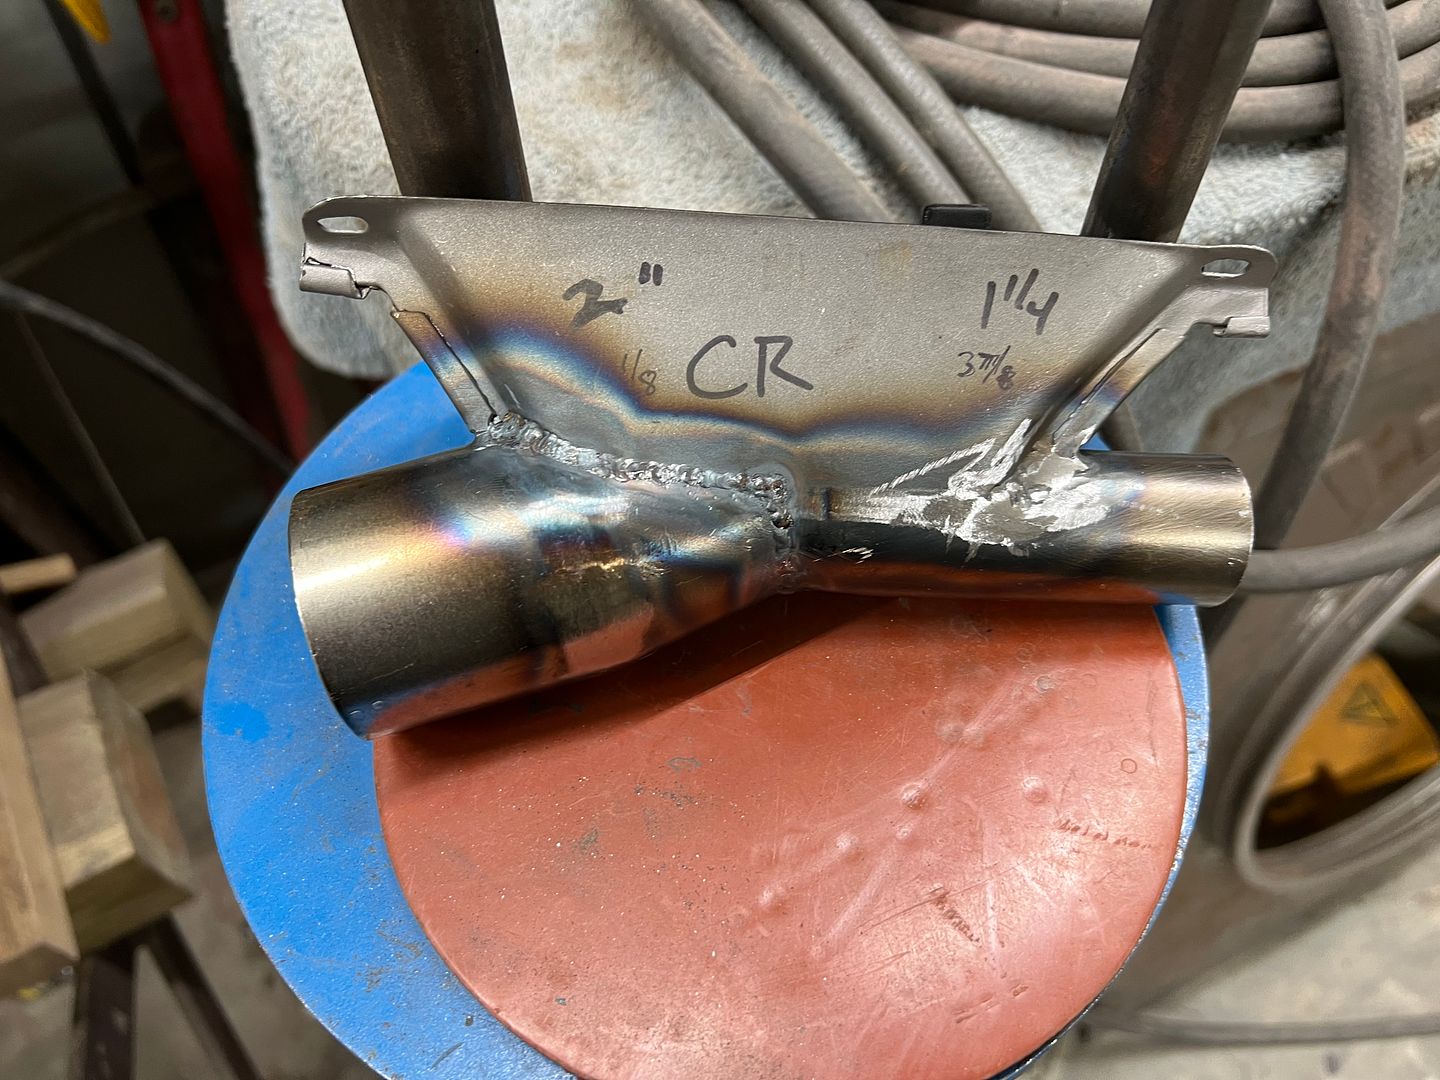 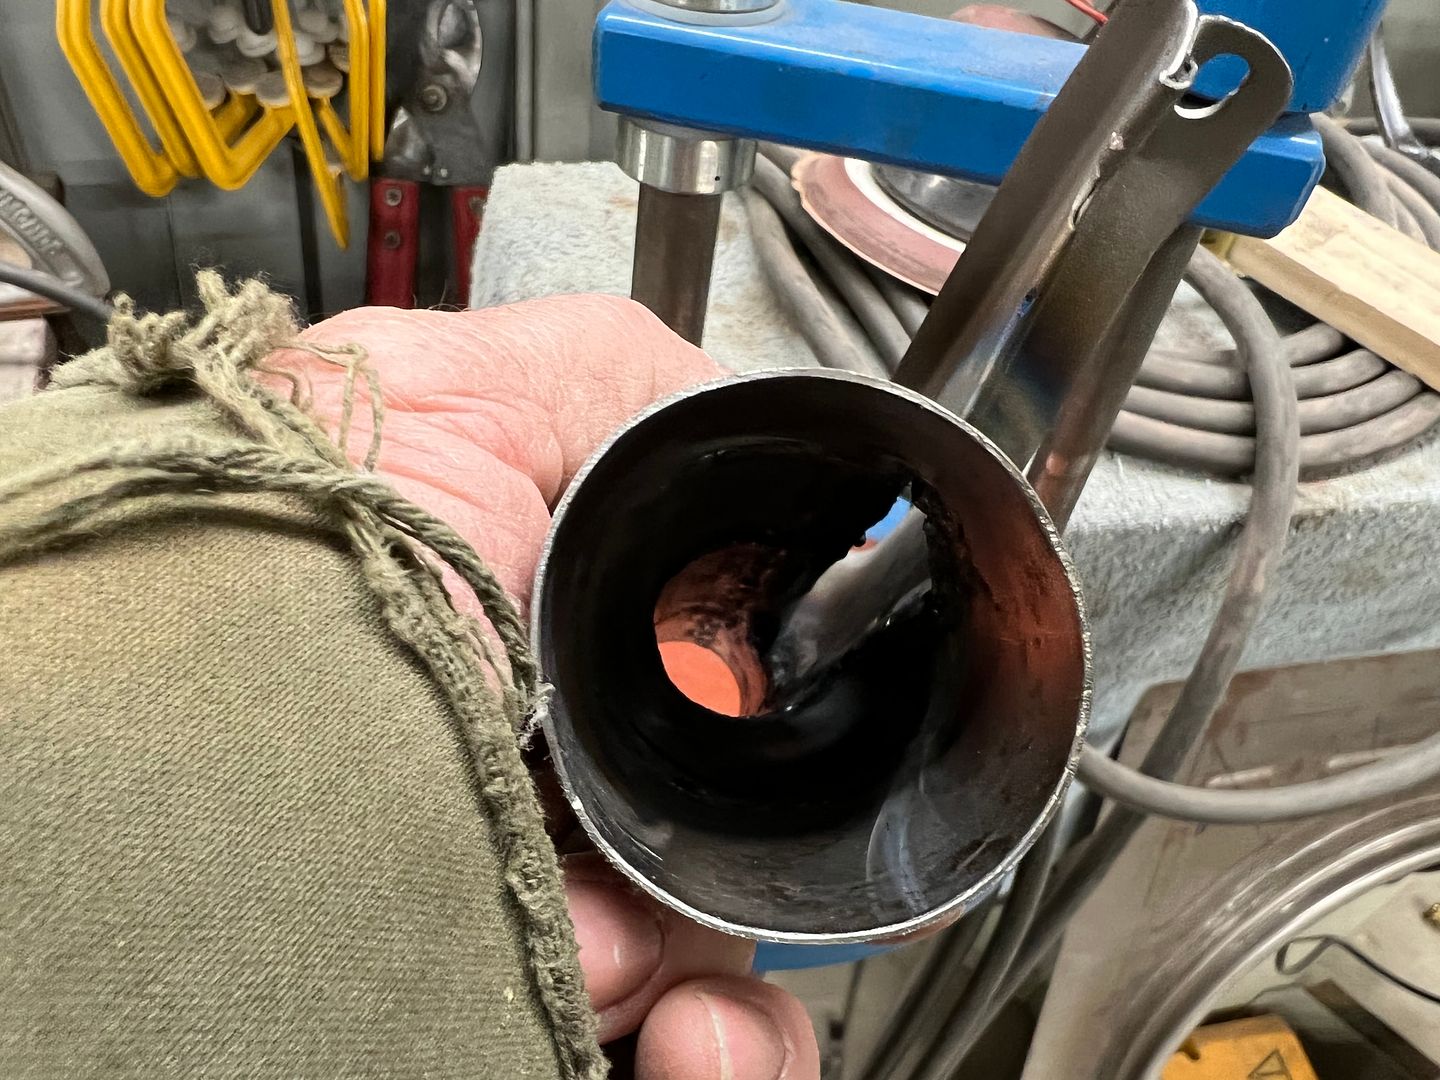 .....as a follow-up, our local artist has been working on the other side of the Lennox.. https://www.youtube.com/watch?v=j1FDtYyYGSU and we have been working with some local hippies to explore other shop shirt options.. This was done on the yellow shop shirt so naturally that base color limits what results you will get... 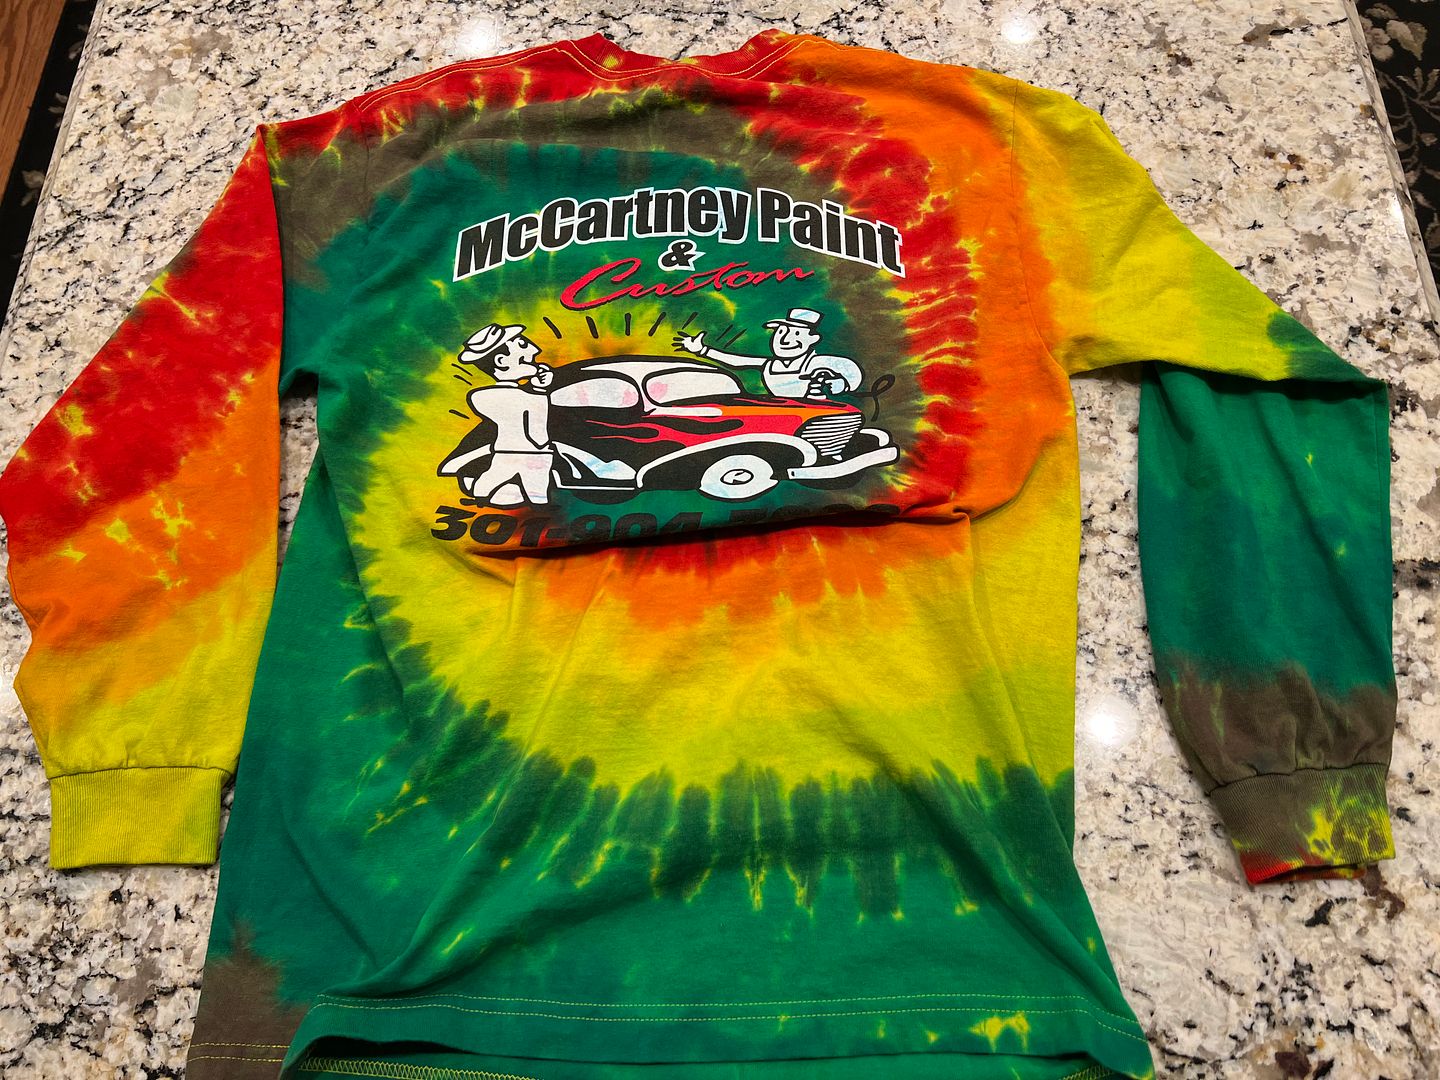
__________________
Robert |
|
|
|
|
01-31-2022, 10:49 AM
|
#1279 |
|
Registered User
Join Date: May 2007
Location: Deale Md
Posts: 4,663
|
Re: 55 Wagon Progress
That's definitely a one of kind color option for sure.
__________________
James 63 GMC V6 4speed carryall 65 chevy swb bbw V8 auto 68 K20 327/4 speed, buddy buckets 2002 GMC CC Dually Duramax 64 GMC lwb 3/4 V6 4speed SOLD 66 GMC swb bbw buddy buckets SOLD IG duallyjams The only thing that stays the same is constant change! |
|
|
|
|
01-31-2022, 11:49 PM
|
#1280 |
|
Senior Member
Join Date: Dec 2009
Location: TN.
Posts: 7,724
|
Re: 55 Wagon Progress
Love the Colors on the Shirt
 I would wear one Because I am a Huge Fan of your work 
__________________
________________________________________________________________________________________ ____________________________________________ 84 Chevy K-20 63 Impala (my high school car) http://67-72chevytrucks.com/vboard/s...Crew Cab Build |
|
|
|
|
02-06-2022, 01:53 PM
|
#1281 |
|
Registered User
Join Date: Jan 2013
Location: Leonardtown, MD
Posts: 1,633
|
Re: 55 Wagon Progress
Thanks for the comments on the prototype
shirts.. We are still working the logisitics and trying to keep them cost effective. The tye dye portion per shirt cost me about what I paid for the shirt to begin with. So we're still investigating options to try and keep the cost down. In adapting our defroster vents for the wagon, we needed to add a bead in the tubing to better retain the hose attached. The beading die we made for this purpose on the bead roller was too large to fit the 1-1/4" tube, so another tool is in order.. Our worn out Southbend was used to make the round profiles, with a step in the bottom die to act as a backstop for better consistency in bead placement. 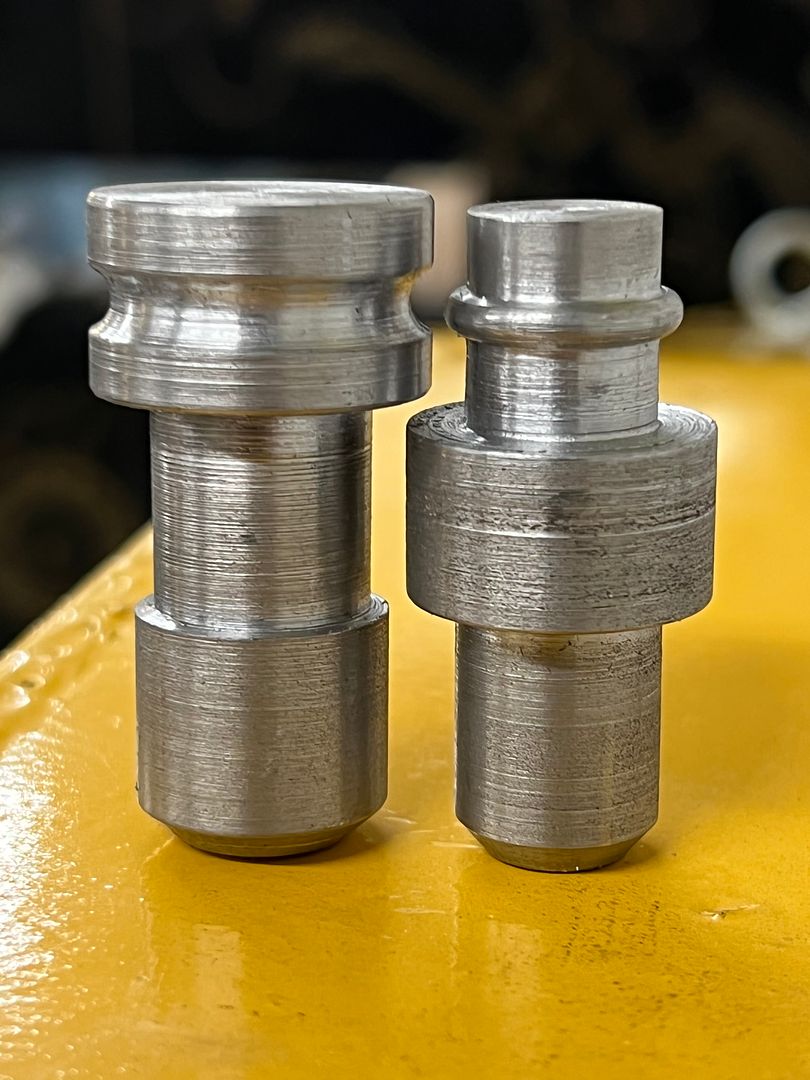 I don't have much in the form of hardened tool steel for making specialized cutters for the lathe, so I used a 3/4" square cutter from the Lennox to form the following for making the concave shape.. the male counterpart was done on the fly... 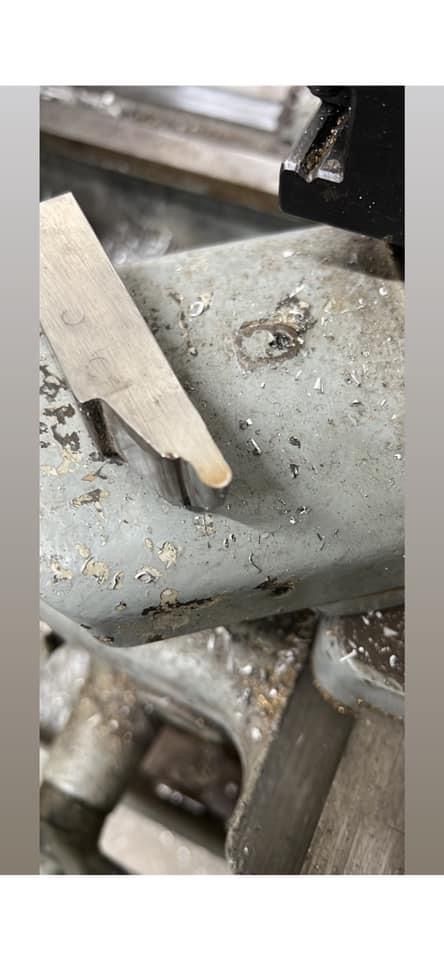 The 4140 square stock was squared on both ends, then a relief added for our round profile to rest in. 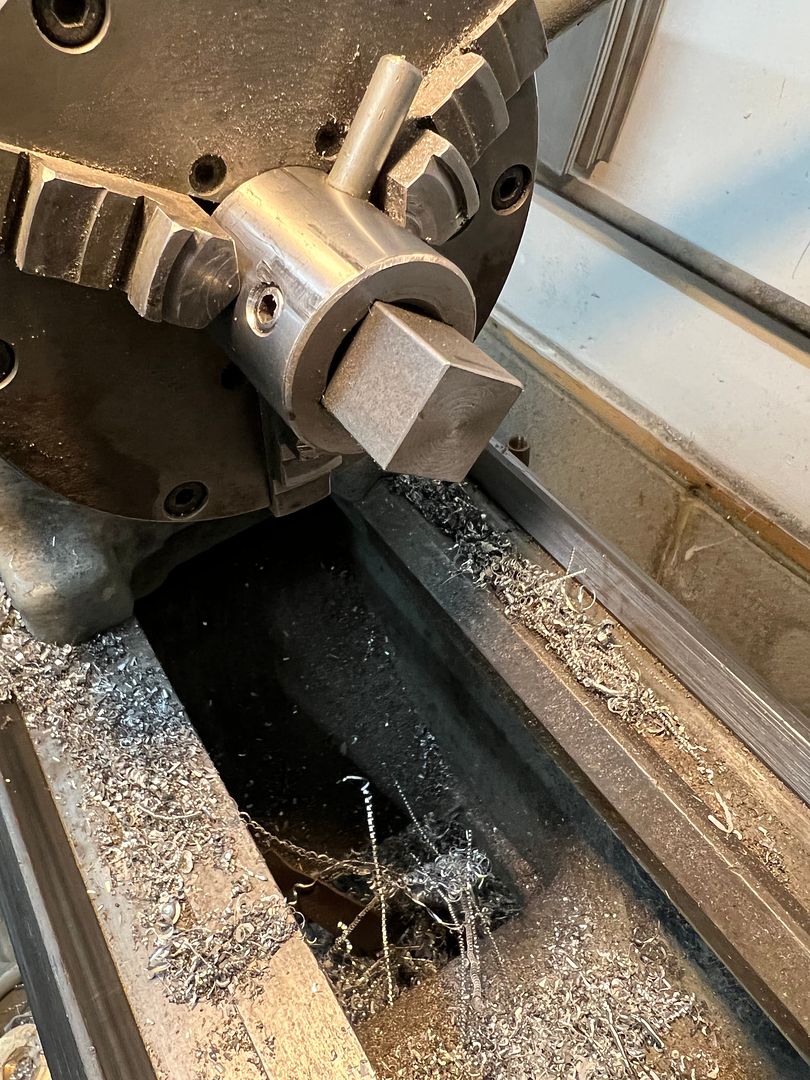 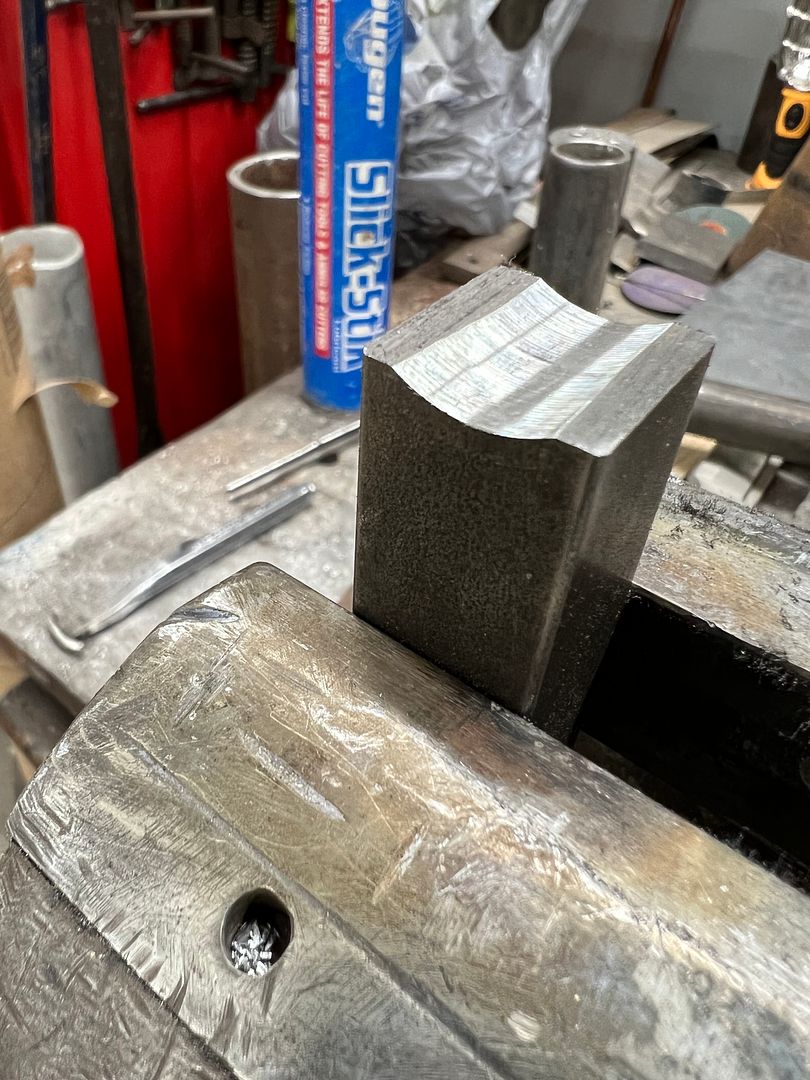 Our c-clamps had a VEE notch that would assist in keeping the round bits from moving, so that was used in lieu of a vise.. 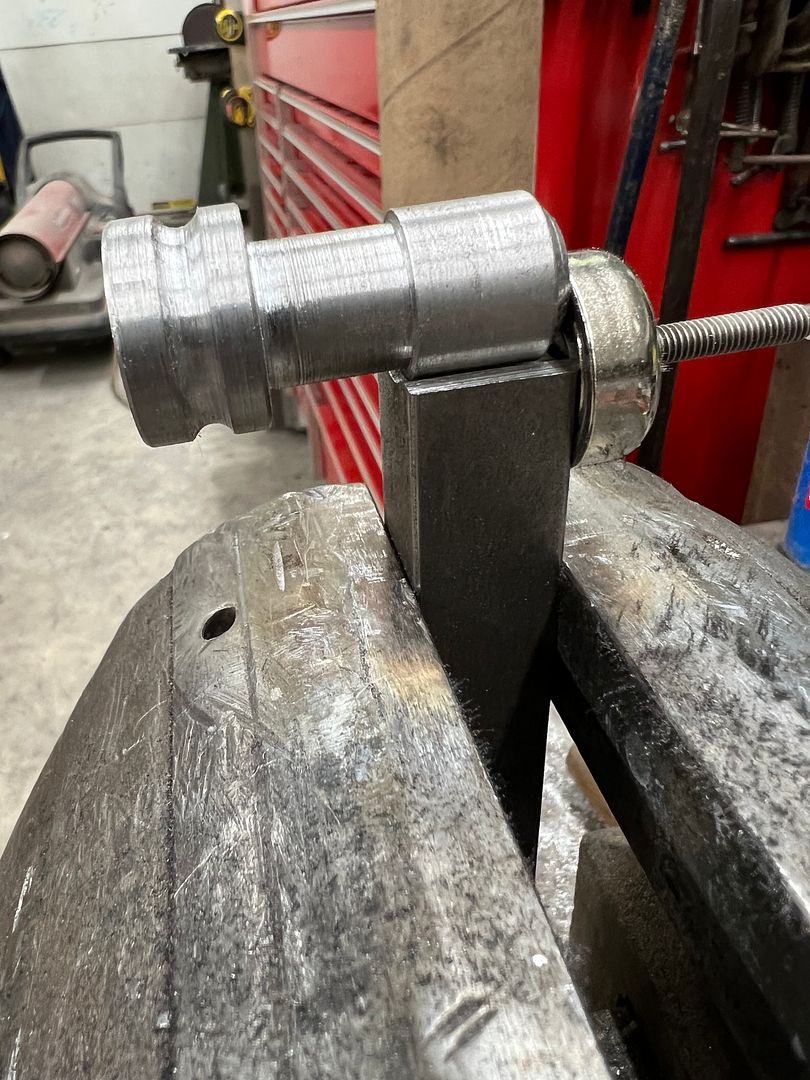 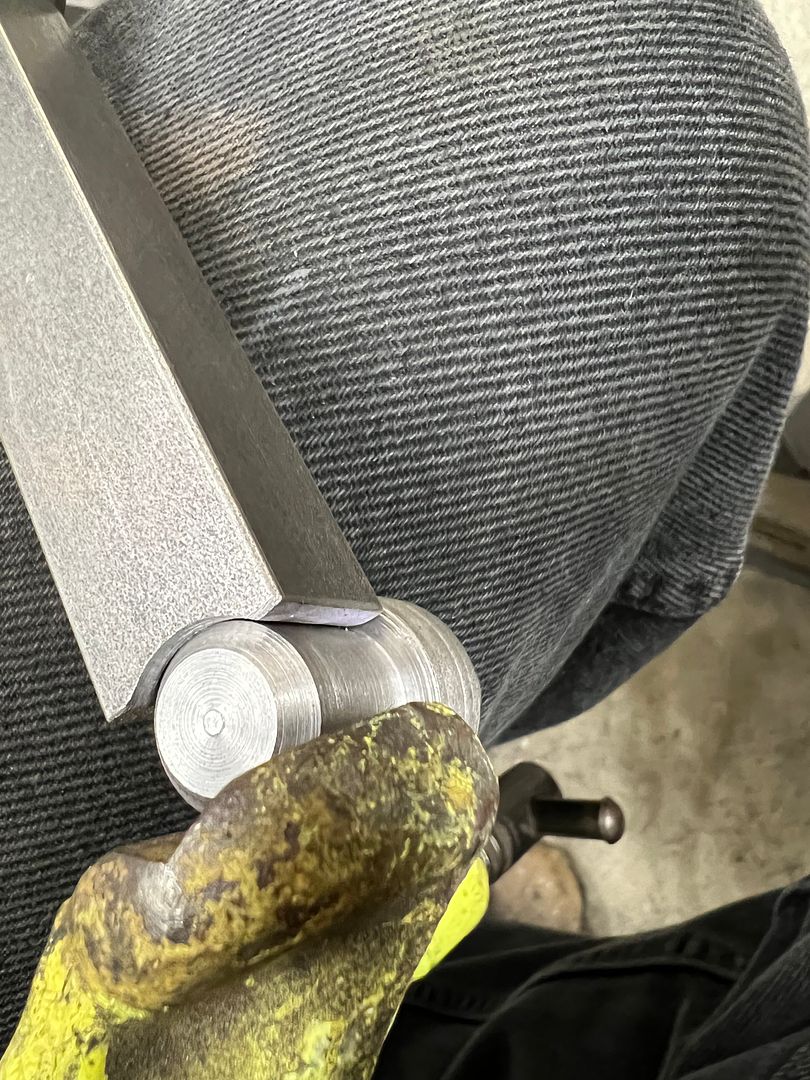 The infinitely adjustable clamps worked well, the TIG was used to add a fusion weld around the perimeter (no filler rod) 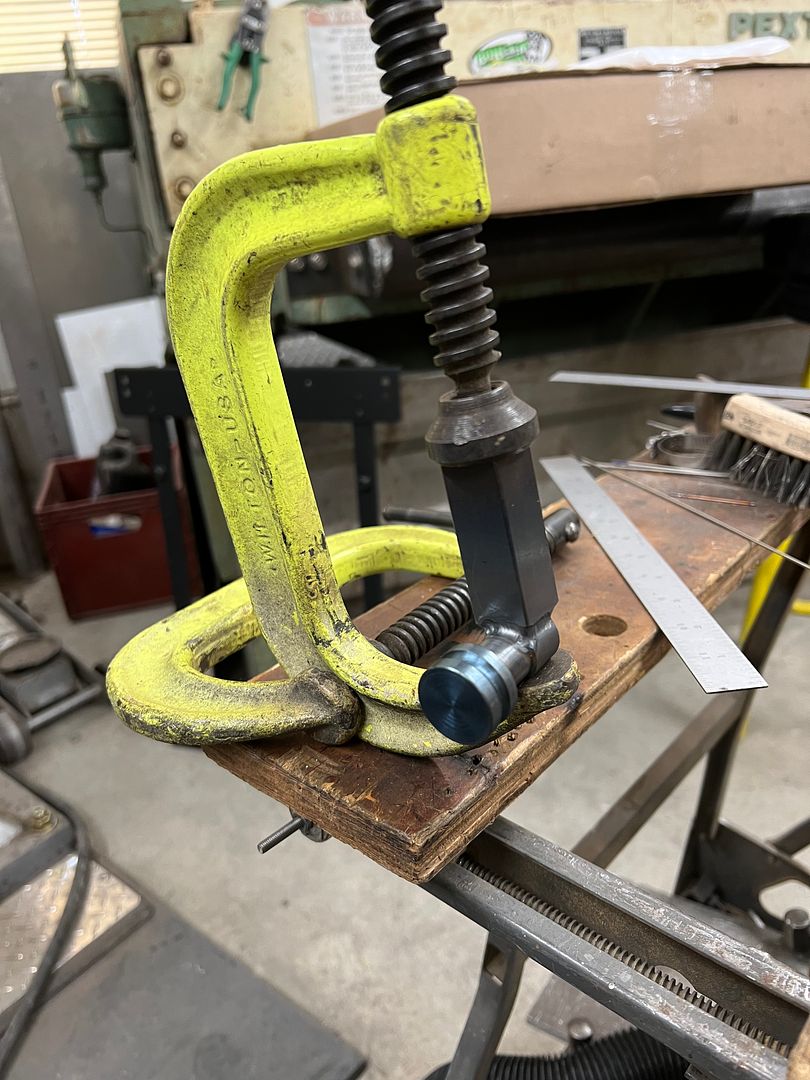 https://youtube.com/shorts/a3cJ9NzG-qM After welding, the assembly is heated to a straw color (pre-blue) and dipped in our official Mickey Thompson fluid container (transmission fluid) to harden things up a bit. .JPG) Here are the dies in use, take note of what happens when you don't keep pressure against the backstop.... No harm no foul, a couple more passes cleans it right up... https://www.youtube.com/watch?v=7YMJkqdMVyU  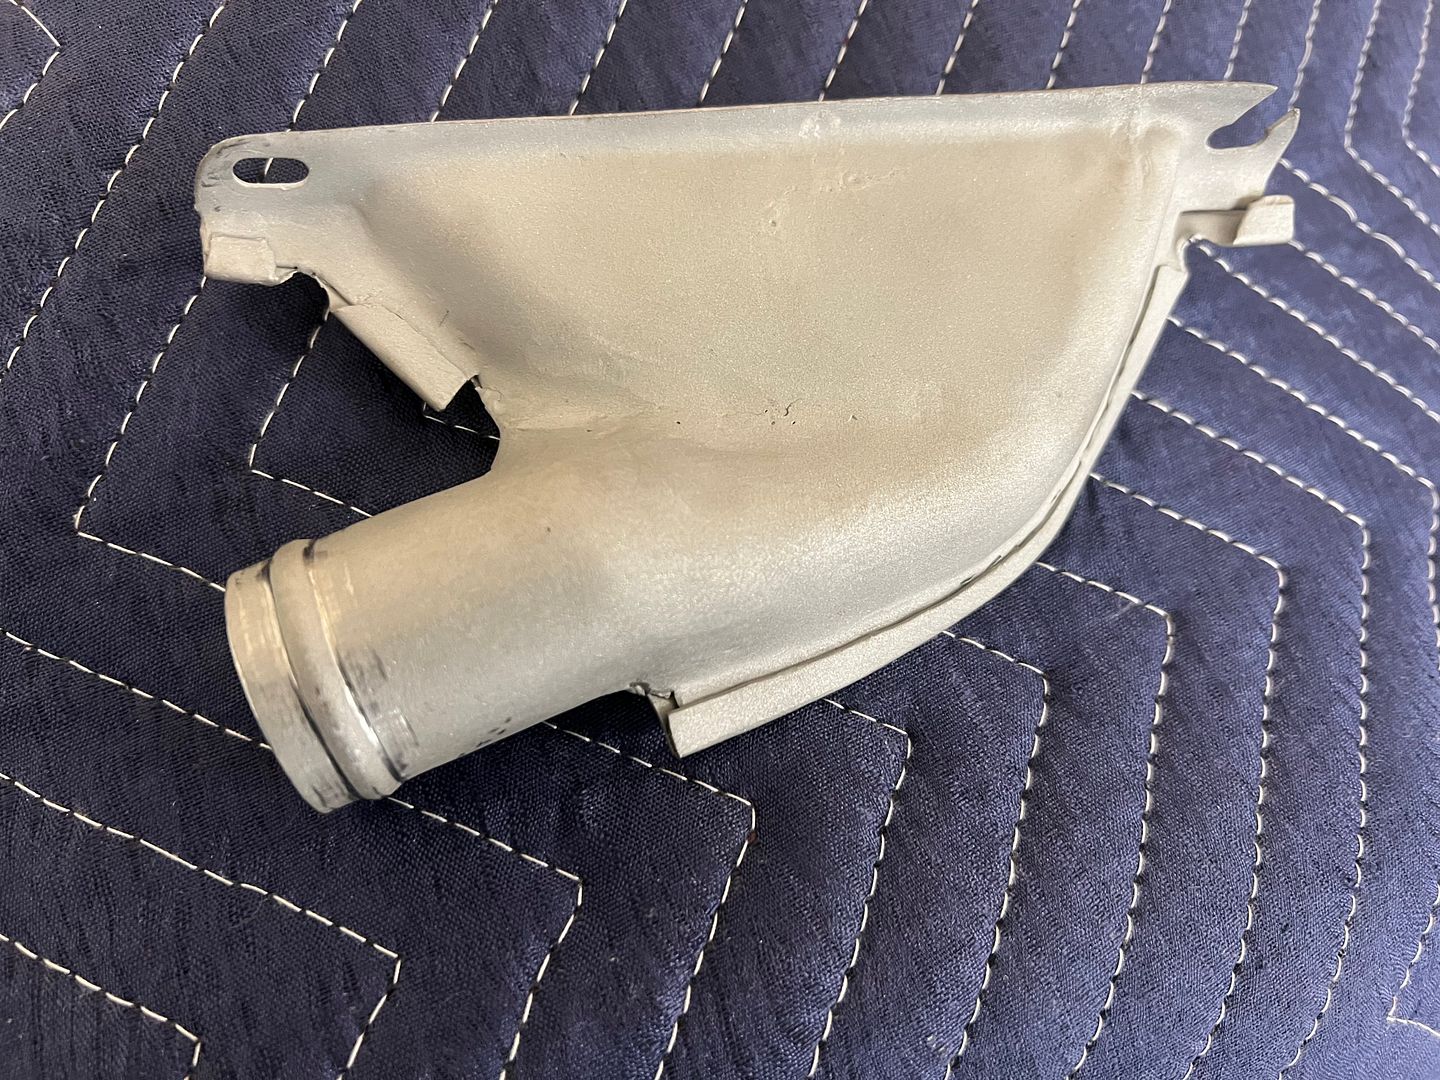 That should help to keep the hose in place...
__________________
Robert Last edited by MP&C; 02-06-2022 at 02:11 PM. |
|
|
|
|
02-06-2022, 03:13 PM
|
#1282 |
|
Post Whore
Join Date: May 2015
Location: Alabama
Posts: 14,583
|
Re: 55 Wagon Progress
Nicely done...I thought for sure you were making dies for the beadroller..but that works great also
__________________
Mongo...aka Greg RIP Dad RIP Jesse 1981 C30 LQ9 NV4500..http://67-72chevytrucks.com/vboard/s...d.php?t=753598 Mongos AD- LS3 TR6060...http://67-72chevytrucks.com/vboard/s...34#post8522334 Columbus..the 1957 IH 4x4...http://67-72chevytrucks.com/vboard/s...63#post8082563 2023 Chevy Z71..daily driver |
|
|
|
|
02-06-2022, 05:00 PM
|
#1283 |
|
Registered User
Join Date: Jan 2013
Location: Leonardtown, MD
Posts: 1,633
|
Re: 55 Wagon Progress
I have one made up for the bead roller but it was too big in diameter to work for the 1-1/4 tube.
Posted via Mobile Device |
|
|
|
|
02-06-2022, 11:07 PM
|
#1284 |
|
Senior Member
Join Date: Dec 2009
Location: TN.
Posts: 7,724
|
Re: 55 Wagon Progress
I thought the same as Greg
Then I was like WoW Just do what you do, Too make it Work.' Nice job
__________________
________________________________________________________________________________________ ____________________________________________ 84 Chevy K-20 63 Impala (my high school car) http://67-72chevytrucks.com/vboard/s...Crew Cab Build |
|
|
|
|
04-18-2022, 02:34 PM
|
#1285 |
|
Registered User
Join Date: Jan 2013
Location: Leonardtown, MD
Posts: 1,633
|
Re: 55 Wagon Progress
Finally back from the latest round of hanging TV's for the day job, We’ve installed three video walls since the end of December, along with other AV equipment. Some we can’t take pictures of, but we’ve included two that we could. So here's some highlights of what we installed and some of the fabrications made in the shop to help out in getting the job done....
Before, a couple of 80" displays 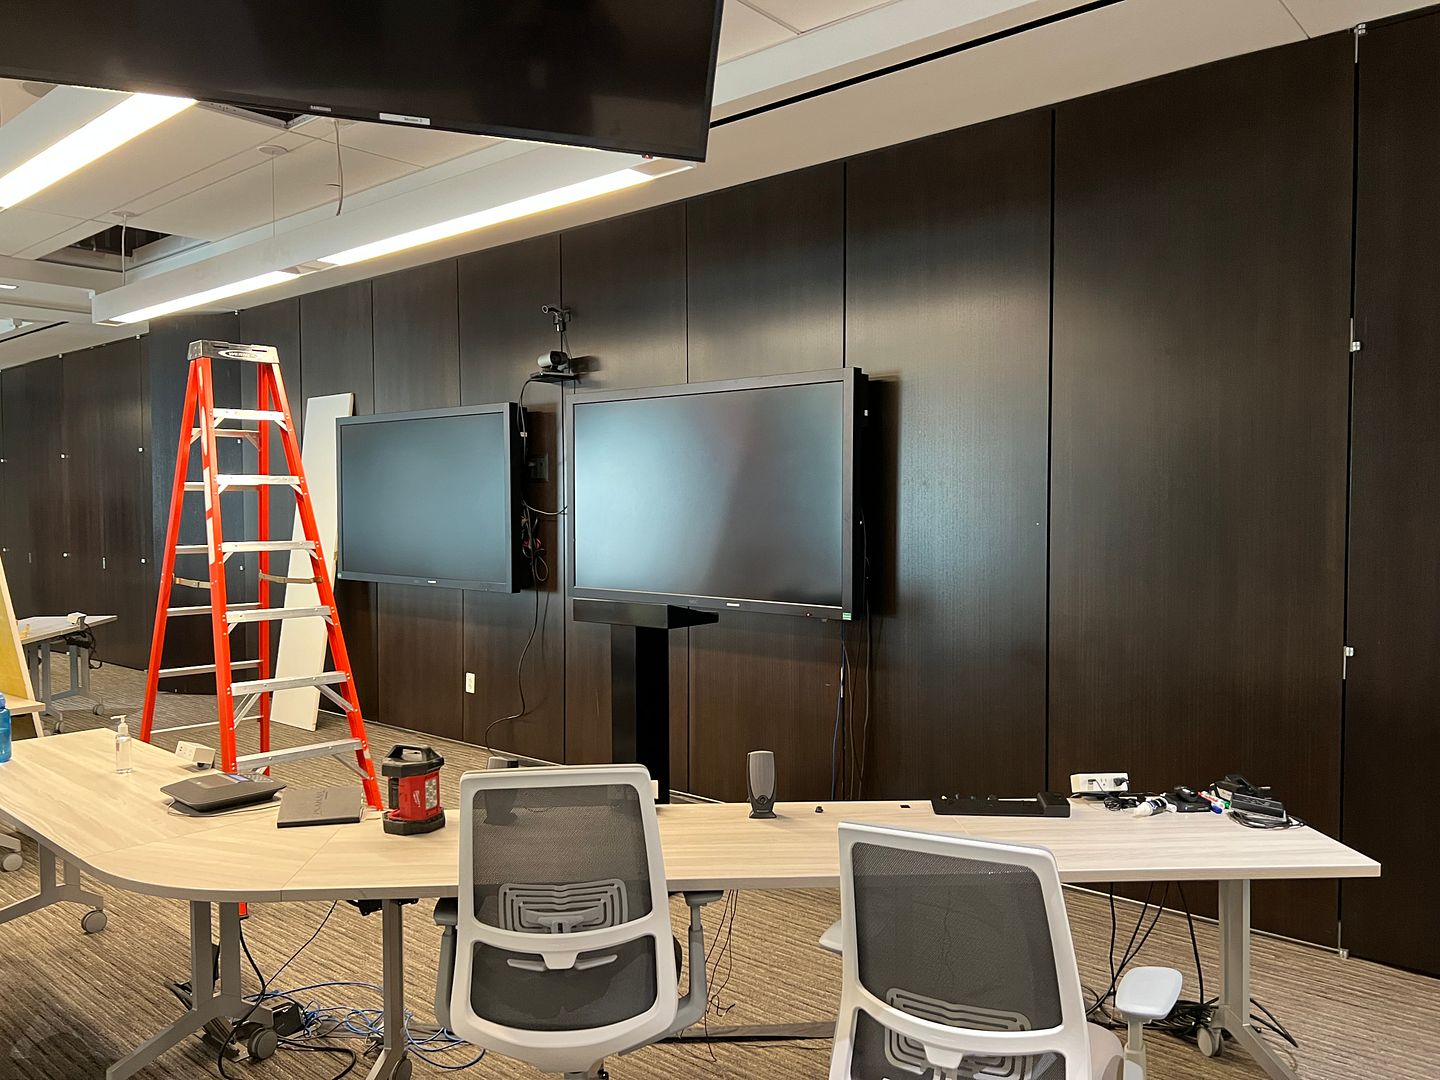 After, a seamless video wall just shy of 24' long... much better suited to this classroom setting.. 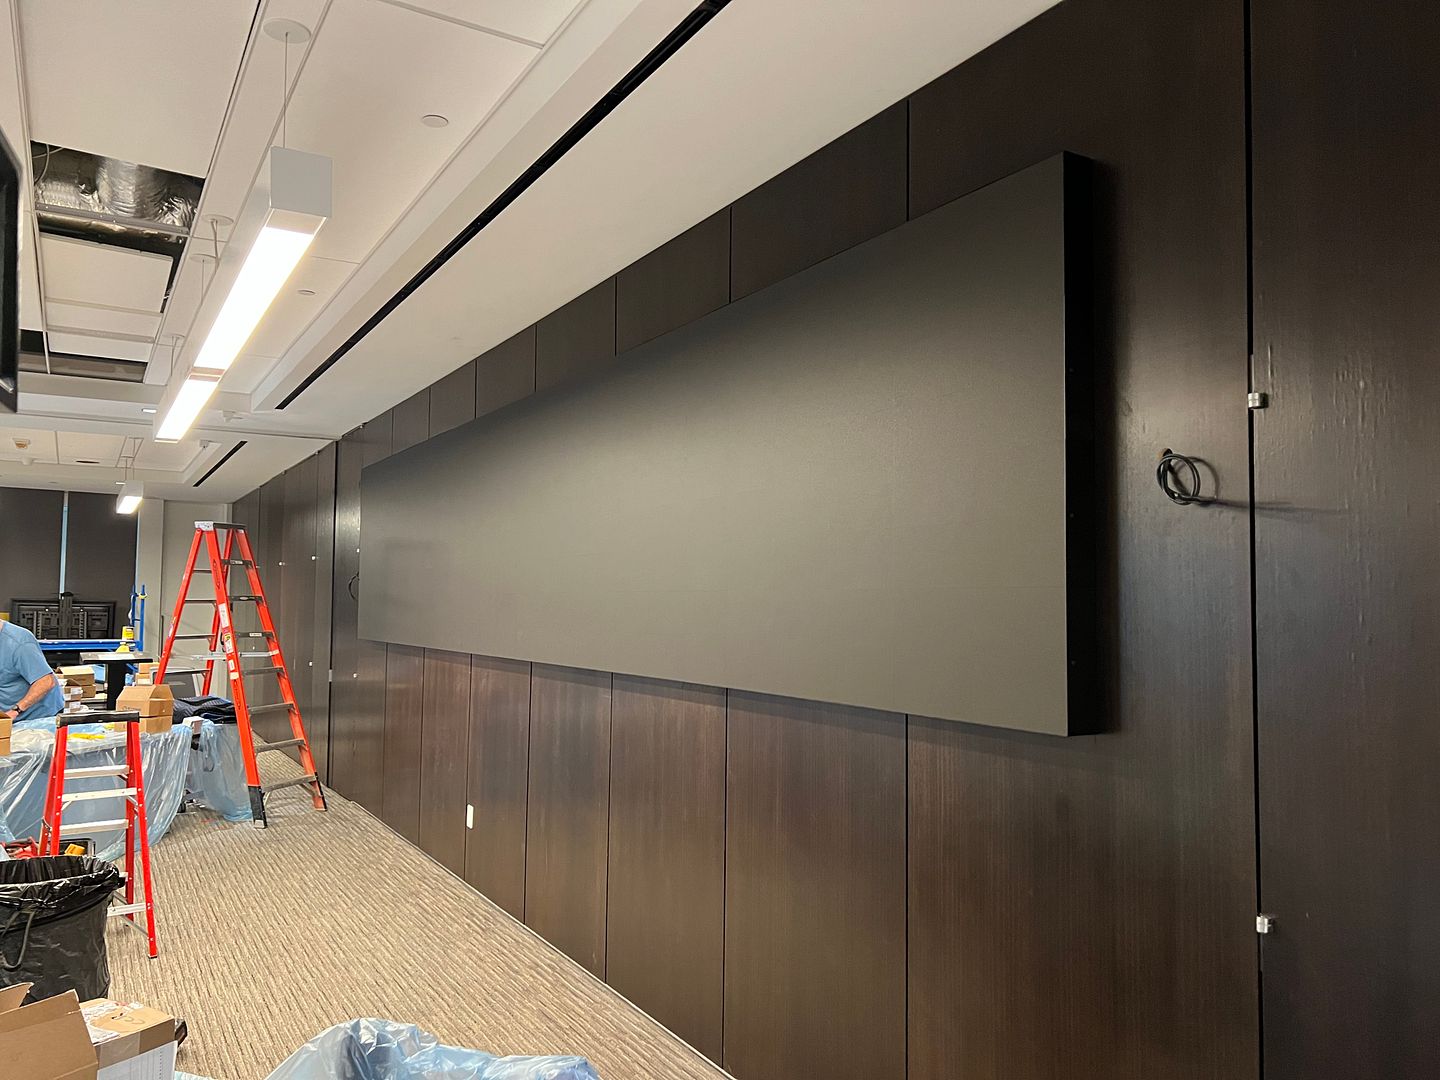 Our next room gave us a multitude of challenges, the walls here are free standing and we felt they were insufficient for supporting the video wall without deflection. So we opted for an 8020 structure in front of the existing, attached to the floor and the deck above. Next challenge is to anchor the columns to the concrete above with no access due to the 60" Drywall surround encircling the ceiling tiles.. before: .JPG) So I came up with a diagonal bracing that would make use of hinges for allowing assembly of the column and brace within the hole we would cut into the ceiling for minimal disturbance (less drywall repairs) 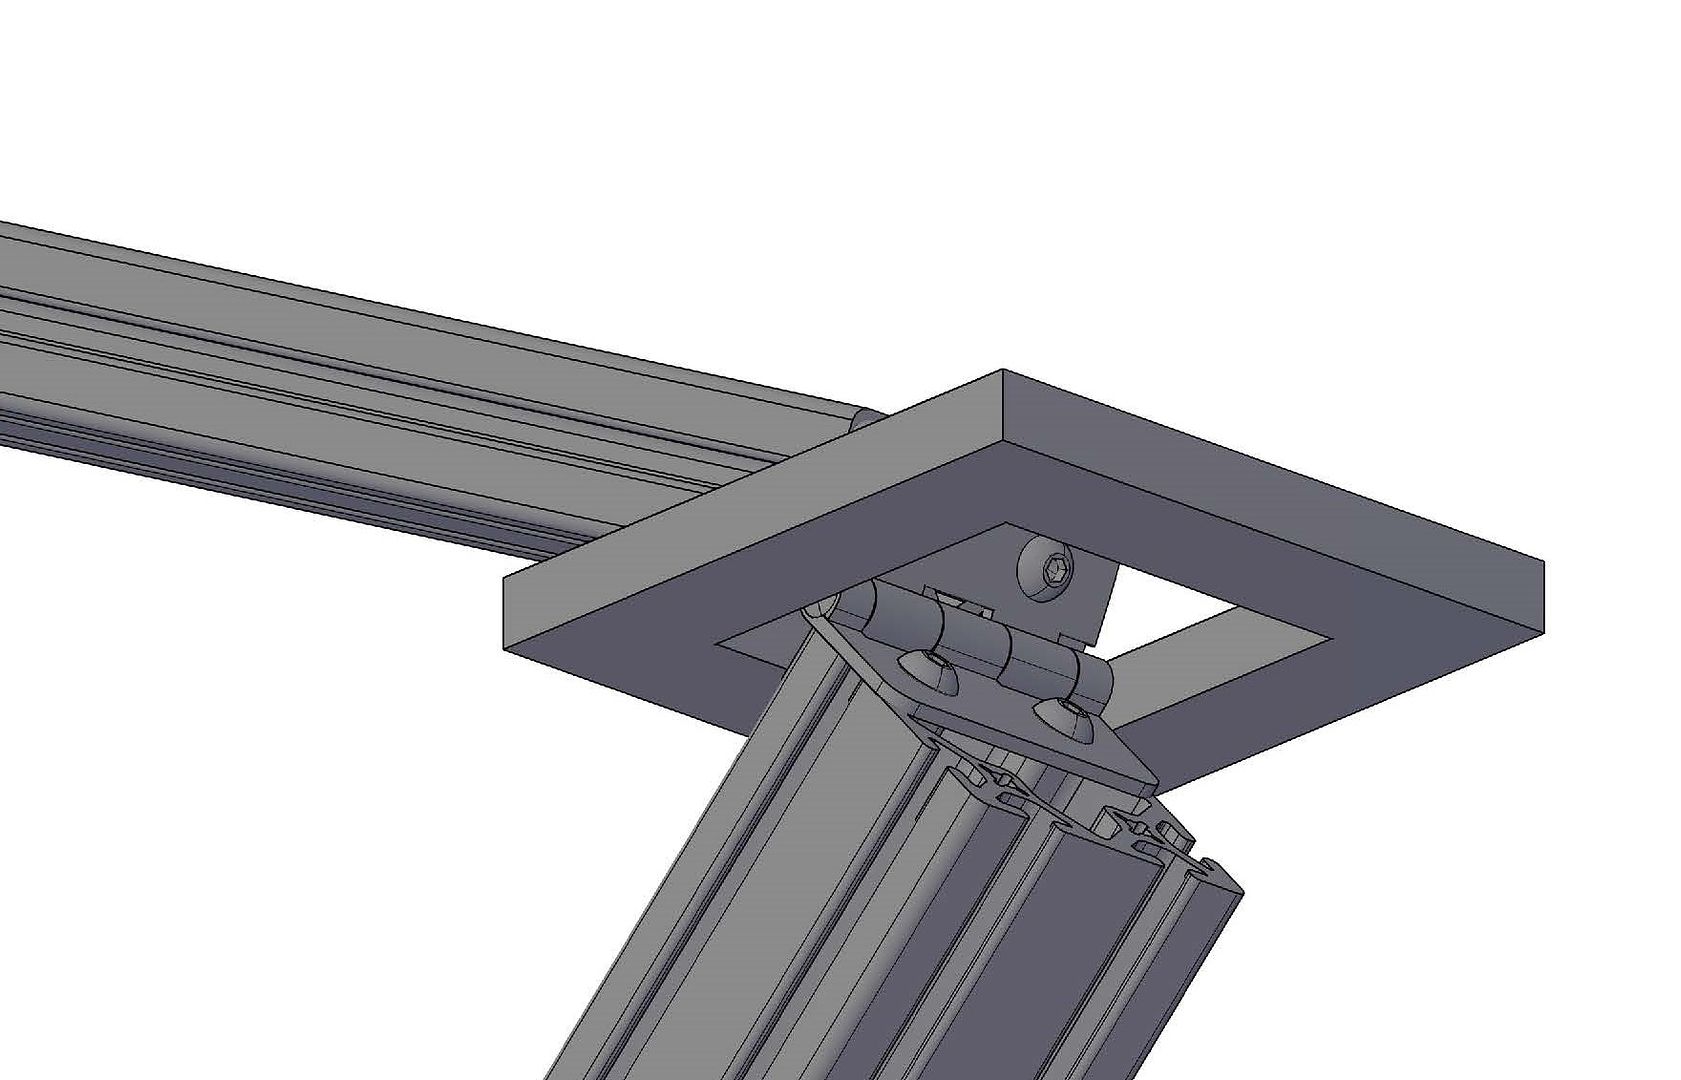 ....which in reality was not as easy as it appeared in print.... 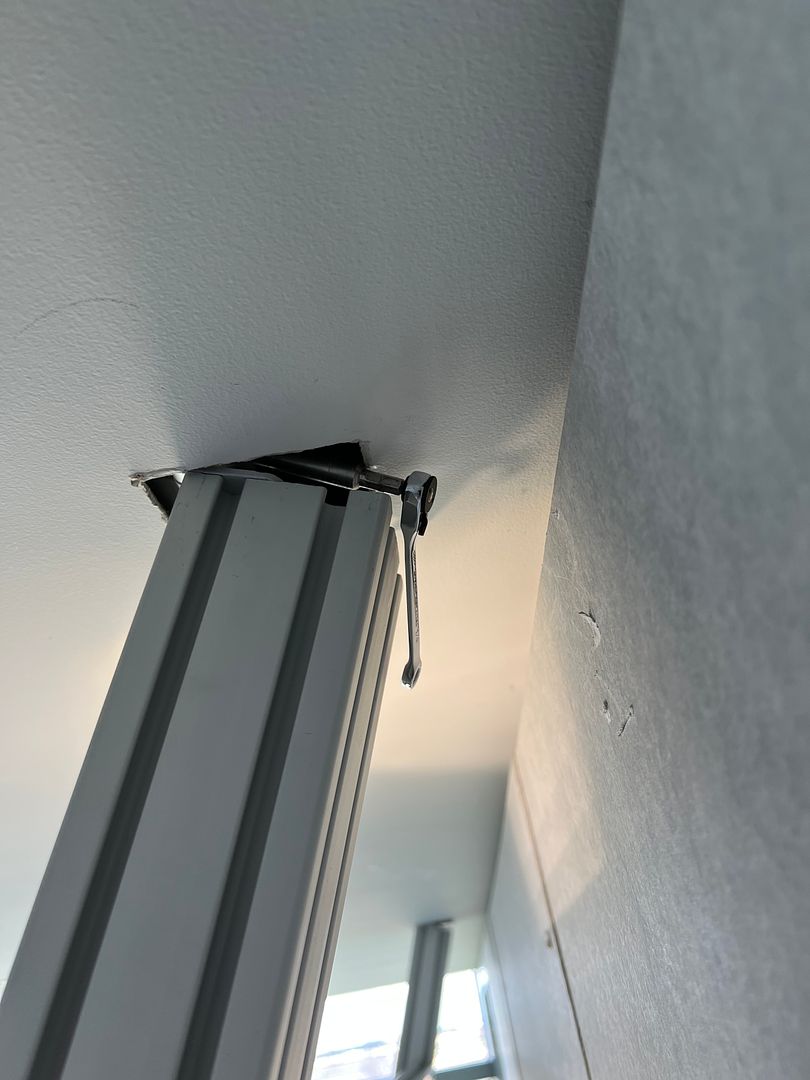 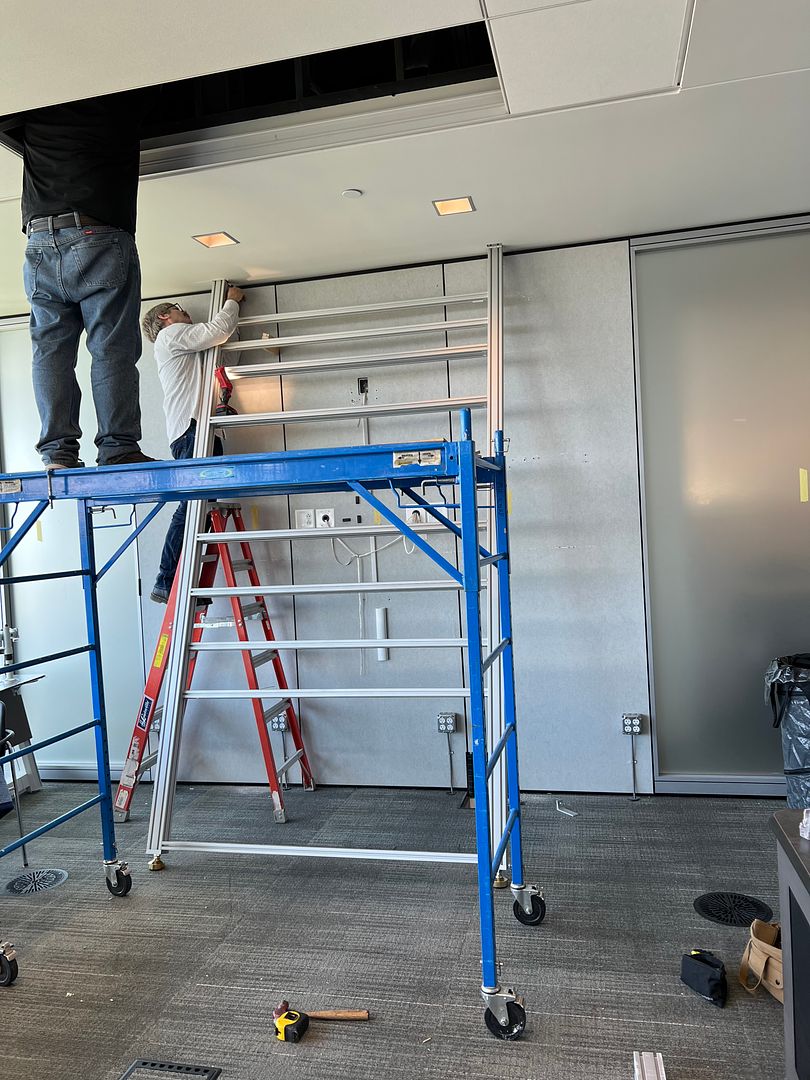 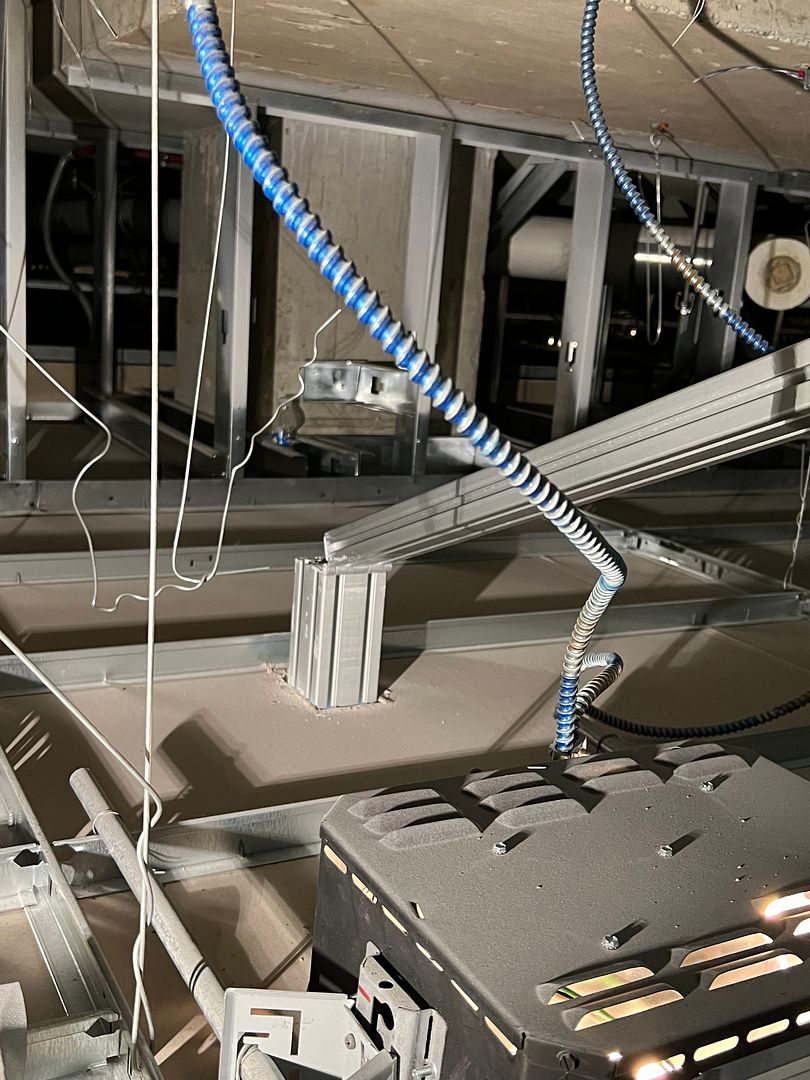 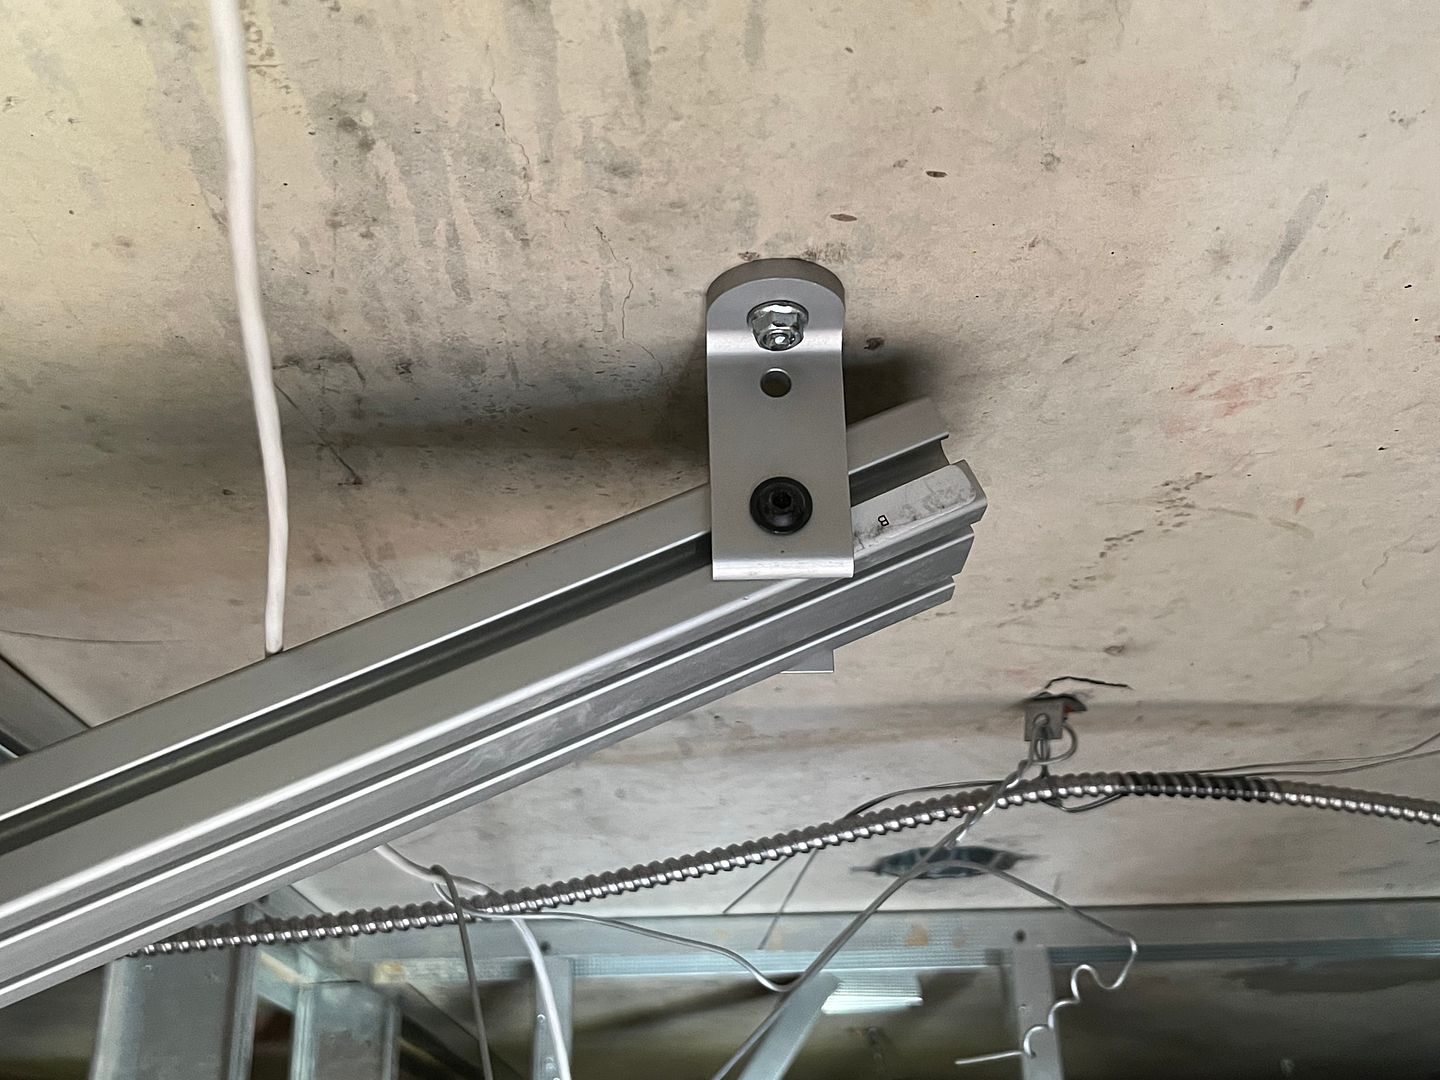 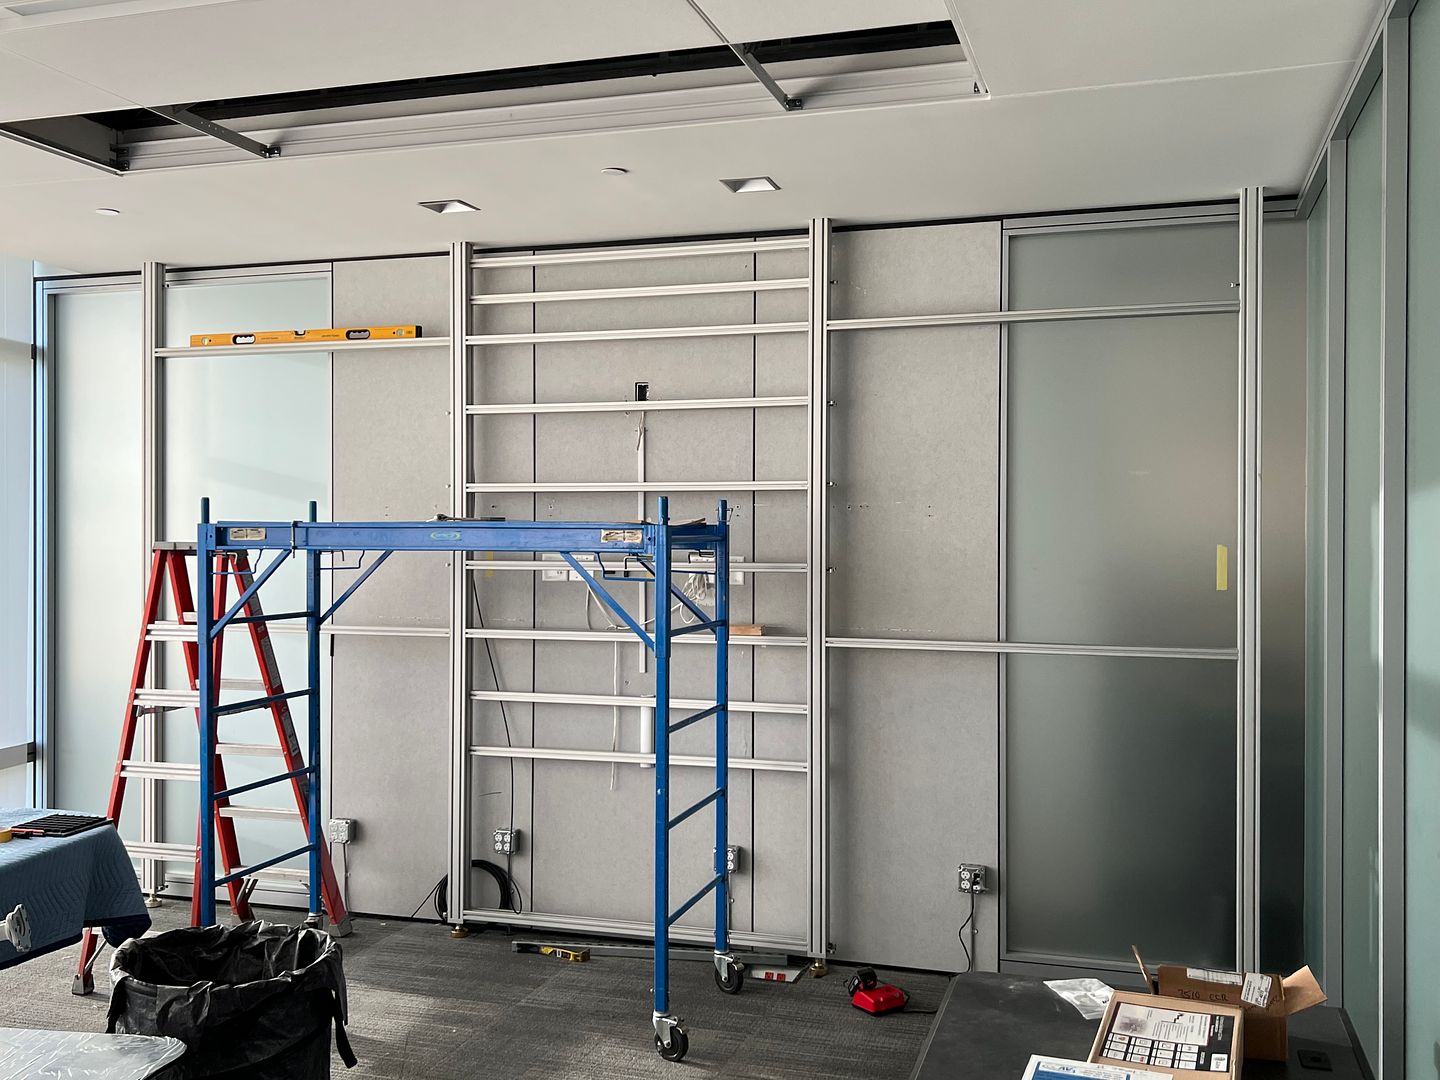 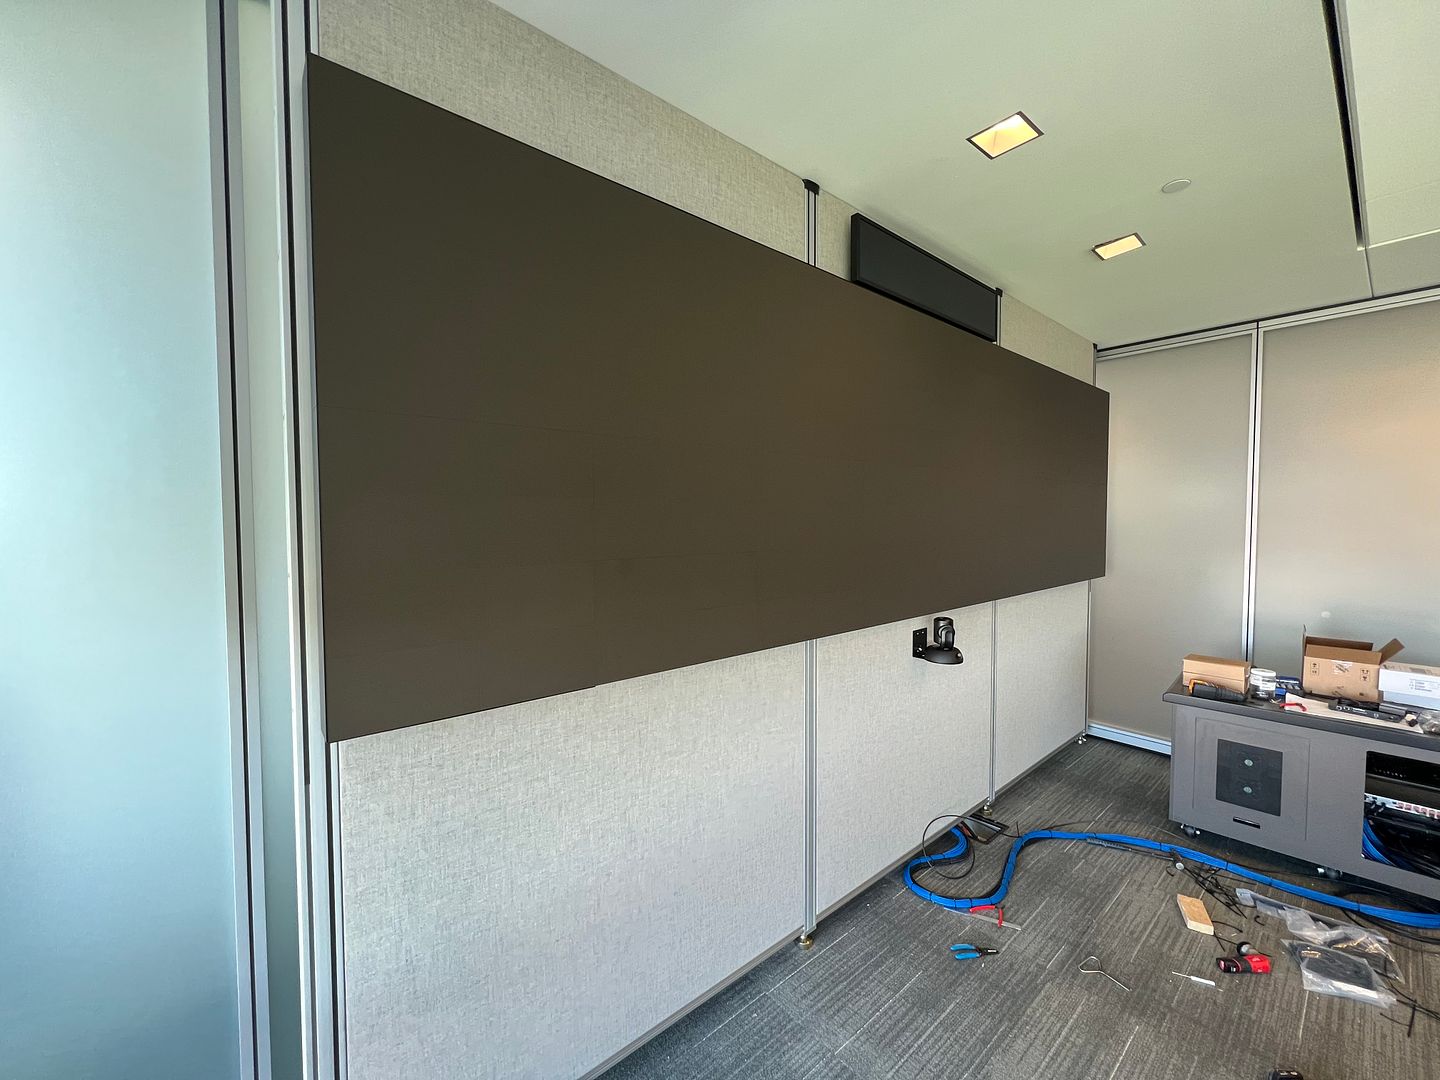 This video wall is just shy of 16' long and uses 0.9mm pixels. Some of the fabrications made in the shop, a water fall to help support the abundance of cabling going into the equipment rack.... .JPG) .JPG) .JPG) This was our first time using Cyviz touch panels, which were only available as a table top version. The old touch panel was recess mounted in the wall, so we either leave the old one in place to fill a hole in the wall, fill the hole in the wall with a blank panel, or come up with a wall mount design that Cyviz sorely needs.. One guess as to the option I chose.... .JPG) .JPG) .JPG) Powder coating done locally by The Shop at Shorty’s. Here's the video of installing the mount to the touch panel... Funny story, one of the tech reps that showed up from Cyviz swore this wall mount was their product... :ROFLMAO: He was told, "no, one of my guys made it in his garage".. He didn't believe it... https://www.youtube.com/watch?v=sNDN_mF-o8k ....and installed... 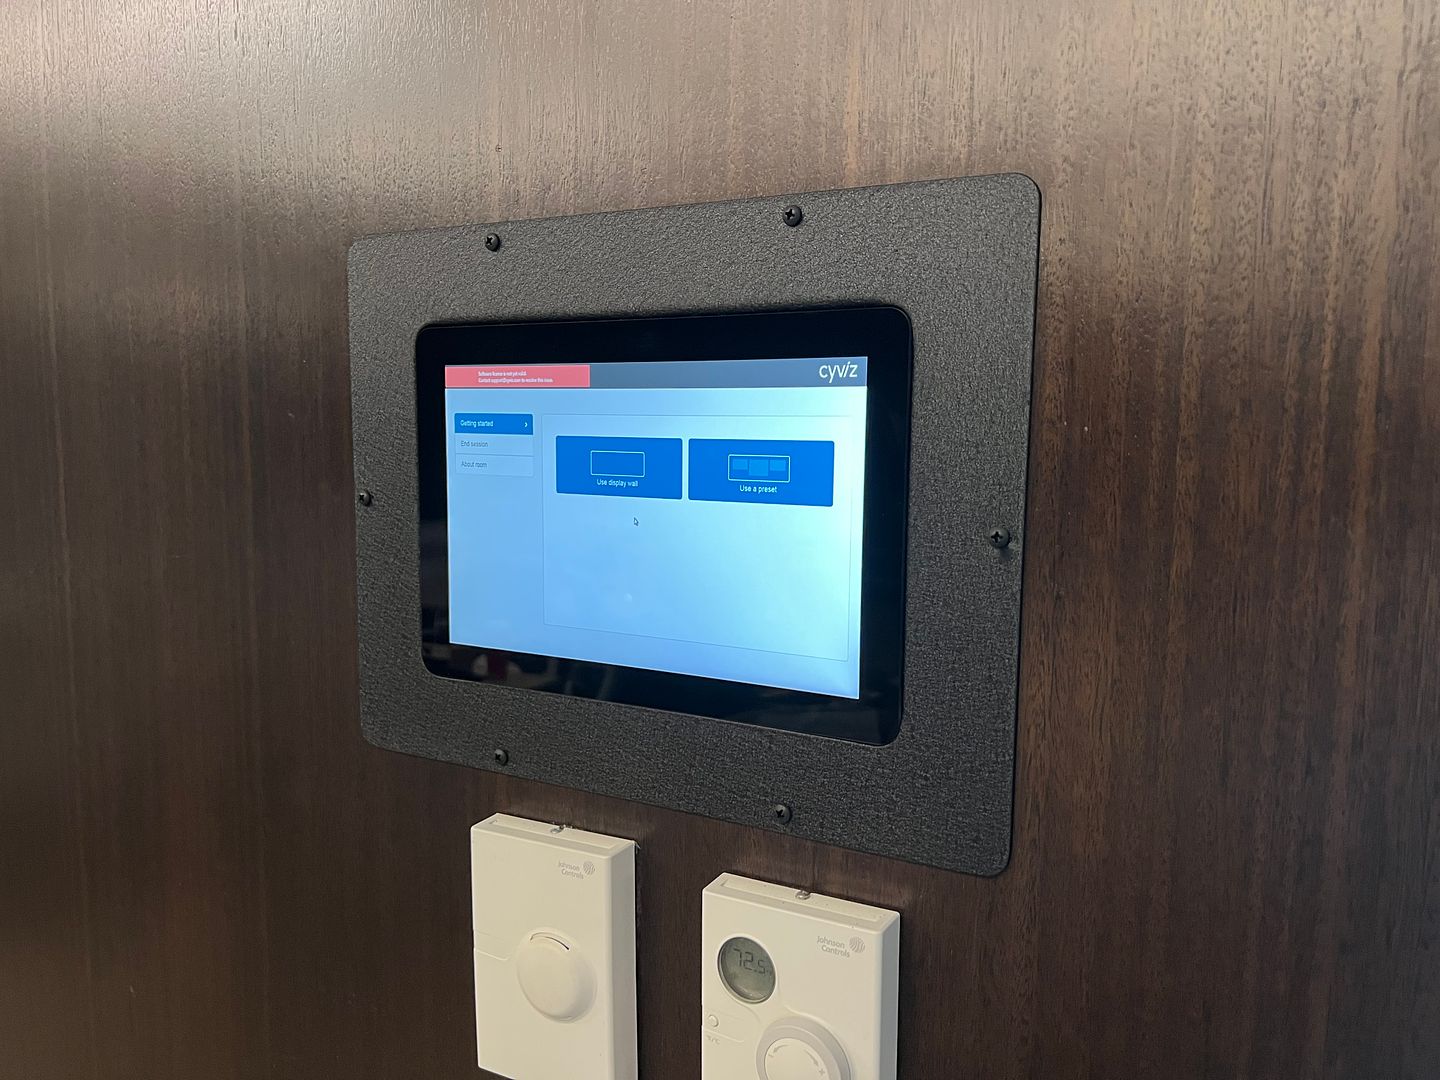
__________________
Robert |
|
|
|
|
04-18-2022, 02:51 PM
|
#1286 |
|
Registered User
Join Date: Jan 2013
Location: Leonardtown, MD
Posts: 1,633
|
Re: 55 Wagon Progress
So...where we had left off on the wagon, more blocking of primer, fabrication/modification of defroster vents, and wiring.. So a test fit of our fuse panel mounting plate (American Autowire) found that along with our parking brake pedal assembly location and the close proximity of the Raingear wiper motor, things were much too snug. So in looking at the room available under the dash, just to the right of the brake pedal looked promising but one of our newly formed defroster tubes interferred... This one hung down too low....
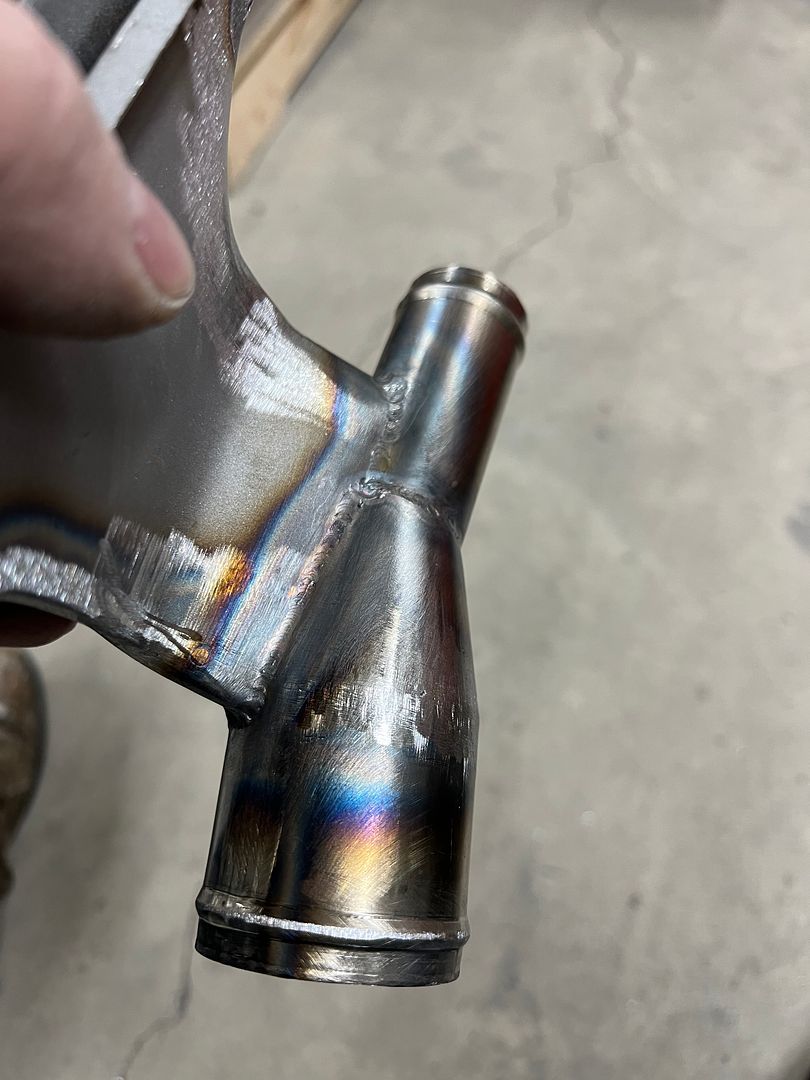 And, in typical domino fashion, the fuse panel mounting plate would not work where it was not intended. 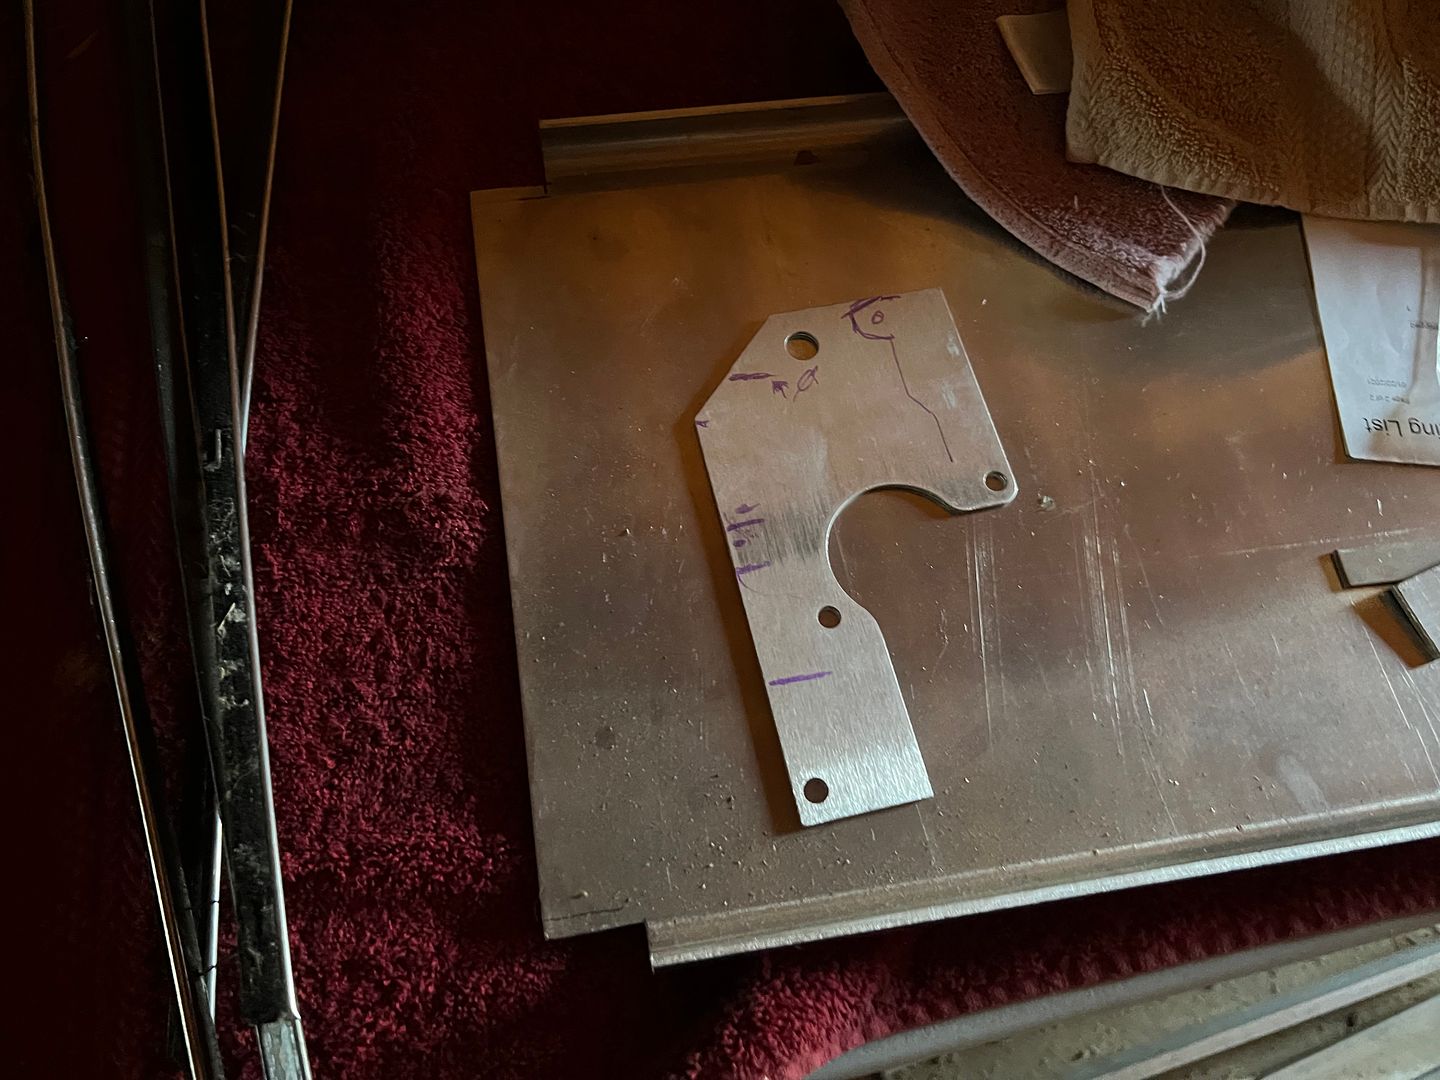 We made a new bracket of 1/8" aluminum, and bent some mounting ears to be able to place it well above the accelerator linkage. We also designed it to use existing hardware to minimize any additional holes through the nicely painted firewall. 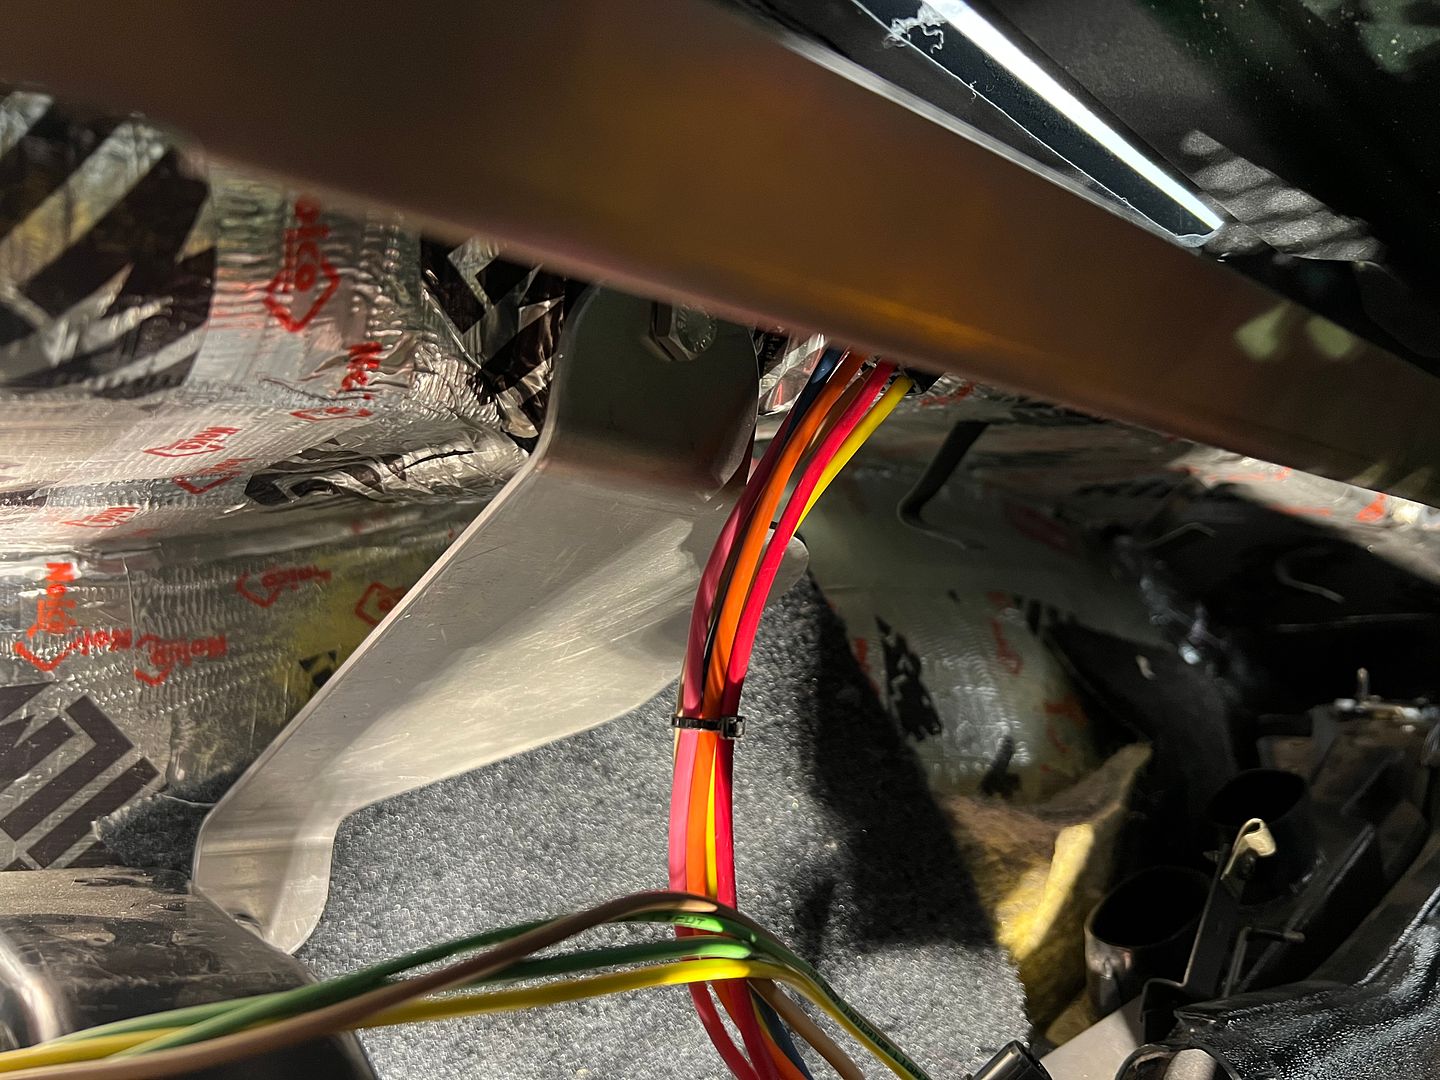 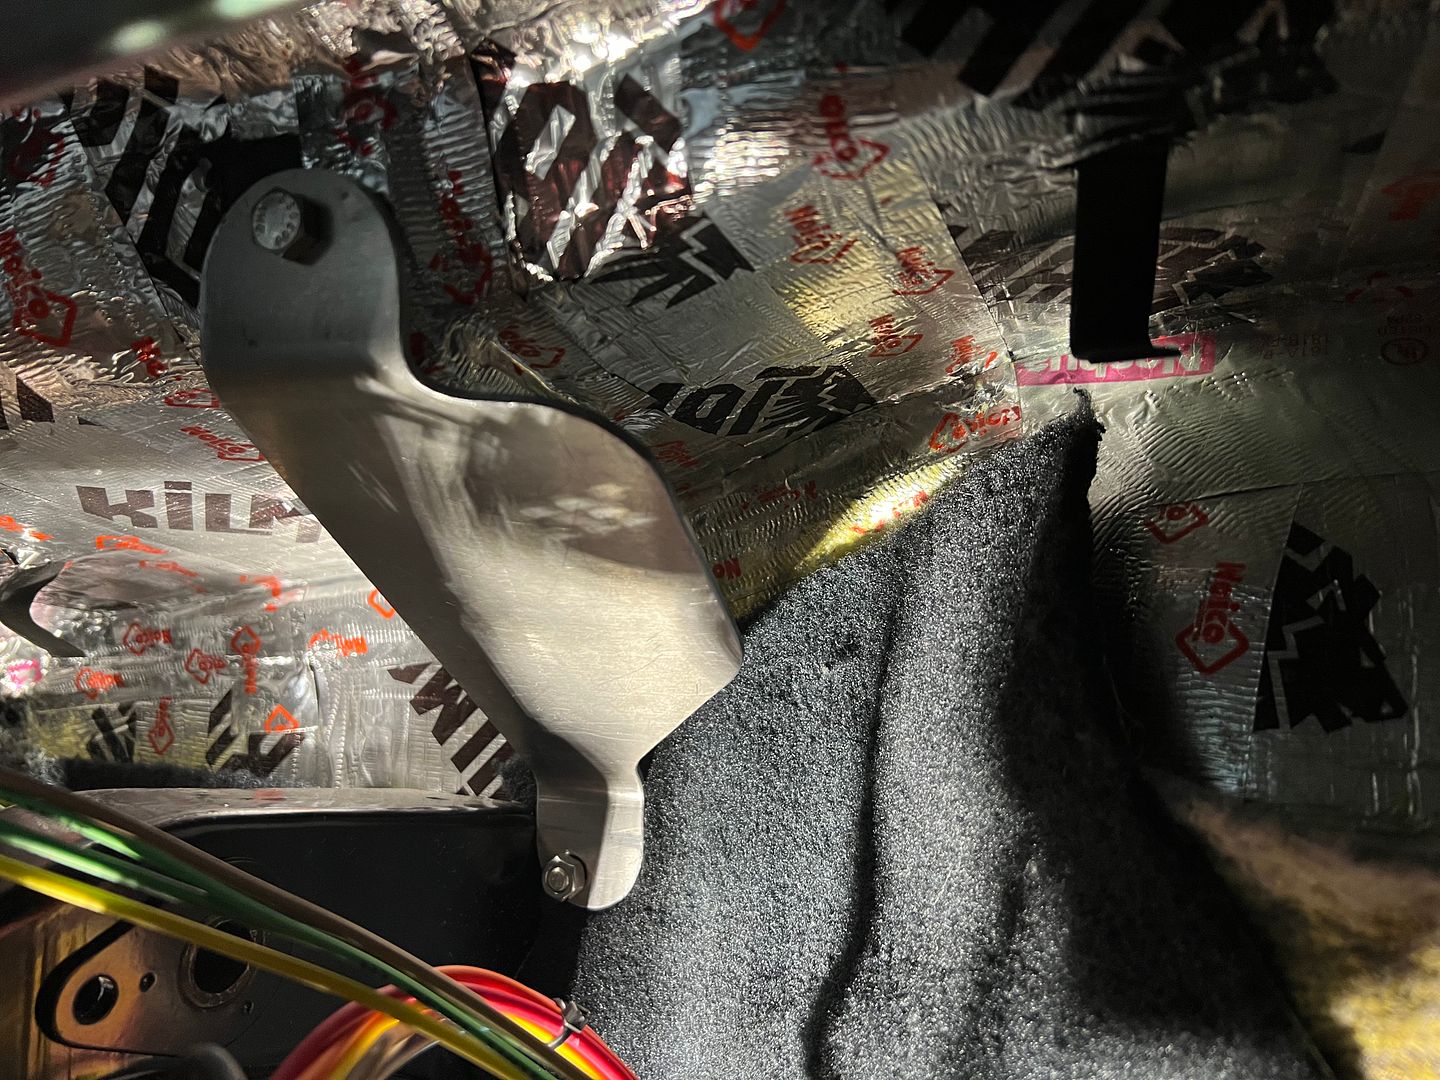 Next, the interfering defrost duct was shortened to provide the needed clearance. Side note: Check out the HAZ difference between a TIG tack on tight fitting panels vs. having to add filler on a slight gap...  Fitted before we do the final welding, this shows to leave us sufficient room... 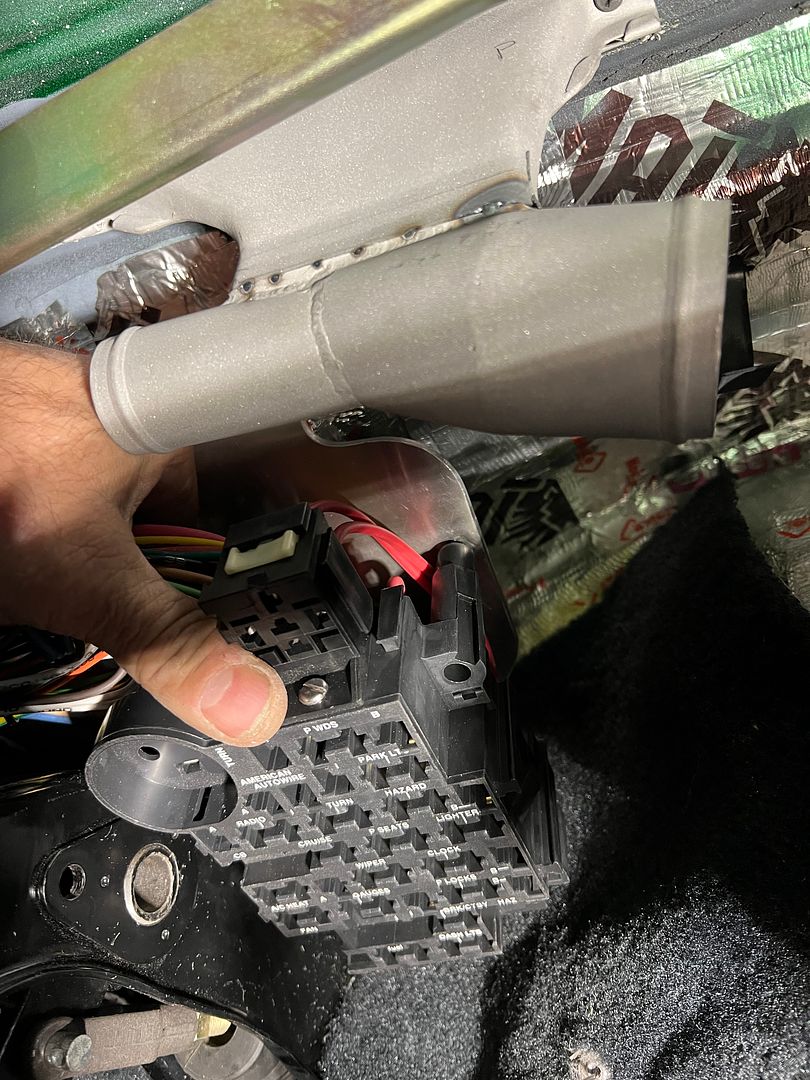 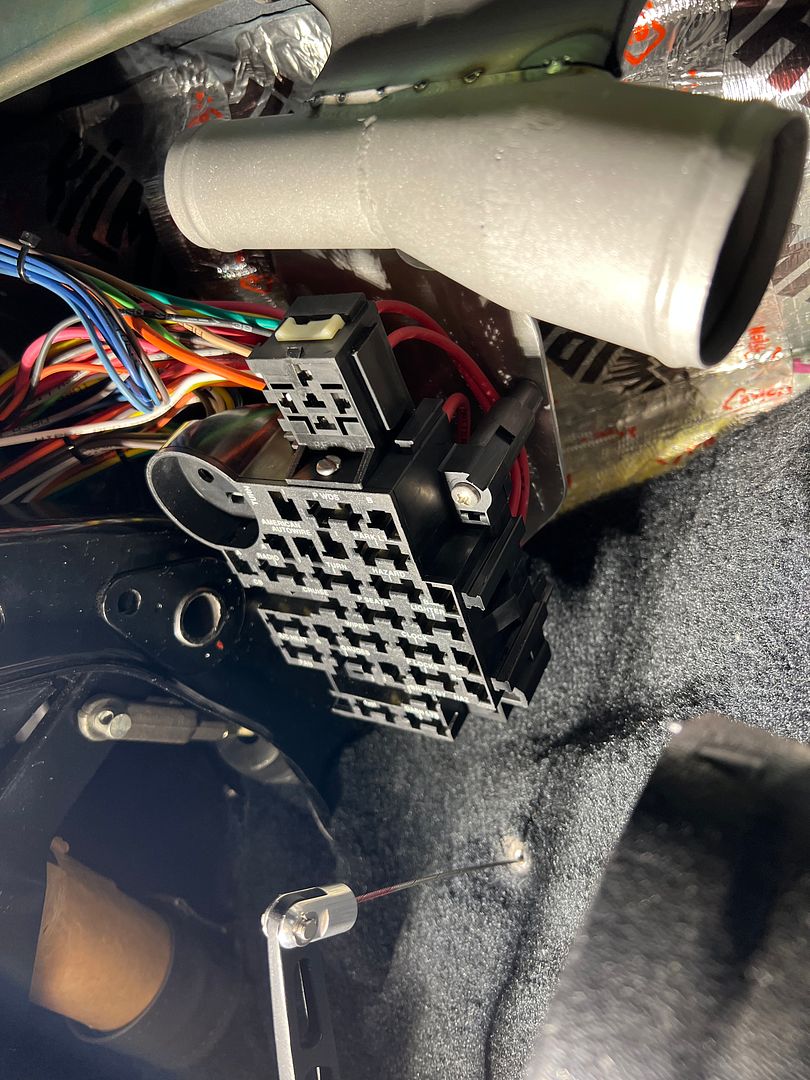 And now for the fun part....
__________________
Robert |
|
|
|
|
04-18-2022, 07:37 PM
|
#1287 |
|
Post Whore
Join Date: May 2015
Location: Alabama
Posts: 14,583
|
Re: 55 Wagon Progress
Wow...that's some serious screens!..
Built a bunch of stuff at work with 80/20 Good to see yall back .!!
__________________
Mongo...aka Greg RIP Dad RIP Jesse 1981 C30 LQ9 NV4500..http://67-72chevytrucks.com/vboard/s...d.php?t=753598 Mongos AD- LS3 TR6060...http://67-72chevytrucks.com/vboard/s...34#post8522334 Columbus..the 1957 IH 4x4...http://67-72chevytrucks.com/vboard/s...63#post8082563 2023 Chevy Z71..daily driver |
|
|
|
|
04-22-2022, 08:35 AM
|
#1288 |
|
Registered User
Join Date: Jan 2013
Location: Leonardtown, MD
Posts: 1,633
|
Re: 55 Wagon Progress
Thanks Greg!
While we're getting prepared for wiring installation, the instrument cluster was dug out of its box to help us see where all the wiring was going. And there it was in all it's billet glory. This will kinda clash with the ribbed stainless trim we're using for the dash insert, so let's look at adding it to our gauge cluster as well... 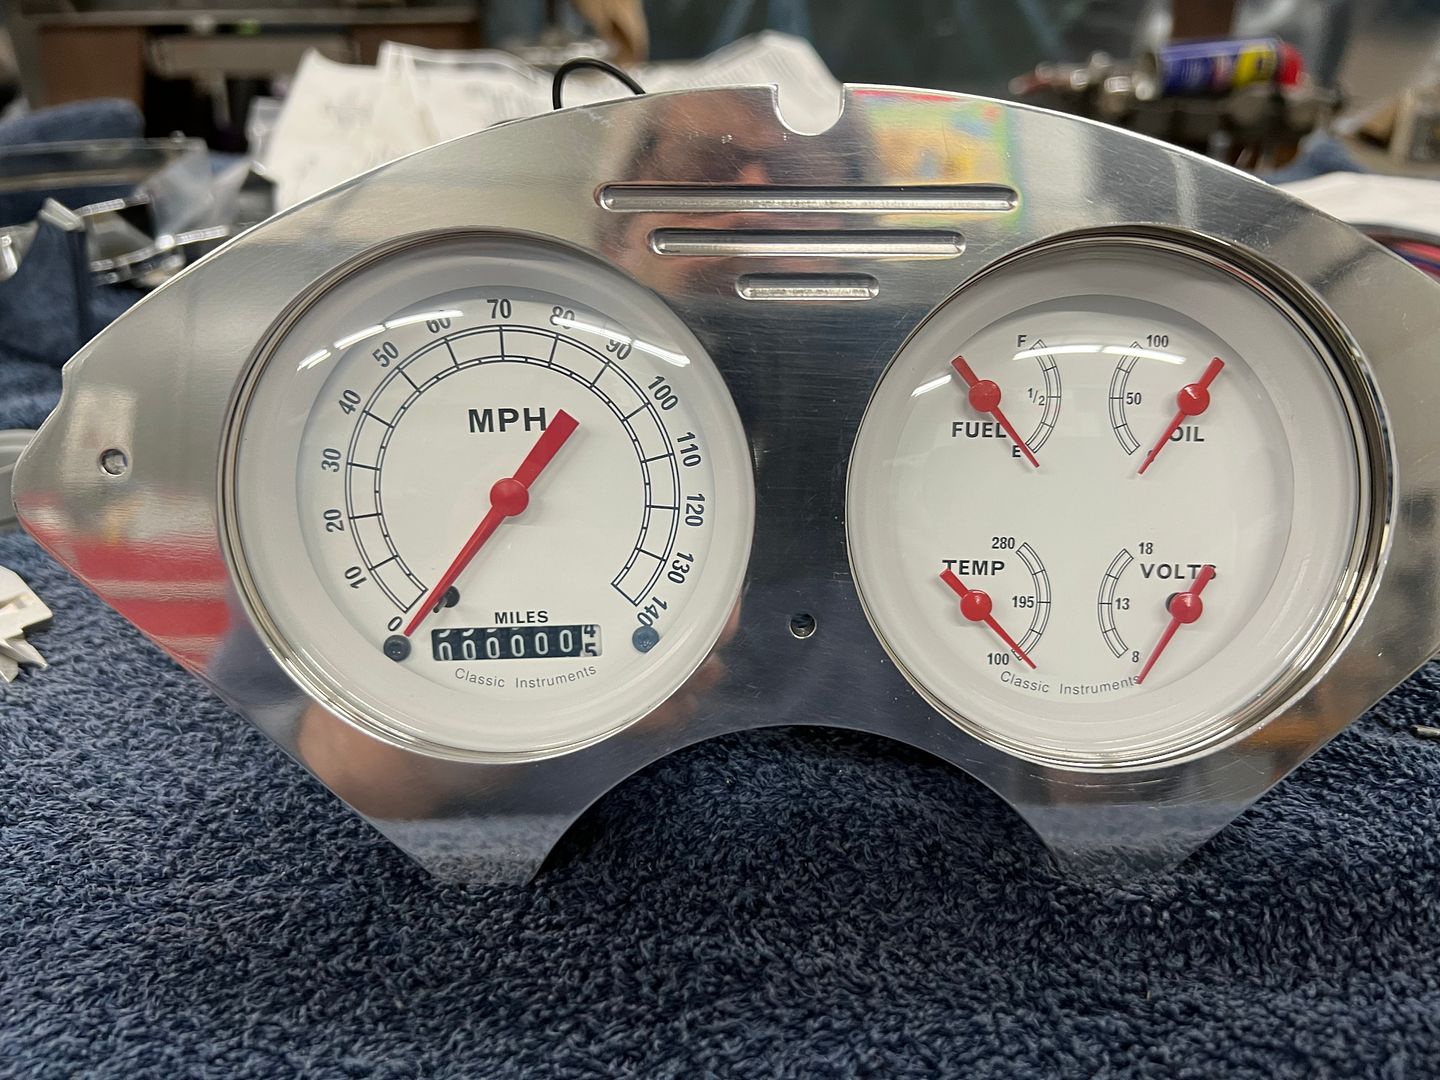 Where this gauge cluster was designed with a flush fit in mind, we need to be able to hide the cut edge of the ribbed stainless. So the holes were opened up slightly where the gauge could be installed from the front, and the bezel will now hide our cut edges.. 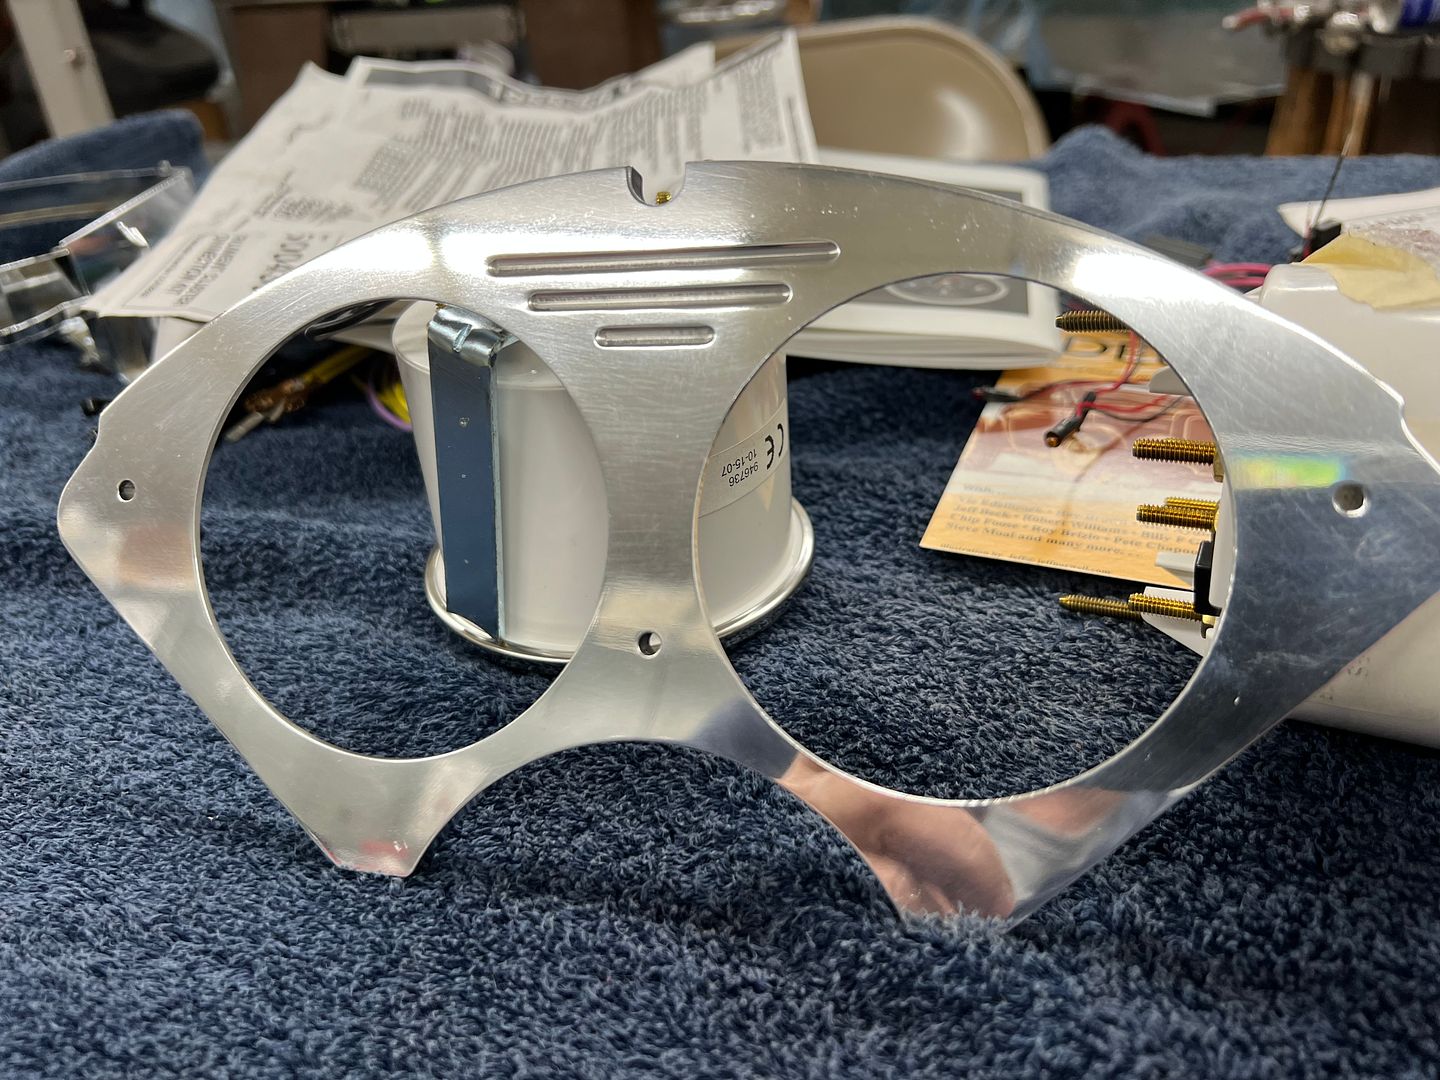 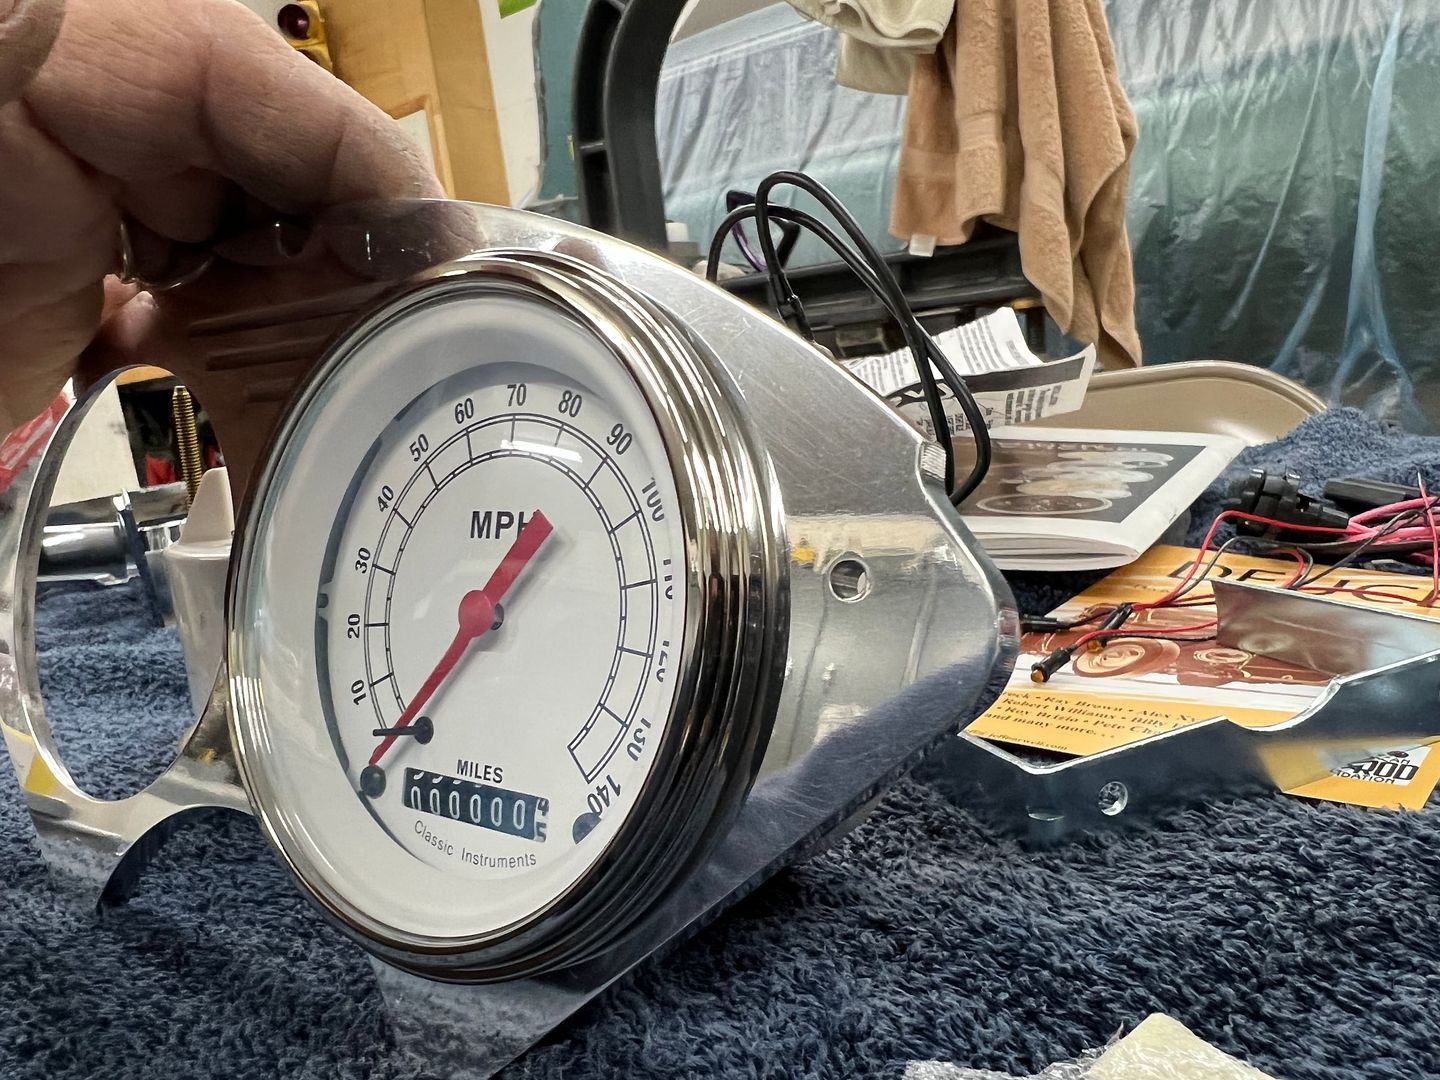 The stainless is in a rather raw form, and to give it more pizazz, perhaps some polishing is in order... So we used some Trizact products on the DA, and ended things on the buffer... 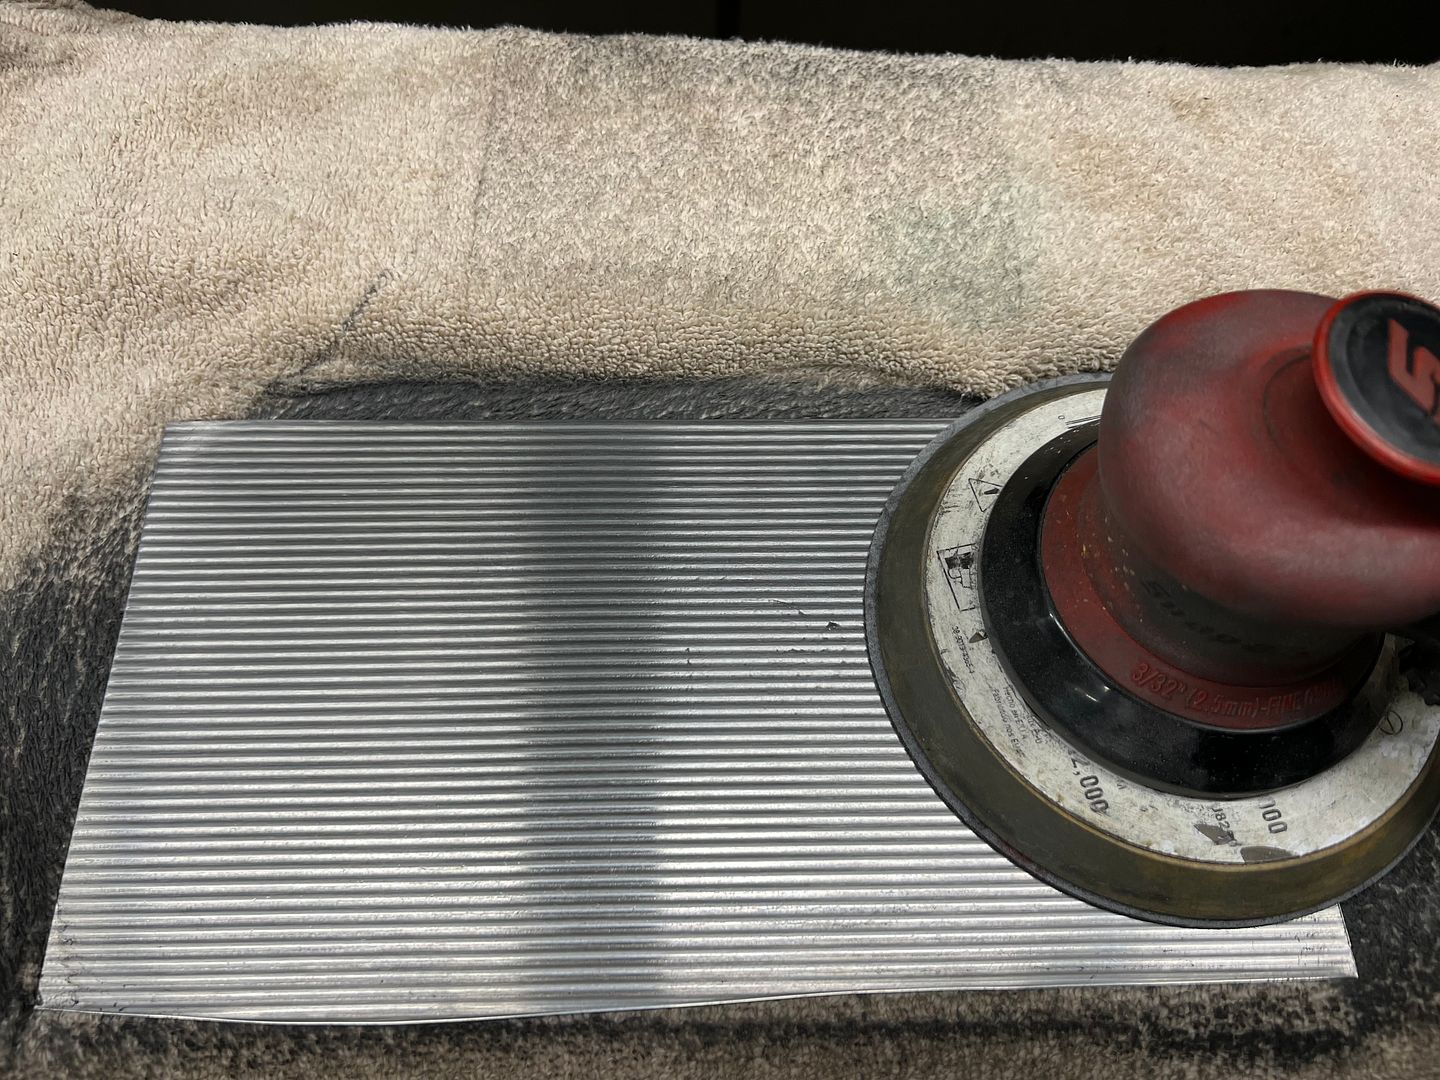 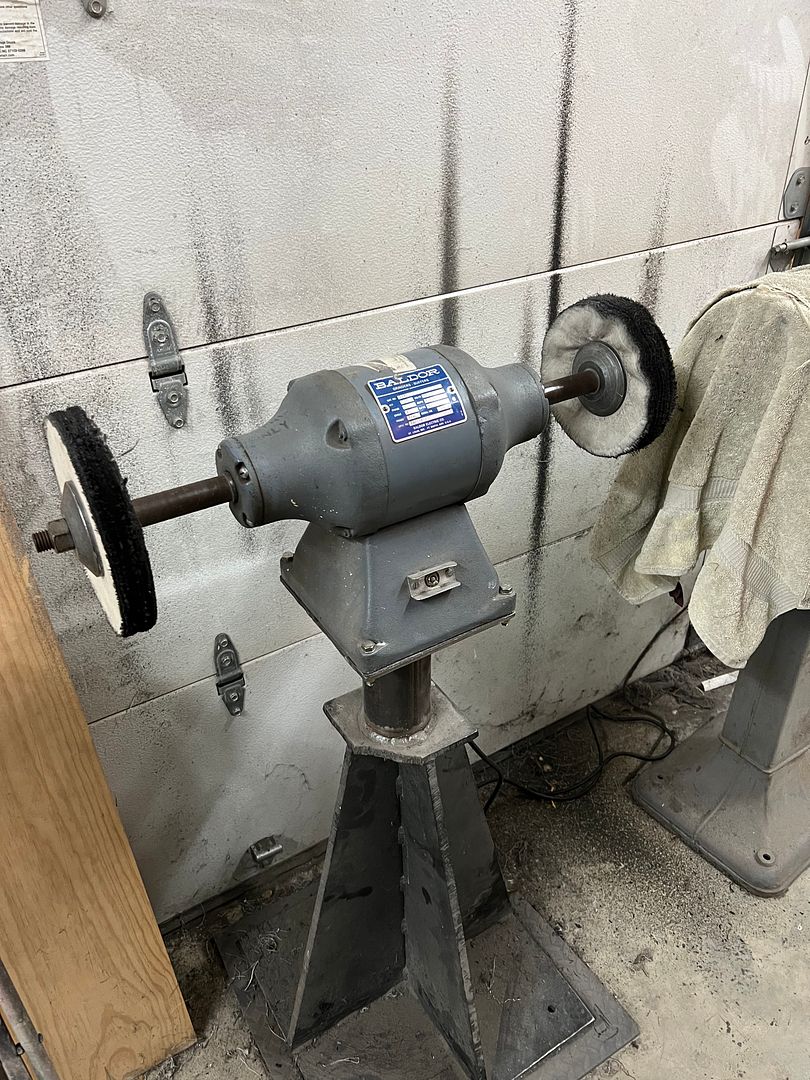 Here's how it turned out... https://www.youtube.com/watch?v=HlN9sreTbaE https://www.youtube.com/watch?v=VfAiY6wfEyw We also have some new indicator lights coming for the high beam and turn signals to get away from the tiny LED's that also scream billet.. The new lights should hopefully be here Saturday where we can get this modification wrapped up this weekend.. 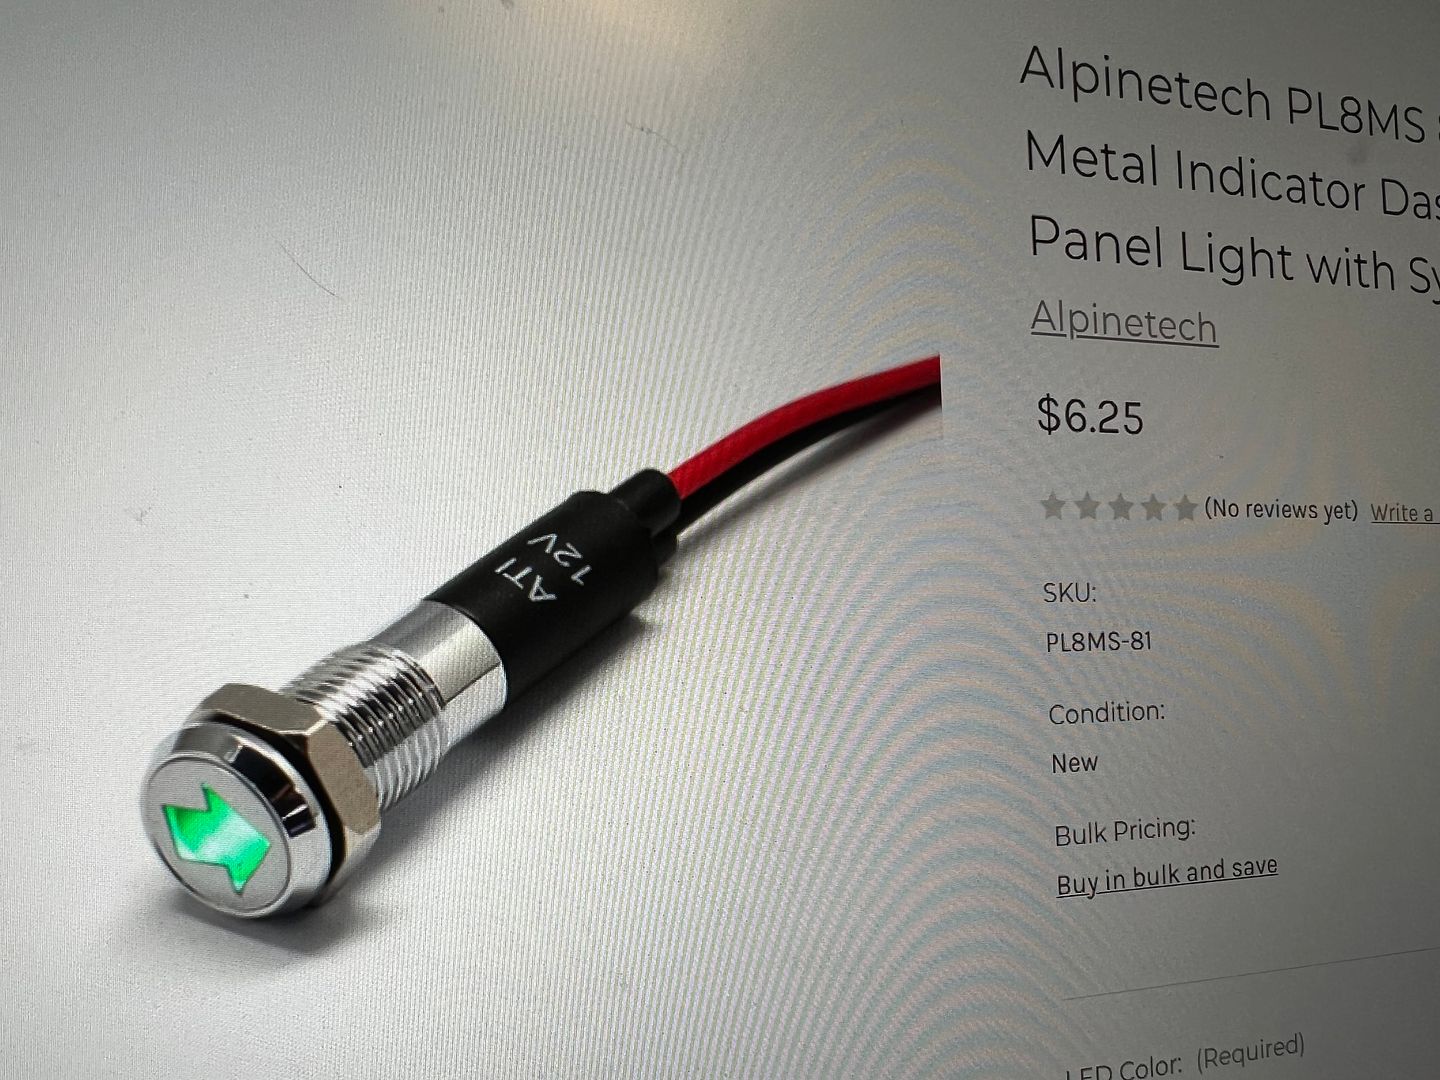
__________________
Robert |
|
|
|
|
04-23-2022, 08:14 AM
|
#1289 |
|
6>8 Plugless........
Join Date: Sep 2007
Location: Prairie City, Ia
Posts: 17,135
|
Re: 55 Wagon Progress
More amazing work as usual Robert. Mounting those screens looks like some outside the box thinking and great work with that all.
__________________
Ryan 1972 Chevy Longhorn K30 Cheyenne Super, 359 Inline 6 cylinder, Auto Trans, Tilt, Diesel Tach/Vach, Buckets, Rare Rear 4-link and air ride option Build Thread 1972 GMC Sierra Grande Longhorn 4x4 1972 Chevy Cheyenne Super K20 Long Step side tilt, tach, tow hooks, AC, 350 4 speed 1972 C10 Suburban Custom Deluxe 1969 Chevy milk truck 1971 Camaro RS 5.3 BTR STG3 Cam Super T10 1940 Ford 354 Hemi 46RH Ford 9" on air ride huge project Tired of spark plugs? Check this out. |
|
|
|
|
04-24-2022, 12:18 AM
|
#1290 |
|
Registered User
Join Date: Jan 2013
Location: Leonardtown, MD
Posts: 1,633
|
Re: 55 Wagon Progress
Thanks Ryan!
Today we had a back up and punt moment. The nice chrome bezel on the gauges is far too large to fit in those corners of the instrument panel bezel from the outside. So we'll have to keep it on the backside, but that doesn't help us cover up the cut edge of the hole in the ribbed stainless.. 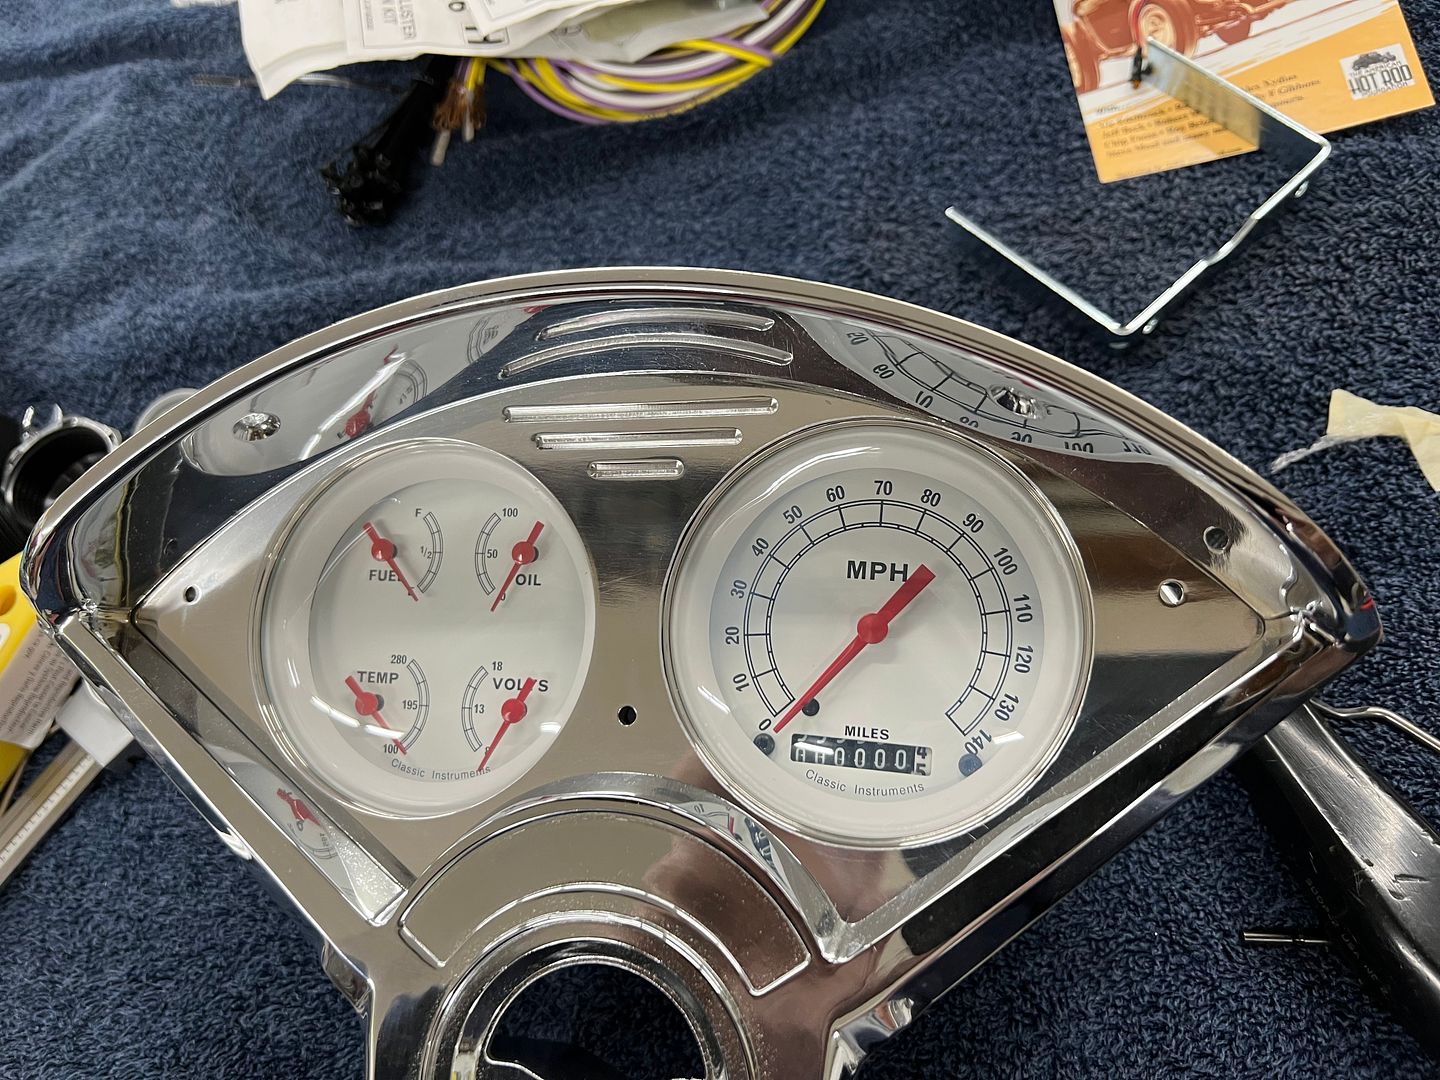 ......so let's make some stainless "eyelets" to both hold the ribbed stainless securely to the billet panel, as well as give us a finished edge around the cut hole.. First a punch and die will be needed to press one side of our eyelet. 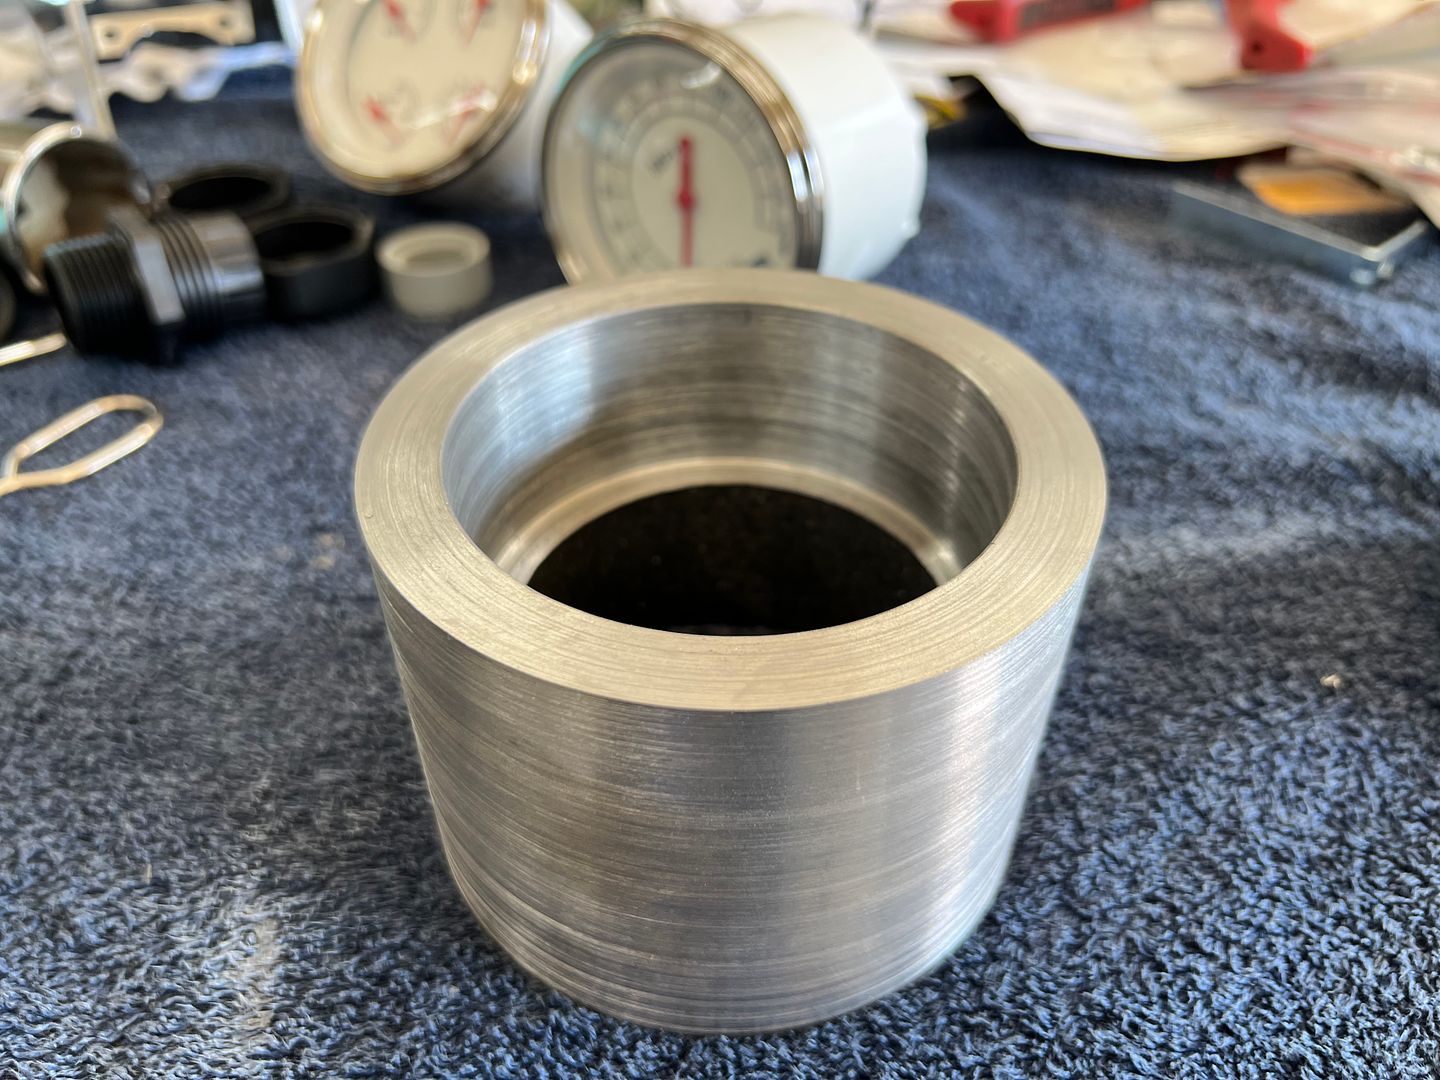 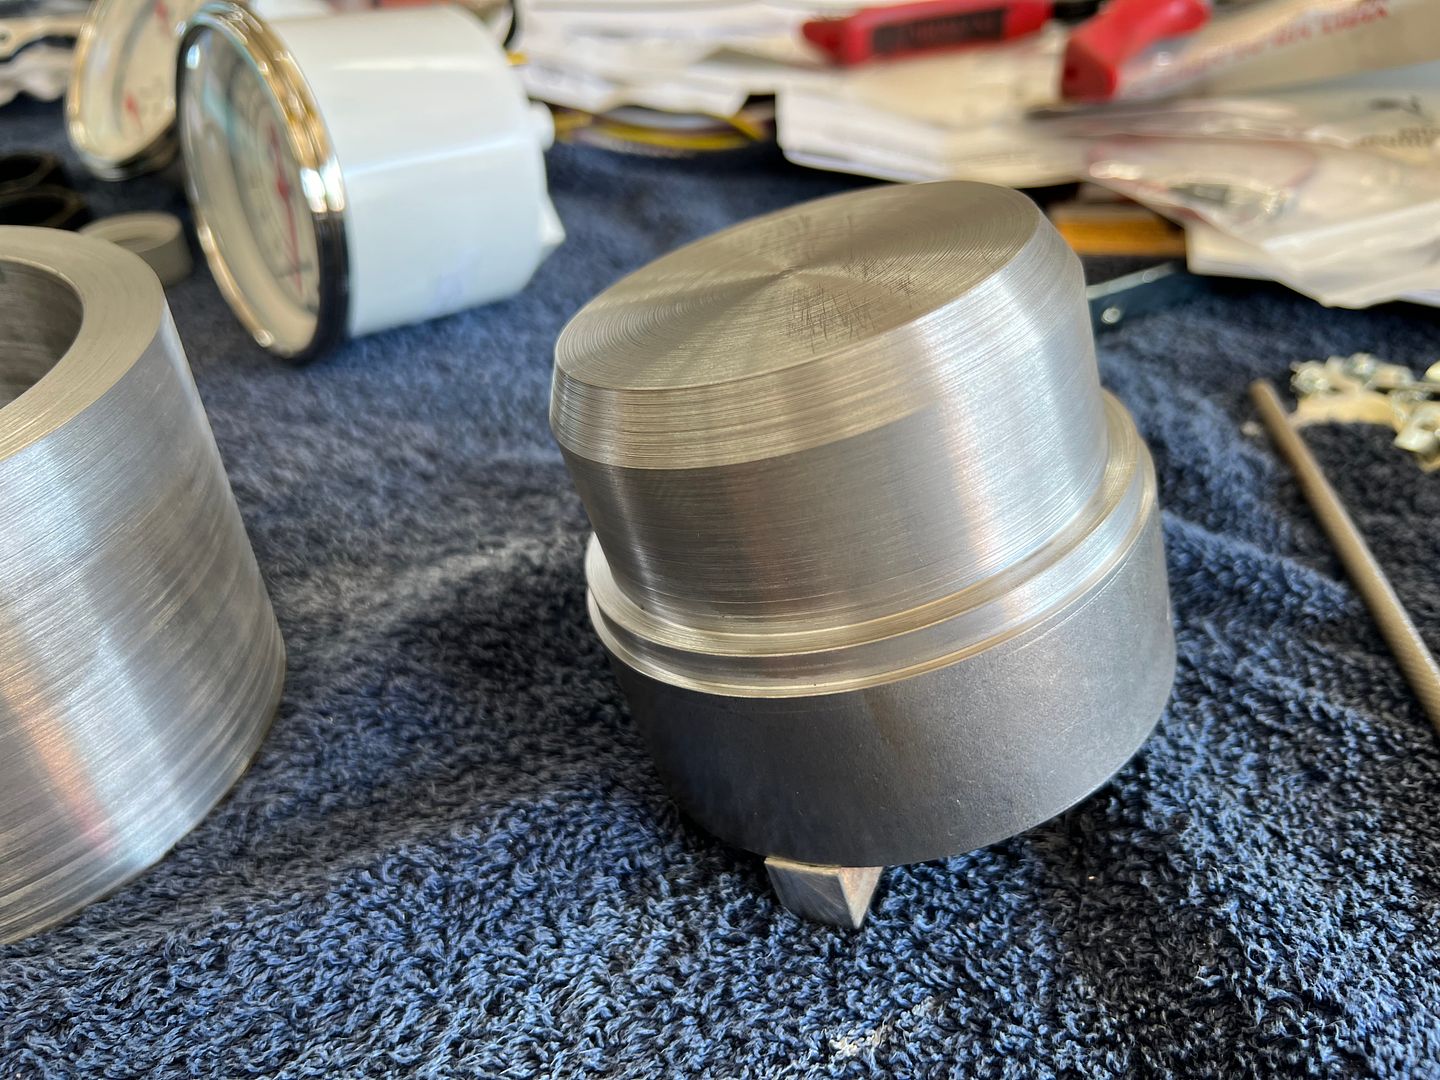 and we added a 1/2 x 1/2 tang to hold the punch in the press brake...  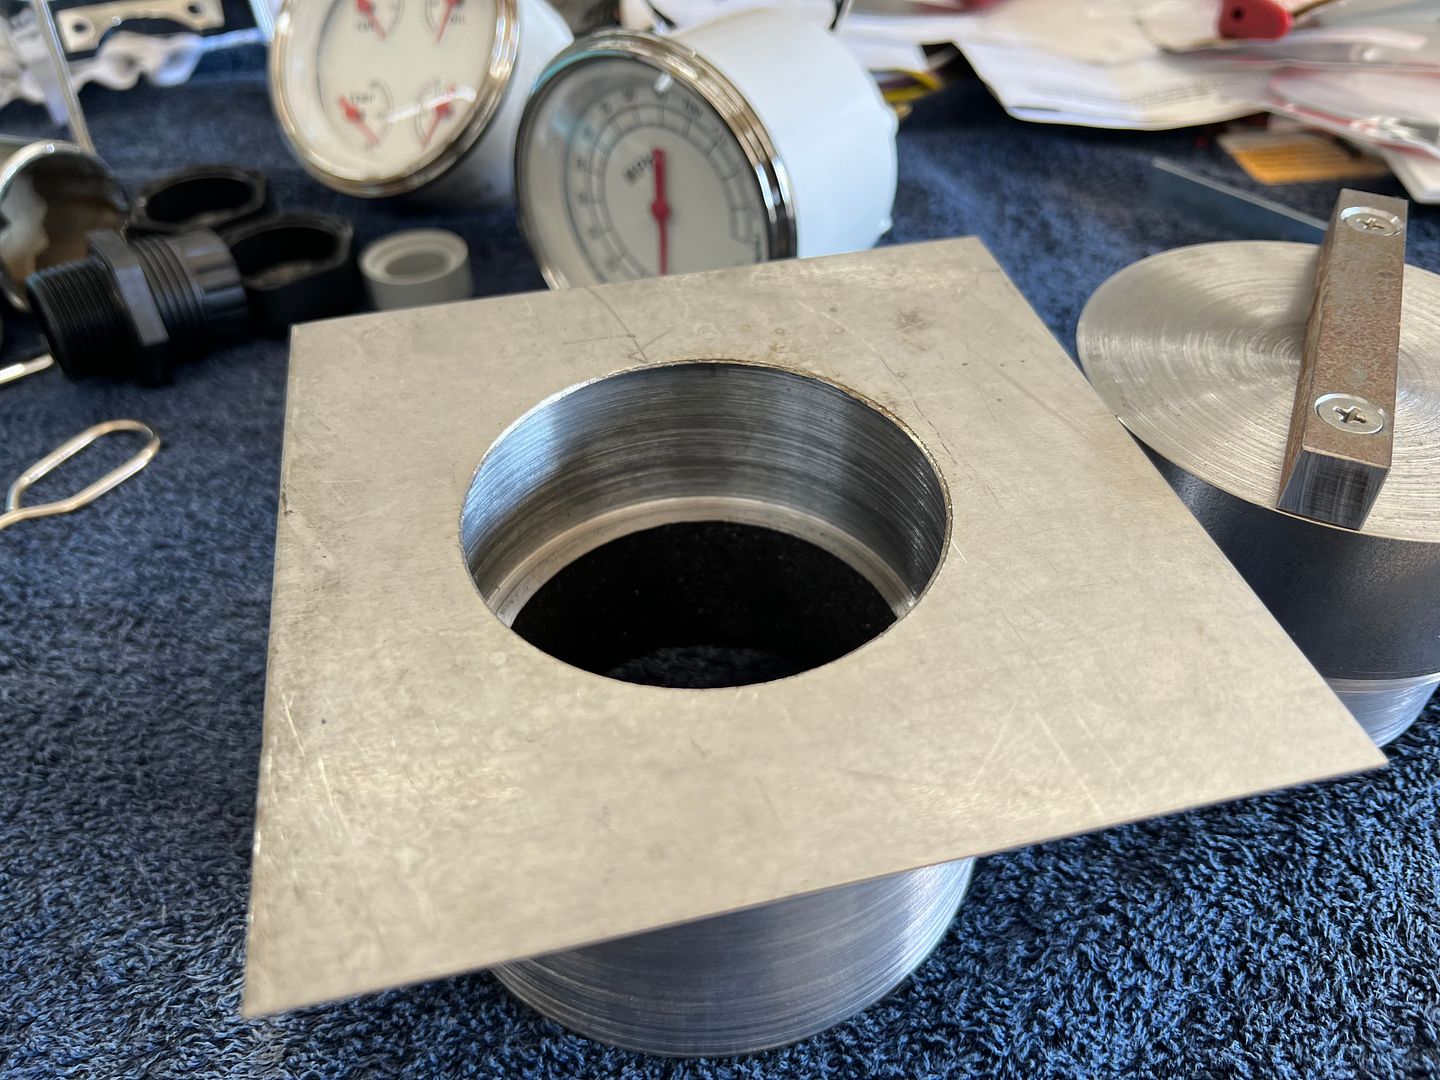 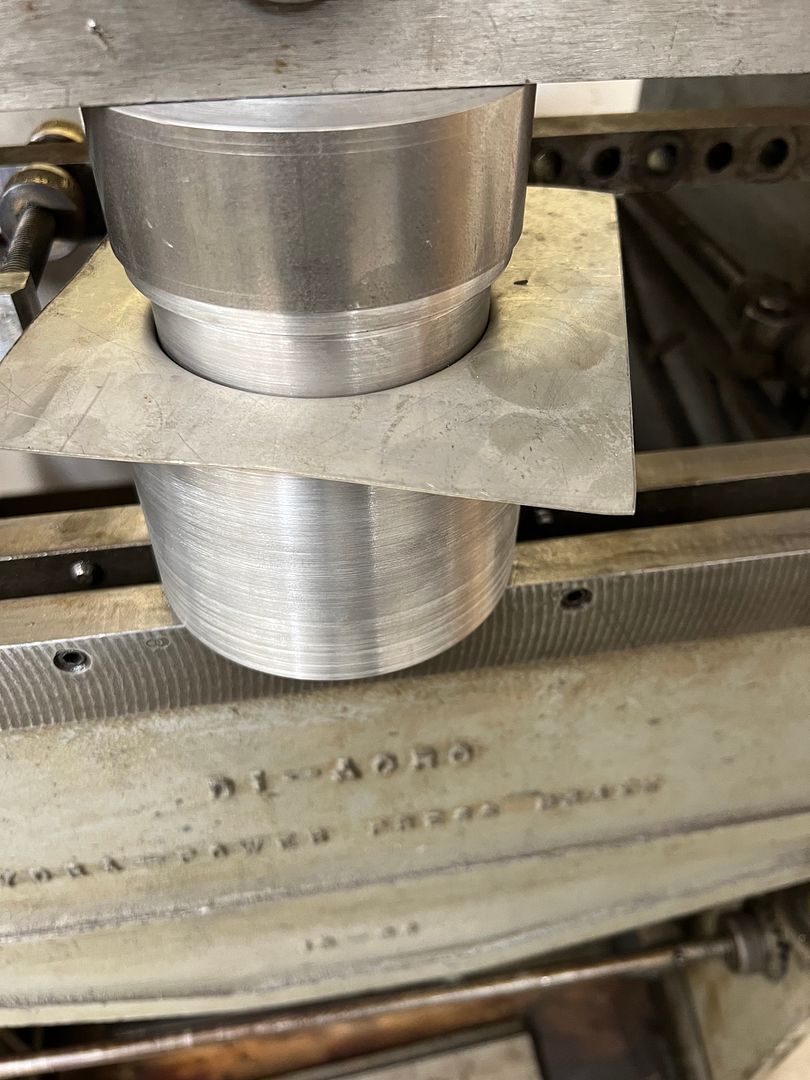  Back to the south bend to cut out our flange lip.. The punch was snug after the press operation, so it was used as a holding fixture for the trimming operation. 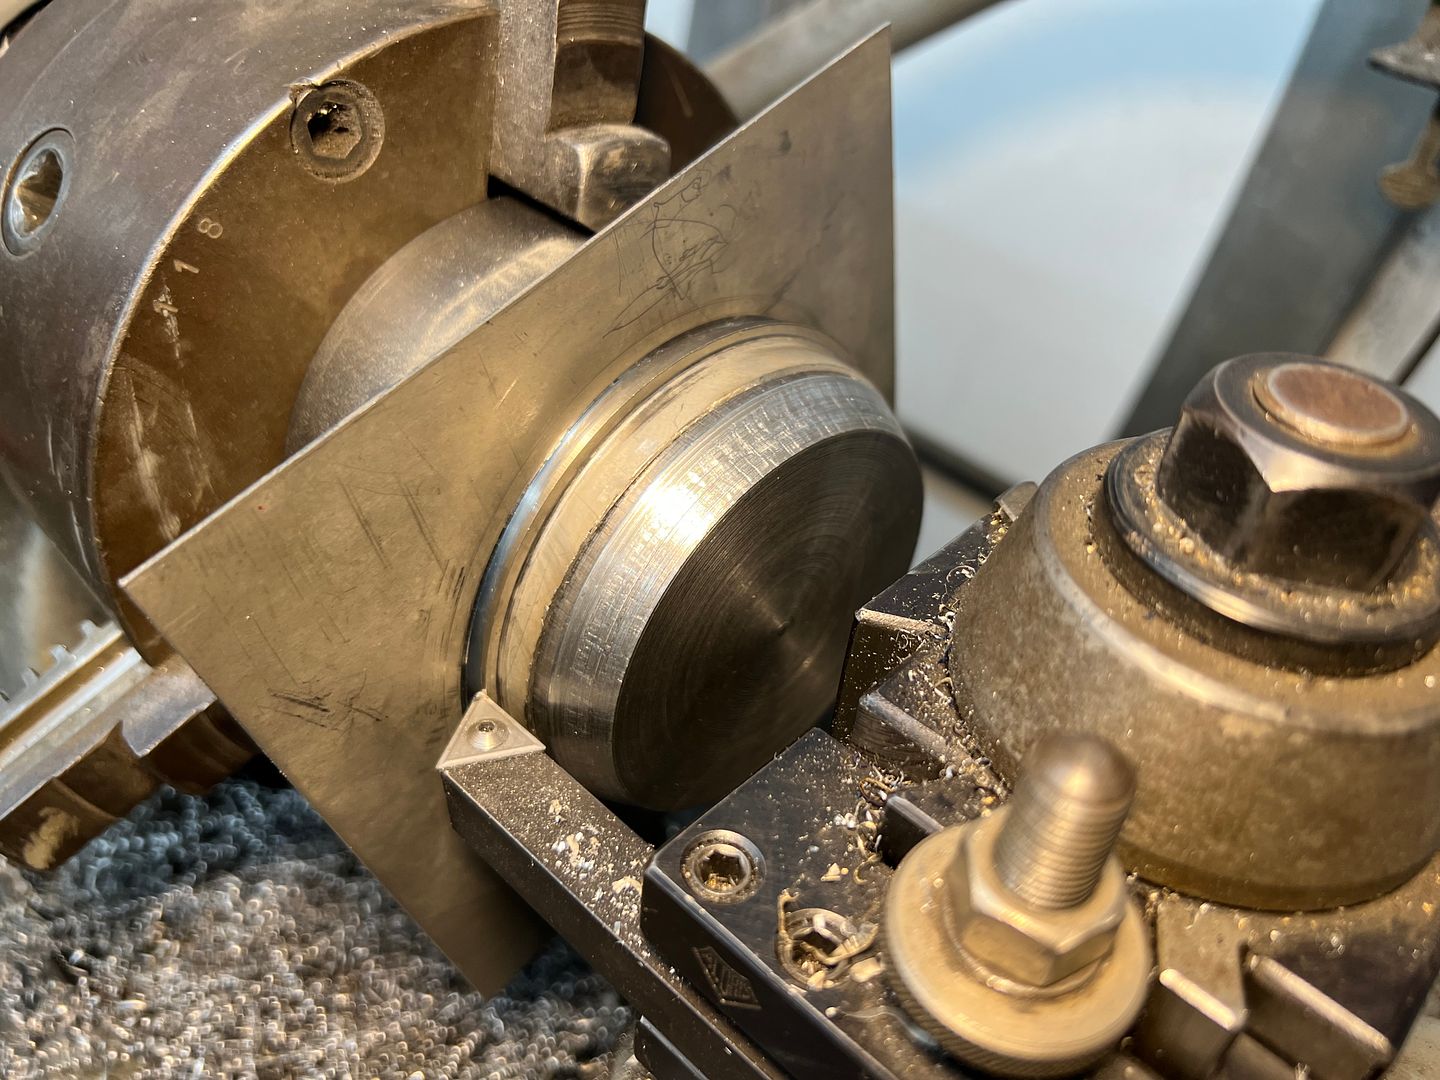 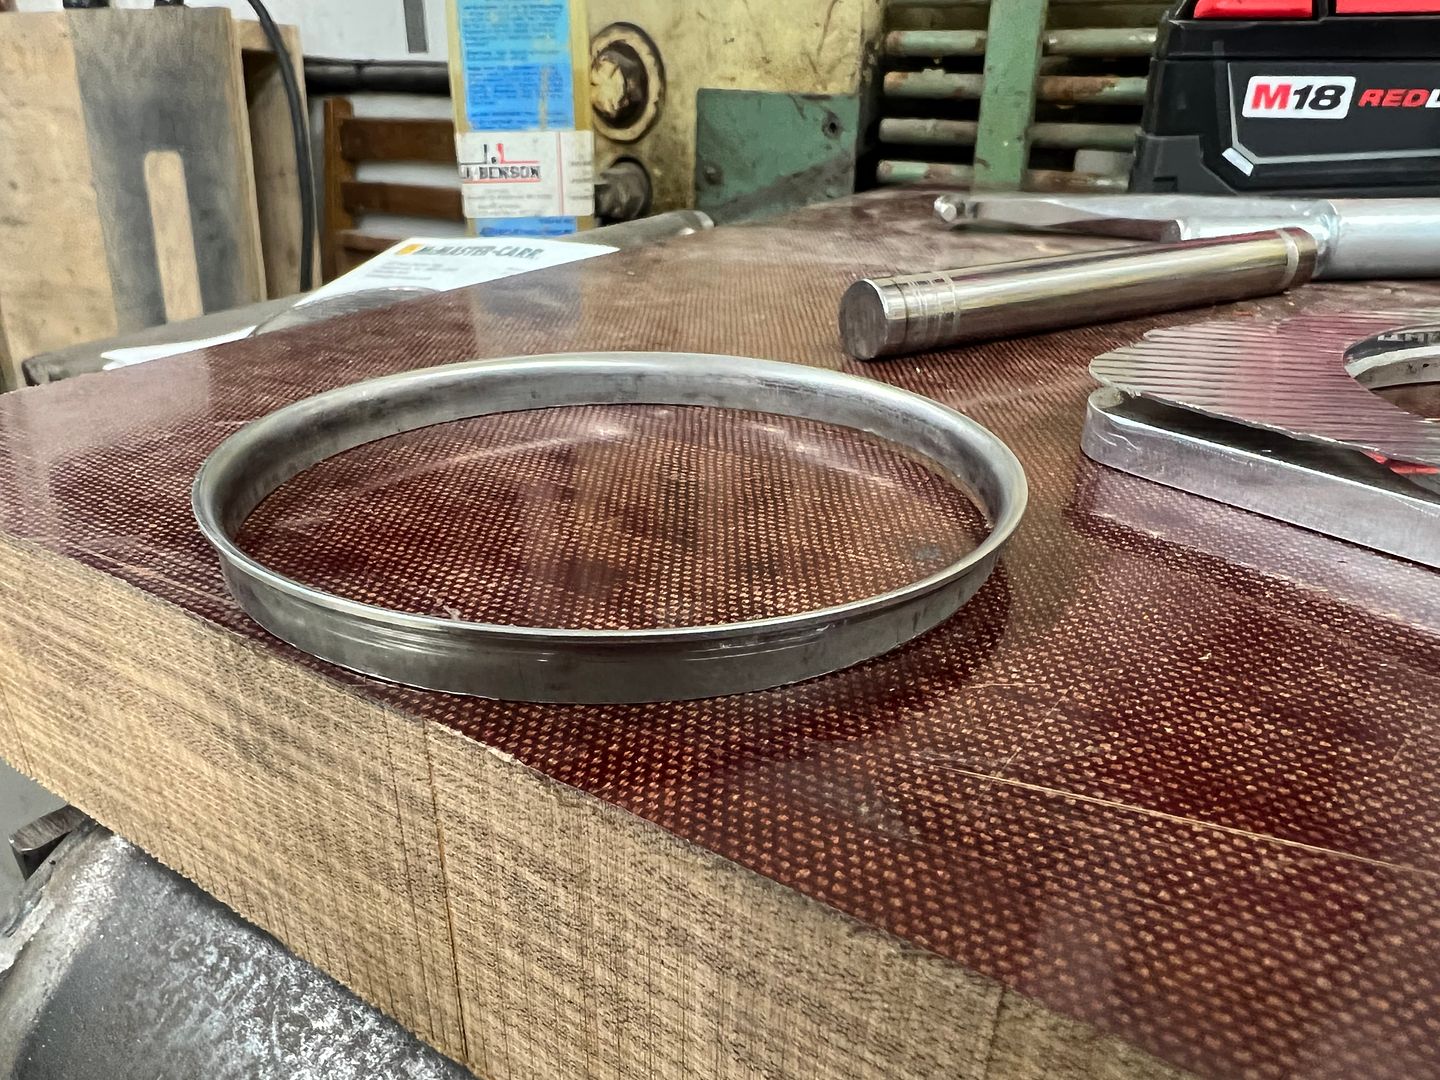 A holesaw in the drill press started the holes for the gauges and then we used our Jigsaw with cruise control to fine tune the openings.  A sheet of phenolic gives us a non-marring surface to pound on, the Snap-on linear stretch hammer swages the flange over and a 1/2" diameter round makes a good punch to flatten out the rest. 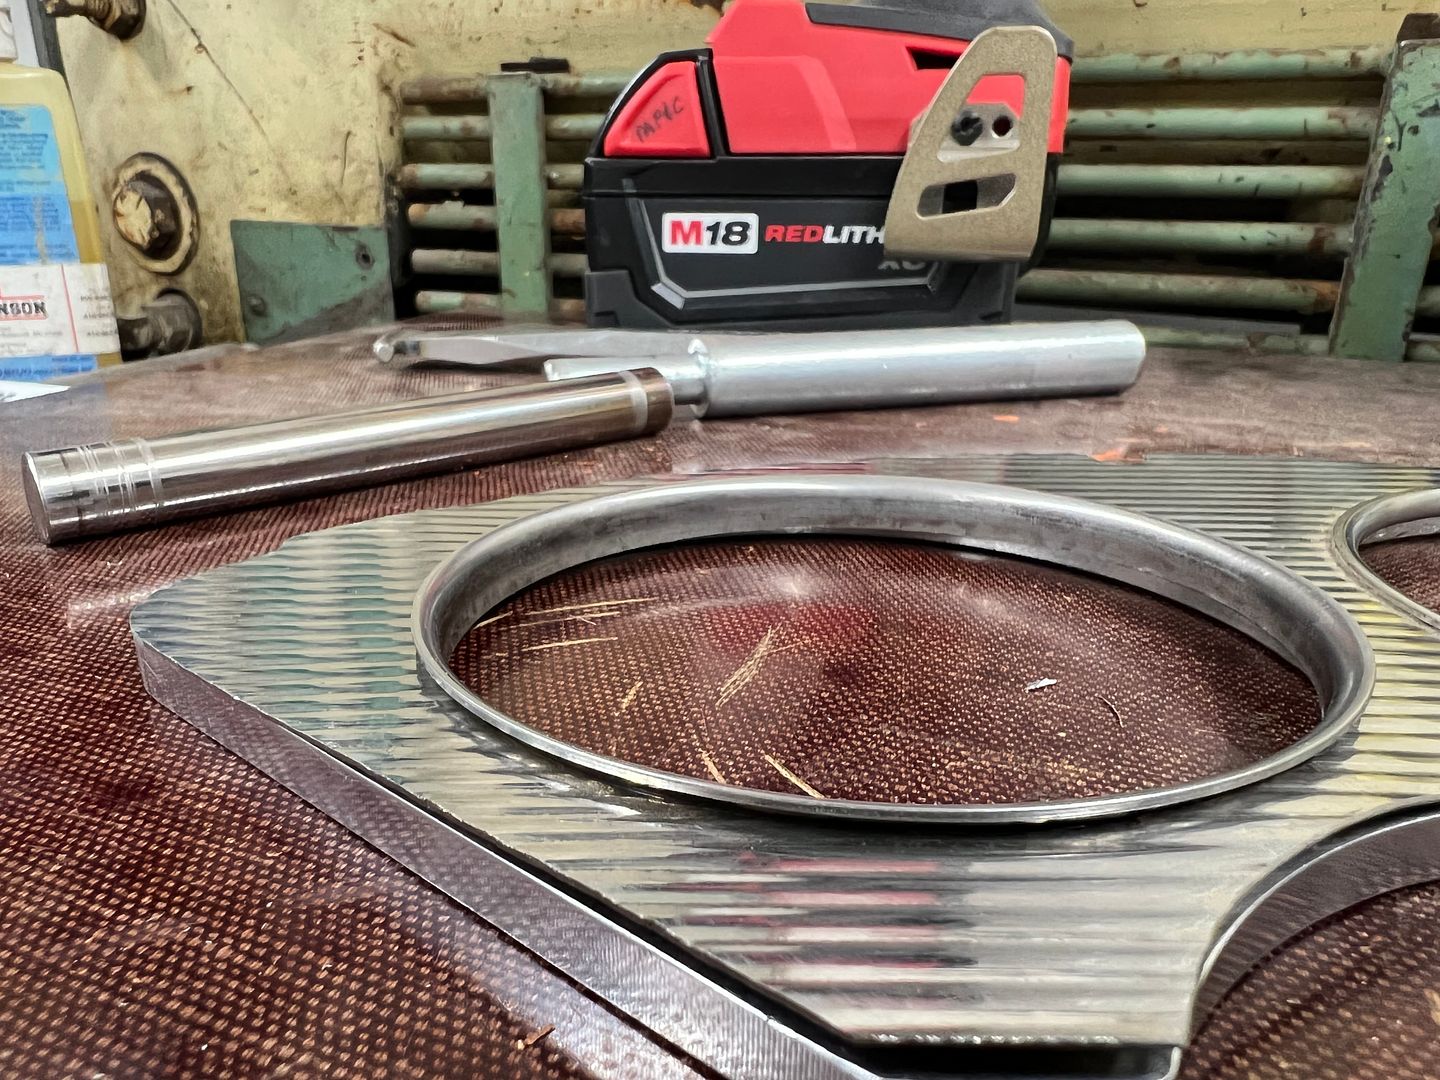 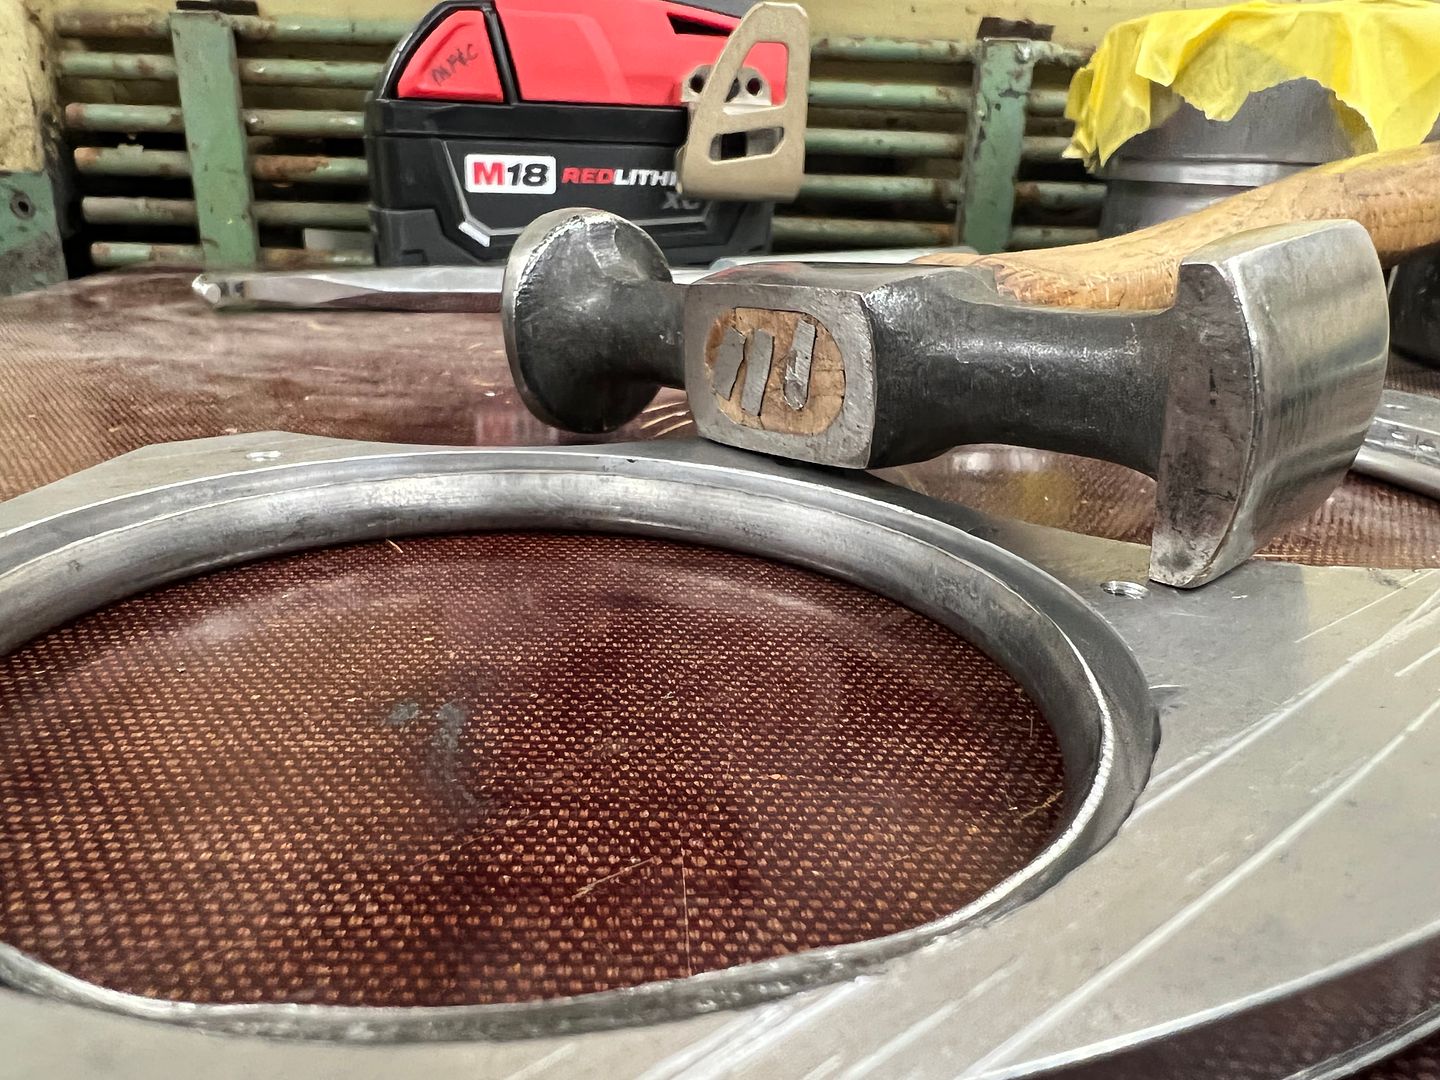 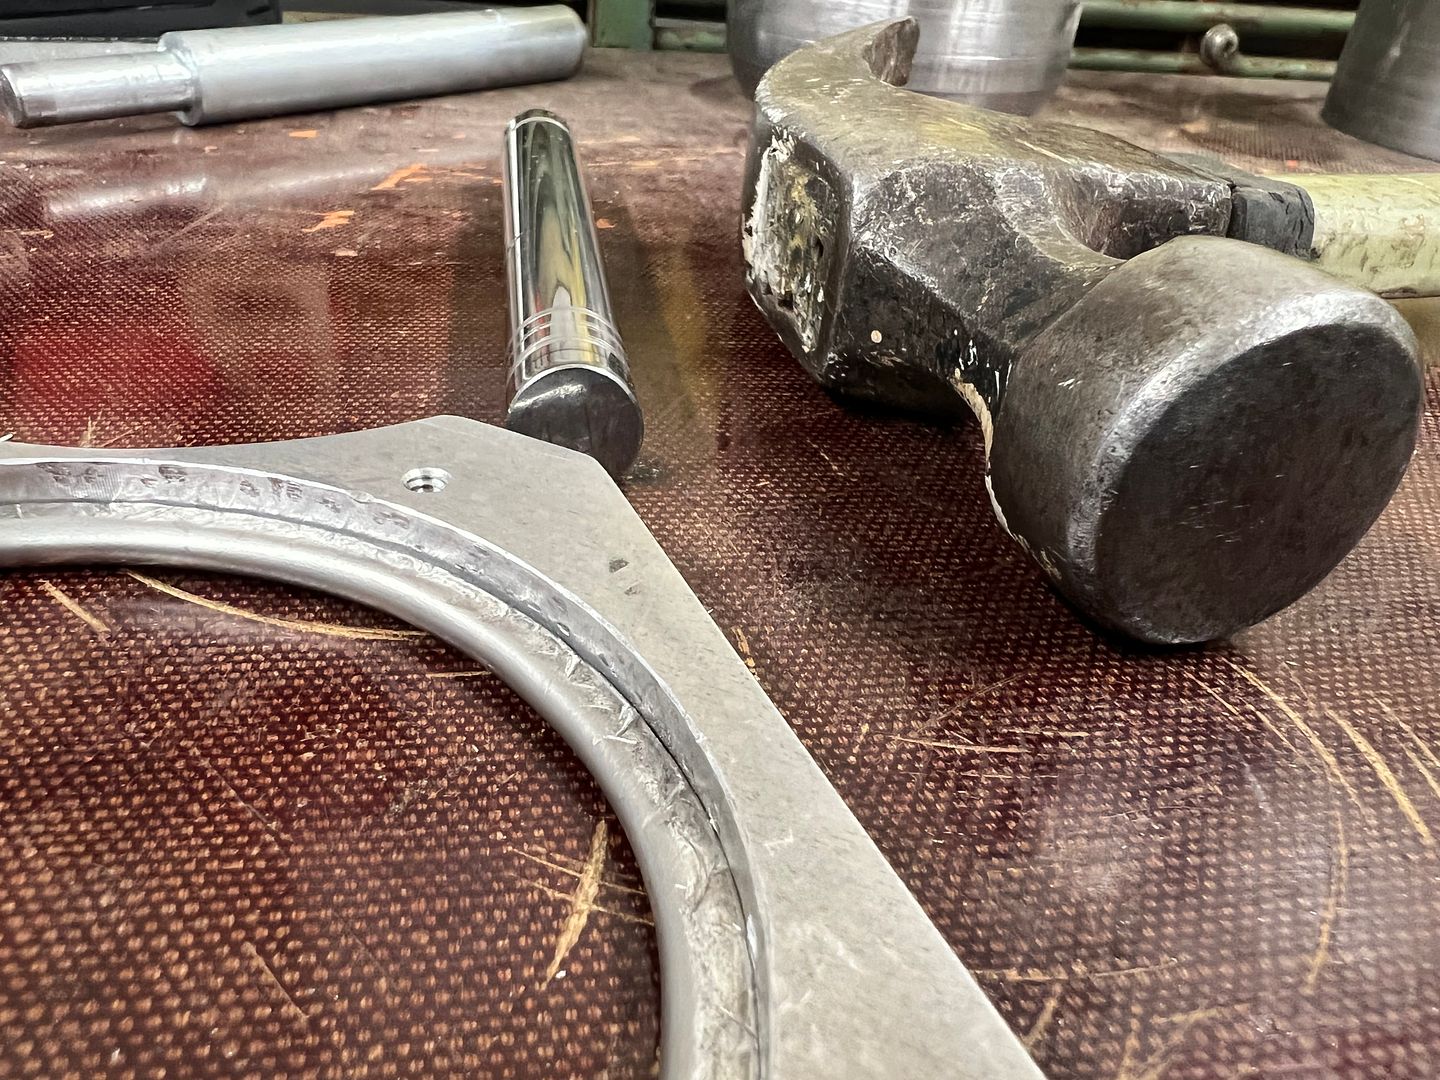 Finished "eyelets" 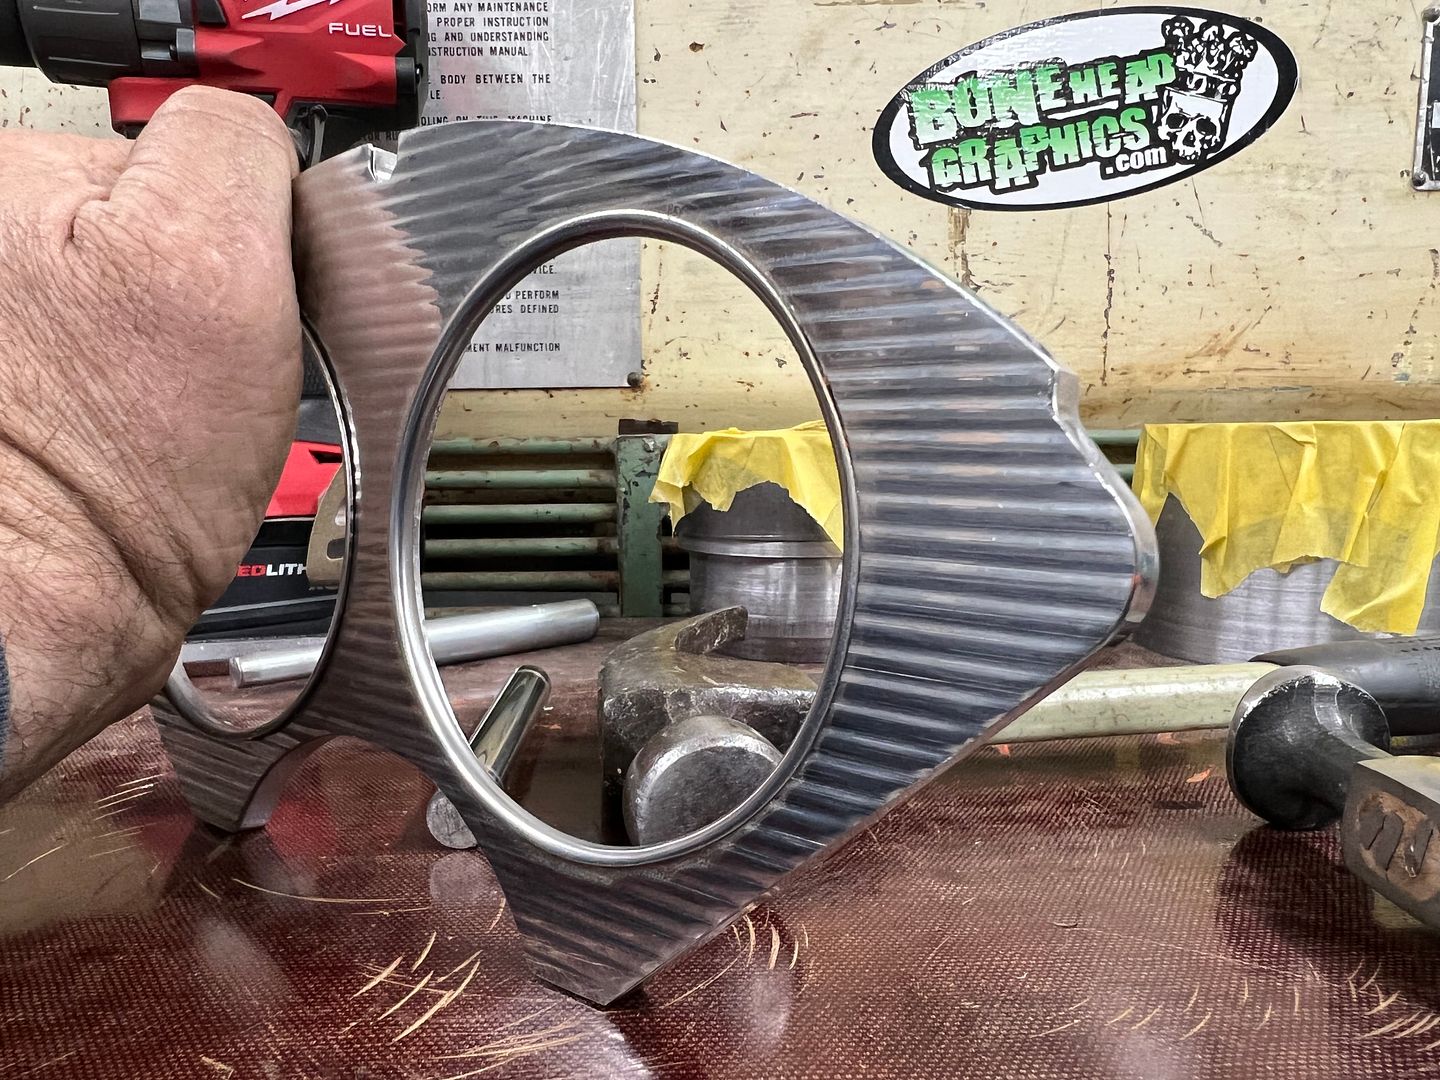  Still have to install the indicator lights, but since I need to pack up for the local car show tomorrow in Leonardtown, we'll finish that up this coming week. https://www.youtube.com/watch?v=q6oKduQOqC8
__________________
Robert |
|
|
|
|
04-24-2022, 03:29 AM
|
#1291 |
|
Post Whore
Join Date: May 2015
Location: Alabama
Posts: 14,583
|
Re: 55 Wagon Progress
That's a slick fix..!!!
__________________
Mongo...aka Greg RIP Dad RIP Jesse 1981 C30 LQ9 NV4500..http://67-72chevytrucks.com/vboard/s...d.php?t=753598 Mongos AD- LS3 TR6060...http://67-72chevytrucks.com/vboard/s...34#post8522334 Columbus..the 1957 IH 4x4...http://67-72chevytrucks.com/vboard/s...63#post8082563 2023 Chevy Z71..daily driver |
|
|
|
|
04-24-2022, 03:16 PM
|
#1292 |
|
Registered User
Join Date: Jan 2003
Location: Safford,AZ
Posts: 3,613
|
Re: 55 Wagon Progress
Nice work!!
|
|
|
|
|
05-16-2022, 03:38 PM
|
#1293 |
|
Registered User
Join Date: Jan 2013
Location: Leonardtown, MD
Posts: 1,633
|
Re: 55 Wagon Progress
Thanks guys!!
We did a test fit of the instrument panel in the car to see what it looked like with the green backdrop... 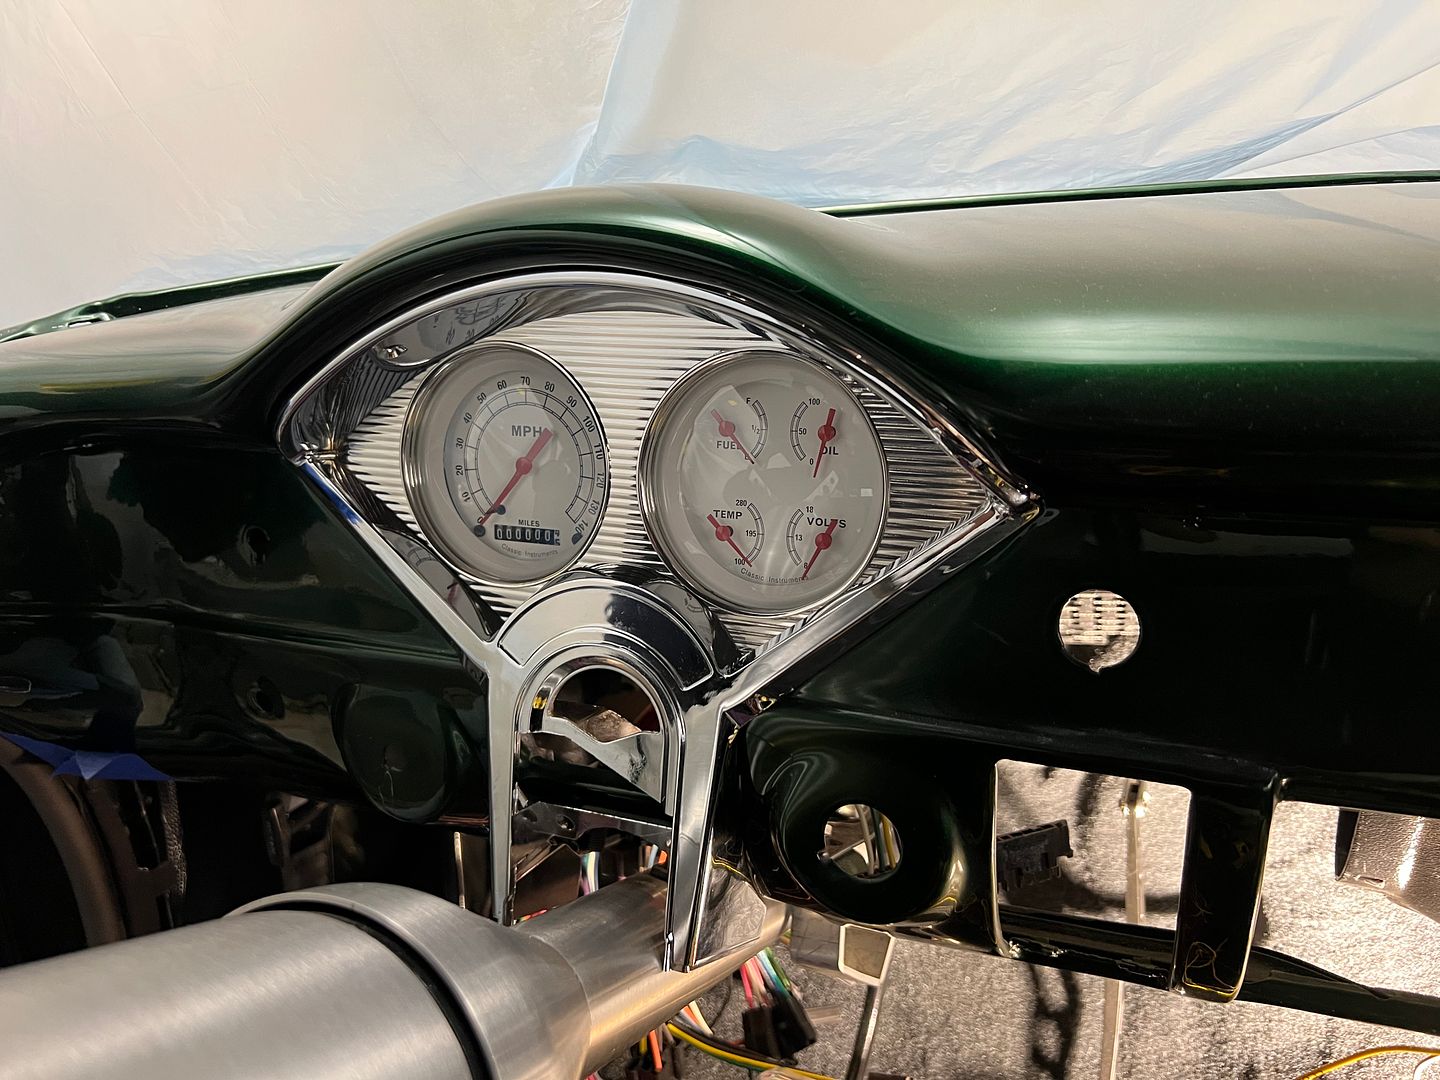 This stainless will be the same material used in the dash insert "band" that goes from side to side, as well as the insert for the console. Should add some pizazz to the interior... Here's the view with our Alpinetech indicator lights added.... https://www.youtube.com/watch?v=4zLvM4XG2fQ Our OEM retainers for the bottom of the curved side glass had one piece with a bracket broken off. These brackets serve as a place to screw/attach the garnish moldings. 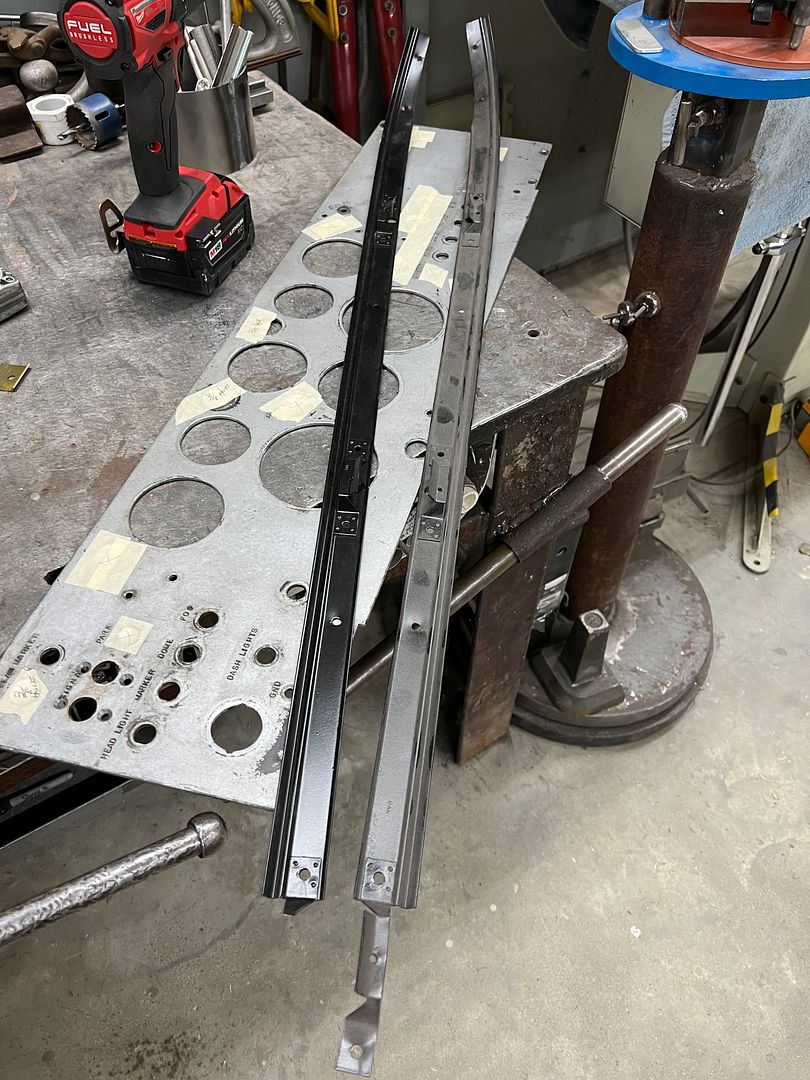  The broken piece was removed and the spot welds ground smooth... 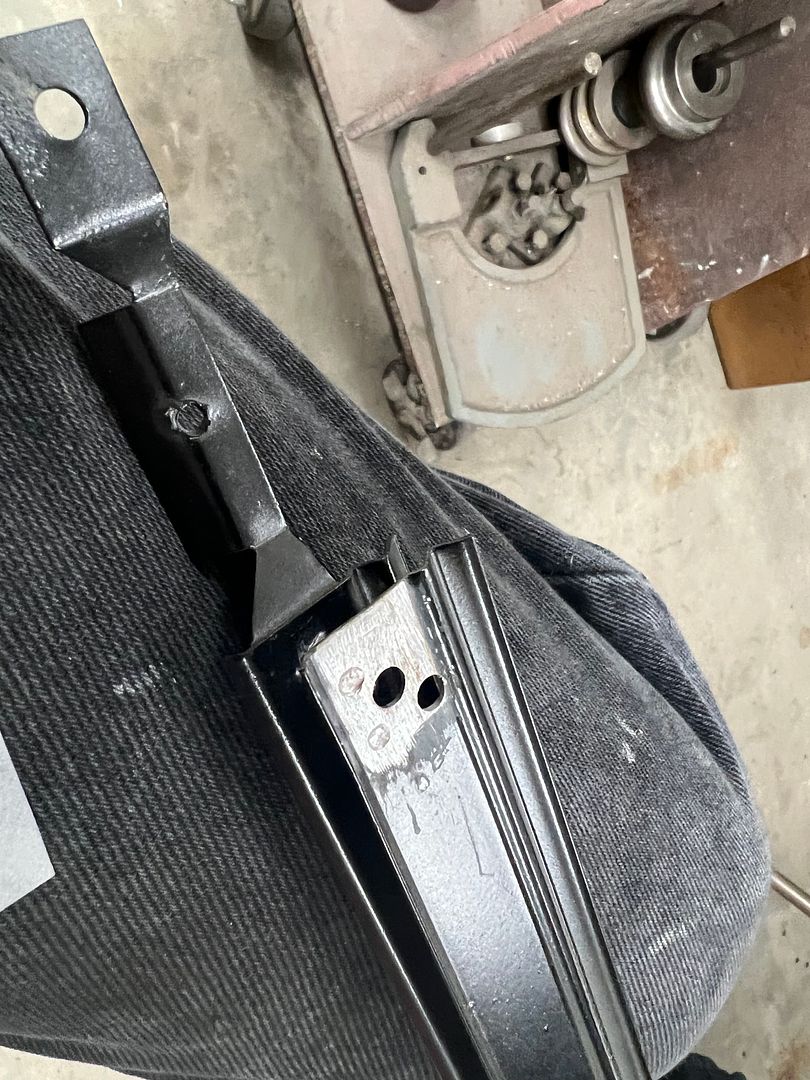 A new piece was cut out of some 19 ga steel and the Diacro press brake made short work of repeating 45* bends. 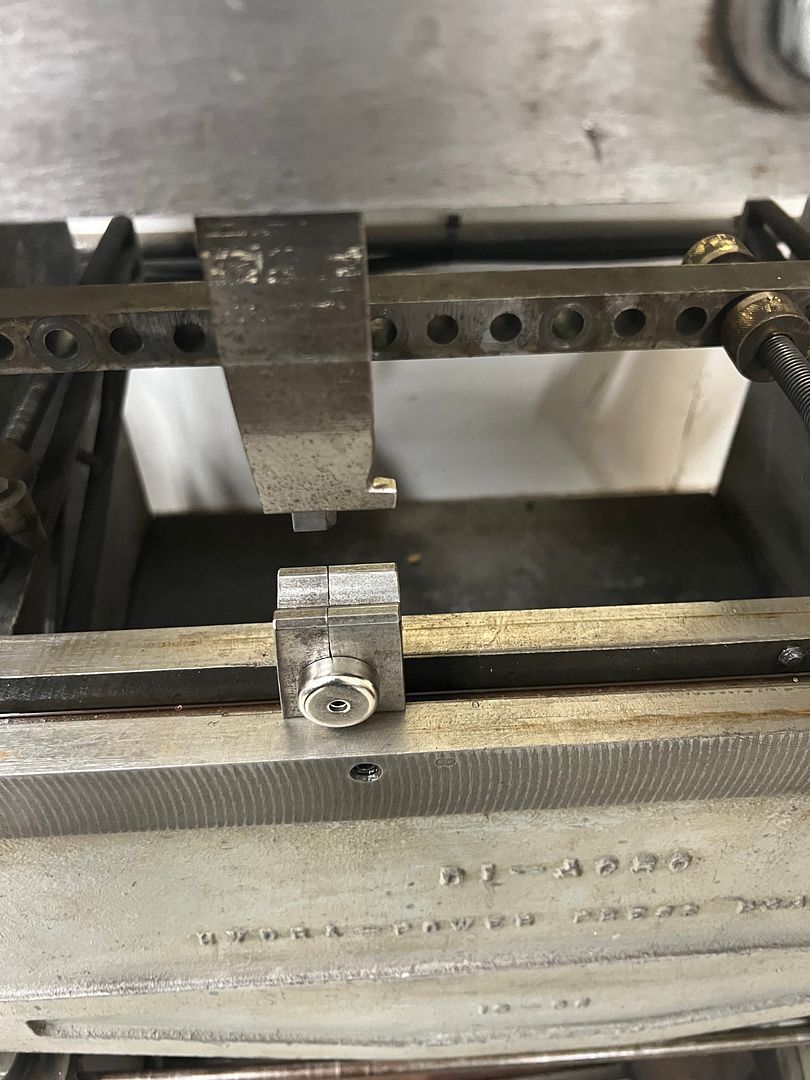 The new part was media blasted, TIG welder used to plug weld things back together, more media blasting and some epoxy mixed up and brushed on using an acid brush. 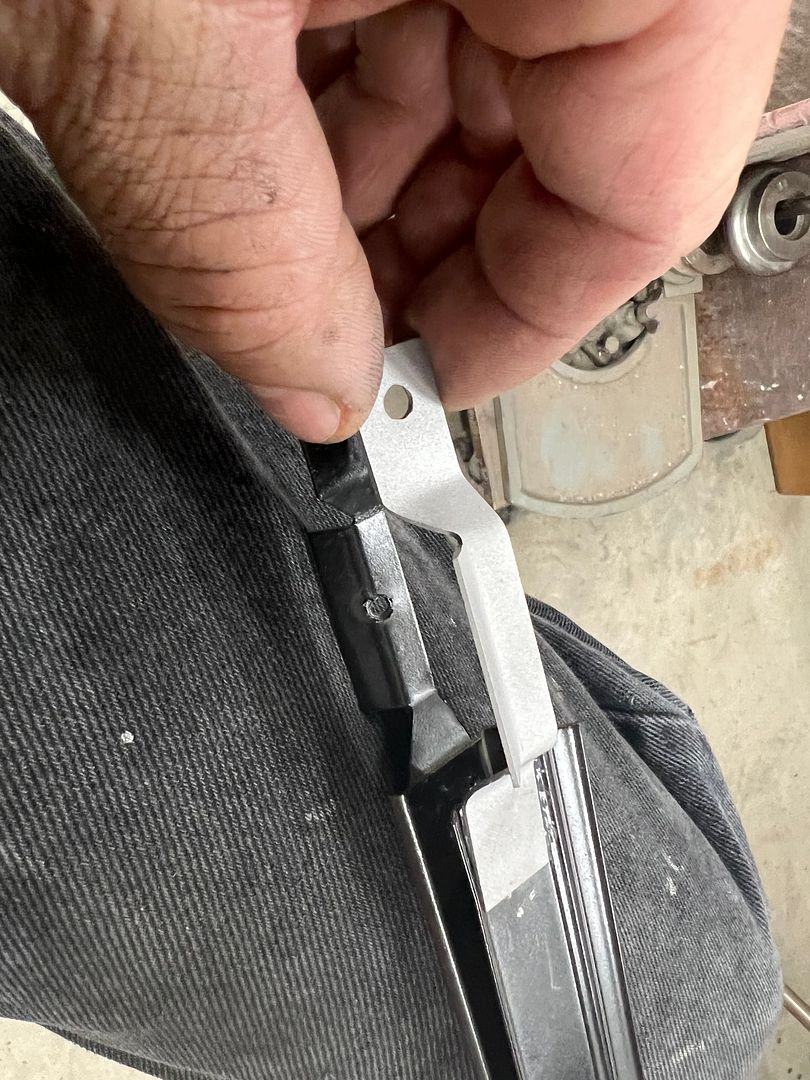 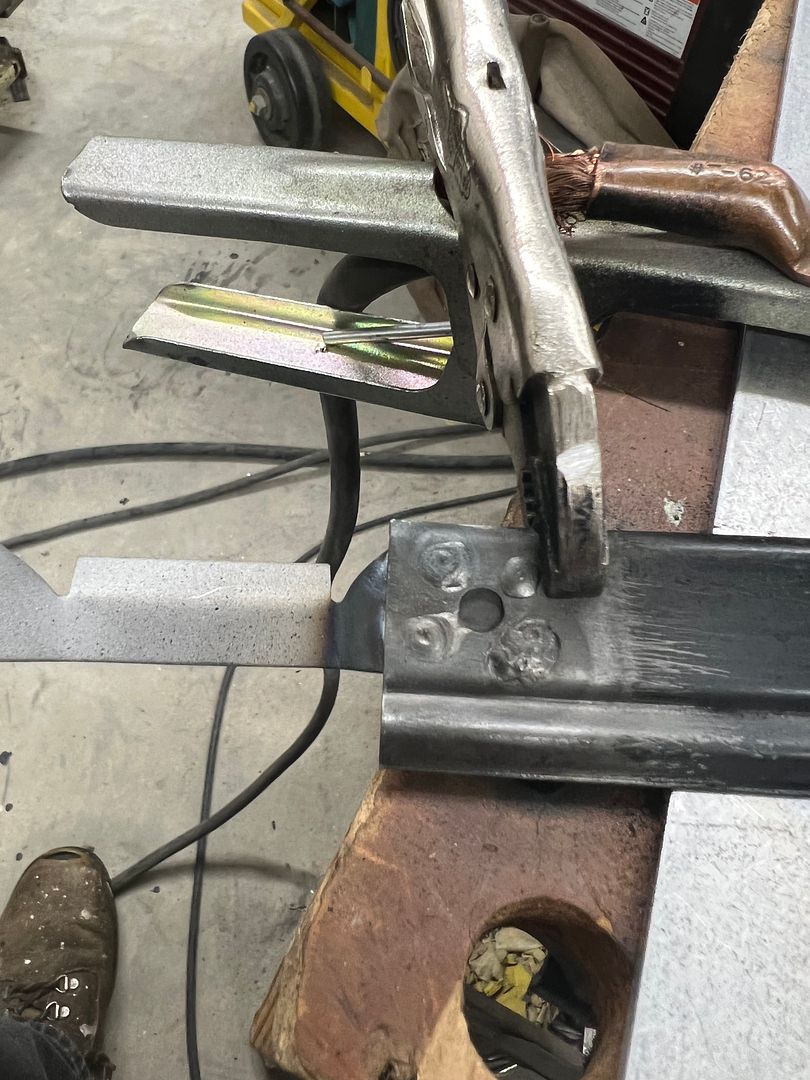 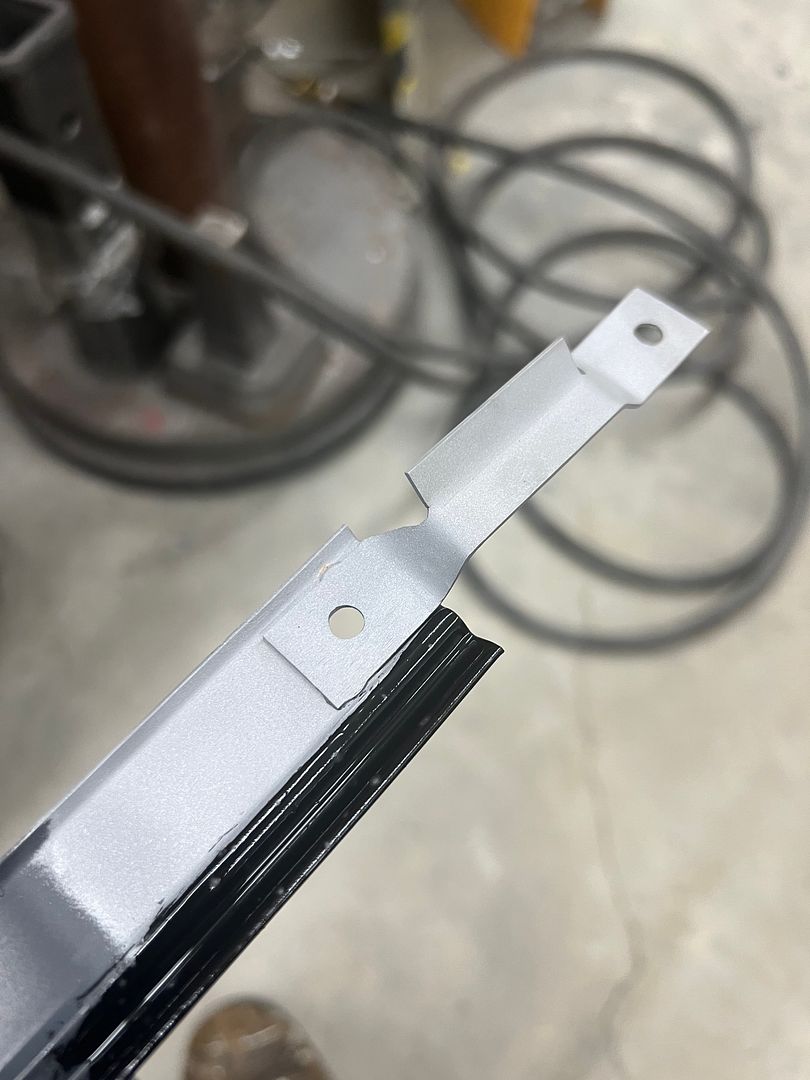 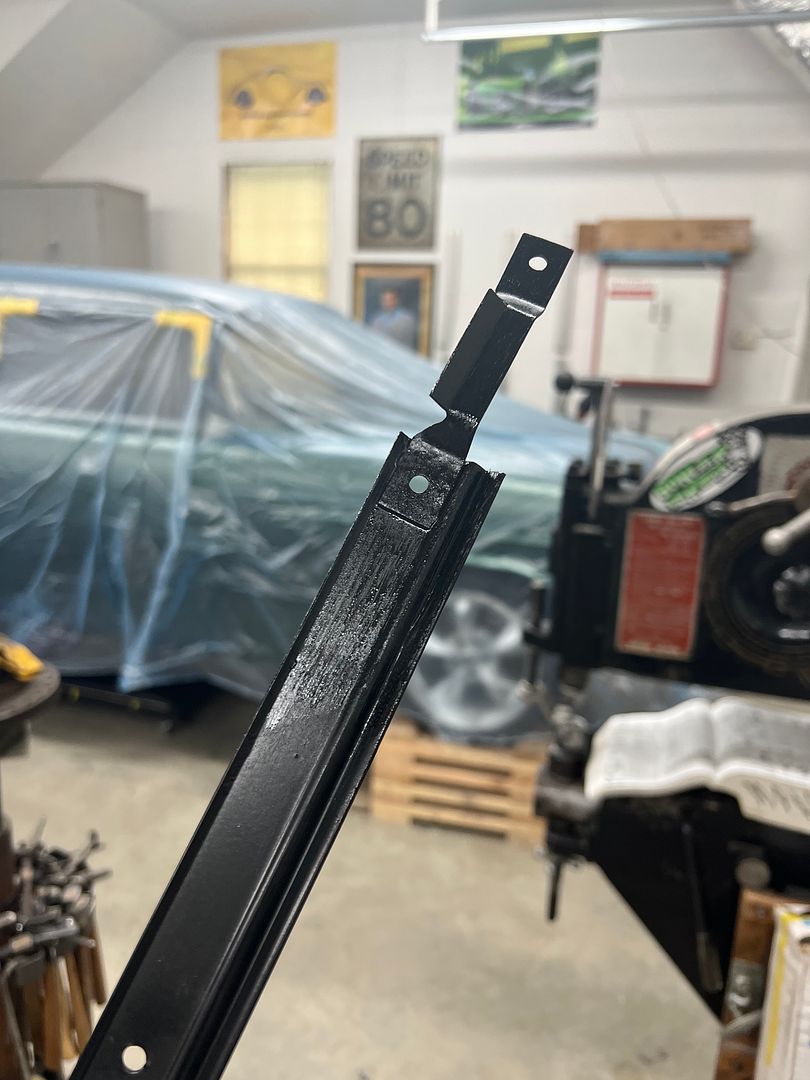 On to our glass installation, we had picked up some 3M strip-calk to seal the rubber to the glass. 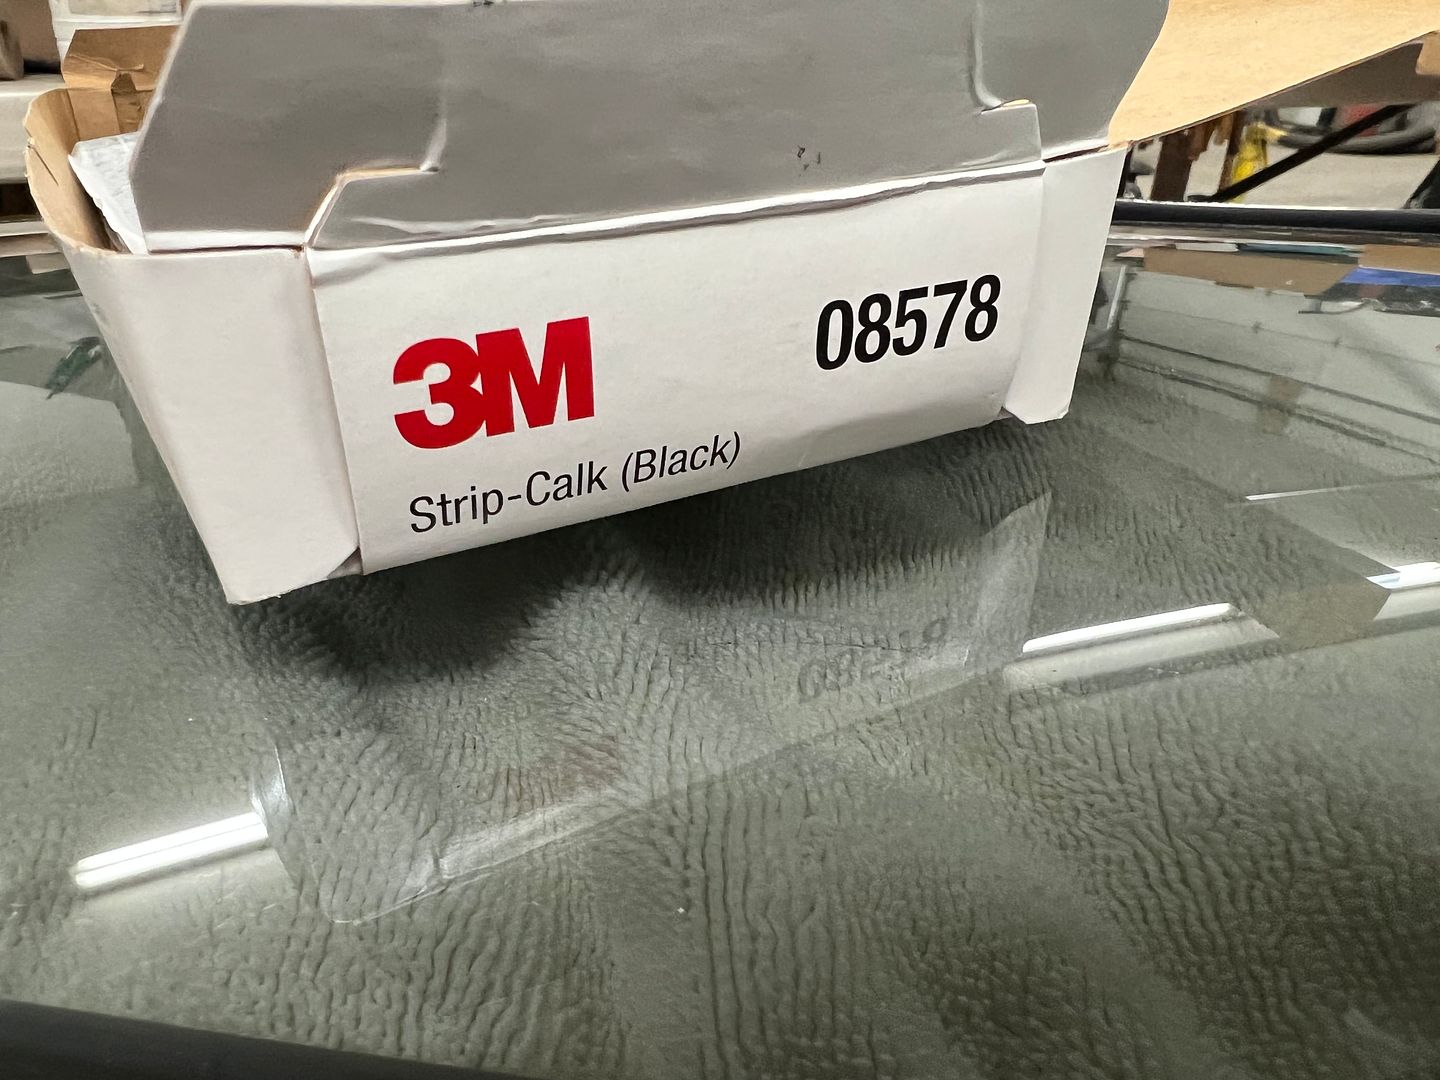 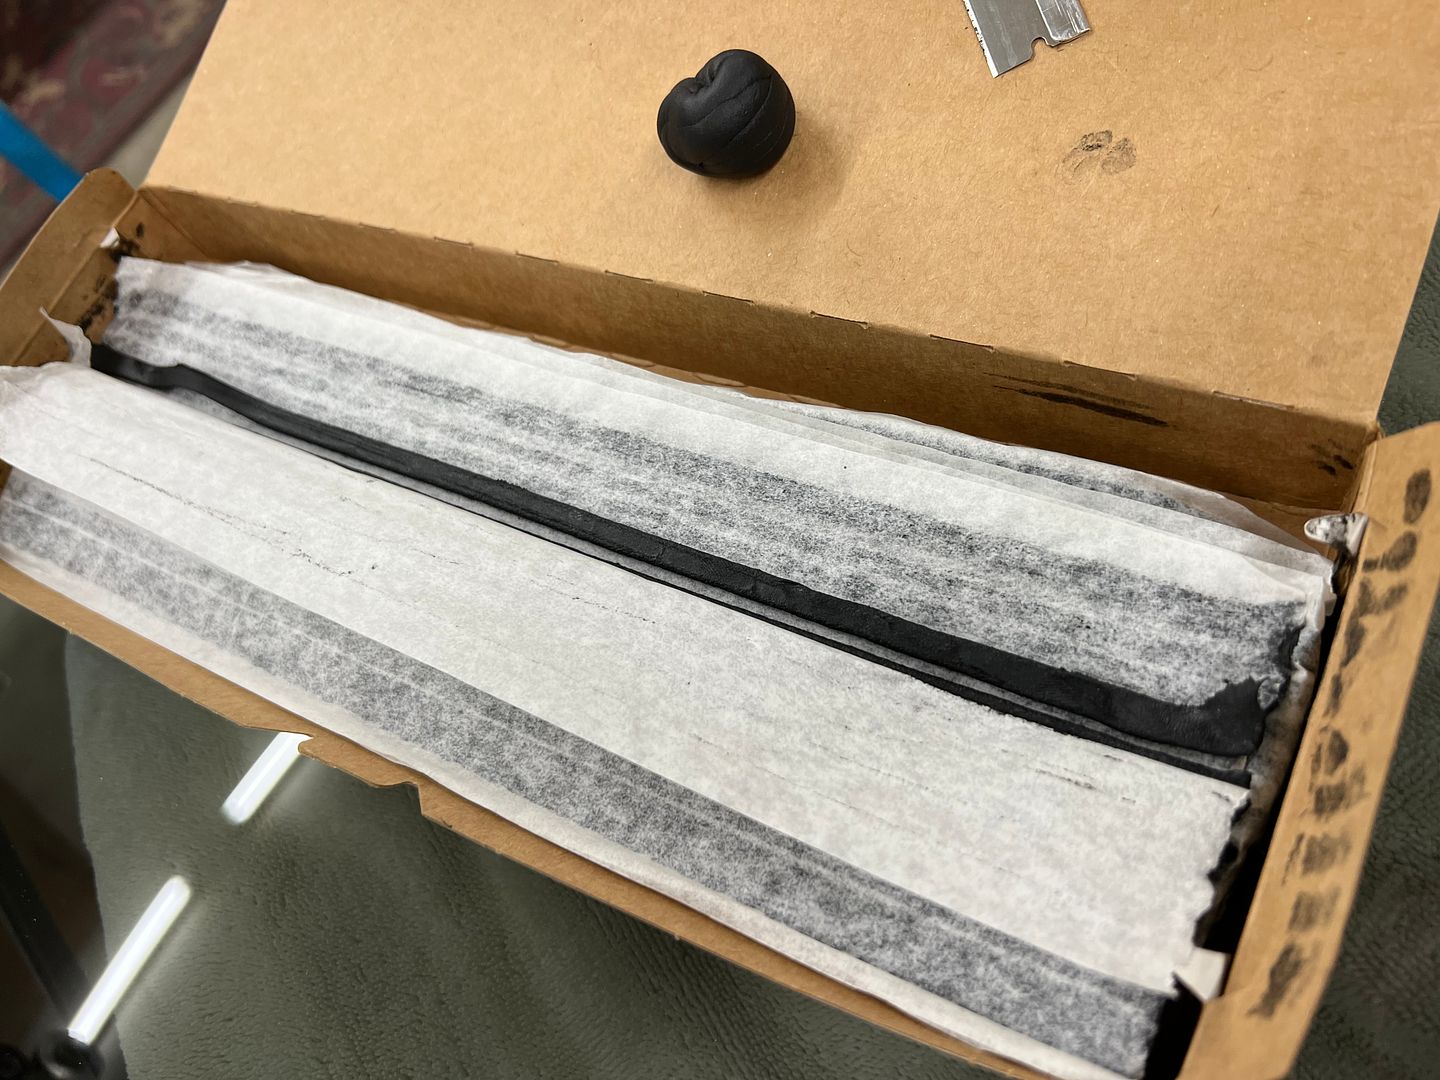 We found that the full width strip provided a bit too much and some oozage ensued... First is always the messy one, right? 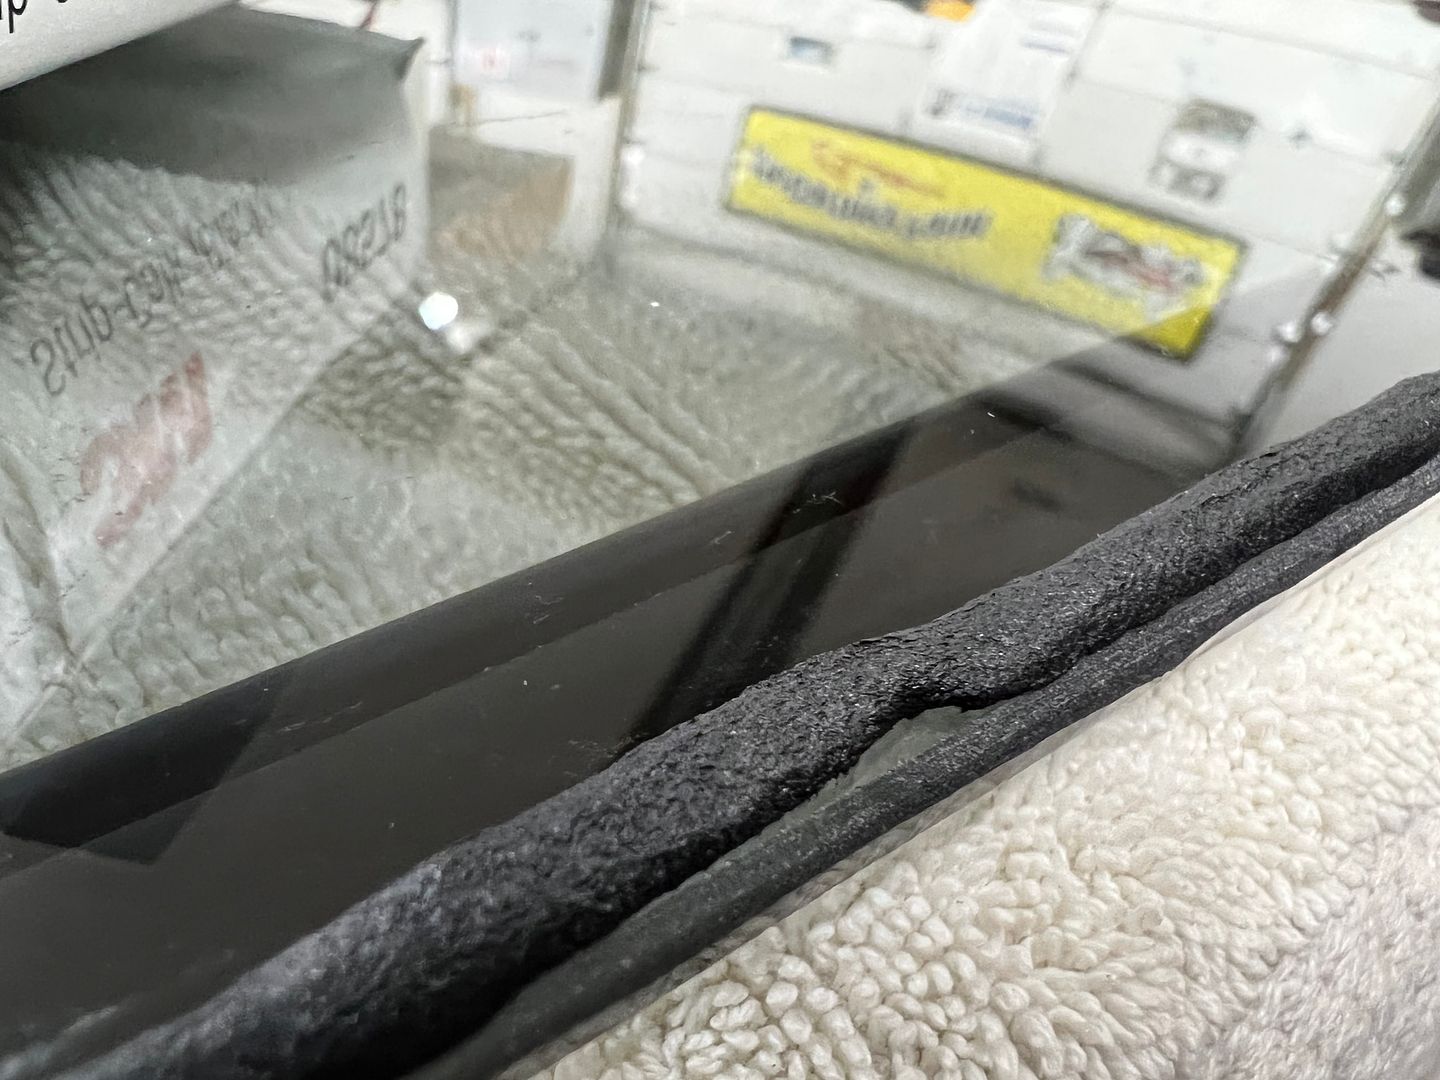 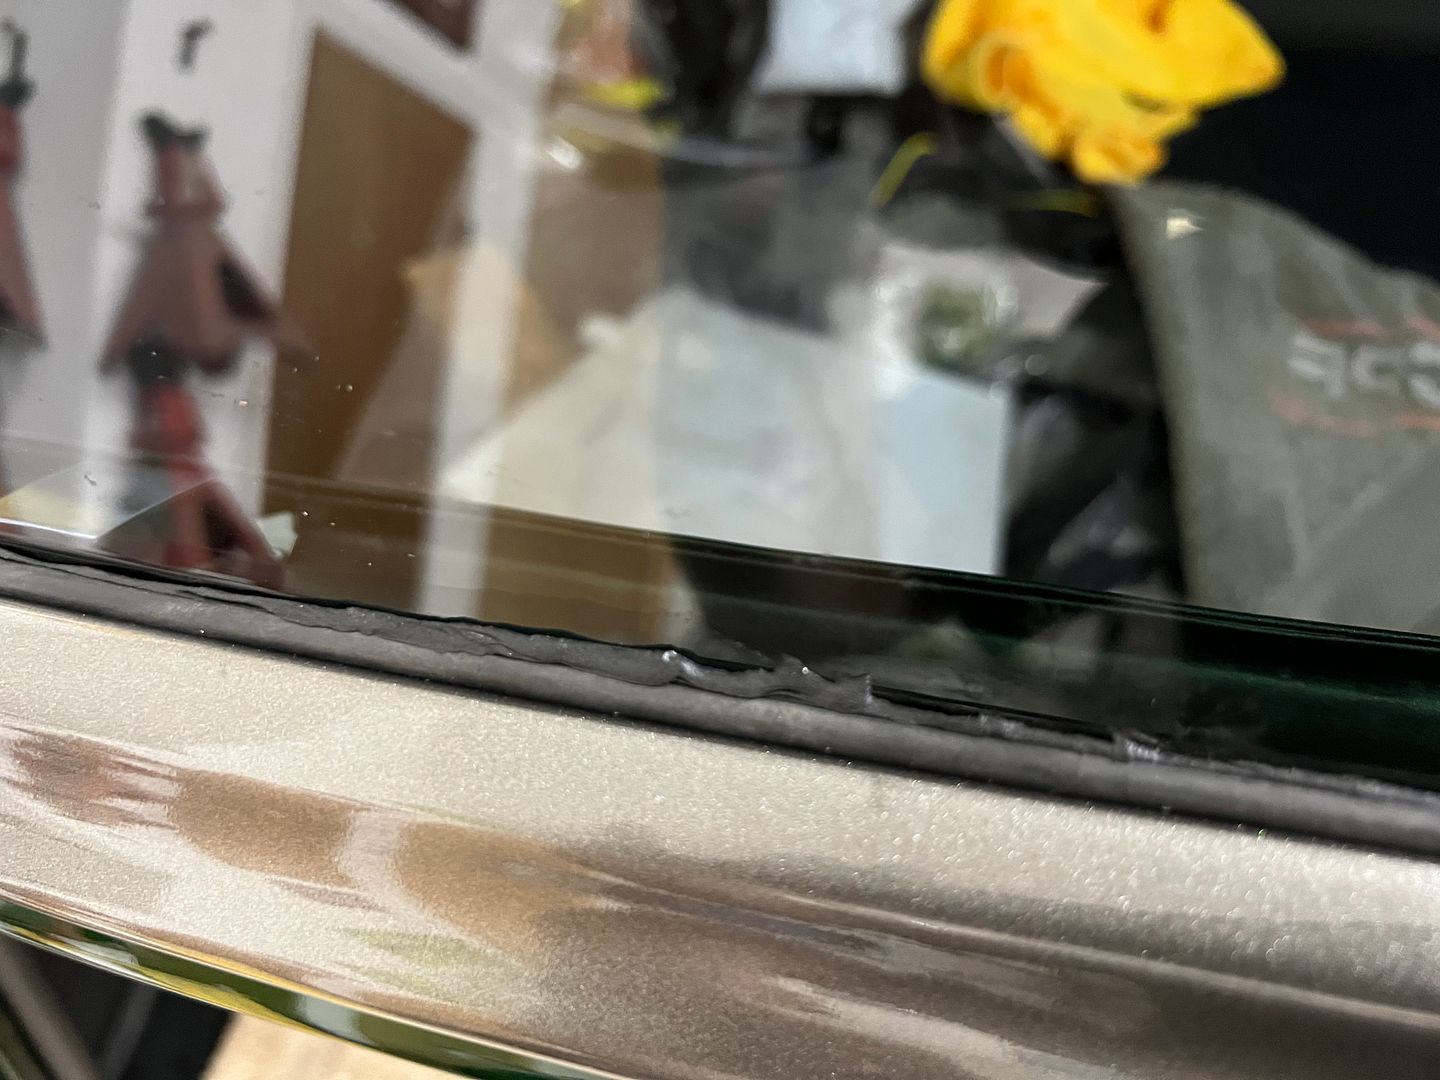 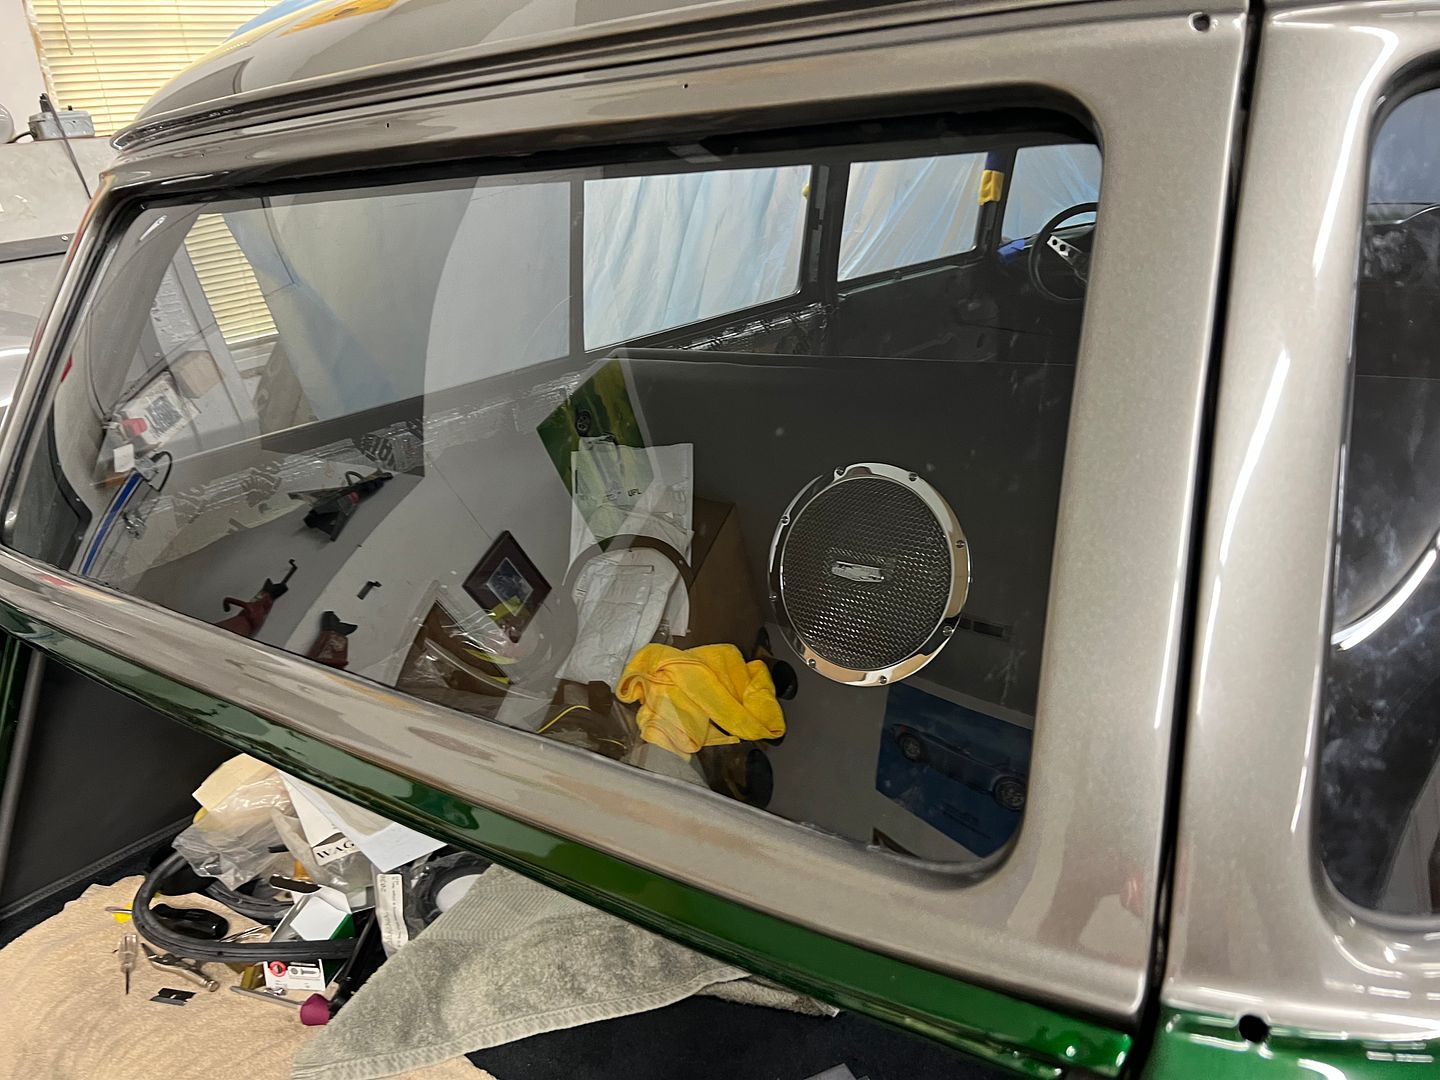 So we laid the following ones on the glass and cut down the middle for a more narrow strip.. More better.... 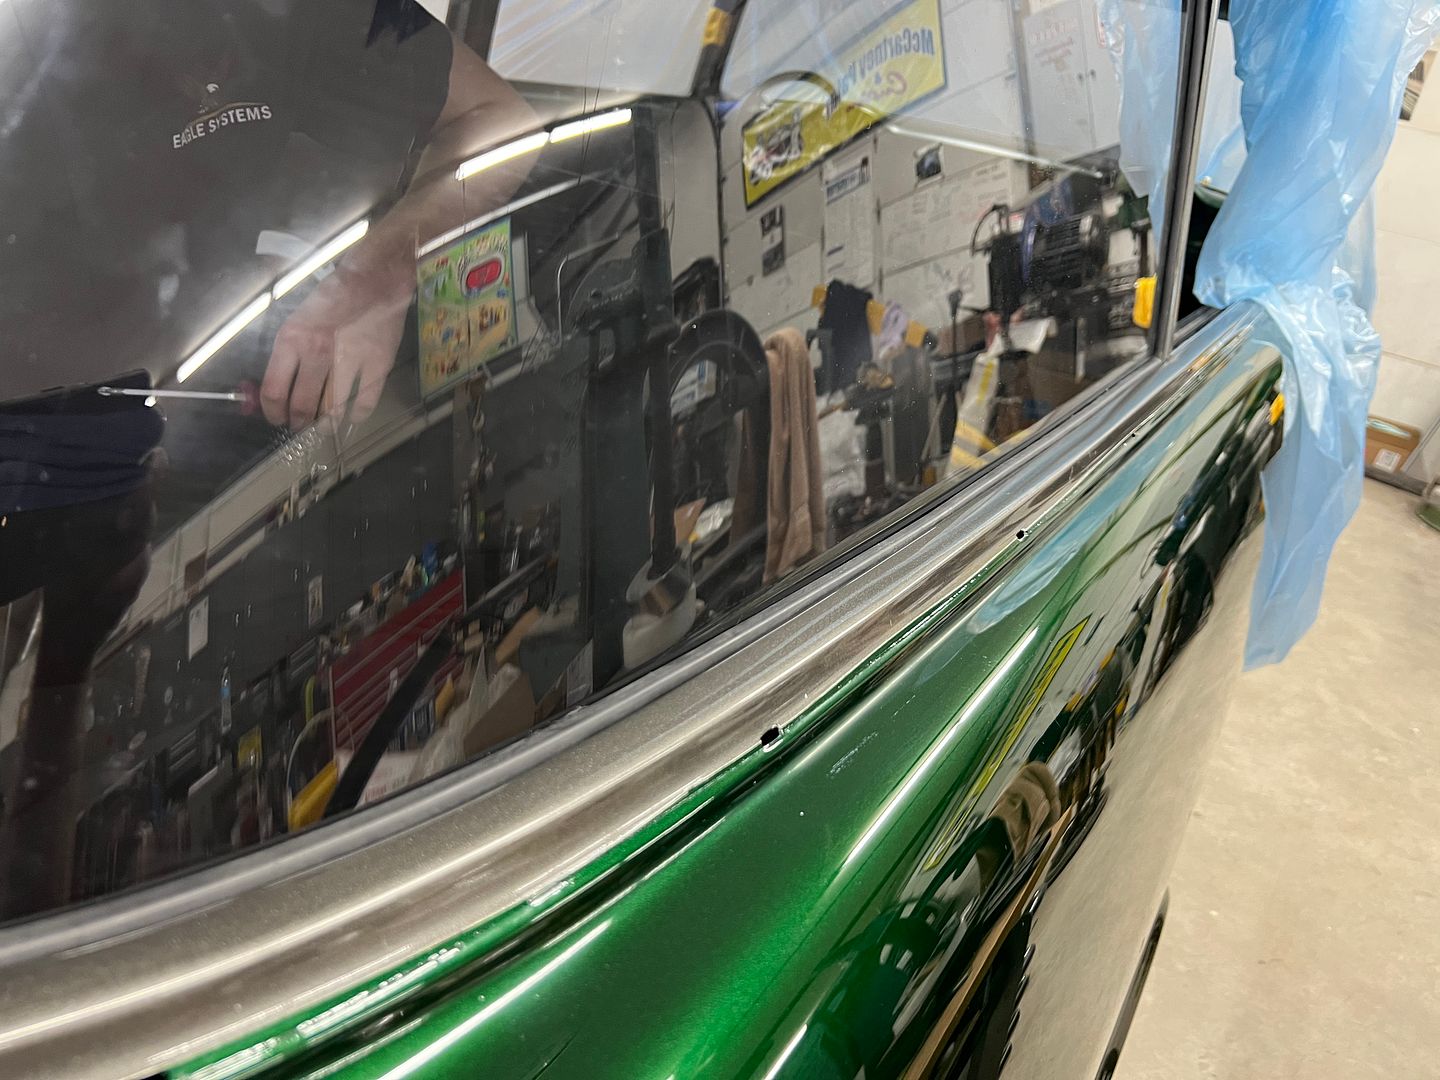 So then a person gets cocky and needs a reality check on the driver's side.... 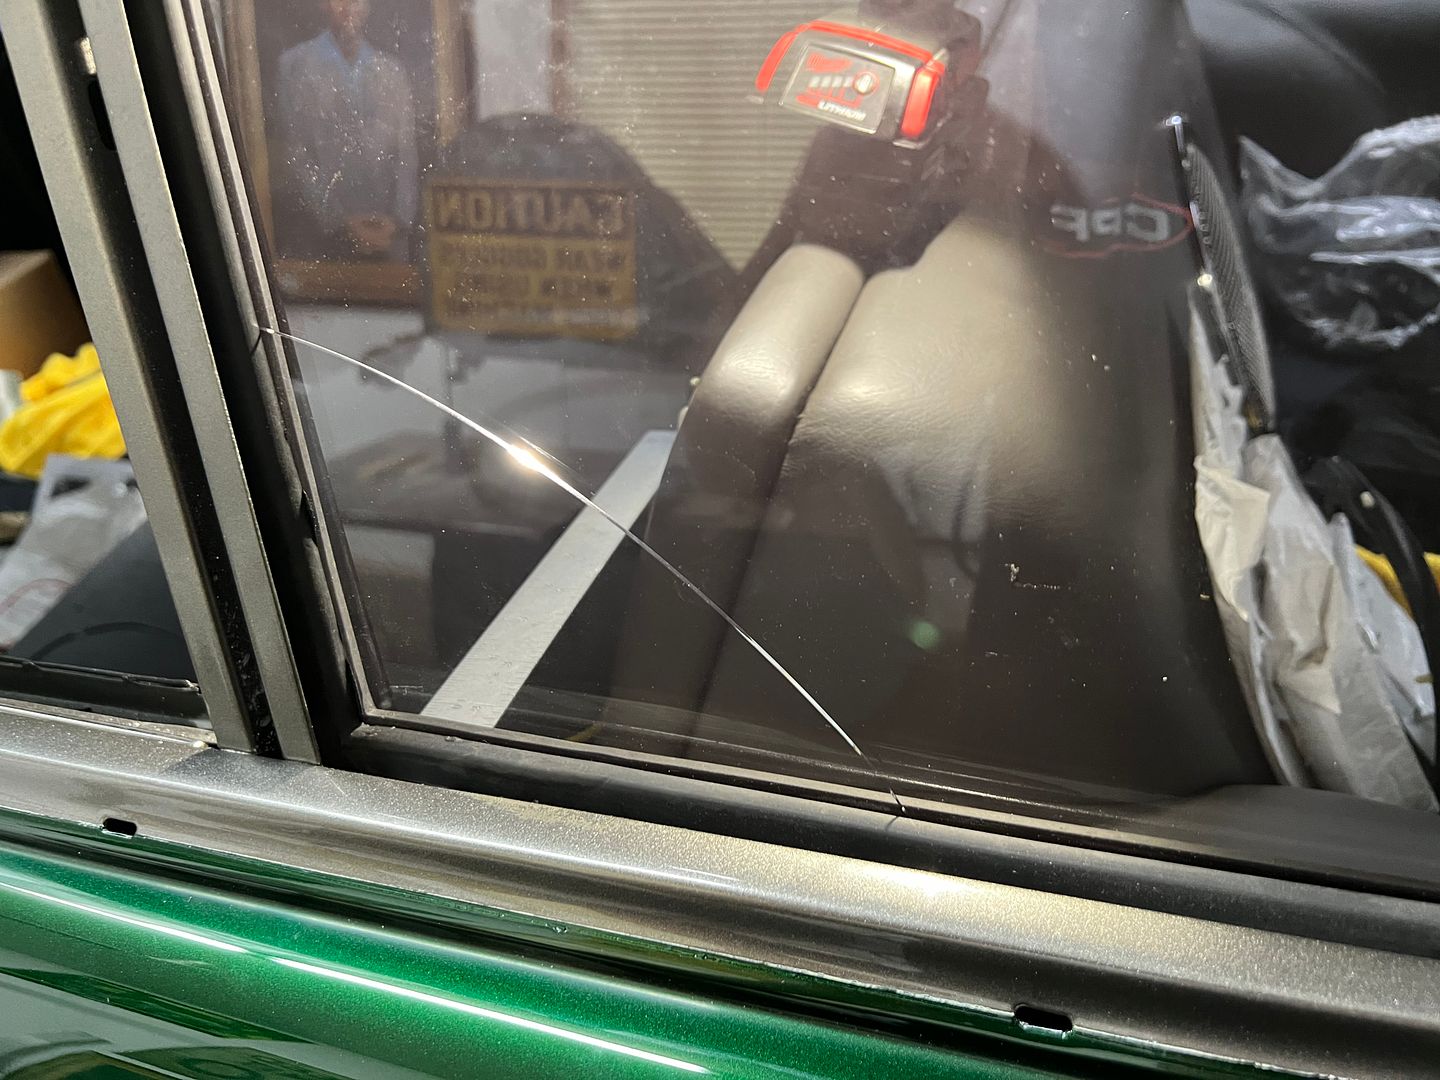 Eh, good a stopping point as any..
__________________
Robert |
|
|
|
|
05-16-2022, 05:03 PM
|
#1294 |
|
Post Whore
Join Date: May 2015
Location: Alabama
Posts: 14,583
|
Re: 55 Wagon Progress
Ouch...the glass..!!..
__________________
Mongo...aka Greg RIP Dad RIP Jesse 1981 C30 LQ9 NV4500..http://67-72chevytrucks.com/vboard/s...d.php?t=753598 Mongos AD- LS3 TR6060...http://67-72chevytrucks.com/vboard/s...34#post8522334 Columbus..the 1957 IH 4x4...http://67-72chevytrucks.com/vboard/s...63#post8082563 2023 Chevy Z71..daily driver |
|
|
|
|
06-03-2022, 04:46 PM
|
#1295 |
|
Registered User
Join Date: Jan 2013
Location: Leonardtown, MD
Posts: 1,633
|
Re: 55 Wagon Progress
OK, long overdue for an update..
Playing some more with our dash insert, this should look good.. 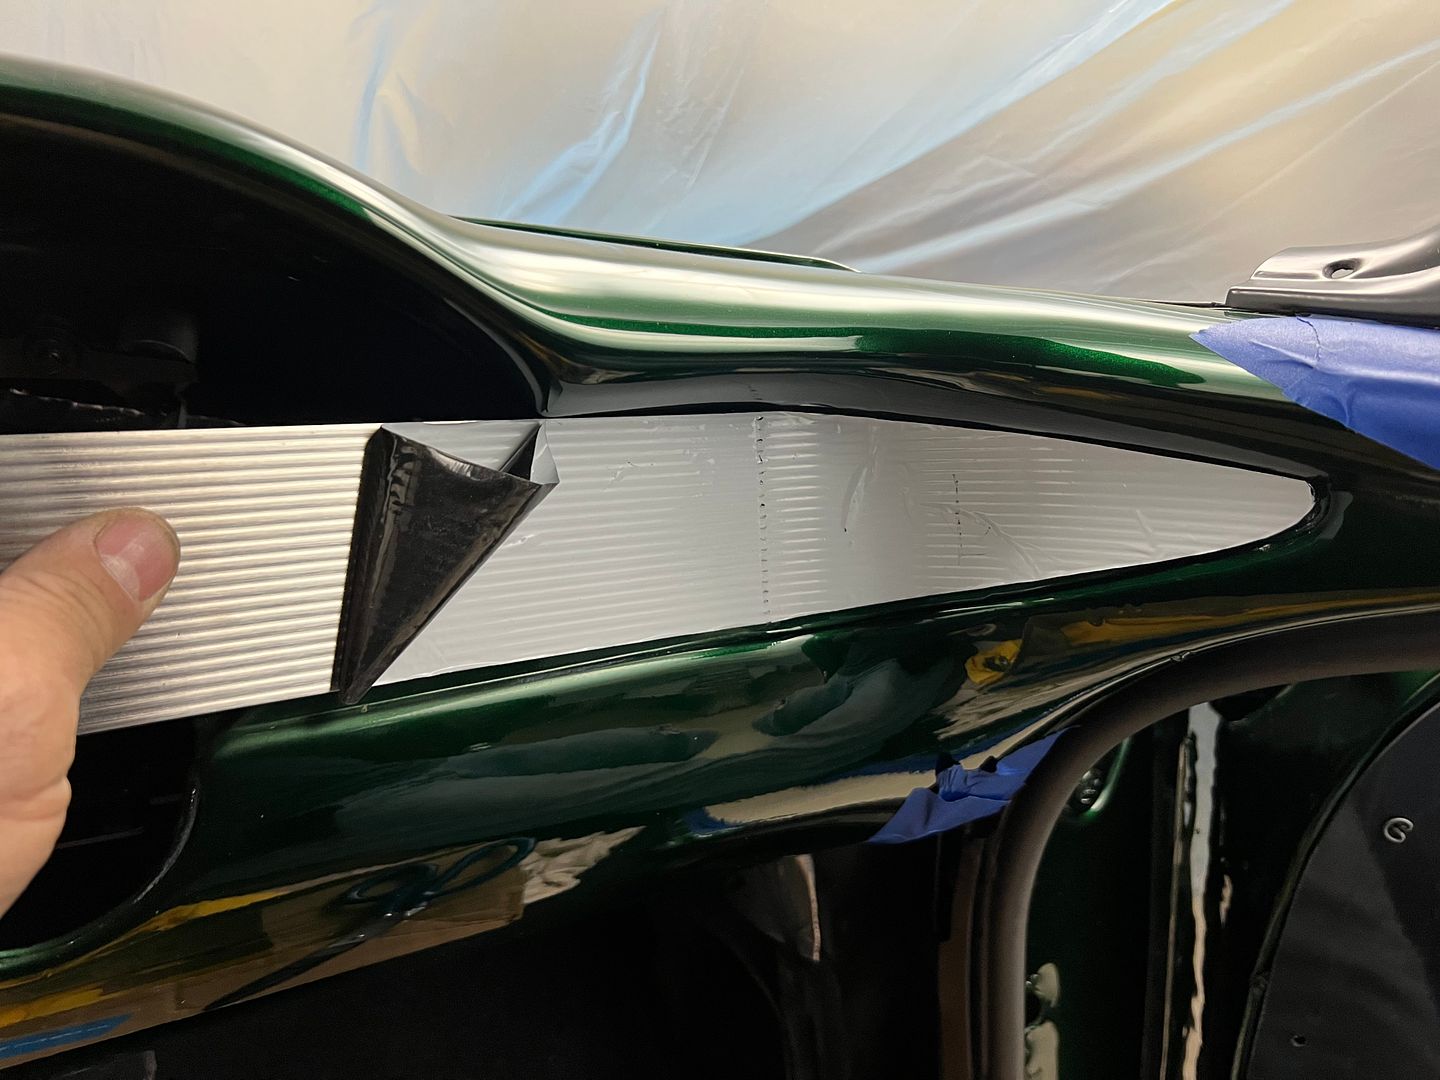 We attempted different processes for folding the hemmed edge trim, but alas none gave a good consistent finish. 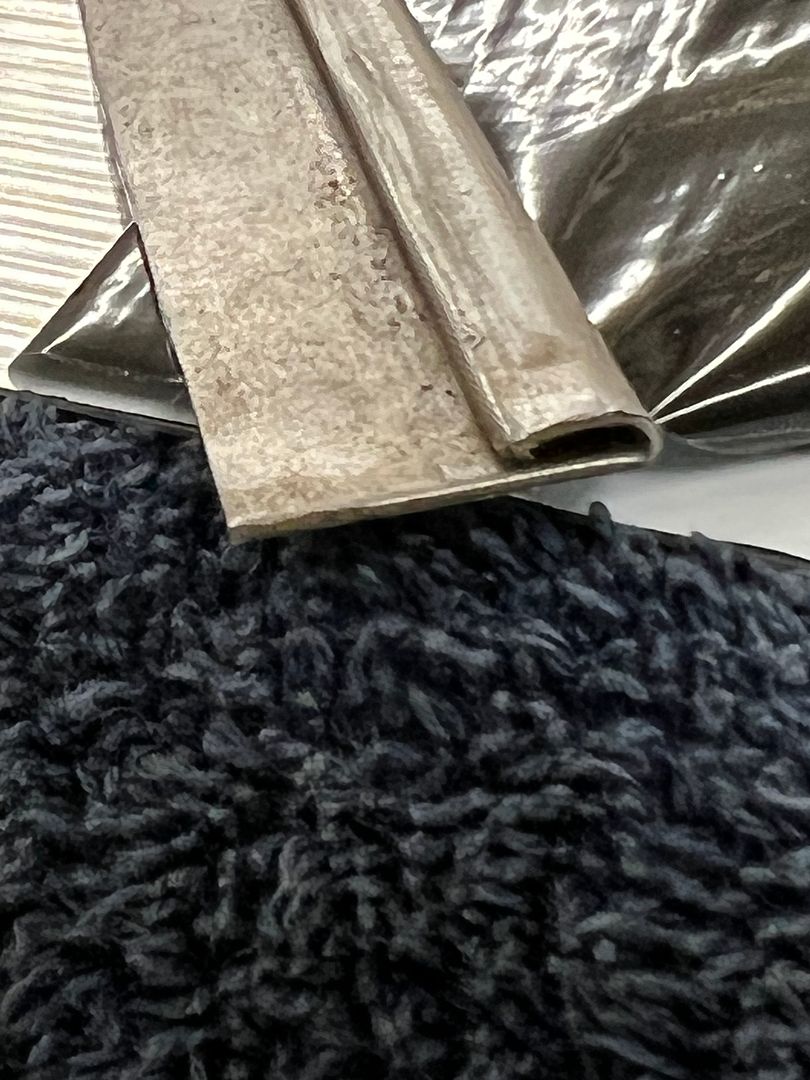 So some stainless strips were dropped off at Triton metals, a local machine shop we have used before... They will get much better results, still waiting on completion. Back to our problem child of a window, this crack occurred as I slightly pried rearward with a metal rule. Exactly where I pried. 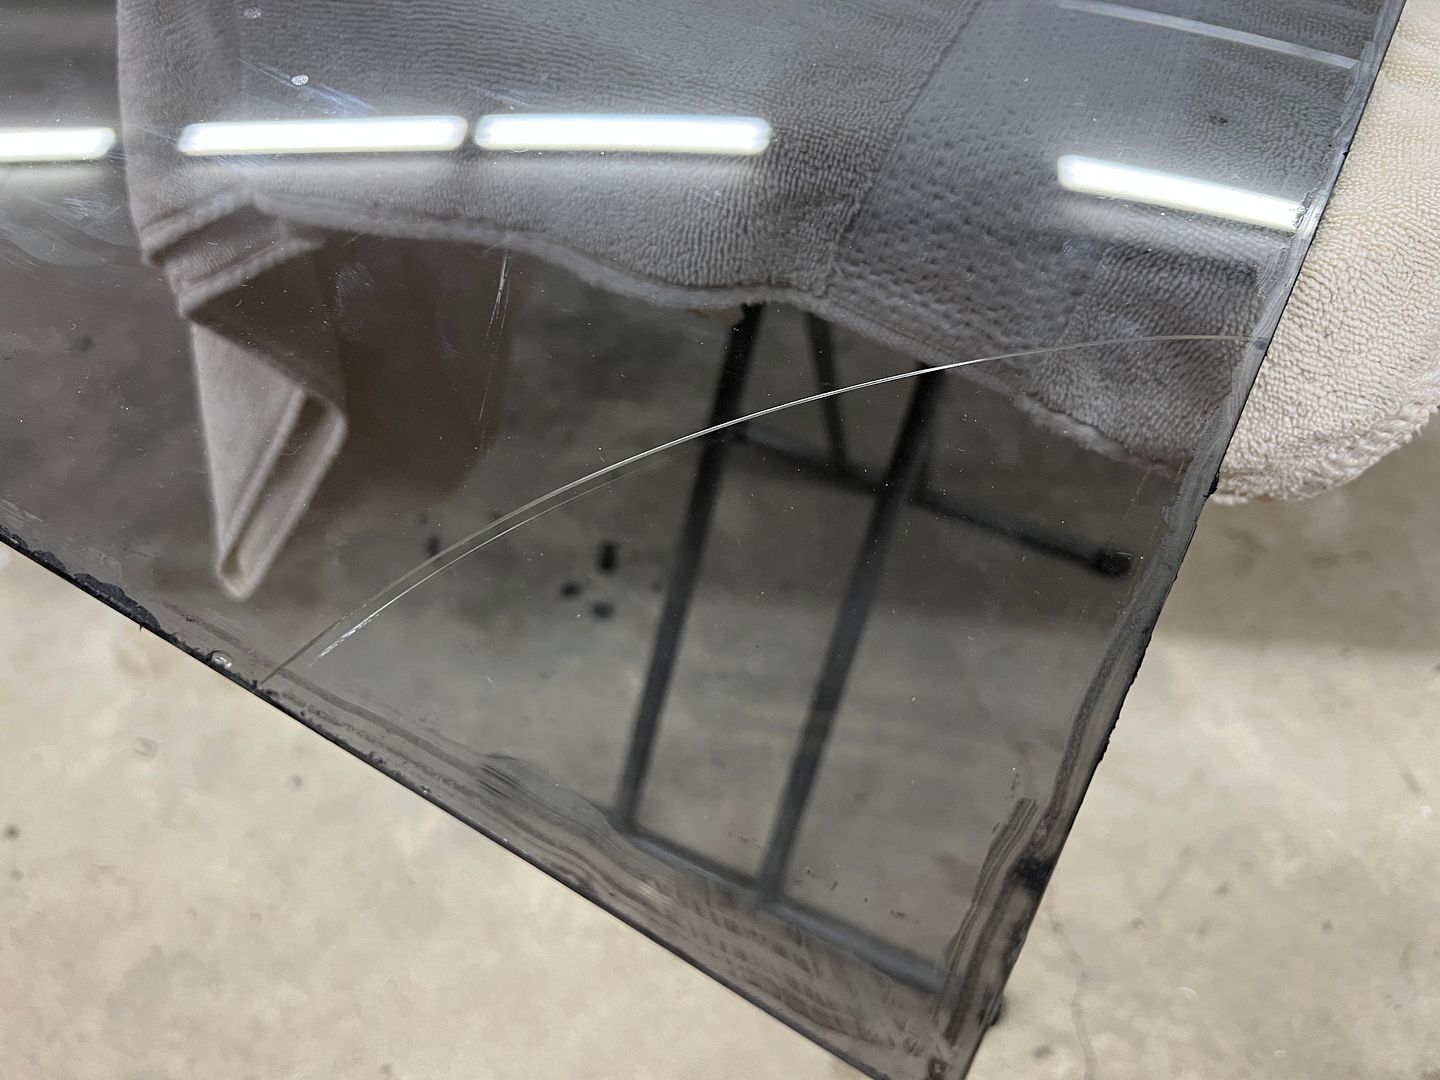 To limit the excess squeezed out of the seals on our next glass, we took the 3M strip-calk in its original form and sliced right down the middle.. 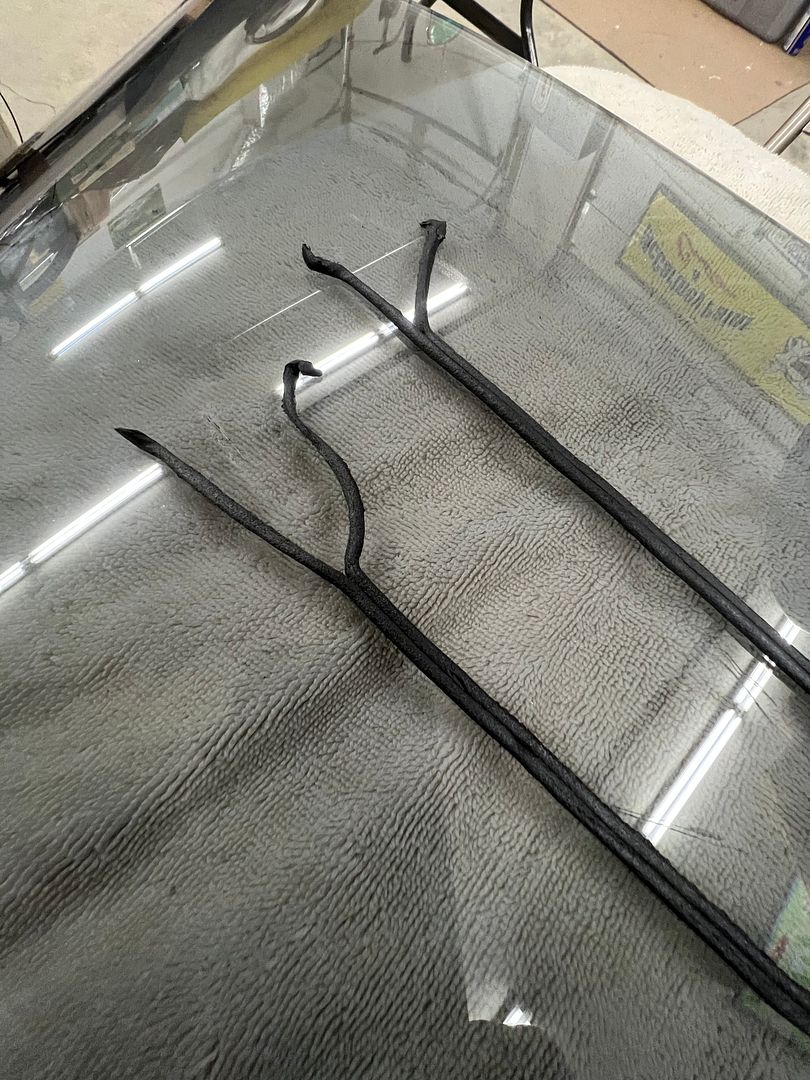 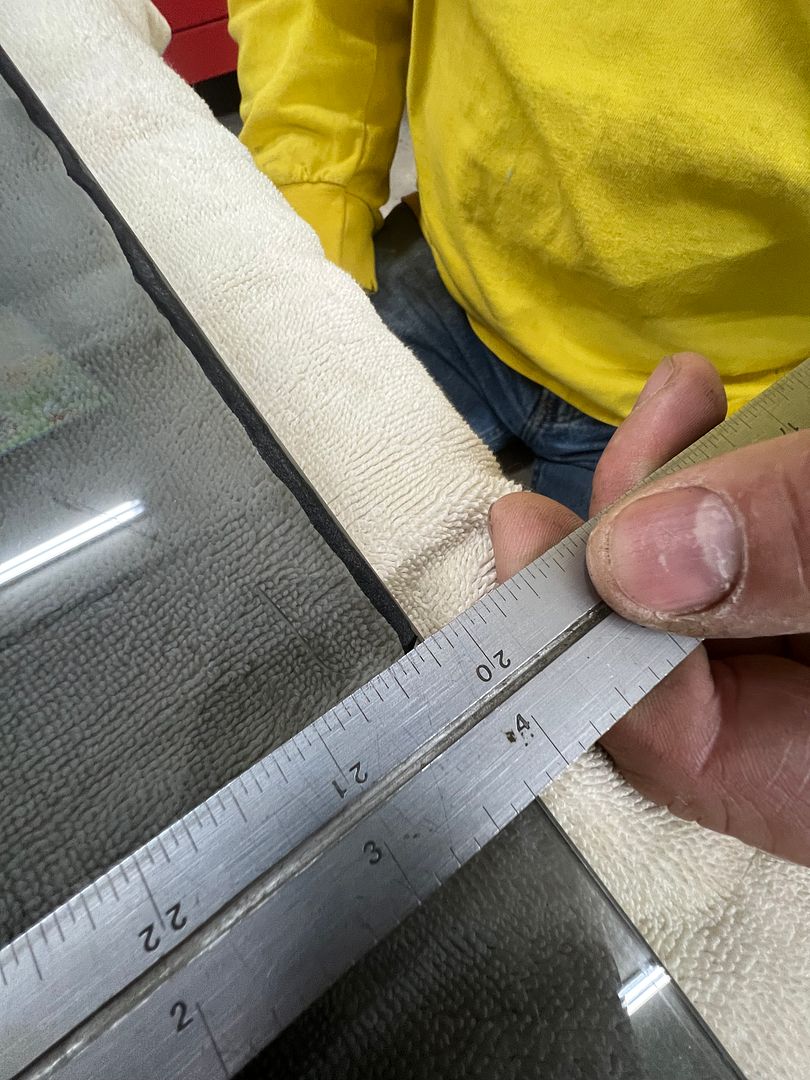 Here's a video showing installation of the strip-calk, and another with installation of the seal over the strip-calk. https://youtube.com/shorts/41FgeNHBBa0?feature=share https://youtube.com/shorts/hQxR2nUTVSs?feature=share Installing window #2, we had a slight tight area and I asked Jared to push outward and that's when we had a repeat of Groundhog Day.. 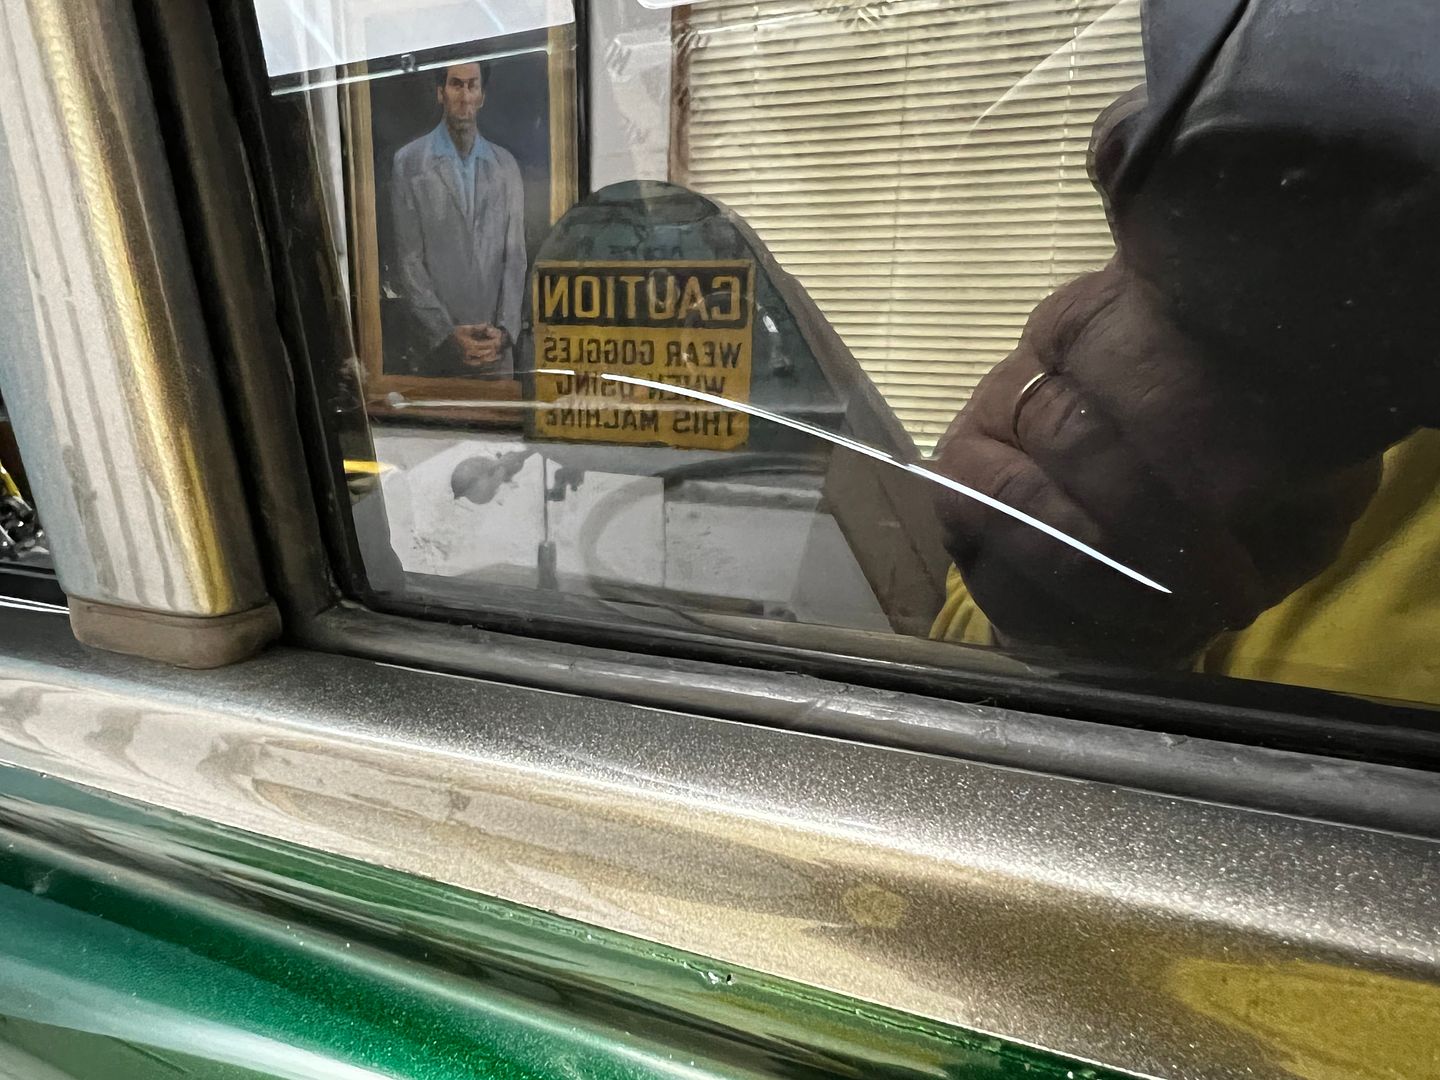 So, maybe the pry the first time was not the only issue. Fast forward so we can look back, last night we did a dry fit of the garnish moldings around these windows and found that the tack strips holding the headliner were far too thick and pushed the moldings down so far that the back side would be visible through the glass. In addition, this was also pushing downward on the window and seal while we were attempting the installation. When we had installed the quarter panel previously, we used plug welds inside this window opening and some had a slight proud. Nothing that I was concerned with at the time and considering had the tack strip been the correct thickness it likely wouldn't have been an issue now. But with the headliner pushing downward, the seal was hanging up on one of the plug welds as Jared was pushing outward on the corner, which made a perfect fulcrum effect for crack #2. Since we aren't pulling a headliner out, we went ahead and cleaned up the plug welds. This meant taping off all the nice pretty paint on the outside and the interior as well.. 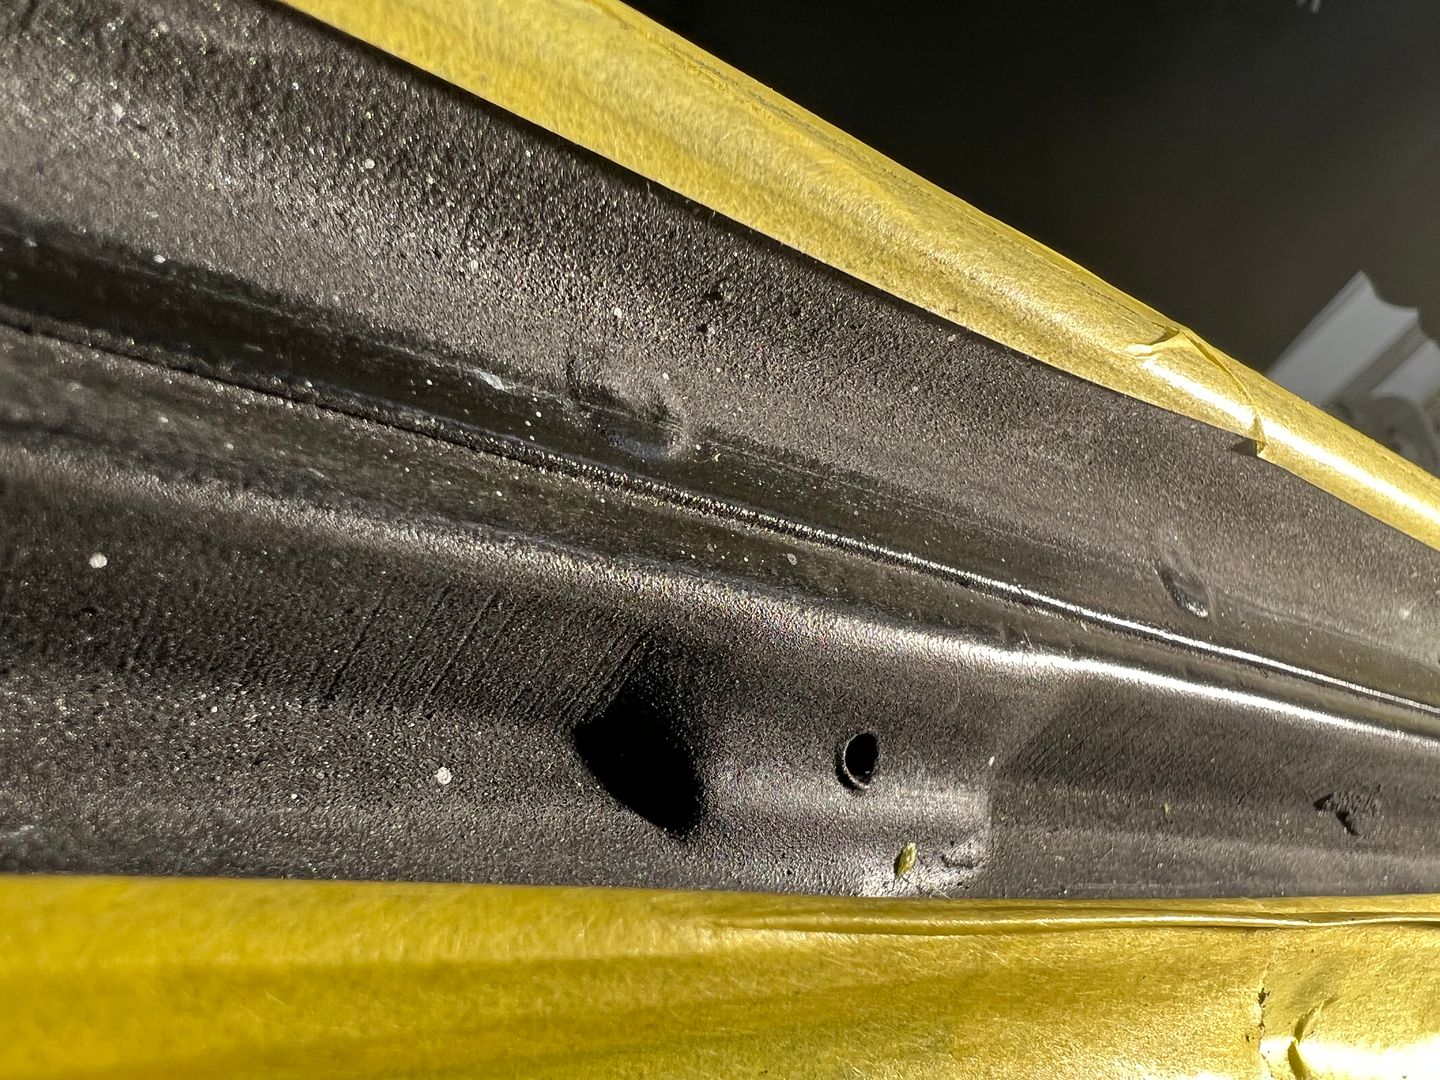 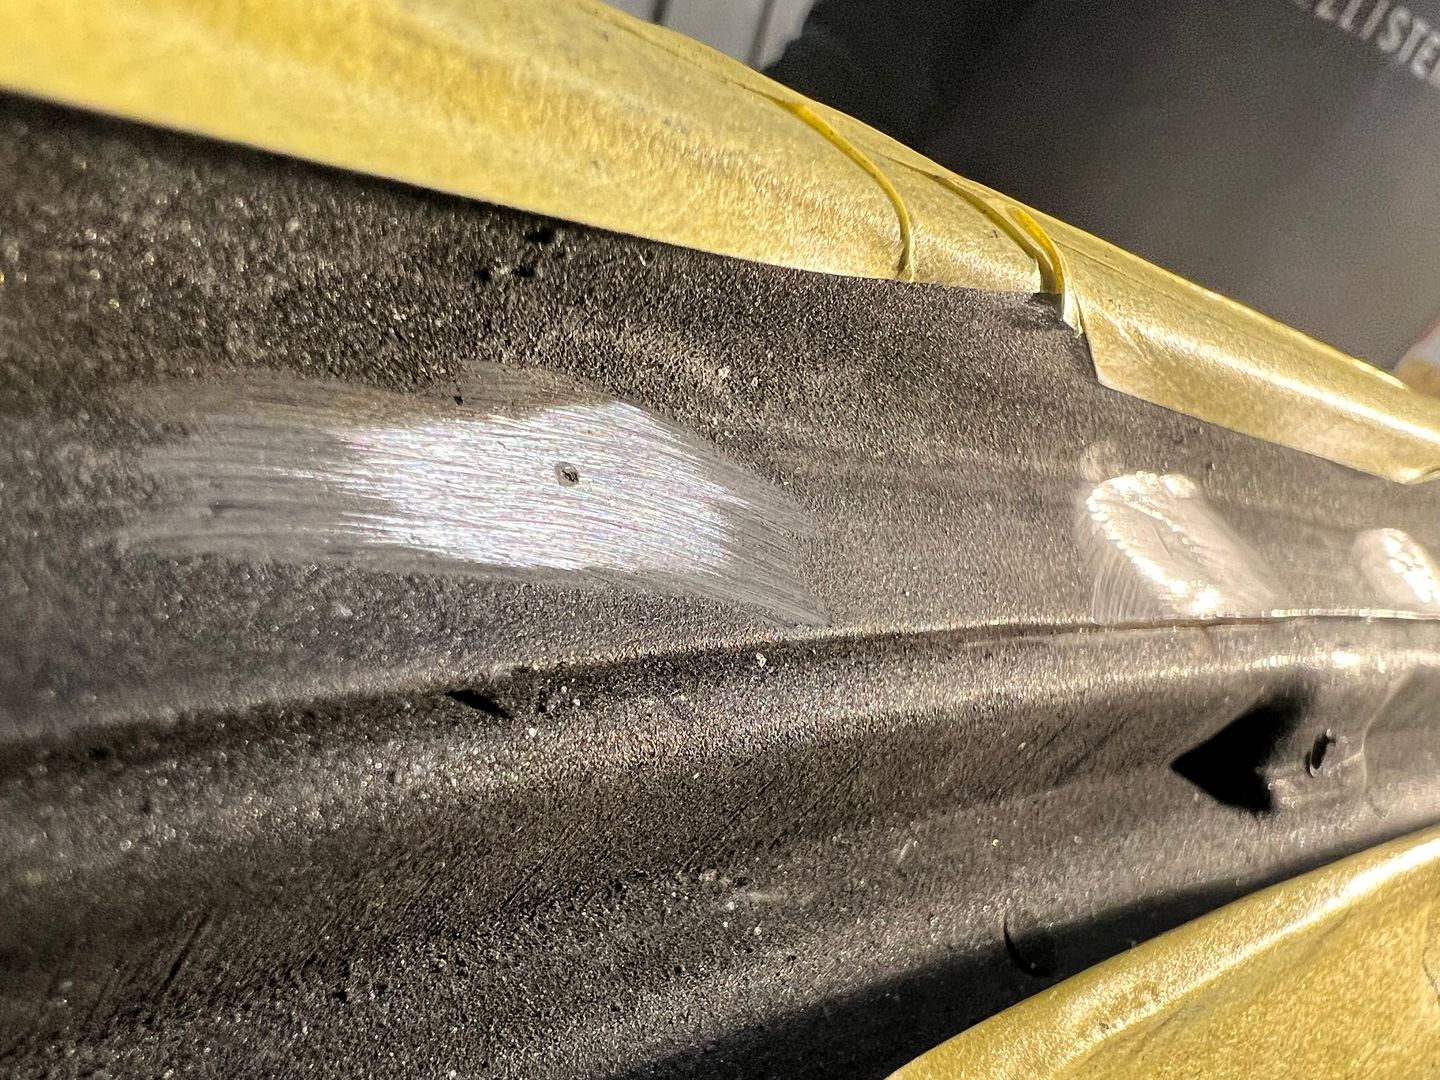 All of the welds cleaned up, we mixed up some SPI epoxy and used a small brush to add three coats on the bare areas. And to counter the effect of the garnish molding hanging too low, we will now need to make some one-off upper clips that are half height of the ones we just ordered (and have been waiting 4 months to arrive), in order to get the molding up and out of sight when looking through the glass. Story of my life.. Window #3!! We had length issues from the last replacement, let's check this one as well. Hooking our tape measure on the apex of the pointy end, the original ordered with the rest of the glass set shows to be 40-1/16 in length. The new replacement, like the last one (#2), was 40-5/16. So we have a 1/4" to remove. 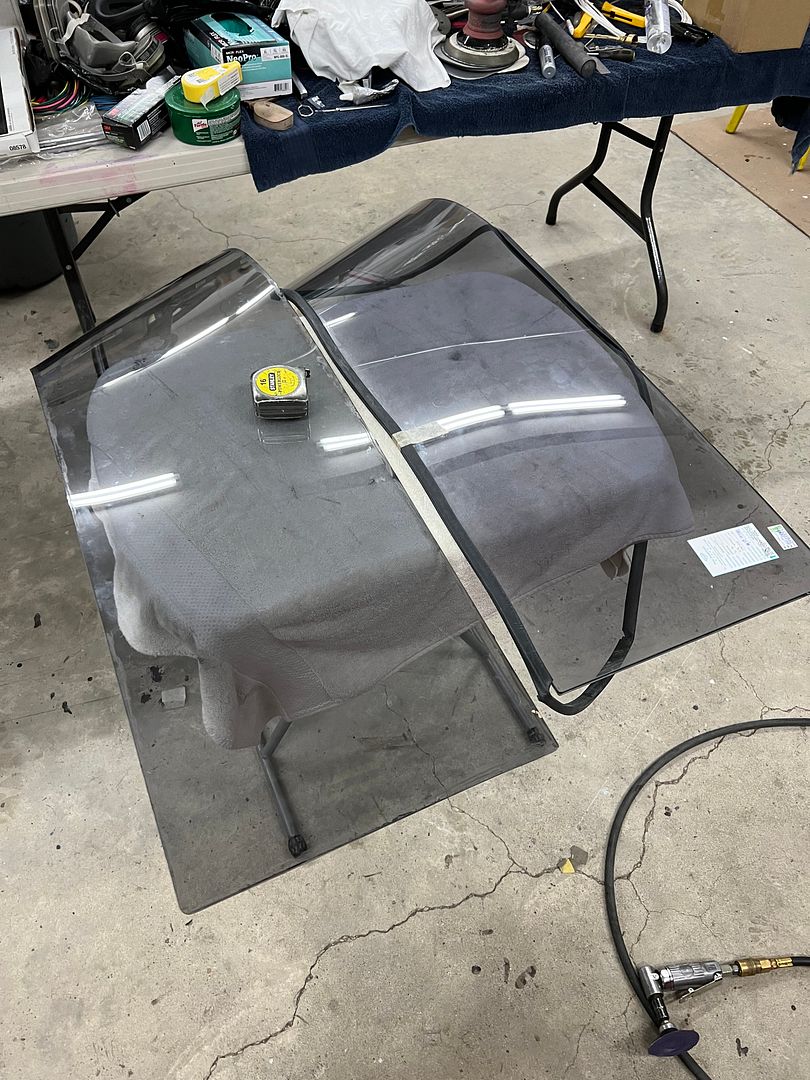 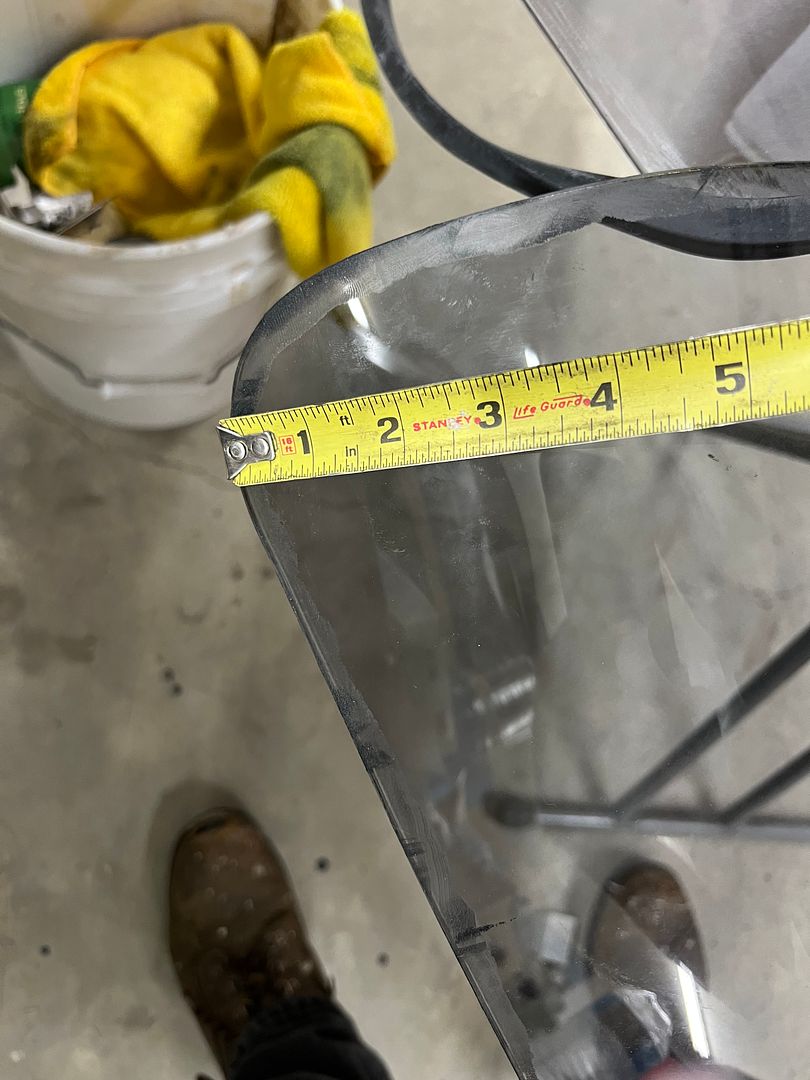 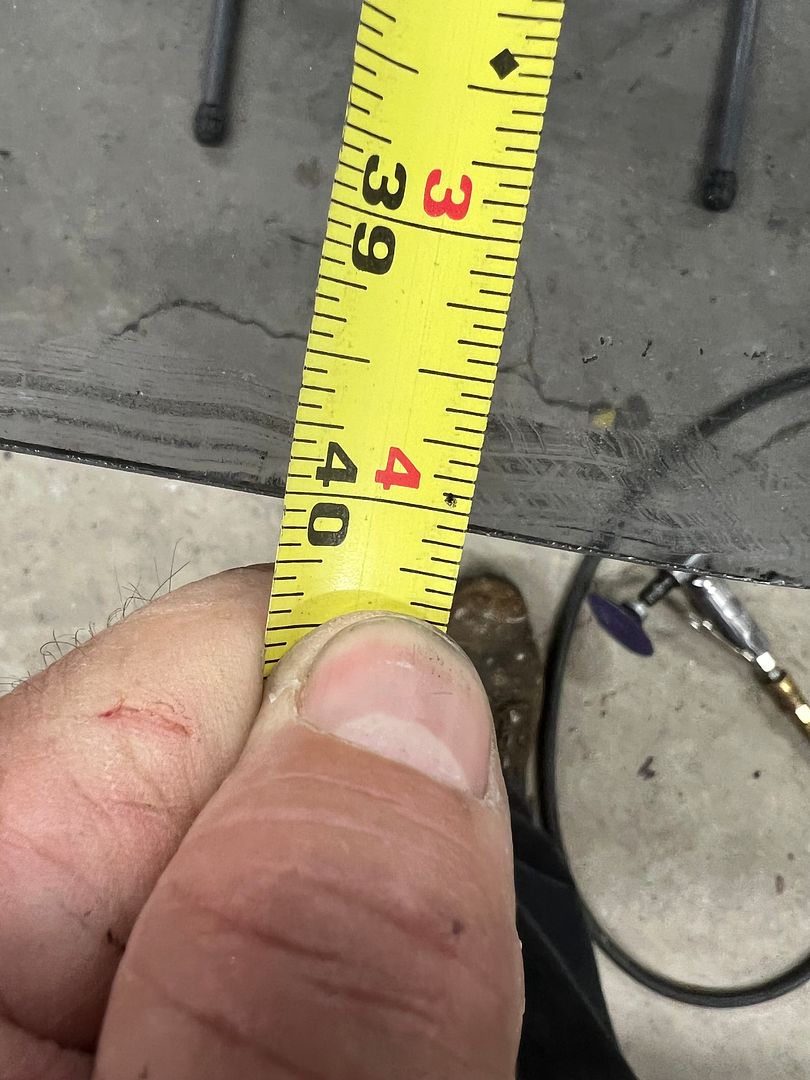 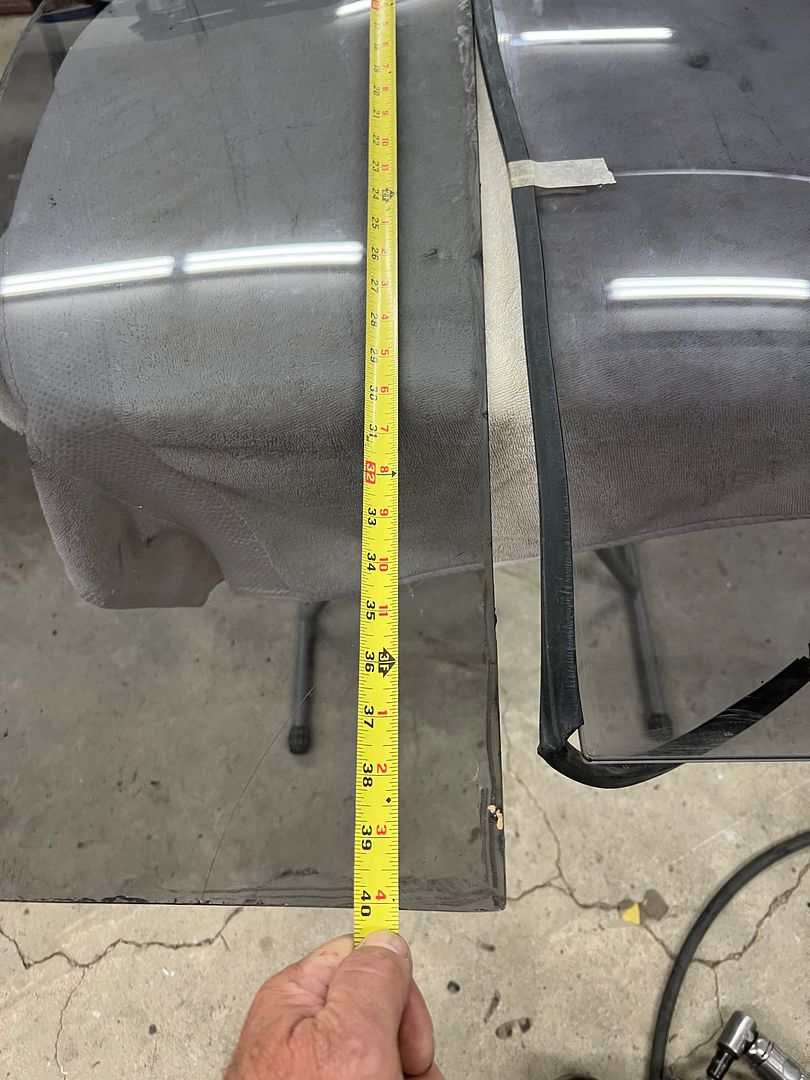 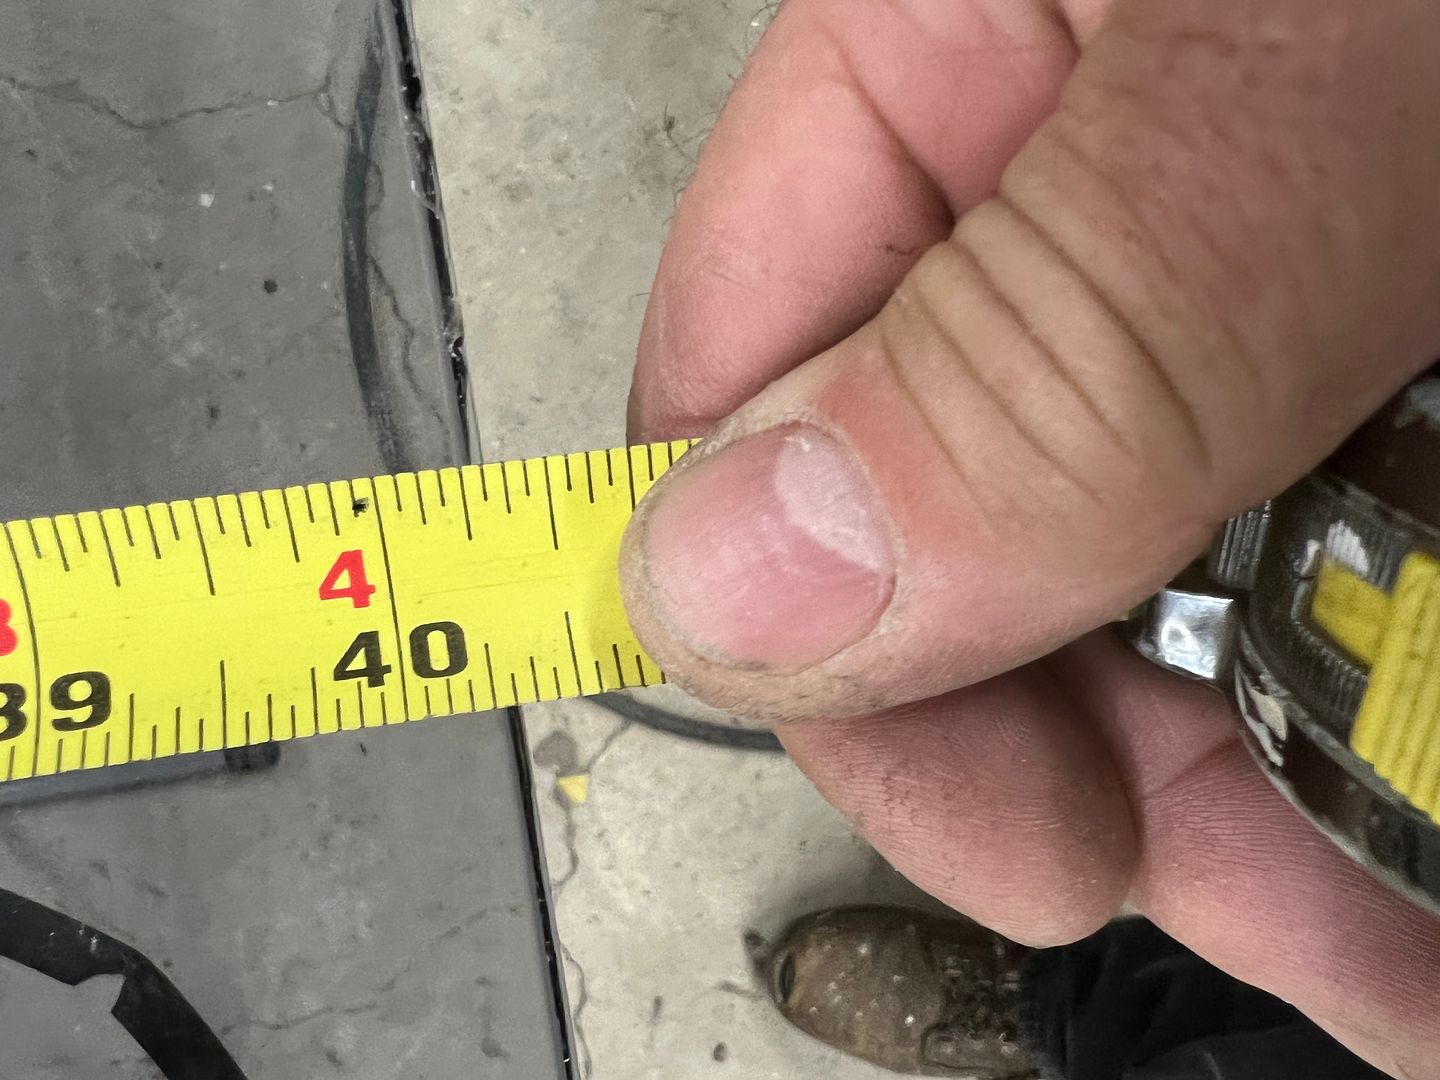 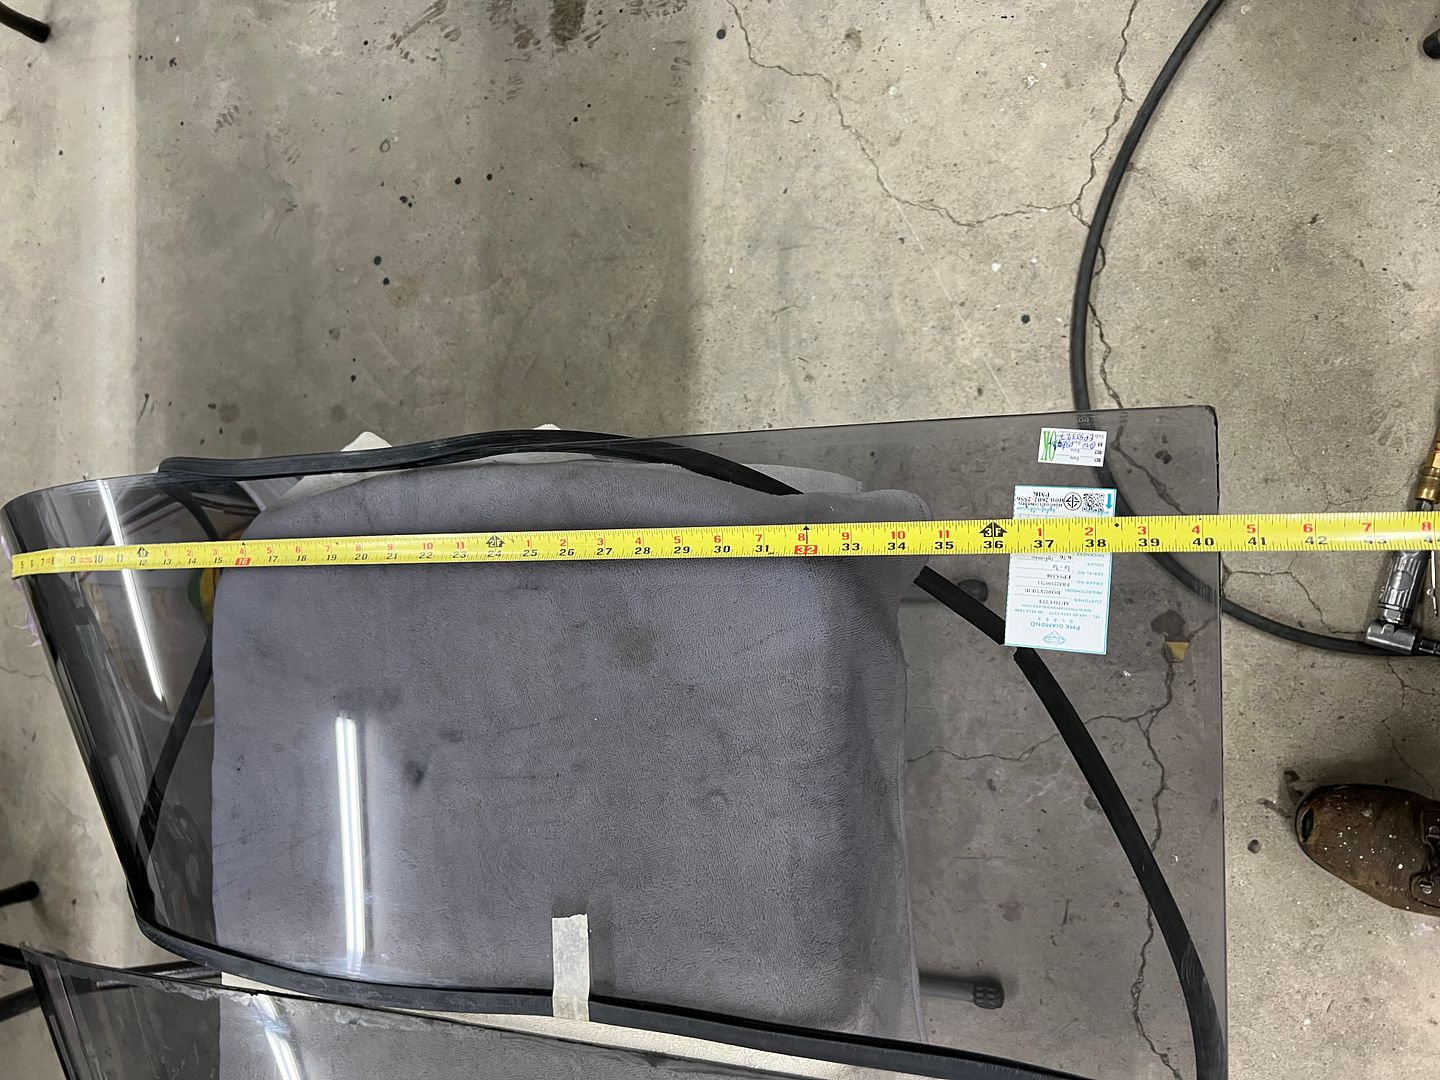 So we consulted my glass expert John Glenn the last time we did this, and got the rundown of the various methods we could possibly use. Since I'm more of a go slow and sneak up on the end goal, I opted for using Cubitron belts on our Dynabride sander. It did a better job of taking down corners so we followed the process discussed in the next video. Then when we had reached the size needed (three hours later), a 320 grit disc on the DA gave a more polished appearance. https://youtu.be/W_8DPnVPcik 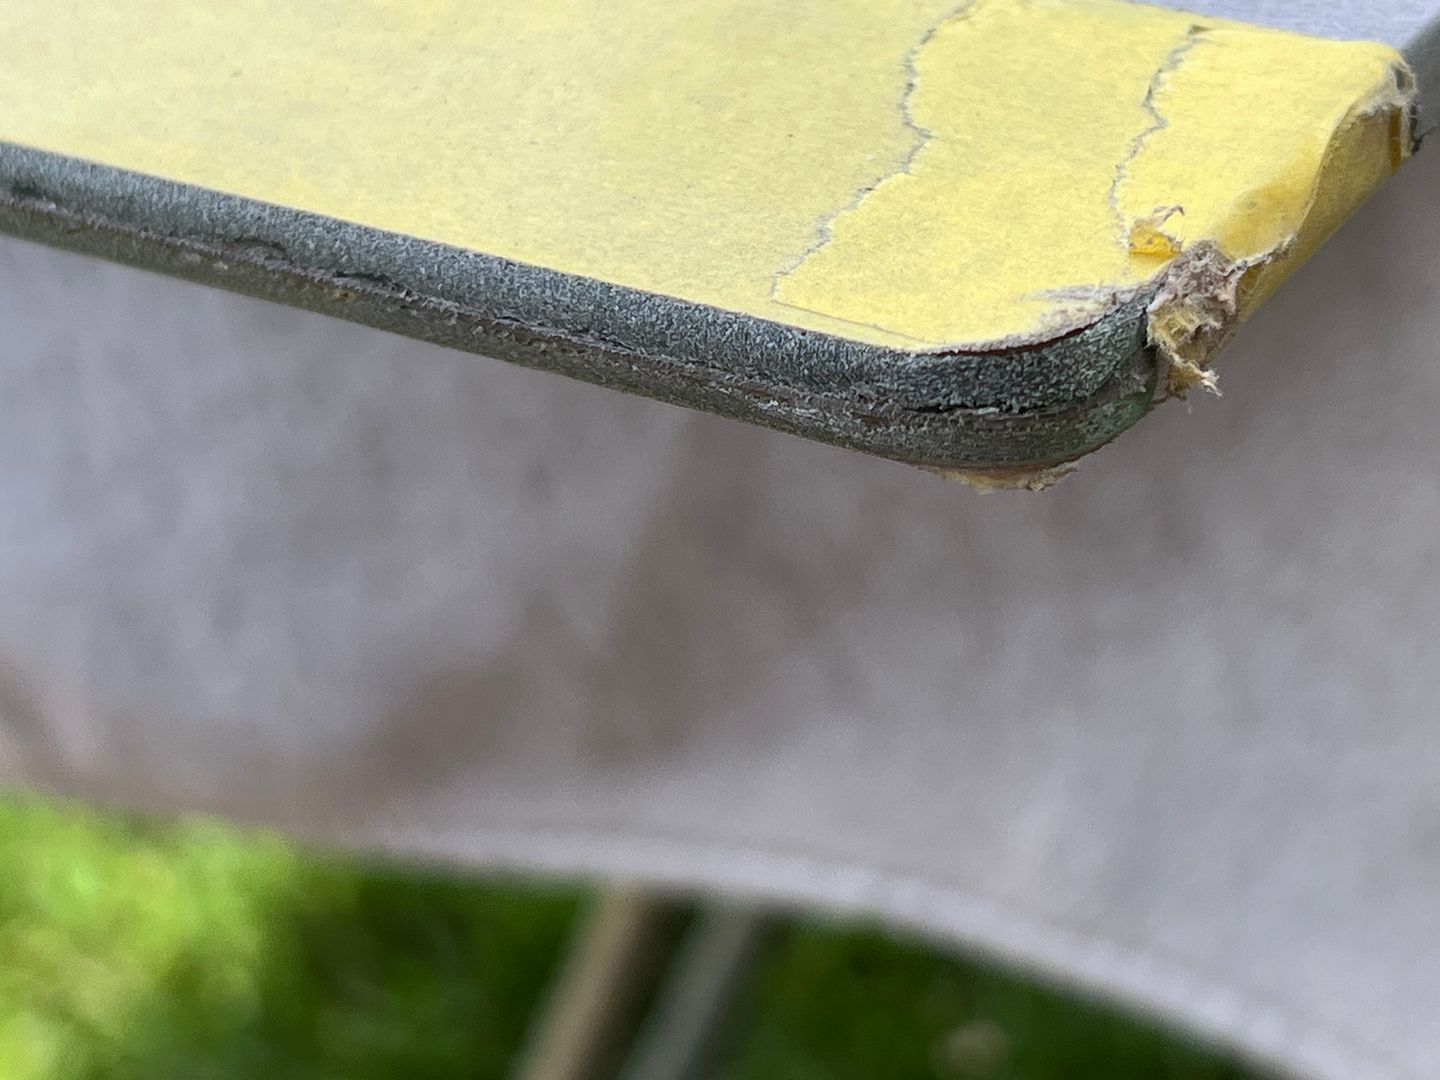 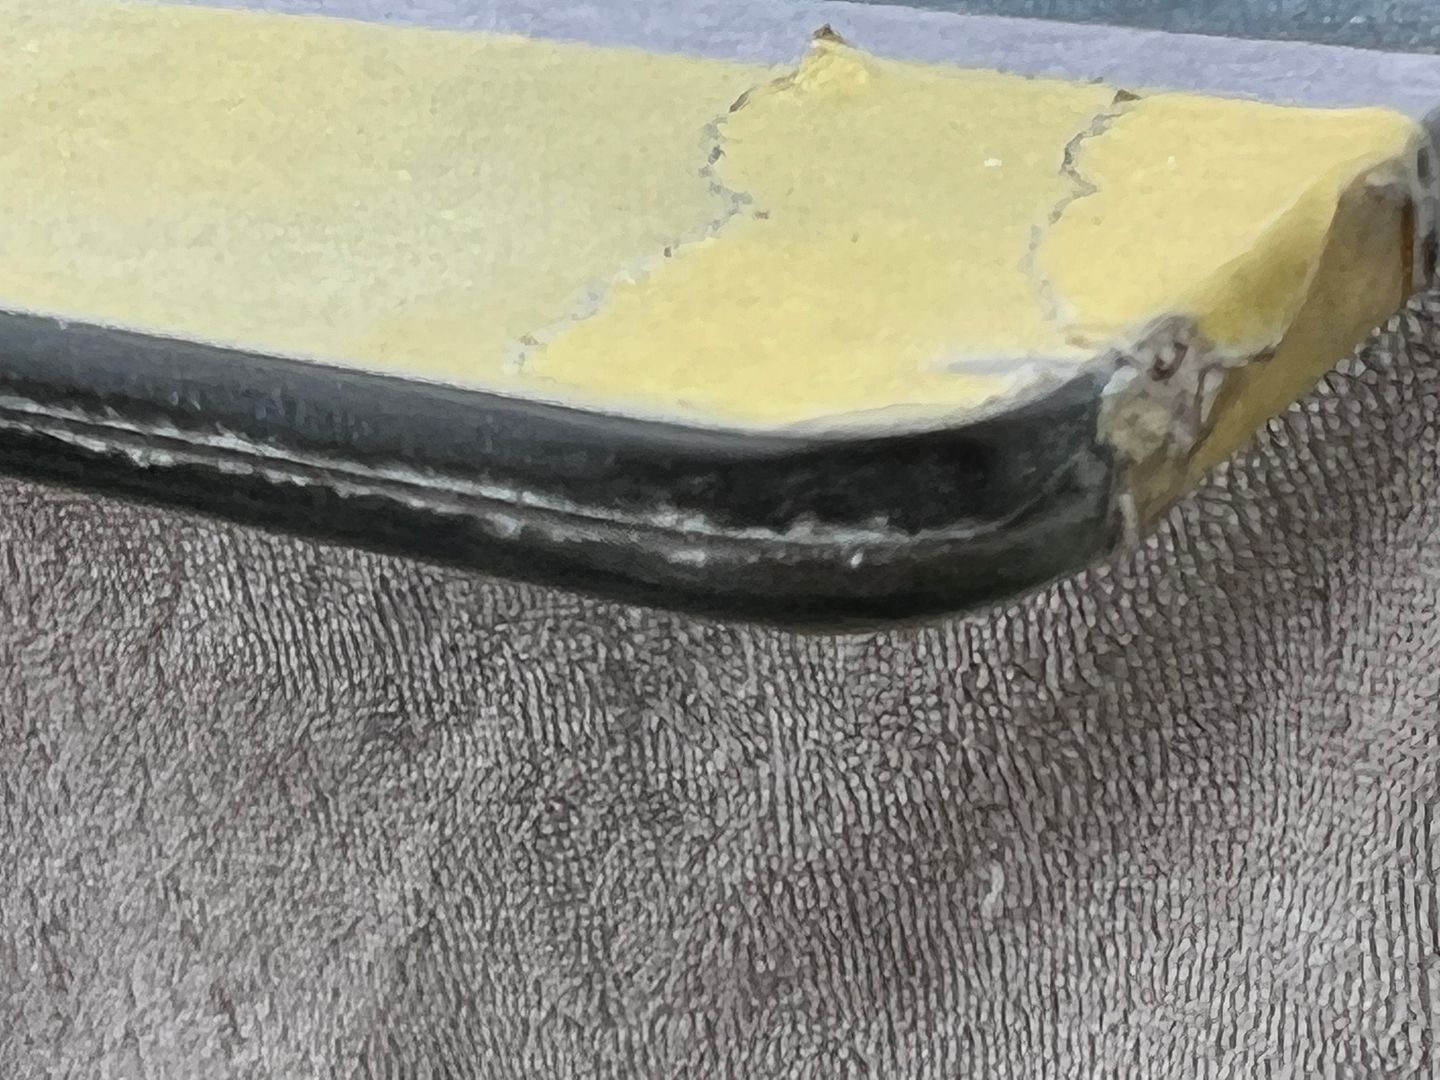 Our installation last night went in relatively painless and crack free. Now to make some upper clips.. https://youtu.be/XPazuJajT10
__________________
Robert Last edited by MP&C; 06-04-2022 at 09:54 AM. |
|
|
|
|
06-03-2022, 06:08 PM
|
#1296 |
|
Post Whore
Join Date: May 2015
Location: Alabama
Posts: 14,583
|
Re: 55 Wagon Progress
Congrats on the successful install...for the 3rd time..!!!
I kinda dread when I get going on the travelall, I'm already getting nervous about the rear quarter glass..they are unobtainable new and extremely expensive if you find used ones..I'm definitely letting a pro do mine..but still nervous
__________________
Mongo...aka Greg RIP Dad RIP Jesse 1981 C30 LQ9 NV4500..http://67-72chevytrucks.com/vboard/s...d.php?t=753598 Mongos AD- LS3 TR6060...http://67-72chevytrucks.com/vboard/s...34#post8522334 Columbus..the 1957 IH 4x4...http://67-72chevytrucks.com/vboard/s...63#post8082563 2023 Chevy Z71..daily driver |
|
|
|
|
06-12-2022, 12:03 PM
|
#1297 |
|
Registered User
Join Date: Jan 2013
Location: Leonardtown, MD
Posts: 1,633
|
Thanks Greg, if you are making no modifications to the window opening framework, I would think youd be fine.
Another small project in the shop, a good friend of mine has a powder coat business and has been restoring a Kent model KMX850 bmx bike. The bike was found in the woods and was brought to him for repairs, with many of the obsolete parts being sourced from other style bikes and scooters. Here is where he has it thus far.. .JPG) Once the sun had taken its toll on the seat upholstery, the foam inside became a nice sponge for all the precipitation that Mother Nature could throw at it, leaving much of the seat pan gone. So he needed a seat pan fabricated, and this is where I entered the picture.. .JPG) His major concern was that we duplicate the impaling spikes to secure the upholstery. .JPG) I had attended an estate sale about a year ago and picked up a set of Malco notchers, not knowing what I'd ever need them for, but also knowing I couldn't do without them. 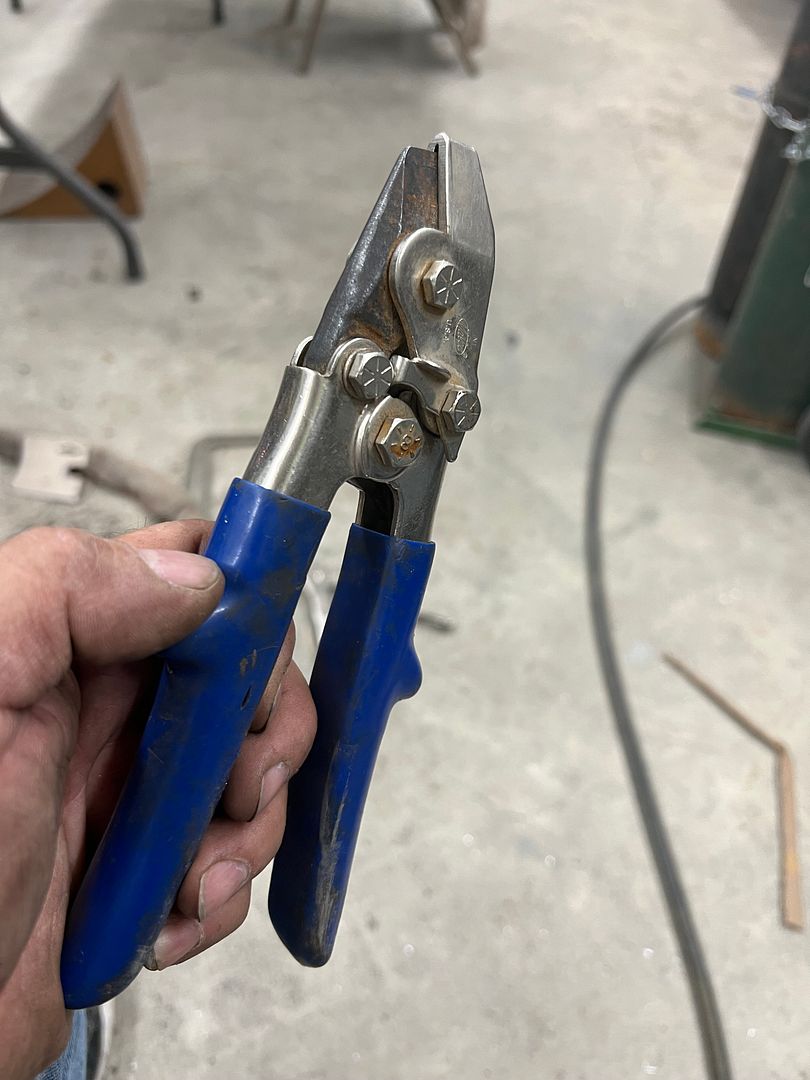 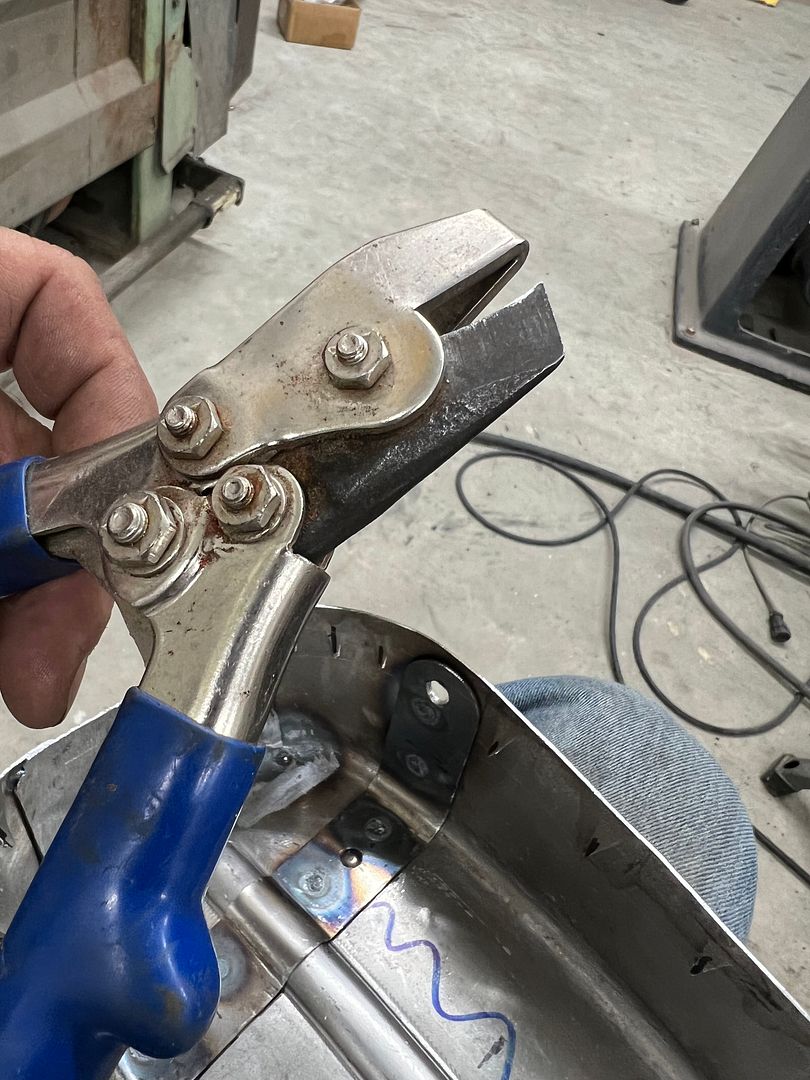 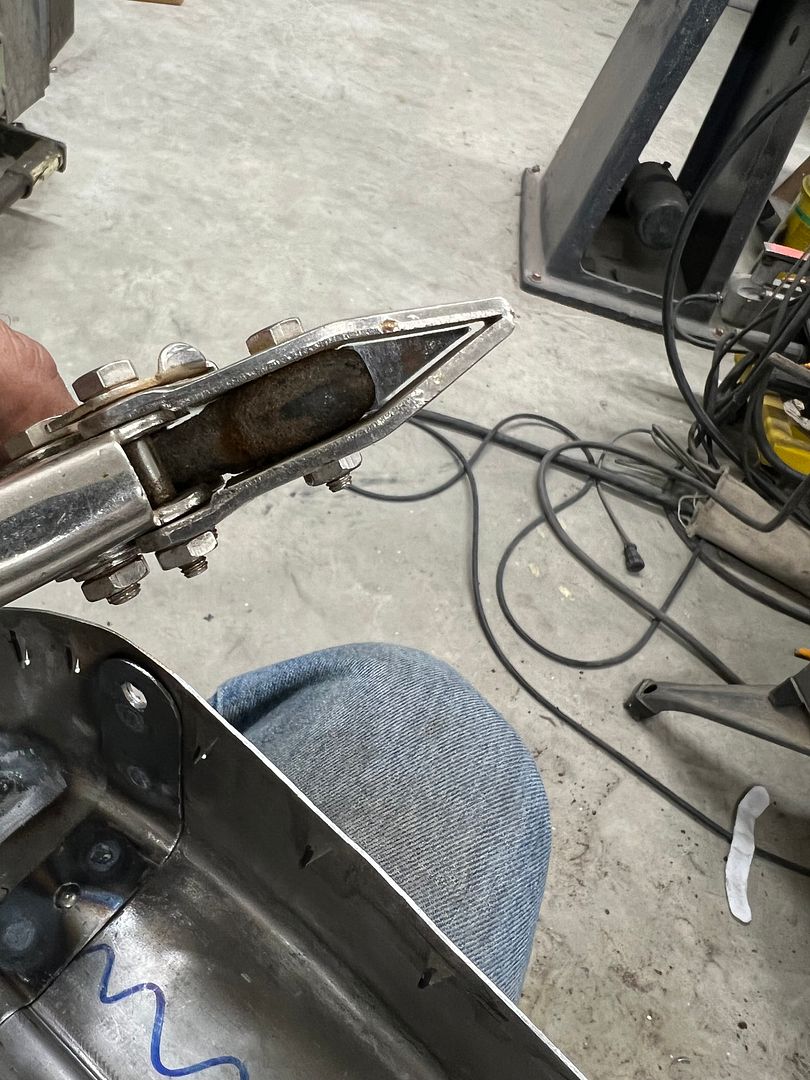 So when I pulled these out of the tool box all fears had been abated.. We started with a piece of 19 gauge AKDQ and used Stan Fulton beading dies to add the center bead. 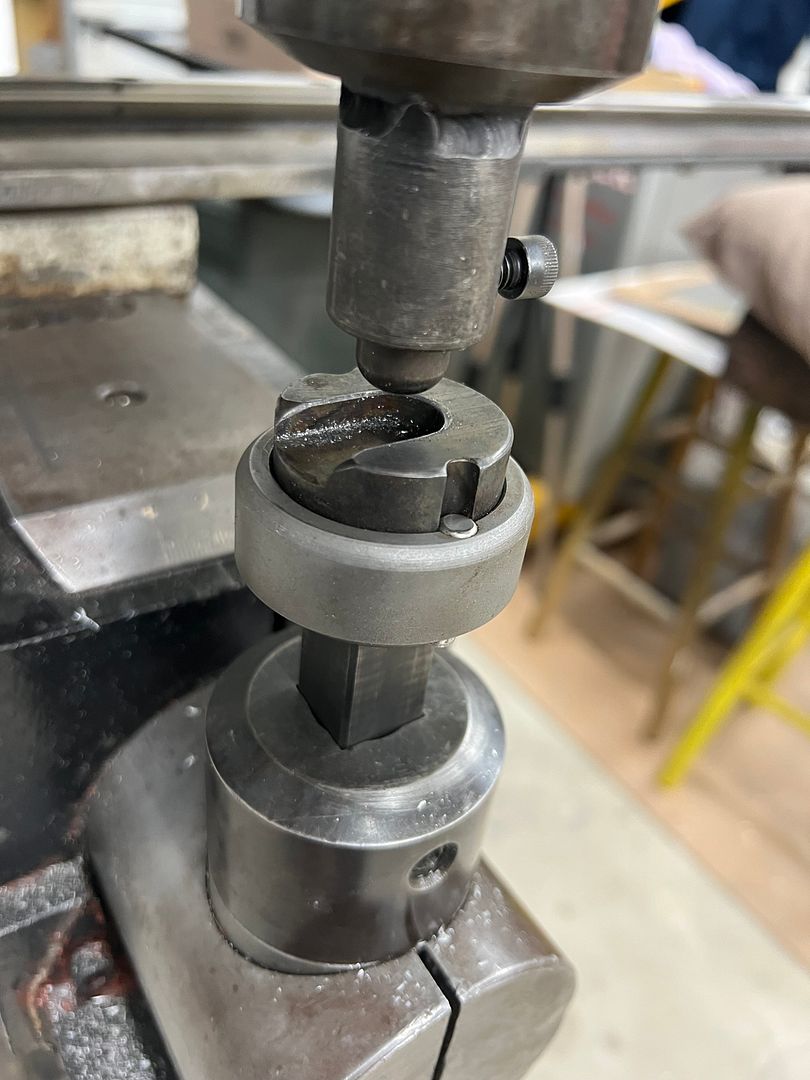 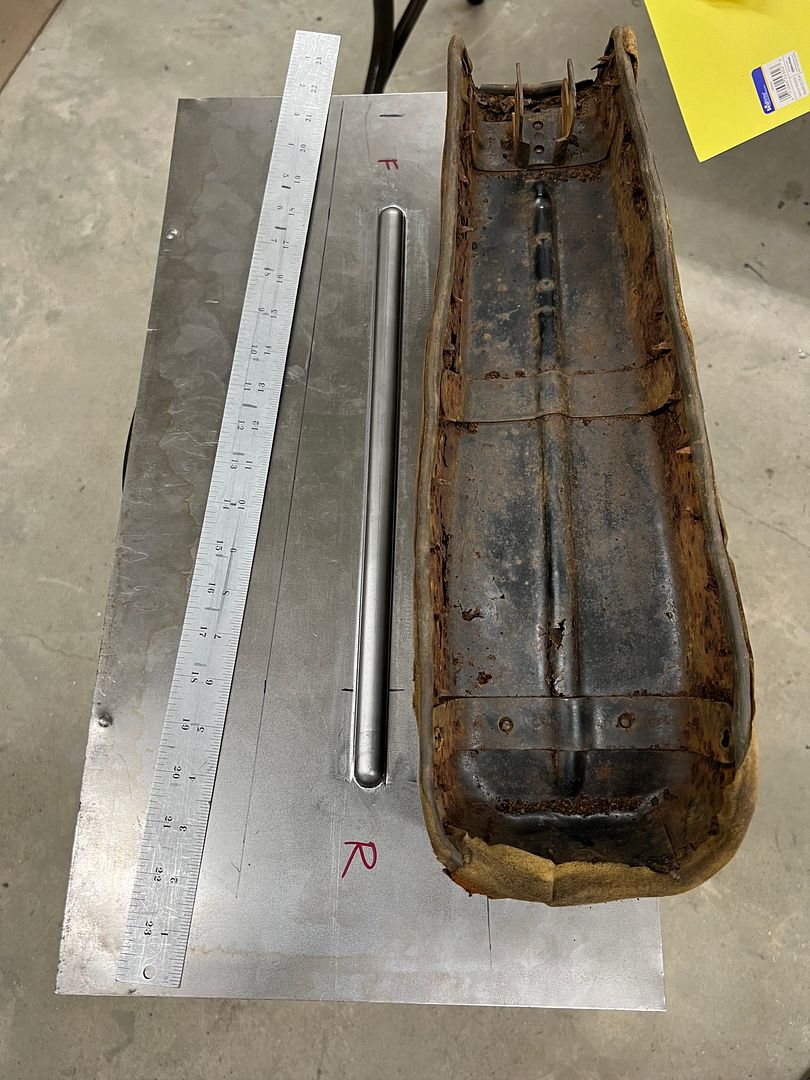 A piece of 5/8 round stock on the magnetic brake then added the radius for the side bends. Some of the 5/8 round stock was also used to make some post dollies with a welded stop for use in the bench vise.. 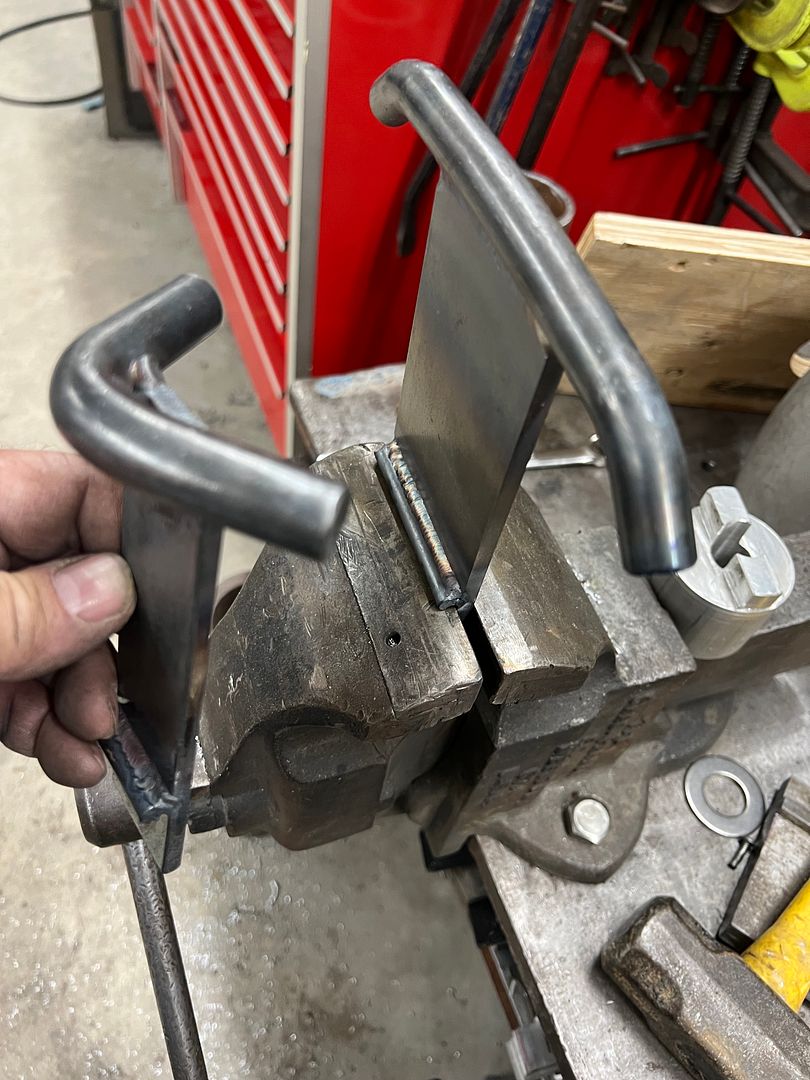 Basic shape 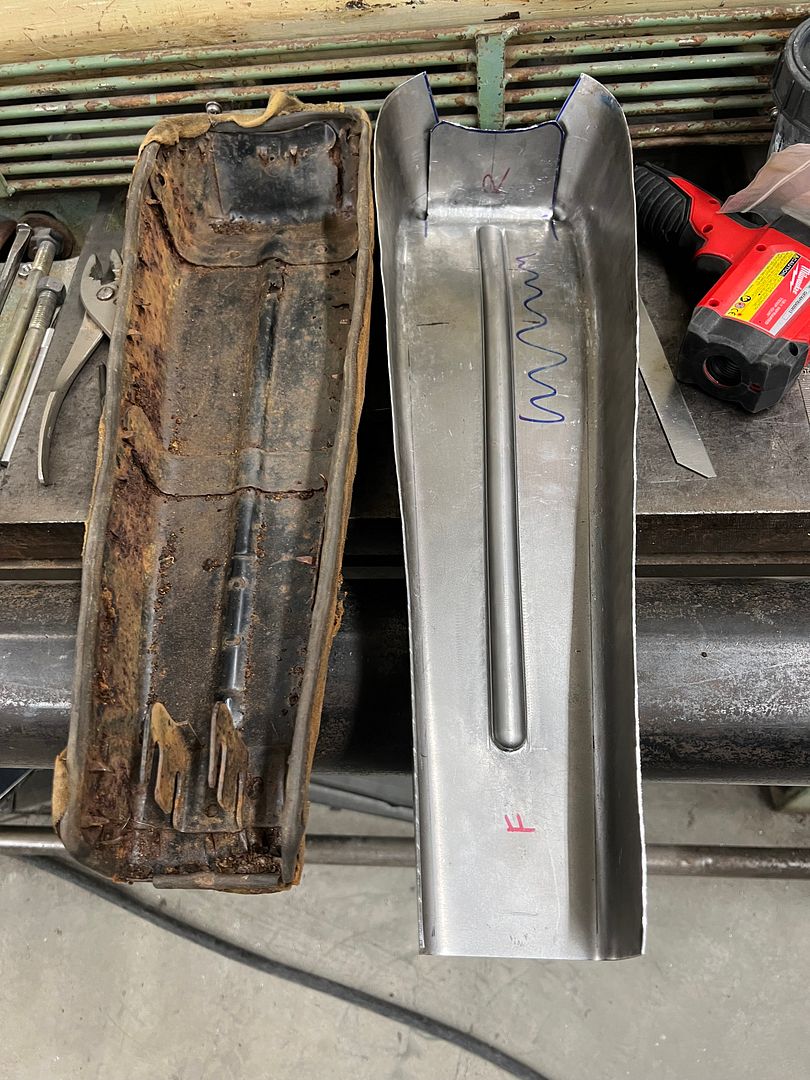 The Erco kick stretcher used on the sides and the post dollies on manipulating the radius bend helped to provide the kickup needed at the rear. 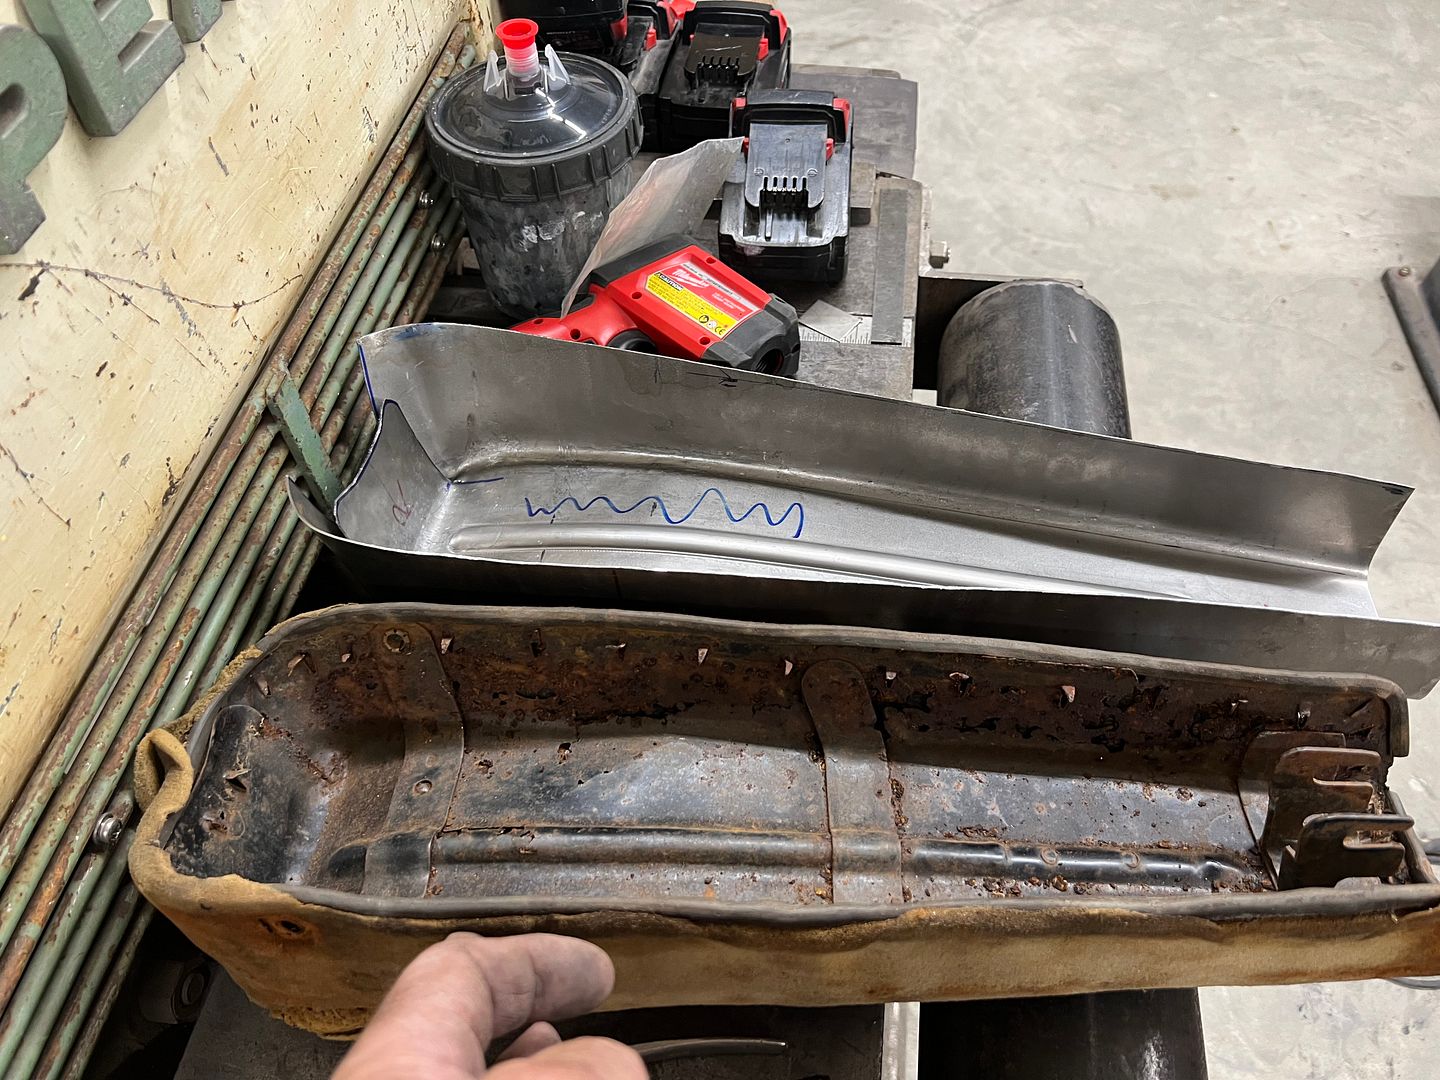 A solid rod across the rear mounting holes gives us some critical dimensions for layout.... 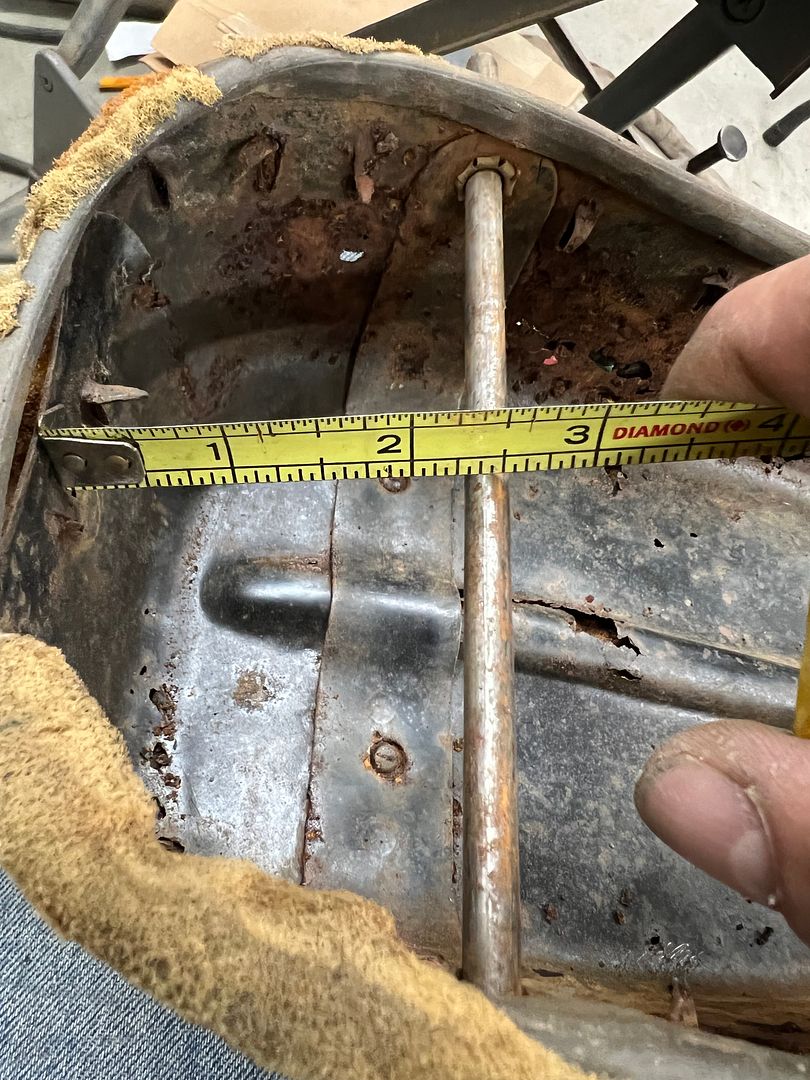 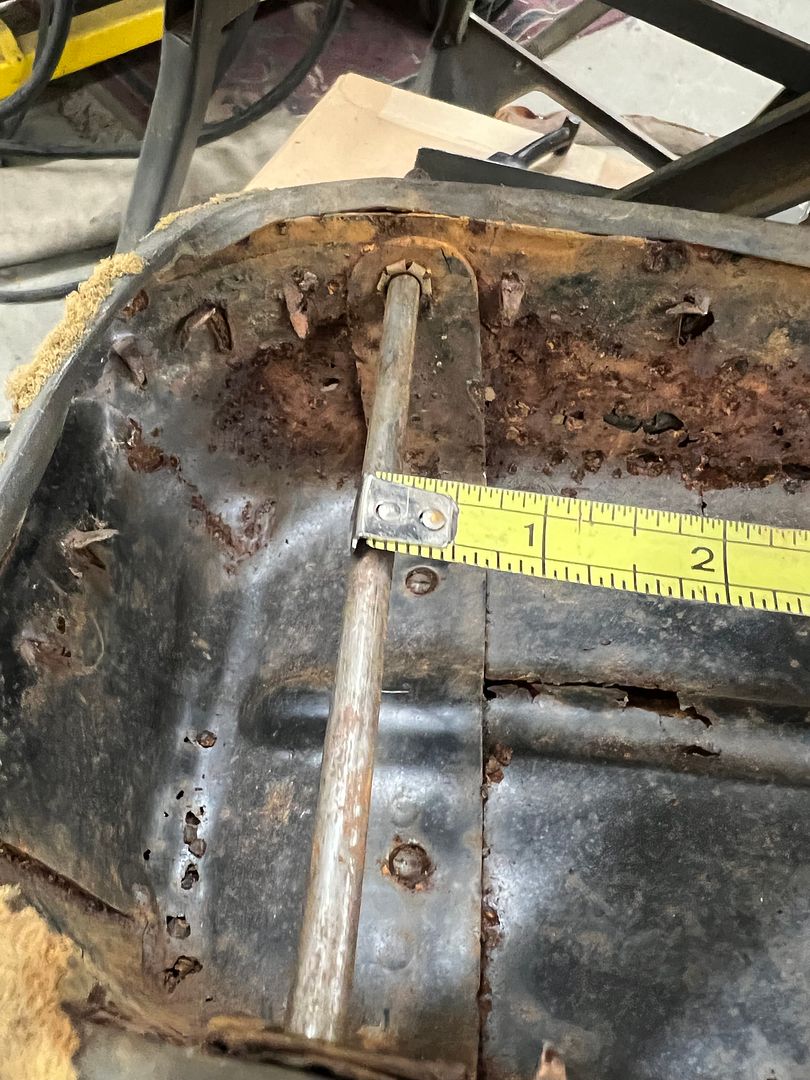 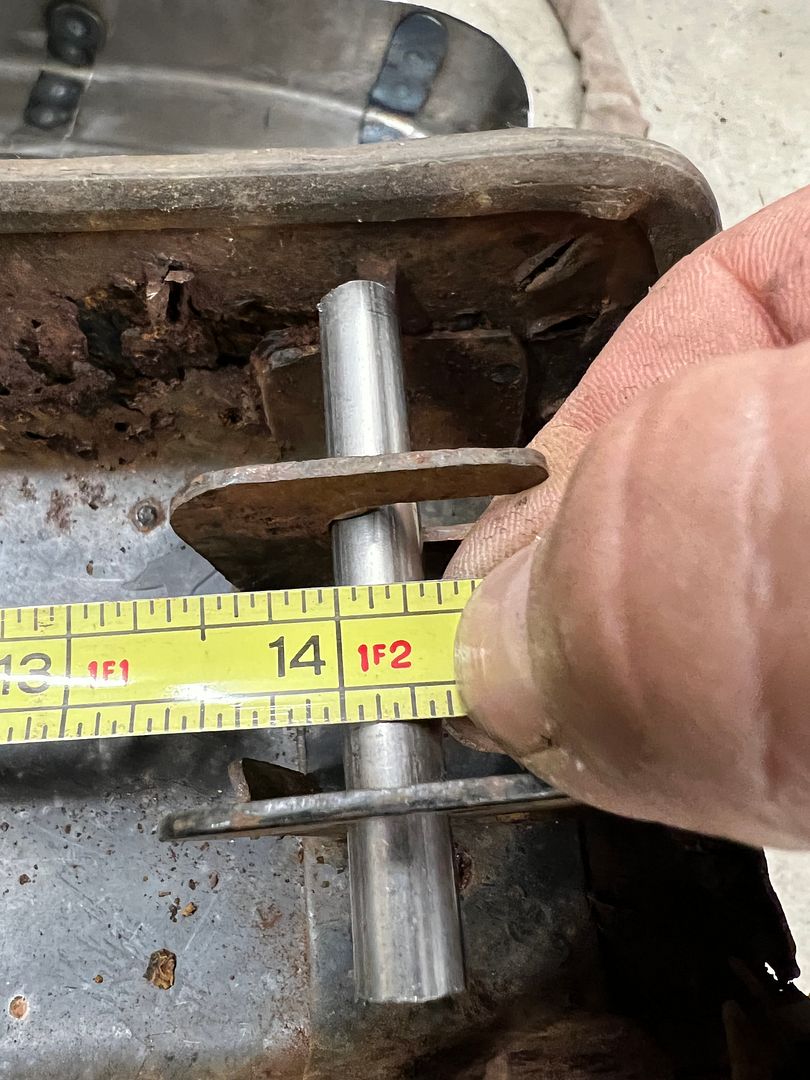 For the mounting holes in the rear, we measured 9/16 from the edge to hole center as per original, and then made a two ended transfer punch that fit snugly between the sides. Once we had our rear measurement and the point aligned to the 9/16 scribe line, we tapped either side to mark the holes. 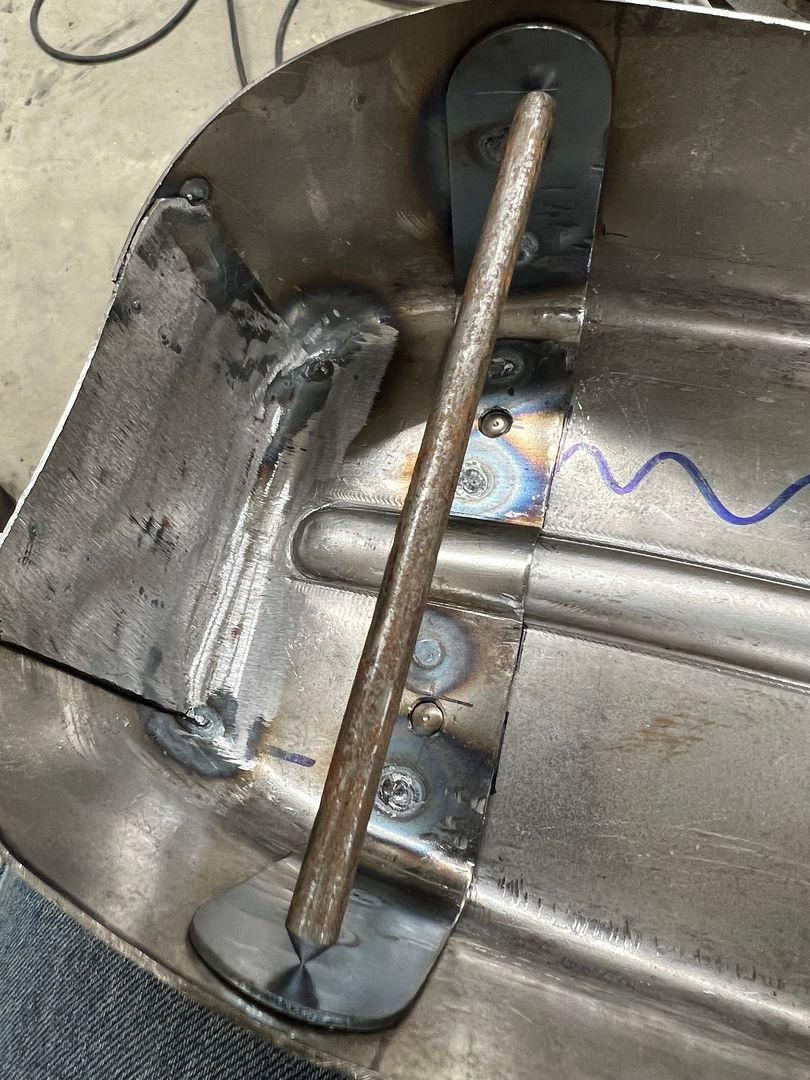 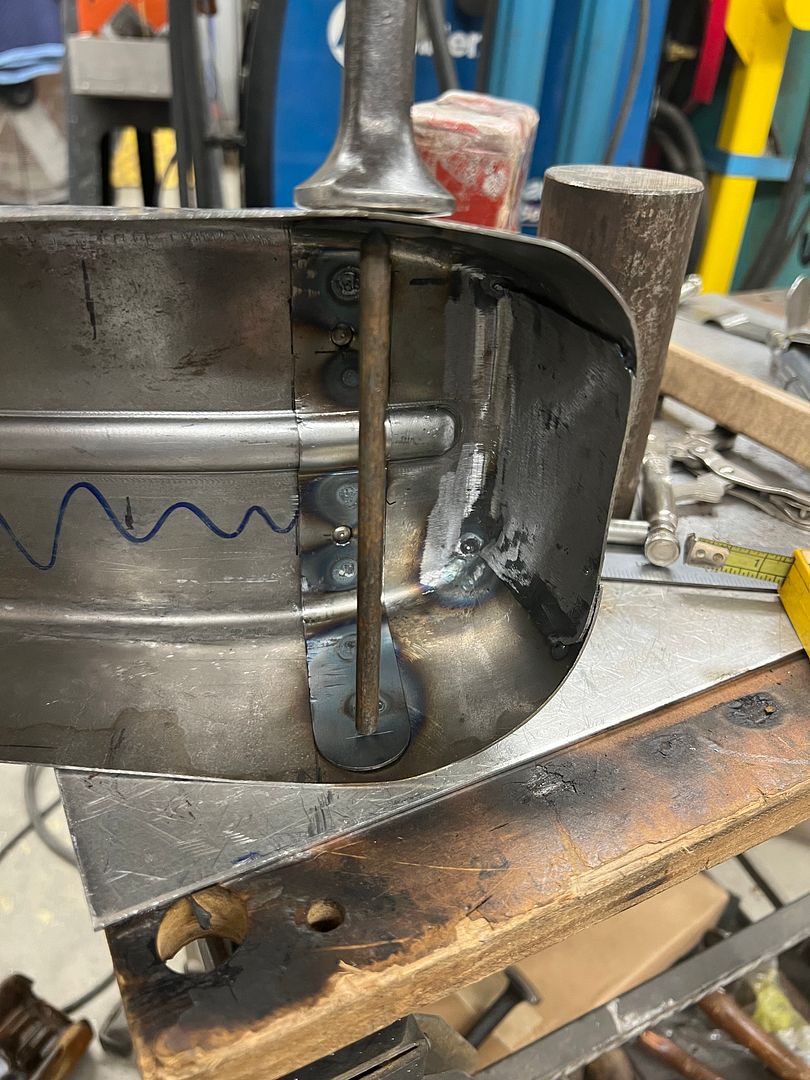 Once drilled, a rod through these holes lets us locate the front bracket. We reused the bracket to save some time (and money) as it was still good and solid.. 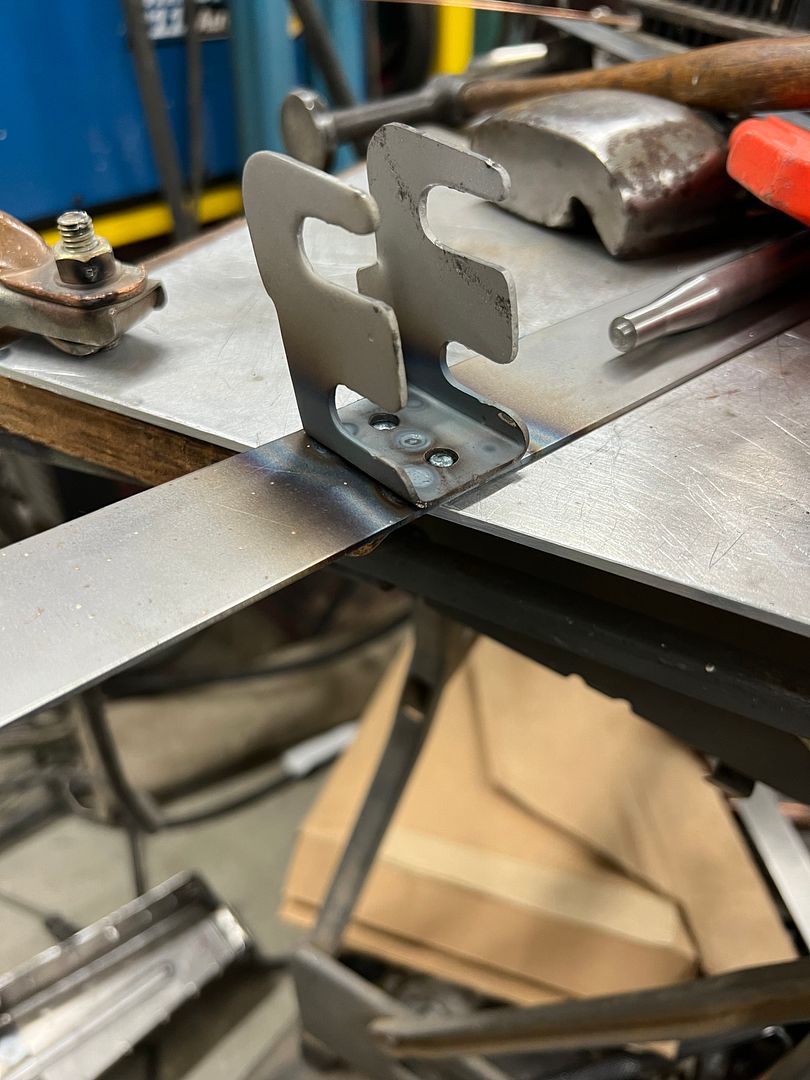 Impaling spikes added  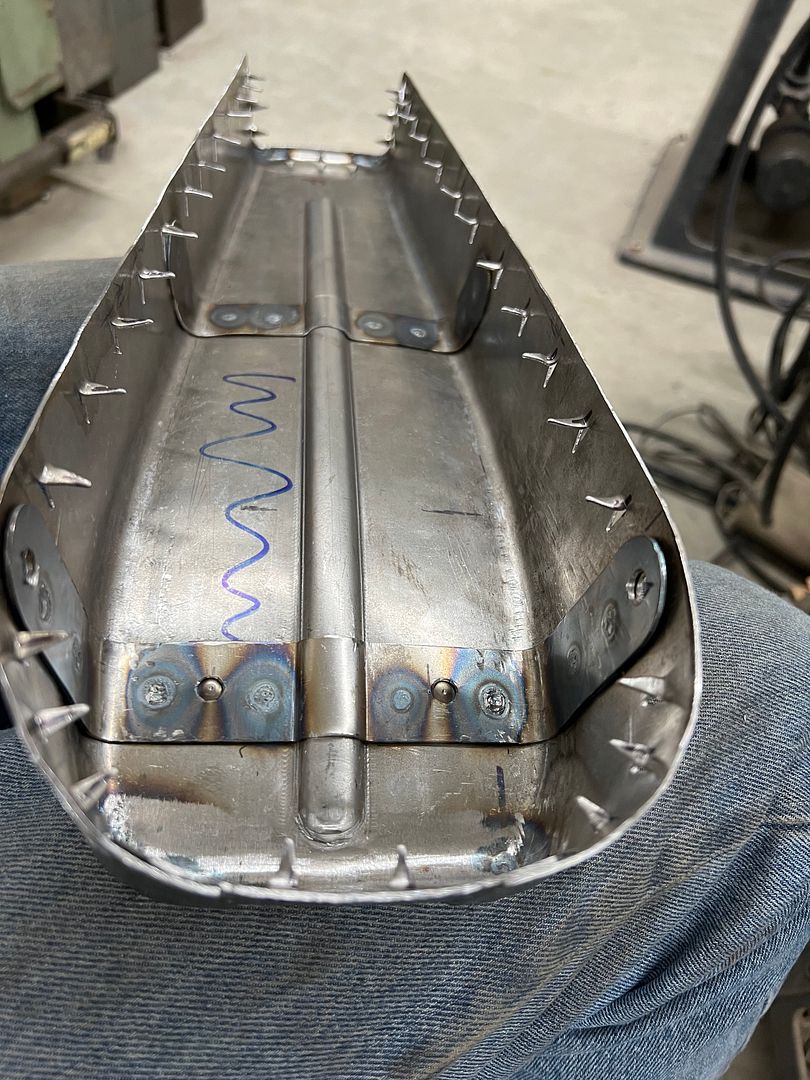 All bracket installed and assembly gets media blasted to prep for powder coat. 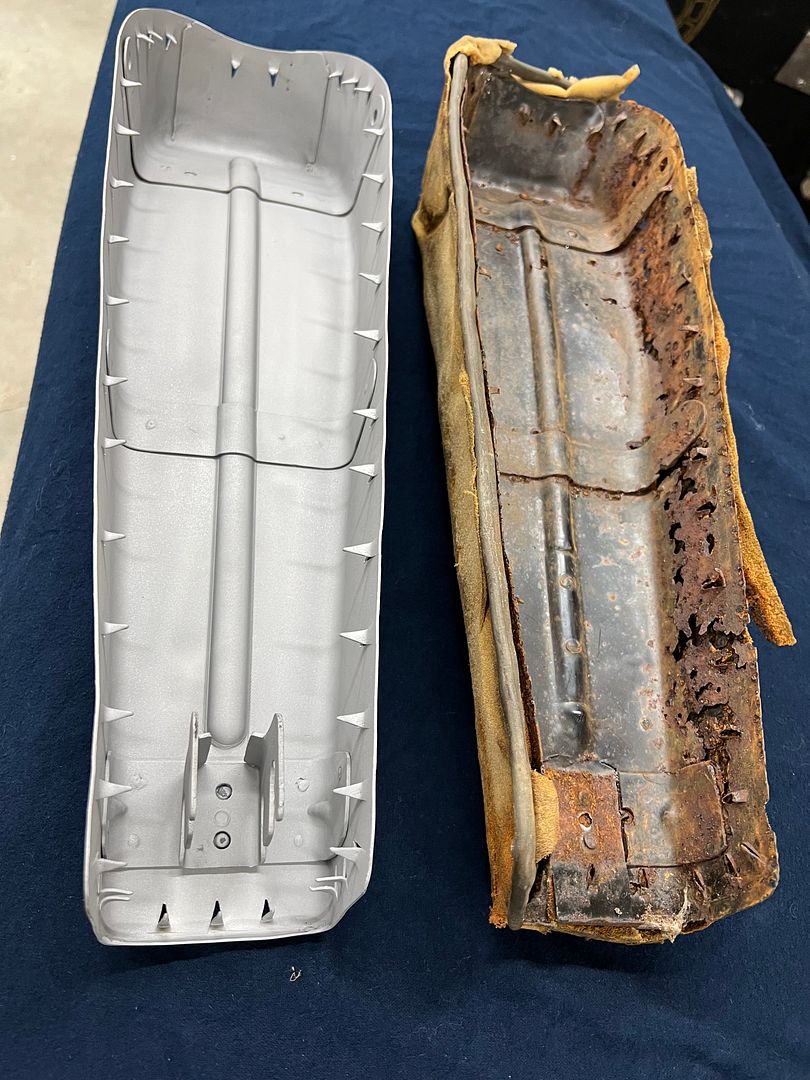 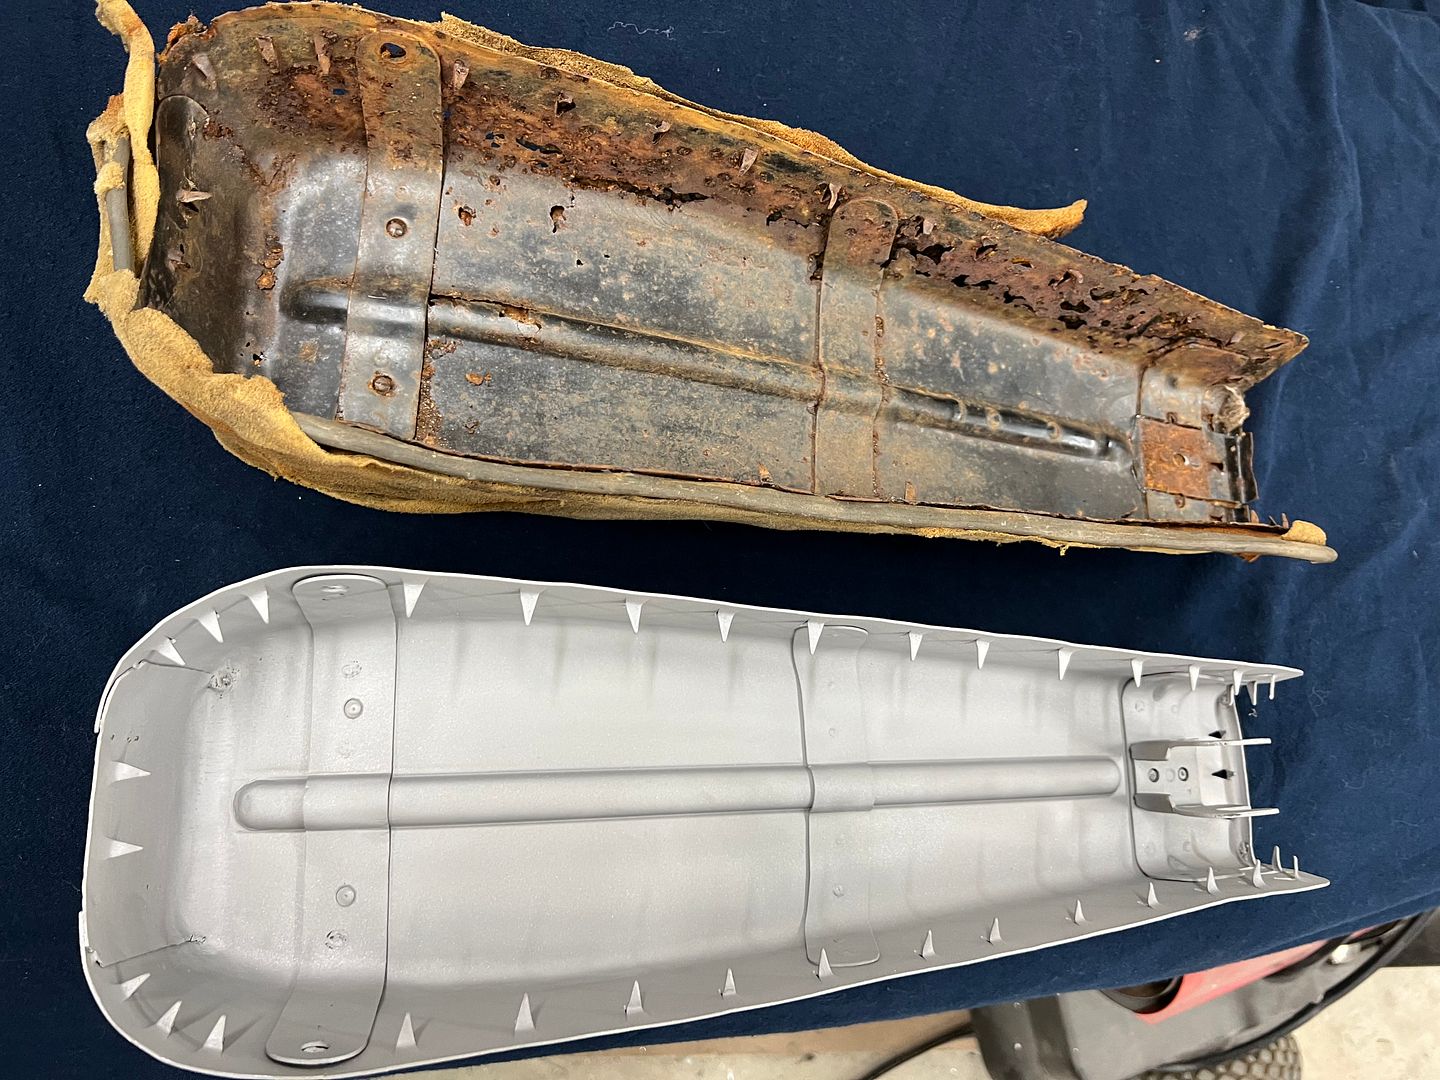 Posted via Mobile Device Last edited by MP&C; 06-12-2022 at 12:18 PM. |
|
|
|
|
06-12-2022, 11:48 PM
|
#1298 |
|
Post Whore
Join Date: May 2015
Location: Alabama
Posts: 14,583
|
Re: 55 Wagon Progress
How do the malcos reach that far in past the edge?.they dont look like they have that much throat to them
__________________
Mongo...aka Greg RIP Dad RIP Jesse 1981 C30 LQ9 NV4500..http://67-72chevytrucks.com/vboard/s...d.php?t=753598 Mongos AD- LS3 TR6060...http://67-72chevytrucks.com/vboard/s...34#post8522334 Columbus..the 1957 IH 4x4...http://67-72chevytrucks.com/vboard/s...63#post8082563 2023 Chevy Z71..daily driver Last edited by mongocanfly; 06-13-2022 at 01:33 AM. |
|
|
|
|
06-13-2022, 12:13 AM
|
#1299 |
|
Registered User
Join Date: Jan 2013
Location: Leonardtown, MD
Posts: 1,633
|
Re: 55 Wagon Progress
Greg, the location of the original punch for the spikes happened to be exactly the throat depth of the Malcos. Like it was meant to be...
__________________
Robert |
|
|
|
|
06-13-2022, 01:35 AM
|
#1300 |
|
Post Whore
Join Date: May 2015
Location: Alabama
Posts: 14,583
|
Re: 55 Wagon Progress
Ok..wow
Fantastic job yall did on that...btw
__________________
Mongo...aka Greg RIP Dad RIP Jesse 1981 C30 LQ9 NV4500..http://67-72chevytrucks.com/vboard/s...d.php?t=753598 Mongos AD- LS3 TR6060...http://67-72chevytrucks.com/vboard/s...34#post8522334 Columbus..the 1957 IH 4x4...http://67-72chevytrucks.com/vboard/s...63#post8082563 2023 Chevy Z71..daily driver |
|
|
|
 |
| Bookmarks |
|
|


 Linear Mode

