
|
 05-20-2014, 12:28 AM
|
#1451 |
|
Registered User
Join Date: Jun 2012
Location: Portland
Posts: 1,330
|
Re: Markeb01 Build Thread
Jeeze man looking great. Next time I have to swing up to Seattle I'll drop you a line if you're willing to show it off in person.
|

|

|
|
05-20-2014, 01:23 PM
|
#1452 |
|
Registered User
Join Date: Jan 2010
Location: Roanoke, Tx.
Posts: 1,561
|
Re: Markeb01 Build Thread
Where did you buy the 59 Caddy tail lights.
|
|
|
|
|
05-21-2014, 01:38 AM
|
#1453 |
|
Senior Enthusiast
Join Date: Feb 2007
Location: Spokane Valley, WA
Posts: 8,356
|
Re: Markeb01 Build Thread
Thanks for the comments guys.
Siggy Im always happy to show off the truck in person, but we live about 300 miles east of Seattle in Spokane. Were closer to Idaho than the west side of the state. Grs, I looked through the master parts list and I apparently failed to record the tail light purchase. It was over 10 years ago and I just dont remember where they were purchased. Theyre standard aftermarket Cadillac lights, not originals. One modification I did make was adding Maglite flashlight reflectors behind each bulb. It did help boost the output quite a bit at night. I tried Ron Francis Bright Bulbs long ago, but they burned out too often and are too hard to change to make it worth the trouble. Someday I may bump up to LEDs to improve day light illumination.
__________________
My Build Thread: http://67-72chevytrucks.com/vboard/s...d.php?t=444502 |
|
|
|
|
05-22-2014, 01:10 AM
|
#1454 | |
|
Senior Enthusiast
Join Date: Feb 2007
Location: Spokane Valley, WA
Posts: 8,356
|
Re: Markeb01 Build Thread
Quote:
Sadly my Nikon digital camera is too smart for me, and is almost impossible to trick into doing what I want. For almost 20 years I had a very basic Nikon film camera body and a $500 telephoto lens I used for everything, with excellent results. I bought a D40 about 4 years ago and apparently I'm not amateur enough for it. When I cover the flash or hold it closed the pictures just come out black. And it's almost impossible to focus in the center of a shot without using flash (which I normally don't want). Everything else focuses on whatever is nearest. My son has a Kodak which does everything I like, but it goes through batteries like gangbusters! In truth it's not enough of a priority at present to invest in finding a resolution. If I'd spend more time reading the book it would probably provide me with better pictures! According to my new fender emblems my engine has just been upgraded from a 327 to a 350. I finally found a pair that looked pretty decent available through Summit Racing. They were drop shipped from the manufacturer who turned out to be Classic Headquarters Pro Shop Series. The box is labeled as Officially Licensed GM Restoration Parts, but with so many companies using the name Classic today, I have no idea who actually produced these. The good news the castings are razor sharp and the letters are very clear and straight:  Many other 350 emblems in the aftermarket are very poor quality. The 5 leans to the left and then bends back to the right, and the zero leans to the left making the whole emblem look crooked and substandard to the point I went with the 327 emblems, which I always preferred. The not so good news the castings are undersized. They are very refined and well done, but the size difference can be seen in this photo:  The 2nd point, being too small all over the mounting pins are also undersized and wont accept any of the speed nuts typical to these applications. This required threading the pins to 6-32 so I could attach them with nuts and washers. I was thankful to have succeeded in threading all four pins without breaking any of them. They may not show up well in the photo, but the emblem on the far right has the pins threaded at this stage:  And finally, the plating apparently has very little nickel under the chrome. Rather than looking bright chrome, they almost look nickel plated, and they dont match the finish of the flag emblems very well. They are so dark, its easy to not see them in poor light. For now theyll stay. They will eliminate the need to answer a lot of questions, but if the finish tarnishes prematurely, Ill probably just go back to the 327 emblems as they still look perfect, and shiny!
__________________
My Build Thread: http://67-72chevytrucks.com/vboard/s...d.php?t=444502 |
|
|
|
|
|
05-22-2014, 07:36 PM
|
#1455 |
|
Registered User
Join Date: Apr 2012
Location: Searcy, AR
Posts: 4,203
|
Re: Markeb01 Build Thread
As for the D40, I use one for my tattoo work and I found this setting which allows me to take pics w/o the flash, and for more focus control I switch to manual focus... Hope this helps...

__________________
DON Proverbs 27:17  US Air Force Retarded errr Retired My '65 Stepper Build:http://67-72chevytrucks.com/vboard/s...d.php?t=533920 My '60 Rusty Patina Build:http://67-72chevytrucks.com/vboard/s...66#post7402266 My '72 http://67-72chevytrucks.com/vboard/s...59#post7204359 SOLD |
|
|
|
|
05-22-2014, 09:47 PM
|
#1456 |
|
But Found Her 25yrs Later!
 Join Date: Oct 2010
Location: Oregon City, Oregon
Posts: 10,497
|
Re: Markeb01 Build Thread
I hadn't stopped by your thread for sometime.
Man you have done some really cool mods and upgrades. Wow!
__________________
I lost my 65 - Found it 25 years later: http://67-72chevytrucks.com/vboard/s...d.php?t=426650 66 C20 Service Truck: http://67-72chevytrucks.com/vboard/s...d.php?t=428035 |
|
|
|
|
05-23-2014, 01:22 AM
|
#1457 |
|
Senior Enthusiast
Join Date: Feb 2007
Location: Spokane Valley, WA
Posts: 8,356
|
Re: Markeb01 Build Thread
Thanks for the tip Don, I'll give that a try and see if my old eyes can focus manually!
And thanks for stopping by Lostmy65. I'm working on adding Dagmars to the front bumper guards (somewhat like a 55 Buick), but that's been delayed while my focus has shifted to house/yard/contractor stuff. I just had some new fencing installed and am looking forward to having new garage doors in a few weeks. They are really going to brighten up the place and add a great deal more comfort in the winter due to the improved insulation.
__________________
My Build Thread: http://67-72chevytrucks.com/vboard/s...d.php?t=444502 |
|
|
|
|
05-23-2014, 10:14 PM
|
#1458 |
|
Registered User
Join Date: Jan 2011
Location: Tulare, CA
Posts: 732
|
Re: Markeb01 Build Thread
Mark, I always check out your posts and have stolen quite a few tips from you. But I got to tell you - you are dating yourself. I think anyone younger than about 50 would have no idea what Dagmar's are let alone know that Dagmar's were named after Dagmar herself (Virginia Ruth Egnor). As a teen I've owned a 56 Buick - The last Buick Dagmar's were in 55 but Cadillac carried them on for a few more years. Those were the days. Sorry, I just haven't heard the term Dagmar's in over a decade at least and your post brought back some fond memories and a smile to my face so I just had to comment. Keep up the good work, I definitely enjoy your posts and what you've done to your truck!
|
|
|
|
|
05-24-2014, 03:27 AM
|
#1459 |
|
Senior Enthusiast
Join Date: Feb 2007
Location: Spokane Valley, WA
Posts: 8,356
|
Re: Markeb01 Build Thread
Thanks for the input. Its pretty certain that I date myself frequently, I figure anyone that knows what Im talking about already knows, and those that are too young probably wont care, or may take the time to do a Google search.
I was introduced to Dagmars by my next door neighbor in 1958 when I was ten years old. I thought it was pretty considerate of him to explain the relationship of the car parts to the real lady, but it would be years later before I ever saw a picture of her or knew who she was. A while back I was contemplating how popular bumper bullets were for a period in time. It occurred to me it shouldnt be too hard to adapt some to the front bumper guards on my truck, if they looked good when finished. I looked at every car that originally came with bumper bullets, Cadillac, Buick, Mercury, Lincoln, Packard and a few others. None of the factory designs were practically adaptable to my truck. So I started searching for bullet shaped shells. I went through photos of all the mid 1930s headlight shells and they are all too big. I finally ended up focusing on a specific outdoor lamp holder Hubbell model 308. It looks like this:  I think it may be obsolete, as the only units I found in current inventory are 309 models, which have an extension on the front holding a sealed lamp assembly. I found two 308s available on Ebay from two different sellers. Unfortunately one was in its box, so I really couldnt match it up with the other one until they both arrived when I discovered a minor setback they dont match exactly, apparently since one is dated 1994 and the other is dated 1996 or 1998. One had somewhat of a point on the end with two flat areas cast into the shell for attaching the lamp socket. The other one is flat on the end, so Ill need to create a mold and cast a matching nose once the pointed one is finish shaped. The overall shape is identical except for what is going to end up being the front tip, but when they are finished they will look exactly the same. Here are a couple of pictures showing the flat nose untouched shell next to the in-process modified piece: 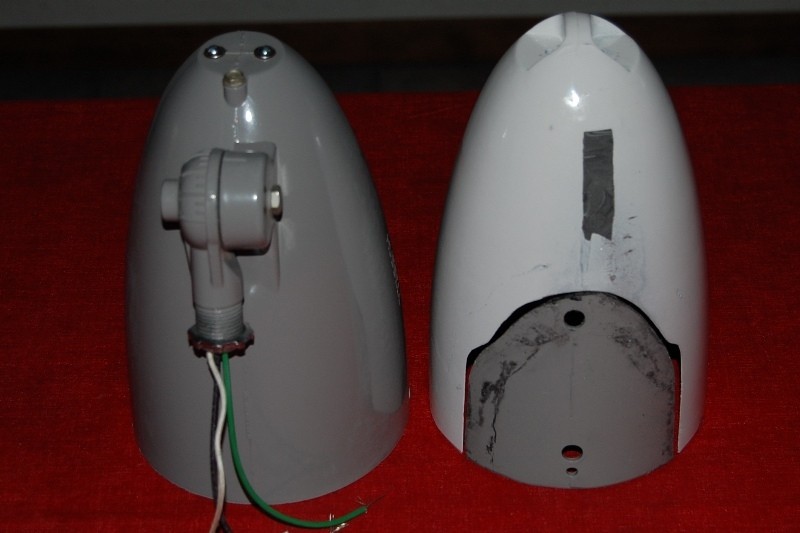  And heres what the white one looked like the first time it was trial fitted to the bumper guard, showing how much work is required to get this to fit properly:  Heres what the gray one (#2) looks like as of tonight. It has been sliced up to fit over the bumper guard, and the mounting bracket has been removed and filled with JB Weld (same as what has already been done on the white bullet):  And this is what the inside looks like:  The nose in each bullet has two 1/4x20 bolts long enough to attach brackets that will eventually hold these to the guards. The JB Weld filler can be seen in the bottom of the bullet ahead of the cutout area. This shell also has two holes (one on either side) for mounting the new extension lamp - those will require filling tomorrow. The indentations on the nose of the white bullet have been filled with JB Kwik (no photo yet). Tomorrow they will be rough shaped, and touched up with Rage filler before final shaping/priming. This is the first stand back and take a look at it photo:  The first thing that jumped out at me is the bottom of the bullet needs to be flush with the top of the bumper, they are too high in this photo. This requires cutting the top couple inches off the guards to lower the bullets. Slicing up the guards commits me to the project. Whether these bullets survive the cut or not Im not sure yet. I am however convinced this design will work, so even if I have to start over with different shells, Im going to continue until I have a traditional pair of bumper bullets poking out on the front of my truck. More to follow.
__________________
My Build Thread: http://67-72chevytrucks.com/vboard/s...d.php?t=444502 |
|
|
|
|
05-24-2014, 11:42 AM
|
#1460 |
|
Registered User
Join Date: Sep 2011
Location: Tacoma, WA
Posts: 2,425
|
Re: Markeb01 Build Thread
Your Dagmar reference struck a chord with me so I have to assume I have heard the term before.
Nonetheless I look her up... She had a heck of a pioneering career for women in television and certainly set the stage for the popularity of large chested women in entertainment, as well as intelligent women playing ding bats (Jean Stapleton from All in the Family also comes to mind). I found it odd though that she never had children, that was certainly not the norm in that generation. On your mod: I think it is a grand idea, and I LOVE it already !! However I am sort of surprised you did not check out the Army Surplus shop on Division, or call out to Fairchild DRMO yard for some old ordinance dummy rounds/bombs. There are some that would have had the perfect leading cone that you are looking for on this mod. Your Veteran status should be enough for you to get stuff from the Air Force out there, though I have yet to investigate this myself (soon.....my pretty, soon.....) Anyways, you got my attention again 
__________________
Michael McMurphy My 66 Stepside My 64 Tow Truck My 66 Tempest Table Of Contents Added to Page1 |
|
|
|
|
05-24-2014, 12:00 PM
|
#1461 |
|
Senior Enthusiast
Join Date: Feb 2007
Location: Spokane Valley, WA
Posts: 8,356
|
Re: Markeb01 Build Thread
Thanks Mike. I'm going down that way today anyway, so I'll stop by and see what they may have. If I could find something else with perfect noses requiring less work I'm not too far into it to switch.
I've read up on Dagmar too, and came away very impressed what a cool person she was. Somebody everyone would like to have for a friend. 8,000 fan letters a week and half of them from women. Her back story reminds me of Robert Stack. I grew up only seeing him playing Elliott Ness but he was a very cool guy, the kind of man I wish I'd had for a dad.
__________________
My Build Thread: http://67-72chevytrucks.com/vboard/s...d.php?t=444502 |
|
|
|
|
05-24-2014, 12:25 PM
|
#1462 |
|
Registered User
Join Date: Apr 2012
Location: Searcy, AR
Posts: 4,203
|
Re: Markeb01 Build Thread
Over the top once again!!!
Those Bumper Bullets, Dagmars... 
__________________
DON Proverbs 27:17 US Air Force Retarded errr Retired My '65 Stepper Build:http://67-72chevytrucks.com/vboard/s...d.php?t=533920 My '60 Rusty Patina Build:http://67-72chevytrucks.com/vboard/s...66#post7402266 My '72 http://67-72chevytrucks.com/vboard/s...59#post7204359 SOLD |
|
|
|
|
05-24-2014, 12:43 PM
|
#1463 |
|
Registered User
Join Date: Jun 2012
Location: Selkirk Ontario Canada
Posts: 1,141
|
Re: Markeb01 Build Thread
that is wild looking..what a cool idea
__________________
My 63 GMC Panel Slow Build http://67-72chevytrucks.com/vboard/s...=1#post5457281 63 
|
|
|
|
|
05-25-2014, 09:40 PM
|
#1464 |
|
Senior Enthusiast
Join Date: Feb 2007
Location: Spokane Valley, WA
Posts: 8,356
|
Re: Markeb01 Build Thread
Made a lot more progress today. Last night I added the first layer of JB Kwik to the passenger side bullet nose, so I could do preliminary shaping later today.
Ever since I added the 55 Buick propeller, the clearance between the blades and the back of the guards has been about 1/8. It became obvious that was going to be insufficient with the bullets, so I started by moving the grille bar back 3/8. Here it is before being moved:  This was accomplished by removing the silver nuts holding the grille bar bracket to ¼ steel brackets bolted to the radiator support:  I doesnt really look much different, but the gap is now closer to ½ between the back of the guards and the grille bar blades. In this photo the grille has been set back, and tops of the guards have been sliced off and set back in place:  I also sliced off the 1/4 overhang on the back of both guards. Now the rear edge of both guards stop even with the upper rear edge of the bumper, and the tops have been removed in the following photo:   Throughout the fitting process I tried keeping the gaps as tight as possible, as I intend to blend the guards and bullets together making them appear on piece when finished;  These last two photos show the finished fitment: The bullets are aligned straight ahead and level with the truck, although the curvature of the lens makes them appear wall eyed:   Tomorrow Ill work on mounting brackets, and Tuesday Ill head back to the paint store for some more U-Pol 2k primer. This project really shouldnt take all that long. The only real tedious work will be match shaping both bullets to look exactly alike, and blending them to what is left of the bumper guards. The paint will be simple, as all the grille parts are painted with white Rustoleum.
__________________
My Build Thread: http://67-72chevytrucks.com/vboard/s...d.php?t=444502 |
|
|
|
|
05-25-2014, 10:25 PM
|
#1465 |
|
Registered User
Join Date: Apr 2012
Location: Searcy, AR
Posts: 4,203
|
Re: Markeb01 Build Thread
Smokin' Fast Mod!!!
__________________
DON Proverbs 27:17 US Air Force Retarded errr Retired My '65 Stepper Build:http://67-72chevytrucks.com/vboard/s...d.php?t=533920 My '60 Rusty Patina Build:http://67-72chevytrucks.com/vboard/s...66#post7402266 My '72 http://67-72chevytrucks.com/vboard/s...59#post7204359 SOLD |
|
|
|
|
05-25-2014, 11:17 PM
|
#1466 |
|
Registered User
Join Date: Apr 2012
Location: Cambridge, Ontario, Canada
Posts: 1,771
|
Re: Markeb01 Build Thread
Mark, I love the bullets, I know the are not done, but they already look awesome! Could we get a little follow up on the 350 emblems too? I am so looking forward to being done to the point that I can putter away on the perpetual upgrades. Great to see you continuing to enjoy your truck after all these years
__________________
Craigerrr My build thread, CRGRS 66 Winter Build: http://67-72chevytrucks.com/vboard/s...09#post5638709 |
|
|
|
|
05-26-2014, 12:17 AM
|
#1467 |
|
Rollin' Old Skool
Join Date: Jun 2007
Location: Hattiesburg, MS
Posts: 5,371
|
Re: Markeb01 Build Thread
Always tinkering with something.
 ....neat stuff my friend, neat stuff! ....neat stuff my friend, neat stuff!
__________________
_____________________________________________ Phillip My Build threads: 1966 Chevy C-10 "Black Betty" shortbed, fleetside, BBW, 327 V8/ Powerglide (under construction) http://67-72chevytrucks.com/vboard/s...ighlight=betty 1997 Chevy Tahoe, 2dr/2wd, mild custom (Daily driver) http://67-72chevytrucks.com/vboard/s...d.php?t=601142 Pics: '66 C-10 https://flic.kr/s/aHsjHWD4h9 '97 Tahoe https://flic.kr/s/aHsjGZ7wKP '93 C-1500 https://flic.kr/s/aHskxdpdnQ '88 S-10 Blazer https://flic.kr/s/aHsjYGx4Md Previous Rides: 1993 Chevy S-10 ext. cab, 4.3L, 4/5 drop (Sold) 1993 Chevy C-1500 short/step Retro-Rod (Sold) 1988 S-10 Blazer 2dr/2wd mild custom (Sold) |
|
|
|
|
05-26-2014, 02:21 AM
|
#1468 |
|
Senior Enthusiast
Join Date: Feb 2007
Location: Spokane Valley, WA
Posts: 8,356
|
Re: Markeb01 Build Thread
Thanks as always for checking in guys. I appreciate the comments and feedback.
I cant wait to finish the bullets as they look really cool all painted white. I already sprayed one of them white to show my wife what I had in mind, and then had to remove all that fresh paint! Im so close to being done now, Im just going to have some patience until theyre finished. As for the 350 emblems, Ive read numerous complaints (none directed at me) that fender emblems should only be displayed if they are correct (accurate). Personally I dont subscribe to this doctrine. I think they should be whatever the owner prefers. Which is why, when I decided to put emblems on the front fenders, there really was only one consideration 327! In my youth, that was just the coolest engine a person could have. The 283 was the most popular engine on earth, until the 327 came along. And just saying 327 out loud carried a certain panache with it. Ever since 1992 when I junked the 305 GMC V6, my truck has never had anything in it but a 350 crate engine. To me that has no appeal at all. And since all the 350 emblems on the market when I decided to add the fender emblems looked terrible, it was an easy decision to go 327 instead. And since I really did love the 327 engine, I modified the valve covers to conceal the smog connection and swapped to a manifold with an oil fill pipe in front. To the unknowing, it really does appear to be a 327. More recently I started thinking about modifying the engine again to look like a 1970s-80s motor with Mickey Thompson valve covers, etc., but it was a mistake. I still love the 327 over everything else, and adding the 350 emblems was a disappointment. They look okay and are accurate, but theyre also undersize, too dark, and dont impress me at all. So once Im done with the current project, the 327 emblems are going back on! Adding the 350 emblems has also been a great object lesson. I have to accept that the truck is done, and I have plenty of other hobbies to keep me occupied. I just wanted to make absolutely sure I finished everything before I left it alone. I loved my peep mirrors and used them for decades, and that fond history inspired me to go back and try them again. It was a mistake (to me) because they just didnt add beauty to the truck like the Impala mirrors. So I swapped back to what I just removed. Same thing with the 350 emblems (and a few other items). Its time to leave it alone as wasting good money just to make changes is stupid. Unless I ever make the custom hood of my dreams, it is likely the last improvement Ill be adding will be chrome window frames to the side glass if I ever come up with a suitable pair. From then on I just plan on enjoying it the way it is. Thanks for asking and hopefully that answered your question.
__________________
My Build Thread: http://67-72chevytrucks.com/vboard/s...d.php?t=444502 |
|
|
|
|
05-26-2014, 09:30 AM
|
#1469 | |
|
Registered User
Join Date: Apr 2012
Location: Searcy, AR
Posts: 4,203
|
Re: Markeb01 Build Thread
Quote:
 I would only add, that as long as the displacement emblem is within the same engine family, I agree
Because to me, if you pop the hood on a vehicle with a 396 Emblem and there's a Small Block residing there, that would just be wrong... I would only add, that as long as the displacement emblem is within the same engine family, I agree
Because to me, if you pop the hood on a vehicle with a 396 Emblem and there's a Small Block residing there, that would just be wrong...Just my $.02 worth Happy Memorial Day Sir!!! 
__________________
DON Proverbs 27:17 US Air Force Retarded errr Retired My '65 Stepper Build:http://67-72chevytrucks.com/vboard/s...d.php?t=533920 My '60 Rusty Patina Build:http://67-72chevytrucks.com/vboard/s...66#post7402266 My '72 http://67-72chevytrucks.com/vboard/s...59#post7204359 SOLD |
|
|
|
|
|
05-26-2014, 11:21 AM
|
#1470 |
|
Senior Enthusiast
Join Date: Feb 2007
Location: Spokane Valley, WA
Posts: 8,356
|
Re: Markeb01 Build Thread
Good point. I always liked the early Corvette Fuel Injected emblems as well, but I'd never hang them on anything that runs a carburetor.
And Happy Memorial Day back to you and all the other veterans on the forum! Semper Fi!
__________________
My Build Thread: http://67-72chevytrucks.com/vboard/s...d.php?t=444502 |
|
|
|
|
05-26-2014, 11:30 AM
|
#1471 |
|
Registered User
Join Date: Apr 2012
Location: Cambridge, Ontario, Canada
Posts: 1,771
|
Re: Markeb01 Build Thread
Thanks Mark, I recently order some 283 emblems (have yet to receive), they are supposedly NOS items with original packaging, but we will see what they look like when they arrive. I was inspired by your original 327 emblems, and although I am using the same crate 350 (minus the cam upgrade), the truck originally was a 283. My thinking is that I may put them where the 66 fender badge normally goes.
__________________
Craigerrr My build thread, CRGRS 66 Winter Build: http://67-72chevytrucks.com/vboard/s...09#post5638709 |
|
|
|
|
05-26-2014, 12:05 PM
|
#1472 |
|
Senior Enthusiast
Join Date: Feb 2007
Location: Spokane Valley, WA
Posts: 8,356
|
Re: Markeb01 Build Thread
Personally I like the 283 emblems nearly as much as the 327 versions. From the mid 50's to the early 60's almost every cool car where I grew up had a 283 (or a 265). I was always amazed how those things could scream and spin so high (around town) with solid lifters and without pulling the rocker studs out of the heads. Many had two four barrels.
I also witnessed many young guys getting tickets doing burn outs or high speed passes in the residential areas or in front of the high school with those little engines. To a teenager on foot it was all very impressive.
__________________
My Build Thread: http://67-72chevytrucks.com/vboard/s...d.php?t=444502 |
|
|
|
|
05-26-2014, 12:08 PM
|
#1473 |
|
Registered User
Join Date: Dec 2012
Location: Rochester, KENT
Posts: 10,483
|
Re: Markeb01 Build Thread
Just to say thank you for continueing to entertain with your narative and journey.
Wish I could spend time with guys like you, Mike and various other guys on here, just watching and learning in the fast lane.
__________________
MY BUILD LINK: http://67-72chevytrucks.com/vboard/s...585901]Redneck Express - 1966 C10 Short Fleetside MY USA ROADTRIPS http://forum.retro-rides.org/thread/...2018-humdinger IF YOU CAN'T FIX IT WITH A HAMMER, YOU'VE GOT AN ELECTRICAL PROBLEM MATE. |
|
|
|
|
05-26-2014, 02:38 PM
|
#1474 |
|
Senior Enthusiast
Join Date: Feb 2007
Location: Spokane Valley, WA
Posts: 8,356
|
Re: Markeb01 Build Thread
Thanks Grizz! Back to the garage today. I'm hoping to finalize the mechanical connections and get started on the finish prep for paint.
__________________
My Build Thread: http://67-72chevytrucks.com/vboard/s...d.php?t=444502 |
|
|
|
|
05-26-2014, 03:51 PM
|
#1475 |
|
Registered User
Join Date: Sep 2011
Location: Tacoma, WA
Posts: 2,425
|
Re: Markeb01 Build Thread
I personally prefer the engine to match the emblems and vice~versa (even though on my Tempest I kinda bend that rule because even though it is a OHC6, it is really a sleeper Sprint motor) but that is an argument for another day....
On emblems: I always liked the more beefy, block numerals from the 1969 Camaros. Here is your 327: and a 350 for me: I have seen these with the lettering colored (black being my fave) and they look real sharp to my eye. In the end though it is all about personal preference By the way, I looked up the Fairchild DRMO their number is (509) 247-2350 You would be amazed at what you can get at DRMO yards. DRMO = Defense Reutilization and Marketing Office (In case you were wondering)
__________________
Michael McMurphy My 66 Stepside My 64 Tow Truck My 66 Tempest Table Of Contents Added to Page1 |
|
|
|
 |
| Bookmarks |
|
|


 Linear Mode

