
|
Register or Log In To remove these advertisements. |
|
|
|
|||||||
 |
|
|
Thread Tools | Display Modes |
 03-01-2013, 12:48 PM
|
#1 |
|
Registered User
Join Date: Jan 2012
Location: Eastern Ontario, Canada
Posts: 1,041
|
My attempt at fender repair
Thought I would show you all some pictures I my attempt at repairing one of my rear fenders on my 52 Chev truck.
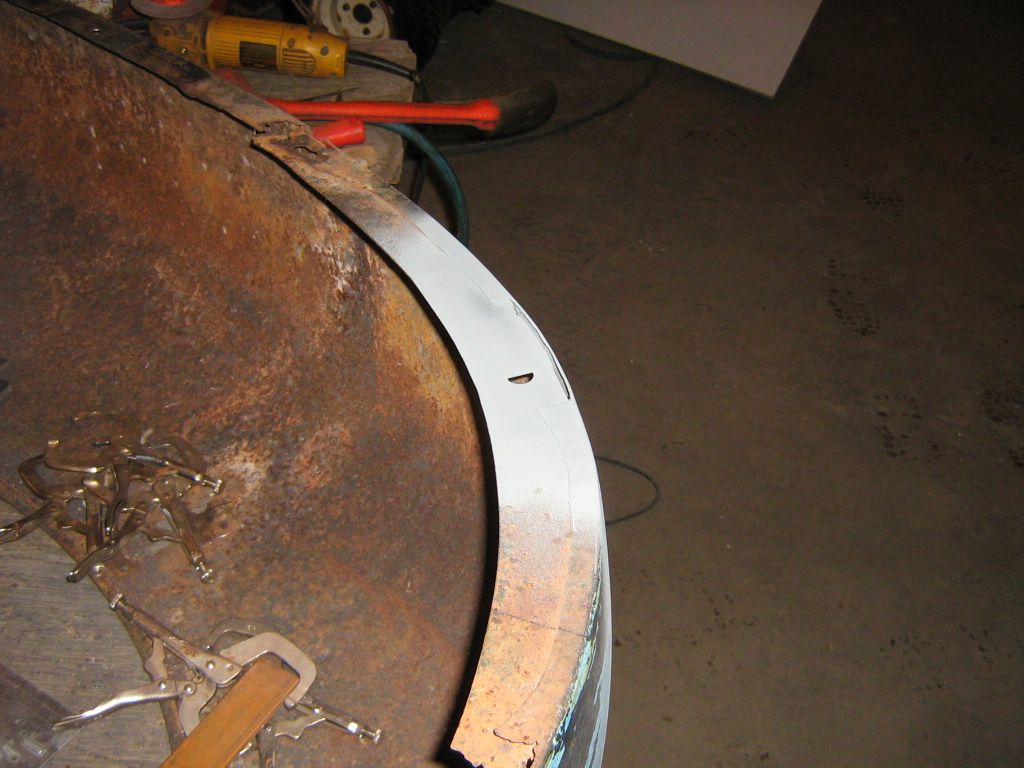
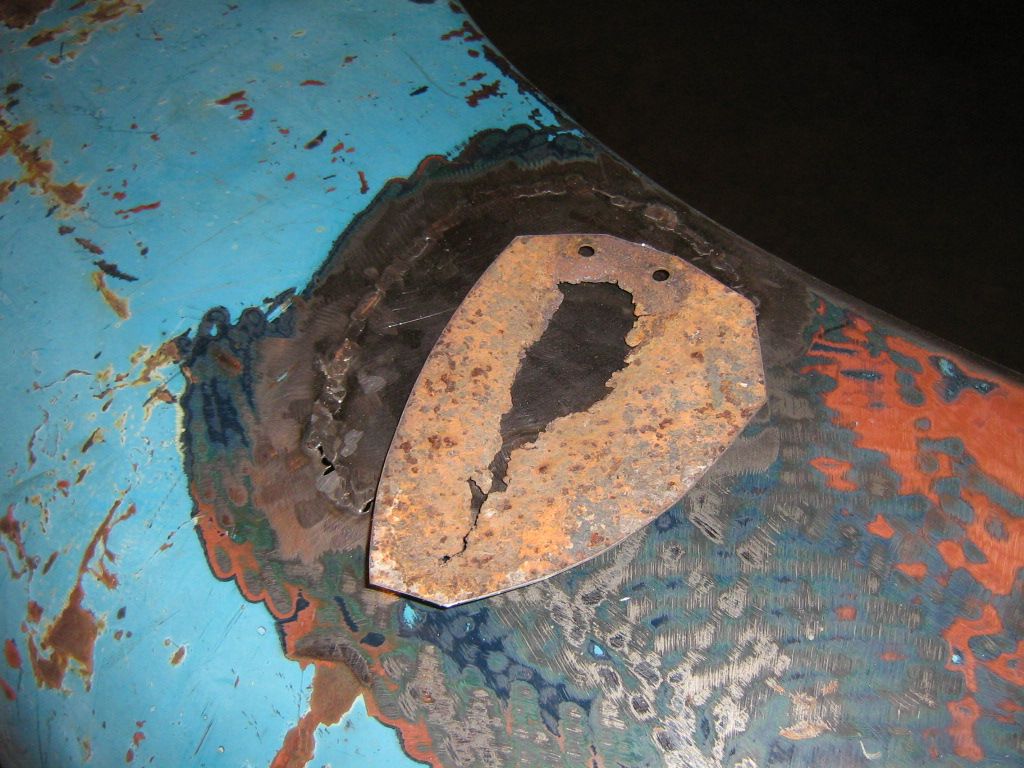
Here is the area to be repaired. 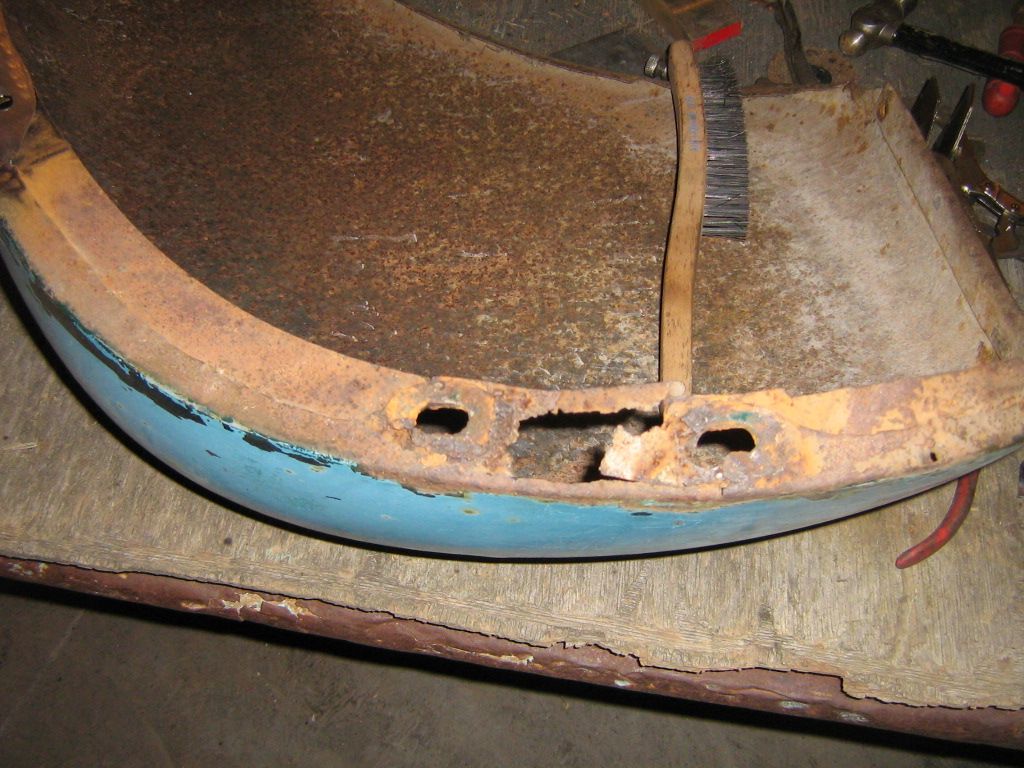 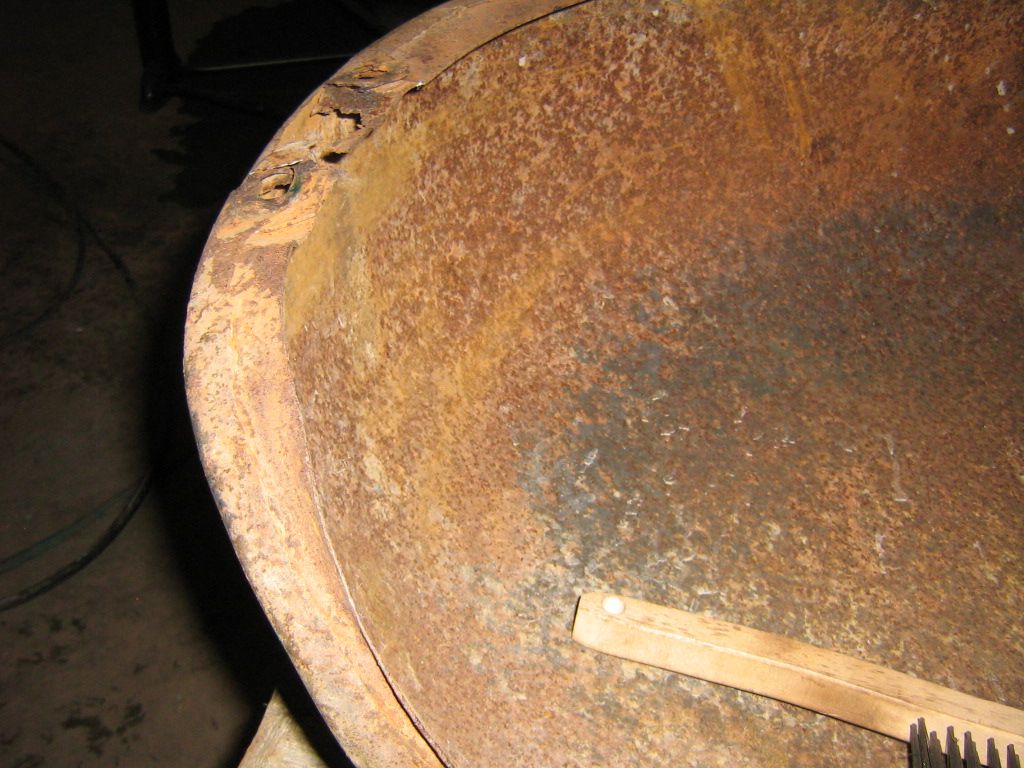 I forgot to take some pictures during but this is another repair just up from the one I posted above. 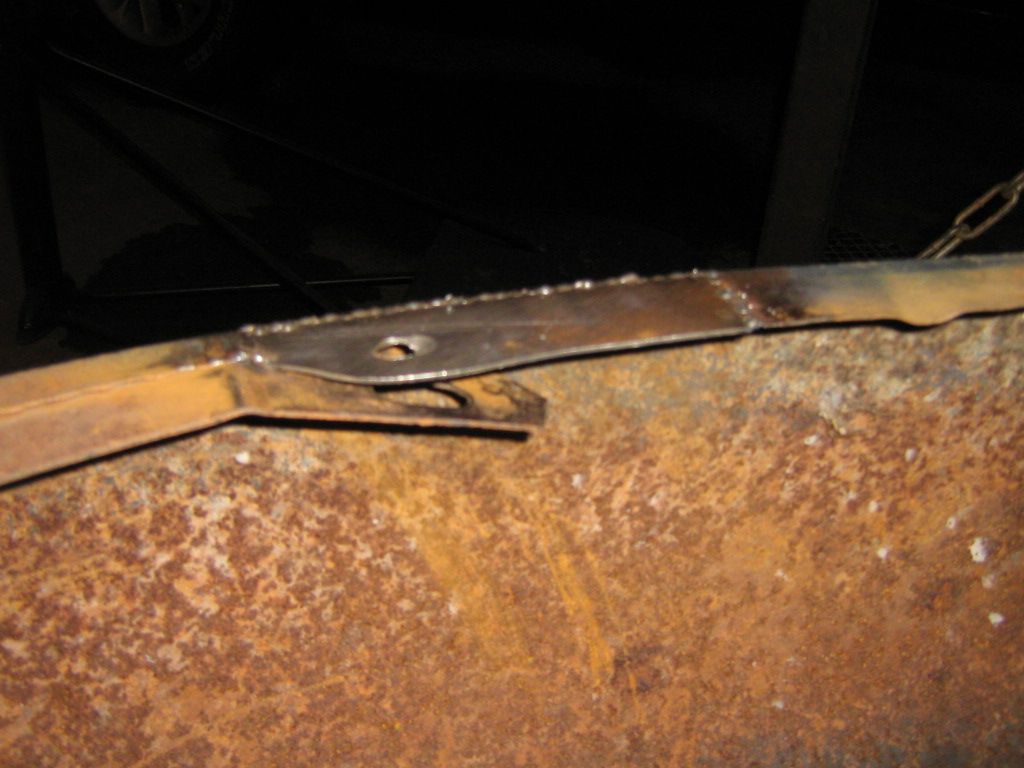 and about half way done. 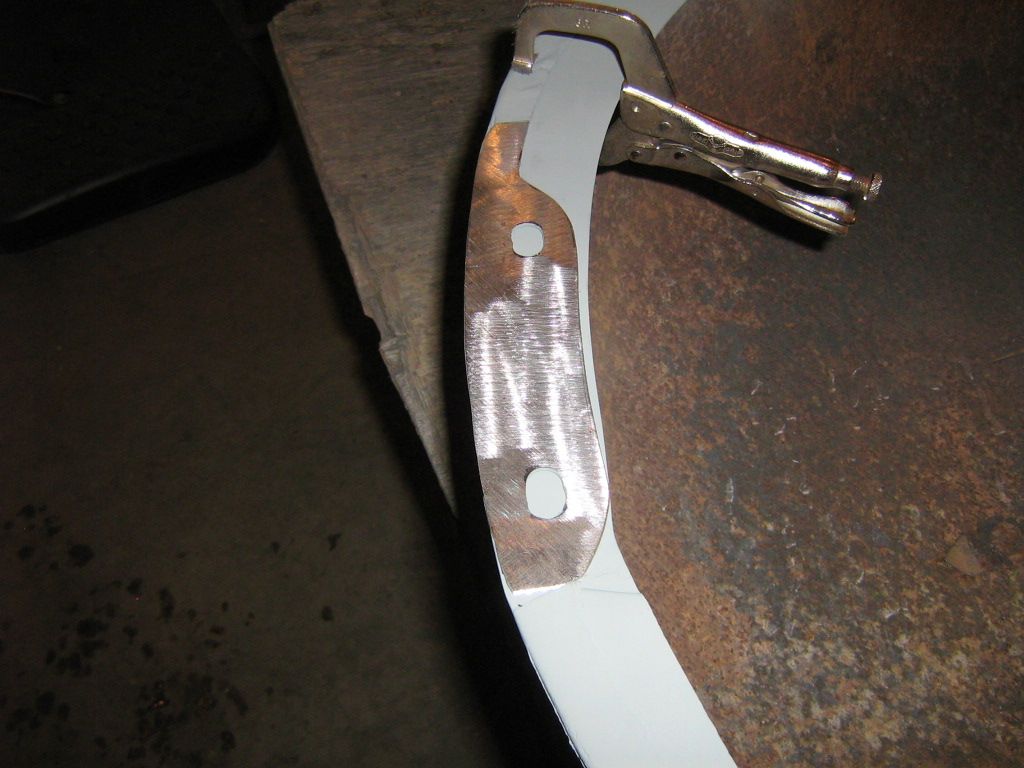  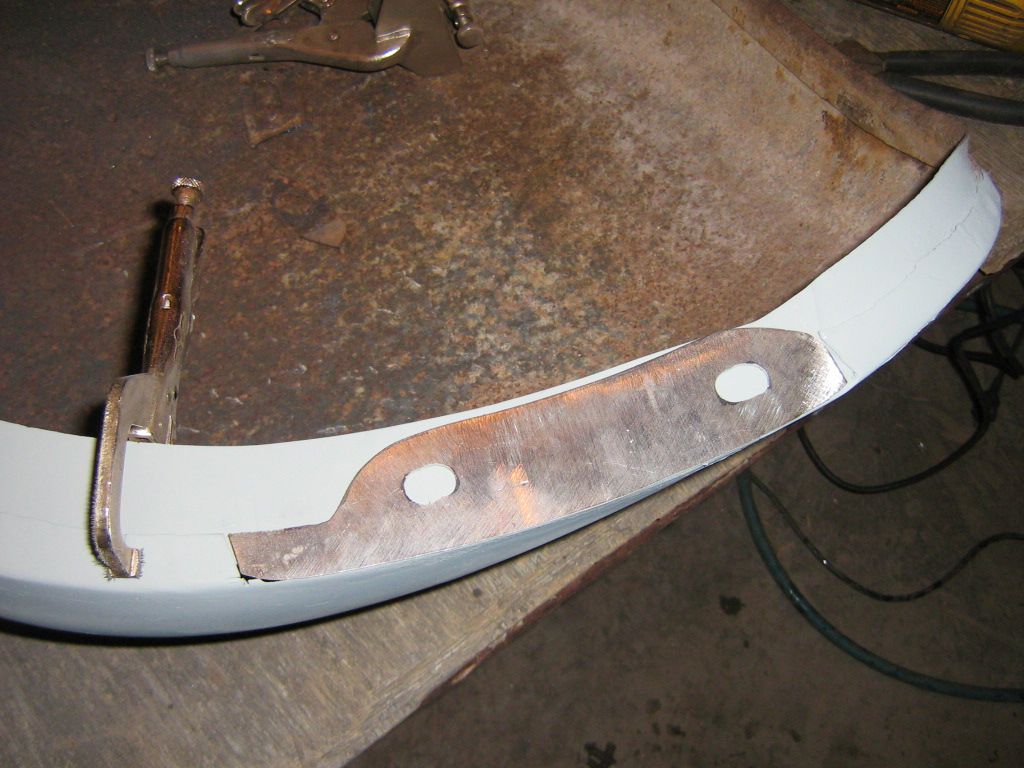 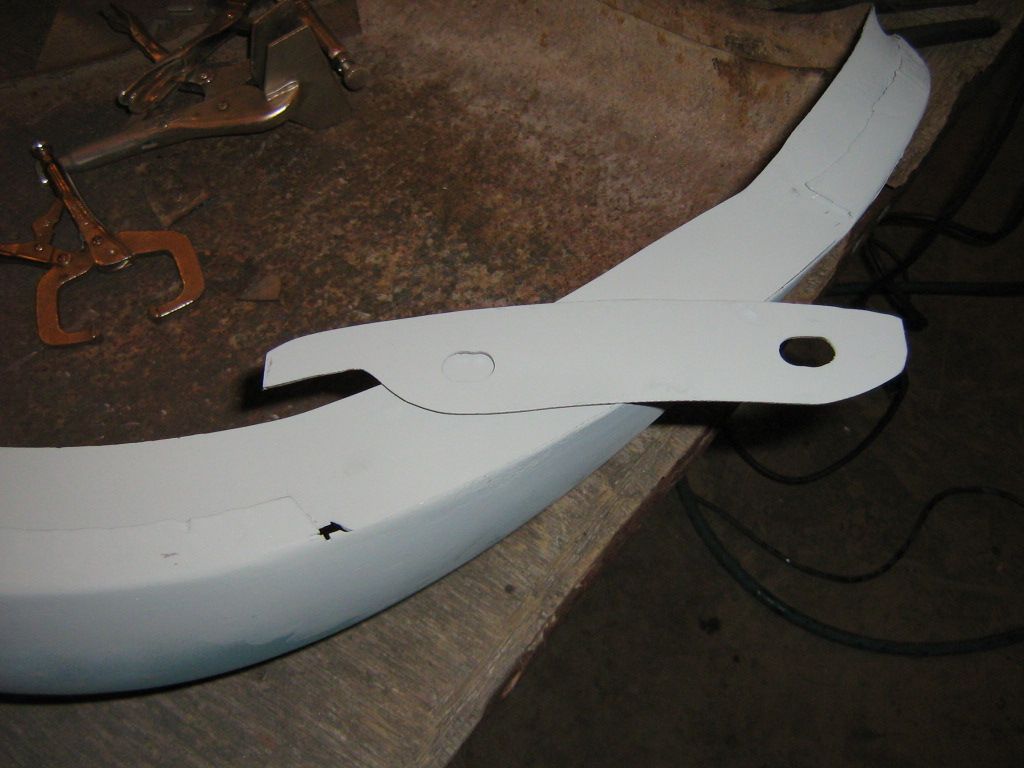 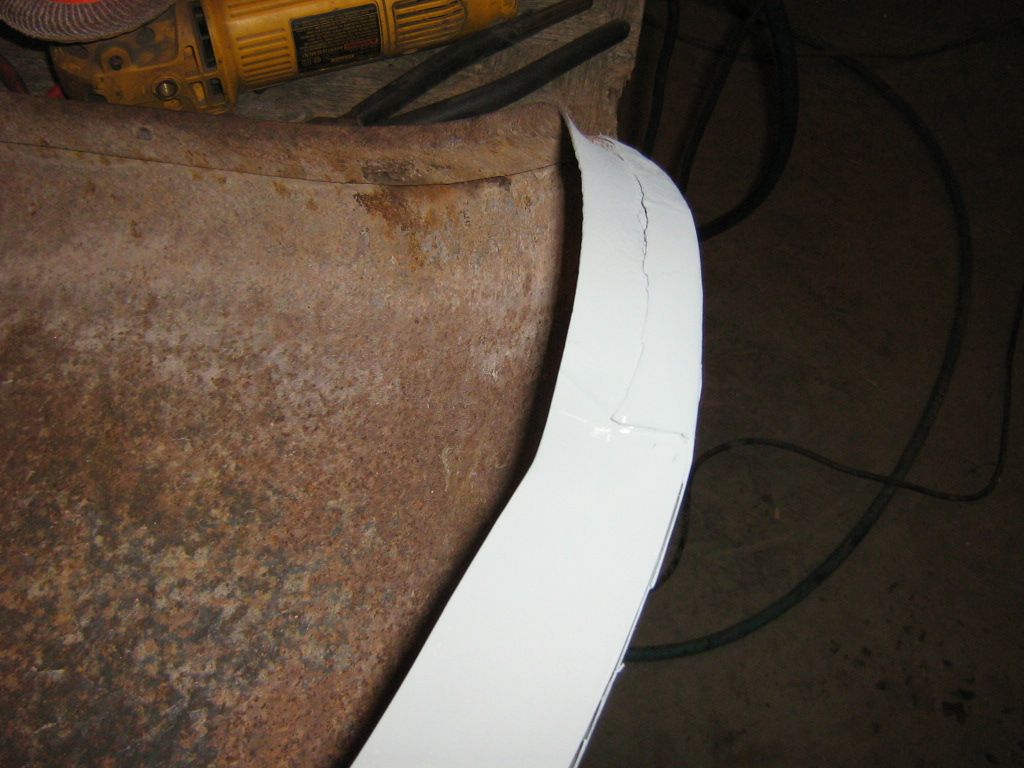  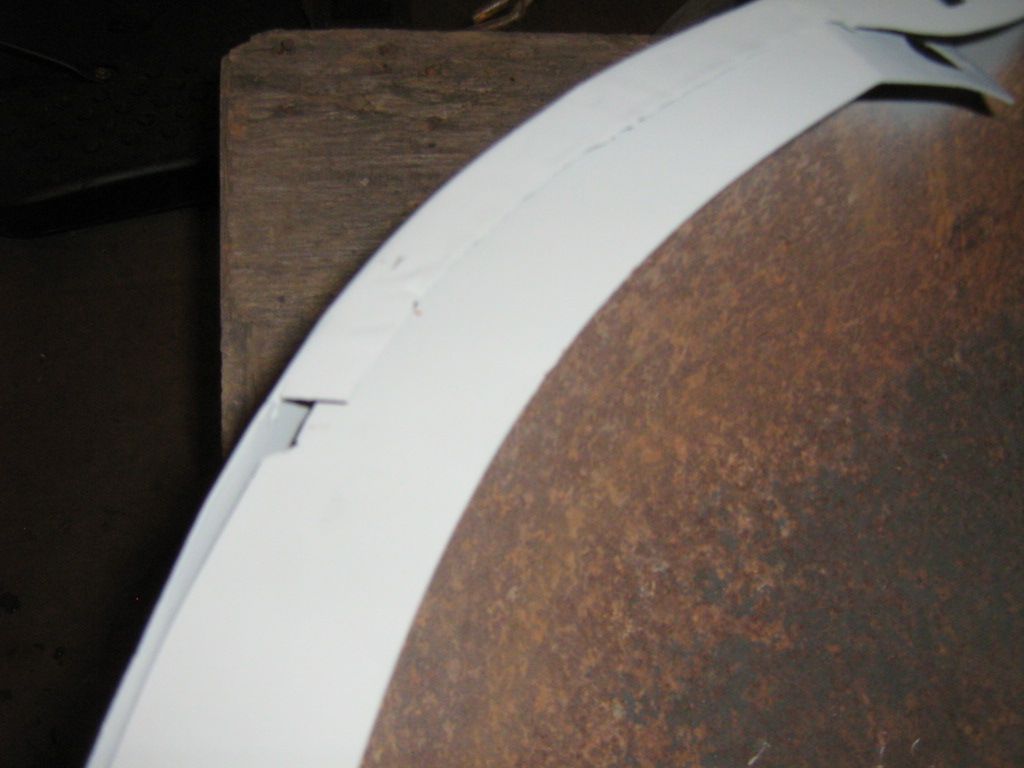   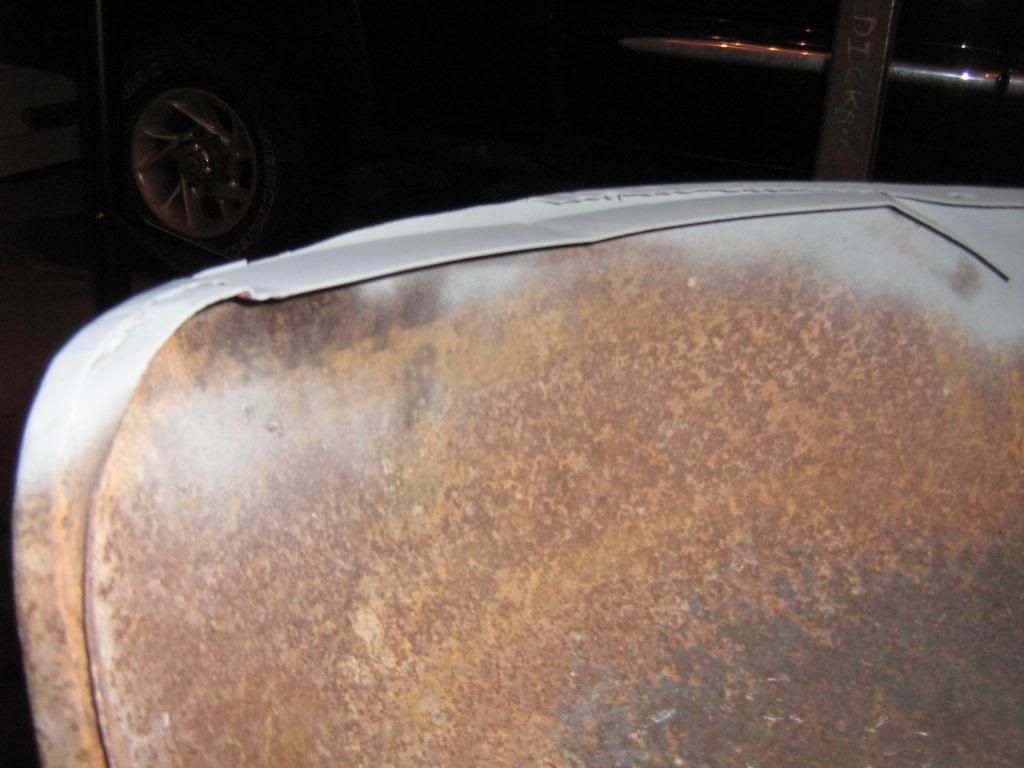 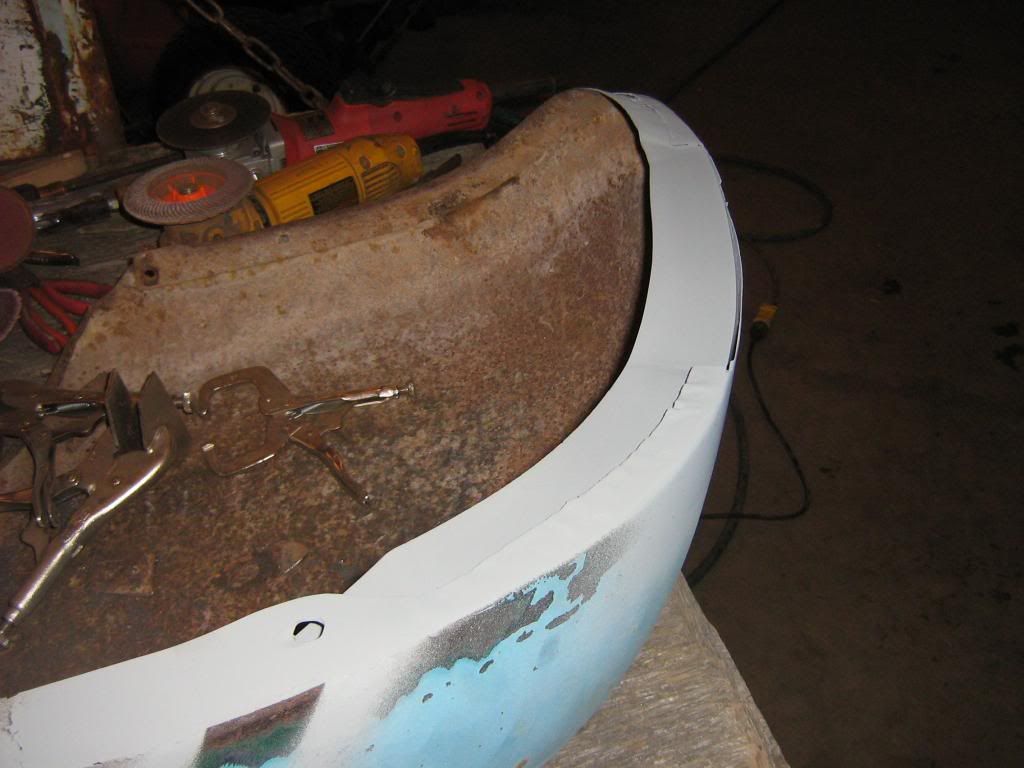   That's it for now. It's suprising how long it took to get that far. Much more to do but I am trying my best to recreate it back to the factory way. Have a good one! |

|

|
|
03-01-2013, 06:51 PM
|
#2 |
|
Registered User
Join Date: Jan 2012
Location: Eastern Ontario, Canada
Posts: 1,041
|
Re: My attempt at fender repair
and that is weld through primer. I'm just about finished welding it in. I happy how it's turning out. Better than I thought. One of my young lads wanted to play in the shop with me so I had to stop welding. Once I get it finished, I will show how it turned out.
|
|
|
|
|
03-01-2013, 07:28 PM
|
#3 |
|
Registered User
Join Date: Aug 2012
Location: Salem Mo
Posts: 647
|
Re: My attempt at fender repair
FarmerSid, you keep at it. I'm a fan of a build thread that tells the story of not only the finished product, but also the steps of how you got to the finished product.
 Jim |
|
|
|
|
03-01-2013, 08:47 PM
|
#4 |
|
Registered User
Join Date: Jan 2012
Location: Eastern Ontario, Canada
Posts: 1,041
|
Re: My attempt at fender repair
I am too Jim. I wish I was better at taking pictures. They don't portray what I am really trying to show. I've searched and searched for pictures and explains on doing what I need to do but didn't find much. To me, the repairs I need to do would not be uncommon for others either but not too much info out there. If what I post gives someone else the confidence to tackle it, I'm happy. This is my first time doing this and if anybody wants any more info on how I did it and what I used to do it, ask
|
|
|
|
|
03-01-2013, 10:31 PM
|
#5 |
|
Certified Car Nut
Join Date: Jan 2005
Location: Inglewood, California
Posts: 3,118
|
Re: My attempt at fender repair
The repair is looking my buddy. Keep up the good work and keep the pics coming.
|
|
|
|
|
03-03-2013, 05:00 PM
|
#6 |
|
Registered User
Join Date: Jan 2012
Location: Eastern Ontario, Canada
Posts: 1,041
|
Re: My attempt at fender repair
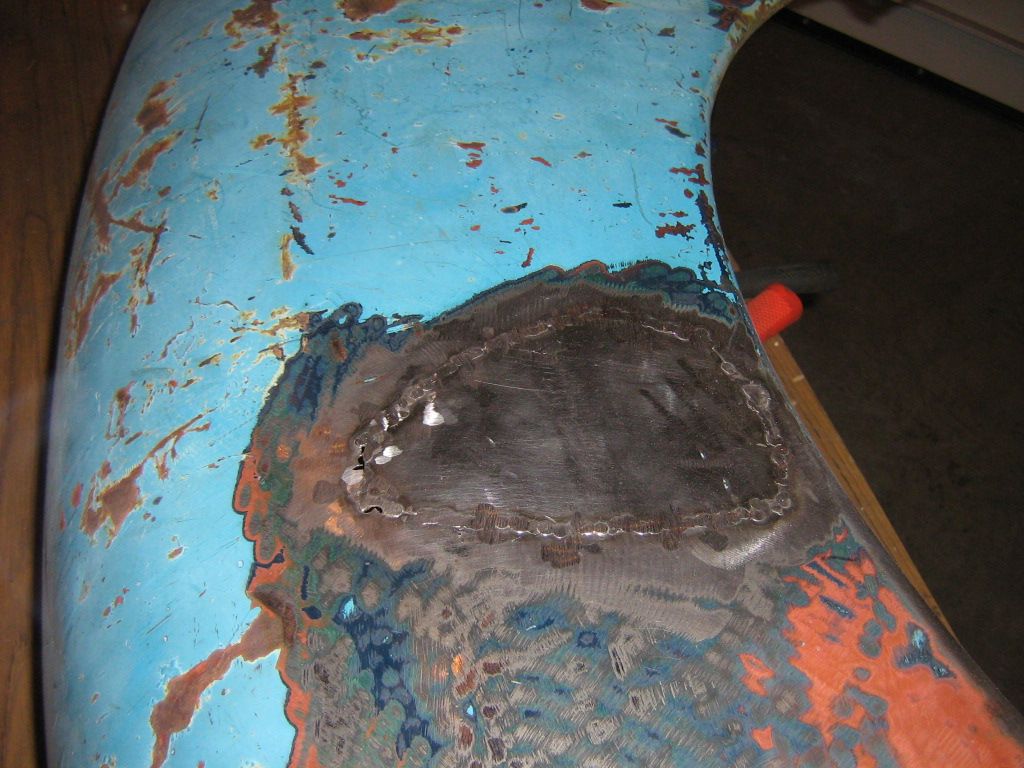
A bit more work done to the fender.
|
|
|
|
|
03-03-2013, 05:07 PM
|
#7 |
|
Registered User
Join Date: Sep 2005
Location: Glendale Arizona
Posts: 1,188
|
Re: My attempt at fender repair
The repair looks good, nice work!
__________________
http://67-72chevytrucks.com/vboard/s...d.php?t=436442 |
|
|
|
|
03-12-2013, 08:51 PM
|
#8 |
|
Registered User
Join Date: Jan 2012
Location: Eastern Ontario, Canada
Posts: 1,041
|
Re: My attempt at fender repair
Got a little done tonight...
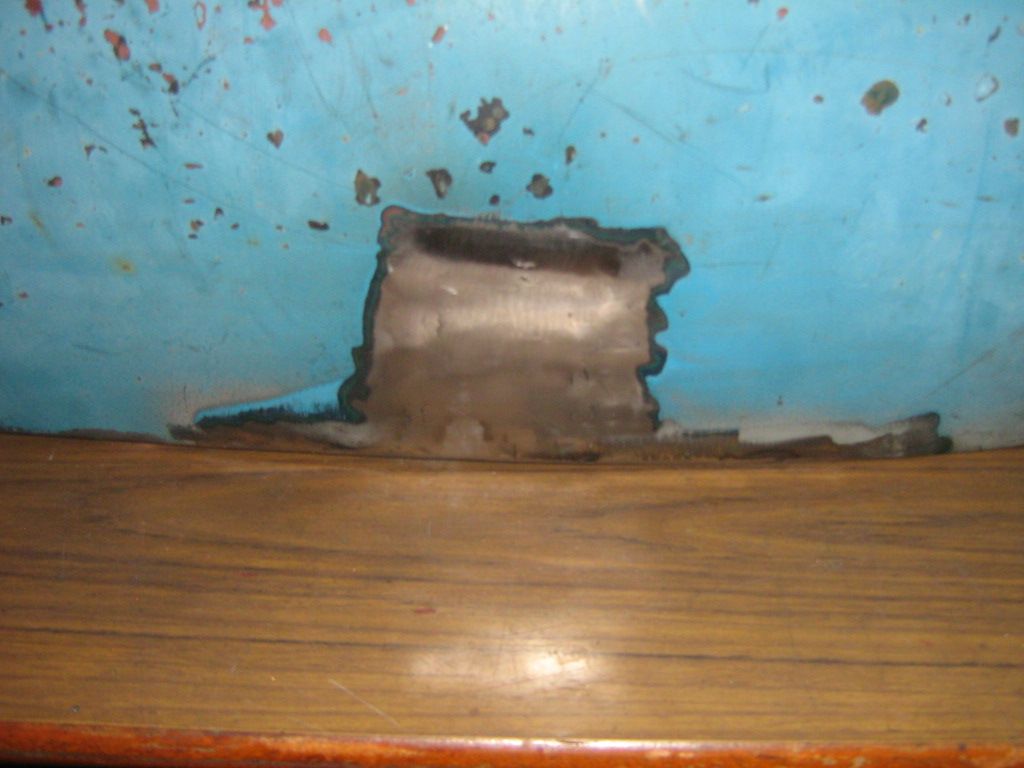
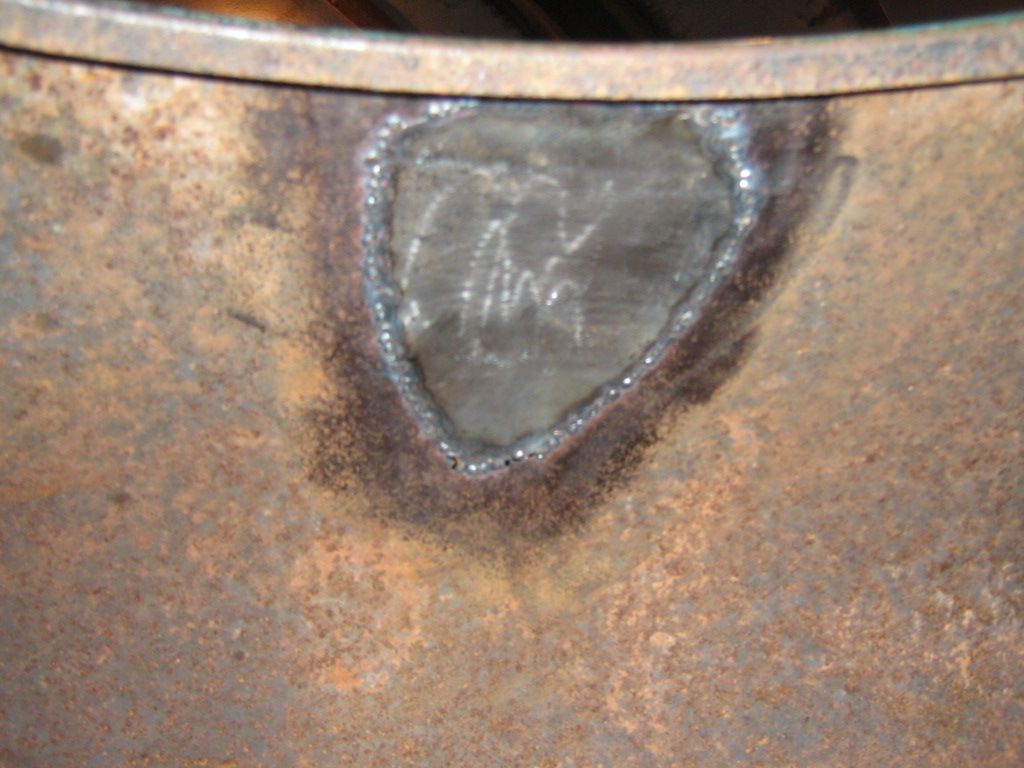
   Patch parts to be added. The part sprayed in grey is the part to be added next. It's sprayed in weld through primer and drying. 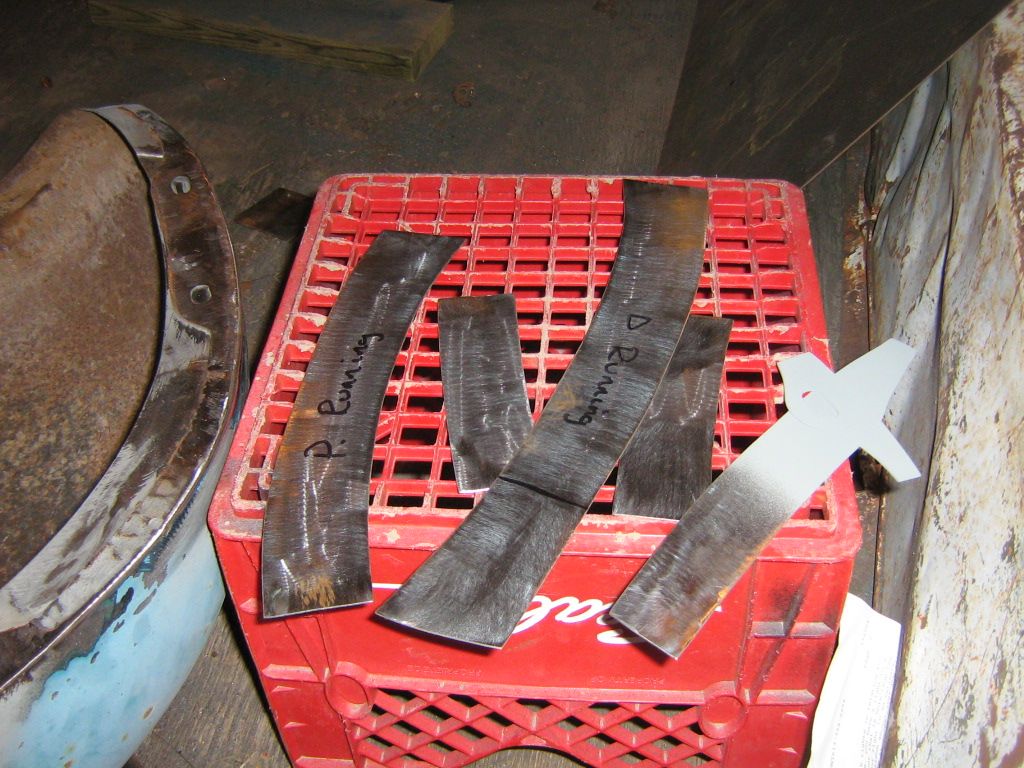 This is the sprayed part above located where it will be welded in.  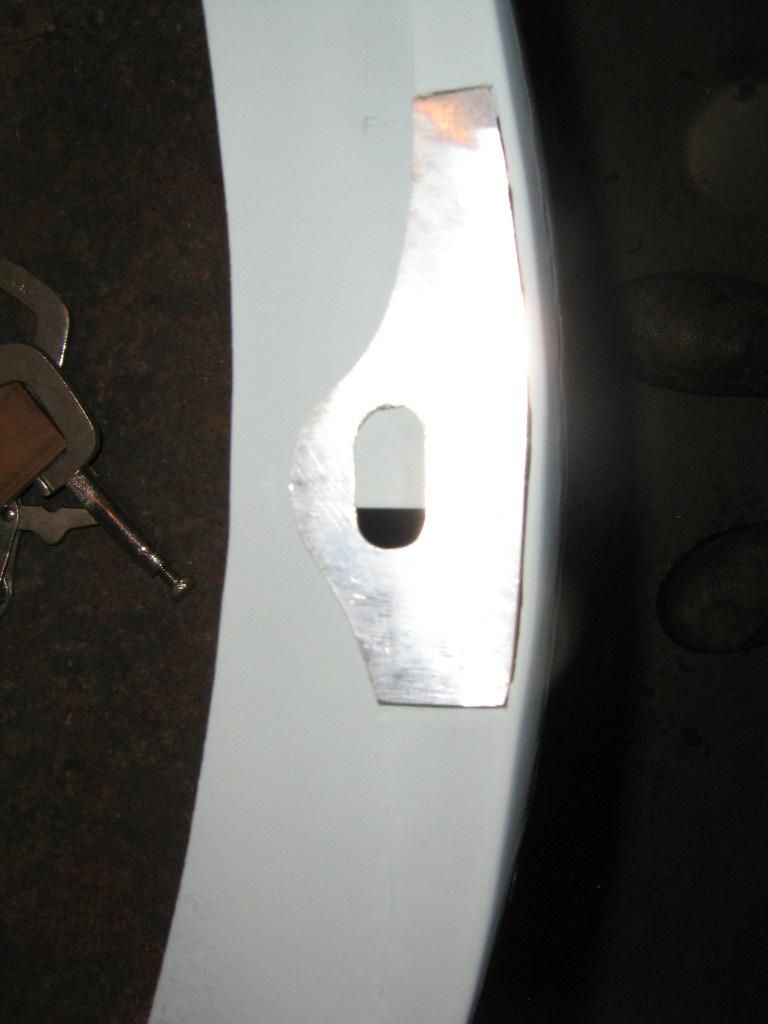 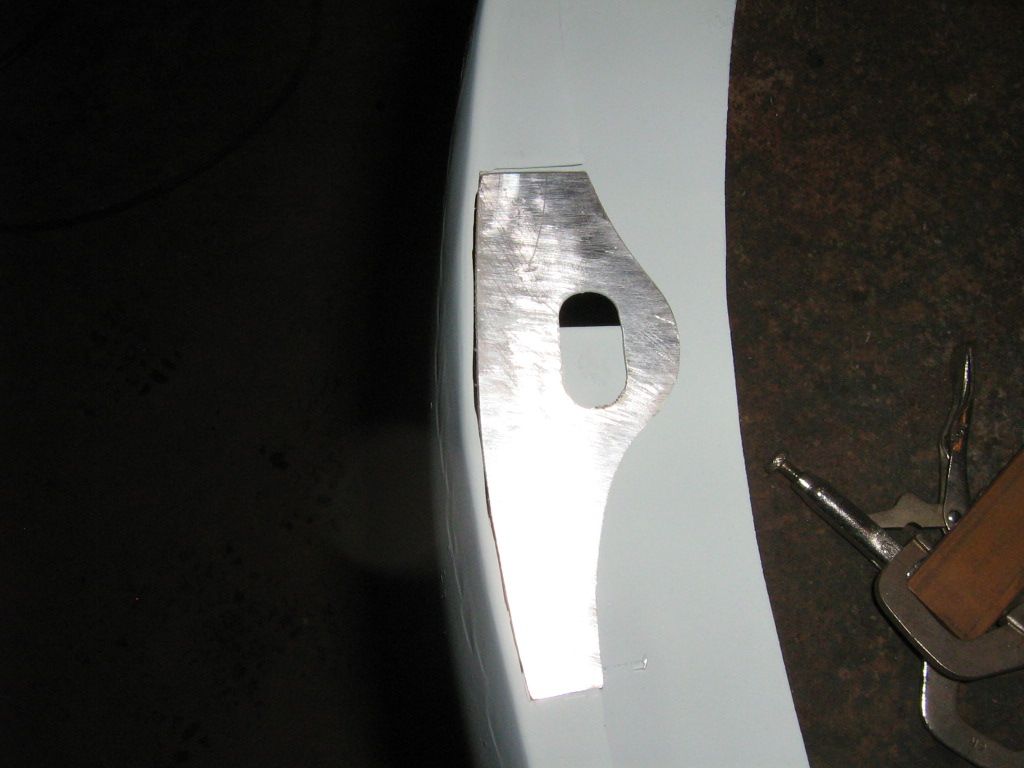 You can see where I left a part of the factory mounting hole and will be ground out later when I'm fitting the fender. I didn't take a picture of the bad part and new part before I sprayed with weld through primer. This is the next spot to be repaired 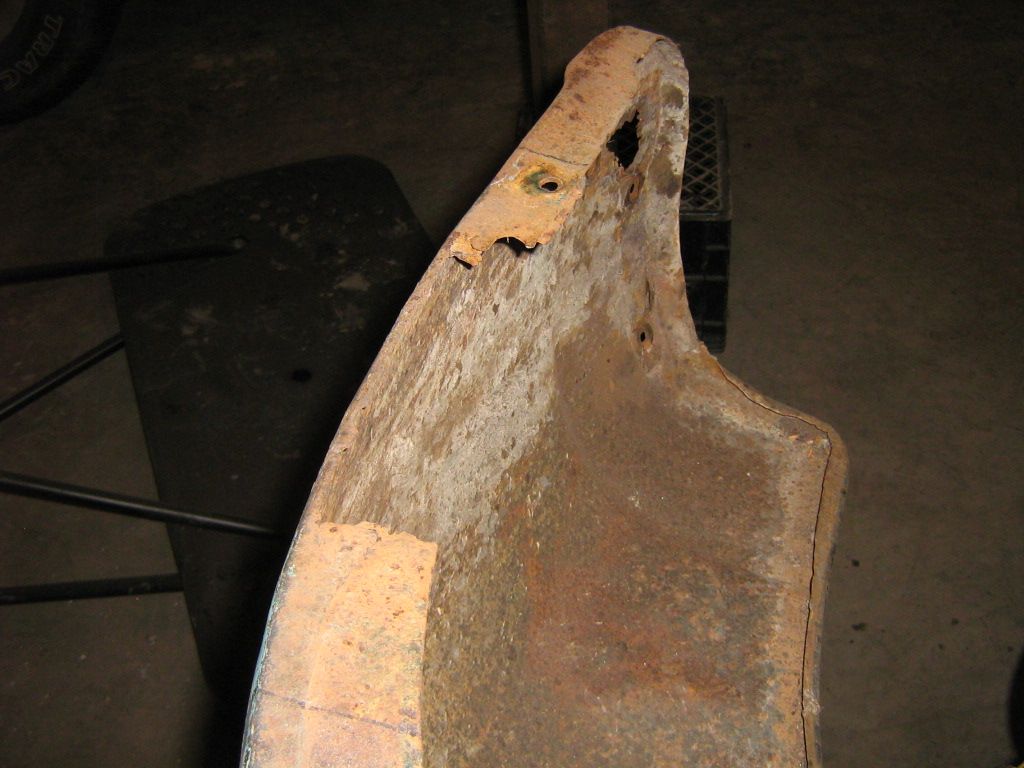 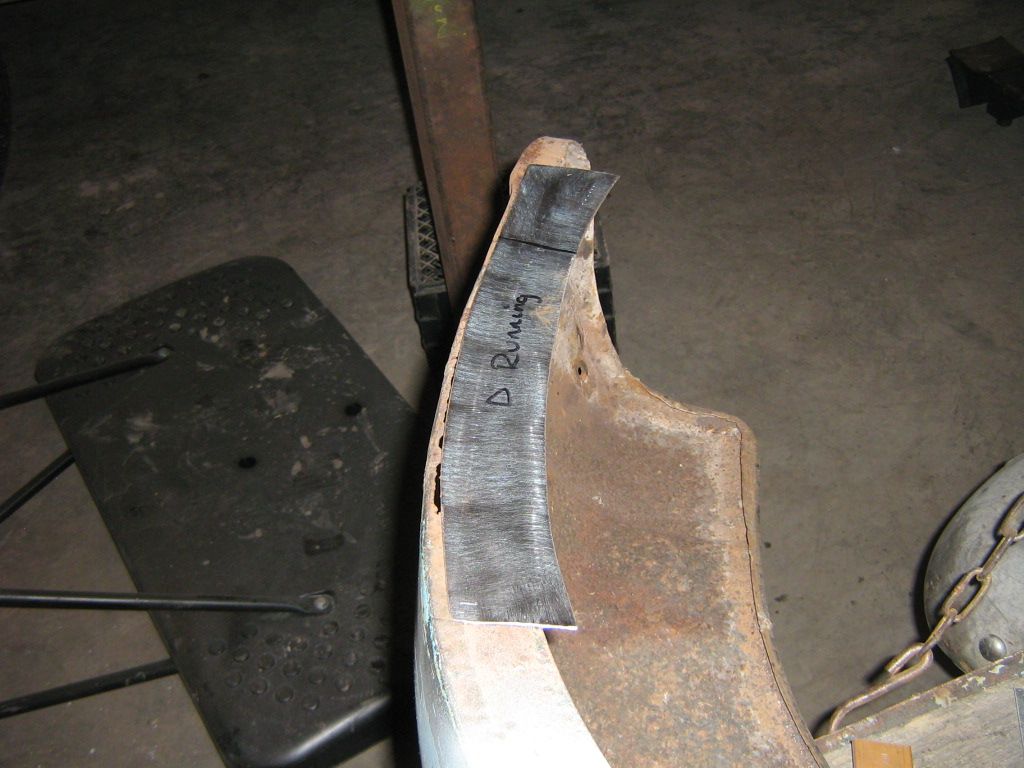 I took the Chevy emblem off the hood and found this. Too cool!  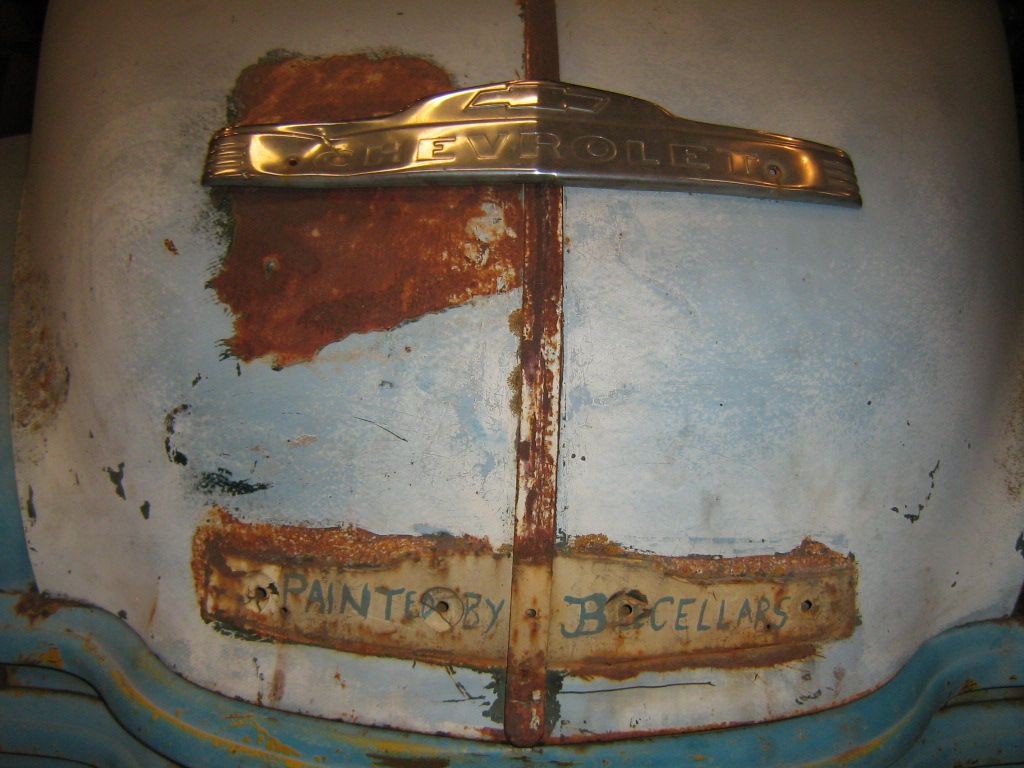 Now that things are warming up, I'm anxious to put these back on my daily.  I plan on farting around in the shop tomorrow night and getting that other piece welded in on the fender. If my little man wants to be with me, I may not. Then we will play truck driver. |
|
|
|
|
03-21-2013, 07:06 PM
|
#9 |
|
Registered User
Join Date: Jan 2012
Location: Eastern Ontario, Canada
Posts: 1,041
|
Re: My attempt at fender repair
You guy's are are hard bunch to please! Seems hard to get connected or accepted into this truck "social pipeline" LOL! Got a bit more done on the fender.
       Had to stop welding as the young lads wanted to have a beer with me in the shop. Below is the area I need to make a patch for. The last one! I will make that tomorrow and maybe get it welded in this weekend. This is the last of OT and get back to more work on the truck. 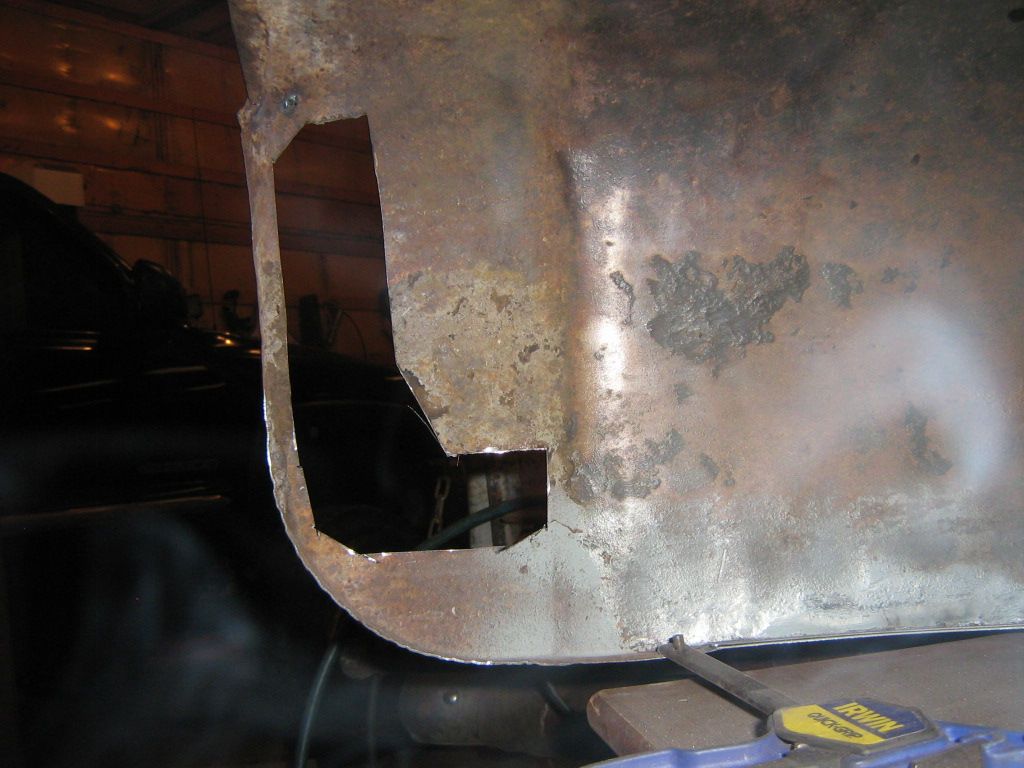 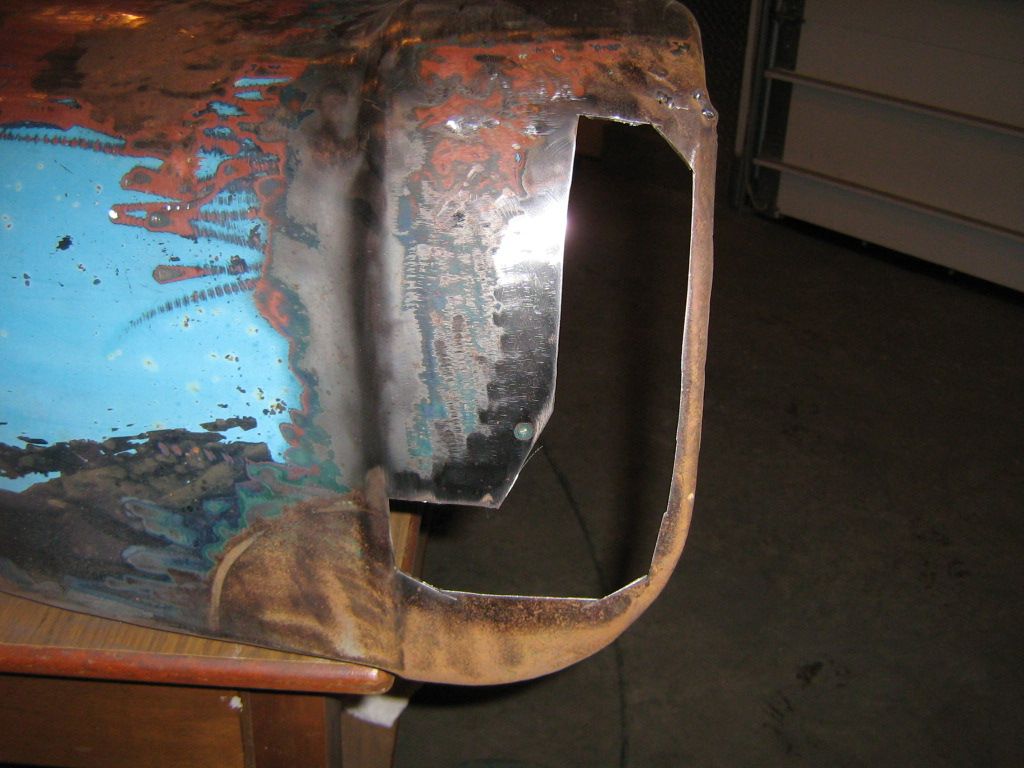
|
|
|
|
|
03-22-2013, 10:34 AM
|
#10 |
|
Registered User
Join Date: Oct 2012
Location: Port Dover, Ontario
Posts: 60
|
Re: My attempt at fender repair
Well sid i gotta say i admire your determination and handywork i'm not quite sure if i have the patience for that kinda work yet lol, but i will soon find out when i start getting to my body panels. Keep up the good work ....bill
|
|
|
|
|
03-22-2013, 11:29 AM
|
#11 | |
|
Senior Member
  Join Date: Nov 2008
Location: Glendora, CA
Posts: 6,336
|
Re: My attempt at fender repair
Quote:
But seriously, I hadn't seen this thread cause its in the Projects section and I don't click in here as often as I drop into the main 47-59 board. Welcome Sid! You're doing what looks to be good work. What are you forming your patch panels from? Is your weld through primer from a rattle can? Brand? A lot of guys (well, ...me) want to know details so when they do the same themselves they won't waste time on techniques & materials that don't work as well. I for one will keep watching. Keep up the good work and please keep posting photos. Best, Dan Posted via Mobile Device |
|
|
|
|
|
03-22-2013, 11:30 AM
|
#12 |
|
Senior Member
Join Date: Nov 2008
Location: Glendora, CA
Posts: 6,336
|
Re: My attempt at fender repair
Oops, double post
|
|
|
|
|
03-23-2013, 04:32 PM
|
#13 |
|
Registered User
Join Date: Jan 2012
Location: Eastern Ontario, Canada
Posts: 1,041
|
Re: My attempt at fender repair
Thanks Dan! I'm making my patch panels from anything I can find that is the same thickness as the fender. 18g I believe. I found some old shelving unit shelves that are the same 18 g metal. They must be from the 60's. The newer shelving units we have are no where's as thick as these old ones. I can get enough to do my whole truck and then some. The guy that pointed them out to me said they have been around his work since he started back in the 60's.
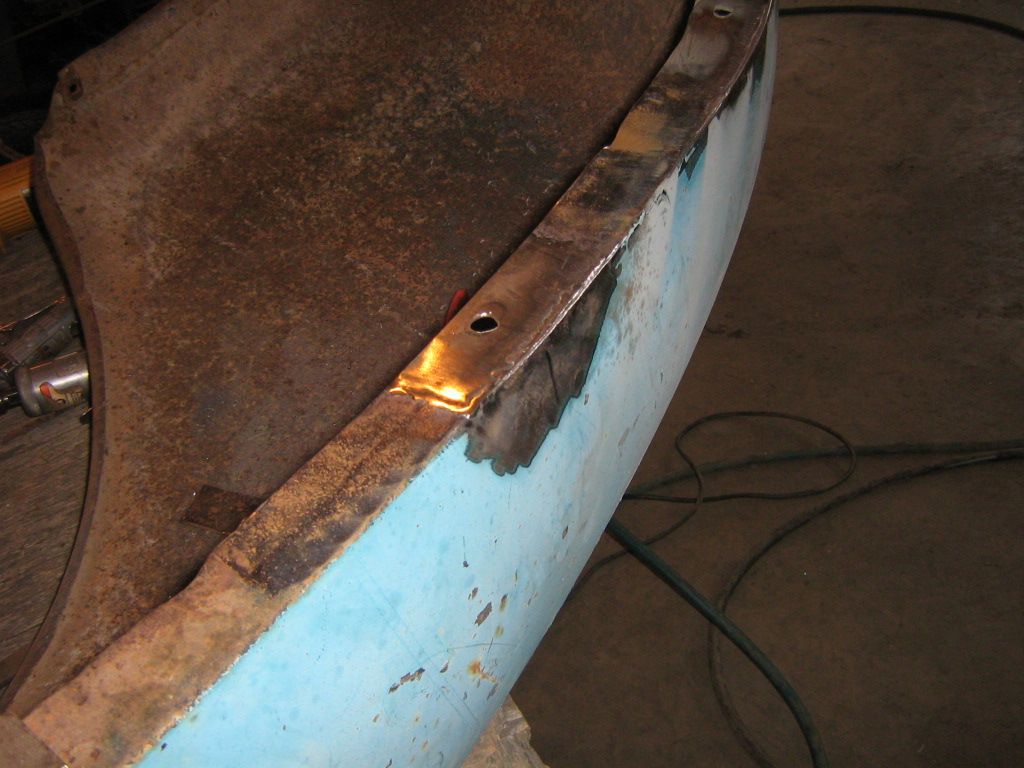
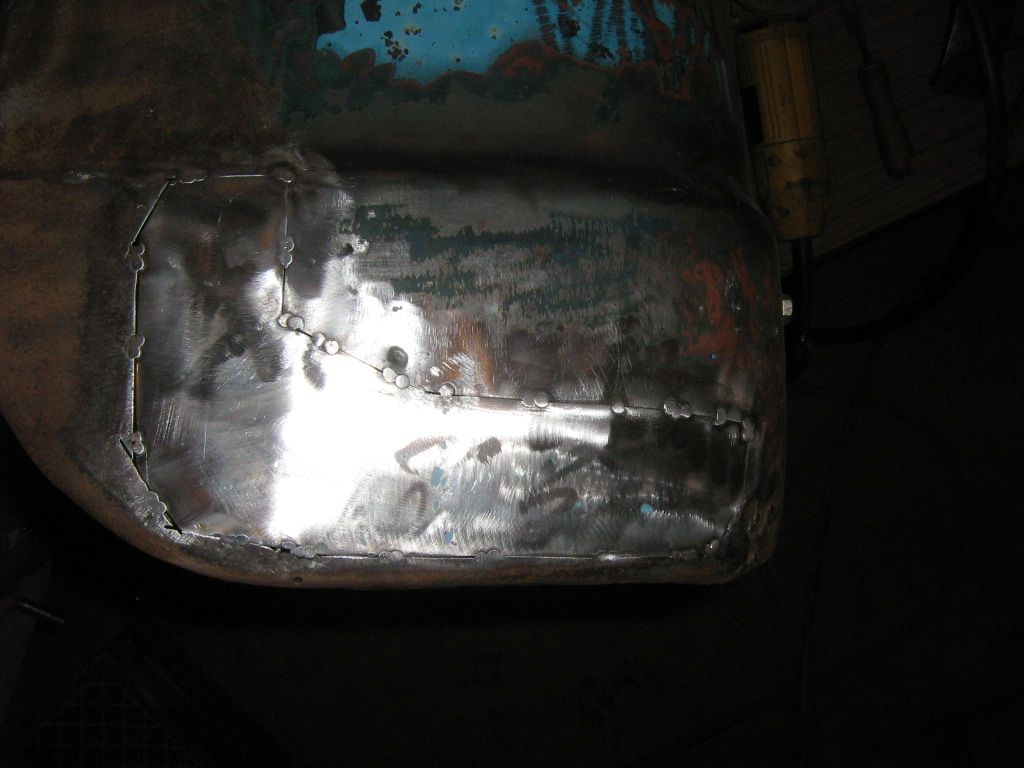
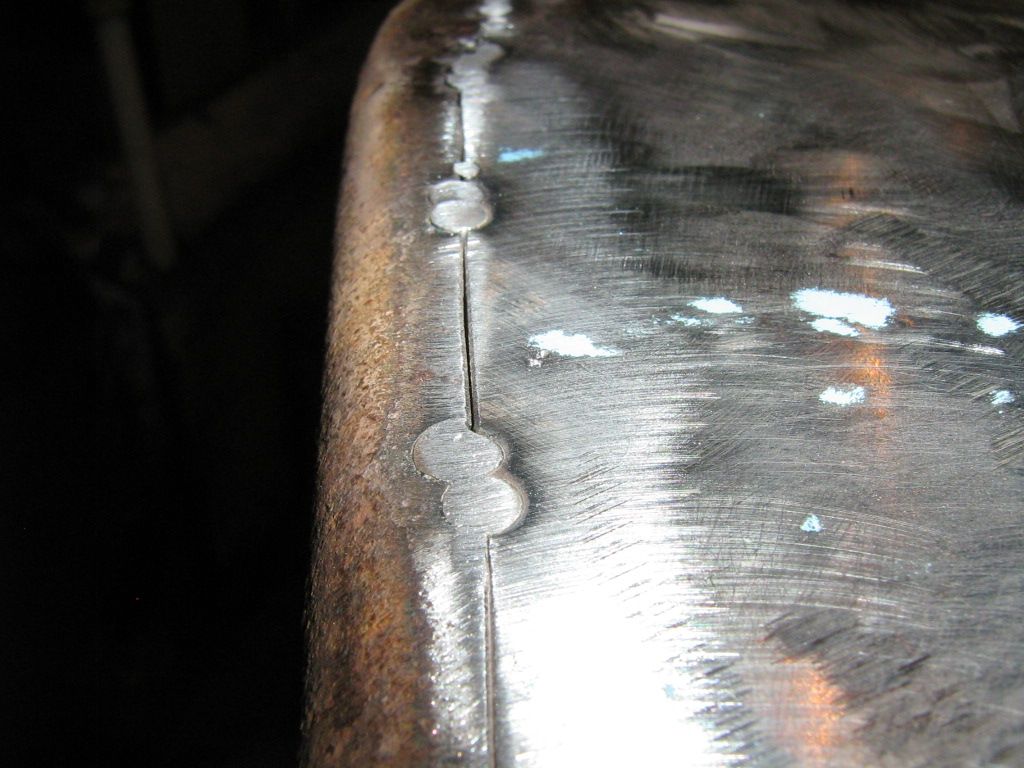
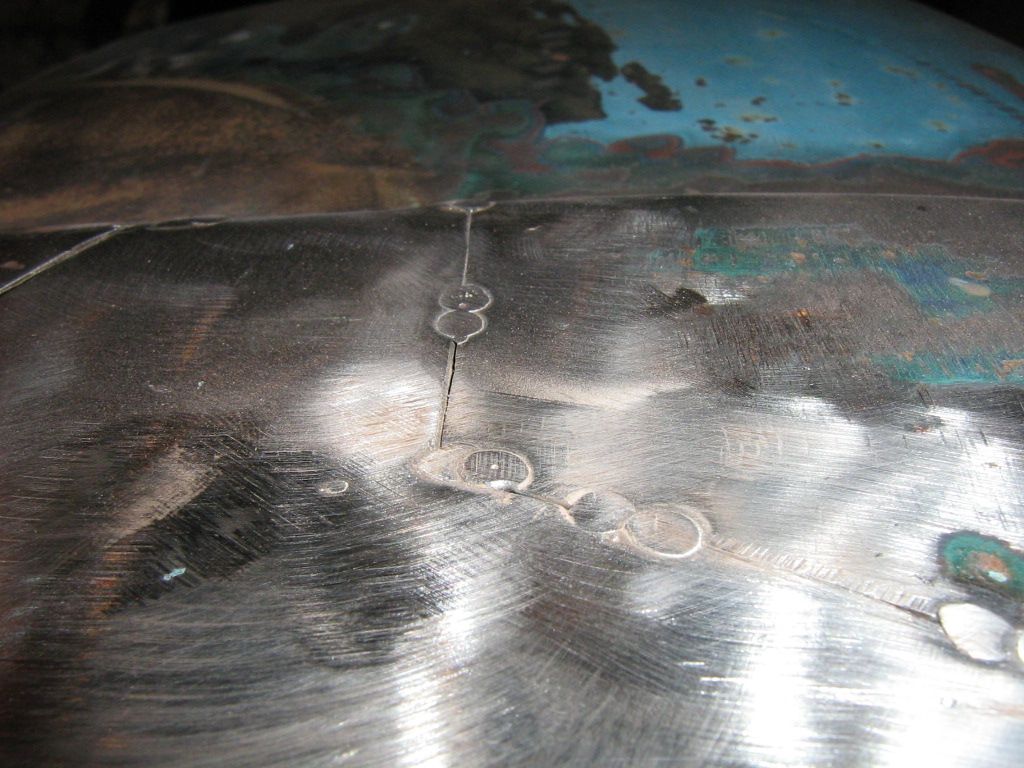
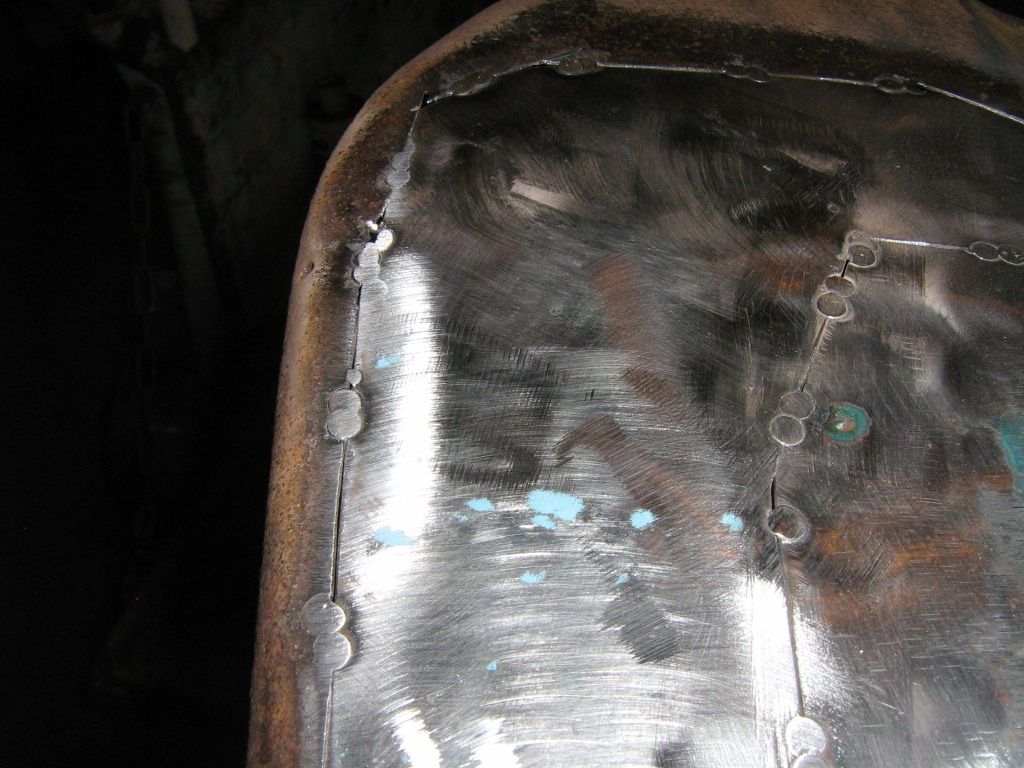
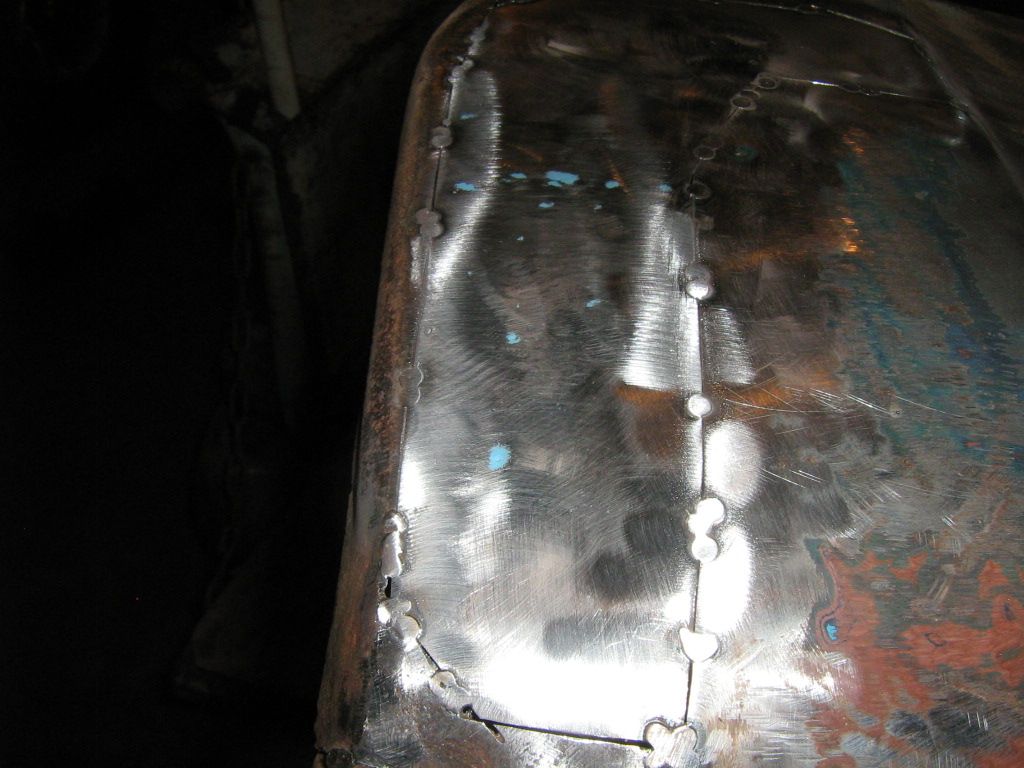
The weld through primer I am using is from a rattle can. It's made by Wurth. I just cut out the bad spot with a 3" cutoff wheel on a die grinder and trace out the old piece on new sheet metal. I make it slightly larger (1/32" or less) and fine tune it's fit till it fits with very little to no gap. I then tack weld it in with 2" or so between tacks around the perimeter of the patch. I then grind down the tacks till they are slightly above the surface of the panel with a 3" cutoff wheel in a die grinder. Using the 3" cutoff wheel is much better that using a 4 1/2" grinder. You can control it much better and make sure you only remove the material from the tack and not the panel. I then hammer and dolly the tacks after the patch has cooled down. I find that hammer and dolly work is a must! You have to do this after every series of tack welds. You have to bring back the shape of the patch and panel before more welding is done. If you don't, the joint will sink down or shrink and require a lot of hammer and dolly work or may not be able to at all. I start the next series of tacks about 1/2 to 1/3 on the previous ground down tacks. I'm using 0.023 wire in a 220V mig welder with a 25%75% gas mix. I'm working OT today but I did manage to make a new patch for the lower front of the rear fender. I may get it tacked in in the morning before work. Last edited by FarmerSid; 03-23-2013 at 04:38 PM. |
|
|
|
|
03-25-2013, 09:06 PM
|
#14 |
|
Registered User
Join Date: Jan 2012
Location: Eastern Ontario, Canada
Posts: 1,041
|
Re: My attempt at fender repair
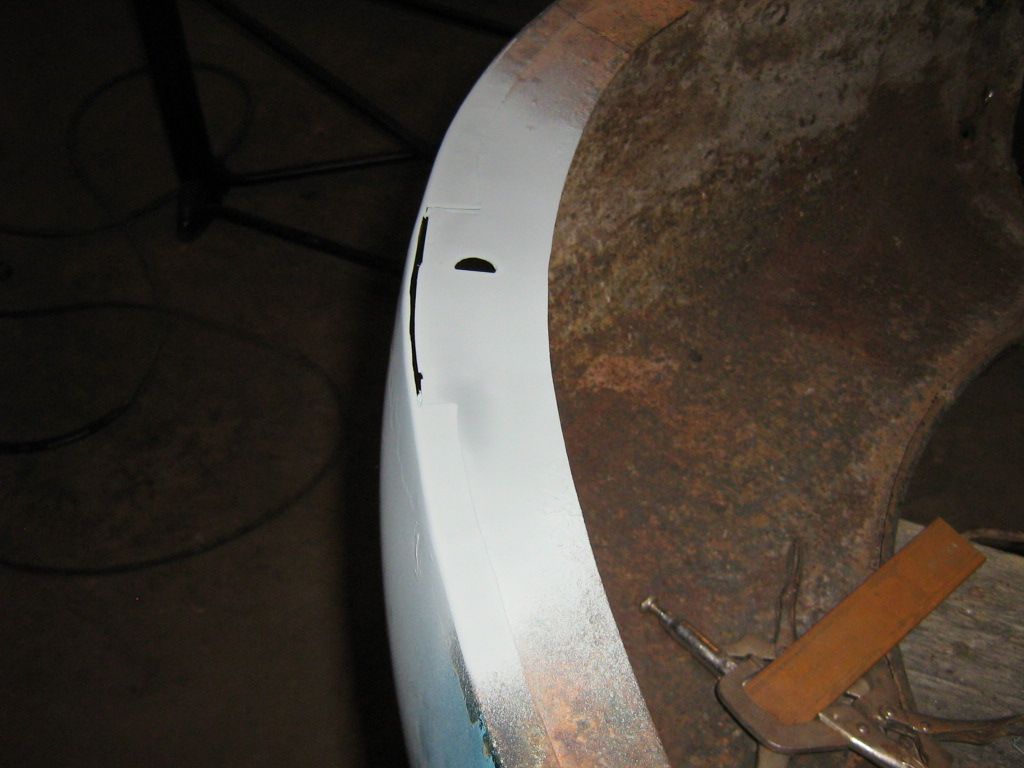
Got that patch tacked in tonight. Had our novice hockey year end party tonight after we won the "A" championship on Saturday. Here is a few pictures of how I have been doing it.
      That's all for now. I hope I'm doing these repairs correctly. |
|
|
|
|
03-25-2013, 09:16 PM
|
#15 |
|
big guy
 Join Date: Jun 2008
Location: mass
Posts: 820
|
Re: My attempt at fender repair
I don't know that much about body work myself but i can tell you one thing it didn't cost you a ton of cash and you mite even had fun doing it... That is how i look at it... either way it looks good to me.
Ray |
|
|
|
|
03-26-2013, 03:19 PM
|
#16 |
|
Registered User
Join Date: Oct 2012
Location: Port Dover, Ontario
Posts: 60
|
Re: My attempt at fender repair
Hey farmer sid i was reading your other post about what chassis you were thinking on using , i used the original frame and grafted a 88 monte carlo clip to it, it was fairly easy to do parts are cheap and plentiful and most interchange with s10 parts. If you check out my build thread i made up a jig so that all my mounts and rad support locations can be duplicated on the new clip to make it easier to hang the sheet metal, i still have the jig and your welcome to it if you decide to go that route i do come through napenee quite a few times as i have relatives up in renfrew ont just off the 41 hwy ...bill
|
|
|
|
|
03-26-2013, 10:28 PM
|
#17 |
|
Registered User
Join Date: Nov 2011
Location: Langley, BC
Posts: 702
|
Re: My attempt at fender repair
Lookin' Good, FarmerSid. Good Luck with your build.
__________________
56 Chevy PU http://67-72chevytrucks.com/vboard/s...d.php?t=531955 Question: Know how to sell your truck for $50,000? Answer: Spend $100,000 building it. |
|
|
|
|
04-05-2013, 07:11 PM
|
#18 |
|
Registered User
Join Date: Jan 2012
Location: Eastern Ontario, Canada
Posts: 1,041
|
Re: My attempt at fender repair
Thanks all! Got my fender pretty much complete. I need to sand blast the inside to make it 100% clean. I went to take some pictures but the dang batteries are dead and I don't have any more right now. Pretty proud of how the fender turned out.
How picky are you guys about the dent removal on body panels? I can take a 3" scotch bright pad type thing on my die grinder and it comes out smooth. The fender started out like it was hit with buck shot once the bondo was removed. Now that the dents are removed, you can still feel a very very slight uneveness about it when you run your bare hand over it. Maybe a shrinking disk will fix that. I don't know if I should continue to work at it or now move to a high build primer or something like that to smooth everything out. I will post some pictures to show you all where I'm at. To me, the amount of filler I would need in some places would be about the thickness of a sheet of paper maybe. Don't know if I'm being too anal or just leave it as is and move on. What do ya think? |
|
|
|
|
04-05-2013, 07:58 PM
|
#19 |
|
Registered User
Join Date: Jan 2012
Location: Eastern Ontario, Canada
Posts: 1,041
|
Re: My attempt at fender repair
Here are some pictures from tonight. I think it turned out pretty good for a first time body job.
So here are a few pics of what I started with........... 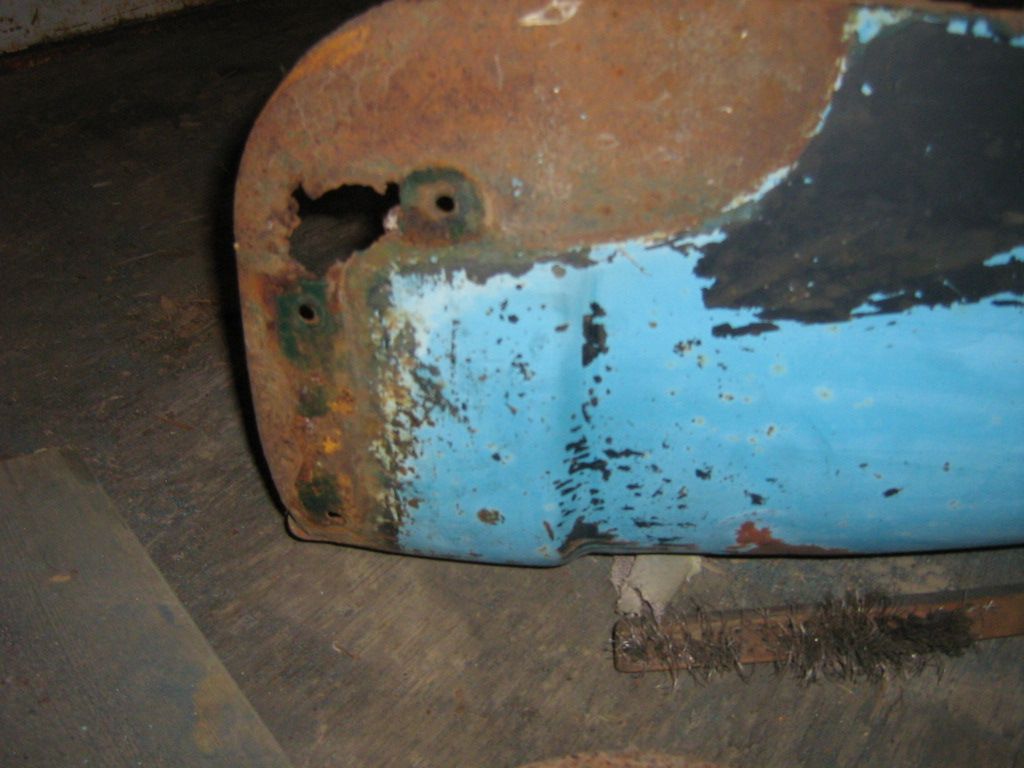  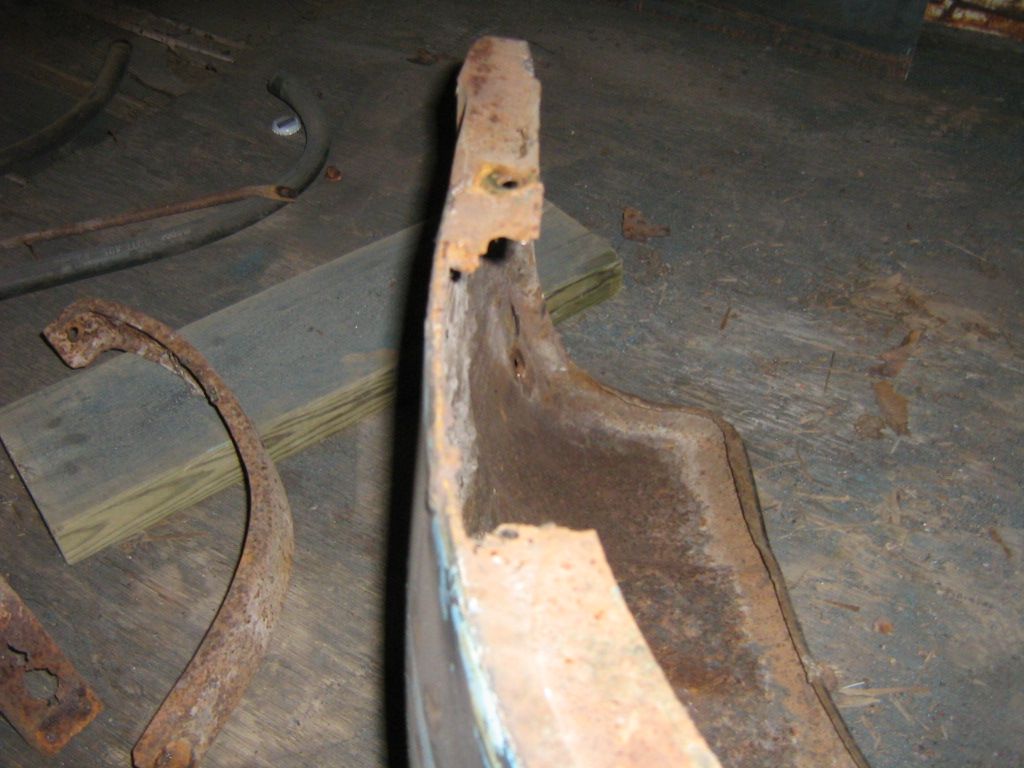  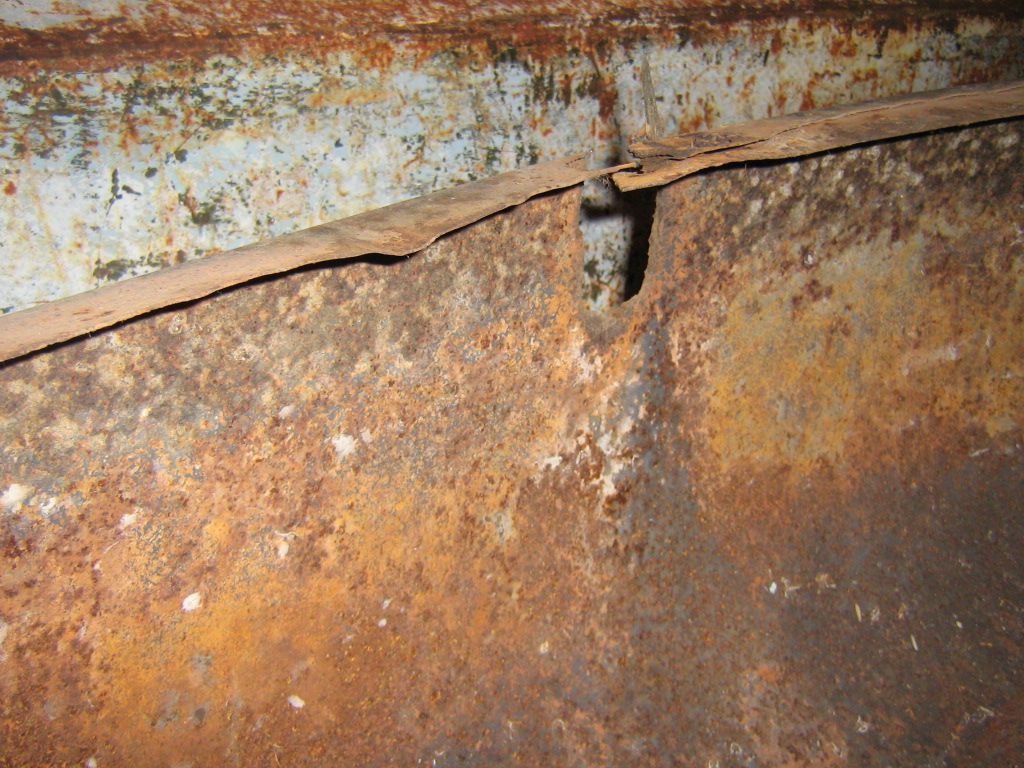 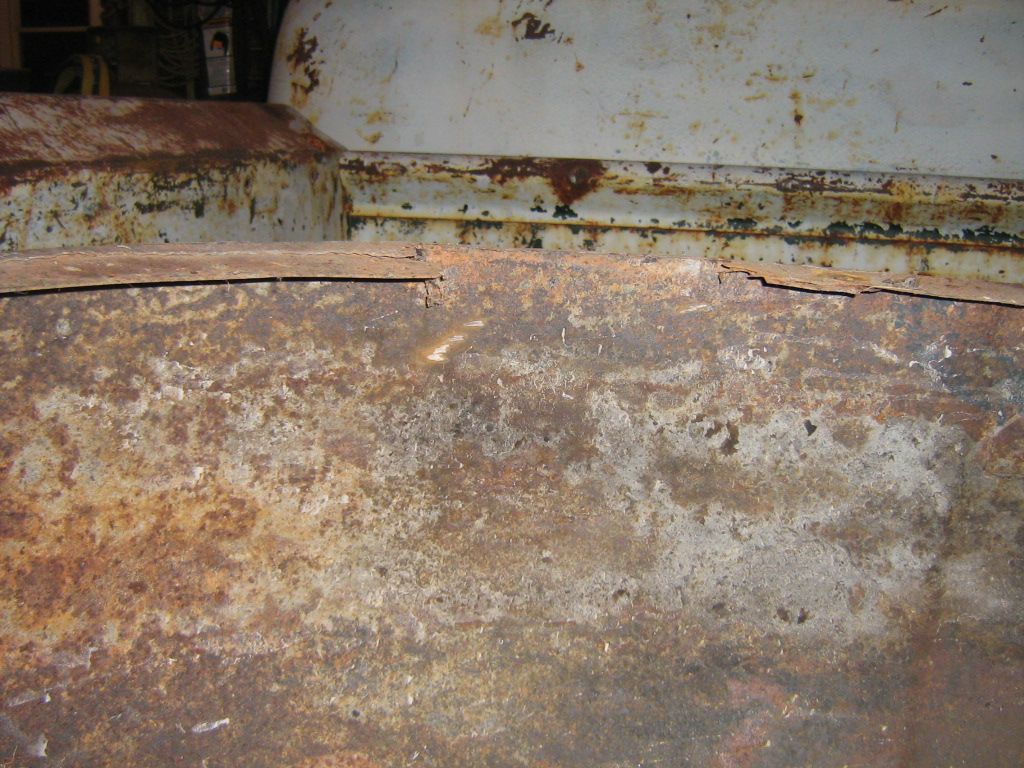  And to how it is tonight.......   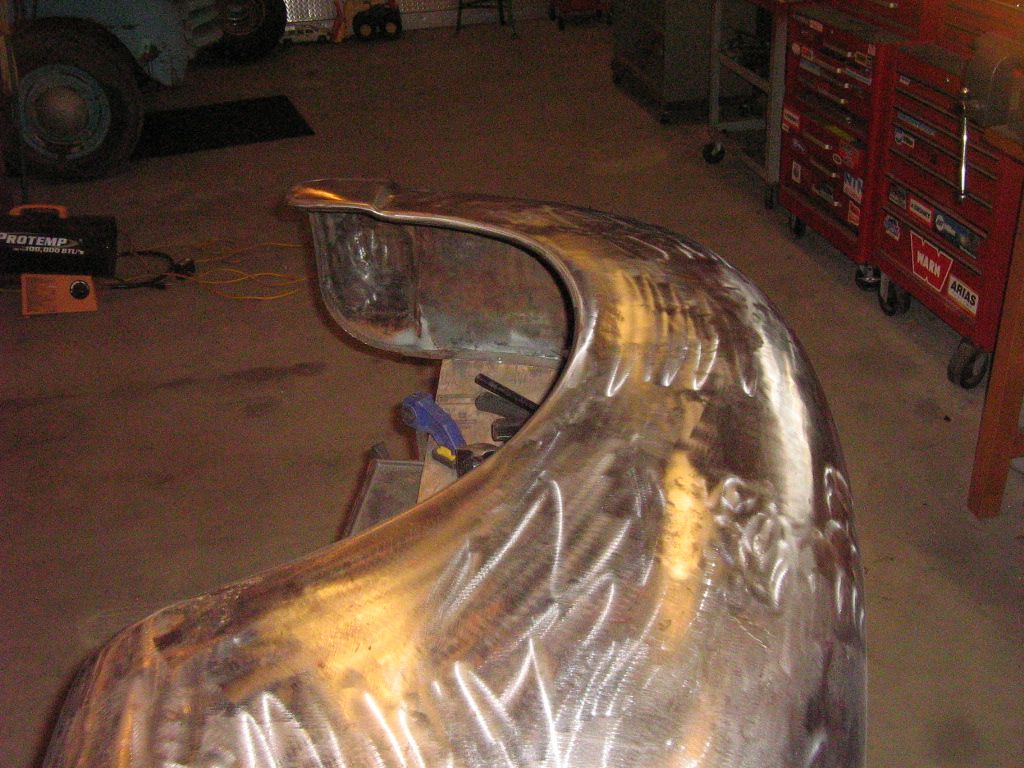 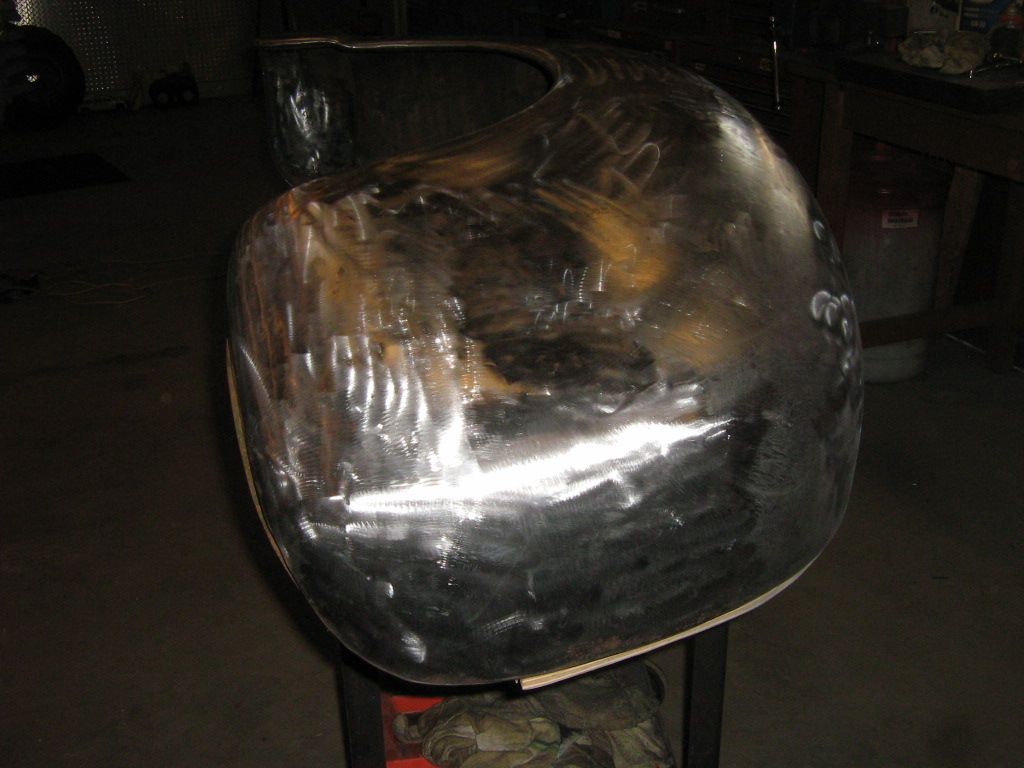 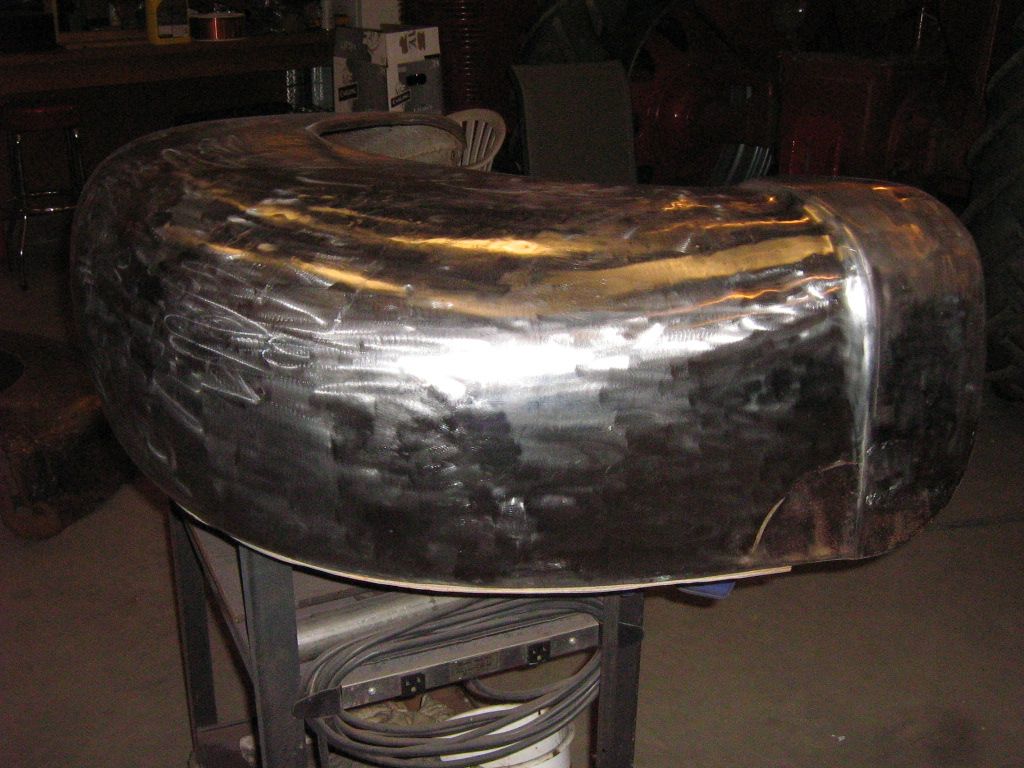 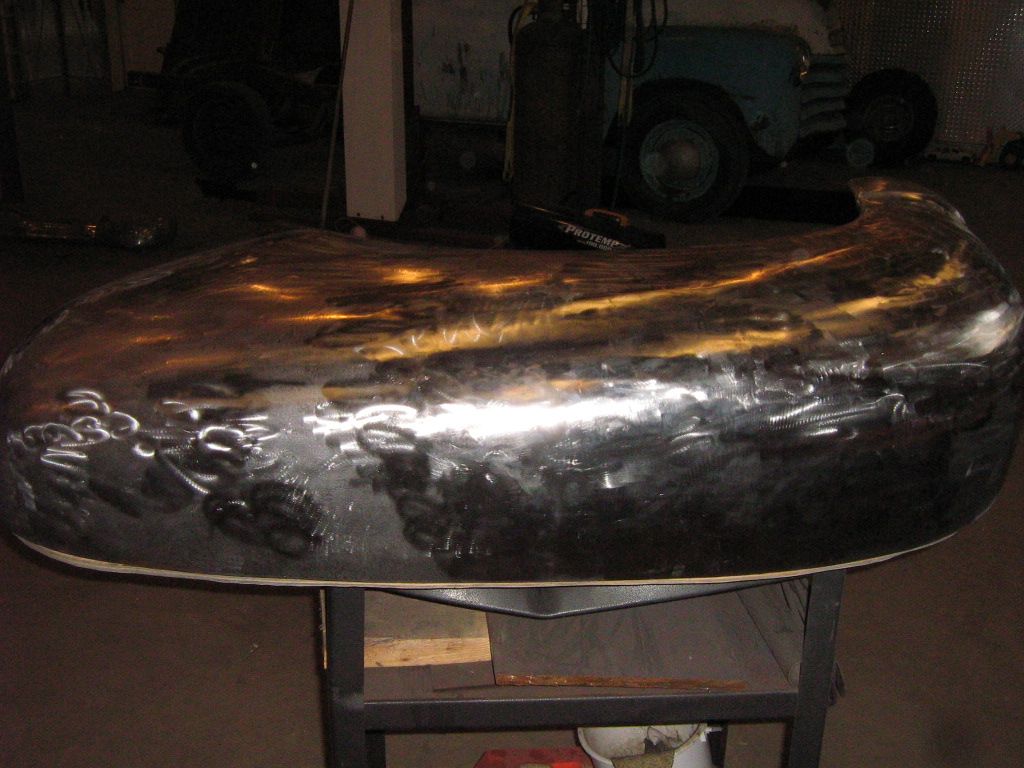 So what do you all think? Did I done good? I think it will only need a very thin layer of filler to finish it off. |
|
|
|
|
04-05-2013, 08:03 PM
|
#20 |
|
Registered User
Join Date: Jan 2012
Location: Eastern Ontario, Canada
Posts: 1,041
|
Re: My attempt at fender repair
Looks like I should be stand back a bit when I take pictures. What do you all do with the fender braces? Do you weld them back in? I don't want he rivets showing on the outside.
|
|
|
|
|
| Bookmarks |
|
|


 MY BUILD THREAD...


 Linear Mode

