
|
|
|
 07-22-2019, 10:31 PM
|
#1 |
|
Registered User
Join Date: May 2012
Location: Houston
Posts: 461
|
Re: Jesses' 48 PU
Perfect fit.. Screwed in like butta.

__________________
 Semper Fi Semper FiCheck out my project: http://67-72chevytrucks.com/vboard/s...d.php?t=559086 Last edited by Jesse49chevy; 07-23-2019 at 01:12 PM. |

|

|
|
07-22-2019, 10:34 PM
|
#2 |
|
Registered User
Join Date: May 2012
Location: Houston
Posts: 461
|
Re: Jesses' 48 PU
Finally, motor and tranny mounted.
__________________
Semper FiCheck out my project: http://67-72chevytrucks.com/vboard/s...d.php?t=559086 |
|
|
|
|
07-22-2019, 10:46 PM
|
#3 |
|
Registered User
Join Date: May 2012
Location: Houston
Posts: 461
|
Re: Jesses' 48 PU
Motor mounts welded in. I pushed the engine back 2 inches and dropped it as low as possible.
__________________
Semper FiCheck out my project: http://67-72chevytrucks.com/vboard/s...d.php?t=559086 |
|
|
|
|
07-22-2019, 10:47 PM
|
#4 |
|
Registered User
Join Date: May 2012
Location: Houston
Posts: 461
|
Re: Jesses' 48 PU

__________________
Semper FiCheck out my project: http://67-72chevytrucks.com/vboard/s...d.php?t=559086 |
|
|
|
|
07-22-2019, 10:49 PM
|
#5 |
|
Registered User
Join Date: May 2012
Location: Houston
Posts: 461
|
Re: Jesses' 48 PU

__________________
Semper FiCheck out my project: http://67-72chevytrucks.com/vboard/s...d.php?t=559086 |
|
|
|
|
07-23-2019, 08:12 AM
|
#6 |
|
Senior Member
 Join Date: Sep 2017
Location: Bryan, Texas
Posts: 2,286
|
Re: Jesses' 48 PU
Nice work again.
I saw Idaho Fabricator's YouTube and he does some great work.
__________________
8man-aka Robert 1948 on a S10 Frame, small block with a carb 1954 Cab, 53 Front and Bed, 50 Doors, S10 Frame, Power TBD Build thread: "]http://67-72chevytrucks.com/vboard/showthread.php?t=746899&highlight=wife%27s+48[/URL] [/URL]http://67-72chevytrucks.com/vboard/showthread.php?t=840204 |
|
|
|
|
07-23-2019, 01:16 PM
|
#7 |
|
Registered User
Join Date: May 2012
Location: Houston
Posts: 461
|
Re: Jesses' 48 PU
Thanks 8man.... It's nice to get away from the office and burn some welds, turn some wrenches. Keep fixing mistakes or changing my mind, seems I'll never get her done, but don't care how long it takes...I'm having fun and challenging my skills.
__________________
Semper FiCheck out my project: http://67-72chevytrucks.com/vboard/s...d.php?t=559086 |
|
|
|
|
07-24-2019, 01:51 PM
|
#8 | |
|
Senior Member
Join Date: Sep 2016
Location: Hershey, PA
Posts: 1,004
|
Re: Jesses' 48 PU
Quote:
__________________
Current Build Thread 1930 Ford Model A Modern Twist: Ford Model A Rat Rod With a Modern Twist Build Thread Phase 1 "The Swap": 1949 3100 with S10 swap. Beginner build with ambition! Build Thread Phase 2 "The Drop": Beginner Build with Ambition gets Air Ride |
|
|
|
|
|
08-04-2019, 06:38 PM
|
#9 |
|
Registered User
Join Date: May 2012
Location: Houston
Posts: 461
|
Got a little bit more done today. I bought the driveshaft and as I suspected it hit the rear crossmember. So that means I have to remove it and add another one further back. Only issue with that is that I have center cab mounts in the rear so I had to figure out how to deal with that. I decided to build rear cab mounts!!
I see all the S10 swaps and how they build them so, I think I can do that. Pulled the truck out of the garage, pulled the cab off, first thing......figure out where and how the cab would be secured.
__________________
Semper FiCheck out my project: http://67-72chevytrucks.com/vboard/s...d.php?t=559086 Last edited by Jesse49chevy; 08-04-2019 at 07:35 PM. |
|
|
|
|
08-04-2019, 06:42 PM
|
#10 |
|
Registered User
Join Date: May 2012
Location: Houston
Posts: 461
|
Re: Jesses' 48 PU
I used 3/16 metal and welded them on the rear with the nut secured on the inside for easy install.
__________________
Semper FiCheck out my project: http://67-72chevytrucks.com/vboard/s...d.php?t=559086 |
|
|
|
|
08-04-2019, 06:46 PM
|
#11 |
|
Registered User
Join Date: May 2012
Location: Houston
Posts: 461
|
Re: Jesses' 48 PU
I got some new toys!!!
Eastwood TIG welder and plasma cutter... The plasma made fast work of cutting the 1/8 metal. No more noisy cutting wheels
__________________
Semper FiCheck out my project: http://67-72chevytrucks.com/vboard/s...d.php?t=559086 Last edited by Jesse49chevy; 08-04-2019 at 07:29 PM. |
|
|
|
|
08-04-2019, 06:51 PM
|
#12 |
|
Registered User
Join Date: May 2012
Location: Houston
Posts: 461
|
Re: Jesses' 48 PU
Used cardboard to draw out the pieces. Transferred them to 1/8 metal and cut them with my plasma....
Did I mention I got a new toy???
__________________
Semper FiCheck out my project: http://67-72chevytrucks.com/vboard/s...d.php?t=559086 |
|
|
|
|
08-04-2019, 06:54 PM
|
#13 |
|
Registered User
Join Date: May 2012
Location: Houston
Posts: 461
|
Re: Jesses' 48 PU
I tried TIG welding, but I need practice and this is not a piece I want to take that chance so MIG'd them.
__________________
Semper FiCheck out my project: http://67-72chevytrucks.com/vboard/s...d.php?t=559086 Last edited by Jesse49chevy; 08-04-2019 at 07:32 PM. |
|
|
|
|
08-04-2019, 06:58 PM
|
#14 |
|
Registered User
Join Date: May 2012
Location: Houston
Posts: 461
|
Left side, spot welded in for now. Will make some square 3/16 washers for final install.
__________________
Semper FiCheck out my project: http://67-72chevytrucks.com/vboard/s...d.php?t=559086 |
|
|
|
|
08-05-2019, 11:39 AM
|
#15 | |
|
Senior Member
Join Date: Sep 2016
Location: Hershey, PA
Posts: 1,004
|
Re: Jesses' 48 PU
Quote:
 Plasma cutter looks like its doing real nice!
__________________
Current Build Thread 1930 Ford Model A Modern Twist: Ford Model A Rat Rod With a Modern Twist Build Thread Phase 1 "The Swap": 1949 3100 with S10 swap. Beginner build with ambition! Build Thread Phase 2 "The Drop": Beginner Build with Ambition gets Air Ride |
|
|
|
|
|
08-22-2019, 09:48 PM
|
#16 | |
|
Registered User
Join Date: May 2012
Location: Houston
Posts: 461
|
Re: Jesses' 48 PU
Quote:
__________________
Semper FiCheck out my project: http://67-72chevytrucks.com/vboard/s...d.php?t=559086 |
|
|
|
|
|
08-04-2019, 07:01 PM
|
#17 |
|
Registered User
Join Date: May 2012
Location: Houston
Posts: 461
|
Re: Jesses' 48 PU
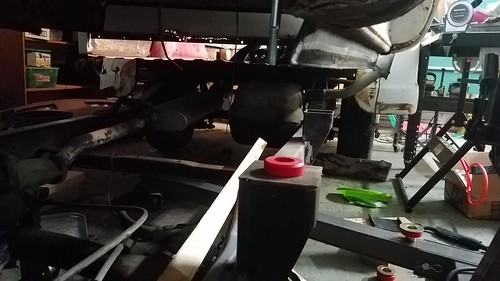
Right side, ran out of time so I will tackle to crossmember next weekend.

__________________
Semper FiCheck out my project: http://67-72chevytrucks.com/vboard/s...d.php?t=559086 |
|
|
|
|
08-10-2019, 02:44 PM
|
#18 |
|
Senior Member
 Join Date: May 2007
Location: Doodah Kansas
Posts: 7,748
|
Re: Jesses' 48 PU
holy strong floor!
__________________
the mass of men live lives of quiet desperation if there is a problem, I can have it. new project WAYNE http://67-72chevytrucks.com/vboard/s...d.php?t=844393 |
|
|
|
|
08-22-2019, 08:31 PM
|
#19 |
|
Registered User
Join Date: May 2012
Location: Houston
Posts: 461
|
Re: Jesses' 48 PU
I fab'd and welded the new cross member/brace with the loop for driveshaft clearance. I had a piece of 2x5 with 1/8 thick wall laying around. Bought the loop from Jegs and got busy. Turned out okay I guess... Tried my Tig skills again, but failed, need practice... I was thinking of closing in the bottom to make it a solid piece, just feel it will flex with the bottom part open.
__________________
Semper FiCheck out my project: http://67-72chevytrucks.com/vboard/s...d.php?t=559086 Last edited by Jesse49chevy; 08-22-2019 at 09:54 PM. |
|
|
|
|
08-22-2019, 08:40 PM
|
#20 |
|
Registered User
Join Date: May 2012
Location: Houston
Posts: 461
|
Re: Jesses' 48 PU
OH yea, you can see the rear cab mounts I fab'd. I haven't welded them in just yet as I want to make sure nothing changed when I removed the original cross member. Oh and even worse, I have a huge dilemma... My rear axle is one inch off center... I realized that when I put in the driveshaft... Rookie mistake I guess. So now I get to redo that too... It's a 10 bolt I bought off craigslist came off a 2000 S10 blazer. A friend said I should cut one inch off one end and either add it on the other or add a wheel spacer if it clears the frame.
I'm thinking if I'm going to do all that, might as well cut up a 9 inch or 8.8 Ford diff.. Need advise guys, what is my best option. I am running an LS engine with a 4L60.
__________________
Semper FiCheck out my project: http://67-72chevytrucks.com/vboard/s...d.php?t=559086 Last edited by Jesse49chevy; 08-22-2019 at 09:55 PM. |
|
|
|
|
08-24-2019, 10:42 PM
|
#21 |
|
Registered User
Join Date: May 2012
Location: Houston
Posts: 461
|
Re: Jesses' 48 PU
When my only daughter asks and says its for my only grandchild....well I guess everything else can wait.... I pulled out the saws, drills and a quick trip to Home Depot and waalaaaa!!!!
__________________
Semper FiCheck out my project: http://67-72chevytrucks.com/vboard/s...d.php?t=559086 Last edited by Jesse49chevy; 08-24-2019 at 10:53 PM. |
|
|
|
|
08-24-2019, 10:45 PM
|
#22 |
|
Registered User
Join Date: May 2012
Location: Houston
Posts: 461
|
Re: Jesses' 48 PU

__________________
Semper FiCheck out my project: http://67-72chevytrucks.com/vboard/s...d.php?t=559086 |
|
|
|
|
08-24-2019, 11:26 PM
|
#23 |
|
Senior Member
Join Date: Mar 2011
Location: West Plains, Missouri
Posts: 7,555
|
Re: Jesses' 48 PU
Nice job...Jim
__________________
my build thread: http://67-72chevytrucks.com/vboard/s...d.php?t=459839 Jimbo's long bed step build:http://67-72chevytrucks.com/vboard/s...t=464626<br /> |
|
|
|
|
08-25-2019, 09:27 AM
|
#24 |
|
Senior Member
Join Date: Jan 2015
Location: pembroke pines, fl
Posts: 698
|
Re: Jesses' 48 PU
came out great!
|
|
|
|
|
09-08-2019, 12:49 AM
|
#25 |
|
Registered User
Join Date: May 2012
Location: Houston
Posts: 461
|
Re: Jesses' 48 PU
It was a normal week, traveled to my Dallas and San Antonio office, came back home Friday. All week I thought about working on my truck, the trans tunnel I needed to build...
So today I did just that, mocked it up using poster board...
__________________
Semper FiCheck out my project: http://67-72chevytrucks.com/vboard/s...d.php?t=559086 Last edited by Jesse49chevy; 09-08-2019 at 01:08 AM. |
|
|
|
 |
| Bookmarks |
|
|


 Hybrid Mode
