
|
 09-02-2009, 08:54 AM
|
#26 |
|
Registered User
Join Date: Aug 2007
Location: pittsburgh pa
Posts: 1,970
|
Re: 48 Build Pictures
Subscribed... Lookin good!!
__________________
68 C10 Shorty TPI,Bagged, and all the good stuff. Classic trucks feature June 06, On the cover of Jegs Christmas Catalog 08 67 C10 Shorty Shop truck project Bagged and Z'd under destruction and getting nowhere fast. 64 C10 Shop Truck/Daily driver, Bagged, Dropmember, SOLD!!!! Gone but not forgotten.. 54 GMC under the knife getting a S10 chassis swap and bagged. See my build thread... 07 GMC Sierra 5/7 drop, 22's and 24's Air ride on my mind.. http://67-72chevytrucks.com/vboard/s...d.php?t=339340 See pics of my trucks in my profile |

|

|
|
09-02-2009, 02:53 PM
|
#27 | |
|
Registered User
Join Date: May 2009
Location: Norman, OK
Posts: 204
|
Re: 48 Build Pictures
Quote:

__________________
53 Chevy 3100 1/2 ton 1st Armored Division, OIF Veteran 
|
|
|
|
|
|
09-02-2009, 03:16 PM
|
#28 | |
|
Senior Member
  Join Date: Nov 2008
Location: Glendora, CA
Posts: 6,333
|
Re: 48 Build Pictures
Quote:
Do you agree to the general rule of thumb to stay with one manufacturer's line of products or will you change for your final paint? |
|
|
|
|
|
09-02-2009, 03:53 PM
|
#29 |
|
Registered User
Join Date: Jan 2009
Location: Springfield, MO
Posts: 258
|
Re: 48 Build Pictures
I use Durablocks, you can get them at your auto paint stores. They come in a variety of shapes and sizes. Buy a nice kit for $60-80 and you will probably be set. Some are bendable which is what I use on curved areas sanding from various directions. After I fog the panel I block sand to see if there are any low spots. The low spots will be obvious as the fog will still be in the low spot just as if you sand through to the sealer or to metal you will know that spot is high. I will post some pictures once I fog the parts. I just get some cheap Wallyworld spray paint, usually gloss black. Something that will contrast with your primer color. I have been told to use gloss so your eye will pick it up better than flat. I am not really an expert at painting. A good friend of mine is however and he taught me what I know. I have always had real good results. I will try to post a couple of my past cars sometime.
|
|
|
|
|
09-02-2009, 04:11 PM
|
#30 |
|
Registered User
Join Date: Jan 2009
Location: Springfield, MO
Posts: 258
|
Re: 48 Build Pictures
I do agree with staying with one manufacture product. This stuff costs too much to take a chance on it not laying down and staying down. There are some chemical reactions built into this paint that makes it happy when another familiy member product is used. You don't want unhappy sealer, primer, color or clear.
|
|
|
|
|
09-03-2009, 12:06 AM
|
#31 |
|
Registered User
Join Date: Jun 2008
Location: Louisiana
Posts: 493
|
Re: 48 Build Pictures
did you use epoxy primer? looks like maybe you did because of the gloss. I learned the hard way about leaving some of the original paint on my corvette and not sealing it with epoxy. after a few months small bubbles started to show. the urethane in the new paint activated the solvents in the original lacquer on the car. now I have to strip it all back down from finished paint back to bare glass, epoxy would have sealed it.
__________________
1971 Corvette convertible 454@ 525 hp  1936 Chevy Truck street rod 1952 Chevy truck hot rod build http://www.killbillet.com/showthread...2-Chevy-Cut-up 1964 F 100 custom street rod http://www.ford-trucks.com/forums/12...mark-viii.html 1950 custom Chevy Truck |
|
|
|
|
09-03-2009, 10:26 AM
|
#32 |
|
Registered User
Join Date: Jan 2009
Location: Springfield, MO
Posts: 258
|
Re: 48 Build Pictures
No the sealer is not expoxy that I use. The sealer does have a little satin gloss to it, once you put the high build primer over the sealer it is very dull. Personally, I would never try to even seal over laquer. I would strip laquer. This particular truck was base coat clear coat so it should not be an issue.
|
|
|
|
|
09-30-2009, 08:20 PM
|
#33 |
|
Registered User
Join Date: Jan 2009
Location: Springfield, MO
Posts: 258
|
Re: 48 Build Pictures
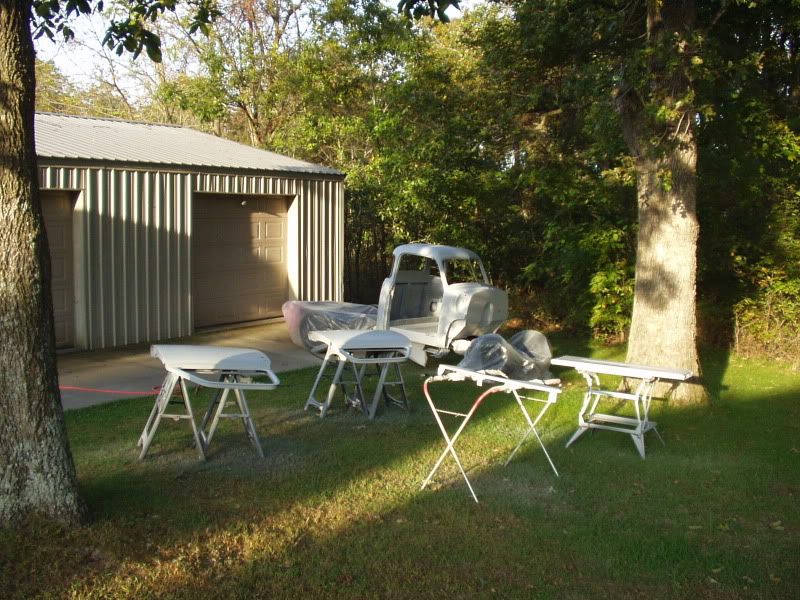
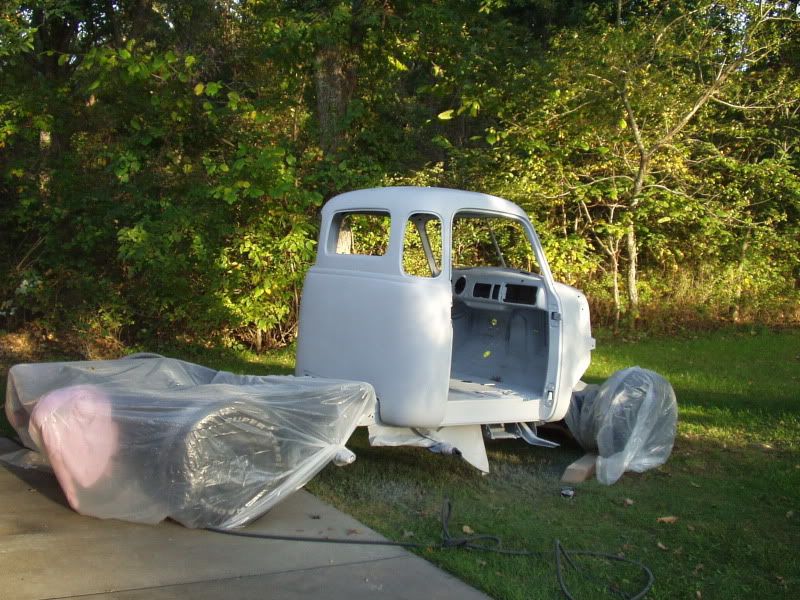
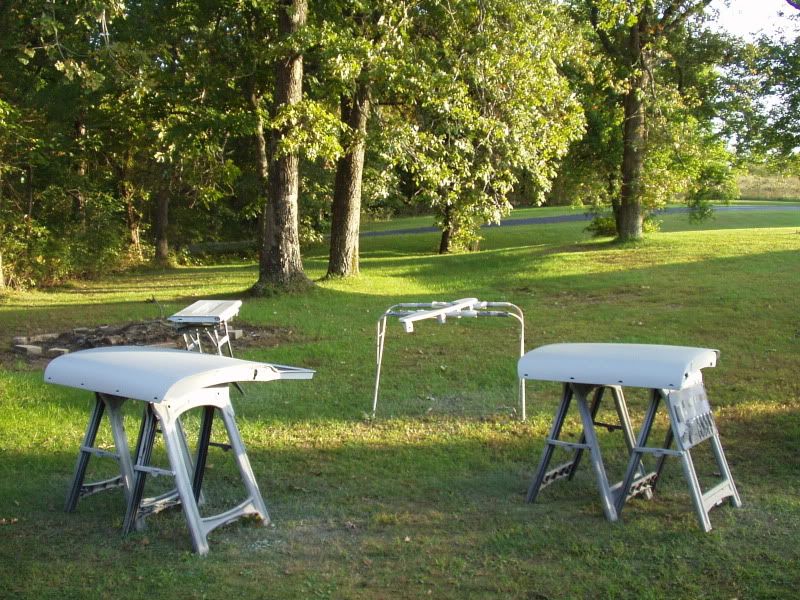
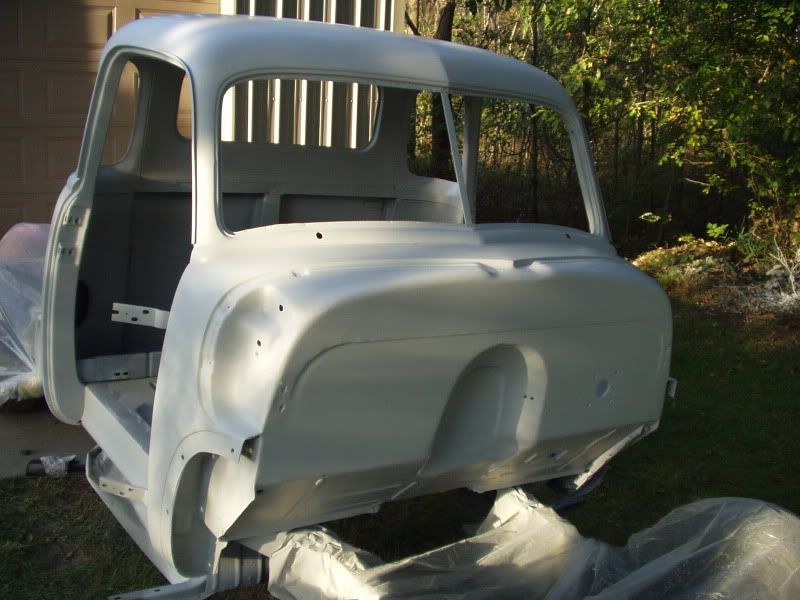
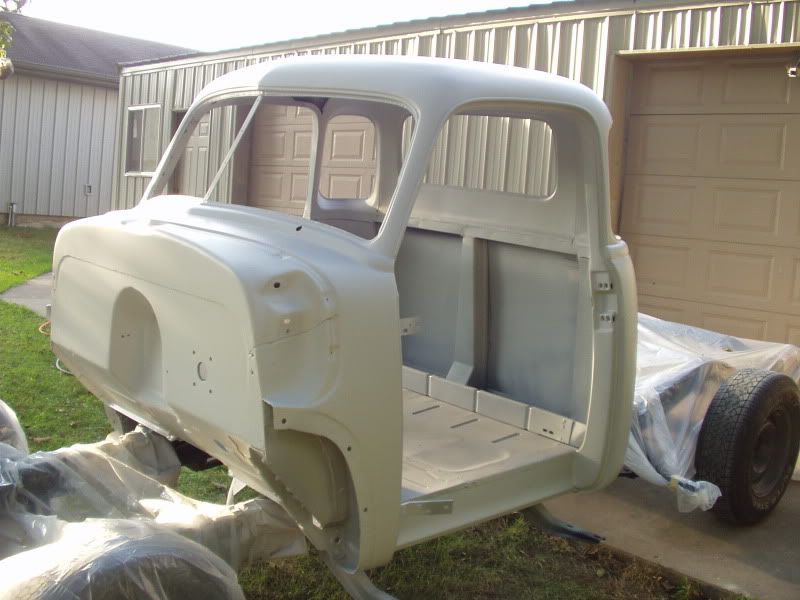
Got most of the rest of the parts sealed and primed tonight. It is not looking like I will get any color on the truck until next spring. I will block and work on the body this winter and shoot it in the spring. It gets too cold here in MO and the heat in my shop will not keep up with the ventilation to pull out the fumes in the winter. I could still paint probably through about mid November, but I doubt I am ready for color by then. I have also about decided to try to find an original seat instead of using buckets. I have seen several of the truck with the original seats upholstered nicely and I like that look. Here are the latest shots:
|
|
|
|
|
10-03-2009, 10:30 PM
|
#34 |
|
Registered User
Join Date: Jun 2008
Location: Louisiana
Posts: 493
|
Re: 48 Build Pictures
looking good, looks like it was a perfect day to spray also.
__________________
1971 Corvette convertible 454@ 525 hp 1936 Chevy Truck street rod 1952 Chevy truck hot rod build http://www.killbillet.com/showthread...2-Chevy-Cut-up 1964 F 100 custom street rod http://www.ford-trucks.com/forums/12...mark-viii.html 1950 custom Chevy Truck |
|
|
|
|
10-03-2009, 10:42 PM
|
#35 |
|
Registered User
Join Date: Jan 2009
Location: Springfield, MO
Posts: 258
|
Re: 48 Build Pictures
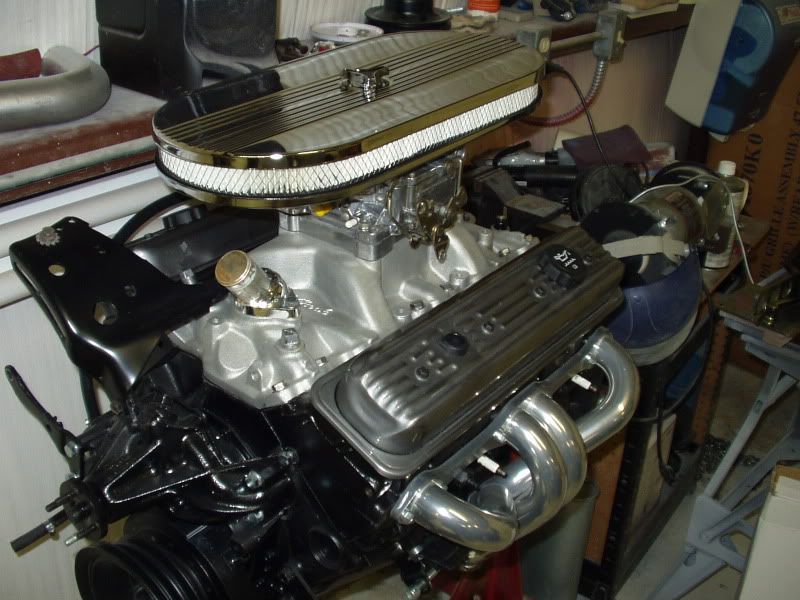
It was a good day, about 75 and low humidity and very little wind. I had everything layed out the day before and decided it was a little too windy and put it all back. I bought some new stock painted steel valve covers at a local swap meet and sand blasted them today. I am thinking I may go with a silver for the truck, but want to find some neat modifications. So after I blasted the valve covers, I hit them with an aggressive scotchbrite pad, then put 3 coats of clear on the bare metal. They really look nice. The clear made them a couple shades darker than the original bare steel, that looks pretty good. I will get some pictures posted. Don't know what will happen over time, but I think I will use them on the engine.
|
|
|
|
|
10-05-2009, 03:53 PM
|
#36 |
|
Registered User
Join Date: Jan 2009
Location: Springfield, MO
Posts: 258
|
Re: 48 Build Pictures
I got in an air cleaner I ordered that I thought went with the stock valve covers nicely. I sandblasted the stock valve covers then hit them with a scotchbright pad and clear coated them on the raw metal. I was amazed how dark they turned, but they look pretty cool in person. I would like to blast the chrome off the air cleaner and do the same thing, but not sure it would work. You can see the scotchbright scuff under the clear. Not sure how well the chrome cleaner goes with the valve cover color. Whacha Thank?
|
|
|
|
|
10-05-2009, 05:20 PM
|
#37 |
|
Registered User
Join Date: Jun 2009
Location: Nashville, TN
Posts: 54
|
Re: 48 Build Pictures
idk about removing chrome, but they would look better together if the air cleaner wasn't so shiney, but the lines do match up nicely
__________________
55 1st Series 5 window, getting an s10 frame and 350 sbc Keeping it LOUD and ROUGH - just like BOONEMAN 
|
|
|
|
|
10-05-2009, 08:14 PM
|
#38 |
|
Registered User
Join Date: Jun 2007
Location: Saskatoon, Saskatchewan,:
Posts: 2,901
|
Re: 48 Build Pictures
Been a while since i checked in, truck is looking great, love the primer booth.lol, any bugs in that finish?
__________________
James 1968 GMC "HAVOC" 1986 GMC "Frank" J.J.R.H. Design & Consulting My 68`Rebuild "HAVOC": http://67-72chevytrucks.com/vboard/s...d.php?t=316300 A 58' chev build thread: http://www.67-72chevytrucks.com/vboa...d.php?t=311238 1969 Camaro Pro Touring http://67-72chevytrucks.com/vboard/s...61#post3513361 Swiss Cheese: http://67-72chevytrucks.com/vboard/s...d.php?t=384390 Adjustable Trailing Arm How-To: http://67-72chevytrucks.com/vboard/s...d.php?t=321100 1968 Ford Farm Truck: http://67-72chevytrucks.com/vboard/s...=1#post6555587 |
|
|
|
|
10-05-2009, 09:43 PM
|
#39 |
|
Registered User
Join Date: Jan 2009
Location: Springfield, MO
Posts: 258
|
Re: 48 Build Pictures
This is a scientifically engineered booth, bugs, not allowed. Well maybe a couple small ones, they sand out pretty easy.
|
|
|
|
|
01-25-2010, 12:44 AM
|
#40 |
|
Registered User
Join Date: Jan 2009
Location: Springfield, MO
Posts: 258
|
Re: 48 Build Pictures
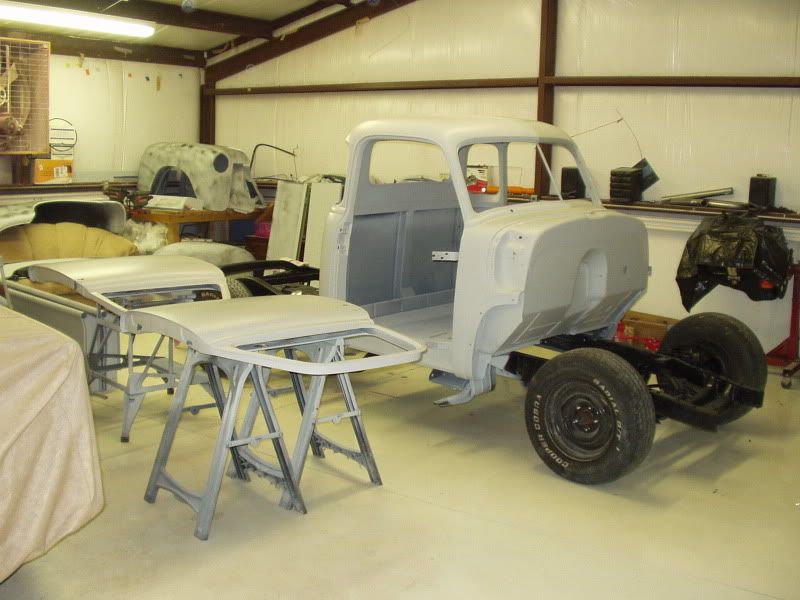
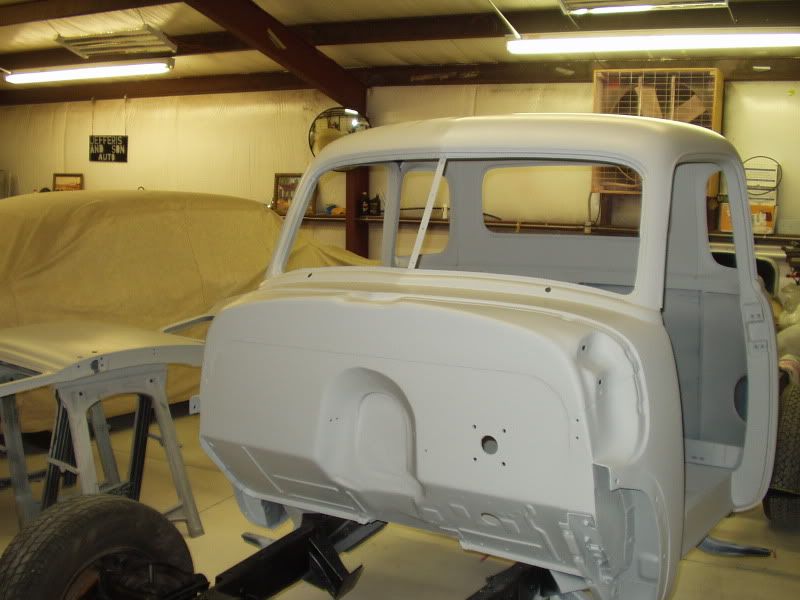
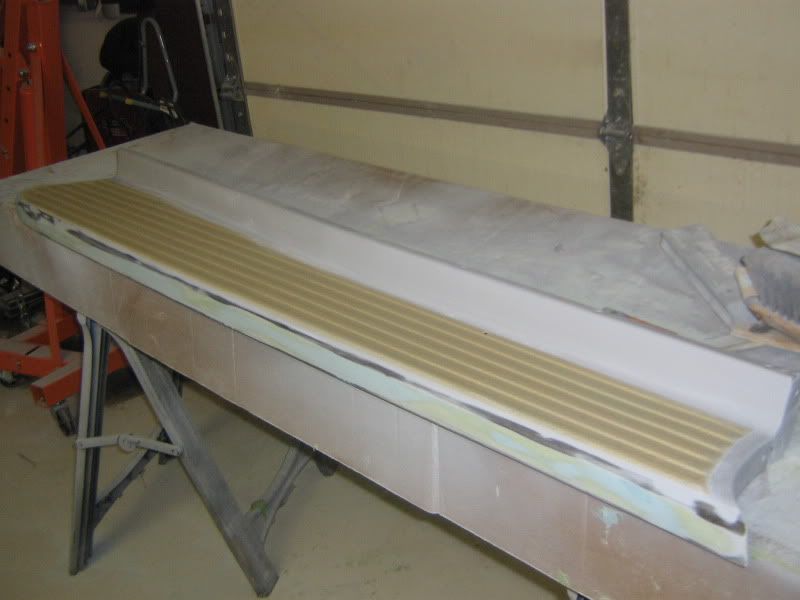
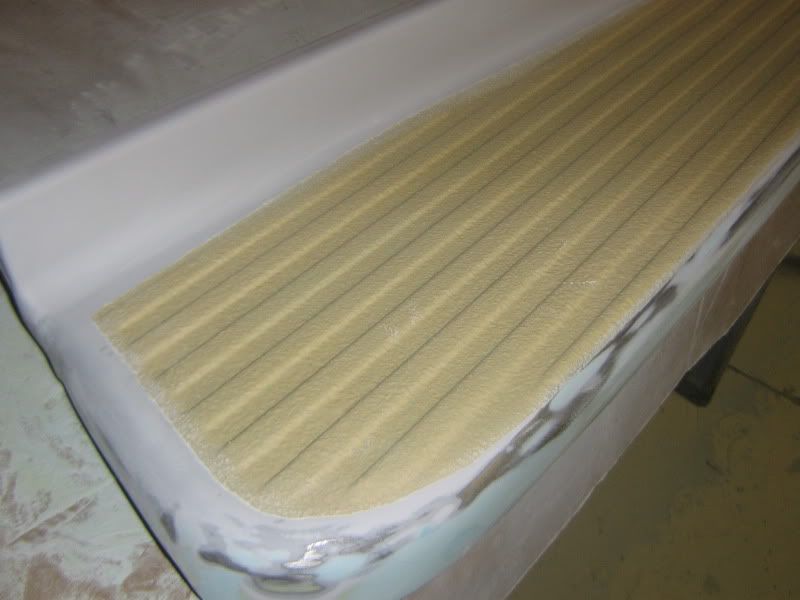
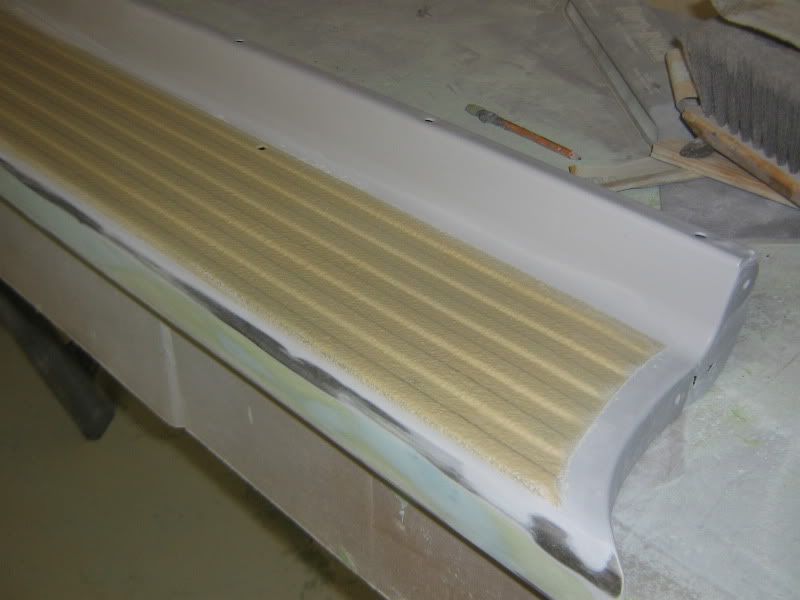
Still working on the truck. Have it pretty well sanded and ready for paint once it warms up in the spring. I did do a little work to the running boards by shooting some rocker spray on them today. I think I will like this look once they are painted. Thought I would share some pictures.
|
|
|
|
|
02-06-2010, 08:56 AM
|
#41 |
|
Registered User
Join Date: Mar 2009
Location: Helena, Alabama
Posts: 453
|
Re: 48 Build Pictures
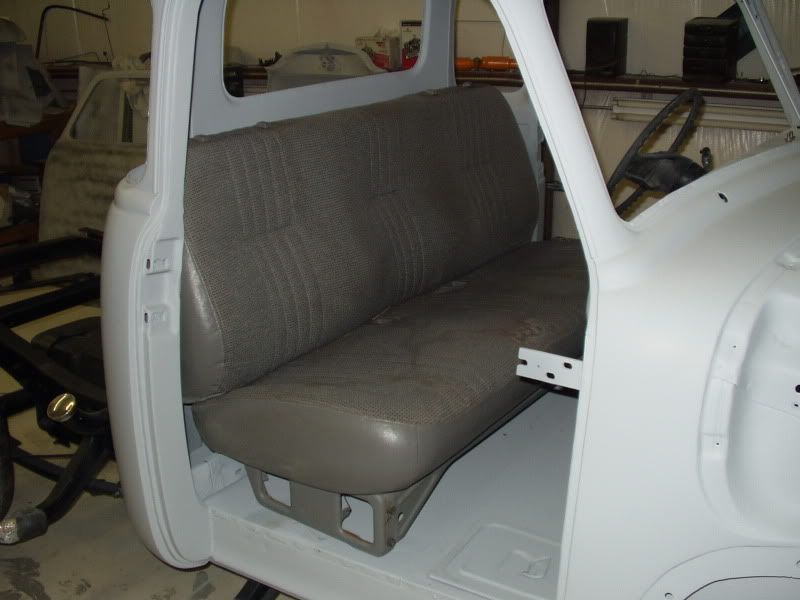
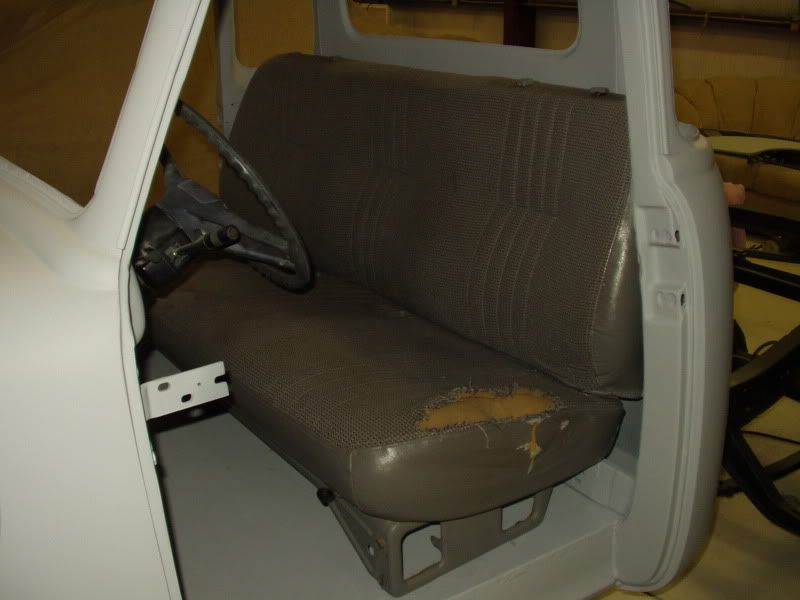
looks great. like the idea with running boards. Do you have pic of what seat you will be using in your truck?
|
|
|
|
|
02-06-2010, 12:47 PM
|
#42 |
|
Registered User
Join Date: Jan 2009
Location: Springfield, MO
Posts: 258
|
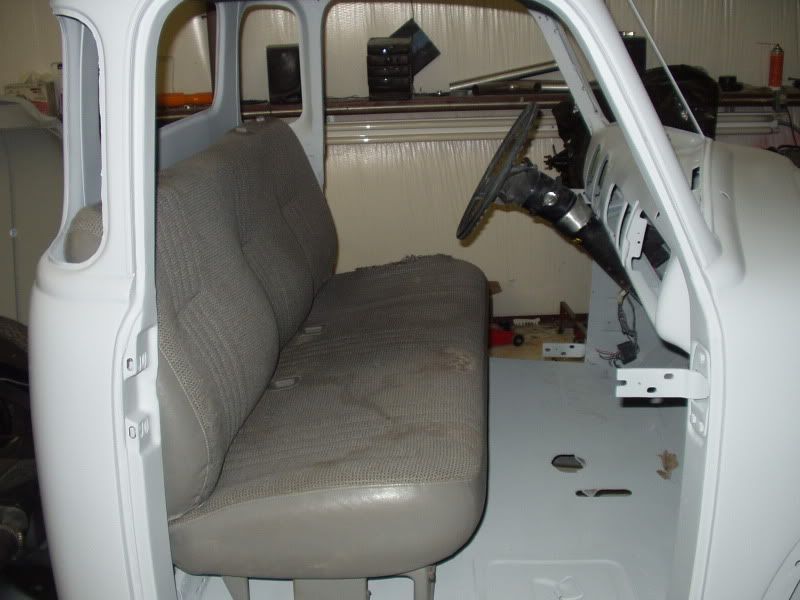
Re: 48 Build Pictures
I was told this seat was from a 95 Chevy Pickup. The back tilts. I am going to have is shaved just a bit on each side when I have it upholstered. And I won't be using the headrests.
|
|
|
|
|
02-06-2010, 09:41 PM
|
#43 |
|
Registered User
Join Date: Jul 2009
Location: Washington, GA
Posts: 319
|
Re: 48 Build Pictures
That is some nice top notch work you are doing! Subscribed!! I wish mine looked that nice!! but the seat was from a 95?
|
|
|
|
|
02-06-2010, 09:51 PM
|
#44 |
|
Registered User
Join Date: Jan 2009
Location: Springfield, MO
Posts: 258
|
Re: 48 Build Pictures
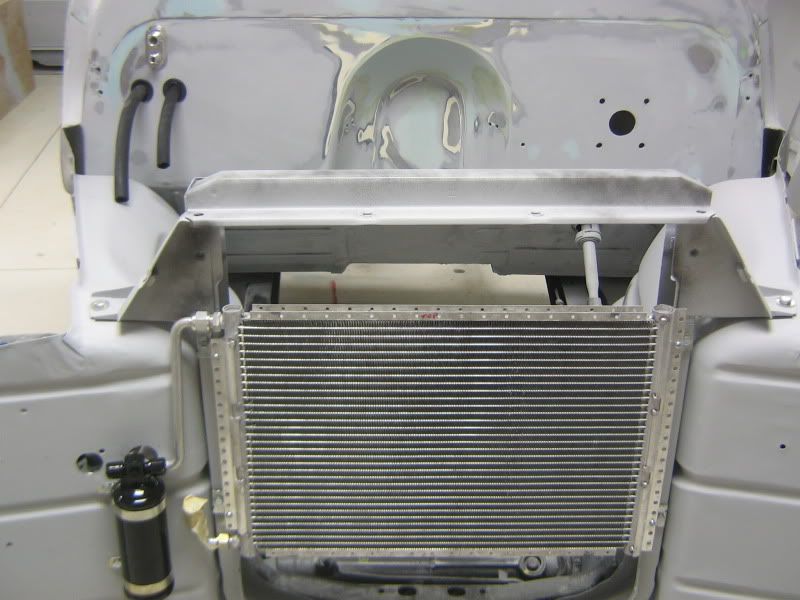
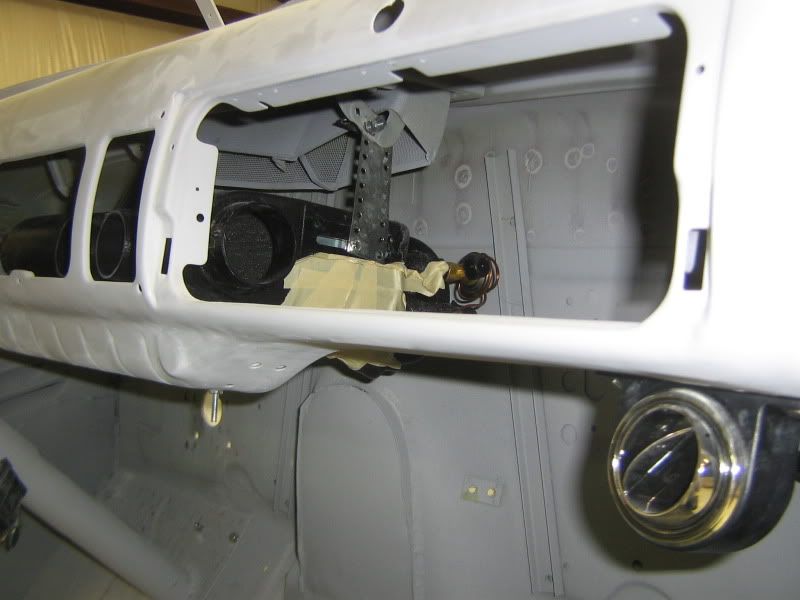
Thanks for the compliments. The guy I got the seat from told me it was from a 94 or 95, I don't really know for sure. It does fit really well. It needs an inch or so of foam removed to fit perfect. I worked today on mounting the AC components. Got the condenser mounted, plan to work under the dash tomorrow.
|
|
|
|
|
02-06-2010, 09:58 PM
|
#45 |
|
Registered User
Join Date: Jul 2009
Location: Washington, GA
Posts: 319
|
Re: 48 Build Pictures
Oh ok...Thank you.....cant wait to see more progress on this bad boy!
|
|
|
|
|
02-07-2010, 08:08 AM
|
#46 |
|
Registered User
Join Date: Feb 2009
Location: snowville
Posts: 104
|
Re: 48 Build Pictures
Yes the seat is from an 95 chevy wt. I had one mounted in my 54. The bench bucket design pushes you out twords the door. You may want to mount your door and steering column and sit in it for a while and play driver so to speek. One thing I noticed the column is to the right of you and your arm sholder is out the side window. I dont know. You dicide. They fit nice and mabe that wont bother you.
Nice truck project! I assume thats 3m rocker pannel spray you used on the running boards? |
|
|
|
|
02-07-2010, 12:26 PM
|
#47 |
|
Registered User
Join Date: Jan 2009
Location: Springfield, MO
Posts: 258
|
Re: 48 Build Pictures
Yes 3M rocker spray. I plan to modify the seat slightly. It seems to sit pretty well. I think I moved my column over slightly as well to center in the gauges so that helps with lining it up with the seat.
|
|
|
|
|
02-07-2010, 07:04 PM
|
#48 |
|
Registered User
Join Date: Feb 2009
Location: snowville
Posts: 104
|
Re: 48 Build Pictures
ok on the seat. Iv been bit in the arse on the 3m rocker spray I put my base coat directly over the top of the 3m product and when I went to up my clear on a bunch of pinholes pulled threw I had to put a lot of clear to fill them. You may want to seal over the top of the 3m. Its a nice product iv got it on my tailgate iv walked over it and could not tell leaves no traces of scratching in the paint.
|
|
|
|
|
02-07-2010, 07:42 PM
|
#49 |
|
Registered User
Join Date: Jan 2009
Location: Springfield, MO
Posts: 258
|
Re: 48 Build Pictures
Yes, you would definitely want to seal it. I seal anykind of body work before I shoot base coat. I have not used this particular product before but have seen some that turned out pretty good.
|
|
|
|
|
02-14-2010, 01:32 PM
|
#50 |
|
Registered User
Join Date: Jan 2009
Location: Springfield, MO
Posts: 258
|
Re: 48 Build Pictures
Working on the AC mock up this weekend. Here are a few pictures.
|
|
|
|
 |
| Bookmarks |
| Tags |
| 48 truck pictures |
|
|


 Linear Mode

