
|
 01-23-2023, 04:06 PM
|
#1326 |
|
Registered User
Join Date: Jan 2013
Location: Leonardtown, MD
Posts: 1,633
|
Re: 55 Wagon Progress
Thanks guys! We just had to improve over the plain looking version that came in the door, I'm real pleased with the outcome.
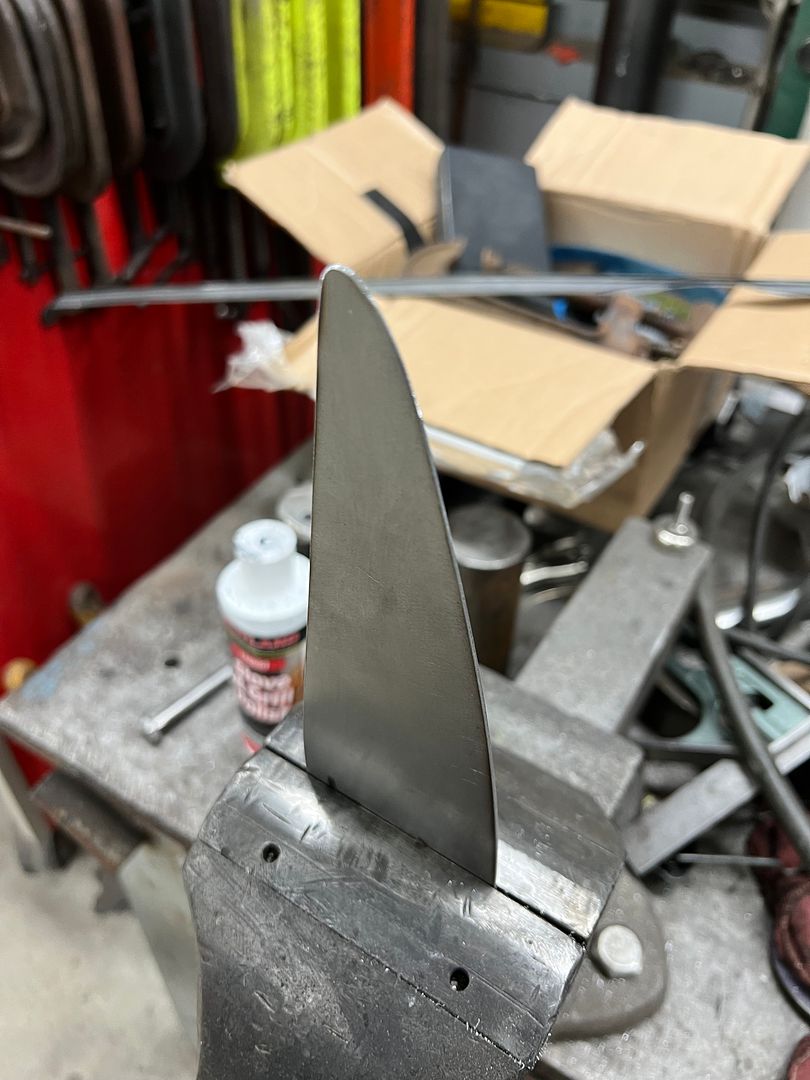
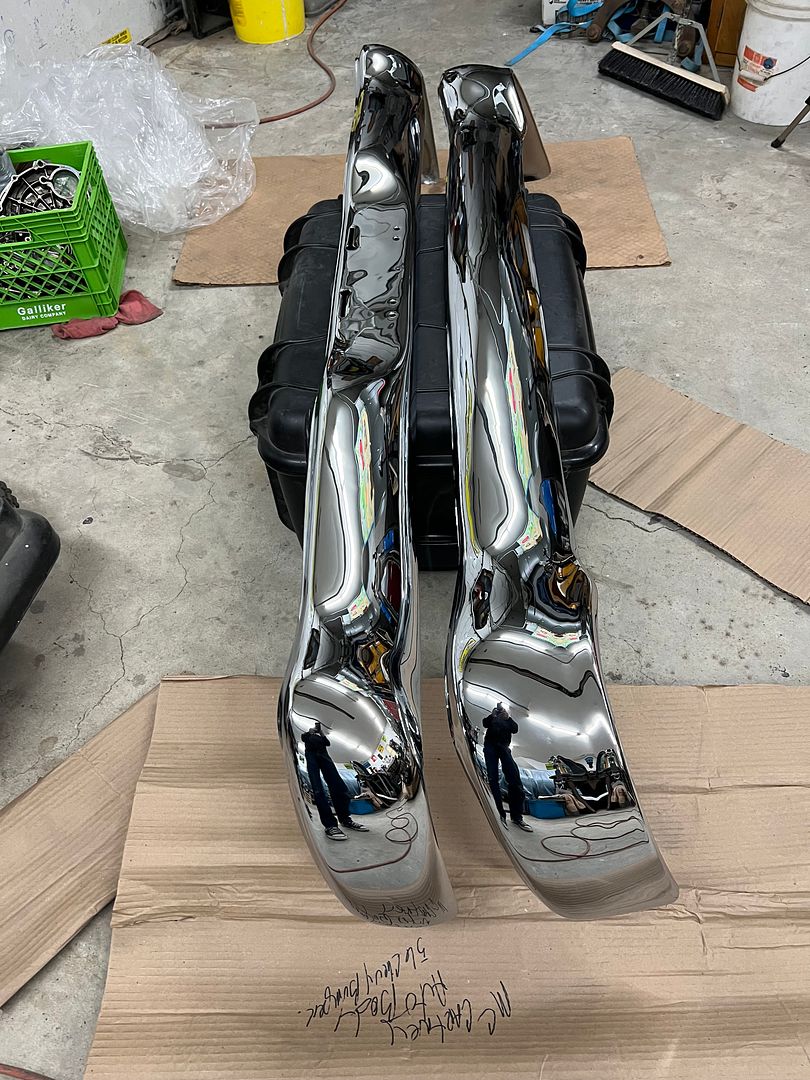
Here's the fabrication of our hinge covers for the wagon, since the originals didn't fit well at all. Some 1-3/16 round stock was used on the magnetic brake to provide a much closer matching radius profile, and some severe stretching was done along the bottom flange and up into the radius.  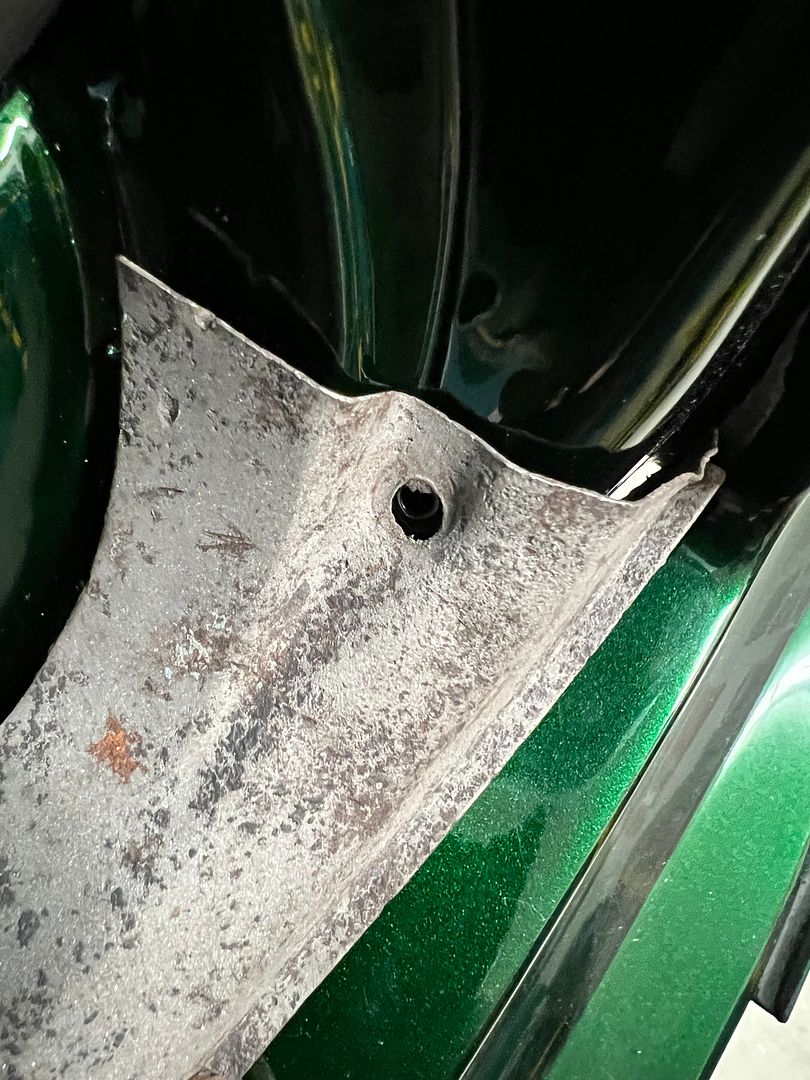 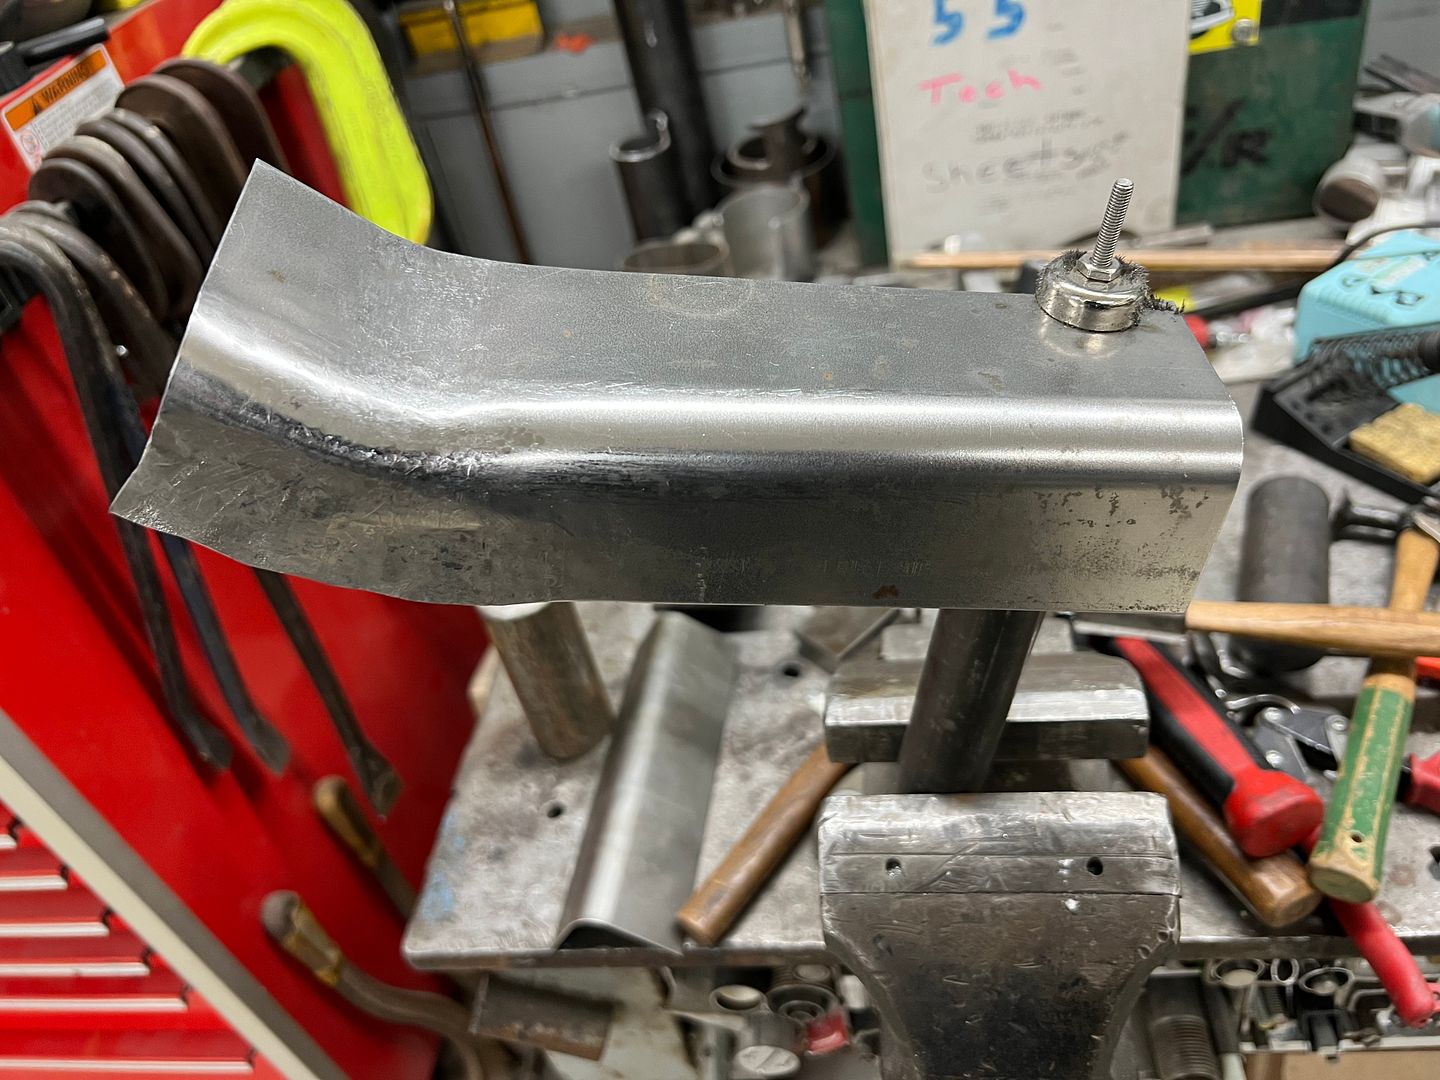 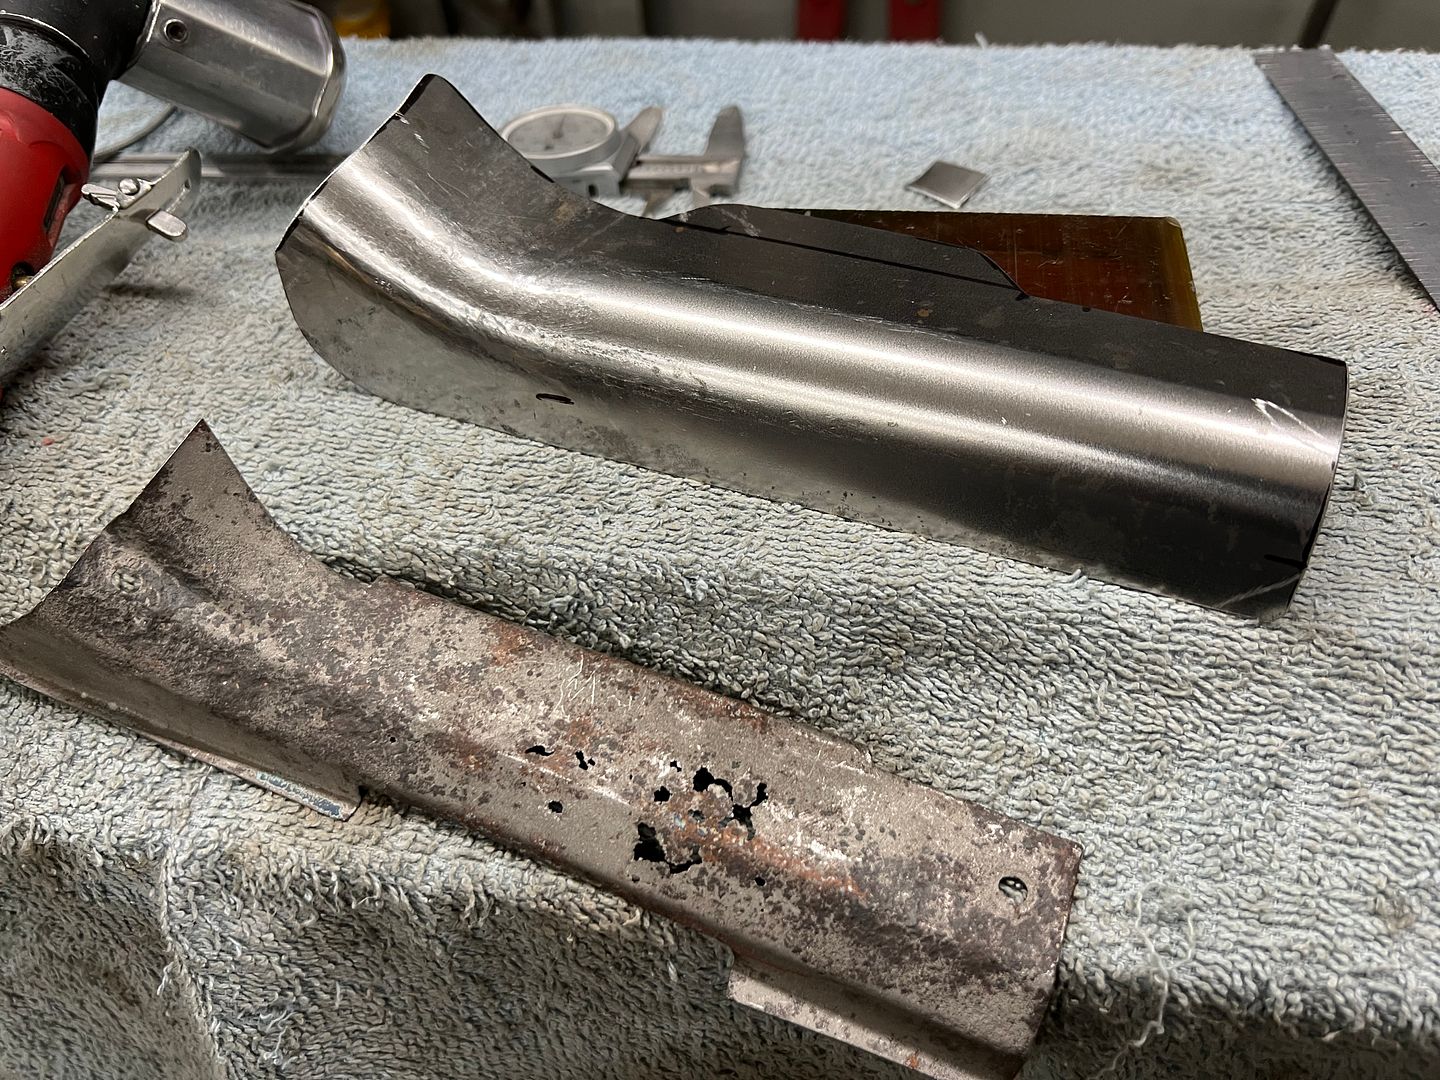 The reverse crease was added using a dulled and rounded press brake die section as an anvil. 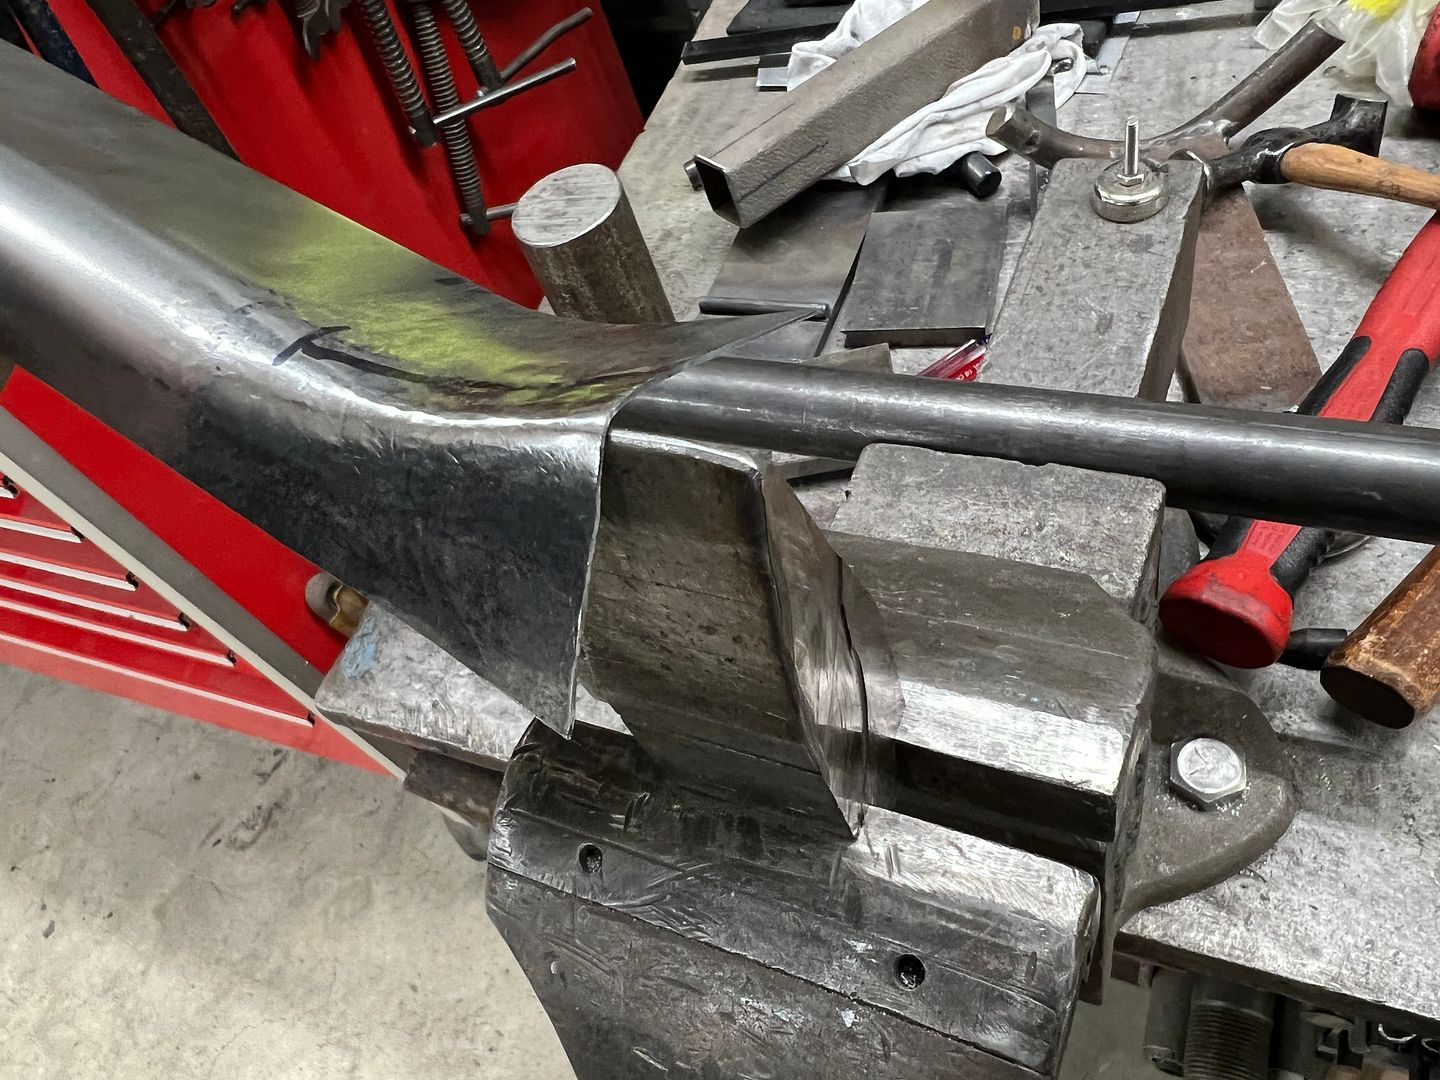 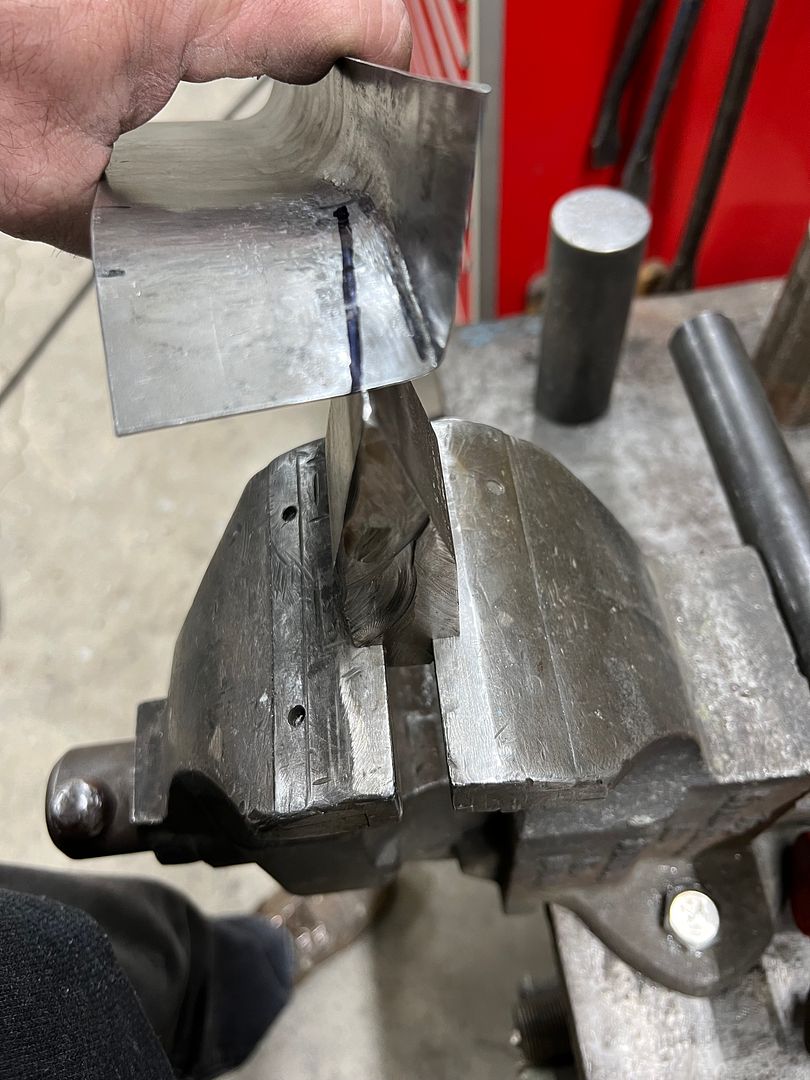 https://youtu.be/-ipNQnB4cjA 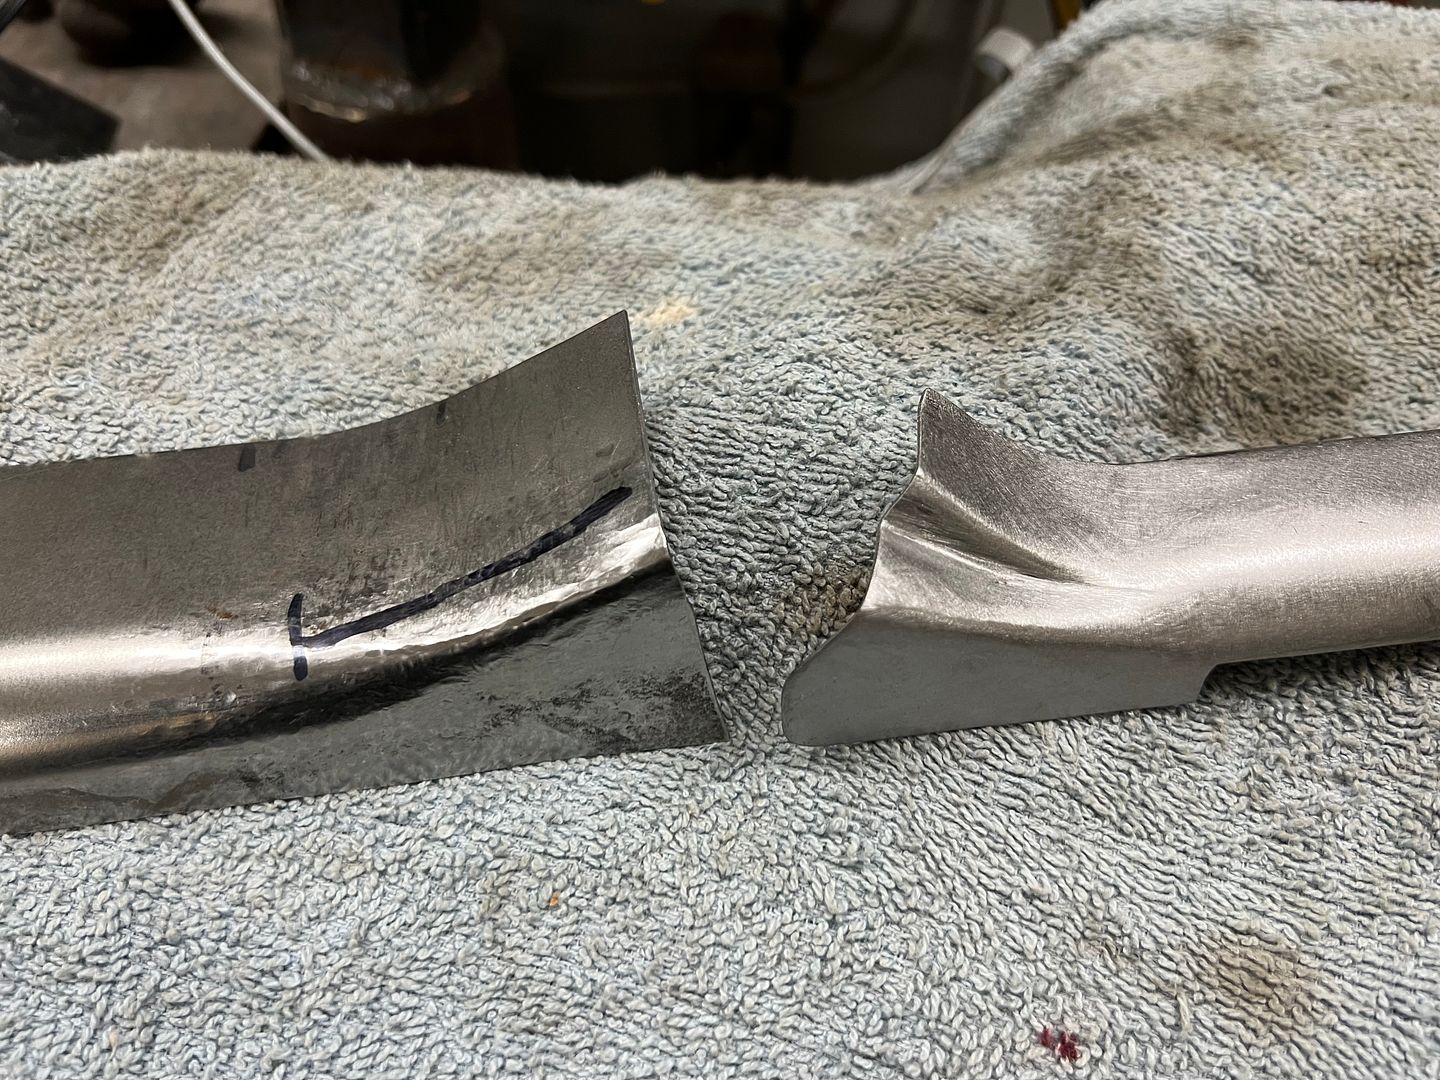 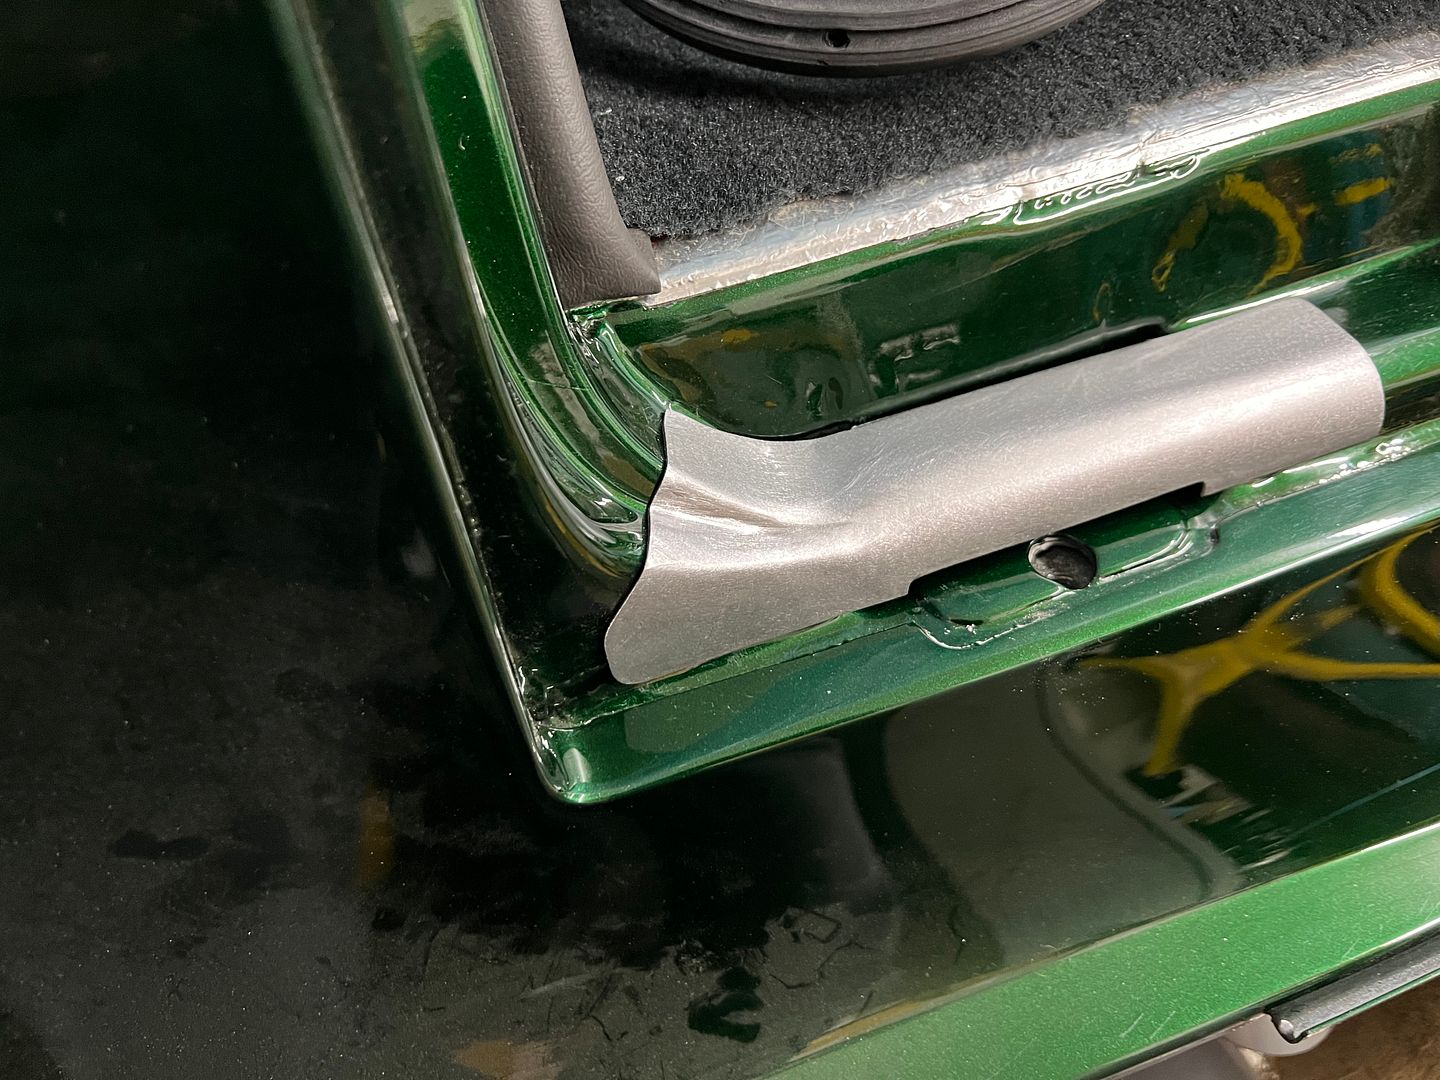 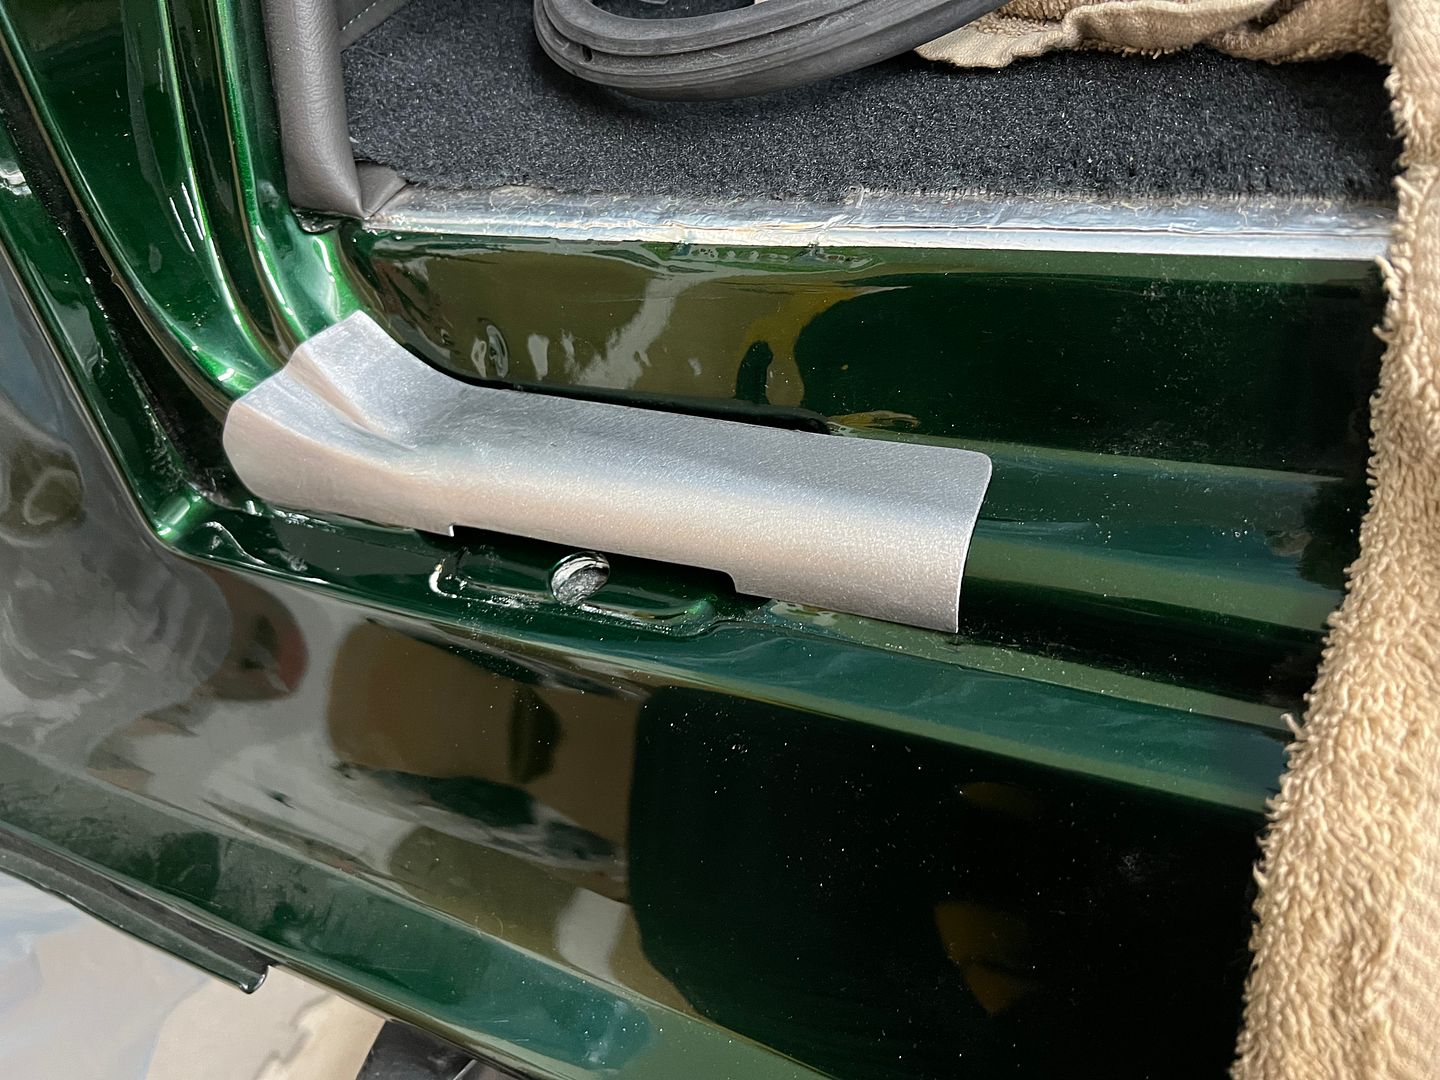 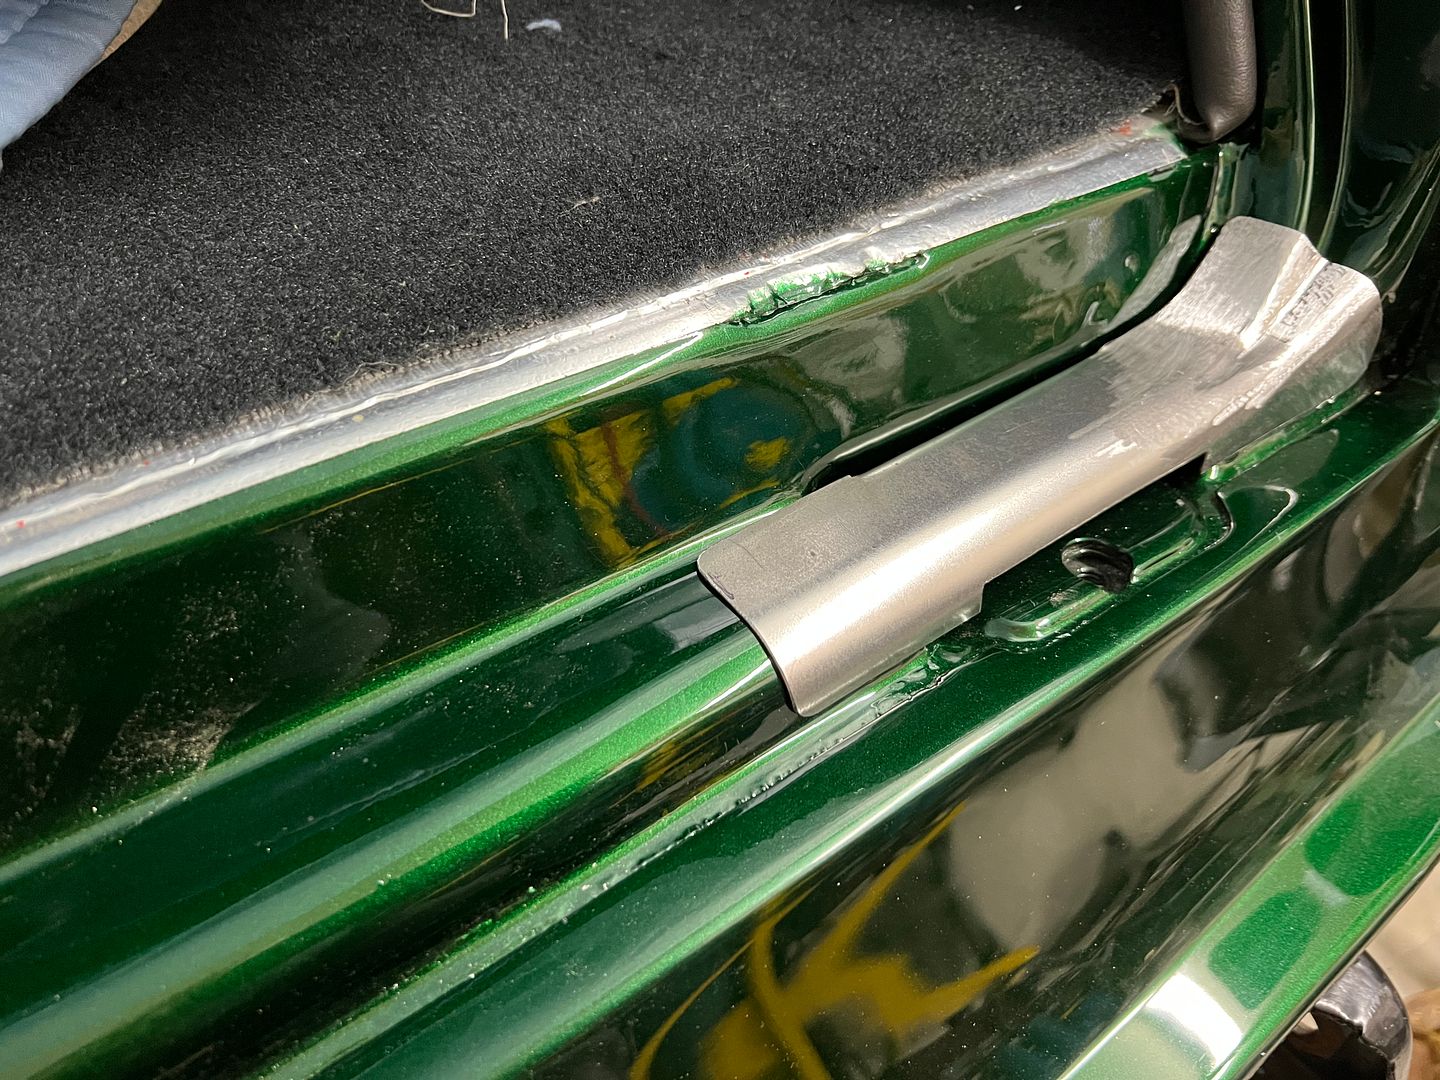 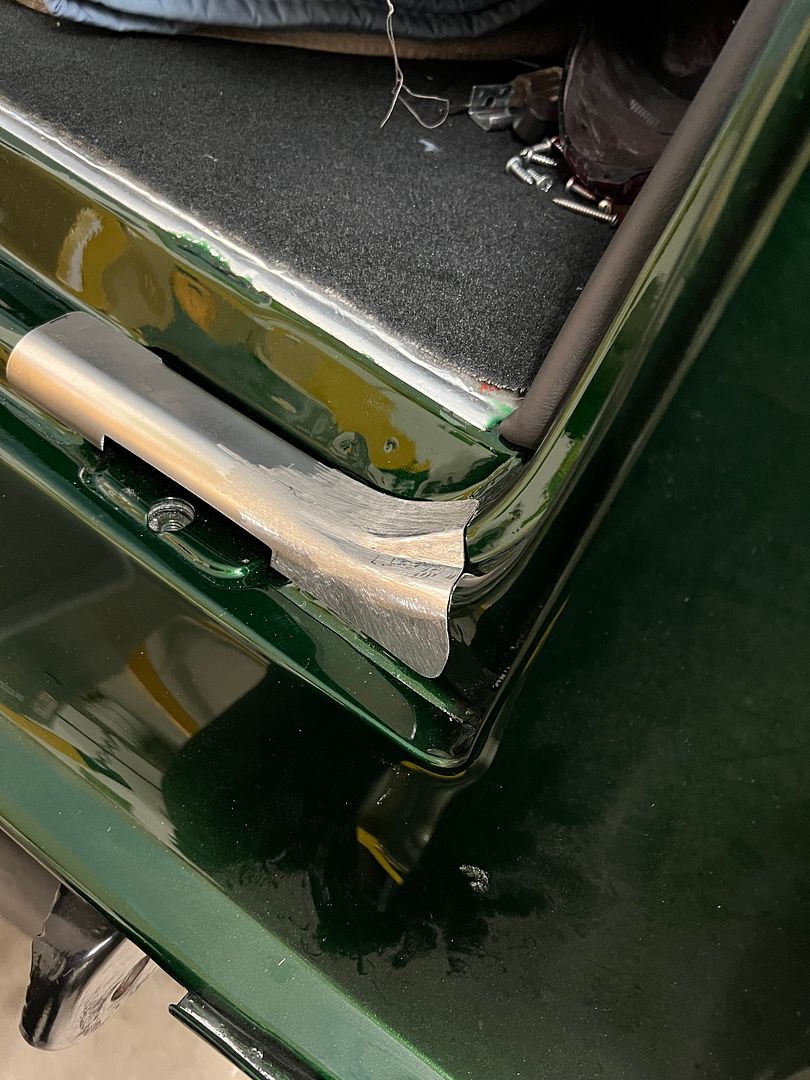 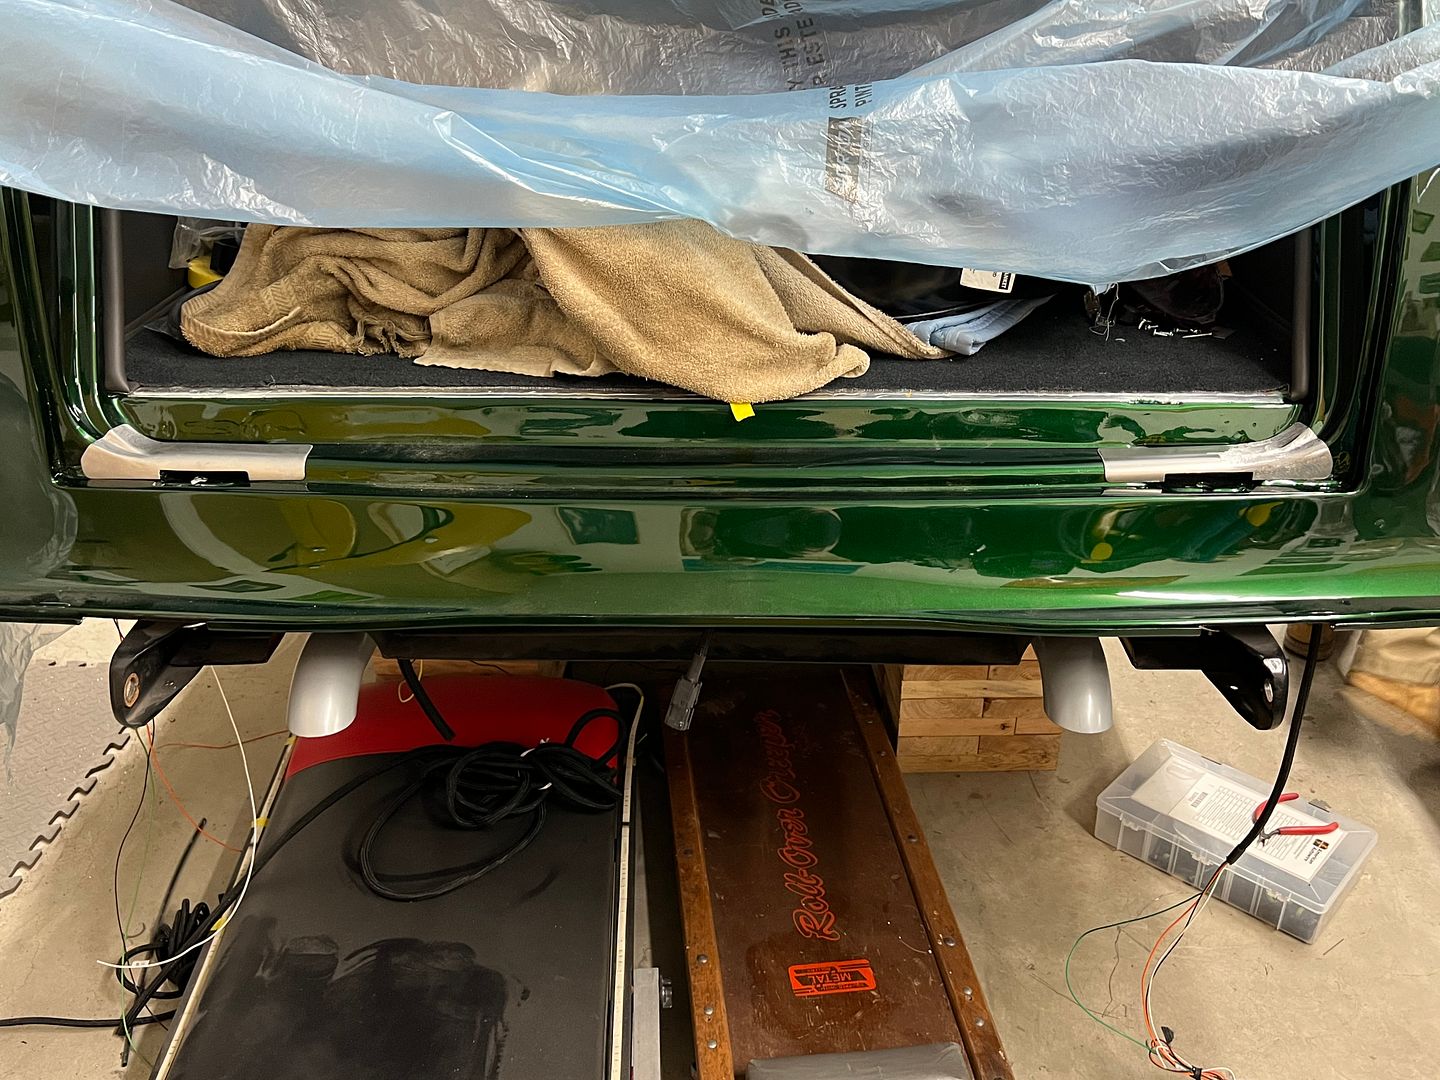 Much nicer look over the stock ones. While I was working on those, Jared has been prepping our stainless trim parts for polishing/buffing... 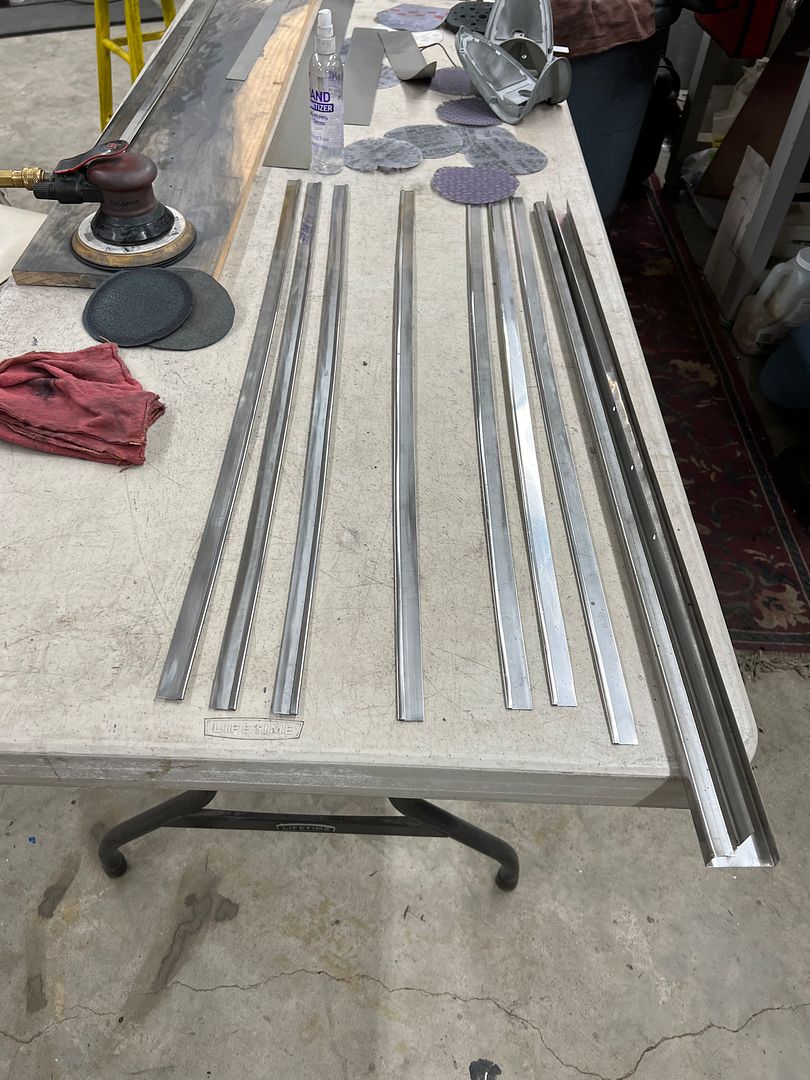 
__________________
Robert |

|

|
|
02-13-2023, 08:22 AM
|
#1327 |
|
Registered User
Join Date: Jan 2013
Location: Leonardtown, MD
Posts: 1,633
|
Re: 55 Wagon Progress
Tying up some loose ends, We still need to finish the wiring at the back of the car, but in the middle of modifying the tail light fixtures for bulb relocation. To that end, in an attempt to keep grounding issues to a minimum, quick disconnect tabs are silver soldered to the tail light housings.
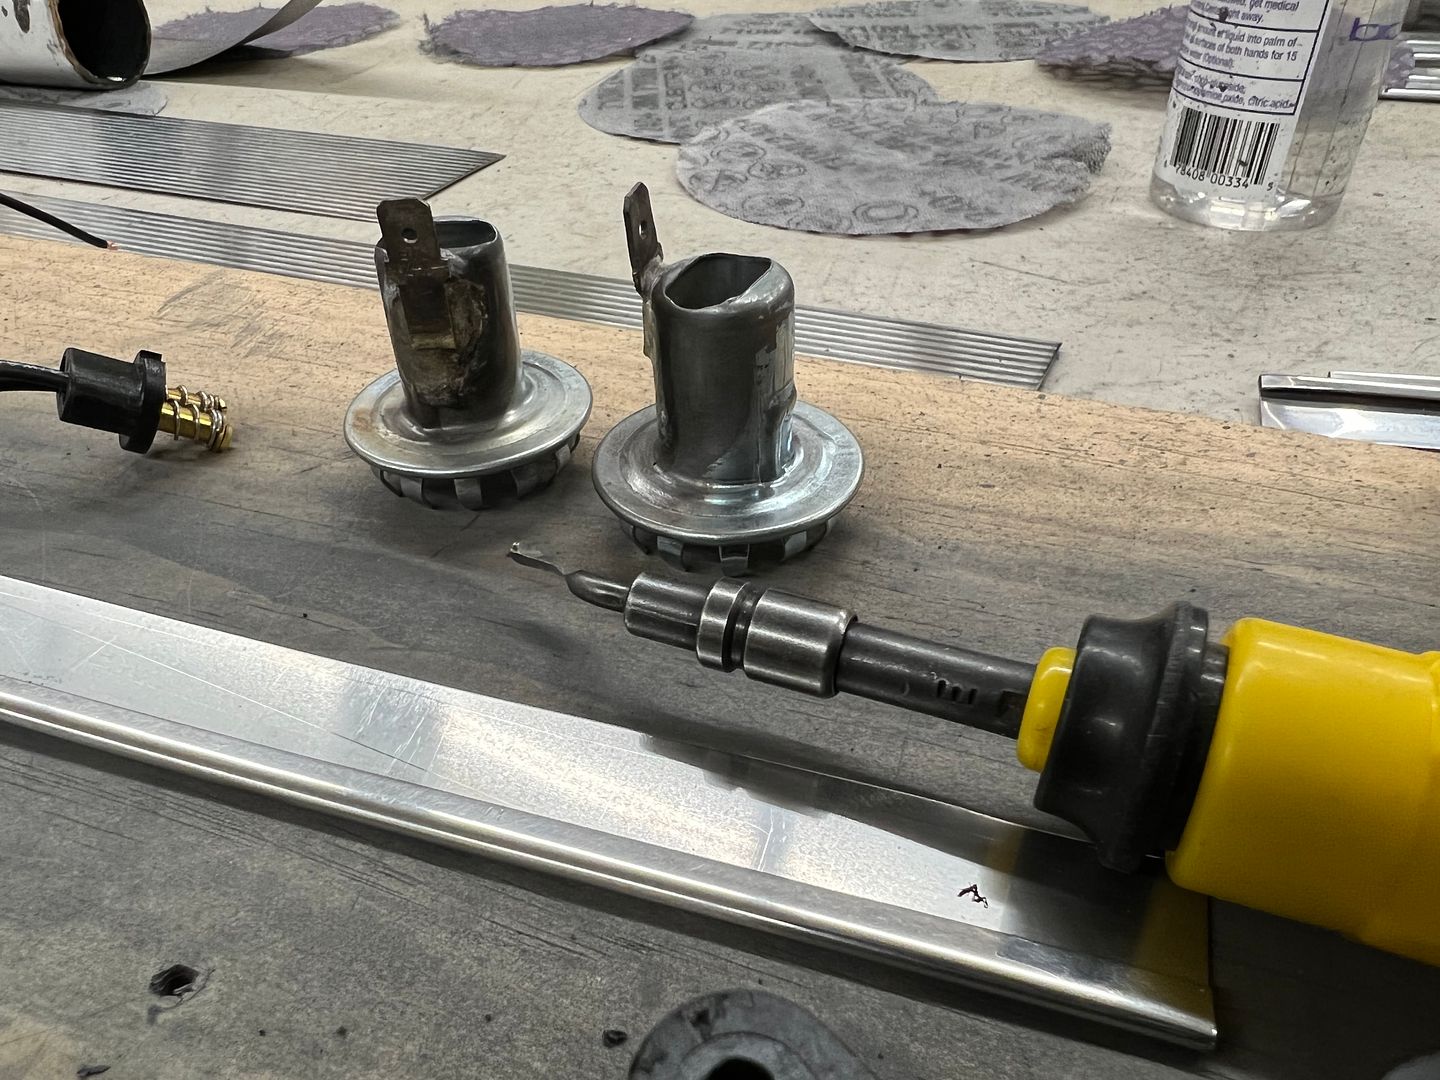 Next, we started the installation of the rear power windows. The rear motors had been mocked up a couple of times and the screw holes in the plastic housings were loose/borderline stripped. So they were drilled and tapped, and 10-32 heli-coils installed for a more permanent solution. 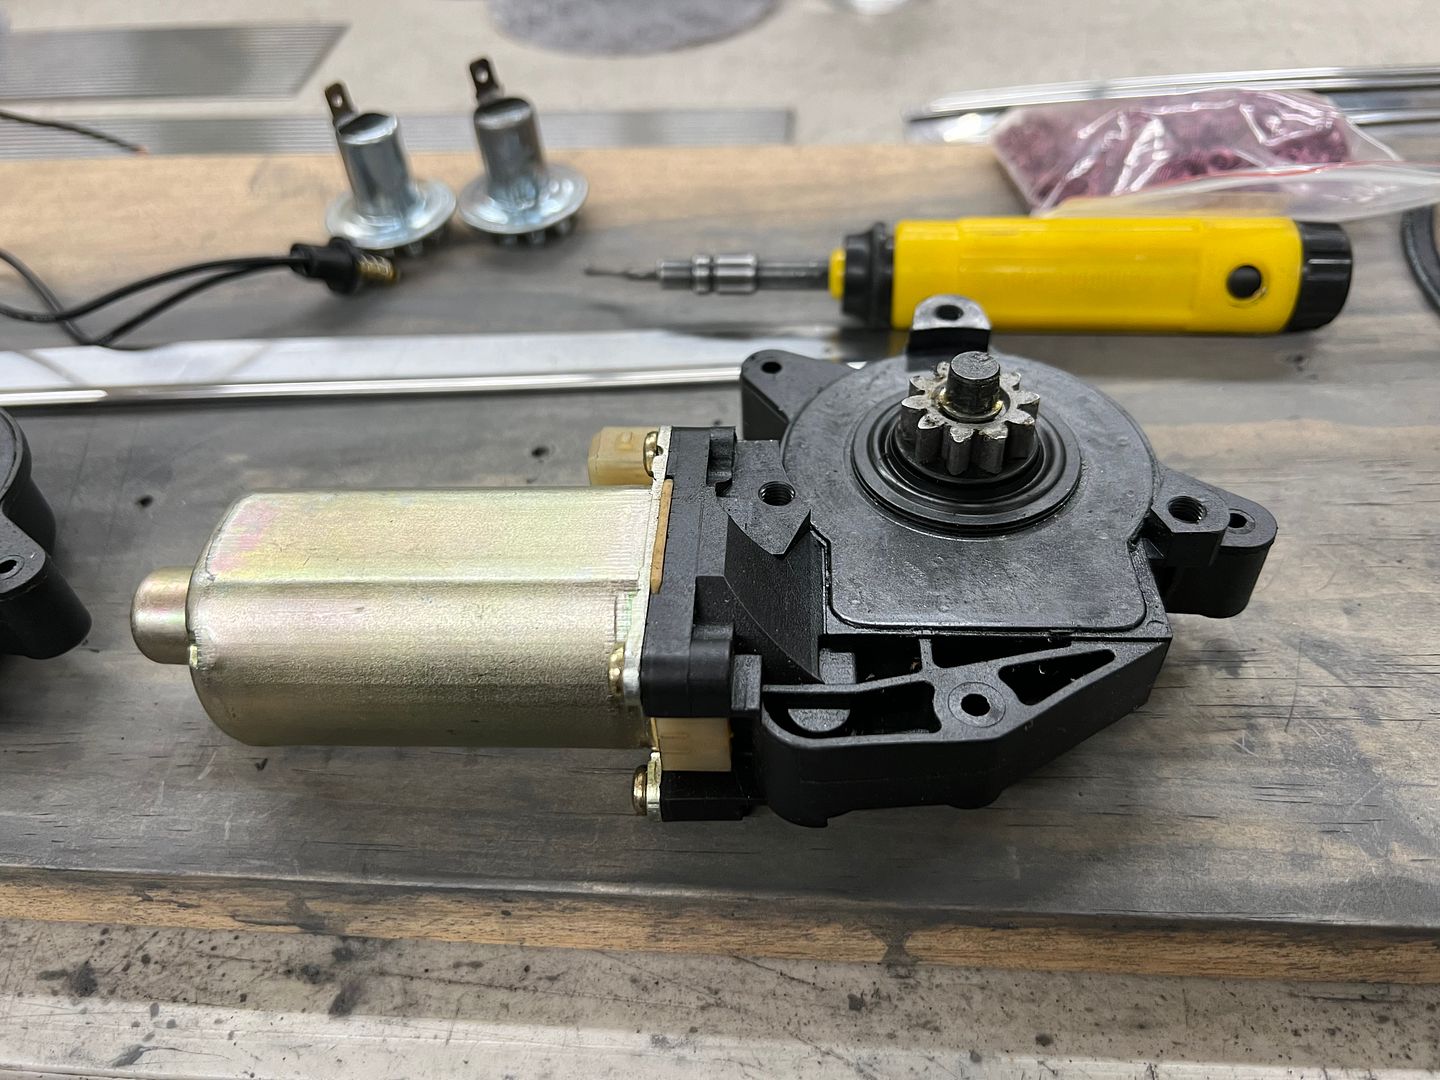 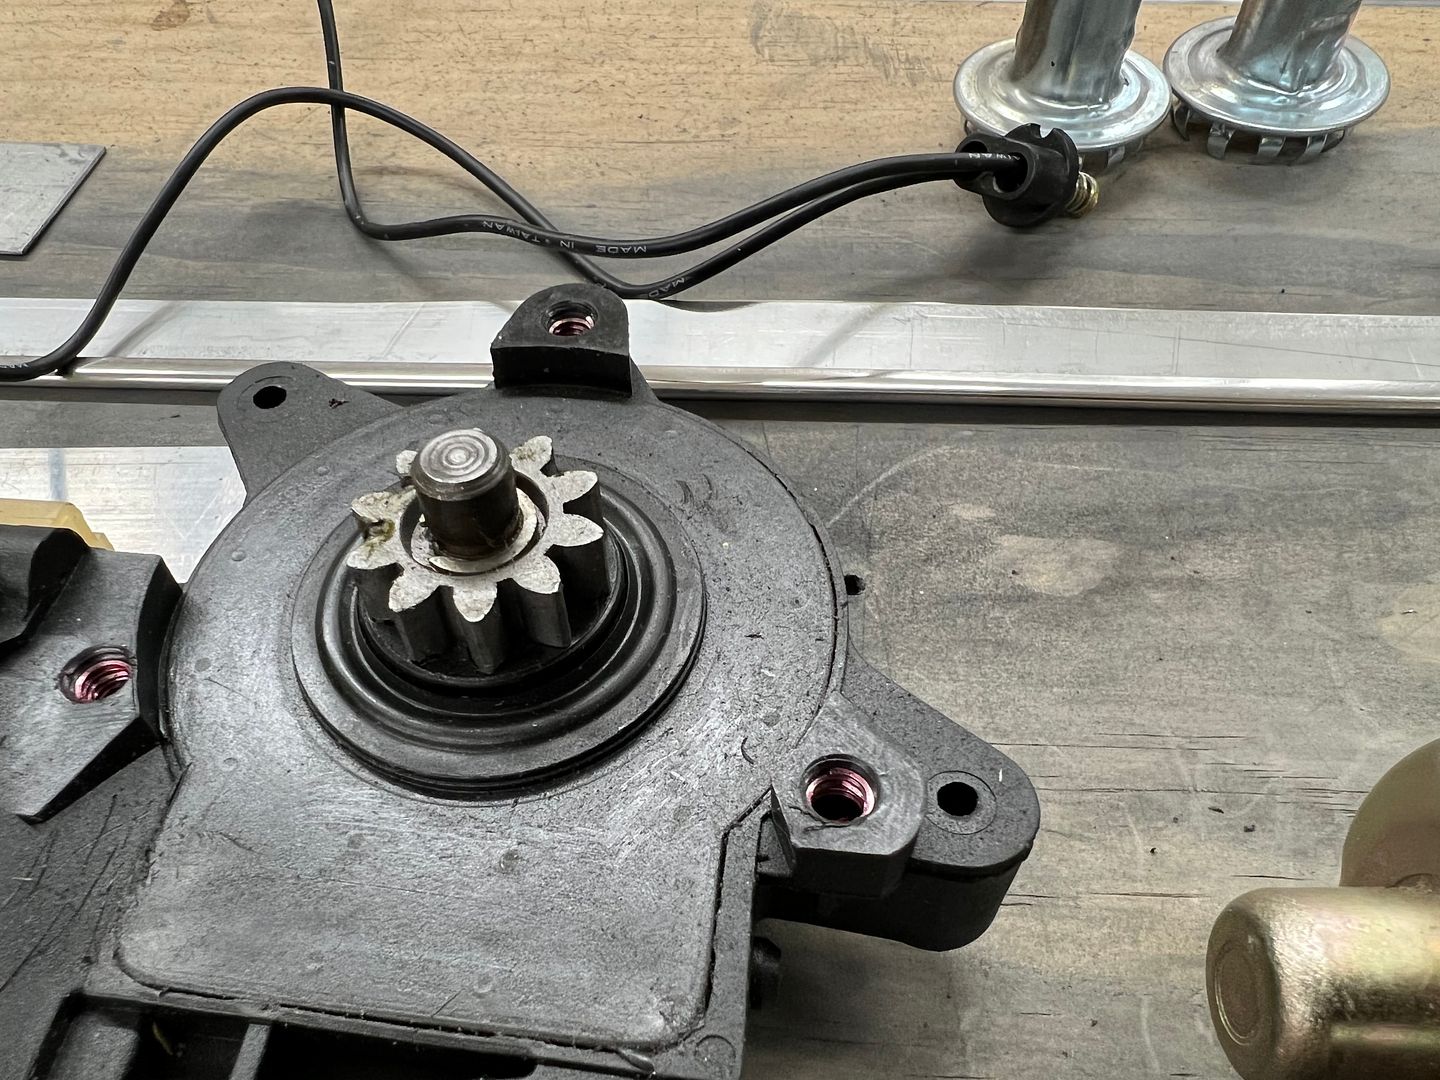 Once the power window track was installed, the OEM stop block for downward travel of the window was found to be useless as the window bottomed out into the wheelwell. Some delrin was cut to size, notched for a snug fit onto the track, and two holes drilled for attachment to the track. Worked well... 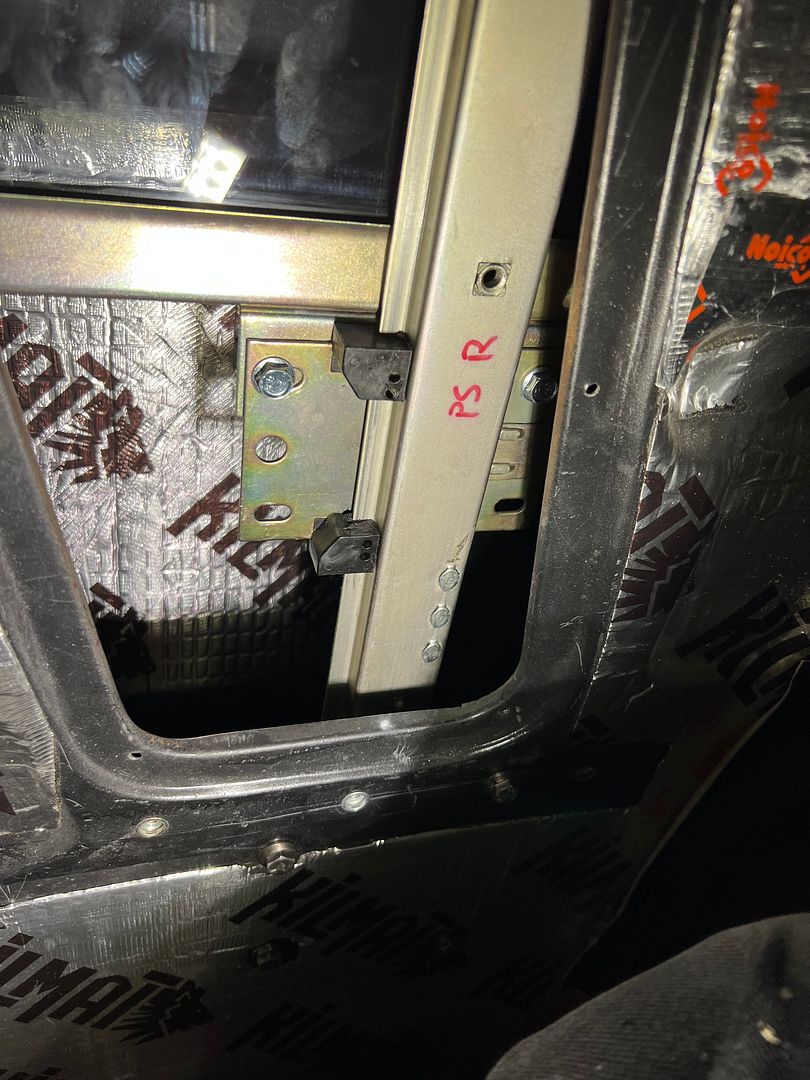 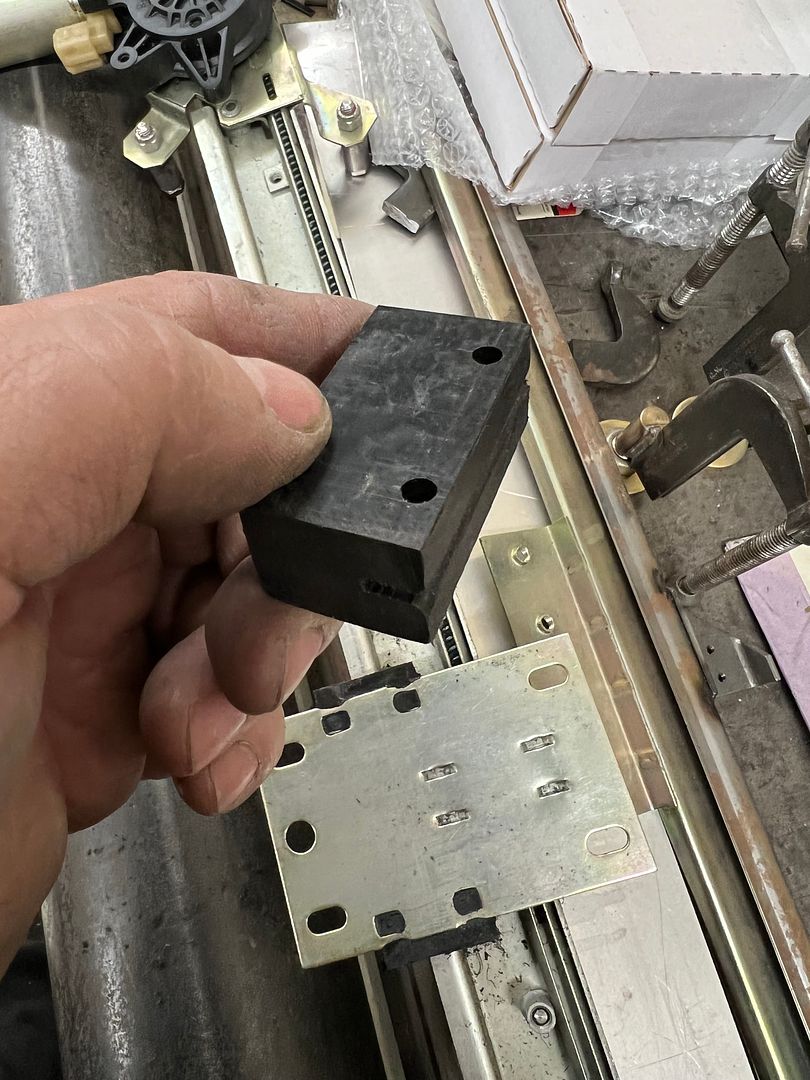 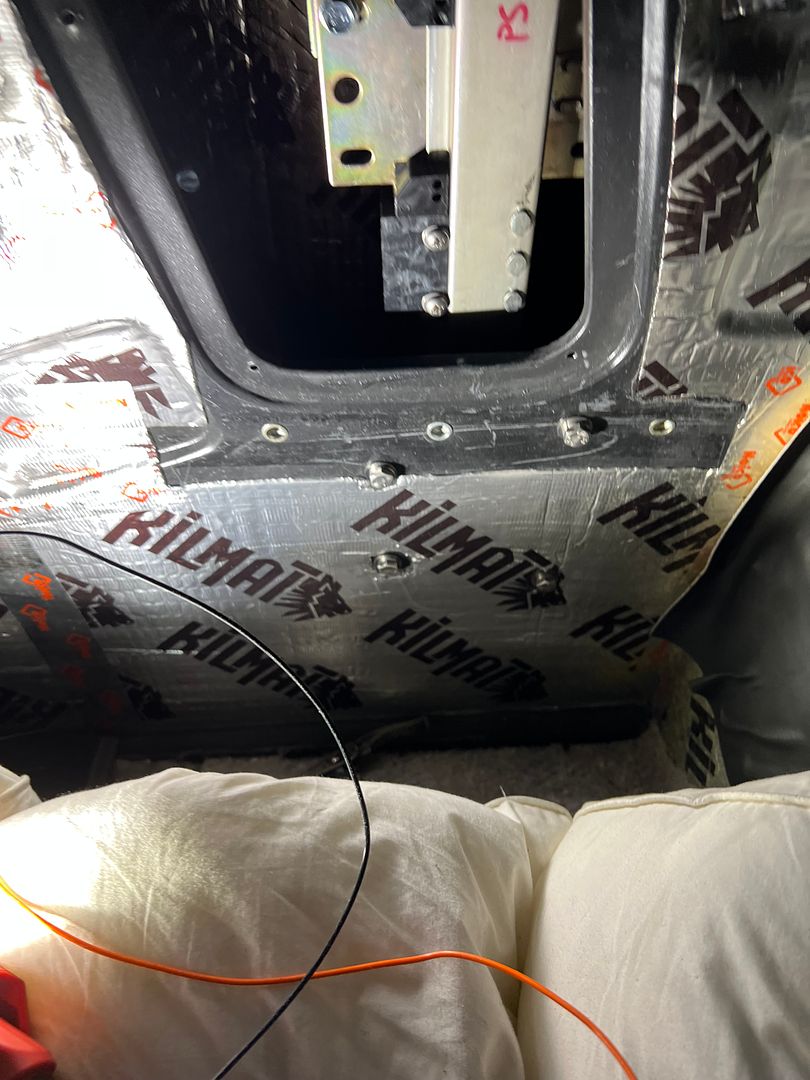 https://www.youtube.com/shorts/vjqXa3sq7D0 While here at the rear window, we still needed to drill mounting holes for the shoulder harness through the window garnish moldings. A 1/2-13 bolt was used to fabricate a threaded hole spotter on the lathe, complete with flats for wrench installation.   With garnish molding positioned, a quick tap of the dead blow hammer gives an exact location for the hole.  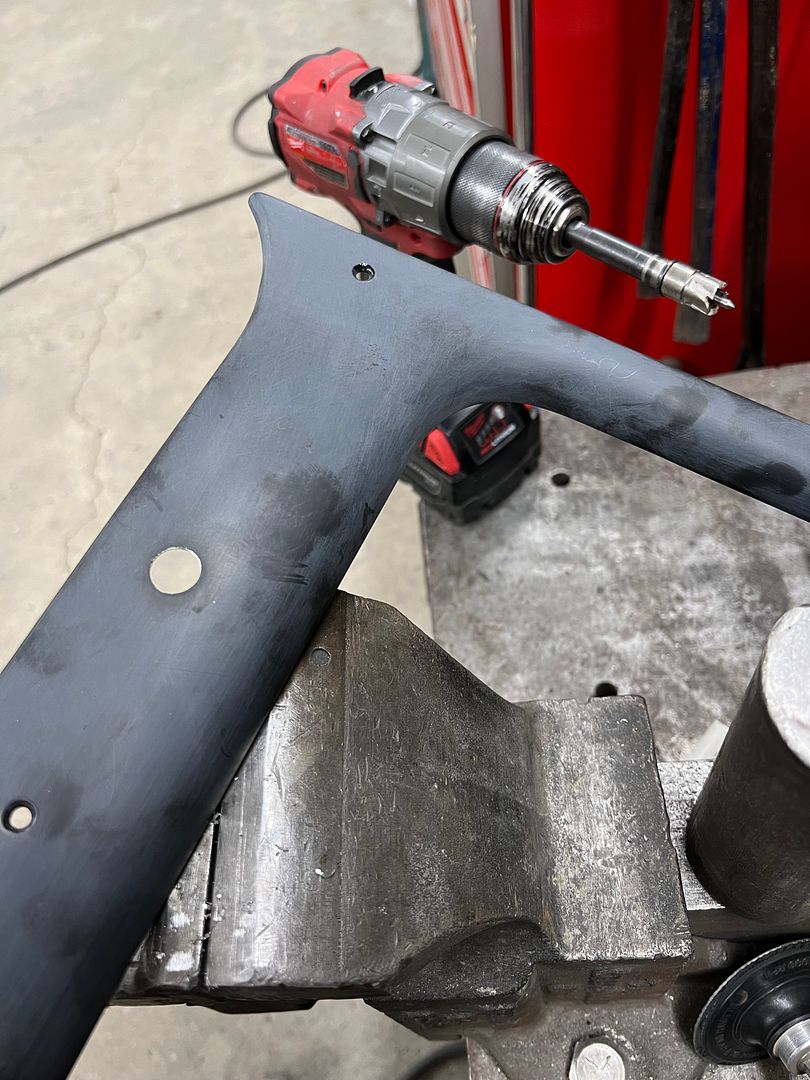 Next, in order that we don't leave an unfinished hole edge, a punch set was machined for the lathe, complete with stepped shoulders to prevent any movement in the jaws when pressure was applied. This will swage the hole edge for a nice inward flange... 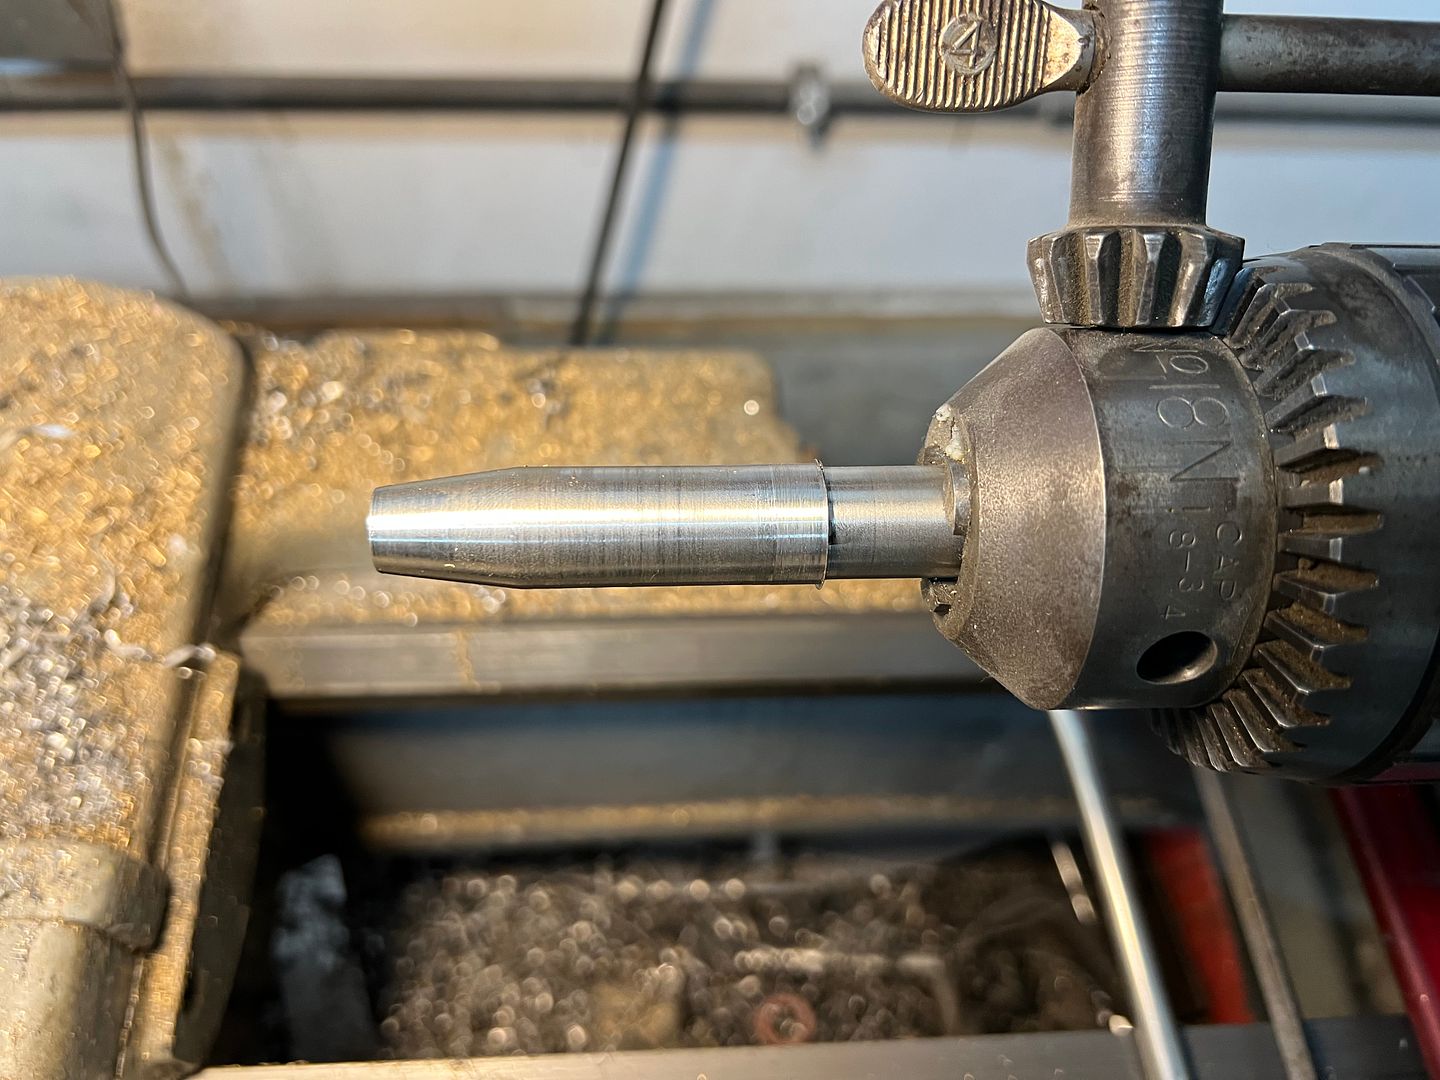 https://www.youtube.com/watch?v=-ZLbmvCv3kk  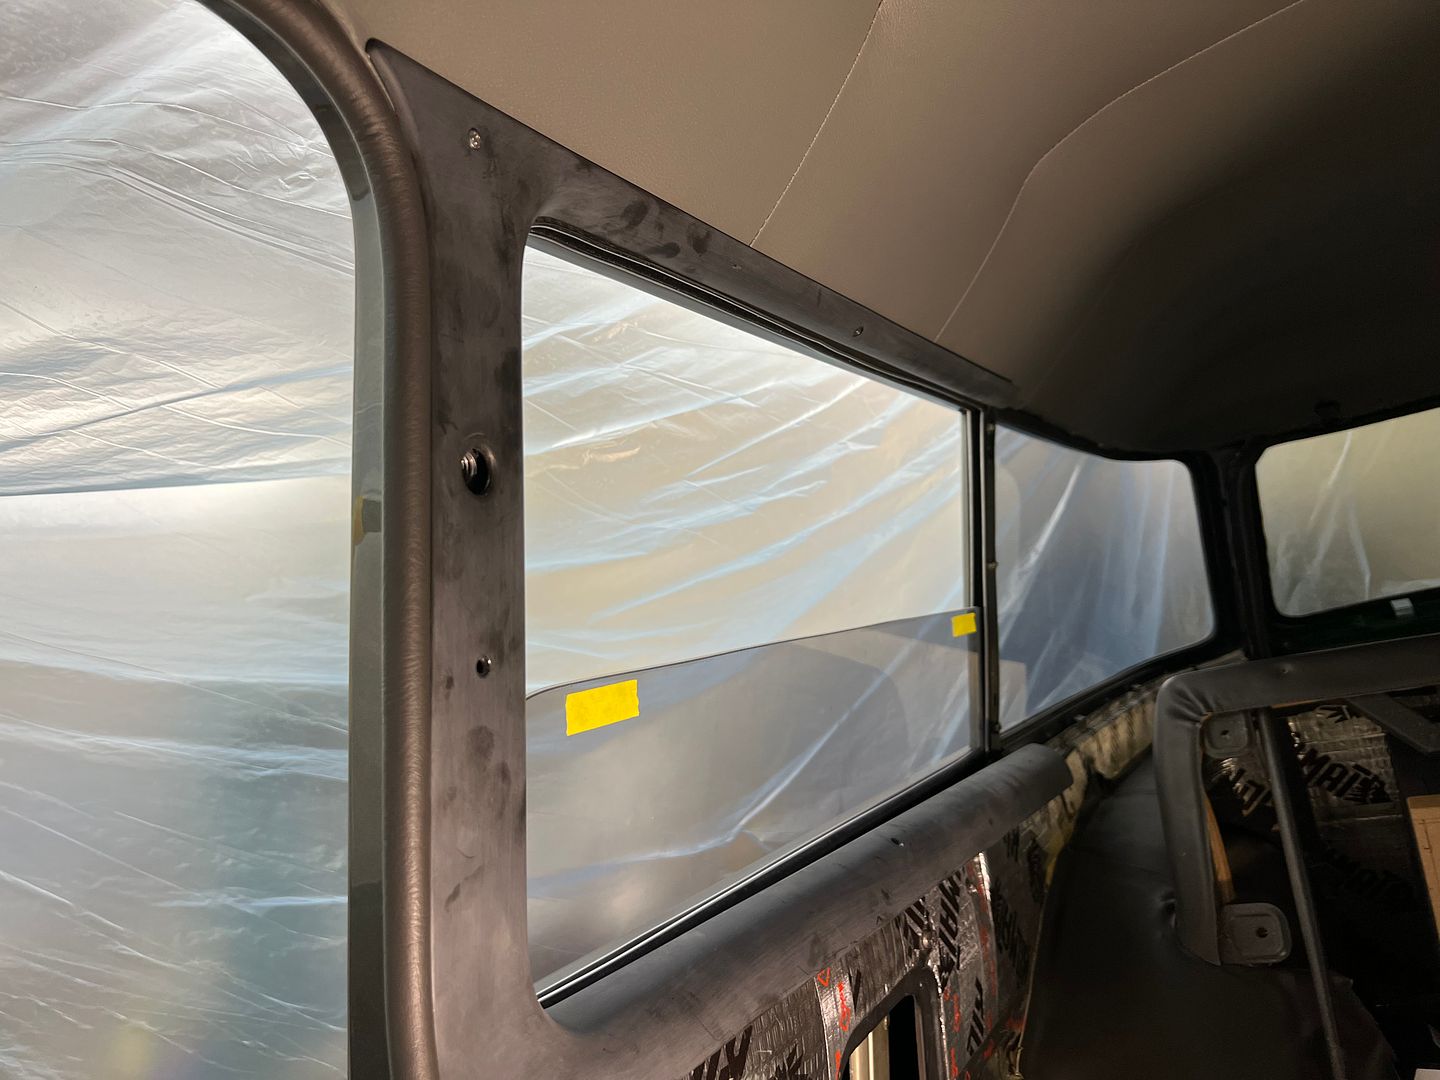 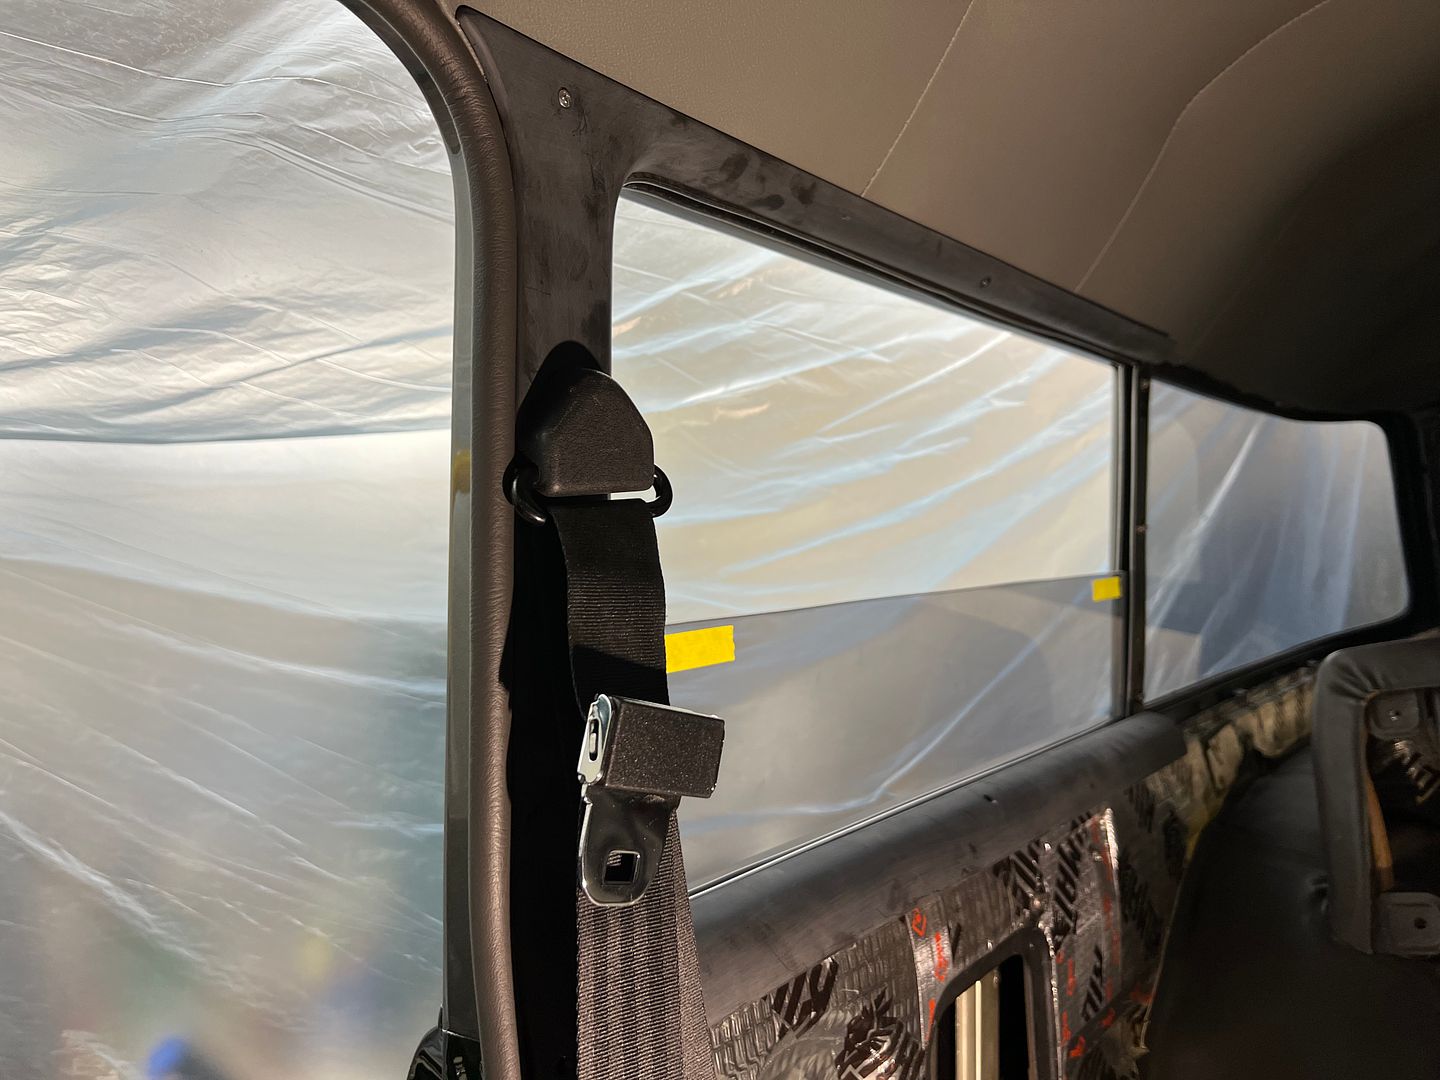 And we had received our new shipment of Cubitron H/L paper from Three Mules Welding Supply for dressing out stainless, so Jared continued prepping our edge trim parts. 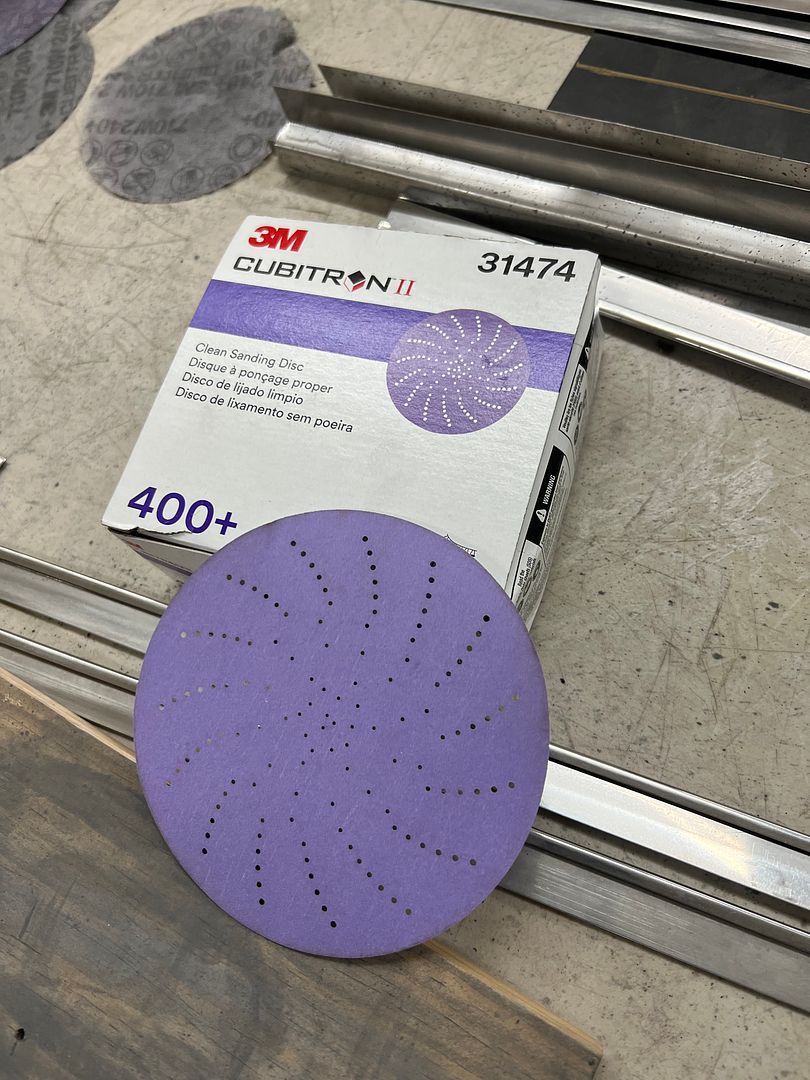 Where the hemming process we used with the bead roller isn't an exacting science, we did have some variance in the gap opening that made the prepping process a challenge. In order to get more consistency in gap width, (and thus flange flatness) a new widget tool was fabricated out of 16 gauge to open up those tight spots.   https://www.youtube.com/shorts/6FTmd8KPPu8 .
__________________
Robert |
|
|
|
|
02-25-2023, 11:54 PM
|
#1328 |
|
Registered User
Join Date: Jan 2013
Location: Leonardtown, MD
Posts: 1,633
|
Re: 55 Wagon Progress
More progress on the dash inset. In order to form the outer edge trim to fit, we made an "anvil" out of 19 gauge that match the dash inset. The excess flange was trimmed in the area of the sharp bend.
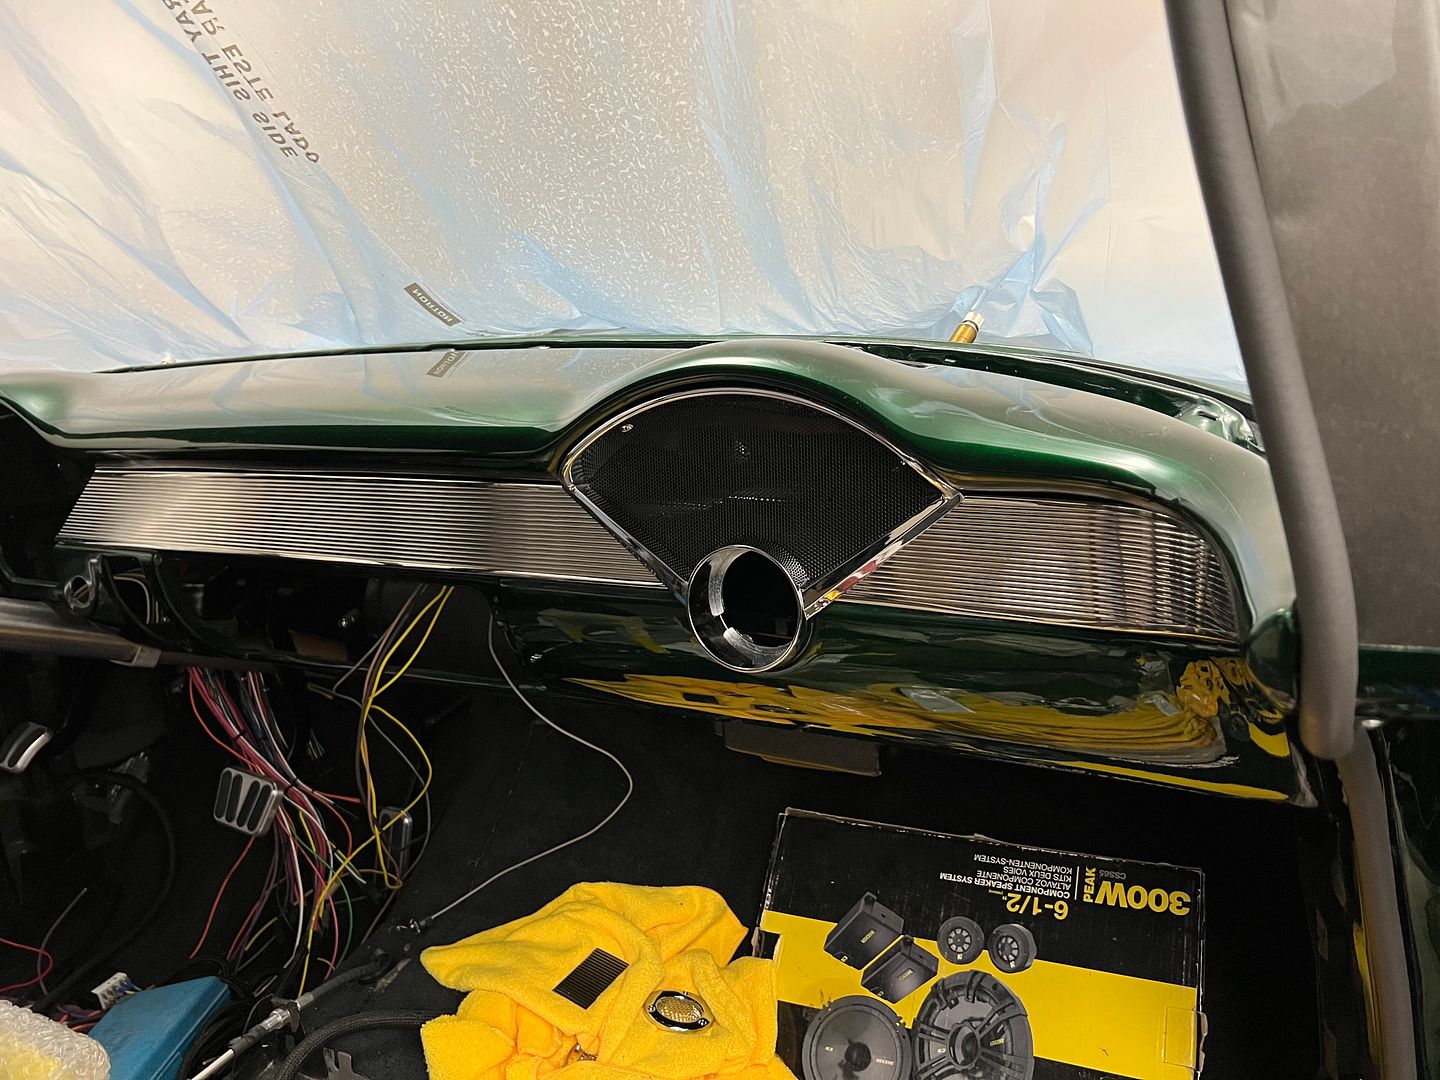
 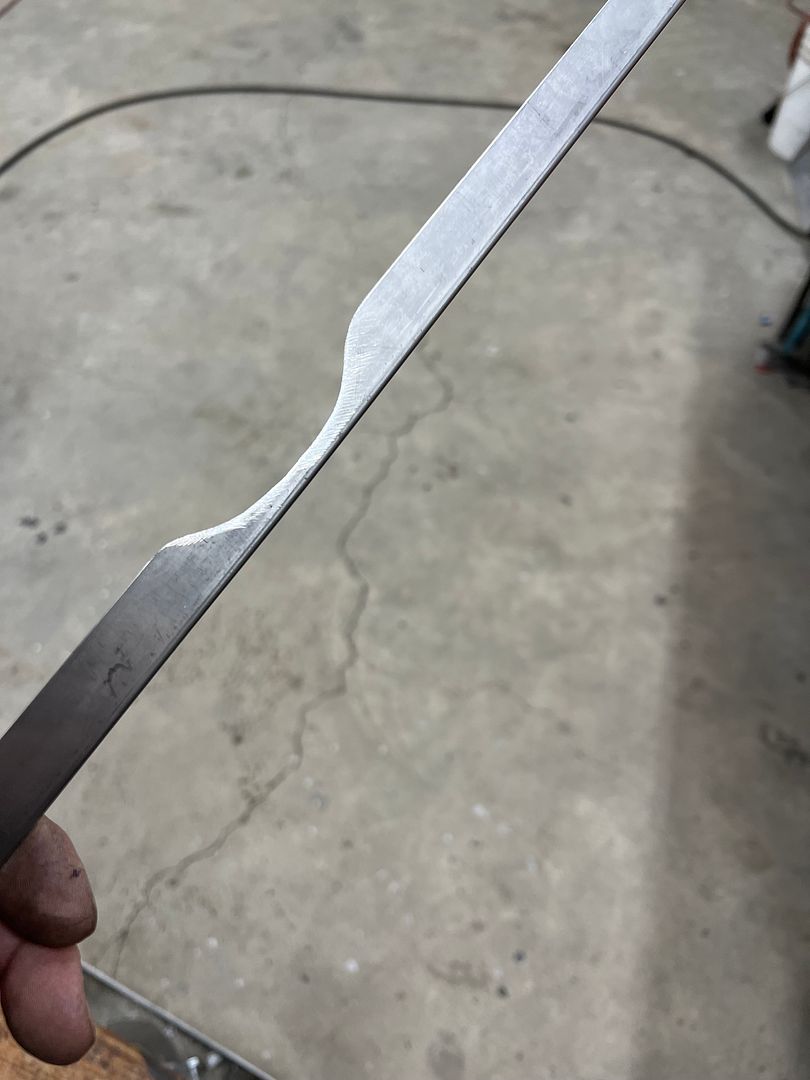  Some heat was applied to the bend area, slight persuasion added to bend a few degrees, the area flattened to remove any puckers, and repeat. 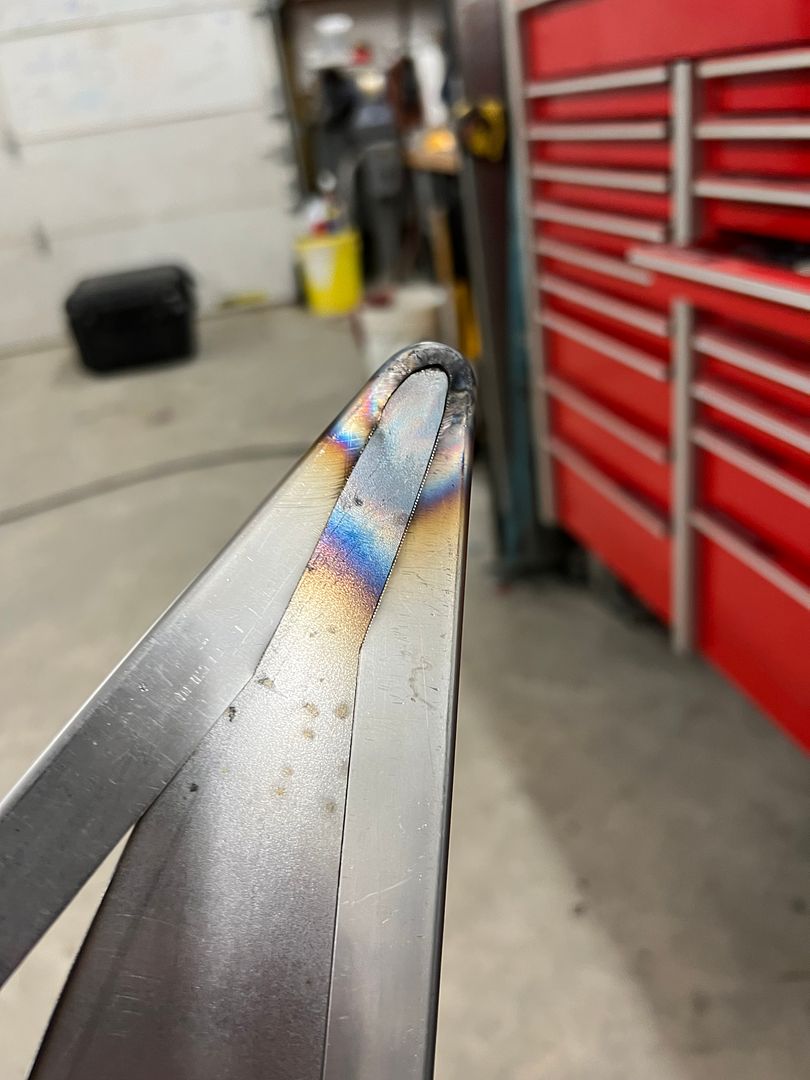 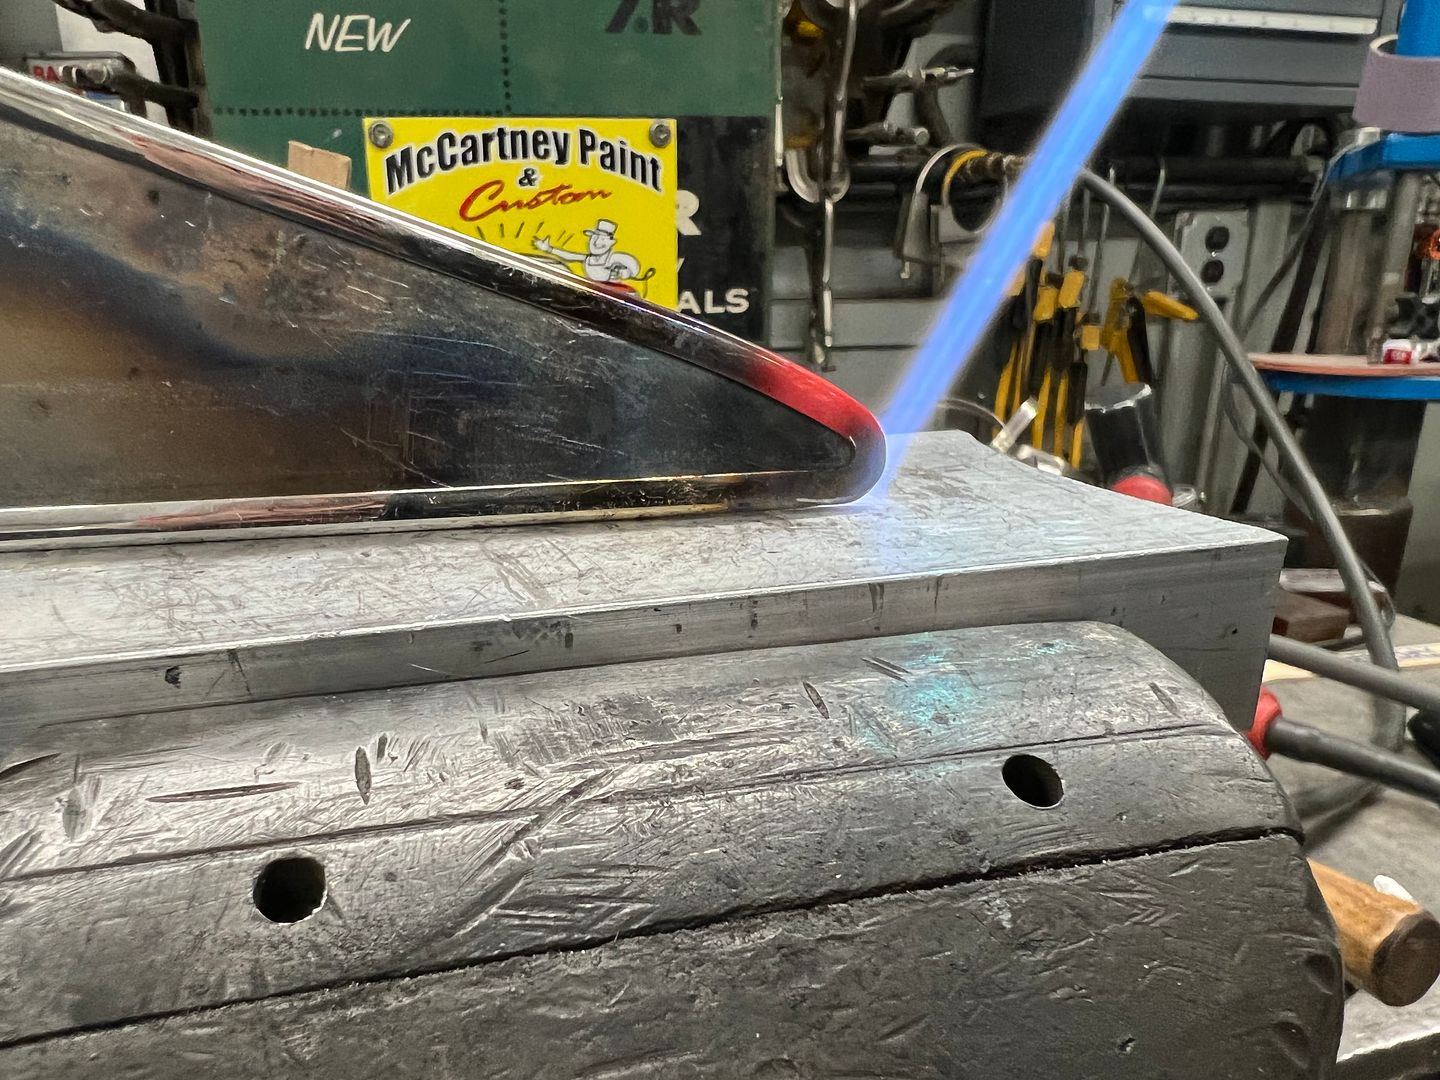 Then we needed to shrink the flange on the insides to match the opening. This was accomplished by squeezing the two edge trim ends together, adding a patch of heat to form a tuck, and then flatten out the tucks to provide the shrink. https://youtu.be/mDUlnW5rNSA 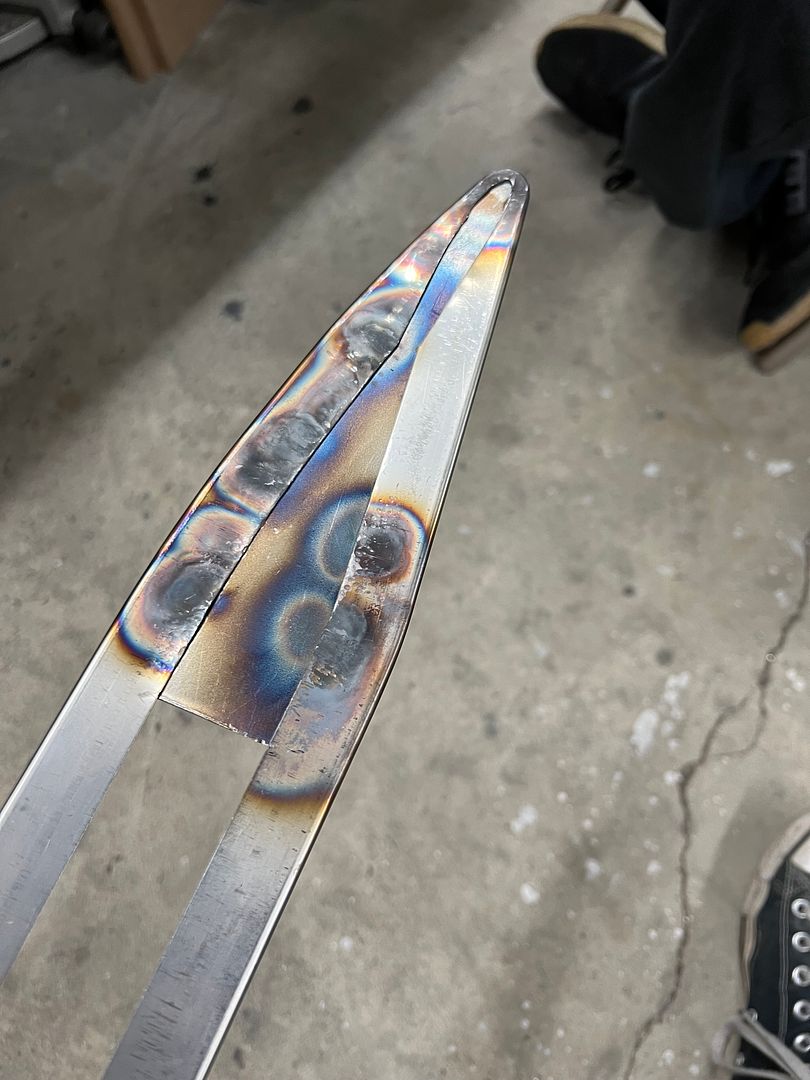 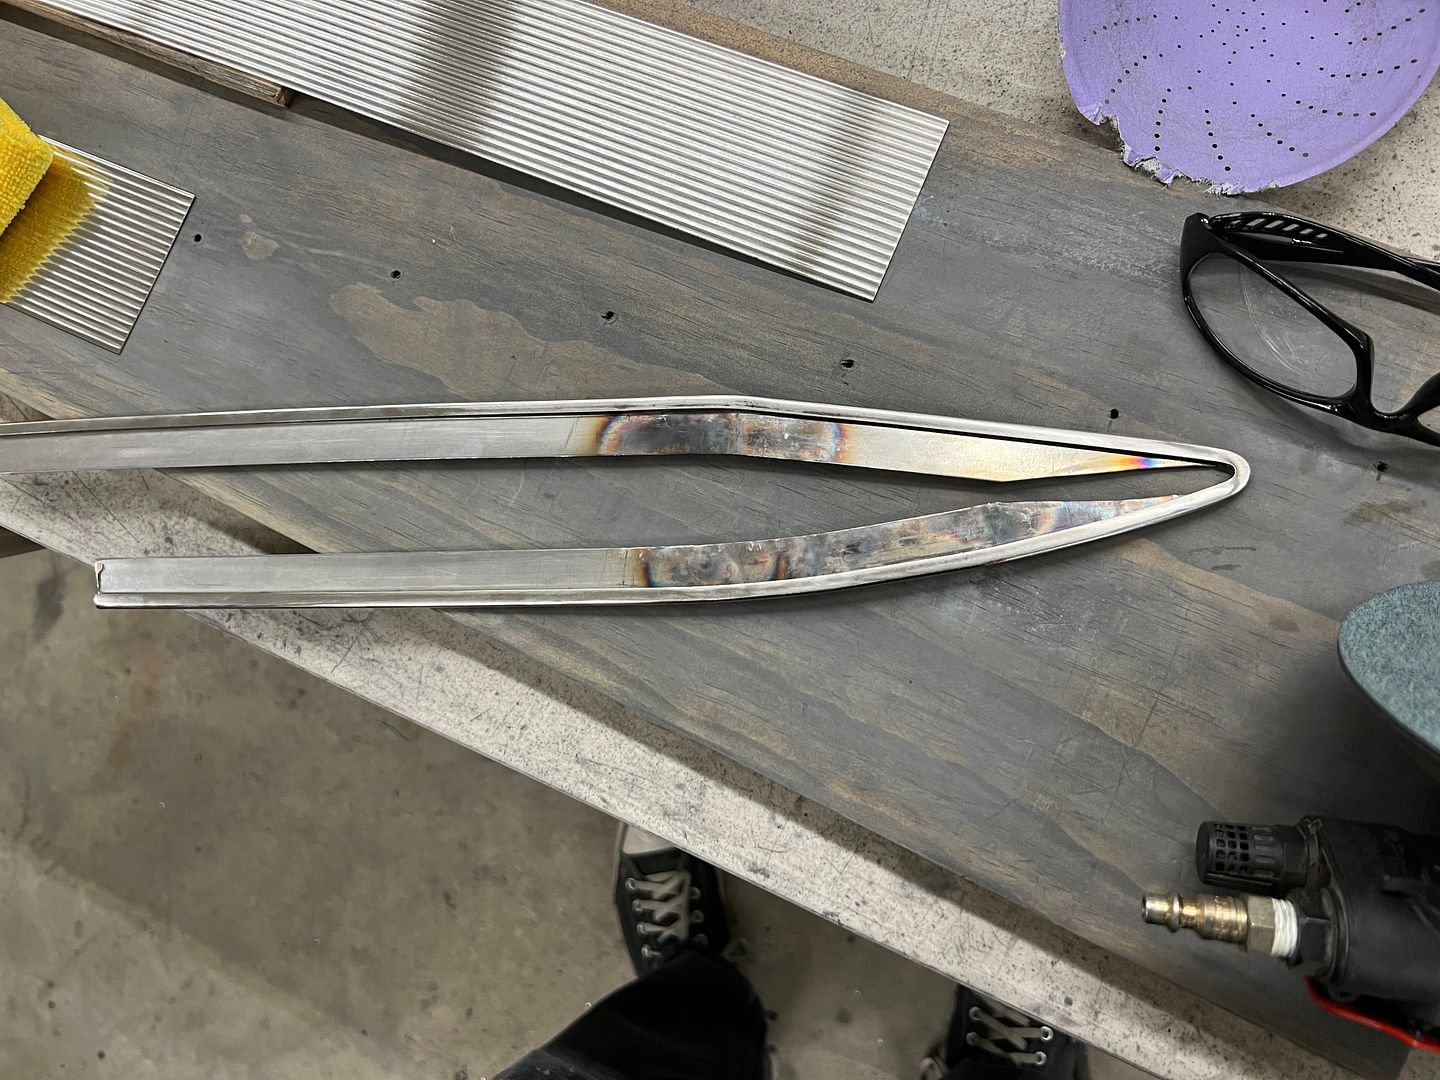 For attachment to the dash, 8-32 press studs were installed in the inner flanges where they are also out of sight. The ribbed stainless was installed in the edge trim, then wrapped around our oxygen bottle to provide the radius. 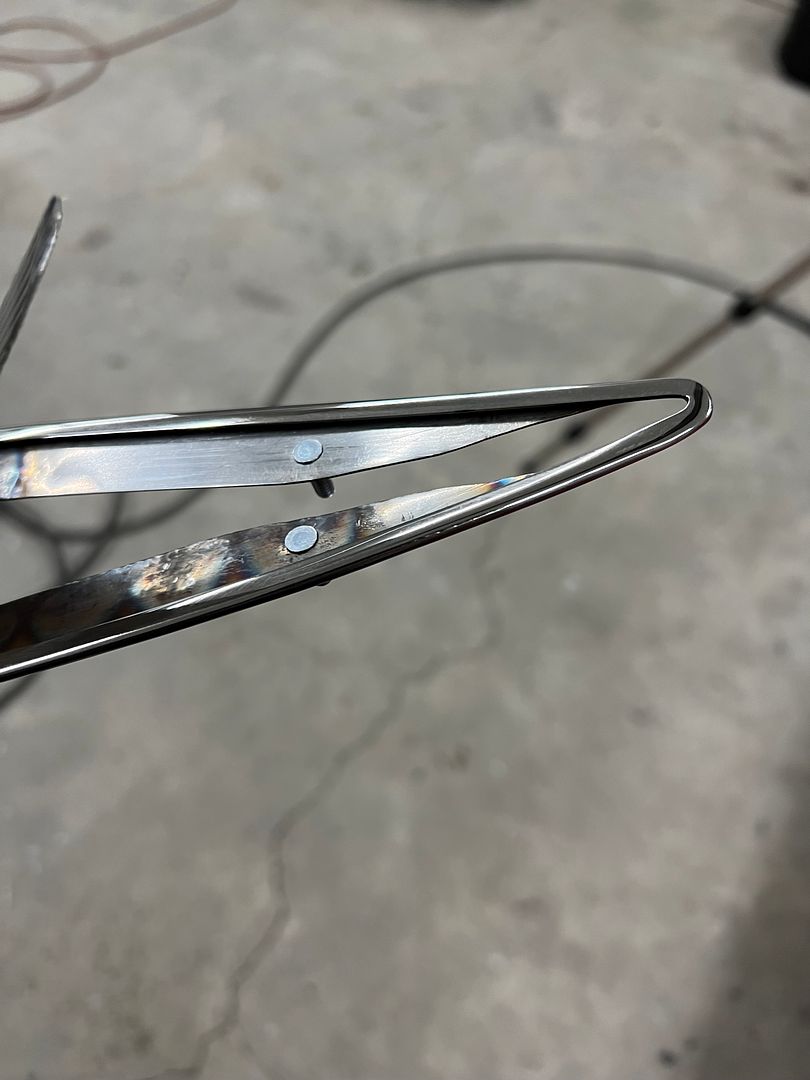 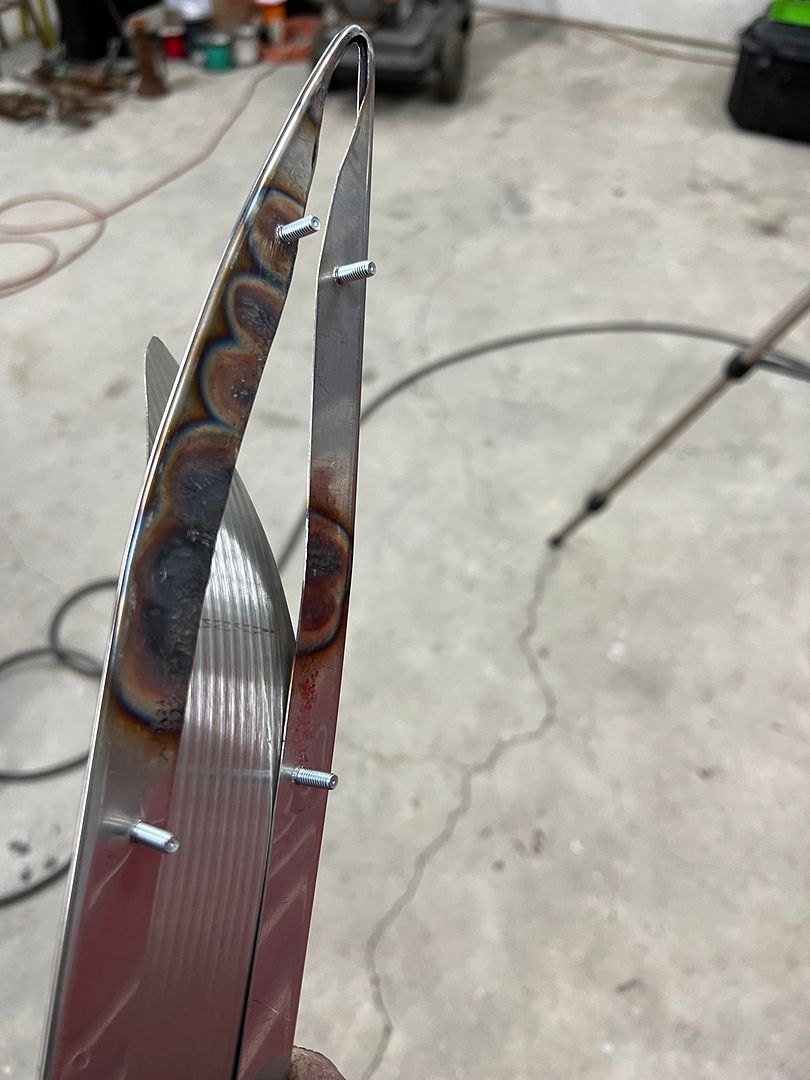 And a sneak peek at our trim fitted to the dash... https://youtu.be/wZk6FftVcC0 
__________________
Robert |
|
|
|
|
03-01-2023, 03:39 PM
|
#1329 |
|
Registered User
Join Date: Jan 2013
Location: Leonardtown, MD
Posts: 1,633
|
Re: 55 Wagon Progress
More shiny stuff...
    Since I was on a road trip Sunday, I popped in and visited the patent display that we made the hood for. The owner has it re-wired and reflectors installed. This video gives a better idea of what it was used for.. https://www.youtube.com/watch?v=sw0gYxvY2m4 Back in the early 20's there were lights that would attach to the bumper and a cable driven mechanism attached to the front steering so that the light would follow the direction of travel. Advantageous for the limited brightness of the headlamps in those days. So this was likely a salesman's prop for selling such a lighting accessory.
__________________
Robert |
|
|
|
|
03-19-2023, 03:01 AM
|
#1330 |
|
Registered User
Join Date: Jan 2013
Location: Leonardtown, MD
Posts: 1,633
|
Re: 55 Wagon Progress
Before we could install the rear bumper we needed to install the rear bumper seal, this keeps exhaust fumes from sneaking through and getting sucked in the back tailgate. The seal sits in a channel which is then "crimped" with some rounded pliers. Only my rounded pliers did not work, we needed parallel jaw pliers. So these channel locks were modified by adding the round stock. Only that did not hold well enough, so a dimpler was added to the bottom jaw, as shown...
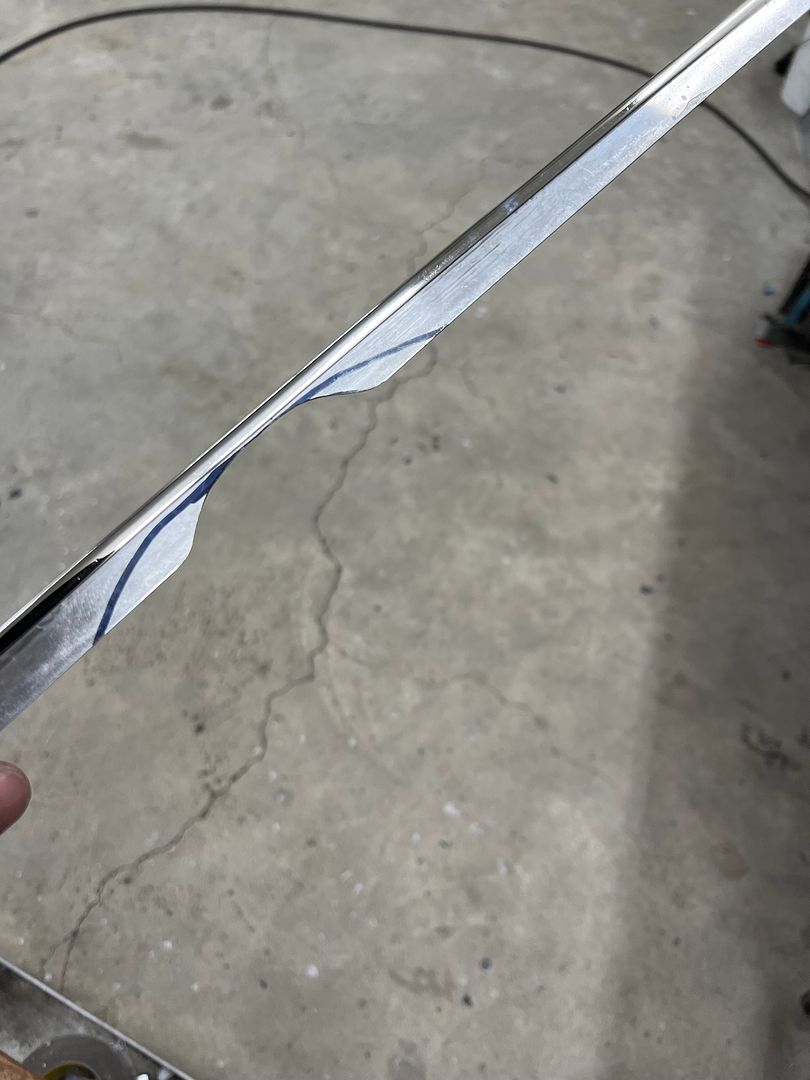
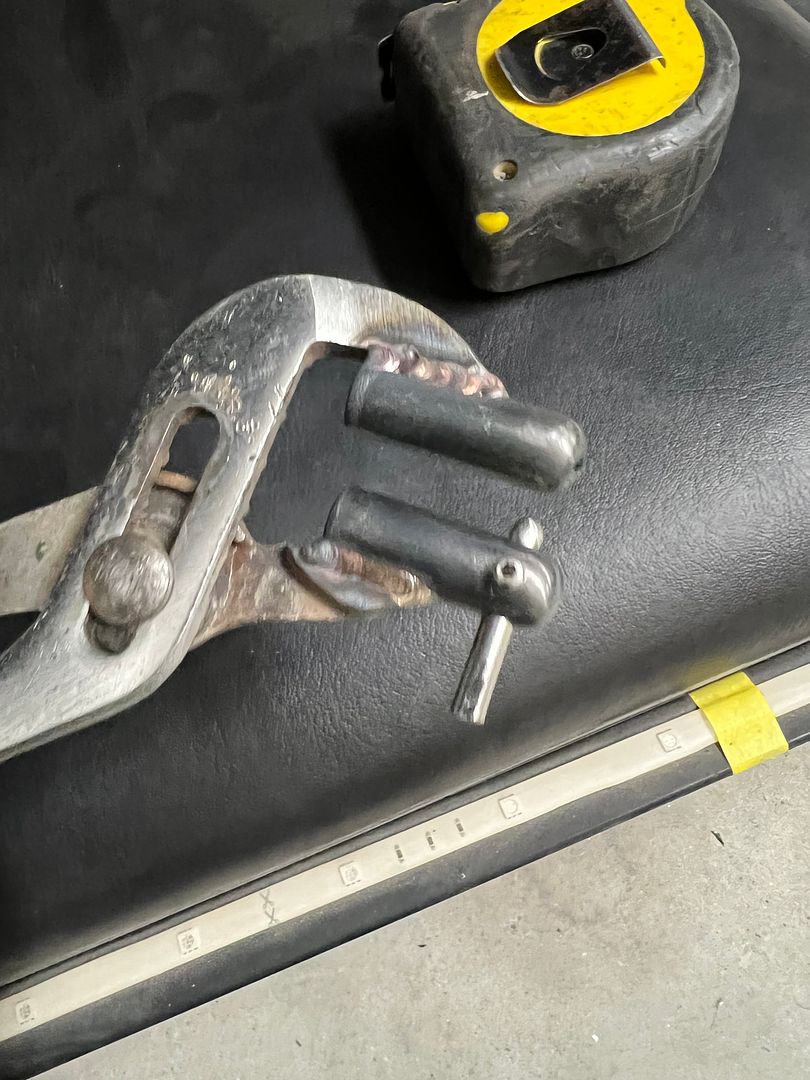  These dimples gave us enough grip, and any chips were removed and then recoated with a couple coats of epoxy primer.  Here's the bumper added, and a video that better shows the hidden hardware... 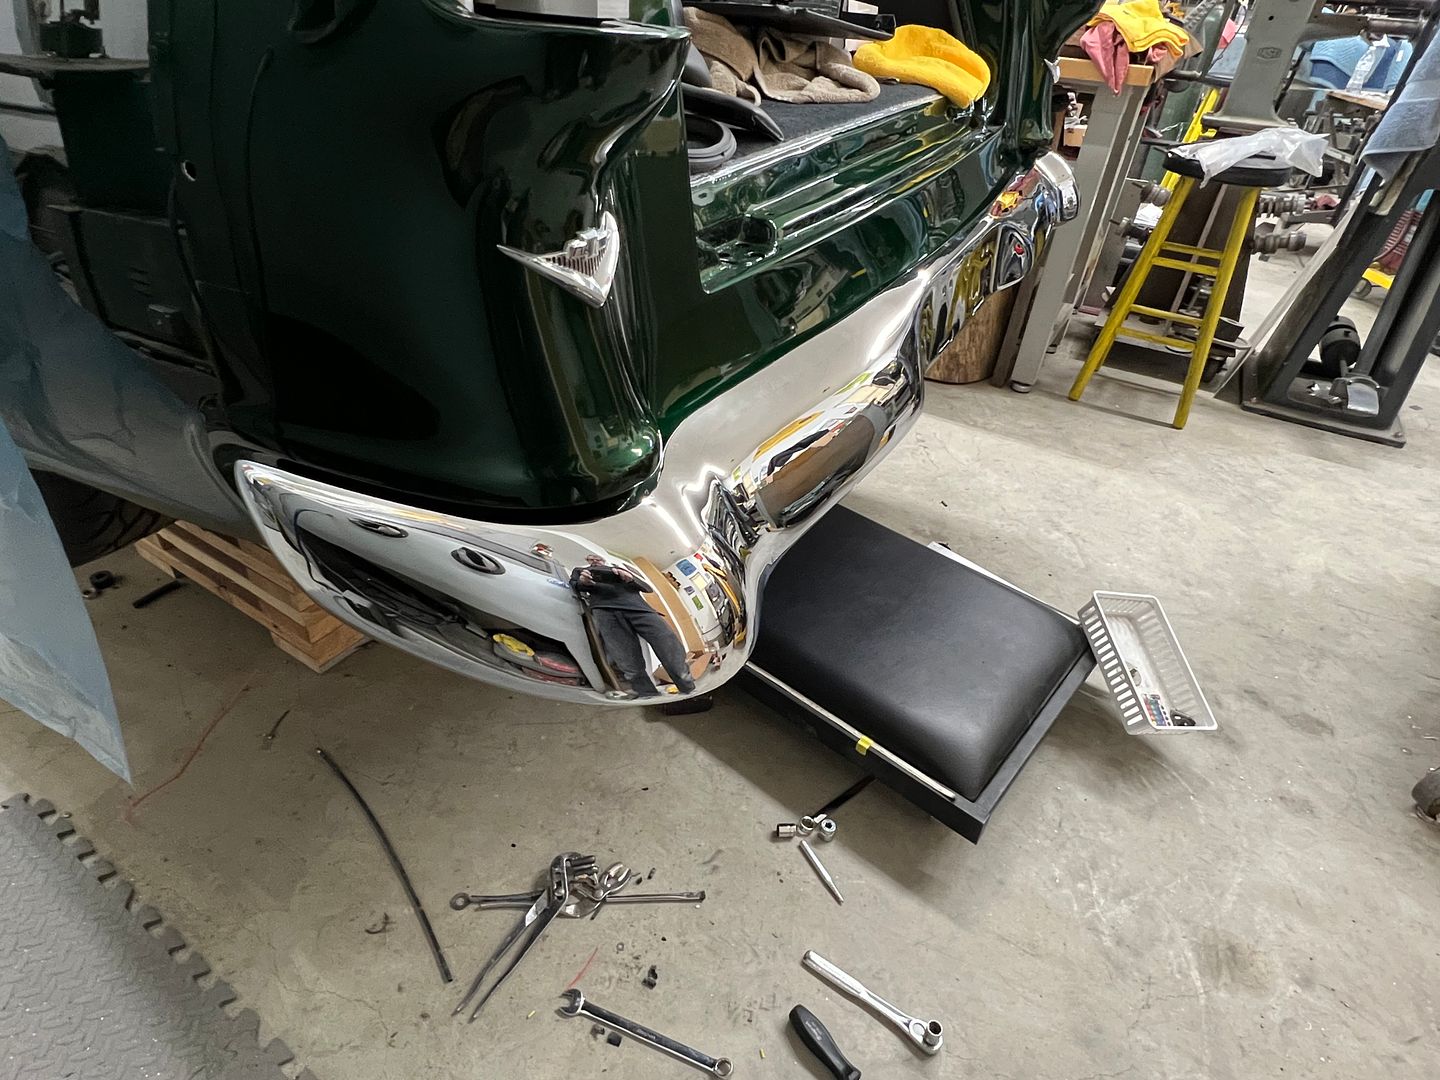 https://www.youtube.com/watch?v=XLtCAbLpv48 Here's a closer look at the forming of the edge trim for our dash inset trim. We had made a template out of 19 gauge steel to match the dash inset, and used it (and some heat) to form the point. This video shows the shrinking of the flange so the edge trim would match. The upper and lower edge trim was squeezed while applying heat to form a tuck for shrinking the flange and providing the radius. https://www.youtube.com/watch?v=Cwpt3_R4284 All shaped, before polishing.. 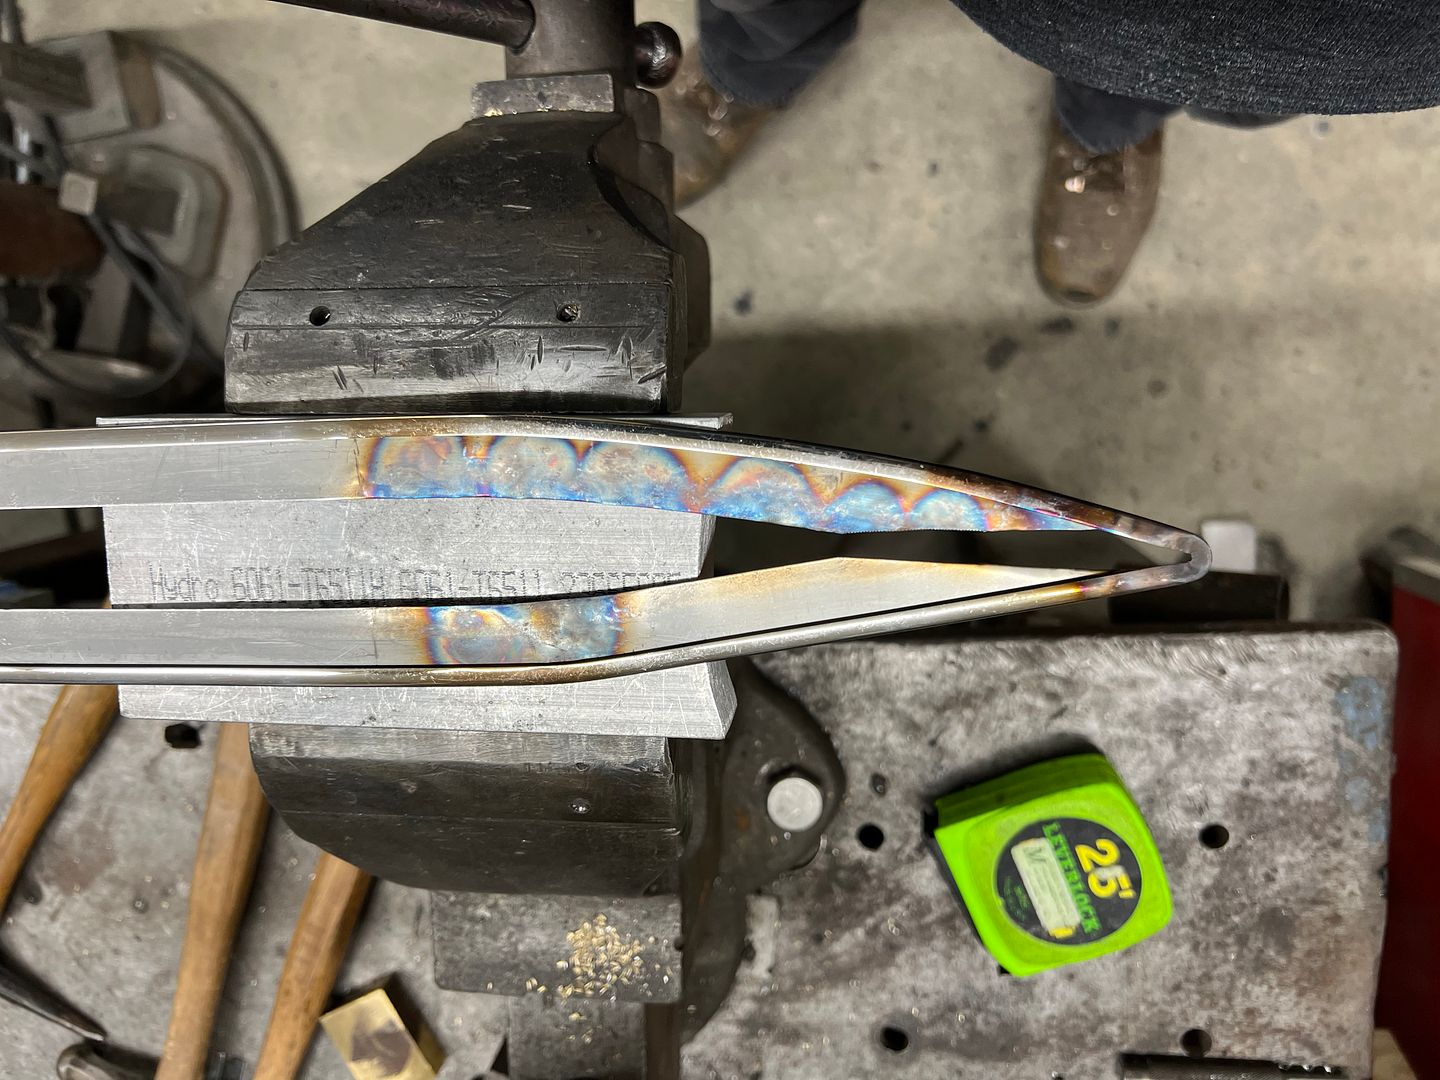 Press studs installed... 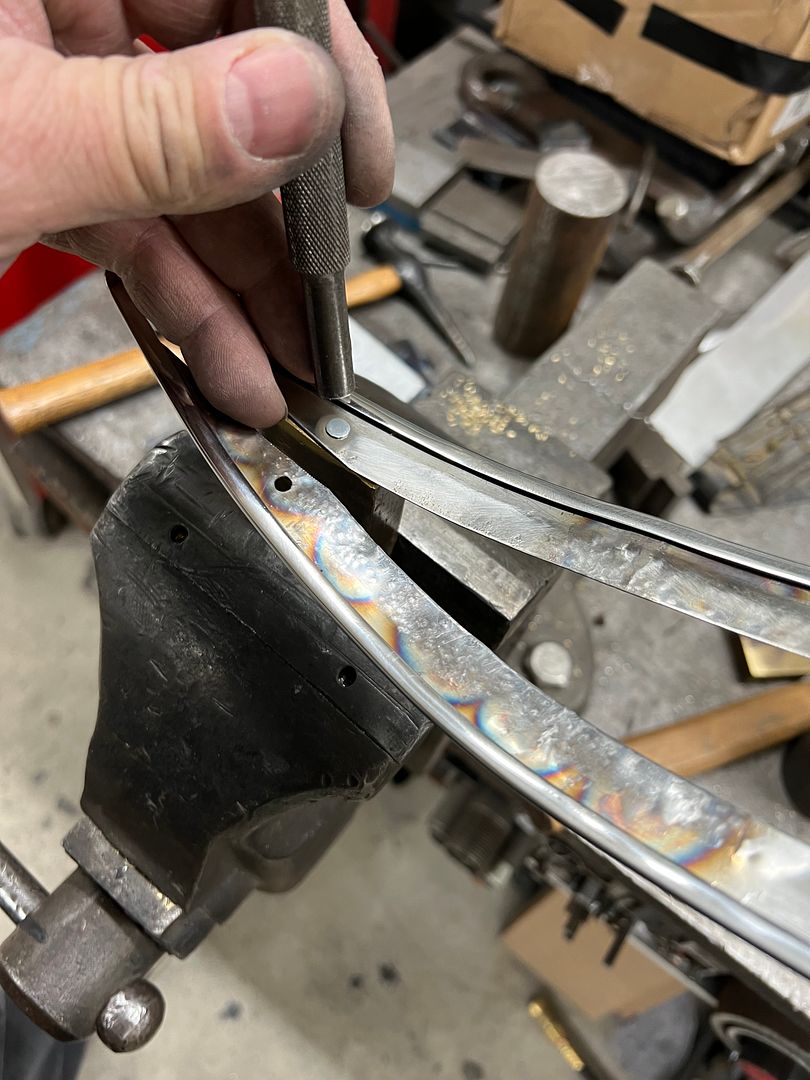 Ribbed stainless insert added and our green radius brake used to match the dash profile... 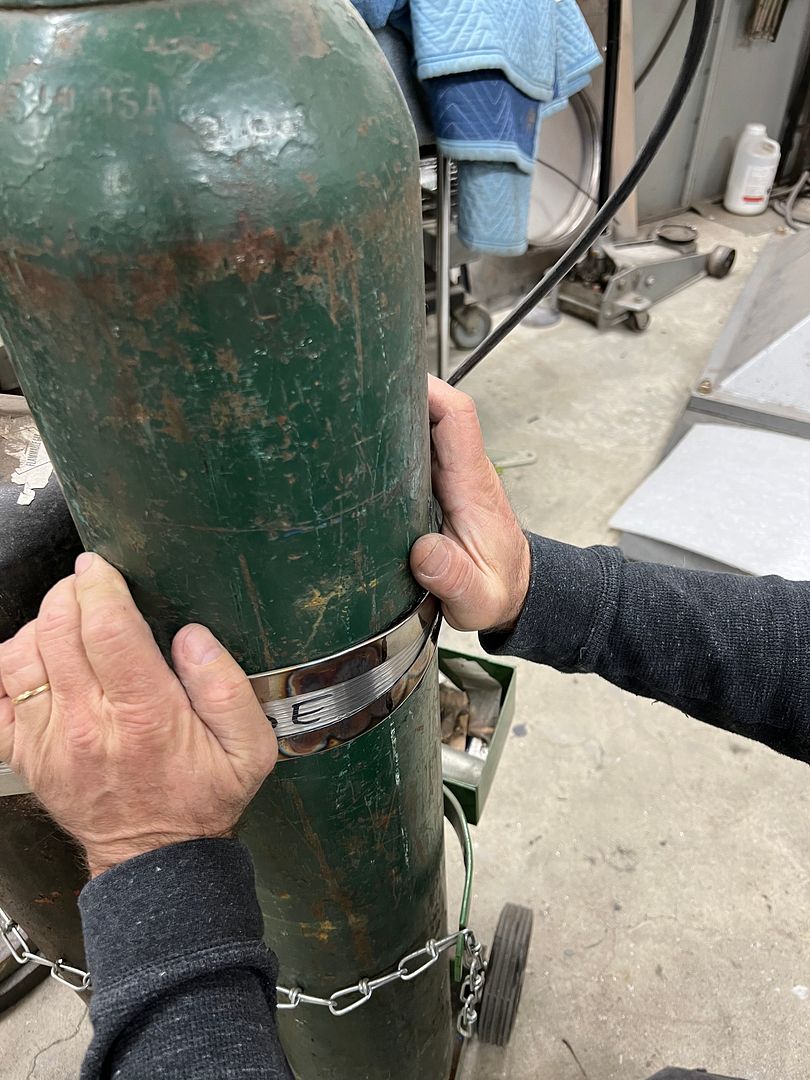 One last touch-up to the polishing and installed in the dash..... https://www.youtube.com/watch?v=WpRCFd29c8Y
__________________
Robert |
|
|
|
|
03-19-2023, 11:42 PM
|
#1331 |
|
Post Whore
  Join Date: May 2015
Location: Alabama
Posts: 14,585
|
Re: 55 Wagon Progress
Looking O so good Robert..!!!!!!
__________________
Mongo...aka Greg RIP Dad RIP Jesse 1981 C30 LQ9 NV4500..http://67-72chevytrucks.com/vboard/s...d.php?t=753598 Mongos AD- LS3 TR6060...http://67-72chevytrucks.com/vboard/s...34#post8522334 Columbus..the 1957 IH 4x4...http://67-72chevytrucks.com/vboard/s...63#post8082563 2023 Chevy Z71..daily driver |
|
|
|
|
04-20-2023, 08:58 AM
|
#1332 |
|
Registered User
Join Date: Jan 2013
Location: Leonardtown, MD
Posts: 1,633
|
Re: 55 Wagon Progress
Thanks Greg!
I've been remiss in posting an update. We've been doing a bit of block sanding interior parts, and its just hard to make those pictures look like any semblance of progress. We pulled the front fenders back off, we had mocked them up in order to modify the upper fender mounts at the cowl. They came with some excessively sized holes to allow plenty of adjustment, and we had filled in the factory hole and re-drilled to a normal clearance hole. Here shown after a spray of Organic Green KBC, and the stainless washers we used as shims. Hard to leave those stacked washers after we did the other cleanup in resizing the bracket's mounting hole. 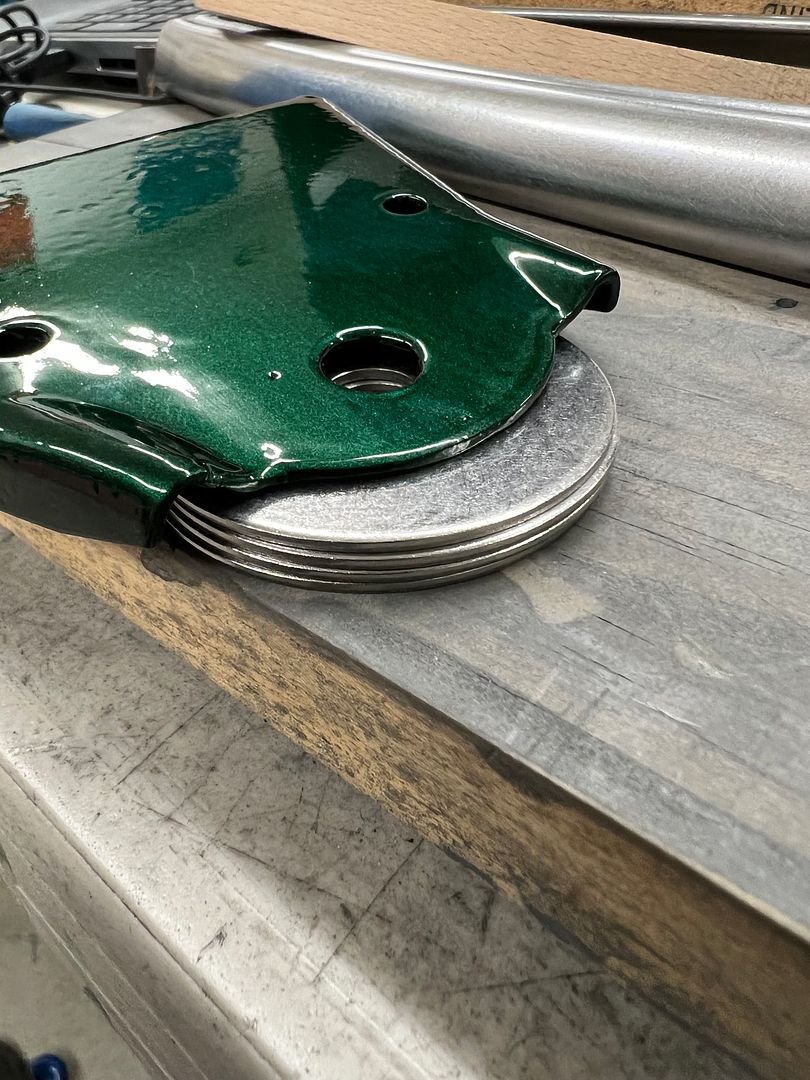 We had some black delrin scraps left over from making the radius arm bushings for Jared's 39, so we put them to use here. Since they had already been drilled, we added an aluminum plug and match drilled the holes to match the bracket. Installed, the black delrin is barely noticeable and makes for a cleaner detail over the stacked washers. 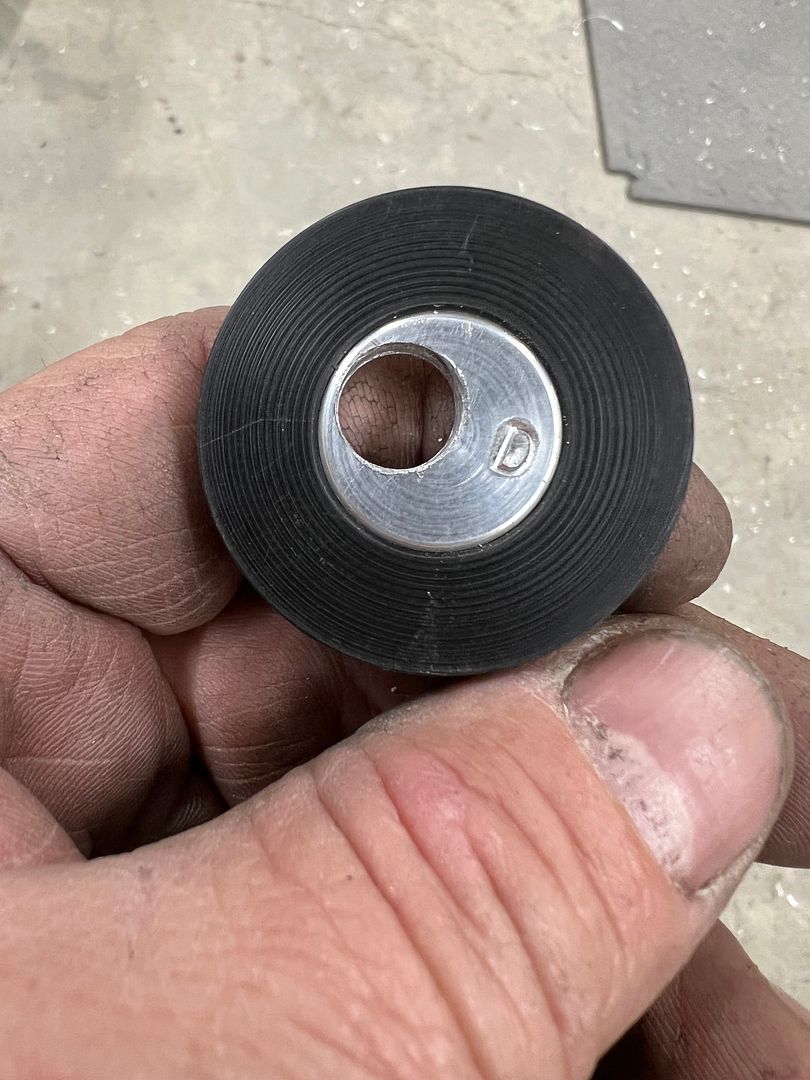 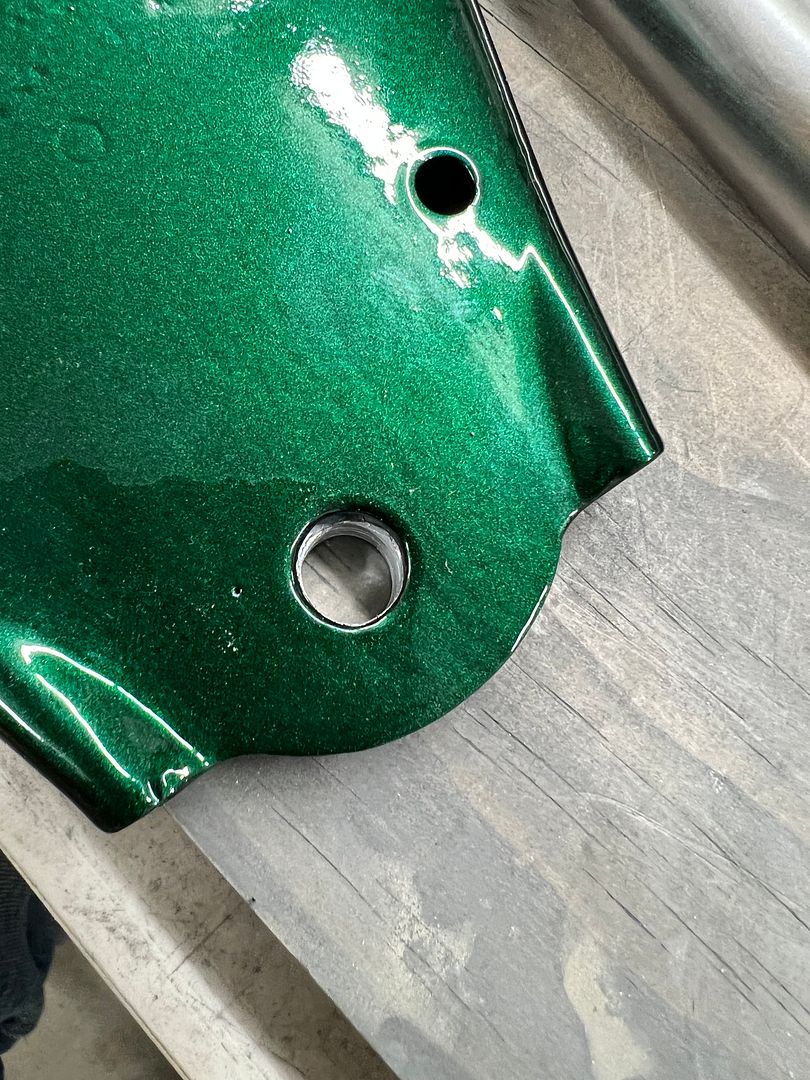 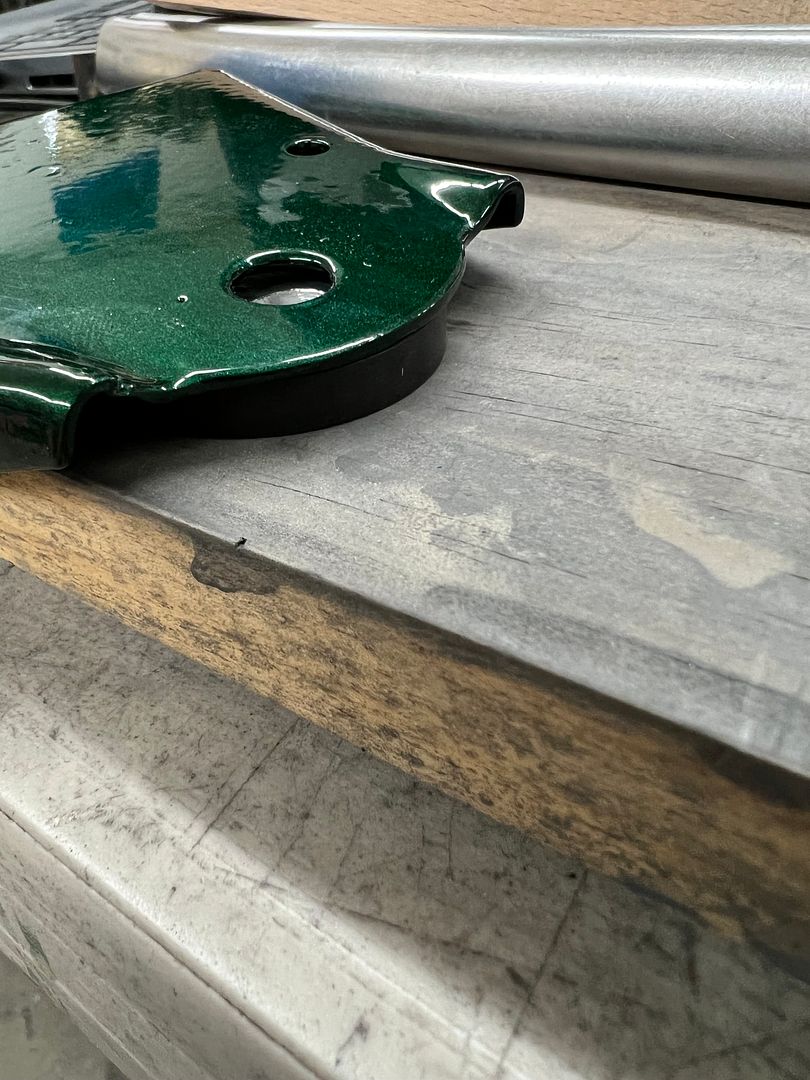 Some of the parts we sprayed while the front fenders were off. 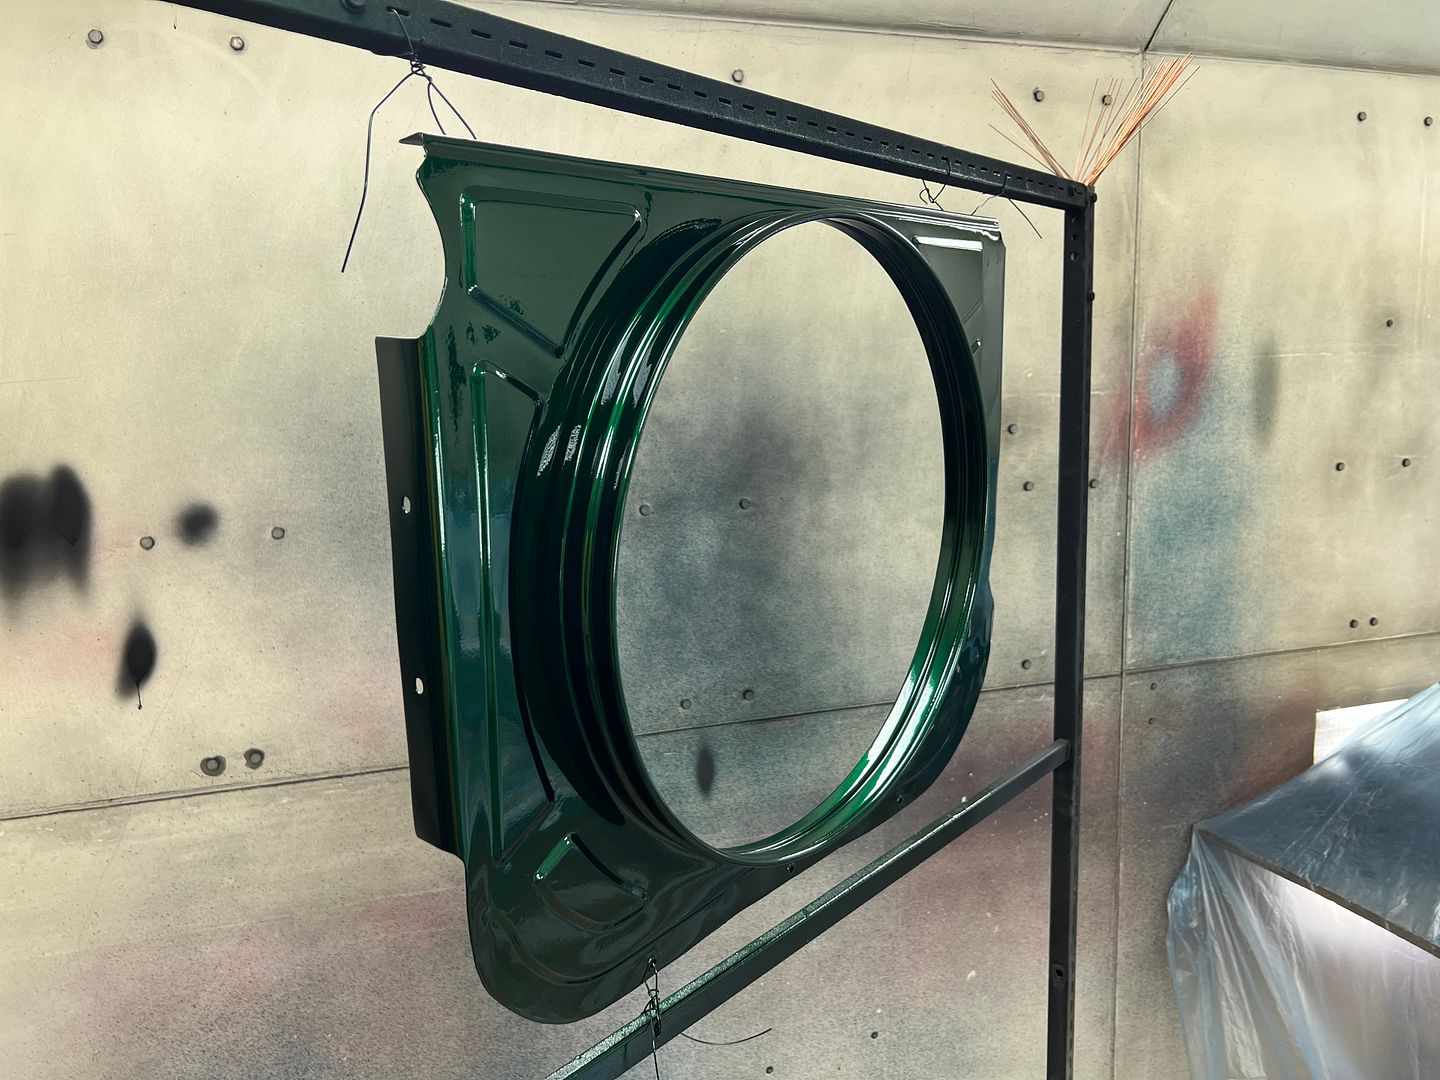 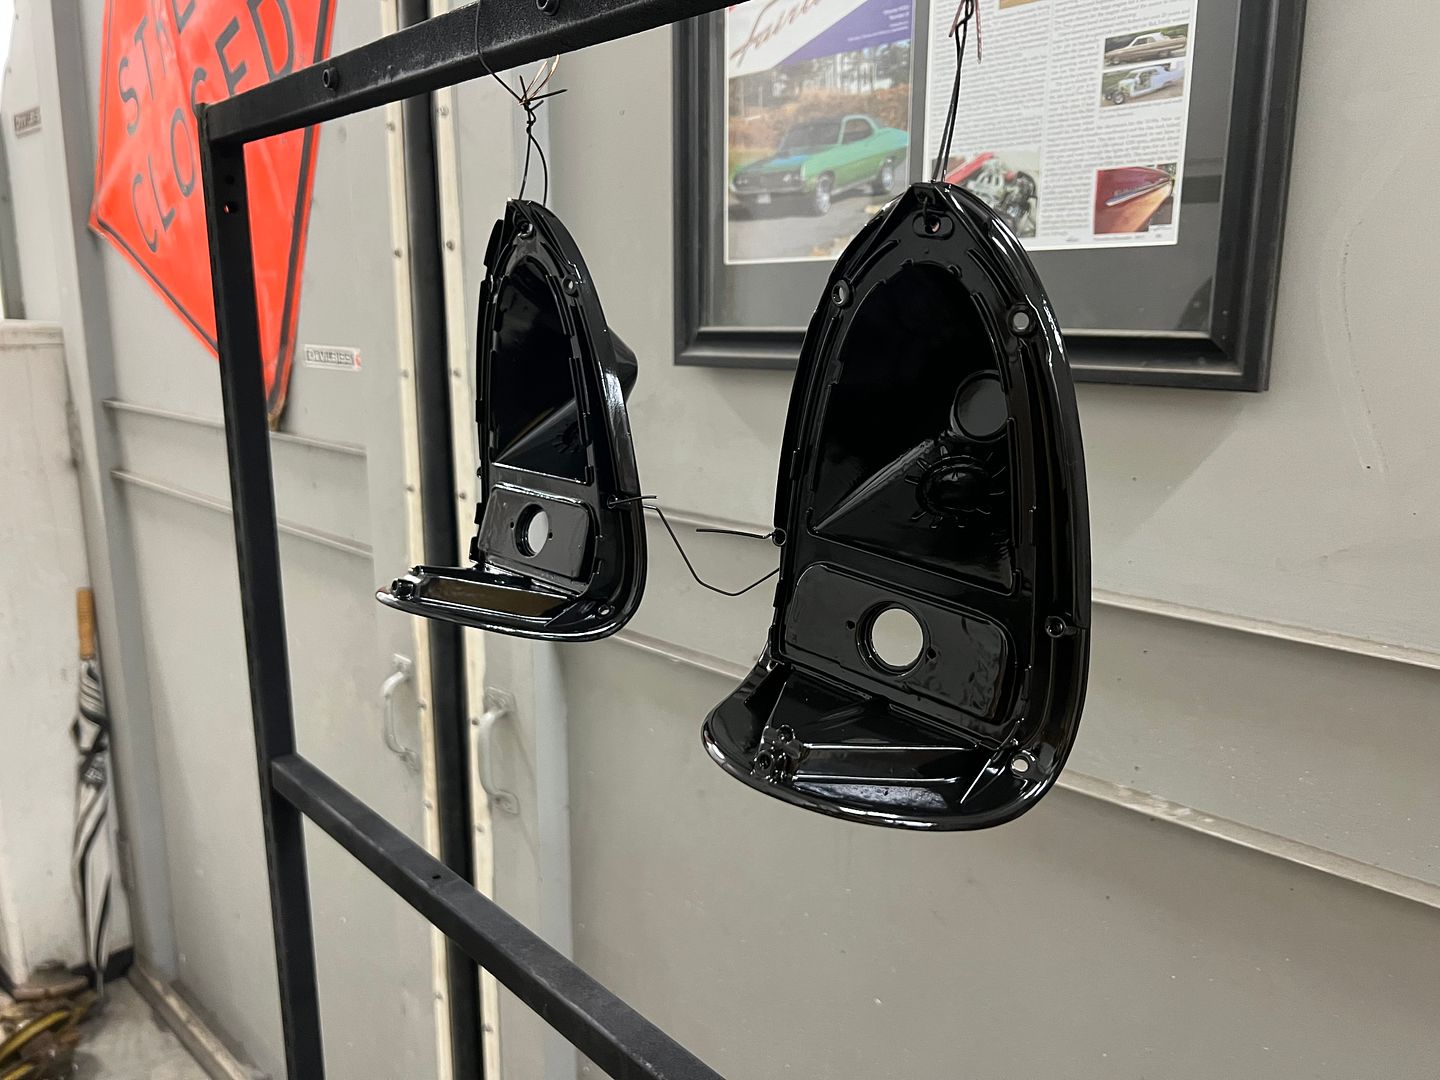  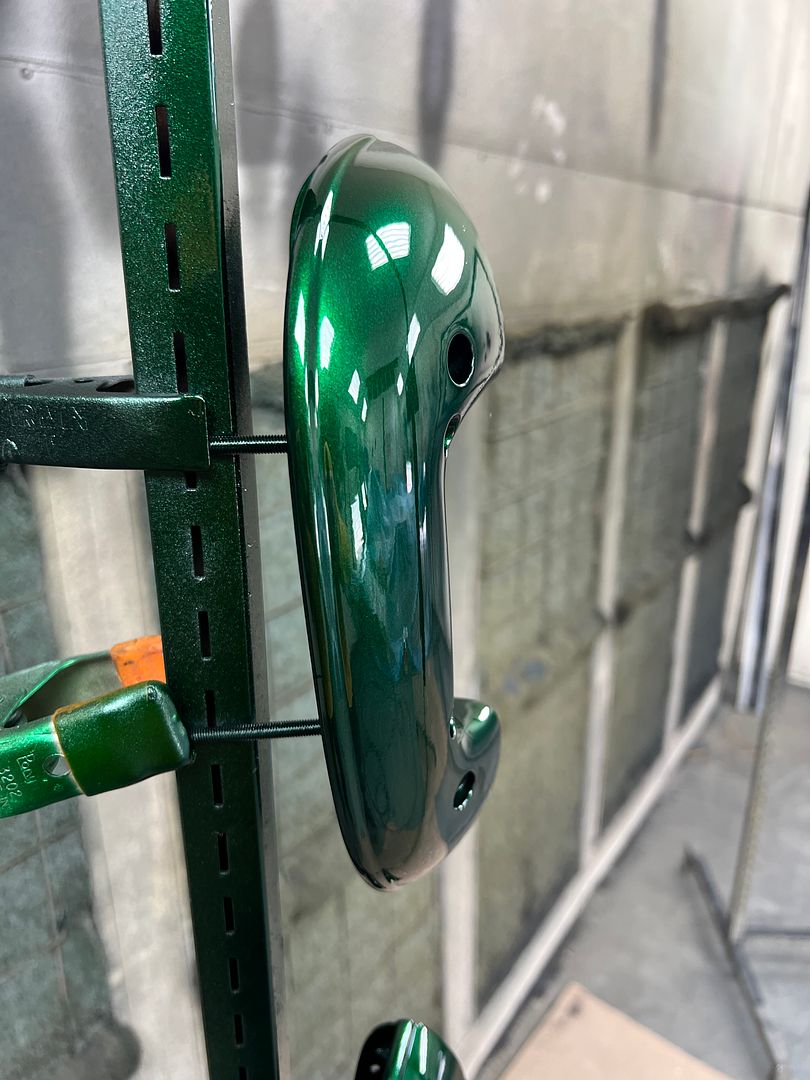 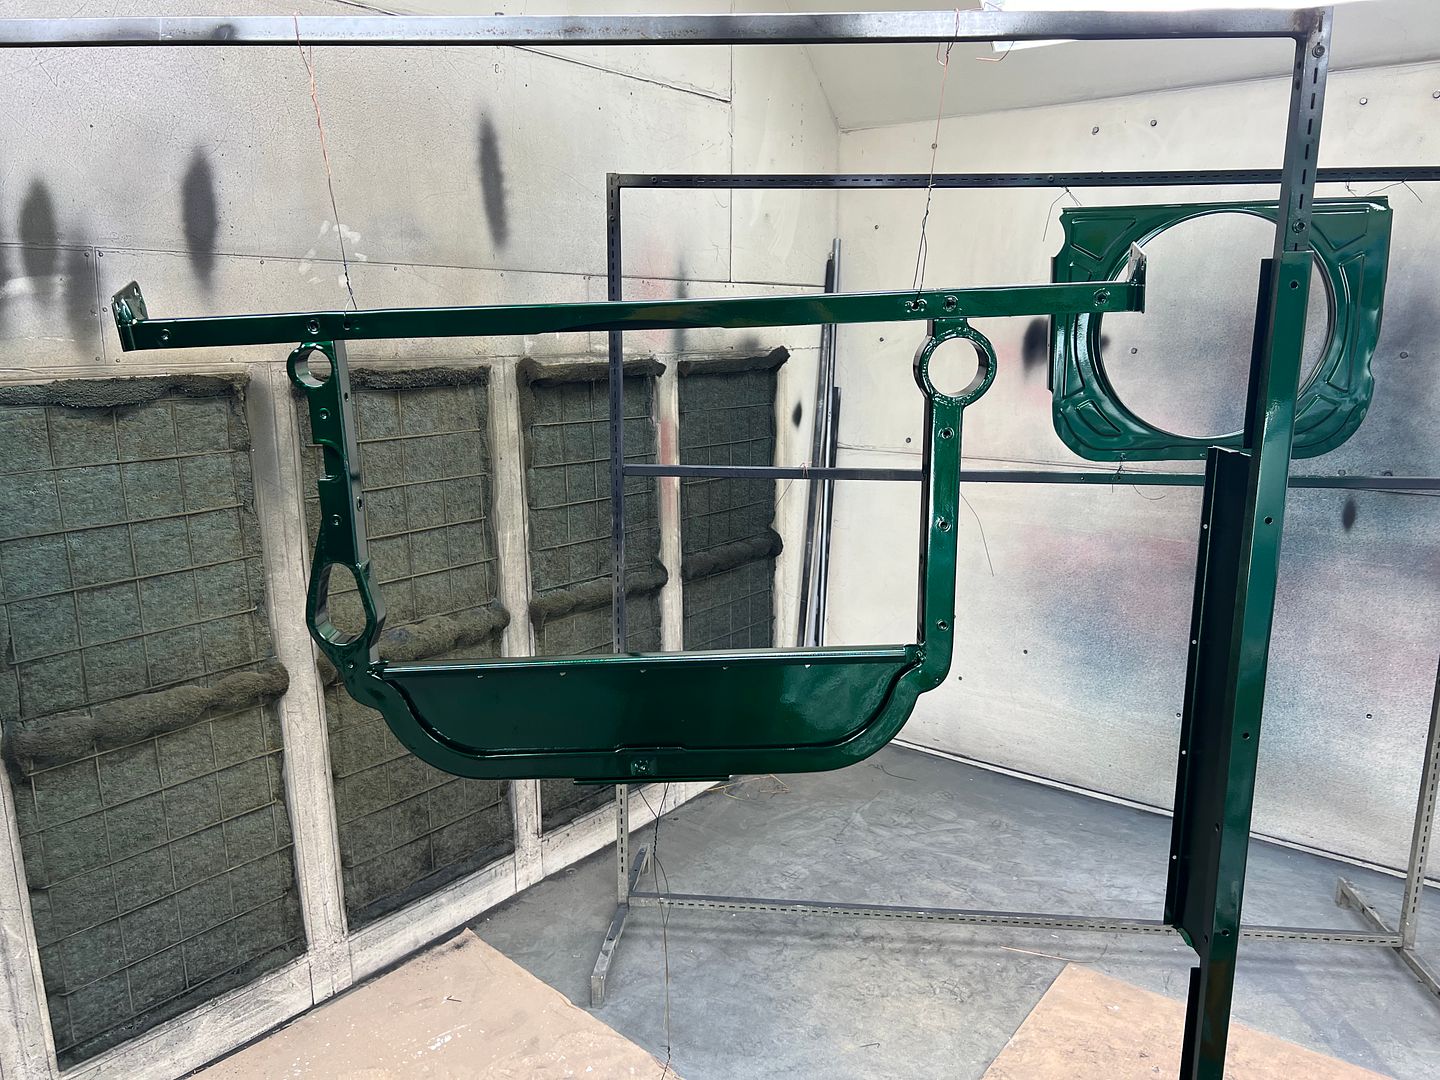 With the core support reinstalled, we started on the installation of the inner fenders. 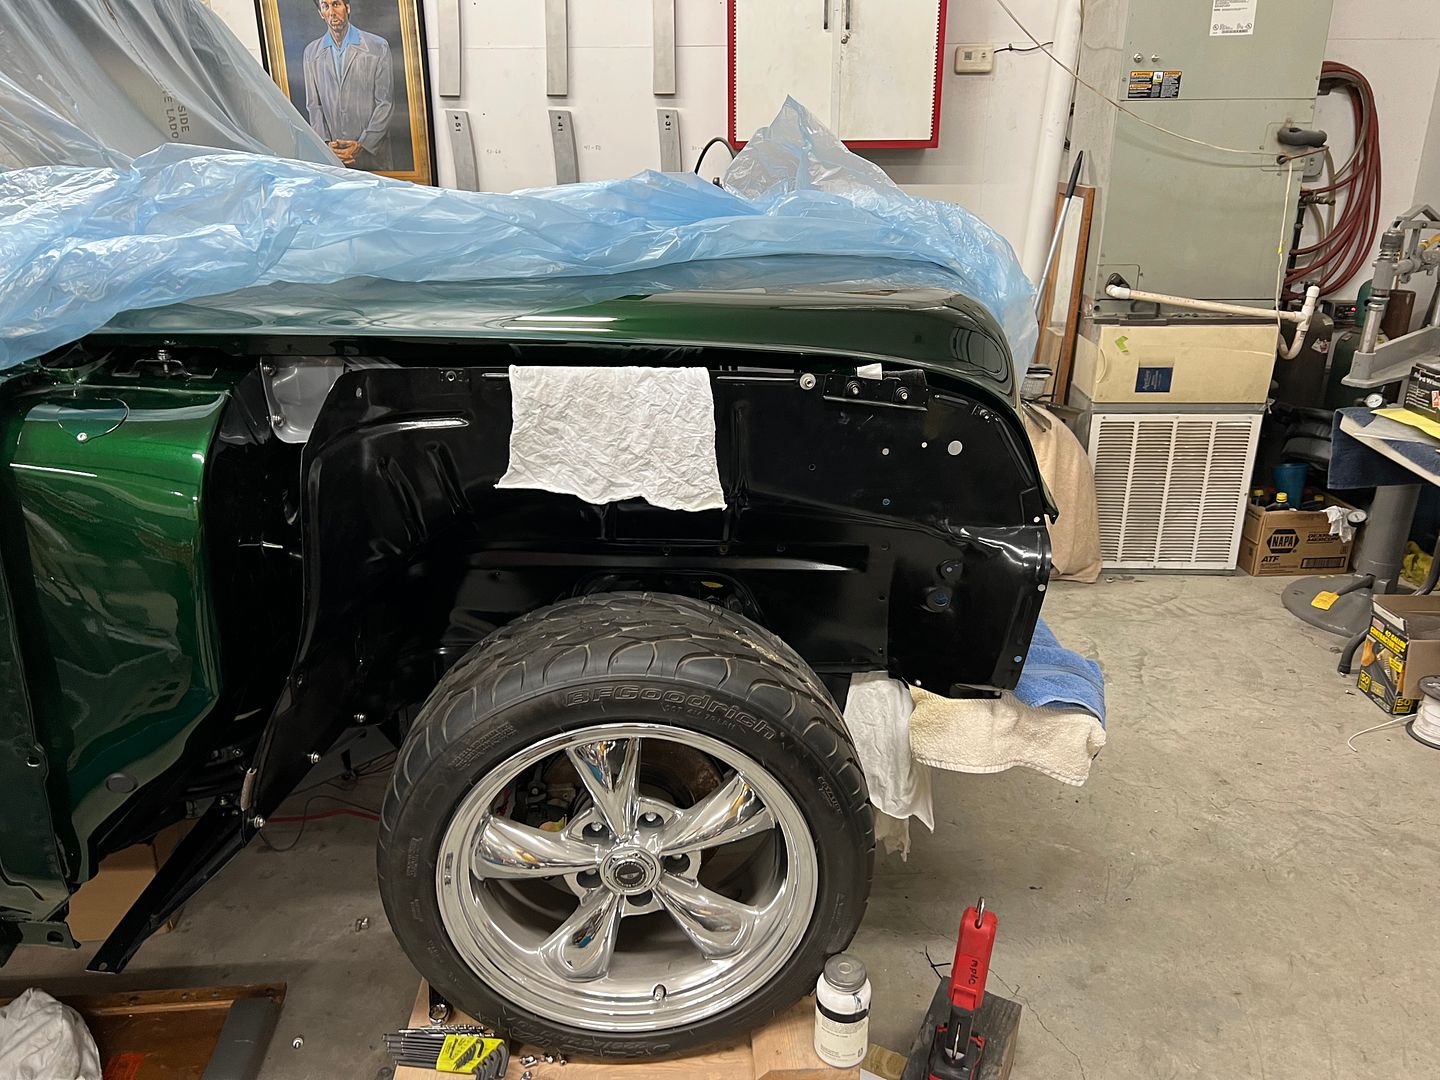 Since our cowl bracket was all cleaned up now, we needed to address the attaching hardware. This started with 400 grit and worked up to 5000 trizact before hitting the buffer... https://youtube.com/shorts/nEgXyGHNFto?feature=share 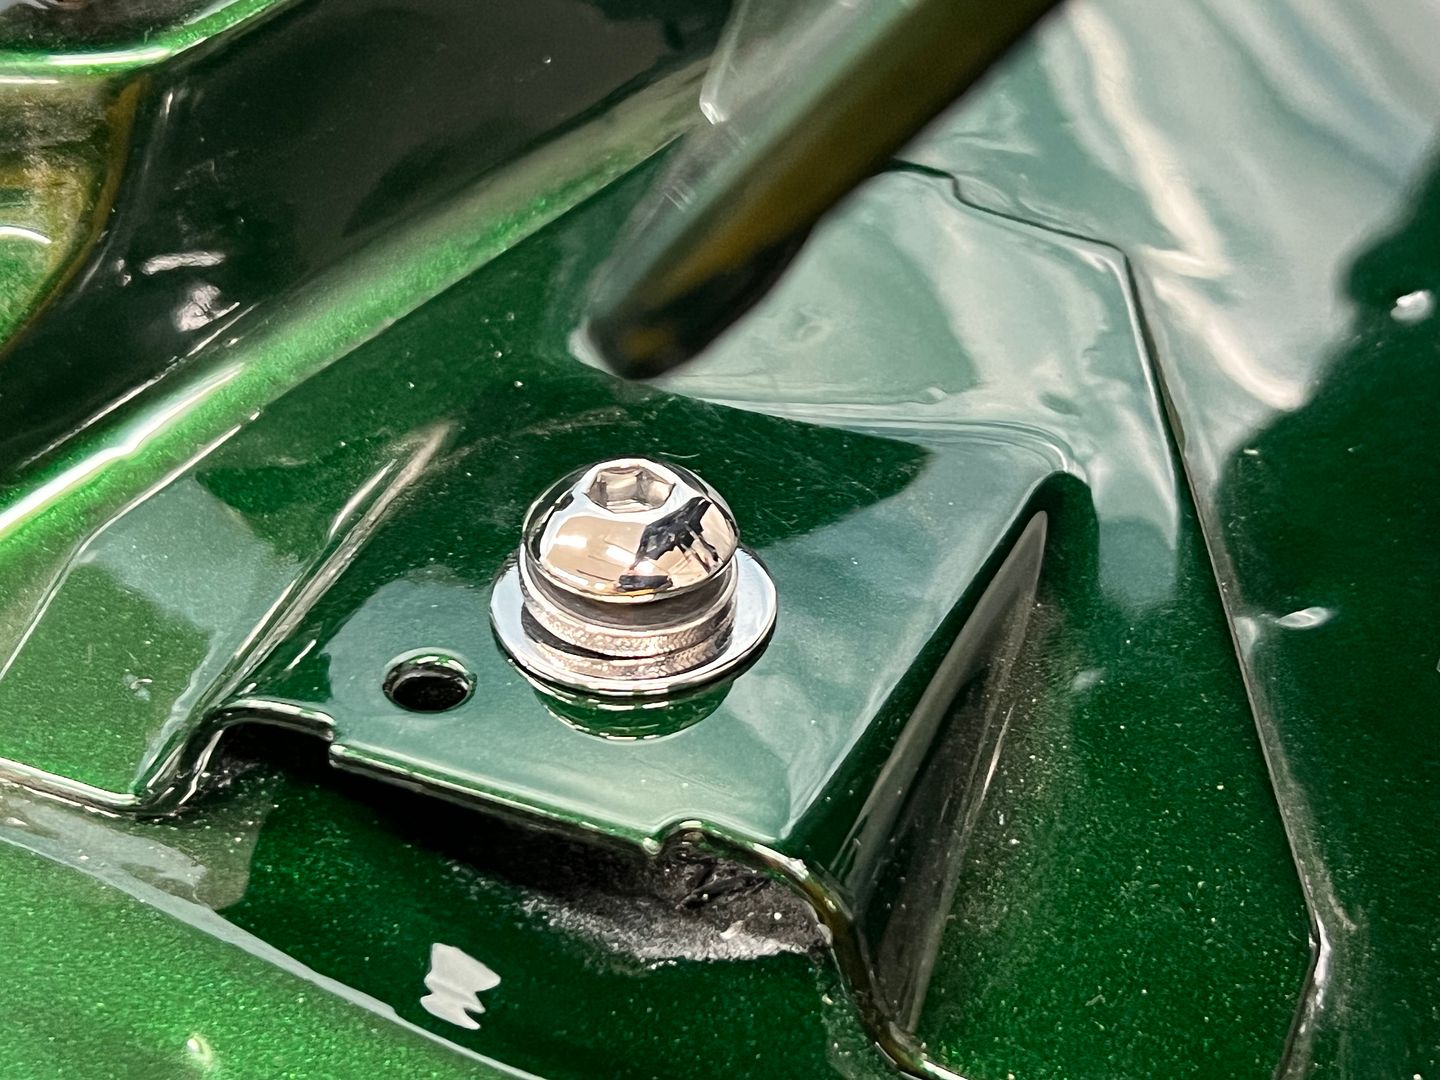 Much better! And so we can finalize the wiring at the back of the car, the tail-light housings had been sprayed in epoxy and we added some catalyzed white to the inner portion for some brighter lights. 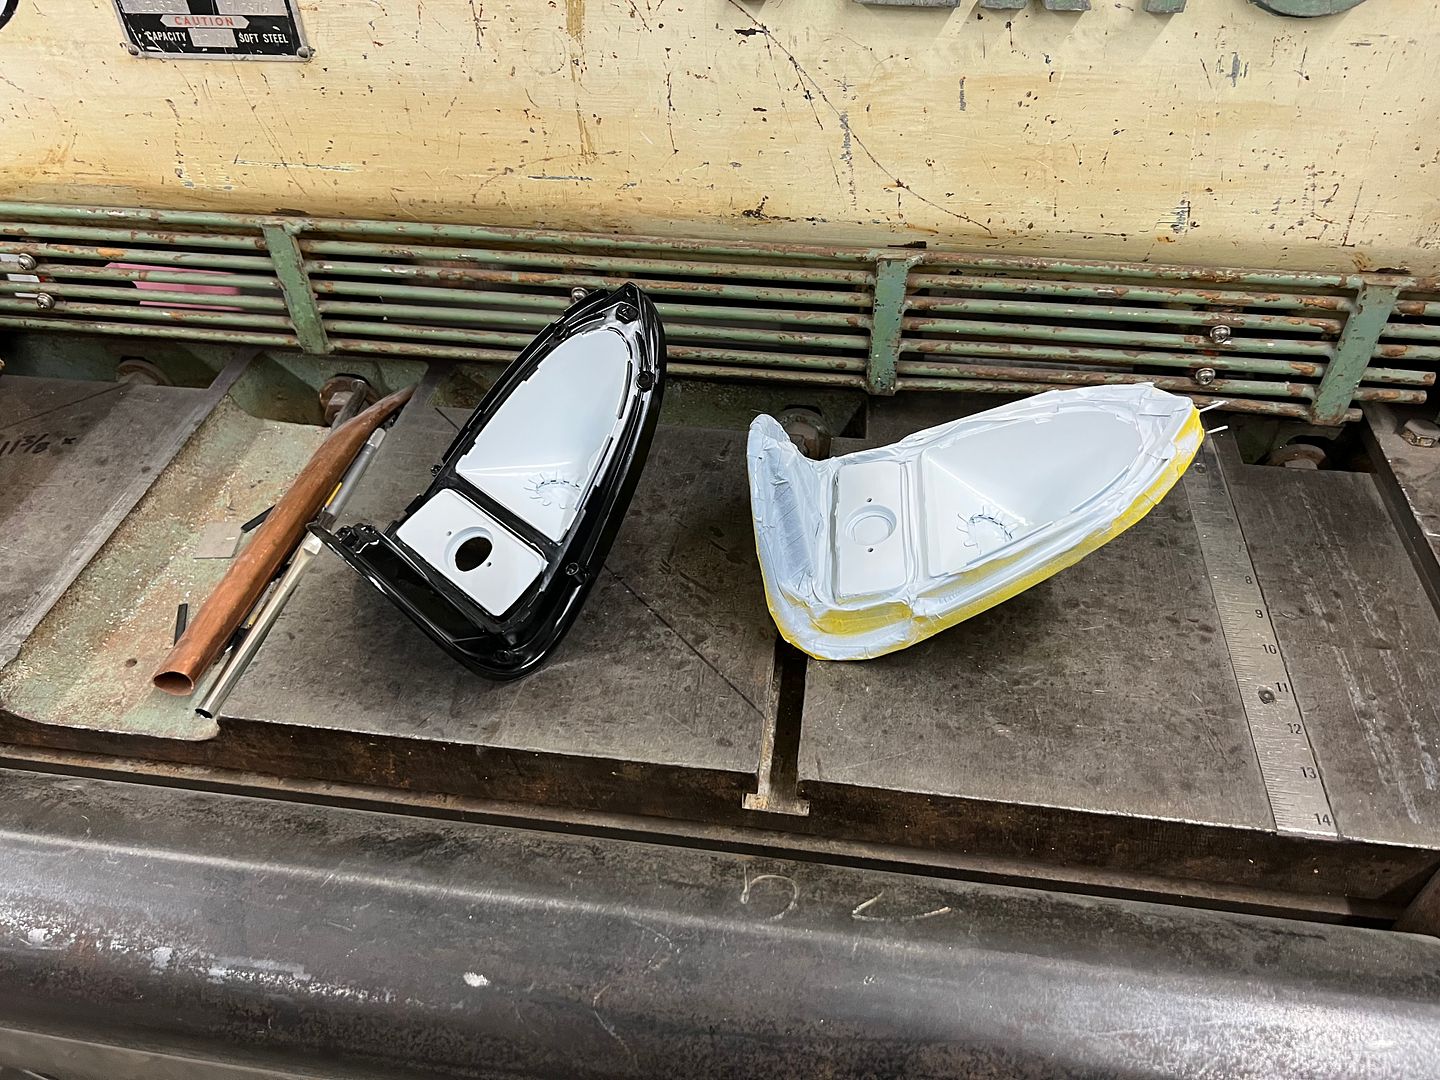 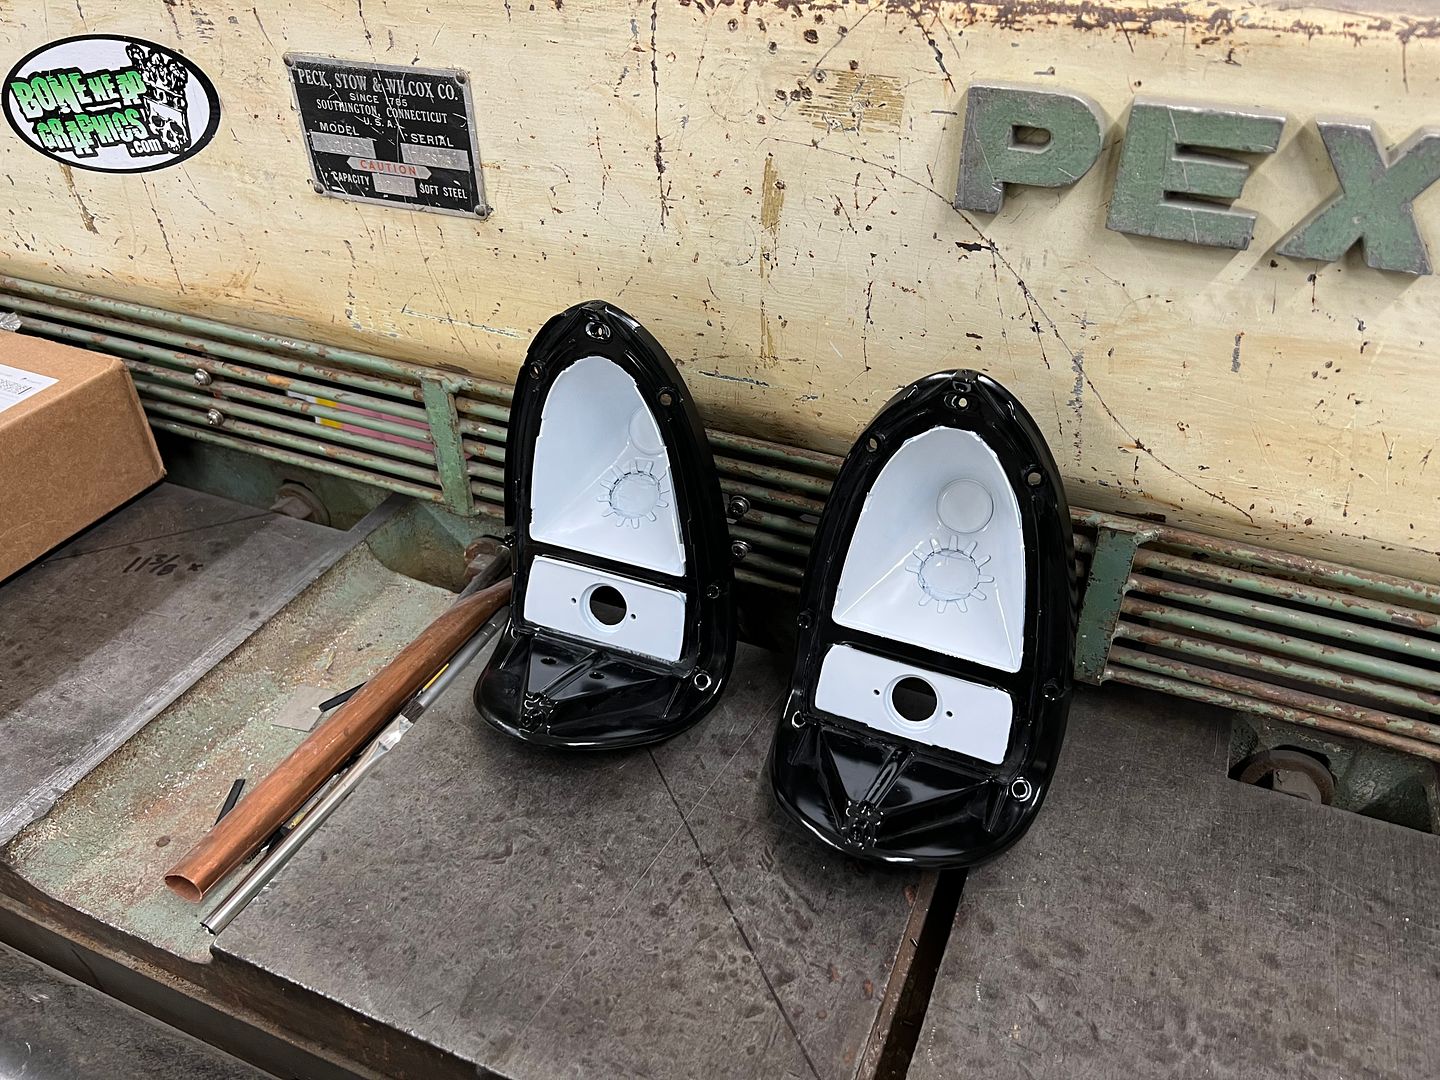 .....and the day job has me building anchored support stanchions for some phone lockers and naturally the mounting holes are on the back side for a wall mounting only. What we need are some bolting plates to hold things down as I wasn’t comfortable with rivnuts in the chinesium steel flange on the bottom.  Well, said flange also has a 1/4” upward fold for added strength, so our bolting plate will need a tight reverse bend to offset those but still leave room for press nuts on the end flanges. 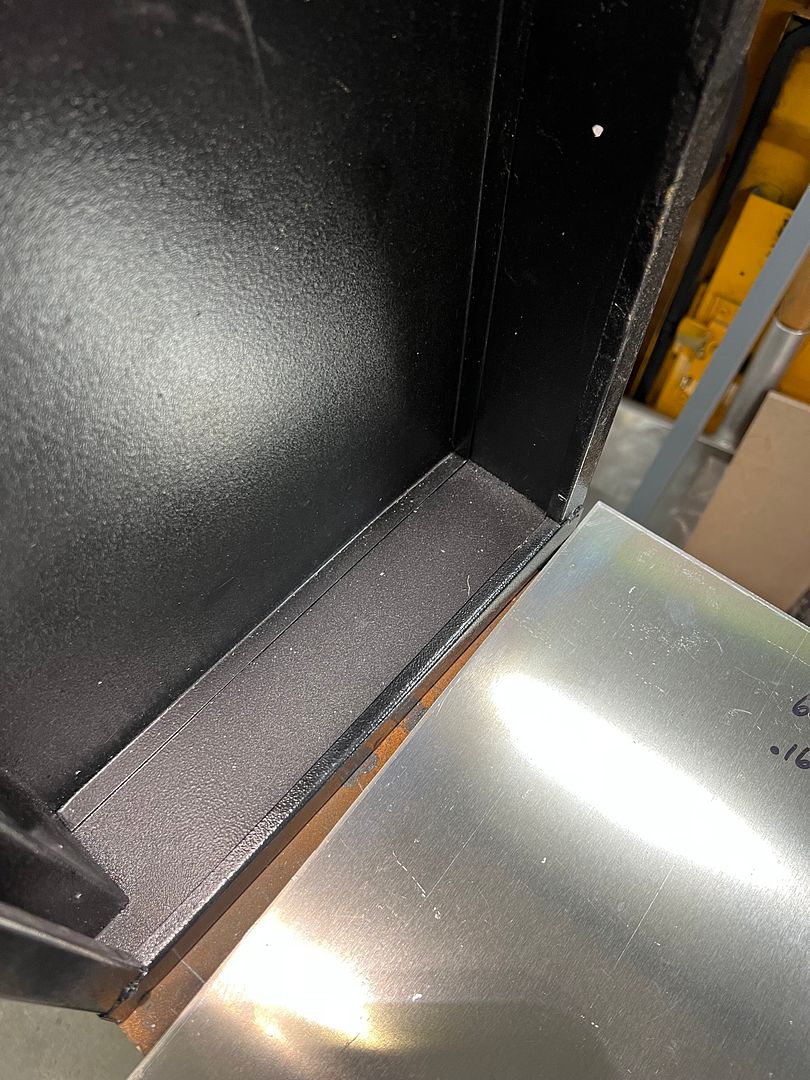 So some 1/2” wide female VEE dies were set up opposing each other with just enough offset to make two bends at once. 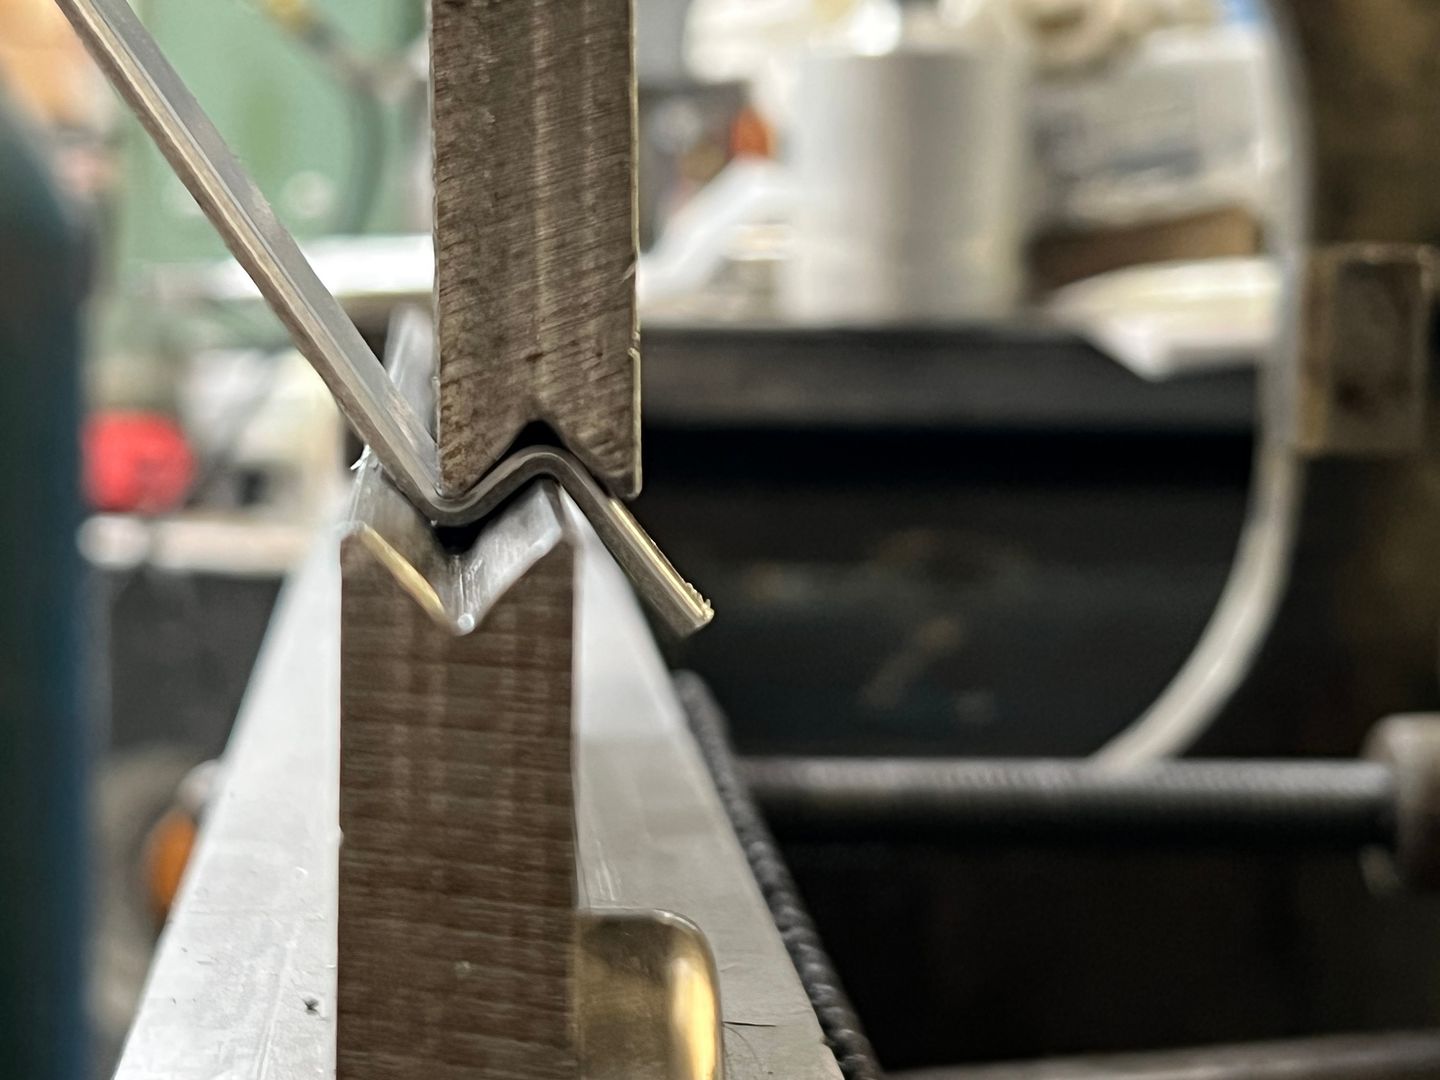 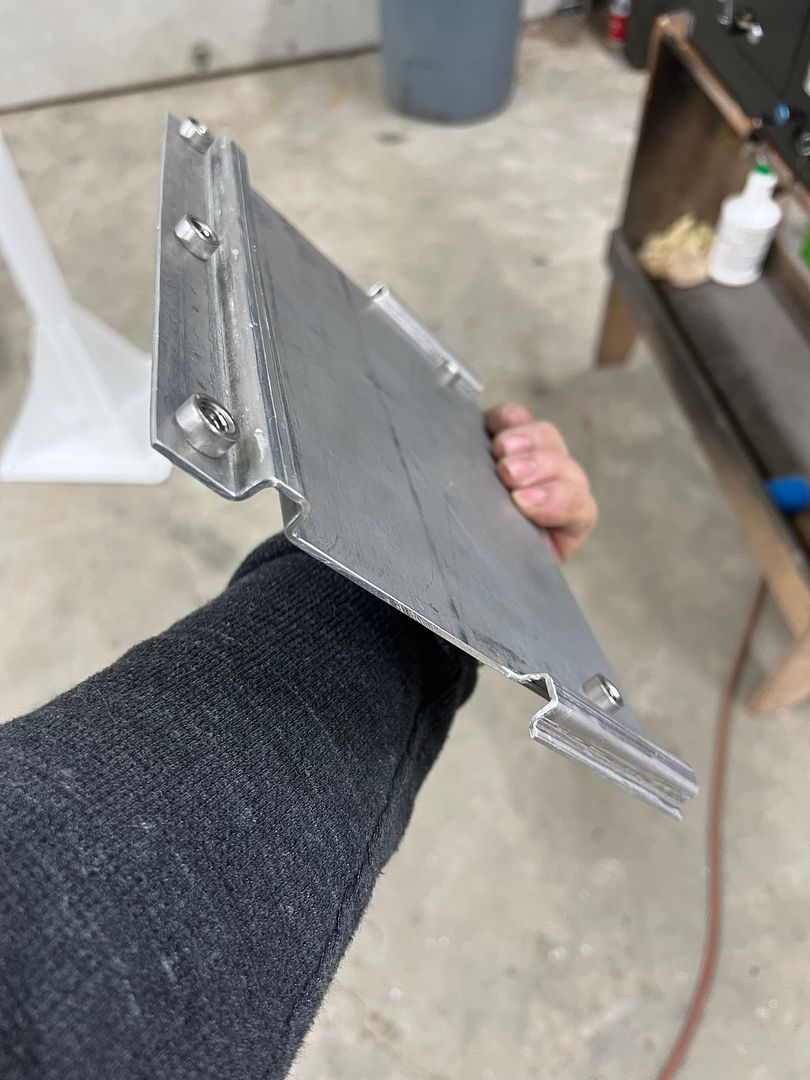 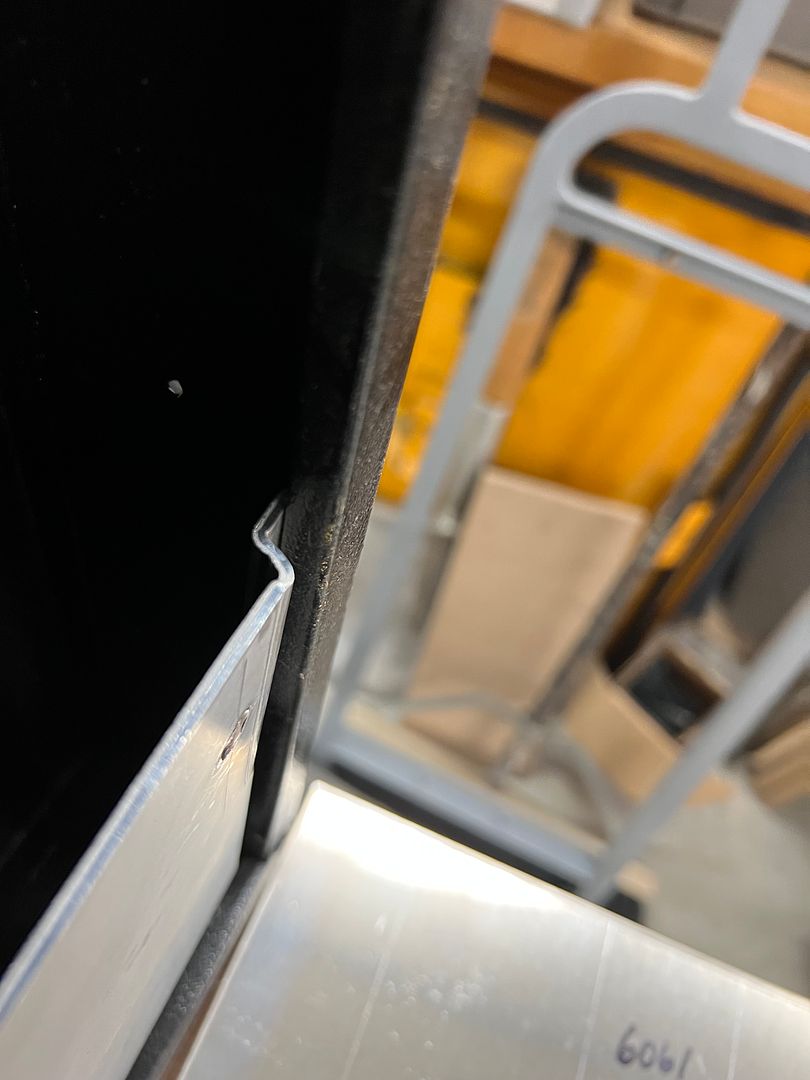 Shroud added for weather resistance.. 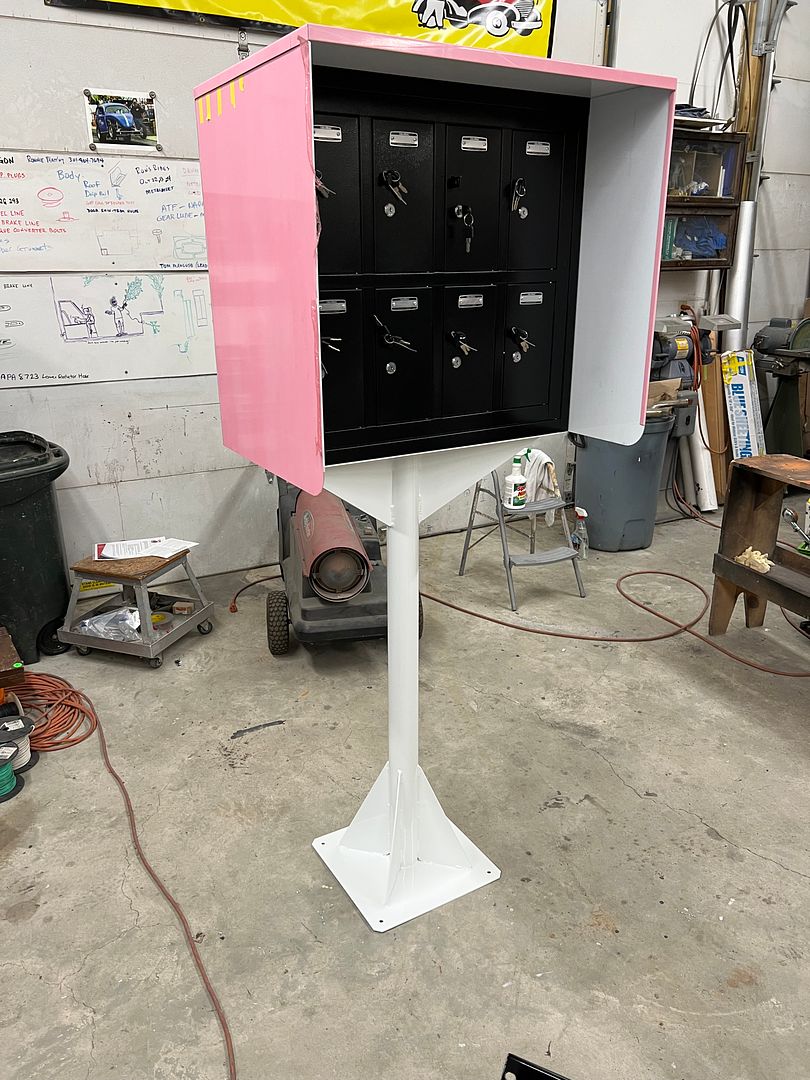
__________________
Robert |
|
|
|
|
04-21-2023, 10:41 PM
|
#1333 |
|
Registered User
Join Date: Nov 2020
Location: socal
Posts: 49
|
Re: 55 Wagon Progress
Fantastic work Robert
|
|
|
|
|
04-22-2023, 09:29 AM
|
#1334 |
|
Registered User
Join Date: Jan 2013
Location: Leonardtown, MD
Posts: 1,633
|
Re: 55 Wagon Progress
Thanks!!
__________________
Robert |
|
|
|
|
05-04-2023, 01:13 PM
|
#1335 |
|
Registered User
Join Date: Jan 2013
Location: Leonardtown, MD
Posts: 1,633
|
Re: 55 Wagon Progress
Last bit of progress, we got the hinges painted so hopefully we can get the tailgate installed this weekend...
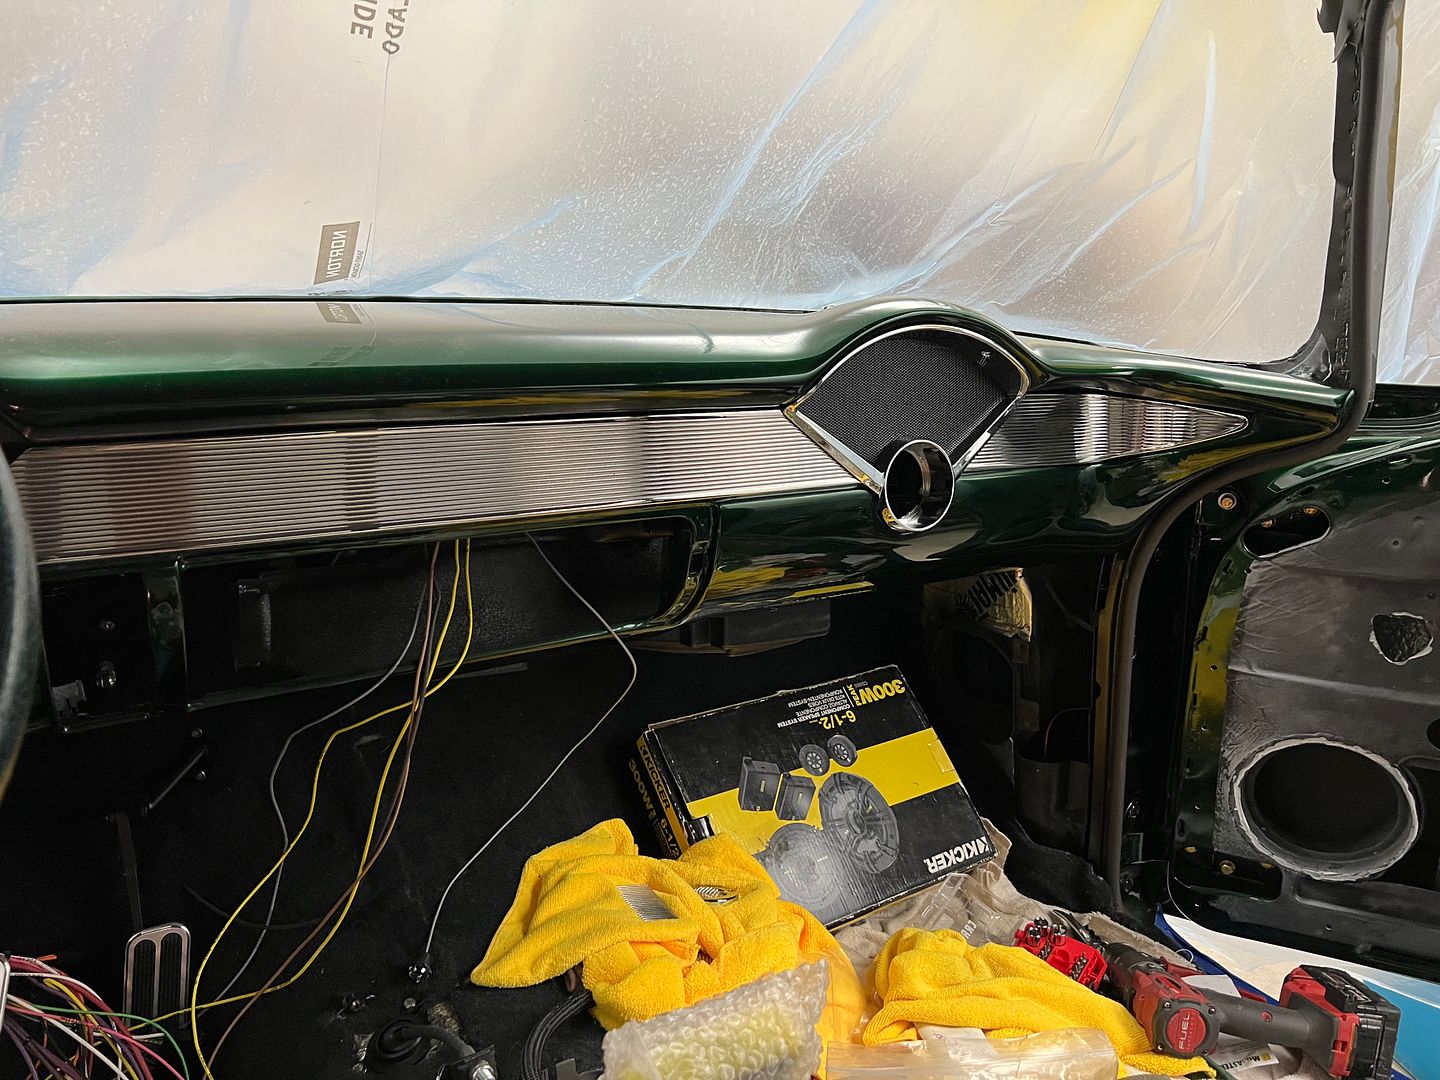
 installing more shiny stuff.... 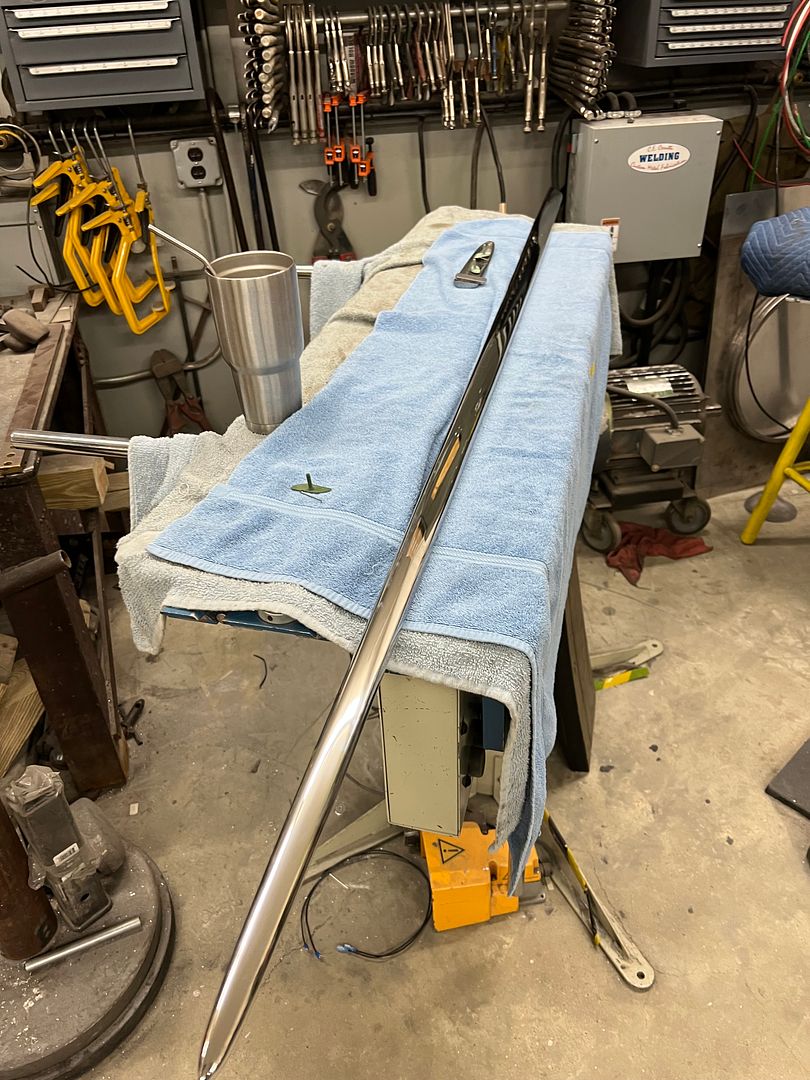 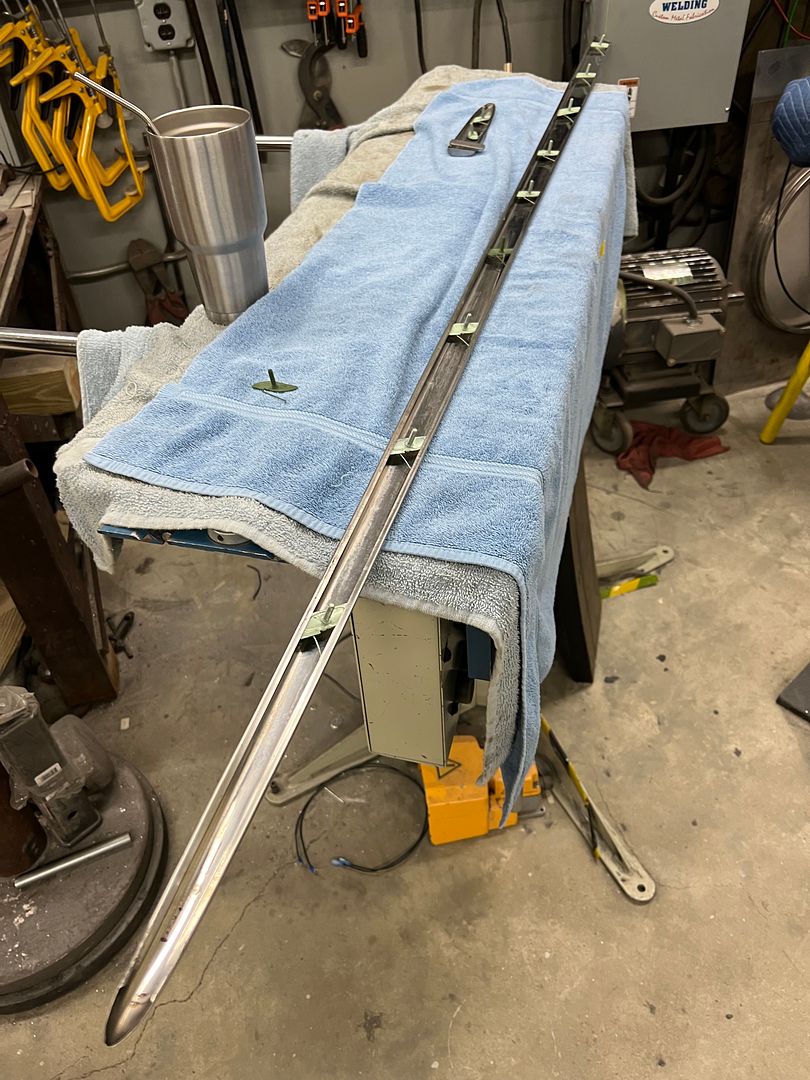 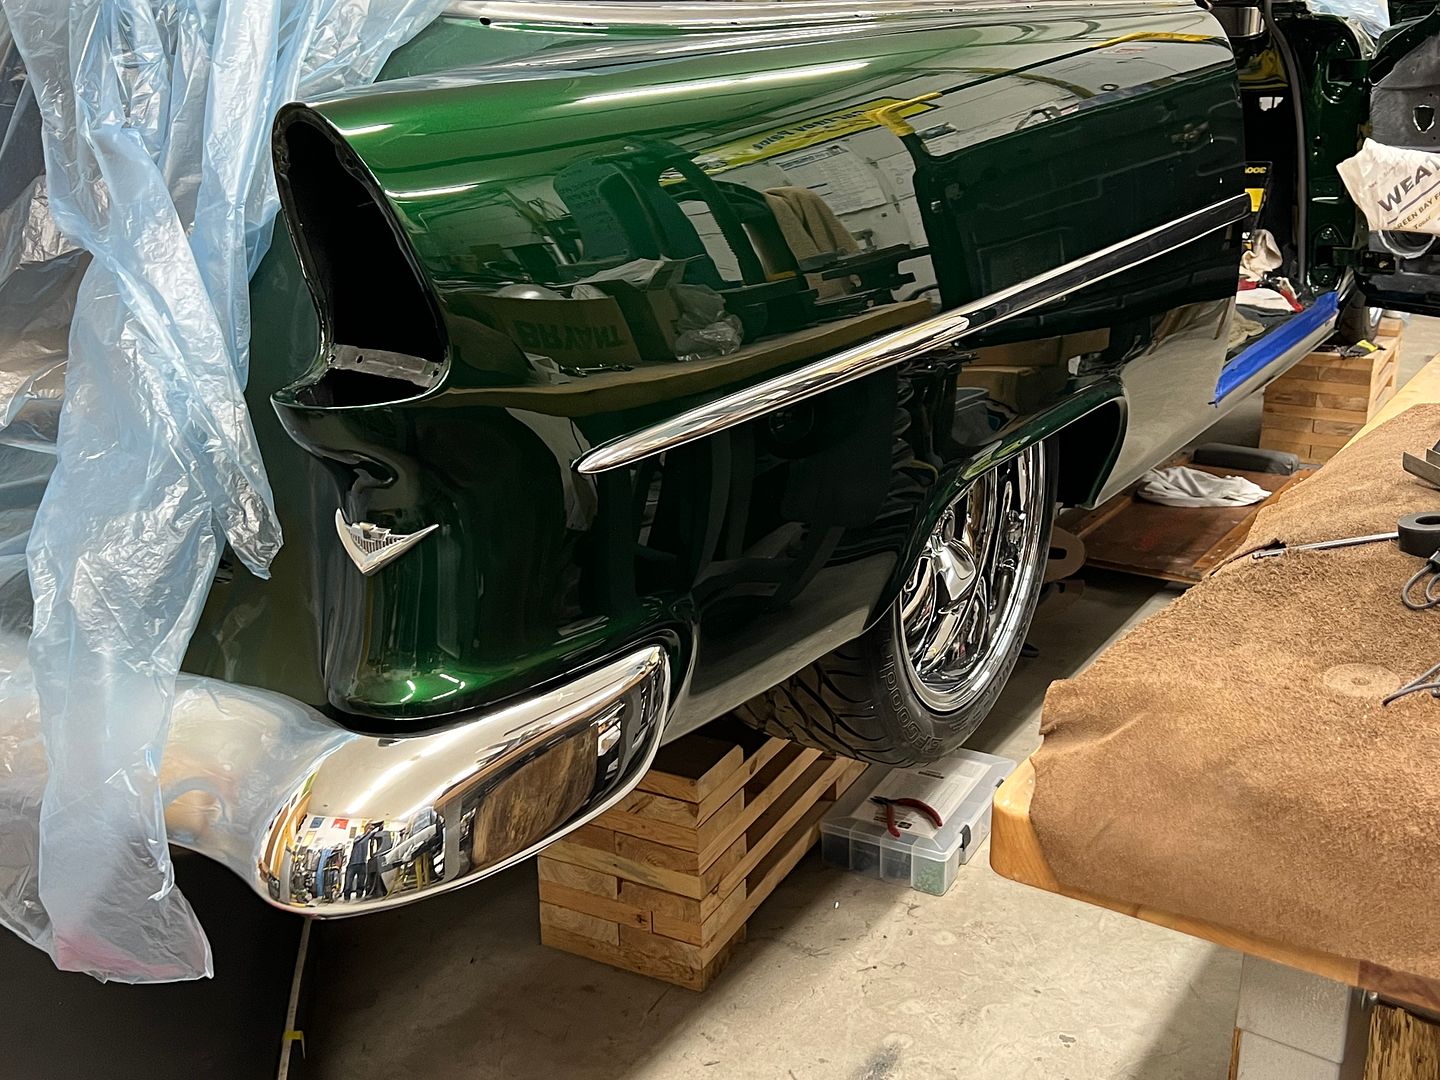 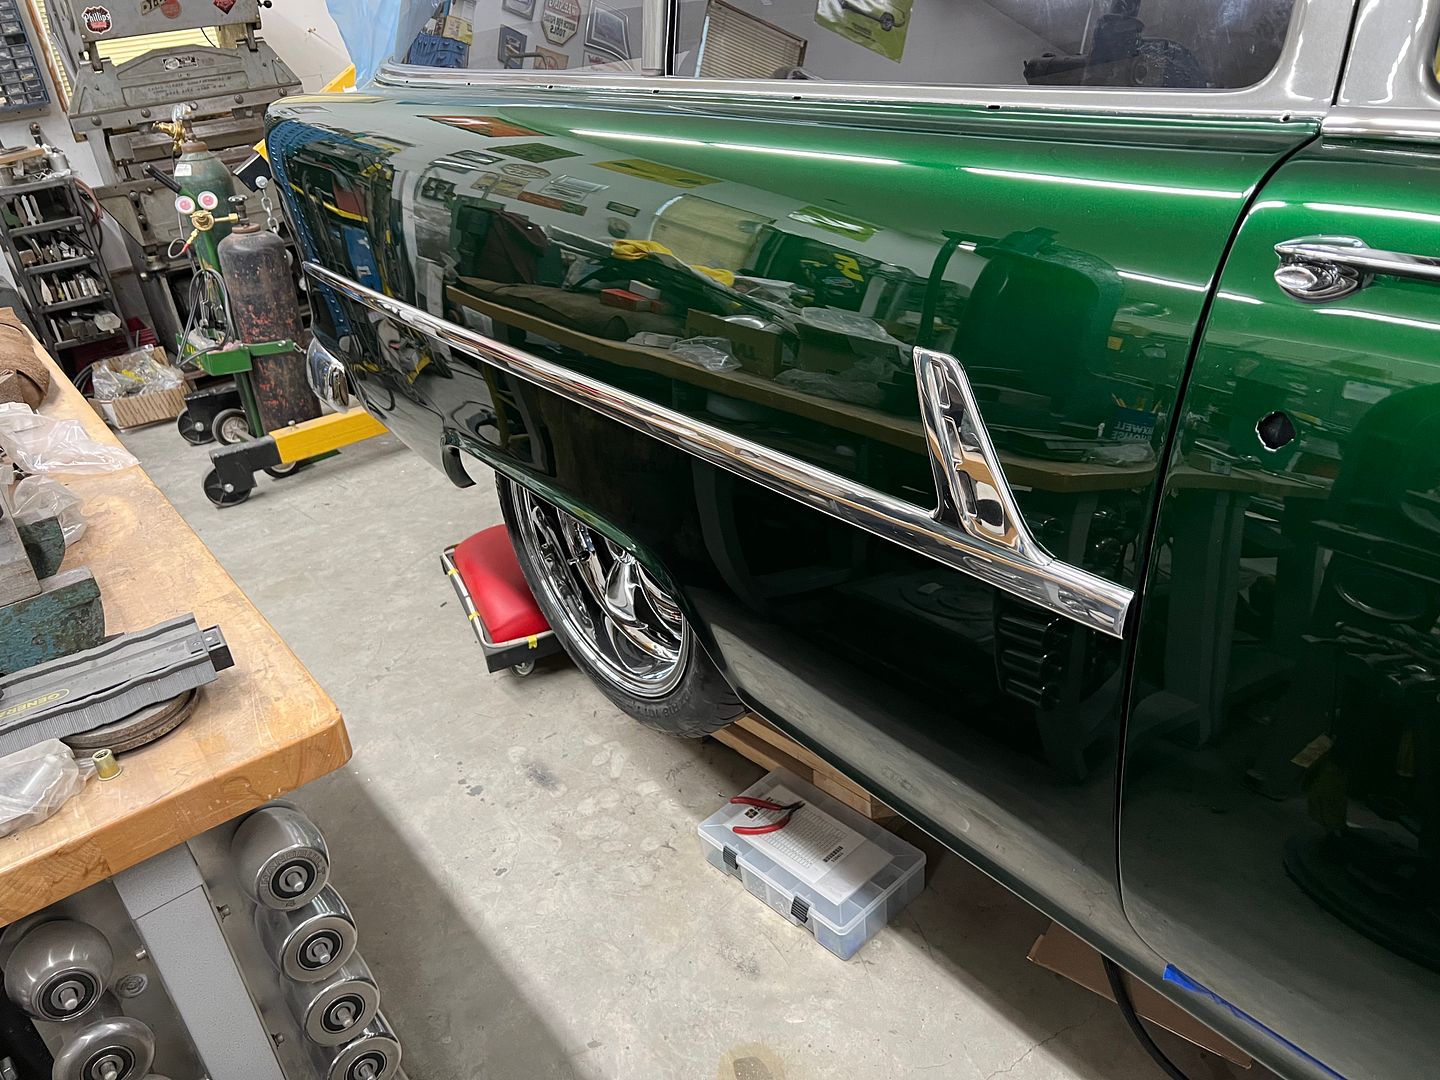 We had not pre-drill the holes for the partial spear on the doors when we installed new door skins, so here we mask off the bottom of the door and drill SLOWLY to prevent heat buildup. 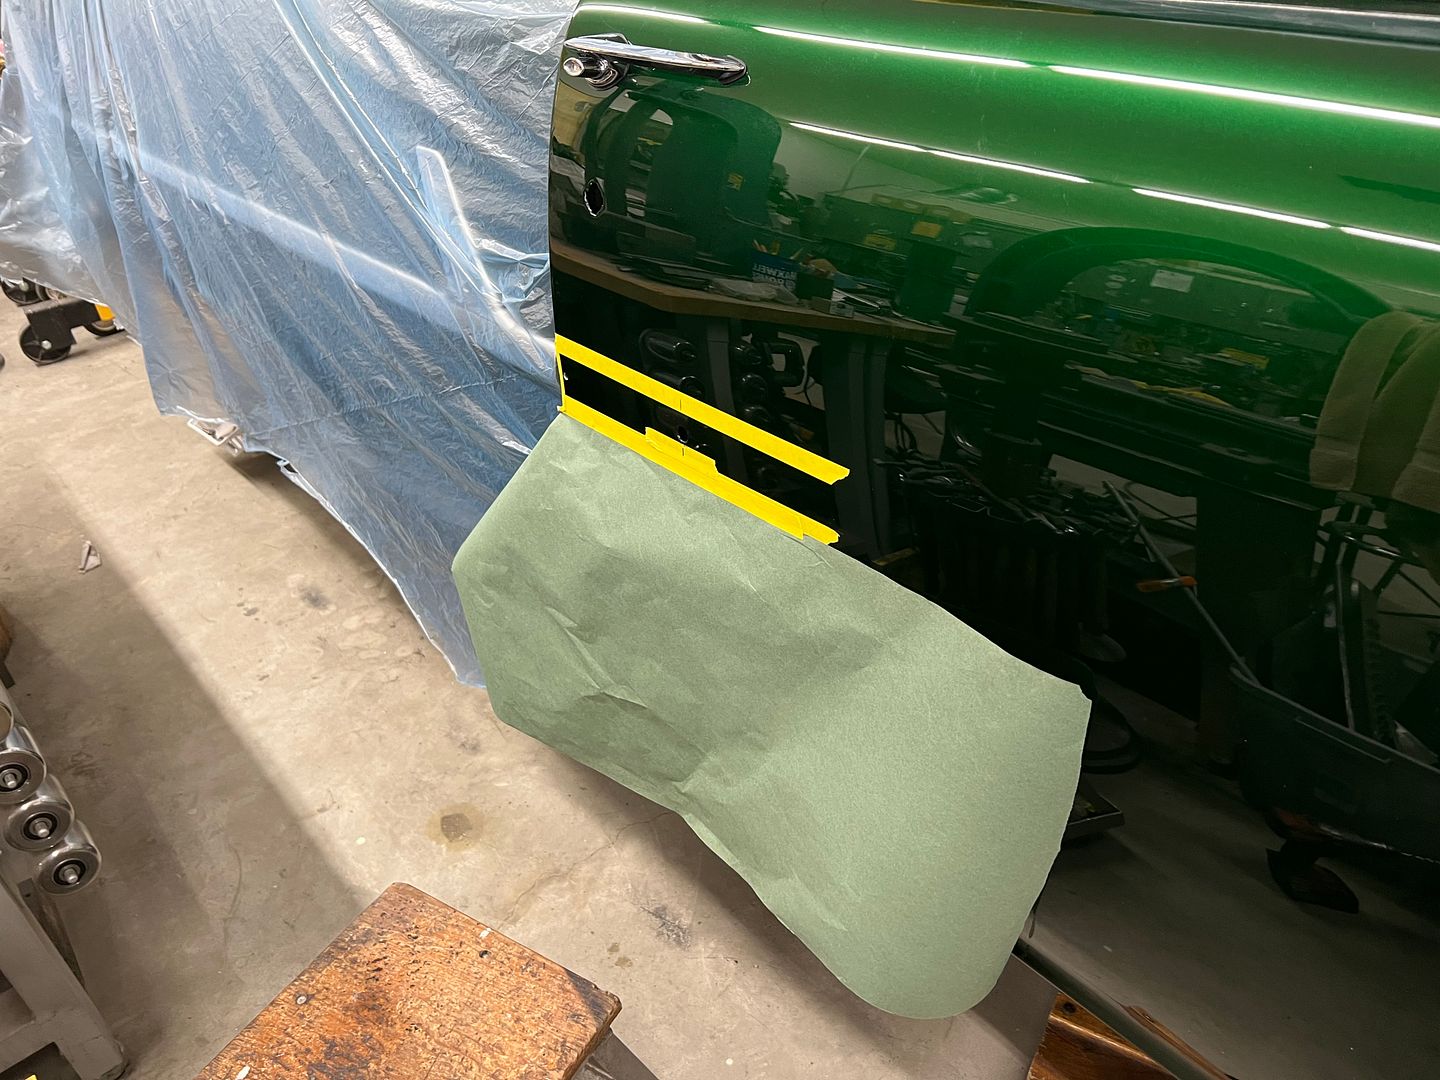 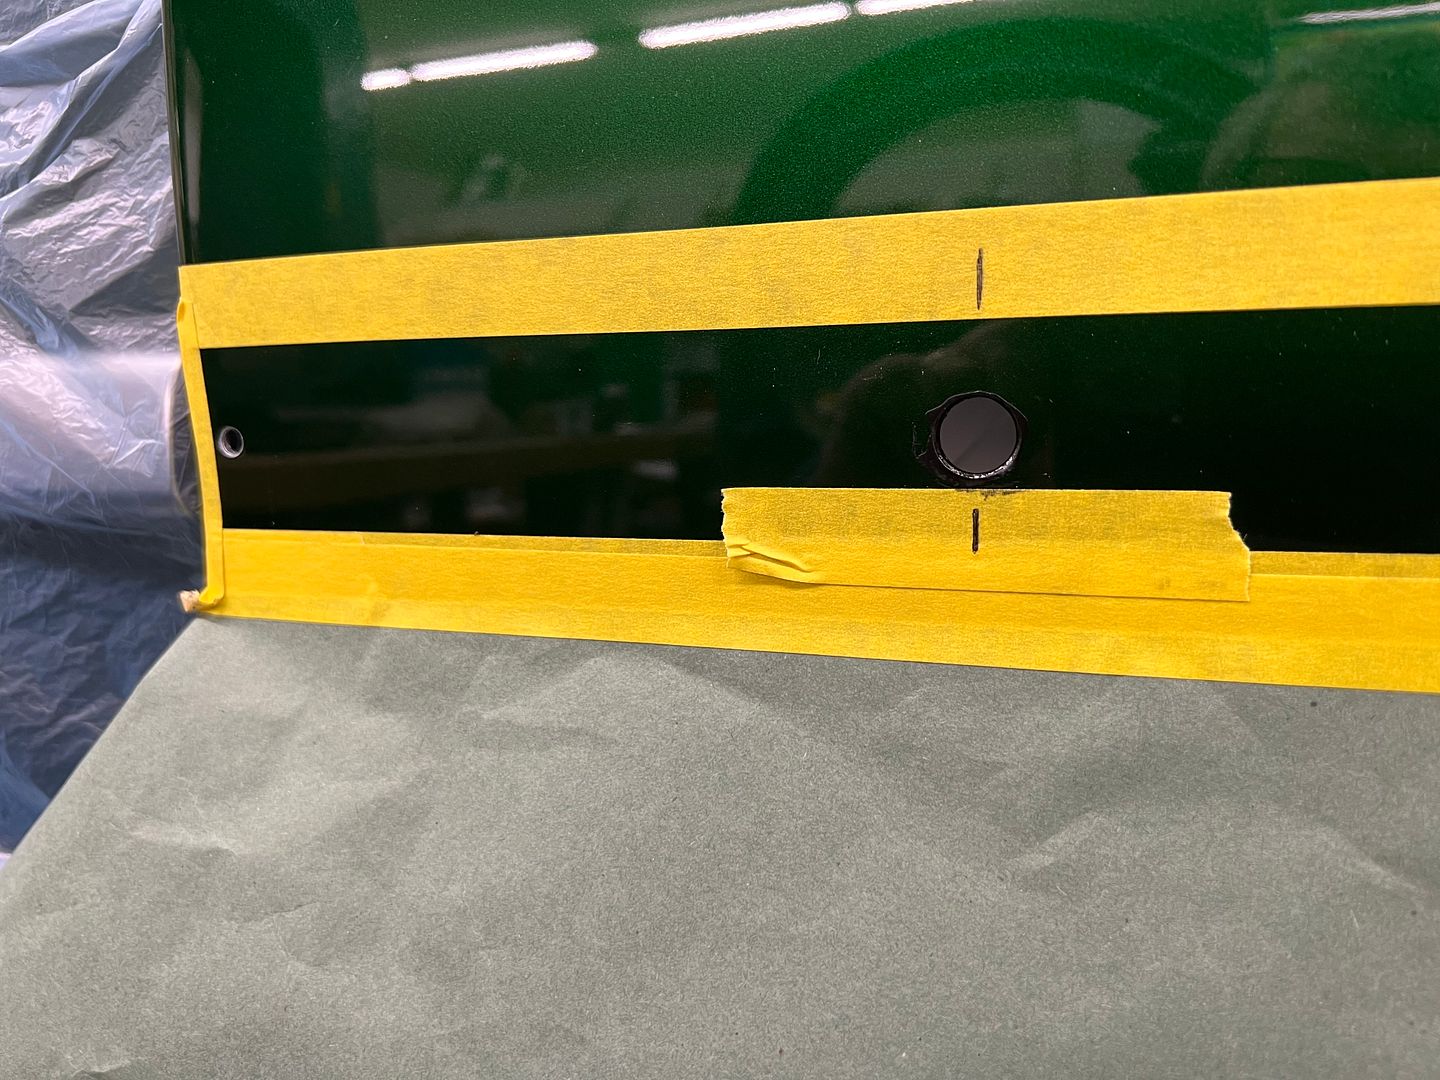 Then the fresh holes are touched up with two coats of epoxy primer. Once dry the spears are added.. 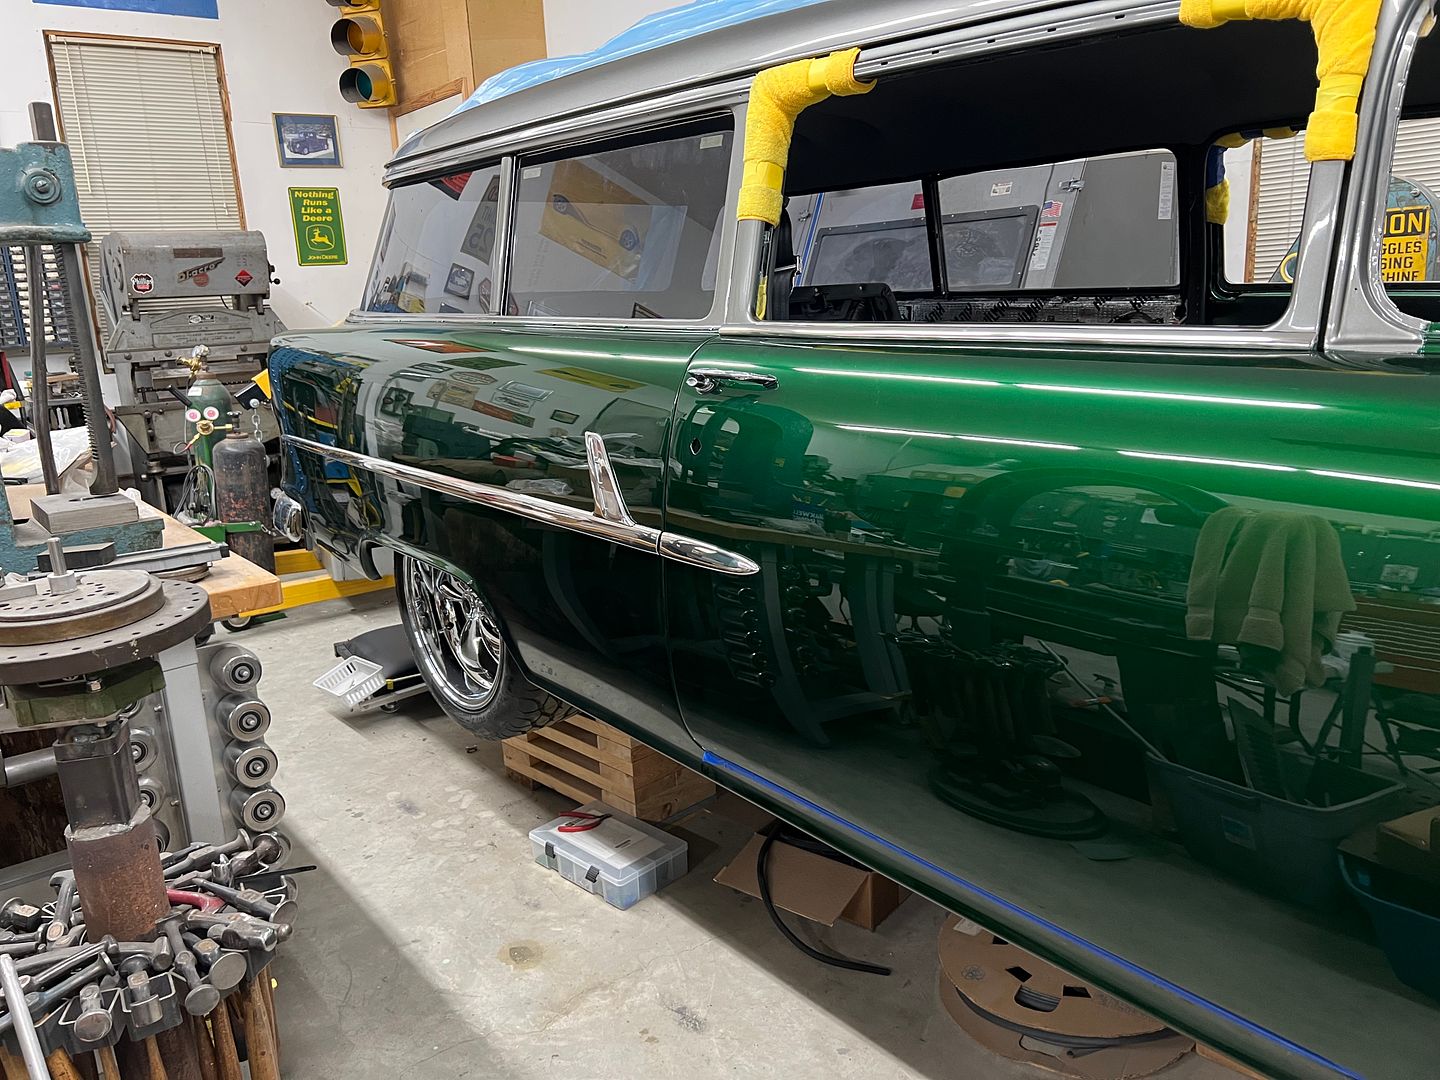 And our dash clock showed up so we can get that hole filled as well
__________________
Robert |
|
|
|
|
05-19-2023, 08:14 AM
|
#1336 |
|
Registered User
Join Date: Jan 2013
Location: Leonardtown, MD
Posts: 1,633
|
Re: 55 Wagon Progress
While assembling the door bits, we noticed that the retaining clip for the reproduction lock cylinders did not match the originals, which would leave us with a gaping hole in the back side of the inner door.
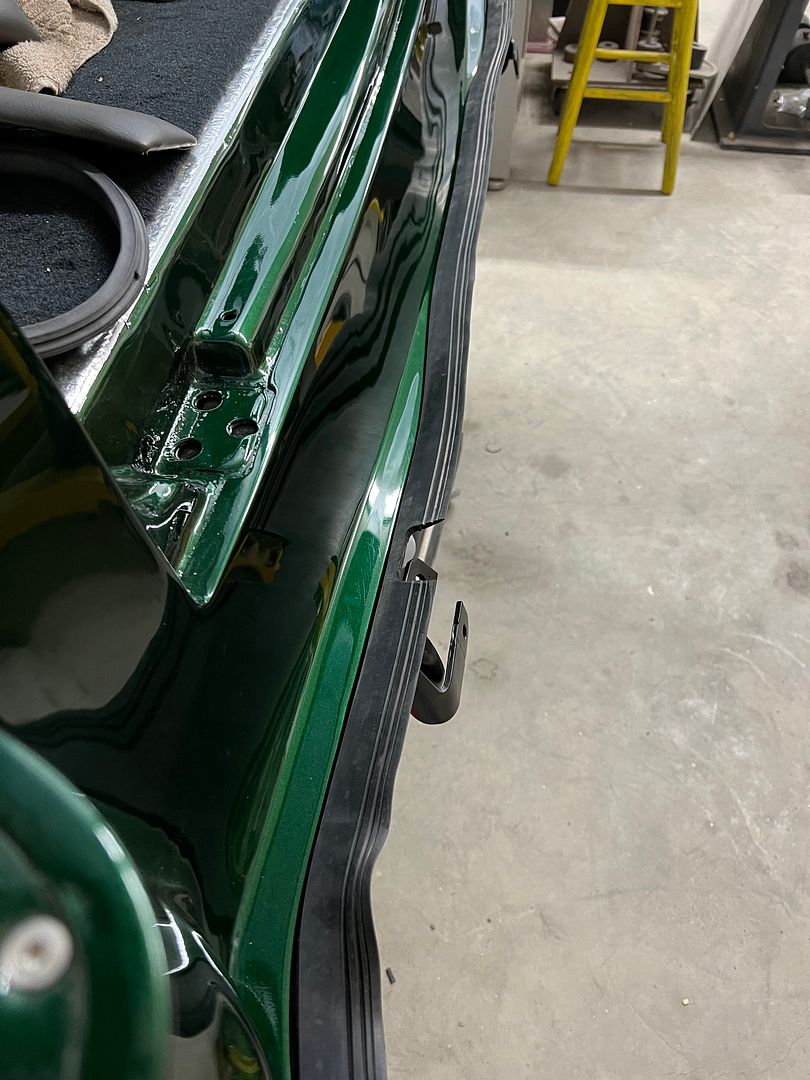
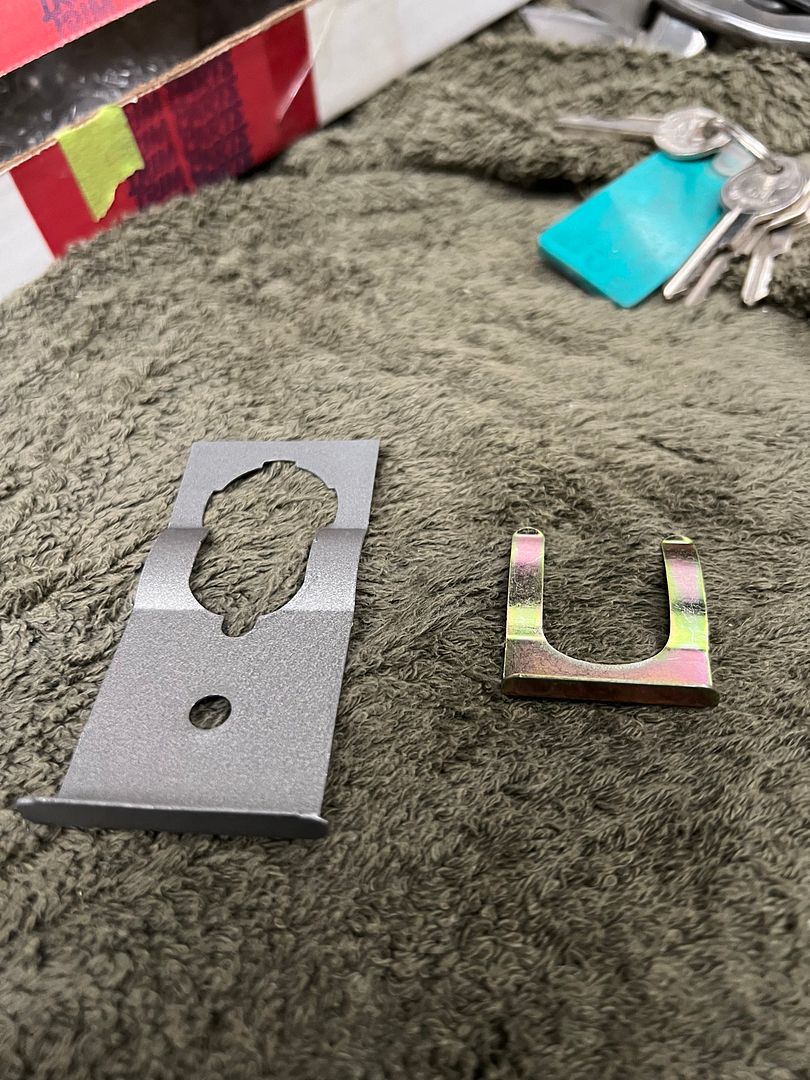 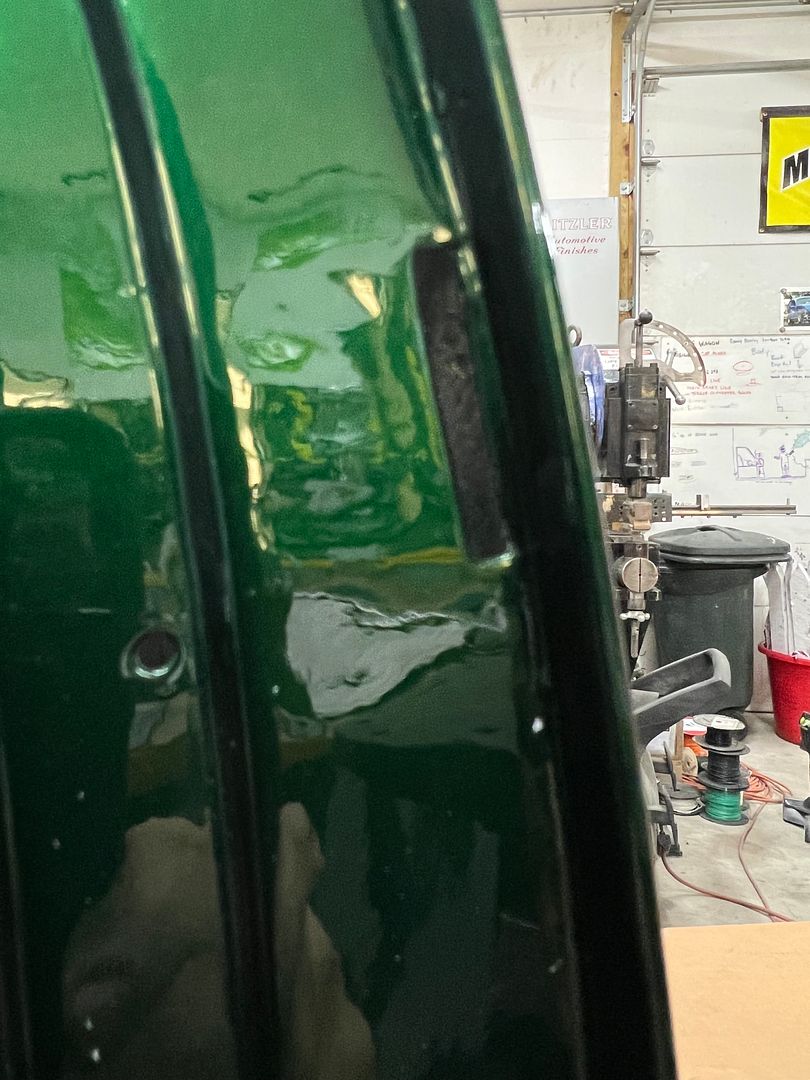 So we had media blasted the originals and sent to the Shop at Shorty's for a cerakote finish of gun metal grey. As my luck would have it, the door skins we had installed had some accuracy issues in the lock hole locations. 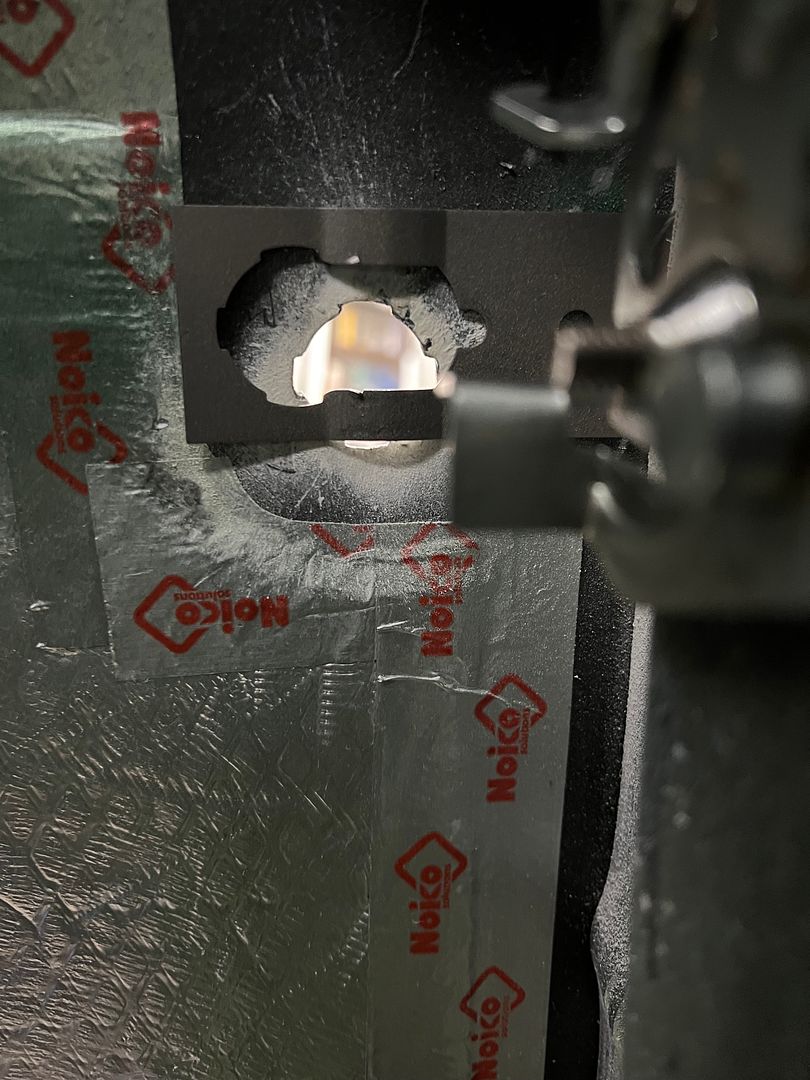 Aligning the clip to the lock hole would result in a slight misalignment out back... and you know Robert's not having that. 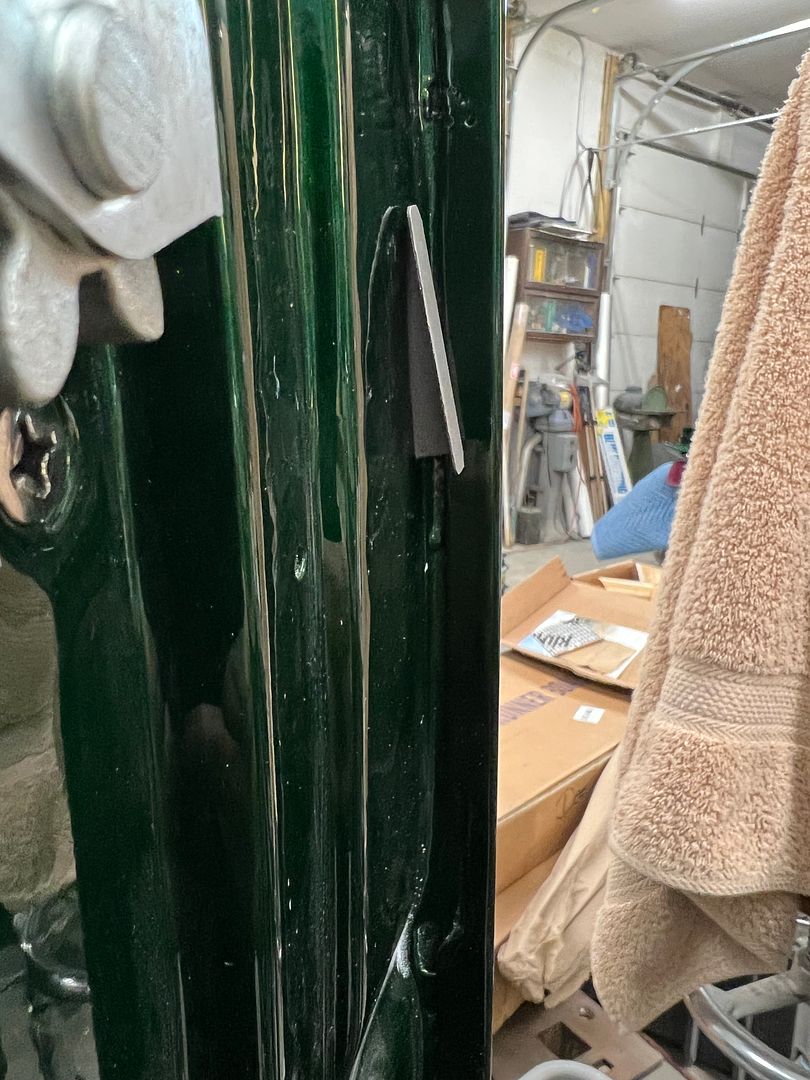 With Cerakote still fresh, some trimming was done so we could use the original clips to fill the hole void, and the new ones would be used to hold the lock cylinder in place as well as the original clip, whose new job has been reduced to filling a slotted opening. Some window sealant will slow any movement of the pretend clip. 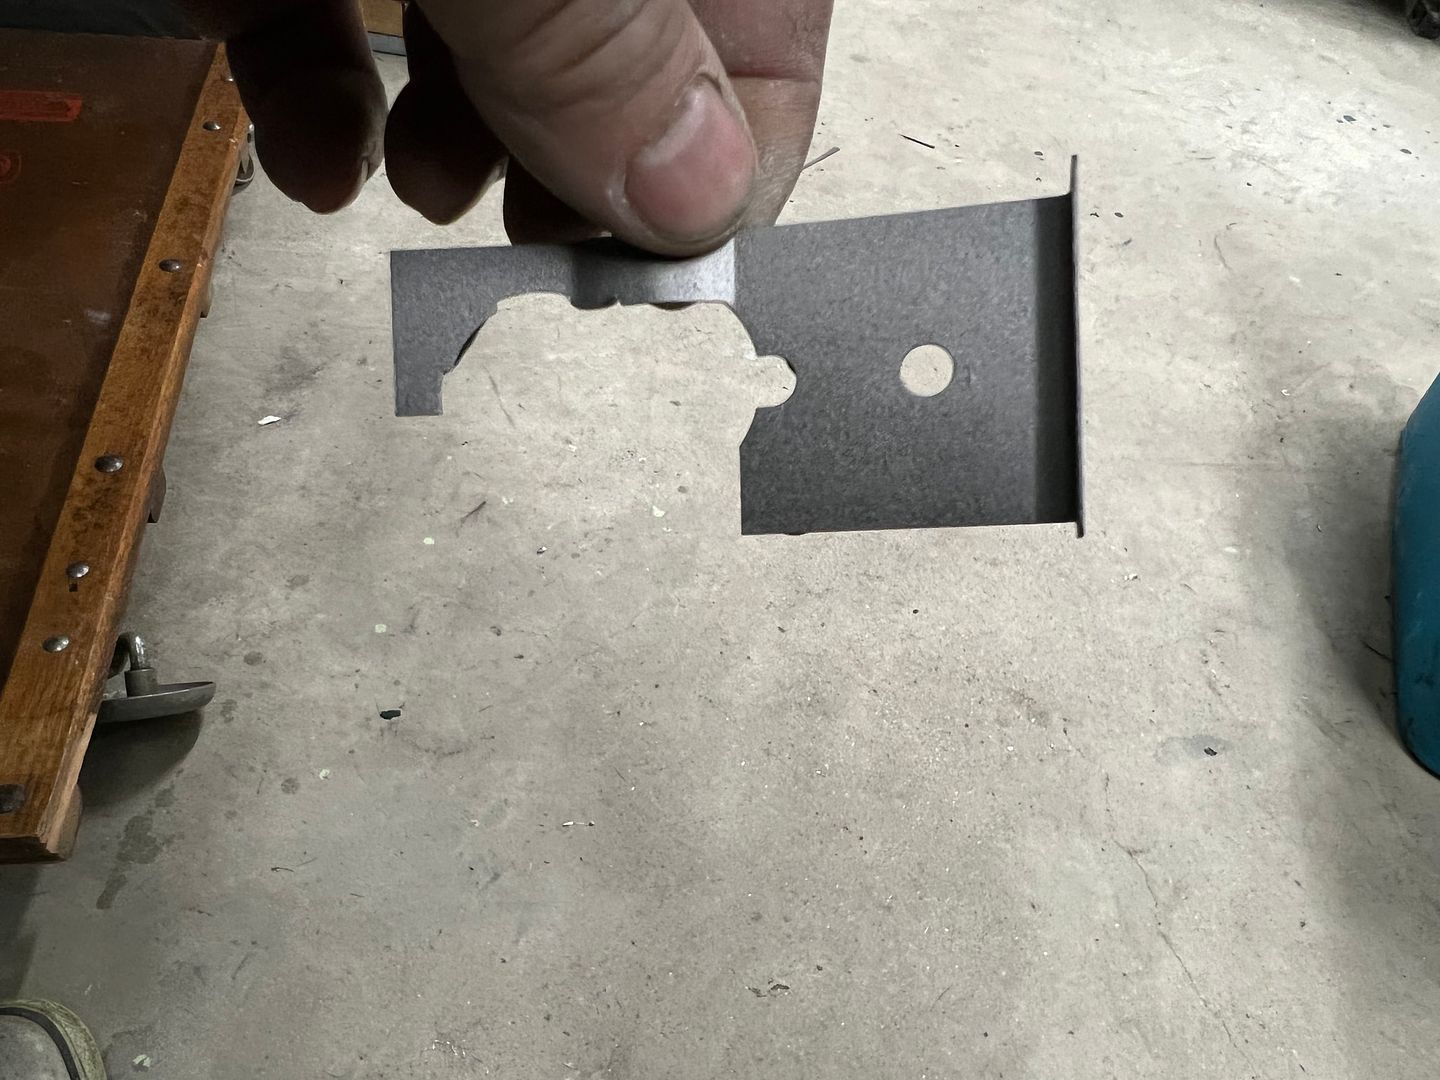 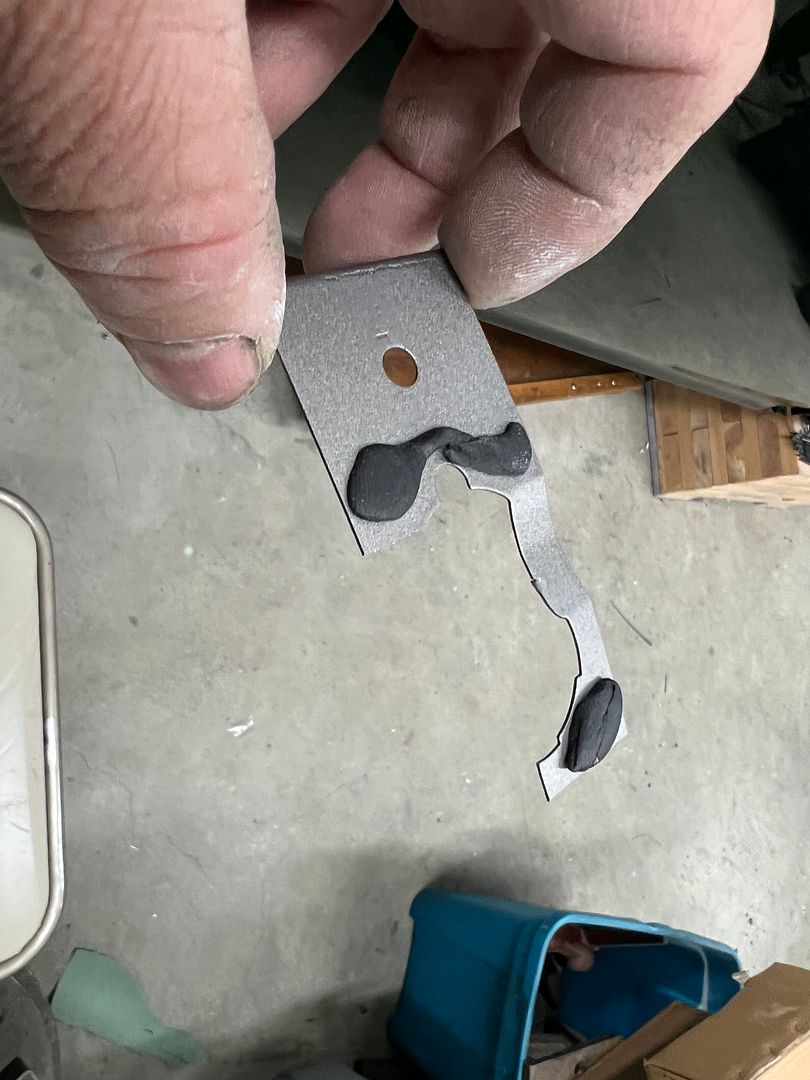 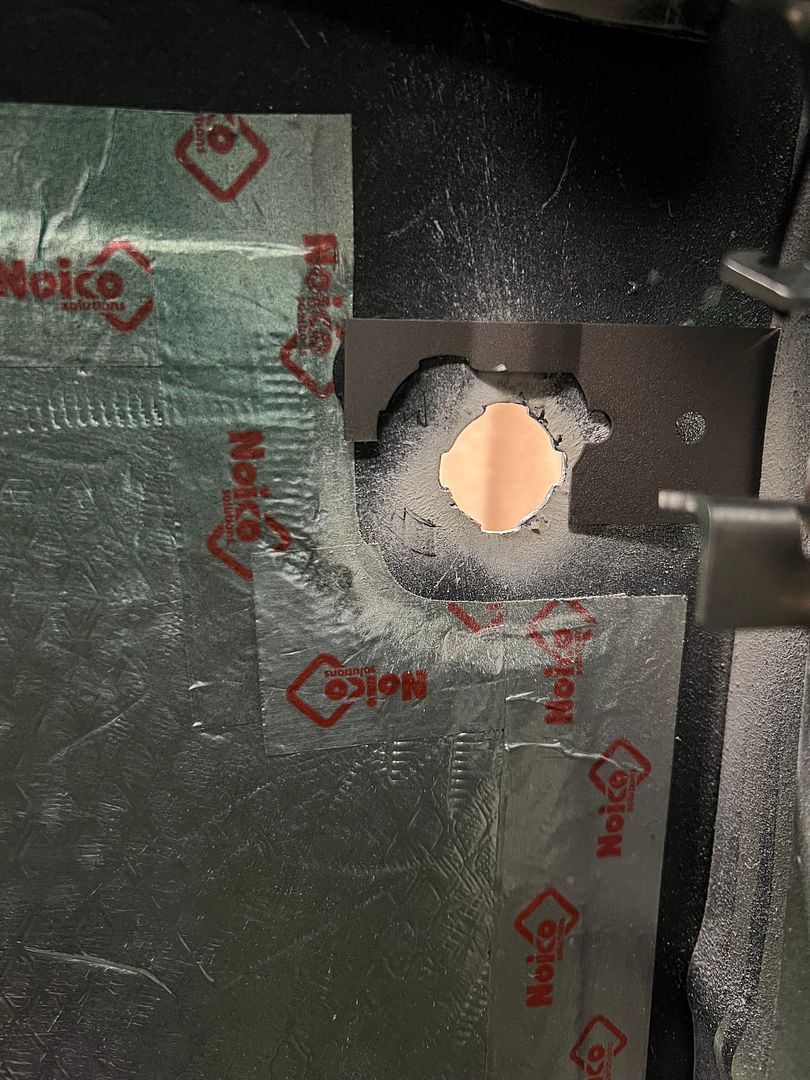 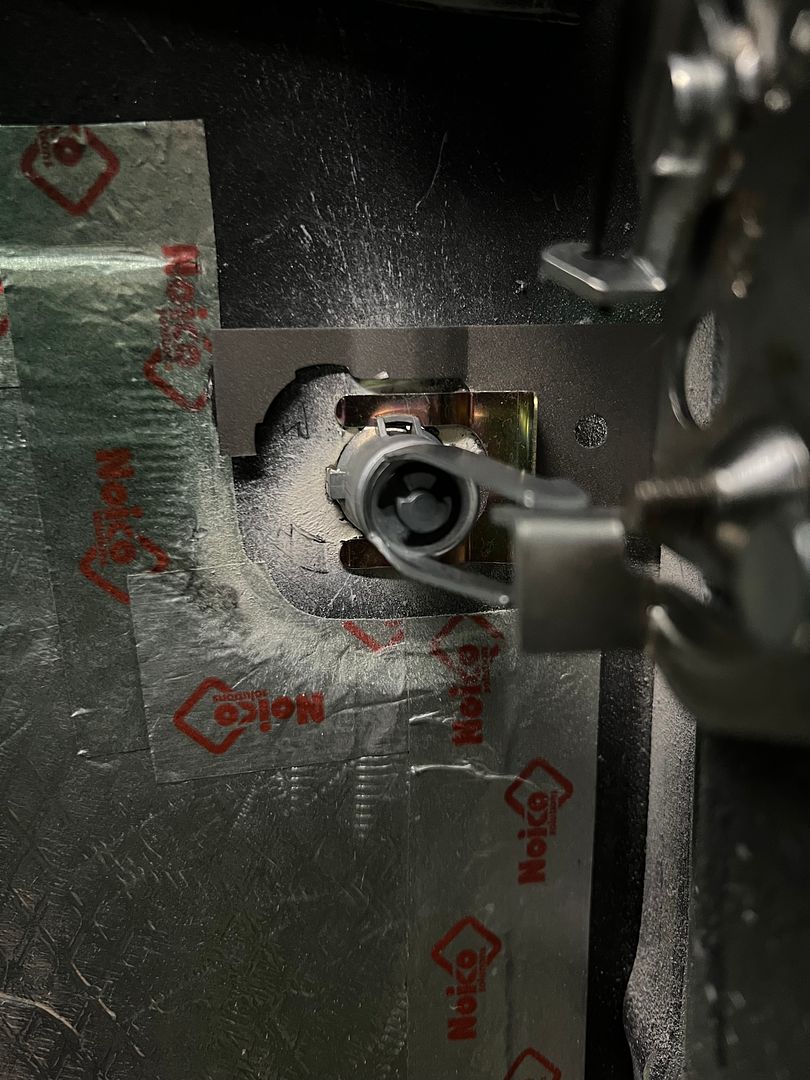 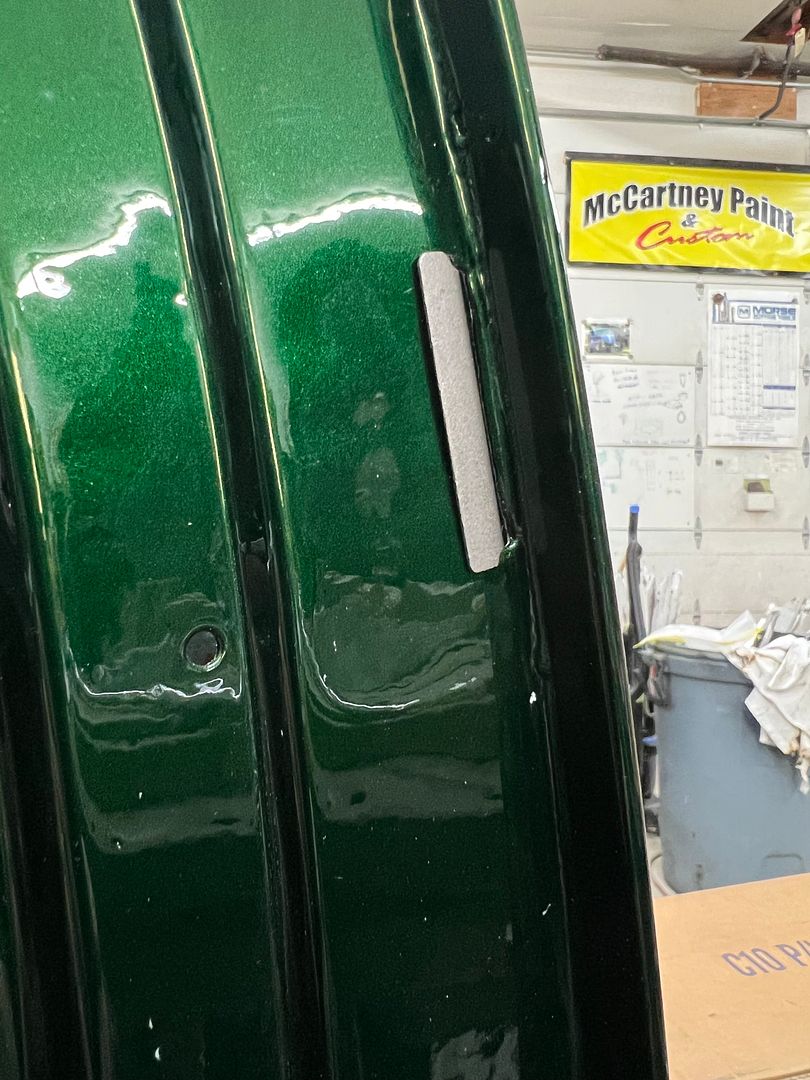 And the same effort repeated for the driver's side. Where it wasn't as far off as the other side, our mods were still required. 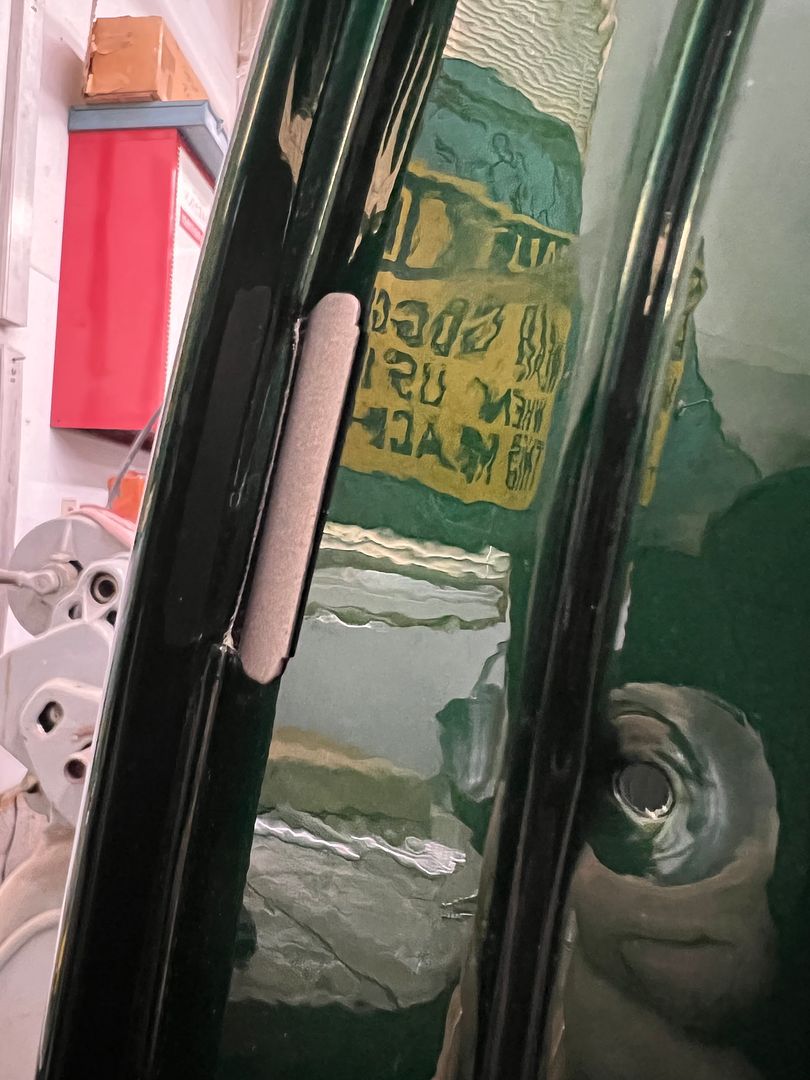 Mandatory Kramer photo bomb 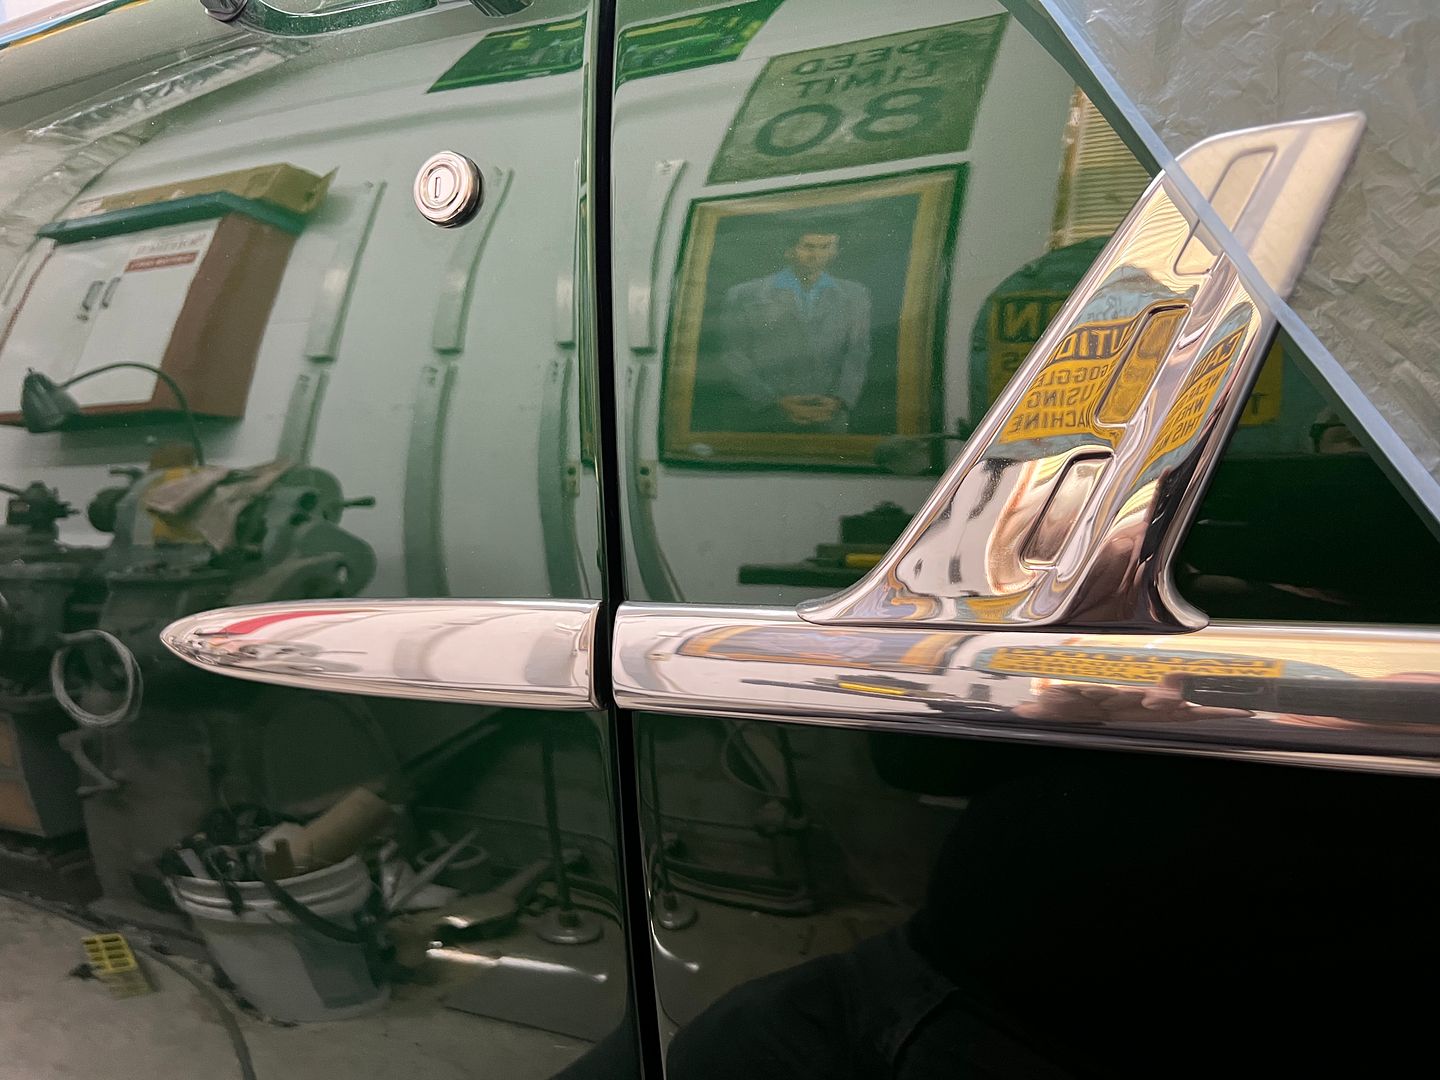 Adding the pull rod for the door lock....  and the addition of a rubber grommet will help keep rattles down. 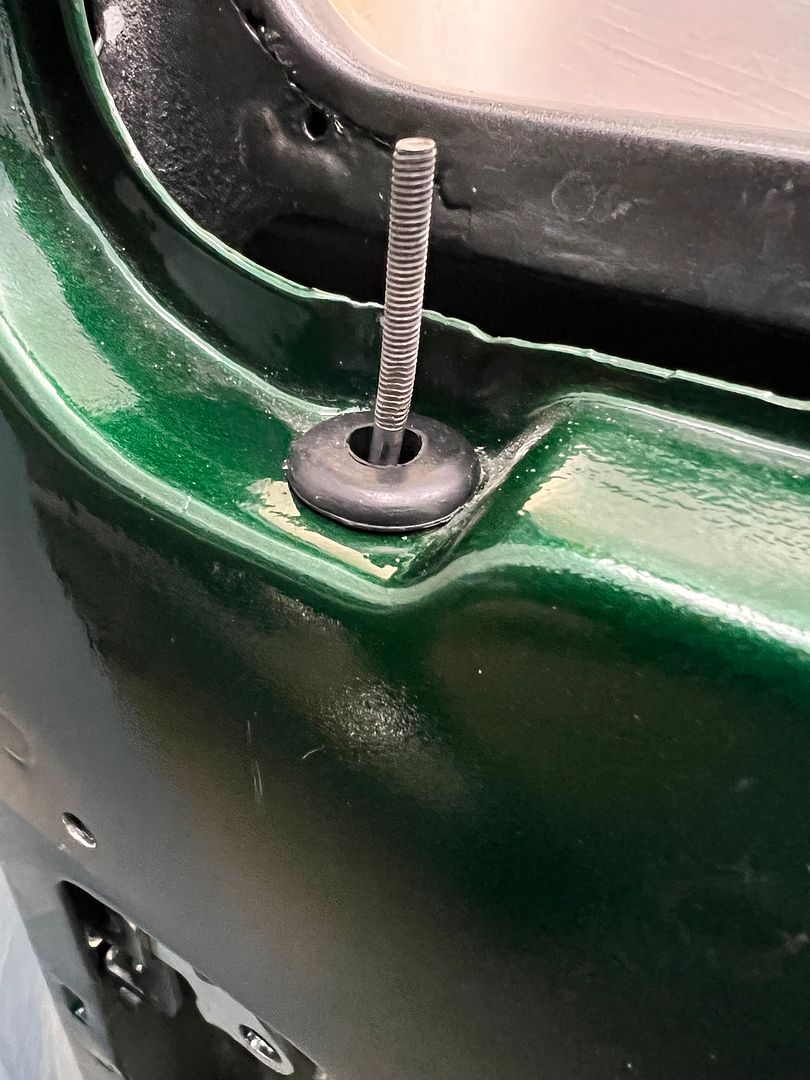 Jared applied some Kilmat inside the tailgate and we added more bling..  And we've had a casualty with the Baileigh magnetic brake. The magnet stopped working and some troubleshooting found an open with the coil. Some inspection of the supply wires found an over heat issue. Removing all the epoxy showed it's been warm for awhile....   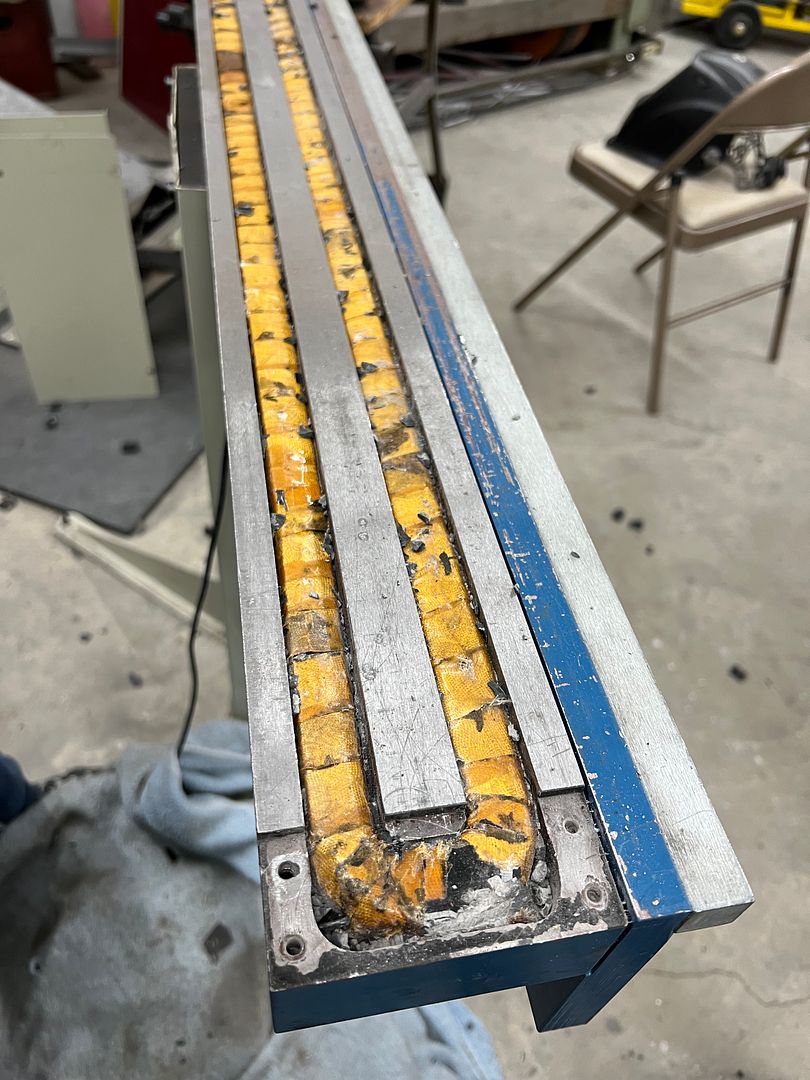 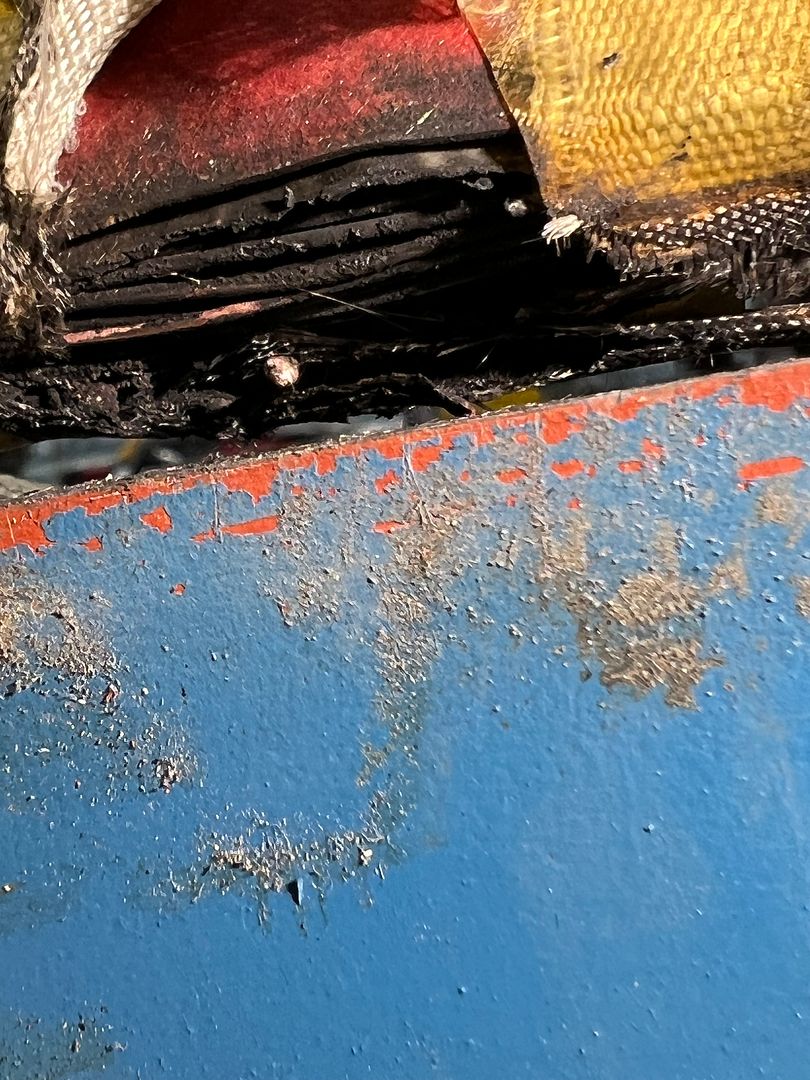 So it looks like we'll be in search of replacement parts.
__________________
Robert |
|
|
|
|
05-19-2023, 09:03 AM
|
#1337 |
|
Post Whore
Join Date: May 2015
Location: Alabama
Posts: 14,585
|
Re: 55 Wagon Progress
Nice work on the "Robert ain't having it" issues..!!!!
I always wondered how your mag brake worked.. or I guess dont work now...but I know you'll getter done..
__________________
Mongo...aka Greg RIP Dad RIP Jesse 1981 C30 LQ9 NV4500..http://67-72chevytrucks.com/vboard/s...d.php?t=753598 Mongos AD- LS3 TR6060...http://67-72chevytrucks.com/vboard/s...34#post8522334 Columbus..the 1957 IH 4x4...http://67-72chevytrucks.com/vboard/s...63#post8082563 2023 Chevy Z71..daily driver |
|
|
|
|
05-24-2023, 07:31 AM
|
#1338 |
|
Registered User
Join Date: Jan 2013
Location: Leonardtown, MD
Posts: 1,633
|
Re: 55 Wagon Progress
Thanks Greg!
More progress, we were test fitting the power antenna an noticed that the mounting bezel did not sit horizontally on the fender. I had quickly whipped up a wedge shaped and tapered spacer out of some aluminum as a quick test. 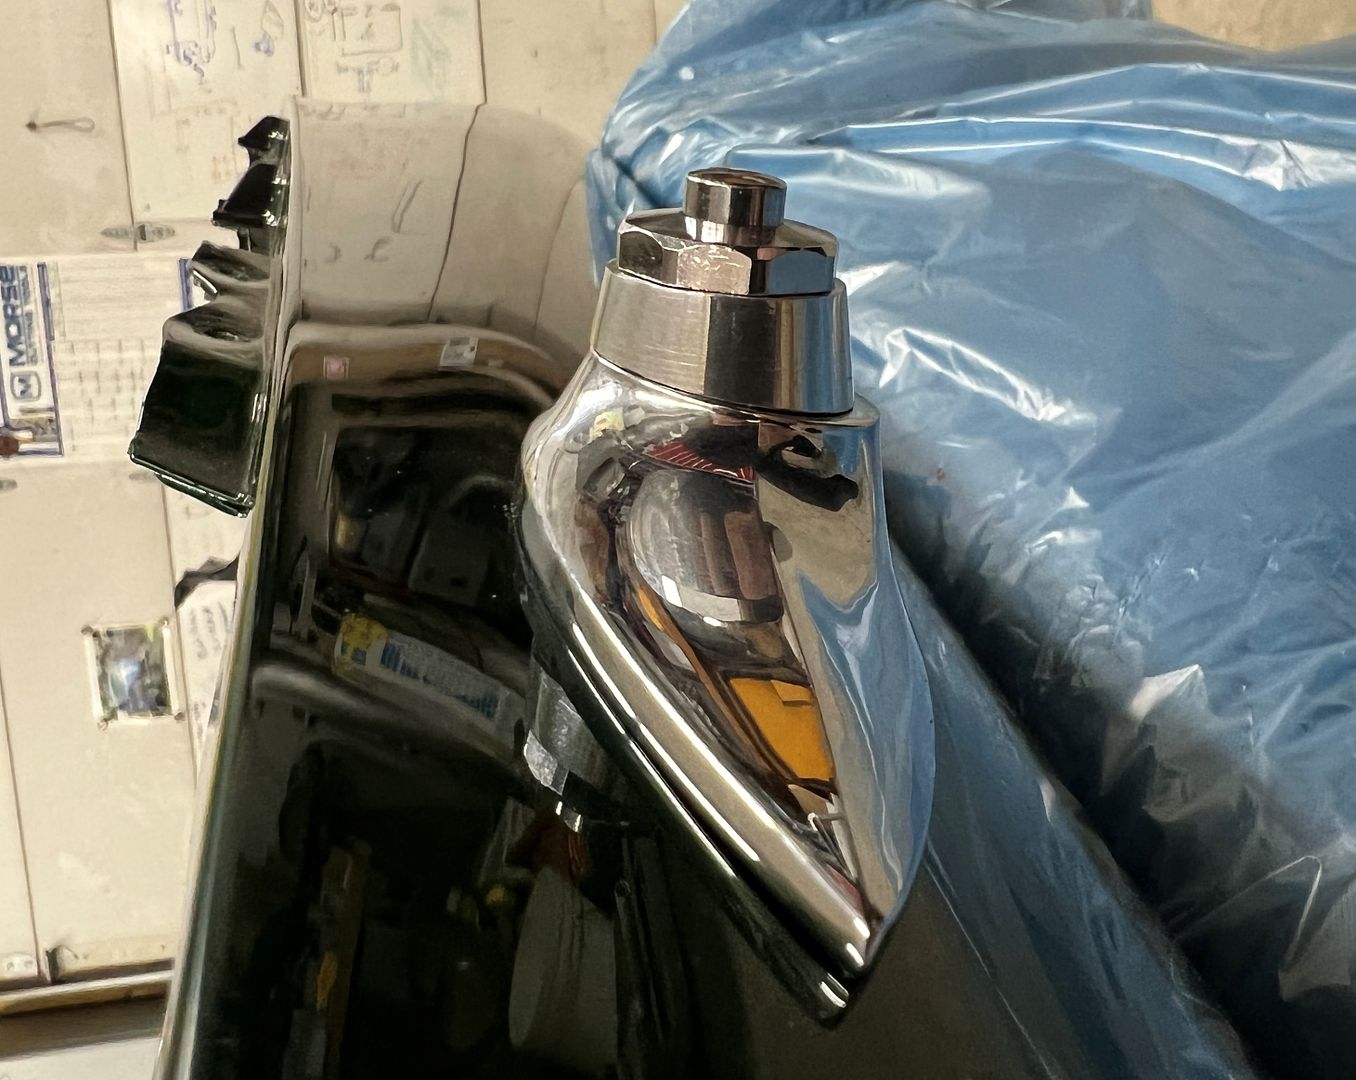 Where that was functional, it did not match the chrome finish of the bezel. I picked up a chunk of 1" stainless rod (local drop cut) to make a duplicate out of stainless. The wedge shape was added first, using the 12" disc sander... then clamped in the Southbend for the taper cut and a hole boring. 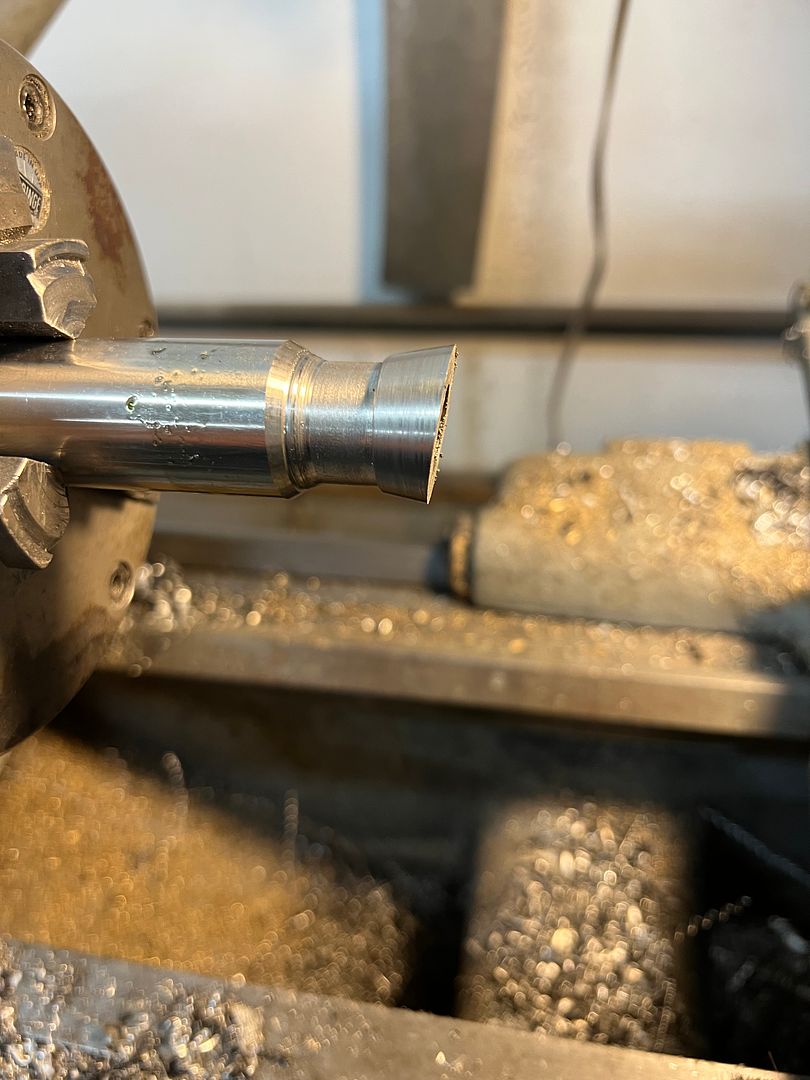 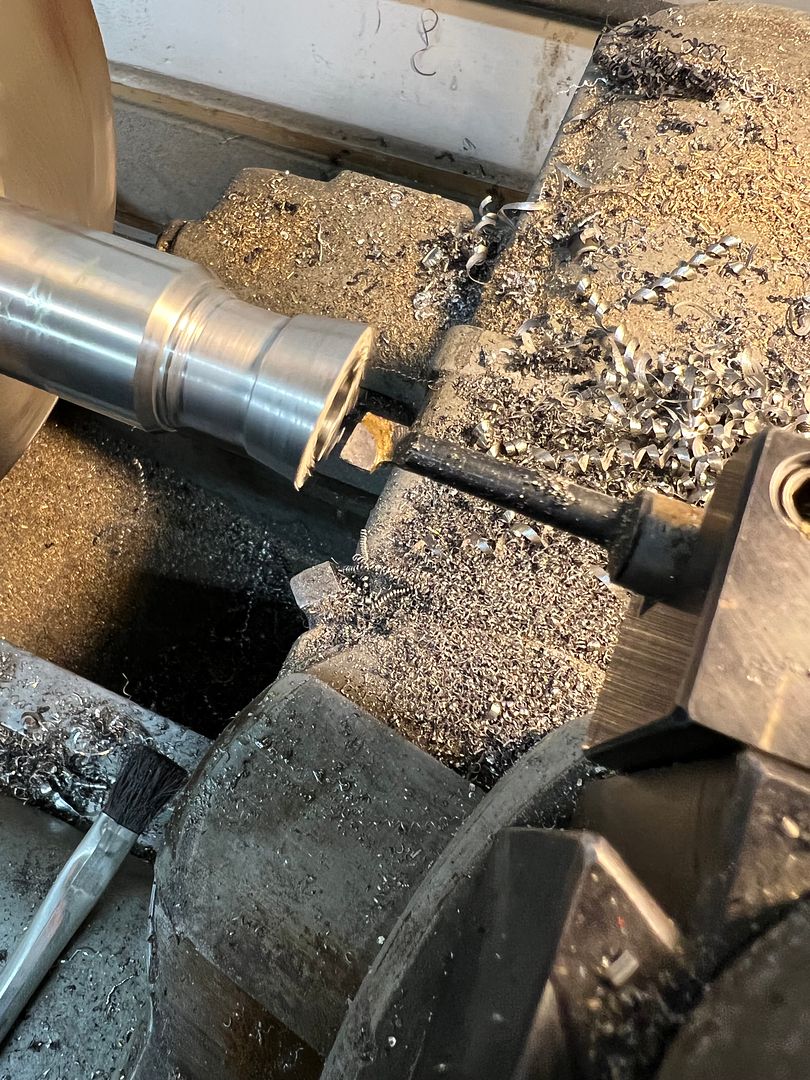 ....and trimmed off to length 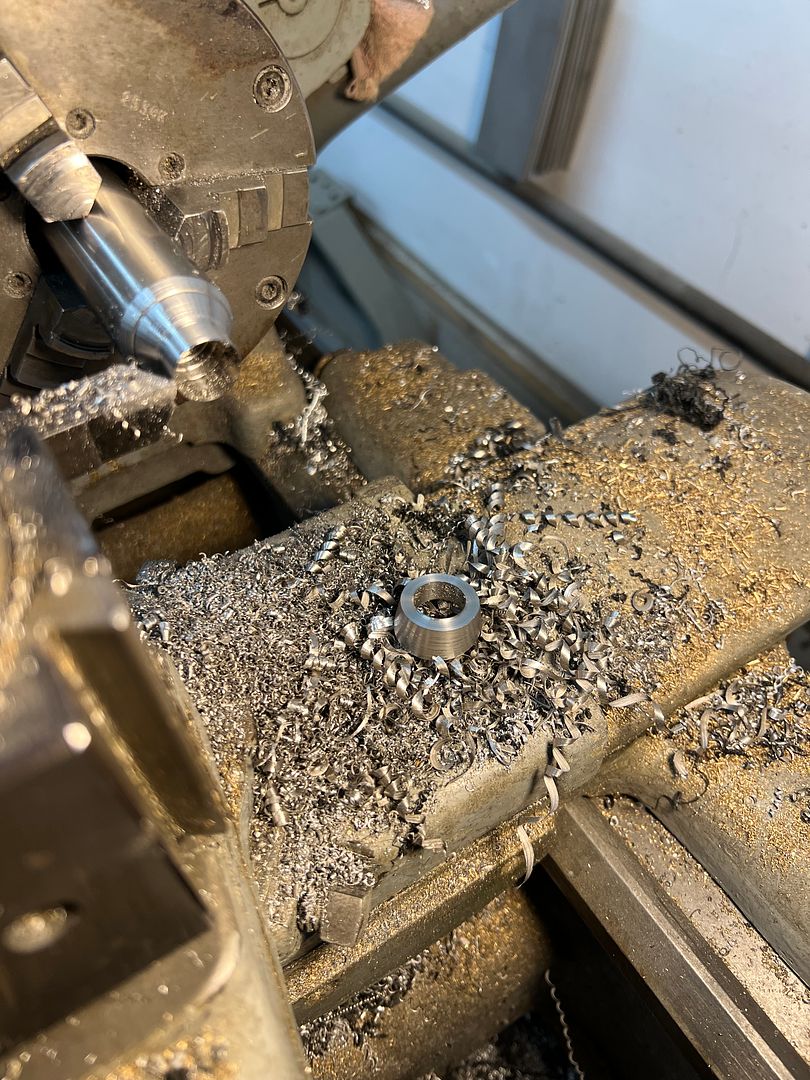 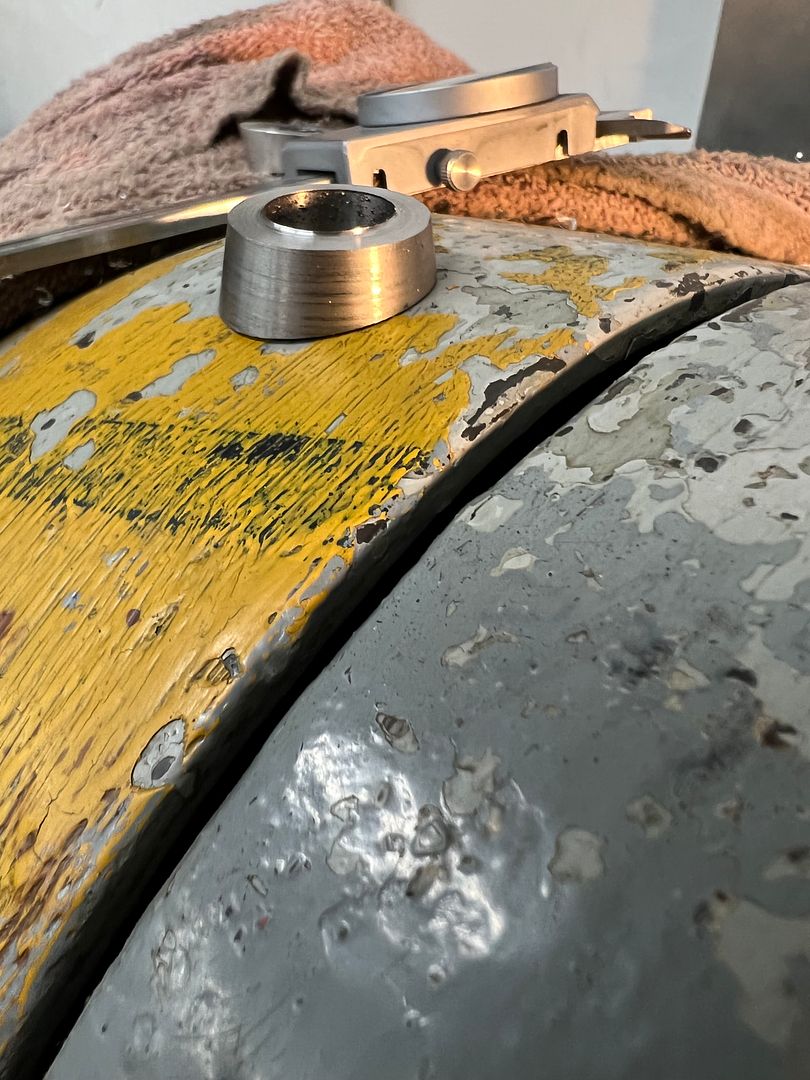 In order to hold this oddball shape for polishing, some rivnuts were used on a 1/2-13 bolt, with the wedge angle added to one for a more positive hold.. 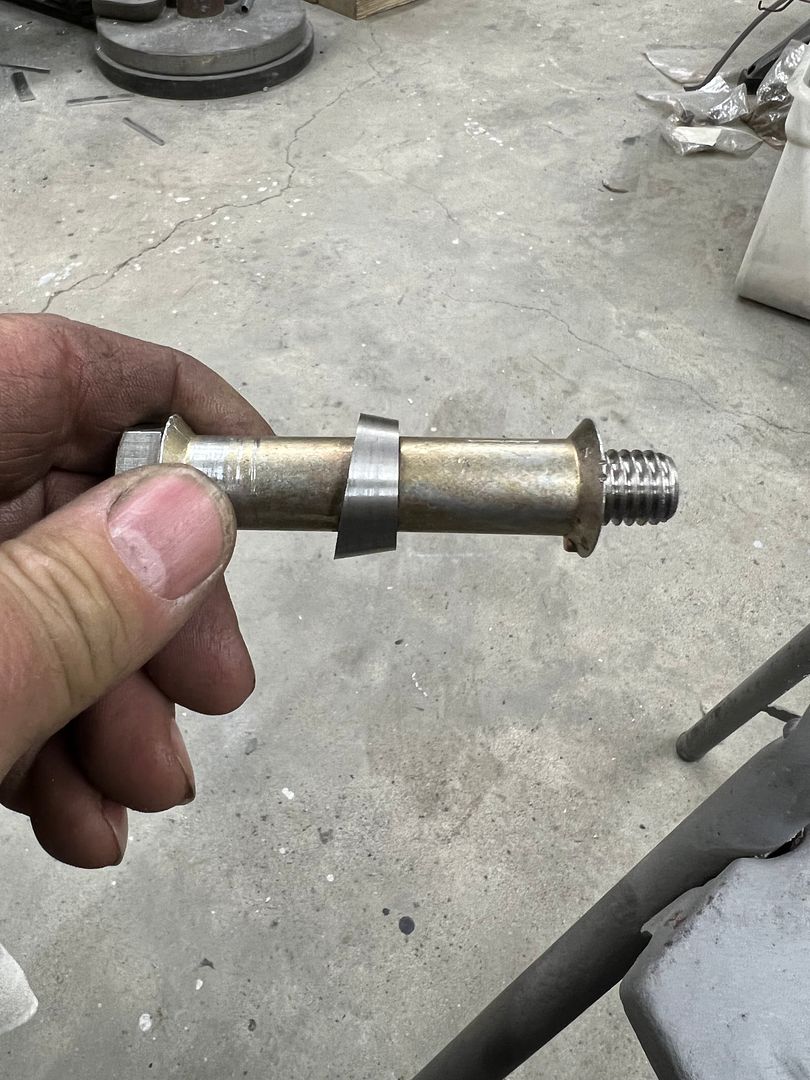 Completed, this matches the chrome finish of the bezel much better... 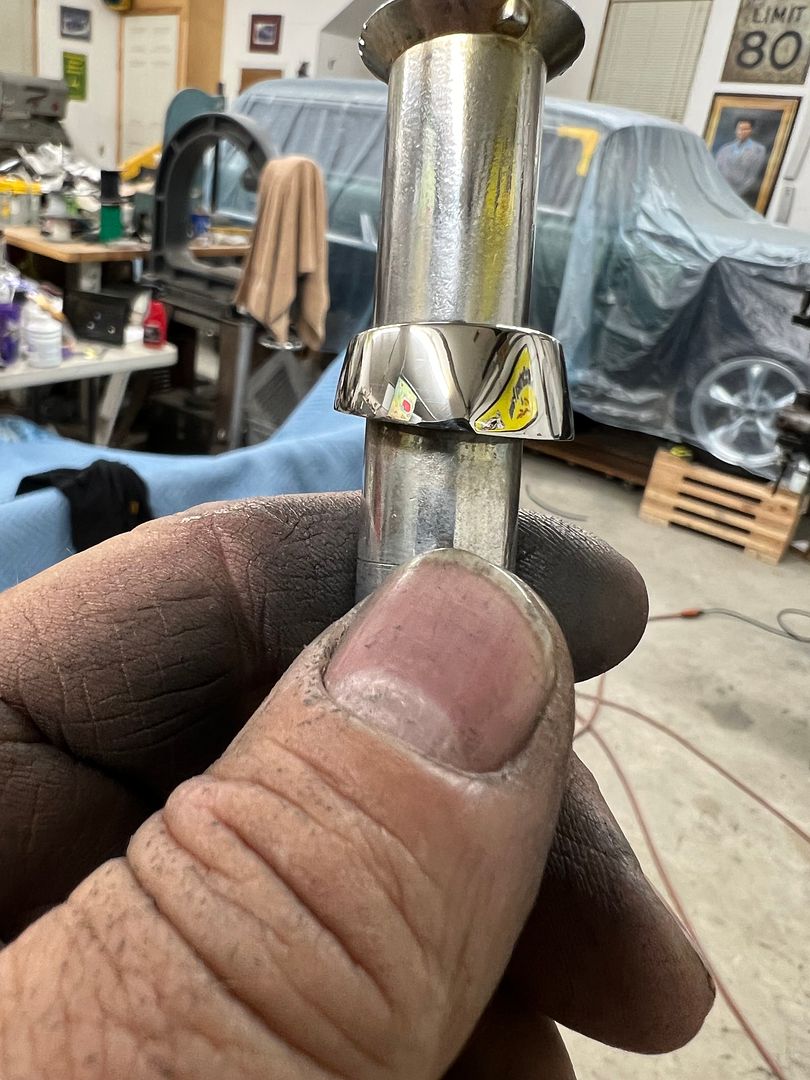 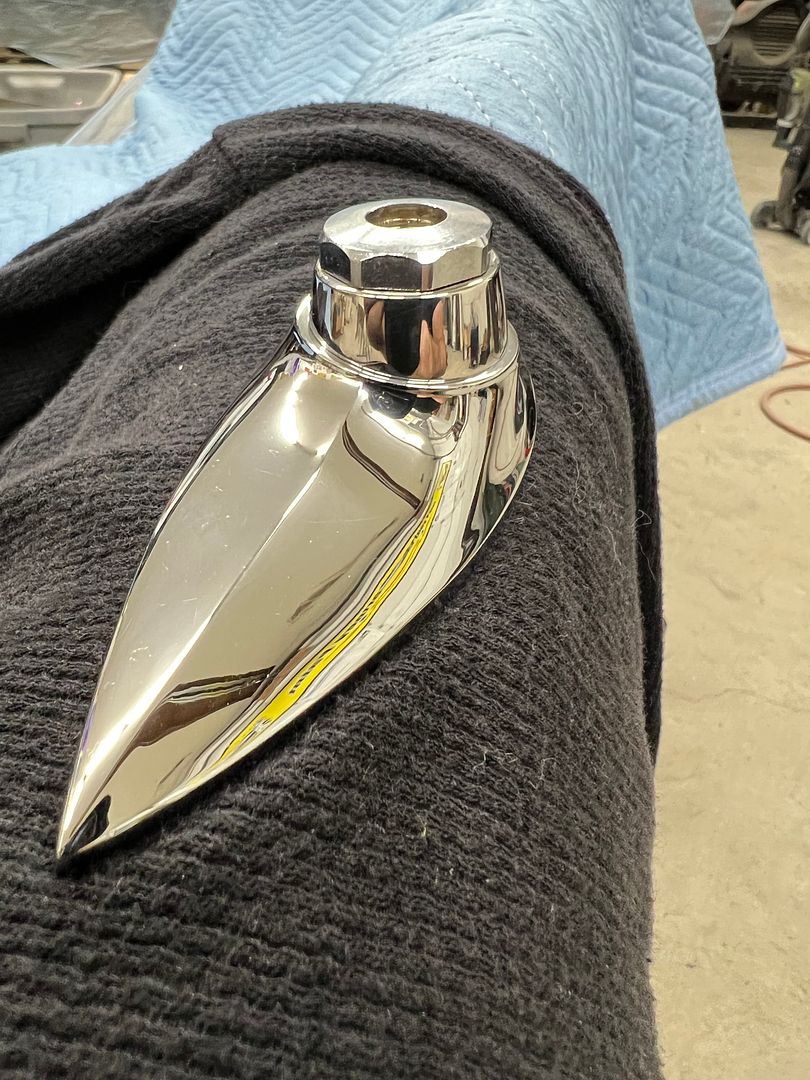 Since we were ready to re-install the front fenders, I thought I'd grab pictures of our fine-tuning adjustment screws for the fender to door alignment. The hex bolt shown on the right is filling an existing hole that used to have a rubber plug in it. I guess having pulled out the dried and cracked old rubber plug, I wanted a more permanent solution. We were going to use that hole but it did not align with the rib on the fender's rear brace. So another hole was drilled next to it, a 3/8-16 AVK style rivet nut installed, and a fully threaded bolt added. The bolt head was covered with a rubber cap and the inside end of the bolt had a slot added for adjustment purposes. Now we could use a screwdriver to adjust the screw outward, pushing the center of the fender until it aligns to the door surface.. A jam nut on the inside tightens against the rivnut to prevent any movement. 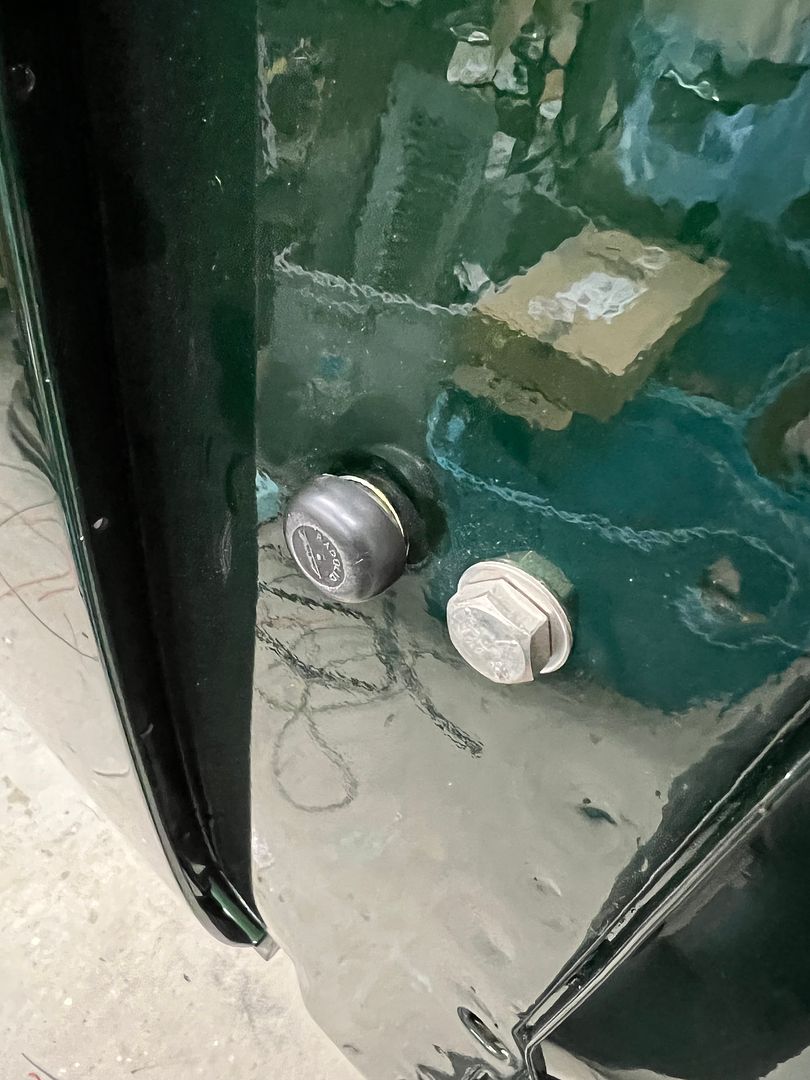  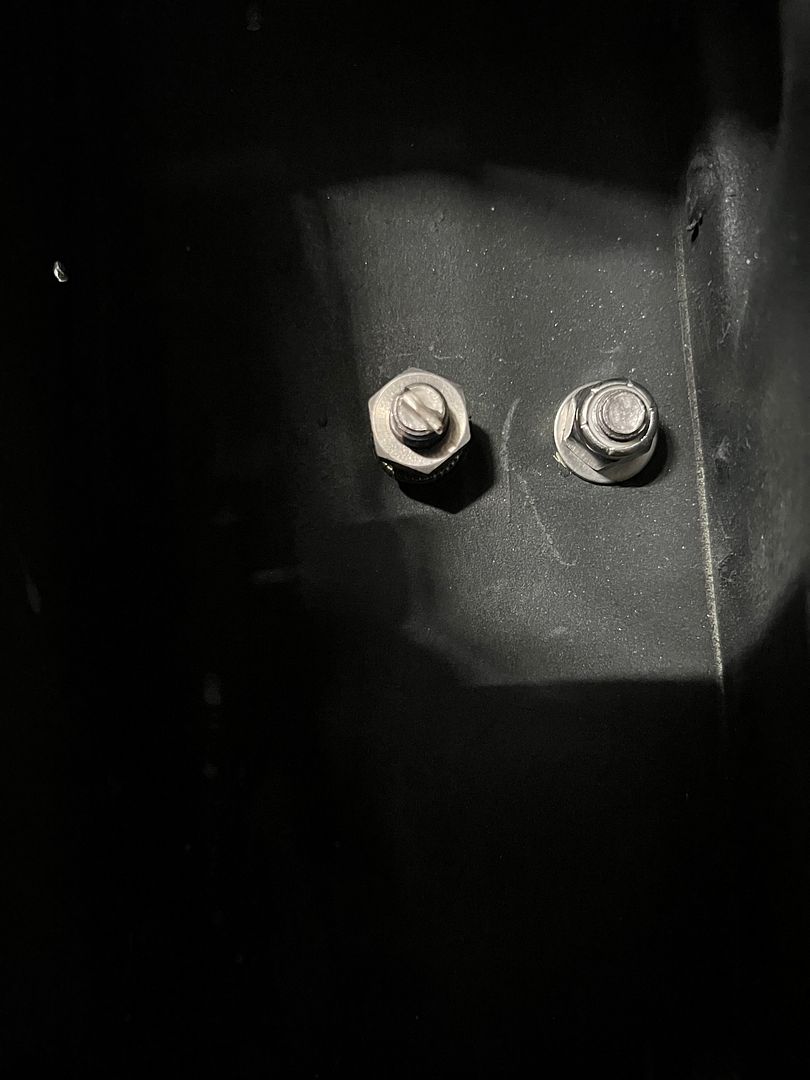 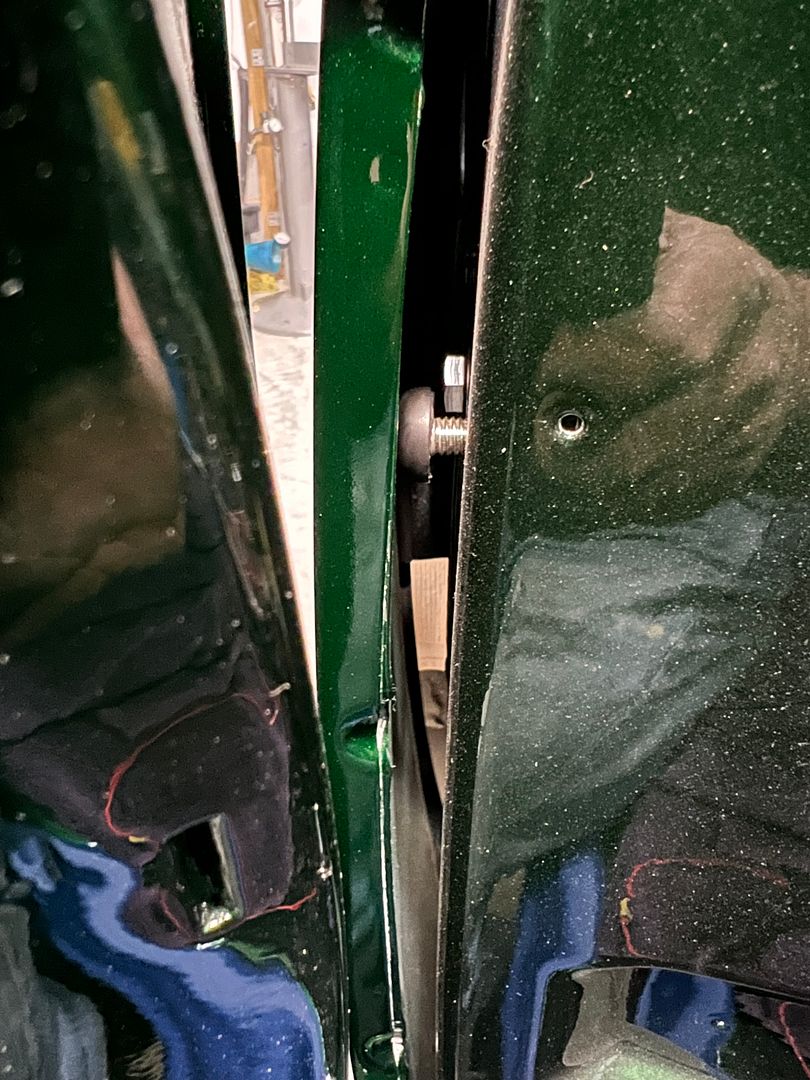 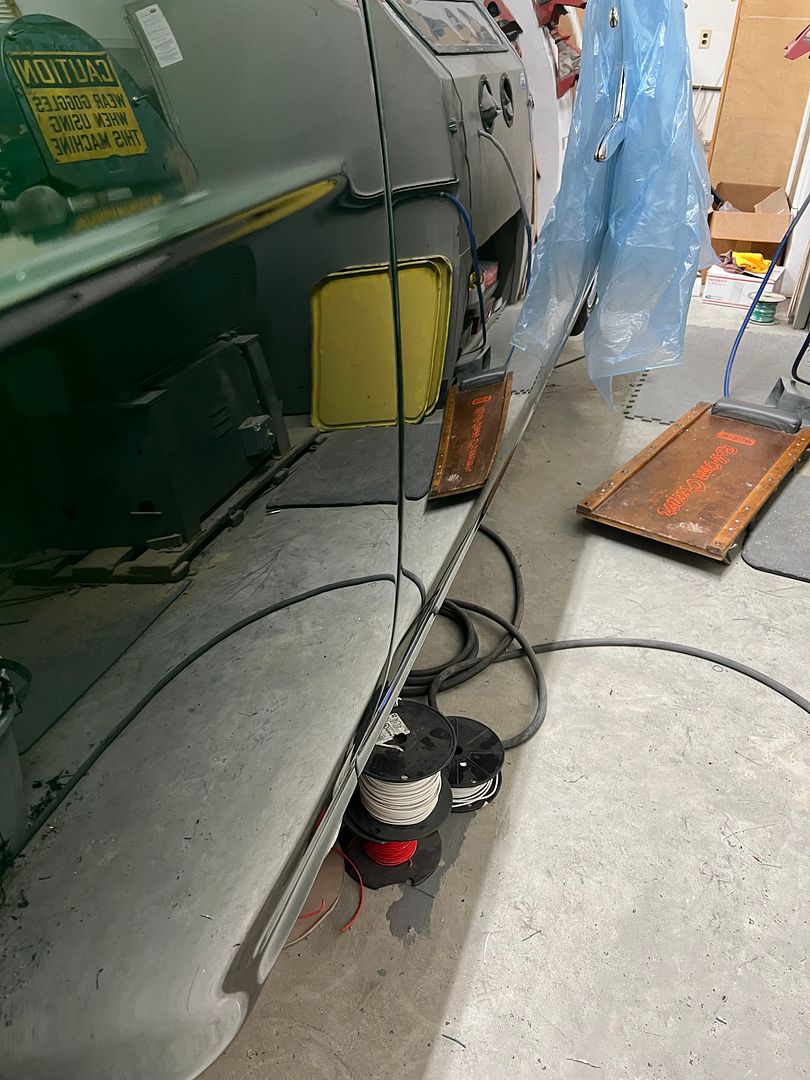 And with our upper fender mounts painted, they get installed using polished button head hardware and our barely noticeable shims we had fabricated. 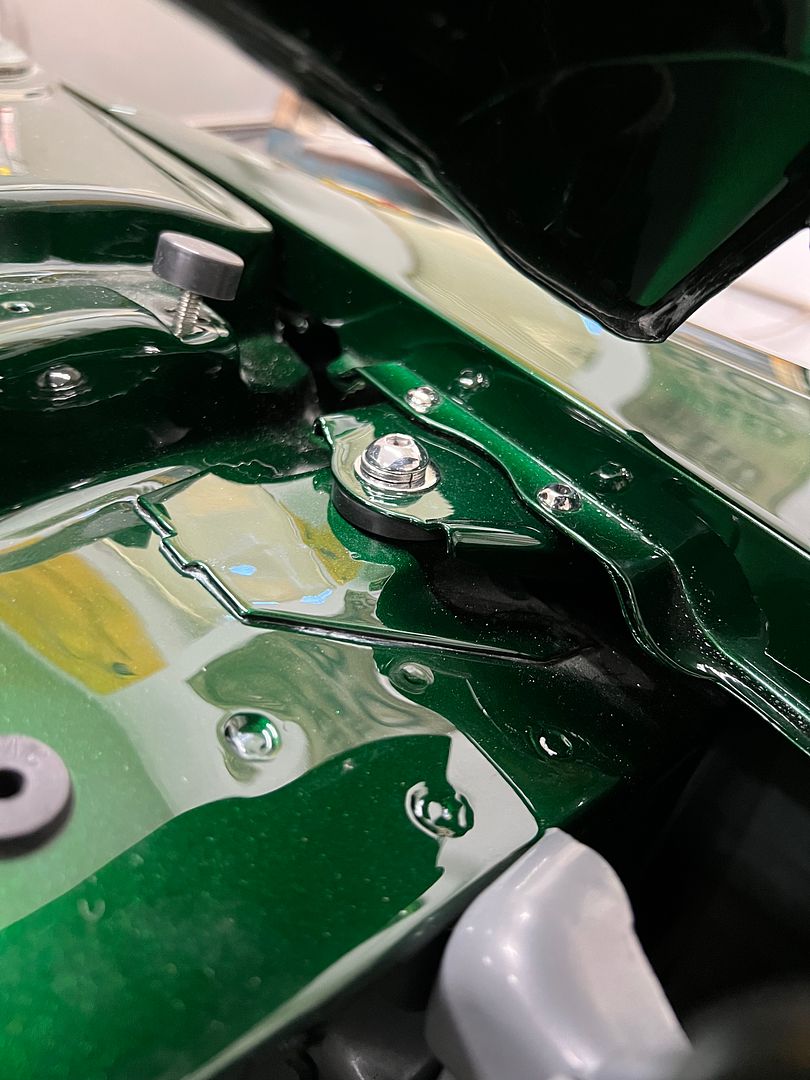 In the tooling department, we needed a tight radius reverse bend on some .090 aluminum, so a Gene Winfield inspired 1-1/4" round stock was added to our 4" pipe. This was bolted straight into tapped holes and used two stacked flat washers to provide the gap. The aluminum was 5052 alloy and was annealed prior to bending. 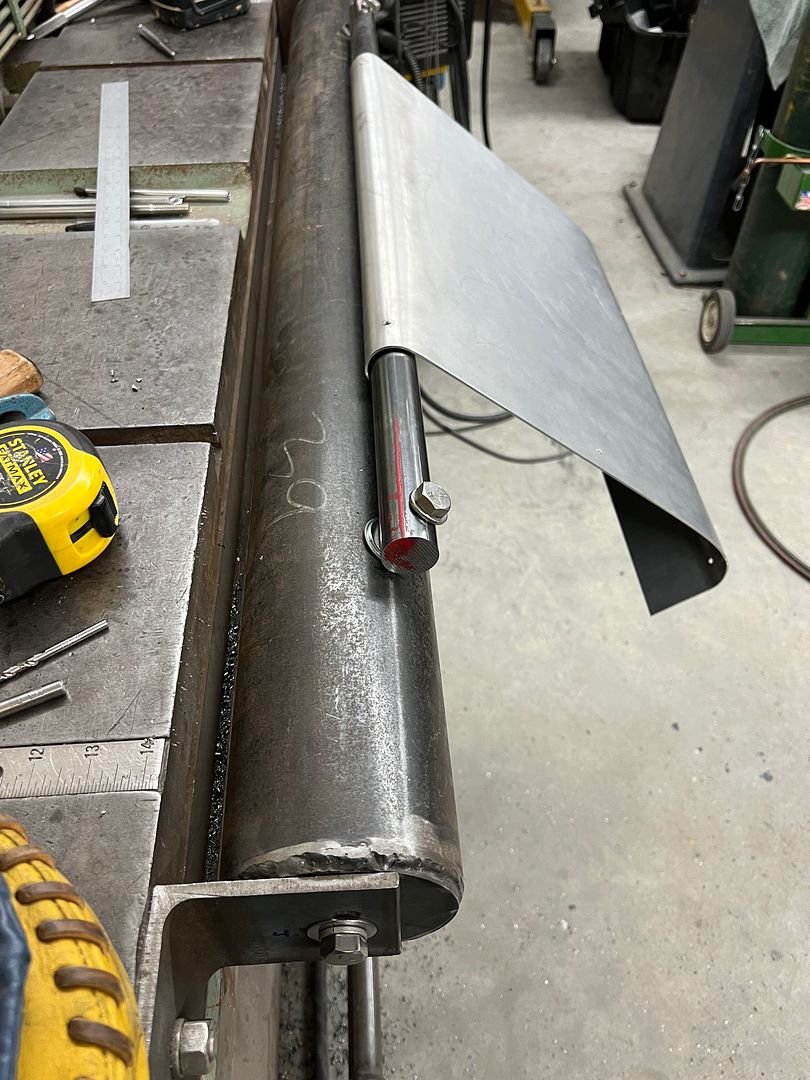 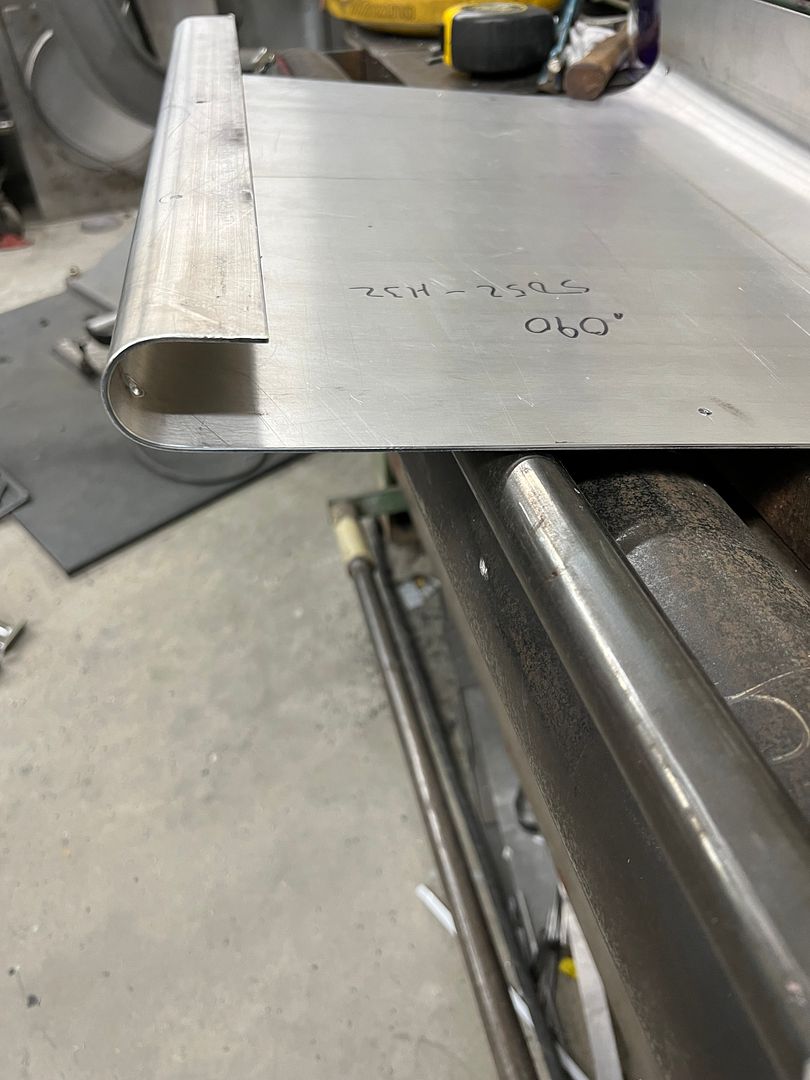 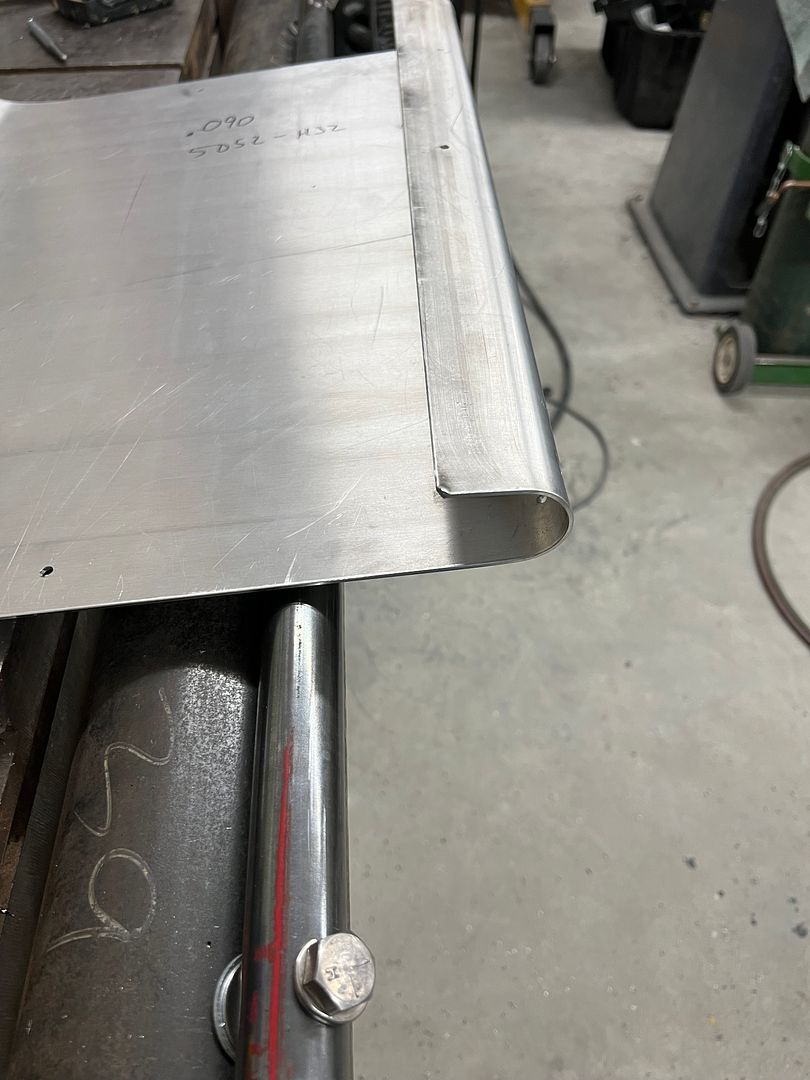
__________________
Robert |
|
|
|
|
06-05-2023, 10:41 AM
|
#1339 |
|
Registered User
Join Date: Jan 2013
Location: Leonardtown, MD
Posts: 1,633
|
Re: 55 Wagon Progress
More progress on the wagon. While reassembling the front end, Jared noticed the fenders were a bit high at the cowl. This next picture shows it, although the perspective makes it a bit exaggerated.
So we pulled each of our new shims we had made and shaved another 1/16" off the height. This shows the fender height after adjusting the shim height. 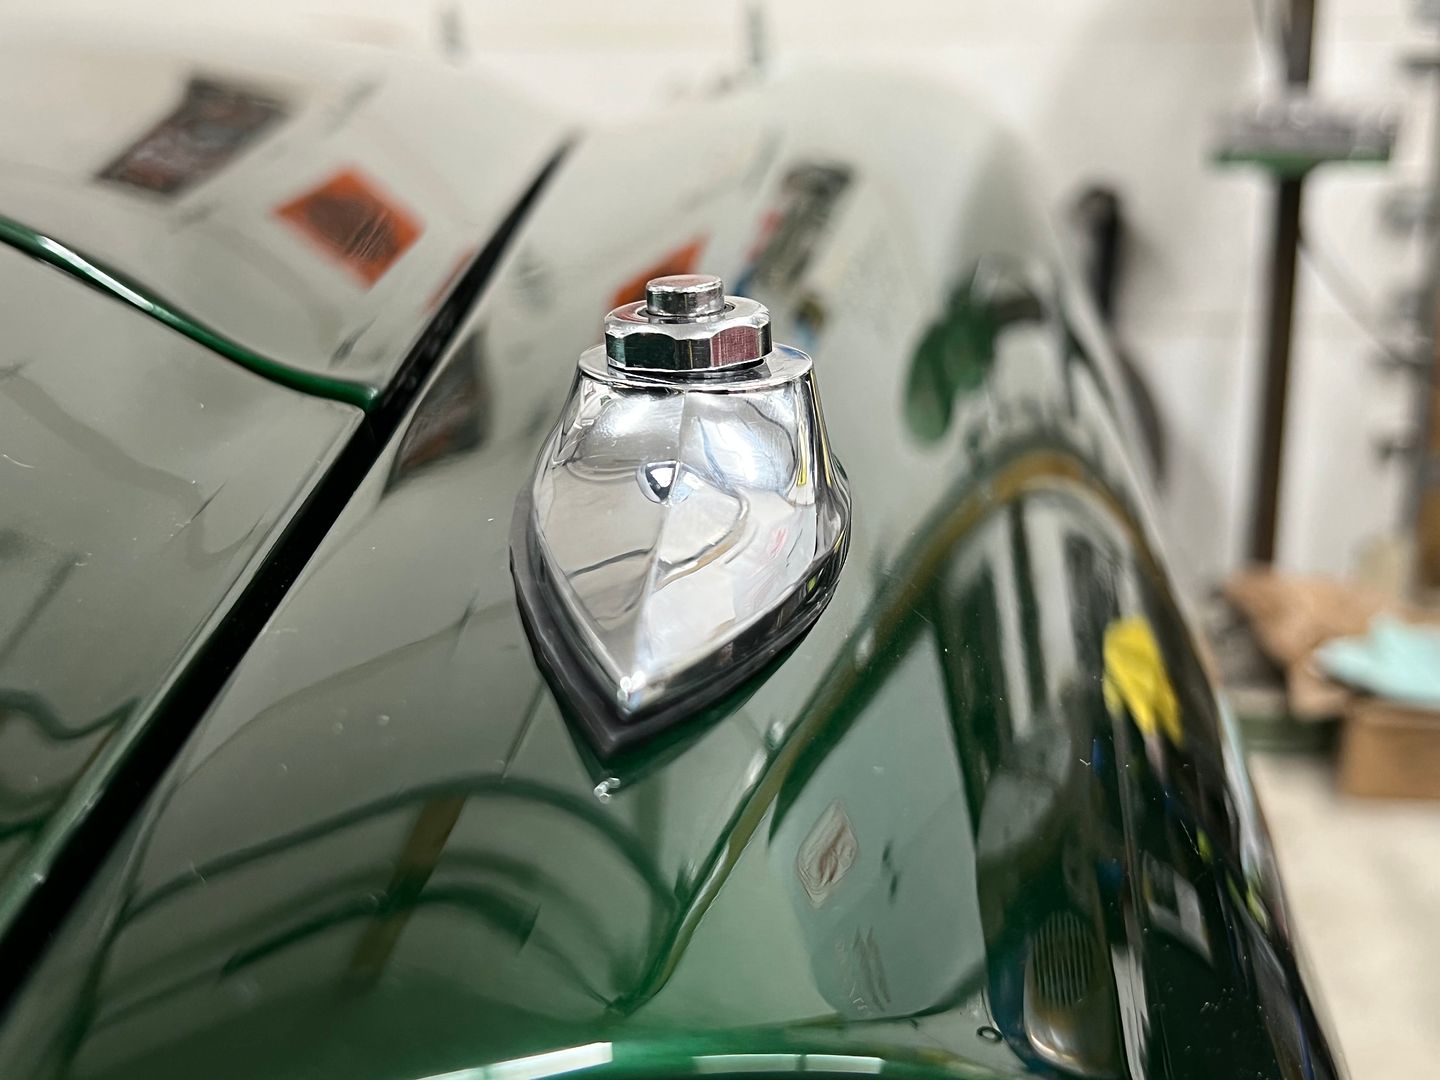 But shows our next back up and punt moment. The wedge shim we had made for the antenna was too steep, and this shows the actual angle needed. So we made another with less angle... 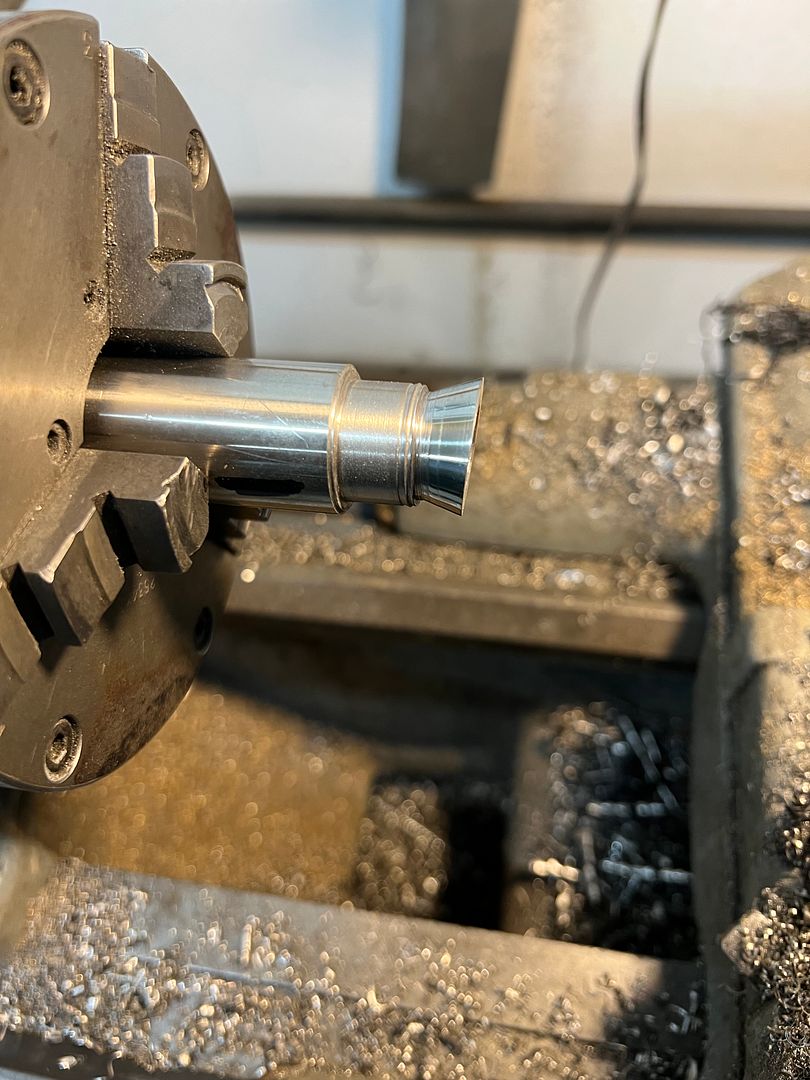 Note some "pre-polishing" was done on the lathe prior to cutting off the wedge to make things a bit easier. Final version installed and vertical orientation verified... 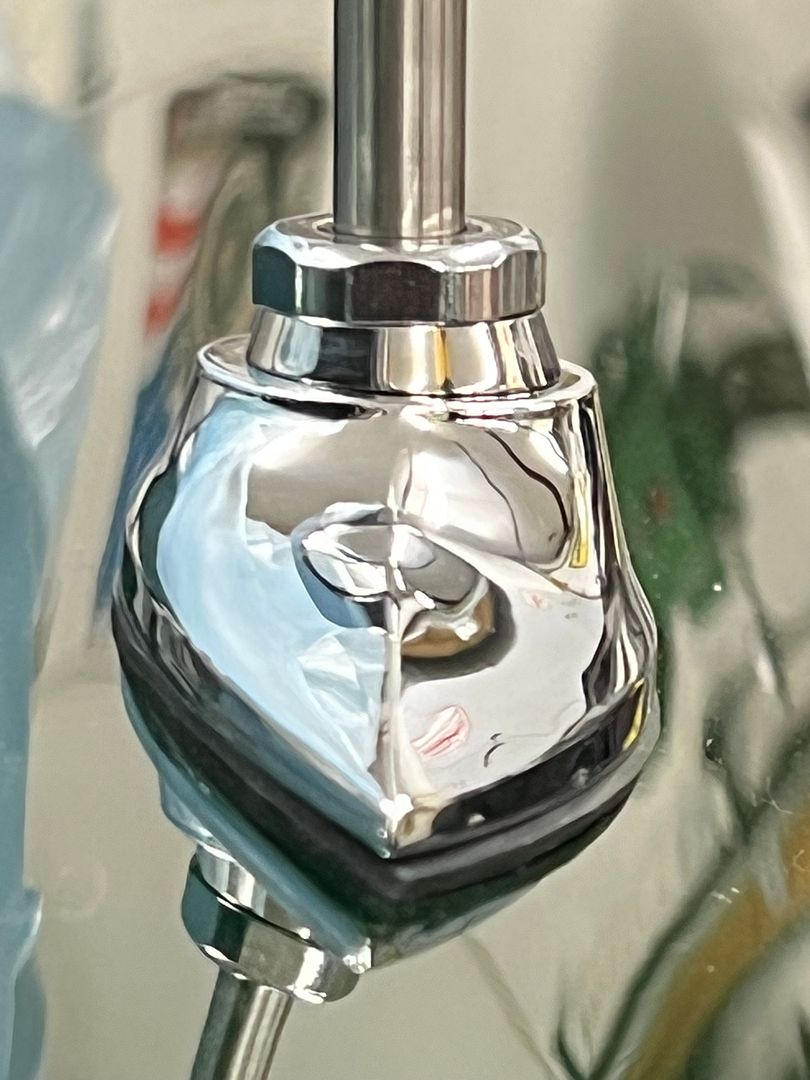 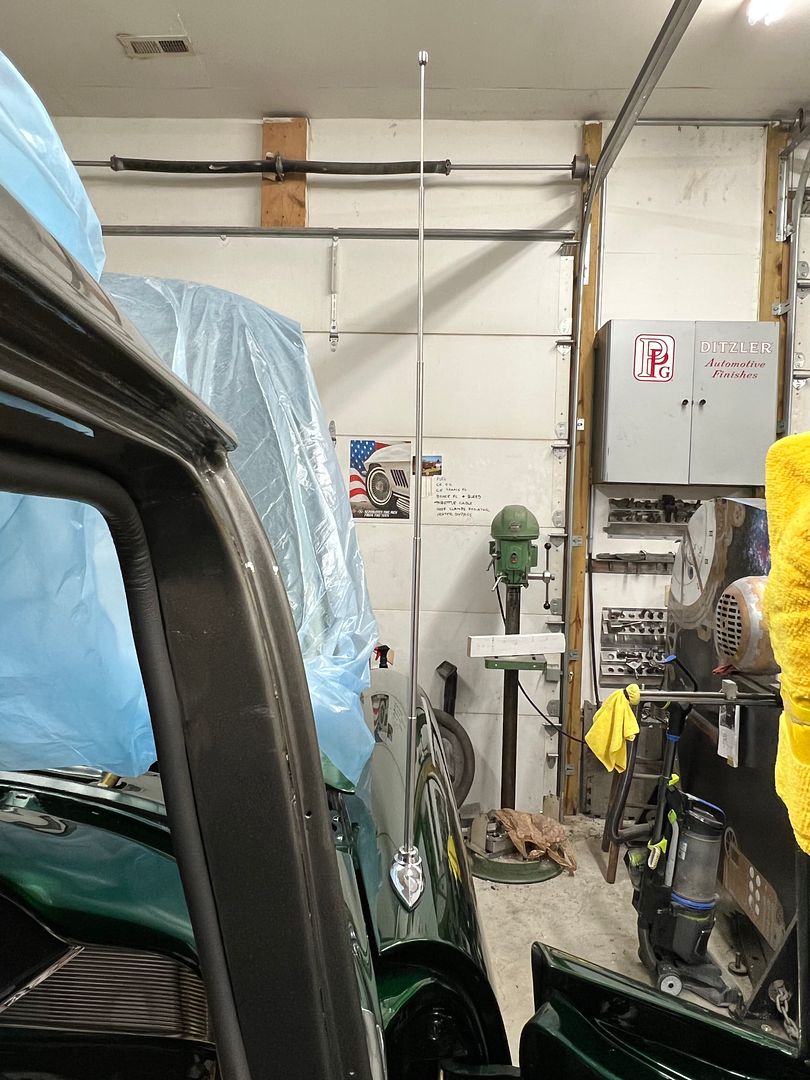 Next, we got the driver's door wiring routed through the upper door hinge... much easier after the trial-and-error practice we did on the passenger side. 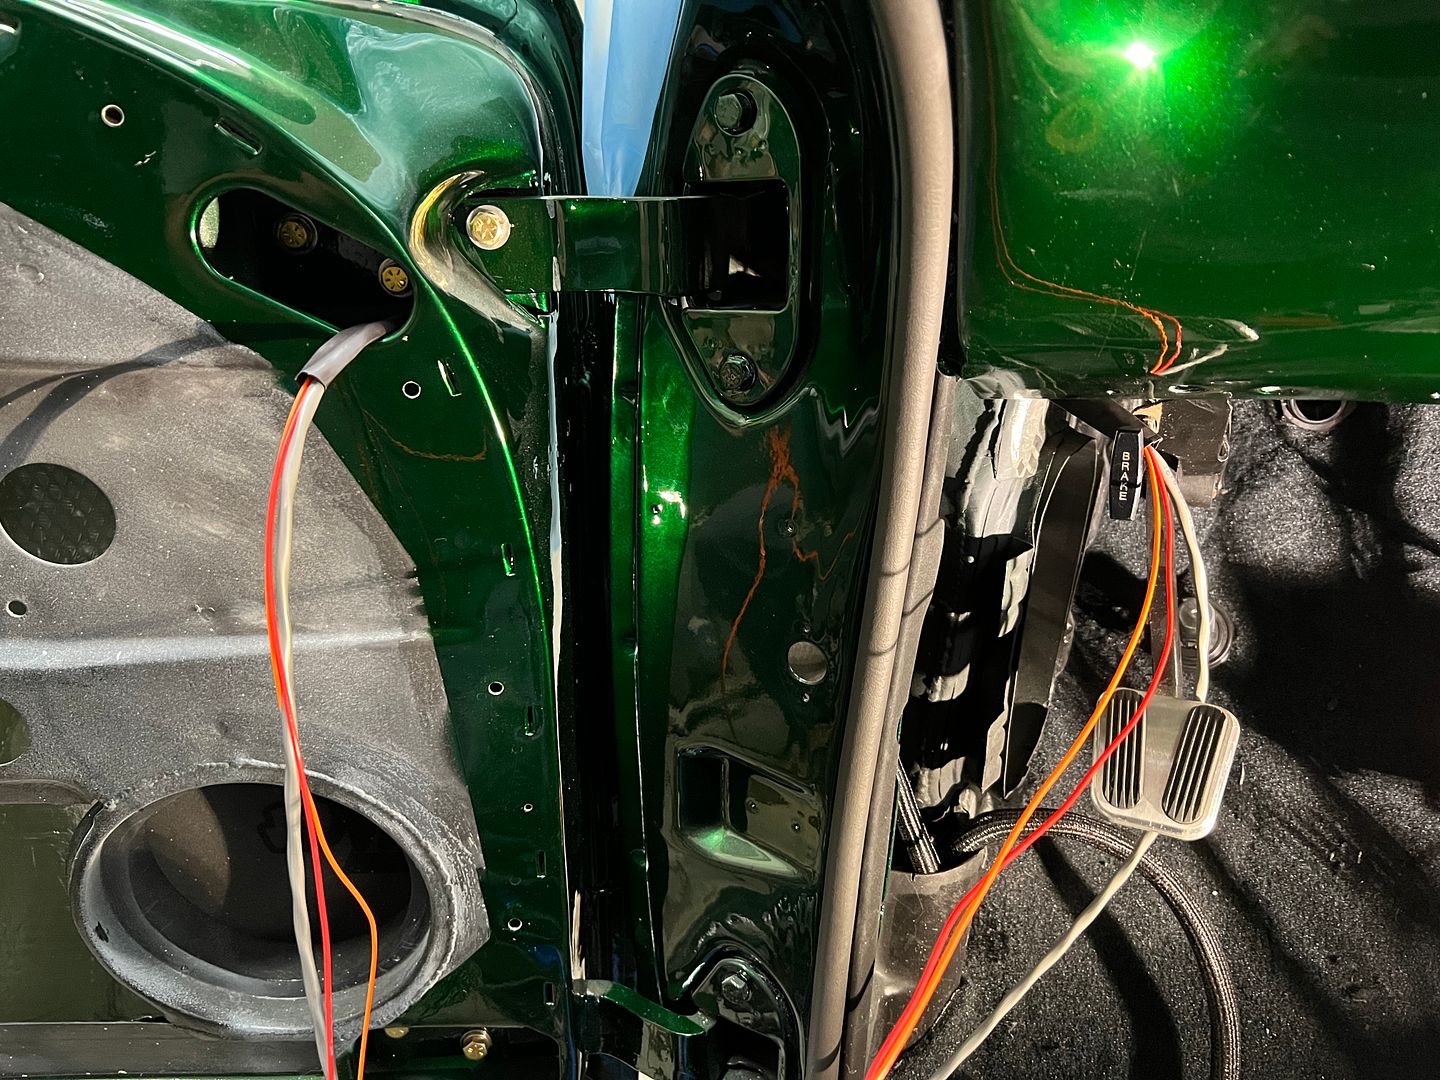 ...and with the front fenders back on to stay, Jared reassembled some of the core support parts. 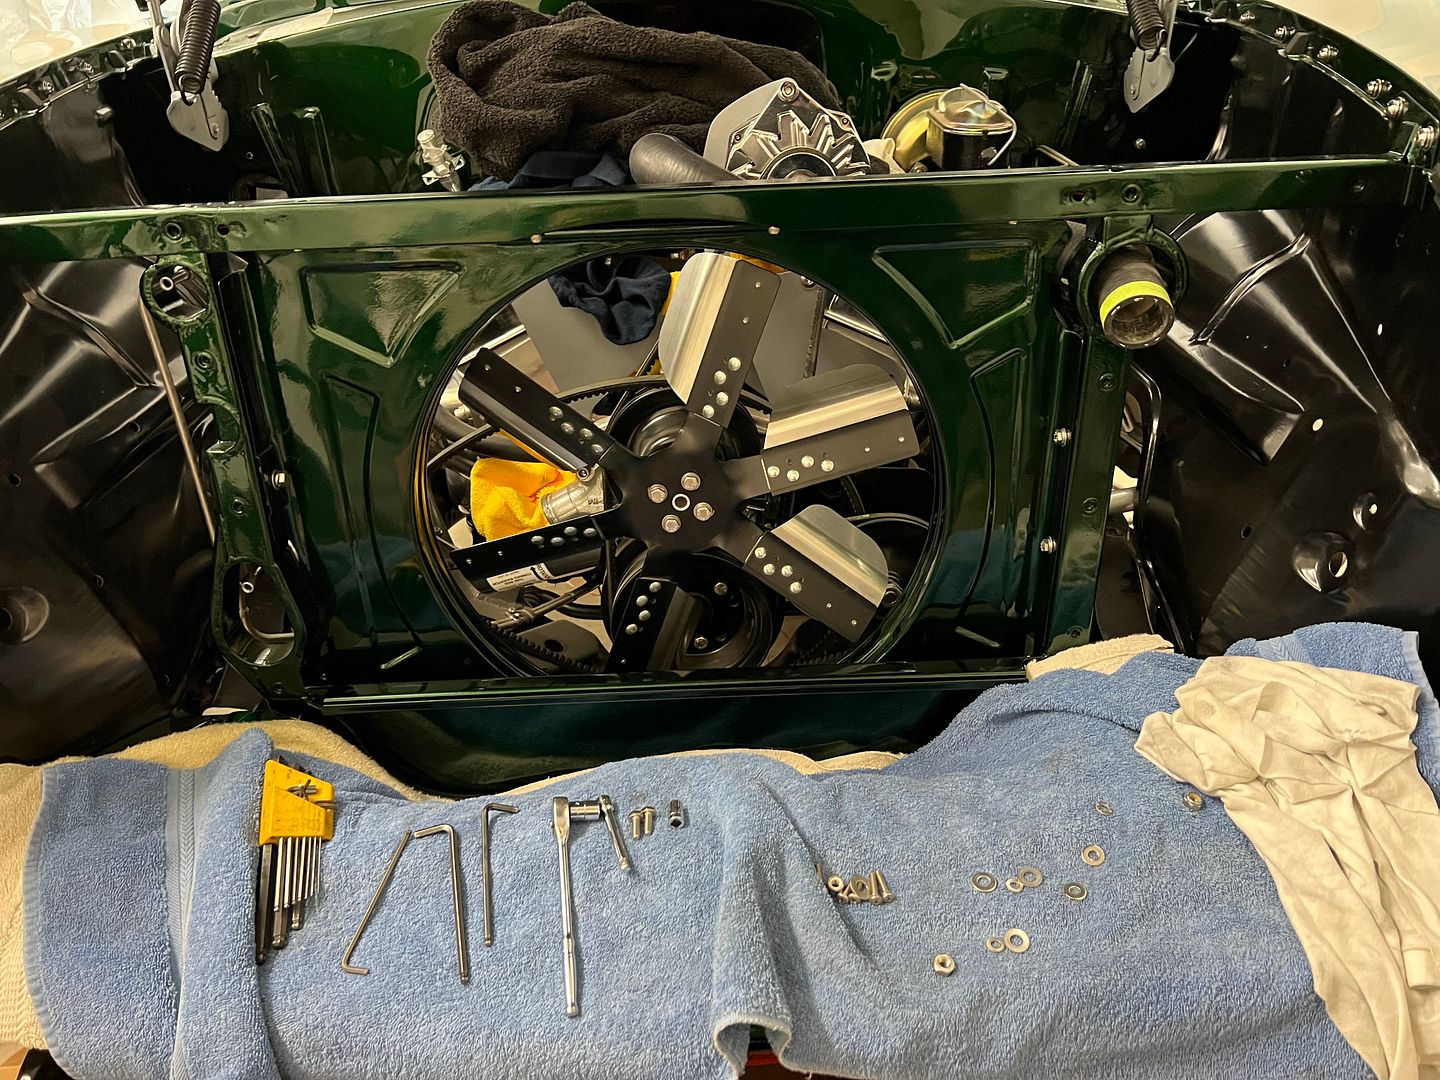 Moving to the rear of the car, we started the rear tail-light install now that they have been painted inside and out. Wiring was routed through OEM style boots to help minimize any water intrusion into the lamp sockets. Replacement button contacts were used in the sockets (w-crimp) to eliminate any unneeded splicing of the wiring. Wiring complete, with bulb seal attached to the housing: 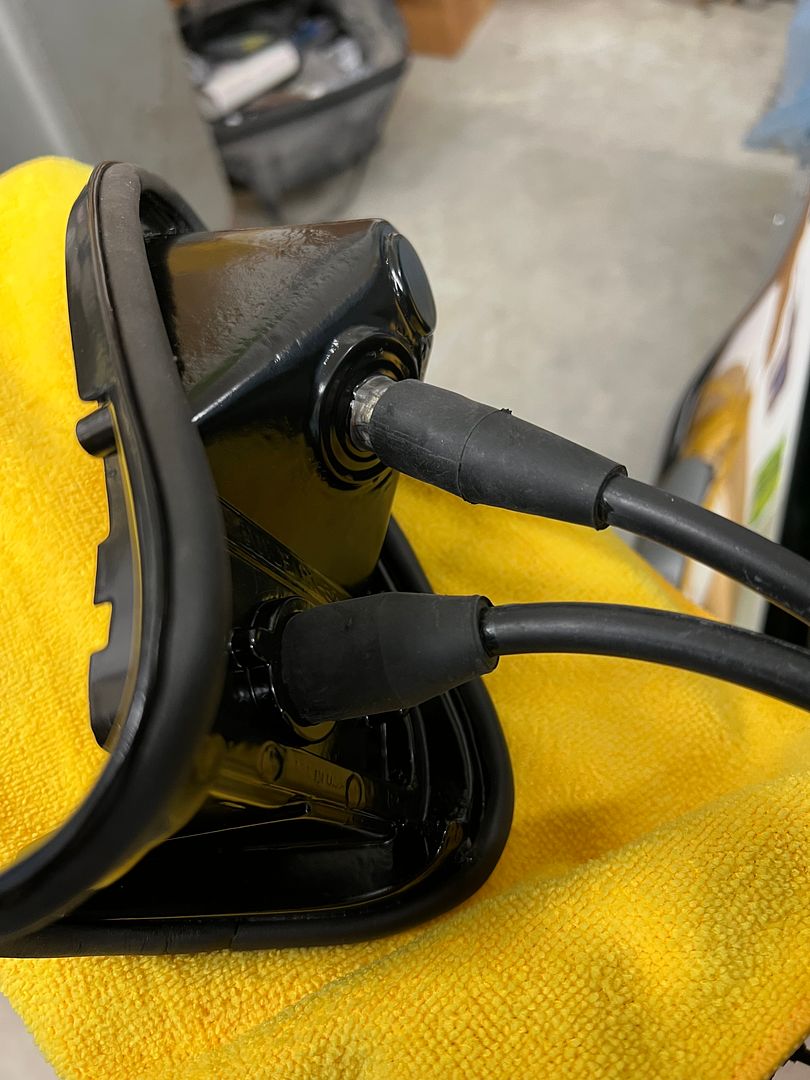 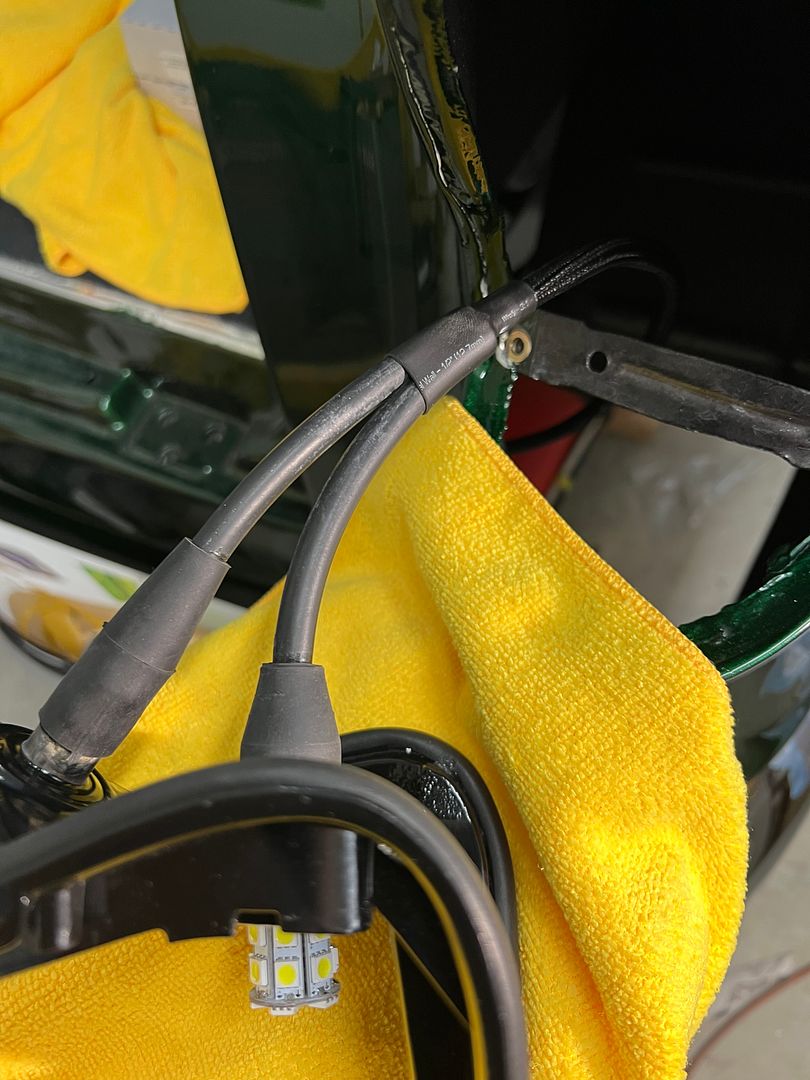 Rivet-nuts were installed for mounting the housing.... 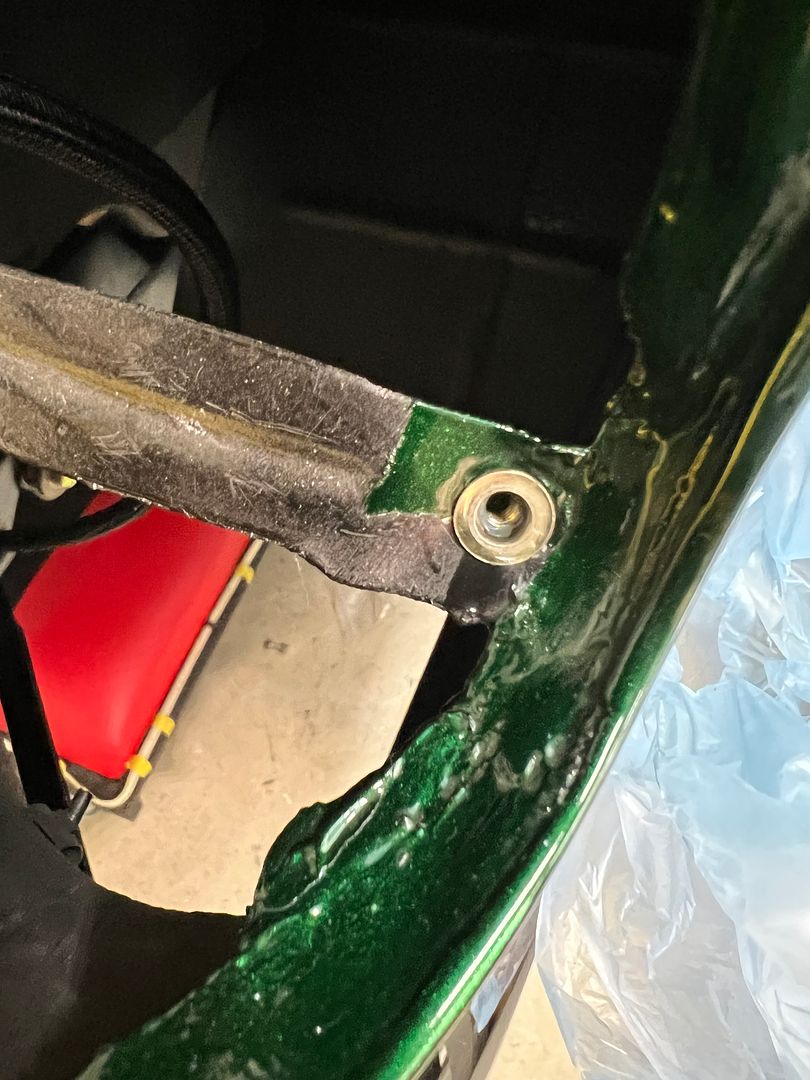 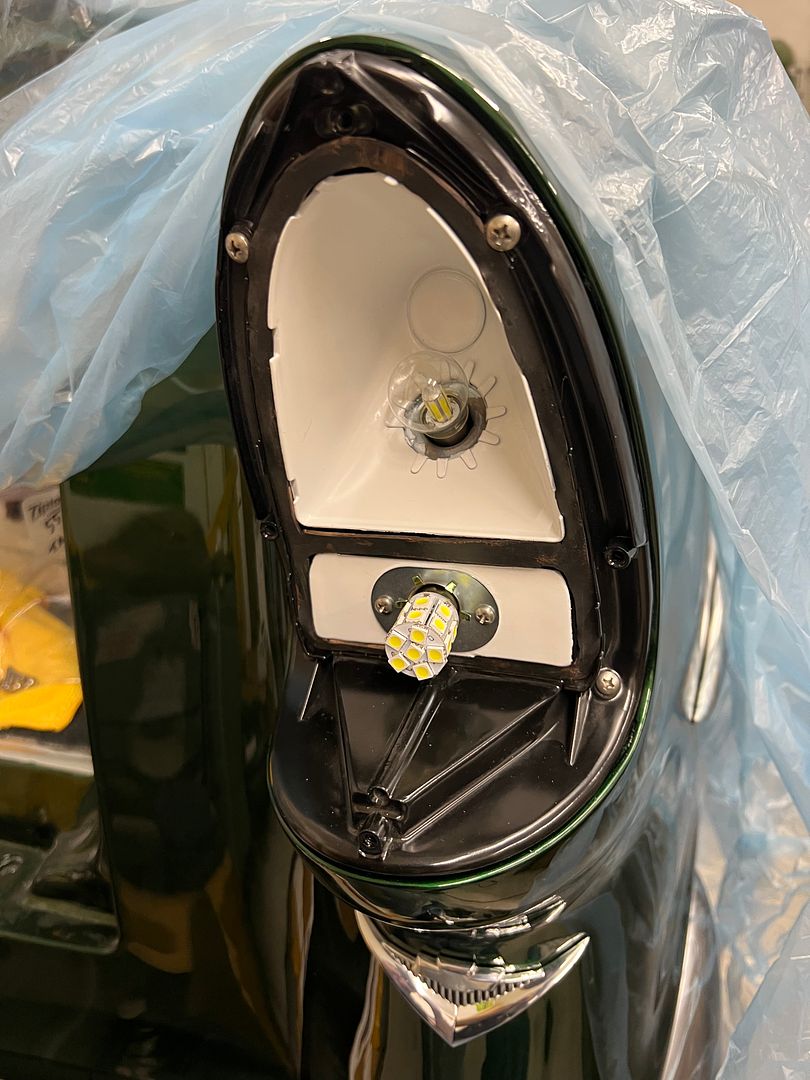 Nice snug fit to the body, and a functional test to make sure we're done here.. 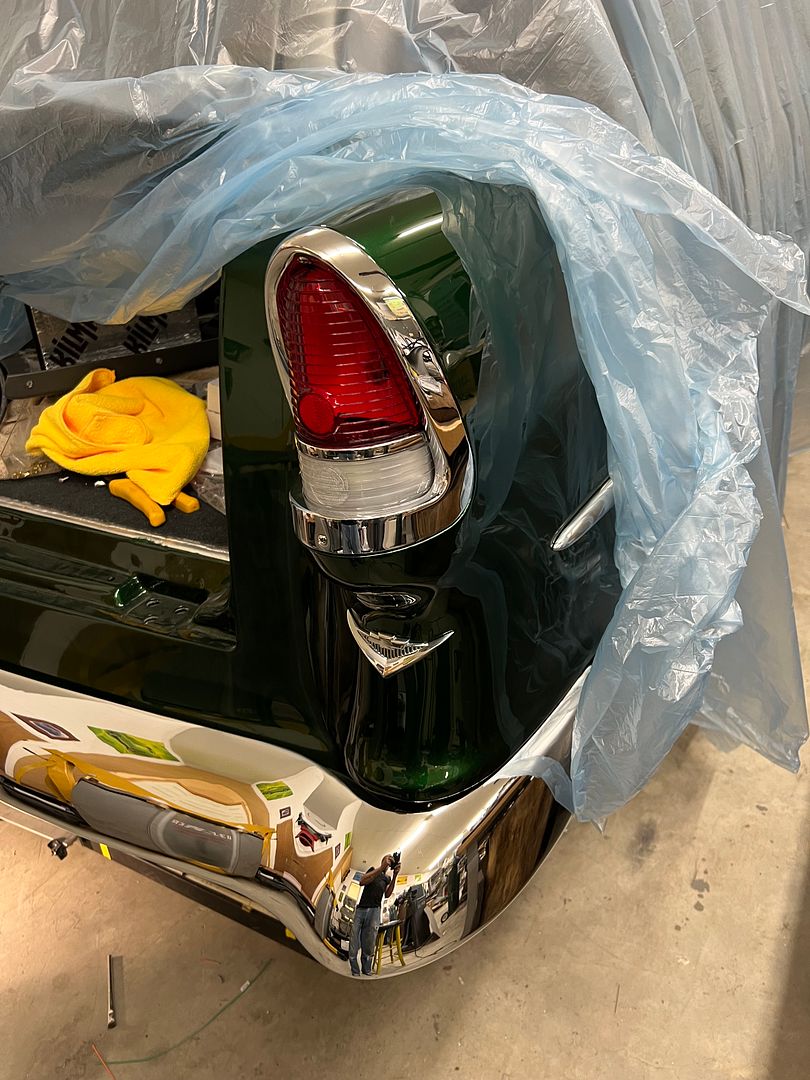 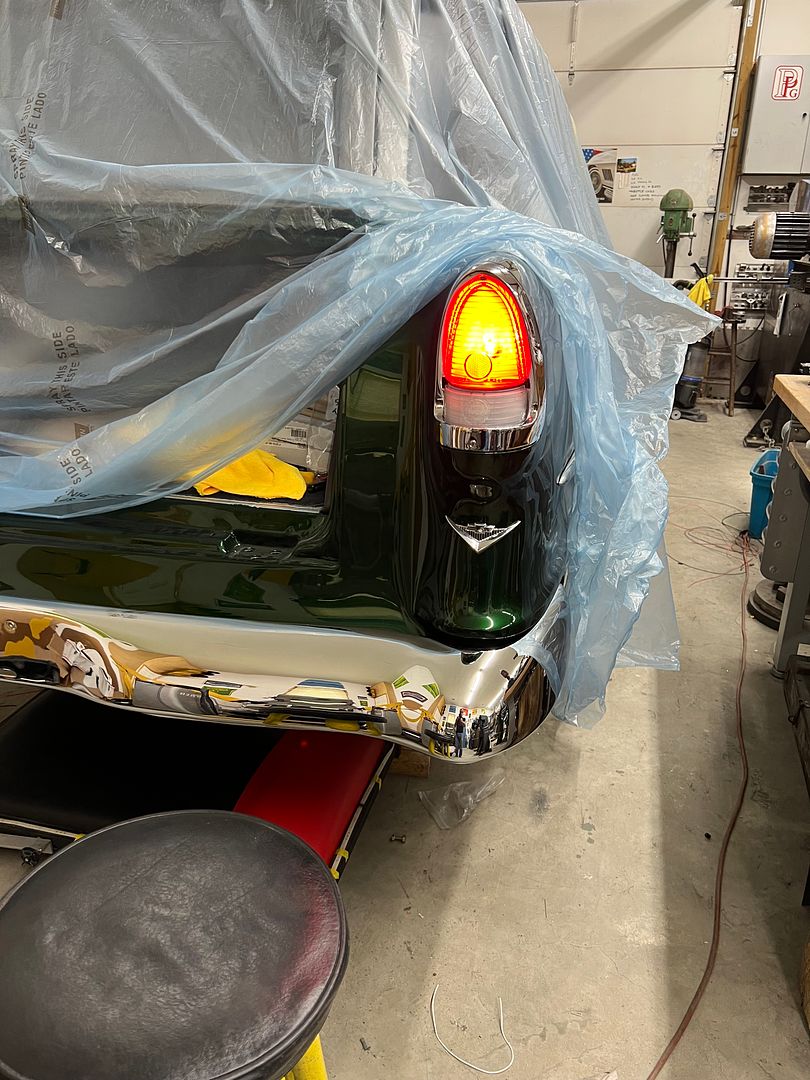 Moving to the passenger side, we'd need to secure the harness to the tail-light swing arm mechanism (part of the hidden gas door mod) so we planned to add some heli-coils in the arm for adel clamps. I had a long 1/8" bit to get in close to the corner, but our final size of 13/64 for the 10-32 heli-coil tap would be another issue. 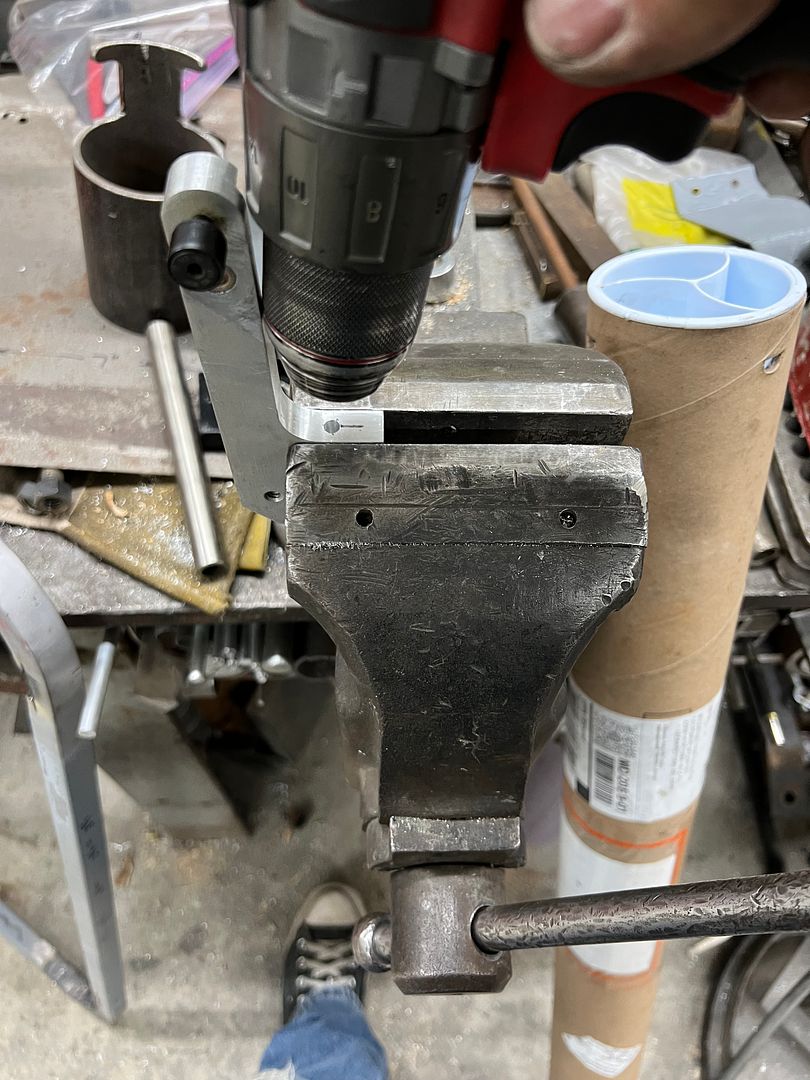 Then I noticed some tubing in the scrap pile that had a 3/16 ID, just undersized. So our drill bit was clamped in the 3 jaw chuck of the lathe, and the tail stock used to press the two together. 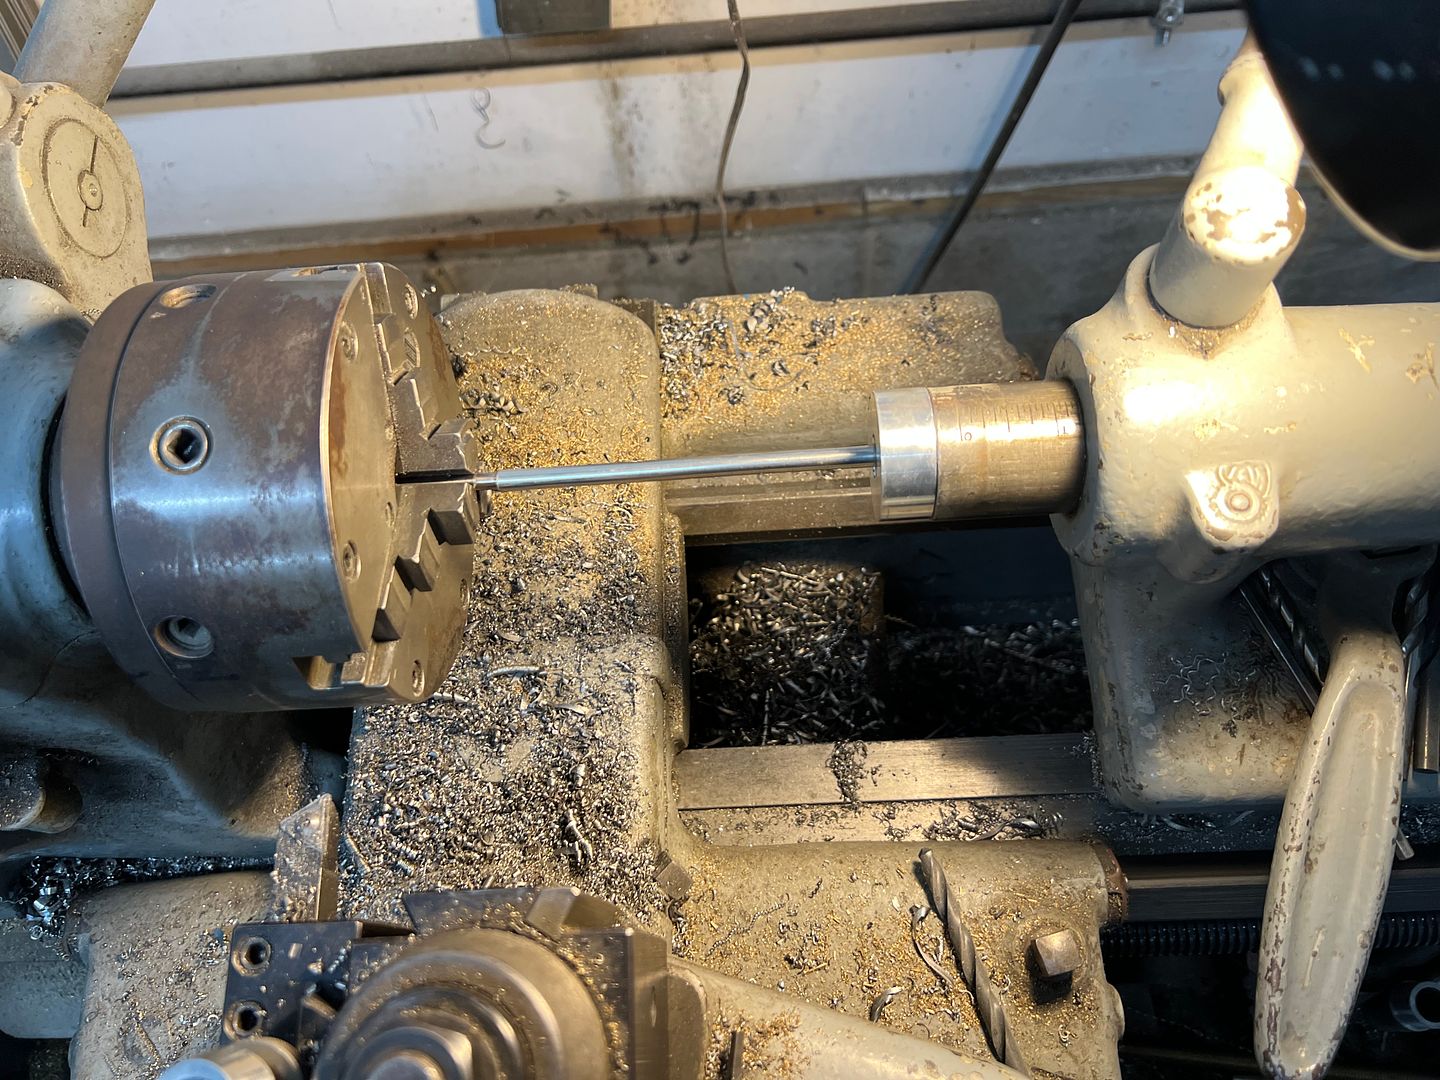 Now we had an extended bit to complete the heli-coil installation. 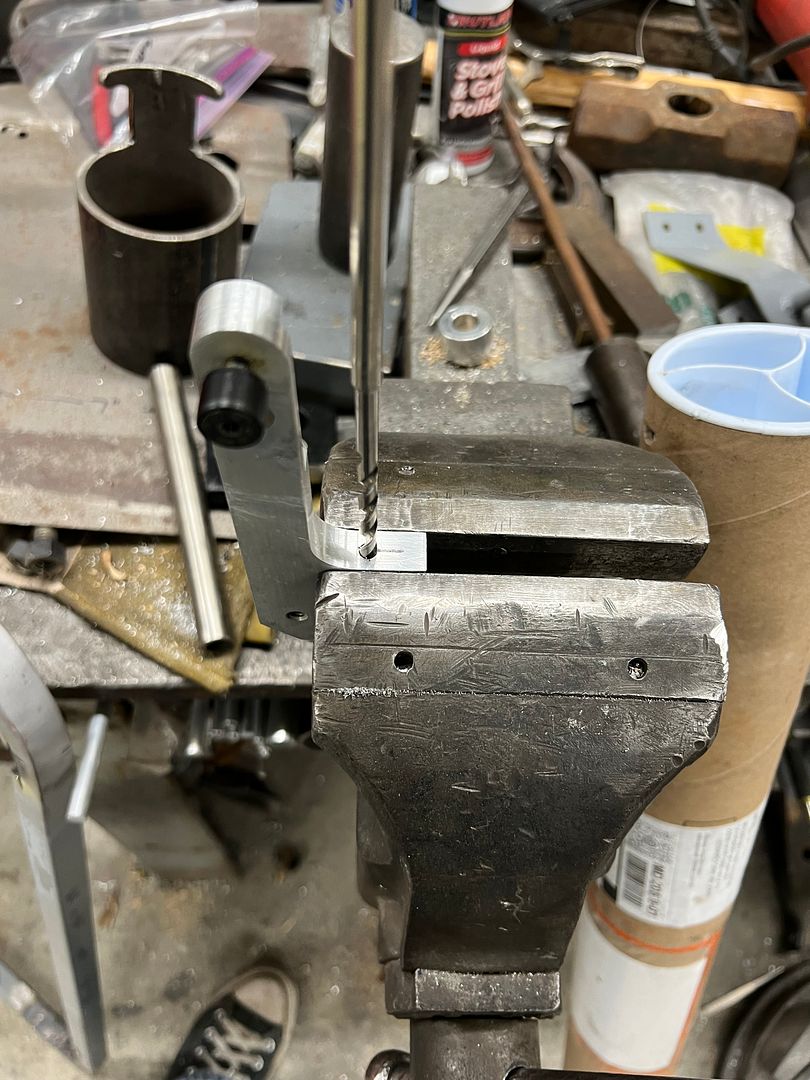  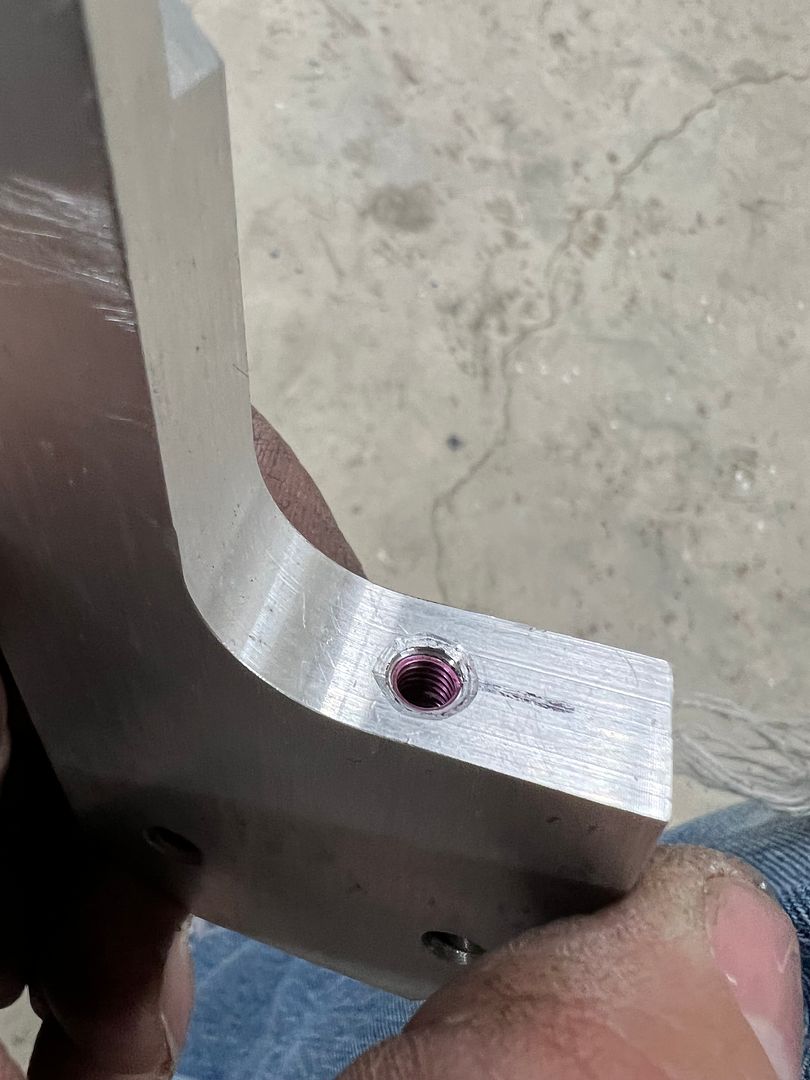 ...and a functional test of the wiring on the arm... https://www.youtube.com/shorts/JzA6W2BdyyQ
__________________
Robert |
|
|
|
|
06-05-2023, 10:51 AM
|
#1340 |
|
Registered User
Join Date: Jan 2013
Location: Leonardtown, MD
Posts: 1,633
|
Re: 55 Wagon Progress
Wagon 2.0 progress, I was tasked with adding a paint job to this:
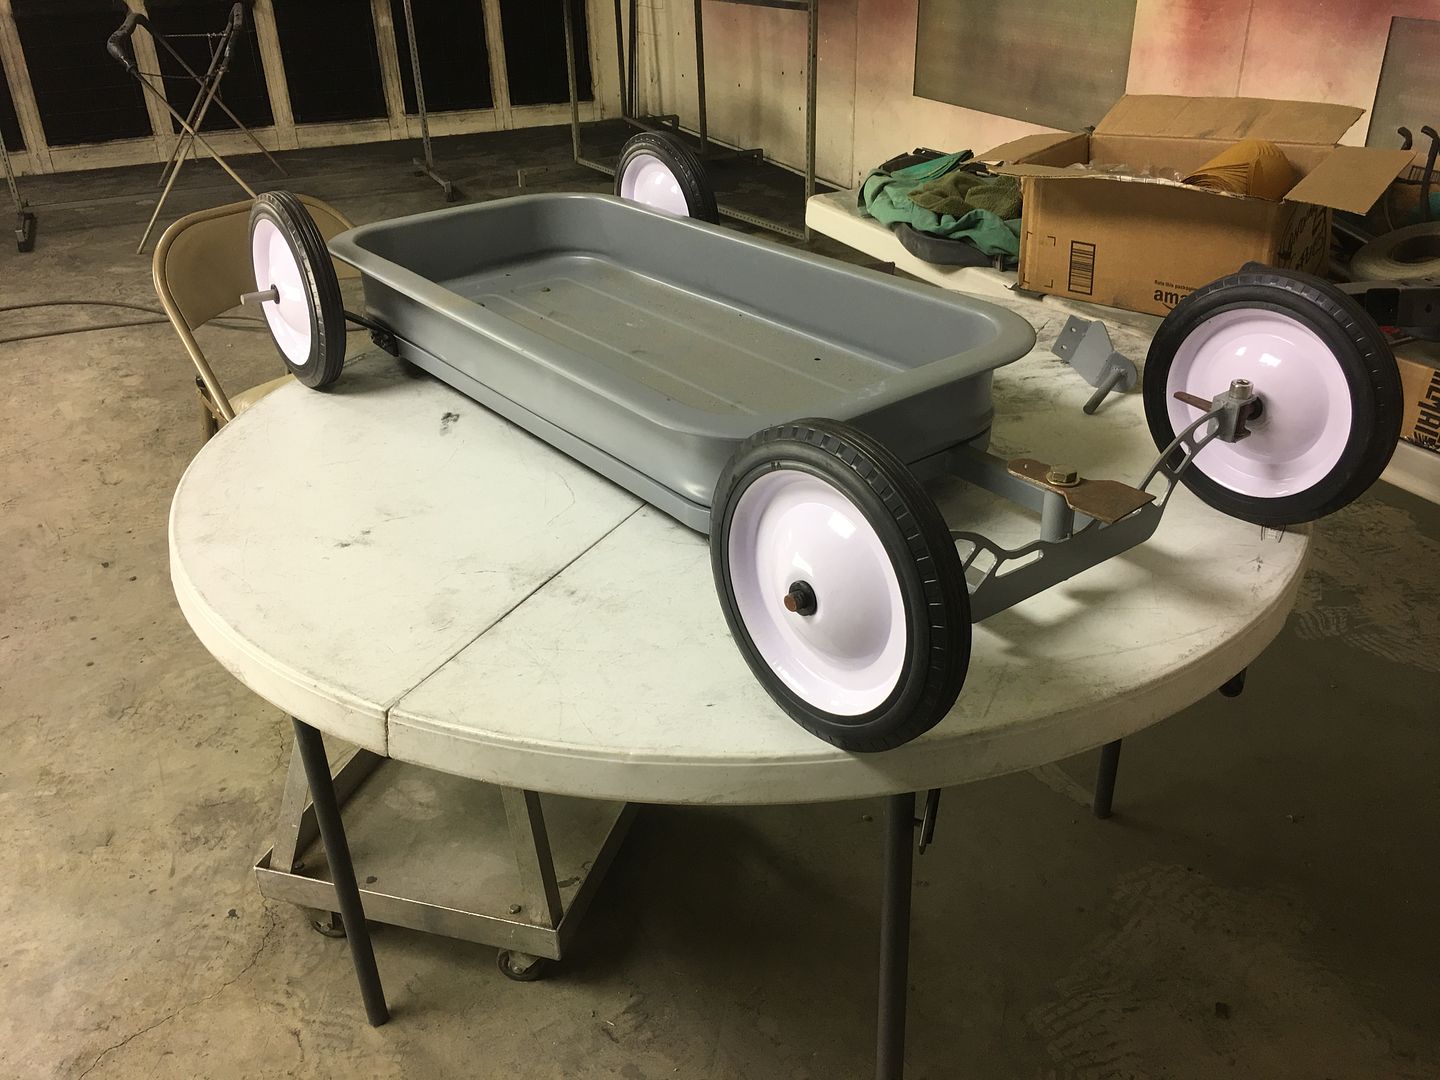 but had a couple of issues to address first prior to paint. The dropped axle design lacked lateral strength of an I-beam, so we ordered some 1/8 x 1/2 flat bar to cap the top and bottom, adding much needed strength. Next, the frame hoop was produced with limited tooling availability, and the corners made use of pie-cuts that some still remained and would show through the paint. I attempted to weld some of these closed, but realized it would be quicker to remake the hoop. 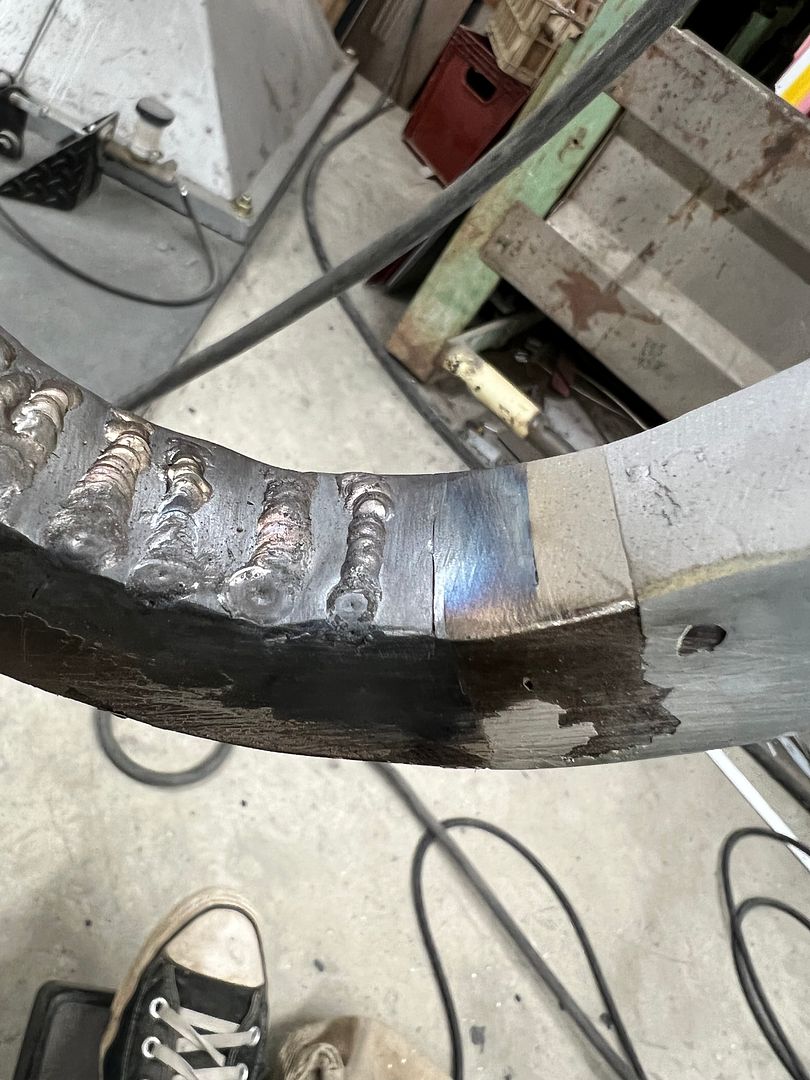 Always one to make tools into multiple use, the new tubing corners were bent on our buffer stand "radius brake" https://www.youtube.com/watch?v=8oyTLqpeXSk 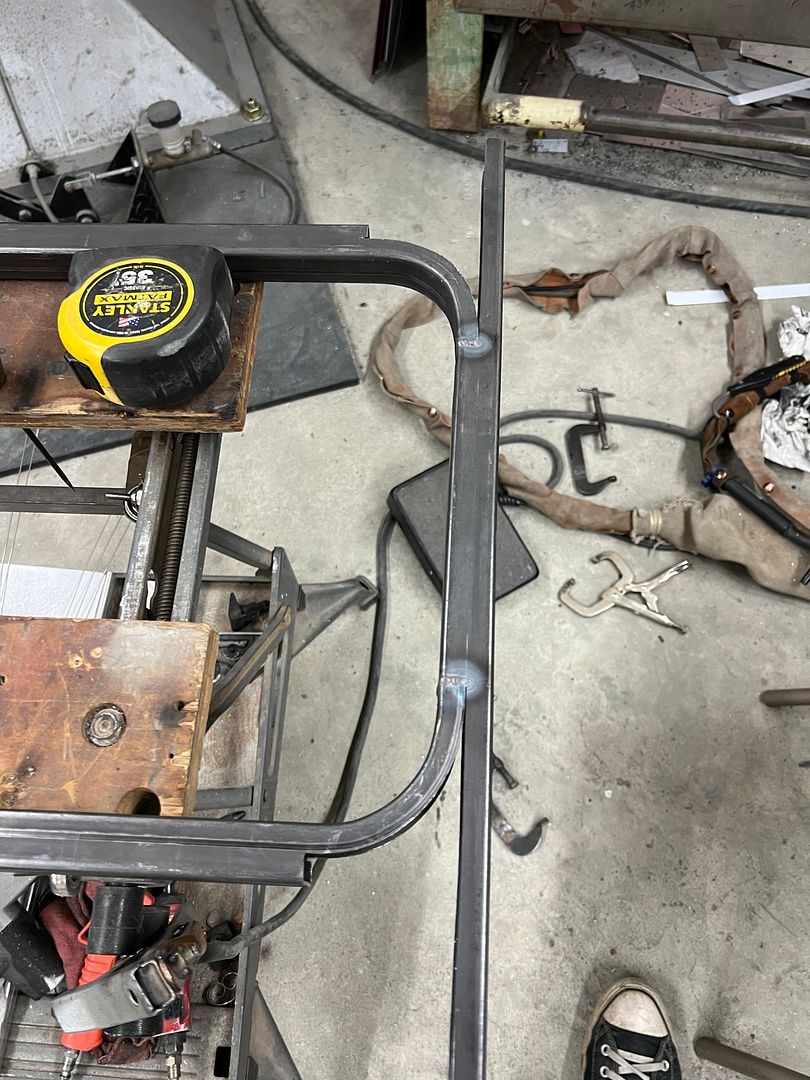 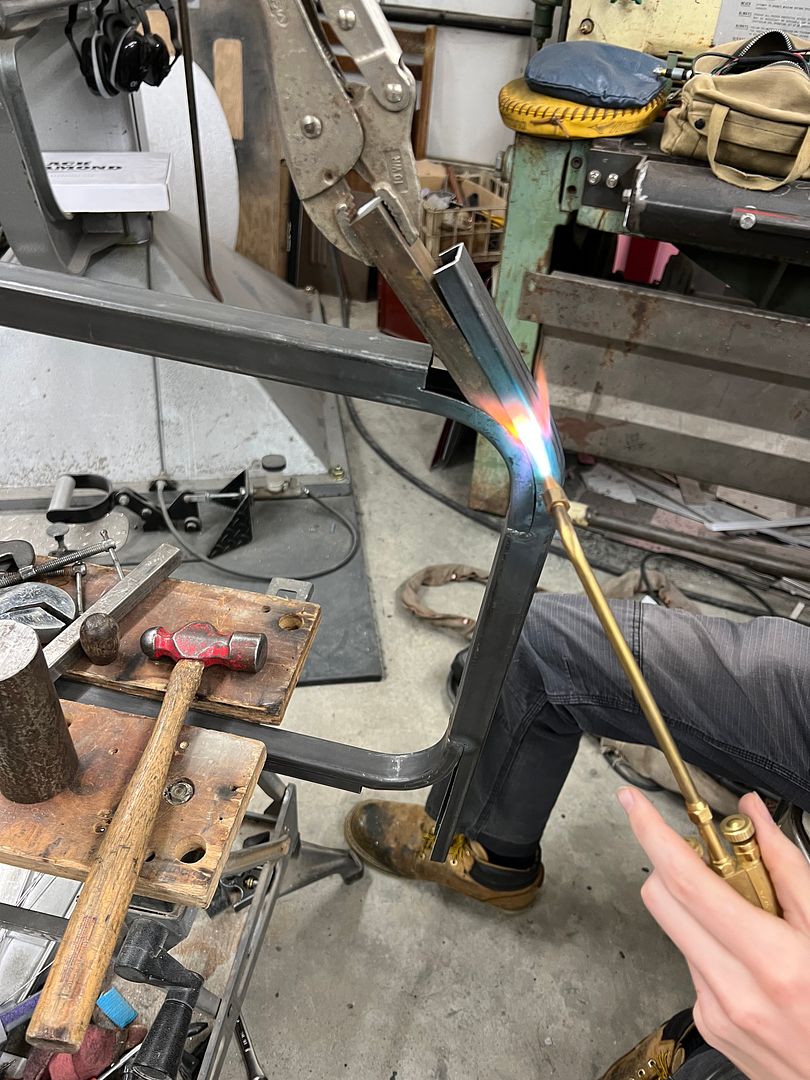 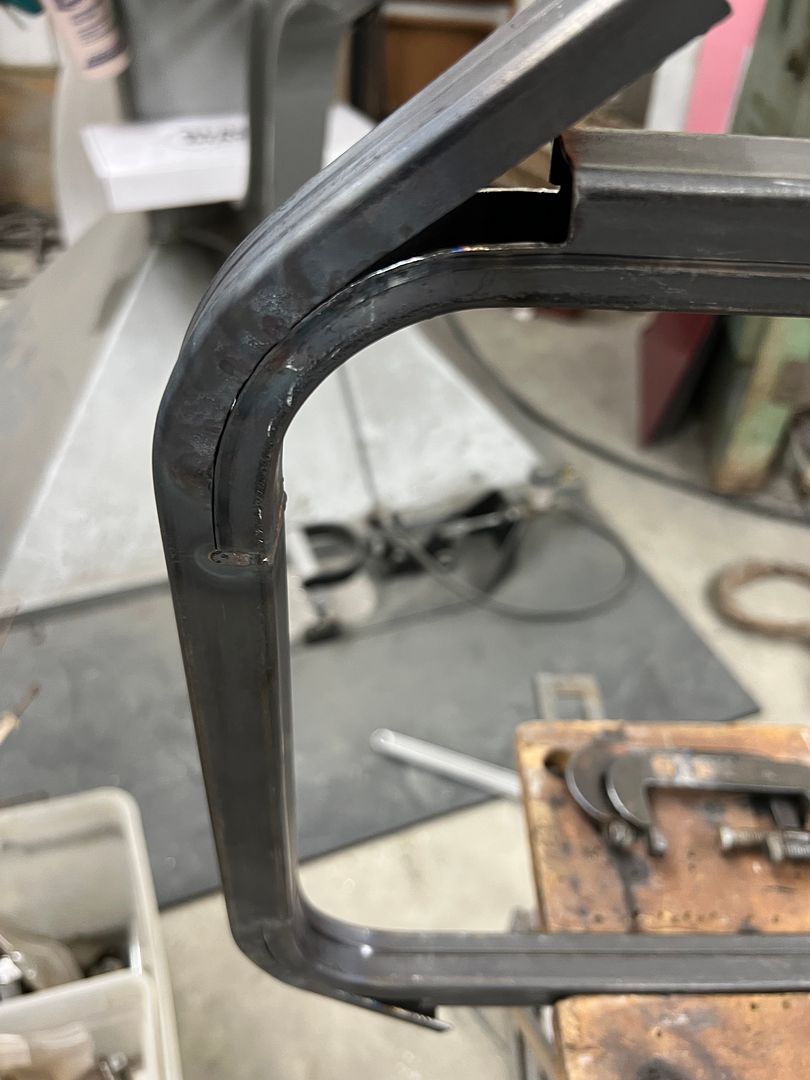 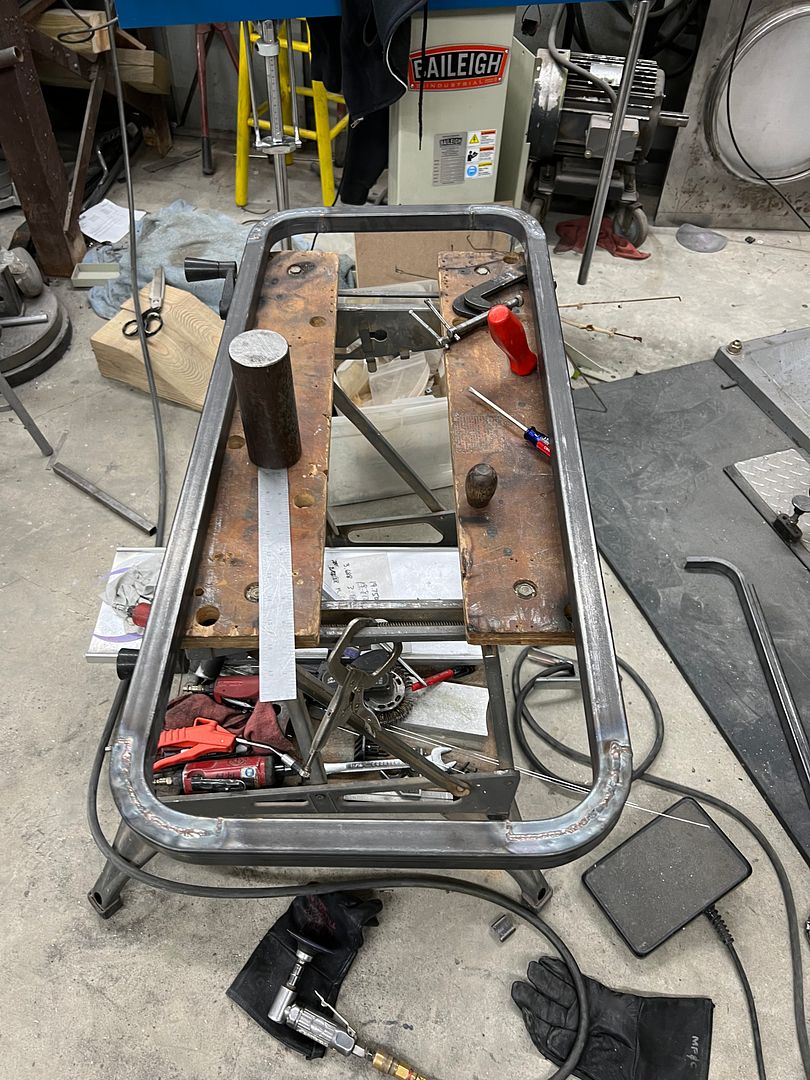 The rear "axle" stanchions had been bolted on using rivnuts, but I was worried the side wall of the tubing may deflect from weight in the wagon. So in true Robert overbuilding form, some threaded standoffs were turned into a sleeve that would weld on both sides of the tubing for less stress upset. 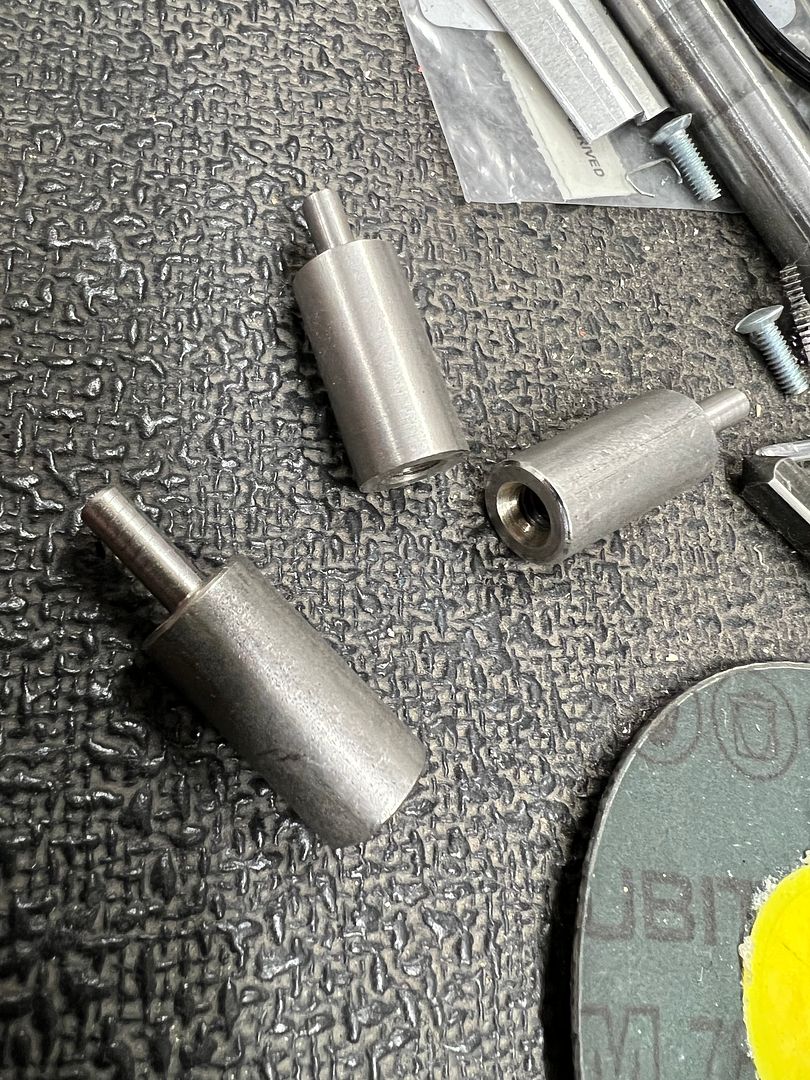 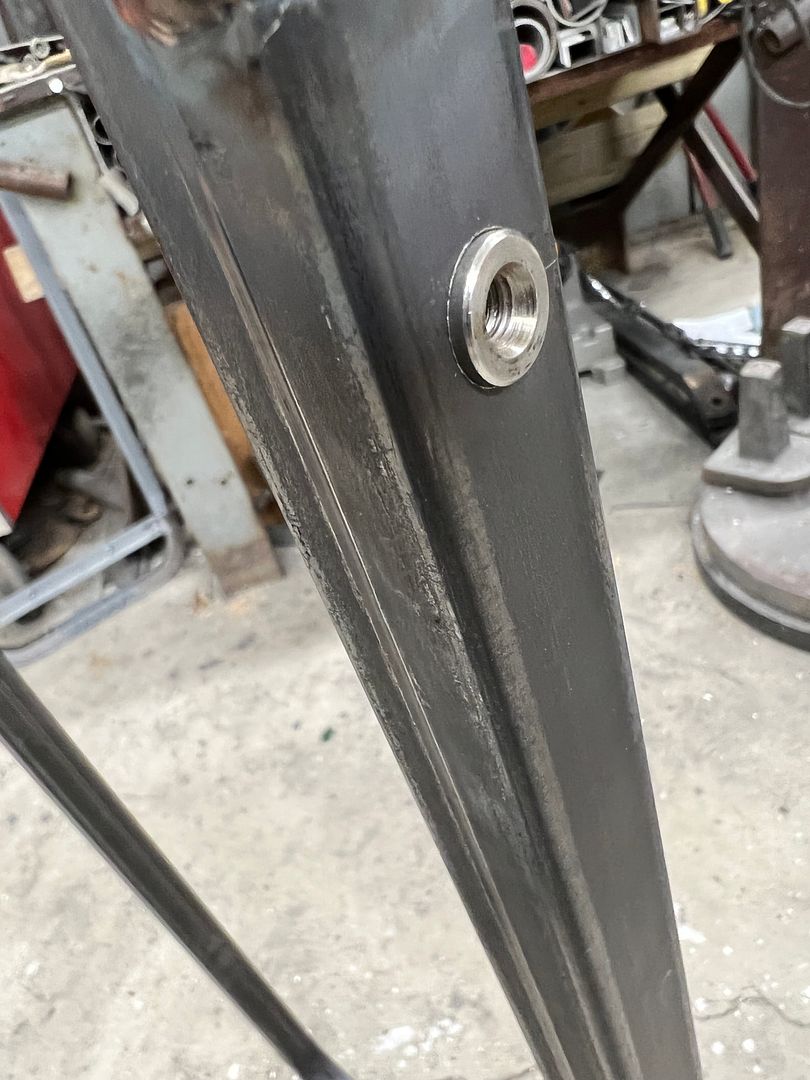  Both ends were ground flush prior to welding..  Welding the front end to the new frame hoop... 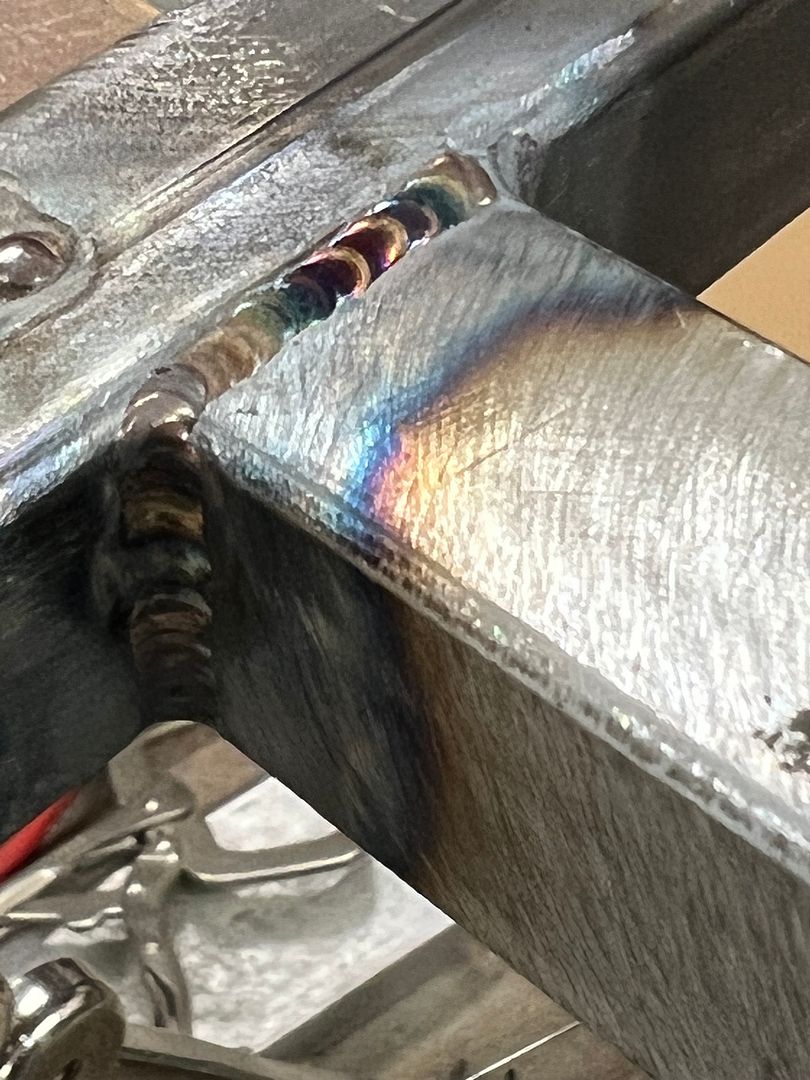 Next, to clean up the front end components a bit in order to add oilite bushings... 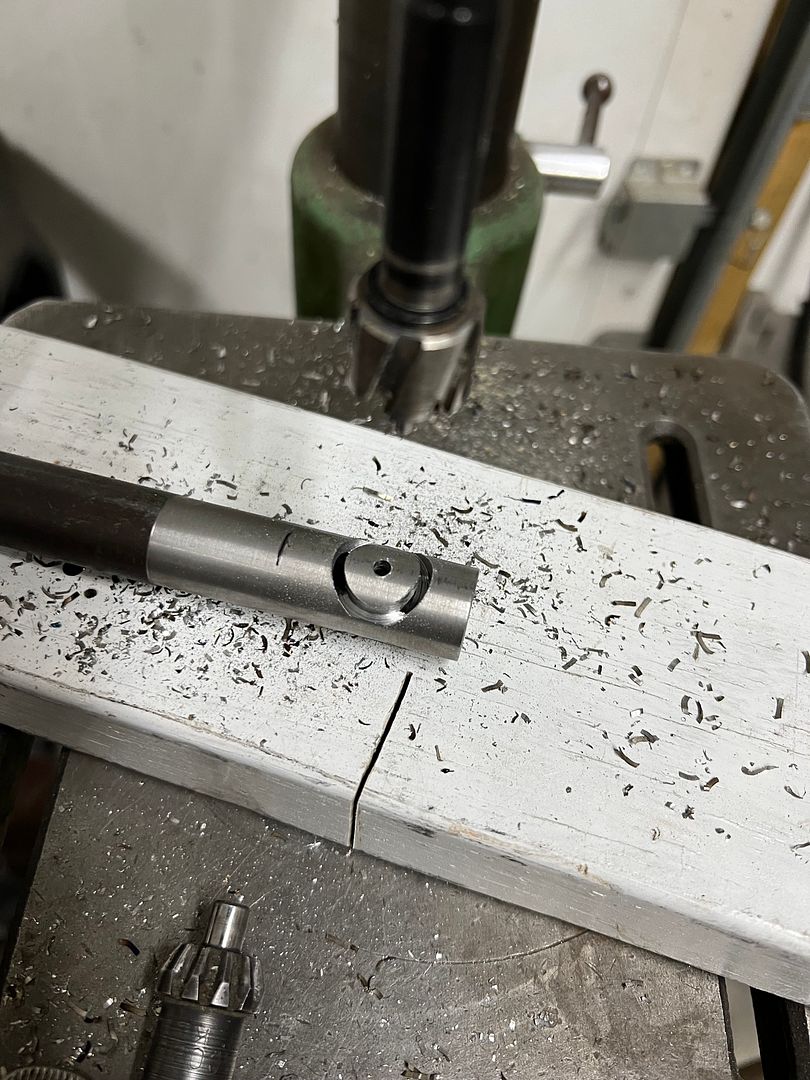 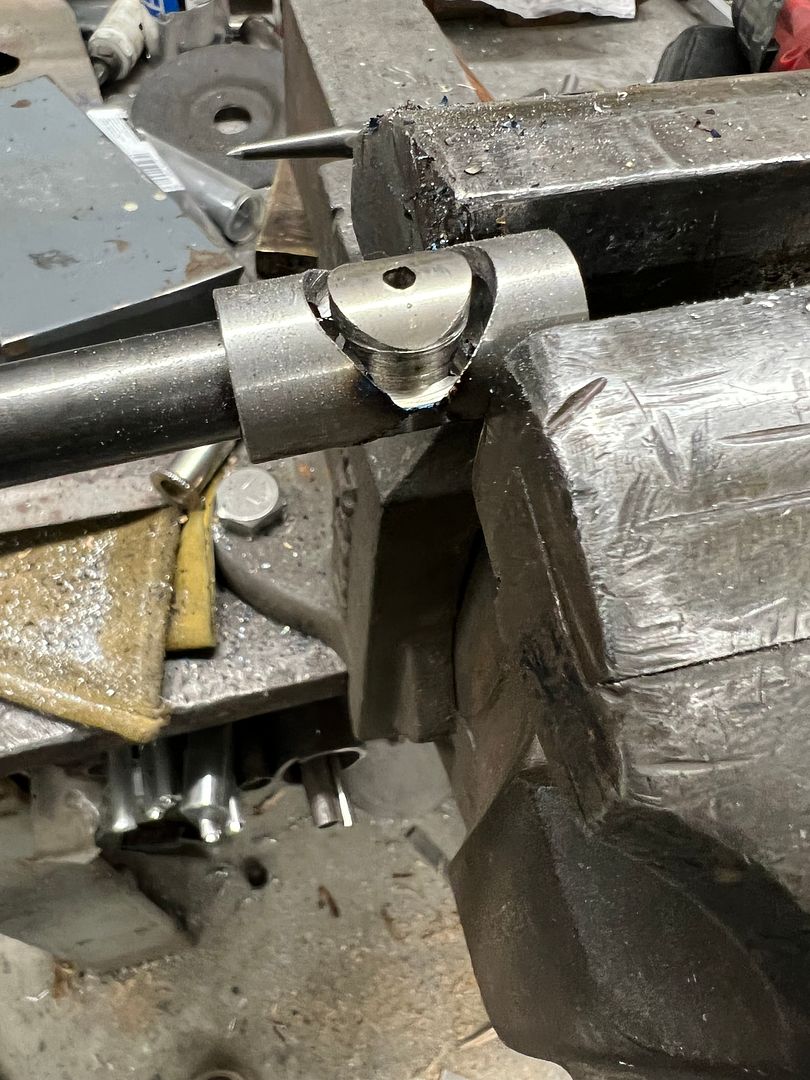 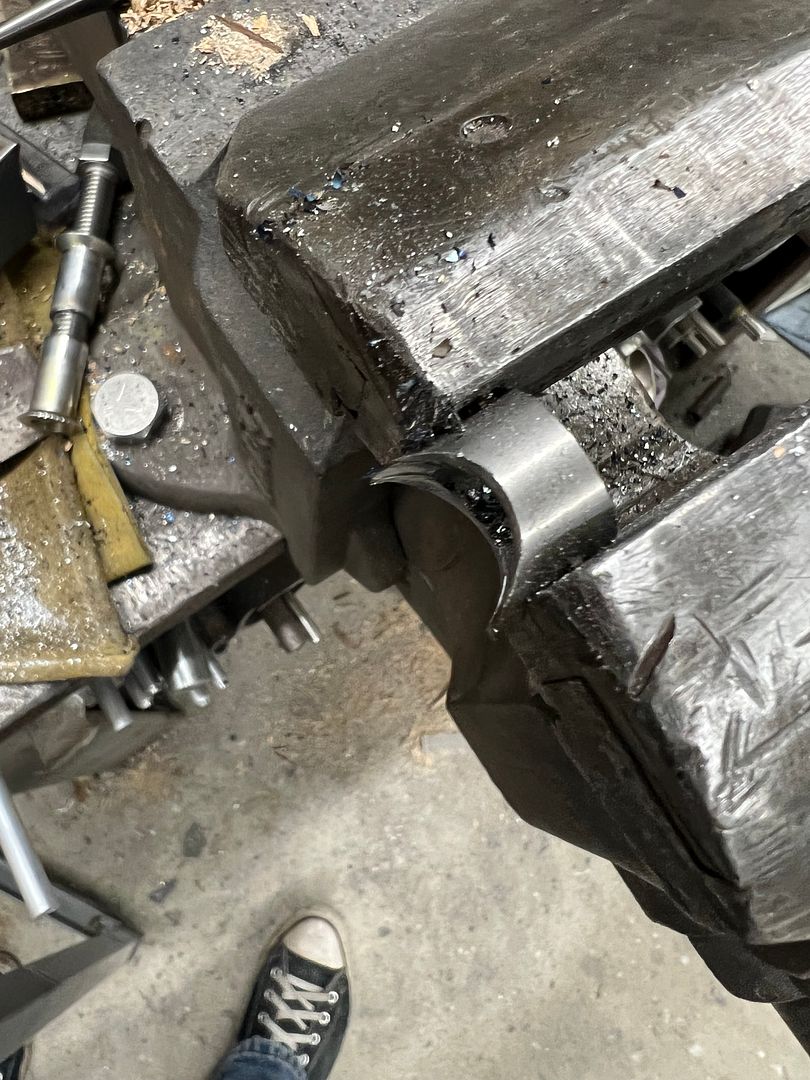 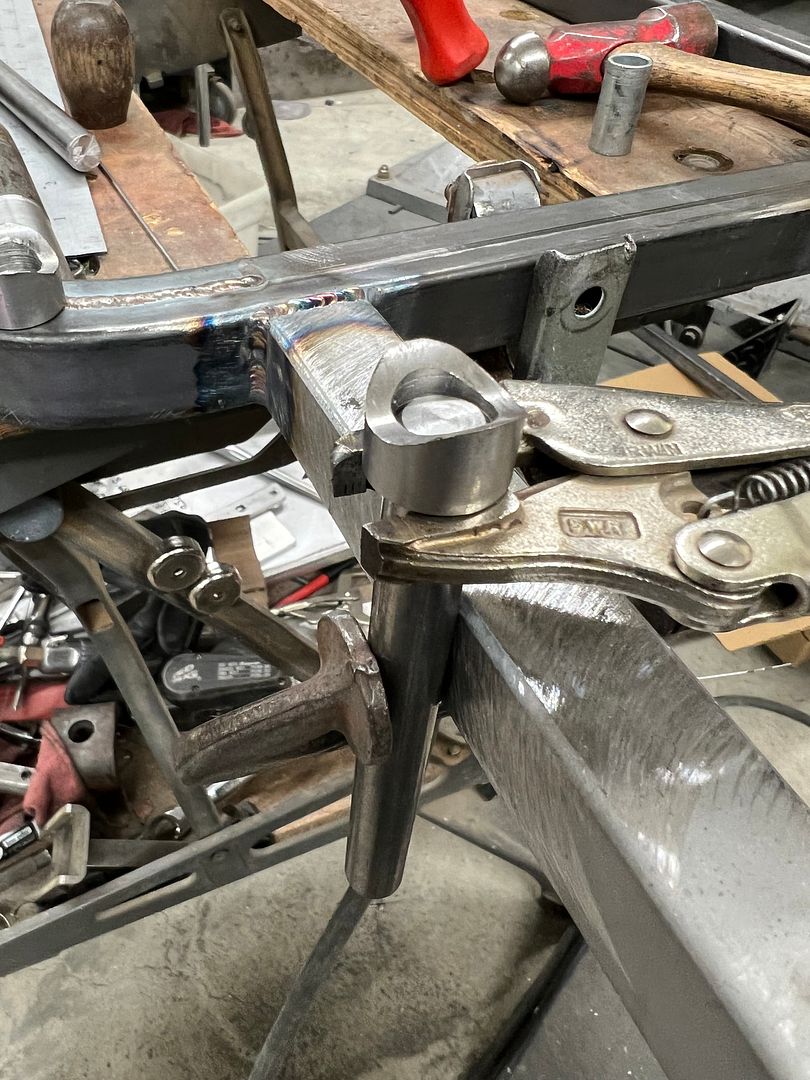 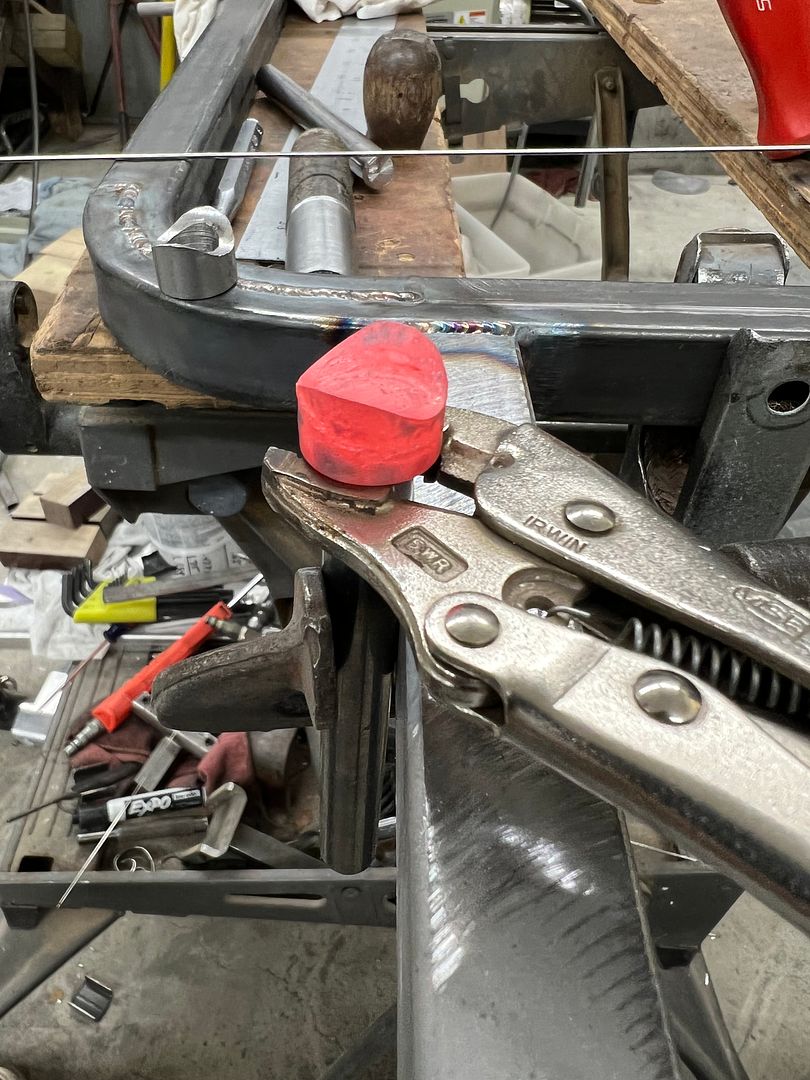 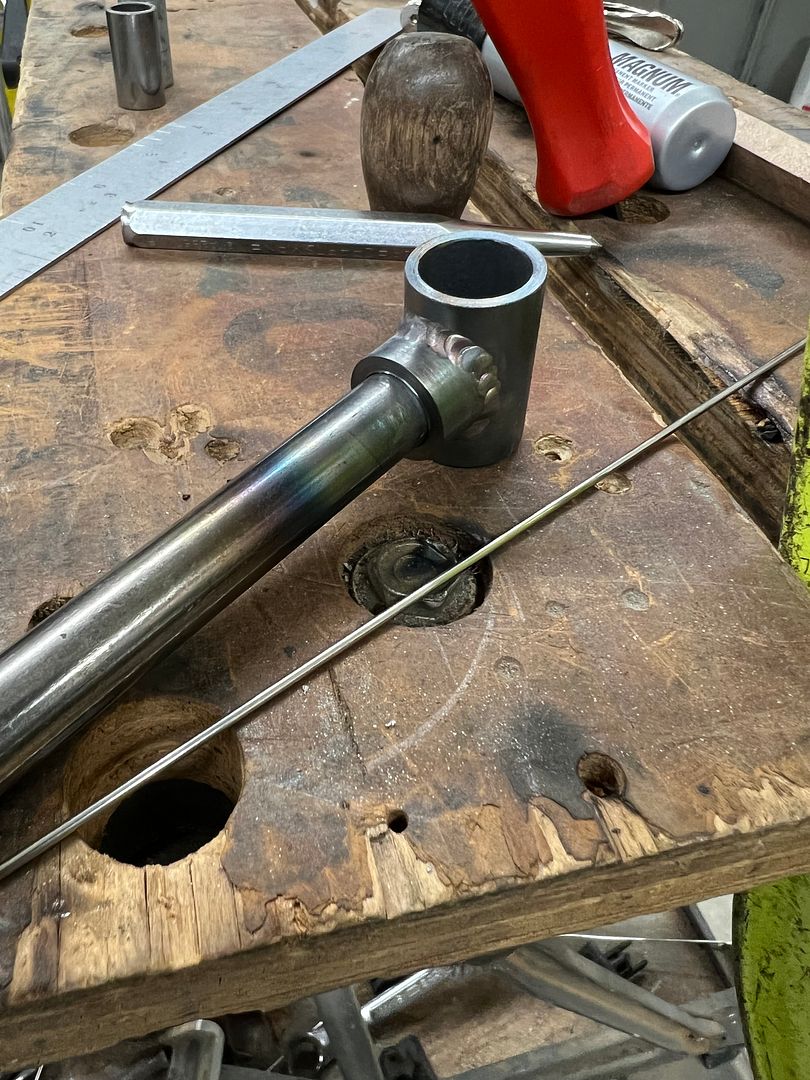 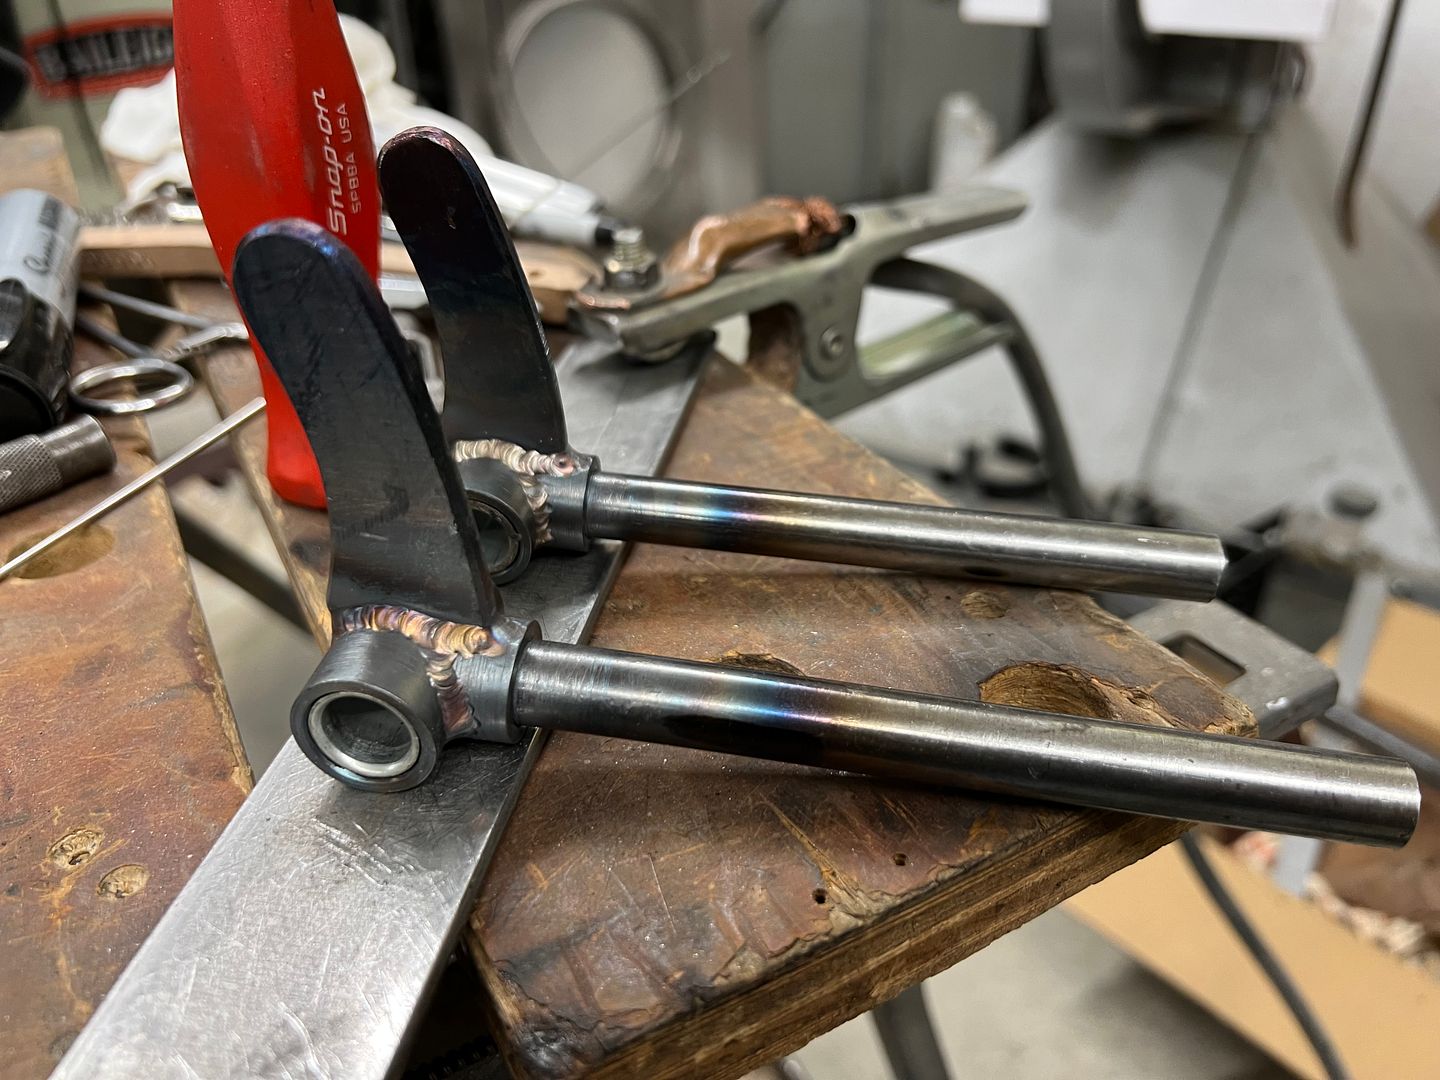 With spindle perches welded to the ends of our "I-beam" front end... a test fit of all the bits.. 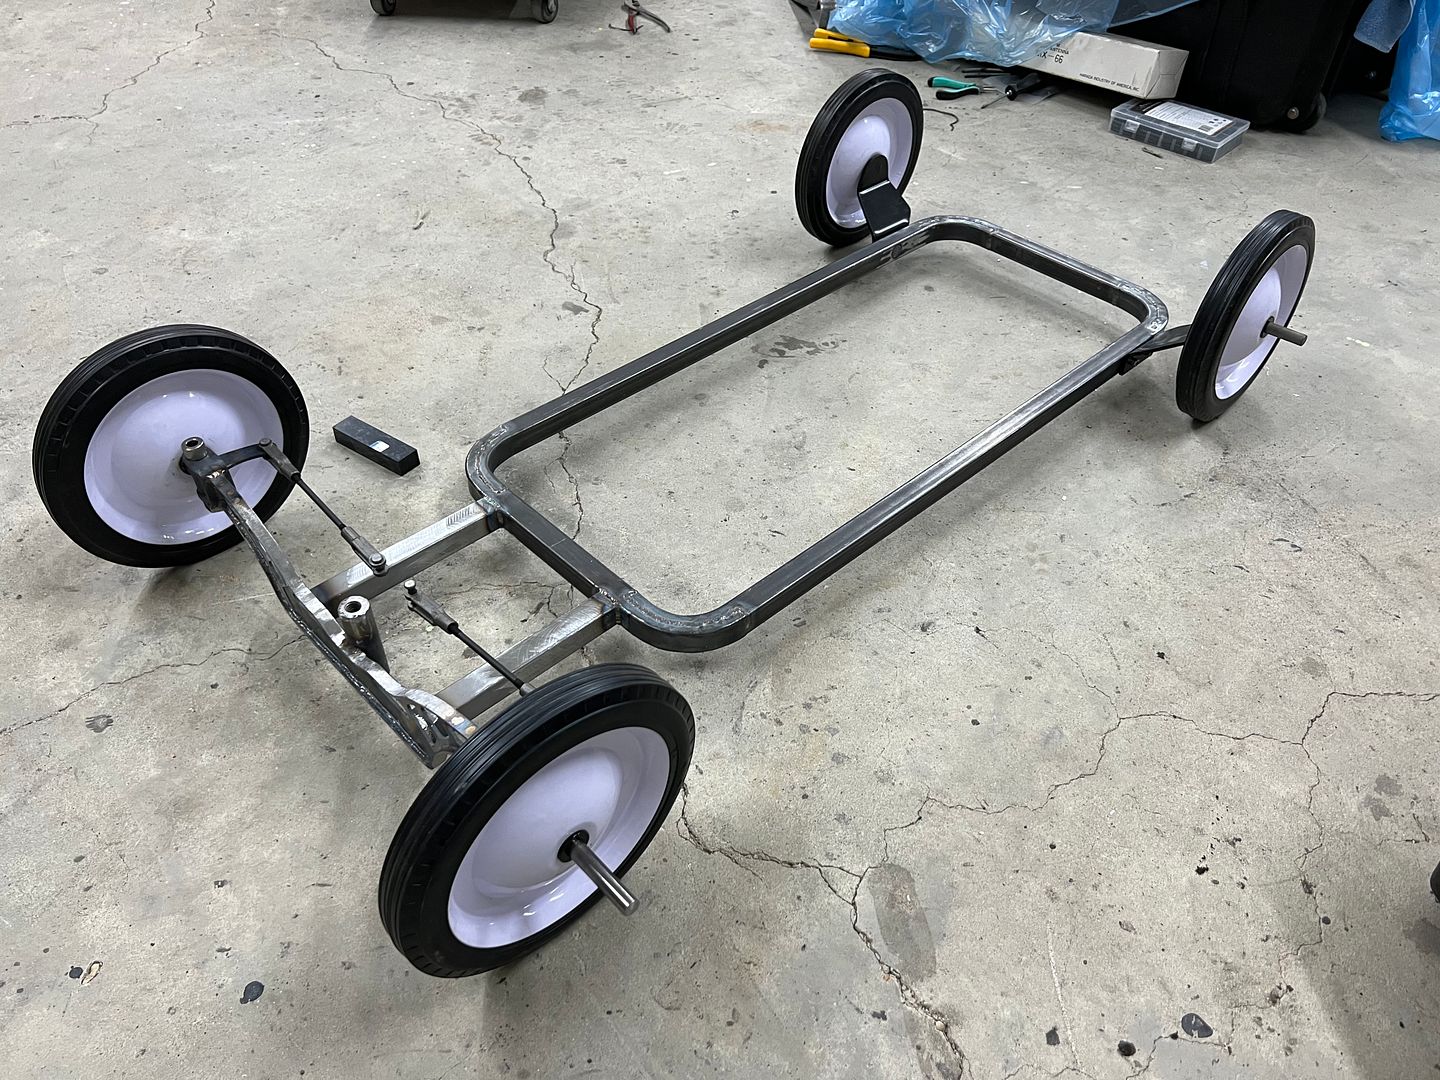 And here with our center link added, the last fabrication detail needed will be the handle.. to be continued... https://www.youtube.com/watch?v=eE6G7vHhYmc
__________________
Robert |
|
|
|
|
06-12-2023, 09:26 AM
|
#1341 |
|
Registered User
Join Date: Jan 2013
Location: Leonardtown, MD
Posts: 1,633
|
Re: 55 Wagon Progress
Here's the hidden fuel door in action, and why we needed the helicoils for adel clamps to hold the wiring in place....and away from moving parts.
https://www.youtube.com/shorts/UwCy8mKRJFU The back end is starting to look like a car again...  ....and more work on the other wagon, here's the start of the pull handle... https://www.youtube.com/shorts/a-8Nmkh_bmQ A functional test of the steering bits... https://www.youtube.com/watch?v=bGSptHK1WBc For the pull handle, we had tried out some knurling on aluminum to see if we liked that.... 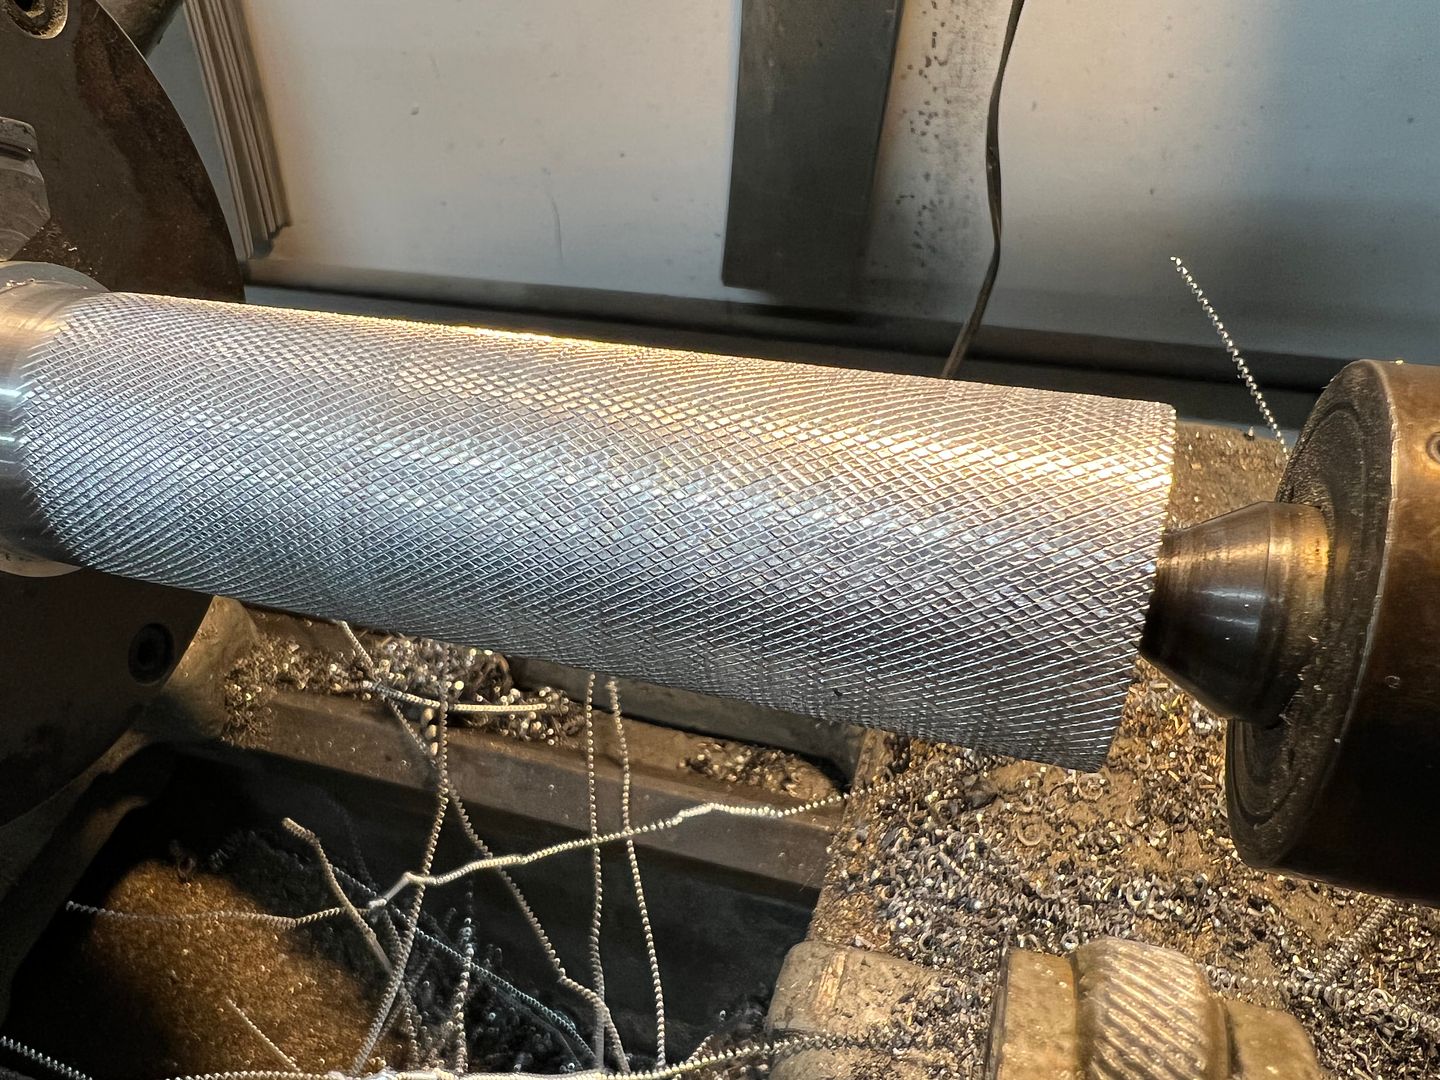 But this would have required more hardware, and the aluminum handle was over-ruled for simplicity of a welded steel tube. Here we formed the handle's hoop, and some side "extensions" were added so we could have a consistent shoulder around the "steering column" for fillet weld. 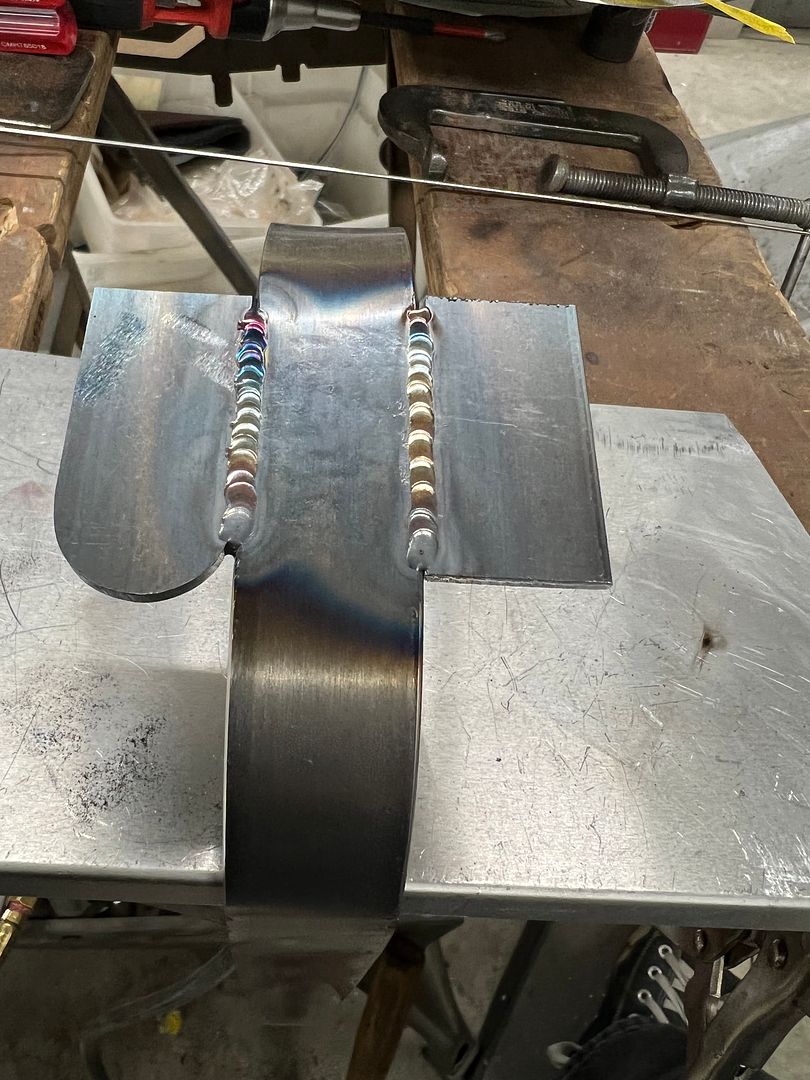 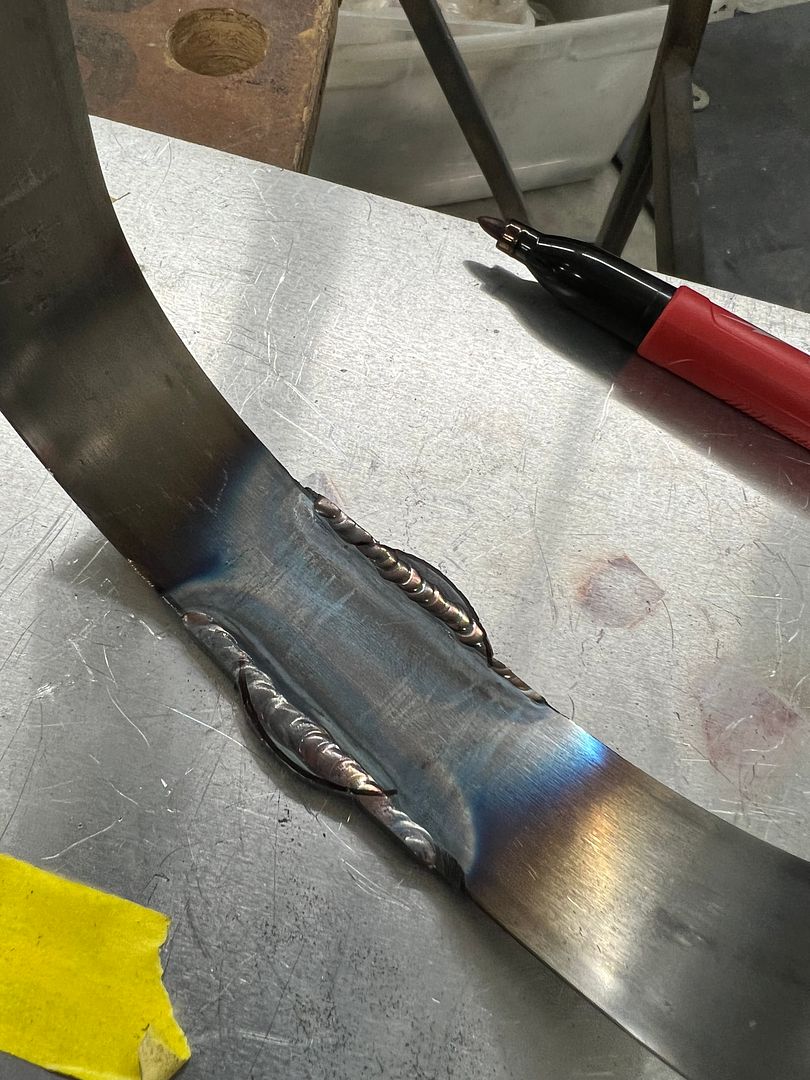 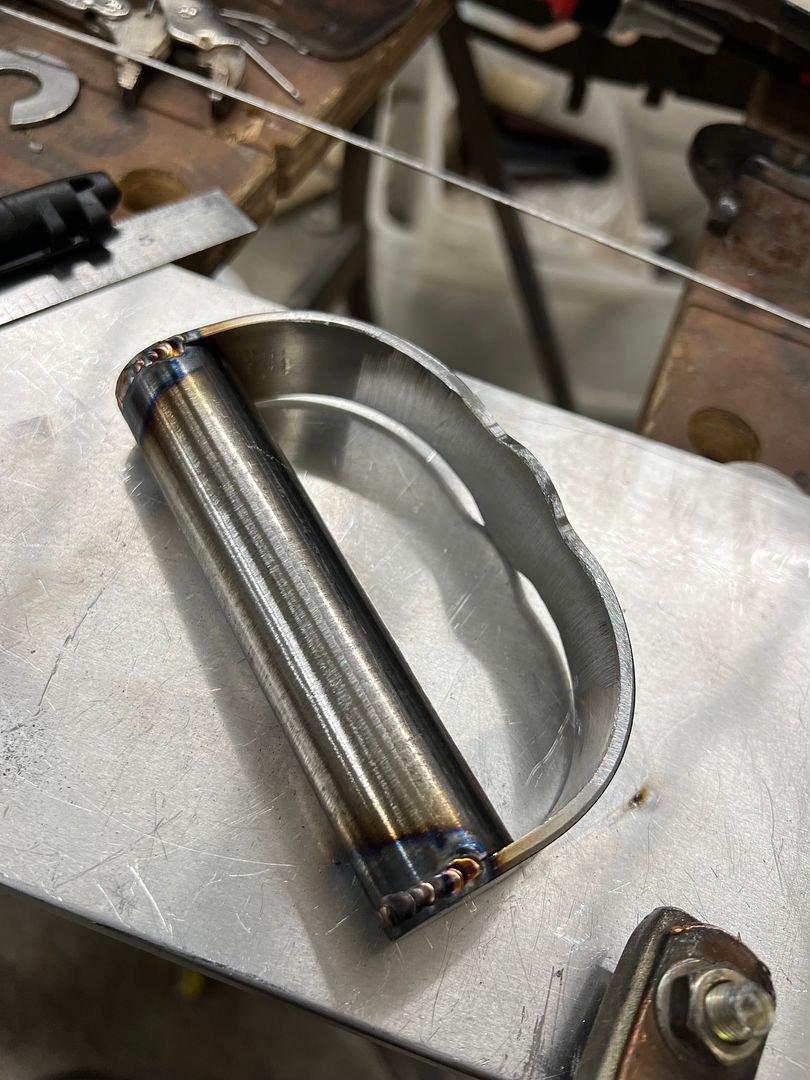 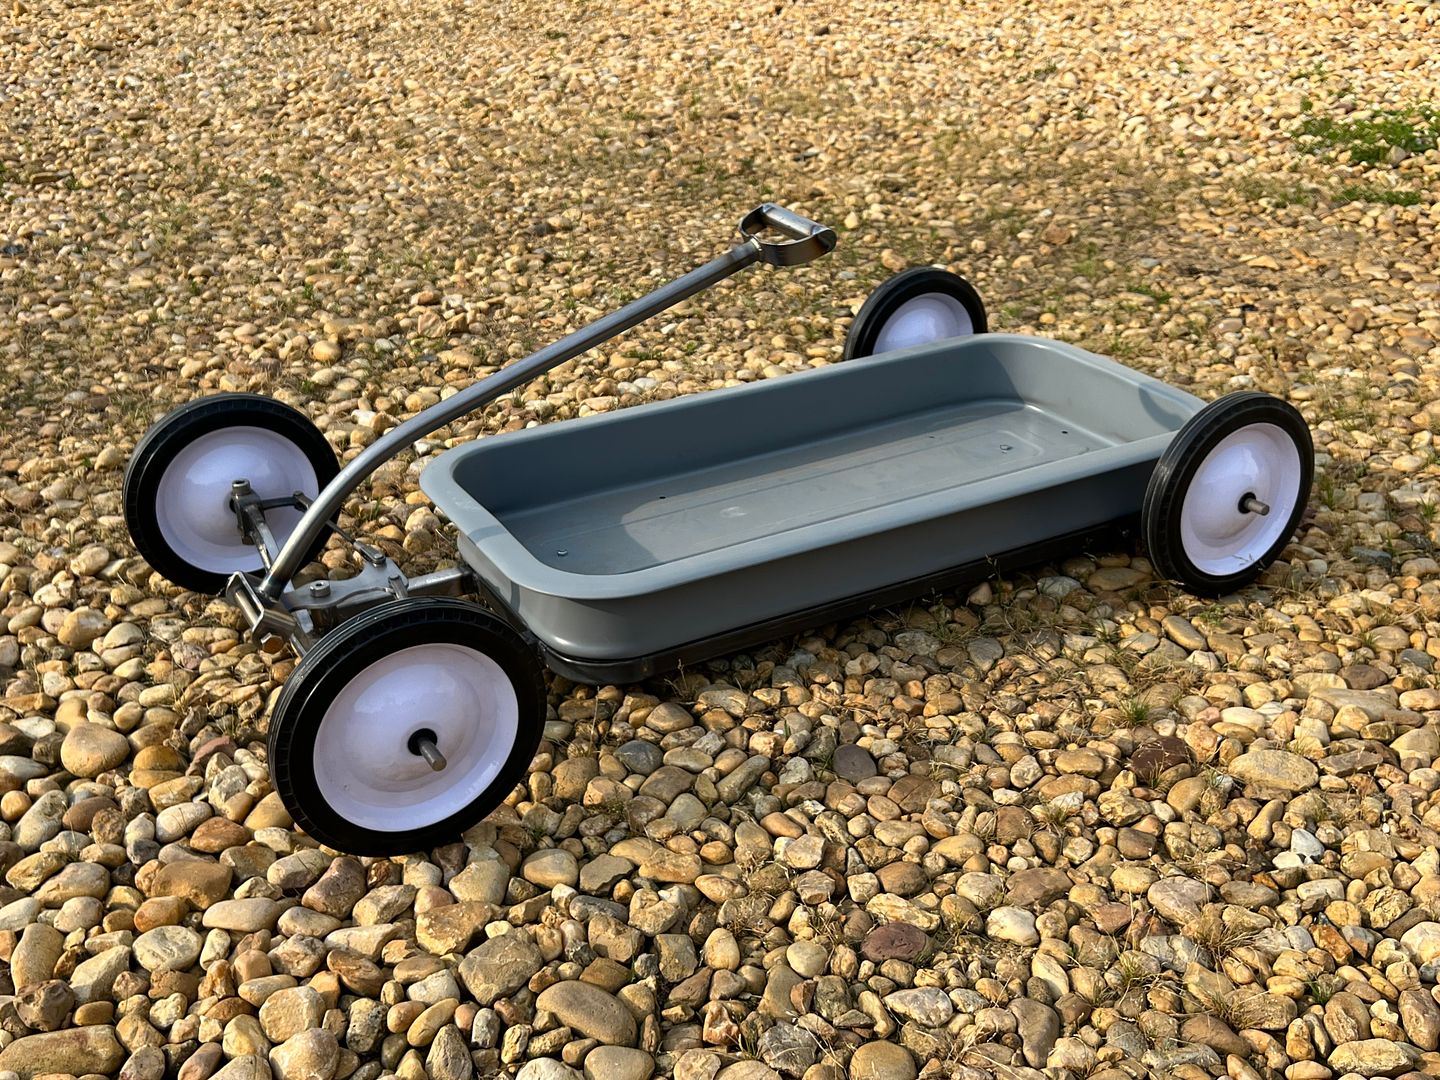 And some shots in da weeds... may have clearance issues 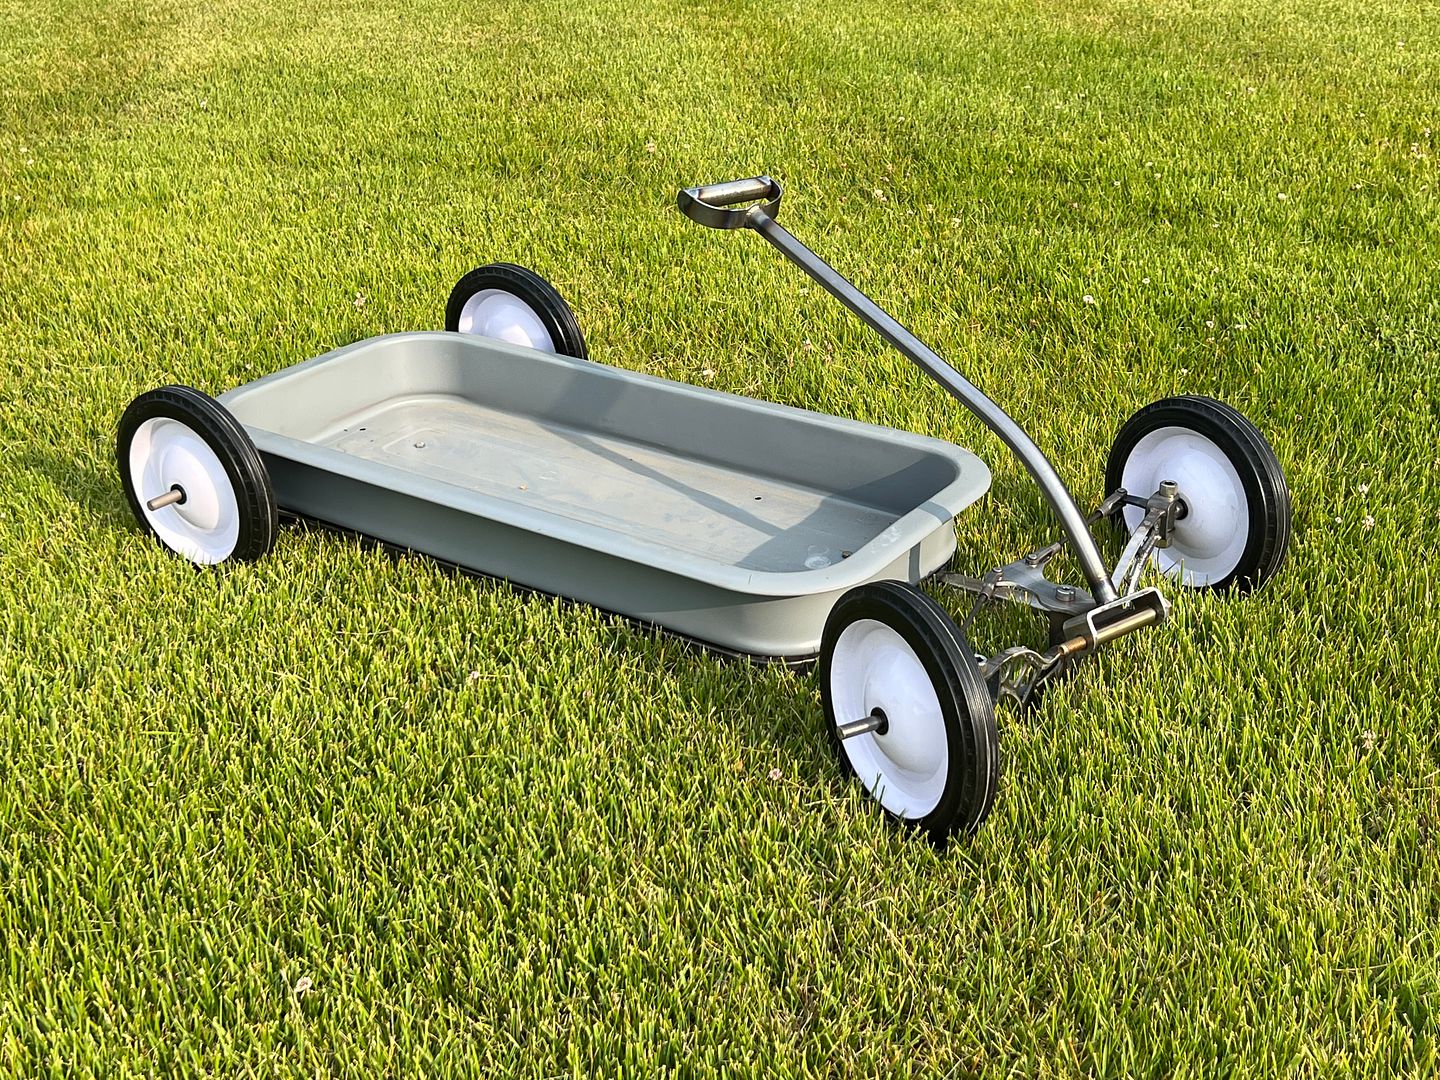 
__________________
Robert |
|
|
|
|
06-12-2023, 05:41 PM
|
#1342 |
|
Senior Member
Join Date: Mar 2008
Location: tyler texas
Posts: 1,531
|
Re: 55 Wagon Progress
Man that's a cool little wagon! Even though I was checking in for the 55 I'm still impressed.
__________________
NHRA Super Street 469C It only runs 10.90 at 156 mph |
|
|
|
|
06-12-2023, 07:15 PM
|
#1343 |
|
Post Whore
Join Date: May 2015
Location: Alabama
Posts: 14,585
|
Re: 55 Wagon Progress
man i love that taillight gas filler..thats just freaking cool..!!!!!
__________________
Mongo...aka Greg RIP Dad RIP Jesse 1981 C30 LQ9 NV4500..http://67-72chevytrucks.com/vboard/s...d.php?t=753598 Mongos AD- LS3 TR6060...http://67-72chevytrucks.com/vboard/s...34#post8522334 Columbus..the 1957 IH 4x4...http://67-72chevytrucks.com/vboard/s...63#post8082563 2023 Chevy Z71..daily driver |
|
|
|
|
06-17-2023, 02:34 PM
|
#1344 |
|
Senior Member
Join Date: Mar 2011
Location: West Plains, Missouri
Posts: 7,553
|
Re: 55 Wagon Progress
Sweet wagon...Jim
__________________
my build thread: http://67-72chevytrucks.com/vboard/s...d.php?t=459839 Jimbo's long bed step build:http://67-72chevytrucks.com/vboard/s...t=464626<br /> |
|
|
|
|
06-18-2023, 02:59 AM
|
#1345 |
|
Registered User
Join Date: Jan 2013
Location: Leonardtown, MD
Posts: 1,633
|
Re: 55 Wagon Progress
Thanks guys!!
Some additional parts for painting, we had media blasted the door latch and tailgate latch pull rods, as well as the end clips. The rods didn't have much option for securing for paint, so we opted for some rare earth magnets screwed to the paint stand. We'd paint one side, let it flash, rotate 180*, and spray the other side. That's our plan...  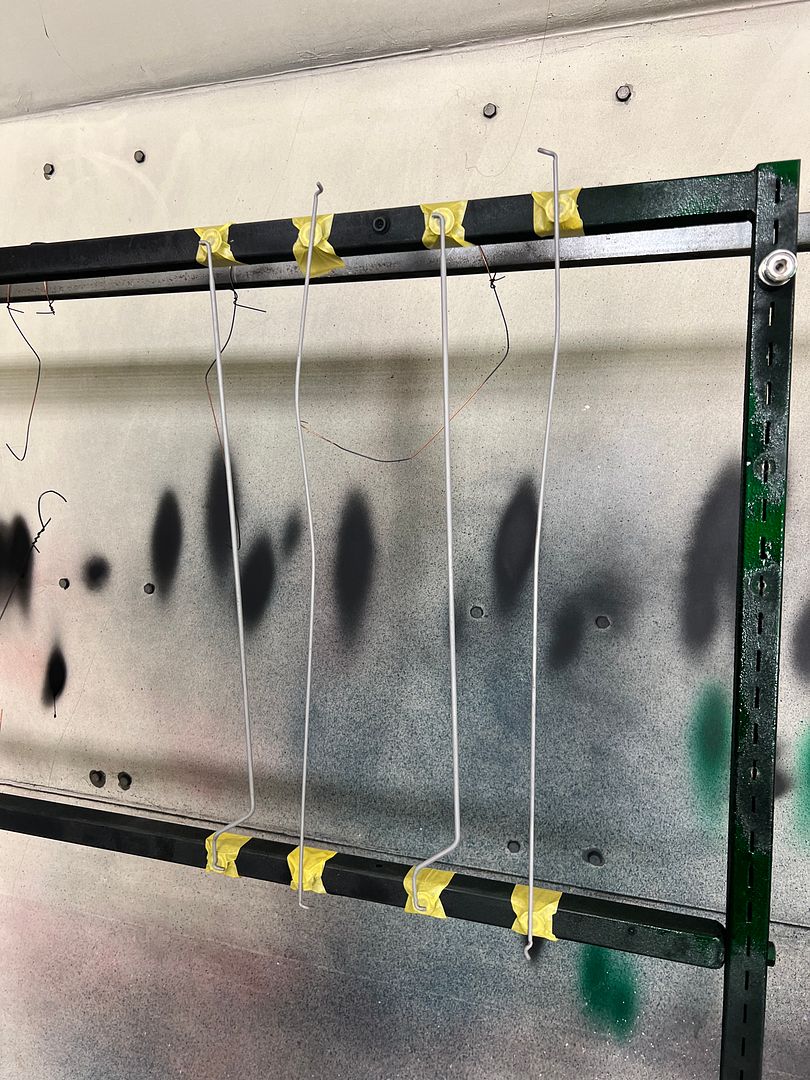 Jared had made a hoop holder for the end clips so they wouldn't get lost in the media blast cabinet, and it looked like a good holder for painting as well. 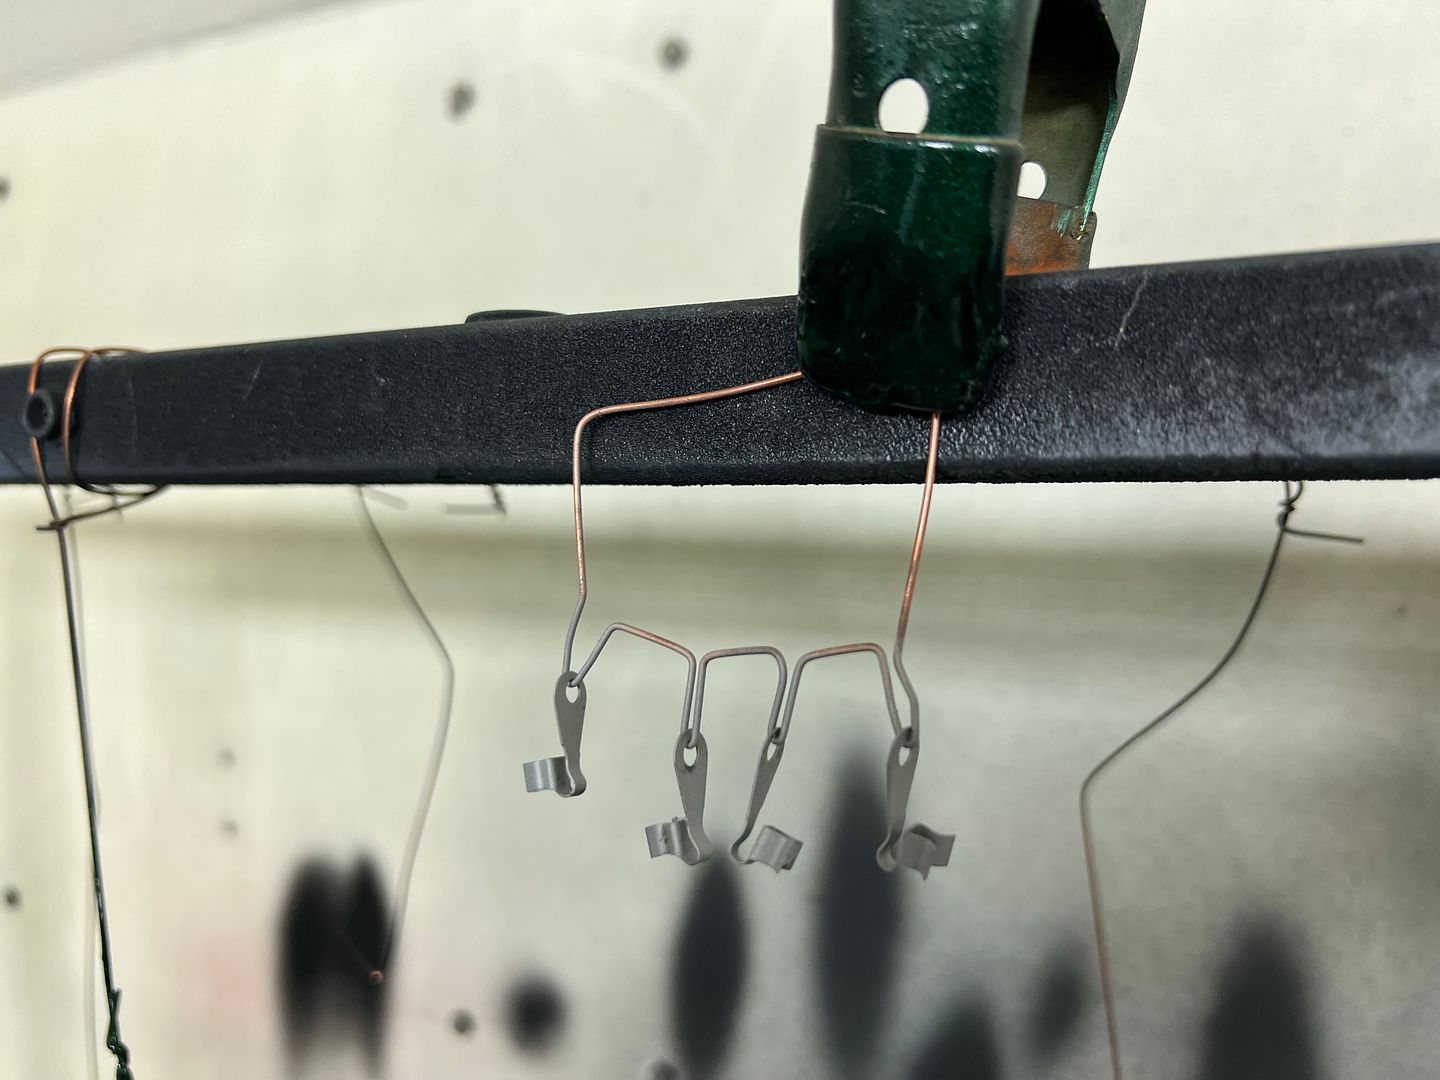 We also needed to paint the steering column, so it was disassembled and media blasted to prep for epoxy primer.. To support the column on the paint stand some eyebolts were fabricated to fit the 1/4-28 threads. 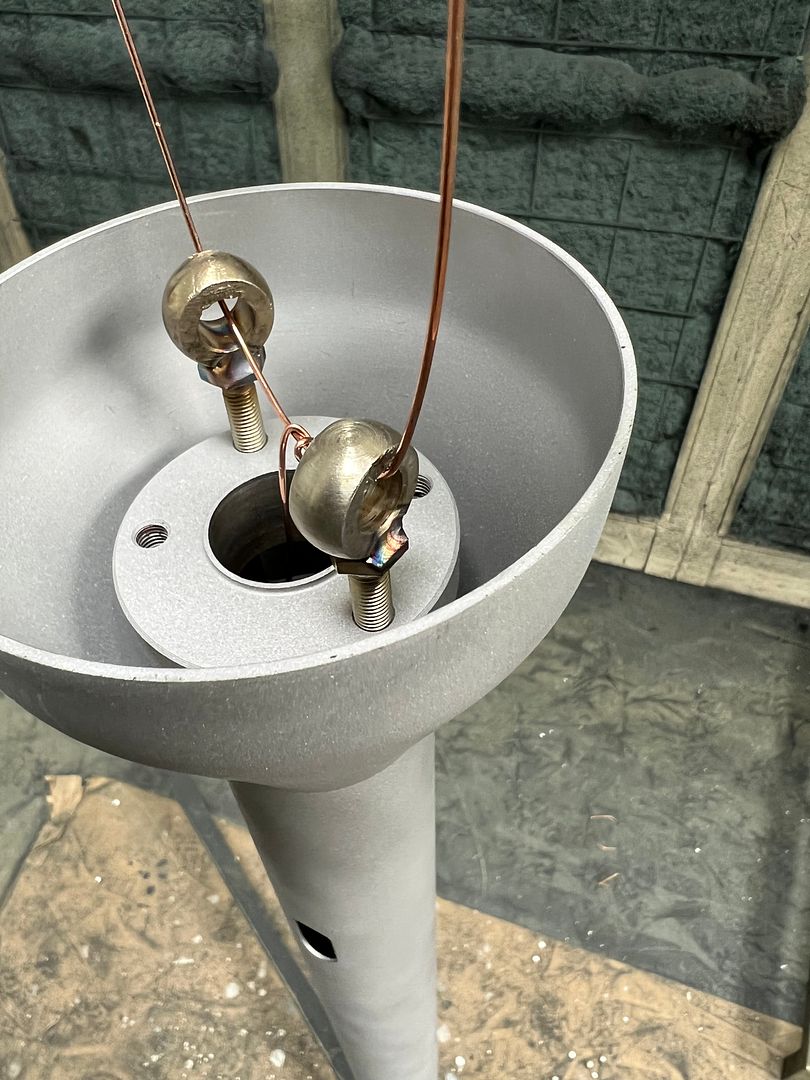 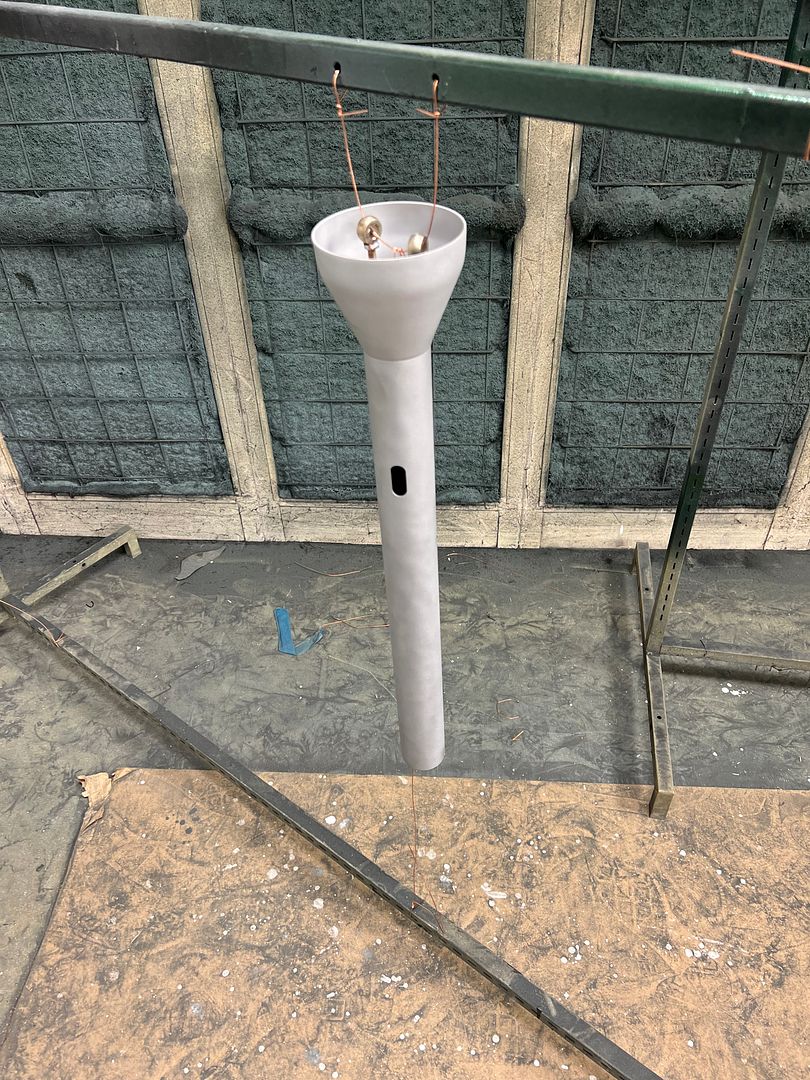 I missed getting pics after primer, so we'll get those next time.. Progress for our other wagon, the bead detail at the bottom of the wagon pan has some flat spots (defects) from the factory. As we will be spraying kandy paint, those spots need to be corrected so they won't be visible. 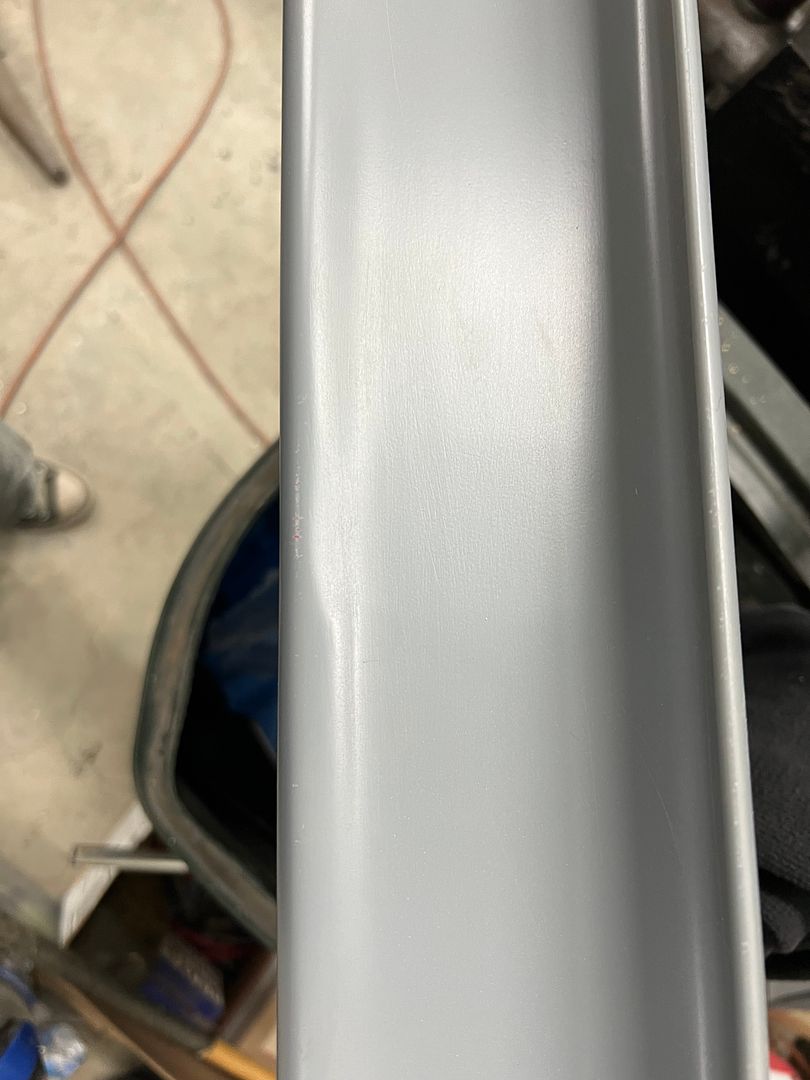 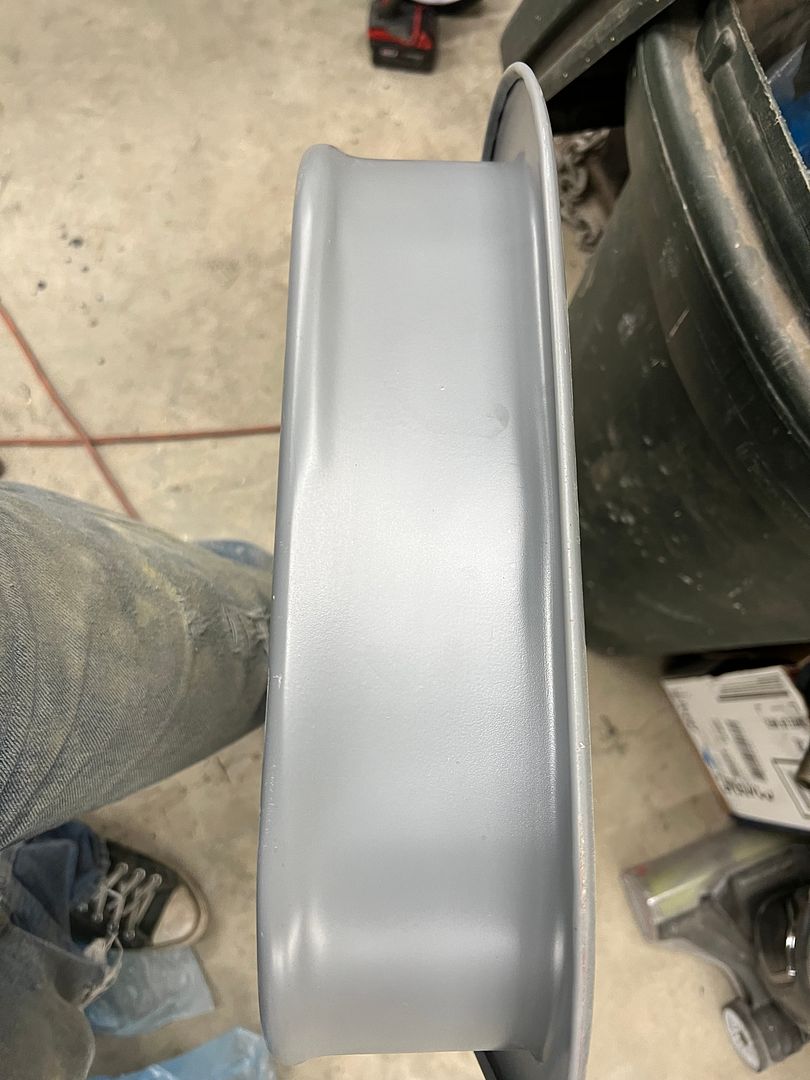 So we made a set of dies for the Lennox to be able to give a consistent bead around the entire perimeter.. 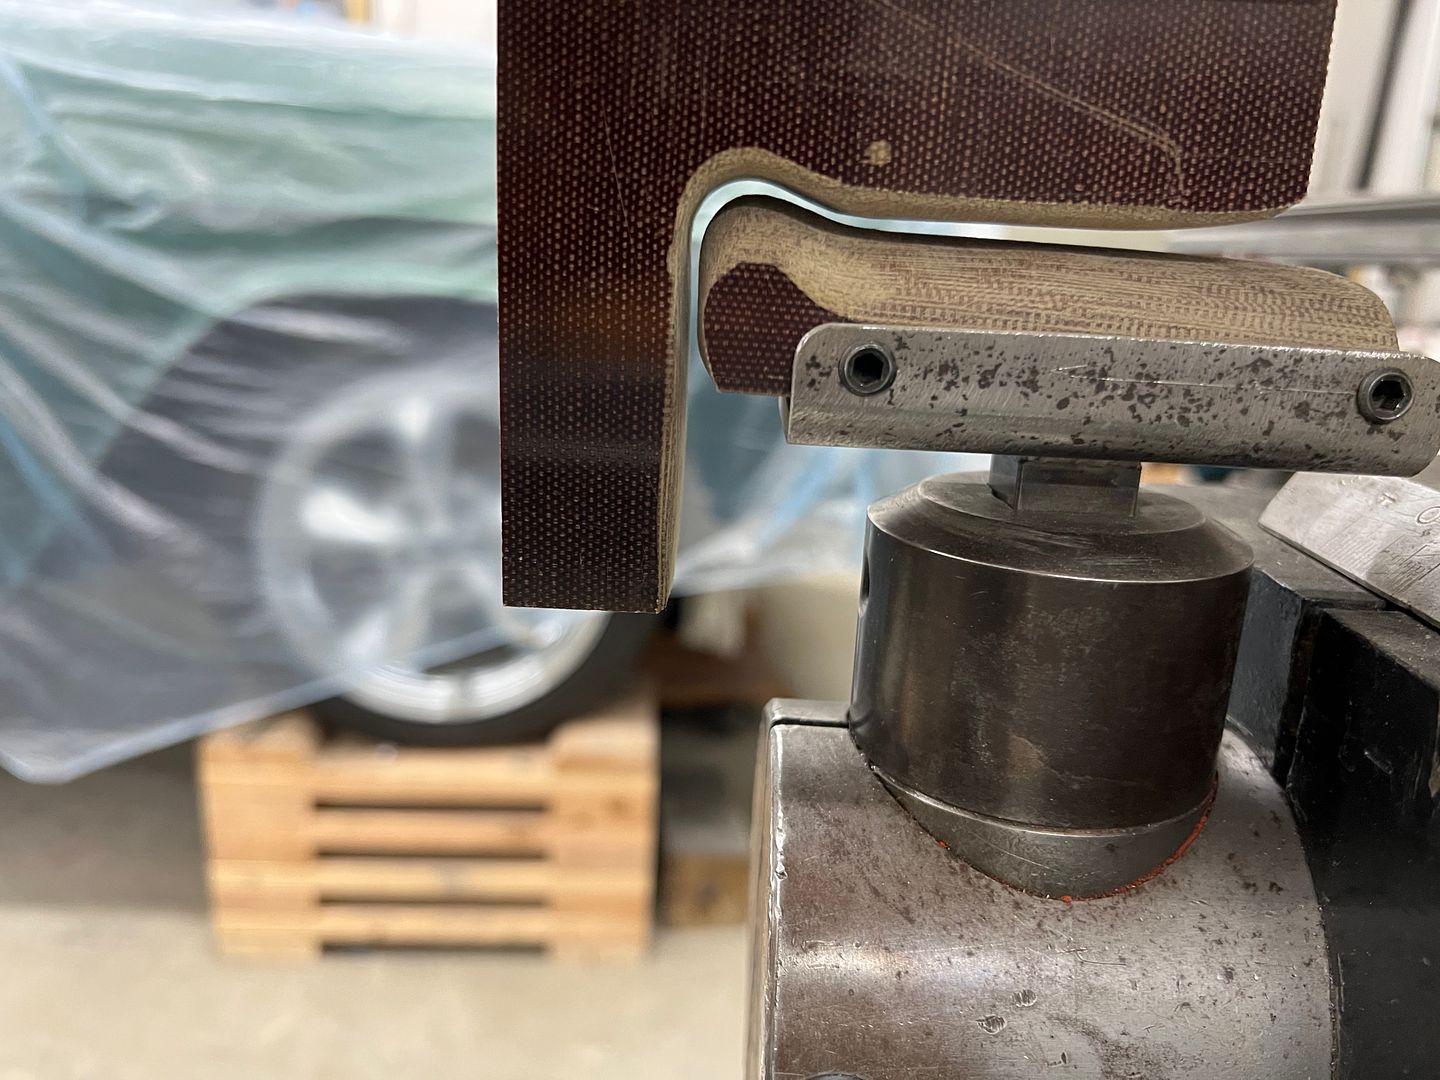 https://youtu.be/5sTsOj_Bqd8 much better: 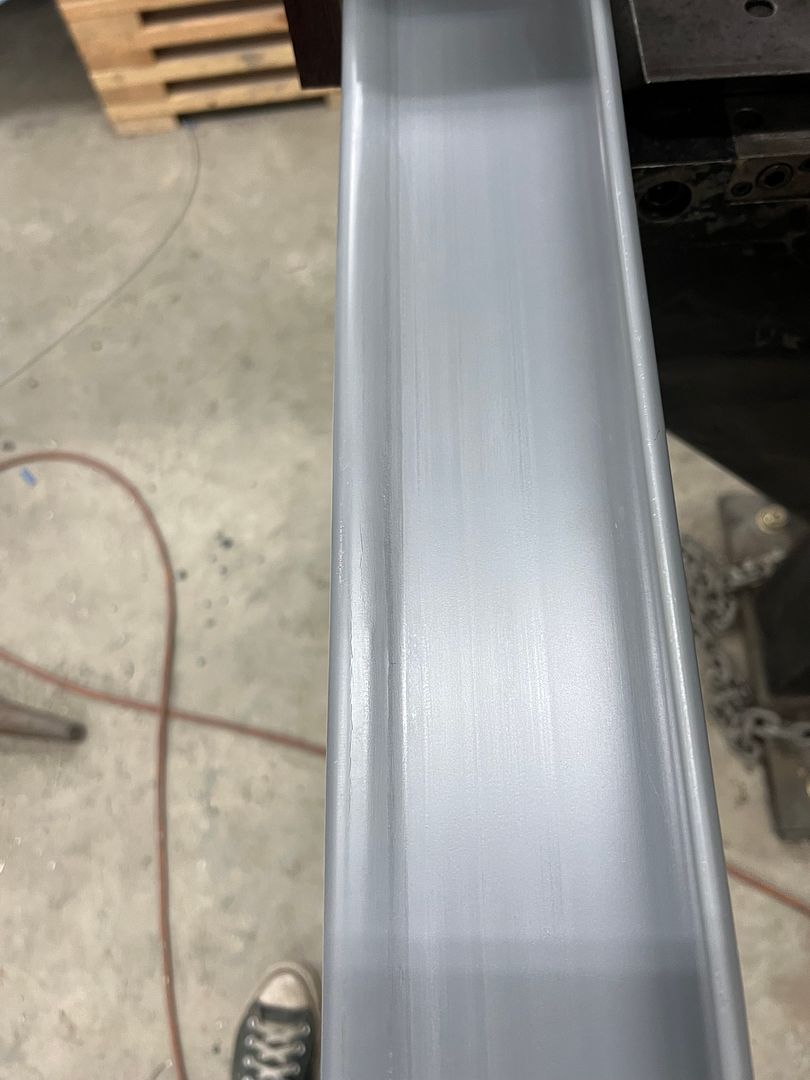 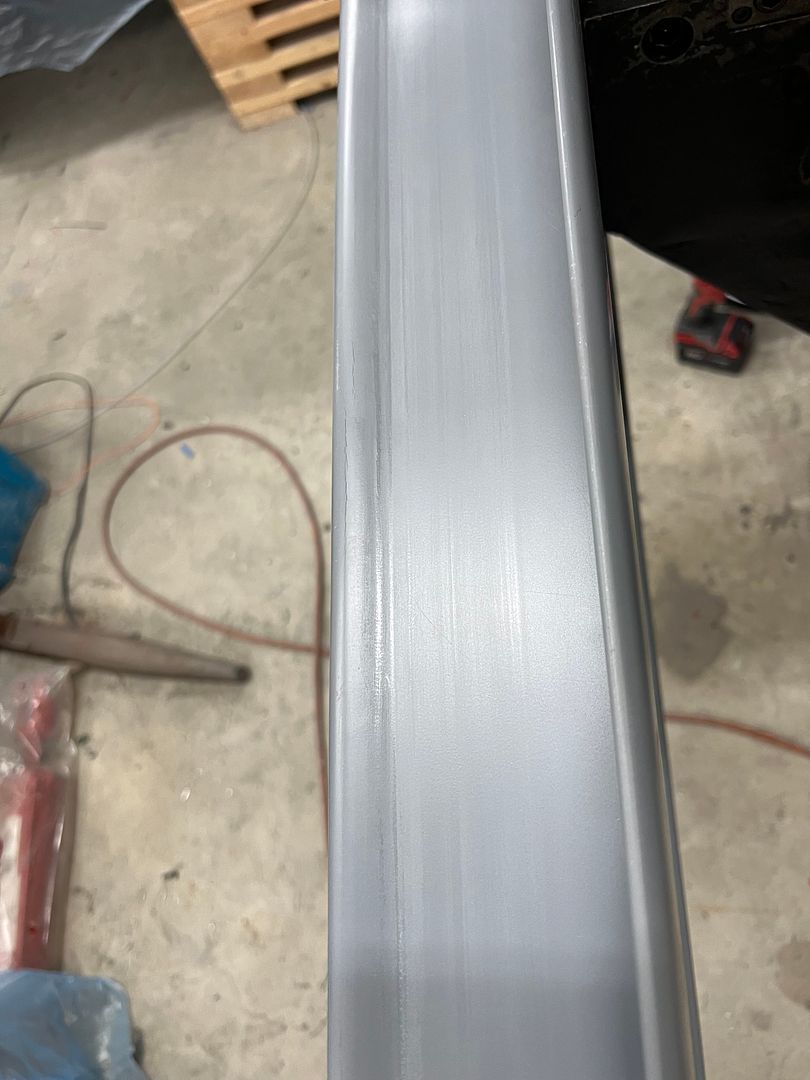 more to come...
__________________
Robert |
|
|
|
|
06-21-2023, 02:32 PM
|
#1346 |
|
Registered User
Join Date: Sep 2008
Location: Newport, North Carolina
Posts: 616
|
Re: 55 Wagon Progress
I'm not contributing a lot to your thread but I'm definitely following along and enjoy seeing the updates and creativity. Thanks for sharing and being so detailed in posts.
|
|
|
|
|
07-07-2023, 07:26 AM
|
#1347 |
|
Registered User
Join Date: Jan 2013
Location: Leonardtown, MD
Posts: 1,633
|
Re: 55 Wagon Progress
Thanks Joe!
A few months back we had received some newly polished stainless spears (side trim) for the 55 wagon. Part of the payment was to fabricate a "factory delete" plate for the spare tire well of a 55 chevy in gasser form. He wanted to mimic the factory X pattern that is located along the centerline of the trunk. We recently got this done, and with as-installed pictures received, it seems a good time to post this as well. We had tried a sample using the bead roller, and also had made a die set for the Lennox that would produce both sides at once. Neither worked well at all. I didn't care for the bead roller version much at all since we would be relying on self guiding and the possibility of line deviation. So we opted for a set of offset dies that I had for the Lennox, and producing each side individually. The Lennox works well because the linear slide lets us clamp the part and produce multiple parallel embossings with good accuracy. 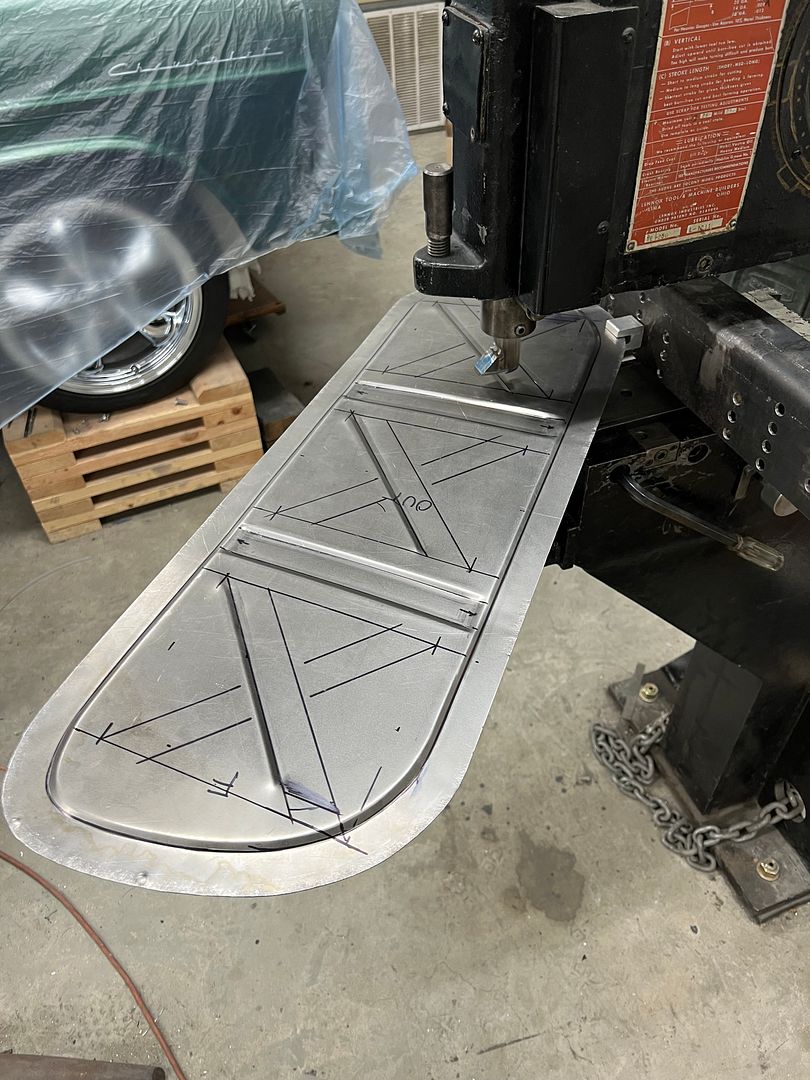 A corking tool made from delrin was used to dress up the ends 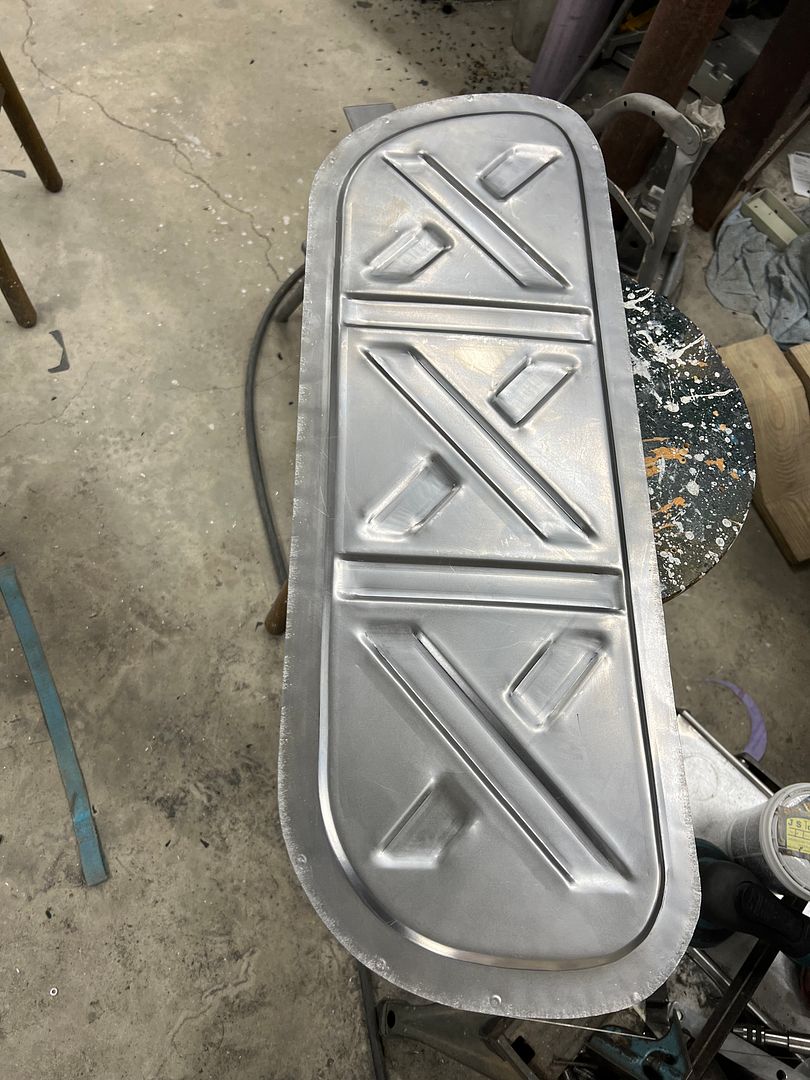 As primed by the owner... Yes, that is Wisconsin farmland. 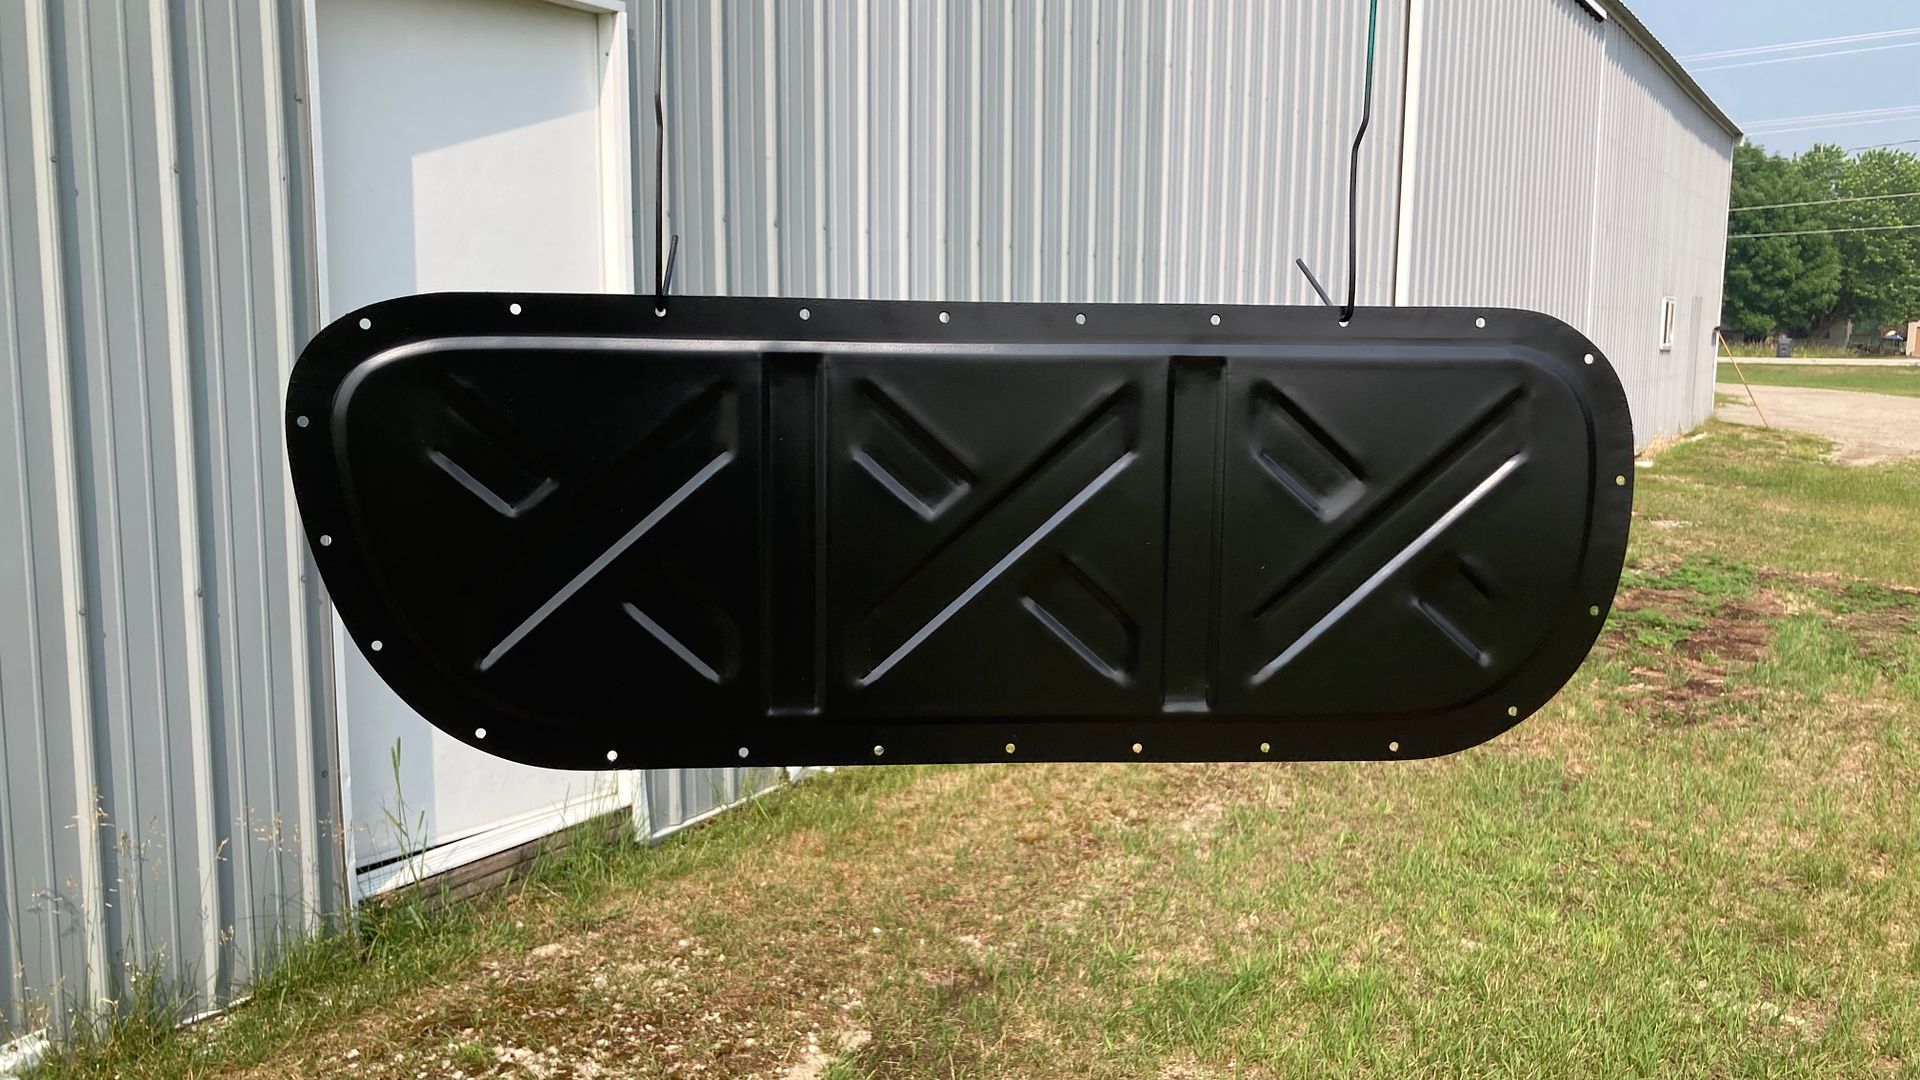 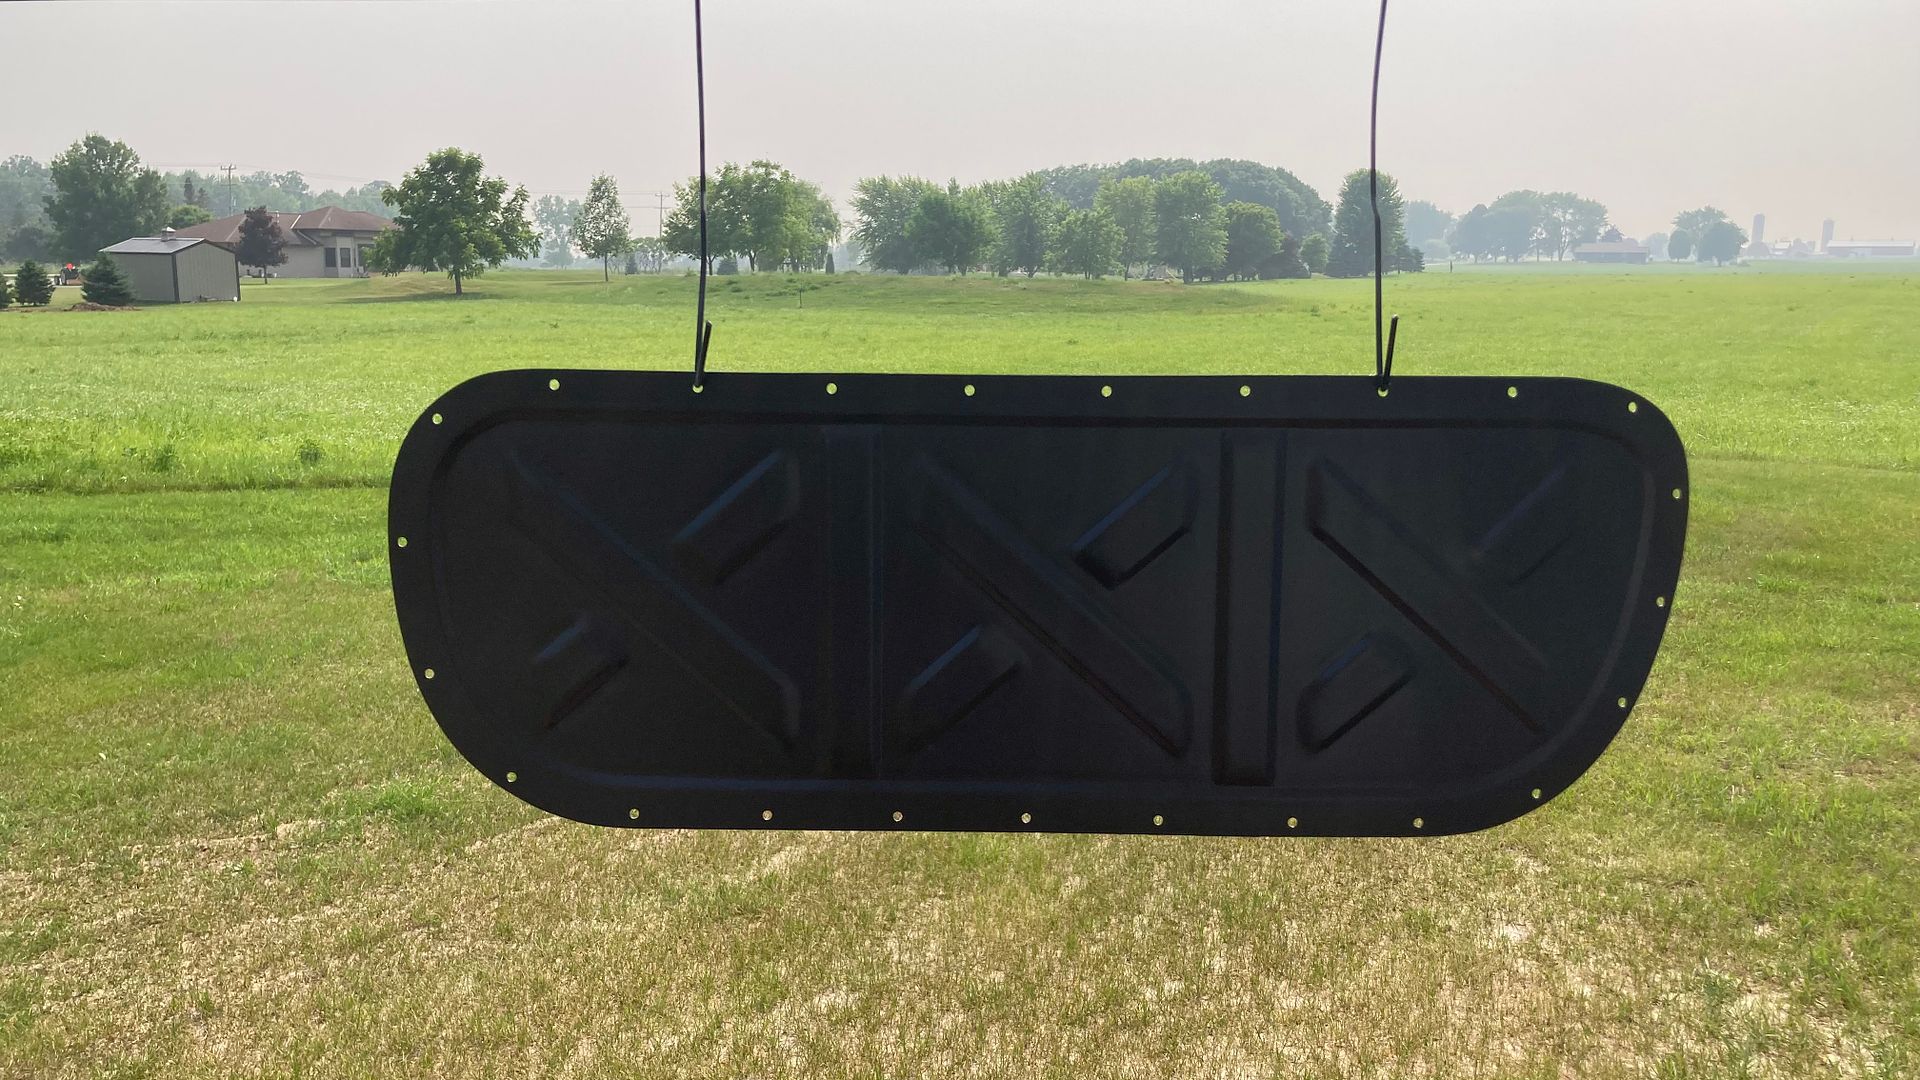 Installed... 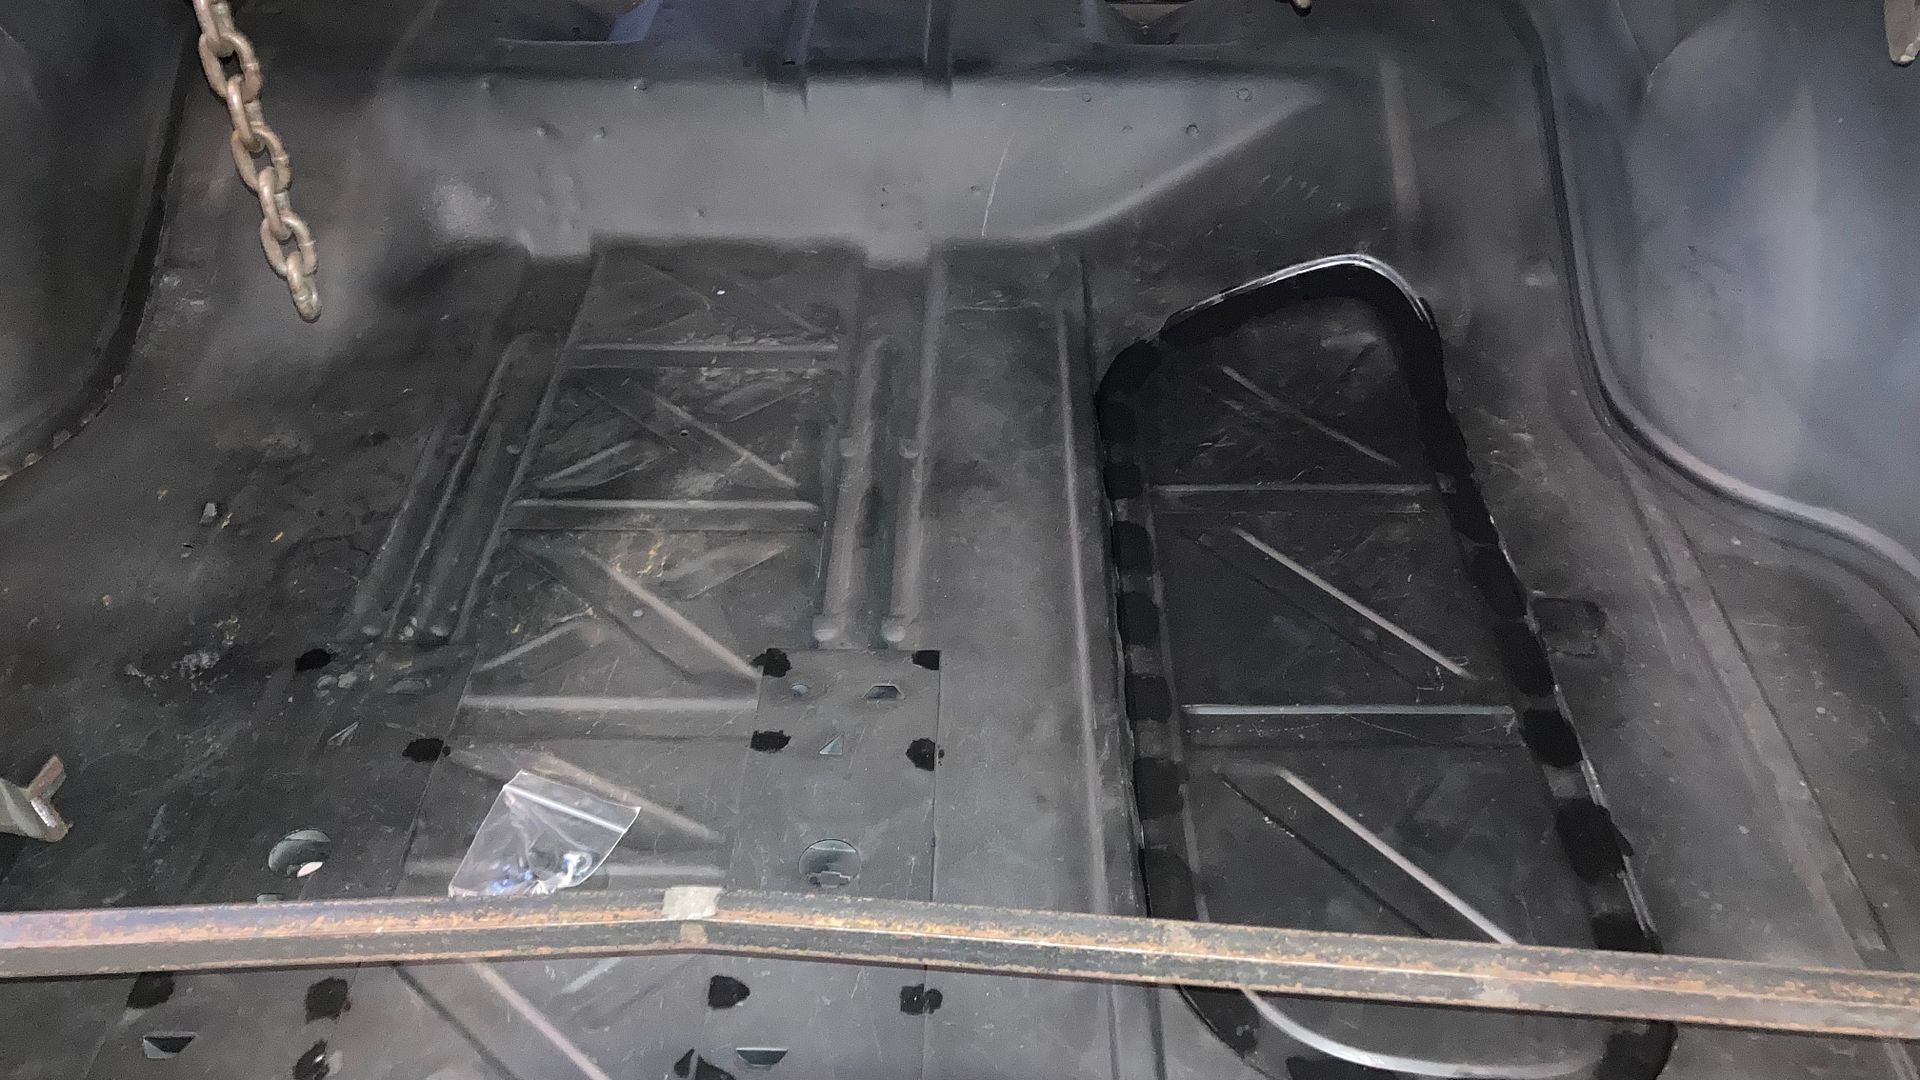  So there you have it, a rare OEM spare tire delete plate.
__________________
Robert |
|
|
|
|
07-07-2023, 02:15 PM
|
#1348 |
|
Senior Member
Join Date: Mar 2011
Location: West Plains, Missouri
Posts: 7,553
|
Re: 55 Wagon Progress
Robert, nice job on the "rare OEM spare tire delete plate"...Jim
__________________
my build thread: http://67-72chevytrucks.com/vboard/s...d.php?t=459839 Jimbo's long bed step build:http://67-72chevytrucks.com/vboard/s...t=464626<br /> |
|
|
|
|
07-14-2023, 07:35 AM
|
#1349 |
|
Registered User
Join Date: Jan 2013
Location: Leonardtown, MD
Posts: 1,633
|
Re: 55 Wagon Progress
Thanks Jim!
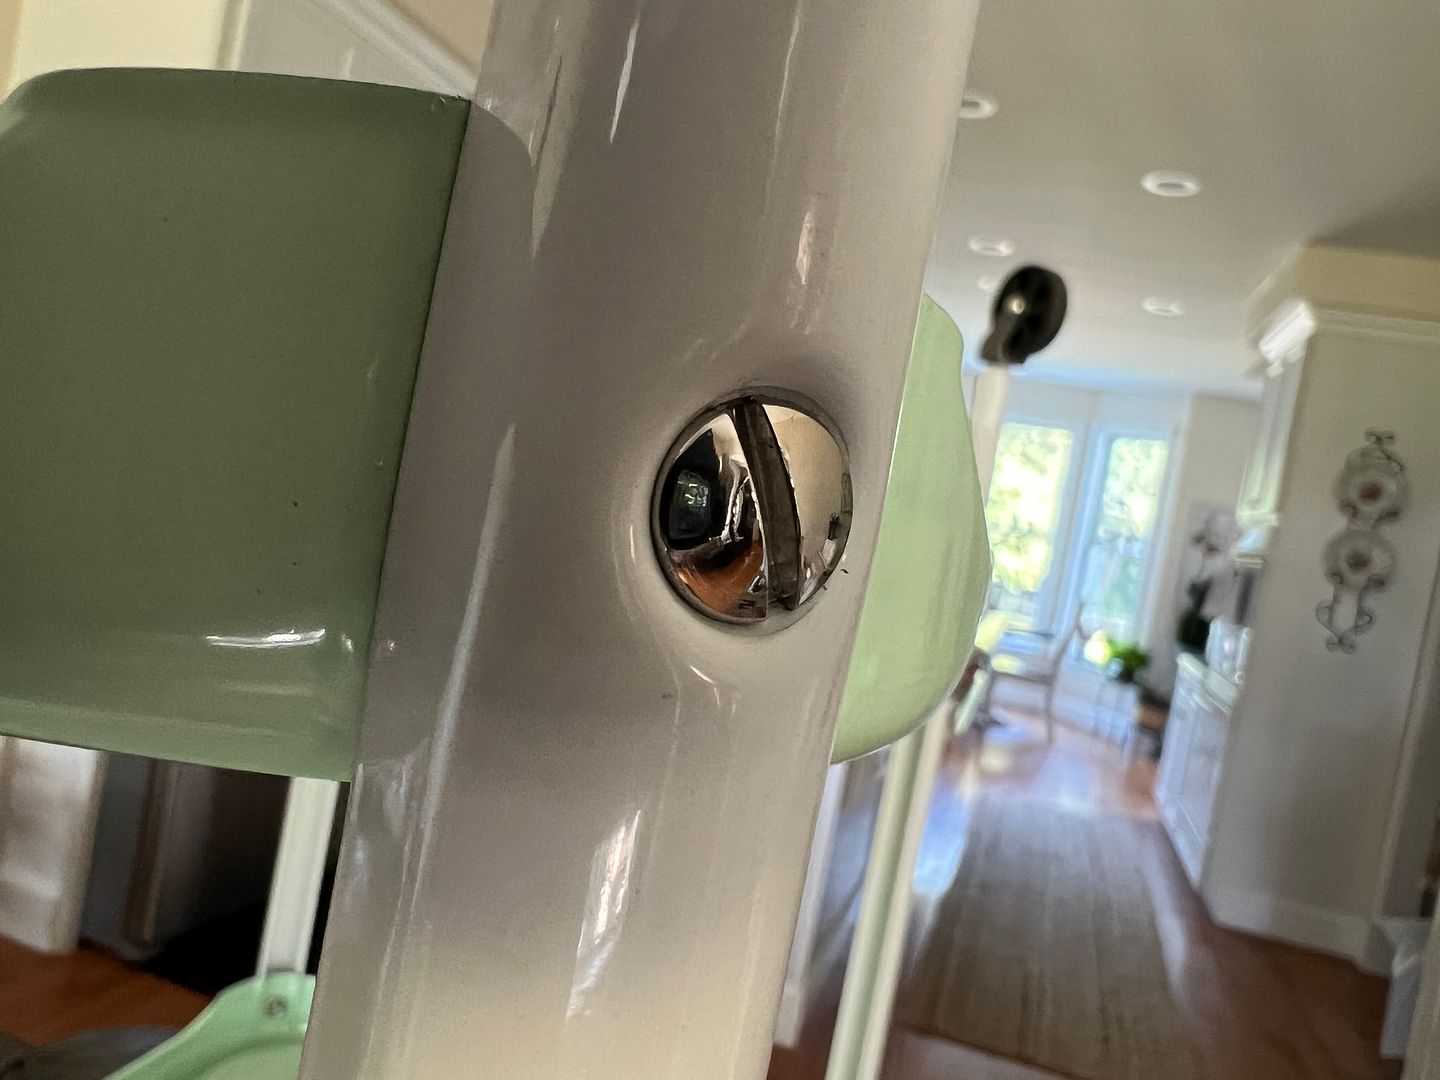
The boss lady had picked up a vintage three-shelved stand a while back, and we had been tripping over the parts in the media blast cabinet. 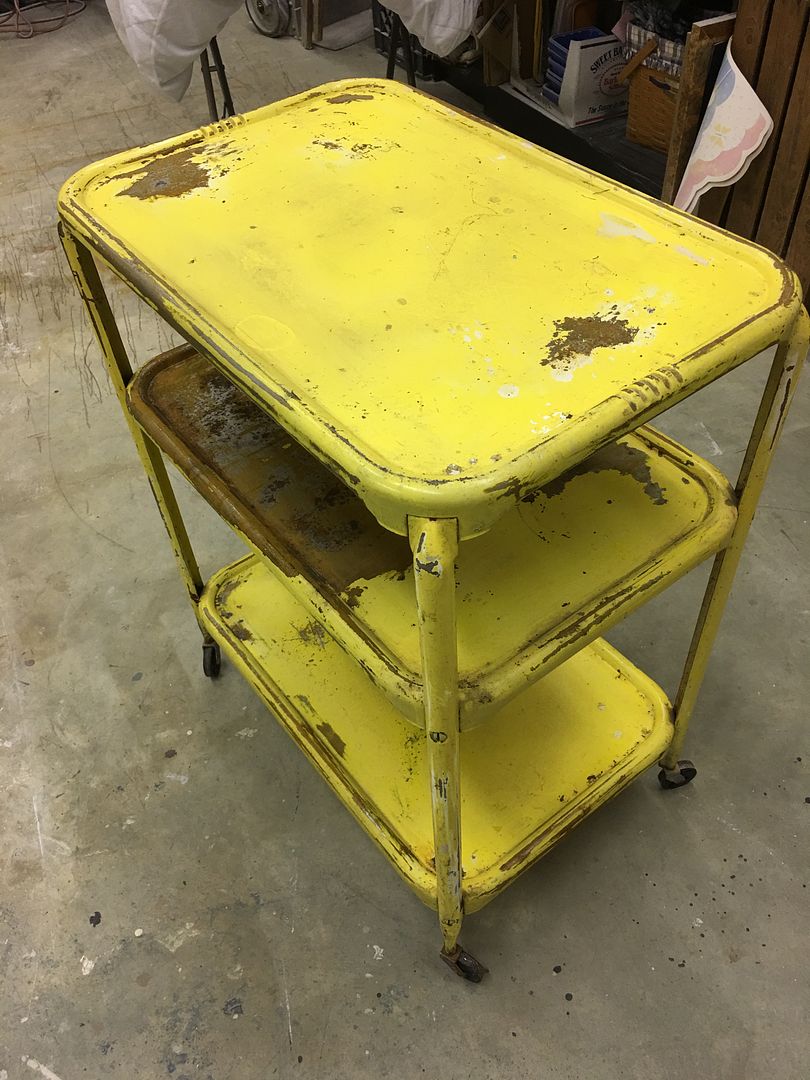 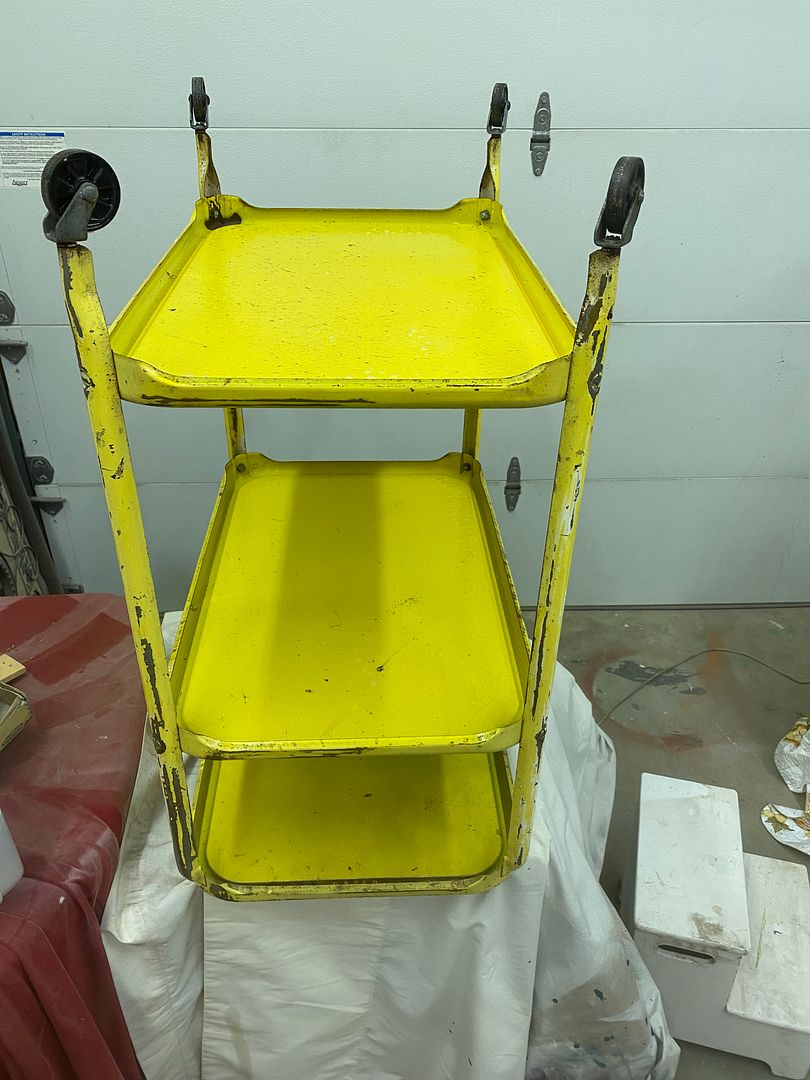 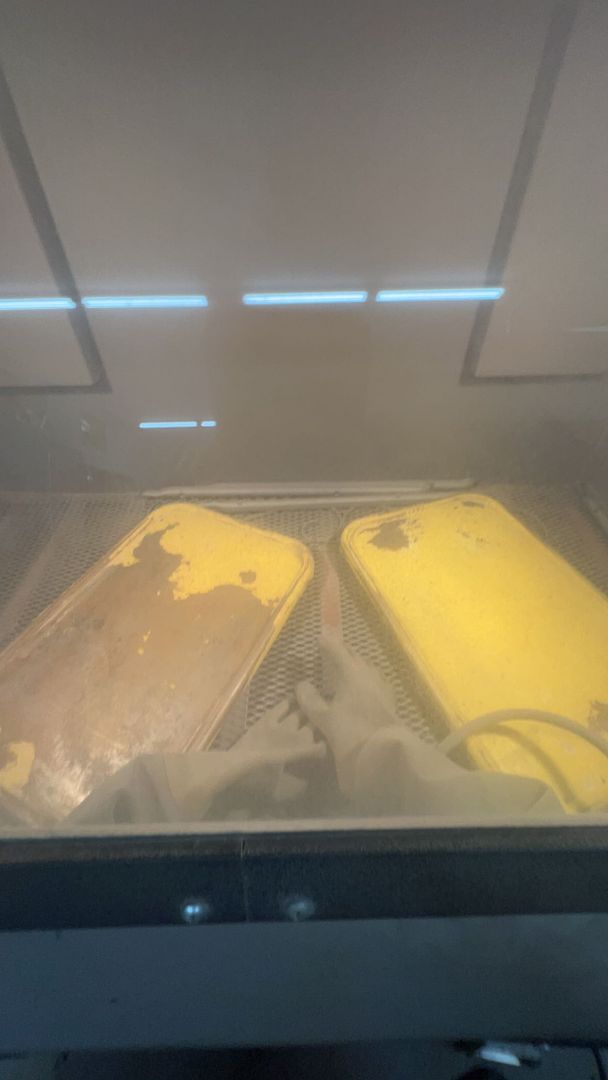 After media blasting they were sent off to The Shop at Shorty's for a powder coat finish. He had some pastel green in stock so we went with that. Here's the preview picture he sent: 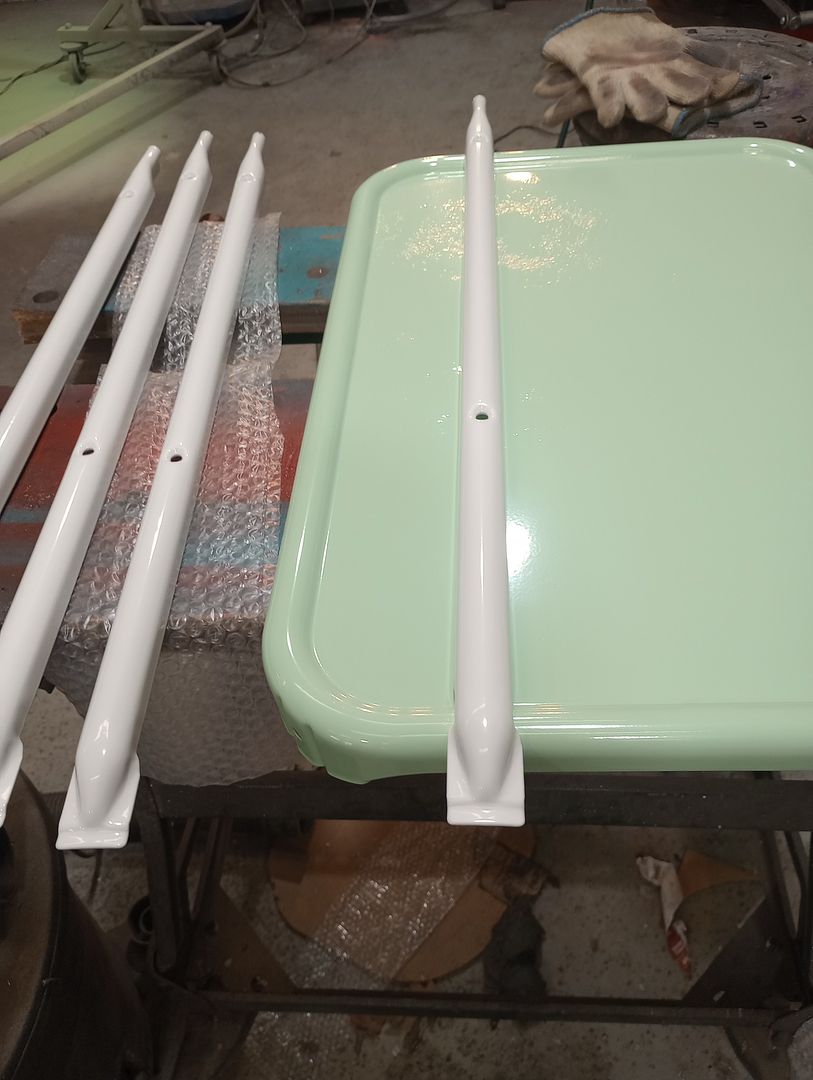 We will get the parts picked up this week. We already ordered new stainless hardware in slotted screws and square nuts for the assembly. Next, the casters seemed in good condition but needed a refinish as well. So the OEM rivets were drilled out so the metal housing could get a Cerakote treatment in gun metal grey. In order to reassemble without rivets we made some faux rivets that will make use of 1/4-20 threads and sleeve retainer loctite to keep things together. 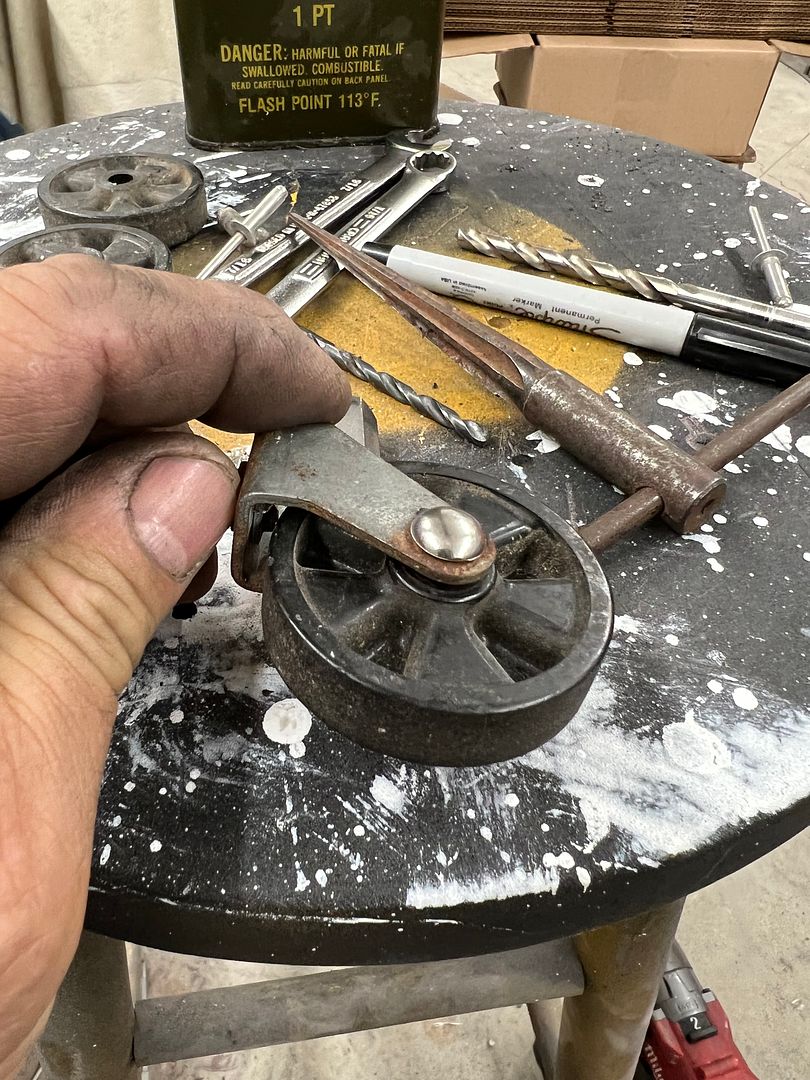 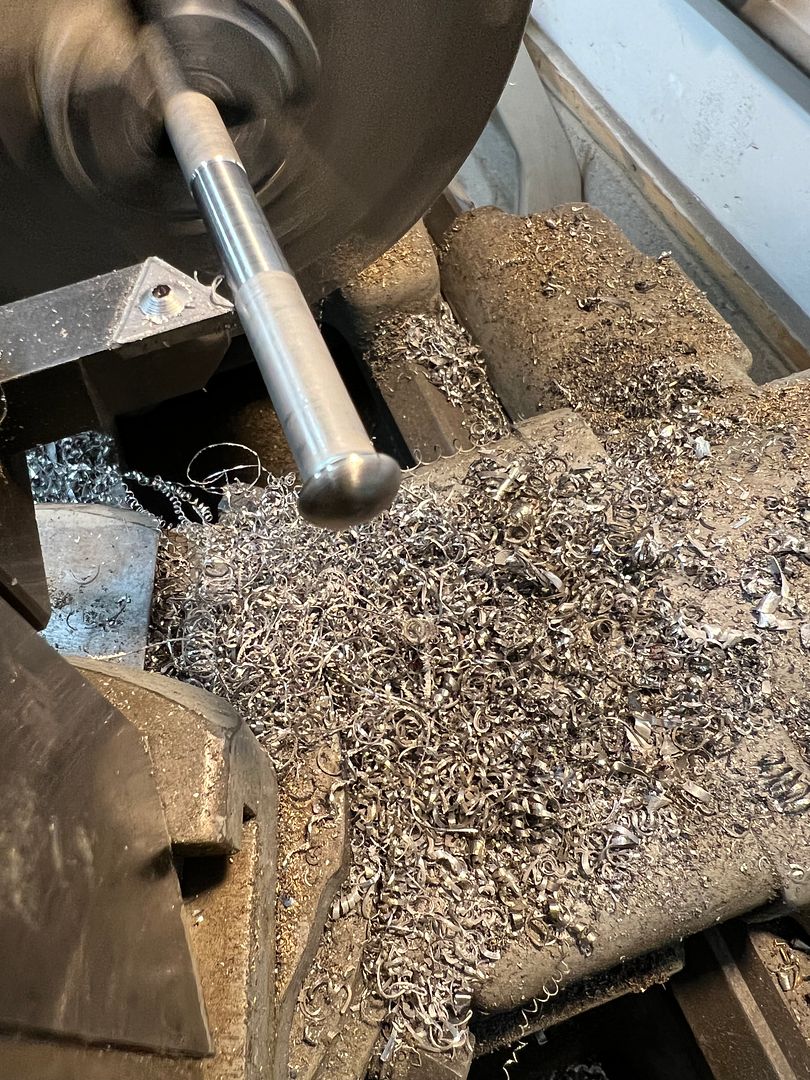 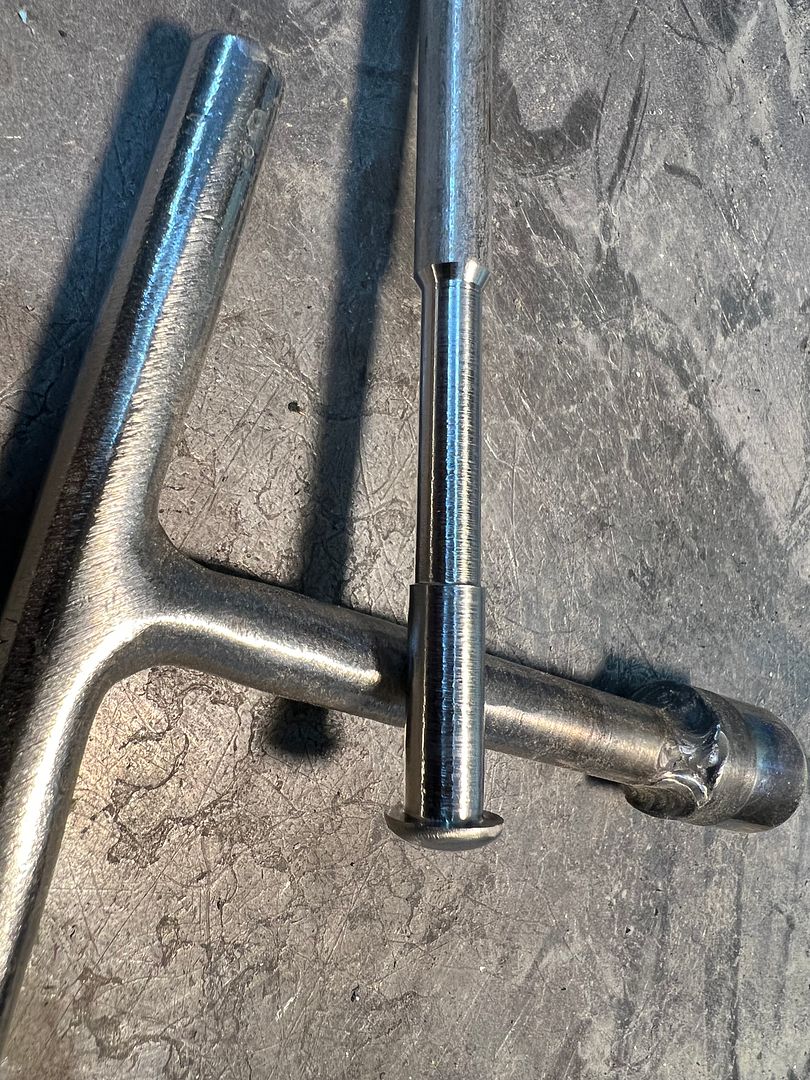 A tap handle in the vise was used to clamp the "rivet" while it was threaded.. 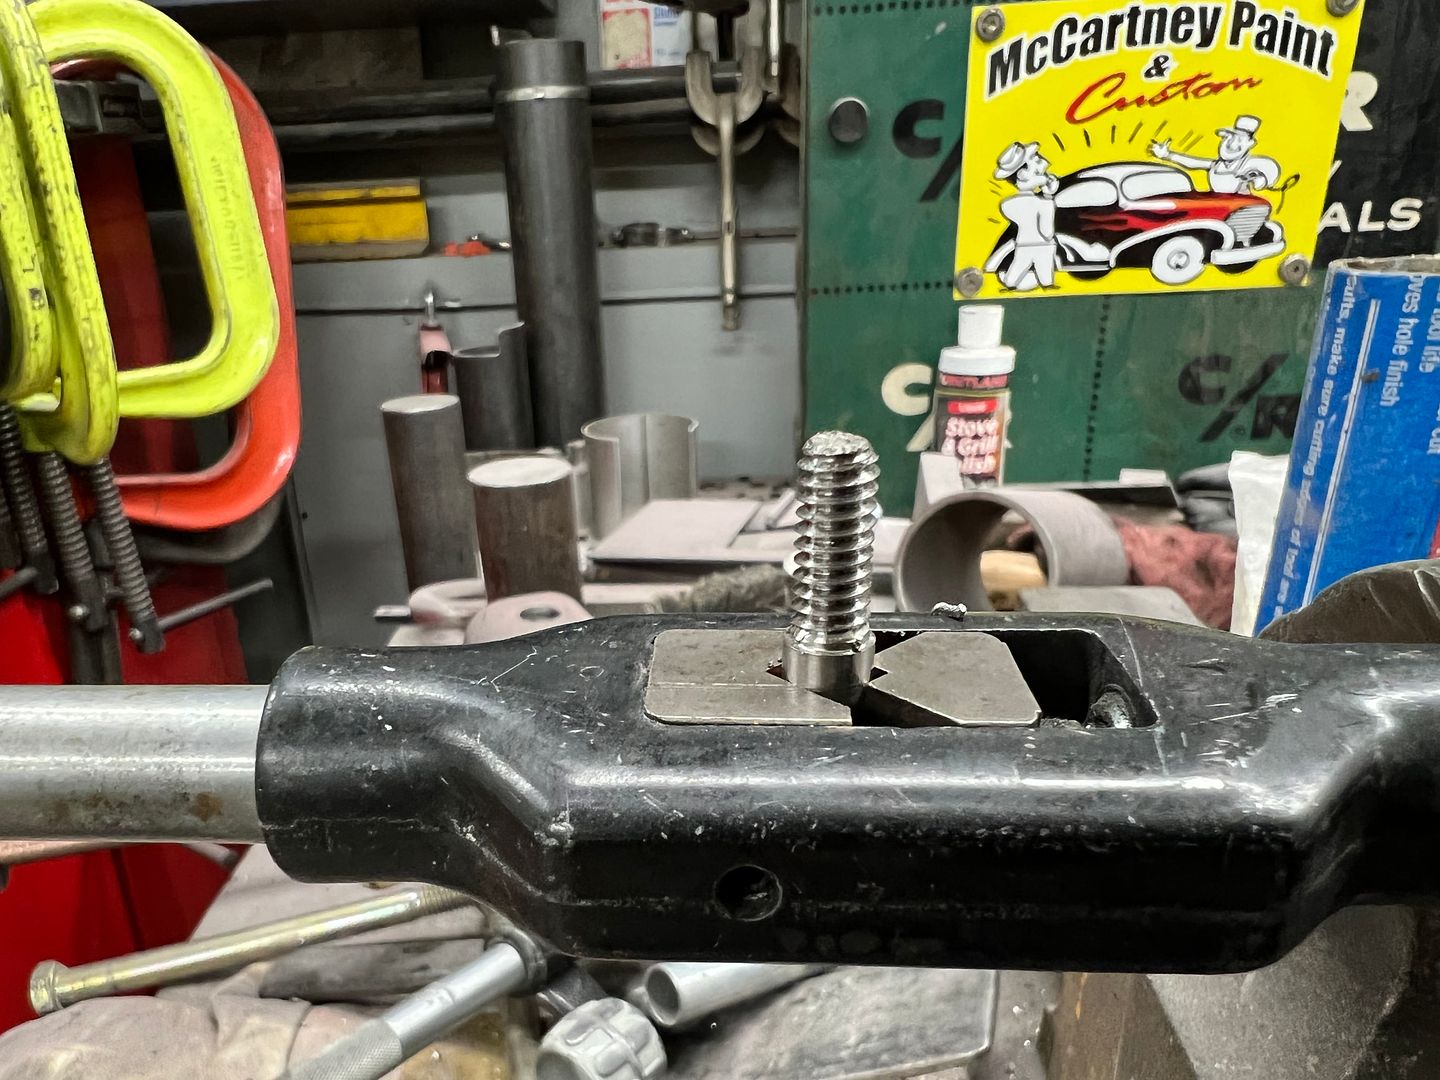 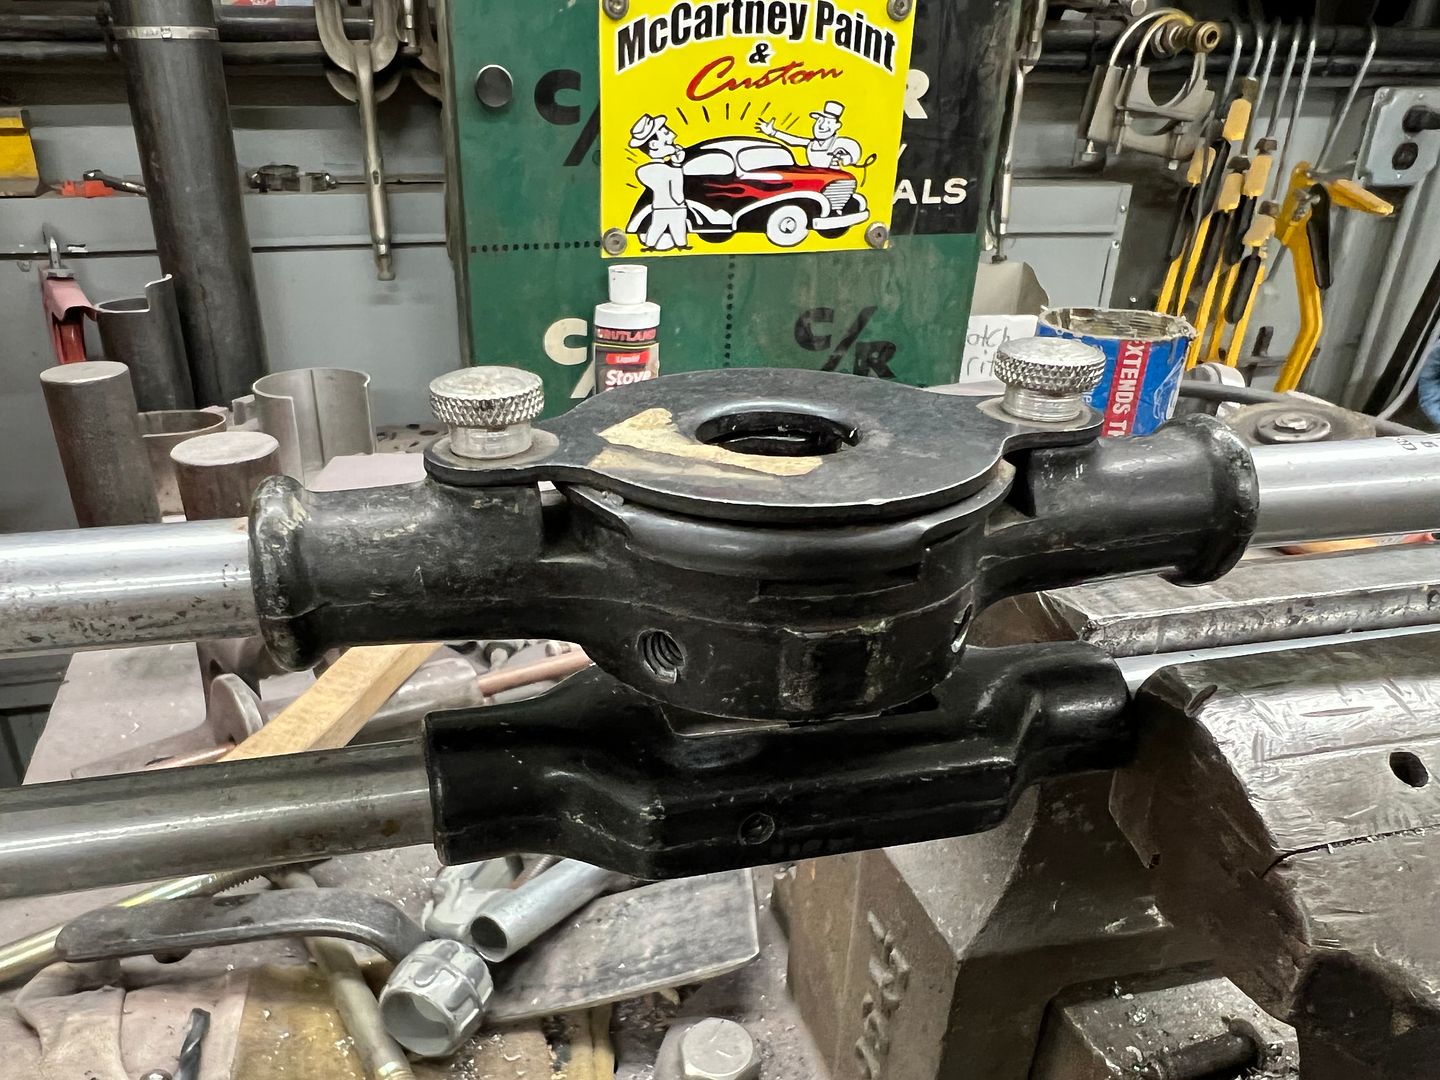 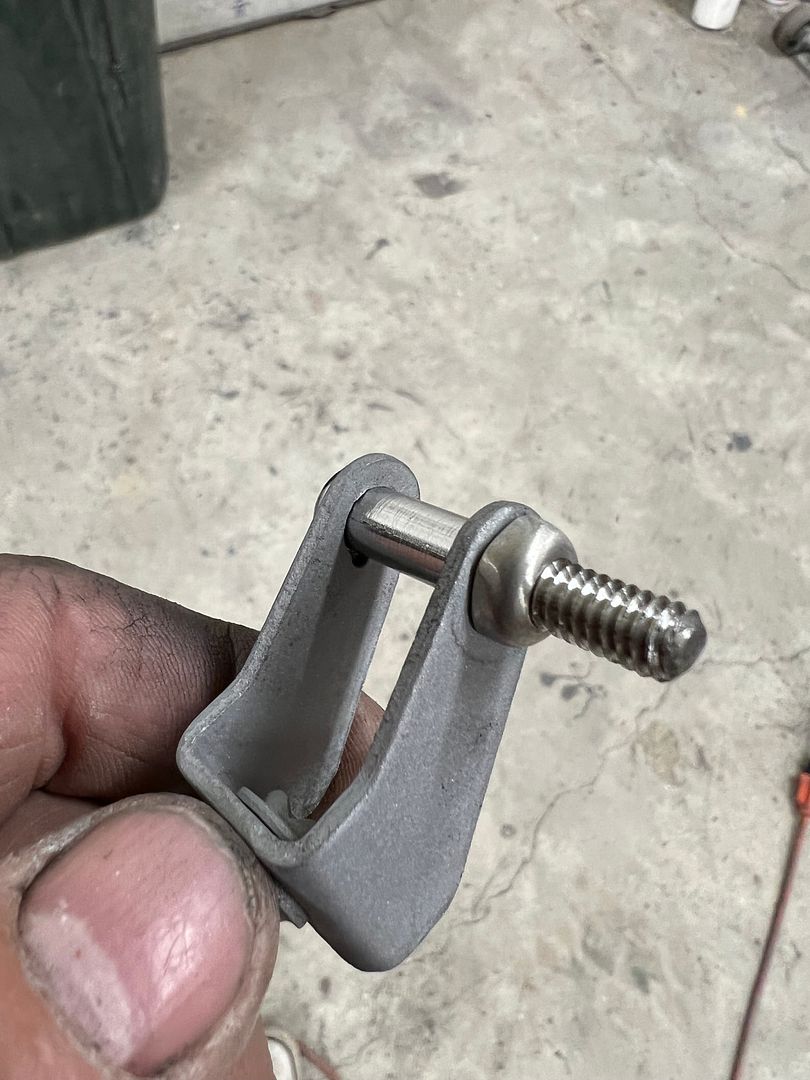 The nuts were rounded as well, leaving just enough flat for assembly, to mimic the rounded head rivet as well. Threads trimmed to size and the parts were then polished. 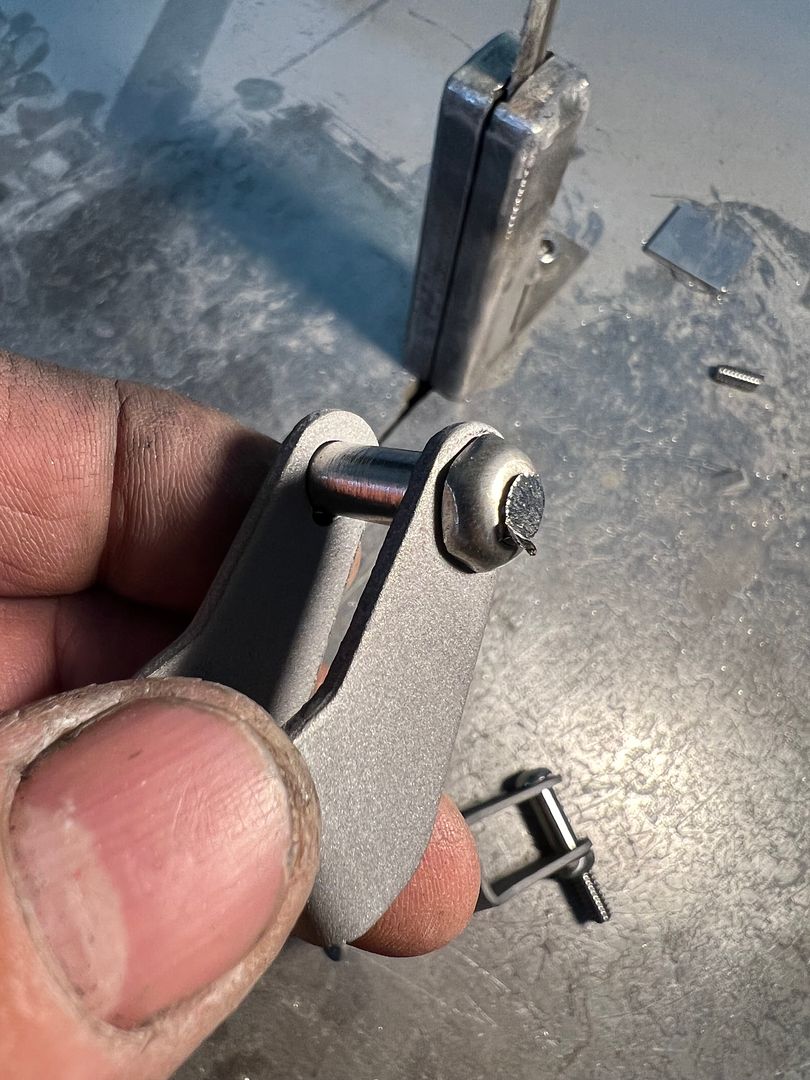 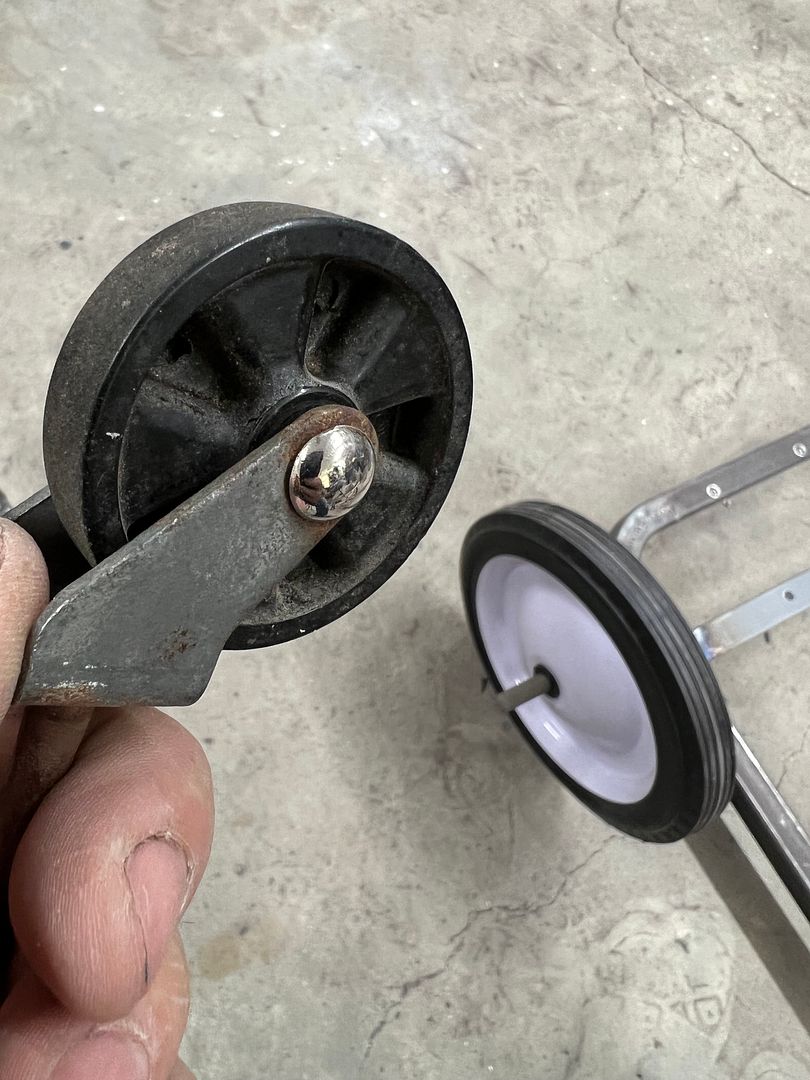 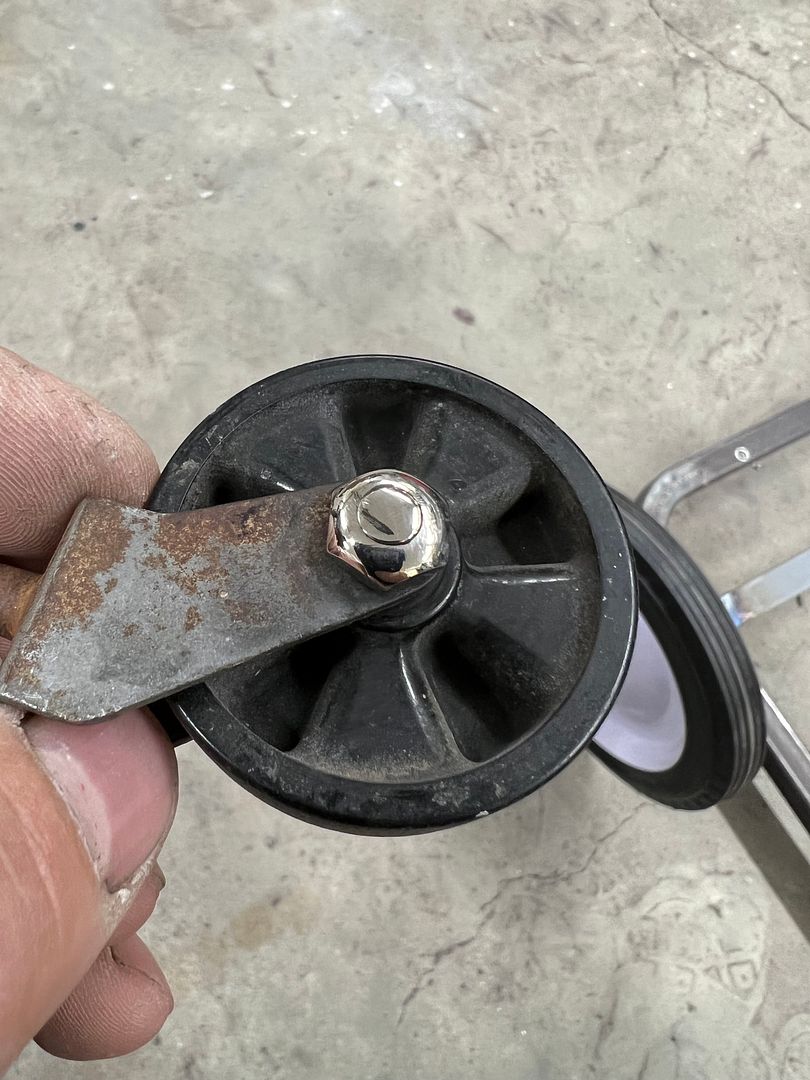
__________________
Robert |
|
|
|
|
07-14-2023, 07:49 AM
|
#1350 |
|
Registered User
Join Date: Jan 2013
Location: Leonardtown, MD
Posts: 1,633
|
Re: 55 Wagon Progress
We picked up the powder coated parts from The Shop at Shorty's, for reassembly we had ordered some replacement slotted oval head screws and square nuts in stainless so we could polish them up a bit for a bit of bling.
 And no job is complete without undergoing the close scrutiny of the quality control inspector... 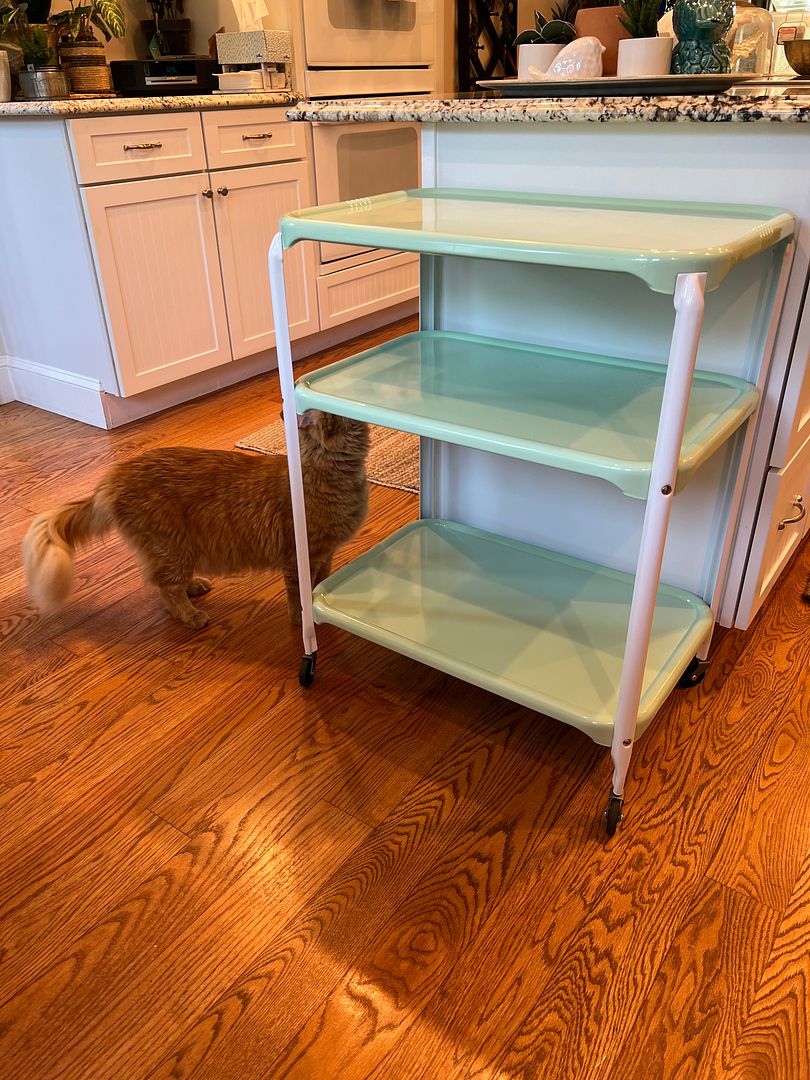 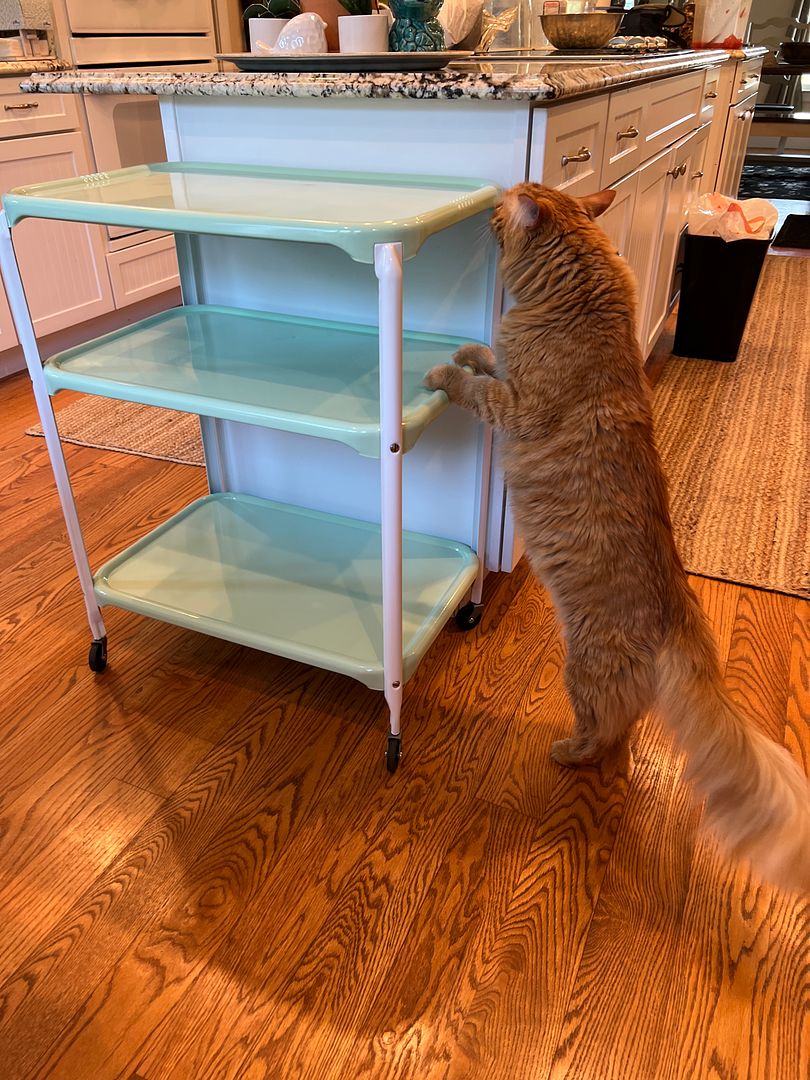 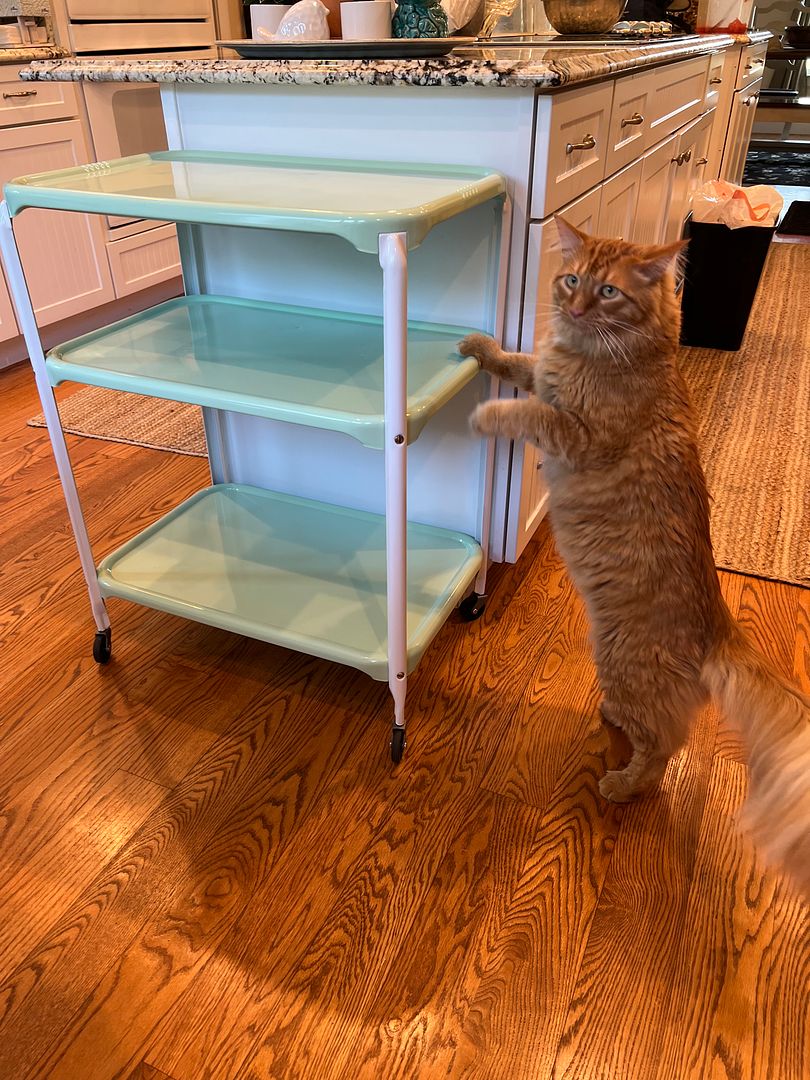
__________________
Robert |
|
|
|
 |
| Bookmarks |
|
|


 Linear Mode

