
|
 07-15-2011, 06:44 PM
|
#326 |
|
Registered User
Join Date: Nov 2008
Location: So. Cal.
Posts: 452
|
Re: Project "49 No Buck$"
Chuck, your engine compartment looks AMAZING!!!
__________________
It's all about the stance, baby! http://67-72chevytrucks.com/vboard/s...d.php?t=320546 |

|

|
|
07-15-2011, 08:51 PM
|
#327 | |
|
A320 Pilot/USAF Retired
Join Date: Mar 2009
Location: Charleston, SC
Posts: 2,622
|
Re: Project "49 No Buck$"
Quote:
__________________
JJ My 1957 build: http://67-72chevytrucks.com/vboard/s...d.php?t=334552 http://www.trifive.com/forums/showthread.php?t=22037 Instagram - Chuckdriver57 |
|
|
|
|
|
07-25-2011, 10:39 AM
|
#328 |
|
Registered User
Join Date: Nov 2008
Location: So. Cal.
Posts: 452
|
Re: Project "49 No Buck$"
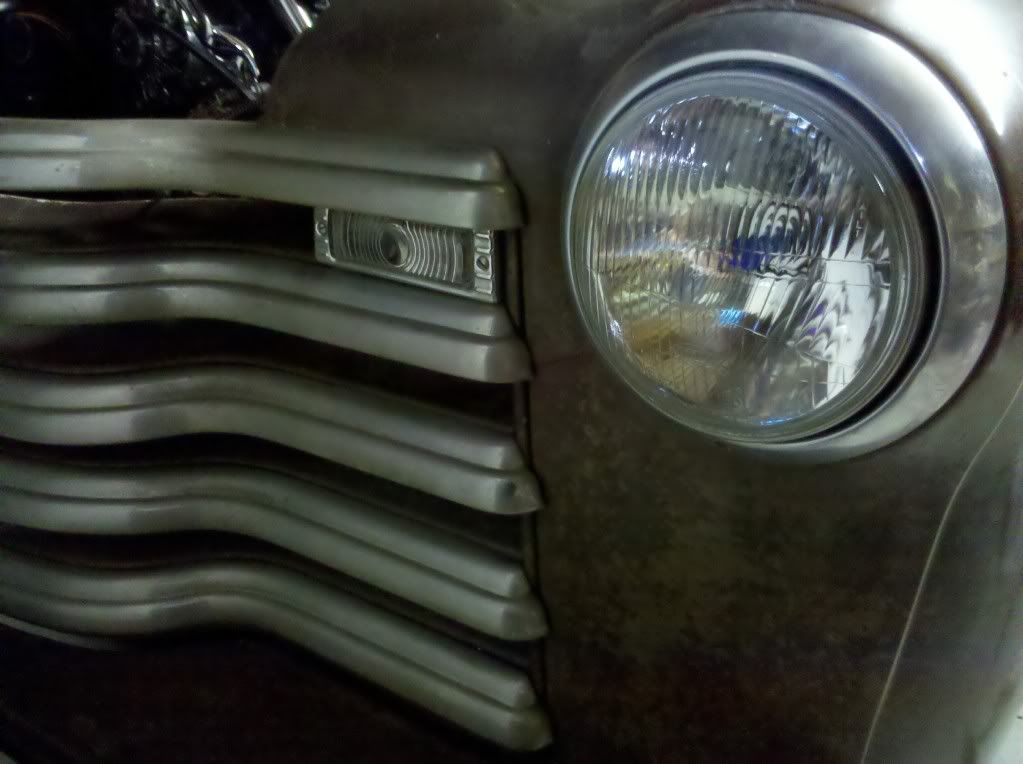
Went to Pick n Pull again this Sat. to look for some dumb little things (light pigtails, taillight brackets, etc.) and got one more thing crossed off my checklist! The front signals (or running lights, I'm not sure) on these trucks are just set up for just one of those things but not both. I found some old motorhome taillights that had a small 1157 style bulb bracket that I trimmed up and bolted inside of the stock truck light holder after I sandblasted it and painted it silver again
 I used amber bulbs because I thought they'd look cool with the stock clear lenses. Now the truck has running lights AND turn signals! Here's how they look in park mode I used amber bulbs because I thought they'd look cool with the stock clear lenses. Now the truck has running lights AND turn signals! Here's how they look in park mode 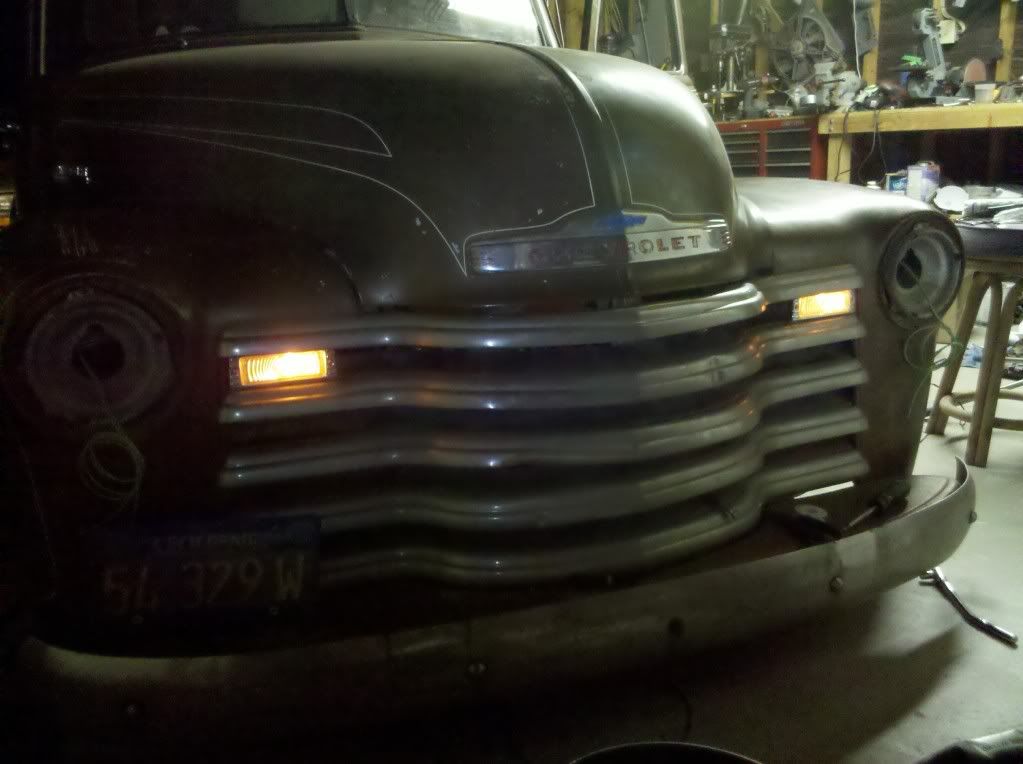
__________________
It's all about the stance, baby! http://67-72chevytrucks.com/vboard/s...d.php?t=320546 |
|
|
|
|
07-28-2011, 10:58 AM
|
#329 |
|
Registered User
Join Date: Aug 2007
Location: Corona, California
Posts: 7,998
|
Re: Project "49 No Buck$"
It's been a while since I've caught up on your thread. The truck is coming along great and sounds killer.
Kim |
|
|
|
|
08-15-2011, 12:30 PM
|
#330 |
|
Registered User
Join Date: Nov 2008
Location: So. Cal.
Posts: 452
|
Re: Project "49 No Buck$"
Well, I finally got the majority of the wiring done! It's pretty time consuming trying to do that stuff correctly, but I'm very happy. Hooked up power yesterday and EVERYTHING worked!! I'll be putting up pics shortly of the the engine stuff as soon as it's all finished. It looks pretty cool and it's almost all wrapped up. Sorry, but you'll have to wait until the interior is finished before I show anything else, 'cuz I have too many little things that just need to be shown together once it's all done! Yesterday morning Alex and myself ran down to the Pomona Swap Meet to look for a few things (namely my Cal Custom window cranks that I still can't find) but had a good time anyways. Found some H4 halogen headlights with motorcycle bulbs (I've always been a believer in H4's) so now driving at night will not be an issue 'cuz they're soooo bright!
 Now here's something that's not much for the technical aspect, but I thought it was cool. I was originally going to paint the center of my gas and high beam pedals red to go more with the interior. My friend Bobby told me I should somehow do them red metalflake so they match the shifter and signal knobs...Great idea! Here they are when I started Now here's something that's not much for the technical aspect, but I thought it was cool. I was originally going to paint the center of my gas and high beam pedals red to go more with the interior. My friend Bobby told me I should somehow do them red metalflake so they match the shifter and signal knobs...Great idea! Here they are when I started 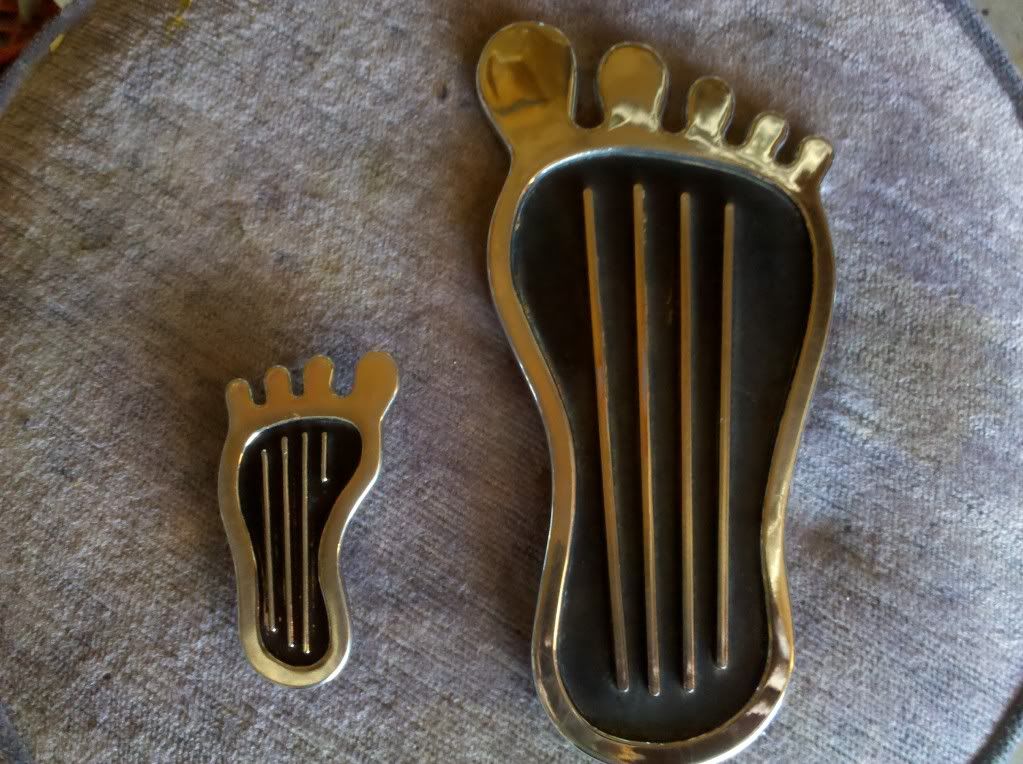 I then went to Michaels art supply and grabbed a tube of red glitter for $1.29 and drug out some fiberglass resin. I then went to Michaels art supply and grabbed a tube of red glitter for $1.29 and drug out some fiberglass resin.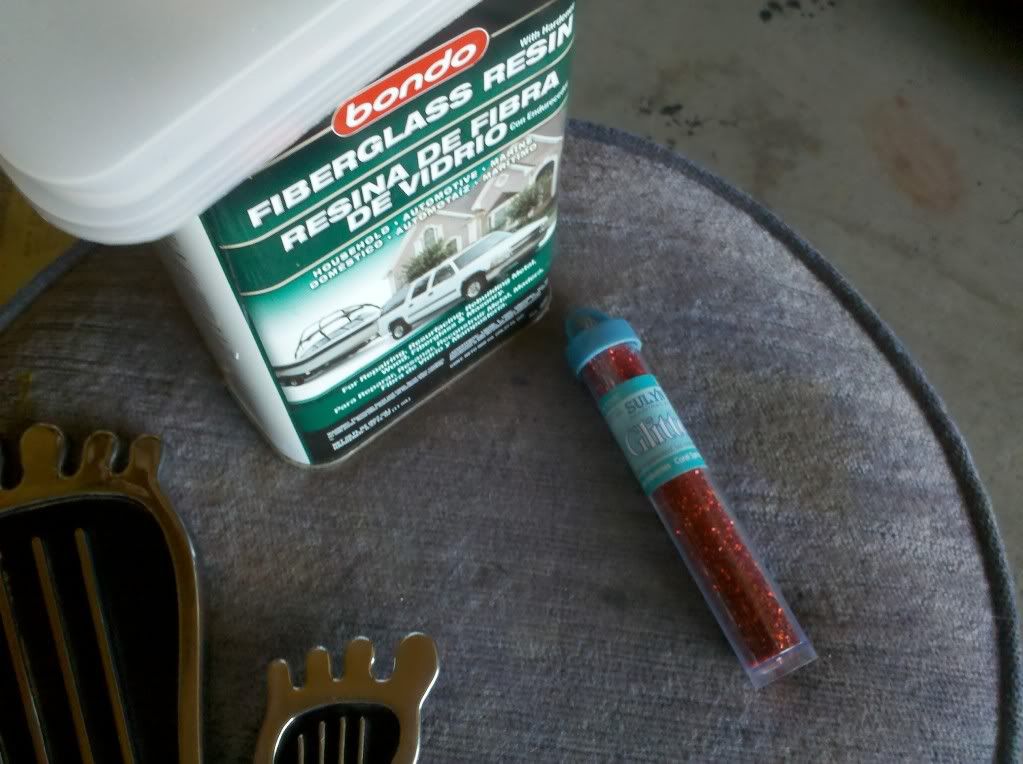 After cleaning the them up, I mixed up some resin, poured it into the feet and spread it around evenly with a toothpick. I set them on some paper and sprinkled glitter on them until they were covered evenly. After the resin kicked off I shook the excess glitter off and covered the remaining glitter with more resin to seal it up. Here they are After cleaning the them up, I mixed up some resin, poured it into the feet and spread it around evenly with a toothpick. I set them on some paper and sprinkled glitter on them until they were covered evenly. After the resin kicked off I shook the excess glitter off and covered the remaining glitter with more resin to seal it up. Here they are 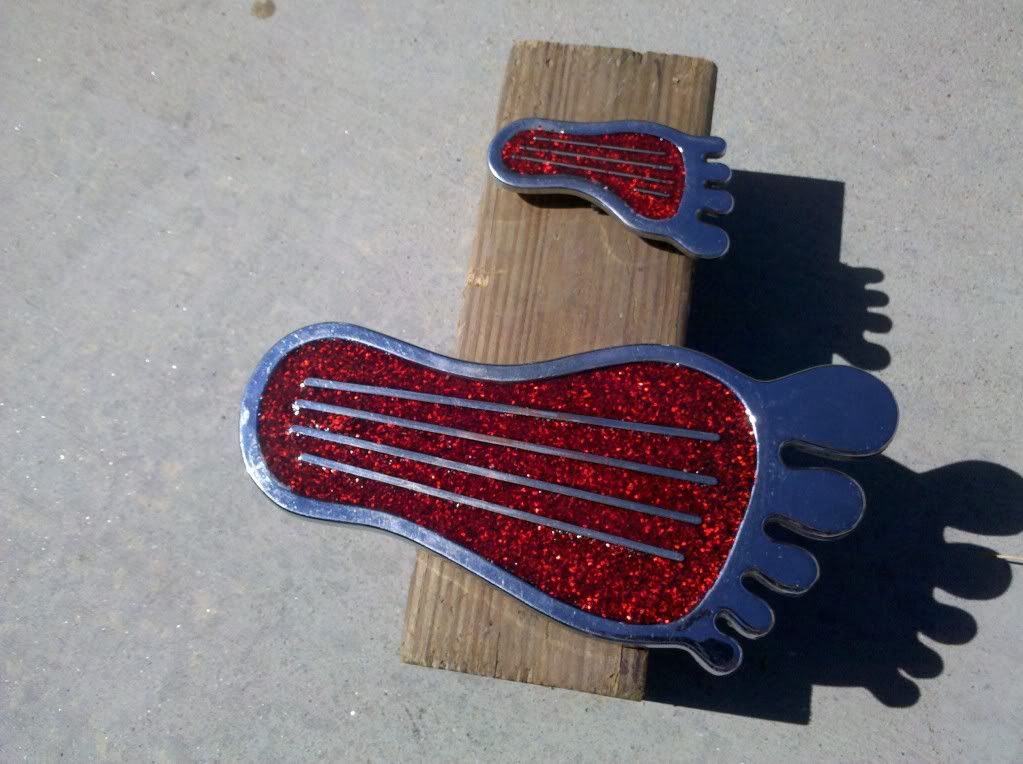 I need to clean them all up, but I think they look awesome and really match the other stuff! I need to clean them all up, but I think they look awesome and really match the other stuff!
__________________
It's all about the stance, baby! http://67-72chevytrucks.com/vboard/s...d.php?t=320546 |
|
|
|
|
08-15-2011, 12:59 PM
|
#331 |
|
VA72C10
 Join Date: Mar 2008
Location: Midlothian, VA
Posts: 25,269
|
Re: Project "49 No Buck$"
Those look awesome!!! Nice job!
__________________
Looking for a 67-72 swb or blazer project in or around VA. 
|
|
|
|
|
08-15-2011, 03:09 PM
|
#332 |
|
Registered User
Join Date: Aug 2007
Location: Corona, California
Posts: 7,998
|
Re: Project "49 No Buck$"
The feet look slick.
Kim |
|
|
|
|
08-15-2011, 03:46 PM
|
#333 |
|
Registered User
Join Date: Nov 2010
Location: SoCal
Posts: 914
|
Re: Project "49 No Buck$"
WOW that is such a kool idea, I really like that.
__________________
I'm not tail-gating, I'm drafting.  http://67-72chevytrucks.com/vboard/s...d.php?t=432758 |
|
|
|
|
08-15-2011, 03:54 PM
|
#334 |
|
Registered User
Join Date: Nov 2010
Location: SoCal
Posts: 914
|
Re: Project "49 No Buck$"
sorry about double post, site must have a hicup
__________________
I'm not tail-gating, I'm drafting. http://67-72chevytrucks.com/vboard/s...d.php?t=432758 |
|
|
|
|
08-22-2011, 01:27 PM
|
#335 |
|
Registered User
Join Date: Nov 2008
Location: So. Cal.
Posts: 452
|
Re: Project "49 No Buck$"
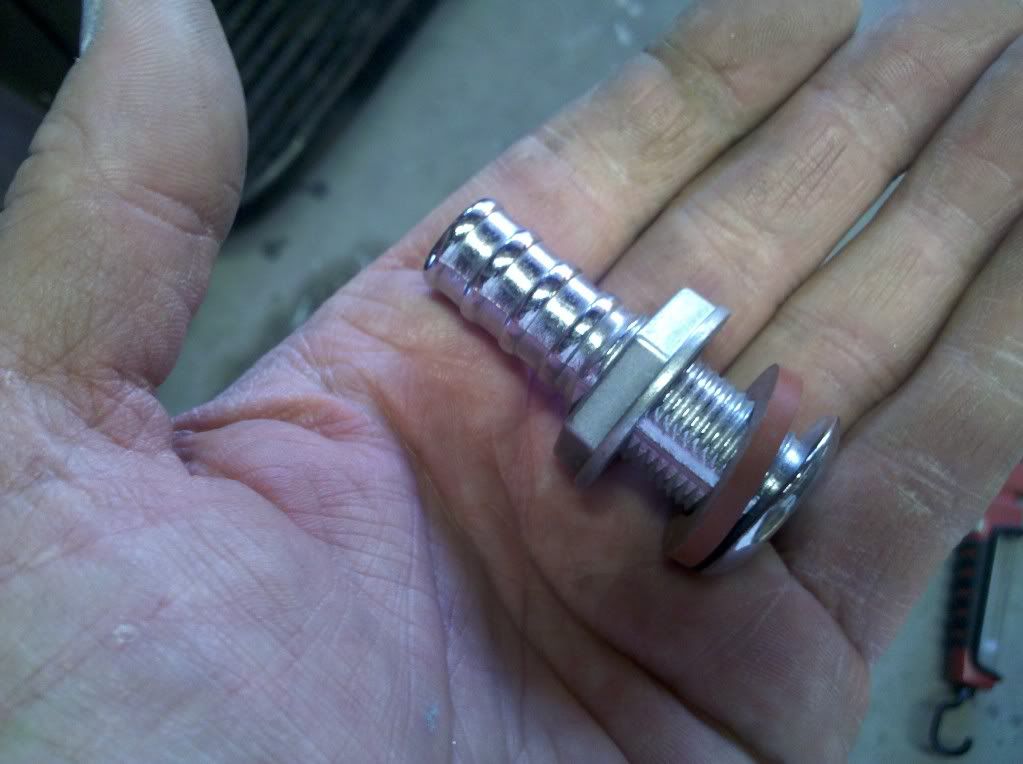
Now I did this next deal to keep the engine clean and free of oil leakage/fumes from the front filler spout. I wanted a PCV type setup, but it had to look almost non-existent. I picked up 2 sizes of bilge pump boat drains. One was 1/2" the other 3/8" for this project. Here's the 1/2" size
 and then mocked up (it was removed, blasted and painted black) in the drivers side valve cover and then mocked up (it was removed, blasted and painted black) in the drivers side valve cover 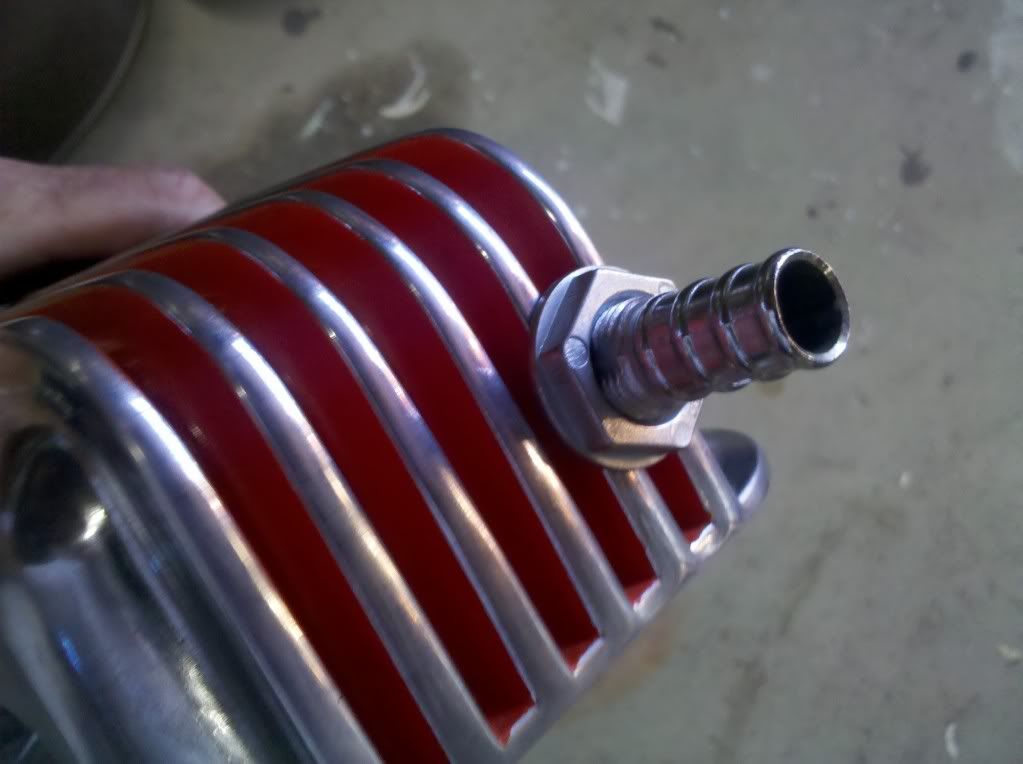 I found a piece of 1/2" vacuum hose at the wrecking yard that had a 180 degree loop I found a piece of 1/2" vacuum hose at the wrecking yard that had a 180 degree loop 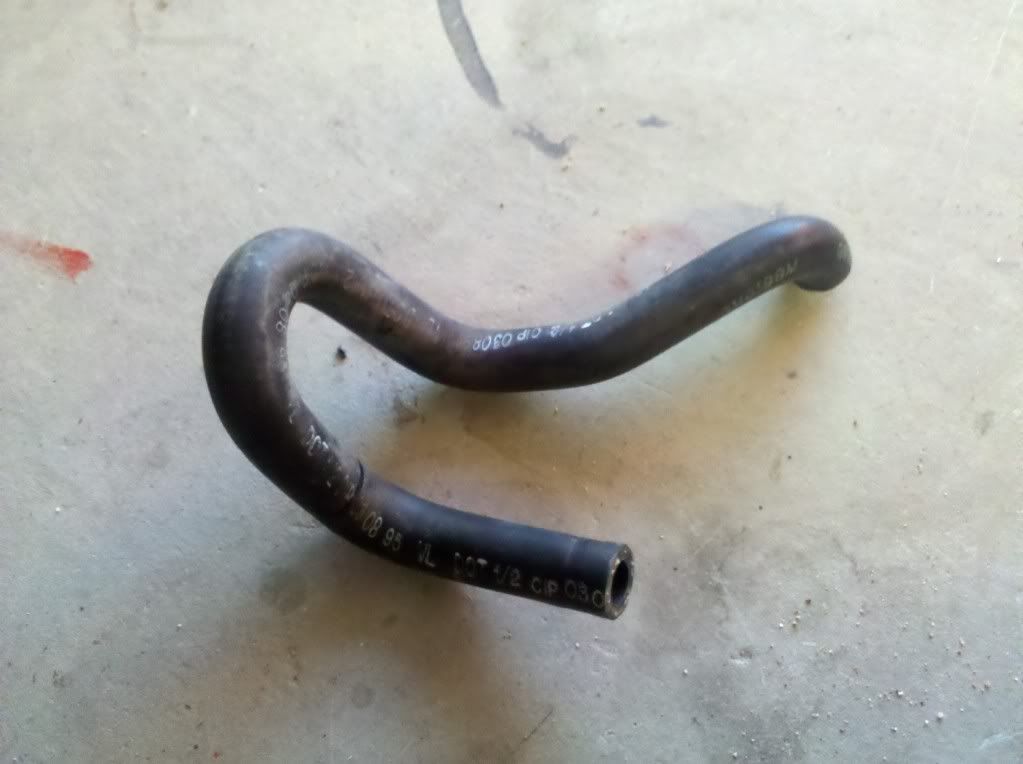 that I cut out to use on the drivers side. I then bent up a piece of 1/2" tubing to go from the back of the valve cover to the bottom of the air cleaner that I cut out to use on the drivers side. I then bent up a piece of 1/2" tubing to go from the back of the valve cover to the bottom of the air cleaner 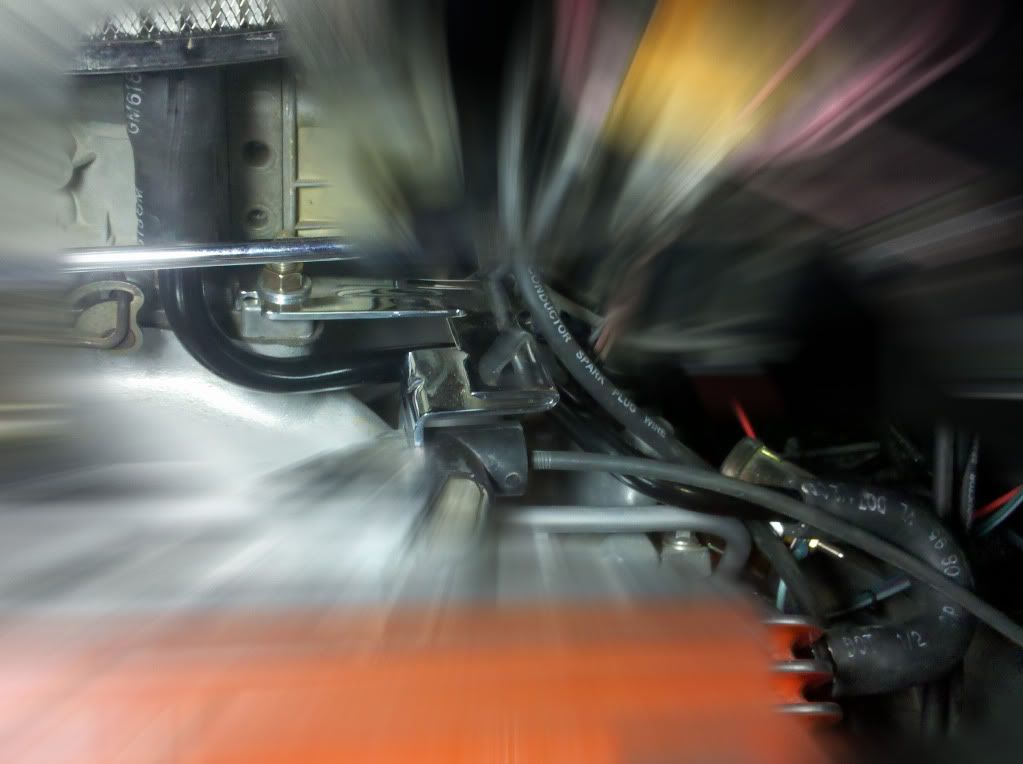 I blurred everything so you could actually see the tubing and hoses put together. On the passenger side I put the 3/8" drain in the valve cover (again painted black) and ran the hose to an inline PCV valve and hooked it to the back of the carb. I blurred everything so you could actually see the tubing and hoses put together. On the passenger side I put the 3/8" drain in the valve cover (again painted black) and ran the hose to an inline PCV valve and hooked it to the back of the carb. 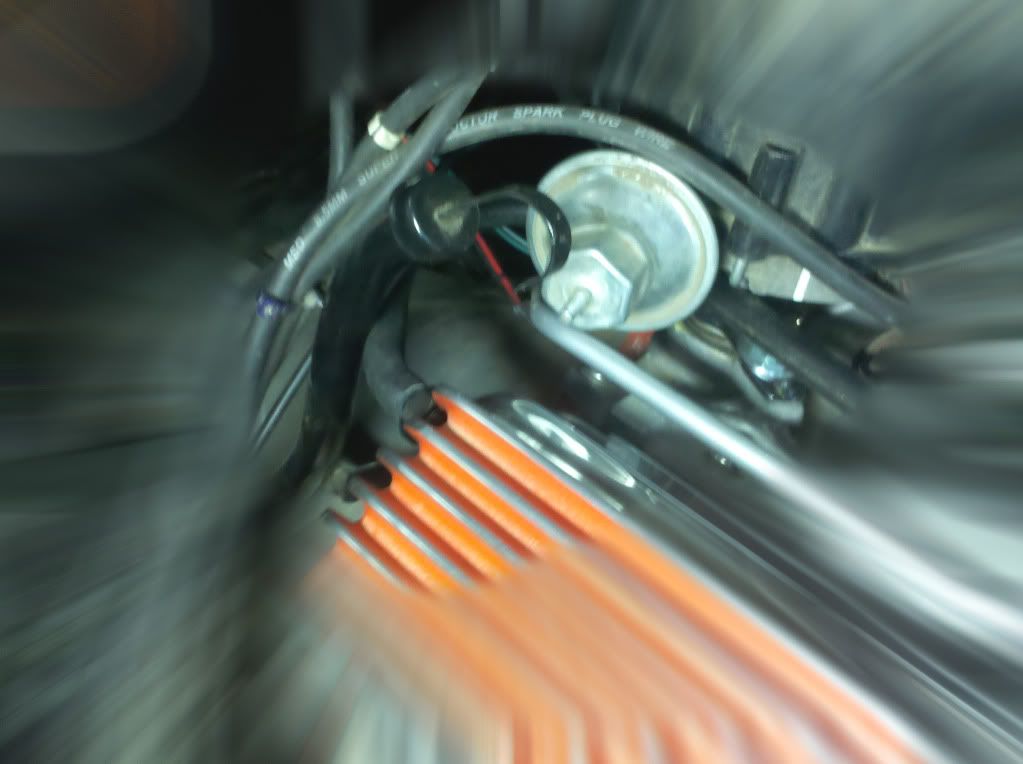 I used a 1 3/8" expander plug, welded it to a washer and nut and tack welded that to the backside of the oil breather I used a 1 3/8" expander plug, welded it to a washer and nut and tack welded that to the backside of the oil breather 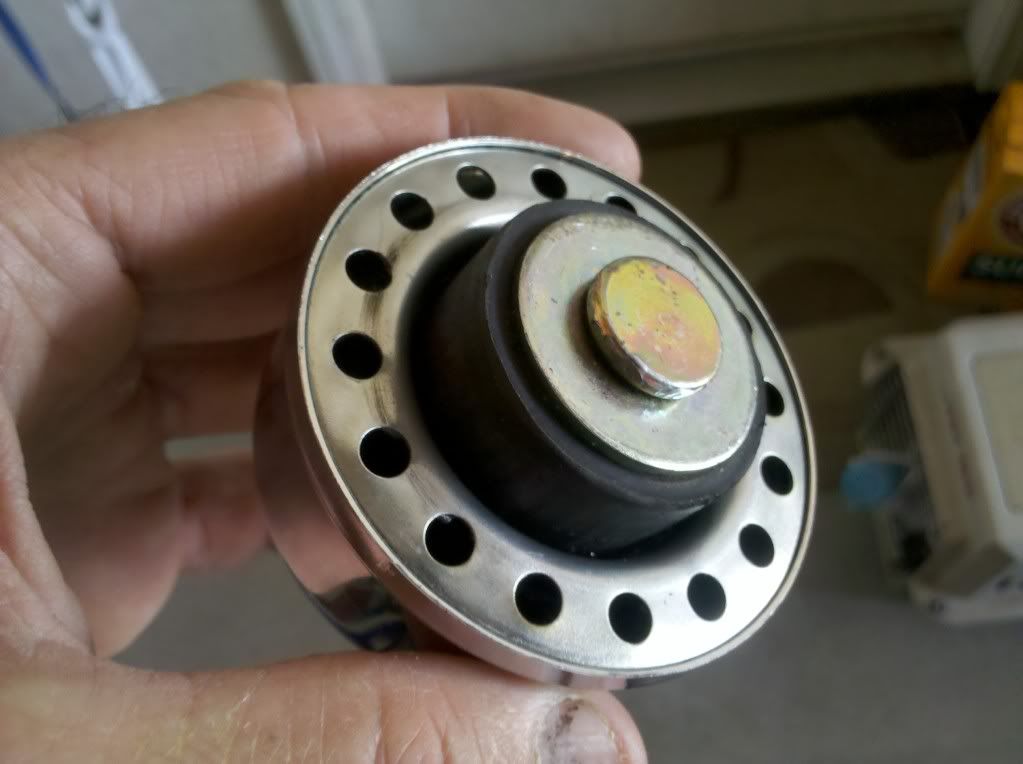 so now engine vacuum is keeping the mess to a minimum and pulling nice clean air from the air cleaner! so now engine vacuum is keeping the mess to a minimum and pulling nice clean air from the air cleaner!
__________________
It's all about the stance, baby! http://67-72chevytrucks.com/vboard/s...d.php?t=320546 Last edited by kustombrad; 08-22-2011 at 01:49 PM. |
|
|
|
|
08-22-2011, 02:02 PM
|
#336 |
|
Registered User
Join Date: Nov 2008
Location: So. Cal.
Posts: 452
|
Re: Project "49 No Buck$"
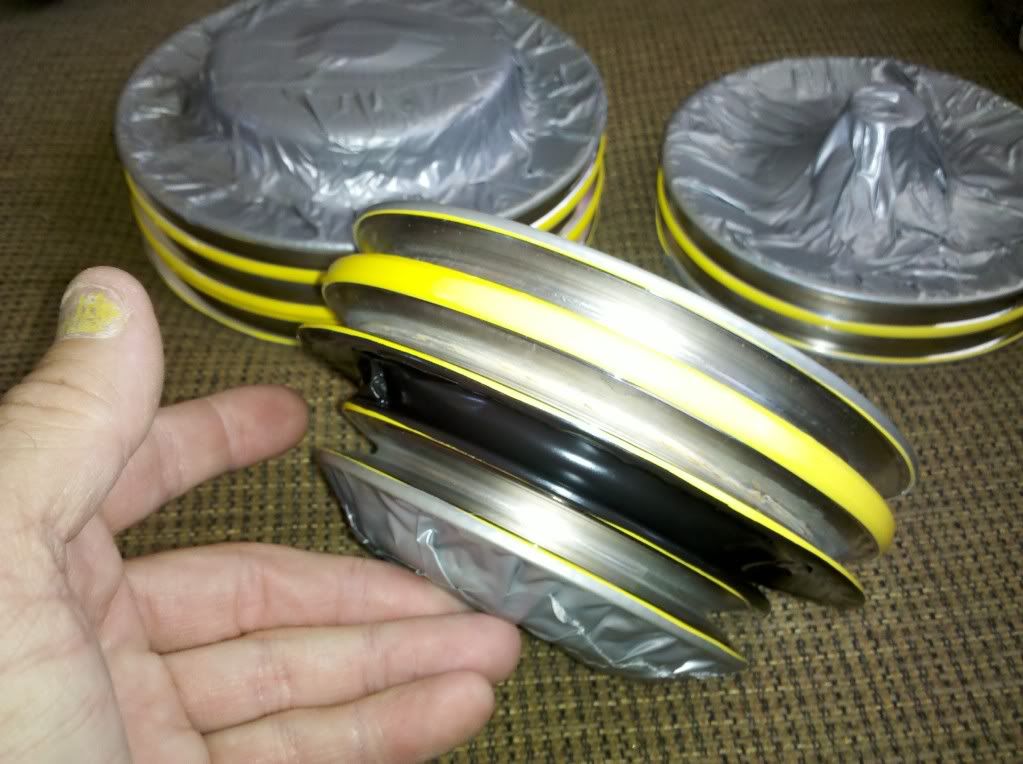
I also scored a few ORIGINAL (circa 1970) metal latch Stant radiator caps!
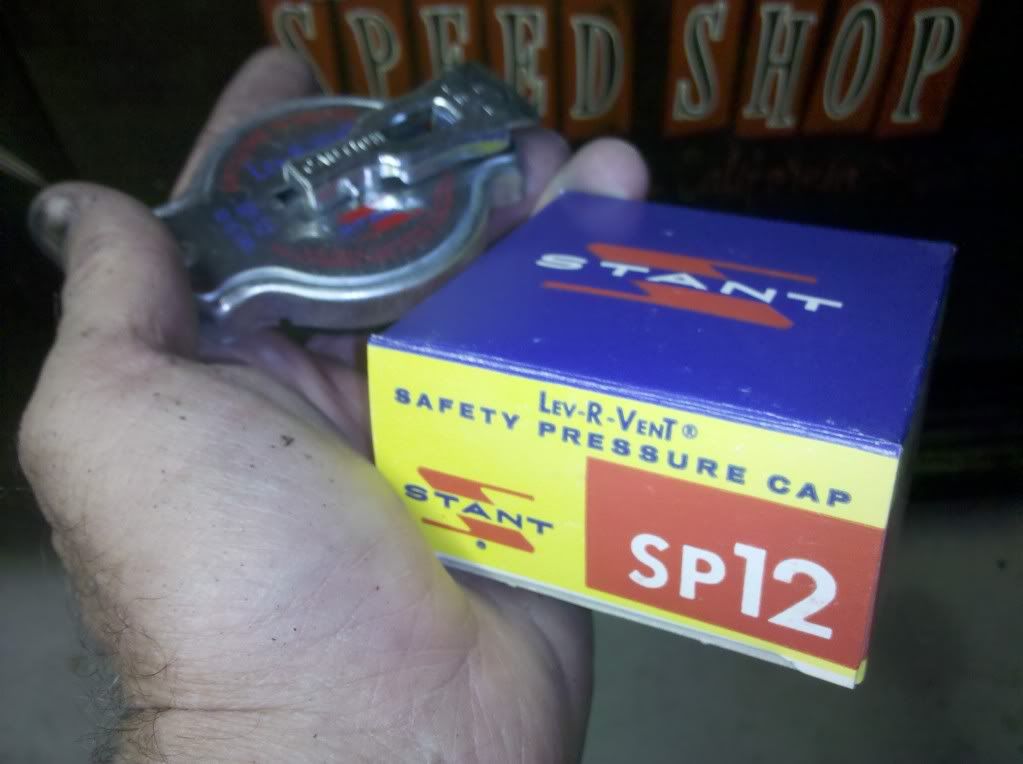 So far on this build I've only used a handfull of late model parts (NO BILLET ANYTHING!) and kept with the whole late 60's early 70's vibe (just lower!) So far on this build I've only used a handfull of late model parts (NO BILLET ANYTHING!) and kept with the whole late 60's early 70's vibe (just lower!)
__________________
It's all about the stance, baby! http://67-72chevytrucks.com/vboard/s...d.php?t=320546 |
|
|
|
|
08-22-2011, 05:26 PM
|
#337 |
|
Registered User
Join Date: Nov 2008
Location: 30277
Posts: 31
|
Re: Project "49 No Buck$"
Cool! Neat project you got going here!
|
|
|
|
|
08-23-2011, 10:44 AM
|
#338 |
|
Registered User
Join Date: Dec 2002
Location: Cactus Patch So. Az
Posts: 4,749
|
Re: Project "49 No Buck$"
Thanks for the great idea Brad, now I can drill holes in my Corvette valve covers, and not too big of holes and try and hide them
__________________
53 TuTone Extended Cab 350 4-Spd 3:08 (SOLD) 53 Chevy Moldy pearl green ZZ-4 4L60E 9" 3:25 55 GMC 1st Black Mll (ZZ4) ZZ6 TKO 600 5 sp 3:73 62 Solidaxle Corvette Roman Red (327 340hp 4spd 3:36) C4 & C5 suspension tube chassis LS 3 4L70E 65 Corvette Coupe 327 350hp 4spd 4:11 78 Black Silverado SWB (350/350) 5.3 & 4L60E 3:42 2000 S-Type 3.0 (wife cruiser) 2003 GMC SCSB 5.3 4L60E 3:42 |
|
|
|
|
09-02-2011, 10:08 AM
|
#339 |
|
Registered User
Join Date: Jul 2011
Location: bush louisiana
Posts: 213
|
Re: Project "49 No Buck$"
i also built a 1949 truck on the cheap. 1981 malibu car for sub frame 100 dollars, 1973 camaro rearend 100 dollars,1988 astro van(4.3 v6 700r4 master cylinder drive shaft(exact fit) an variuos other parts) 300 dollars. an i did use the shock towers to square off every thing an it workd perfectly, truck drives strait an true. i welded mine in just about the same way
|
|
|
|
|
09-04-2011, 05:49 PM
|
#340 |
|
Registered User
Join Date: Jul 2011
Location: bush louisiana
Posts: 213
|
Re: Project "49 No Buck$"
ide like to use your idea on the speaker face. if you dont mind can u show more pics on that an how it looks now please, rite now my radio is in the glovebox.it looks like enough room for the radio,tempgauge,an my air compressor switch for my train horns, dam good idea how did u come up with it
|
|
|
|
|
09-07-2011, 12:04 PM
|
#341 |
|
Registered User
Join Date: Nov 2008
Location: So. Cal.
Posts: 452
|
Re: Project "49 No Buck$"
Thanks for the compliments on the dash door! I'm getting ready for stereo install shortly and I'll post pics of how I'll do it. Here's the engine compartment and what I've been working on lately. I've never been a fan of guys doing the traditional hot rod look and then bolting a big, ugly polished AC compressor on TOP of everything to kill the whole look. I went after mine a little different as you'll notice. I had a chrome guy owe me a favor from awhile back, so I used that up on my truck. The pulleys, mounts, linkages and brackets I had done all shiny to give the underhood a little flair! Be sure to lightly sandblast the belt area or they will squeal!
 When I built the brackets for the AC, I wanted it out of the way and low key, so at first glance it wouldn't be noticed which is why I painted everything black! The compressor is late 80's Chevy Sprint/Geo When I built the brackets for the AC, I wanted it out of the way and low key, so at first glance it wouldn't be noticed which is why I painted everything black! The compressor is late 80's Chevy Sprint/Geo 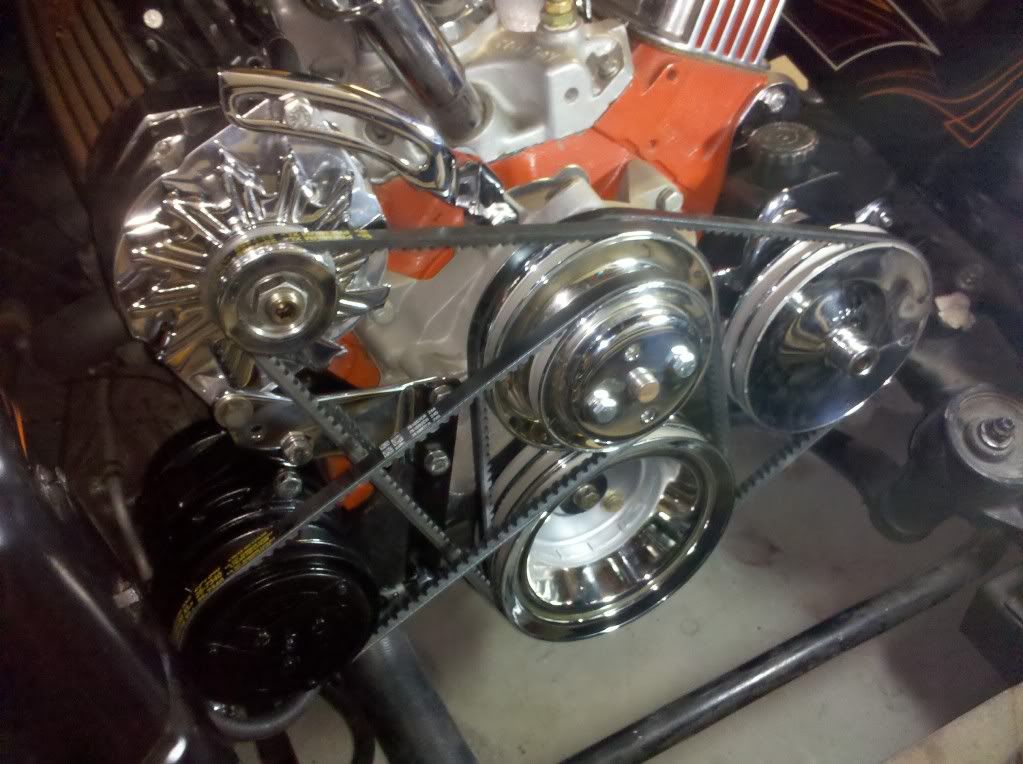 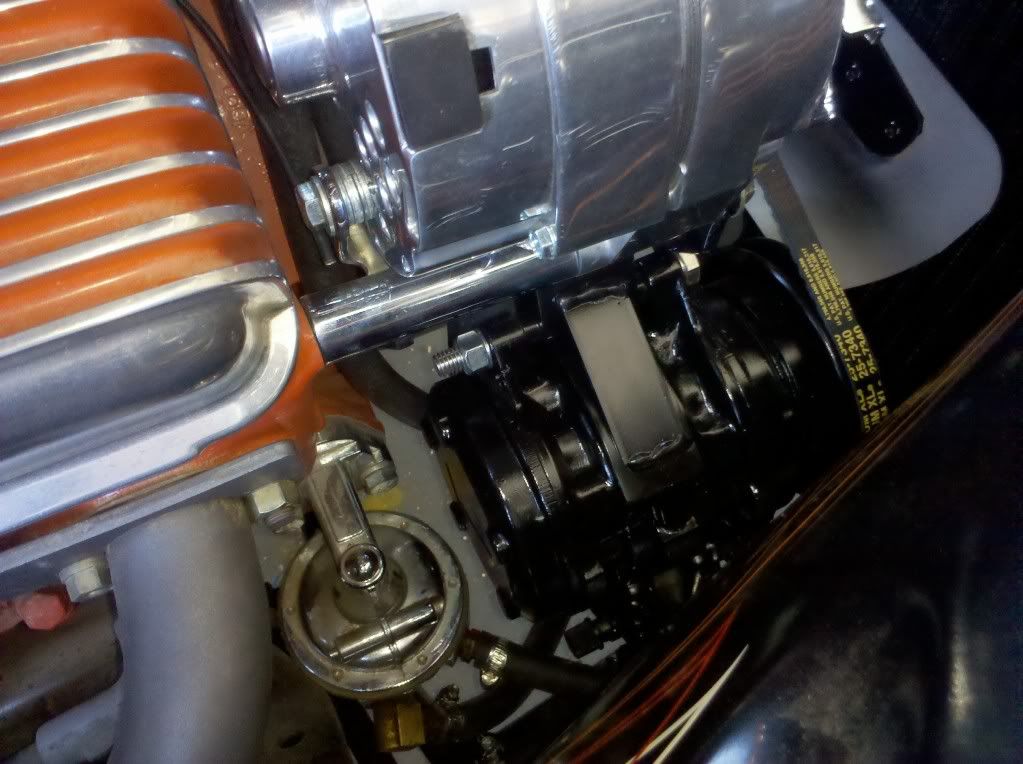 The hoses will be run up in the inner fenders and out of sight. I ended up running a flex fan (my fault for not sliding the engine back another inch) because I didn't have enough room for a clutch fan! Bummer! Radiator and hoses are mounted, just need to finish the shroud. The hoses will be run up in the inner fenders and out of sight. I ended up running a flex fan (my fault for not sliding the engine back another inch) because I didn't have enough room for a clutch fan! Bummer! Radiator and hoses are mounted, just need to finish the shroud.  Now I just need to finish up the interior! Now I just need to finish up the interior!
__________________
It's all about the stance, baby! http://67-72chevytrucks.com/vboard/s...d.php?t=320546 |
|
|
|
|
09-07-2011, 12:56 PM
|
#342 |
|
Registered User
Join Date: Jan 2010
Location: Titusville, PA
Posts: 3,585
|
Re: Project "49 No Buck$"
I'm def feeling the ac compressor mounting below the alt like that. Def looks more clean and traditional.
__________________
51' 99toLife finished 2011,355 sbc,5speed, patina, redoing whole truck, inter, bags, etc http://67-72chevytrucks.com/vboard/s...d.php?t=382481 49Hardtimes s/10 susp- bagged, vortec sbc, 5 speed, patina, sold http://67-72chevytrucks.com/vboard/s...d.php?t=594874 VIDEOS https://youtu.be/E8zHhjgS_lA https://youtu.be/E8zHhjgS_lA Geronimo 54' LS engine, static drop IFS, Client build, just about done http://67-72chevytrucks.com/vboard/s...62#post7399162 52' 3100 Slowly in progress, will be painted two toned, have 235 with a t-5, lowered OG frame Other projects, 49' farmuse 3100, killer Patina, will be slammed, LS engine, full done interior up next! www.coffeeandcustoms.com |
|
|
|
|
09-07-2011, 01:44 PM
|
#343 |
|
Registered User
Join Date: Sep 2009
Location: Monroe,Iowa
Posts: 4,370
|
Re: Project "49 No Buck$"
WOW!!! What a thread,Love what your doing and how you do it
|
|
|
|
|
09-07-2011, 04:18 PM
|
#344 |
|
Registered User
Join Date: Aug 2007
Location: Corona, California
Posts: 7,998
|
Re: Project "49 No Buck$"
The engine is looking nice.
Kim |
|
|
|
|
09-08-2011, 01:24 AM
|
#345 |
|
Registered User
Join Date: Nov 2008
Location: So. Cal.
Posts: 452
|
Re: Project "49 No Buck$"
Had to find a cool horn for this thing, but all my plans just didn't seem to fall into place. Walking around "Pick and Plunder" the other day, I decided to grab a late 60's VW Bug horn!
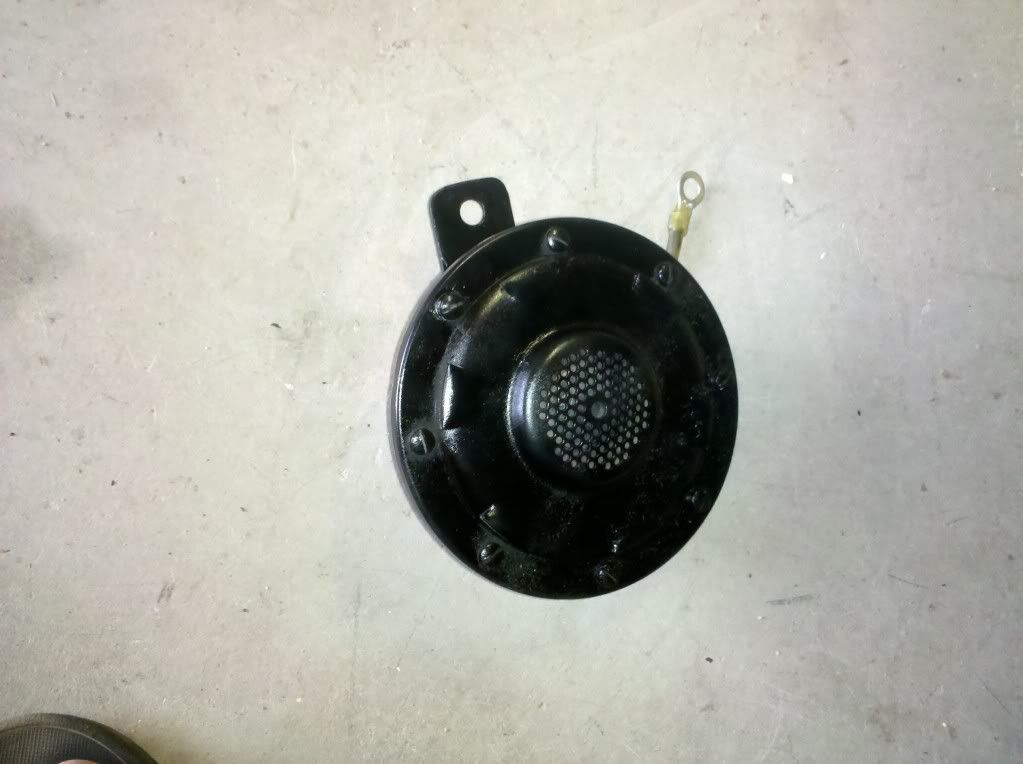 It's too cool and has that great annoying sound that makes you cringe! It fits right in front of the radiator perfectly. It's too cool and has that great annoying sound that makes you cringe! It fits right in front of the radiator perfectly. 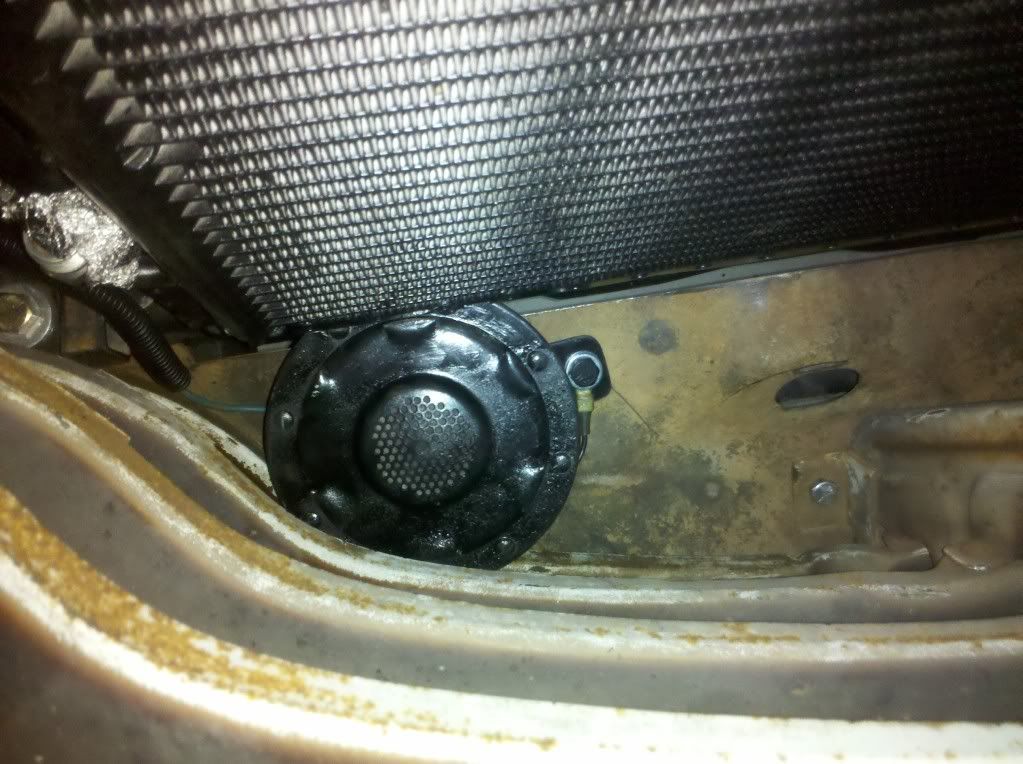 I love it!!! I love it!!!
__________________
It's all about the stance, baby! http://67-72chevytrucks.com/vboard/s...d.php?t=320546 |
|
|
|
|
09-14-2011, 11:45 AM
|
#346 |
|
Registered User
Join Date: Nov 2008
Location: So. Cal.
Posts: 452
|
Re: Project "49 No Buck$"
Finally, I'm done with the engine and wiring stuff and now working on the interior! Was kind of cool turning the key and actually turning the motor over! It's getting closer to being a driver! Here's something else I figured I'd share with the group... taillight bulbs. I know it's not a huge thing, but since I tried some stuff out I had to share. I wanted to try some LED taillight bulbs since thats the rage anymore. The first set I bought (these were all from Ebay) were the 12 bulbs, straight bulbs. The next set were the 39(!) bulb all around type.
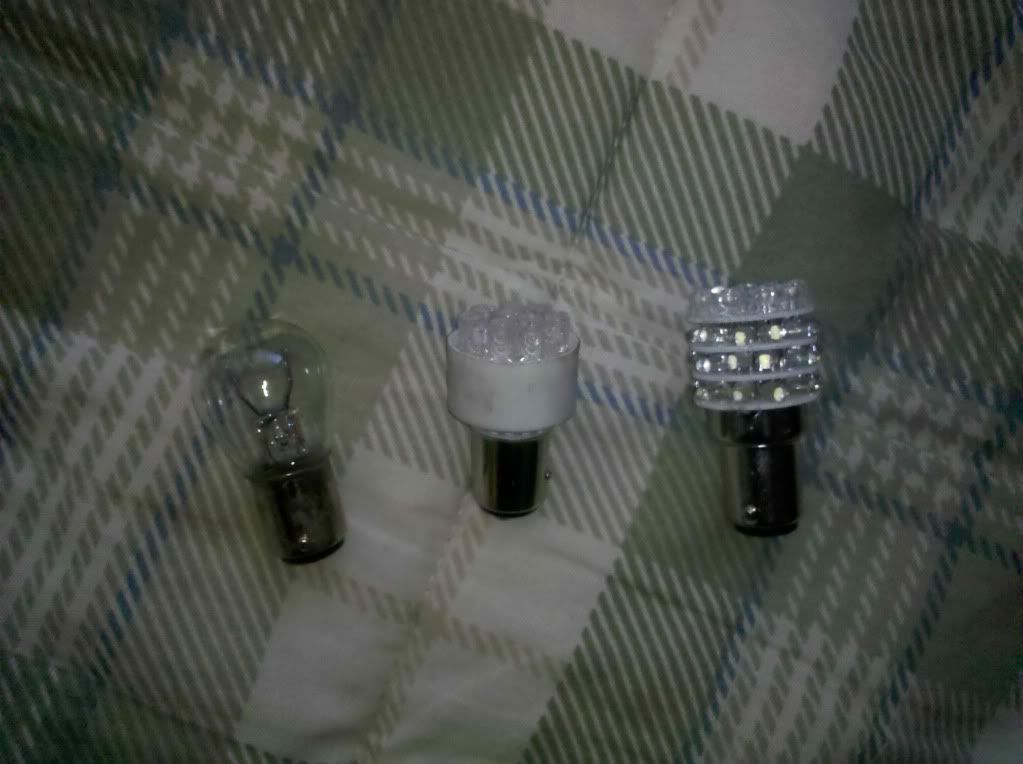 So, after messing around with both types of LED's, I ended up using the standard 1157 bulbs because they are WAY brighter! The LED's were pretty weak for all the hype they get and I wanted bright. We're told the old bulbs aren't as efficient as the others, but that's what alternators are for... So, after messing around with both types of LED's, I ended up using the standard 1157 bulbs because they are WAY brighter! The LED's were pretty weak for all the hype they get and I wanted bright. We're told the old bulbs aren't as efficient as the others, but that's what alternators are for...
__________________
It's all about the stance, baby! http://67-72chevytrucks.com/vboard/s...d.php?t=320546 |
|
|
|
|
09-14-2011, 12:20 PM
|
#347 |
|
Registered User
Join Date: Jun 2006
Location: Idaho
Posts: 8,800
|
Re: Project "49 No Buck$"
Good to know on the leds, I had heard that looking from straight back they were ok, but no side or reflective dispursement. When I run standard filament bulbs I upgraded to the 2056 and 2057, same socket, a little brighter.
Are you going to post the throttle bearing deal?? And did you get a look at the trim photos I emailed?
__________________
1959 Chevy Short Fleetside w/ 74 4WD drive train (current project) OrrieG Build Thread 1964 Chevelle Malibu w/ 355-350TH (daily driver) Helpful AD and TF Manual Site Old Car Manual Project |
|
|
|
|
09-14-2011, 01:00 PM
|
#348 |
|
Registered User
Join Date: Jul 2009
Location: Minneapolis
Posts: 97
|
Re: Project "49 No Buck$"
Having done this sort of thing numerous times, I can tell you from experience that it is VERY dependant on the actual LED (Light Emitting Diode) used.
There are variations, even within the voltage (like High Intensity, etc) and even more variations in voltage (crazy... like increments of tenths of volts or less all through volts - ie, 10, 10.1, 10.2, 10.3 .... so on) It is likely that they may have used 12.somethings or low intensity LED's I have replaced countless bulbs with LED's in low voltage settings (Mostly in pro audio equipment where bulbs introduce noise in a signal chain) I've always had good experience with swapping to LED's, and in my experience they are brighter. These bulbs, on 12v, should be far dimmer than even ONE PAIR of SMALL HIGH INTENSITY LED'S I am going to be making indicator bulbs all around for mine, soldering LED's to bulb 'buckets' .... I guess I'll have to post a thread  Should be noted though, that you may need to swap flashers to different amperage when using LED's Just thought I'd share my experience. If you want LED's, Don't give up. You can make em for dirt cheap and some time if you can solder. Radio Shack even has LED's, though I wouldn't recomment their selection. Check your local electronic suppliers. |
|
|
|
|
09-18-2011, 07:29 PM
|
#349 | |
|
Registered User
Join Date: Dec 2002
Location: Cactus Patch So. Az
Posts: 4,749
|
Re: Project "49 No Buck$"
Quote:
and the cost & time to produce
__________________
53 TuTone Extended Cab 350 4-Spd 3:08 (SOLD) 53 Chevy Moldy pearl green ZZ-4 4L60E 9" 3:25 55 GMC 1st Black Mll (ZZ4) ZZ6 TKO 600 5 sp 3:73 62 Solidaxle Corvette Roman Red (327 340hp 4spd 3:36) C4 & C5 suspension tube chassis LS 3 4L70E 65 Corvette Coupe 327 350hp 4spd 4:11 78 Black Silverado SWB (350/350) 5.3 & 4L60E 3:42 2000 S-Type 3.0 (wife cruiser) 2003 GMC SCSB 5.3 4L60E 3:42 |
|
|
|
|
|
09-18-2011, 08:12 PM
|
#350 |
|
Registered User
Join Date: Jul 2009
Location: Minneapolis
Posts: 97
|
Re: Project "49 No Buck$"
Funny
Here's what I just finished about an hour ago $36 7" light housings with H4's, LED halo, and indicator bulb. Cheap chinese made deals. The LED halo and bulb come blue. I separated the lens from the housing, removed the blue LED's and wiring I picked up some cheap orange LED's today for 25 CENTS each I put 4 in each one. I got a standard intensity led, 3V each, used 4 wired in series in each housing. Here's how they look... The ring will be more of a ring at night. But you can clearly see the position of the LED's in 4 places Click image to watch em flash, 5 second video clip 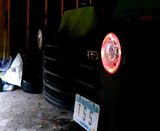
|
|
|
|
 |
| Bookmarks |
|
|


 Linear Mode

