
|
 05-20-2014, 09:53 AM
|
#601 | ||
|
Registered User
 Join Date: Mar 2005
Location: apple valley, ca
Posts: 2,670
|
Re: Project '64 Cheapskate
Quote:
Unfortunately, it won't be ready for Brother's this year. I still need to do all of the brake and fuel lines and do the wiring kit. Plus, I want to get all of the lettering on it before I get it on the road. Did you get your rear suspension sorted out? Are you going to Brother's? Quote:
__________________
Check out my latest endeavor: https://roundsixpod.com My build threads: '55 Chevy: http://67-72chevytrucks.com/vboard/s...d.php?t=247512 '64 C-20: http://67-72chevytrucks.com/vboard/s...d.php?t=446527 |
||

|

|
|
05-20-2014, 10:24 AM
|
#602 |
|
Registered User
Join Date: Apr 2003
Location: Indep, MO
Posts: 5,893
|
Re: Project '64 Cheapskate
The footer is the 16" wide x 4-6" thick separately poured ring at the bottom that the basement walls sit on. Dug the entire back and one side 8' deep all the way to the bottom x 3' wide. Grading was bad, trapping water with no gravel or drainage on the back and clay soil, which would expand and squeeze the house. Water would come UP through the window wells and go in the basement windows. Back wall was split horizontally and pushed in 2" at the worst spot. No one would touch it and the only estimate I got was 20k. Called an engineer friend for analysis/plans (2 cases of CL) and called the redneck friends and did it all myself for 2200 ish. It was kinda fun, actually. Everyone thought I was nuts. Ha, I win.
Ah, better understanding of your deal. Duuuuude, that sucks. Really, I'm sorry. Does it get cold enough in the high desert for the lines in the attic to be a problem, esp in Pex? Hmmrm... Well, at least you got 'er staved off for now. I 'bleve I'd carpet them bathrooms!
__________________
Boppa's Old Yeller Truck Build, Old Yeller's New Heart! Project Buzz Bomb Flyin' Low! |
|
|
|
|
05-20-2014, 11:15 AM
|
#603 |
|
Registered User
Join Date: Mar 2005
Location: apple valley, ca
Posts: 2,670
|
Re: Project '64 Cheapskate
We're in the High Desert at 3000ft above sea level, where the temperature can get as low as the single digits in the winter to triple digits in the summer. We have huuuge temperature swings here, where we can have a 40 degree difference between the low and high temps of the day.
I've got R-19 insulation in the attic, so I think PEX would be just fine up there. It's funny that you mentioned carpeted bathrooms. When we bought the house, both bathrooms were fully carpeted, and when I ripped it all out to lay tile, the area around the toilets stunk so bad that I still cringe to this day. And I think that they kept a cat box in the common bathroom, tucked around behind the toilet. Ughhhh..... When we got the house, we gutted it and started fresh. The folks who owned the house before us were a little strange, to say the very least. Their cat lived in the attic........seriously.
__________________
Check out my latest endeavor: https://roundsixpod.com My build threads: '55 Chevy: http://67-72chevytrucks.com/vboard/s...d.php?t=247512 '64 C-20: http://67-72chevytrucks.com/vboard/s...d.php?t=446527 |
|
|
|
|
05-20-2014, 01:03 PM
|
#604 |
|
Registered User
Join Date: Apr 2003
Location: Indep, MO
Posts: 5,893
|
Re: Project '64 Cheapskate
Cats in the attic- Oy Vey! Can't believe you can stand it now! I used to be in the cat damage remediation bidness. Nasty.
__________________
Boppa's Old Yeller Truck Build, Old Yeller's New Heart! Project Buzz Bomb Flyin' Low! |
|
|
|
|
05-20-2014, 01:35 PM
|
#605 |
|
Registered User
Join Date: Jul 2010
Location: Baker,Florida
Posts: 8
|
Re: Project '64 Cheapskate
Very nice build I just bought a 66 last week and you've give me some great ideas and motivation
|
|
|
|
|
05-20-2014, 02:21 PM
|
#606 | ||
|
Registered User
Join Date: Mar 2005
Location: apple valley, ca
Posts: 2,670
|
Re: Project '64 Cheapskate
Quote:
Quote:
__________________
Check out my latest endeavor: https://roundsixpod.com My build threads: '55 Chevy: http://67-72chevytrucks.com/vboard/s...d.php?t=247512 '64 C-20: http://67-72chevytrucks.com/vboard/s...d.php?t=446527 |
||
|
|
|
|
05-20-2014, 05:23 PM
|
#607 |
|
Registered User
Join Date: Sep 2012
Location: Midway, NC
Posts: 3,275
|
Re: Project '64 Cheapskate
People never fail to amaze me. In my field of work I see every way people can live and do live. We have three cats and I'm over the top of keeping the litter boxes clean. They are out of sight and you don't smell them. I've been to peoples houses and it smells soon as you open the door. Two of our cats go out but we have one that stays in. I've seen cats tear up duct work in attics and crawlspaces. I've seen squirrels tear up duct work in attics before. They can really do some damage. Luckily with three cats, we don't have a mouse problem. We did when we moved in but the cats got to work. Our neighbors like the cats because they keep the mice and other rodents at bay.
Sorry to hear about your problems and I hope that you are able to get them fixed so that we can get more truck updates. Man I'm itching for more. I can't wait to see the bed of this thing and all the work you have done. Keep on keeping.
__________________
http://67-72chevytrucks.com/vboard/s...d.php?t=581873 The low buck build threads. Check'em out! http://67-72chevytrucks.com/vboard/s...d.php?t=666022 My build thread Crossmembers CC Last edited by rusty76; 05-20-2014 at 05:36 PM. |
|
|
|
|
05-20-2014, 10:39 PM
|
#608 | |
|
Registered User
Join Date: Apr 2003
Location: Indep, MO
Posts: 5,893
|
Re: Project '64 Cheapskate
Quote:
Dimwits heve their uses, though. Bet you got a good buy-in, but ohhhhh the horror! (lol! Been there.) Hope it levels out and you're back in the shop soon. Some of us need some inspiration 'round here!
__________________
Boppa's Old Yeller Truck Build, Old Yeller's New Heart! Project Buzz Bomb Flyin' Low! |
|
|
|
|
|
05-21-2014, 06:42 PM
|
#609 | |
|
Registered User
Join Date: Jan 2014
Location: Victorville, CA
Posts: 13
|
Re: Project '64 Cheapskate
Quote:
 Someday.... Someday....
|
|
|
|
|
|
05-21-2014, 10:18 PM
|
#610 |
|
Registered User
Join Date: Mar 2005
Location: apple valley, ca
Posts: 2,670
|
Re: Project '64 Cheapskate
Someday we convoy down there in our trucks, along with all the other guys from our area!
__________________
Check out my latest endeavor: https://roundsixpod.com My build threads: '55 Chevy: http://67-72chevytrucks.com/vboard/s...d.php?t=247512 '64 C-20: http://67-72chevytrucks.com/vboard/s...d.php?t=446527 |
|
|
|
|
05-22-2014, 01:13 AM
|
#611 |
|
Registered User
Join Date: Jan 2014
Location: Victorville, CA
Posts: 13
|
Re: Project '64 Cheapskate
Sounds good.
|
|
|
|
|
06-17-2014, 09:58 PM
|
#612 |
|
Registered User
Join Date: Mar 2005
Location: apple valley, ca
Posts: 2,670
|
Re: Project '64 Cheapskate
I've been working a lot on the fuel system on the '64, and I figured that it was time to start posting up what I've been doing. I did a ton of work on the tank(s), but I have a few more things to do on them before I'm ready to post up my progress.
I was drawing a blank on how I wanted to vent the tanks, and I came up with probably a half dozen ideas, and none of them got me excited. I didn't want a clunky looking system, and it had to perform well. I did not want a vent system that made the inside of the garage smell like raw fuel, so I needed to make a filtered vent system. If you remember a few months back, I built two extra crossmembers out of 1"x3" tubing to support the middle of the bed floor after I raised it. I decided that the forward crossmember would now serve two purposes, support the bedfloor and vent the tank. Here's what I did: I wanted a vent system that had the opening to the atmosphere higher than the tank outlet so it could vent most efficiently. The bedfloor crossmember was about the only thing above the tank because I raised the tanks as high as I could get them for extra ground clearance. I decided to utilize the crossmember as a vent chamber. I came in 10" from each end of the crossmember and made a cut: 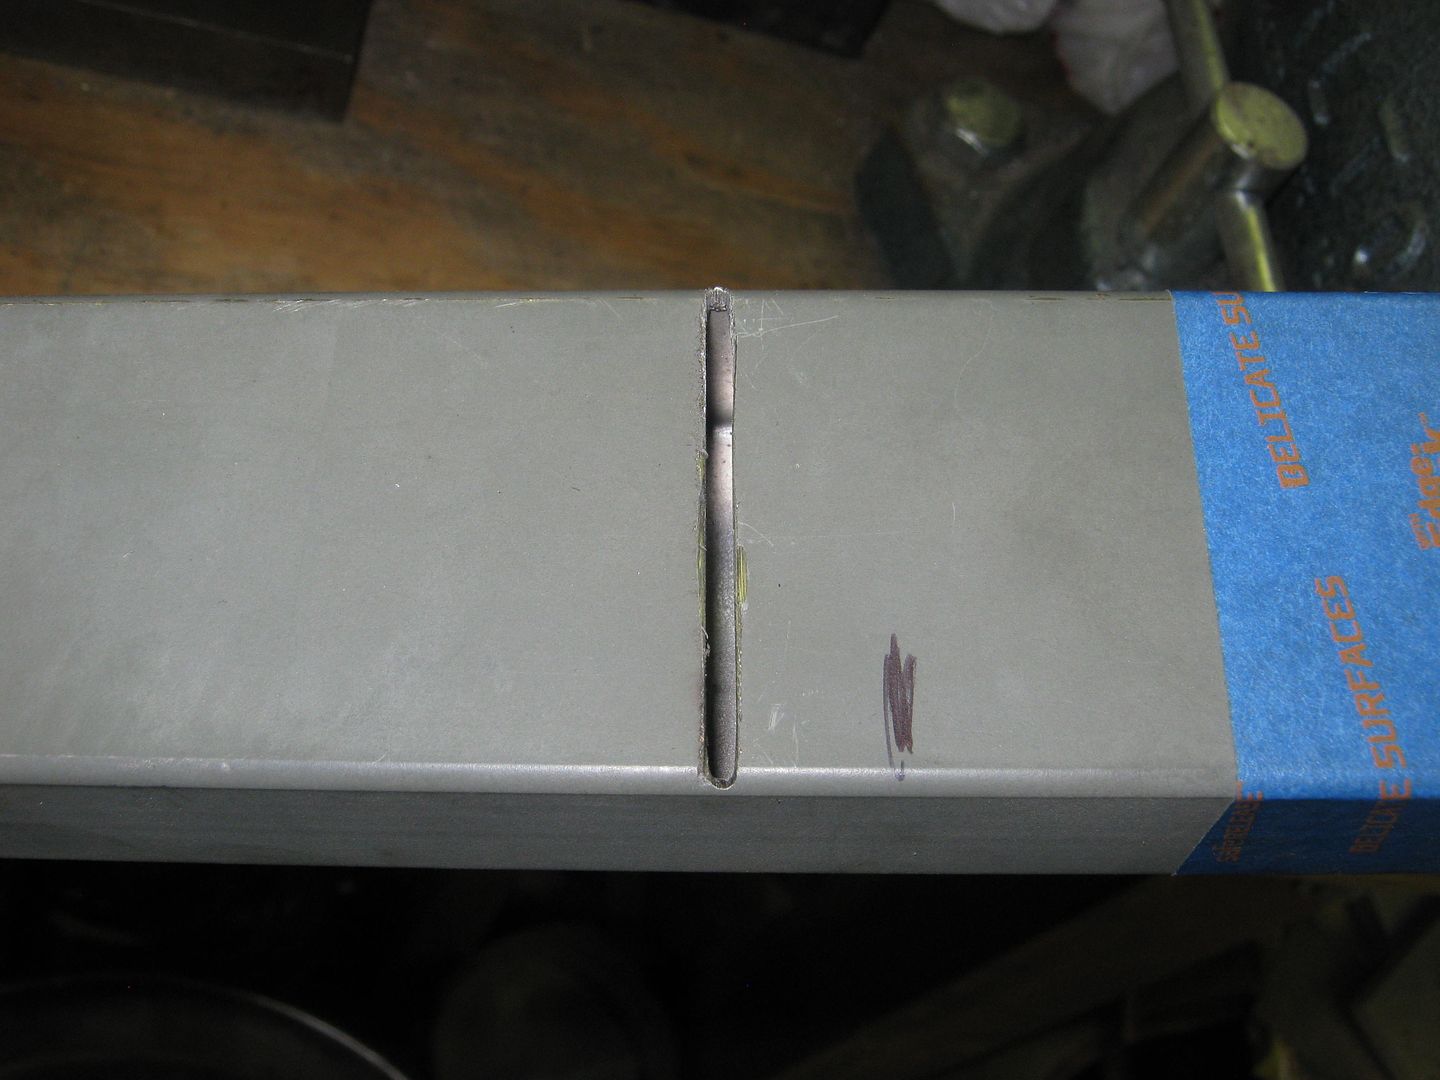 I then cut a piece of .125" thick steel to the inner dimension of the tube: 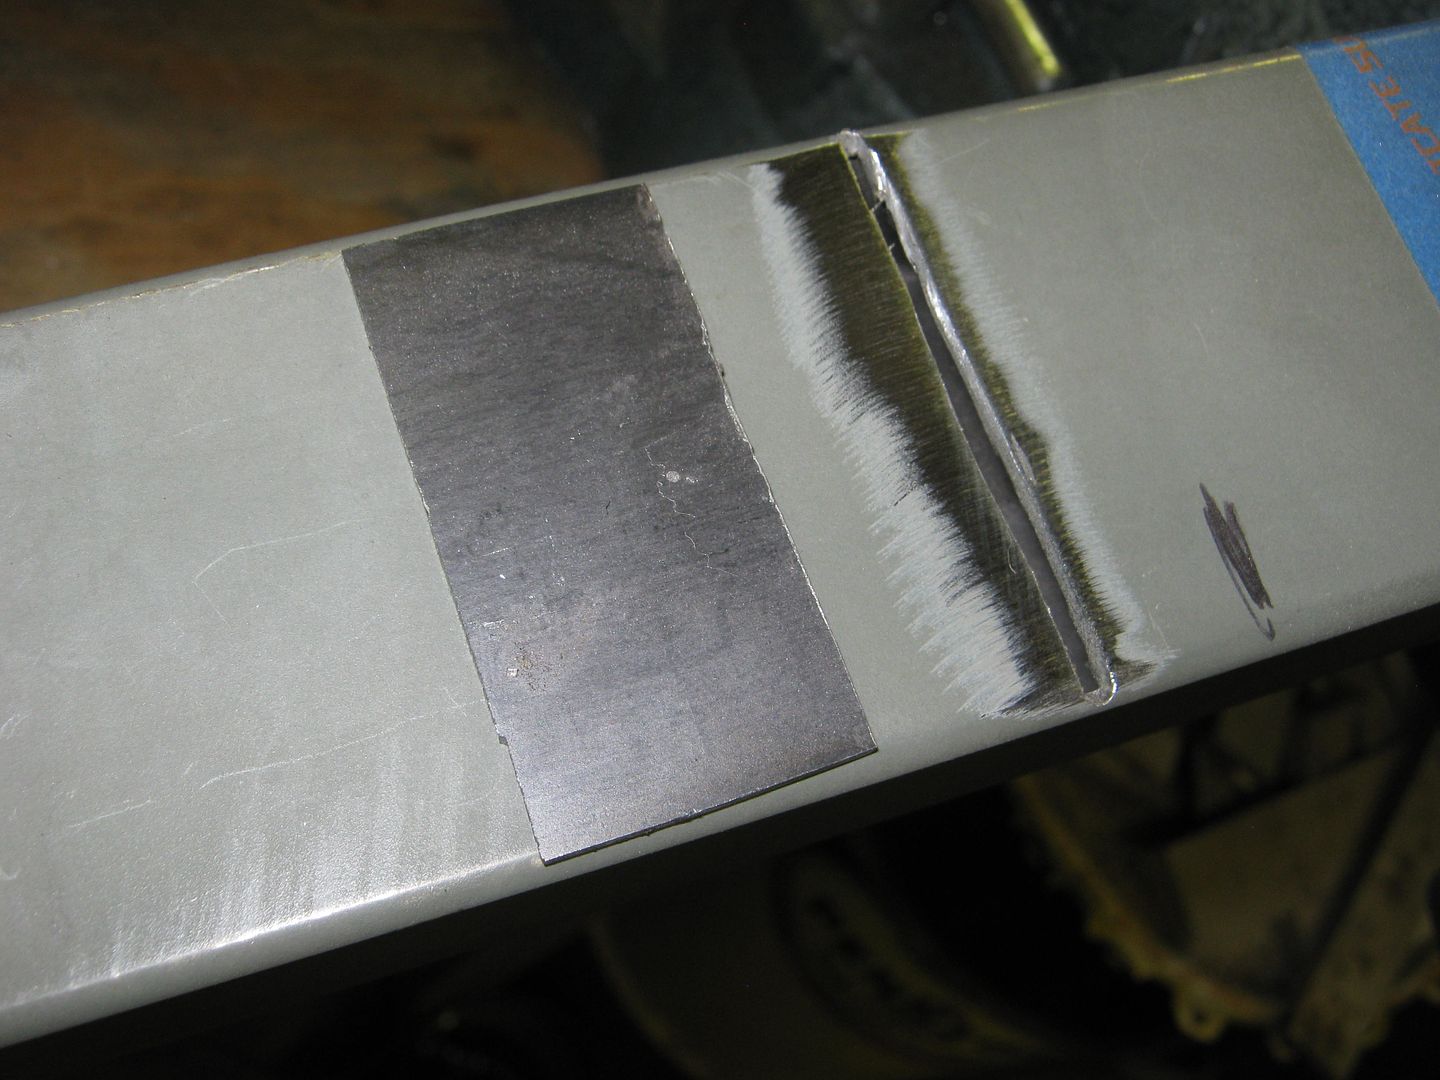 And slid it into the cut. I made it a tad bit shorter on the top so I could get a good weld on it: 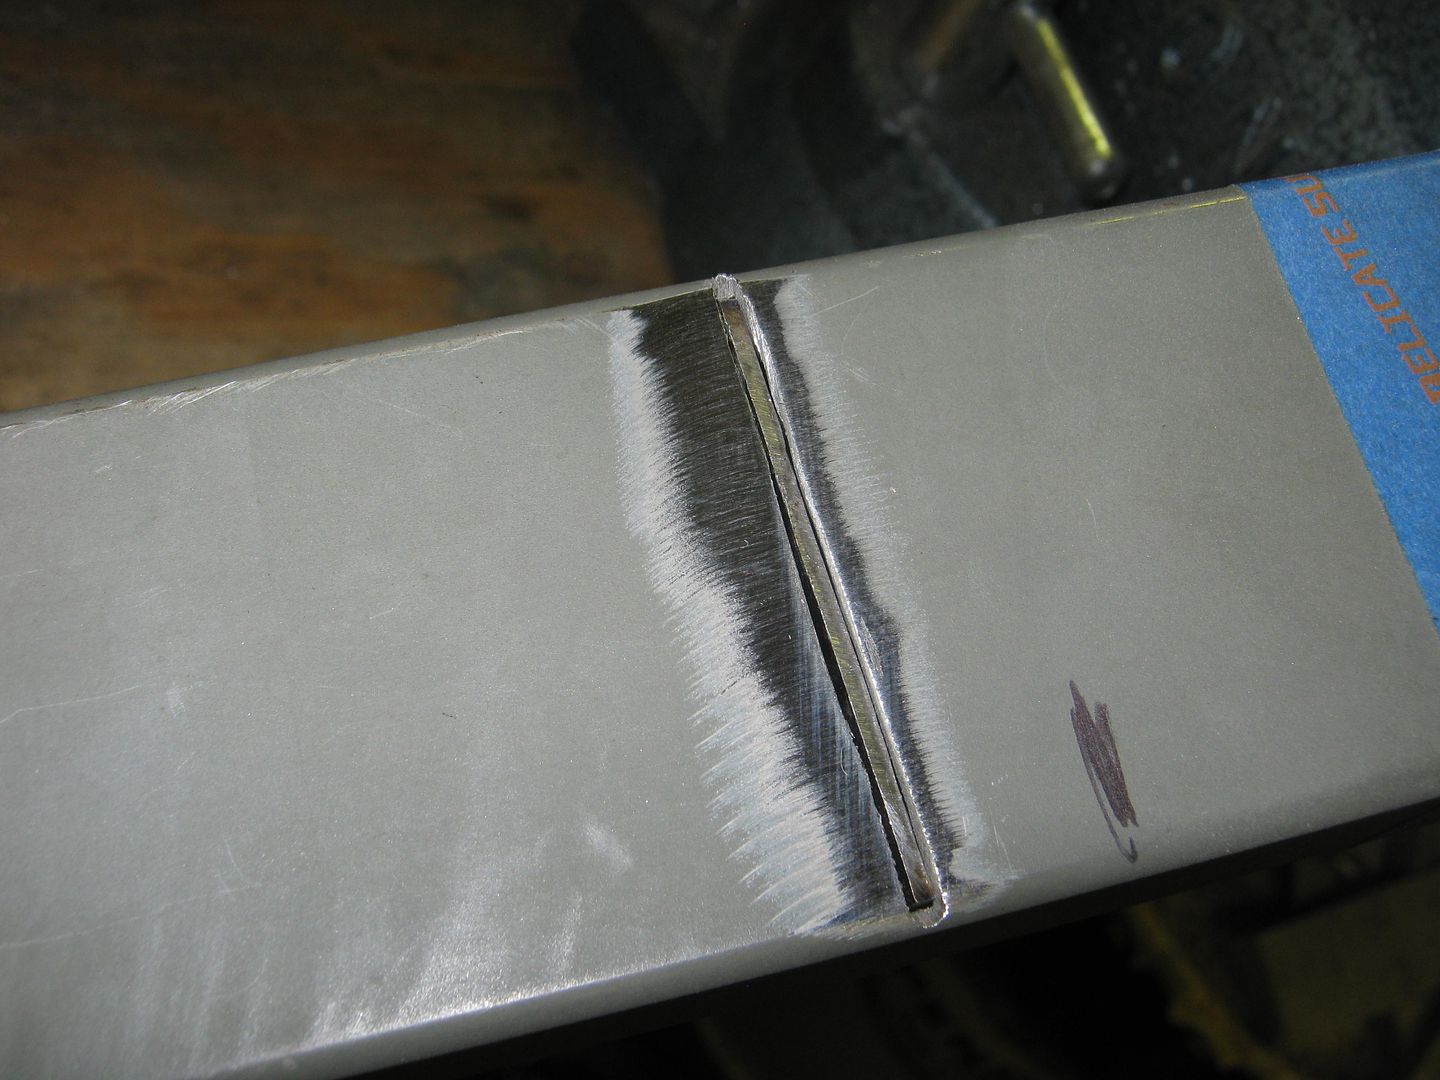 Welded and ground smooth. Now, the tube has the first part of the chamber. 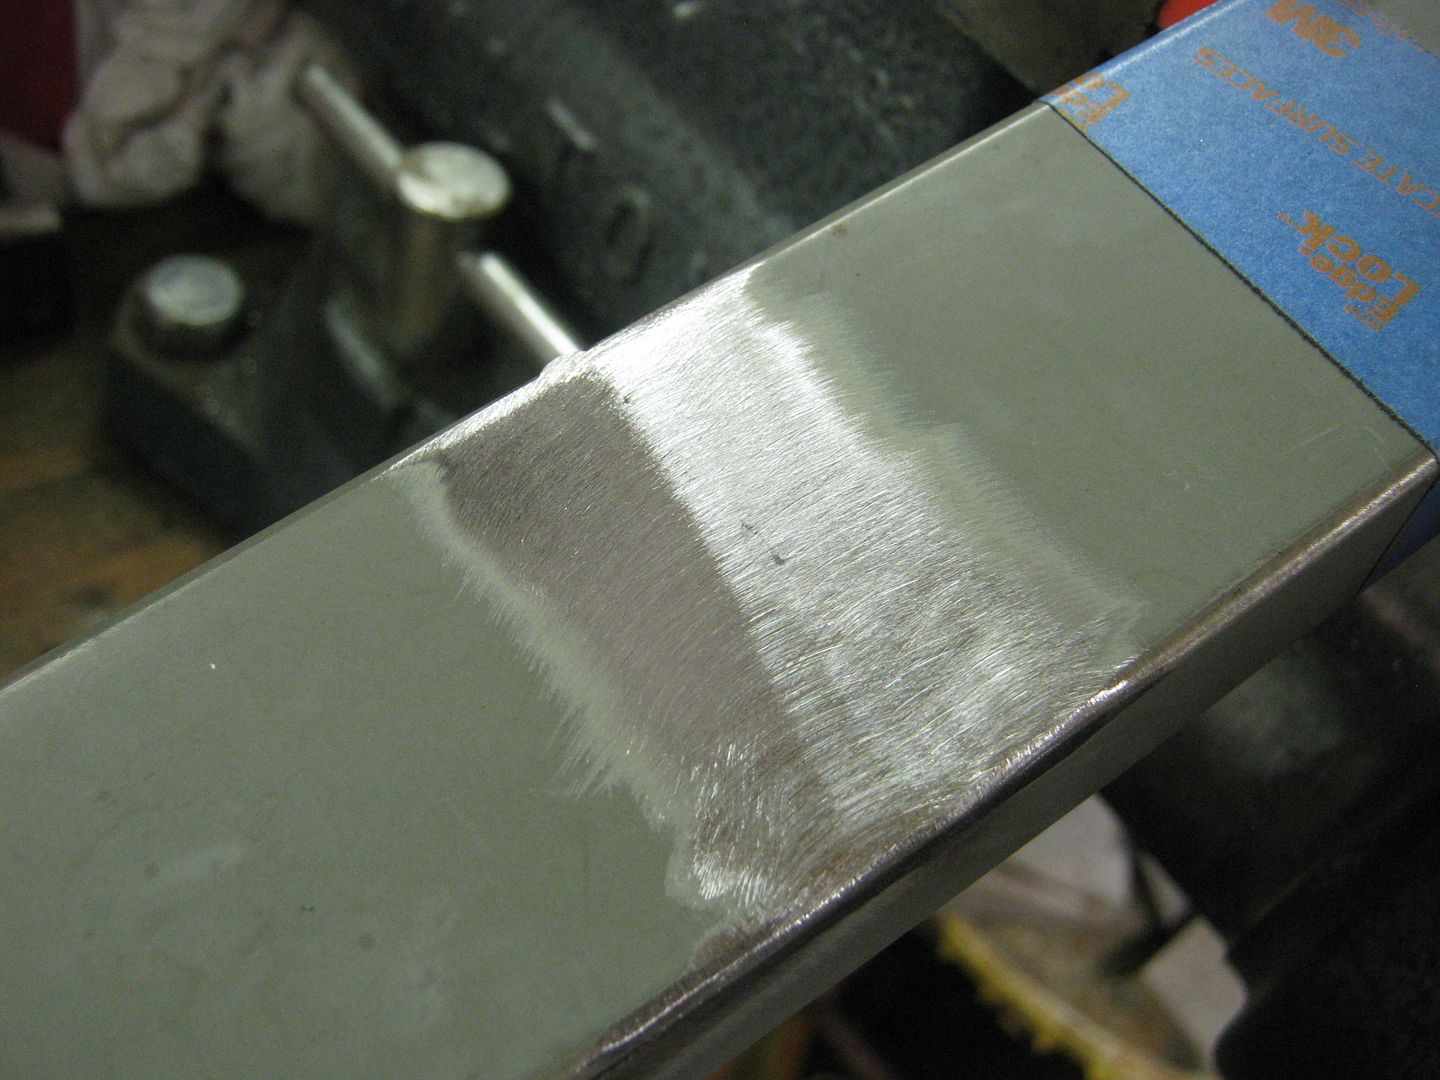 I bought a couple of cheap K&N clone filters off of ebay for $5 each, and cut a section of steel tubing from a scrap power steering pressure line I had laying around and drilled a hole in the crossmember and welded the tube into place. I took a 1/4 NPT x 1/4 barb fitting and threaded it into the tube as well. The barb fitting will be the connection to the rollover vent valve on the tank. The area that is marked with a Sharpie shows the size of the chamber. When it all goes back together for the final time, I will fill the chamber with activated charcoal . The section on the end that is unmarked will have a foam plug to contain the charcoal, and there with be a plastic tubing cap on the end. This will give me the capability of reservicing the charcoal at a later date, if needed. 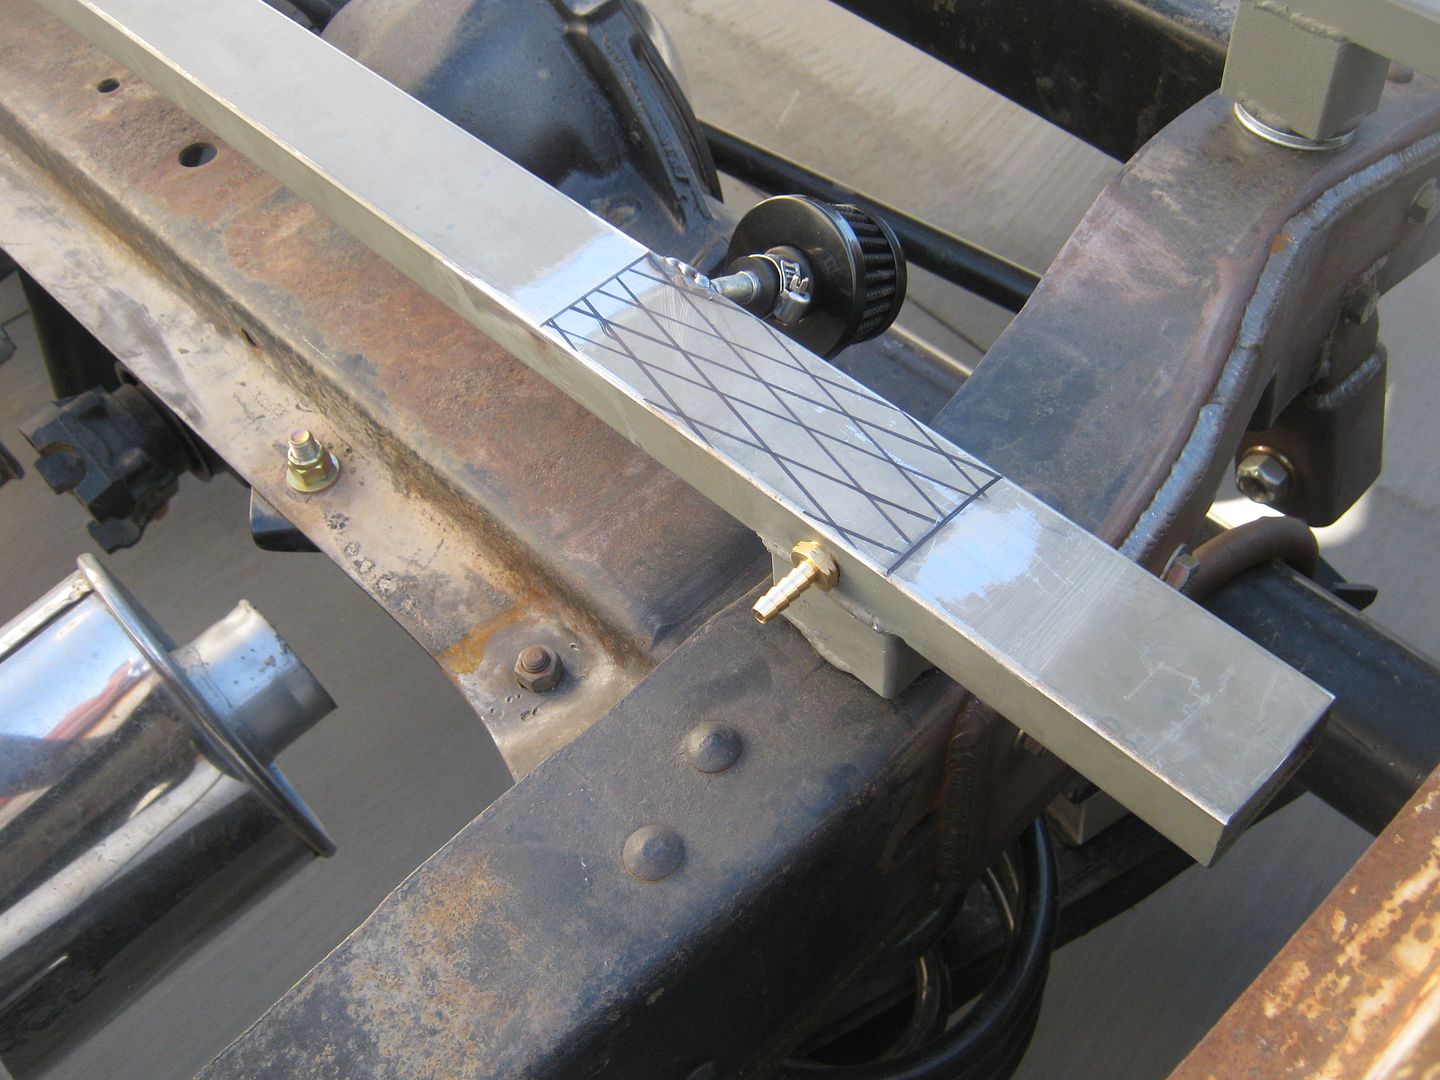 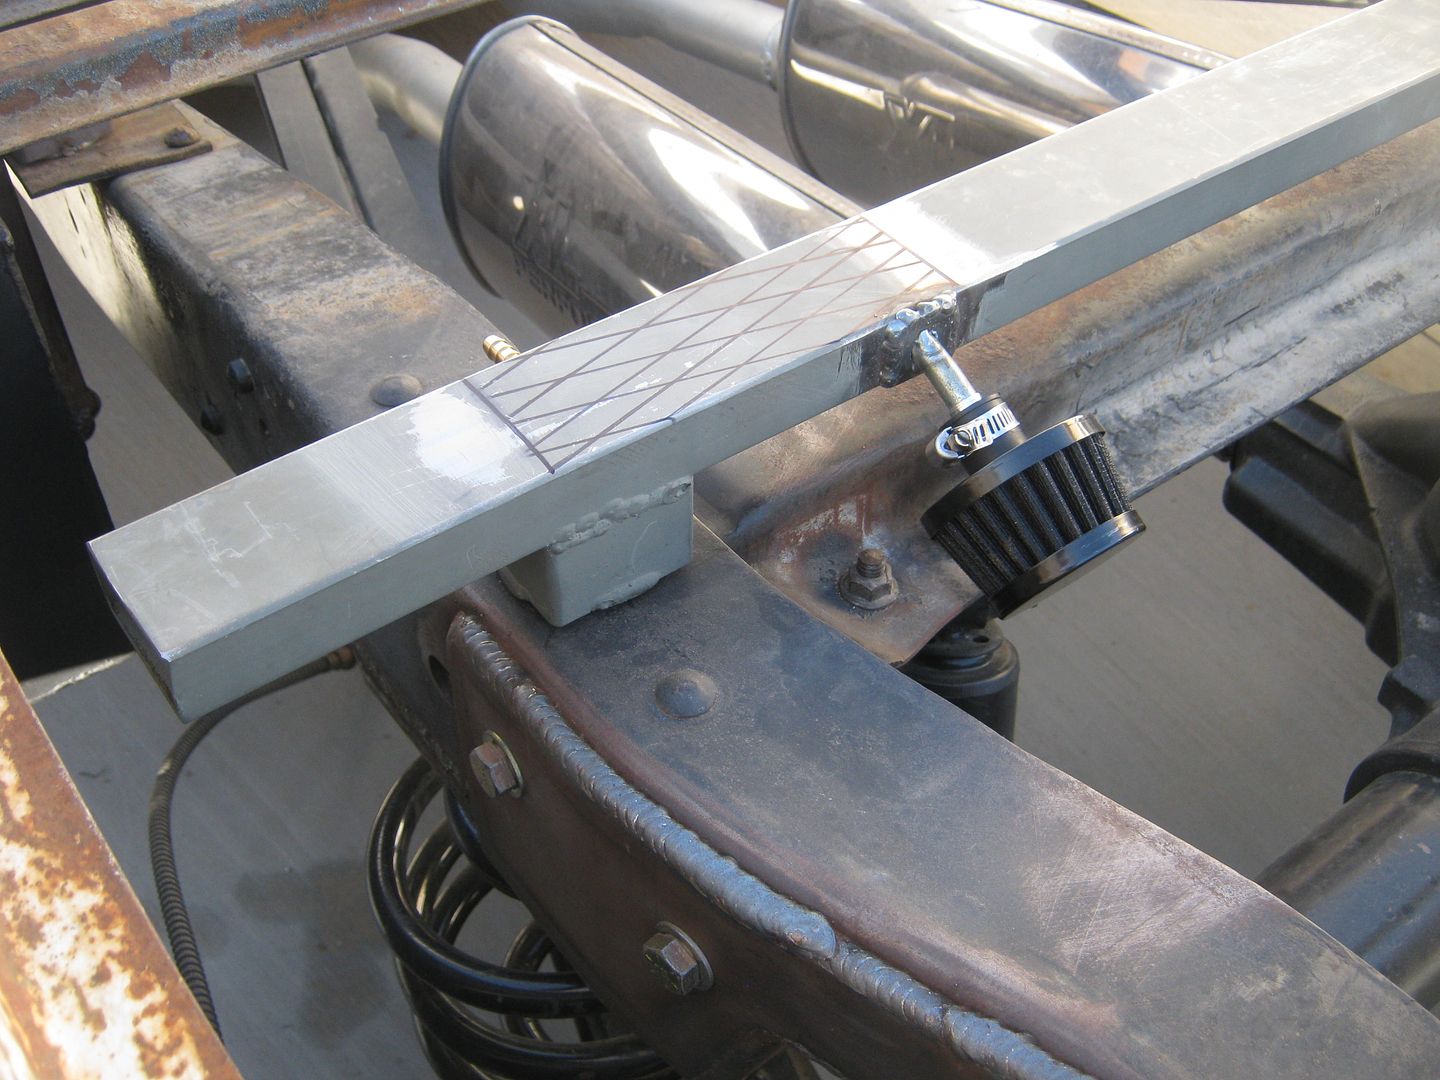 There you have it. A cheap ($7 in parts) fuel tank vent! I will post up the progress on the tanks very soon. I wish I would have taken more pictures of what I did.
__________________
Check out my latest endeavor: https://roundsixpod.com My build threads: '55 Chevy: http://67-72chevytrucks.com/vboard/s...d.php?t=247512 '64 C-20: http://67-72chevytrucks.com/vboard/s...d.php?t=446527 |
|
|
|
|
06-18-2014, 08:15 AM
|
#613 |
|
Registered User
Join Date: Apr 2003
Location: Indep, MO
Posts: 5,893
|
Re: Project '64 Cheapskate
Hmmmm.... Me likey! Good to hear from you. Is Brad gonna make Speedweek, and are you going?
__________________
Boppa's Old Yeller Truck Build, Old Yeller's New Heart! Project Buzz Bomb Flyin' Low! |
|
|
|
|
06-18-2014, 11:45 AM
|
#614 | |
|
Registered User
Join Date: Mar 2005
Location: apple valley, ca
Posts: 2,670
|
Re: Project '64 Cheapskate
Quote:
Have you seen Brad's car on Facebook? The car is turning out awesome, and for a first time chassis builder, the quality is on par with any high-end shop in So Cal. I have extremely high standards, and even I'm blown away. He's going to use some of my aerospace connections to build the body, and with the guys I introduced him to, it'll be off the charts. These are the guys who designed, engineered, and built the Red Bull space capsule that Felix Baumgartner set the manned freefall record a couple of years ago. They are some smart guys who love to think waaaaay outside the box. When that car makes it to Bonneville, it'll be a ground breaker in innovation and technology. here's his F-book page: https://m.facebook.com/brad.king.1694
__________________
Check out my latest endeavor: https://roundsixpod.com My build threads: '55 Chevy: http://67-72chevytrucks.com/vboard/s...d.php?t=247512 '64 C-20: http://67-72chevytrucks.com/vboard/s...d.php?t=446527 |
|
|
|
|
|
06-18-2014, 03:07 PM
|
#615 |
|
Registered User
Join Date: Apr 2003
Location: Indep, MO
Posts: 5,893
|
Re: Project '64 Cheapskate
Got on the website thru his 49 thread. Looks very nice! Oughta be fun, watching it grow.
__________________
Boppa's Old Yeller Truck Build, Old Yeller's New Heart! Project Buzz Bomb Flyin' Low! |
|
|
|
|
06-18-2014, 05:17 PM
|
#616 |
|
Registered User
Join Date: Sep 2012
Location: Midway, NC
Posts: 3,275
|
Re: Project '64 Cheapskate
Man you are one smart cookie. I finally got my cheap fix for the day. Thanks. Looking good!
__________________
http://67-72chevytrucks.com/vboard/s...d.php?t=581873 The low buck build threads. Check'em out! http://67-72chevytrucks.com/vboard/s...d.php?t=666022 My build thread Crossmembers CC |
|
|
|
|
06-18-2014, 10:51 PM
|
#617 |
|
Registered User
Join Date: Apr 2011
Location: .
Posts: 3,104
|
Re: Project '64 Cheapskate
That vent set up is slick. Won't take up any room either.
Thanks for the write up. |
|
|
|
|
06-19-2014, 08:13 PM
|
#618 |
|
1 thing at a time is progress.
Join Date: Jun 2007
Location: Ball Ground GA
Posts: 5,511
|
Re: Project '64 Cheapskate
Loving the progress and what your doing.
Good luck with house plumbing issues.
__________________
Alan
Philippians 2:14-16 |
|
|
|
|
07-06-2014, 12:45 PM
|
#619 |
|
Registered User
Join Date: Mar 2005
Location: apple valley, ca
Posts: 2,670
|
Re: Project '64 Cheapskate
I have been working hard on the '64, so I figured that I should start posting up some progress. I mentioned earlier in this thread that I removed the factory fuel tank in order to gain more cab room. I also didn't want to lose the capability of storing the spare tire, so a rear mounted tank was out of the question. My truck was originally equipped with a pair of aftermarket saddle tanks, and from the beginning, I was adamant about getting rid of them. After some thought, I decided that the saddle tanks could come in quite useful if I upgraded them and made them the primary fuel tanks for the truck. The tanks were essentially gas cans with no floats, sending units, or proper vent system. In order to make them work, I would need to upgrade them to a proper sending unit/float and put a safe, effective vent system in them.
I used to have pictures of what the tanks looked like when I pulled them out, but because I wasn't planning on using them, I deleted them from my camera. They were disgusting! The exteriors were rusty, the interiors were rusty, and the driver's side tanks had a HUGE beehive inside of it. Before I cleaned the inside of the tanks, I decided to drill the hole for the sending unit. Once I determined where the bed support braces were going to be, I marked the tanks for the hole pattern using the plate that came with the sender (Classic Instruments is the manufacturer of the senders). 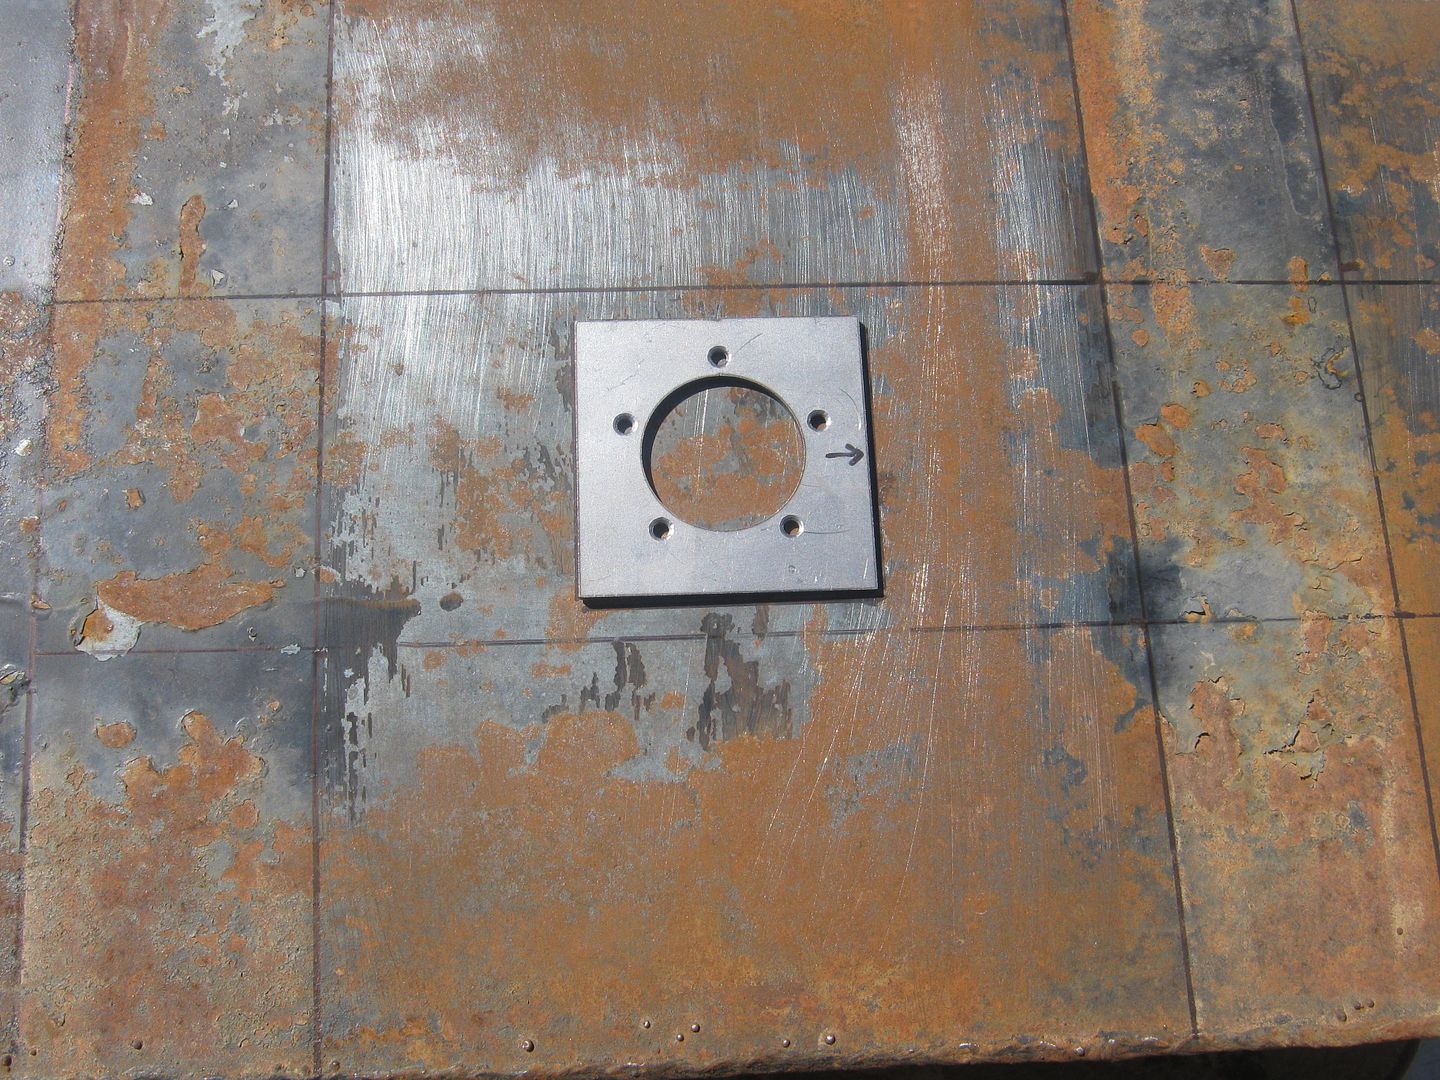 After I drilled the holes. The plate that came with the kit is threaded, and will get welded to the tank, and the sender with bolt to the plate. In this picture, you can see how nasty the inside of the tank was.  I also drilled the tanks for the filler. I am going to have access doors in the bed floor, and the fillers are the push through type from Tanks, Inc. I have an idea for the access doors, but I'm not ready to that yet. 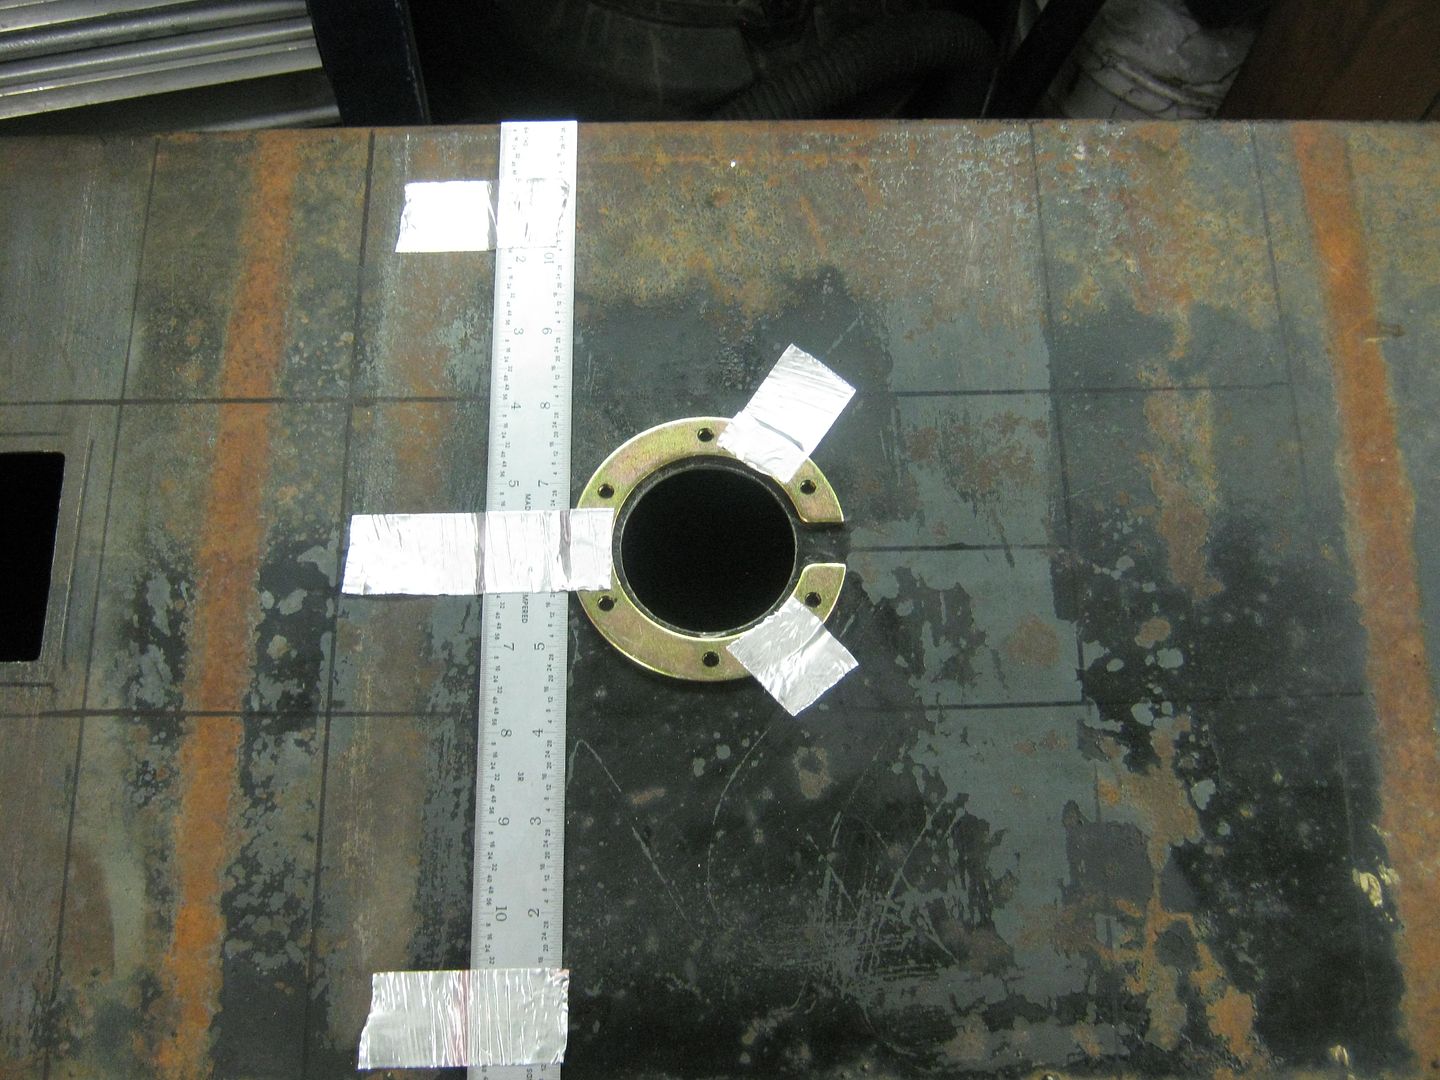 In my typical fashion, I got in a hurry and stopped taking pictures. I also welding in threaded bungs for the roll-over vent valves, which I also got from Tanks, Inc. I showed the tank vent mod that I did a few posts ago, so I won't go into detail about that. After the drilling and grinding, it was time to clean the tanks. The beehive was a real challenge, and it took me a few hours to get it all out. After that, I poured 2 gallons of undiluted muriatic acid in each one and let it sit for an hour. After that, I sloshed the solution around for about 30 minutes. I then filled the tanks to the top with water and let them sit overnight. In the morning, I drained the tanks and then put two boxes of baking soda and refilled the tanks to neutralize the acid. What a difference! The interior of the tanks turned out nice and clean. I then poured some WD-40 inside and sloshed the insides to ensure that it wouldn't flash rust. I plan to paint the exterior of the tanks when I'm finished with the fab work, so right now, they're in metal etch primer to prevent them from rusting. Next step: Fuel lines, filter, and tank solenoid.
__________________
Check out my latest endeavor: https://roundsixpod.com My build threads: '55 Chevy: http://67-72chevytrucks.com/vboard/s...d.php?t=247512 '64 C-20: http://67-72chevytrucks.com/vboard/s...d.php?t=446527 |
|
|
|
|
07-06-2014, 01:16 PM
|
#620 |
|
Registered User
Join Date: Mar 2005
Location: apple valley, ca
Posts: 2,670
|
Re: Project '64 Cheapskate
The tanks were temporarily re-installed, and I went to work bending fuel lines. Because I am using a factory GM fuel tank selector solenoid, I decided to mount it on the passenger side framerail and bring the right and left fuel lines to it. I installed new 1/4 NPT/3/8 inverted flare fittings in the tanks. Here is a shot of the driver's side fuel line, which follows the trailing arm crossmember over to the passenger's side. The line is clamped with Adel clamps and has air-gap clearance for the entire run. The lines do not touch adjacent metal at any point during their entire run. That's something I learned from all of my years in aerospace. A rubbing line WILL eventually rub a hole.
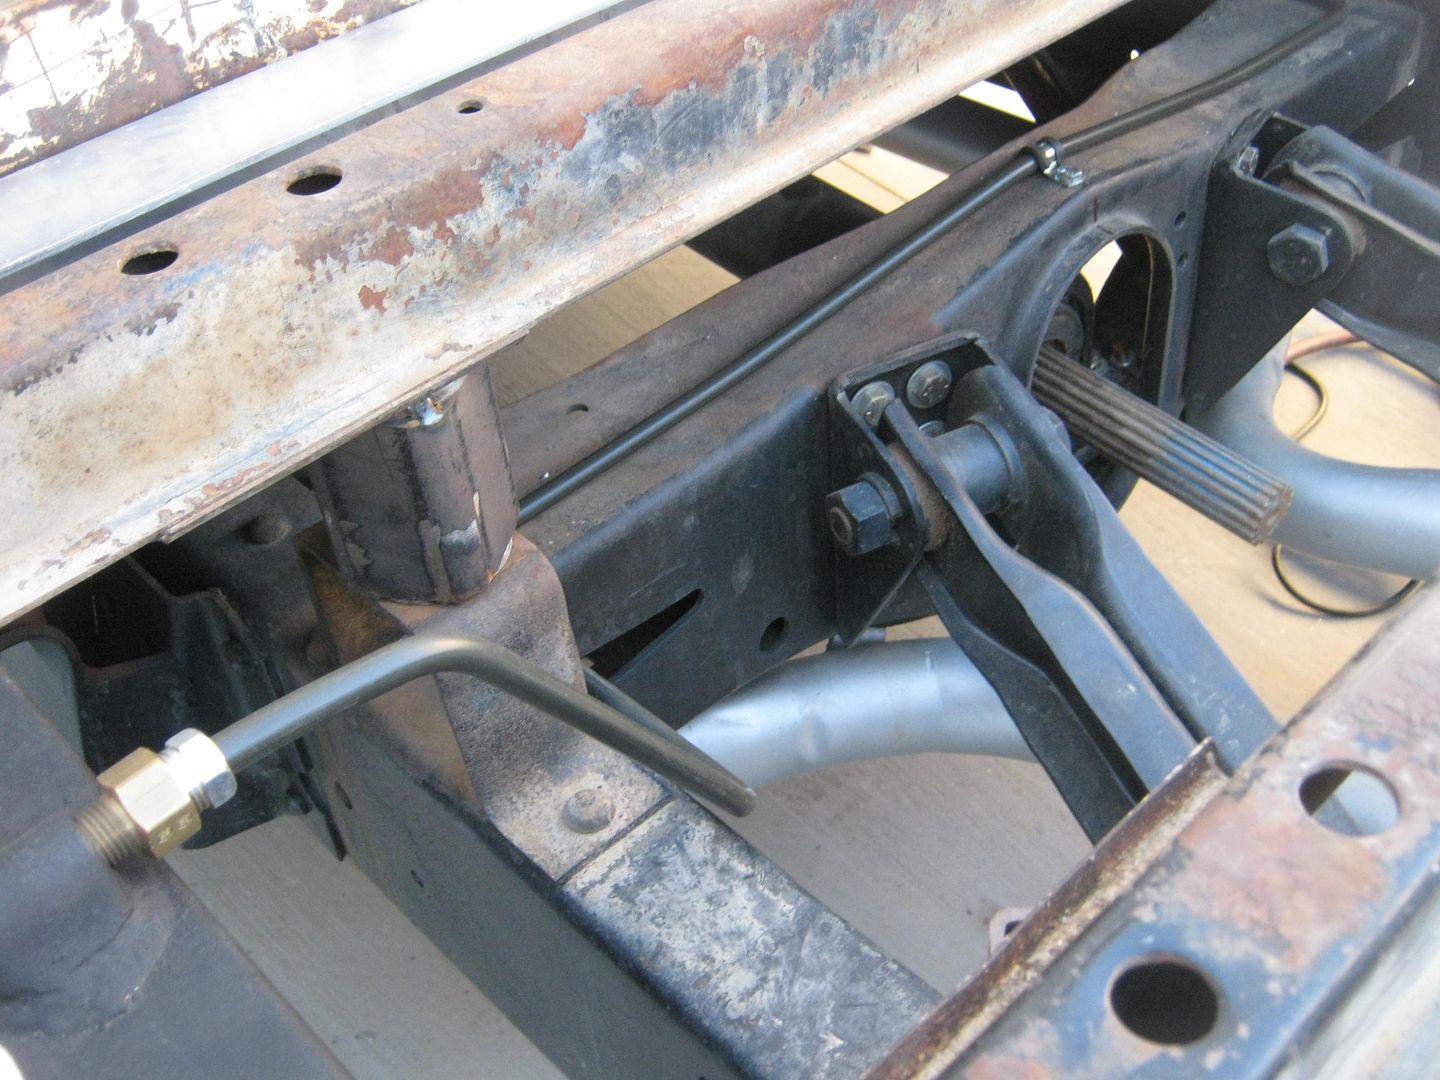 And a shot showing the route out of the passenger tank 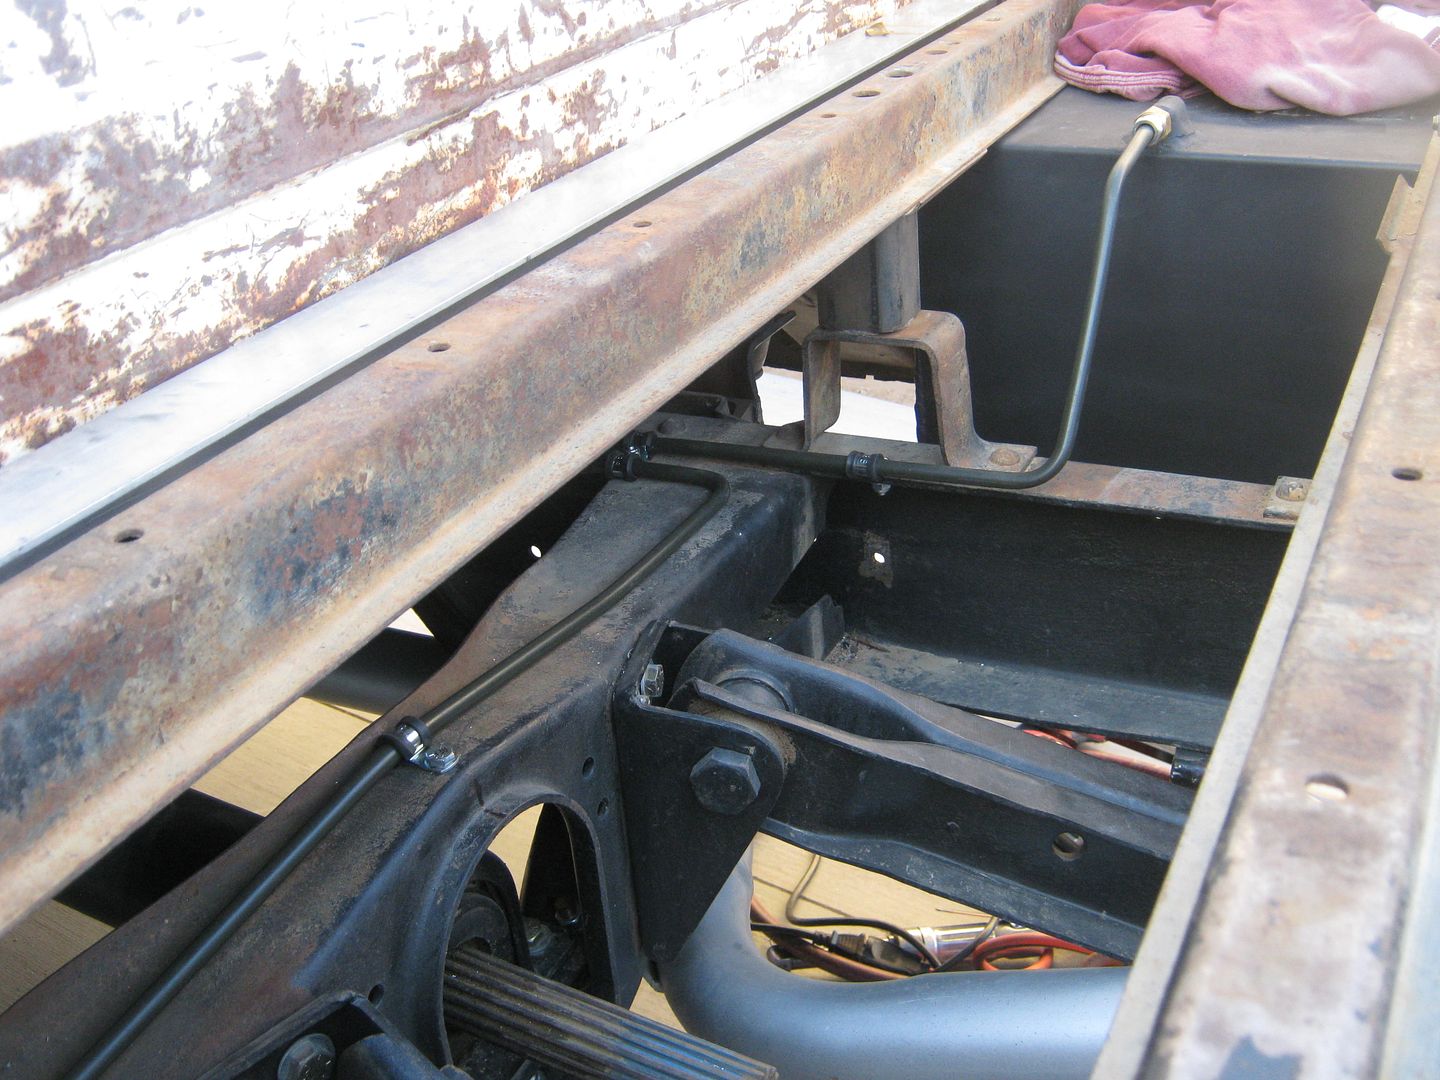 Here is a shot of the solenoid and the filter. I built a filter bracket out of 1"x3" square tubing using a 1.5" hole saw. The filter locks in and gets secured with a hose clamp. I'm still in the mock-up stage so none of the lines are clamped. All of the rubber lines shown in the picture will be replaced with 3'8" fuel injection hose and F.I. line clamps. 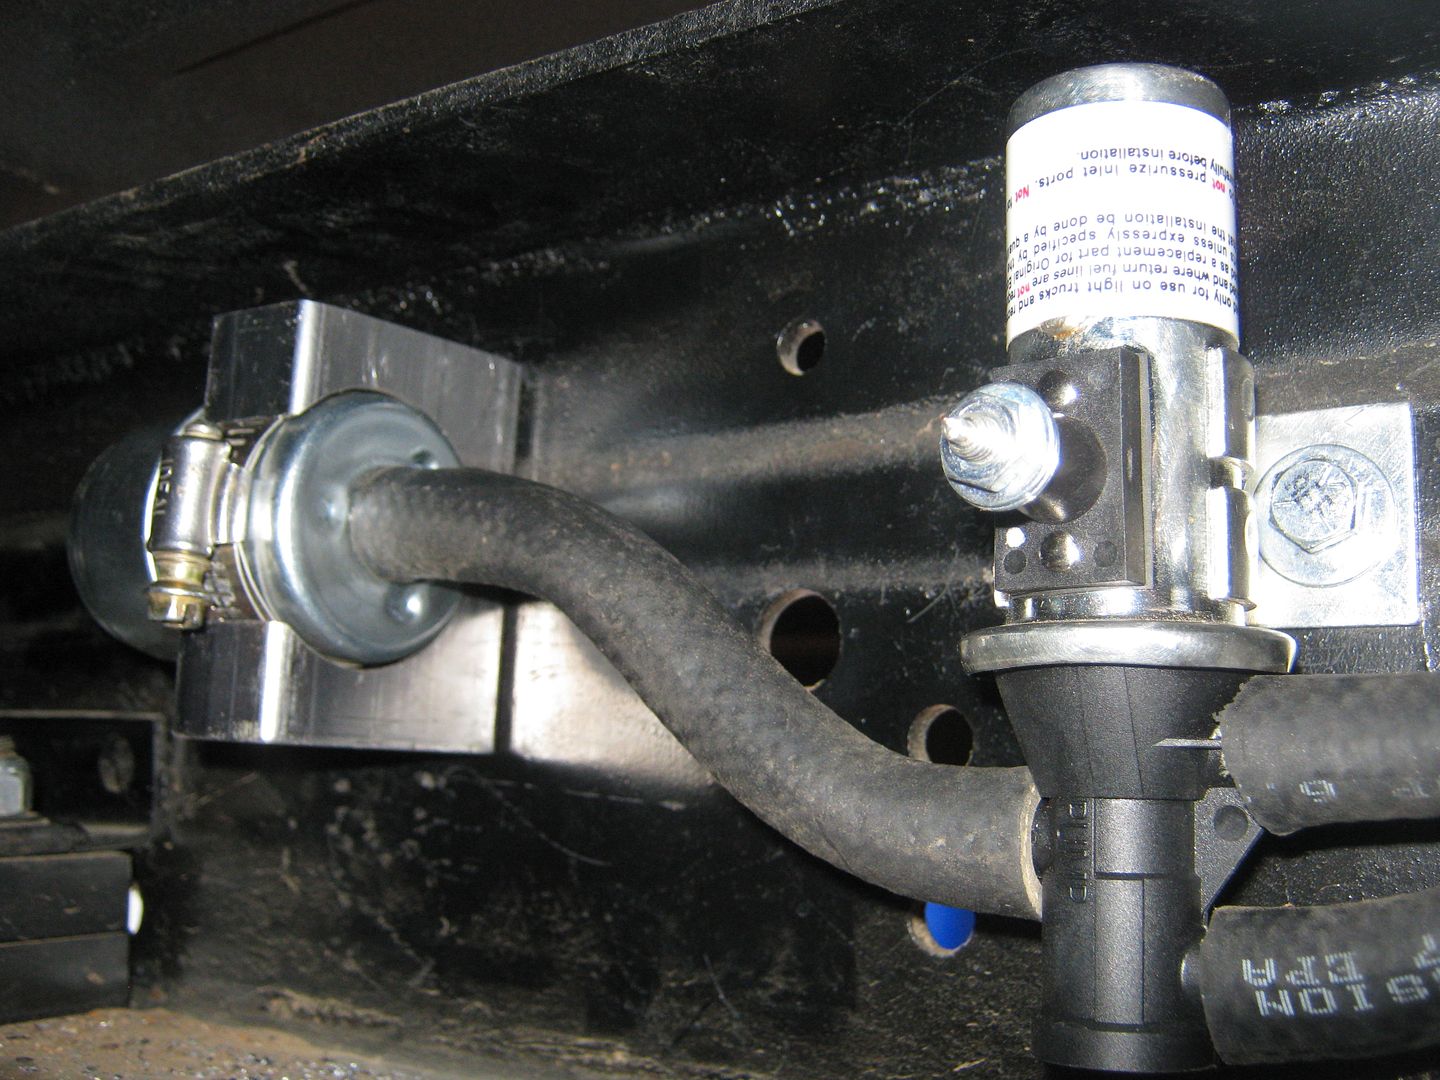 The fuel line to the fuel pump eventually met up with the trans cooler lines, so I routed them together. I was going to make my own billet clamps to secure them, but I had a brainstorm to utilize spark plug wire separators instead. I found a set on ebay for $18 that were for a 9.5mm wire, and if you do the conversion, 9.5mm is almost exactly 3/8", so they worked perfectly. In order to make them work, I had to drill out the hole that secures the halves together to .250", and now, the bolt that holds the halves together is also the mount bolt. I made a couple of standoffs from some steel tubing to space the lines away from the frame. Here's a shot of the fuel and tranny cooler lines as they come up the frame rail and go over the front suspension crossmember. The trans lines are on the top, and the fuel line is on the bottom. 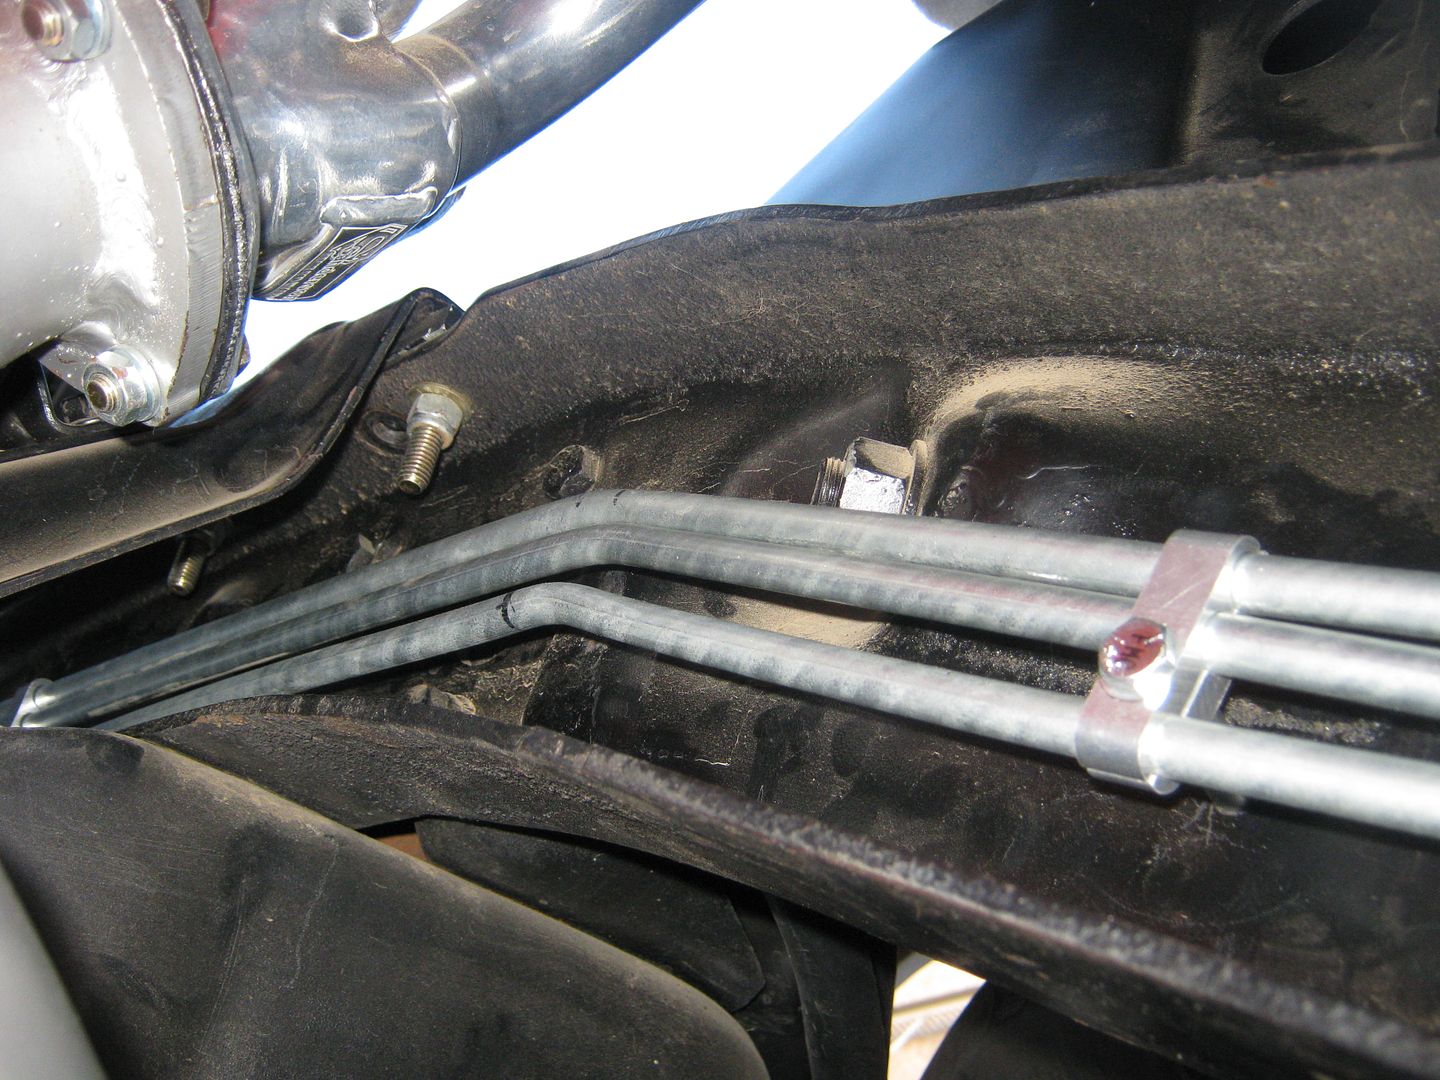 When the lines got to where the fuel pump is, I stopped the fuel line and continued the cooler lines to the front radiator crossmember. 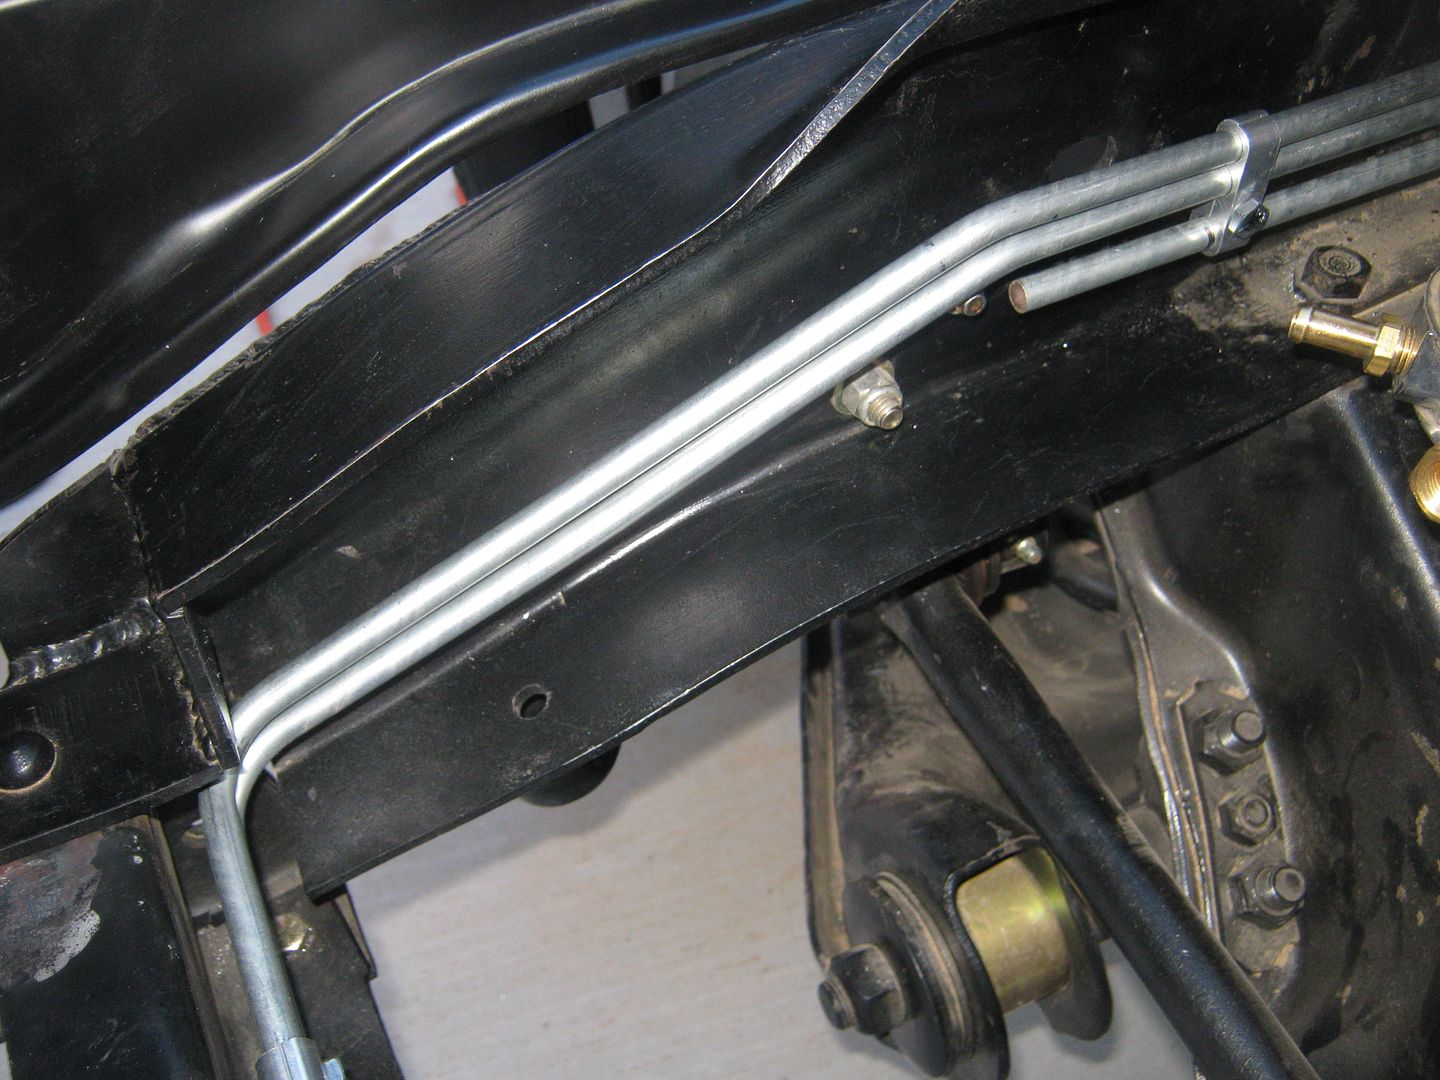 I built a fuel line from the pump to the carb last night, but it was getting dark, and after looking at it this morning, I have a better route planned. That line is tricky to make because the serpentine brackets give you no access holes to sneak a line through. On another note, I am always checking Craigslist for C10 stuff, and I found a guy selling a brand new Early Classic hidden hitch for $75! I am running a '67-'72 fleetside rear bumper, and that's what this hitch is designed for. The receiver section sits behind the license plate, and you use a flip bracket and slide the hitch into it. I was going to buy a universal hitch and modify it, but this save me a TON of fab work. It's a really nice piece, and seriously heavy duty (heavy). The build quality is nice, like all of ECE's stuff. 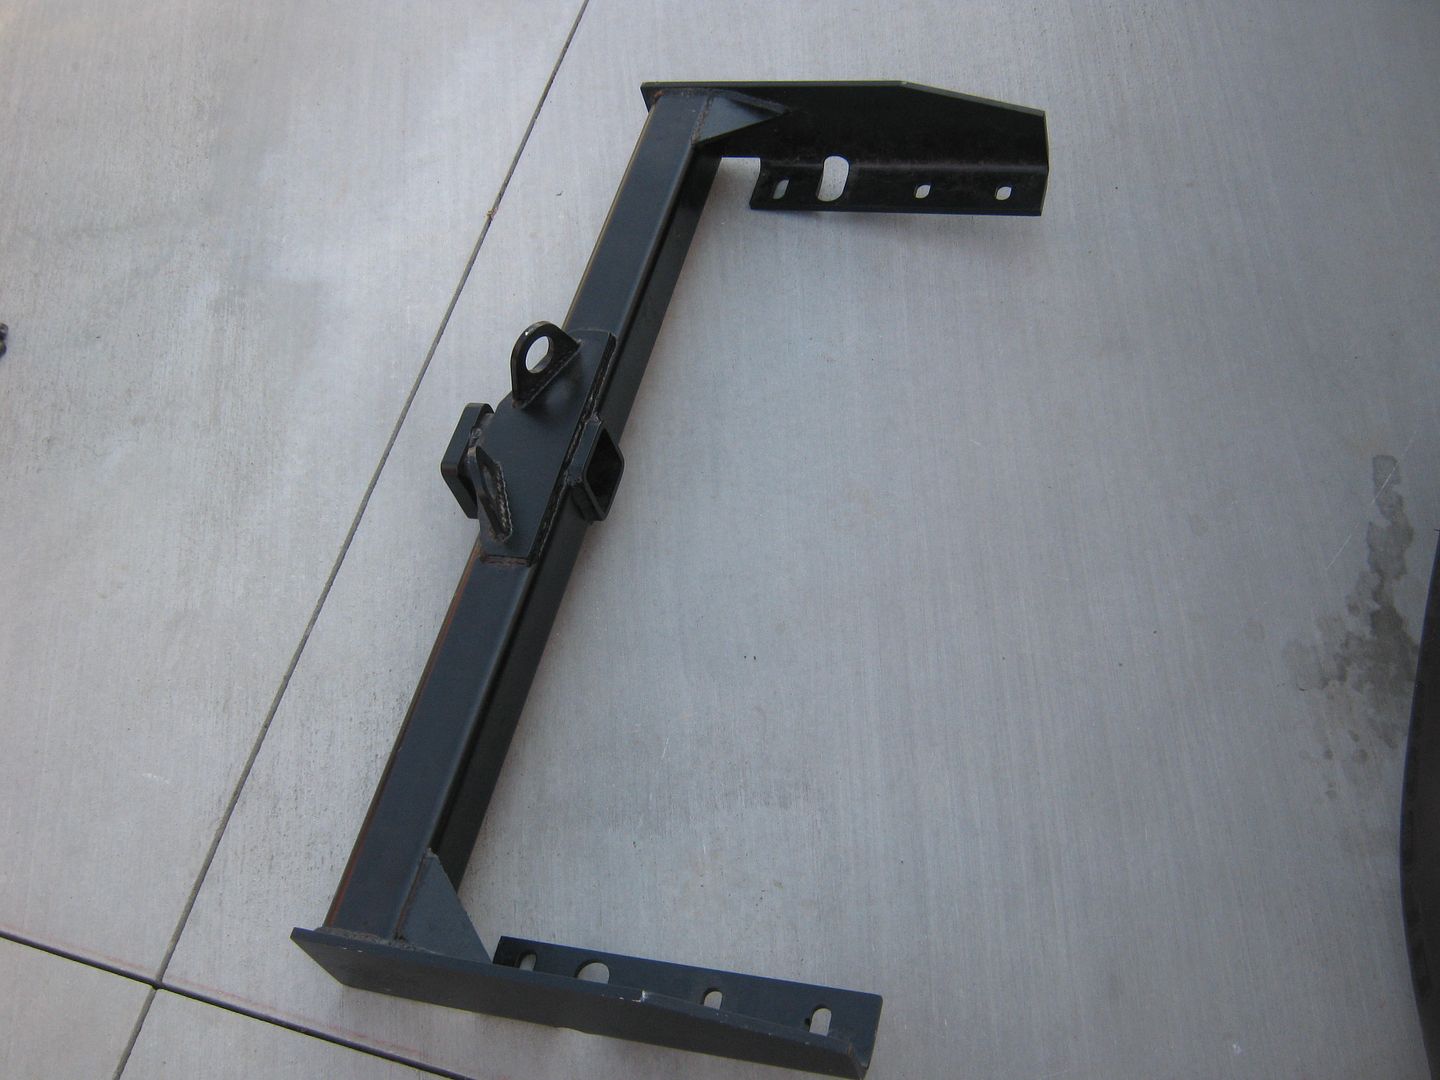 I'm getting a lot of little things done, so that's a good thing. My helpers, on the other hand, are less than enthused. This little guy will stay with me under the truck for hours, even when I'm throwing sparks and using loud tools. A great shop dog. The other Pug is sneaky, and likes to sniff around places he's not supposed to be, knowing that I'm busy and can't watch him. 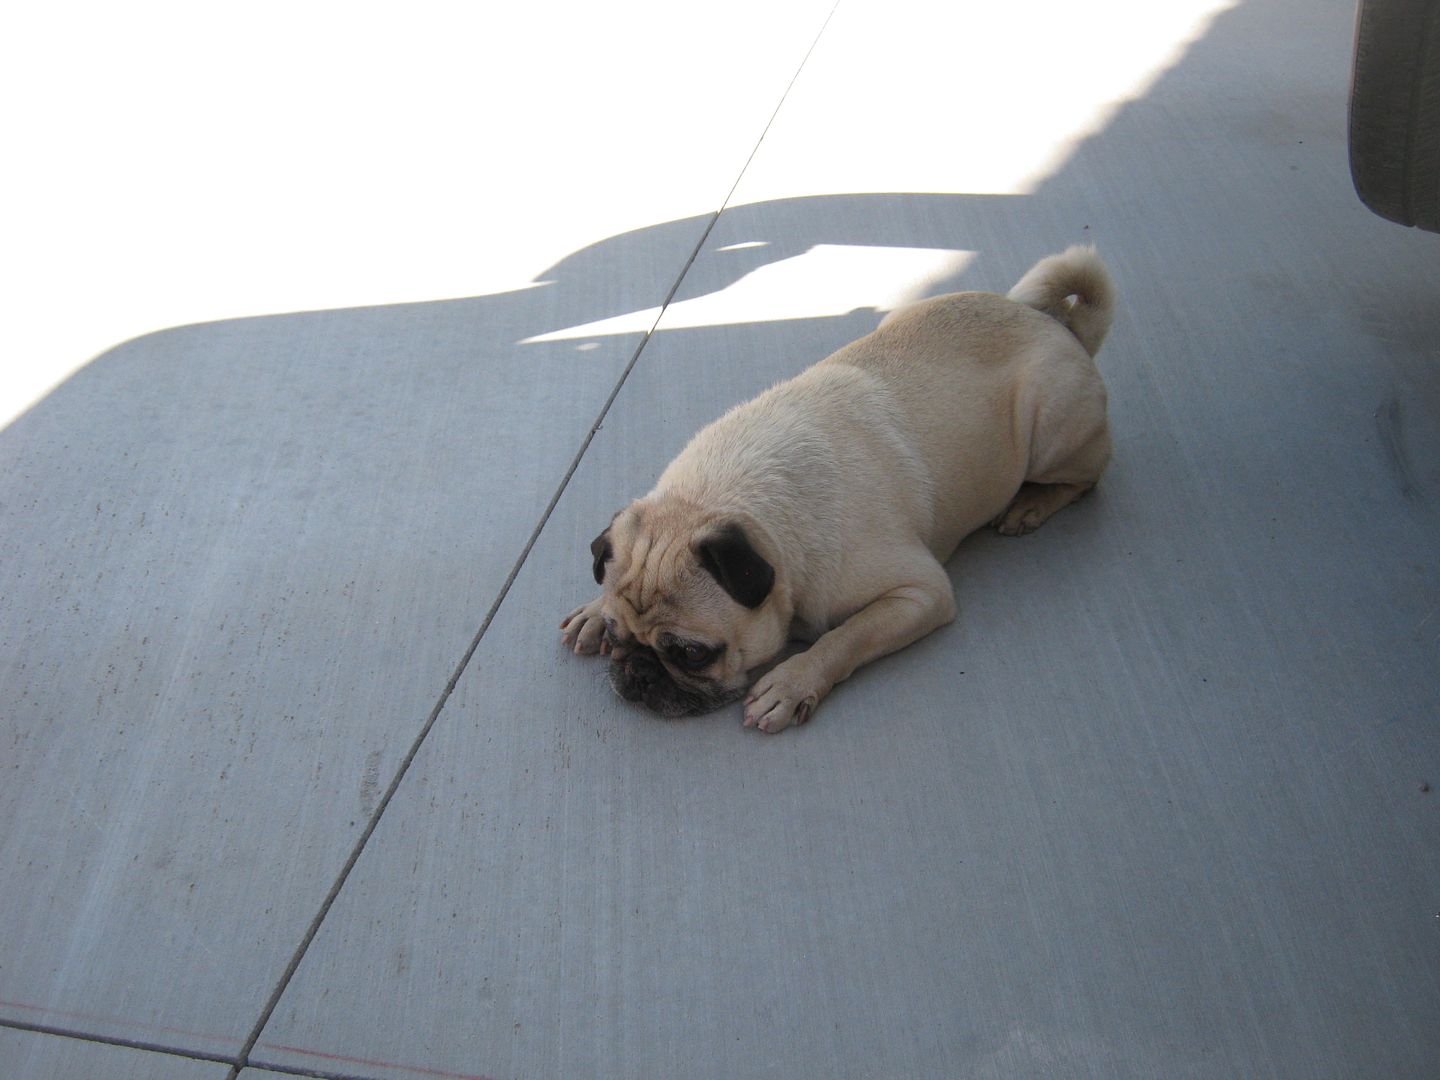
__________________
Check out my latest endeavor: https://roundsixpod.com My build threads: '55 Chevy: http://67-72chevytrucks.com/vboard/s...d.php?t=247512 '64 C-20: http://67-72chevytrucks.com/vboard/s...d.php?t=446527 |
|
|
|
|
07-06-2014, 05:46 PM
|
#621 |
|
Rollin' Old Skool
Join Date: Jun 2007
Location: Hattiesburg, MS
Posts: 5,371
|
Re: Project '64 Cheapskate
I love these builds that are so carefully thought out. Some nice work you're doing!

__________________
_____________________________________________ Phillip My Build threads: 1966 Chevy C-10 "Black Betty" shortbed, fleetside, BBW, 327 V8/ Powerglide (under construction) http://67-72chevytrucks.com/vboard/s...ighlight=betty 1997 Chevy Tahoe, 2dr/2wd, mild custom (Daily driver) http://67-72chevytrucks.com/vboard/s...d.php?t=601142 Pics: '66 C-10 https://flic.kr/s/aHsjHWD4h9 '97 Tahoe https://flic.kr/s/aHsjGZ7wKP '93 C-1500 https://flic.kr/s/aHskxdpdnQ '88 S-10 Blazer https://flic.kr/s/aHsjYGx4Md Previous Rides: 1993 Chevy S-10 ext. cab, 4.3L, 4/5 drop (Sold) 1993 Chevy C-1500 short/step Retro-Rod (Sold) 1988 S-10 Blazer 2dr/2wd mild custom (Sold) |
|
|
|
|
07-06-2014, 05:46 PM
|
#622 |
|
Registered User
Join Date: Sep 2012
Location: Midway, NC
Posts: 3,275
|
Re: Project '64 Cheapskate
Awesome work as usual man. I like all the tidbits of info on routing and securing fuel lines. Very kool work. Thanks for posting up some updates!
__________________
http://67-72chevytrucks.com/vboard/s...d.php?t=581873 The low buck build threads. Check'em out! http://67-72chevytrucks.com/vboard/s...d.php?t=666022 My build thread Crossmembers CC |
|
|
|
|
07-07-2014, 10:36 AM
|
#623 |
|
Registered User
Join Date: Apr 2003
Location: Indep, MO
Posts: 5,893
|
Re: Project '64 Cheapskate
Nice line work! Gettin' close to makin' noise!
__________________
Boppa's Old Yeller Truck Build, Old Yeller's New Heart! Project Buzz Bomb Flyin' Low! |
|
|
|
|
07-08-2014, 12:02 AM
|
#624 |
|
Registered User
Join Date: Nov 2008
Location: So. Cal.
Posts: 452
|
Re: Project '64 Cheapskate
I went over to Alex' house this afternoon because he had an AC fitting I needed for my truck deal and I finally saw his fuel and transmission, first attempt at making lines deal. Holy crap! It came out absolutely AWESOME and I was blown away by how clean and tidy it was! This truck is going to blow people away when they actually look at all the nice little details! Who says low buck can't be badass?! Nice job dude!
__________________
It's all about the stance, baby! http://67-72chevytrucks.com/vboard/s...d.php?t=320546 |
|
|
|
|
07-09-2014, 01:34 PM
|
#625 |
|
Registered User
Join Date: Apr 2003
Location: Indep, MO
Posts: 5,893
|
Re: Project '64 Cheapskate
I would posit that low buck is MORE badass, since you didn't just go out and buy whatever.
__________________
Boppa's Old Yeller Truck Build, Old Yeller's New Heart! Project Buzz Bomb Flyin' Low! |
|
|
|
 |
| Bookmarks |
|
|


 Linear Mode

