
|
 08-06-2023, 12:17 PM
|
#176 |
|
Registered User
Join Date: Jun 2014
Location: Mocksville, NC
Posts: 1,726
|
Re: Sullii the 72 GMC 1500
After the first drive and discovering some items that need attention, I decided to hit the two most significant to me. Those being the steering and driveshaft. For the steering, I decided to go through and double check my alignment. The camber and toe were out a bit so I dialed those back in. I landed on about 0.2 degrees negative camber on both sides, and 1/8" toe out. I read, in detail, through all the alignment threads I could find and the consensus seemed to be that these trucks should be toed out 1/8", not in. I also checked to make sure the springs are seated properly since the driver side is rubbing. From what I can tell they are properly centered on top and bottom. I think my only solution to the rubbing spring is going to be to go back on some of my caster mod. Right now I'm 3/4" forward on the lower arm and I will probably have to go to 3/8" to give enough clearance for the spring.
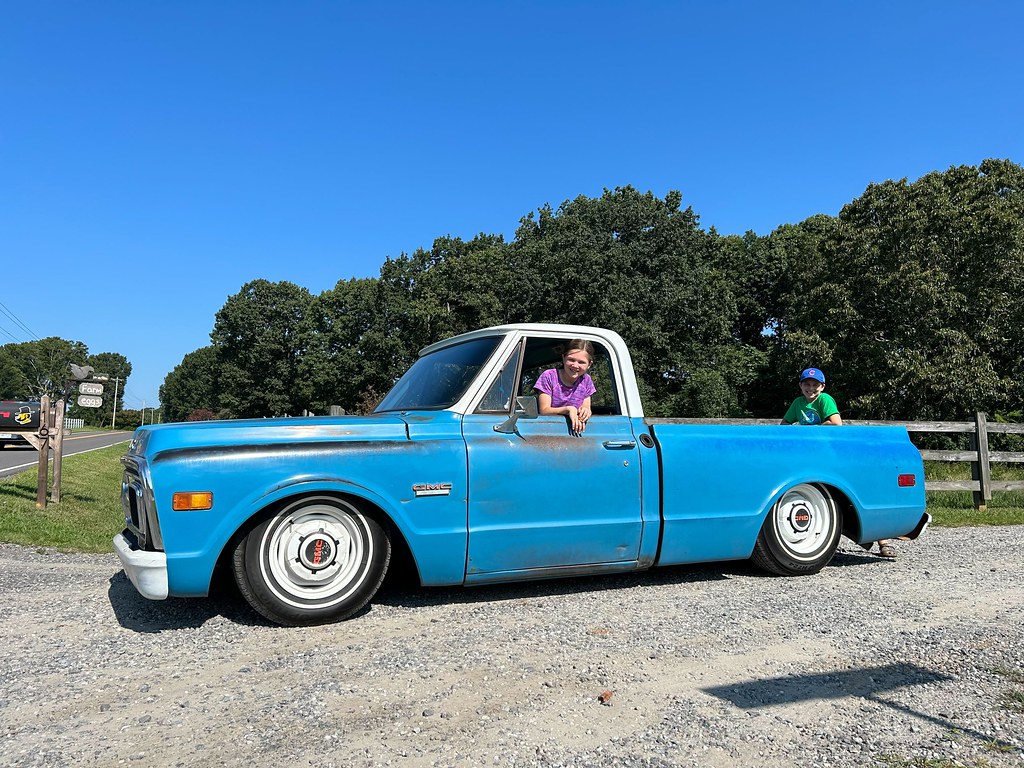
   For the driveshaft, I realized that I totally messed up on the angles. When I initially measured I figured I would need a half inch spacer under the carrier bearing. After measuring the current angles, I realized I would need a 1 inch spacer to get close to where I needed to be! The original goal was to raise the carrier until the first shaft was at the same angle as the pinion. With the 1 inch spacer I am within 1/2 degree between the two.  I was out of spacers and couldn't get it any closer so I figured I might as well give this a try and see if I've at least made an improvement. This did indeed improve the vibration drastically. There is still a brief shudder that has moved up in RPM from my first drive, but I feel like I can clear that up with another shim or two. As for the steering, I only made minimal adjustments to the alignment so I didn't expect much of a change there. I was mainly wanting to reassure myself that the alignment was correct and put more time in driving the truck to get a good feel for it. I was able to go out and drive around town for about one hour and under most circumstances I was ok with the steering. It definitely does track straight, so that's a positive. It's only when doing slow speed maneuvering, or driving around our downtown area that it becomes tedious to drive. For now, I am satisfied enough with it that I will keep going on other items that need to be completed before I can call this phase of the build complete. This time, my daughter came along for the ride and she loved it. 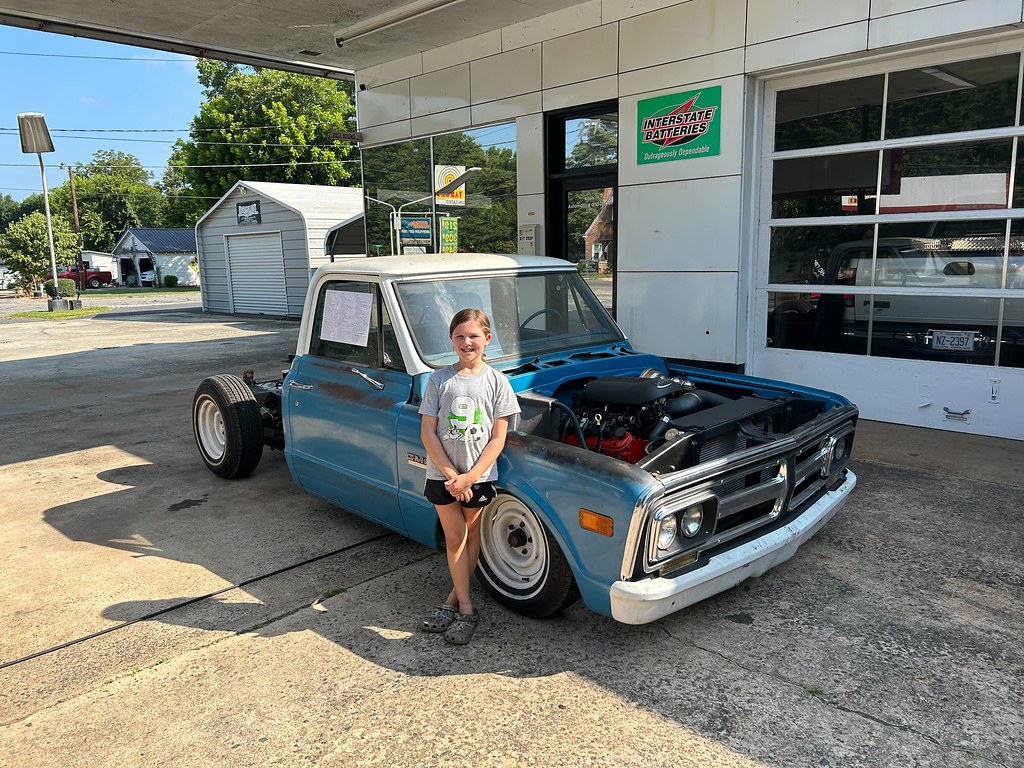 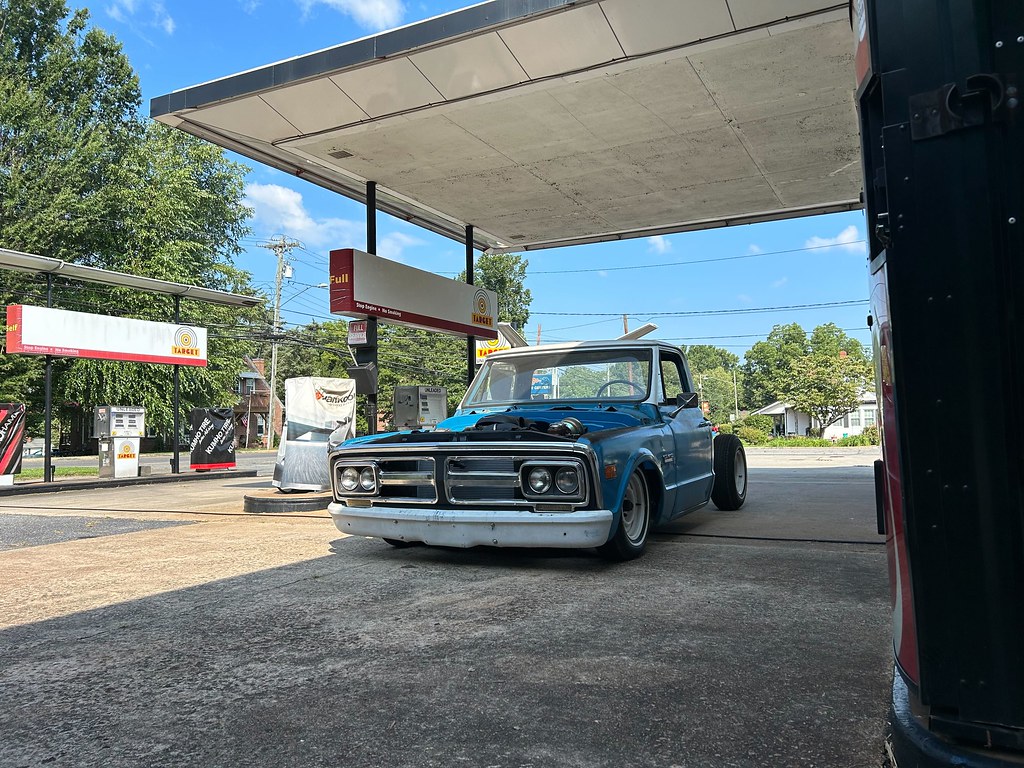 As a bonus, I also discovered a little something my kids did some time during the tear down of the truck. It appears that they both decided to carve their initials into the bed floor. Part of me was upset they thought this would be ok, but honestly look at the rest of the truck! I also figured it is now part of the history of the truck and a reminder of the times they helped me with it. They for sure though got a talking to that they are never to scratch their initials into another car! 
__________________
Builds: Green Gus the 68 C10 ; Sullii the 72 1500 - Instagram: @dr.hewitt - C10 Concept/Development Photos: Master Thread Last edited by hewittca; 08-07-2023 at 07:04 AM. |

|

|
|
08-07-2023, 08:43 PM
|
#177 |
|
Senior Member
 Join Date: Mar 2011
Location: Hanover NJ
Posts: 4,111
|
Re: Sullii the 72 GMC 1500
I truly appreciate the technical feedback and will need to get mine on a rack for alignment at some point there is a shop that is familiar with our trucks and your posts keep me on my toes... but what really makes my day is your children and how they are a part of this journey ...yes my first thought would be like yours about ...keying in initials ...but that's now a keep safe ...coincidently we started renovations on our main bath today and I memorialized my there kids names and ages on the wall behind the medicine cabinet 18 years ago .. now they have kids of their own.I gave it a update with my two grand babies 20 months and 2 weeks and four days FAMILY and TRUCKS who's better than us
__________________
Doc & Kim build http://67-72chevytrucks.com/vboard/s...d.php?t=722288 I am from the desert http://67-72chevytrucks.com/vboard/s...d.php?t=650332 basket case build SOLD http://67-72chevytrucks.com/vboard/s...d.php?t=648557 |
|
|
|
|
08-08-2023, 06:41 AM
|
#178 |
|
Registered User
Join Date: Jun 2014
Location: Mocksville, NC
Posts: 1,726
|
Re: Sullii the 72 GMC 1500
Thank you, and congrats on another grand baby! Family definitely puts things in perspective about what's important, and it's great to have them a part of the things you are passionate about. Working on the truck is fun for me, but the best part is when we go for a ride and the kids just sit there with a smile on their face and ask if we can keep going instead of turning back towards the house.
__________________
Builds: Green Gus the 68 C10 ; Sullii the 72 1500 - Instagram: @dr.hewitt - C10 Concept/Development Photos: Master Thread |
|
|
|
|
08-13-2023, 07:43 PM
|
#179 |
|
Registered User
Join Date: Jun 2014
Location: Mocksville, NC
Posts: 1,726
|
Re: Sullii the 72 GMC 1500
The only things I needed to get all my body panels reinstalled were hood hinges and a friend to help! Everything came together to make that happen this weekend. First, the hood hinges. I looked into Porterbuild and Switch Suspension since they are the only ones that make the cowl mounted hinges. AZ Pro Performance had one set of Switch Suspension hinges in stock, otherwise it was a 4 week wait on Porterbuilts. I decided to go with the Switch hinges. Overall, I am pleased with their quality. One thing I will say is I wish they included photos in their instructions. You can see in this first photo that I have installed the front cowl plate upside down. We did not realize this until the hood was installed and we could not get the struts on. This realization in the 95 degree heat and what felt like 100% humidity just about derailed my motivation to continue, but my friend encouraged me that we should press on. And we did!
 Once we completely disassembled the hinges and installed them correctly, the struts went on perfectly. These hinges are definitely stout, and the struts are eager to lift the hood. In fact, maybe a bit too eager. You actually have to keep a hand on the hood to prevent it from slamming up too quickly. I'm wondering if these struts will loose some of their force after a while. It was great to see the hood on the truck again.    After finishing the hood, it was time to back the truck into the shop and get busy on the bed. I already had it reassembled and ready to lift onto the frame.   I also had a chance to bend up the bracket I needed to mount my fuel filler. This is a 1.5" filler with a o-ring sealed cap. This bracket mounts behind the driver side marker light. In my haste to finish the bed install, I did not get any other photos of this filler installed. Those may not be worth it to add later because the filler actually doesn't work that well! The filler hose is close to level between the filler and the tank which makes it very slow to fill. I may end up just putting a door in the bed floor over top of the fill neck on the tank. 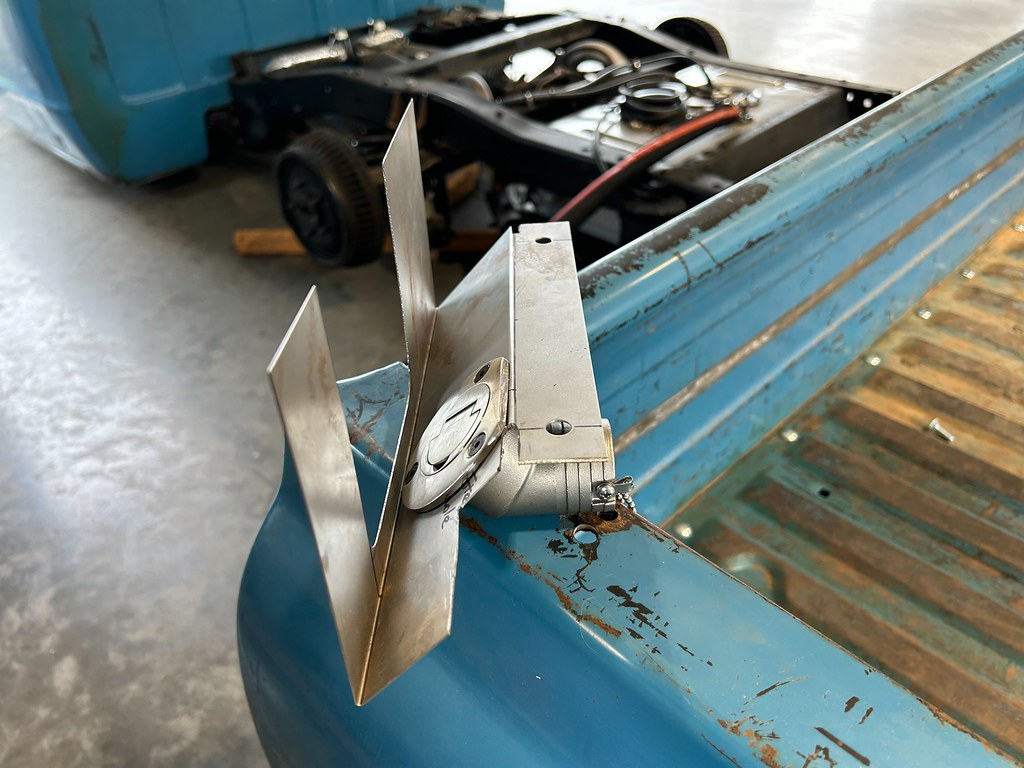 Installation of the bed allowed us to knock a few other items off the install list including bumper, wiring, lights, and the above mentioned failure of a fuel filler. With everything installed, the truck is literally too low to fit a jack under it! I had to lower it down on some 2x6s to sneak the jack out. After dropping it down, we rolled it outside for the first glimpse of the truck fully assembled and outside. This was definitely an exciting moment!    Of course, the next logical step was to get in and go for a drive. My friend and I cruised around town for about an hour before we had to head home due to an impending storm. I was not ready to test this thing in the wet weather yet.   The next morning I took the truck out again, this time accompanied by my daughter. It was early Sunday morning so I thought it was a good time to take the truck out on the highway and see how it performs. At 2100 RPM we were cruising with ease at 70 mph and tracking dead straight down the road with almost no steering input. I must mention here that along with all the reassembly I also tweaked the alignment again. I decided to go half back on my caster mod and redrill my index holes at 3/8" forward (instead of 3/4"). I also went to 1/8" toe IN instead of toe OUT. Both of these changes definitely made an improvement in the steering. After looking back through the alignment threads it really is hard to say whether these trucks should be toe in or out, but on my truck I like the feel of toe in slightly better. After the run up the interstate we stopped to wash the truck for the first time in two years and take a few photos.     At this point, the truck is ready to start driving while I continue to make incremental updates. For now, I am going to continue putting miles on it to build confidence in the truck as a whole. I also need to keep it in a drivable state because my goal all along was to drive it to the C10 Fall Revival in October. My updates may slow down from here on out but I will still be here updating when I have something to share! 
__________________
Builds: Green Gus the 68 C10 ; Sullii the 72 1500 - Instagram: @dr.hewitt - C10 Concept/Development Photos: Master Thread |
|
|
|
|
08-14-2023, 08:05 AM
|
#180 |
|
Senior Member
Join Date: Aug 2004
Location: Centennial, CO
Posts: 2,898
|
Re: Sullii the 72 GMC 1500
I bet you'll rack up a lot of miles now! It looks great and its cool that your daughter got to come along.
I'm curious to see what your alignment angles look like now. If you ever get it on a rack, post up the results. How's it running?
__________________
ClusterTruck: 68 C10 Bought in 89, wrecked in 03. Slow low $ rebuild started '17. 6.0 & TKO http://67-72chevytrucks.com/vboard/s...d.php?t=788602 93 K1500 Short Step, 350, NV4500, EBL flash ECU. Vortec heads & roller cam someday... 05 Jeep Wrangler Unlimited. 3 lift & 6-speed 02 E320 the insurance total free car 13 Tahoe LTZ |
|
|
|
|
08-14-2023, 03:01 PM
|
#181 | |
|
Junior Member
Join Date: Apr 2023
Location: Anchorage, Alaska
Posts: 97
|
Re: Sullii the 72 GMC 1500
Quote:
|
|
|
|
|
|
08-15-2023, 06:41 AM
|
#182 |
|
Registered User
Join Date: Jun 2014
Location: Mocksville, NC
Posts: 1,726
|
Re: Sullii the 72 GMC 1500
Thanks y'all! So far she's running really well. Overall, I am happy with the baseline I have to work with now. There are a few things that still need attention, but it is drivable as is. There is a weird scrubbing sound when I first start moving. Almost like the brakes are dragging but then it goes away all of a sudden. It will return if I coast down to that slow speed again without the brakes, so I don't think it's them. Still trying to source that sound. Also, the driveshaft still has a slight vibration. I've managed to eliminate most of it, but I have gone both directions on my carrier shims and it's still there. Next I think I need to recheck my pinion angle and possibly reshim that. Lastly, the manual steering is better than it was with these new alignment specs but it is still a chore. I am currently looking into which power steering box I want to use. I'm torn between a stock box and one of the later variable ratio boxes. On my old truck I swapped to a variable ratio and didn't like it much, but I felt like the box I got was junk and I didn't get a good feel for what that box would be like.
Aside from all that, I did get the chance to drive my truck to work for the first time. This is always a milestone voyage for my builds since work is about an hour away. Other than me melting in this NC heat, the truck handled it flawlessly. The only thing I'm kind of bummed about is the gas mileage. I was expecting closer to 20 mpg but I'm roughly at 15-16 mpg. Granted, it could be my heavy foot during all these test drives! 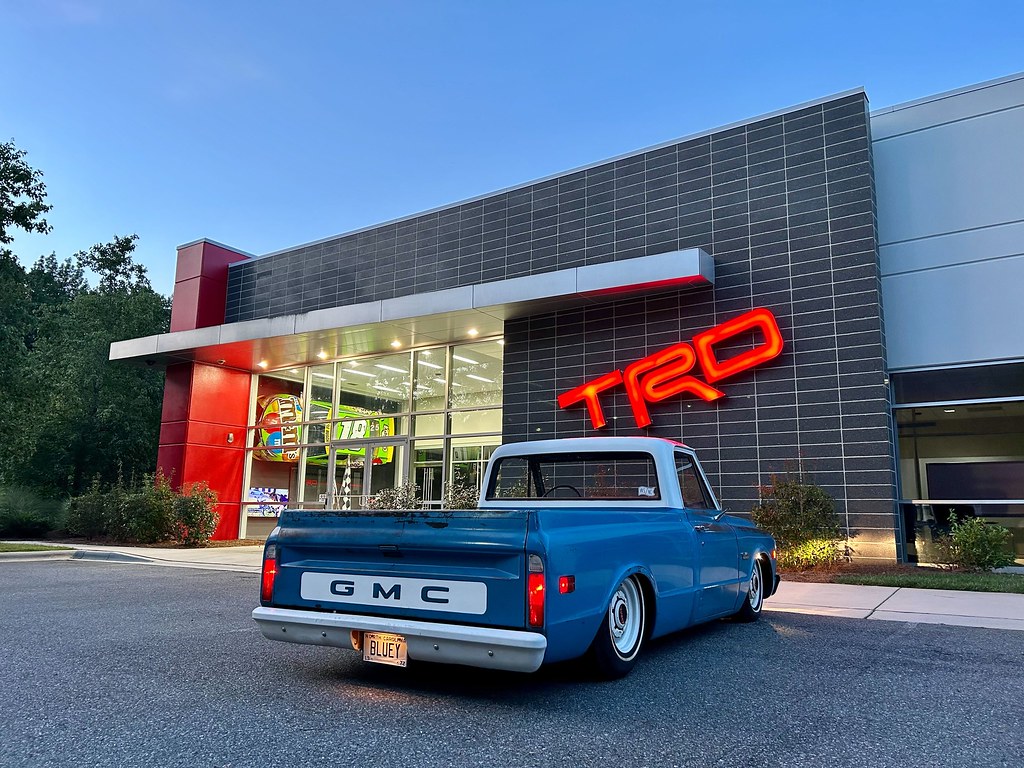
__________________
Builds: Green Gus the 68 C10 ; Sullii the 72 1500 - Instagram: @dr.hewitt - C10 Concept/Development Photos: Master Thread |
|
|
|
|
08-15-2023, 07:07 AM
|
#183 |
|
Senior Member
Join Date: Mar 2011
Location: Hanover NJ
Posts: 4,111
|
Re: Sullii the 72 GMC 1500
Amazing the entire journey congratulations
__________________
Doc & Kim build http://67-72chevytrucks.com/vboard/s...d.php?t=722288 I am from the desert http://67-72chevytrucks.com/vboard/s...d.php?t=650332 basket case build SOLD http://67-72chevytrucks.com/vboard/s...d.php?t=648557 |
|
|
|
|
08-15-2023, 02:54 PM
|
#184 |
|
Registered User
Join Date: Apr 2014
Location: Azle,Texas
Posts: 2,248
|
Re: Sullii the 72 GMC 1500
Such a cool truck! I'm happy for you man. 100% glad you stayed with the
 grille. When I get my 72 roadworthy I hope to take a long road trip. It'd sure be fun to cruise along side you. grille. When I get my 72 roadworthy I hope to take a long road trip. It'd sure be fun to cruise along side you.
__________________
Brian 1972 C10, "Loyd", LWB to SWB, 5.3, L83/6L80e, 4:11 Tru Trac, Air Ride, VA, DD, 20" Coys, 4 wheel disc, A quick LS swap turned into a 6 year frame off resto-mod. |
|
|
|
|
08-16-2023, 11:02 PM
|
#185 |
|
67-72 parts collector,
Join Date: Nov 2002
Location: Mid-MO
Posts: 22,683
|
Re: Sullii the 72 GMC 1500
I can’t get over the stance.
I absolutely love this truck. Well done!
__________________
Keith Convert to disc brakes. http://67-72chevytrucks.com/vboard/s...d.php?t=444823 |
|
|
|
|
08-19-2023, 02:10 PM
|
#186 | |
|
Senior Member
 Join Date: Apr 2013
Location: Houston,Tx
Posts: 738
|
Re: Sullii the 72 GMC 1500
Quote:
__________________
1966 C10 "Mary" 1972 C10 Cheyenne "Betty" https://67-72chevytrucks.com/vboard/...d.php?t=847364 1976 C35 Sierra Grande "Mr. Harvey" 1979 C10 Silverado "The BIG TEN" https://67-72chevytrucks.com/vboard/...d.php?t=841339 1982 C10 Silverado "Lucy" C10 Club Texas -HMIC |
|
|
|
|
|
08-20-2023, 09:15 PM
|
#187 |
|
Registered User
Join Date: Jun 2014
Location: Mocksville, NC
Posts: 1,726
|
Re: Sullii the 72 GMC 1500
Thanks everyone! I'm pretty stoked with the stance as well. It was A LOT of work to get it this low with basically stock suspension components, but it was worth the effort. I've just been putting miles on it now trying to work out the bugs. The driveshaft vibration is a constant reminder that I still have work to do. I decided to climb under the truck and actually measure my angles and I came to the realization that I was way off with my first set of estimates. The first set of angles here are my measurements and the arrow indicates direction referenced from front to rear. The ideal setup has the first shaft and pinion at the same angle and direction so they are parallel to eachother. As you can see from my numbers, the first shaft and pinion are pointed in opposite directions with 2 degrees between them. This gives me different operating angles on the universals (5.6 and 3.8) which is a definite source of vibration. With that in mind, I figured I had to add more shim to the carrier and change my pinion angle so it matches the first shaft.
 I went as high as I could on the carrier which set it to within 1/4" of the floor! This got me to 0.8 degrees down on the first shaft. Based on my initial measurements, this meant I had to rotate the pinion up by 1 degree to match. I decided to cut this angle into my drop blocs instead of changing my 4 degree pinion shims because I could not find 3 degree shims. Due to a blunder on my part, I ended up with 1.3 degrees on my bocks. Despite this, I was able to get the two angles within 0.2 degrees of eachother which is well within variation under driving conditions. With these changes, there was a noticeable improvement in the vibration. There is still a slight shudder under moderate acceleration from a stop, but I'm starting to lean towards this being loss of traction. At this point, I have the angles as close as I can possibly get them. If this shudder bothers me I may look into swapping to one of those poly center bearings.   
__________________
Builds: Green Gus the 68 C10 ; Sullii the 72 1500 - Instagram: @dr.hewitt - C10 Concept/Development Photos: Master Thread |
|
|
|
|
08-20-2023, 09:22 PM
|
#188 |
|
67-72 parts collector,
Join Date: Nov 2002
Location: Mid-MO
Posts: 22,683
|
Re: Sullii the 72 GMC 1500
Just my preference,… but I hate that style carrier bearing.
Even the poly version. The poly version allows for zero give. Do you have a slip yoke in the rear shaft? I know all the heavy duty 1-ton and bigger trucks use the “horse shoe” shaped carrier bearings. I would definitely consider switching to that style with a rear slip yoke.
__________________
Keith Convert to disc brakes. http://67-72chevytrucks.com/vboard/s...d.php?t=444823 |
|
|
|
|
08-20-2023, 09:30 PM
|
#189 |
|
Registered User
Join Date: Jun 2014
Location: Mocksville, NC
Posts: 1,726
|
Re: Sullii the 72 GMC 1500
Throughout the build of this truck, my friend Nick has been a huge help in getting some of the more daunting projects completed, like sectioning the crossmember, z-ing the rear frame, modifying the bedsides, all the suspension work, engine work, exhaust, hood hinges, etc. This truck wouldn't be anything close to my vision without his help. Recently, he also machined me this really nice shift lever for my truck since the 2002 Blazer shifter didn't quite fit the build. I think this retro style lever is perfect for the truck; now I just need to finish the rest of the interior! Here we are the day we got the engine started for the first time (I'm on the right).
  
__________________
Builds: Green Gus the 68 C10 ; Sullii the 72 1500 - Instagram: @dr.hewitt - C10 Concept/Development Photos: Master Thread Last edited by hewittca; 08-21-2023 at 06:50 AM. |
|
|
|
|
08-20-2023, 09:34 PM
|
#190 | |
|
Registered User
Join Date: Jun 2014
Location: Mocksville, NC
Posts: 1,726
|
Re: Sullii the 72 GMC 1500
Quote:
__________________
Builds: Green Gus the 68 C10 ; Sullii the 72 1500 - Instagram: @dr.hewitt - C10 Concept/Development Photos: Master Thread |
|
|
|
|
|
08-20-2023, 09:51 PM
|
#191 |
|
Registered User
Join Date: Jun 2014
Location: Mocksville, NC
Posts: 1,726
|
Re: Sullii the 72 GMC 1500
I've been driving the truck around and thought it would be a good illustration to recreate a few photos I took when I first got the truck. These two comparisons really illustrate the 9/10 drop I ended up with. Overall, the ride quality at this level of drop is actually quite good.
    Here's a few more photos out and about, just trying to put some miles on the truck. At this point, I am feeling pretty confident that I can make the 2 hour drive to the C10 Fall Revival without any real worries. I will continue to drive the truck locally to make sure no other issues arise. I think this one is quickly becoming a driver!  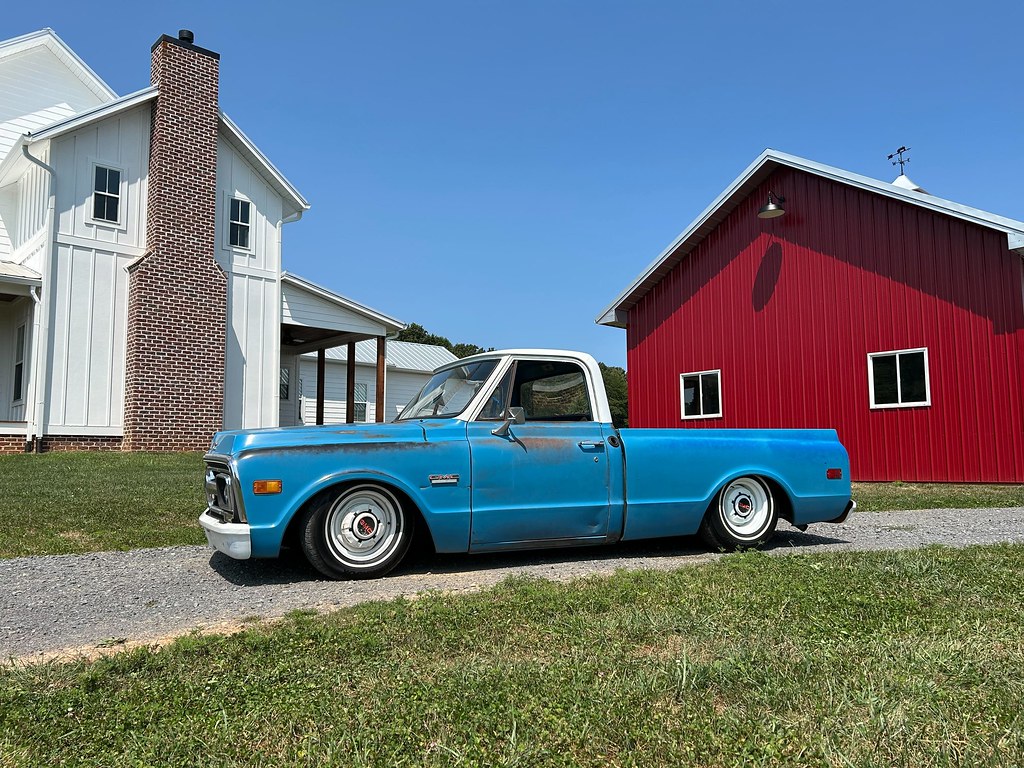    
__________________
Builds: Green Gus the 68 C10 ; Sullii the 72 1500 - Instagram: @dr.hewitt - C10 Concept/Development Photos: Master Thread |
|
|
|
|
08-20-2023, 10:50 PM
|
#192 |
|
Registered User
Join Date: Apr 2014
Location: Azle,Texas
Posts: 2,248
|
Re: Sullii the 72 GMC 1500
I think you have produced one of the better write ups with this build, thorough explanations and pictures of each dilemma and corresponding fix. It shows the huge amount of work required to have such a cool ride. Absolutely well done. Seeing the changes in your kids adds to the perspective as well, even though you've handled it much quicker than probably most extensive builds, we can see how much your children have grown over the process. I'd bet you already do... but be sure to return the favors that Nick has done for you. Good friends like him aren't easy to come across. Don't be a stranger. I'll need your assistance when I'm able to get back to work on my 72.

__________________
Brian 1972 C10, "Loyd", LWB to SWB, 5.3, L83/6L80e, 4:11 Tru Trac, Air Ride, VA, DD, 20" Coys, 4 wheel disc, A quick LS swap turned into a 6 year frame off resto-mod. |
|
|
|
|
10-04-2023, 12:28 PM
|
#193 |
|
Registered User
Join Date: Jun 2014
Location: Mocksville, NC
Posts: 1,726
|
Re: Sullii the 72 GMC 1500
Wow, it's already been over one month since I've had the truck running and I feel like I haven't updated this thread in forever! The last month has been extremely busy at home, but I have found time to get out and drive the truck a few times per week.
 My son started baseball and we drove the truck to his first game.  Then one morning about two weeks ago I pulled the truck out of the garage and could smell coolant. When opening the hood I was greeted with a spray of coolant leaking from the water pump and scattered by the pulley. So, it was time to go back up on jackstands and get this fixed. The water pump was original to the motor, so for this fix I decided to skip junkyard pumps and just go with a new Gates replacement. A little orange paint and steam port fitting and it was ready to bolt on.   While the truck was up on jackstands, I figured it was a good time to take care of a few more items before I make it to my goal destination of the Fall Revival. I went back and forth on if I wanted to flip the tires to blackwalls out. Ultimately, I chose blackwalls and had the tires flipped. I think these tires match the overall vibe of the truck better. With the whitewalls, wheels, and caps it was a little too much white.  I also wanted to get my door and window seals installed so everything would quit rattling around while I drive (more on the seals in a later post). While I had the door panels off, I hit them with some cleaner and the pressure washer. On the left is original, right is washed. Overall they look significantly better, but as a whole they still look desperately worn out. One day I will replace these...  Then I started thinking, wouldn't it be nice if I could get the power steering upgrade done before I drive this thing 2 hours to the show? I searched around and found what I thought was a good deal on a power steering box, so I ordered it. Along with that I had to get lines, pump, pump brackets, pulley, belt, pitman arm, and steering coupler. These things add up quick! After bolting the box on things just weren't lining up right. I also had significant interference between the crossmember and tierod.  I started measuring between my manual box and this power box and found that the sector shaft was about 0.8" longer on the new box. Then I took a few steps back and really started analyzing this box and realized it wasn't even the correct box for our trucks! Although it was stamped with the part number that I wanted, the box itself was a Saginaw 800 series box.    At this point I was still determined to get this swap done, so I promptly ordered another box from a different supplier. This box should arrive today, so hopefully I will be back on track to getting this swap done. Once I do, I will update with all the details on the swap.
__________________
Builds: Green Gus the 68 C10 ; Sullii the 72 1500 - Instagram: @dr.hewitt - C10 Concept/Development Photos: Master Thread |
|
|
|
|
10-08-2023, 08:52 PM
|
#194 |
|
Senior Member
Join Date: Mar 2011
Location: Hanover NJ
Posts: 4,111
|
Re: Sullii the 72 GMC 1500
your blessed never know he could go to big league one day Im liken the black walls good luck with the steer box ....been there and done that...thanks for sharing
__________________
Doc & Kim build http://67-72chevytrucks.com/vboard/s...d.php?t=722288 I am from the desert http://67-72chevytrucks.com/vboard/s...d.php?t=650332 basket case build SOLD http://67-72chevytrucks.com/vboard/s...d.php?t=648557 |
|
|
|
|
10-10-2023, 07:50 AM
|
#195 |
|
Senior Member
Join Date: Aug 2004
Location: Centennial, CO
Posts: 2,898
|
Re: Sullii the 72 GMC 1500
That's a great pic with your son. Is it the game day truck?
Wrong parts are aggravating. Hopefully you get the right one soon.
__________________
ClusterTruck: 68 C10 Bought in 89, wrecked in 03. Slow low $ rebuild started '17. 6.0 & TKO http://67-72chevytrucks.com/vboard/s...d.php?t=788602 93 K1500 Short Step, 350, NV4500, EBL flash ECU. Vortec heads & roller cam someday... 05 Jeep Wrangler Unlimited. 3 lift & 6-speed 02 E320 the insurance total free car 13 Tahoe LTZ |
|
|
|
|
10-15-2023, 07:57 AM
|
#196 |
|
Registered User
Join Date: Jun 2014
Location: Mocksville, NC
Posts: 1,726
|
Re: Sullii the 72 GMC 1500
Yes, we try to make it the game day truck if it's just the two of us, but normally it's the whole family going to the game which is quite alright too!
__________________
Builds: Green Gus the 68 C10 ; Sullii the 72 1500 - Instagram: @dr.hewitt - C10 Concept/Development Photos: Master Thread |
|
|
|
|
10-15-2023, 08:21 AM
|
#197 |
|
Registered User
Join Date: Jun 2014
Location: Mocksville, NC
Posts: 1,726
|
Re: Sullii the 72 GMC 1500
The simple power steering swap turned into a major headache with this mystery box. I fought with the vendor for about two weeks to prove that they sent the wrong part and to give me a return shipping label. Ultimately, they told me they have no guarantees that the part pictured or described on their website will match the part that arrives if it is labeled with the correct part number. Since this was drop shipped and the box had the correct part number on it, then from their perspective they sent the correct part and it's labeled as a "bought by mistake" return... This is the cost of buying from a lesser known vendor to save a few bucks. I ended up ordering another box from a more respectable vendor and within two days had the correct box in hand. This one measured within 0.1" of my manual box and resulted in a perfect fit. I was also able to use the same steering coupler that was on my manual box.
  Since I moved my alternator to the low mount position, I couldn't really utilize the stock 5.3 power steering pump. I ended up using a 2002 Camaro steering pump which mounts above the alternator. The only problem with this is I had to space it out to match the truck belt spacing. Luckily, LSX Innovations makes a nice adapter bracket with the correct spacing. For the belt, if you are using a truck alternator you need a belt that is 3/4" longer than a stock Camaro belt. I used a Gates K060795 and it fit perfectly. The outlet port on the pump is on the passenger side which is somewhat strange (maybe it's an interference issue in the Camaro). I decided to just try the Camaro lines and they actually do fit with no modifications. Maybe if you are doing a really clean custom installation you would want to use something different, but for me they work for now.   In the end, the swap was worth the effort and frustration because it is a major improvement in driving quality. The wheel almost felt too light at first, but after a readjustment period I feel like it is the perfect box for this style build. My old '68 with power steering had an extremely light wheel with almost no feel, but this '87 box is a good upgrade compared to that. It's still light, but has just enough road feel that you have confidence in the wheel. 
__________________
Builds: Green Gus the 68 C10 ; Sullii the 72 1500 - Instagram: @dr.hewitt - C10 Concept/Development Photos: Master Thread |
|
|
|
|
10-20-2023, 04:41 PM
|
#198 |
|
Registered User
Join Date: Jun 2014
Location: Mocksville, NC
Posts: 1,726
|
Re: Sullii the 72 GMC 1500
I had just a few more things I wanted to get done on the truck before I head to the Fall Revival (which is tomorrow!). First up was some 3 point belts. I didn't like riding around with the lap belts, so I ordered a set from Seatbelt Planet. They have a great selection of colors and I ended up going with electric blue. They are a close match to the original belts and will fit the interior scheme perfectly once I add carpet and a new seat cover. The only thing I had to do to make these work was make a bracket to mount the retractor. Since I don't have the tank in the cab, I was able to set the retractor back behind the b-post. My daughter is safety focused and approves of the new belts!
   I also wanted to try and fill in some of the gaps that were left from raising the bed floor. At this point, I was running low on sheetmetal and time to order more, so I made what I could. I fabbed up a center filler piece between the stock gravel guards. Why GM left this gap I have no clue, but it looks much better filled in.    After these final upgrades, I wanted to put some more miles on the truck around town to work out any bugs. I'm glad I did because my engine started missing under part throttle. I drove the truck a few times trying to figure out what was going on until it got to the point where it went into limp mode and threw a code. The truck would idle but I had no throttle pedal response. The P0120 code indicated that I had a APP sensor issue, so I ordered a new sensor for the pedal and swapped it in. I also read that if you do not have a pedal stop and you go beyond 100% throttle the PCM will freak out and go into limp mode. For safe measure, I decided to add a quick and dirty adjustable stop so I can dial the pedal in to exactly 100% at max throw.   After swapping the sensor out I drove the truck about 50 miles with no problems and then I had another issue. One morning I started the truck and I had no pedal response and the P0120 code again. This time I had to clear the code, restart the truck, and then it was fine. This makes me think the sensor was not the issue, but at this point I have not had a chance to dig into it any further. I have since put another 100 miles on the truck with no issue. I feel like the underlying issue is still lurking, however, it's intermittent enough that I am still going to give it a go at making it to the Revival. Hopefully worst case scenario will be another code that I can clear and keep truckin'. After the show I will park the truck and try to sort out the issue. I will update this thread after the show and hopefully I will have some event photos to share! 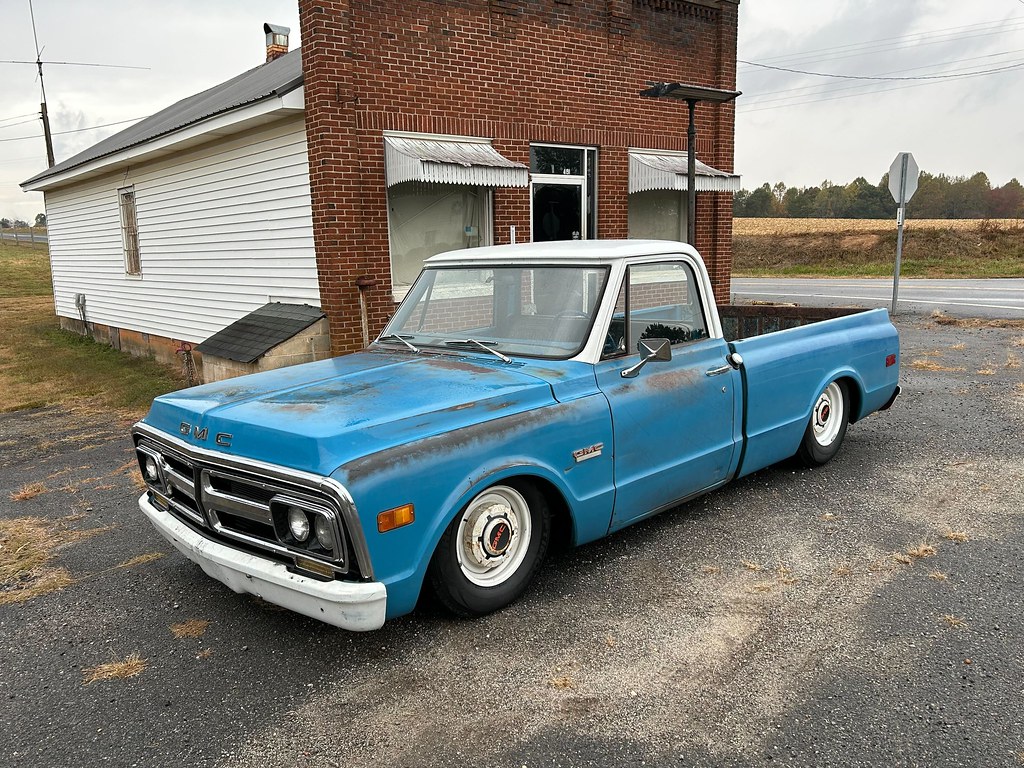
__________________
Builds: Green Gus the 68 C10 ; Sullii the 72 1500 - Instagram: @dr.hewitt - C10 Concept/Development Photos: Master Thread |
|
|
|
|
10-22-2023, 09:18 PM
|
#199 |
|
Registered User
Join Date: Jun 2014
Location: Mocksville, NC
Posts: 1,726
|
Re: Sullii the 72 GMC 1500
We made it! Saturday morning my son and I started the trek to C10 Fall Revival at 6 am. We had to make a detour to pick up my friend Nick who has helped me so much along the way. After looking over the progress he has made on his truck, we continued on our way. The total journey took about 2.5 hours. Not too bad to go to one of the best C10 shows on the east coast. We made it to within about half a mile of the venue by 9 am where they were already letting trucks in early. From here to the gates it took about 30 minutes, but who could get mad being stuck in a line of C10s?!
 By the time we got there we were already truck number 926! All of the premium spots were taken by this point and I was directed into the "overflow truck" area. Looking at the map prior to the show, I was worried if I were to end up there because it's hilly and full of roots, gravel, and dirt. Ultimately it turned out to be a great spot because it was a nice shady retreat when we needed a break.  After parking the truck, we had a short debate about whether or not to open the hood. I wanted to leave it closed because I like to stand back and look at the truck as a whole, but ultimately we opened it. After settling that debate we headed straight up to the main show area to look around.    Around lunch time my wife and daughter drove out to meet us at the show. It was amazing to have my whole family at the first outing with the truck since they have been huge supporters of my time and efforts spent working on it! My wife especially has always been by my side for the past 22 years inspiring me to stay motivated.  Unfortunately, my wife and kids had to leave early because their was a best friend's birthday to attend, so it was just myself and Nick for the remainder of the show. We tried our best to see everything, but with a final tally of "at least" 1488 trucks coming and going all day, we just couldn't make it to every one. We hung around until the official closing time of 5 pm and then started our ride back home.     All in all, it was an uneventful drive which is exactly what I was hoping for. The truck performed nearly perfectly, aside from a newly discovered driveshaft interference issue. With the weight of three people and our stuff in the bed the driveshaft found itself clashing with the cab floor brace a few times. I am confident this is because of all the play in the stock carrier bearing. I am currently debating between whether or not I want to install a poly bushing, or notch the cab floor brace. That, however, is a project for later. After thrashing on this thing for the last 6 months I think it's time to take a step back and slow down for a while. Now that the weather is cooling off, I have many projects around the house that need to be completed. For now, I want to get back to my normal project car philosophy of trying to enjoy driving them while I make incremental upgrades. I will still update this thread as I go. Although my posts will be fewer and farther between, I will still be here. I don't plan to let this truck go as hastily as I did my last one. For now, it's just lights out in the shop... 
__________________
Builds: Green Gus the 68 C10 ; Sullii the 72 1500 - Instagram: @dr.hewitt - C10 Concept/Development Photos: Master Thread Last edited by hewittca; 10-22-2023 at 10:04 PM. |
|
|
|
|
10-22-2023, 09:41 PM
|
#200 | |
|
Senior Member
Join Date: Mar 2011
Location: Hanover NJ
Posts: 4,111
|
Re: Sullii the 72 GMC 1500
Quote:
__________________
Doc & Kim build http://67-72chevytrucks.com/vboard/s...d.php?t=722288 I am from the desert http://67-72chevytrucks.com/vboard/s...d.php?t=650332 basket case build SOLD http://67-72chevytrucks.com/vboard/s...d.php?t=648557 |
|
|
|
|
 |
| Bookmarks |
|
|


 Linear Mode

