
|
 04-04-2010, 11:22 PM
|
#251 |
|
GEARHEAD
Join Date: Aug 2003
Location: MN
Posts: 6,104
|
Re: Over 25 Years Later, Finally My 71 C-10 Truck Build
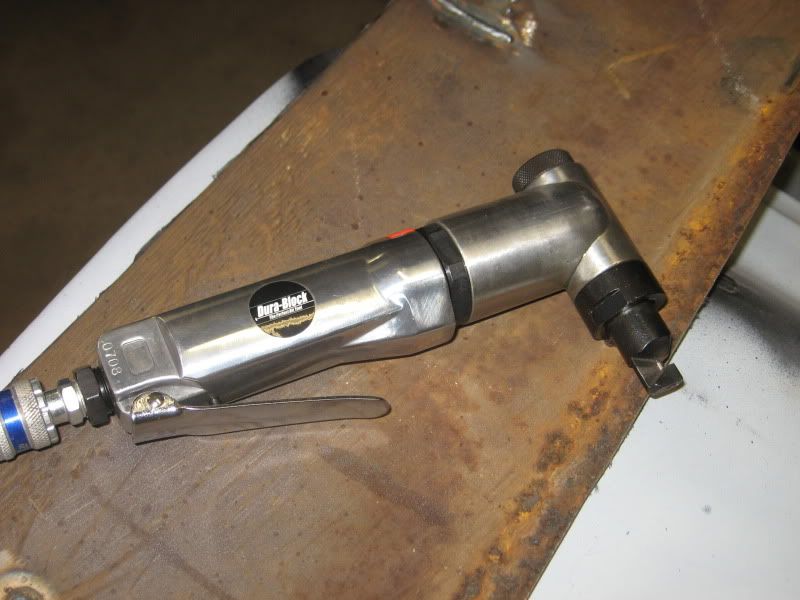
I got a new tool the other day, it works great. An air nibbler. It was about $47 and I think it will pay for itself quickly. The thin cutting wheels I've been using work fine, but are about $2 each and burn up very quick. I went through 2 and a half just cutting the tailgate section the other day. The nibbler works faster and doesn't blow sparks and grit into my face.
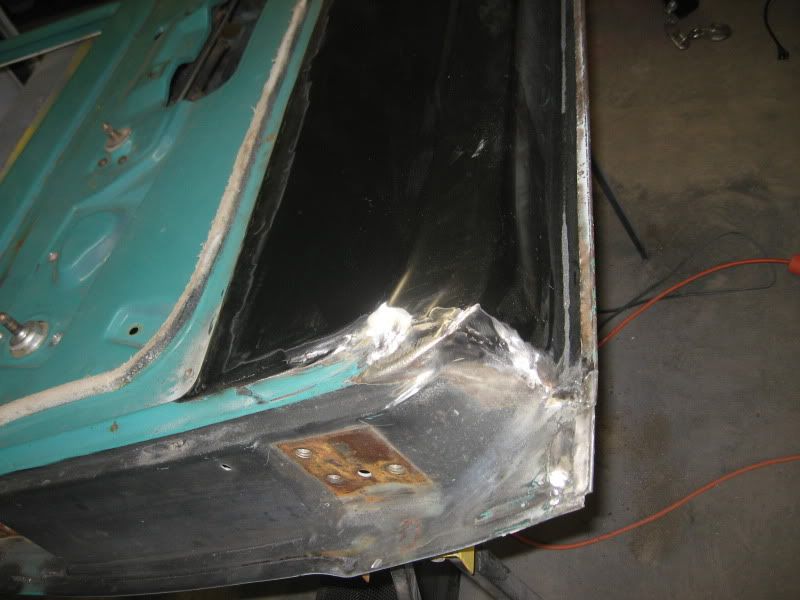
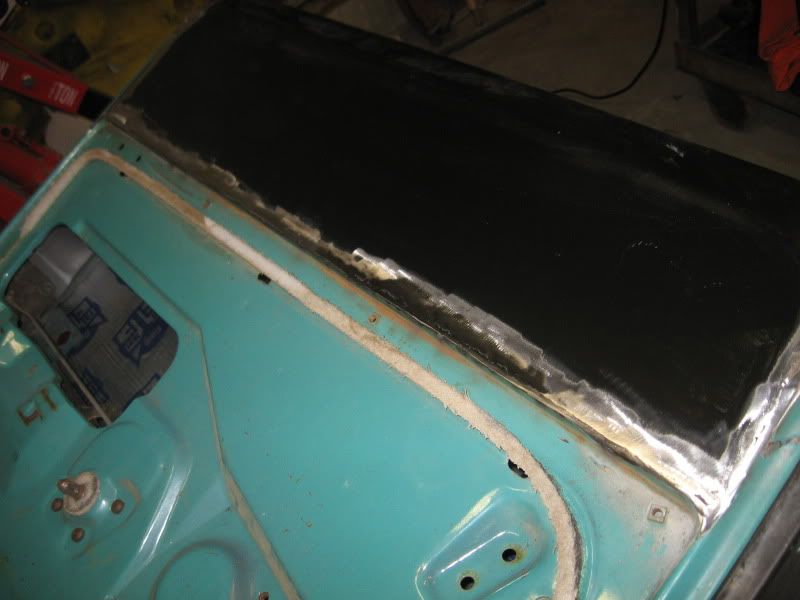
 Work continues on the pass side door. I started with doing the patch for the skin. Nice fit there. 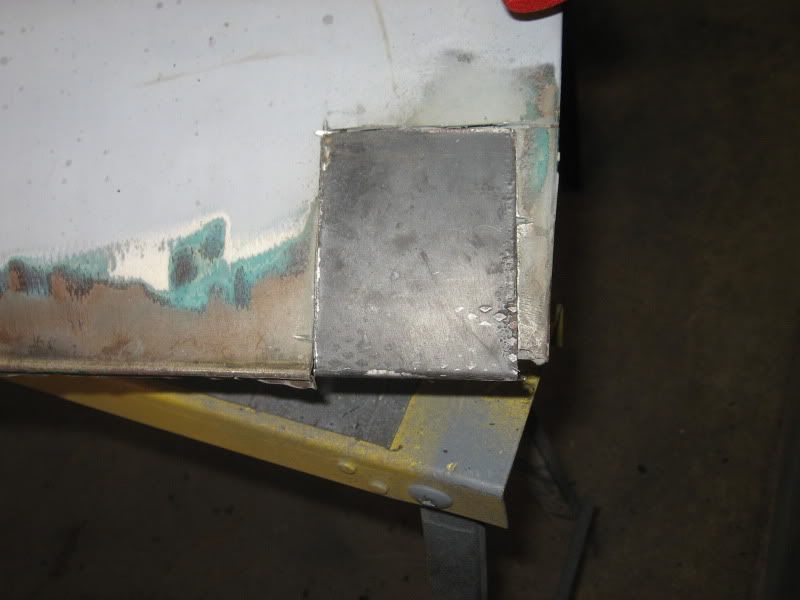 Welded it in and cleaned up the welds. 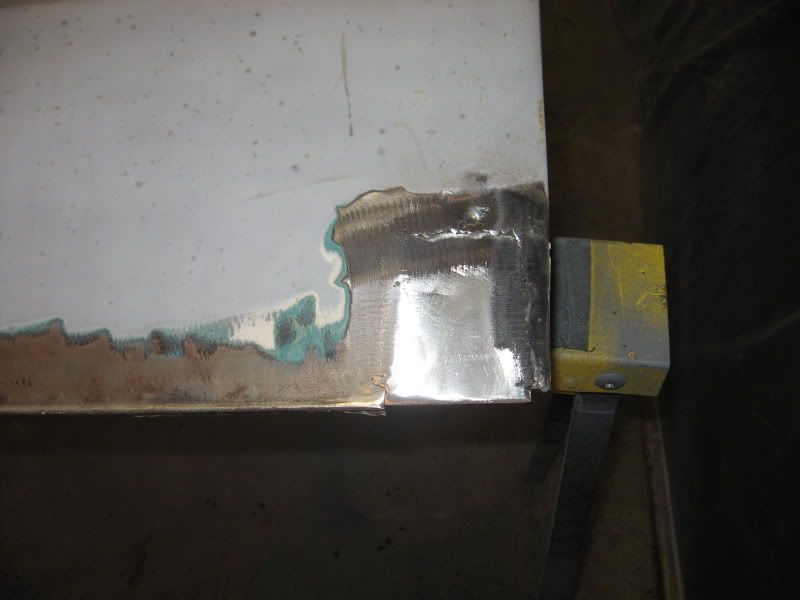 Had a small hole on the inner panel lower front corner, so I patched it up a bit. 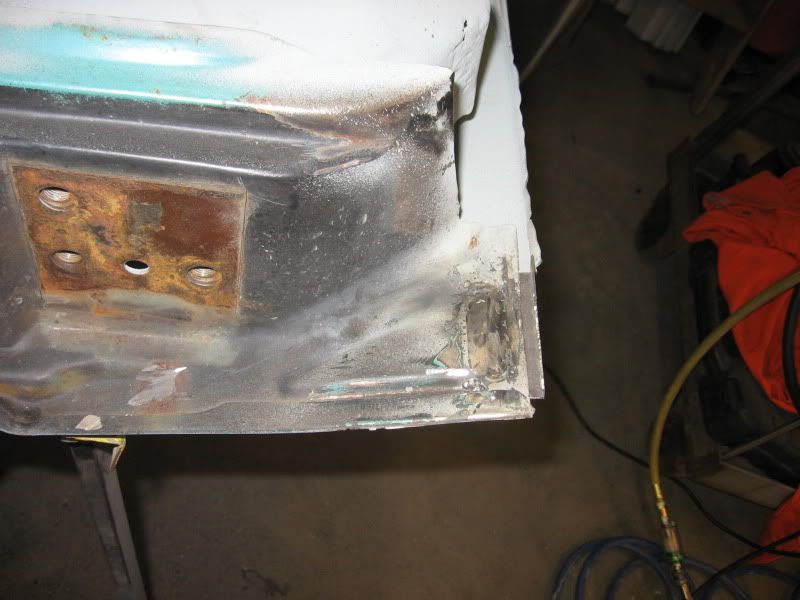 Got the fat mat layed in. 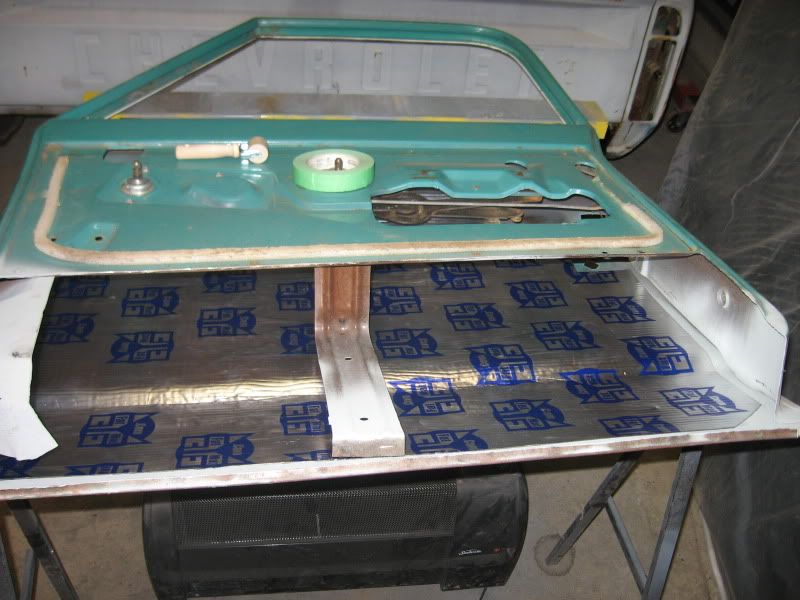 Started putting the inner patch panel in. This is as far as I got today. I should be able to finish it up this week. 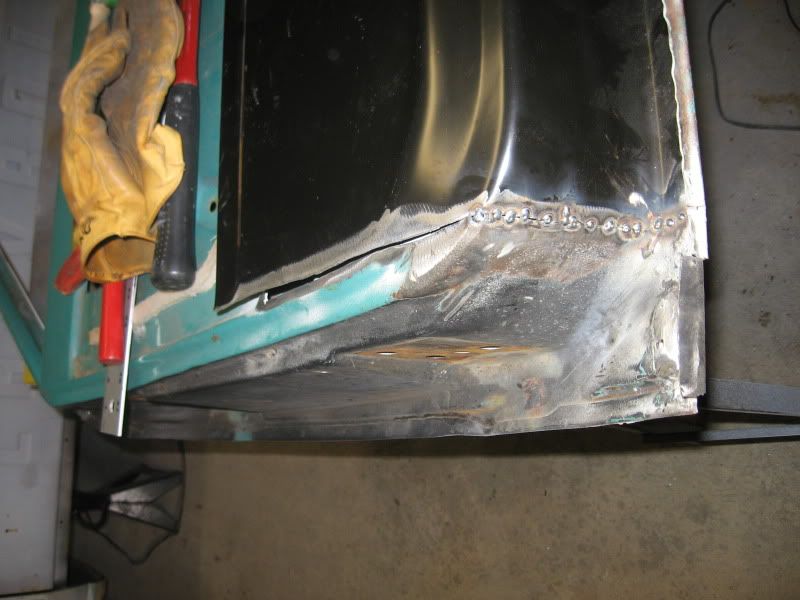 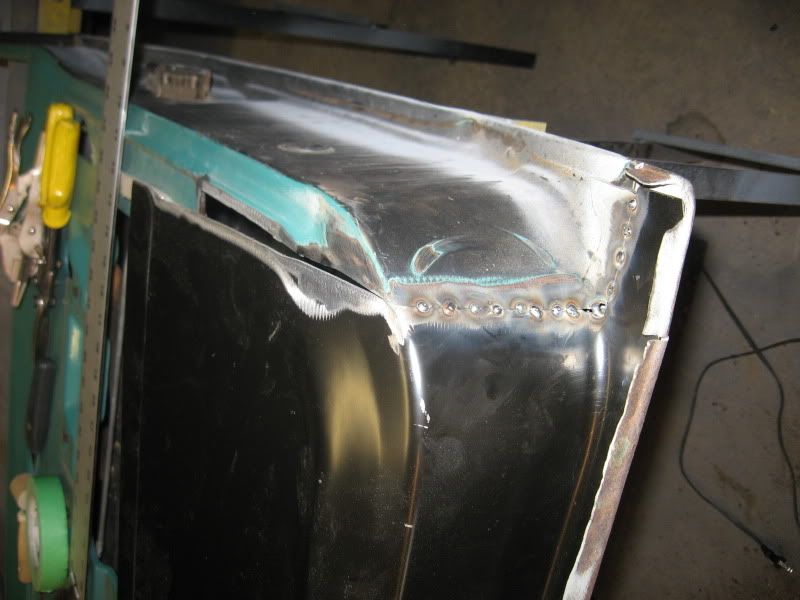 How am I doing James?
__________________
If no one knows what you're doing, they can't tell you you're doing it wrong HG's Dream Car Build - Shelby Cobra Kit Build your own adjustable track bar 71  Long Fleet C/10 Long Fleet C/10 72  Jimmy 4x4 (Junkyard Jimmy) Jimmy 4x4 (Junkyard Jimmy)HG's Plow Truck '78  K35 Dually K35 DuallyBigass Farm Truck HG's thread of miscellaneous stuff |

|

|
|
04-05-2010, 01:17 AM
|
#252 |
|
Registered User
Join Date: Jun 2007
Location: Saskatoon, Saskatchewan,:
Posts: 2,901
|
Re: Over 25 Years Later, Finally My 71 C-10 Truck Build
Looking really good! just beware of the nibbler bits, they get into everything, and I mean everything, check your socks before going into the house, they follow you around then the wife steps on one and all H#ll breaks loose, trust me.
__________________
James 1968 GMC "HAVOC" 1986 GMC "Frank" J.J.R.H. Design & Consulting My 68`Rebuild "HAVOC": http://67-72chevytrucks.com/vboard/s...d.php?t=316300 A 58' chev build thread: http://www.67-72chevytrucks.com/vboa...d.php?t=311238 1969 Camaro Pro Touring http://67-72chevytrucks.com/vboard/s...61#post3513361 Swiss Cheese: http://67-72chevytrucks.com/vboard/s...d.php?t=384390 Adjustable Trailing Arm How-To: http://67-72chevytrucks.com/vboard/s...d.php?t=321100 1968 Ford Farm Truck: http://67-72chevytrucks.com/vboard/s...=1#post6555587 |
|
|
|
|
04-05-2010, 08:27 AM
|
#253 | |
|
GEARHEAD
Join Date: Aug 2003
Location: MN
Posts: 6,104
|
Re: Over 25 Years Later, Finally My 71 C-10 Truck Build
Quote:

__________________
If no one knows what you're doing, they can't tell you you're doing it wrong HG's Dream Car Build - Shelby Cobra Kit Build your own adjustable track bar 71 Long Fleet C/10 72 Jimmy 4x4 (Junkyard Jimmy)HG's Plow Truck '78 K35 DuallyBigass Farm Truck HG's thread of miscellaneous stuff |
|
|
|
|
|
04-05-2010, 05:56 PM
|
#254 | ||
|
State of Confusion!
  Join Date: Jul 2002
Location: Gulfport, MS USA
Posts: 46,608
|
Re: Over 25 Years Later, Finally My 71 C-10 Truck Build
Quote:
Quote:
 ) )It is NOT FUN hearing about it for the next several decades (yeah, I still hear about it )
__________________
Bill 1970 Chevy Custom/10 LWB Fleetside 2010 Toyota Tacoma PreRunner SR5 Double Cab - DD Member of Louisiana Classic Truck Club (LCTC) Bill's Gallery Life isn't tied with a bow, but it's still a gift. Live simply. Love generously. Care deeply. Speak kindly. Leave the rest to God! |
||
|
|
|
|
04-10-2010, 09:23 PM
|
#255 |
|
GEARHEAD
Join Date: Aug 2003
Location: MN
Posts: 6,104
|
Re: Over 25 Years Later, Finally My 71 C-10 Truck Build
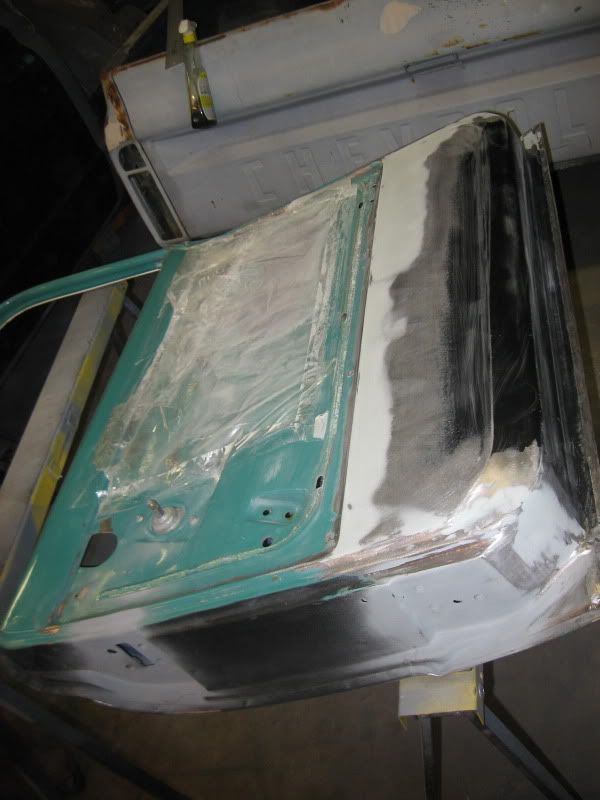
With both daughters starting softball this week, I didn't get much garage time. I finished fitting up the inner door panel on thurday, and finished welding it out today. There is a little more to do to finish it up before filler and primer, but it's very close now.
__________________
If no one knows what you're doing, they can't tell you you're doing it wrong HG's Dream Car Build - Shelby Cobra Kit Build your own adjustable track bar 71 Long Fleet C/10 72 Jimmy 4x4 (Junkyard Jimmy)HG's Plow Truck '78 K35 DuallyBigass Farm Truck HG's thread of miscellaneous stuff |
|
|
|
|
04-12-2010, 11:40 PM
|
#256 |
|
GEARHEAD
Join Date: Aug 2003
Location: MN
Posts: 6,104
|
Re: Over 25 Years Later, Finally My 71 C-10 Truck Build
I was able to get most of the filler work done on the inner side. Just need to scuff/sand and clean it, then the inside is ready for epoxy primer. I'll probably do the driver side inner also and spray both doors at once. Then do the outer skins and get them in primer next. I used a zinc primer for the hinge areas. That was bare metal from the factory.
__________________
If no one knows what you're doing, they can't tell you you're doing it wrong HG's Dream Car Build - Shelby Cobra Kit Build your own adjustable track bar 71 Long Fleet C/10 72 Jimmy 4x4 (Junkyard Jimmy)HG's Plow Truck '78 K35 DuallyBigass Farm Truck HG's thread of miscellaneous stuff |
|
|
|
|
04-23-2010, 06:25 PM
|
#257 |
|
GEARHEAD
Join Date: Aug 2003
Location: MN
Posts: 6,104
|
Re: Over 25 Years Later, Finally My 71 C-10 Truck Build
Duck, duck, gray door!
Not a lot done, but progress is progress. Between chasing after kids games, and taking a few days off with the wife, there just hasn't been a lot of spare time. I primered the hinges also. After this is mounted back up, I'll do the same to the other door. 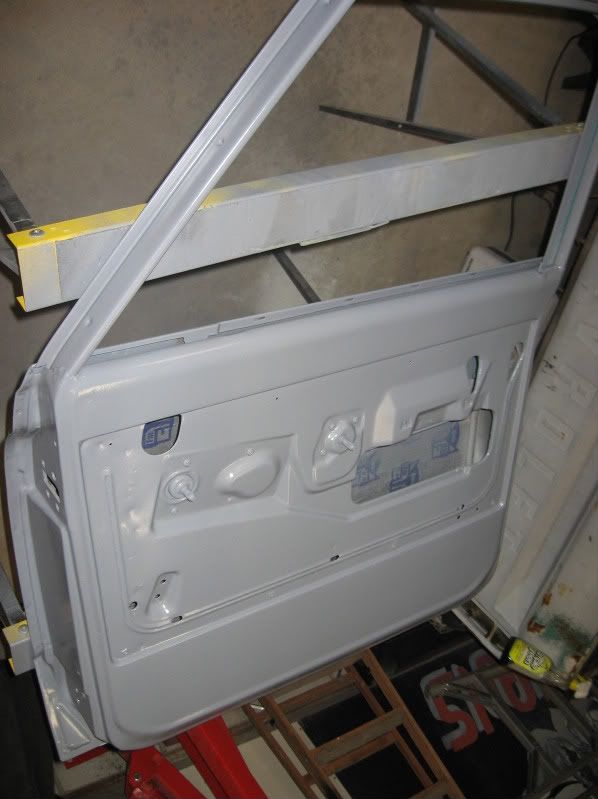
__________________
If no one knows what you're doing, they can't tell you you're doing it wrong HG's Dream Car Build - Shelby Cobra Kit Build your own adjustable track bar 71 Long Fleet C/10 72 Jimmy 4x4 (Junkyard Jimmy)HG's Plow Truck '78 K35 DuallyBigass Farm Truck HG's thread of miscellaneous stuff |
|
|
|
|
04-26-2010, 10:36 PM
|
#258 |
|
GEARHEAD
Join Date: Aug 2003
Location: MN
Posts: 6,104
|
Re: Over 25 Years Later, Finally My 71 C-10 Truck Build
Yesterday I got the driver door inside primered. The transition areas for the inner door panel turned out ok with some filler blending them in. Both doors are now mounted. I'm having a little trouble with some door gaps. The top and bottom on the driver door are real tight. These are doors from my original cab and with the new door skin and inner panel the door may have ended up being a bit taller. I don't know. The passenger side one is tight also, but not as bad. The gaps on the rear edges are good.
I guess the next step is getting the outside flat and smooth and in primer. 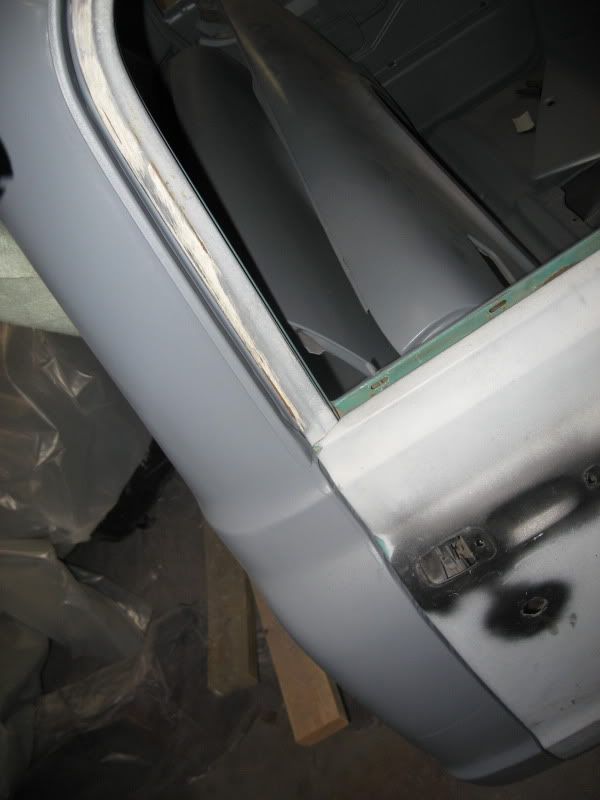 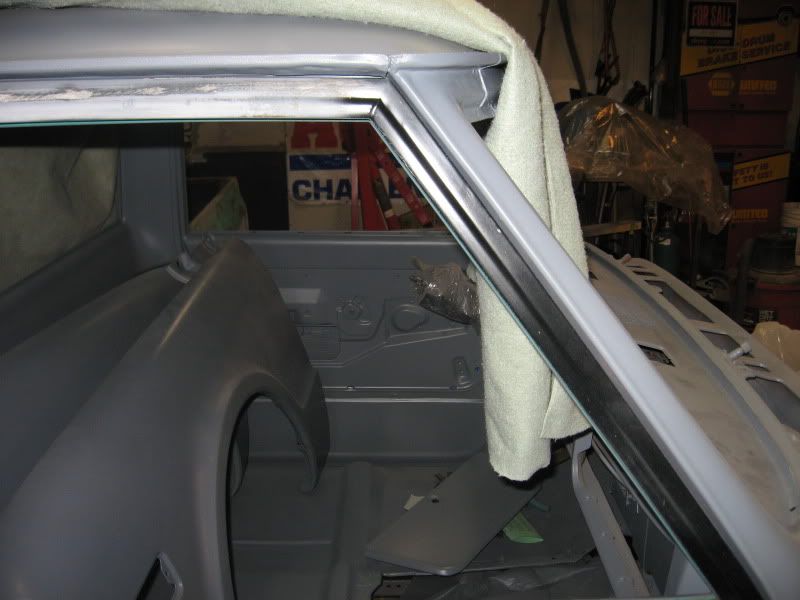 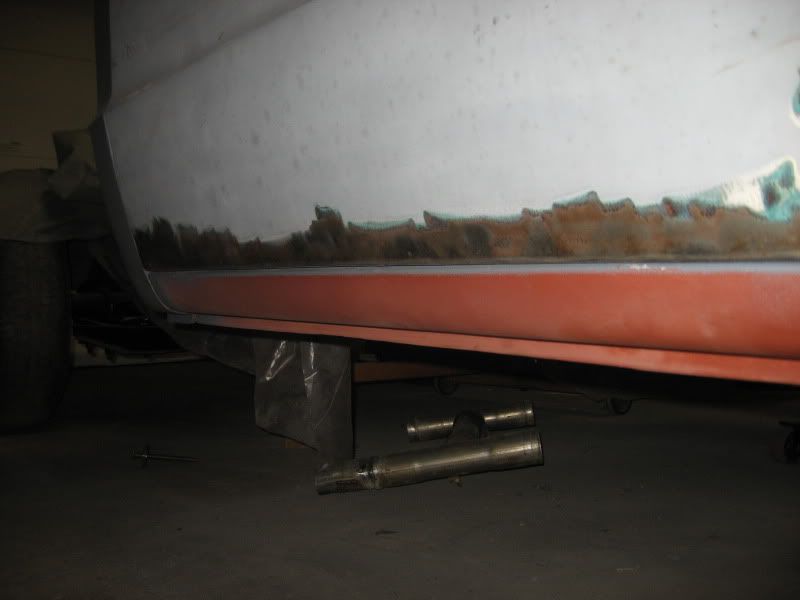 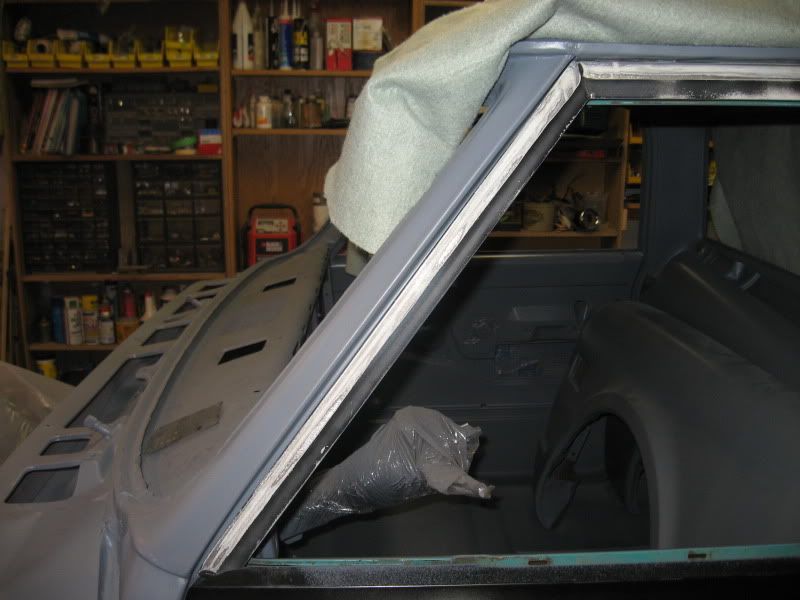 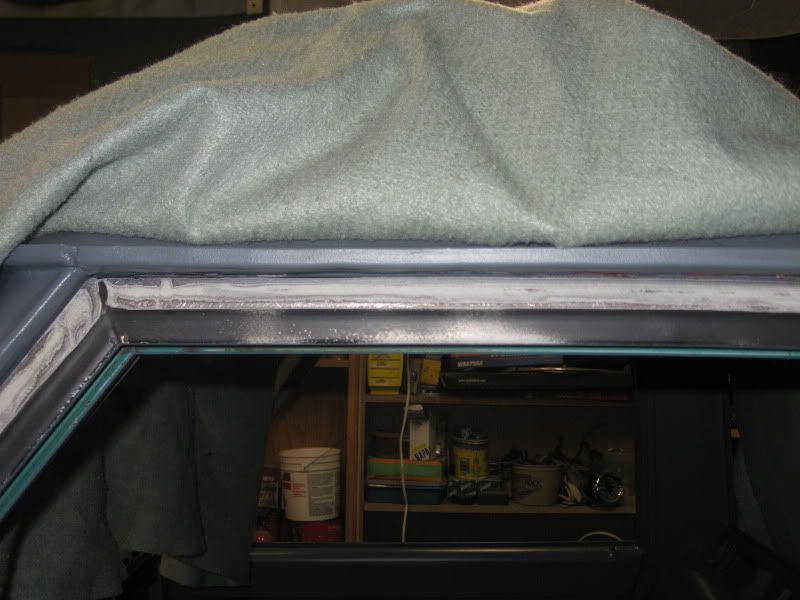 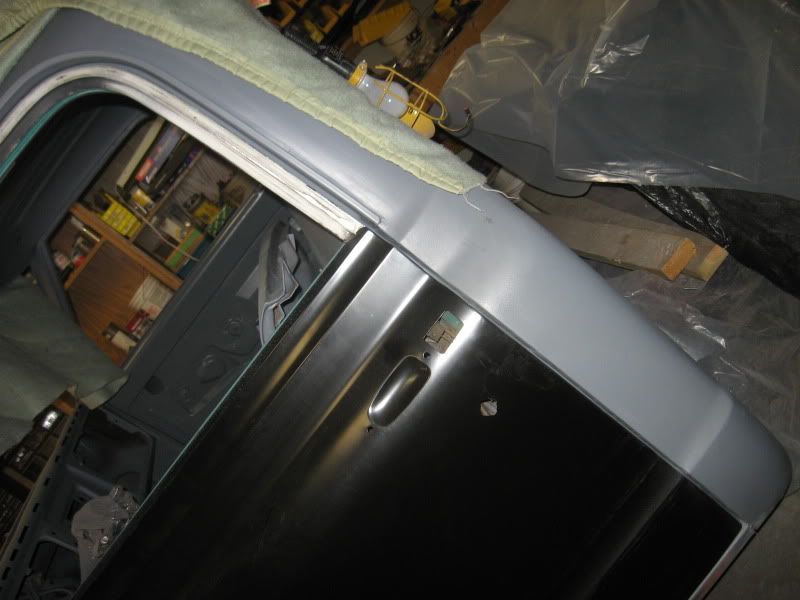 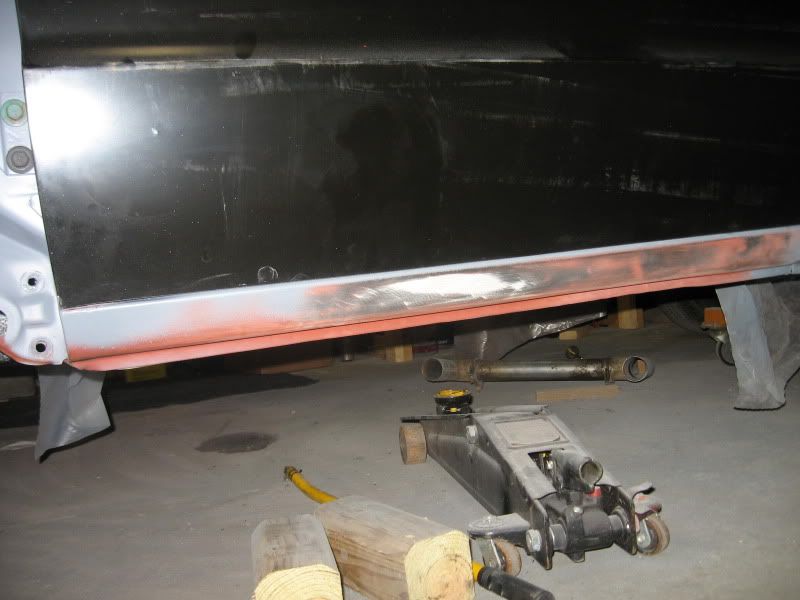 Blended the innner dor panel in, you can see the corners are not the same bends: 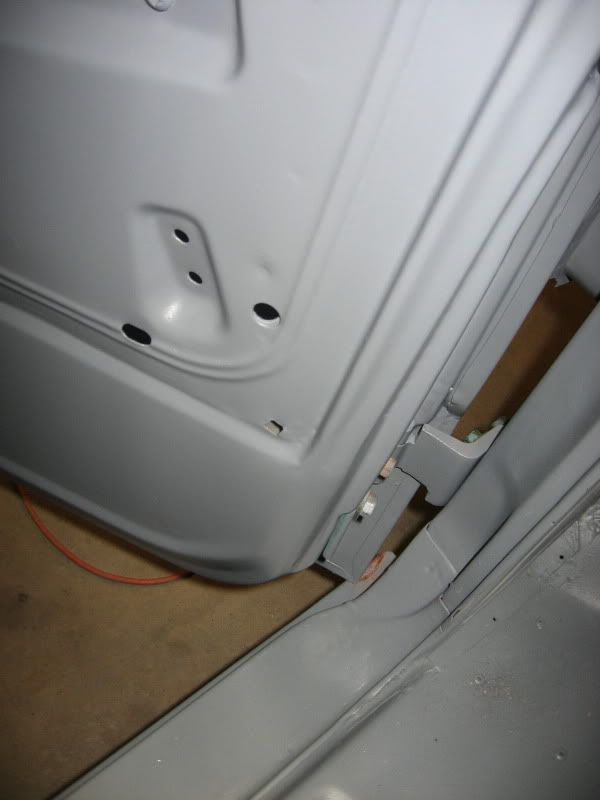 
__________________
If no one knows what you're doing, they can't tell you you're doing it wrong HG's Dream Car Build - Shelby Cobra Kit Build your own adjustable track bar 71 Long Fleet C/10 72 Jimmy 4x4 (Junkyard Jimmy)HG's Plow Truck '78 K35 DuallyBigass Farm Truck HG's thread of miscellaneous stuff |
|
|
|
|
04-30-2010, 12:19 AM
|
#259 |
|
Registered User
Join Date: Jun 2007
Location: Saskatoon, Saskatchewan,:
Posts: 2,901
|
Re: Over 25 Years Later, Finally My 71 C-10 Truck Build
One more thing, movethe door down to wher the top gap is good and cut the bottom off and weld it back up, but make sure the body lines match up first!!! BTW< it sure is coming along good, sure gettintg there, keep it up.
__________________
James 1968 GMC "HAVOC" 1986 GMC "Frank" J.J.R.H. Design & Consulting My 68`Rebuild "HAVOC": http://67-72chevytrucks.com/vboard/s...d.php?t=316300 A 58' chev build thread: http://www.67-72chevytrucks.com/vboa...d.php?t=311238 1969 Camaro Pro Touring http://67-72chevytrucks.com/vboard/s...61#post3513361 Swiss Cheese: http://67-72chevytrucks.com/vboard/s...d.php?t=384390 Adjustable Trailing Arm How-To: http://67-72chevytrucks.com/vboard/s...d.php?t=321100 1968 Ford Farm Truck: http://67-72chevytrucks.com/vboard/s...=1#post6555587 |
|
|
|
|
04-30-2010, 08:19 AM
|
#260 | |
|
GEARHEAD
Join Date: Aug 2003
Location: MN
Posts: 6,104
|
Re: Over 25 Years Later, Finally My 71 C-10 Truck Build
Quote:
I ended up having the door just a bit too tall to fit the door opening properly. If you have the rocker already replaced or set in, you need to make sure the panel is in the right position on the door. They can be moved around a bit, mine should have been slid upwards about 1/8 - 3/16" for a better fit. If the rocker work will be done later, no problem, just fit the rocker to the door when you do that. Also, avoid using any hard clamps like the vise grip style to hold the panel in place because it will dimple the panel and need some filler work later to flatten it back out. A softer spring clamp with a broader tip would be better.
__________________
If no one knows what you're doing, they can't tell you you're doing it wrong HG's Dream Car Build - Shelby Cobra Kit Build your own adjustable track bar 71 Long Fleet C/10 72 Jimmy 4x4 (Junkyard Jimmy)HG's Plow Truck '78 K35 DuallyBigass Farm Truck HG's thread of miscellaneous stuff Last edited by hgs_notes; 03-10-2011 at 10:11 AM. |
|
|
|
|
|
05-02-2010, 02:55 PM
|
#261 |
|
GEARHEAD
Join Date: Aug 2003
Location: MN
Posts: 6,104
|
Re: Over 25 Years Later, Finally My 71 C-10 Truck Build
This was one year ago:
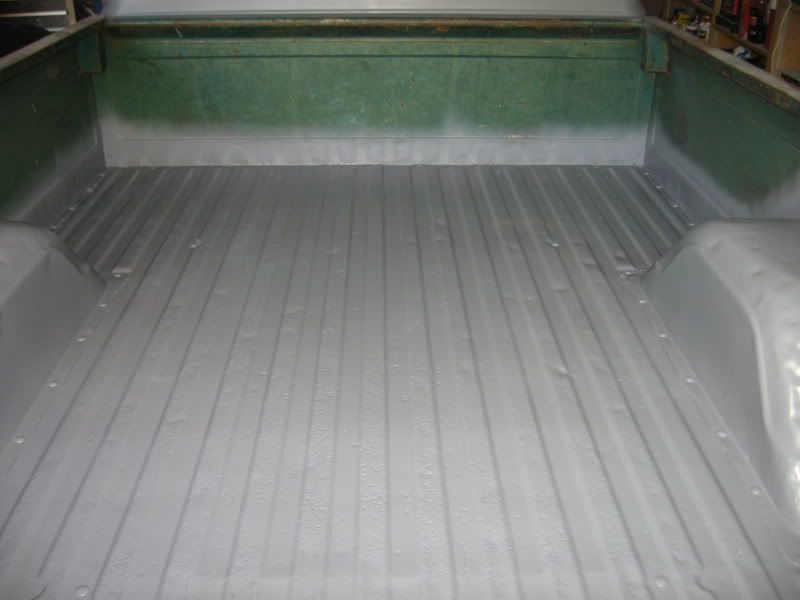
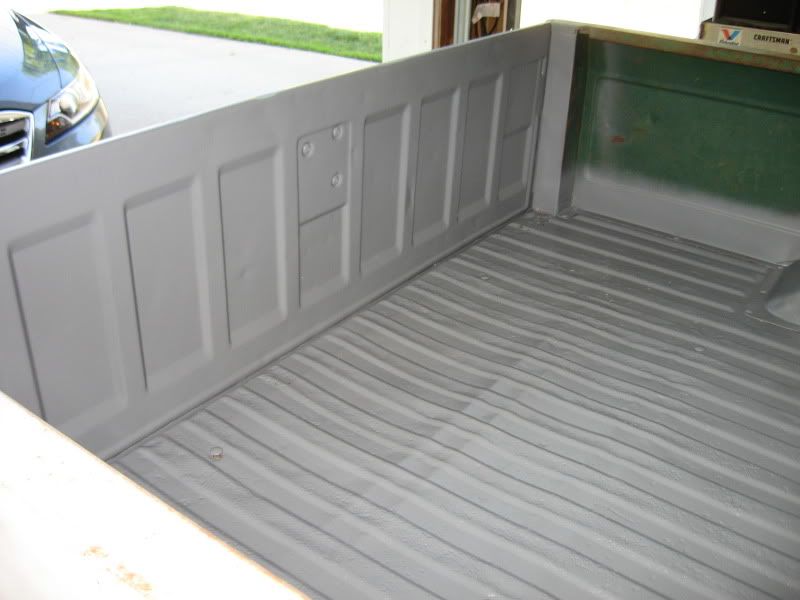
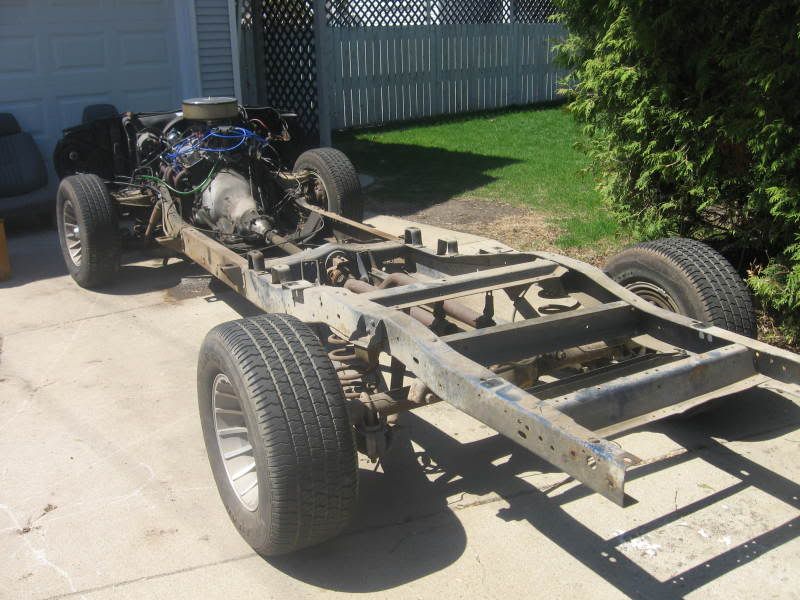 This is from this morning: 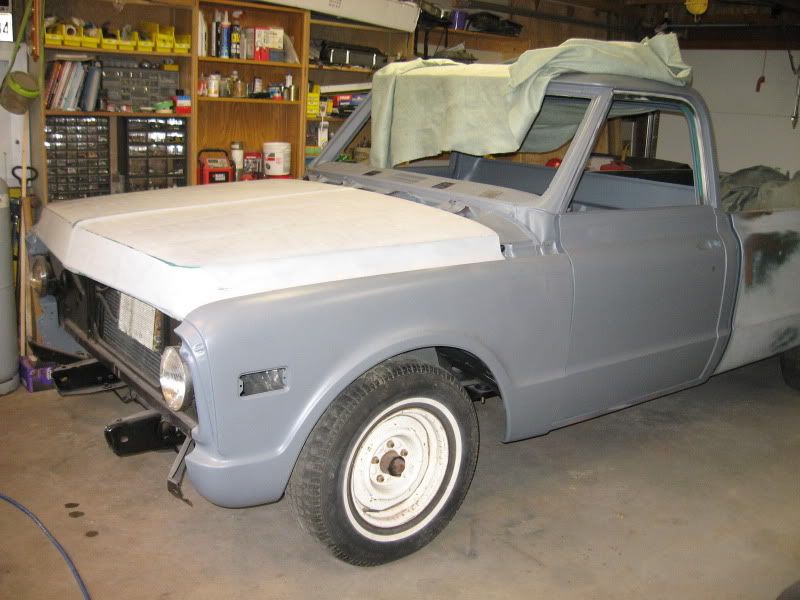 Yesterday I made a patch panel/reinforcement for the front bottom bed panel. It is fairly heavy steel and I used the panel adhesive to install it. There are holes drilled in the bottom that match the original panel, so the bolts go right through as usual. There was some rust on that piece, but it was cleaned up and the adhesive will seal it up on the bottom side, cleaning and good sealer will take care of the top side. Then I got the primer mixed and sprayed until I ran out. Got the bed floor bottom side pretty good, the front panel and a single coat on the driver door. There are a couple dings on that to fix yet. 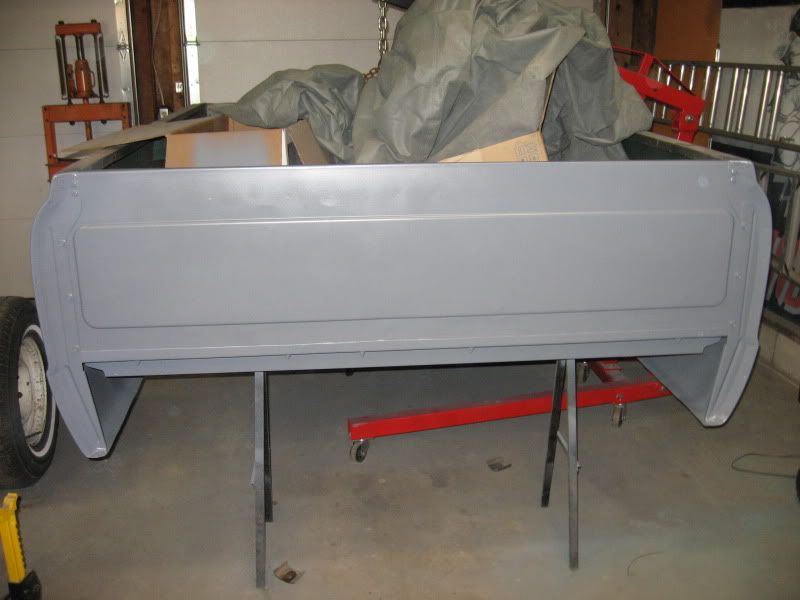  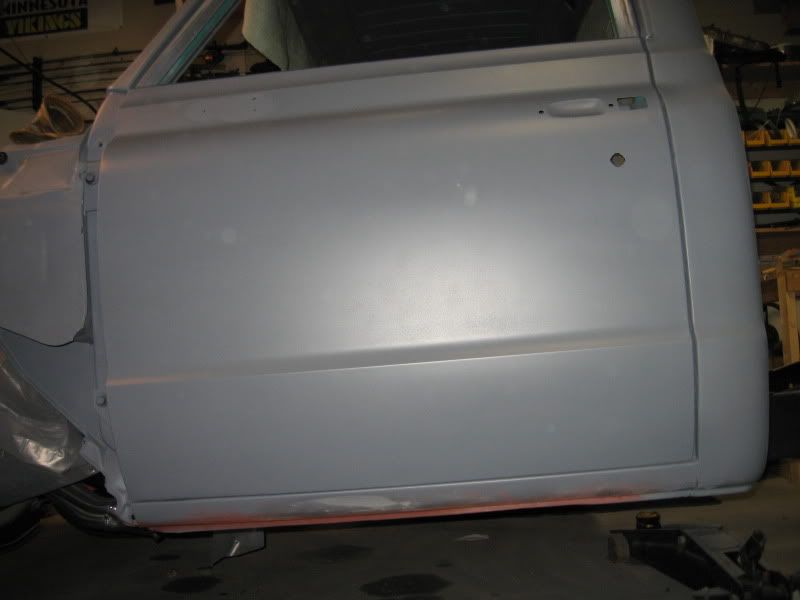 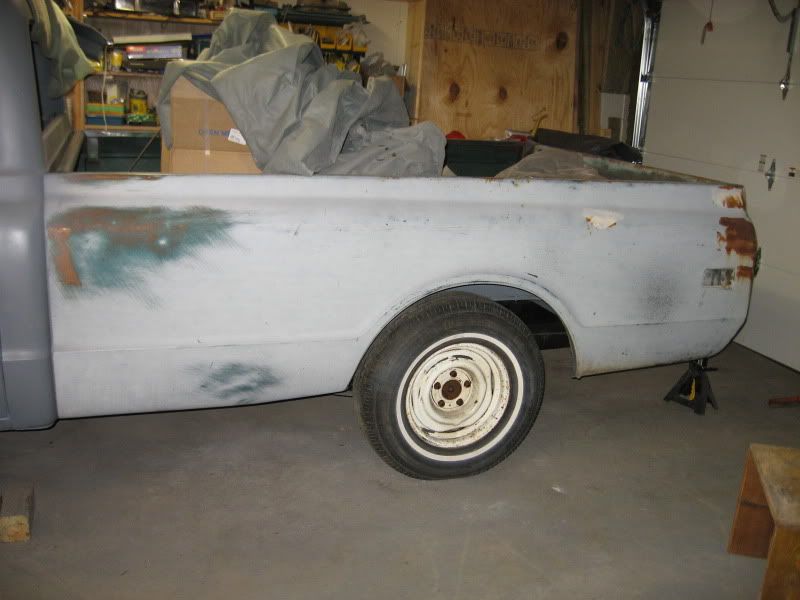 
__________________
If no one knows what you're doing, they can't tell you you're doing it wrong HG's Dream Car Build - Shelby Cobra Kit Build your own adjustable track bar 71 Long Fleet C/10 72 Jimmy 4x4 (Junkyard Jimmy)HG's Plow Truck '78 K35 DuallyBigass Farm Truck HG's thread of miscellaneous stuff |
|
|
|
|
05-27-2010, 07:28 PM
|
#262 |
|
GEARHEAD
Join Date: Aug 2003
Location: MN
Posts: 6,104
|
Re: Over 25 Years Later, Finally My 71 C-10 Truck Build
I wish I had something more exciting to post up, but this is all I got. My oldest is graduating this week and the wife is not giving me time to play. The only reason I was able to get the primer sprayed in the bed is because I have to take the truck out of the garage for the grad party and it was bare metal yet. Once the party is over I'll be finishing up the body work. Just need to fix some more rust on the bed floor, straighten out the bed sides, and go over the hood and I'll be 90% done with the body work.
  I'm not really planning on any fancy work in the bed, just fixing the rust holes. It will get a spray in liner and will used as a truck again. I might eventually replace the wheel wells, but who knows. A bed cover will do wonders for making a bed look good. I've also got the jimmy to do a body swap on. replacement body is sitting on a trailer waiting for sandblasting.
__________________
If no one knows what you're doing, they can't tell you you're doing it wrong HG's Dream Car Build - Shelby Cobra Kit Build your own adjustable track bar 71 Long Fleet C/10 72 Jimmy 4x4 (Junkyard Jimmy)HG's Plow Truck '78 K35 DuallyBigass Farm Truck HG's thread of miscellaneous stuff Last edited by hgs_notes; 05-27-2010 at 07:31 PM. |
|
|
|
|
05-27-2010, 08:37 PM
|
#263 |
|
Still Learning
Join Date: Jul 2009
Location: Central Oklahoma
Posts: 10,108
|
Re: Over 25 Years Later, Finally My 71 C-10 Truck Build
Very nice work on the body! It looks great! Keep the pictures rolling in.
|
|
|
|
|
06-03-2010, 09:26 AM
|
#264 | |
|
GEARHEAD
Join Date: Aug 2003
Location: MN
Posts: 6,104
|
Re: Over 25 Years Later, Finally My 71 C-10 Truck Build
Quote:
There has been no progress on the truck, I'm sad to say, but there has been a lot of work getting done. My daughters grad party is this sunday and the garage was cleaned out. My wife came out there friday and suggested we paint the floor since I got it all cleaned out. Who am I to argue. This is probably the cleanest it's been since it was new, and it's not likely to see this level of cleanliness until the next grad party. Before (we had one side done before I decided to take pics)   After (still have to get some things put away)    We used Rustoleum Professional Epoxy. It's a 2 part mix and goes further than what the can label estimates. I probably could have done the whole garage with one kit. One comment my wife made when I was complaining (again) about lack of space was "You have a good garage, but it was not intended to be a shop, and you have a shop now". Once this party is over I can get back to work on the truck and Jimmy.
__________________
If no one knows what you're doing, they can't tell you you're doing it wrong HG's Dream Car Build - Shelby Cobra Kit Build your own adjustable track bar 71 Long Fleet C/10 72 Jimmy 4x4 (Junkyard Jimmy)HG's Plow Truck '78 K35 DuallyBigass Farm Truck HG's thread of miscellaneous stuff Last edited by hgs_notes; 06-03-2010 at 09:28 AM. |
|
|
|
|
|
06-03-2010, 03:30 PM
|
#265 |
|
6>8 Plugless........
 Join Date: Sep 2007
Location: Prairie City, Ia
Posts: 17,133
|
Re: Over 25 Years Later, Finally My 71 C-10 Truck Build
Very nice progress on the truck! Really nice job on the garage floor. I really need to power wash my shop's floor and do the same thing. My concrete is really old and needs the help.
__________________
Ryan 1972 Chevy Longhorn K30 Cheyenne Super, 359 Inline 6 cylinder, Auto Trans, Tilt, Diesel Tach/Vach, Buckets, Rare Rear 4-link and air ride option Build Thread 1972 GMC Sierra Grande Longhorn 4x4 1972 Chevy Cheyenne Super K20 Long Step side tilt, tach, tow hooks, AC, 350 4 speed 1972 C10 Suburban Custom Deluxe 1969 Chevy milk truck 1971 Camaro RS 5.3 BTR STG3 Cam Super T10 1940 Ford 354 Hemi 46RH Ford 9" on air ride huge project Tired of spark plugs? Check this out. |
|
|
|
|
06-09-2010, 10:23 PM
|
#266 | |
|
GEARHEAD
Join Date: Aug 2003
Location: MN
Posts: 6,104
|
Re: Over 25 Years Later, Finally My 71 C-10 Truck Build
Quote:
") I never had to work so hard for a gift before. I never had to work so hard for a gift before.Well, the grad party is over. The inlaws are on their way back home. The garage is mine again. PROGRESS! Nothing technical about this, just a lot of sanding. Still got a little more to do on the bottom edge of the bed, but otherwise it's ok to start body work. The worst of the dents are around the tail light area. I'm going to see if I can borrow the dent puller and stud gun again for that. A few dings might get a little hammer work, though I really don't know what I'm doing with those tools. Hopefully I can get it straightened out this weekend and in primer. 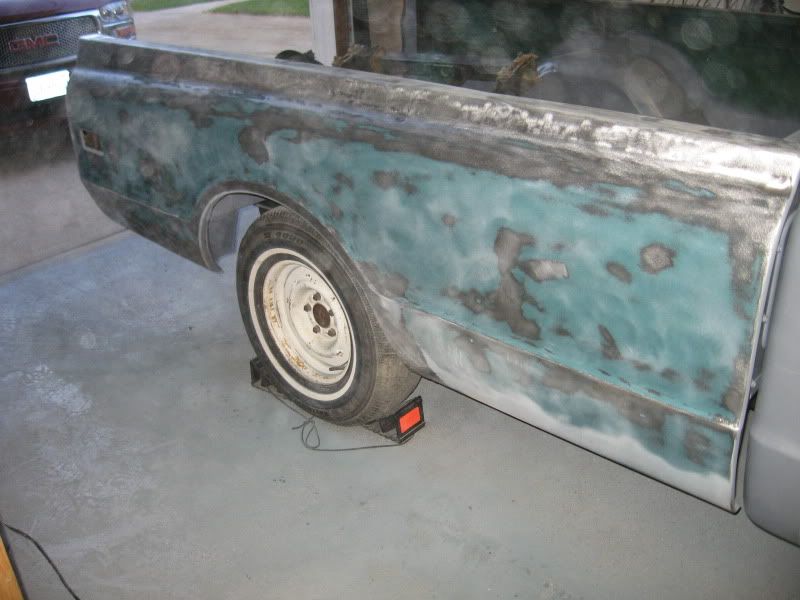 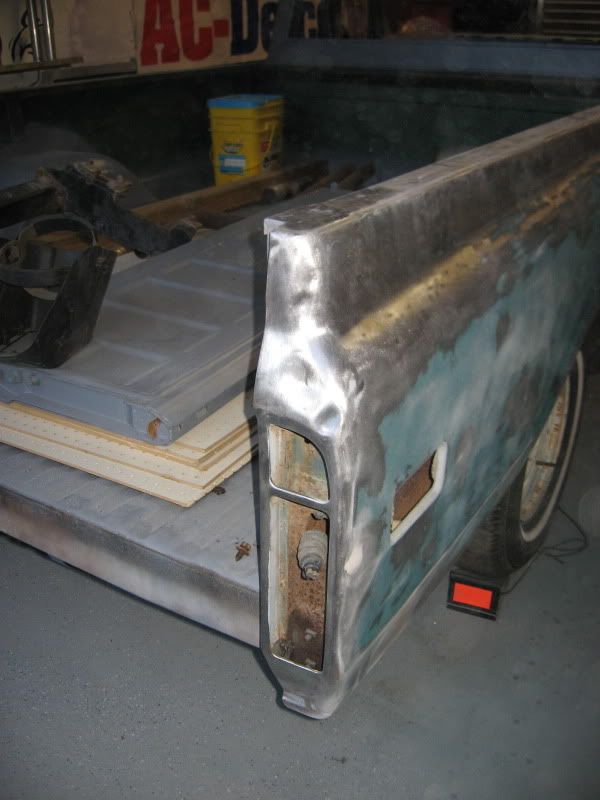 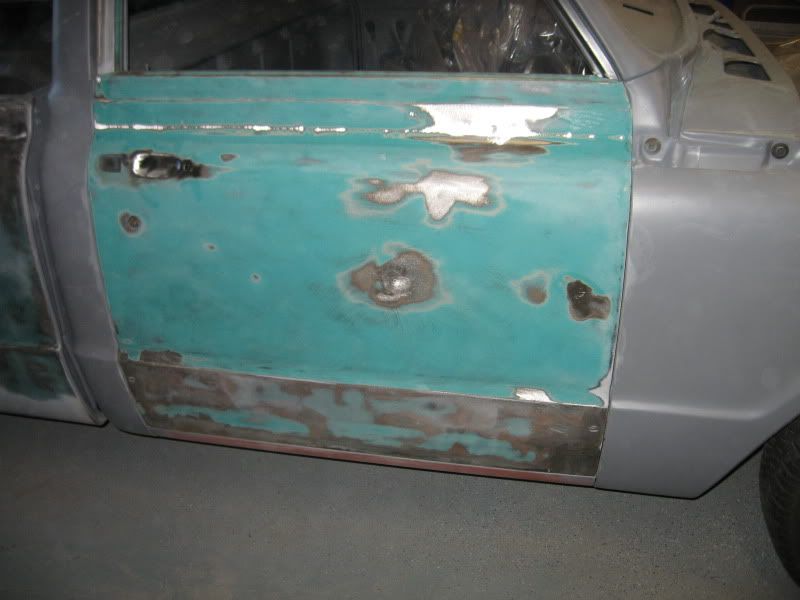
__________________
If no one knows what you're doing, they can't tell you you're doing it wrong HG's Dream Car Build - Shelby Cobra Kit Build your own adjustable track bar 71 Long Fleet C/10 72 Jimmy 4x4 (Junkyard Jimmy)HG's Plow Truck '78 K35 DuallyBigass Farm Truck HG's thread of miscellaneous stuff |
|
|
|
|
|
06-09-2010, 11:44 PM
|
#267 |
|
Still Learning
Join Date: Jul 2009
Location: Central Oklahoma
Posts: 10,108
|
Re: Over 25 Years Later, Finally My 71 C-10 Truck Build
Great progress on the truck the floor looks great too! I know you said the kit went further than the can stated, just curious if you had to put down one coat or two for good coverage? I've been wanting to do this to my garage too, just haven't pulled the trigger on it yet.
|
|
|
|
|
06-10-2010, 07:19 AM
|
#268 | |
|
GEARHEAD
Join Date: Aug 2003
Location: MN
Posts: 6,104
|
Re: Over 25 Years Later, Finally My 71 C-10 Truck Build
Quote:
__________________
If no one knows what you're doing, they can't tell you you're doing it wrong HG's Dream Car Build - Shelby Cobra Kit Build your own adjustable track bar 71 Long Fleet C/10 72 Jimmy 4x4 (Junkyard Jimmy)HG's Plow Truck '78 K35 DuallyBigass Farm Truck HG's thread of miscellaneous stuff |
|
|
|
|
|
06-11-2010, 08:06 AM
|
#269 |
|
GEARHEAD
Join Date: Aug 2003
Location: MN
Posts: 6,104
|
Re: Over 25 Years Later, Finally My 71 C-10 Truck Build
Got a few things done last night. I installed the new wheelwell braces to keep the front of the wheel wells in place. I borrowed the body shops stud gun and puller again and pulled out the dents around the taillights. I was able to hammer out a few dents on the lower areas also, so at least there will be less filler on it. I welded 2 of the 3 holes in the door skin from the old mirrors. I'll fill the other one too if I can make a little round patch to fit.
I had the bodyman come buy the house and take a look. He said I'm doing really good so far. Gave me a couple things to try to get the door gaps better. Part of the problem will be that there are still a lot of parts (weight) that have to go back in the doors, plus the seals and the latches, which will all effect how the door eventually fits. 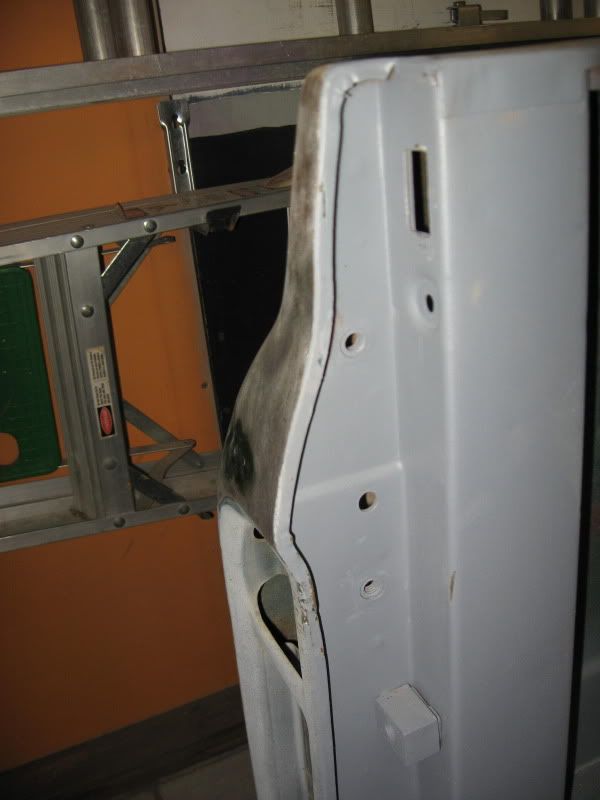 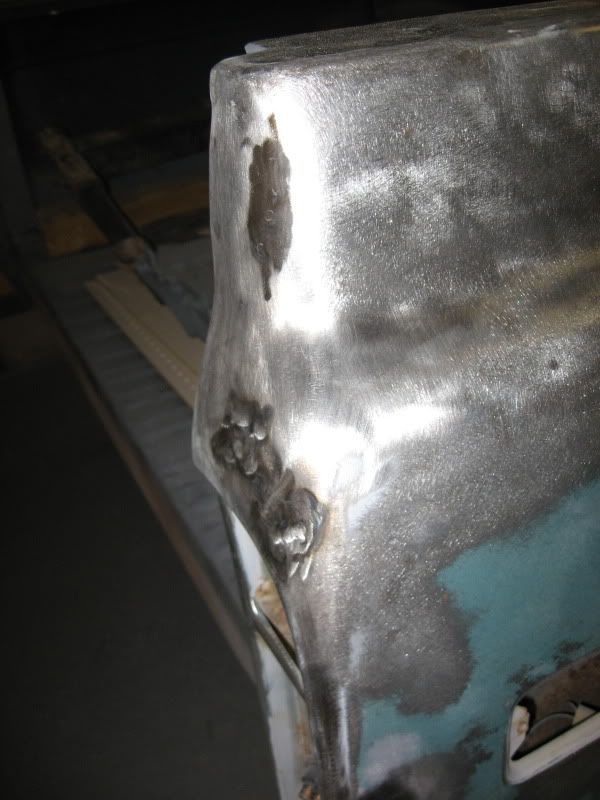  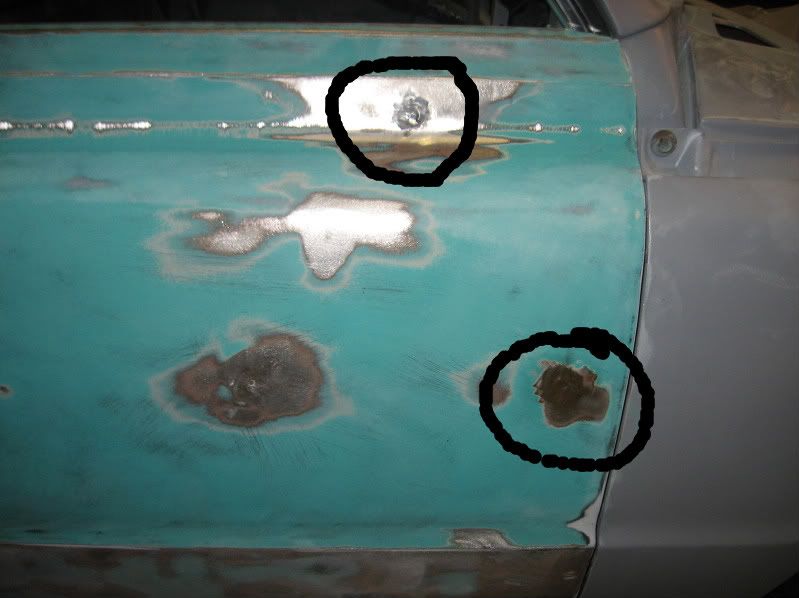
__________________
If no one knows what you're doing, they can't tell you you're doing it wrong HG's Dream Car Build - Shelby Cobra Kit Build your own adjustable track bar 71 Long Fleet C/10 72 Jimmy 4x4 (Junkyard Jimmy)HG's Plow Truck '78 K35 DuallyBigass Farm Truck HG's thread of miscellaneous stuff |
|
|
|
|
06-11-2010, 08:43 AM
|
#270 |
|
Still Learning
Join Date: Jul 2009
Location: Central Oklahoma
Posts: 10,108
|
Re: Over 25 Years Later, Finally My 71 C-10 Truck Build
Looking good! I need to get one of those stud guns. Seems like they would make easy work of dents. Keep the pics coming.
|
|
|
|
|
06-11-2010, 03:10 PM
|
#271 |
|
6>8 Plugless........
Join Date: Sep 2007
Location: Prairie City, Ia
Posts: 17,133
|
Re: Over 25 Years Later, Finally My 71 C-10 Truck Build
I love my stud gun! I purchased it from my Cornwell tool guy. But I think you can get one at harbour freight. IDK how well those hold up though. Great progress on the body work!
I don't want to try to hijack your thread............. But I am curious: The paint you used on your shop floor, dose it fill any crater like holes in the concrete? Just curious as my concrete isn't perfect and tryng to think of any way to help it out.
__________________
Ryan 1972 Chevy Longhorn K30 Cheyenne Super, 359 Inline 6 cylinder, Auto Trans, Tilt, Diesel Tach/Vach, Buckets, Rare Rear 4-link and air ride option Build Thread 1972 GMC Sierra Grande Longhorn 4x4 1972 Chevy Cheyenne Super K20 Long Step side tilt, tach, tow hooks, AC, 350 4 speed 1972 C10 Suburban Custom Deluxe 1969 Chevy milk truck 1971 Camaro RS 5.3 BTR STG3 Cam Super T10 1940 Ford 354 Hemi 46RH Ford 9" on air ride huge project Tired of spark plugs? Check this out. |
|
|
|
|
06-11-2010, 05:21 PM
|
#272 | |
|
GEARHEAD
Join Date: Aug 2003
Location: MN
Posts: 6,104
|
Re: Over 25 Years Later, Finally My 71 C-10 Truck Build
Quote:
One huge benefit to the painted floor is lighting. It is much brighter in there now and better to work in.
__________________
If no one knows what you're doing, they can't tell you you're doing it wrong HG's Dream Car Build - Shelby Cobra Kit Build your own adjustable track bar 71 Long Fleet C/10 72 Jimmy 4x4 (Junkyard Jimmy)HG's Plow Truck '78 K35 DuallyBigass Farm Truck HG's thread of miscellaneous stuff |
|
|
|
|
|
06-11-2010, 11:16 PM
|
#273 |
|
6>8 Plugless........
Join Date: Sep 2007
Location: Prairie City, Ia
Posts: 17,133
|
Re: Over 25 Years Later, Finally My 71 C-10 Truck Build
Thanks for the info. I'm guessing mine won't be able to be filled easily. But sealing it has to help keep it clean.
__________________
Ryan 1972 Chevy Longhorn K30 Cheyenne Super, 359 Inline 6 cylinder, Auto Trans, Tilt, Diesel Tach/Vach, Buckets, Rare Rear 4-link and air ride option Build Thread 1972 GMC Sierra Grande Longhorn 4x4 1972 Chevy Cheyenne Super K20 Long Step side tilt, tach, tow hooks, AC, 350 4 speed 1972 C10 Suburban Custom Deluxe 1969 Chevy milk truck 1971 Camaro RS 5.3 BTR STG3 Cam Super T10 1940 Ford 354 Hemi 46RH Ford 9" on air ride huge project Tired of spark plugs? Check this out. |
|
|
|
|
06-11-2010, 11:26 PM
|
#274 | |
|
Still Learning
Join Date: Jul 2009
Location: Central Oklahoma
Posts: 10,108
|
Re: Over 25 Years Later, Finally My 71 C-10 Truck Build
Quote:
|
|
|
|
|
|
06-12-2010, 03:15 AM
|
#275 | |
|
Registered User
Join Date: Nov 2006
Location: Boring, Oregon
Posts: 162
|
Re: Over 25 Years Later, Finally My 71 C-10 Truck Build
Nice build and what a great learning experience, right? I'll be staying tuned. And don't worry....one of those daughters may end up with a guy who's a complete gearhead!!
Quote:
If you go with the real spray in bedliner, it does not like to be modified. It'll peel up like a sheet off a matress. The only real way of doing a good job is stripping it all off and re-shooting. If you were going to do more bed work to it, I suggest doing it before having a nice, professional spray-in done. If you do the DIY kit stuff(roll on, rattle can), that's easily stripable and re-applied in certain areas. The real stuff is a much different case. This is all really based on the experience with my old '01 F**d Ranger that was rear ended and instead of stripping down to bare and doing it right, the body shop literally pulled up on the 'sheet', used spray-in liner as a glue for the spray-in liner. The results were horrible, wavey, big elevation change, and probably 3/4" thick in some places, while others were the normal 3/16-1/4" tops. I look forward to updates on this build. Keep it up!! Hope to do what you're doing to mine one of these days.
__________________
'71 SNB, 406sbc, TH350 w/ Transpak & Starshifter, 12bolt w/ 3.73s, 2" Early Classic front coils, 2.5" Flowmaster Super 40's
|
|
|
|
|
 |
| Bookmarks |
|
|


 Linear Mode

