
|
|
|
 09-02-2012, 12:47 PM
|
#1 |
|
Registered User
Join Date: Jul 2011
Location: El Campo, Tx
Posts: 1,246
|
Re: '55 International Metal/Body/Paint Work
It is all looking REAAALLLY good, astro. You have some valuable tips in here for us too that will be useful to many of us in the future. Did you get the homemade lizardskin the way that you wanted it eventually? Also what gun are you shooting the Slick Sand through?
Hmmm you are 920 miles from here, you want another job? Haha
__________________
72 Chevy blue LWB, 99% original Oklahoma truck, 28,000 miles 72 Chevy SWB: http://67-72chevytrucks.com/vboard/s...d.php?t=486626 (Attempt/Mistake #2) 2003 Harley Davidson Dyna Superglide with 2007 Street Bob front end 2000 Ford F350 Powerstroke 4WD CCLB, 310,000 miles running great (STOLEN St. Patricks Day 2014 AND NEVER RECOVERED) 2002 Ford F250 Powerstroke 4WD CCLB (To replace stolen one) Hook em Horns!!! |

|

|
|
09-02-2012, 07:50 PM
|
#2 |
|
Old and crusty
 Join Date: Jan 2009
Location: Surprise, AZ
Posts: 462
|
Re: '55 International Metal/Body/Paint Work
That's really looking great, John. Are you going to have it done before the snow starts to fly?
__________________
65 Chevy long wide daily driver - SOLD! 64 Chevy Short Step LS |
|
|
|
|
09-04-2012, 11:07 AM
|
#3 | |||
|
Registered User
Join Date: May 2011
Location: Anderson SC
Posts: 3,870
|
Re: '55 International Metal/Body/Paint Work
Quote:
Quote:
Quote:
 I'm not good at setting and making deadlines; they always run over. I've still got to spray/cut/buff the front clip but it's all ready to spray, just waiting on a dry day to paint them. The cab (already picked up) and doors are done and ready to be bolted up. I still have the whole bed and rear fenders to do though, and I'll probably be making bedsides and the header panel from scratch. I'm not good at setting and making deadlines; they always run over. I've still got to spray/cut/buff the front clip but it's all ready to spray, just waiting on a dry day to paint them. The cab (already picked up) and doors are done and ready to be bolted up. I still have the whole bed and rear fenders to do though, and I'll probably be making bedsides and the header panel from scratch.
__________________
Project Goldilocks '66 C10 Short Fleet BBW Build '65 C10 Highly Detailed Stock Restoration Thread '78 Camaro Targa Roof Build '55 International Metal/Body/Paint Work '66 F100 Full Rotisserie Restoration '40 Packard 120 Convertible Coupe Restoration How To Restore and Detail an Original Gauge Cluster How To Detail Sand Body Panels, Edges, Corners, Etc |
|||
|
|
|
|
09-04-2012, 04:43 PM
|
#4 |
|
Registered User
Join Date: Apr 2012
Location: Beaver, Pa.
Posts: 197
|
Re: '55 International Metal/Body/Paint Work
Astronaut, could you give a quick explanation of how you heat shrink metal? Is it a hard technique to learn? Seems like it would handy as around a dent you always have stretched metal. Following this (and all your threads) closely!
|
|
|
|
|
09-05-2012, 09:33 AM
|
#5 | |
|
Registered User
Join Date: May 2011
Location: Anderson SC
Posts: 3,870
|
Re: '55 International Metal/Body/Paint Work
Quote:
It's not hard if you learn to do it the right way- I wasn't taught the right way, so I was frustrated with it at first. I tried shrinking with a torch and wet rag like some people tell you to do, but they leave out the step of using the hammer and dolly to actually flatten and pull the metal inward while the metal is still red hot. That works but has very little shrinking action, and it's easy to warp the metal more than you're actually helping. Or atleast that was my experience. The way I now do it is: Quickly (or else you'll warp a bigger spot from the panel getting too hot) get a spot about the size of a quarter red hot, support the back with a dolly, and hammer around the red spot to draw down the high spot, then you quench the spot with a wet rag. Don't hit any of the red hot area with the hammer, or you'll just add to the amount of stretch. Repeat until the area is flat and isn't popping in and out. If you over shrink you can use the "hammer on dolly" method to stretch the metal. Hitting the hammer directly on the dolly squeezes the metal outwards to stretch it.
__________________
Project Goldilocks '66 C10 Short Fleet BBW Build '65 C10 Highly Detailed Stock Restoration Thread '78 Camaro Targa Roof Build '55 International Metal/Body/Paint Work '66 F100 Full Rotisserie Restoration '40 Packard 120 Convertible Coupe Restoration How To Restore and Detail an Original Gauge Cluster How To Detail Sand Body Panels, Edges, Corners, Etc |
|
|
|
|
|
09-05-2012, 09:44 AM
|
#6 |
|
Registered User
Join Date: May 2011
Location: Anderson SC
Posts: 3,870
|
Re: '55 International Metal/Body/Paint Work
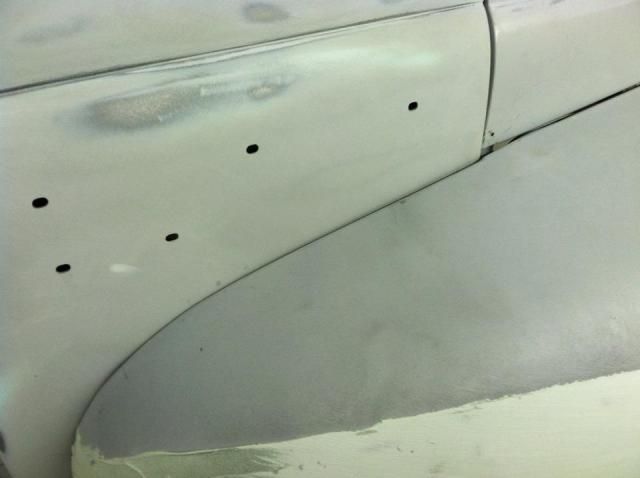
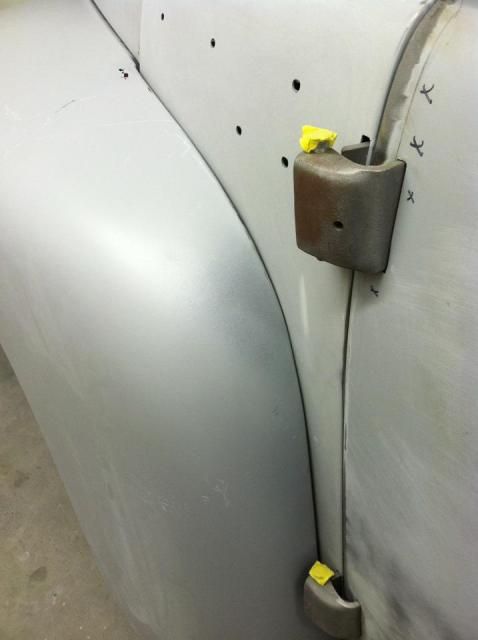
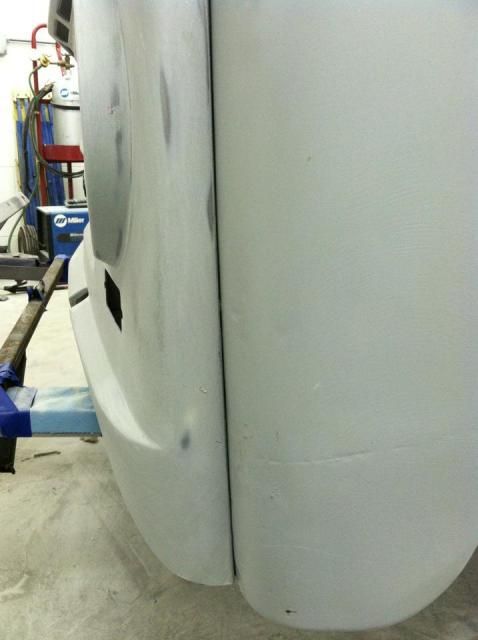
Here were the front clip panel gaps. I was surprised at how well everything fit without any tweaking.
__________________
Project Goldilocks '66 C10 Short Fleet BBW Build '65 C10 Highly Detailed Stock Restoration Thread '78 Camaro Targa Roof Build '55 International Metal/Body/Paint Work '66 F100 Full Rotisserie Restoration '40 Packard 120 Convertible Coupe Restoration How To Restore and Detail an Original Gauge Cluster How To Detail Sand Body Panels, Edges, Corners, Etc |
|
|
|
|
09-05-2012, 12:37 PM
|
#7 |
|
Registered User
Join Date: Jul 2011
Location: El Campo, Tx
Posts: 1,246
|
Re: '55 International Metal/Body/Paint Work
Looking beautiful as usual. My project that I would literally seriously consider having you work on is the truck in my signature. Long story short but it is sheet metal work only that I need done. The chassis has all been rebuilt. The sheet metal consists of the following: Original paint cab from Arizona, no rust through anywhere, rockers are perfect even, New bedsides (SWB), bed has been assembled but one of the bedsides has a wave in it in front of the front wheel and there are several dents on them, original tailgate (no rust), original hood no rust and straight (off of the same truck as cab came from), one original paint door (no rust and one small dent on the bottom of it) and one aftermarket door that actually fits well, one original paint front fender (minimal rust, nowhere close to rusting through) and one aftermarket fender that also fits well, aftermarket core support and two aftermarket inner fenders. No rust repair anywhere
 I am keeping eye out for another original paint door as I REALLLLY like OEM parts versus taiwan crap. The doors I want the handles and mirrors shaved, I will have installed (or mocked up I should say) the one piece windows and the door poppers. I have had such poor luck and gotten screwed by collision body shops that are not passionate about their work and do crappy work with the lower quality products that I would rather take this 1000 miles away and get done by someone who has shown amazing potential than go through that BS again! Especially since you are a forum member and I could splash these pages with your work Oh yea and the final color is going to be the new Range Rover white. Not trying to take away from this International or your thread! I am anxious for those final paint pictures, I could have sworn I saw some teasers somewhere on here of some liquid looking red paint that was about 10 miles deep. I am keeping eye out for another original paint door as I REALLLLY like OEM parts versus taiwan crap. The doors I want the handles and mirrors shaved, I will have installed (or mocked up I should say) the one piece windows and the door poppers. I have had such poor luck and gotten screwed by collision body shops that are not passionate about their work and do crappy work with the lower quality products that I would rather take this 1000 miles away and get done by someone who has shown amazing potential than go through that BS again! Especially since you are a forum member and I could splash these pages with your work Oh yea and the final color is going to be the new Range Rover white. Not trying to take away from this International or your thread! I am anxious for those final paint pictures, I could have sworn I saw some teasers somewhere on here of some liquid looking red paint that was about 10 miles deep.
__________________
72 Chevy blue LWB, 99% original Oklahoma truck, 28,000 miles 72 Chevy SWB: http://67-72chevytrucks.com/vboard/s...d.php?t=486626 (Attempt/Mistake #2) 2003 Harley Davidson Dyna Superglide with 2007 Street Bob front end 2000 Ford F350 Powerstroke 4WD CCLB, 310,000 miles running great (STOLEN St. Patricks Day 2014 AND NEVER RECOVERED) 2002 Ford F250 Powerstroke 4WD CCLB (To replace stolen one) Hook em Horns!!! |
|
|
|
|
09-05-2012, 01:57 PM
|
#8 | |
|
Registered User
Join Date: May 2011
Location: Anderson SC
Posts: 3,870
|
Re: '55 International Metal/Body/Paint Work
Quote:
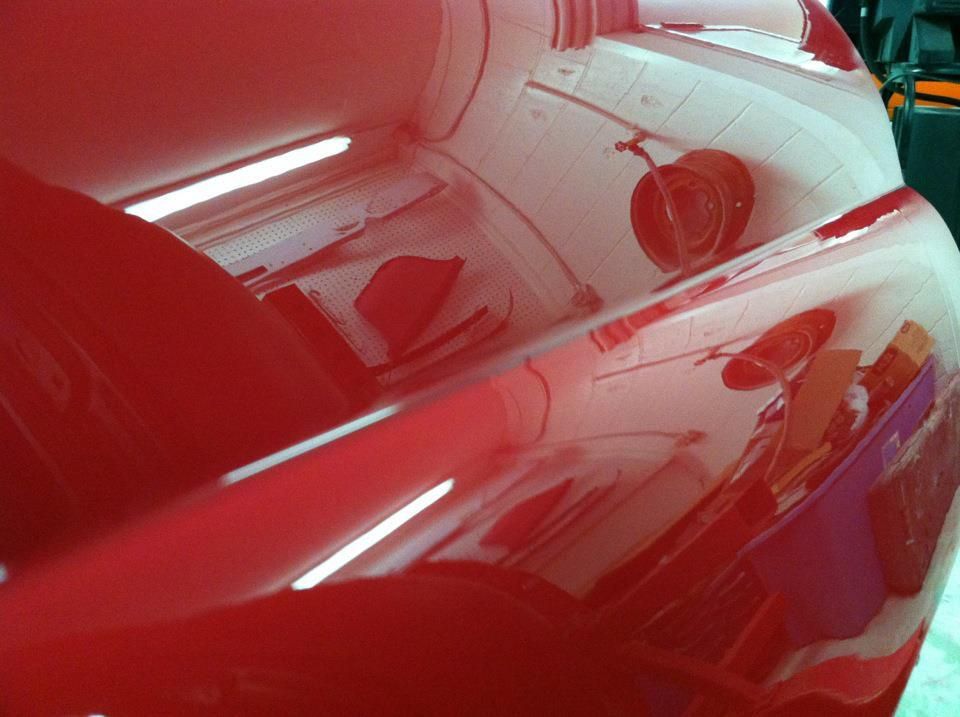
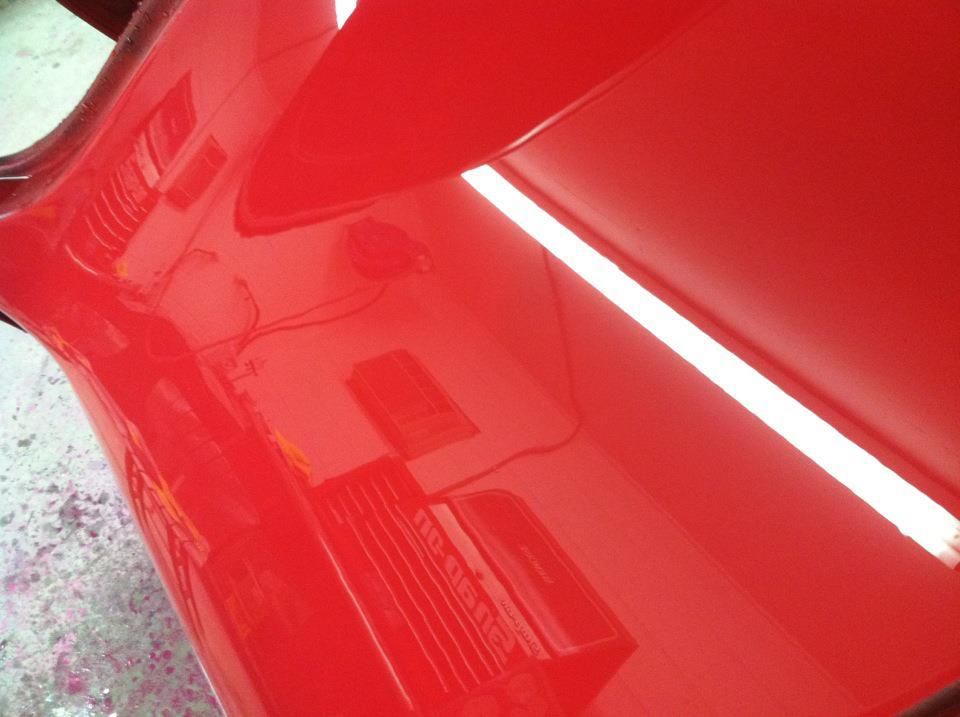
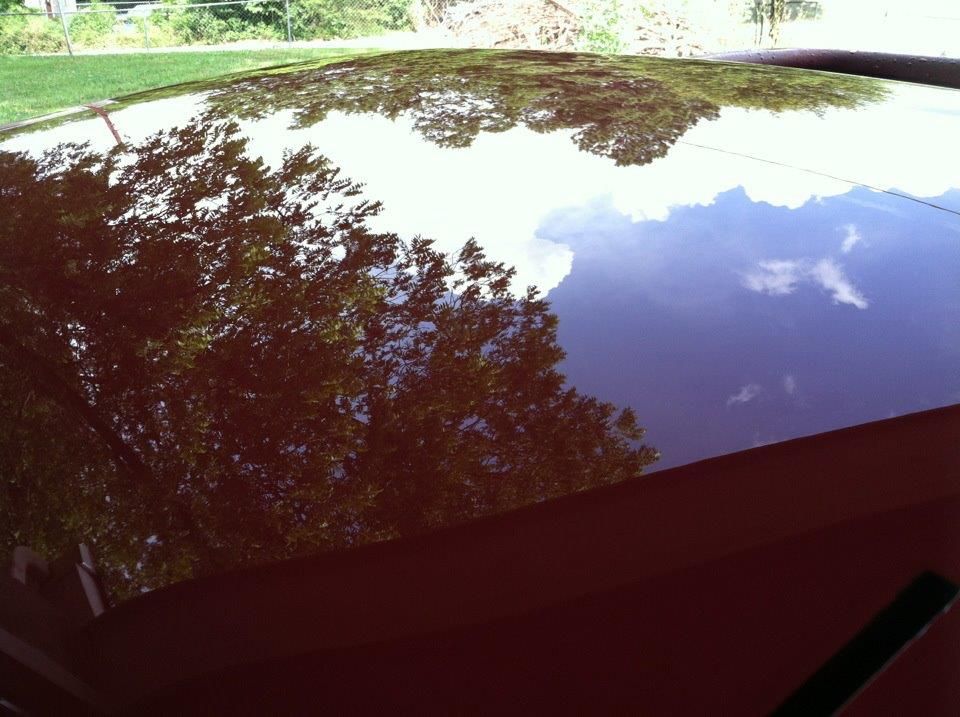
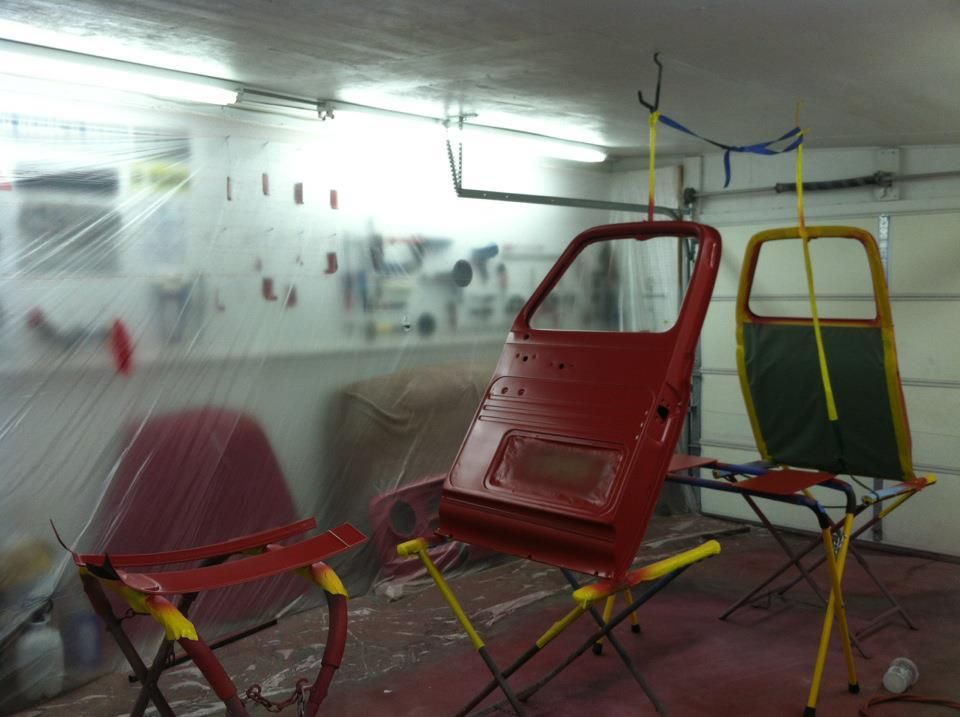
I'd' be up for doing it, but I've got the whole bed to start/finish (likely that I'll be building from scratch) on the '55, and '58 ragtop VW already lined up for metal/body/paintwork. After that I've got a guy that wants me to take the front clip off a couple of his Chevelle's and detail everything under the hood. I've only got room for one at a time, so it'll be quite awhile before I could take on anything else. I'd love to do it though- I'd like to get into doing metalwork only anyways. The body/paint process just takes too long. Here's a few more teaser shots. The first is the reflection of the doors in the roof skin, and the reflection on the doors is a building about 50 feet away. 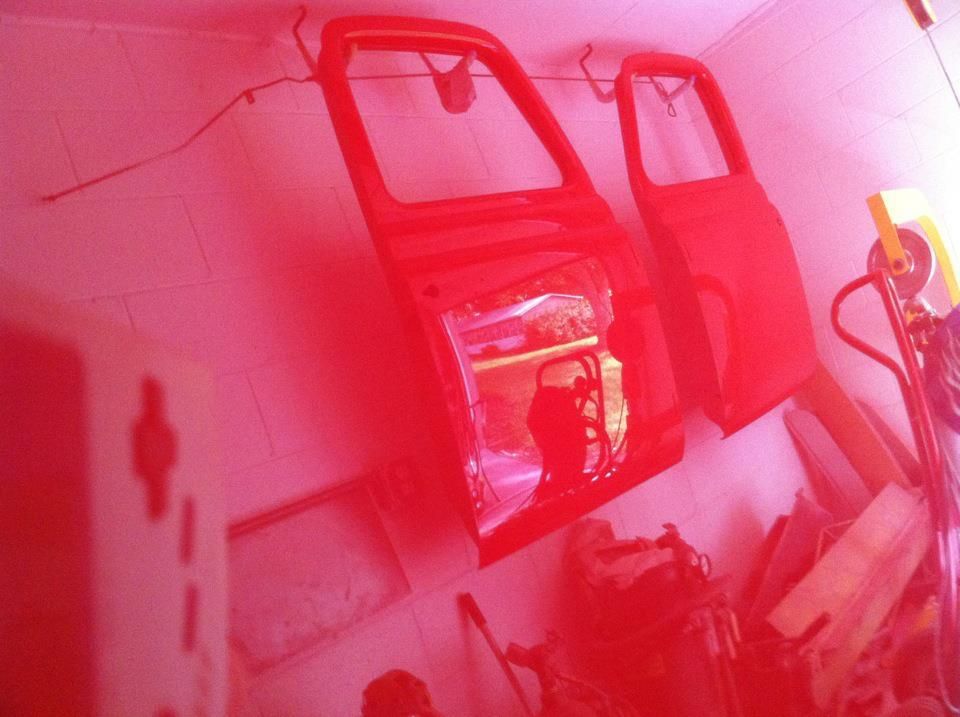 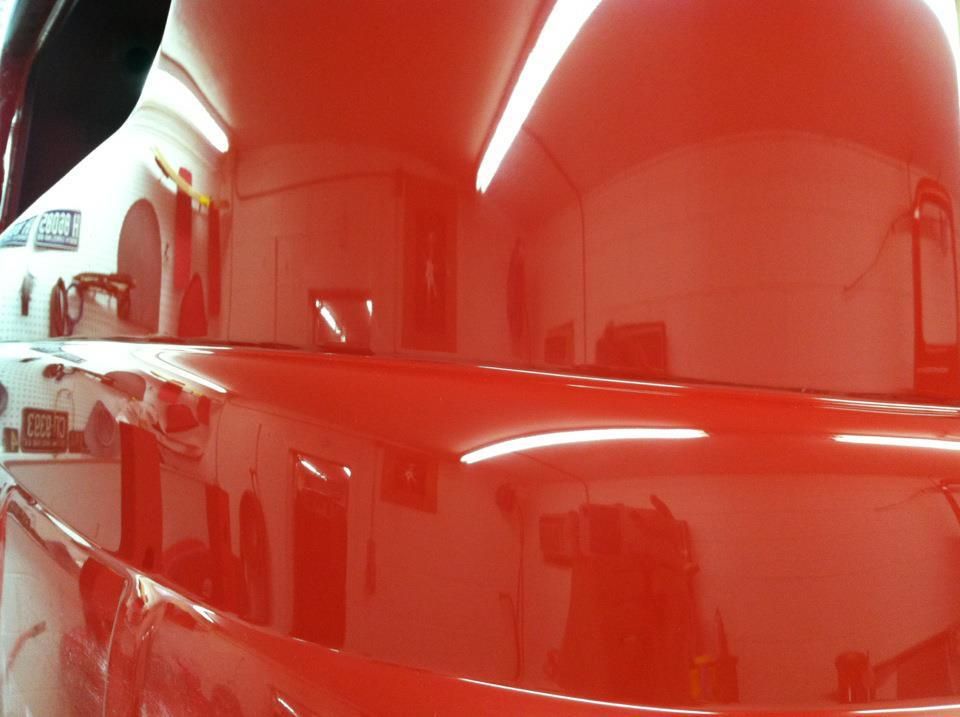 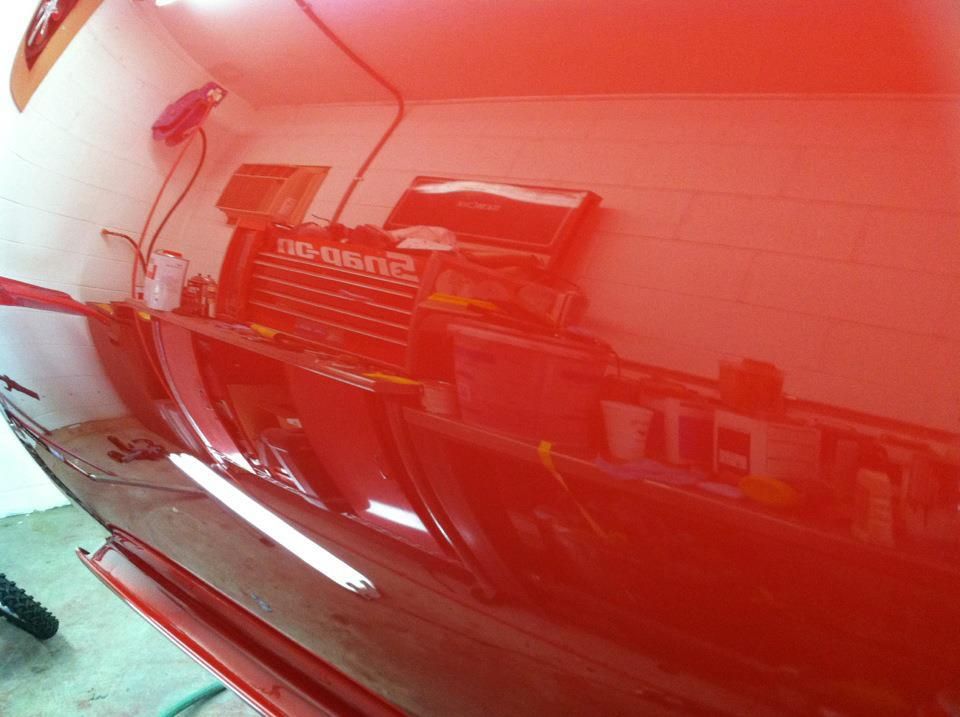
__________________
Project Goldilocks '66 C10 Short Fleet BBW Build '65 C10 Highly Detailed Stock Restoration Thread '78 Camaro Targa Roof Build '55 International Metal/Body/Paint Work '66 F100 Full Rotisserie Restoration '40 Packard 120 Convertible Coupe Restoration How To Restore and Detail an Original Gauge Cluster How To Detail Sand Body Panels, Edges, Corners, Etc |
|
|
|
|
|
09-05-2012, 02:10 PM
|
#9 |
|
Registered User
Join Date: Jul 2011
Location: El Campo, Tx
Posts: 1,246
|
Re: '55 International Metal/Body/Paint Work
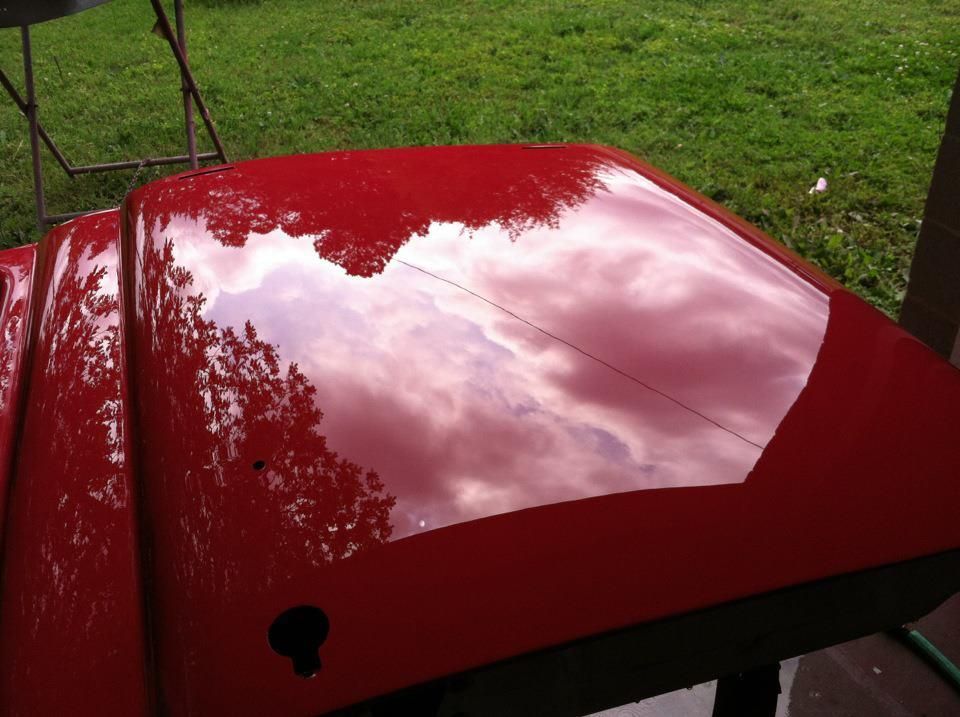
Beautiful!! Thats fine anyways as I am still building up the chassis. Have all the parts for it and am about 60 percent done. Plus I am mocking up everything including wiring prior to doing paint and body. Keep me in mind and when I get closer I will let you know how it is going. Haha heres a teaser of my own and the bottom of the cab is as solid as what you see! And coming from South Texas Gulf Coast I know the meaning of rust probably better than anyone on this whole forum LOL!!Glad to hear you are staying busy though, would be a shame to have talent go to waste.
__________________
72 Chevy blue LWB, 99% original Oklahoma truck, 28,000 miles 72 Chevy SWB: http://67-72chevytrucks.com/vboard/s...d.php?t=486626 (Attempt/Mistake #2) 2003 Harley Davidson Dyna Superglide with 2007 Street Bob front end 2000 Ford F350 Powerstroke 4WD CCLB, 310,000 miles running great (STOLEN St. Patricks Day 2014 AND NEVER RECOVERED) 2002 Ford F250 Powerstroke 4WD CCLB (To replace stolen one) Hook em Horns!!! |
|
|
|
|
09-08-2012, 12:48 AM
|
#10 |
|
Registered User
Join Date: Aug 2005
Location: Hillsboro Oregon
Posts: 6,449
|
Re: '55 International Metal/Body/Paint Work
Your sheetmetal work is top notch.
Posted via Mobile Device |
|
|
|
|
09-13-2012, 08:56 PM
|
#11 |
|
Registered User
Join Date: Aug 2010
Location: Lafayette In.
Posts: 252
|
Re: '55 International Metal/Body/Paint Work
You Sir, are a metal working God. I keep trying to learn all that stuff, and I love watching someone who knows what their doing. Keep up the good work.
|
|
|
|
|
10-12-2012, 01:19 AM
|
#12 |
|
Registered User
Join Date: Jun 2010
Location: Vancouver Island BC
Posts: 652
|
Re: '55 International Metal/Body/Paint Work
Again thanks for the detailed instruction and insight. Wonderful that your willing to take the time to teach.
__________________

|
|
|
|
|
10-18-2012, 05:22 PM
|
#13 |
|
Registered User
Join Date: Apr 2012
Location: Beaver, Pa.
Posts: 197
|
Re: '55 International Metal/Body/Paint Work
I'm really missing seeing progress on this thread!
|
|
|
|
|
10-18-2012, 07:34 PM
|
#14 | ||||
|
Registered User
Join Date: May 2011
Location: Anderson SC
Posts: 3,870
|
Re: '55 International Metal/Body/Paint Work
Quote:
Quote:
Quote:
Quote:
Thanks a ton guys, I've been busy on it gettin the front clip finished and many of the small parts detailed. I've got about 200 of the most recent pics uploading to photobucket right now so I'll be able to catch the thread up soon. Here's a sneak peek of one of the hinges, headlight bezel/grill, and the ash tray. The hinges and ashtray are probably my favorite things about the truck. 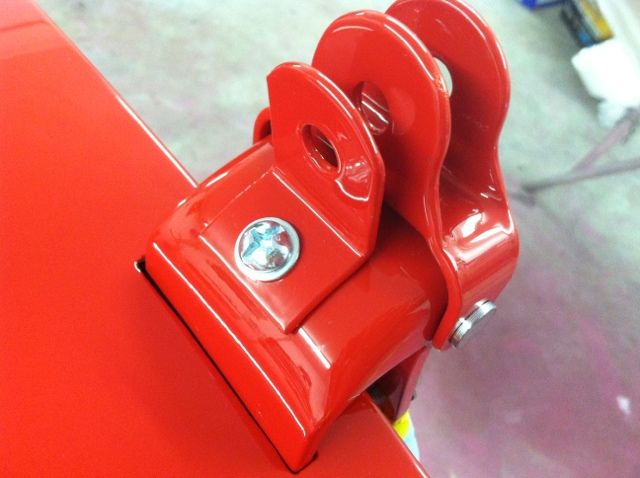 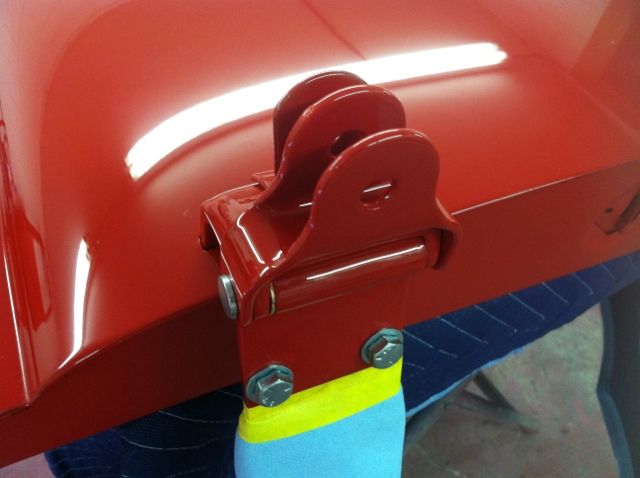 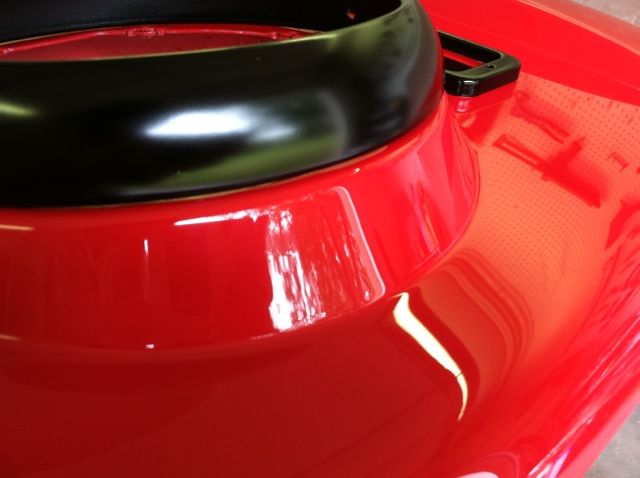 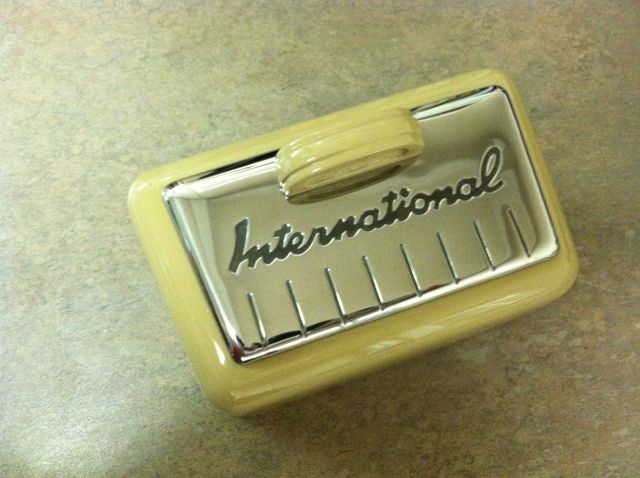 Posted via Mobile Device
__________________
Project Goldilocks '66 C10 Short Fleet BBW Build '65 C10 Highly Detailed Stock Restoration Thread '78 Camaro Targa Roof Build '55 International Metal/Body/Paint Work '66 F100 Full Rotisserie Restoration '40 Packard 120 Convertible Coupe Restoration How To Restore and Detail an Original Gauge Cluster How To Detail Sand Body Panels, Edges, Corners, Etc |
||||
|
|
|
|
10-25-2012, 10:26 AM
|
#15 |
|
Hittin E-Z Street on Mud Tires
Join Date: Nov 2004
Location: Greenville, SC
Posts: 23,090
|
Re: '55 International Metal/Body/Paint Work
Wow, beautiful. He's going to be getting back a show winning truck.
__________________
Jesse James 1967 C10 SWB Stepside: 350/700R4/3.73 1965 Ford Mustang: 289/T5-5spd/3.25 Trac-Loc 1968 Pontiac Firebird: Project Fire Chicken! 2015 Silverado Double Cab 5.3L Z71 2001 Jeep Wrangler Sport 4.0L 5spd 2020 Chevrolet Equinox Premium 2.0L Turbo 2011 Mustang V6 ~ Wife's ride  American Born, Country by the Grace of God  1967 CST Shop Truck Rebuild! My 1967 C-10 Build Thread My Vintage Air A/C Install Project "On a Dime" Trying my hand at Home Renovation! 1965 Mustang Modifications! |
|
|
|
|
10-27-2012, 06:29 PM
|
#16 |
|
Registered User
Join Date: May 2007
Location: Deale Md
Posts: 4,663
|
Re: '55 International Metal/Body/Paint Work
Great build but then again all of your build are. I hate to back up on your thread but , you have a lot of metal work on this build , just wondering how much time is spent on this , I know you can't go back on the whole thread so just use the grill as a example to give us a idea of time it took to do the metal work.
Off topic but I know you like VW this is from a show today
__________________
James 63 GMC V6 4speed carryall 65 chevy swb bbw V8 auto 68 K20 327/4 speed, buddy buckets 2002 GMC CC Dually Duramax 64 GMC lwb 3/4 V6 4speed SOLD 66 GMC swb bbw buddy buckets SOLD IG duallyjams The only thing that stays the same is constant change! |
|
|
|
|
11-01-2012, 01:42 PM
|
#17 | ||
|
Registered User
Join Date: May 2011
Location: Anderson SC
Posts: 3,870
|
Re: '55 International Metal/Body/Paint Work
Quote:
Quote:
The grill was already blasted and primed with PPG PGLF when I started so my time doesn't include that. For metalwork I have 18.5 hours in it, 19.25 hours in bodywork/priming/blocking, and 11.50 in painting/wetsanding/buffing. Total of 49.25 hours in the grill to take it from start to painted and wetsanded/buffed. I've got a total of 611.50 hours into it so far with everything finished and delivered back to the owner except the bed, rear fenders, tailgate, and wheels. They brought the bed over last Monday so I've started the metalwork on it, and we bought a Mittler Bros bead roller this week to build some of the bed panels from scratch. If you thought the rest of the parts were rough, wait til you see the bed. 
__________________
Project Goldilocks '66 C10 Short Fleet BBW Build '65 C10 Highly Detailed Stock Restoration Thread '78 Camaro Targa Roof Build '55 International Metal/Body/Paint Work '66 F100 Full Rotisserie Restoration '40 Packard 120 Convertible Coupe Restoration How To Restore and Detail an Original Gauge Cluster How To Detail Sand Body Panels, Edges, Corners, Etc |
||
|
|
|
|
11-01-2012, 02:56 PM
|
#18 |
|
Registered User
Join Date: May 2011
Location: Anderson SC
Posts: 3,870
|
Re: '55 International Metal/Body/Paint Work
Here's the process of restoring the ash tray.
Torn down, ready for bead blasting. 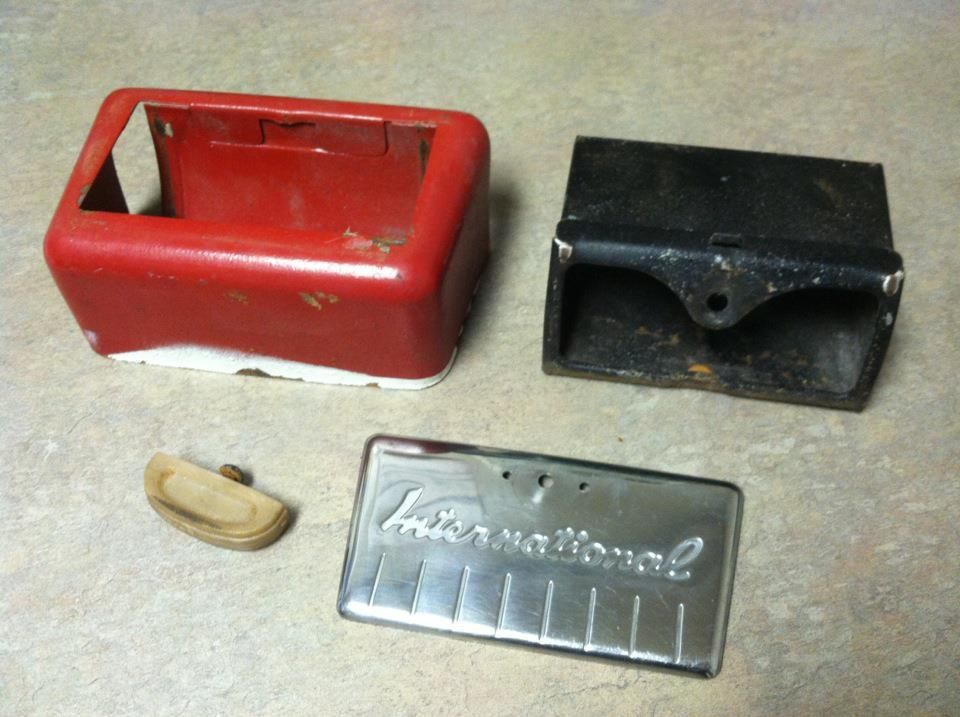 I worked up from 400 grit to remove the scratches from the lid. 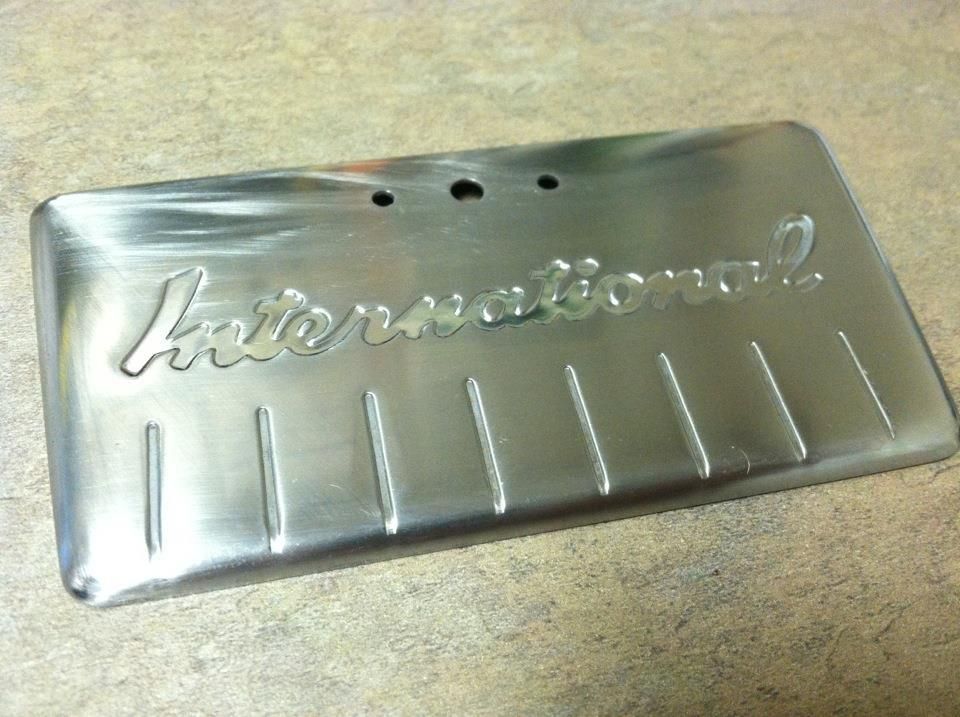 After buffing and filling in the lettered area with charcoal paint. I wasn't sure of the original color so I just picked one that complemented the red and tan. 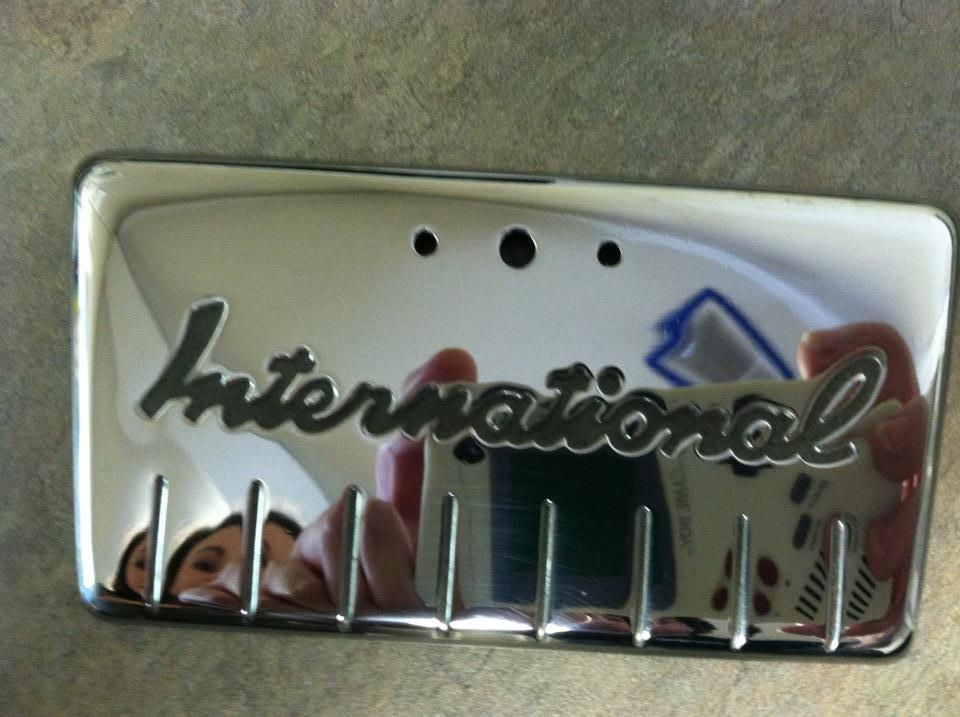 The knob was lightly bead blasted for better adhesion, sprayed with an adhesion promoter, then shot with a few coats of high build. 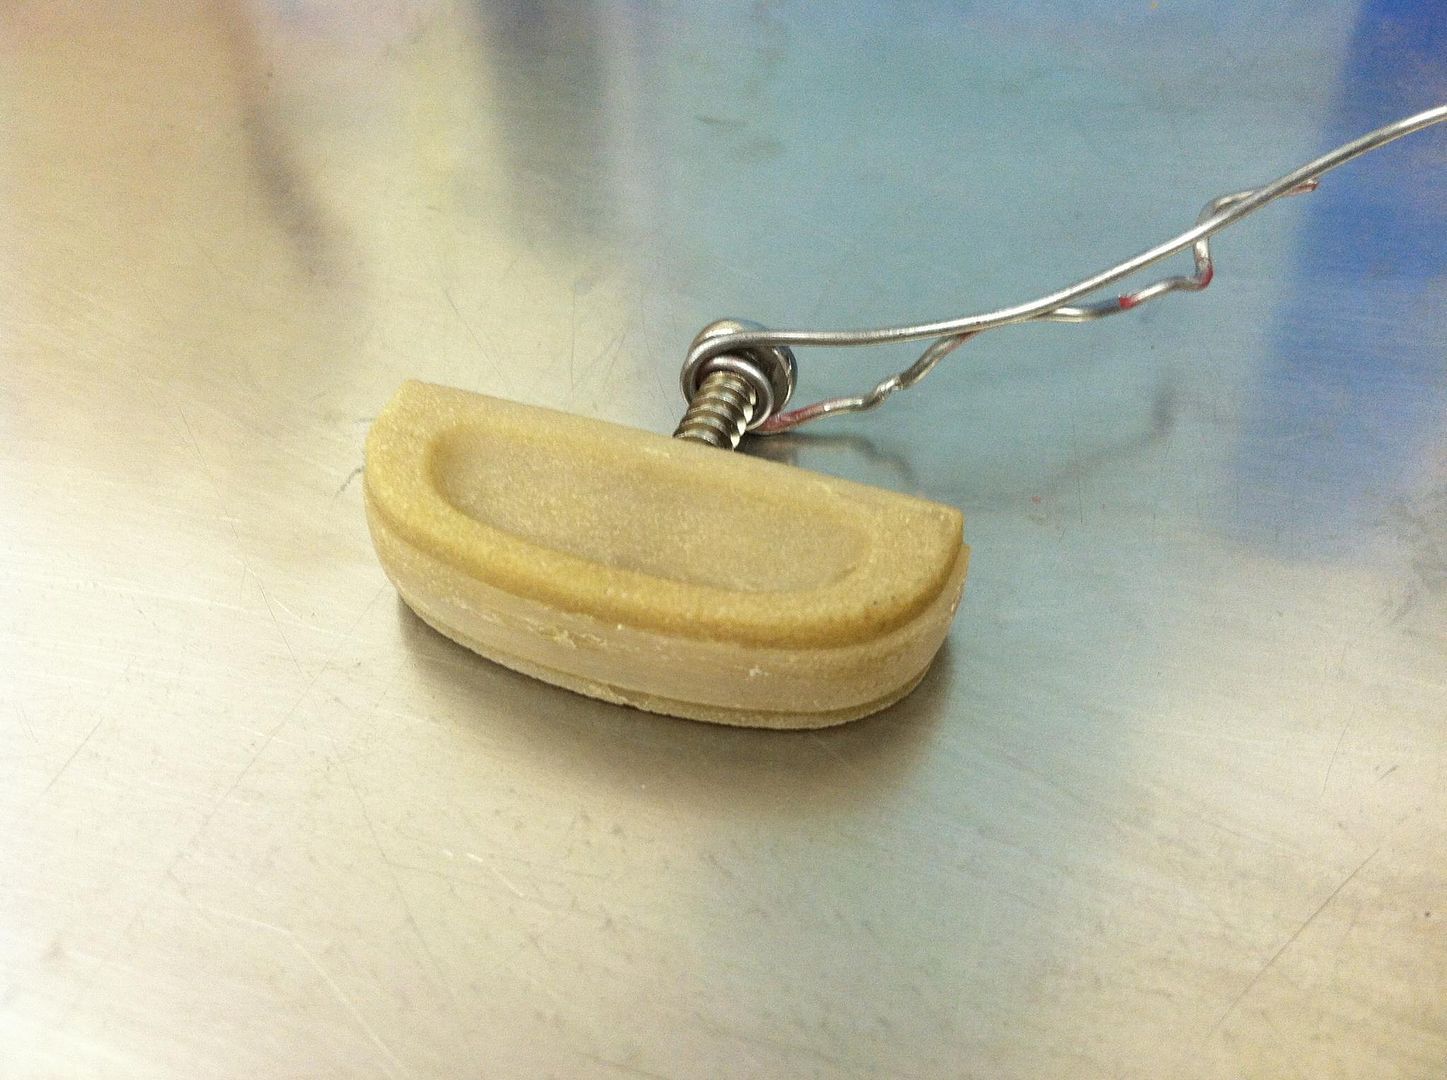 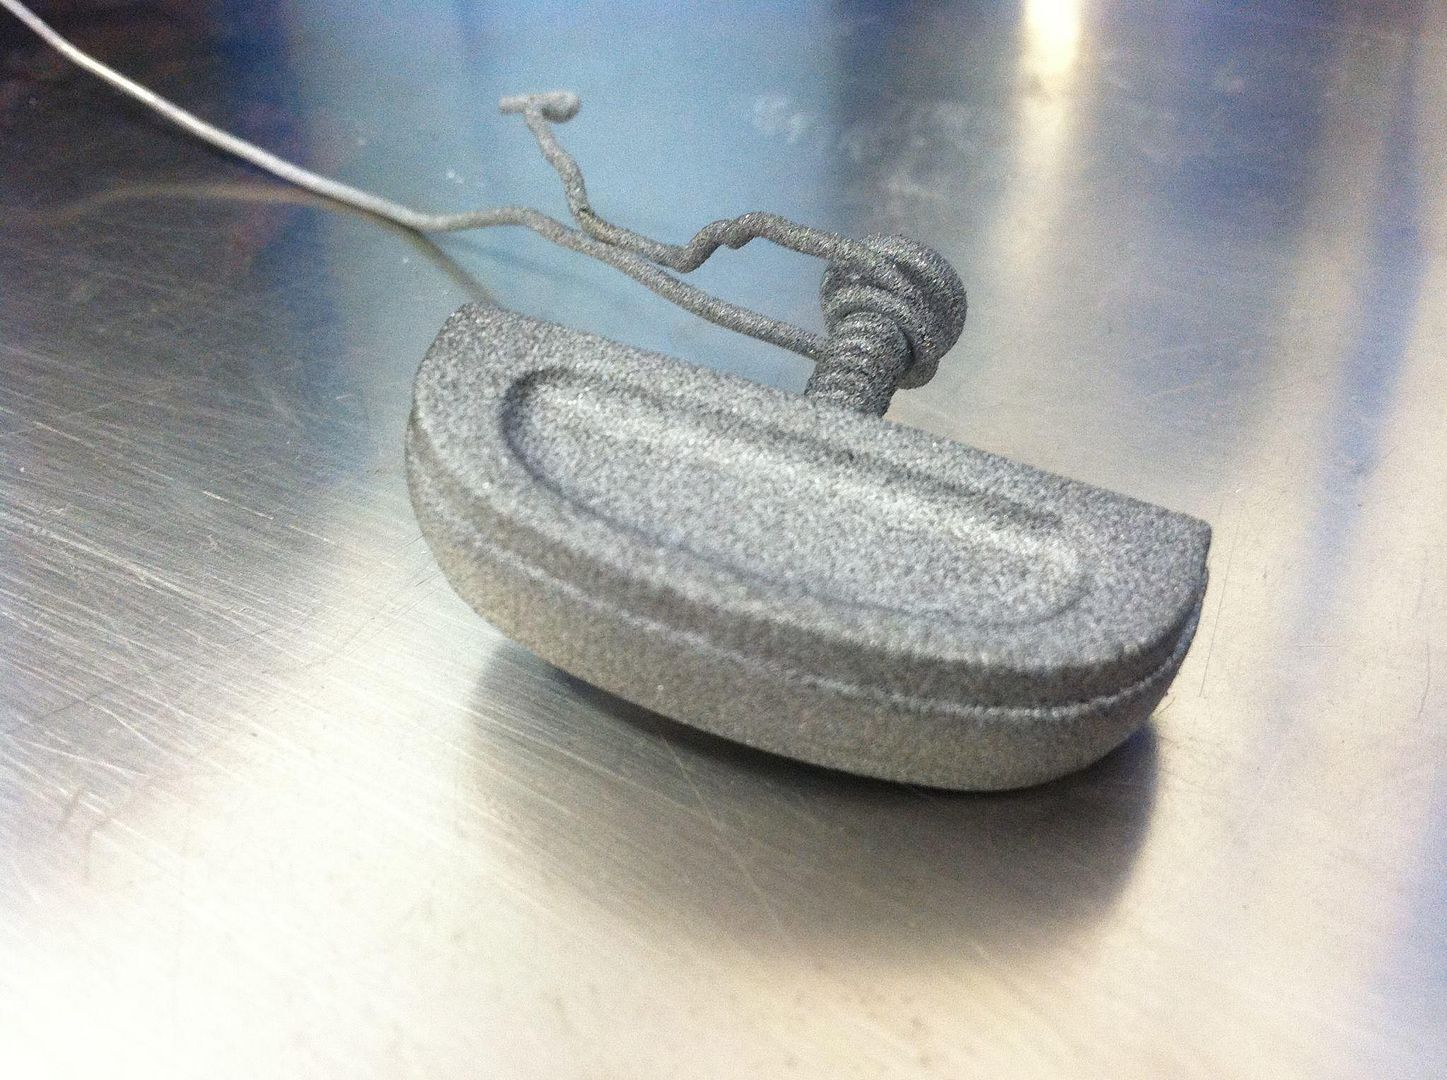 Then wetsanded and painted with base/clear. 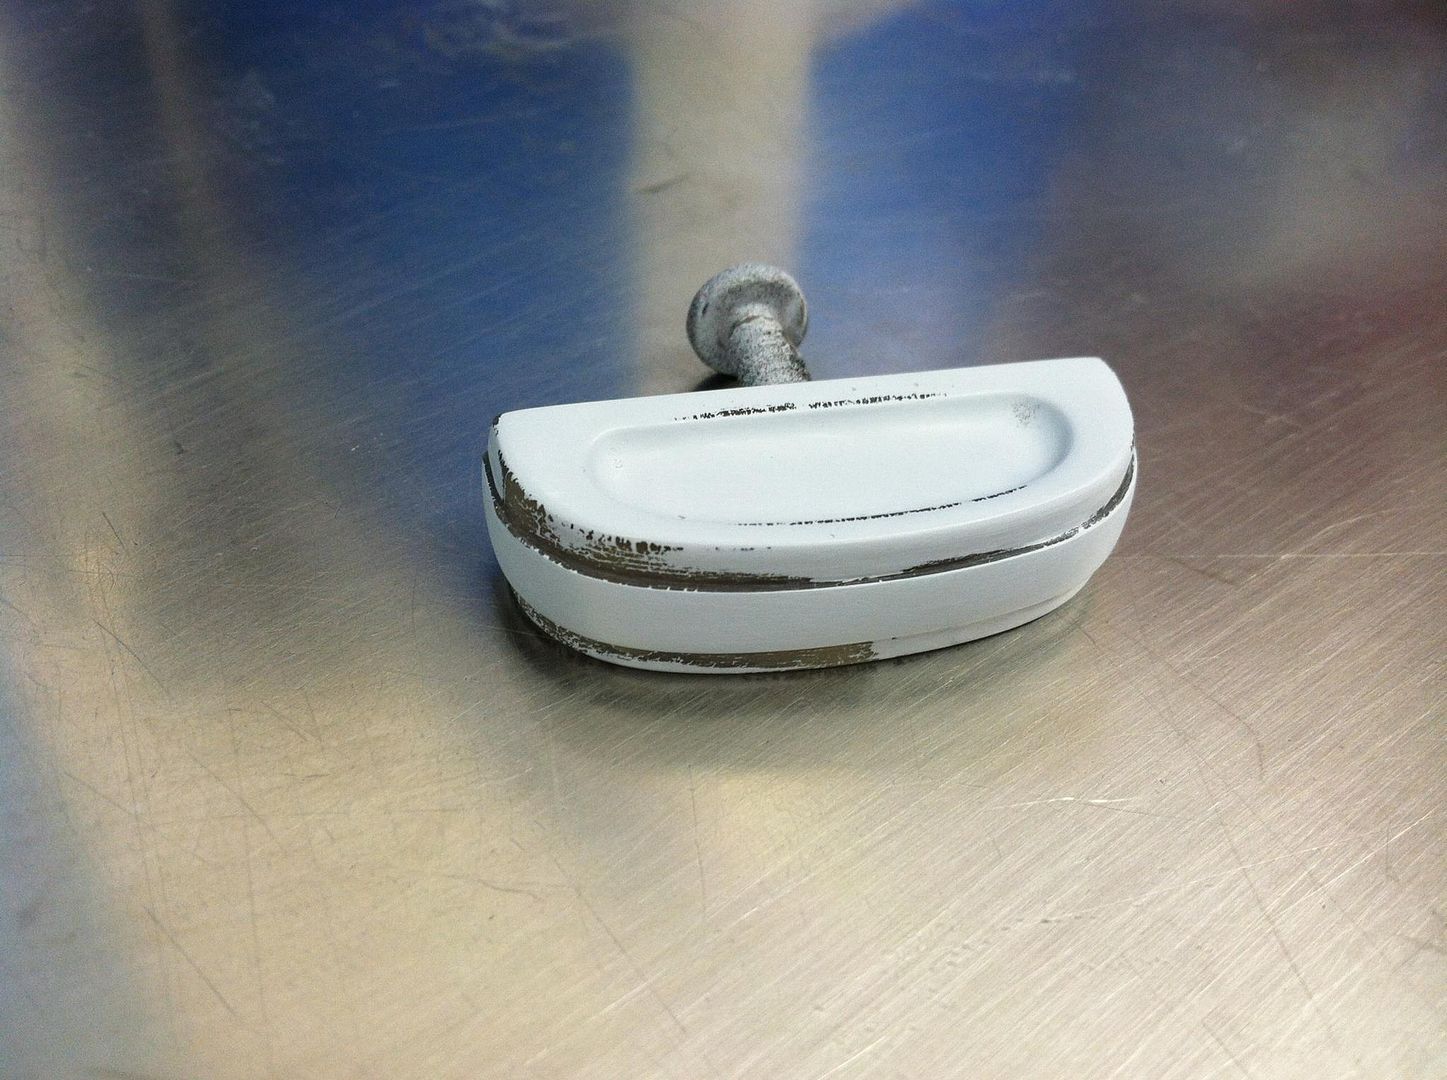 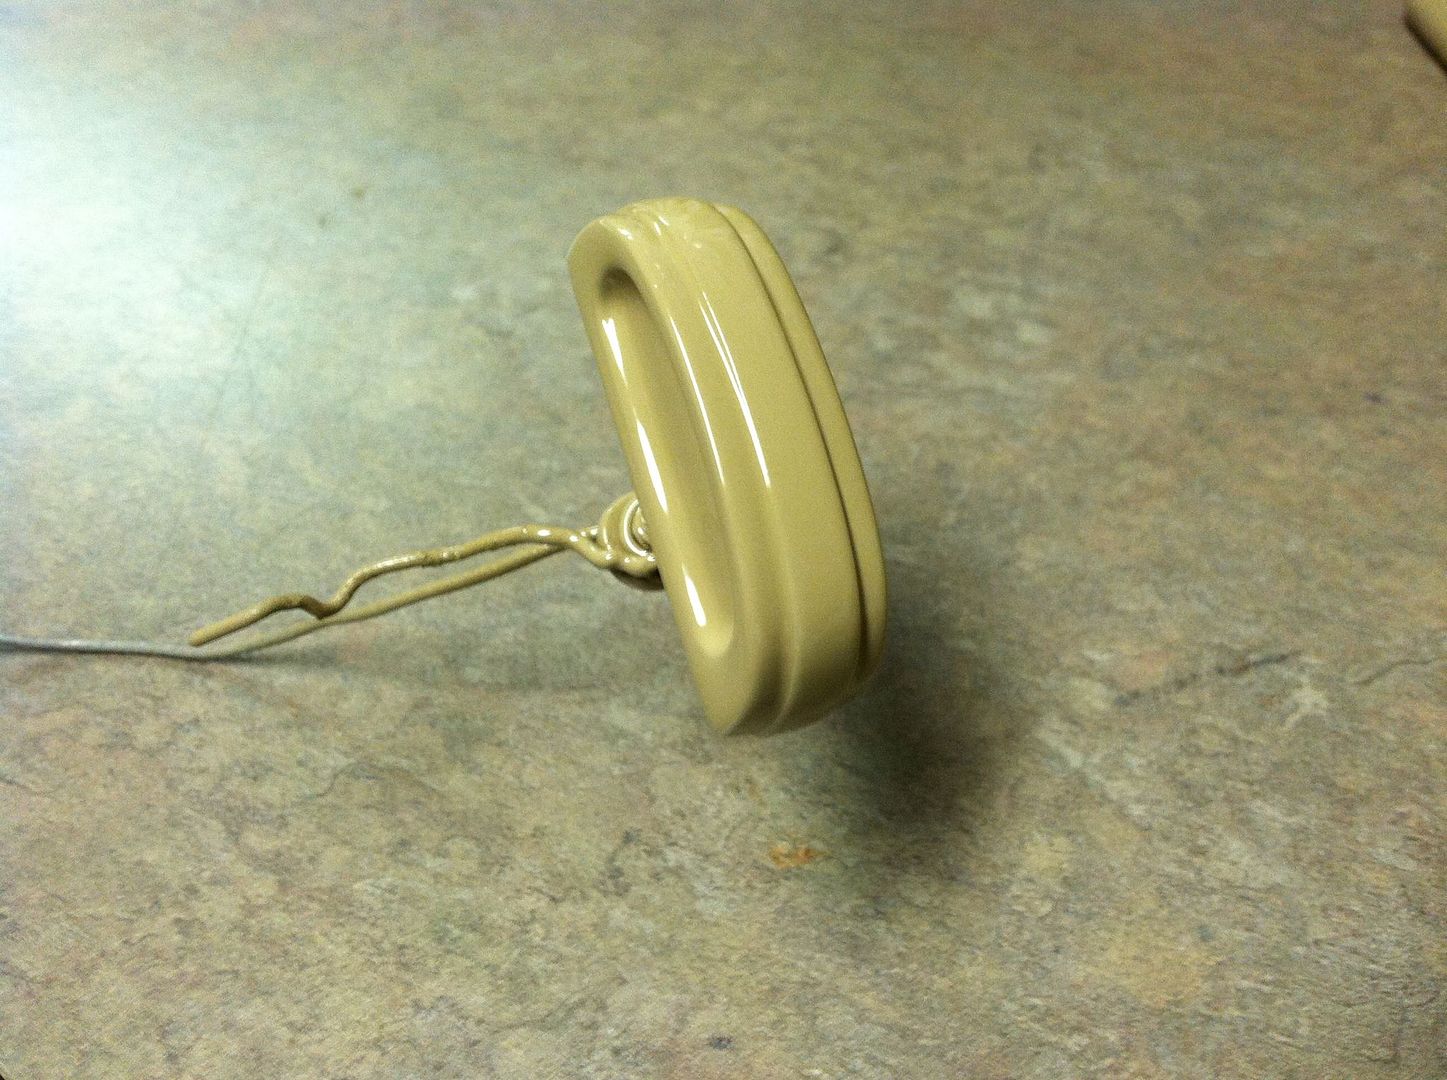 The main shell was bodyworked and painted, then wetsanded an buffed. 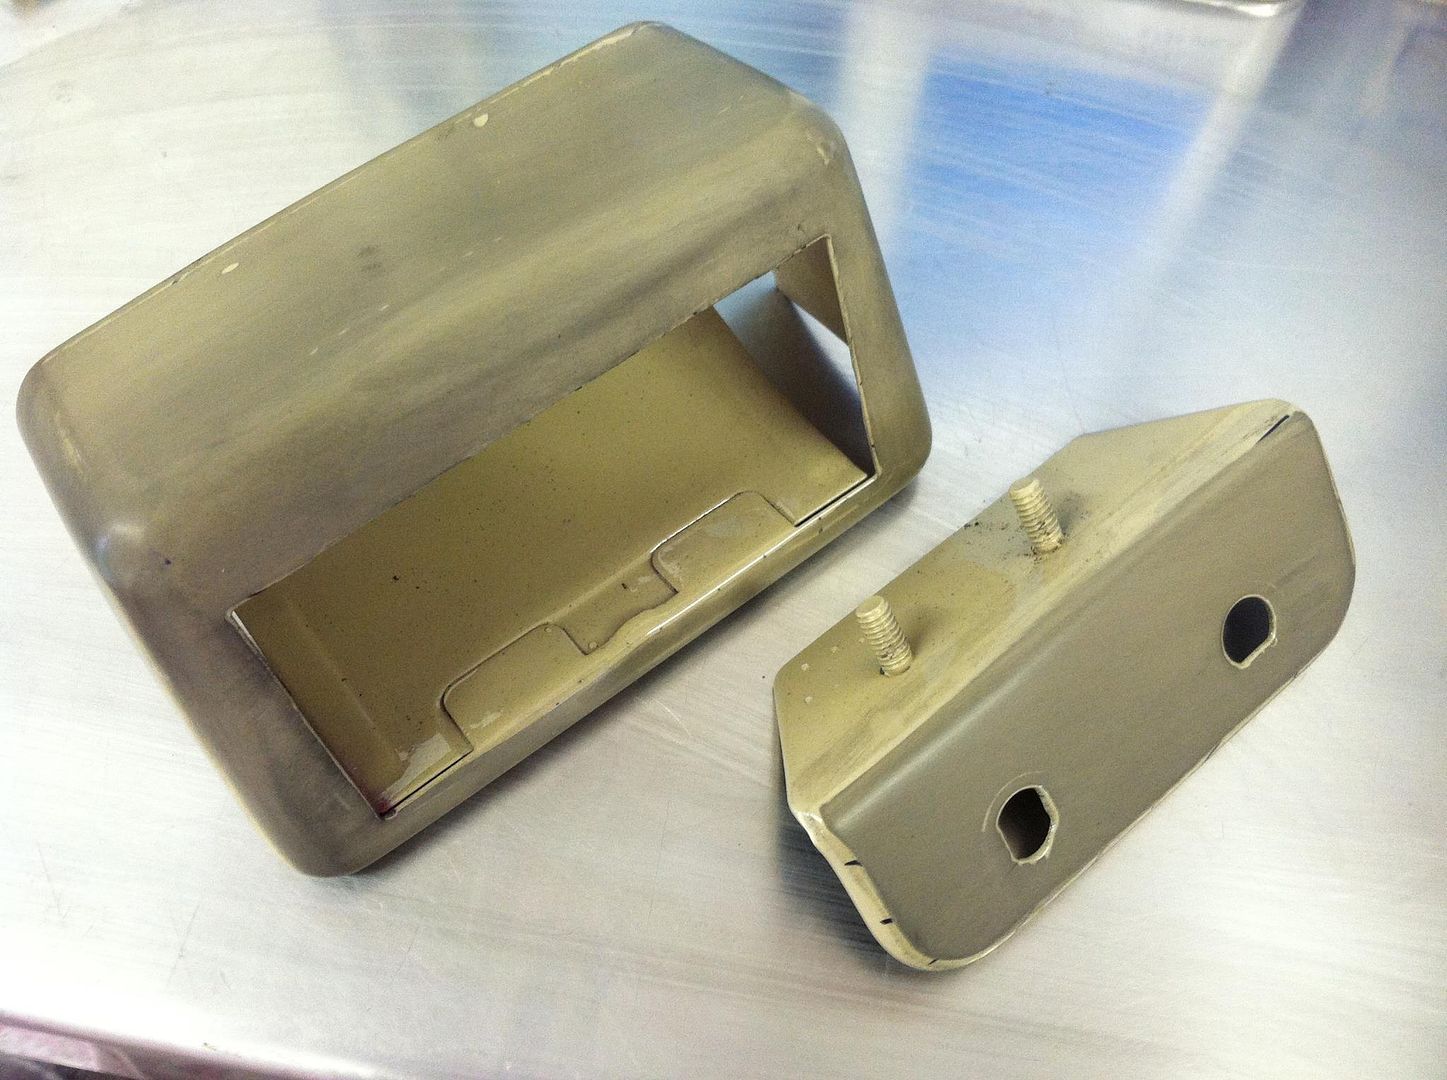 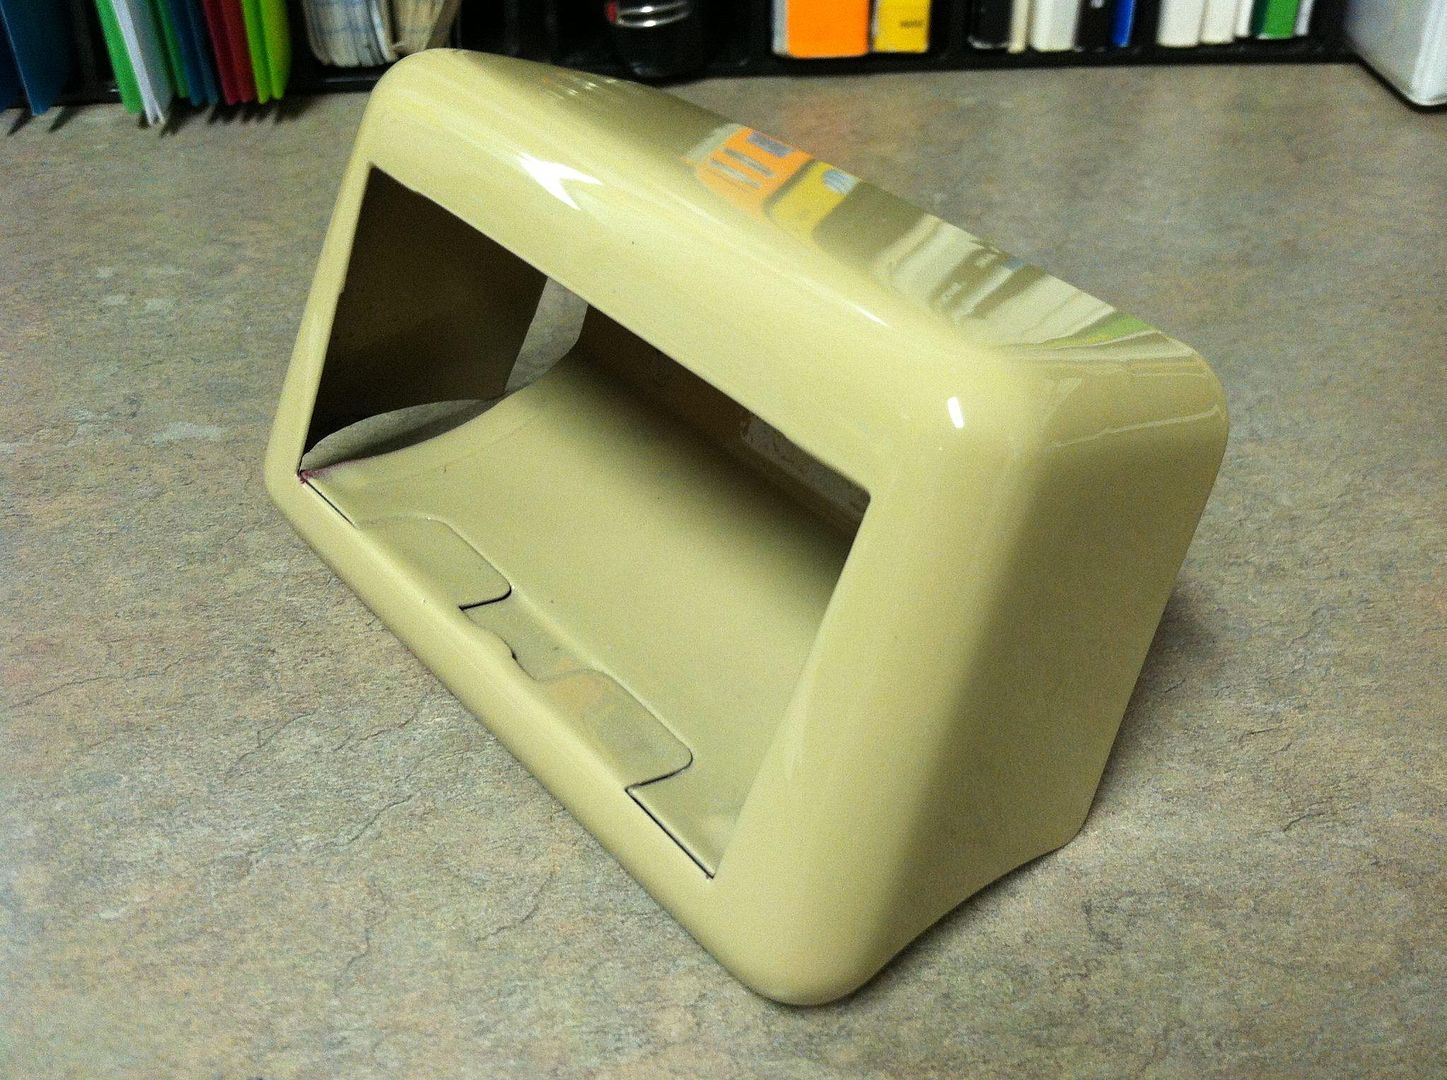 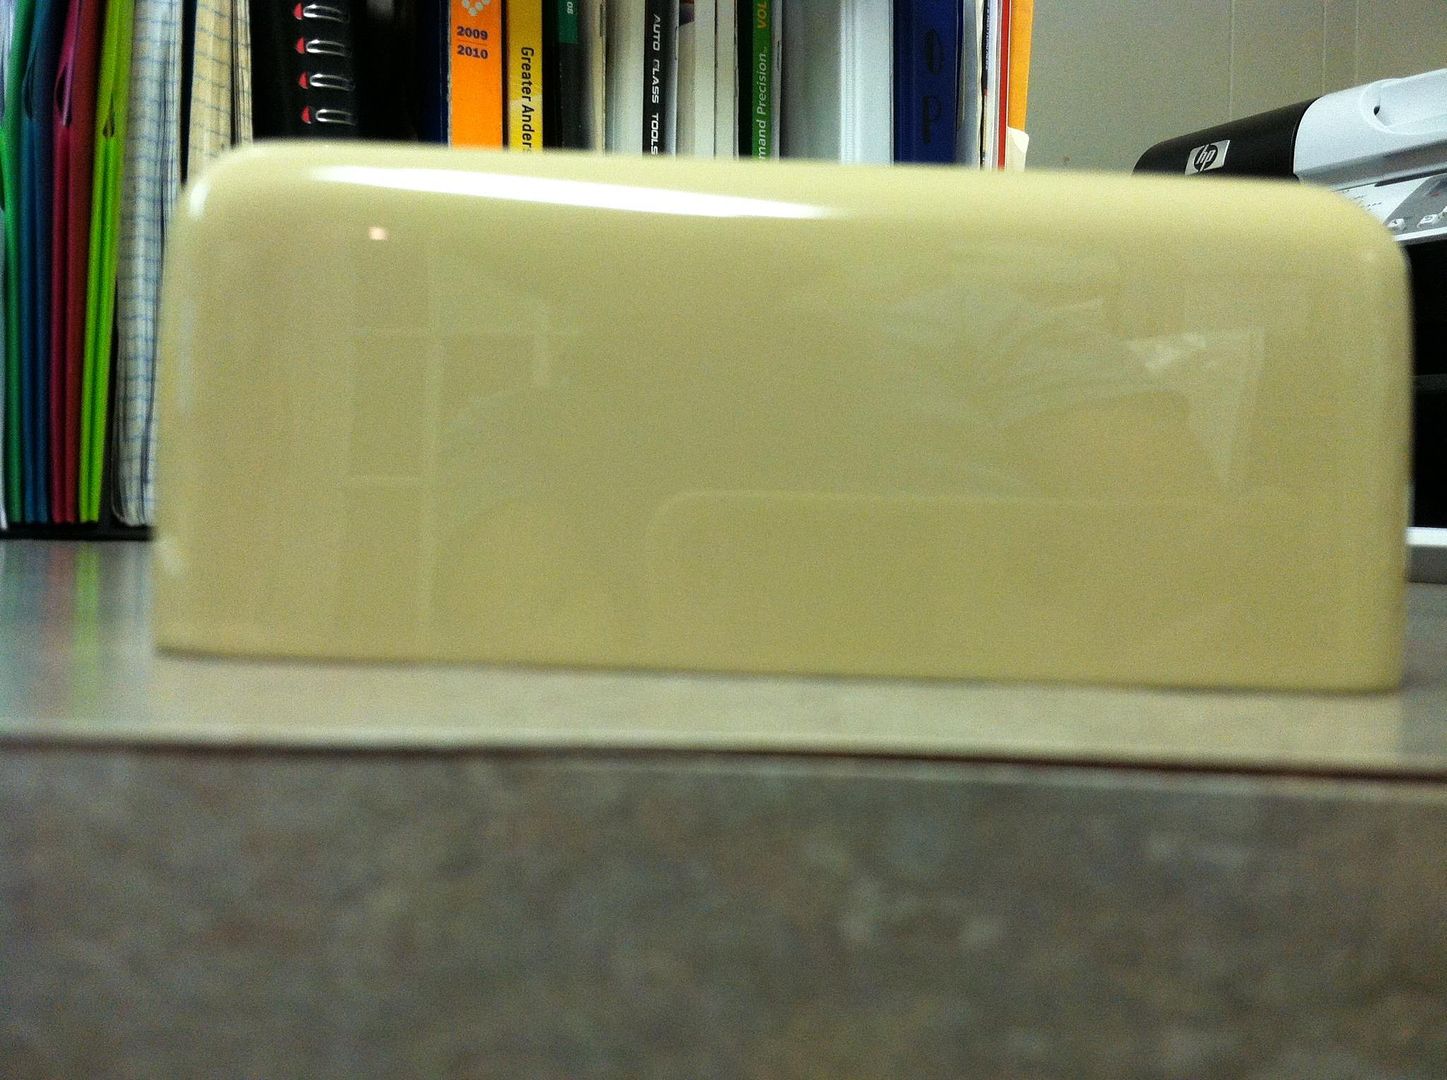 Inner tray (along with the door latches) blasted an painted. 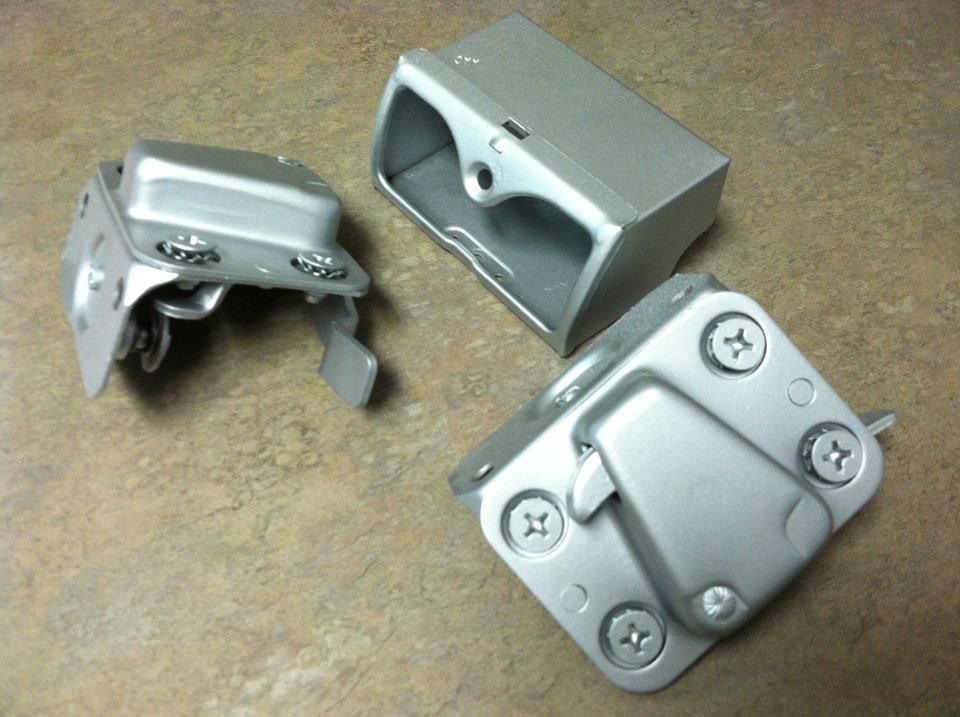 And reassembled, that's the heater switch panel in the background. 
__________________
Project Goldilocks '66 C10 Short Fleet BBW Build '65 C10 Highly Detailed Stock Restoration Thread '78 Camaro Targa Roof Build '55 International Metal/Body/Paint Work '66 F100 Full Rotisserie Restoration '40 Packard 120 Convertible Coupe Restoration How To Restore and Detail an Original Gauge Cluster How To Detail Sand Body Panels, Edges, Corners, Etc |
|
|
|
|
11-01-2012, 04:59 PM
|
#19 |
|
Registered User
Join Date: May 2011
Location: Anderson SC
Posts: 3,870
|
Re: '55 International Metal/Body/Paint Work
More hinge work.
They were blasted, then shot with PPG DPLF. I let that dry for a day then scuffed them and shot a couple coats of Slick Sand on them. 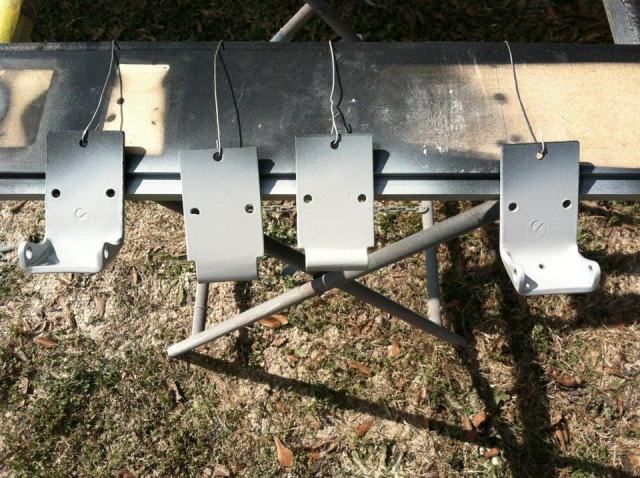 Blocked with 120/180. 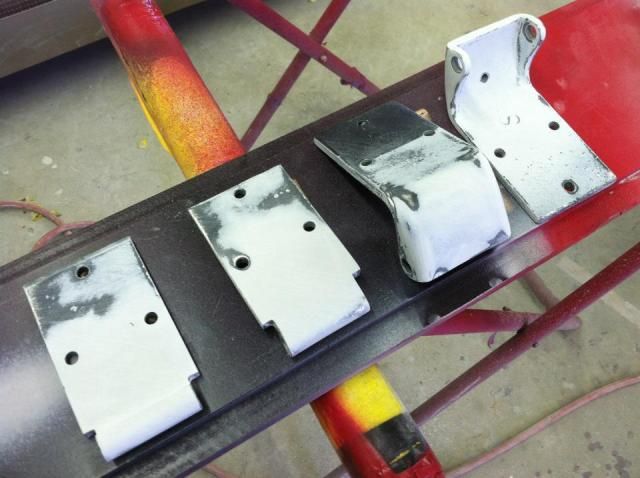 Shot with tinted K93 and wetsanded. 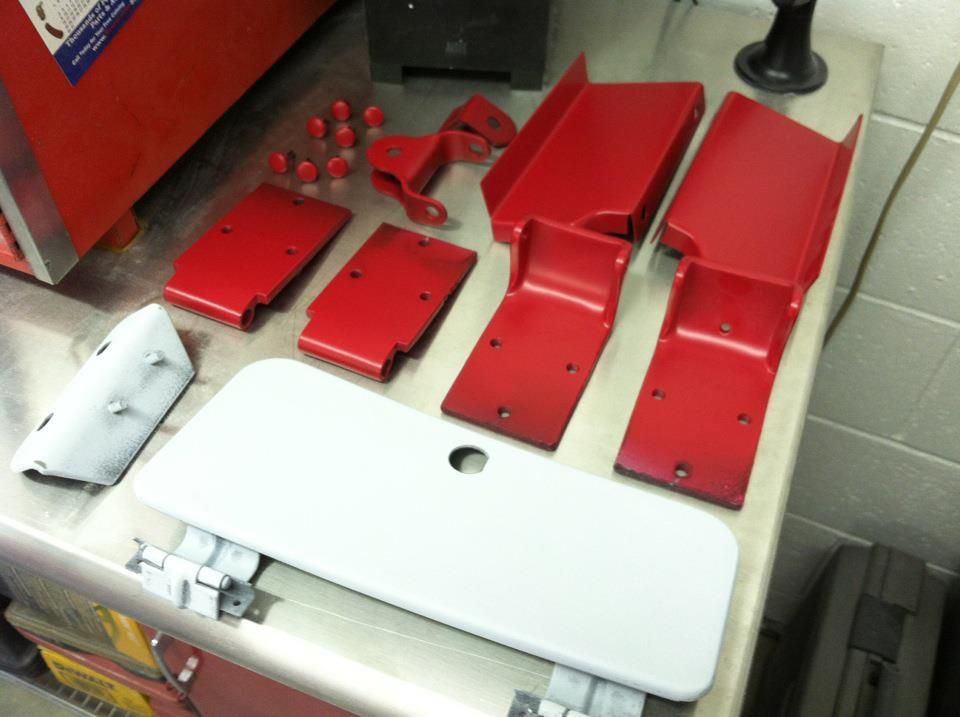 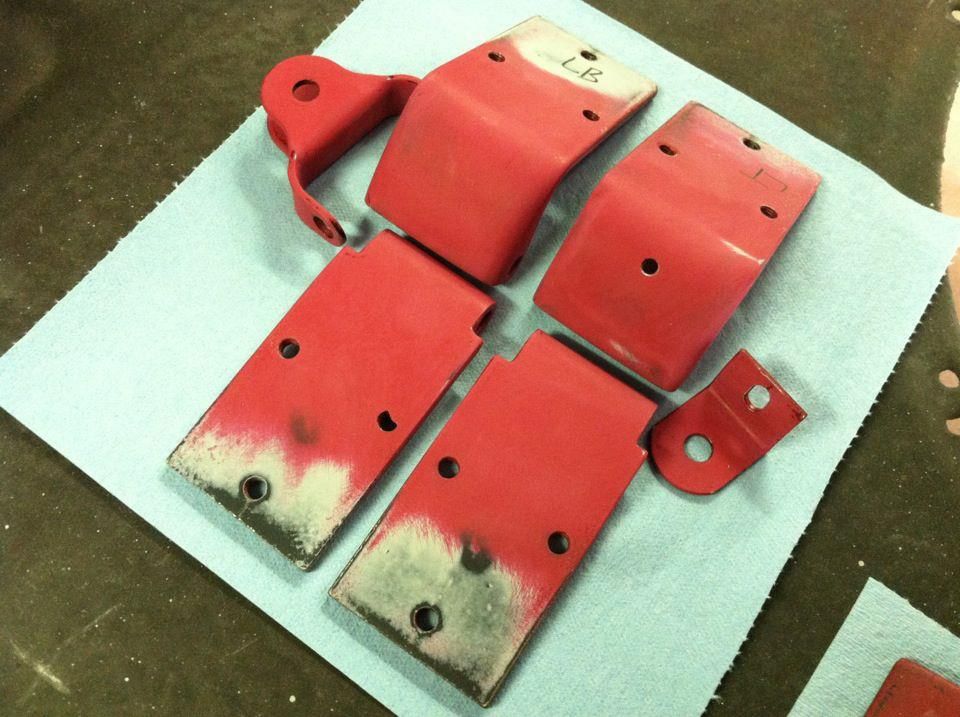 Shot with base/clear.  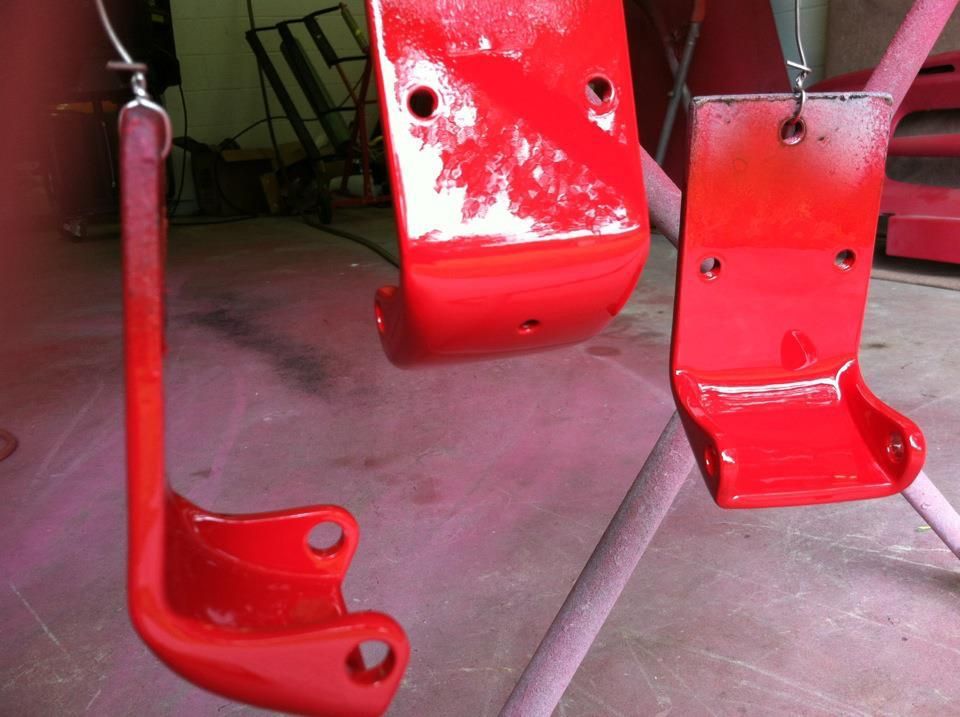 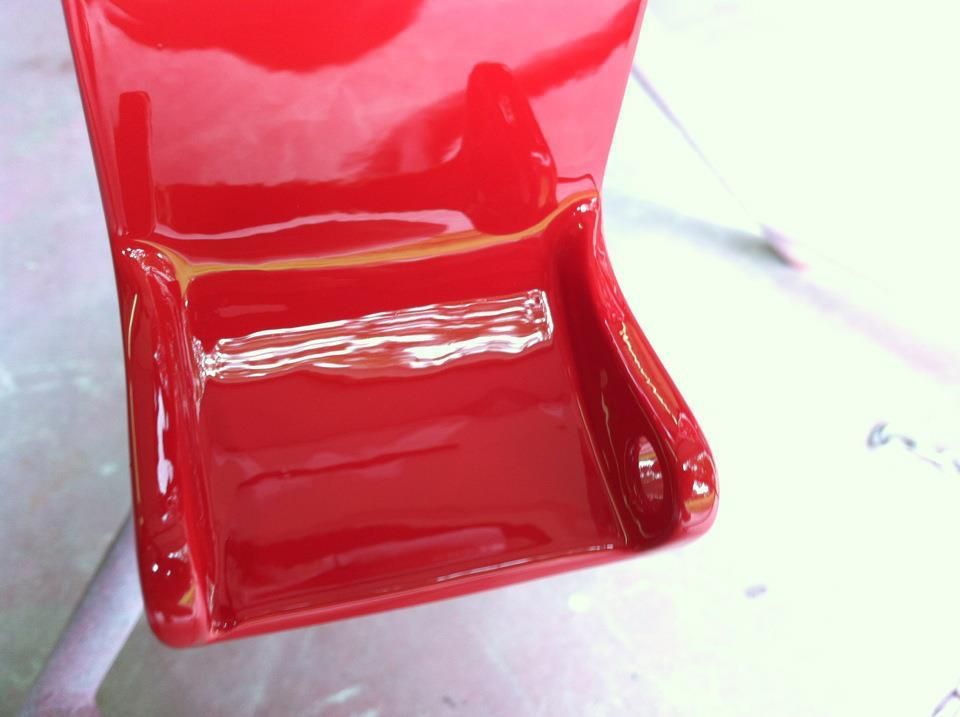 Beginning to carefully reassemble them with new hinge pins and bronze thrust bushings. 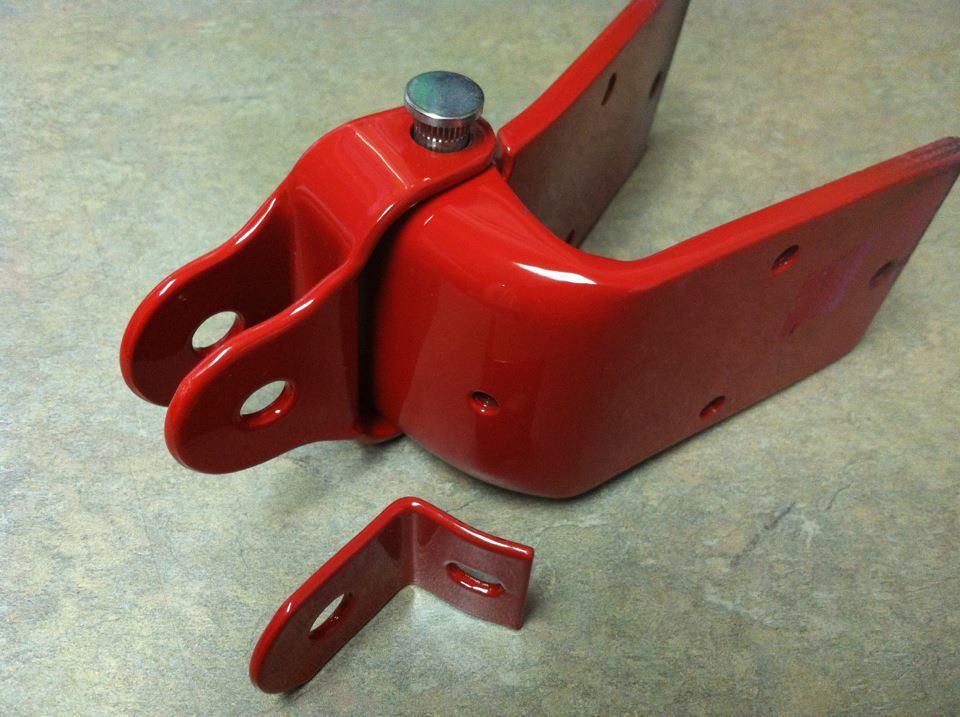  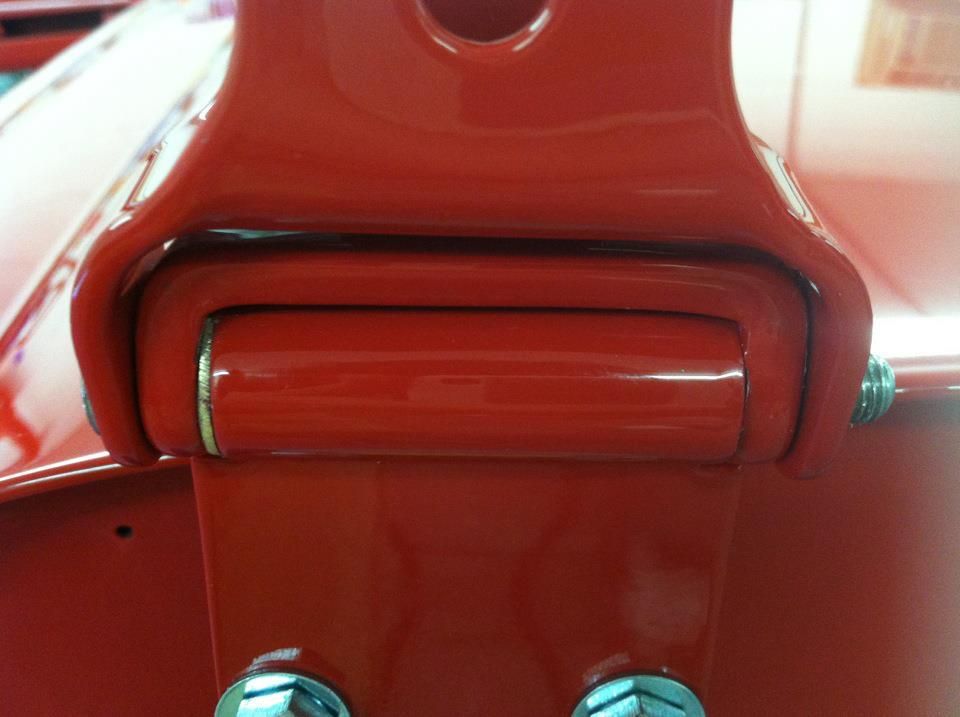 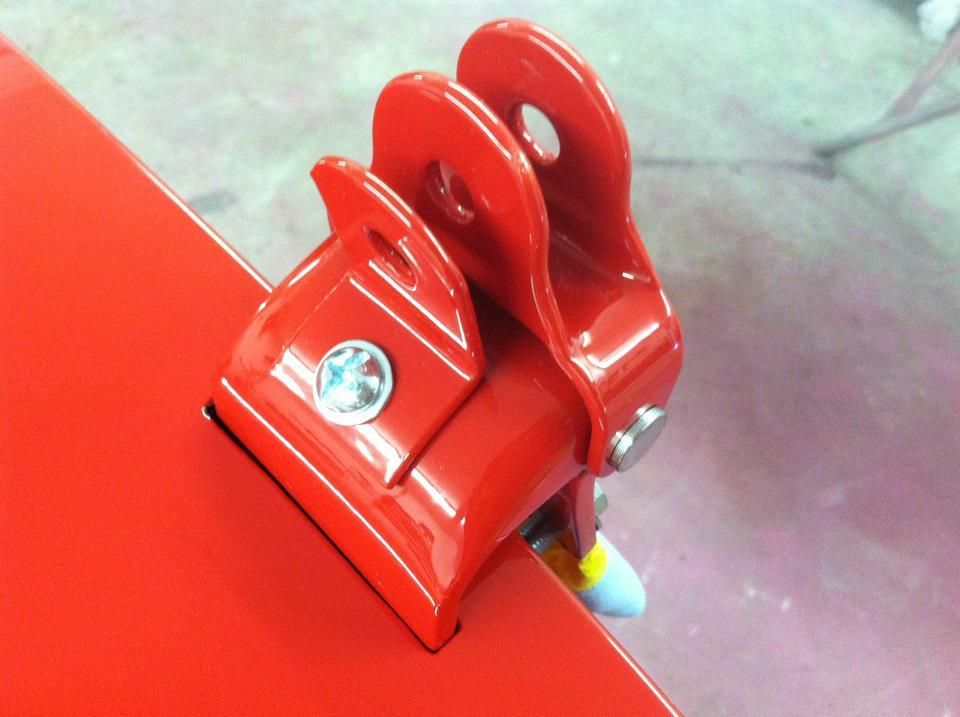
__________________
Project Goldilocks '66 C10 Short Fleet BBW Build '65 C10 Highly Detailed Stock Restoration Thread '78 Camaro Targa Roof Build '55 International Metal/Body/Paint Work '66 F100 Full Rotisserie Restoration '40 Packard 120 Convertible Coupe Restoration How To Restore and Detail an Original Gauge Cluster How To Detail Sand Body Panels, Edges, Corners, Etc |
|
|
|
|
11-01-2012, 05:03 PM
|
#20 |
|
Registered User
Join Date: May 2011
Location: Anderson SC
Posts: 3,870
|
Re: '55 International Metal/Body/Paint Work
The cab and body parts were blocked with 220 (wet) to knock the orange peel flat very quickly, then guidecoated and wet blocked with 500 right before painting.
 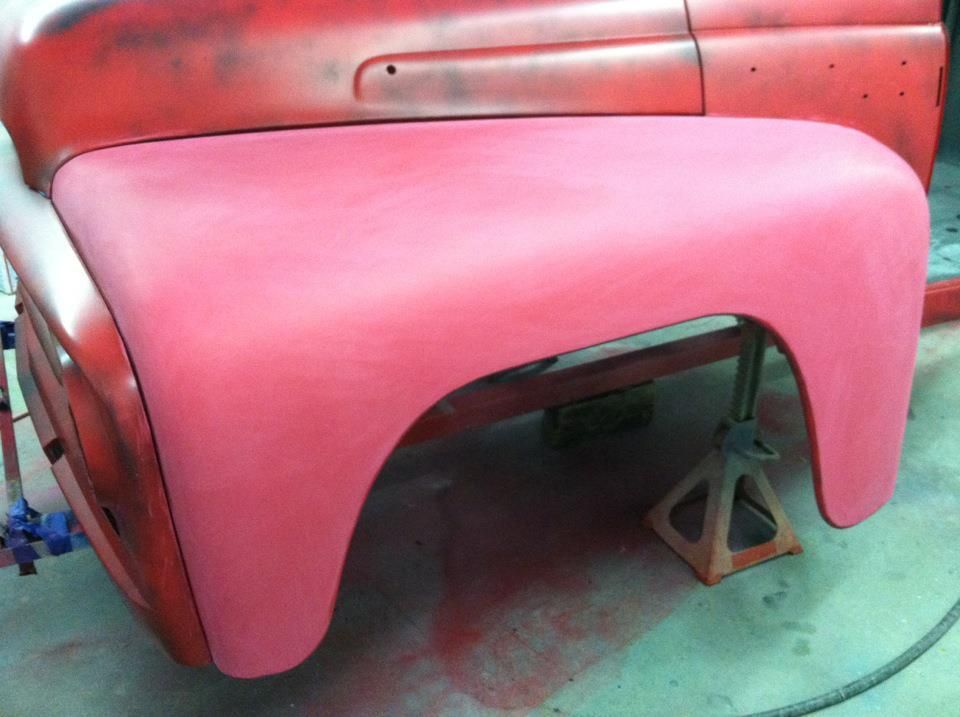 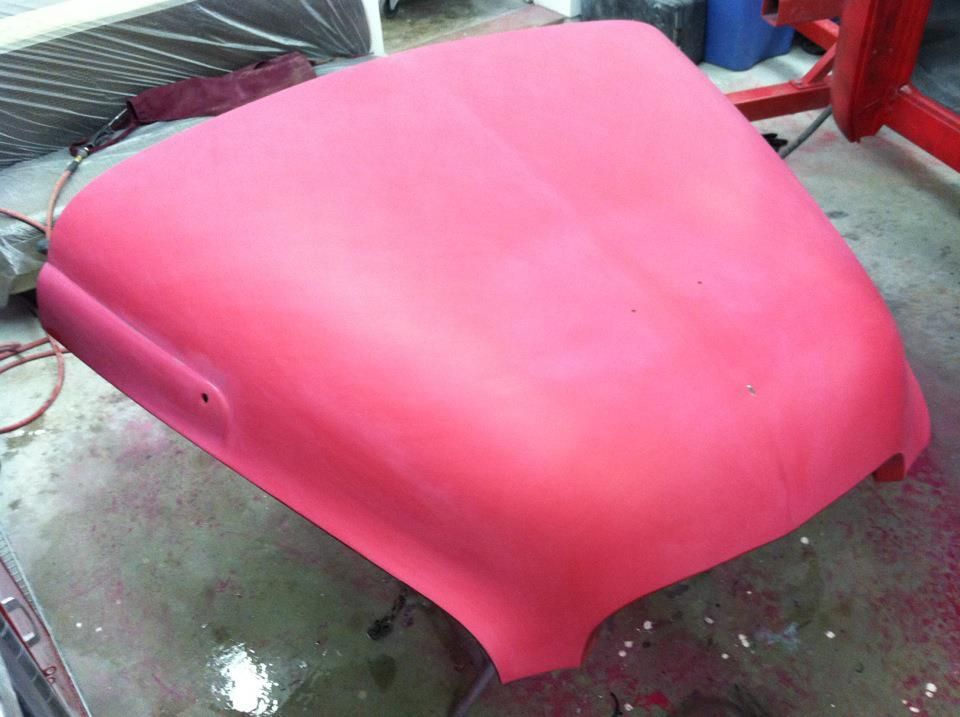   
__________________
Project Goldilocks '66 C10 Short Fleet BBW Build '65 C10 Highly Detailed Stock Restoration Thread '78 Camaro Targa Roof Build '55 International Metal/Body/Paint Work '66 F100 Full Rotisserie Restoration '40 Packard 120 Convertible Coupe Restoration How To Restore and Detail an Original Gauge Cluster How To Detail Sand Body Panels, Edges, Corners, Etc |
|
|
|
|
11-01-2012, 05:06 PM
|
#21 |
|
Registered User
Join Date: May 2011
Location: Anderson SC
Posts: 3,870
|
Re: '55 International Metal/Body/Paint Work
After wetsanding I wash the sanding sludge off and check the reflection in the panels for ripples, waves, drag marks, distortion around body lines, or any other imperfections. Once they check out OK they're ready for paint.
__________________
Project Goldilocks '66 C10 Short Fleet BBW Build '65 C10 Highly Detailed Stock Restoration Thread '78 Camaro Targa Roof Build '55 International Metal/Body/Paint Work '66 F100 Full Rotisserie Restoration '40 Packard 120 Convertible Coupe Restoration How To Restore and Detail an Original Gauge Cluster How To Detail Sand Body Panels, Edges, Corners, Etc |
|
|
|
|
11-01-2012, 05:09 PM
|
#22 |
|
Registered User
Join Date: May 2011
Location: Anderson SC
Posts: 3,870
|
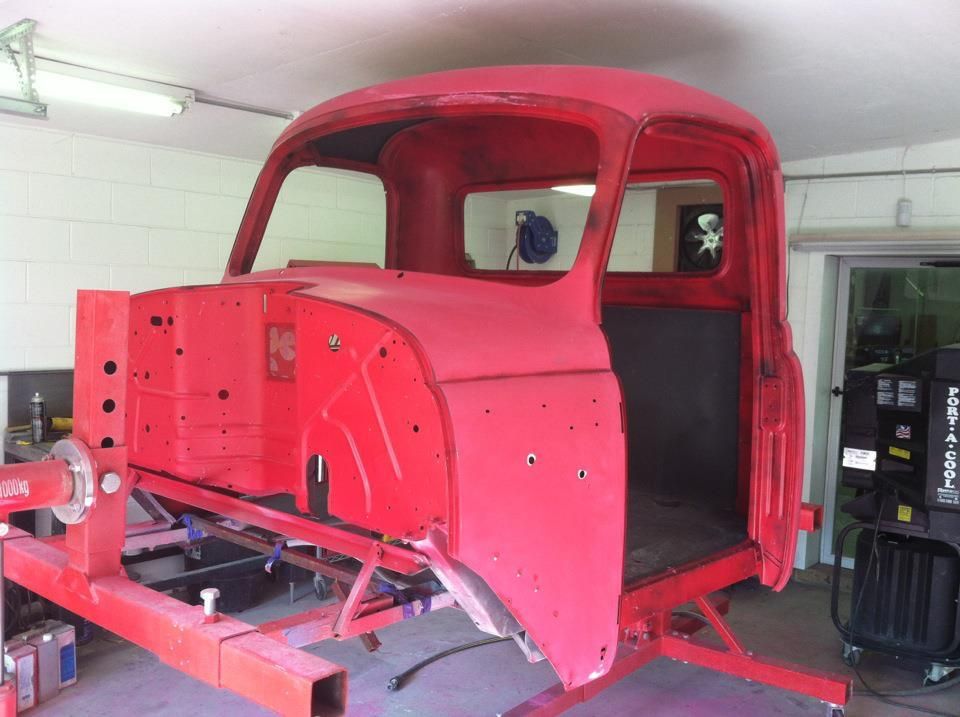
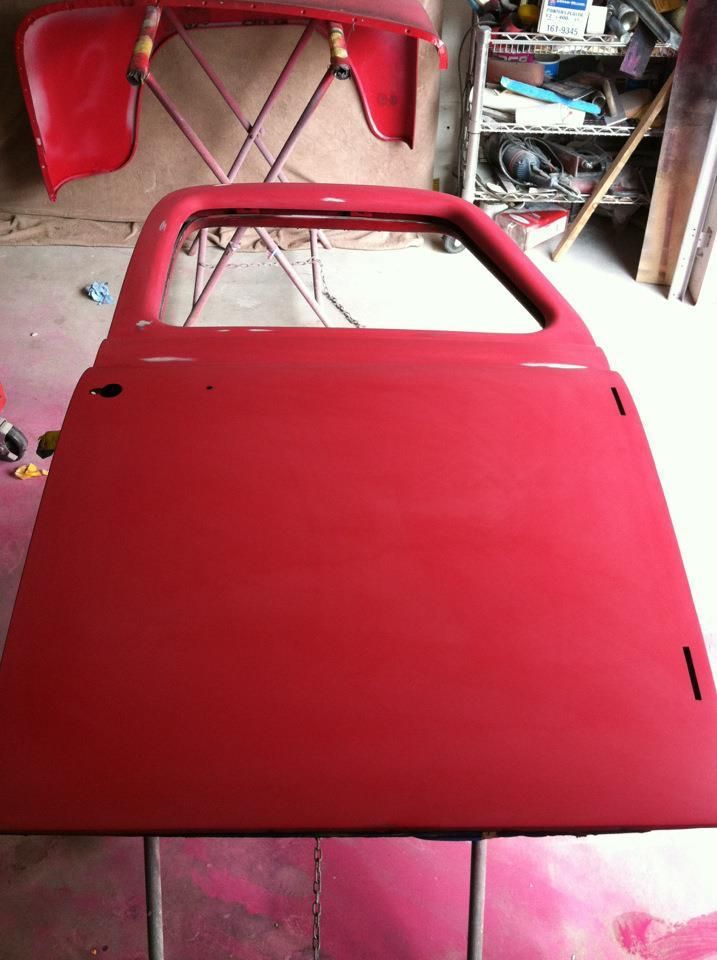
Re: '55 International Metal/Body/Paint Work
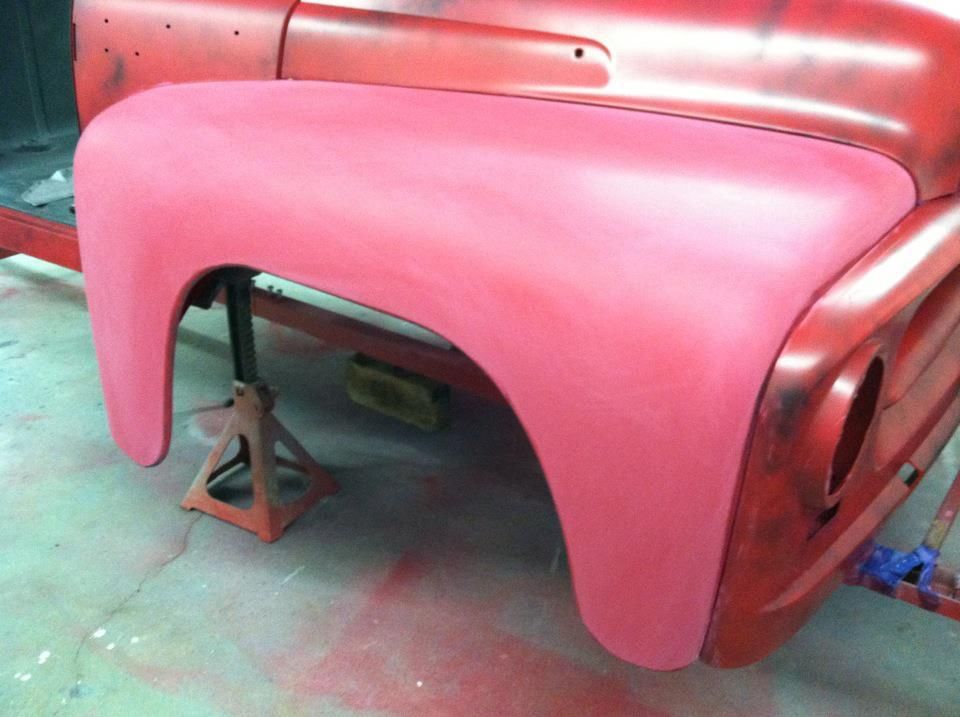
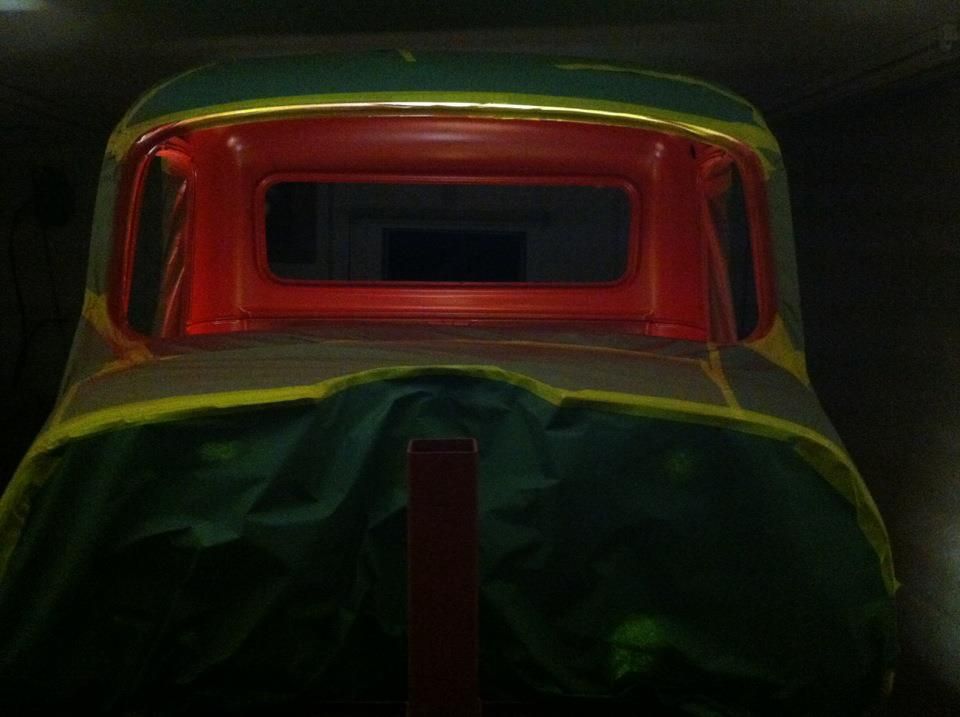
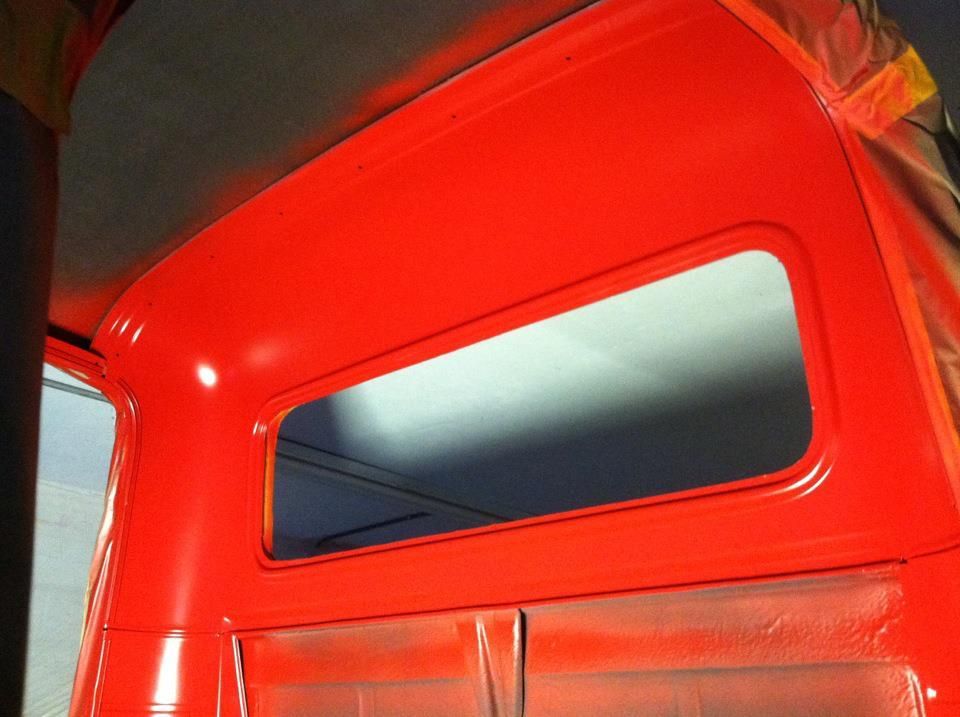
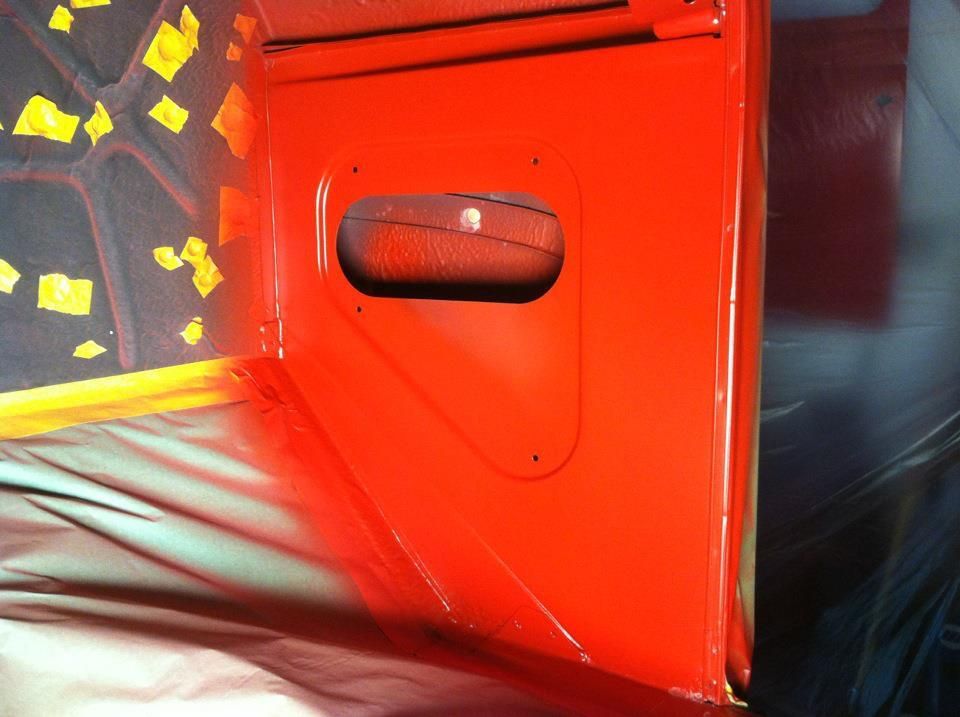
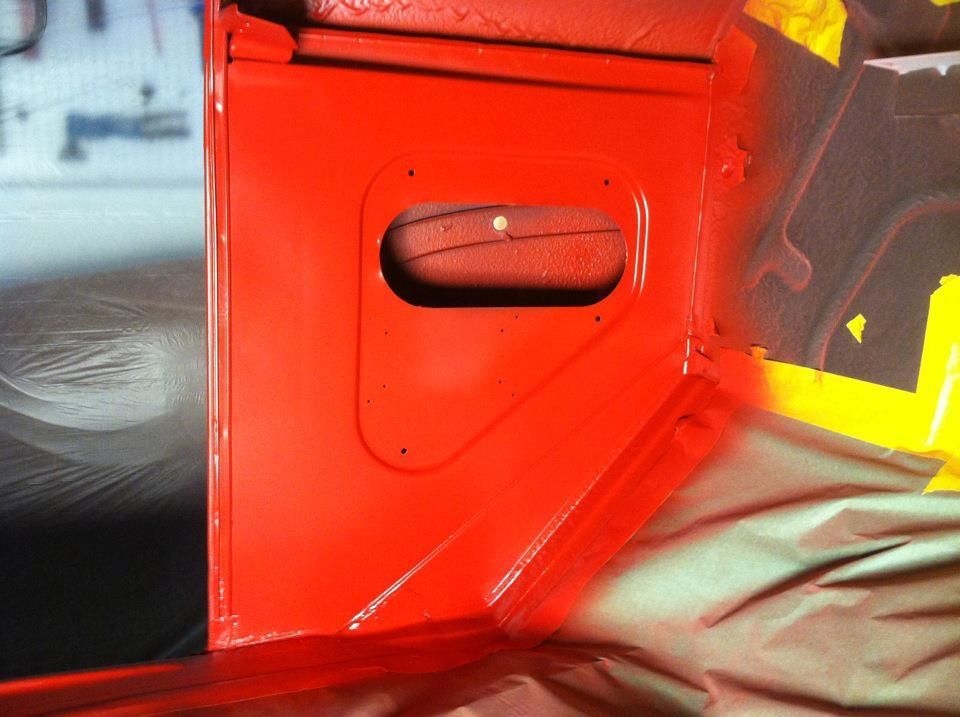
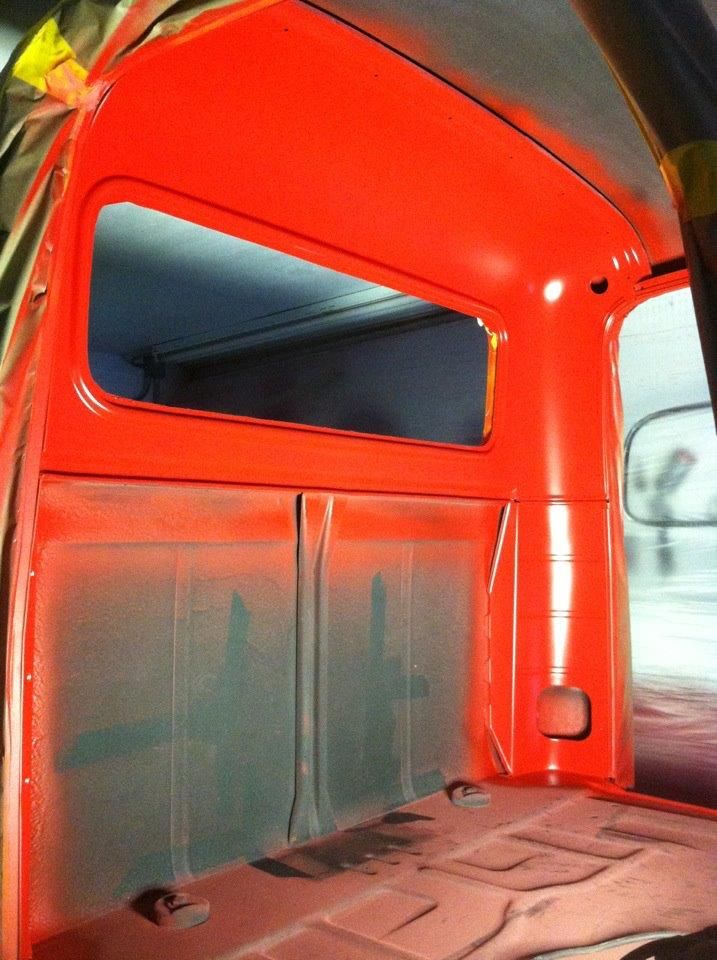
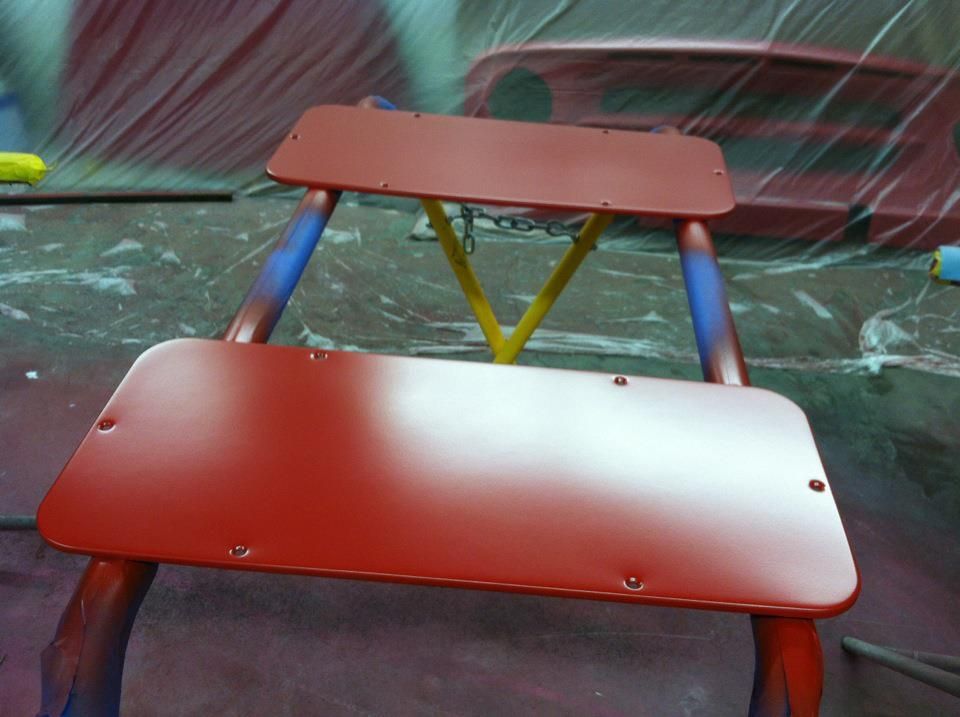
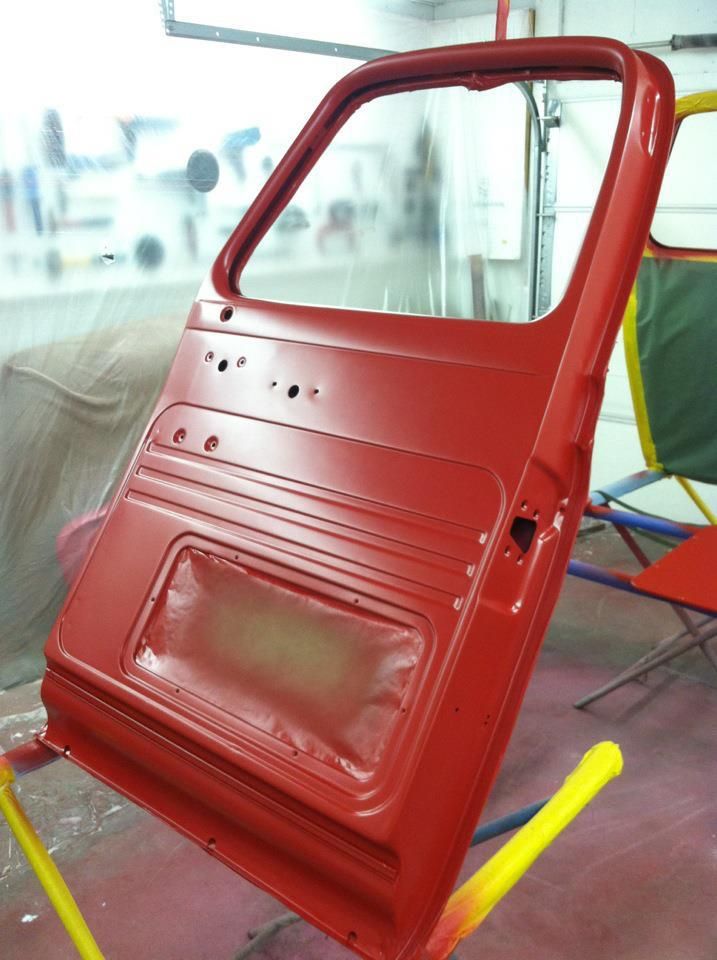
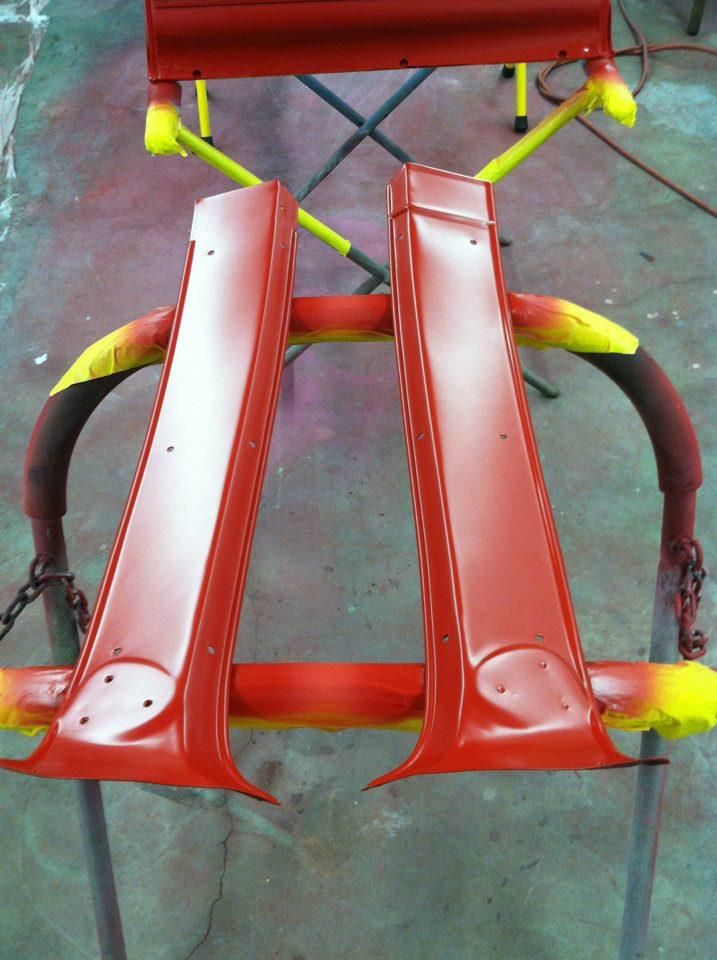
I didn't have room to paint everything at once so I did everything separately, starting with outside of the cab. I'm not good at painting, so don't study these pics too hard!
You'll see how bad the orange peel is in the wetsanding/buffing pics later. 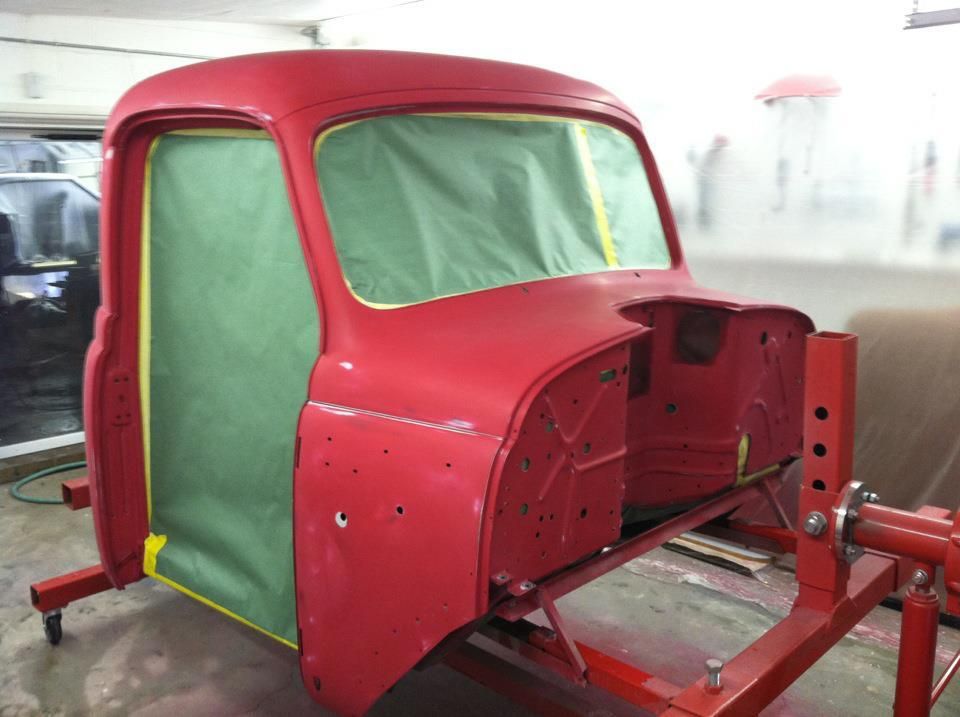 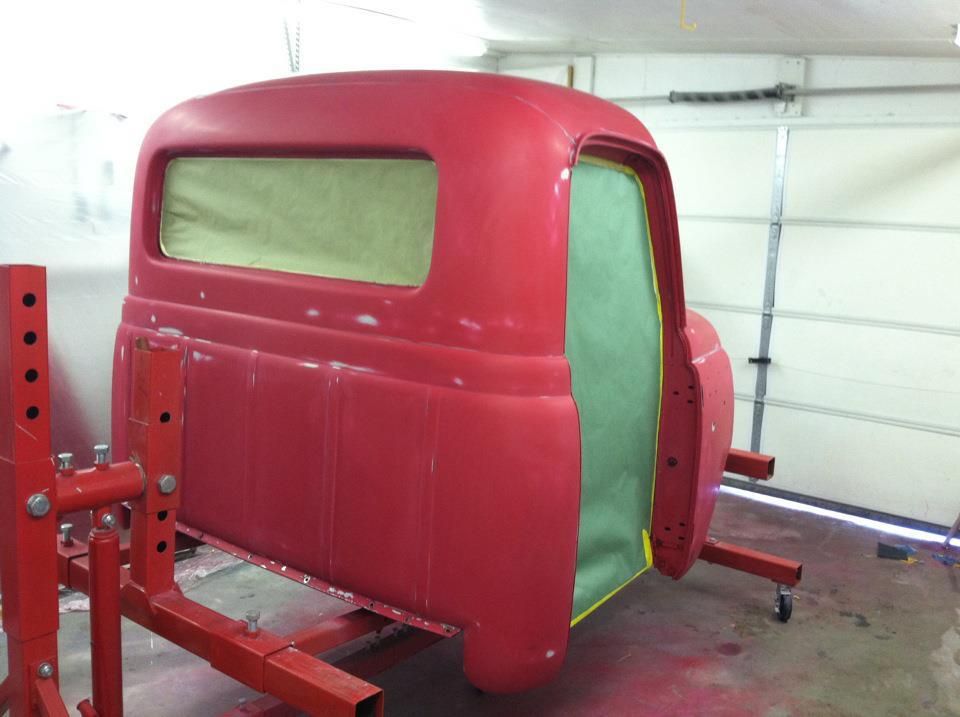 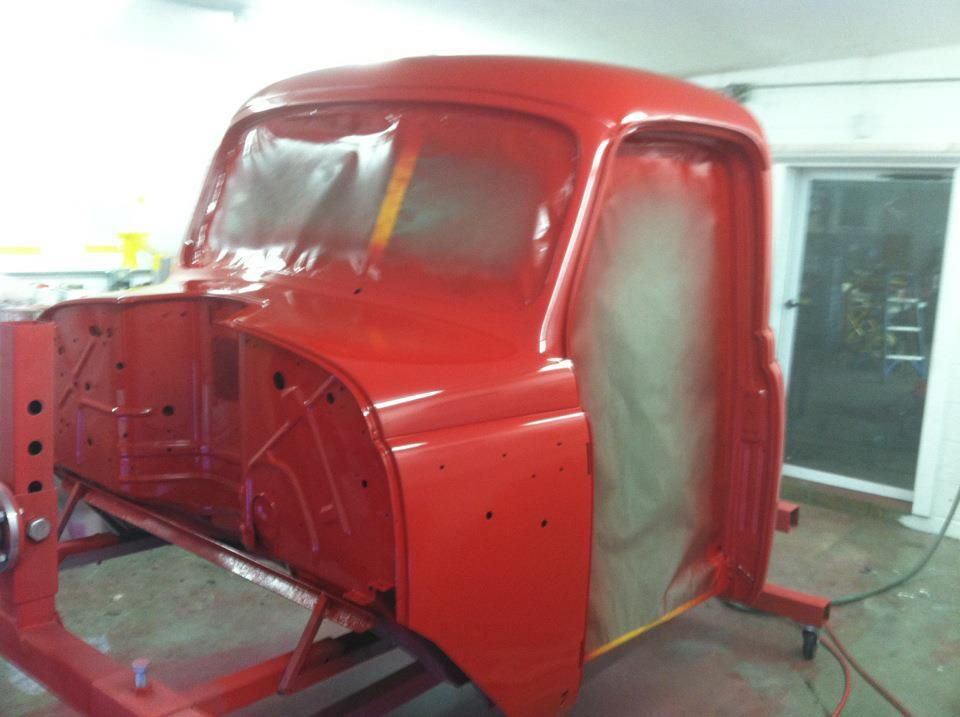 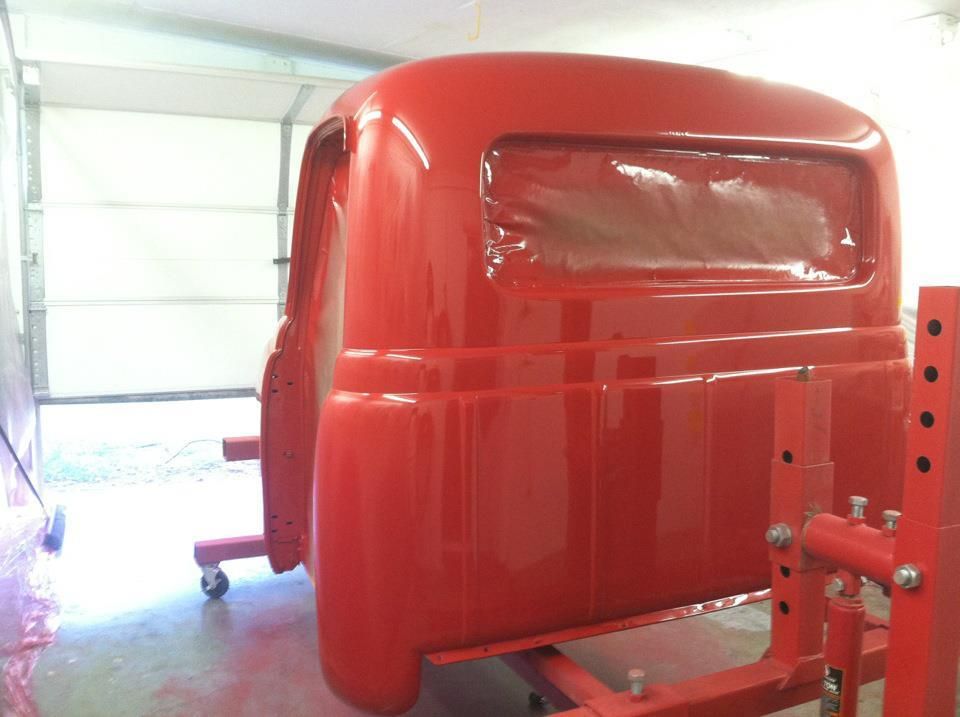 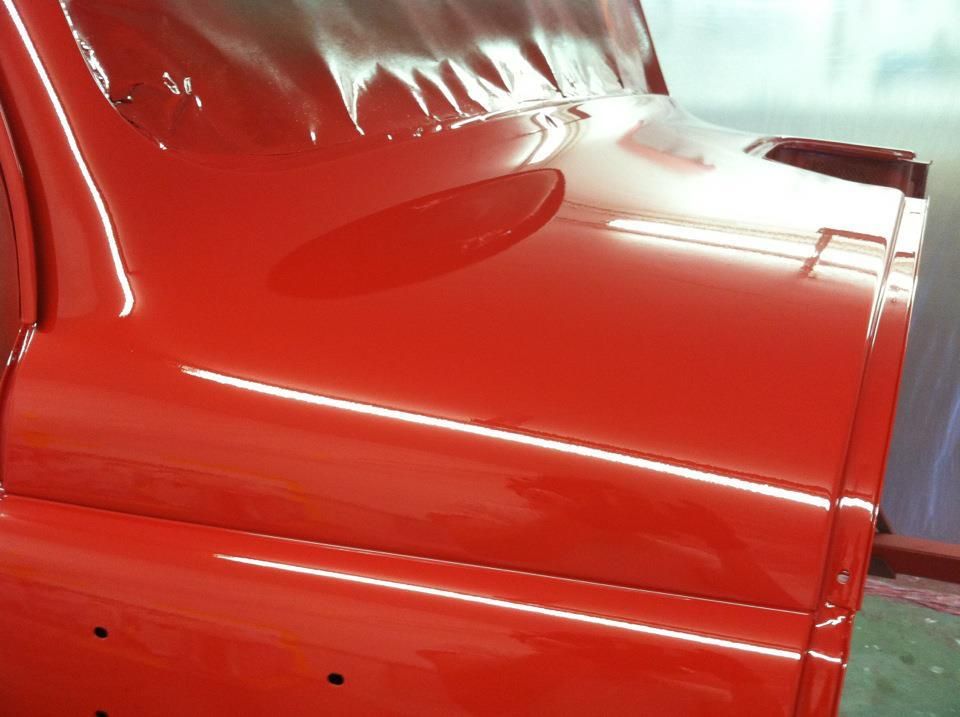 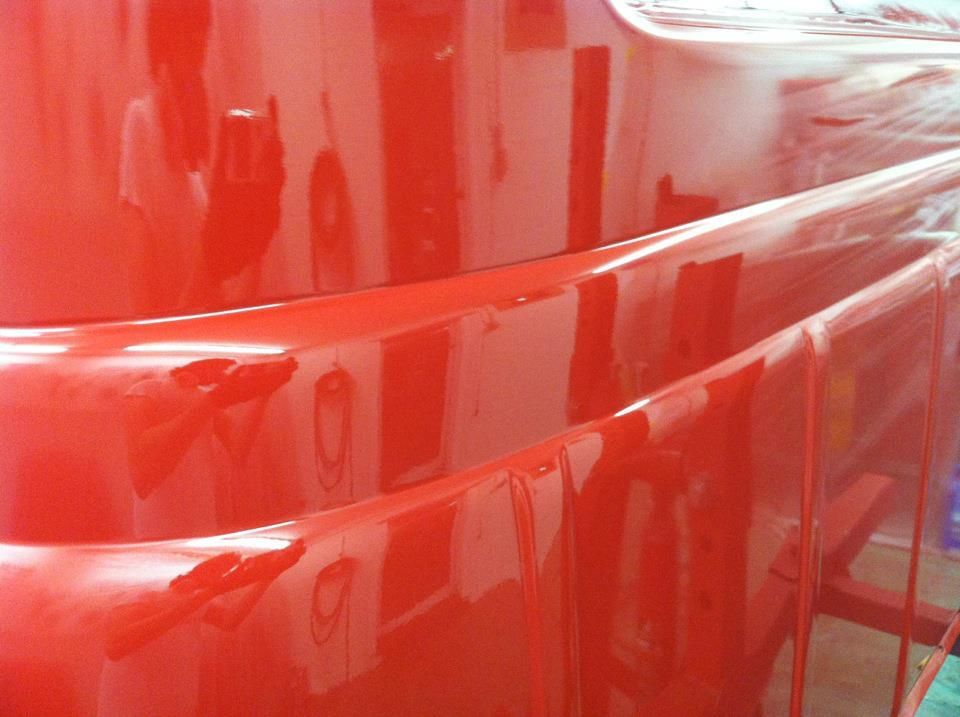
__________________
Project Goldilocks '66 C10 Short Fleet BBW Build '65 C10 Highly Detailed Stock Restoration Thread '78 Camaro Targa Roof Build '55 International Metal/Body/Paint Work '66 F100 Full Rotisserie Restoration '40 Packard 120 Convertible Coupe Restoration How To Restore and Detail an Original Gauge Cluster How To Detail Sand Body Panels, Edges, Corners, Etc |
|
|
|
|
11-01-2012, 05:19 PM
|
#23 |
|
Registered User
Join Date: May 2011
Location: Anderson SC
Posts: 3,870
|
Re: '55 International Metal/Body/Paint Work
The interior and inside of the doors were shot with flattened clear for a matte finish.
__________________
Project Goldilocks '66 C10 Short Fleet BBW Build '65 C10 Highly Detailed Stock Restoration Thread '78 Camaro Targa Roof Build '55 International Metal/Body/Paint Work '66 F100 Full Rotisserie Restoration '40 Packard 120 Convertible Coupe Restoration How To Restore and Detail an Original Gauge Cluster How To Detail Sand Body Panels, Edges, Corners, Etc |
|
|
|
|
11-02-2012, 01:37 PM
|
#24 |
|
Old and crusty
Join Date: Jan 2009
Location: Surprise, AZ
Posts: 462
|
Re: '55 International Metal/Body/Paint Work
Really looking good, John. Can't wait to see it back on the frame!
__________________
65 Chevy long wide daily driver - SOLD! 64 Chevy Short Step LS |
|
|
|
|
11-09-2012, 12:30 PM
|
#25 | |
|
Registered User
Join Date: May 2011
Location: Anderson SC
Posts: 3,870
|
Re: '55 International Metal/Body/Paint Work
Quote:
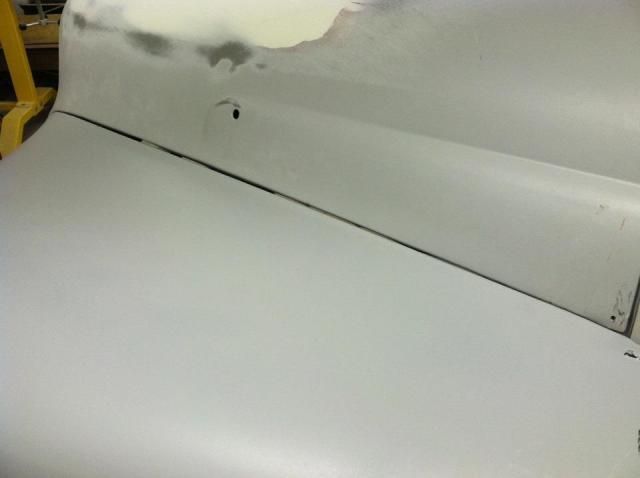
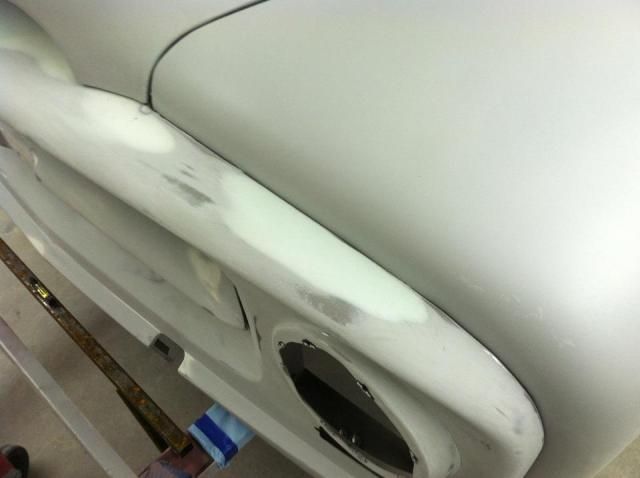
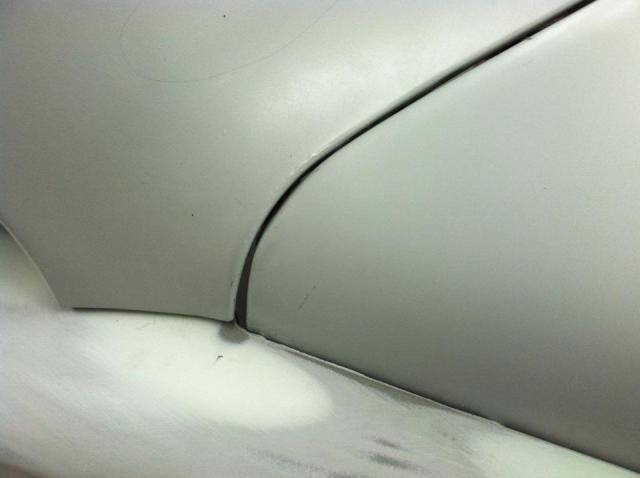
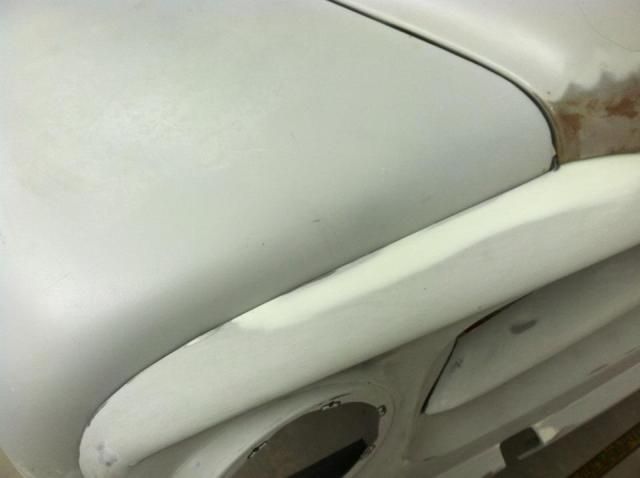
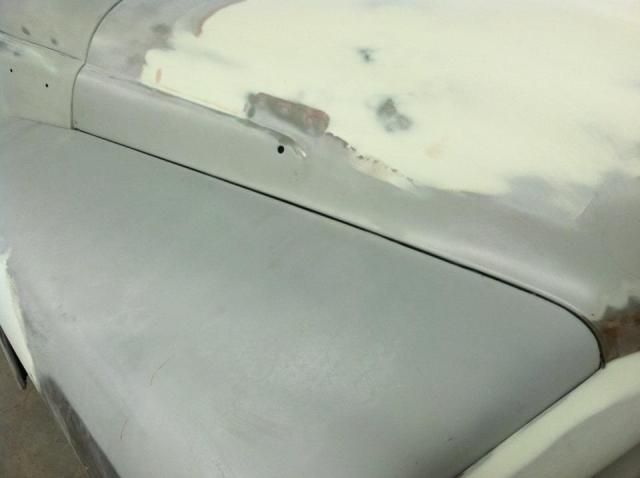
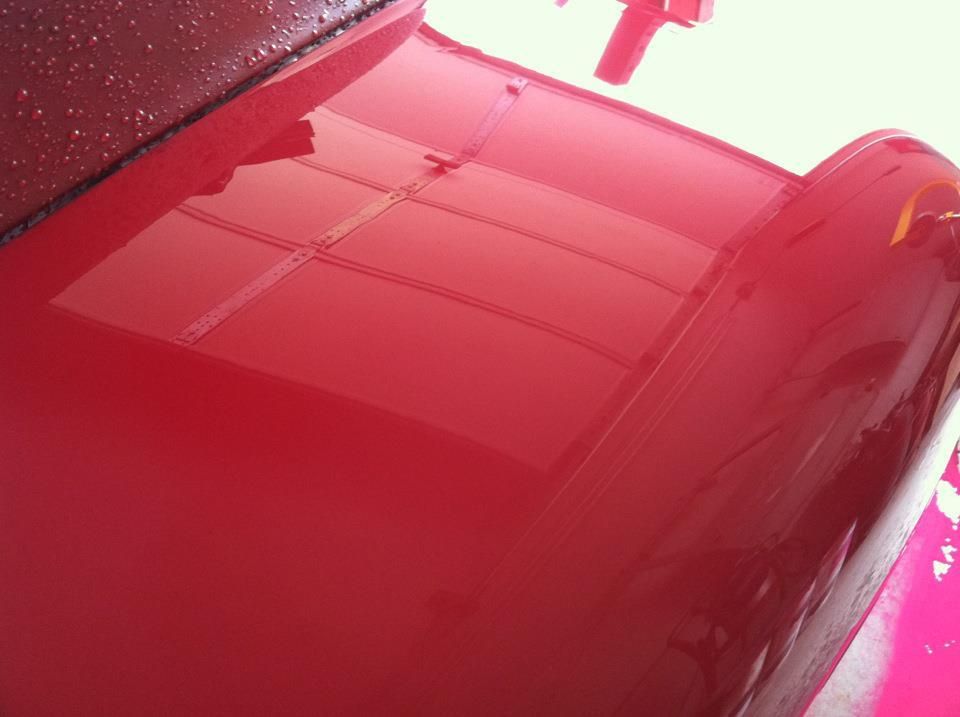
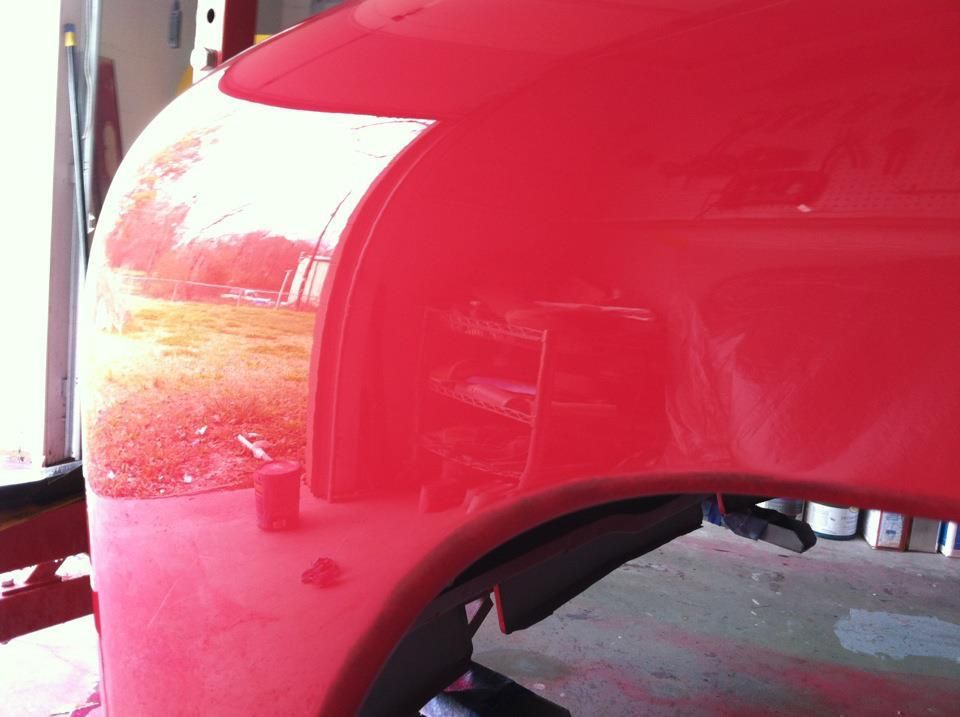
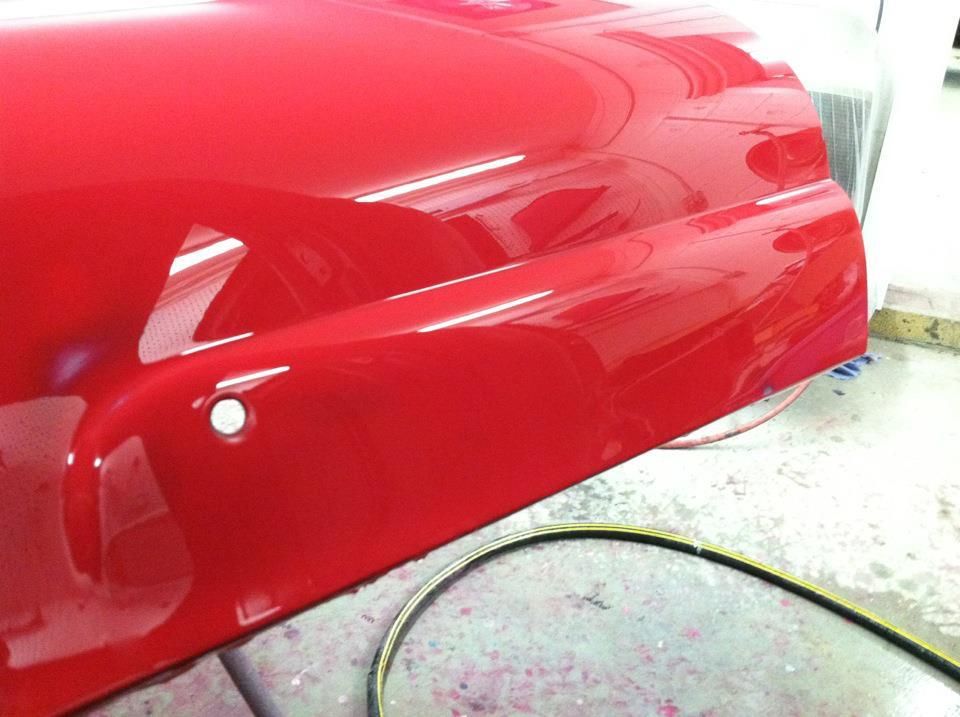
At this point with the cab and doors painted, I started wetsanding and buffing the paint. I like to "bodywork" the orange peel out of the clear just, much like blocking primer flat. This leaves the panels dead flat and the seams are smooth and very defined/detailed with no orange peel. I start with a Sharpie marker on all edges and bodylines. Most people will tell you not to sand or buff anywhere near edges/lines or you'll cut through. Well, this leaves you with areas that are slick as glass, and areas around the seams/edges that still have orange peel. This technique only applies if you do the underlaying bodywork with the same block sanding style I've used during the whole bodywork process or you'll cut through the high/low spots of the paint when blocking the clear down. If your edges and bodylines aren't straight, the block will cut the high spots in a hurry. I very lightly block the surface with 1000 grit to show the imperfections, then mark them with the marker. By marking the edges and trash/imperfections with a sharpie, you can see exactly how much you're cutting so you cut just enough to level the surface and keep from sanding through the clear. 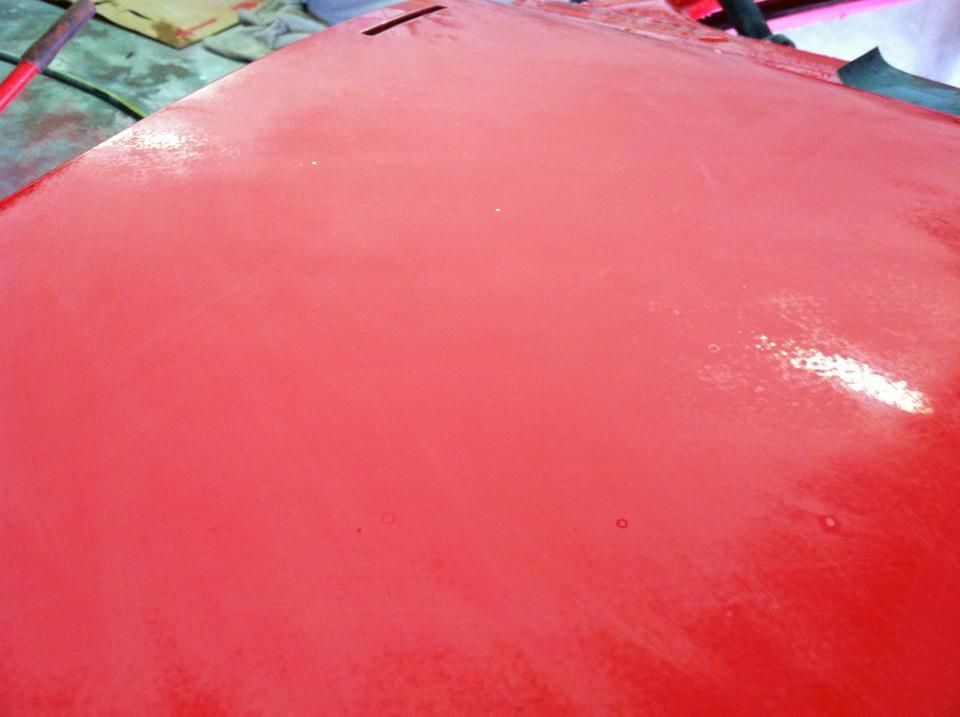 Then use a zig-zag pattern to cover the whole shape of the seam. 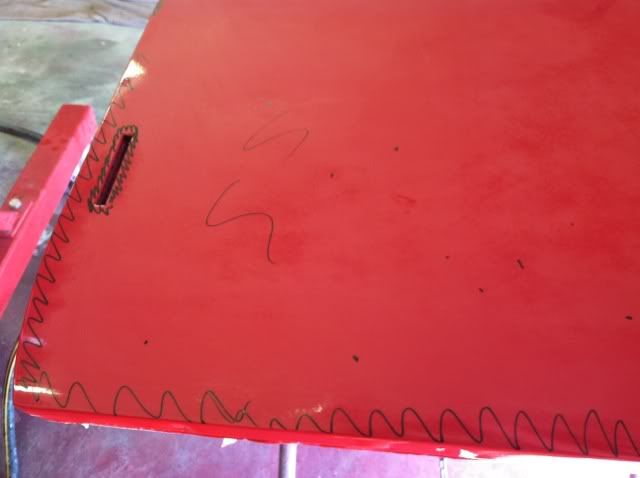 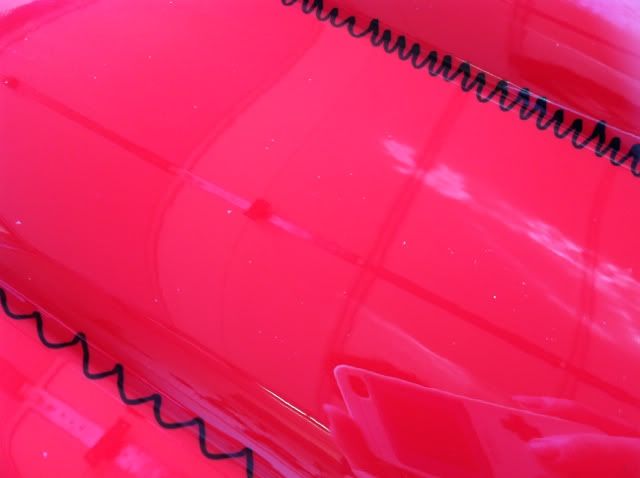 I sand the flatter part of the body line first sanding at an angle to the bodyline, taking care not to sand in straight lines. Sanding in line with the crease/bodyline will leave "drag" marks in the same shape as the block. I sand just enough to take the top of the sharpie off of the flat section, and leave a slight amount of marker showing in the creases. It's easy to burn through on edges with 1000 grit so I leave some sharpie marks showing, I'll save getting it completely smooth for the 2000 grit step. 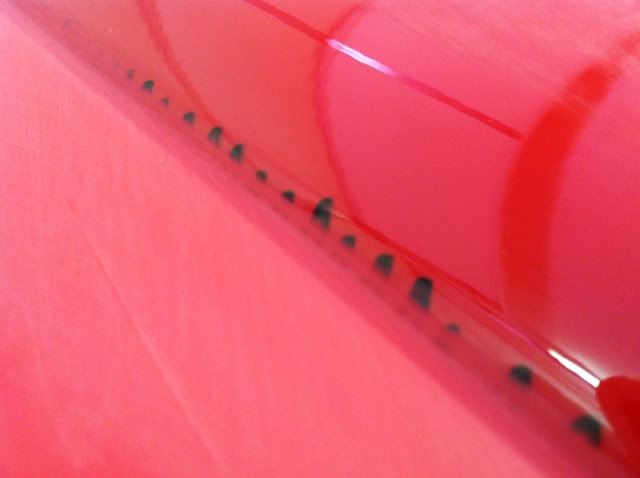 Once the flat section is sanded, I masked it off and sanded the rounded part. This keeps from sanding the edge further or slipping and digging into the flat part. 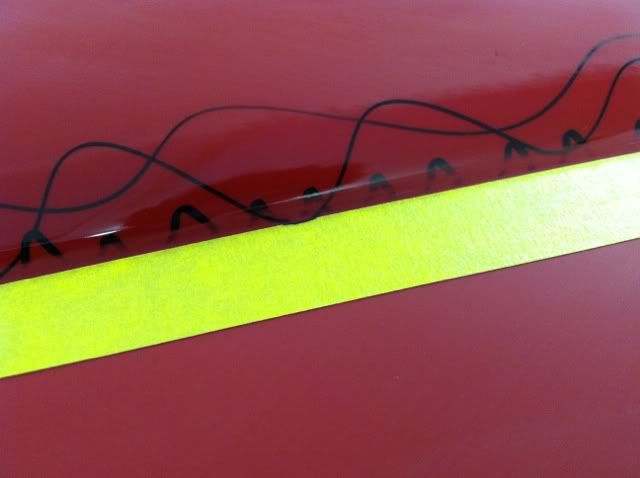 This is the little bit of sharpie showing after the 1000 grit step which will be sanded off in the 2000 grit step. You can see the "X" pattern I used when sanding, so there's no drag marks or distortion from the edge of the sanding block. 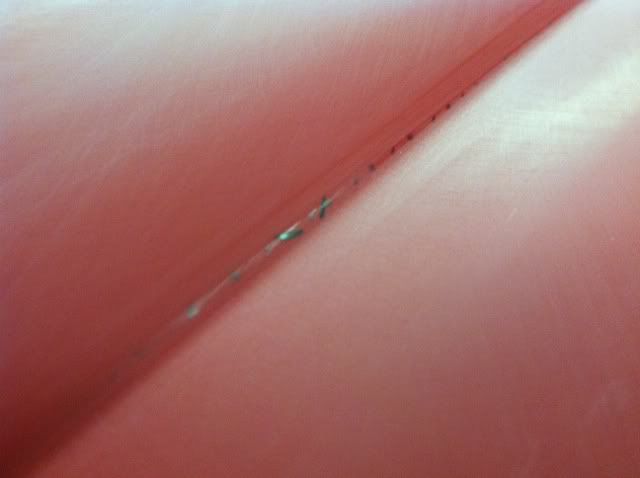 Once everything was blocked with 1000 grit I use dry guidecoat made from ground up charcoal sticks (art store) to coat the entire surface. This lets me wetsand with 2000 grit just enough to get the 1000 grit scratches out without taking more clear off than necessary. 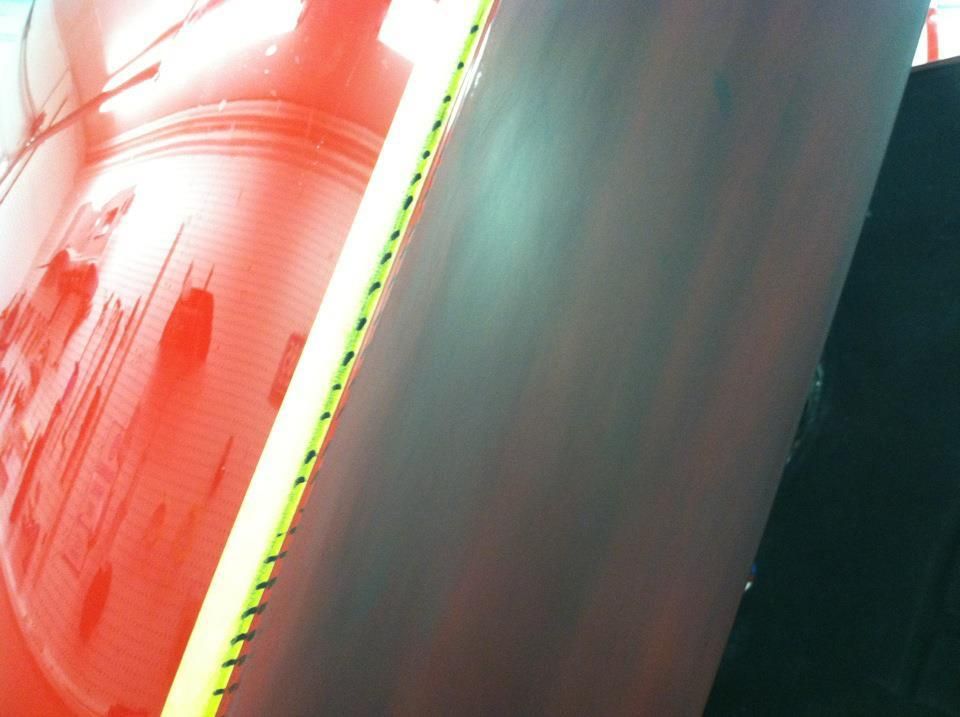 After guidecoating and sanding with 2000/2500 using the same masking technique show above. At this point the panel had a slight sheen and is ready for buffing. 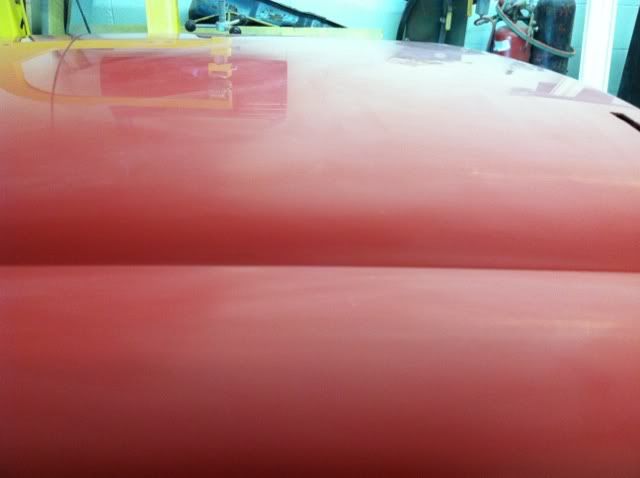 And after buffing. I hold the buffer so the pad is spinning "off" the edges and isn't cutting into the edge. That keeps the edges from burning. On body lines, I like to used buffing pads that have a pointed edge, and sand in-line with the crease. The body lines and edges look as good as the flat parts of the panels this way, and the whole panel is evenly flat- no orange peel spots anywhere. Sanding with 1000 grit gets the paint dead flat, and once it's brought back with 2000/2500 and buffing, the surface of the paint seemingly disappears and all you see is the reflections. Done right with no drag marks, stray scratches, or buffer marks your eyes have a hard time finding and focusing on the surface of the paint!  
__________________
Project Goldilocks '66 C10 Short Fleet BBW Build '65 C10 Highly Detailed Stock Restoration Thread '78 Camaro Targa Roof Build '55 International Metal/Body/Paint Work '66 F100 Full Rotisserie Restoration '40 Packard 120 Convertible Coupe Restoration How To Restore and Detail an Original Gauge Cluster How To Detail Sand Body Panels, Edges, Corners, Etc |
|
|
|
|
 |
| Bookmarks |
|
|


 Hybrid Mode
