
|
Register or Log In To remove these advertisements. |
|
|
|
|||||||
 |
|
|
Thread Tools | Display Modes |
 04-24-2015, 08:28 PM
|
#1 |
|
Senior Member
 Join Date: Jul 2009
Location: Athens, AL
Posts: 499
|
Another way to skin the cat; the High Torque 292 LS swap
I picked up a solid '72 SWB stepside back in February. I finished up the bulk of my LS swap a few weeks back, but I took lots of pics along the way and thought I'd post the details of the swap.
Here's the only "before" picture that I have. 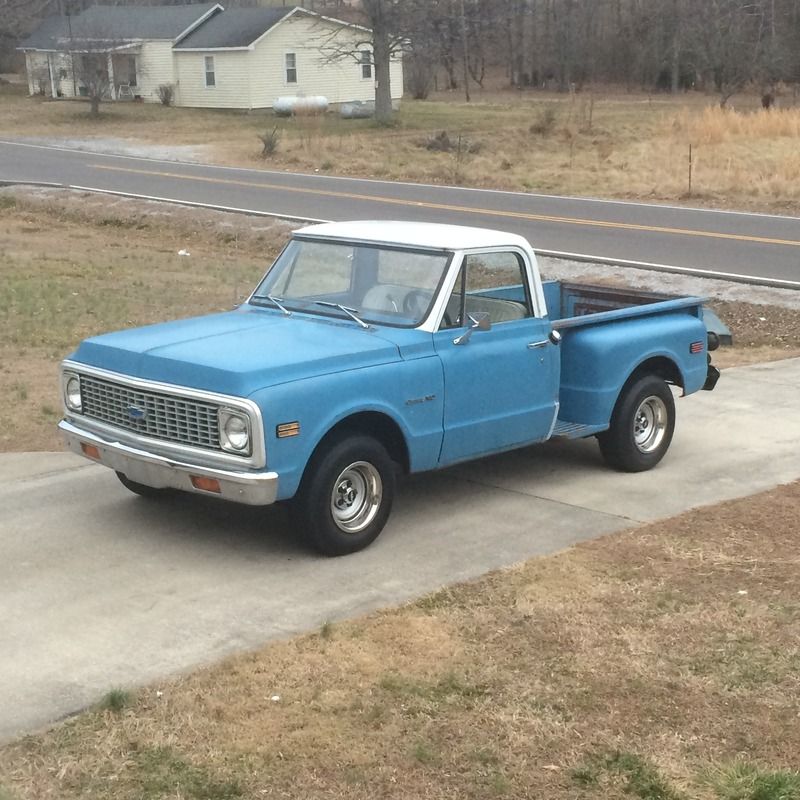 The driver's fender and door were repainted at some point in the past, but the rest of the truck sports the original paint and it's all original sheet metal. The bed wood also appears to be original, but someone had replaced the 307 and manual tranny with a 350/350 combo. I've had this taking up room in my shop for the last year or so waiting on the right vehicle to come along for a swap:  It's the "littlest" LS; a 4.8. Since 4.8L converts to 292.9 cubic inches, I decided to round down and call this a 292 swap  The 4.8 came from a 79K mile 2003 Tahoe. I bought it over a year ago and slowly gathered parts. It's got a mish-mash of truck and Camaro parts for the accessory drive and a LS1 'vette intake. Every good LS swap starts with lowering the truck, right? 3 inch spindles in the front and 4 inch springs in the back left us with this: 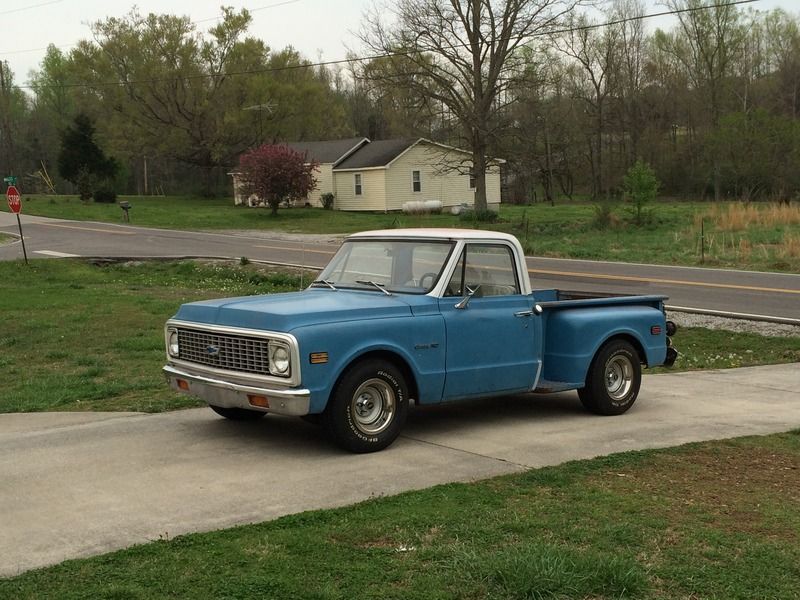 Then, I snatched out the 350. 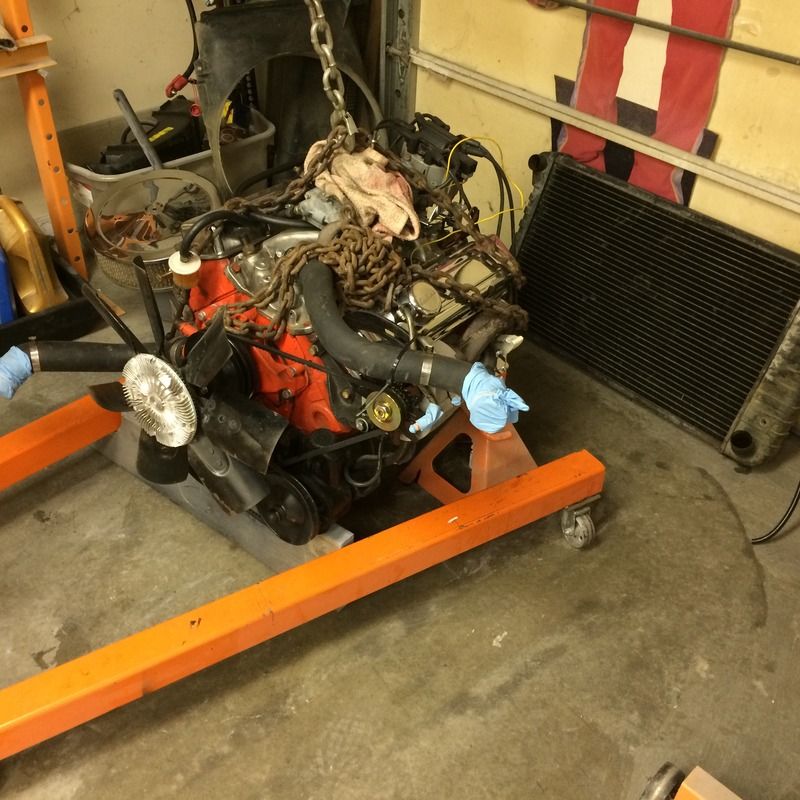 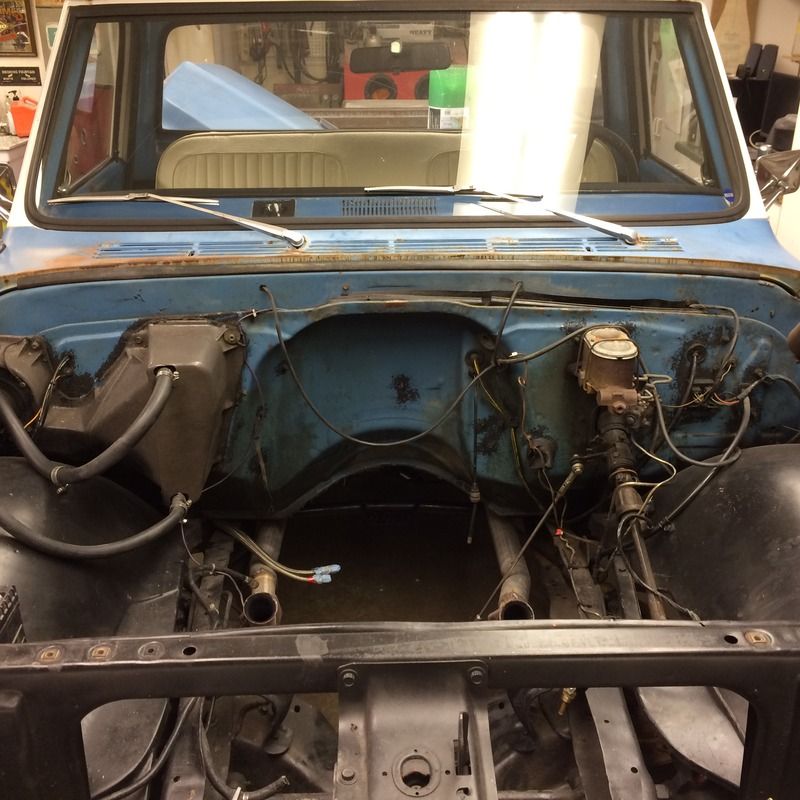
|

|

|
|
04-24-2015, 08:44 PM
|
#2 |
|
Senior Member
Join Date: Jul 2009
Location: Athens, AL
Posts: 499
|
Mounts:
The first order of business was the mounts. I've done several swaps, but this is the first time that I had a SBC and a Gen 3 motor sitting side by side. So, armed with my trusty tape measure I came up with adapter plates for the stock towers and mounts to place the motor just where I wanted it. I made these mounts out of 3/8 plate. There pretty much run of the mill plates, except that the SBC mount holes are 1/4" below the Gen 3 mounting holes. This will raise the motor by about 1/4".
Here are the plates in the middle of painting: 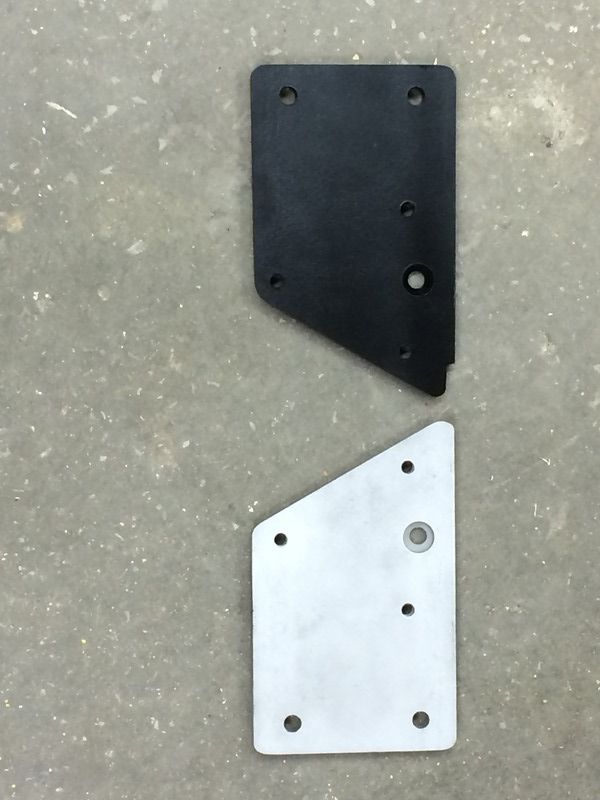 I also needed to modify the passenger's side tower. First, I removed the top of the tower: 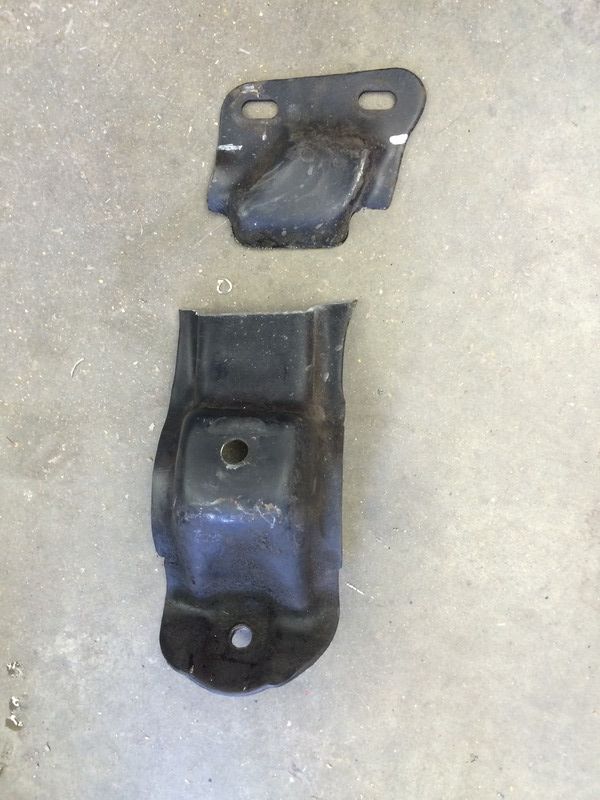 Then a duplicate of the mount "top" in flat steel: 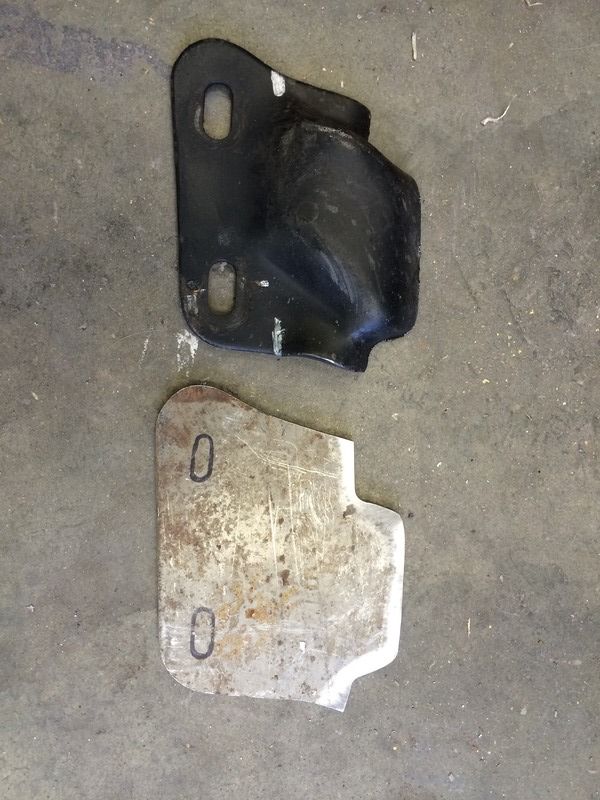 Welded together and a rough pass with the flap wheel: 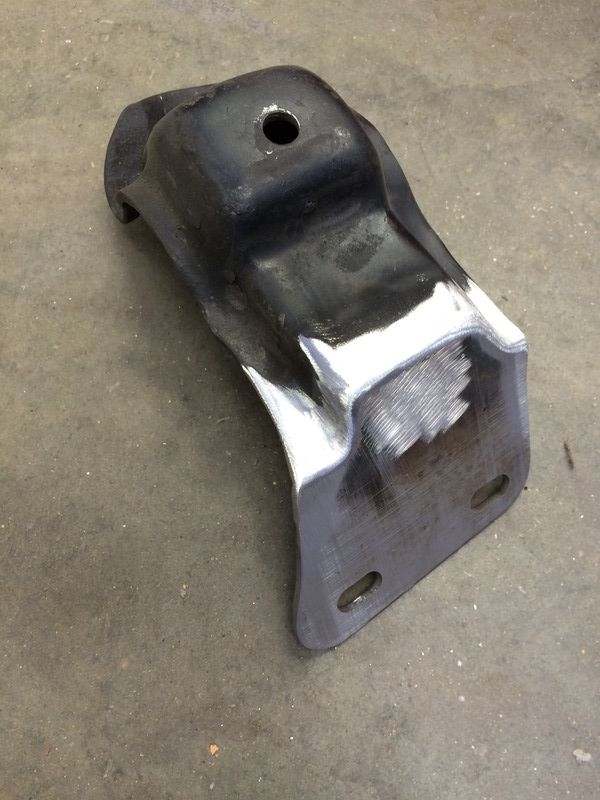 Gusseted under the edges to add back some strength and blasted: 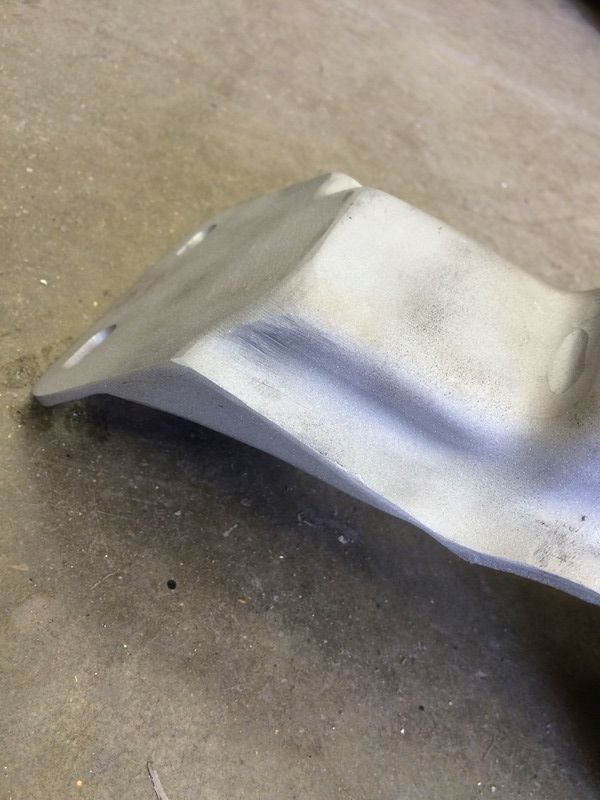 All done, in paint: 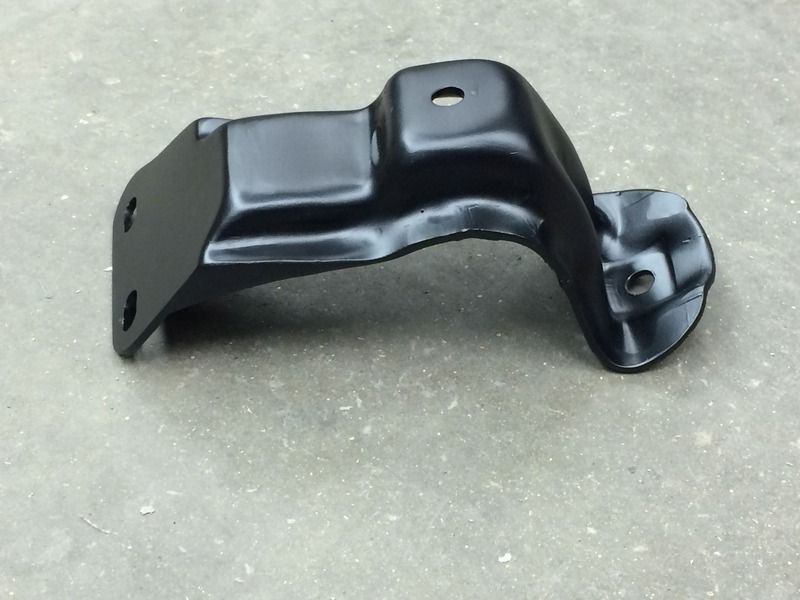
|
|
|
|
|
04-24-2015, 08:59 PM
|
#3 |
|
Senior Member
Join Date: Jul 2009
Location: Athens, AL
Posts: 499
|
Coil Relocation
It was around this point in the swap that I decided that I wanted the new engine to have an old look; Chevy orange and all. I was going to need coil relocation brackets. There are several choices out there for car coils. Truck coils, not so much. I decided that I wanted them behind the heads. So, the fabrication started.
The brackets started as simple angles to bolt to the back of the heads. I center drilled some spacers out of 3/4 rod on the lathe: 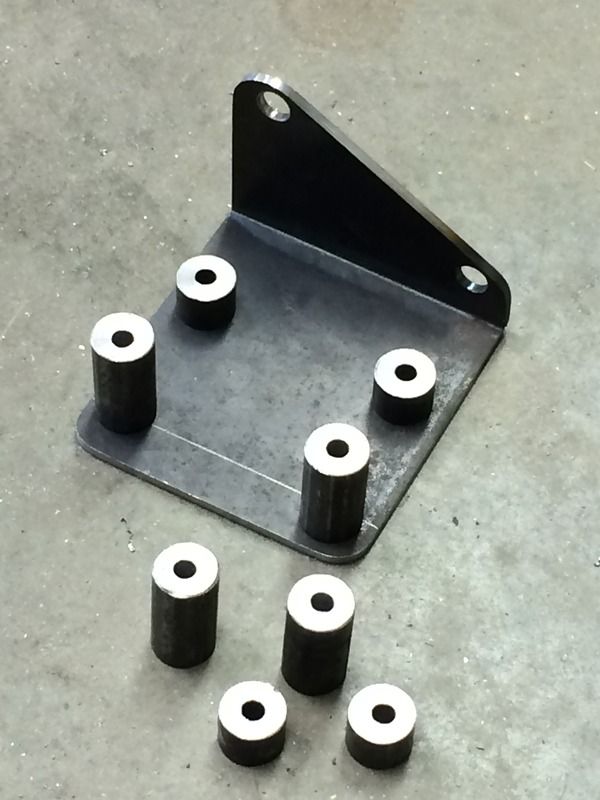 With coils attached: 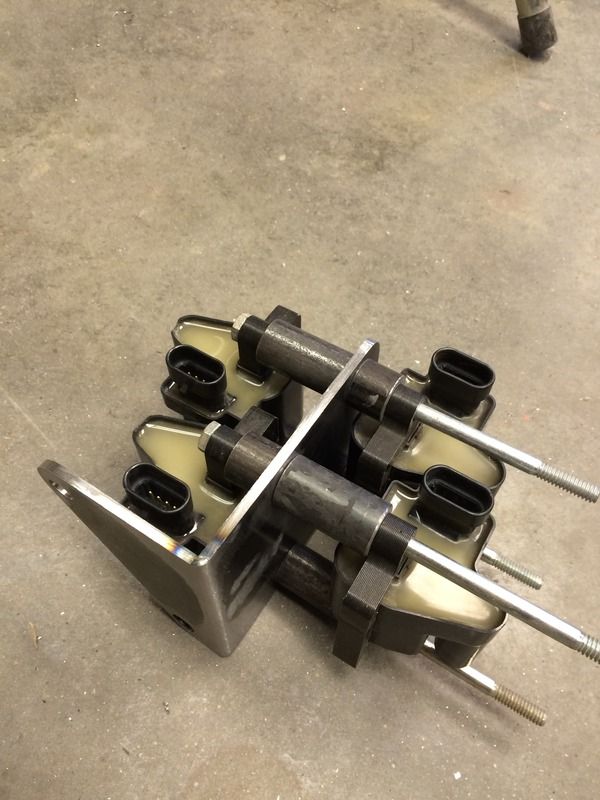 Painted and fully assembled. Notice that they aren't exactly the same since there is just a little less room behind the driver's cylinder head: 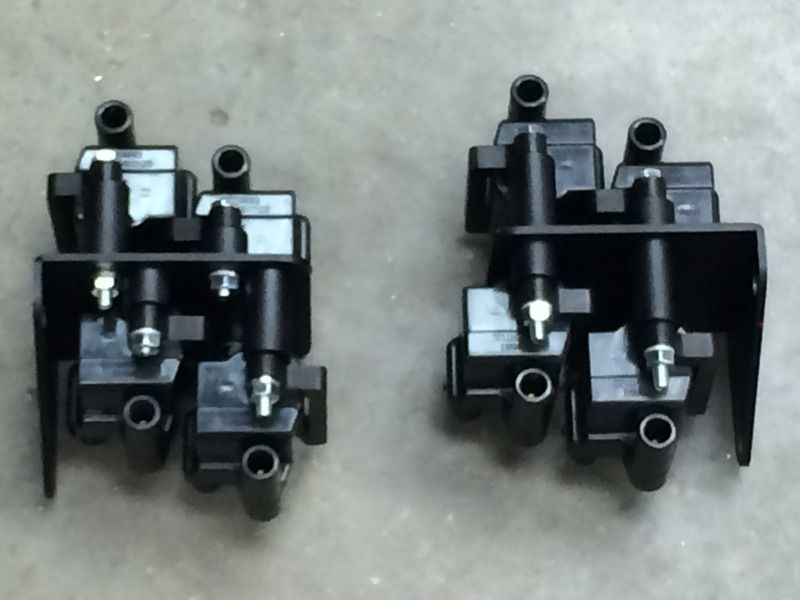 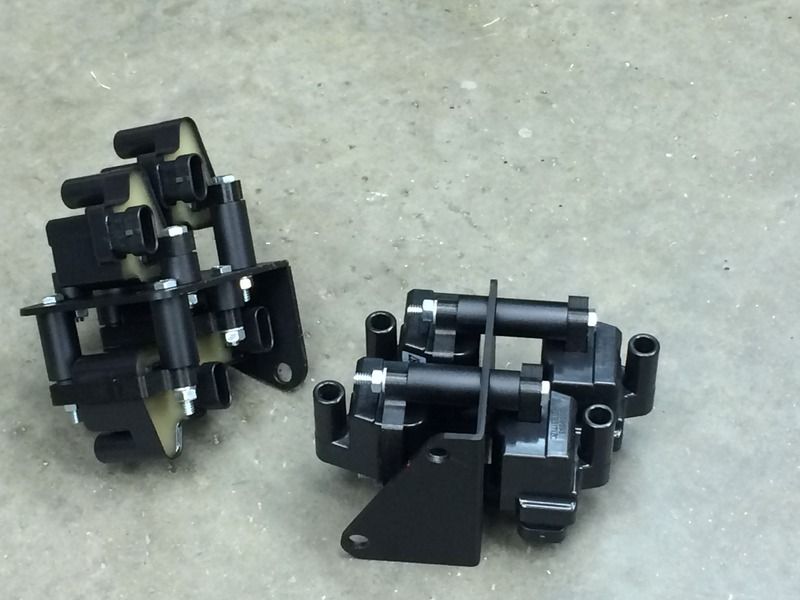
|
|
|
|
|
04-24-2015, 09:14 PM
|
#4 |
|
Senior Member
Join Date: Jul 2009
Location: Athens, AL
Posts: 499
|
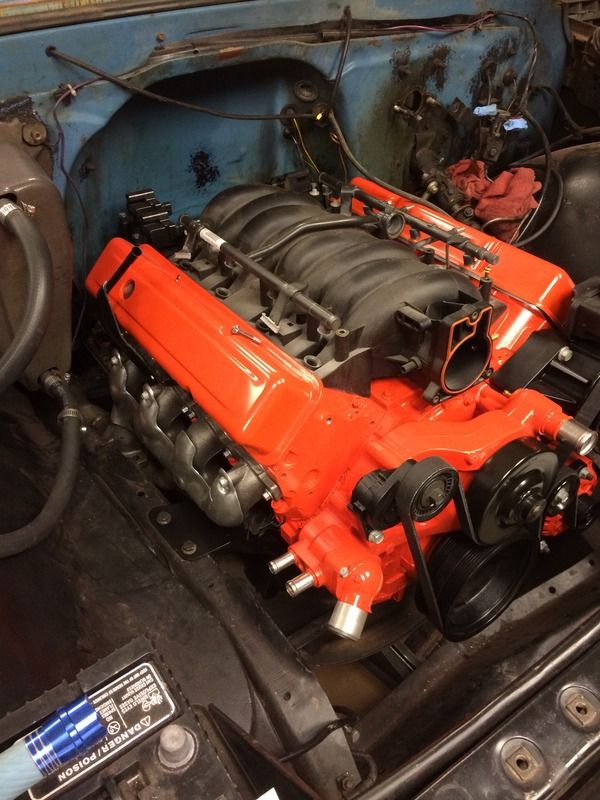
Motor mounted; exhaust clearance
After a coat of Chevy orange, the engine went in:
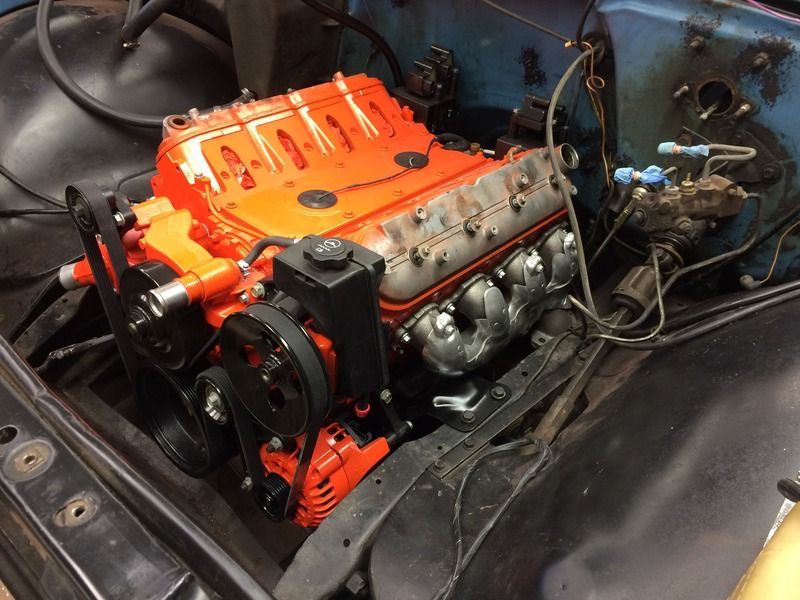 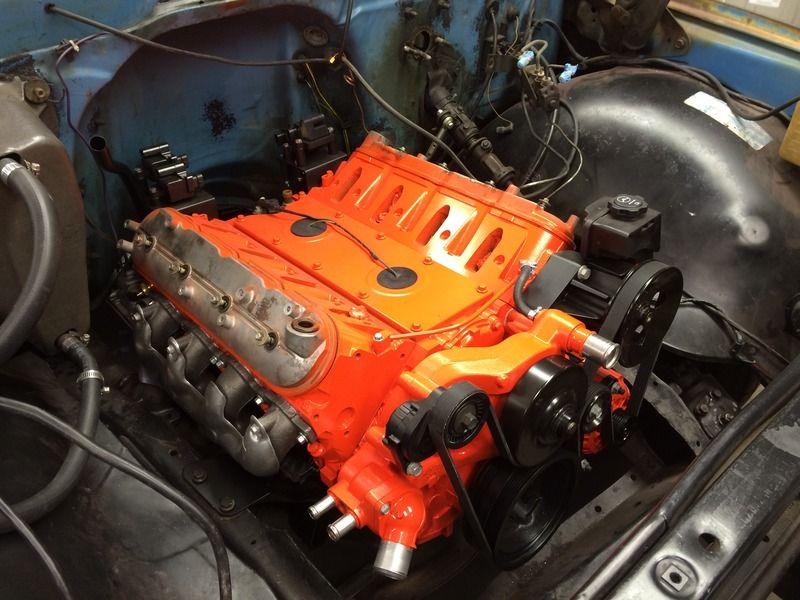 Those are Gen 5 Camaro exhaust manifolds. Here's some shots of the clearance to explain why I made the plates to raise the motor by 1/4" and why I removed the "hump" from the top of the passenger's side tower: 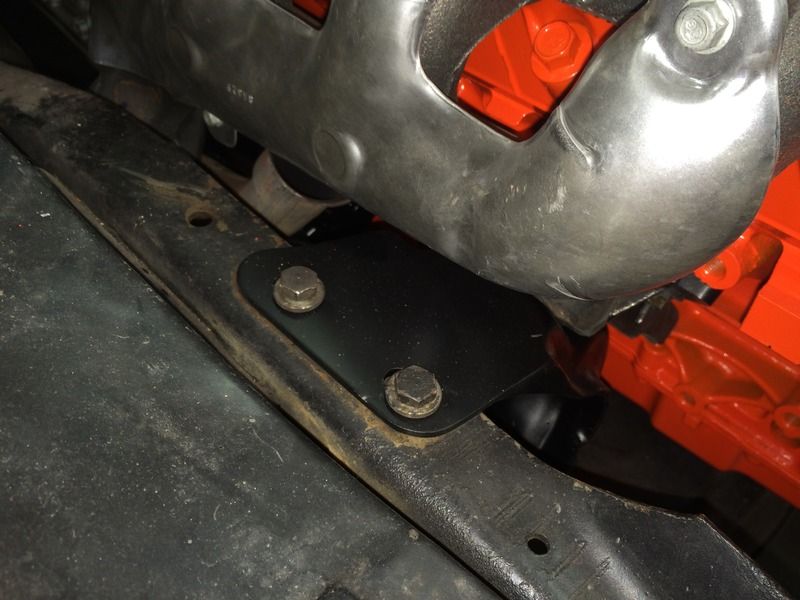 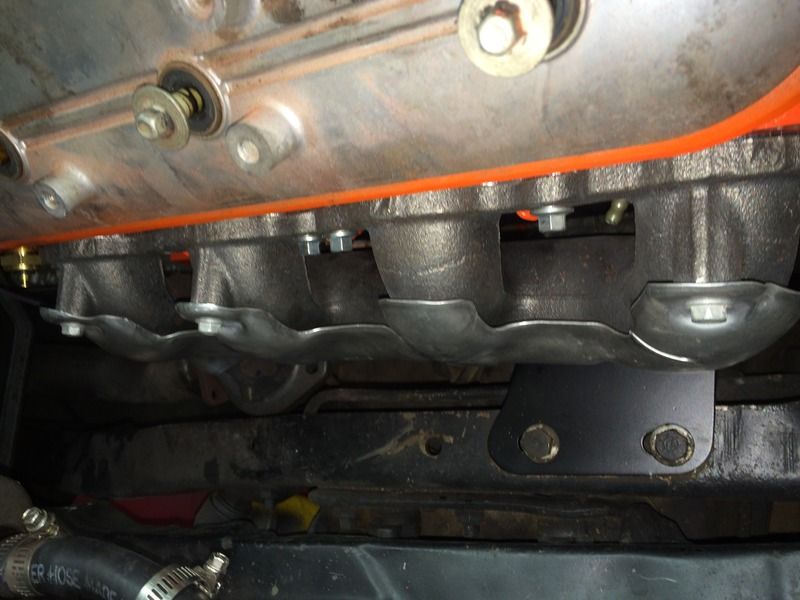 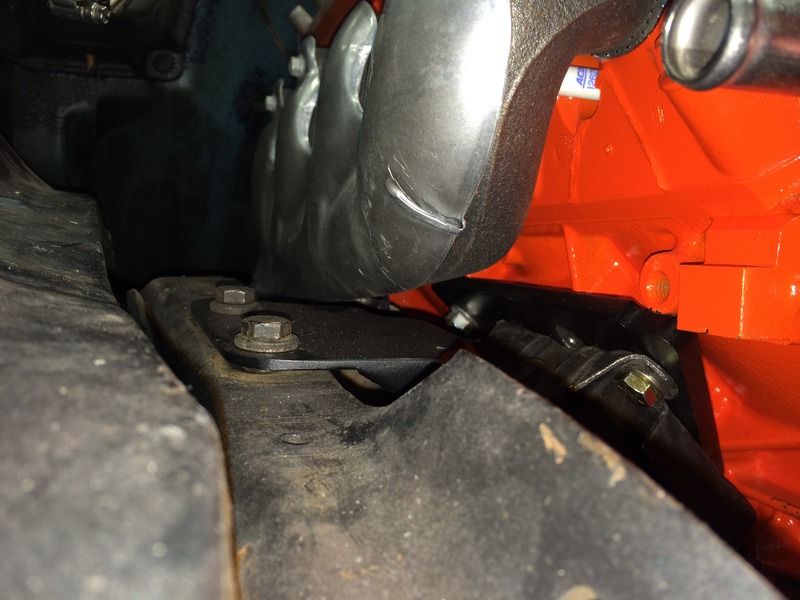 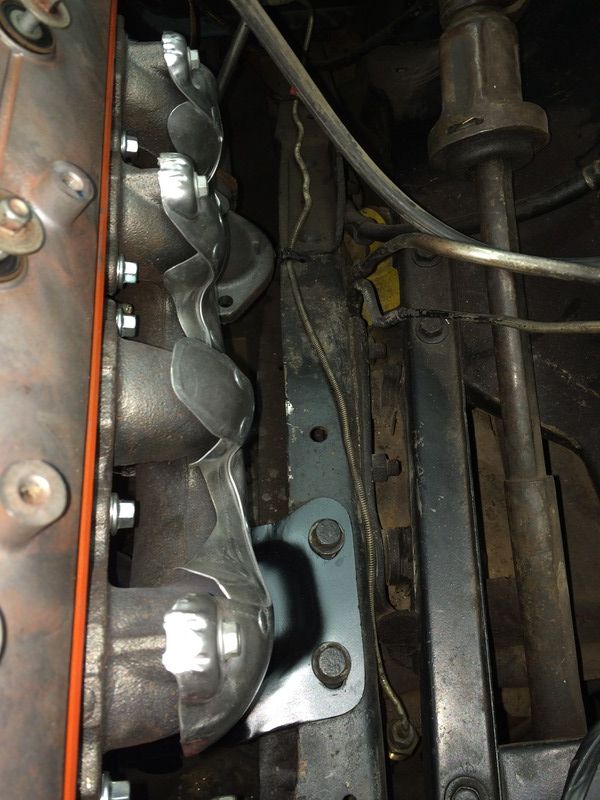 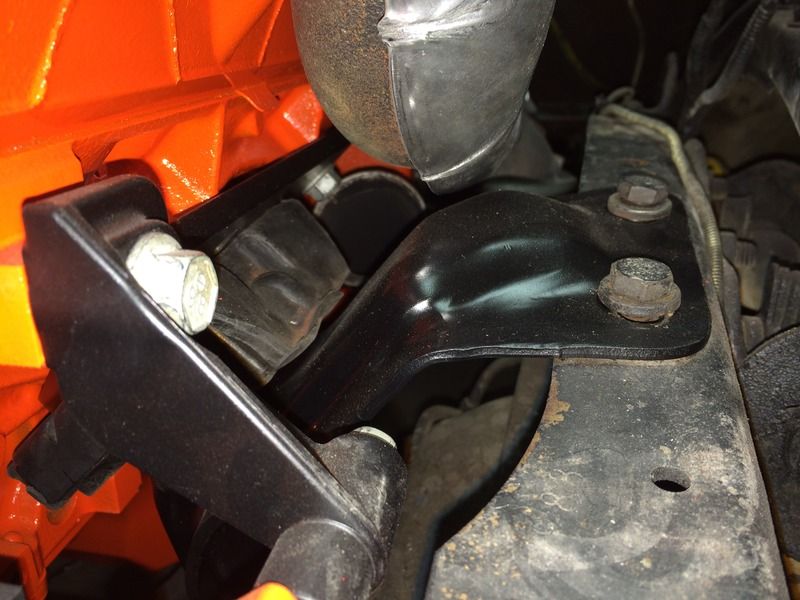
|
|
|
|
|
04-24-2015, 09:35 PM
|
#5 |
|
Senior Member
Join Date: Jul 2009
Location: Athens, AL
Posts: 499
|
Valve covers and Intake
I ordered some LS/SBC valve cover adapters on eBay and some plain Jane orange sheet metal valve covers. I also had to throw the intake on there just to see how it looked.
 I liked the look of the LS1 intake. But, it wasn't quite what I wanted and things really went off the rails. Friends with water jets are cool. Especially when you need things like a square bore to 3-bolt TB adapter: 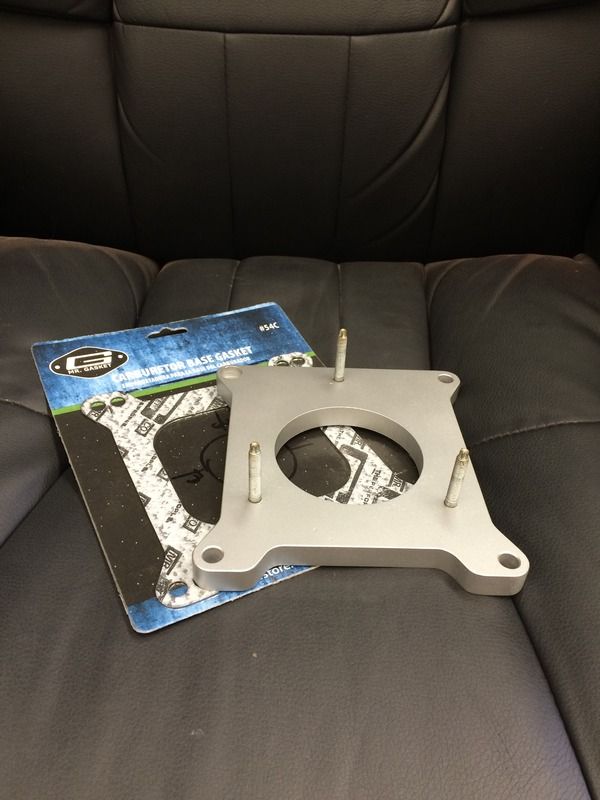 I ordered up a Holley intake and attached the adapter: 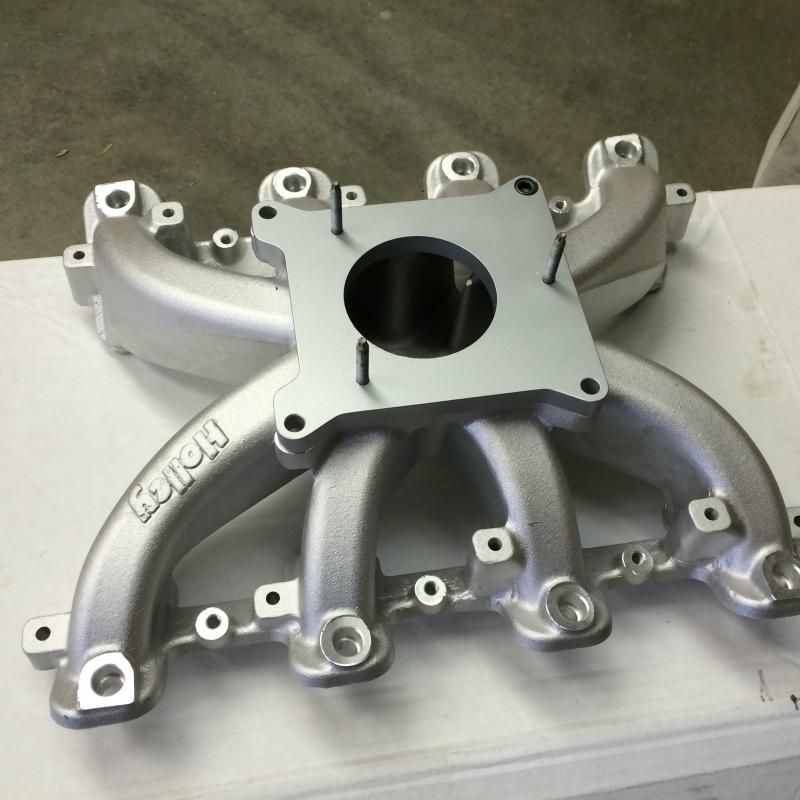 And a test fit of the TB. That's the #1 shop dog, Vance, in the background, BTW. 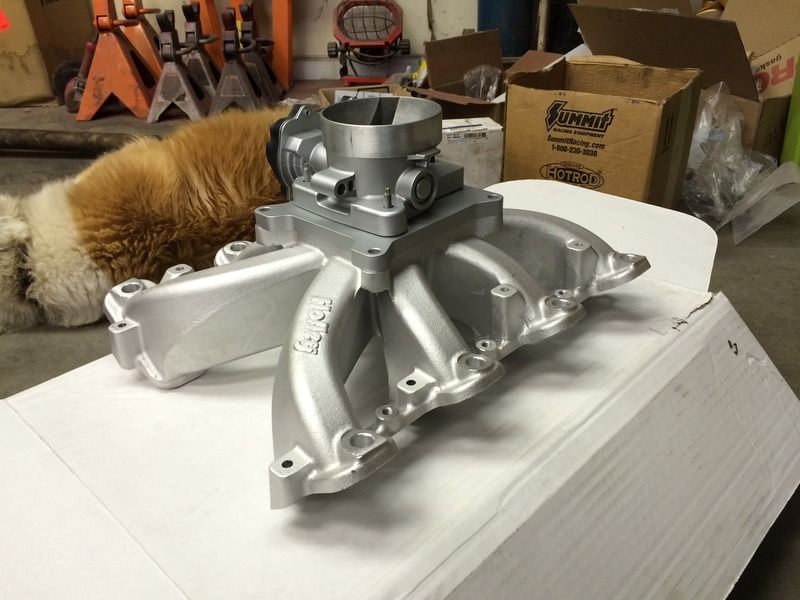 Here is is sitting on the engine: 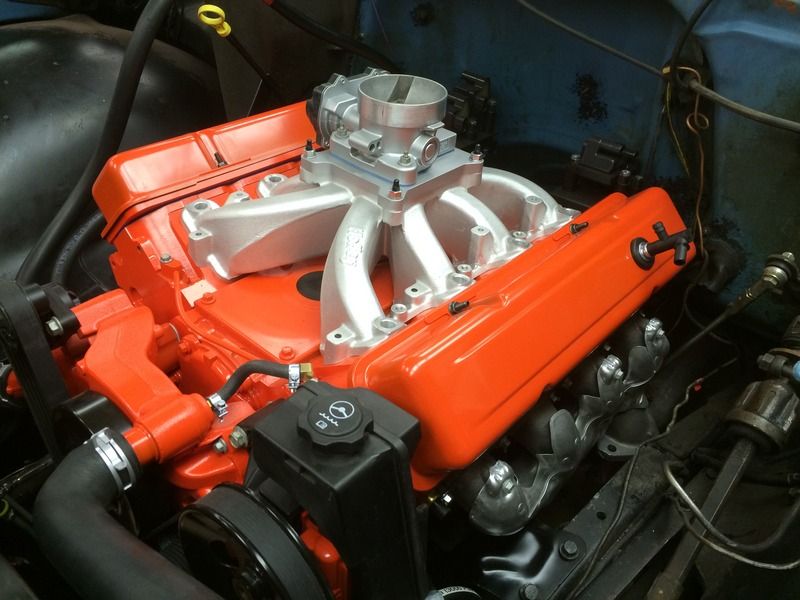
|
|
|
|
|
04-24-2015, 09:50 PM
|
#6 |
|
Senior Member
Join Date: Jul 2009
Location: Athens, AL
Posts: 499
|
Radiator
I took a break from the engine for a little while to work on my radiator.
I took the stock 4 core radiator to a local shop and, $50 later, it got a clean bill of health. I had the heater hose outlet on the tank brazed shut while it was there. After a little tin-bending: 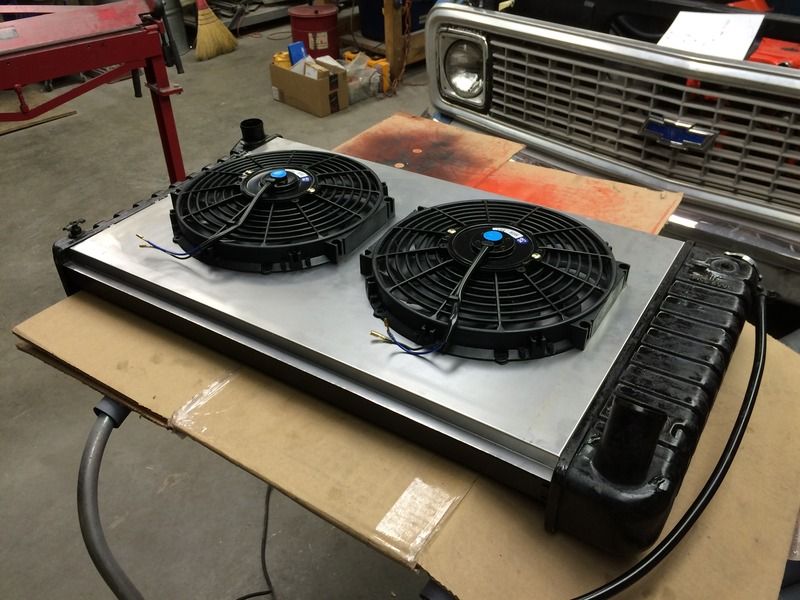 And some paint: 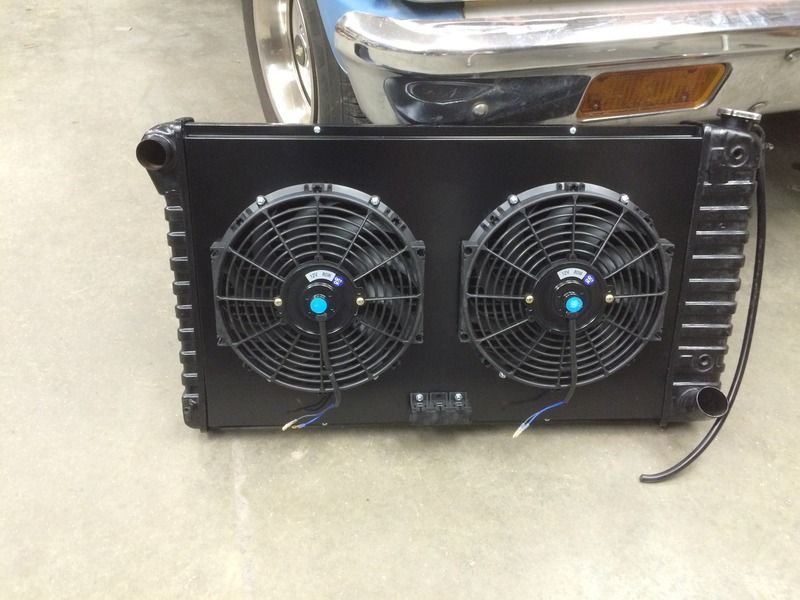 For a lower hose, I used the piece on the left: 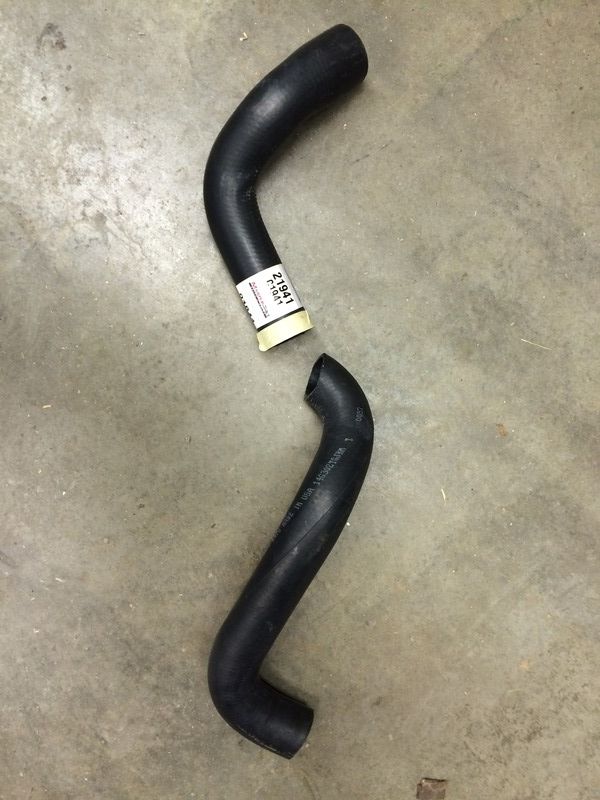 The upper hose was cut at the the tape: 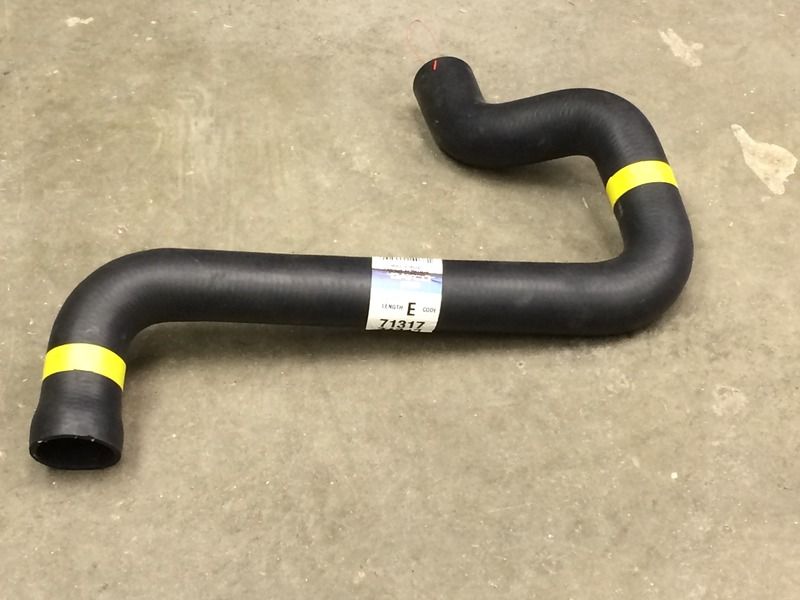 The upper hose also needed a reducer on the water pump end: 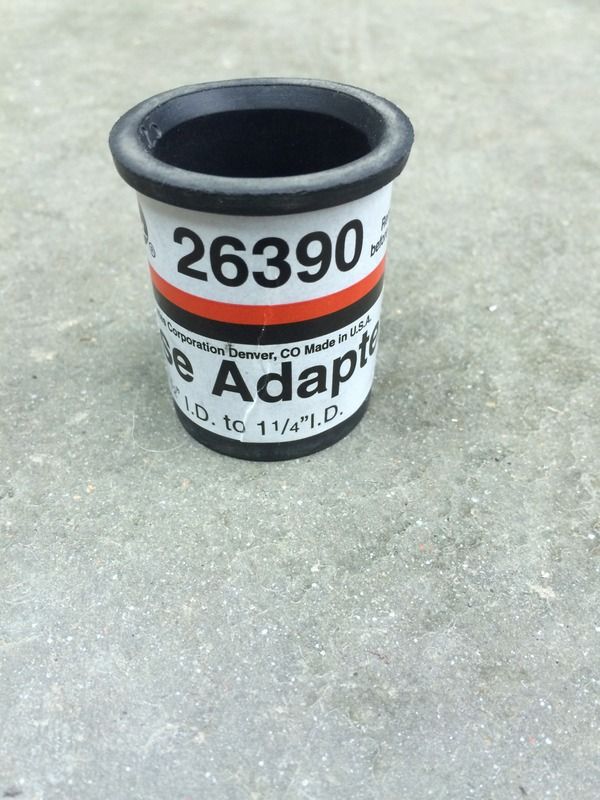 Istalled: 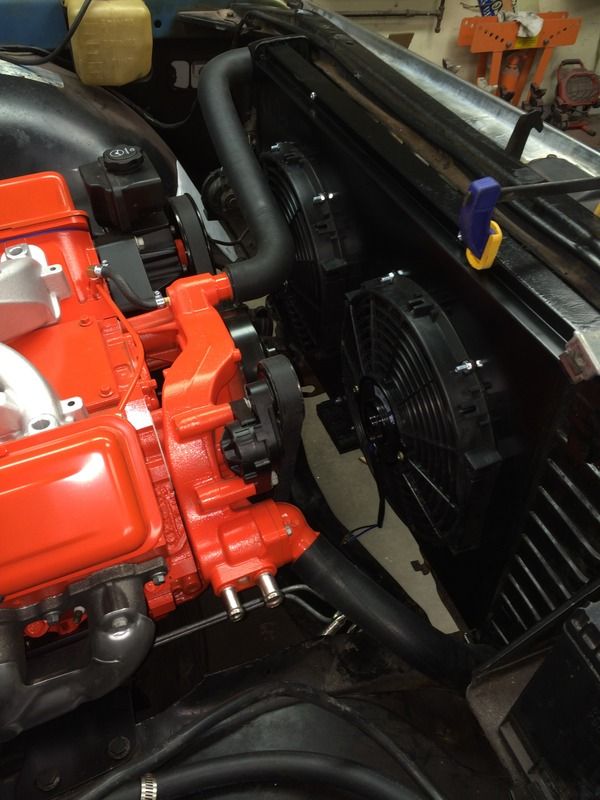 And, since I despise worm clamps, some spring clamps: 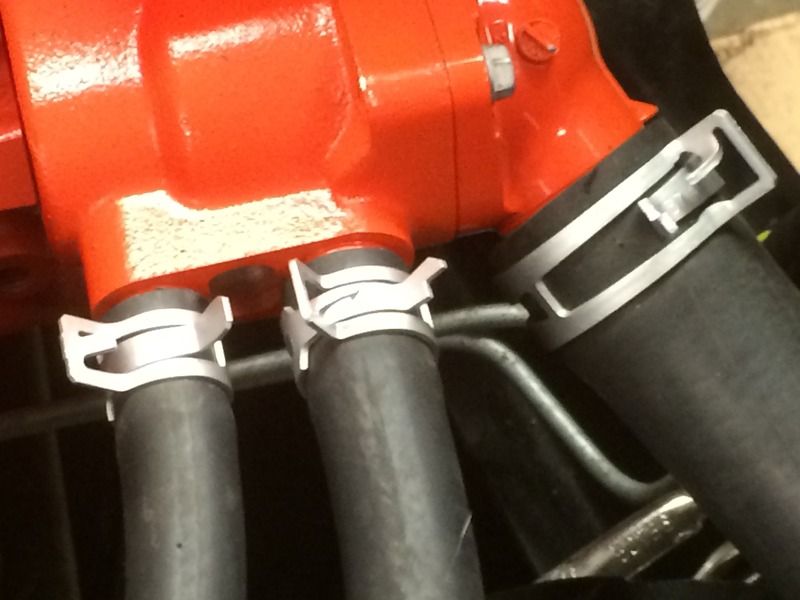
Last edited by dayj1; 04-24-2015 at 10:11 PM. |
|
|
|
|
04-24-2015, 09:51 PM
|
#7 |
|
Registered User
Join Date: Oct 2012
Location: Miami, Florida
Posts: 907
|
Re: Another way to skin the cat; the High Torque 292 LS swap
I am dying to see/read the rest of this post. im interested to see the wiring and tuning for this application. I had a dream I completed a swap, just like this, using the same combination of parts such as intake and throttle body. I assume your going with a speed density tune? good luck. Clark. don't forget to spill all the beans. knowledge is power.
|
|
|
|
|
04-24-2015, 10:03 PM
|
#8 |
|
Senior Member
Join Date: Jul 2009
Location: Athens, AL
Posts: 499
|
Brake booster
The truck didn't originally have power brakes. I sourced one of the small dual S10 boosters from a '93 model at a salvage yard and fabbed up a bracket.
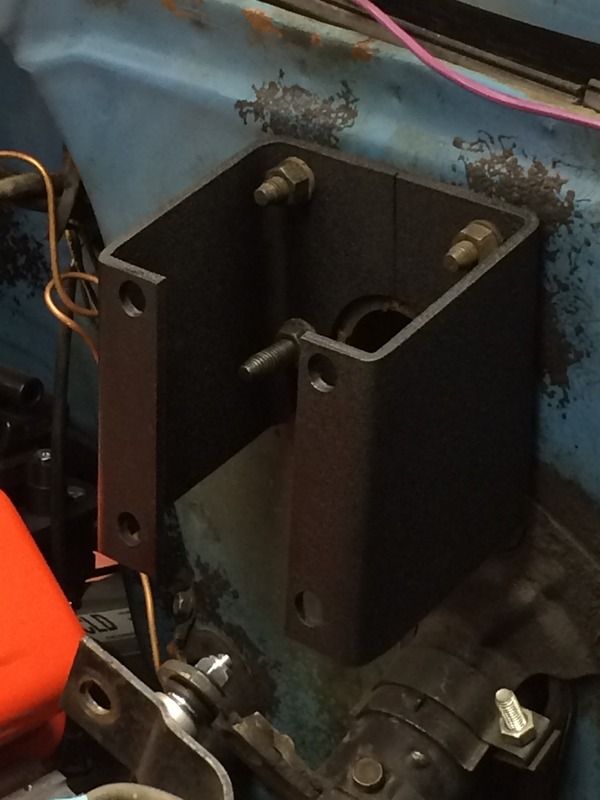 I threaded the pushrod in the booster to 5/16-24: 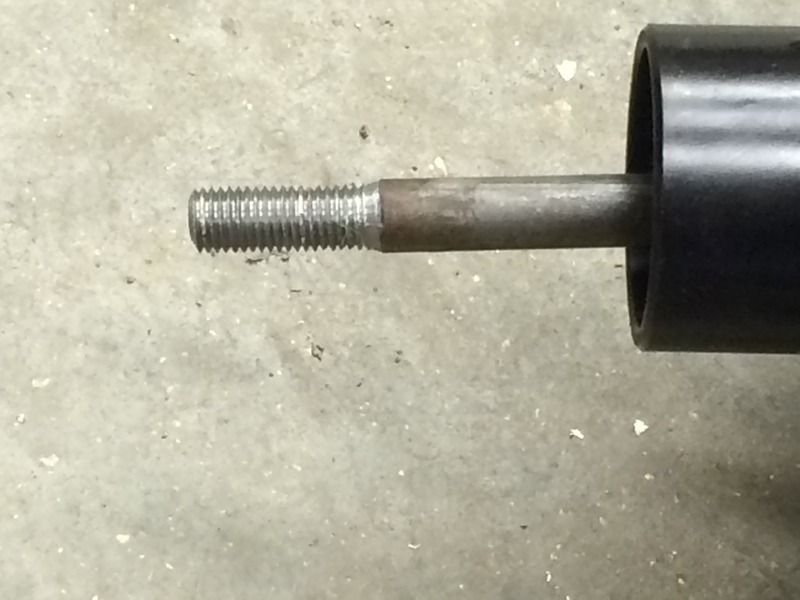 I turned down the end of the original '72 pushrod and threaded it to 5/16-24: 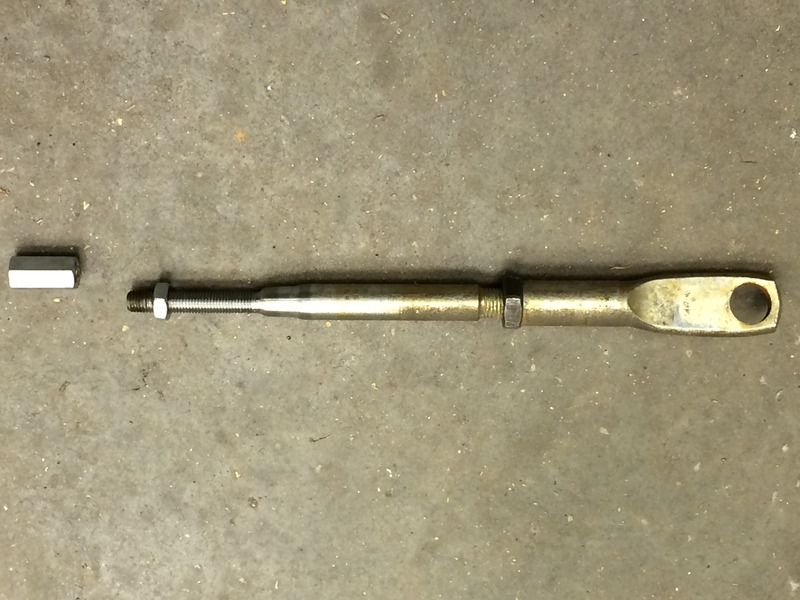 The two rods were joined with a coupling nut and installed along with a C3 style master cylinder that I had left over from another project: 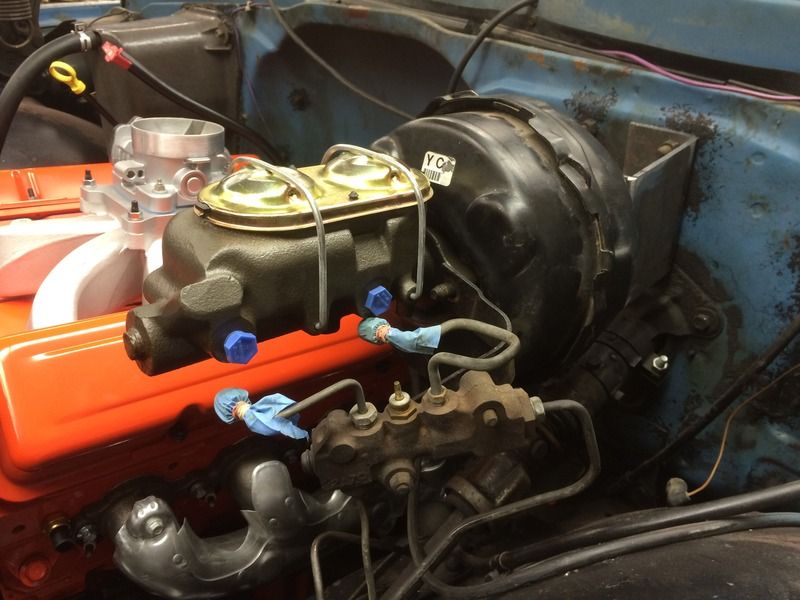
|
|
|
|
|
04-24-2015, 10:14 PM
|
#9 |
|
Senior Member
Join Date: Jul 2009
Location: Athens, AL
Posts: 499
|
Power Steering and Plug Wires
I went to the local Parker hose store and had them make up a flexible high pressure hose for the power steering about 20" long. Then I bent up and flared the ends to match the metric steering pump and standard box.
Here are the parts: 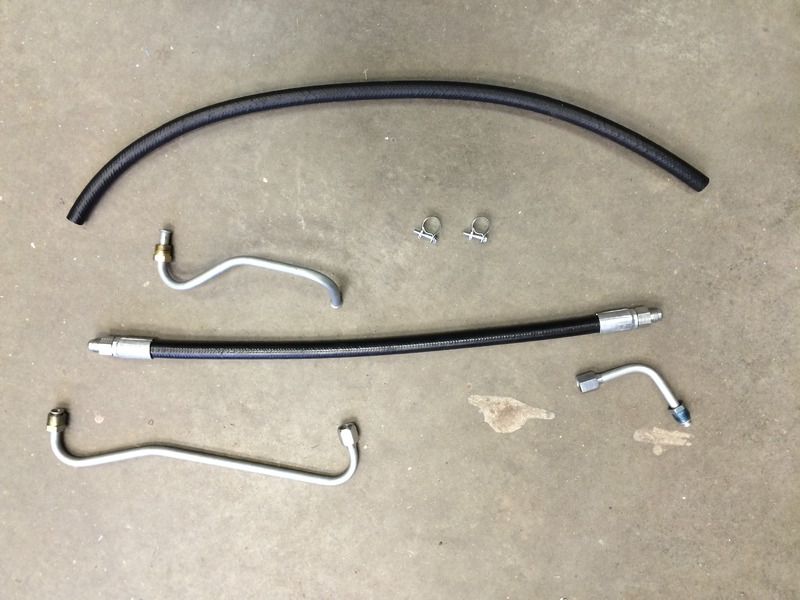 And installed: 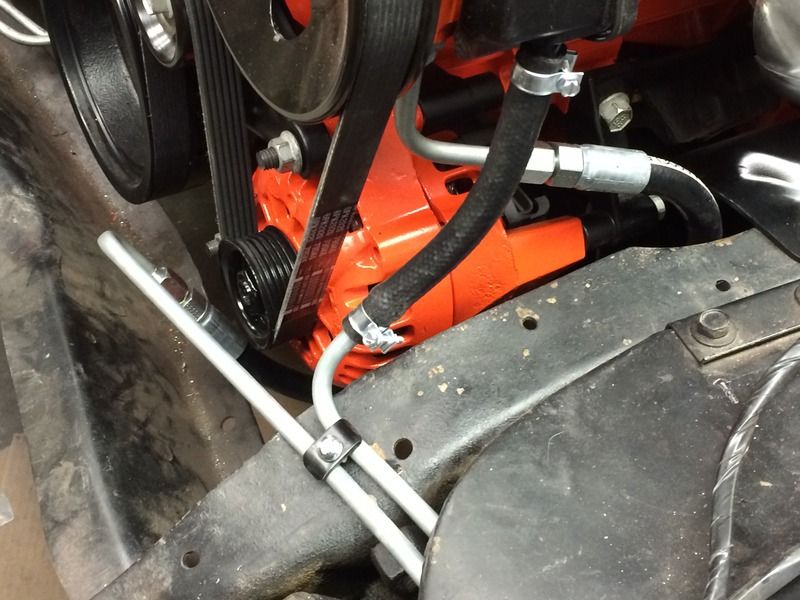 I also modified some SBC wire looms and crimped up a set of plug wires: 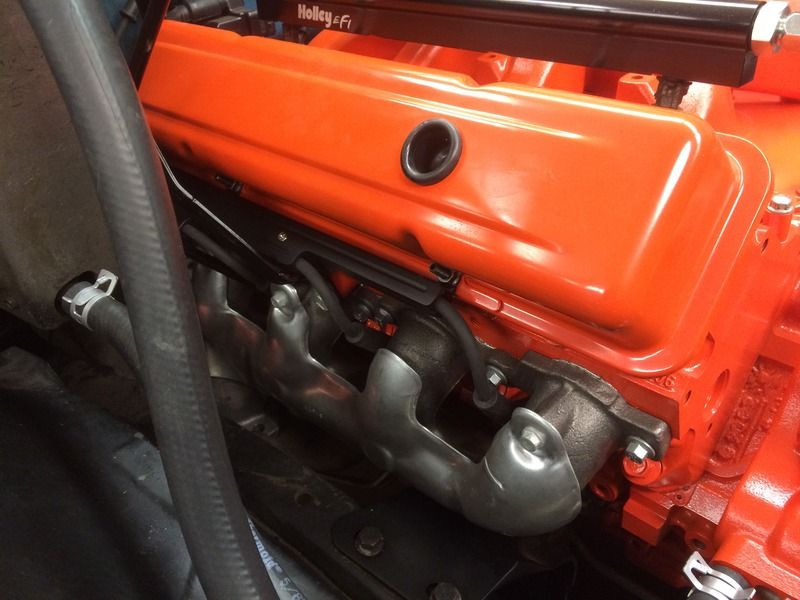
|
|
|
|
|
04-24-2015, 10:36 PM
|
#10 |
|
Senior Member
Join Date: Jul 2009
Location: Athens, AL
Posts: 499
|
Fuel System
For the fuel system, I chose to keep the tank in the cab. I'm not a fan of external pumps, so I made a few modifications to use an in-tank setup.
First, I turned out a plate on the lathe to fit in the stock sending unit location: 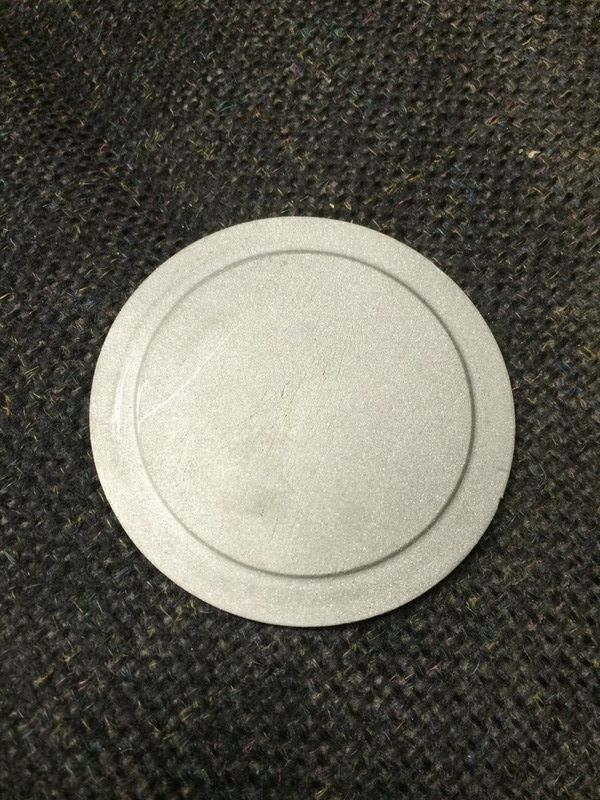 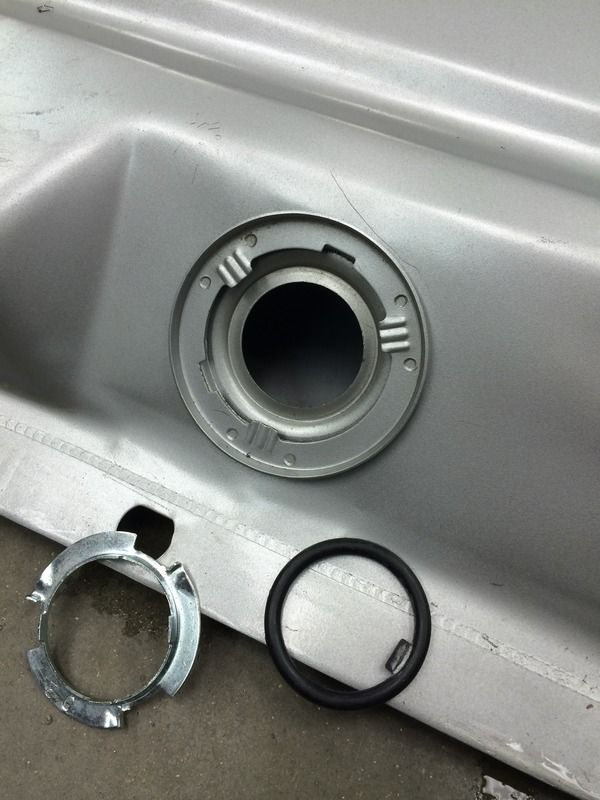 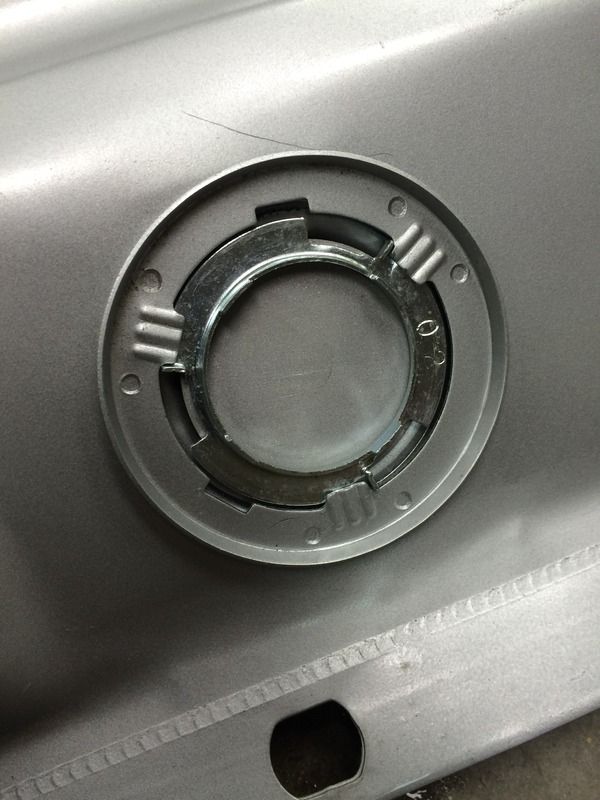 Then I used a JIC 6 bulkhead fitting with the stock feed line which will be used for a return. 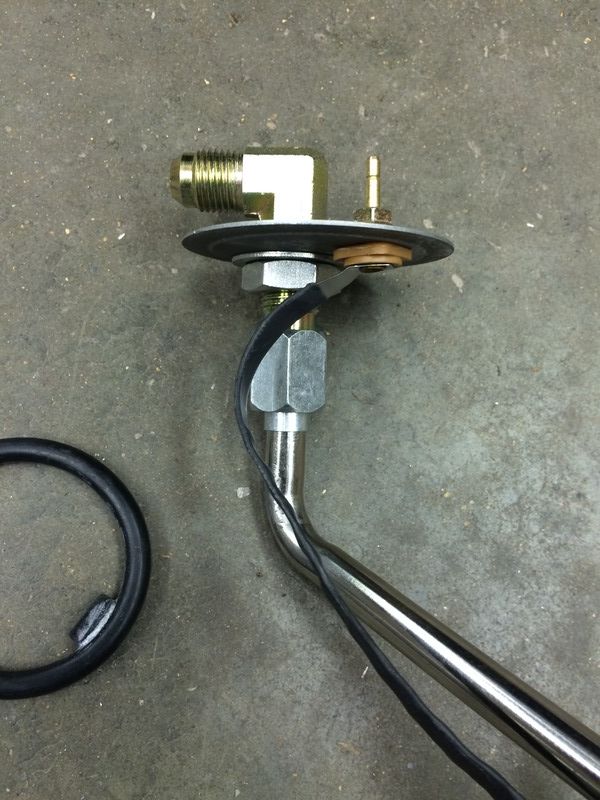 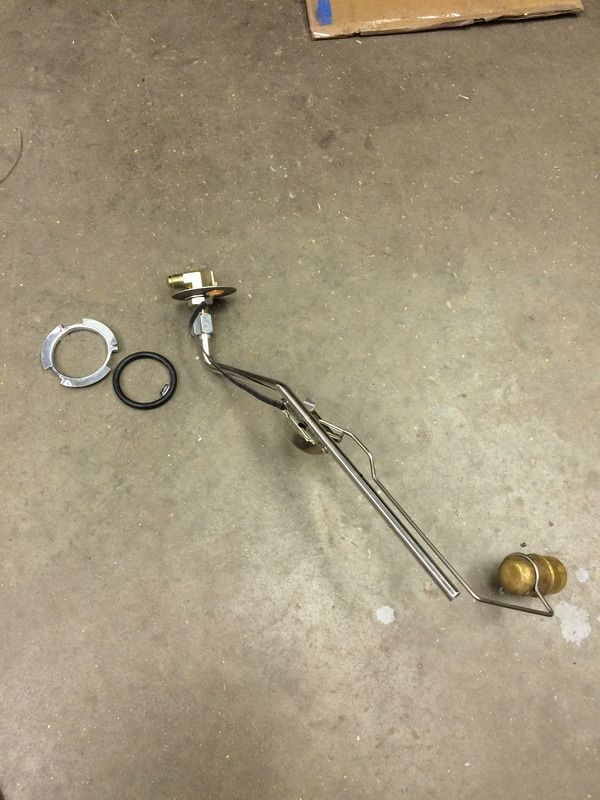 I built my own pump hanger. I started by turning an electrical bulkhead out of nylon. Here it is with a push nut, o-ring, and a quarter to show scale. 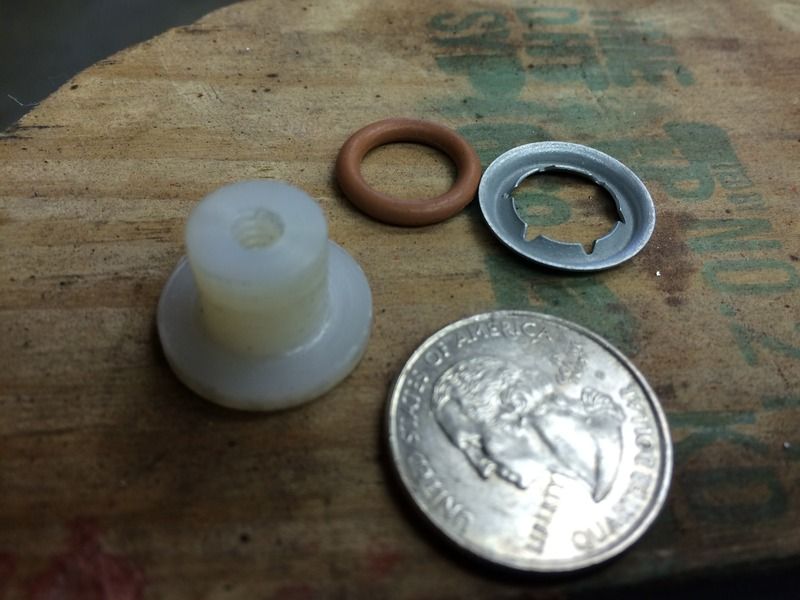 Here it is, assembled: 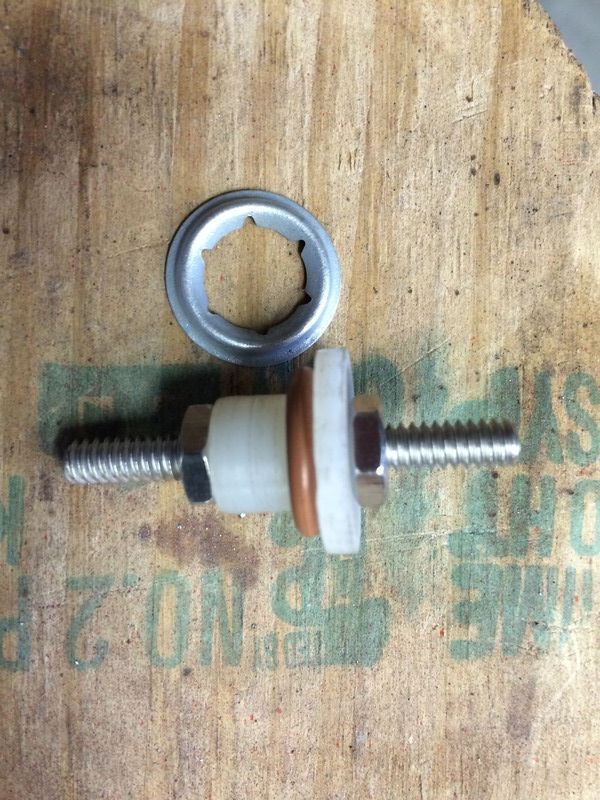 Here is a reinforcement ring, gasket, and block-off plate that I ordered from Tanks, Inc. 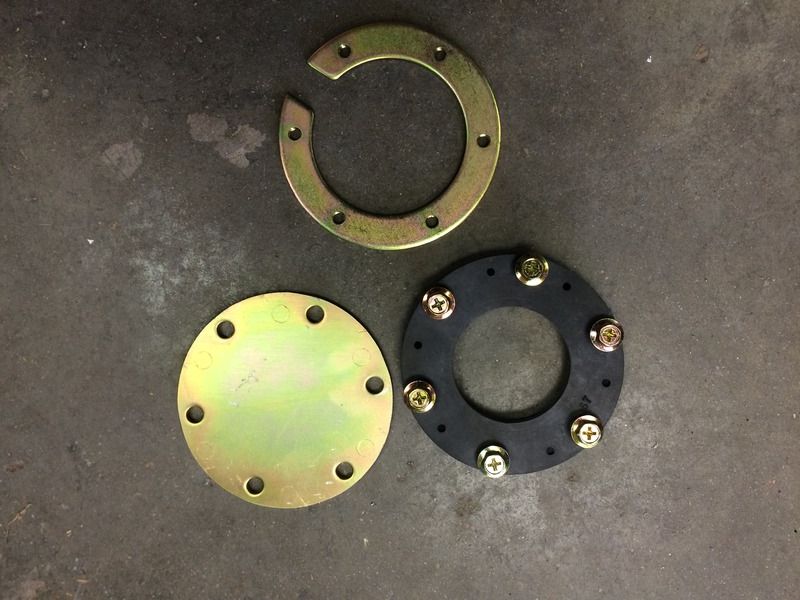 Drilled and counter-bored: 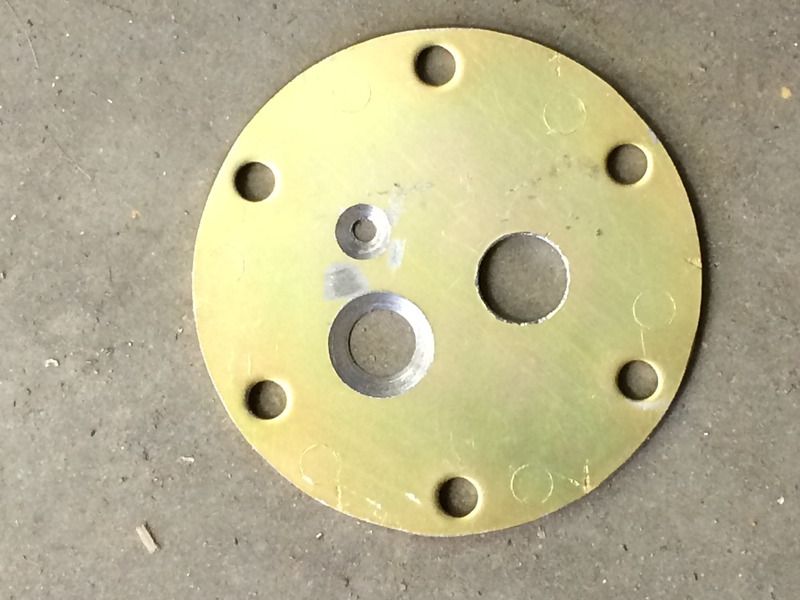 Bulkhead installed: 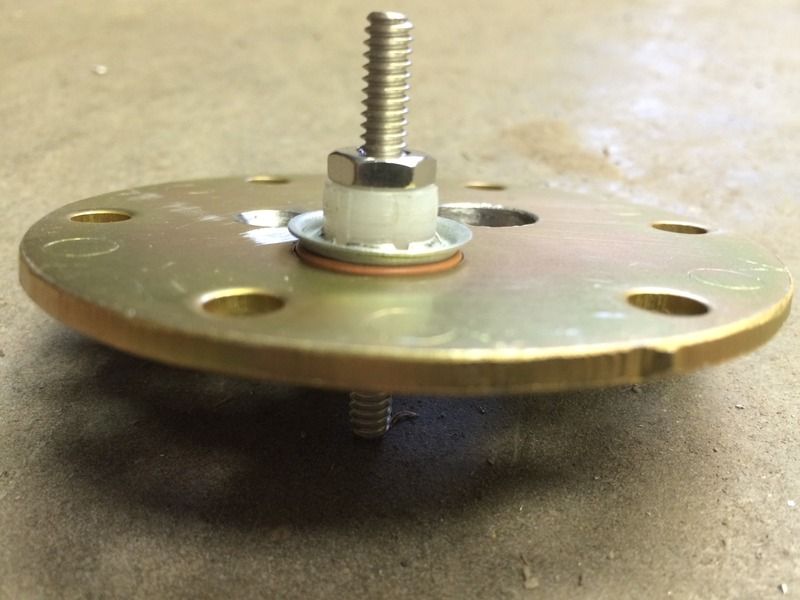 Ground connection and feed line bulkhead added: 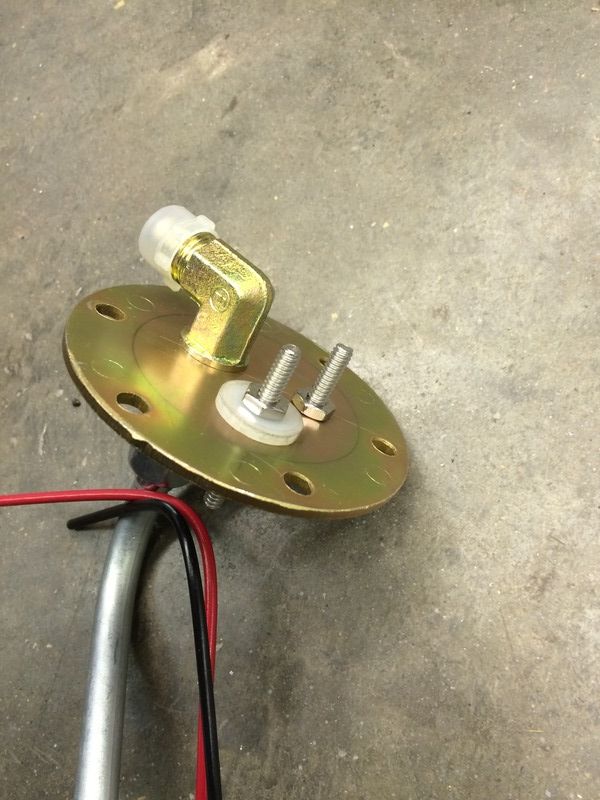 Bottom side: 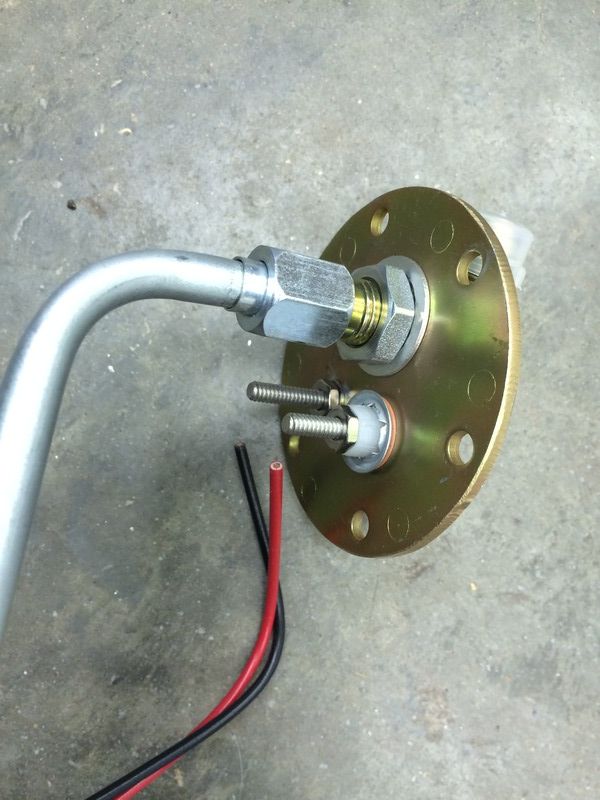 Completed pump hanger: 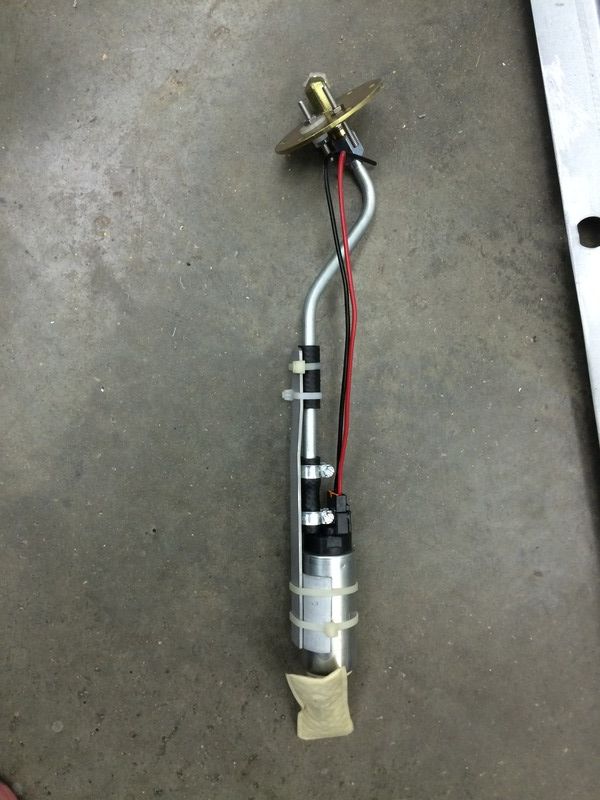 New hole in tank: 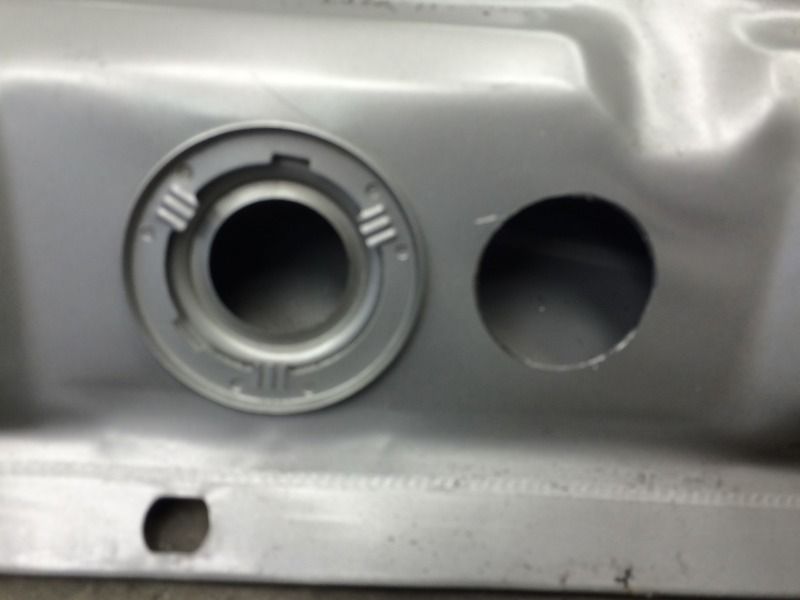 Tank completed: 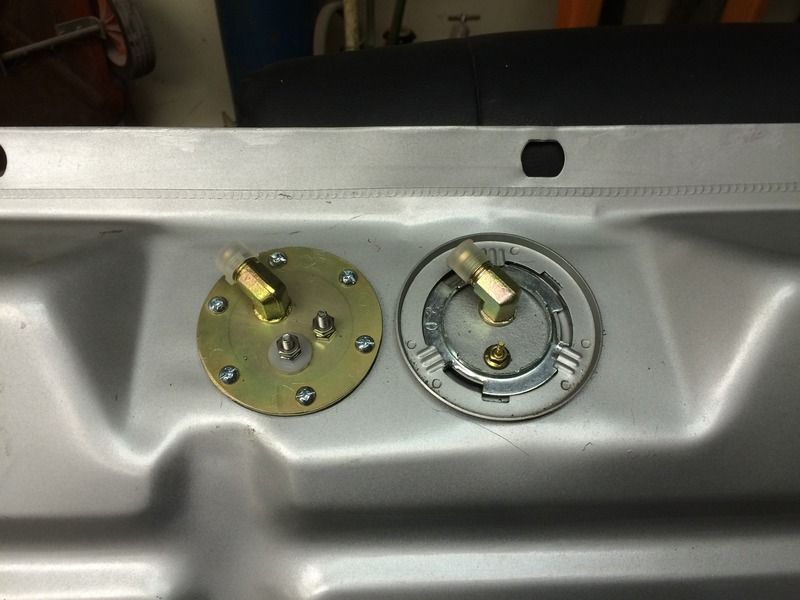 Lines for inside cab: 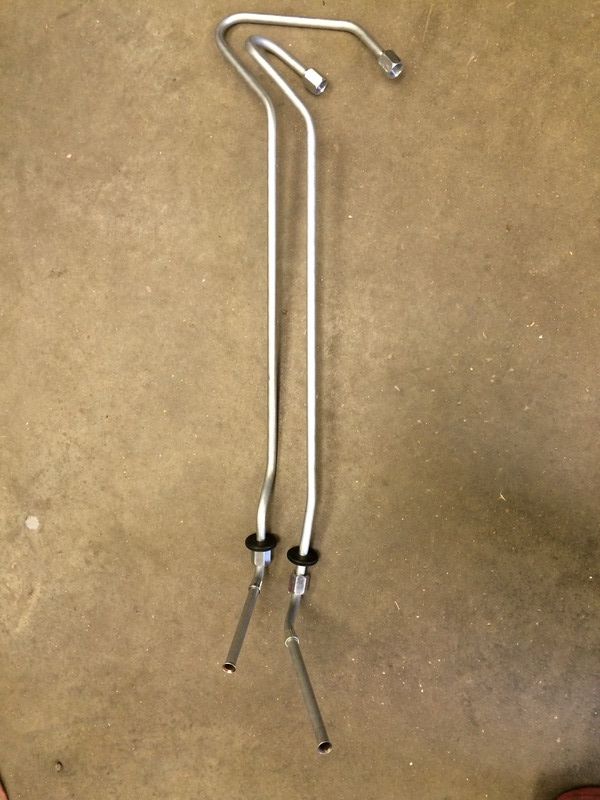 Installed: 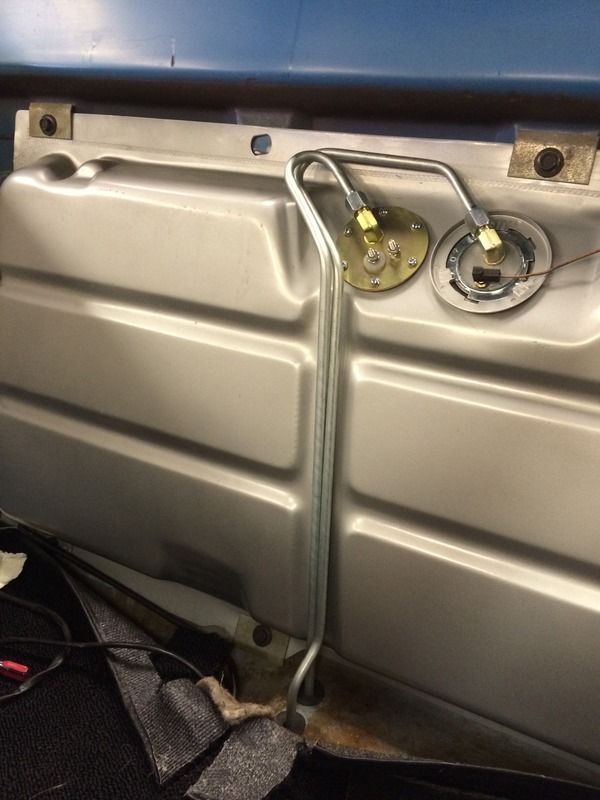
|
|
|
|
|
04-24-2015, 11:21 PM
|
#11 |
|
Senior Member
Join Date: Jul 2009
Location: Athens, AL
Posts: 499
|
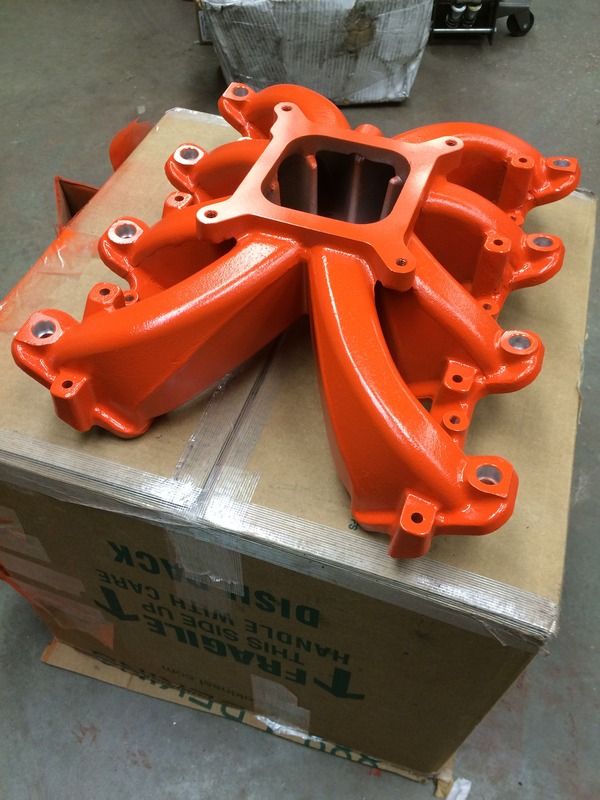
Intake: Part II
Back to the intake. I couldn't stand the aluminum intake. So, I filed off the Holley logo and painted it orange:
 The Holley fuel rails come with two sets of brackets; tall for LS1 and short for LS3 style. The truck injectors are in between those sizes. So I had to cut down the LS1 brackets. In the next photo, LS3 on the left, LS1 on the right and the cut down "truck" size in the middle: 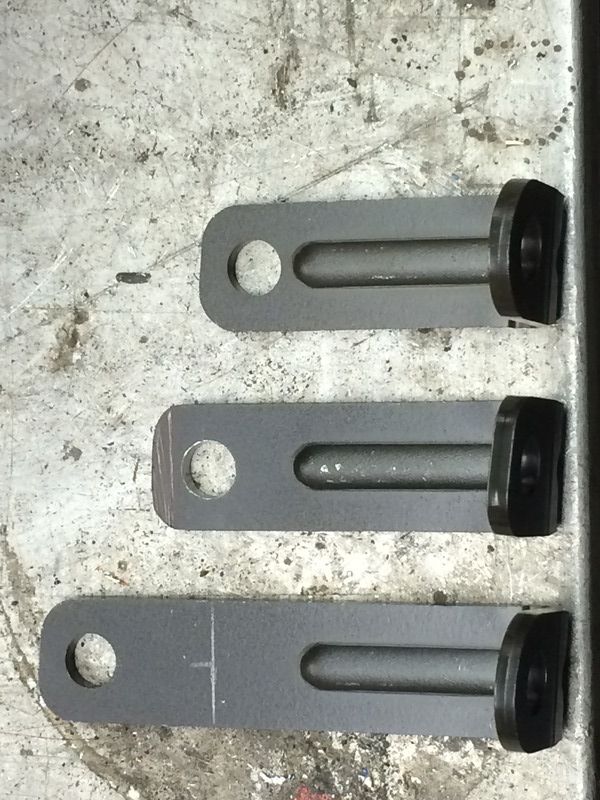 Here's the fuel rail mounted to the intake. Note that the injector wiring is different from left to right. I was trying to determine which way looked better: 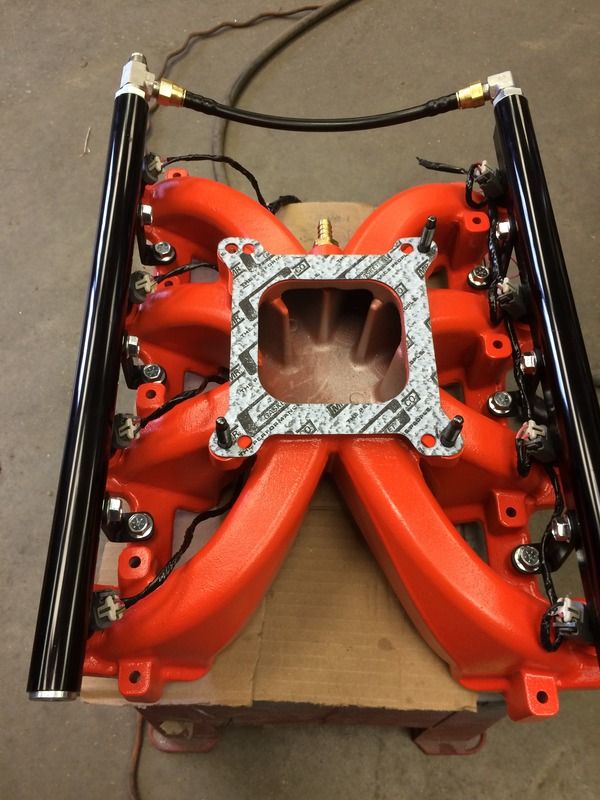 Back to the TB. First, the Holley intake only has a single vacuum port (3/8 NPT). I needed to hook up my PCV system and brake booster, so I didn't really have a place to mount the MAP sensor. In the picture below, the red line represents the square bore of the intake and the black oddly shaped area represents a "relieved" area on the backside of the TB. So, I drilled a 1/8 hole where they intersected and then drilled/chamferred a hole in the TB to accept the MAP. 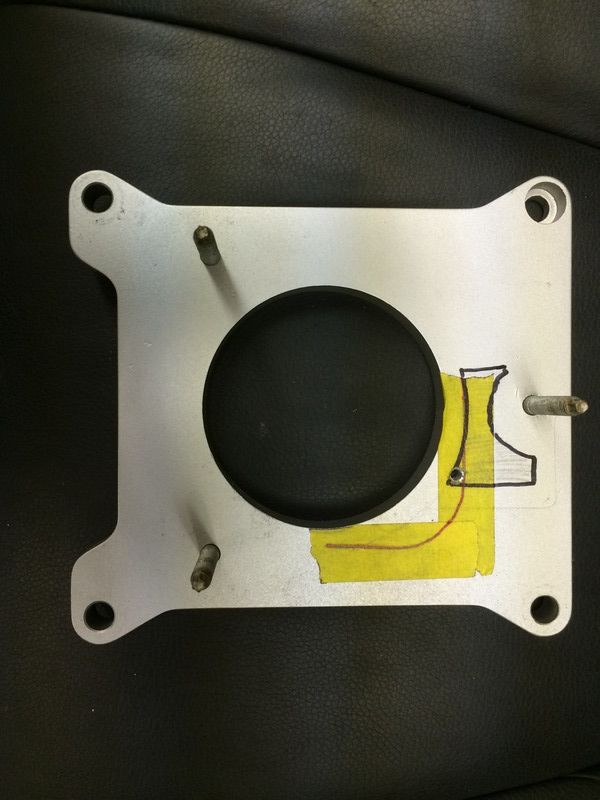 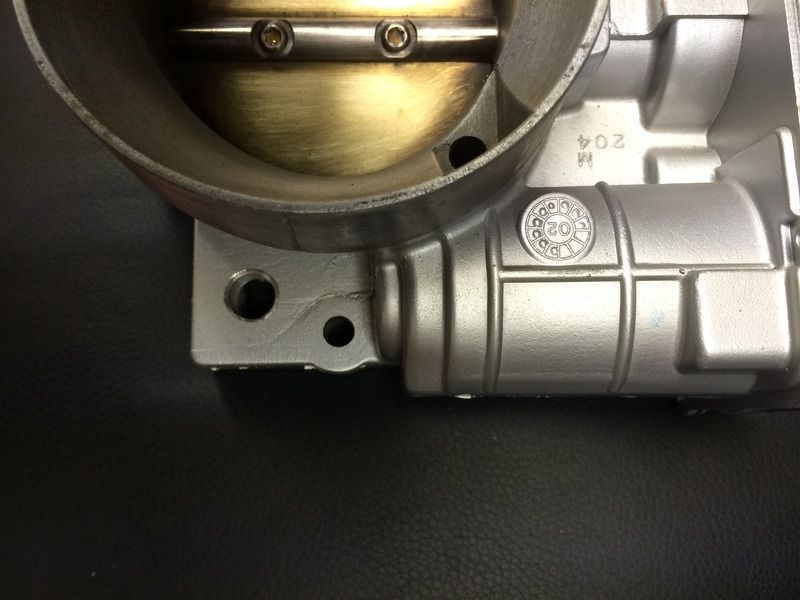 I don't have a pic, but a simple "Z" bracket held in place by the upper TB mounting bolt secures the MAP and keeps if from falling out of the TB. Here's a pic of the air cleaner mounting ring on the TB. I found out really quickly that, being a cast part, the TB has draft (i.e. it tapers smaller toward the top) and it isn't round. So, it took a significant amount of time to hand fit the ring to the top of the throttle body and get a tight interference fit. I literally used machinist's die and emery cloth to get it just right. 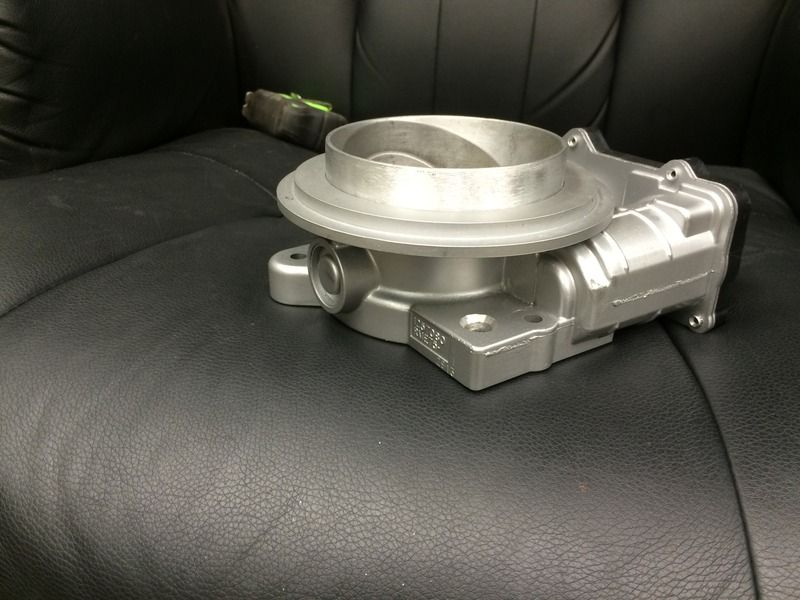 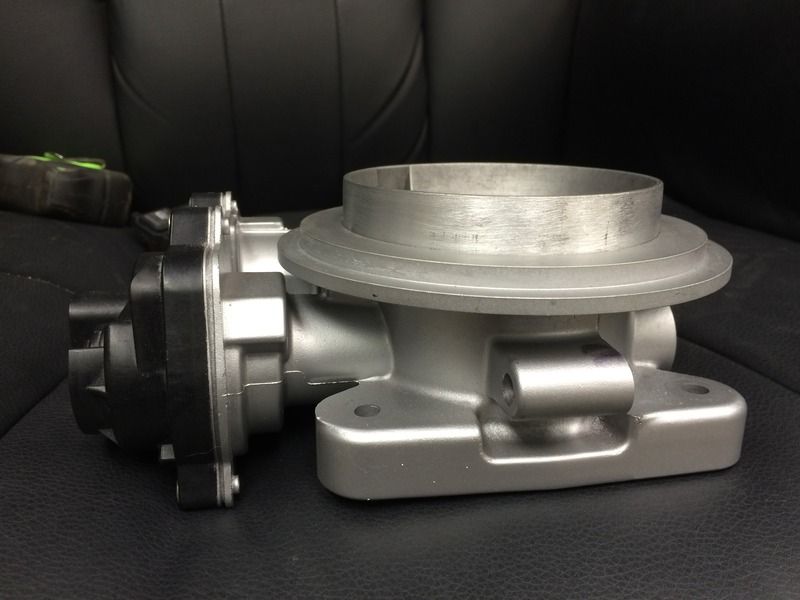 Here's what it looked like on top of the engine. Note that it doesn't have the rail brackets (or even all of the injectors) in this pic, but it gives the idea what it looks like. 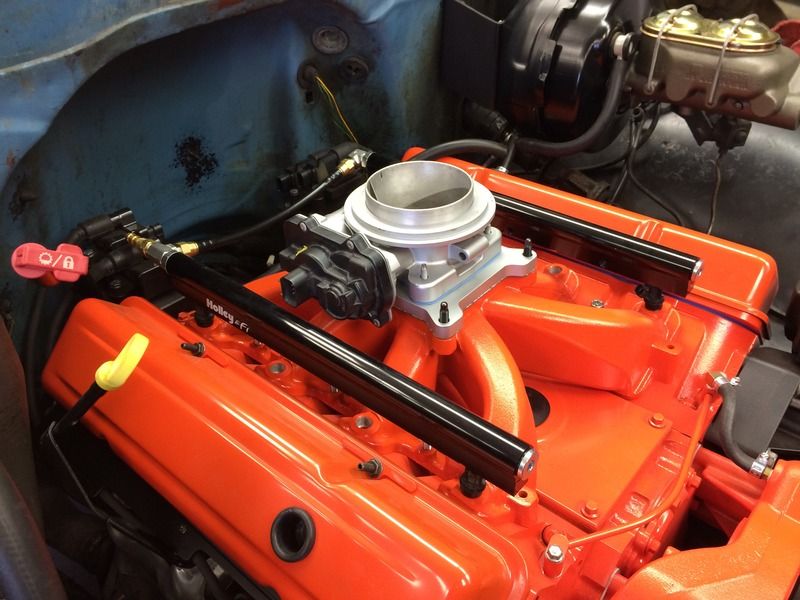
|
|
|
|
|
04-24-2015, 11:33 PM
|
#12 |
|
Senior Member
Join Date: Jul 2009
Location: Athens, AL
Posts: 499
|
More TB/Intake
I initially planned on running speed density. However, my tuner assured me that on this particular setup, he could give me a better tune using the MAF and told me to couple it directly to the TB (inside the air cleaner). I'll go ahead and say that he was right because I've logged over 200 miles in the last week and it's running perfectly.
Anyway, here's the MAF with a silicone coupler holding it directly to the MAF: 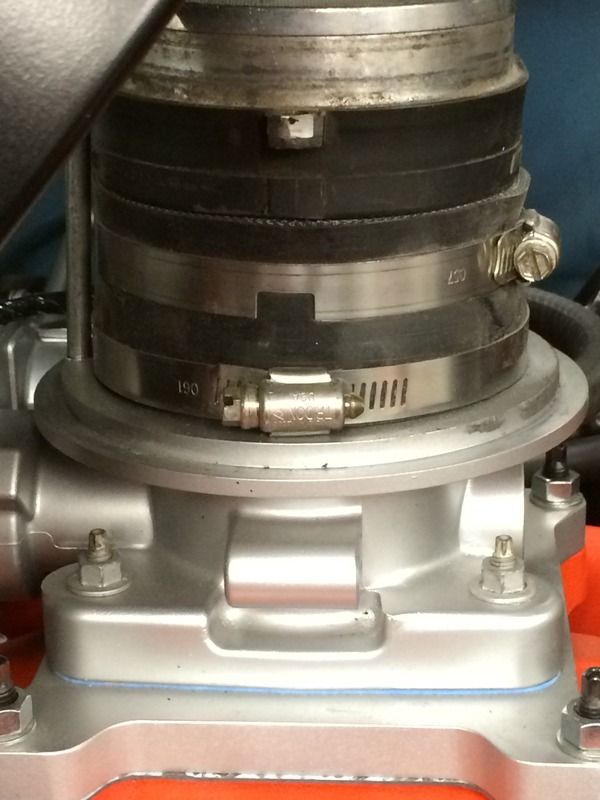 Here it is with the breather base in place (note the offset rod for attaching the breather lid and the MAF wiring coming through the air cleaner base): 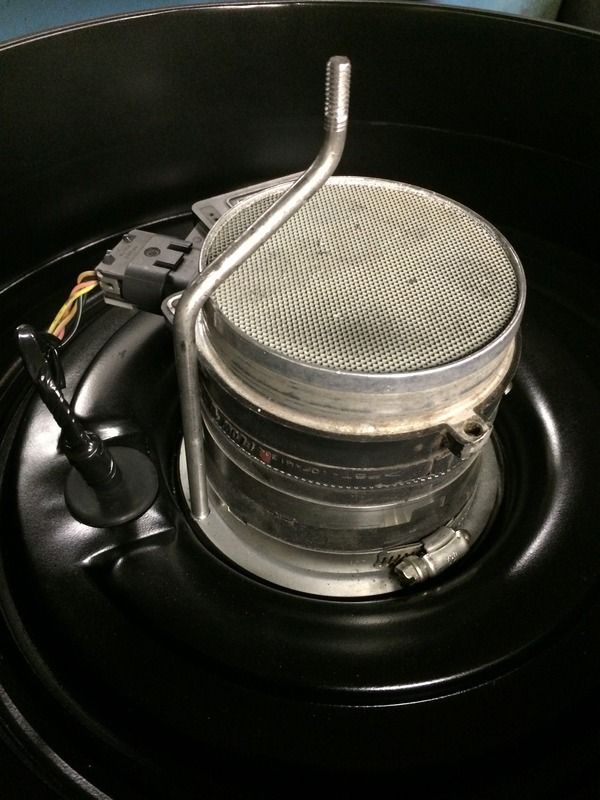 I also had to tap the TB above the blade for the fresh air side of the PCV system:  Here's a not-so-good picture of the "Z" bracket holding down the MAP sensor in the base of the TB: 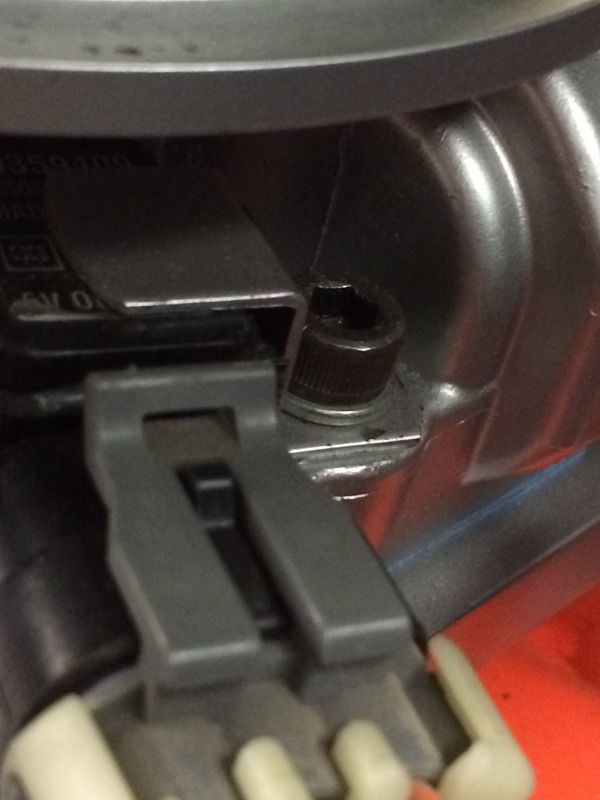 Here's the air filter: 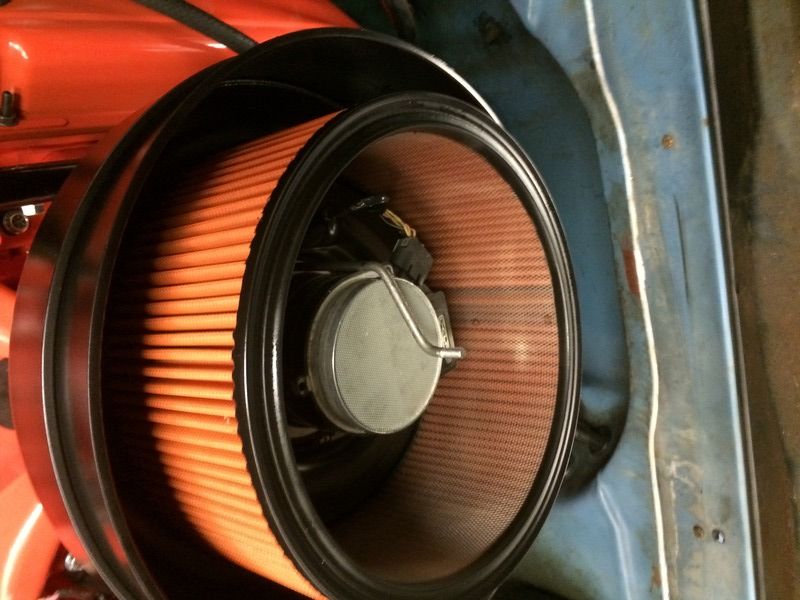
|
|
|
|
|
04-24-2015, 11:39 PM
|
#13 |
|
Registered User
Join Date: May 2009
Location: Fayetteville, NC
Posts: 725
|
Re: Another way to skin the cat; the High Torque 292 LS swap
So putting the throttle body on an intake like that works? That gives me ideas I shouldn't be having with my soon-to-be LS swap. You also have me motivated to go 4.8 instead of 5.3L. I bet the cost difference is enough to justify it. I won't be racing my truck, just want a cruiser at this point and something better than my 250/Powerglide setup. By the way you need to find some 292 fender badges

__________________
Jason TEAM C10 HOT ROD POWER TOUR
689 Short Step 68 Step Trucks Sold: 70 GMC, 72 K5 Members met: Andy4639 GCncsuHD CSGAS zicc1835 hotrod farm truck Mingrao Bhelton brenthiggins |
|
|
|
|
04-24-2015, 11:47 PM
|
#14 |
|
Senior Member
Join Date: Jul 2009
Location: Athens, AL
Posts: 499
|
Wiring
I don't have a lot of photos of the wiring, but it isn't all that different from any other project. With relocated coils, TB, etc, it made the most sense to just split the harness into circuits.
I started by removing the PCM connectors and labeling all the wires. 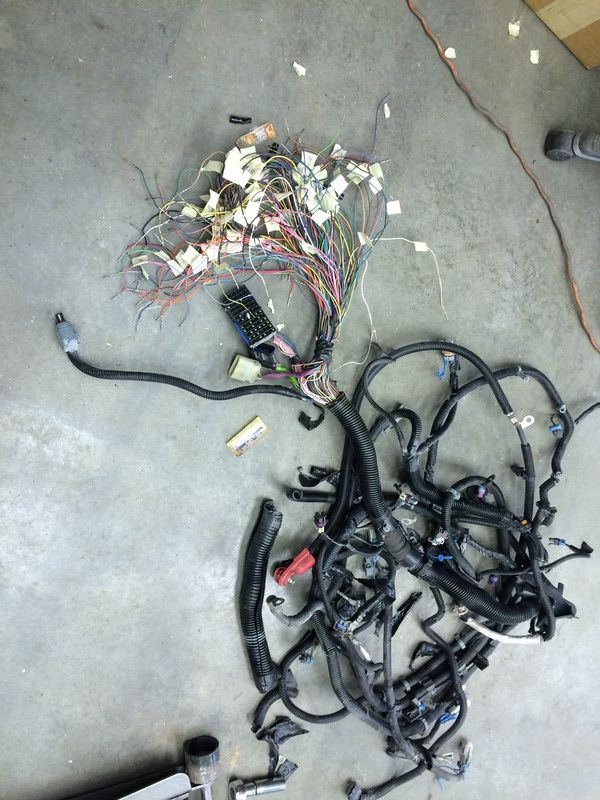 I removed all the tape and loom and split the harness into individual circuits: 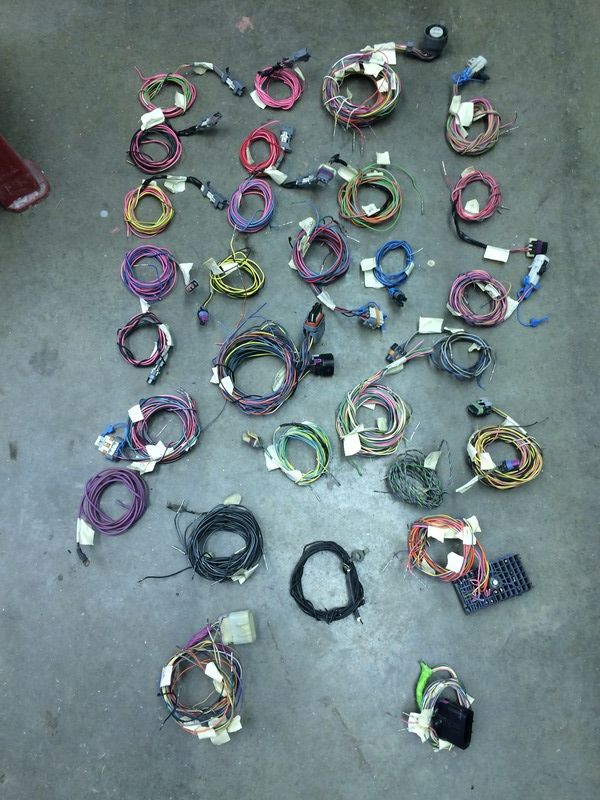 Then I started putting everything back together. The wires that are furthest away are the temp sensor and alternator plugs. The point where everything splits off like spider legs is on top of the bellhousing.  With the coils in back of the engine and the TB on top, most of the wires are hidden without even attempting to hide anything. The harness goes through the firewall in the two factory holes where the oil pressure line and the wiper vacuum lines used to pass trough. I put my PCM under the glovebox and my TAC on the pedal brace under the steering column. |
|
|
|
|
04-24-2015, 11:57 PM
|
#15 |
|
Senior Member
Join Date: Jul 2009
Location: Athens, AL
Posts: 499
|
Gauges
My gauges look stock, but I converted the speedometer to an S10 electric speedo similar to the way ls1nova does it and I used a volt and oil pressure gauge out of a square body ('86) cluster with the '72 faces on them.
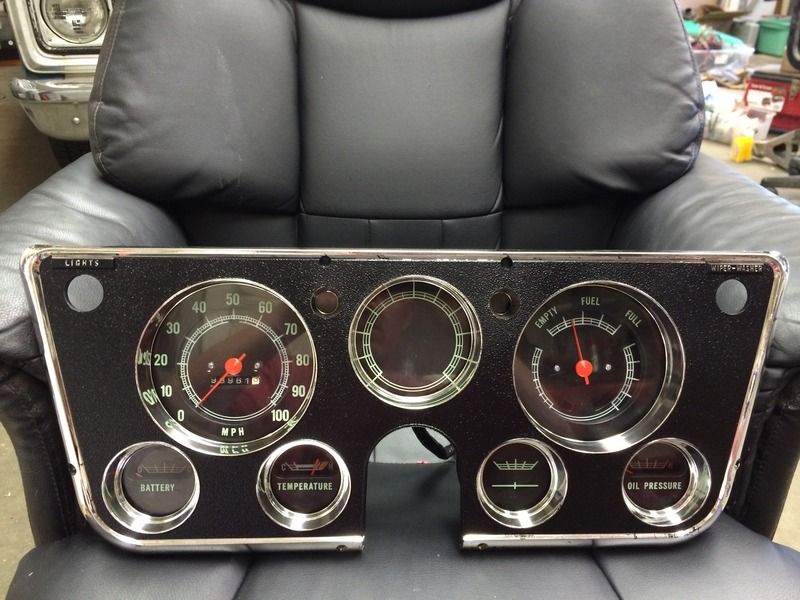  I also modded the fuel gauge to change the "BRAKE" warning light to a little something special for my Check Engine light: 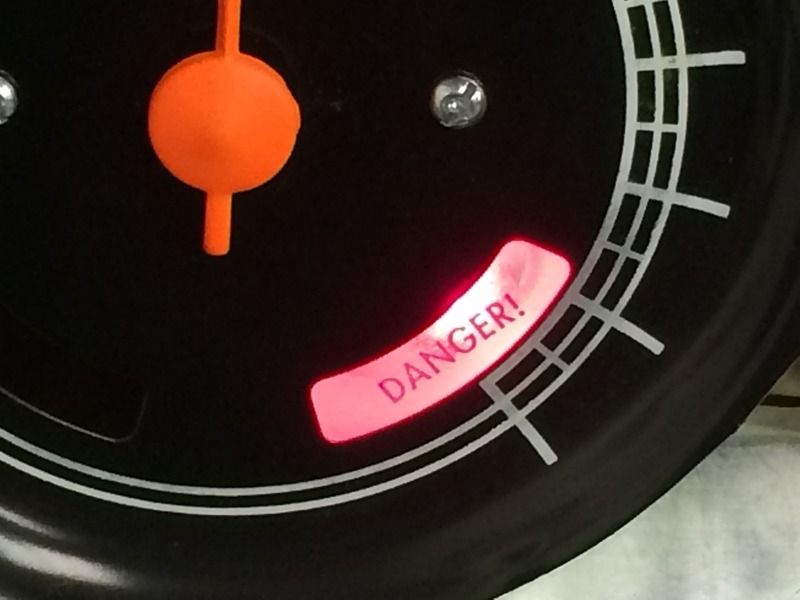
|
|
|
|
|
04-25-2015, 12:09 AM
|
#16 |
|
Senior Member
Join Date: Jul 2009
Location: Athens, AL
Posts: 499
|
Air Cleaner
My air cleaner is made from two breathers from some '90s model TBI trucks.
I started by cutting off the snout and the bottom out of one air cleaner to get just the "ring": 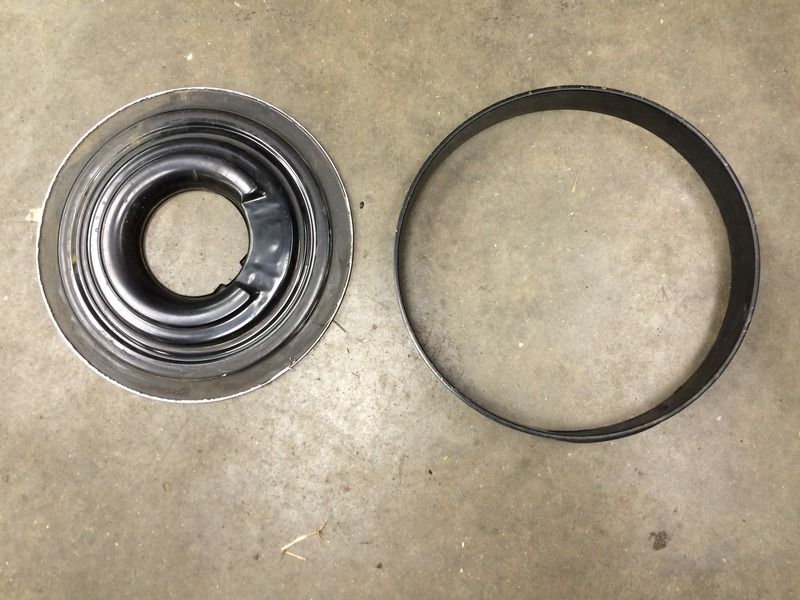 I then removed the snout from the other air cleaner and filled the snout holes: 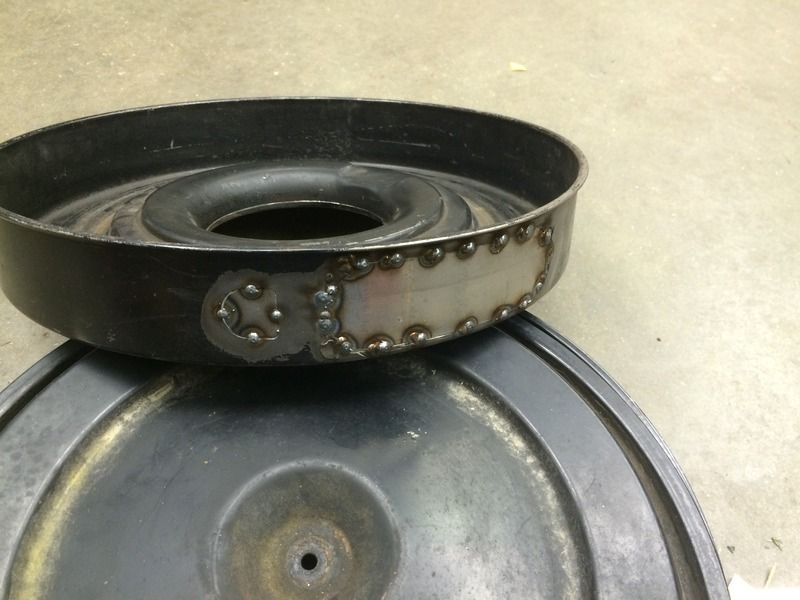 I stacked the ring from the first photo above into the base from the second photo and plug welded them together. After lots of weld smoothing and some paint, I ended up with something that looks like an old oil bath air cleaner. It pulls air in through the 1/4" gap between the lid and base: 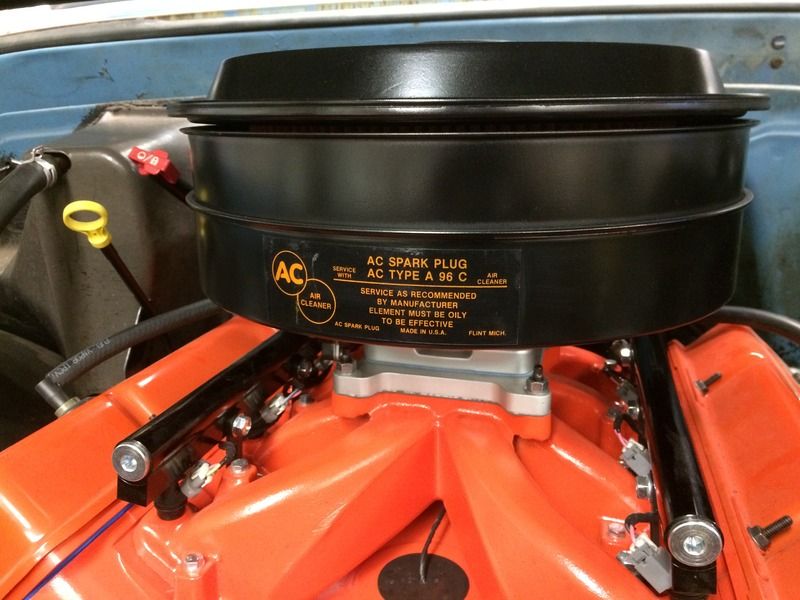
|
|
|
|
|
04-25-2015, 12:14 AM
|
#17 |
|
Senior Member
Join Date: Jul 2009
Location: Athens, AL
Posts: 499
|
Finished Product
I added some vintage 292 decals to the valve covers:
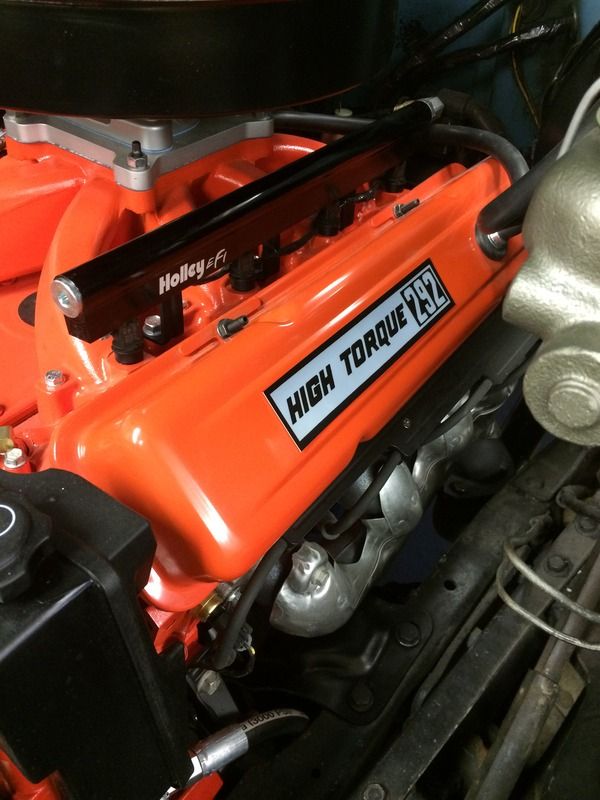 And here is is with everything in place (including the wiring) and I've put about 200 miles on it this week. It's running great. 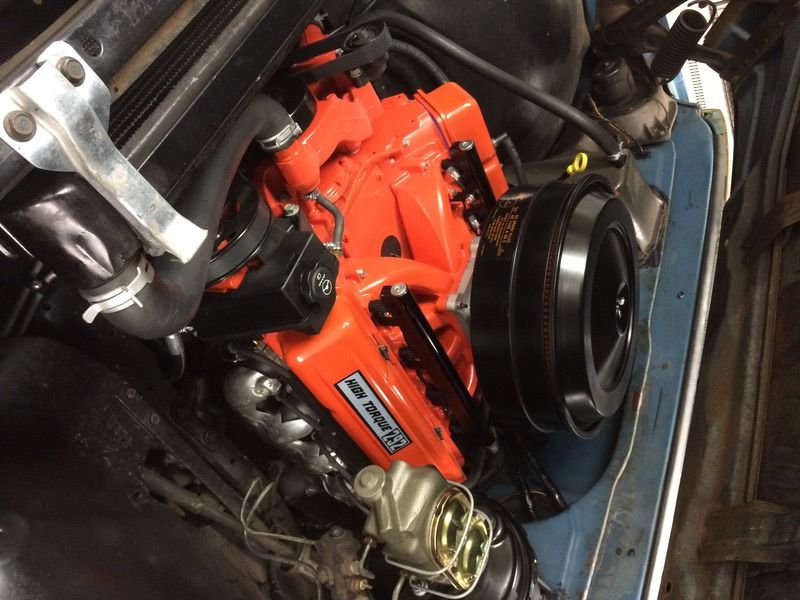
|
|
|
|
|
04-25-2015, 12:19 AM
|
#18 | |
|
Senior Member
Join Date: Jul 2009
Location: Athens, AL
Posts: 499
|
Re: Another way to skin the cat; the High Torque 292 LS swap
Quote:
And, I beat you to it on the badges, I bought a pair from board member mahanian back in March.
|
|
|
|
|
|
04-25-2015, 12:21 AM
|
#19 | |
|
Senior Member
Join Date: Jul 2009
Location: Athens, AL
Posts: 499
|
Re: Another way to skin the cat; the High Torque 292 LS swap
Quote:
|
|
|
|
|
|
04-25-2015, 12:48 AM
|
#20 |
|
Senior Member
 Join Date: Mar 2004
Location: Lee's Summit, MO (KC)
Posts: 742
|
Re: Another way to skin the cat; the High Torque 292 LS swap
Extremely impressive build. I love how you gave it the old school look.
__________________
-Keegan- '72 Jimmy 4x4 - 5.3/4L65E/NP205 swap http://67-72chevytrucks.com/vboard/s...d.php?t=663780 |
|
|
|
|
04-25-2015, 12:59 AM
|
#21 | |
|
Registered User
Join Date: May 2009
Location: Fayetteville, NC
Posts: 725
|
Re: Finished Product
Quote:
One more question. What radiator did you use? I seen you covered it when you talked about the fans but I was wondering what you did about the steam port. I am researching LS swaps and I keep seeing "steam port" come up. Dunno what it is but seems you gotta have it.
__________________
Jason TEAM C10 HOT ROD POWER TOUR
689 Short Step 68 Step Trucks Sold: 70 GMC, 72 K5 Members met: Andy4639 GCncsuHD CSGAS zicc1835 hotrod farm truck Mingrao Bhelton brenthiggins |
|
|
|
|
|
04-25-2015, 01:06 AM
|
#22 |
|
Registered User
Join Date: Nov 2011
Location: Williamsburg, VA
Posts: 955
|
Re: Another way to skin the cat; the High Torque 292 LS swap
Great build!!!
|
|
|
|
|
04-25-2015, 08:19 AM
|
#23 |
|
Registered User
Join Date: Oct 2012
Location: Miami, Florida
Posts: 907
|
Re: Another way to skin the cat; the High Torque 292 LS swap
dayj1, nice. im very much impressed. I have a few idols in the LSx world. My Top 3 are. This list is in no particular order.
LS1Nova71 MeanyellowZ dayl1. |
|
|
|
|
04-25-2015, 09:21 AM
|
#24 |
|
*************
Join Date: Apr 2005
Location: Pensacola, FL
Posts: 17,827
|
Re: Another way to skin the cat; the High Torque 292 LS swap
Dang Jonathan, you've been busy! The truck looks great and as usual, awesome attention to detail! Post more pics!
__________________
Rob - https://www.instagram.com/hart_rod_c10 As Iron Sharpens Iron, So One Man Sharpens Another. Proverbs 27:17 FOR SALE: DBW pedal bracket - http://67-72chevytrucks.com/vboard/s...d.php?t=651123 FOR SALE: Hood Brackets http://67-72chevytrucks.com/vboard/s...d.php?t=679945 1987 Silverado SWB - 34.5K original miles http://67-72chevytrucks.com/vboard/s...d.php?t=801834 1969 SuperBurb - http://67-72chevytrucks.com/vboard/s...d.php?t=200387 1968 Farm truck - http://67-72chevytrucks.com/vboard/s...d.php?t=358692 1968 SWB - http://67-72chevytrucks.com/vboard/s...d.php?t=551258 1948 Chevy - http://67-72chevytrucks.com/vboard/s...=122164&page=3 |
|
|
|
|
04-25-2015, 09:56 AM
|
#25 |
|
Registered User
Join Date: Oct 2013
Location: Alabama
Posts: 1,206
|
Re: Another way to skin the cat; the High Torque 292 LS swap
the boy is an artist (pronounced: r-teest)
Last edited by Willie Makeit; 04-25-2015 at 10:10 AM. |
|
|
|
|
| Bookmarks |
|
|


 Linear Mode

