
|
|
|
 09-11-2014, 10:00 PM
|
#1 |
|
Registered User
Join Date: Jan 2013
Location: Leonardtown, MD
Posts: 1,636
|
Re: 55 Wagon Progress
Well the Wheeling Machine finally has paint!
Napa Econo-etch primer.... 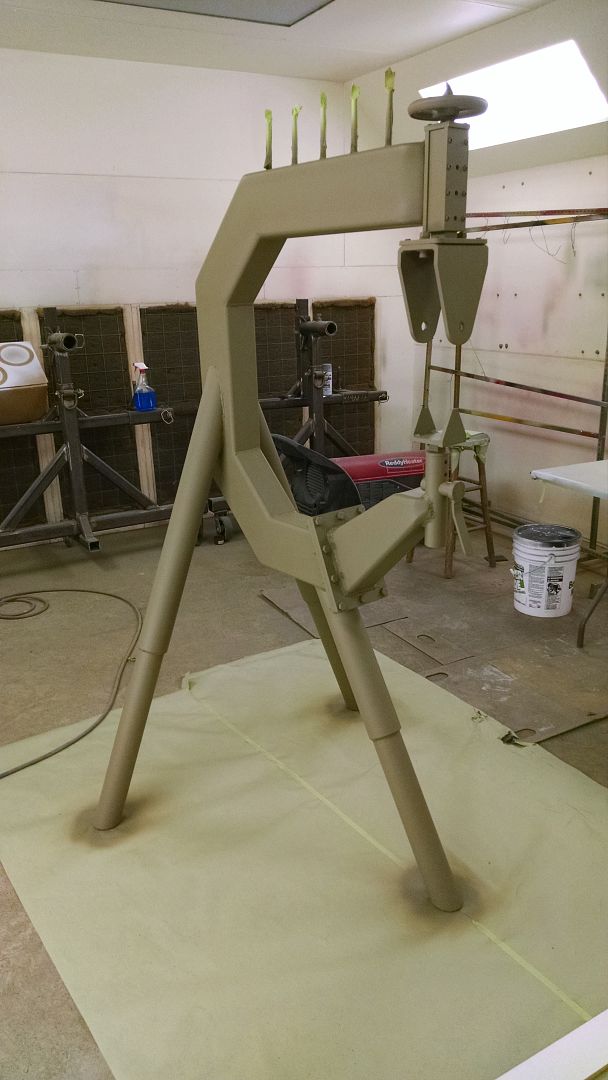 H/K Pavo Purple and Flo Klear. I tried playing with the camera settings to get it to capture the true color, but it just wasn't happening. It may look blue in the pic, but it's about as close to Chrysler's Plum Crazy as you can get without putting a HEMI under the hood.. 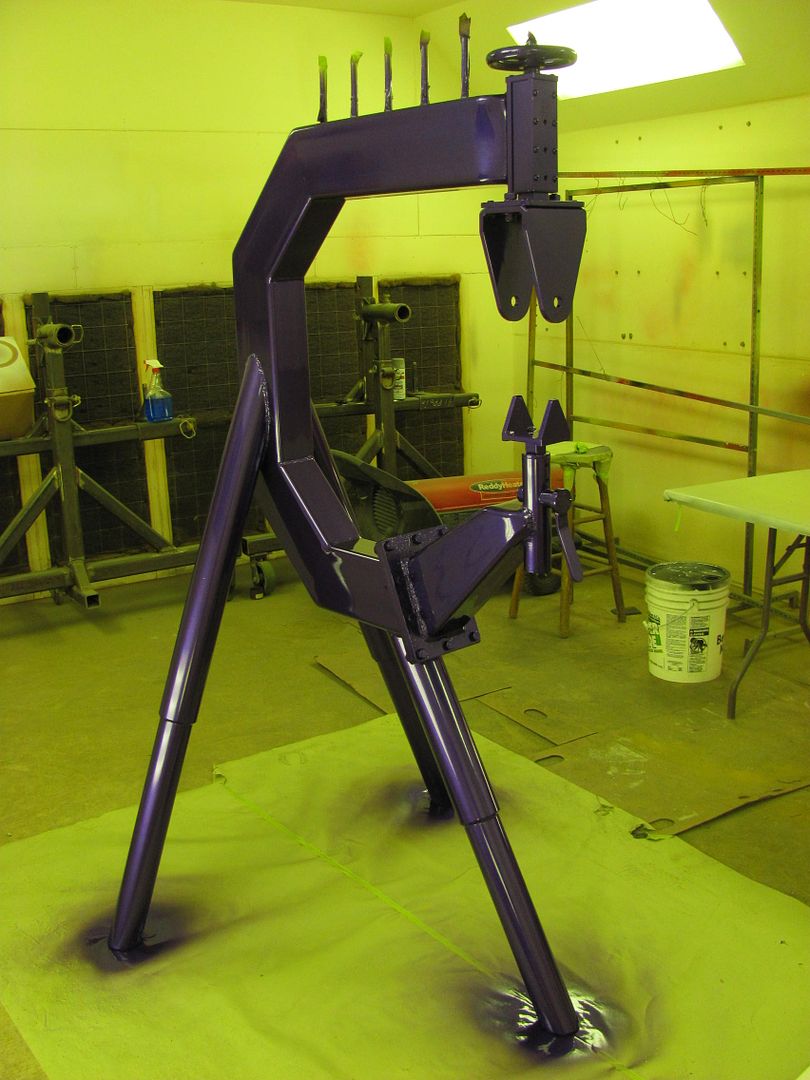 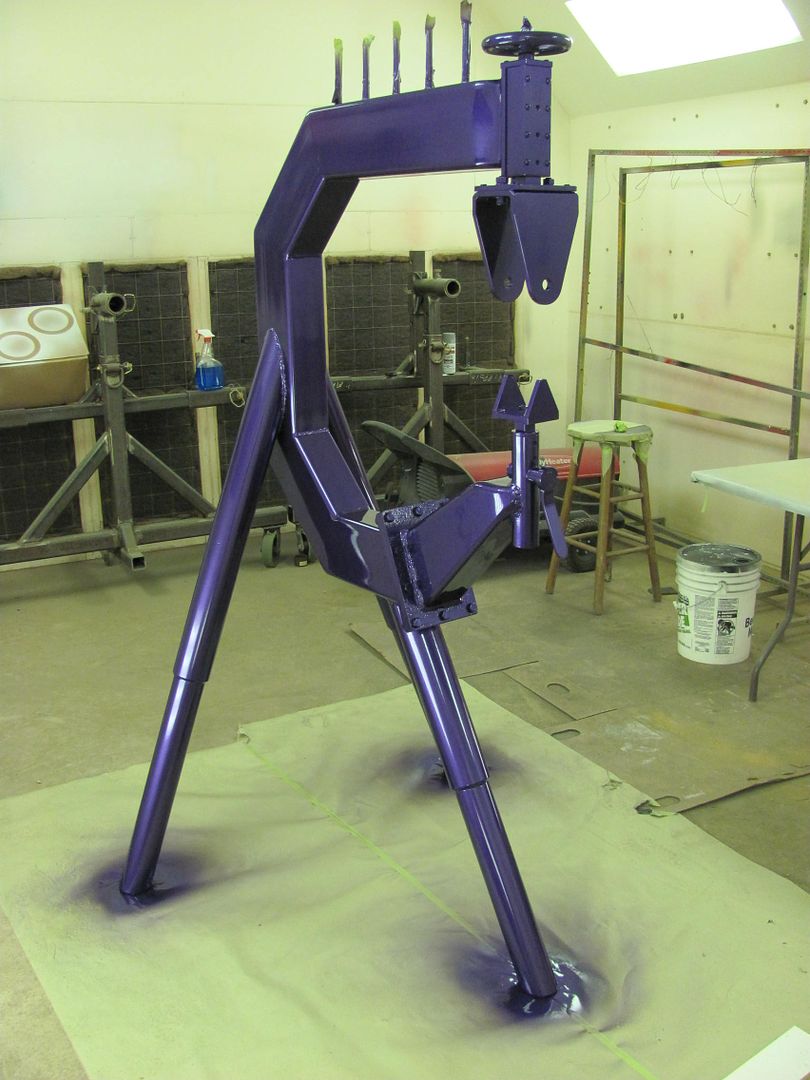 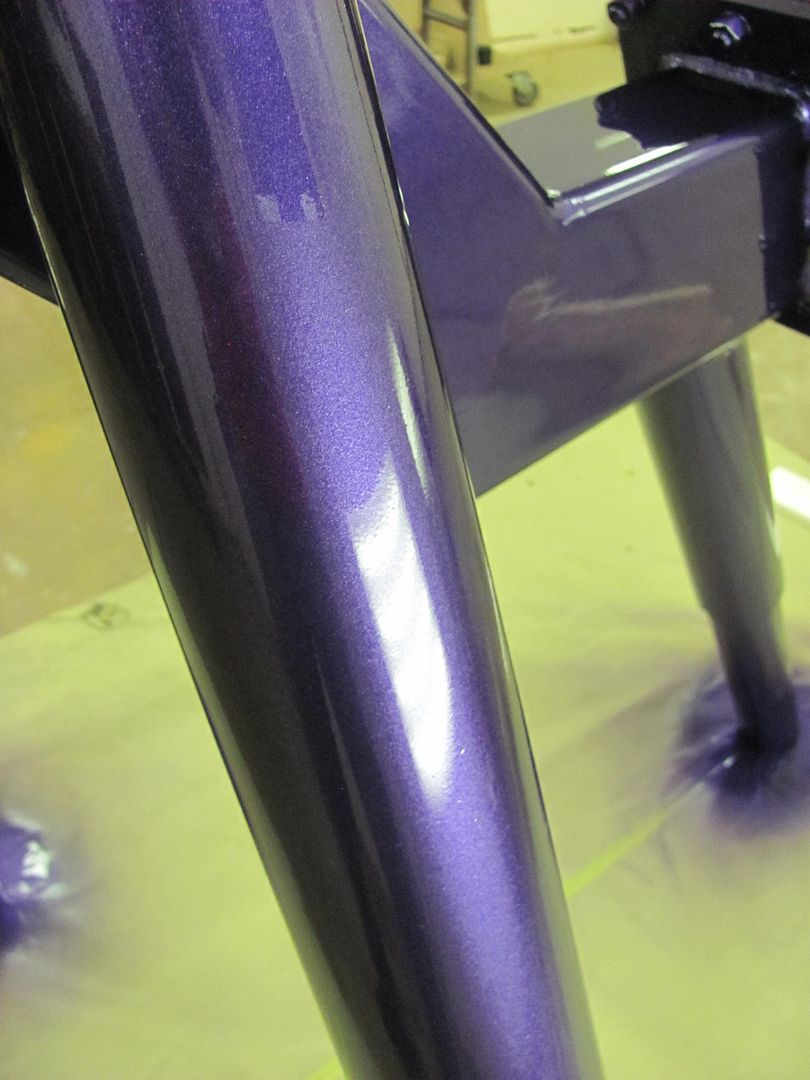 Here's the actual color... 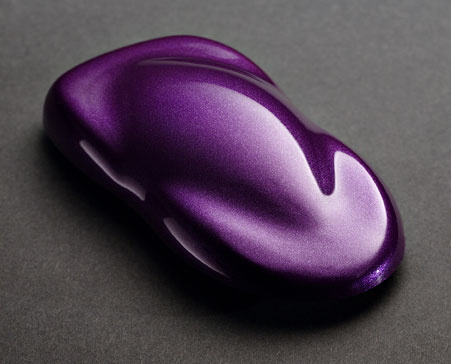
__________________
Robert |

|

|
|
09-11-2014, 10:20 PM
|
#2 |
|
Registered User
 Join Date: May 2007
Location: Deale Md
Posts: 4,663
|
Re: 55 Wagon Progress
Ya gonna add some art work on it.
__________________
James 63 GMC V6 4speed carryall 65 chevy swb bbw V8 auto 68 K20 327/4 speed, buddy buckets 2002 GMC CC Dually Duramax 64 GMC lwb 3/4 V6 4speed SOLD 66 GMC swb bbw buddy buckets SOLD IG duallyjams The only thing that stays the same is constant change! |
|
|
|
|
09-11-2014, 10:33 PM
|
#3 |
|
Registered User
Join Date: Jan 2013
Location: Leonardtown, MD
Posts: 1,636
|
Re: 55 Wagon Progress
I'll have to find someone that does some striping..
 While I was finishing up the paint on the English Wheel, Kyle stripped the driver's inner fender. This one has the same issues in the front as well as a spot up top where the flange of the fender had some rust issues we previously repaired.. 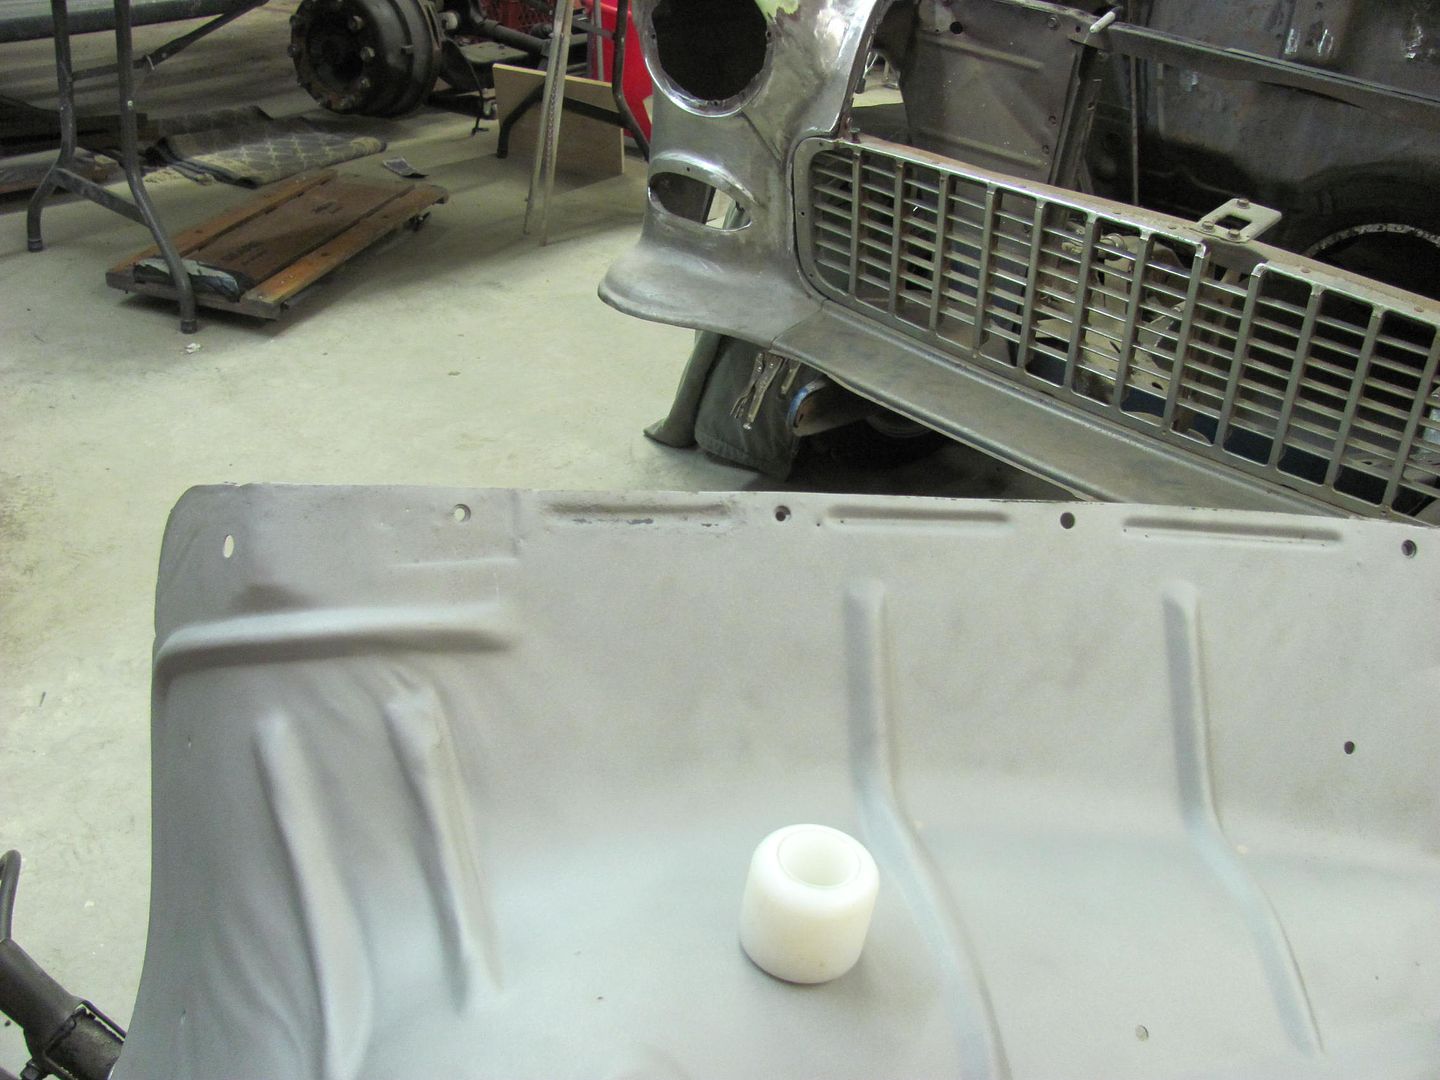 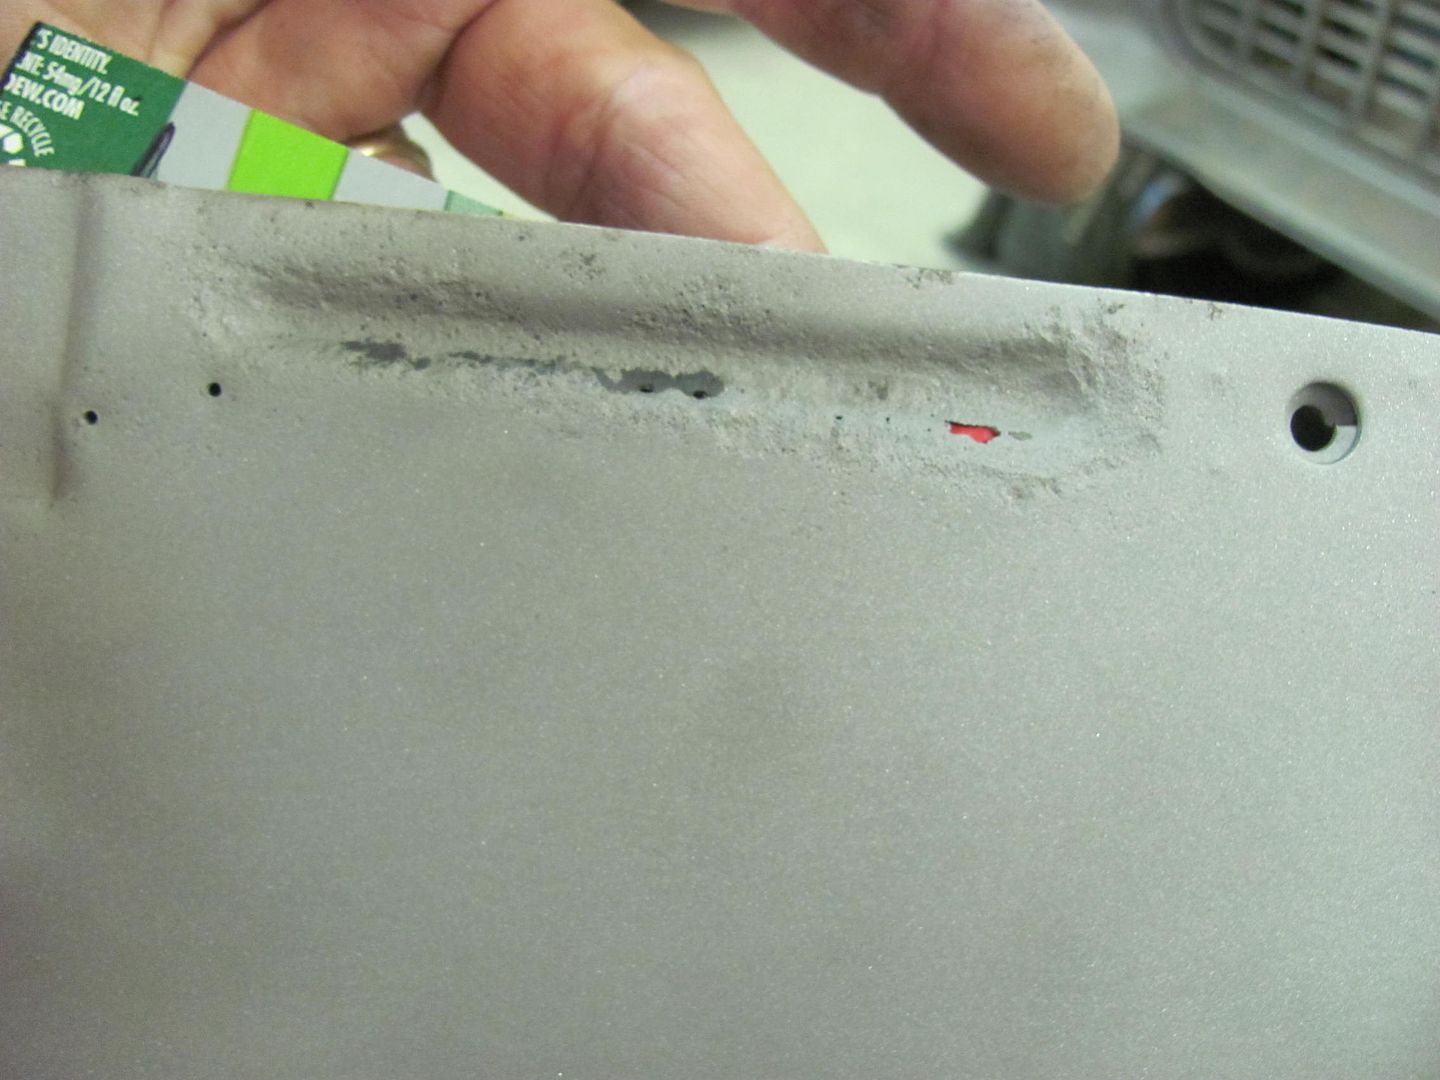 Looks like our same template will work here as well.. 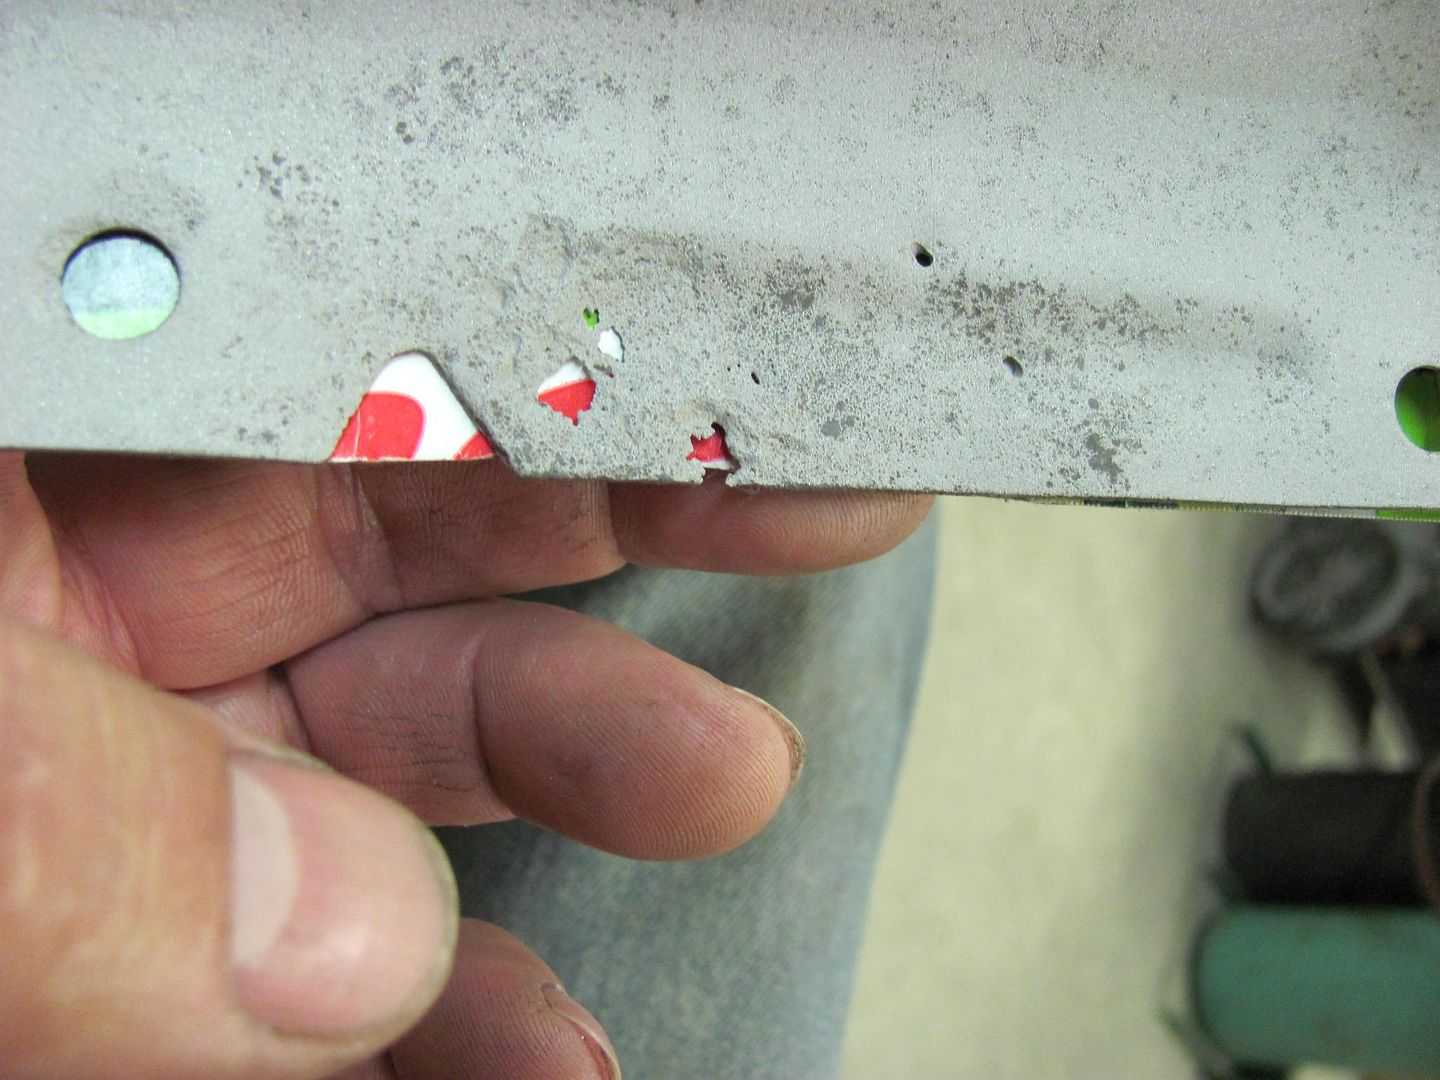 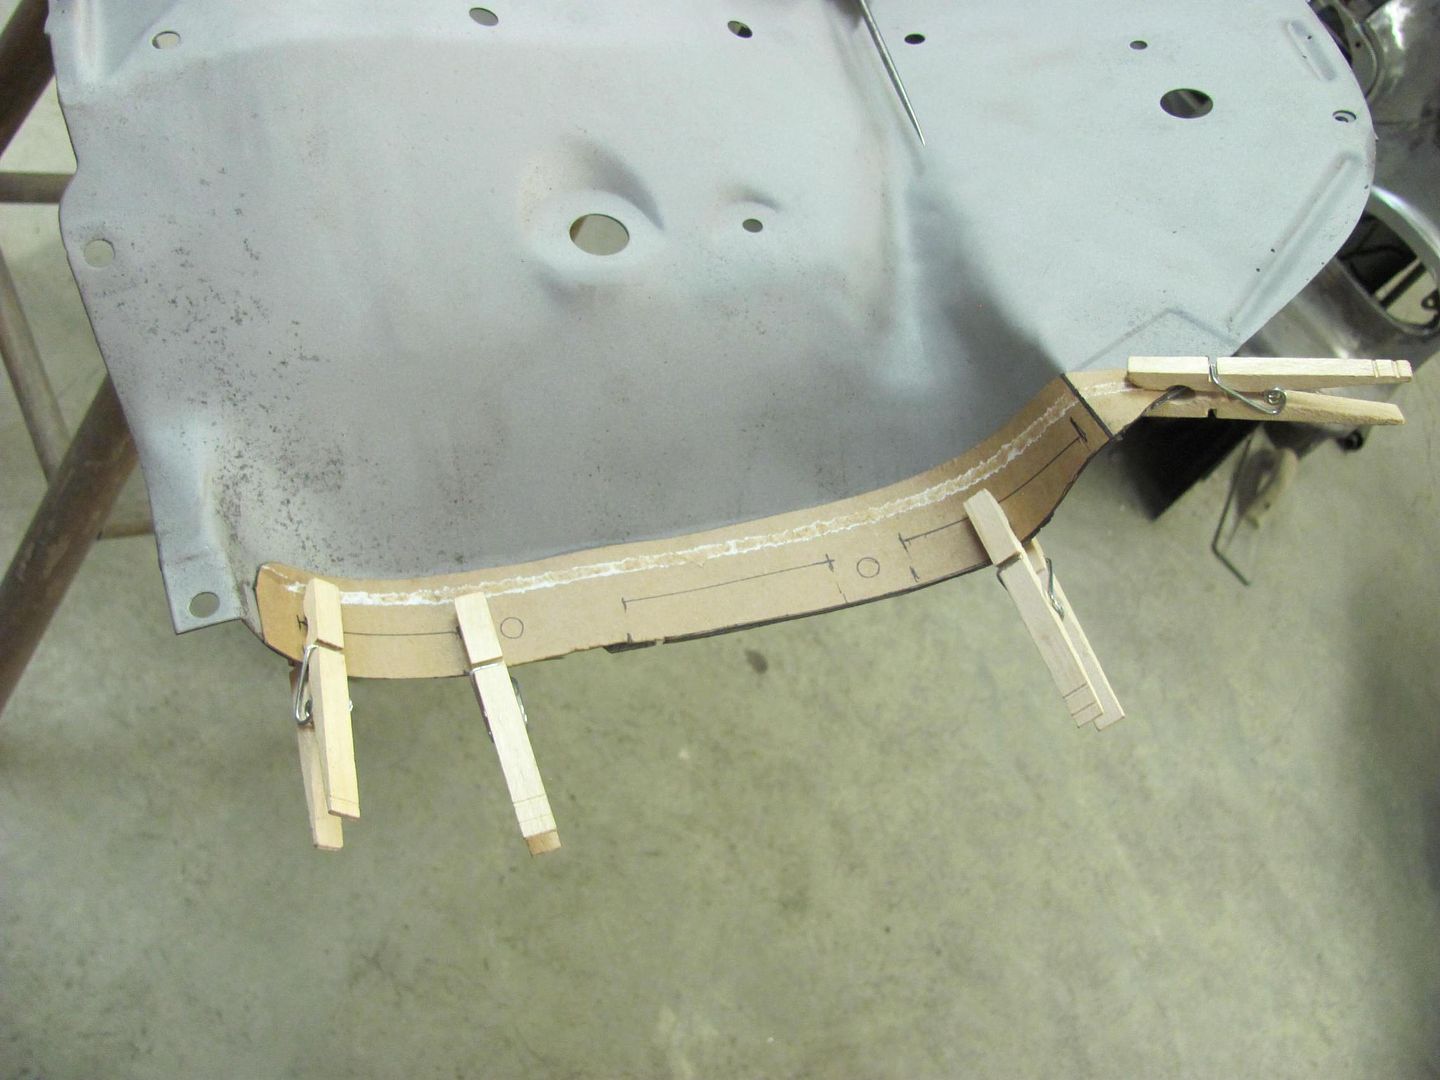 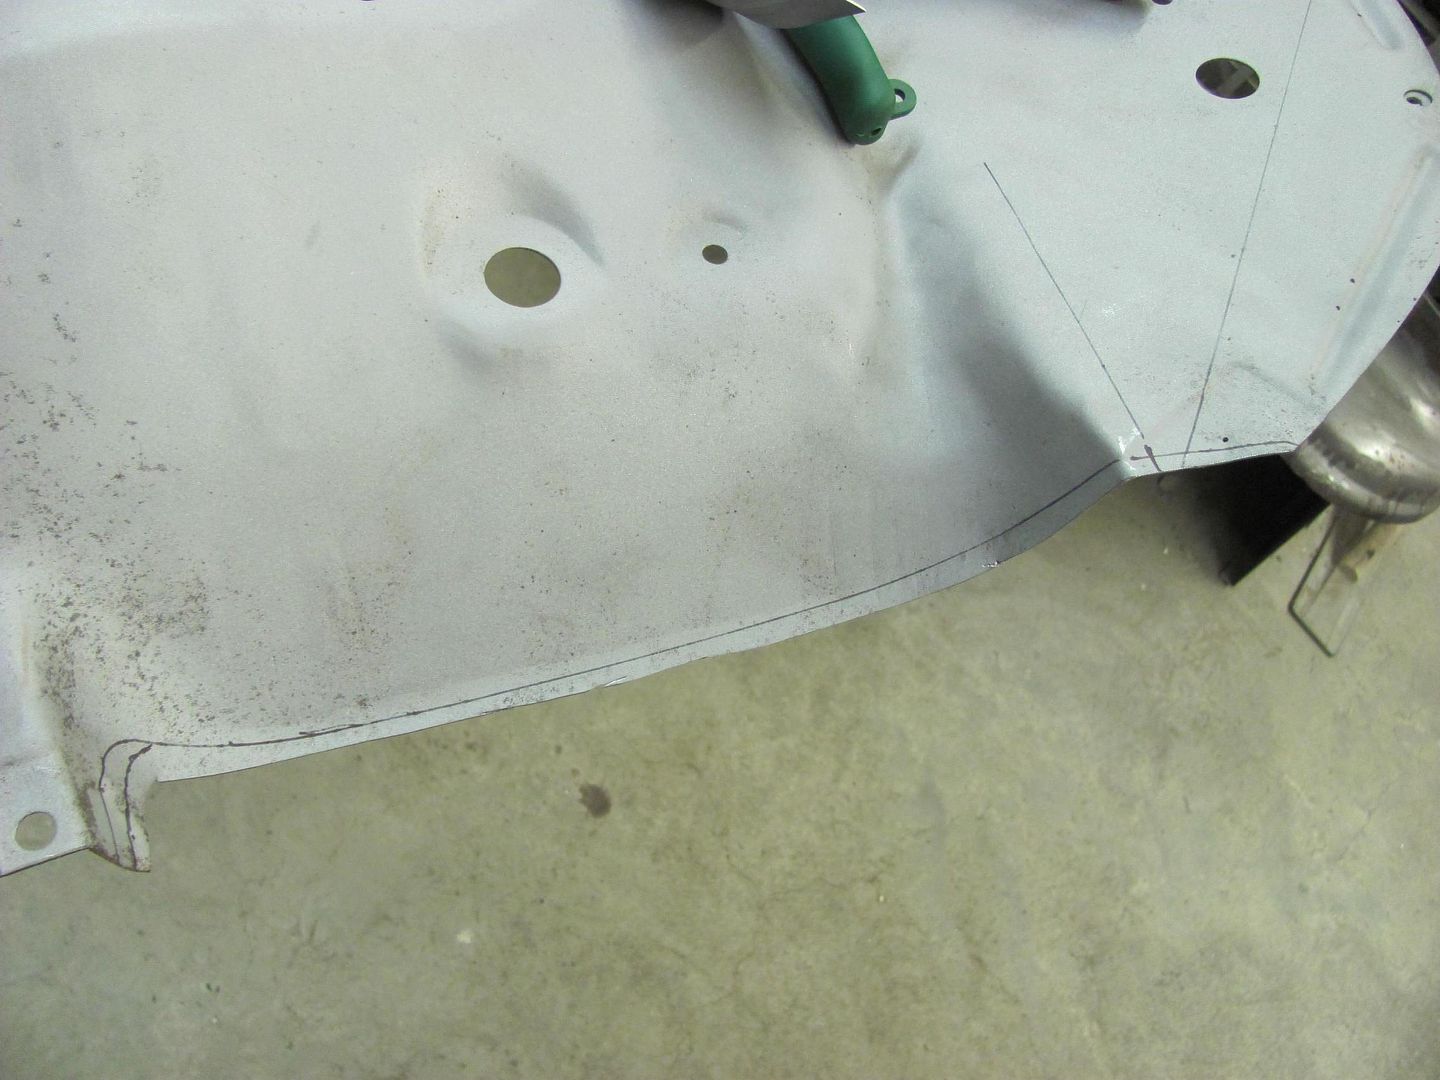 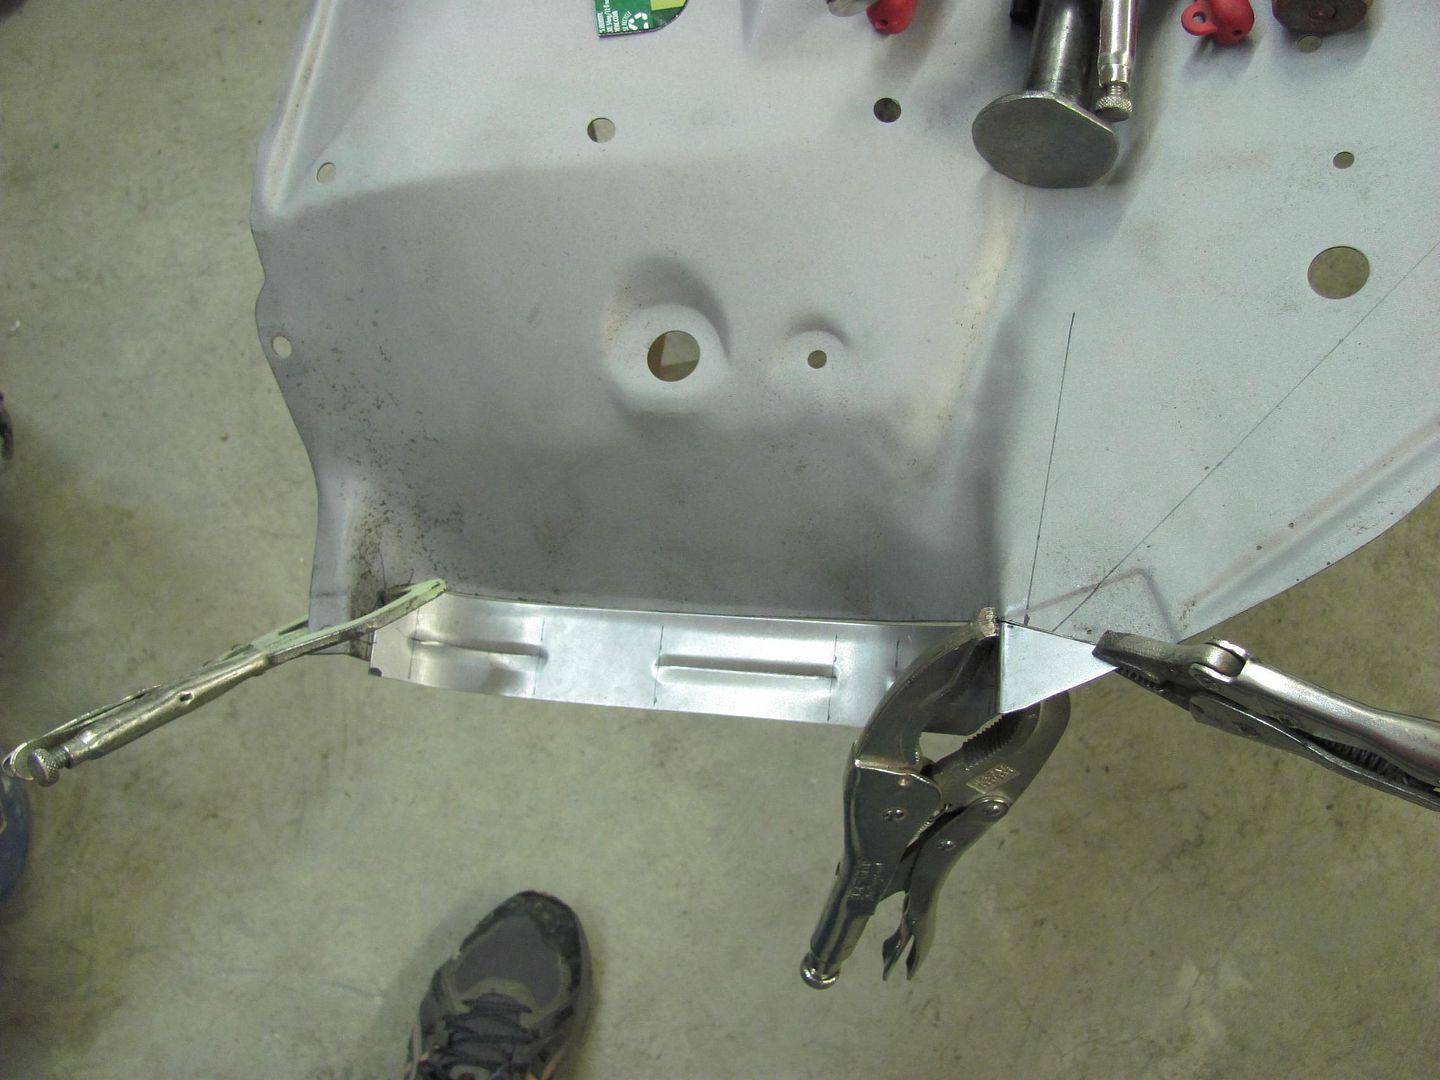 And while I was trimming more rust away, Kyle was working on the passenger side learning the fine art of dressing welds... 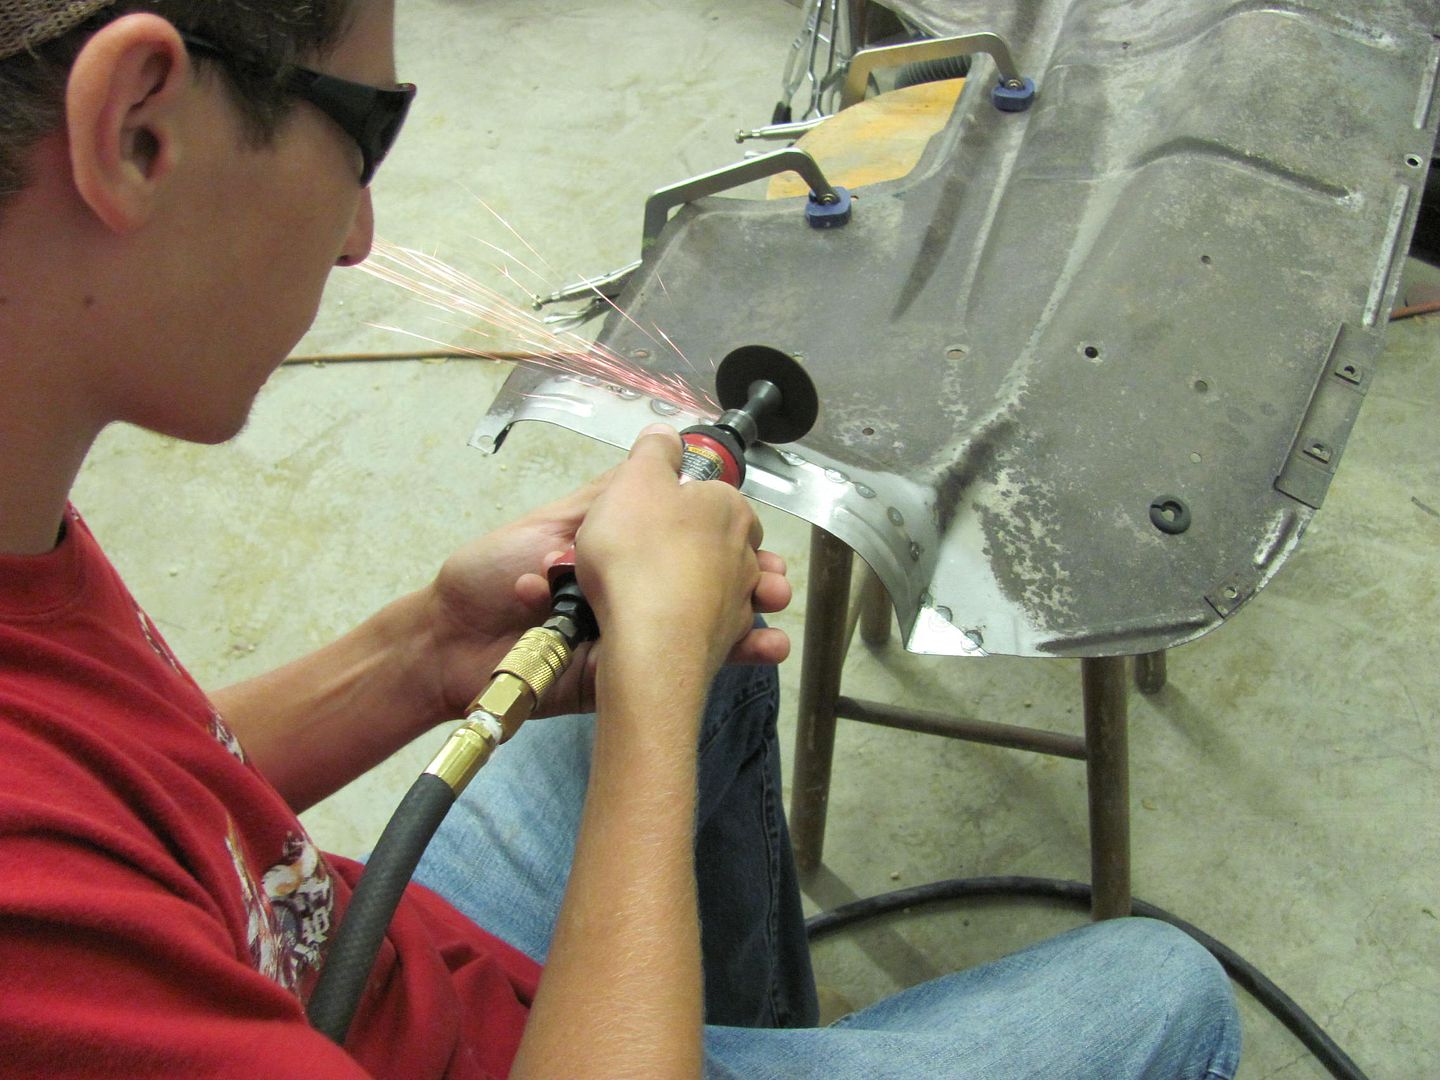 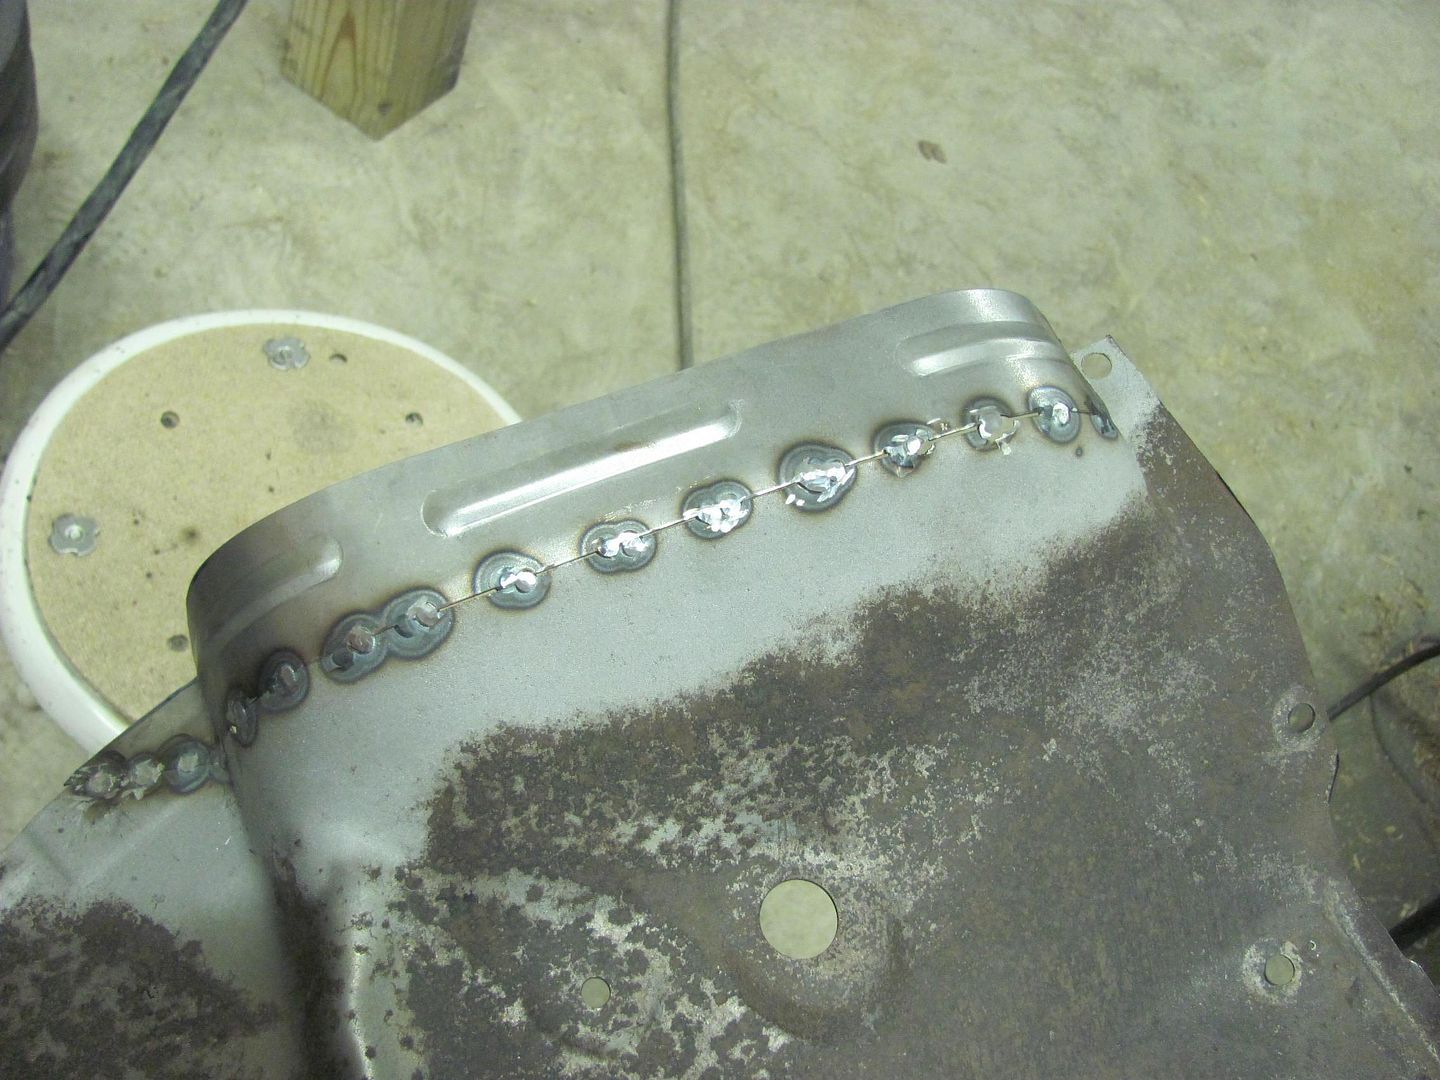 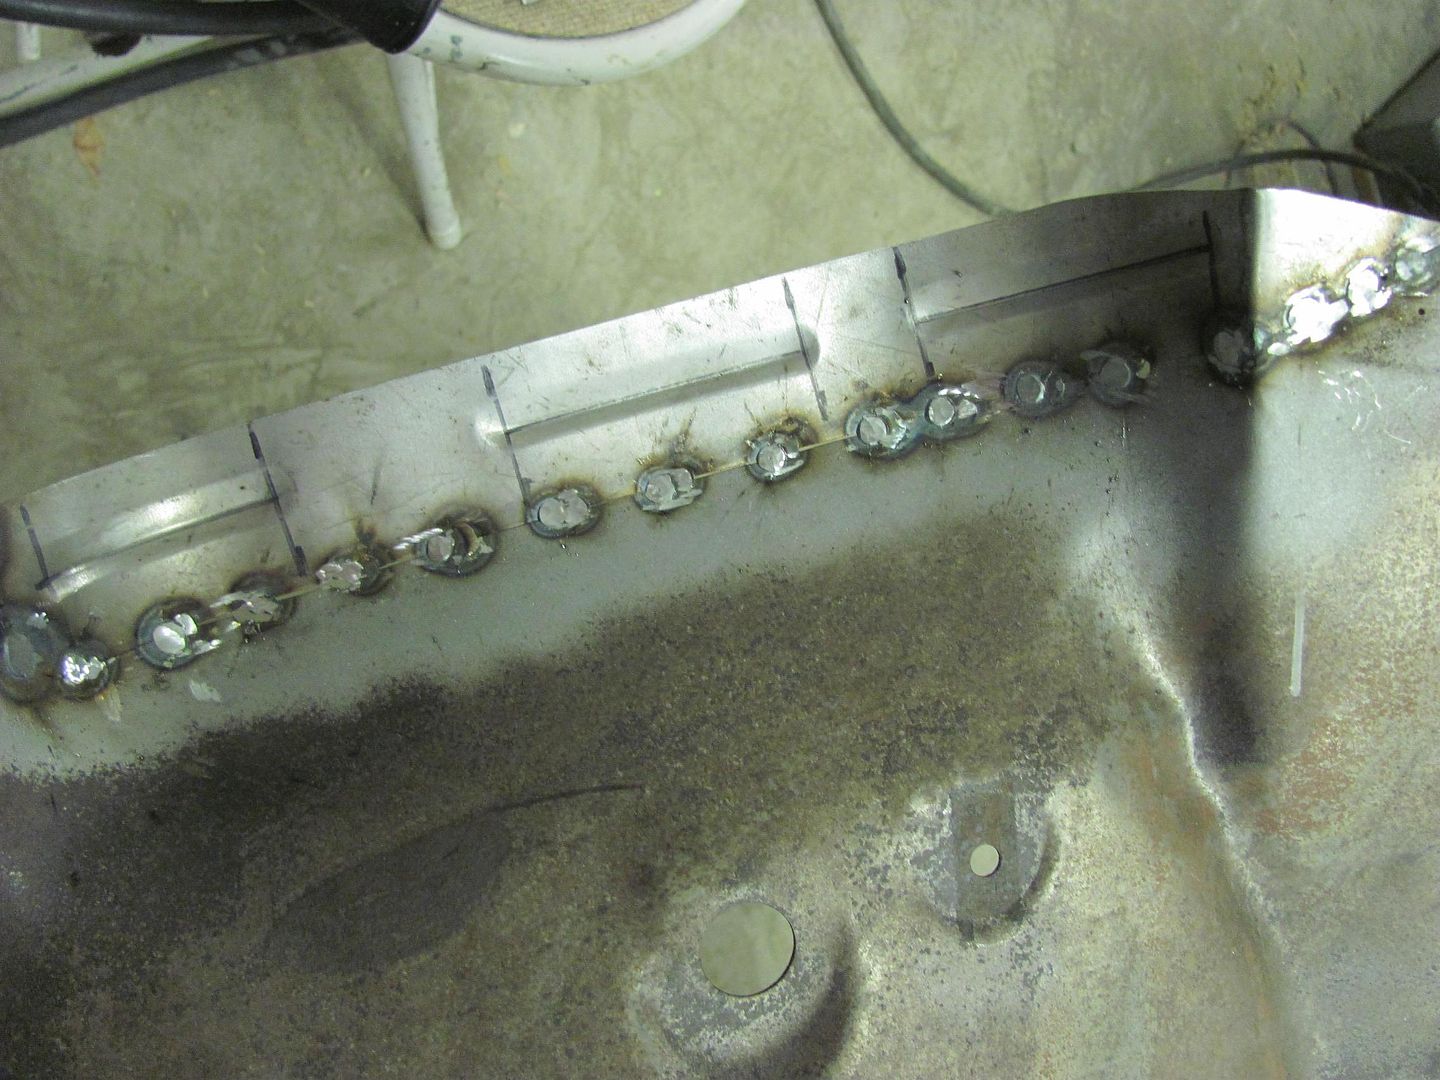
__________________
Robert |
|
|
|
|
09-11-2014, 10:40 PM
|
#4 |
|
Registered User
Join Date: May 2007
Location: Deale Md
Posts: 4,663
|
Re: 55 Wagon Progress
Young ears no hearing protection.
__________________
James 63 GMC V6 4speed carryall 65 chevy swb bbw V8 auto 68 K20 327/4 speed, buddy buckets 2002 GMC CC Dually Duramax 64 GMC lwb 3/4 V6 4speed SOLD 66 GMC swb bbw buddy buckets SOLD IG duallyjams The only thing that stays the same is constant change! |
|
|
|
|
09-18-2014, 07:59 AM
|
#5 |
|
Registered User
Join Date: Jan 2012
Location: Eastern Ontario, Canada
Posts: 1,041
|
Re: 55 Wagon Progress
Nice welds as usual! I'd love to have one of the hand held planishing hammers. What lower die did you use?
__________________
1952 Canadian Chevy 1300 C4 IFS & D44 IRS 5.3 HO L33 My Build: http://67-72chevytrucks.com/vboard/s...d.php?t=632938
|
|
|
|
|
09-18-2014, 09:48 AM
|
#6 |
|
Registered User
Join Date: Jan 2013
Location: Leonardtown, MD
Posts: 1,636
|
Re: 55 Wagon Progress
Sid, it was about a 4 or 6" radius die, can't remember which one I ended up using
__________________
Robert |
|
|
|
|
09-20-2014, 05:15 PM
|
#7 |
|
Registered User
Join Date: Jan 2013
Location: Leonardtown, MD
Posts: 1,636
|
Re: 55 Wagon Progress
Here's the passenger side with the welds dressed and mocked up to the grille....
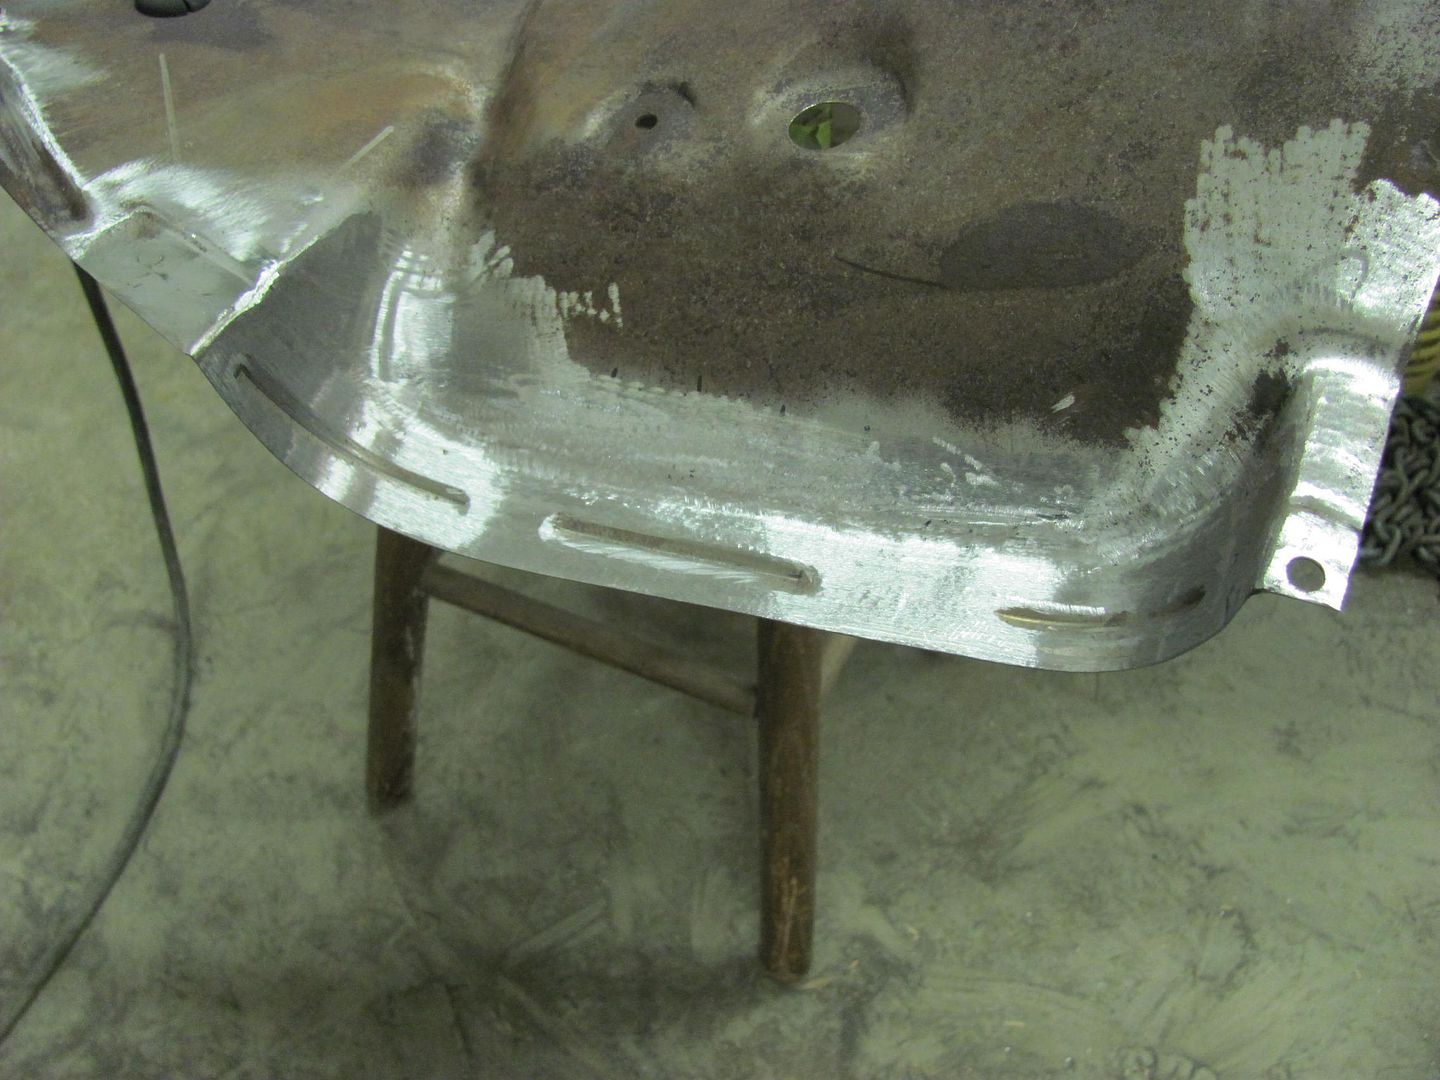 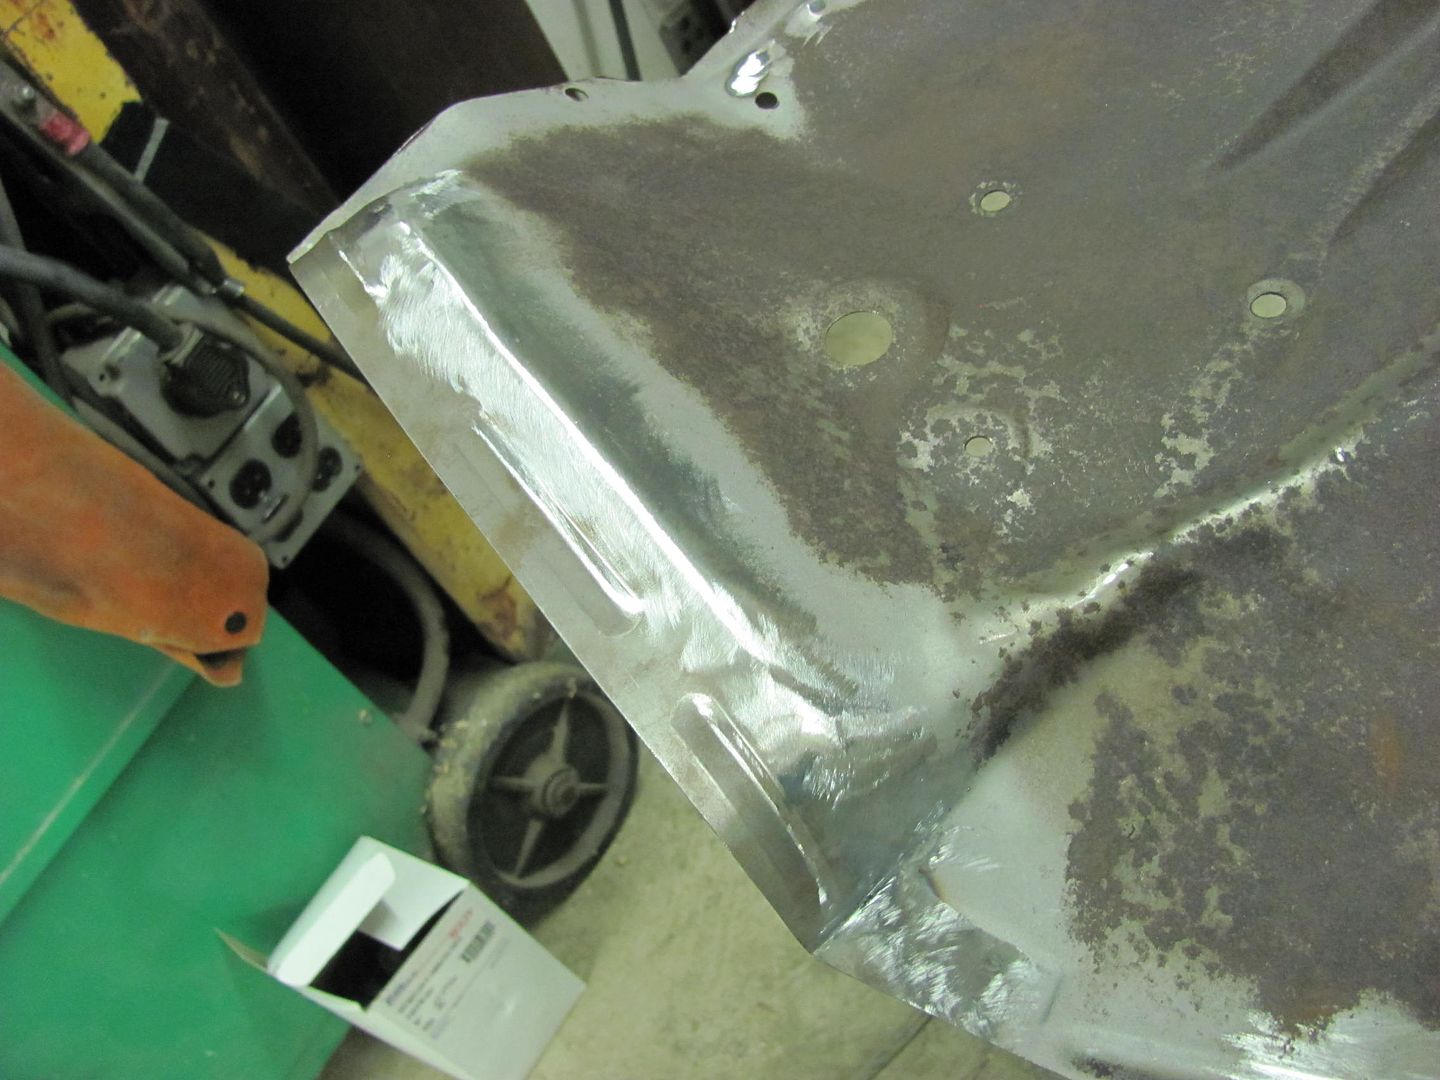 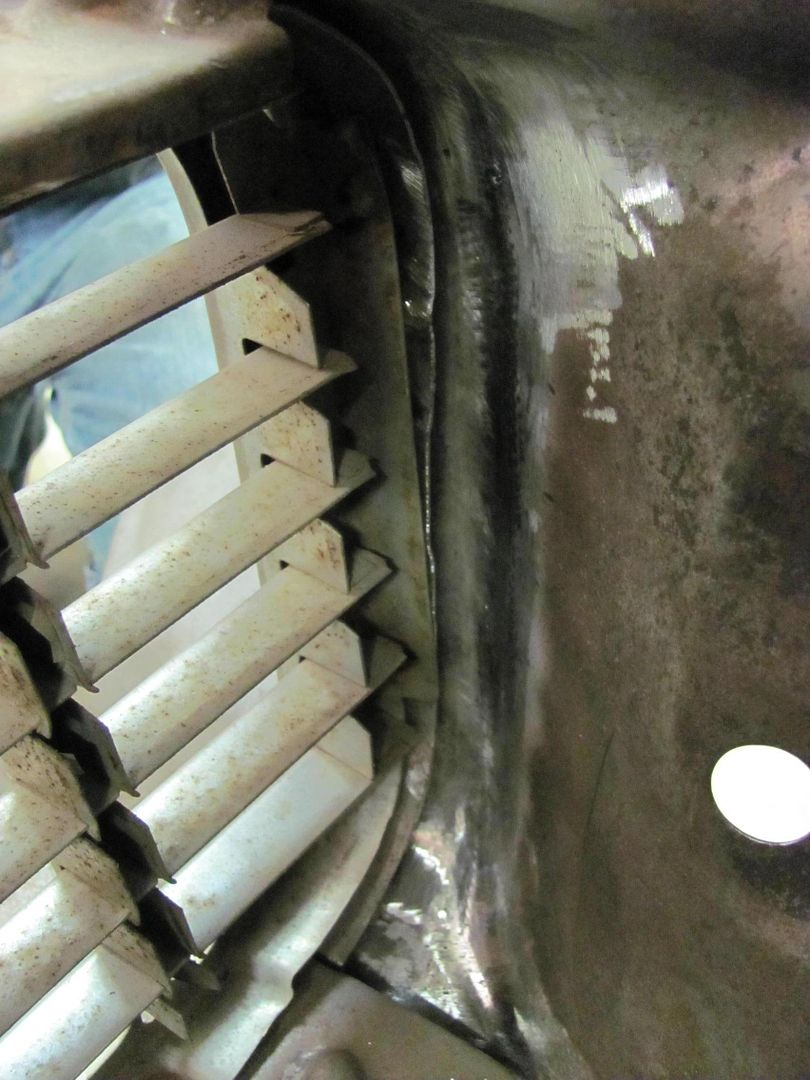 While Kyle media blasted the passenger side, I did some finish work on the driver's side. We still had this up at the top to fix... 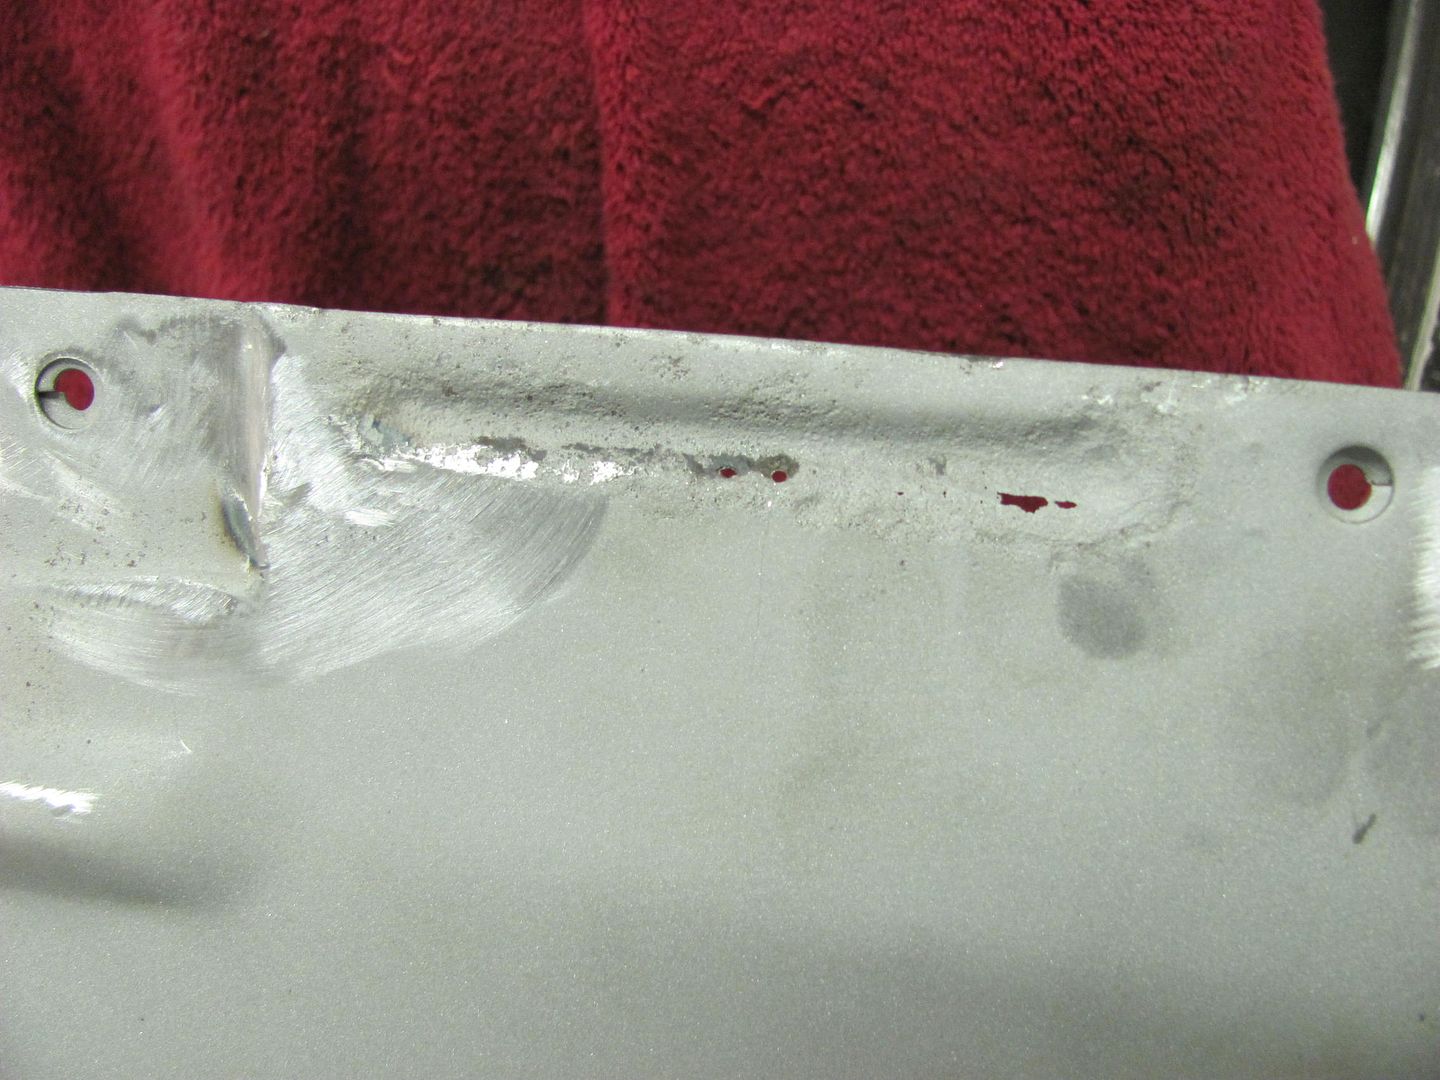 A replacement was made and marked out on the inner fender.. 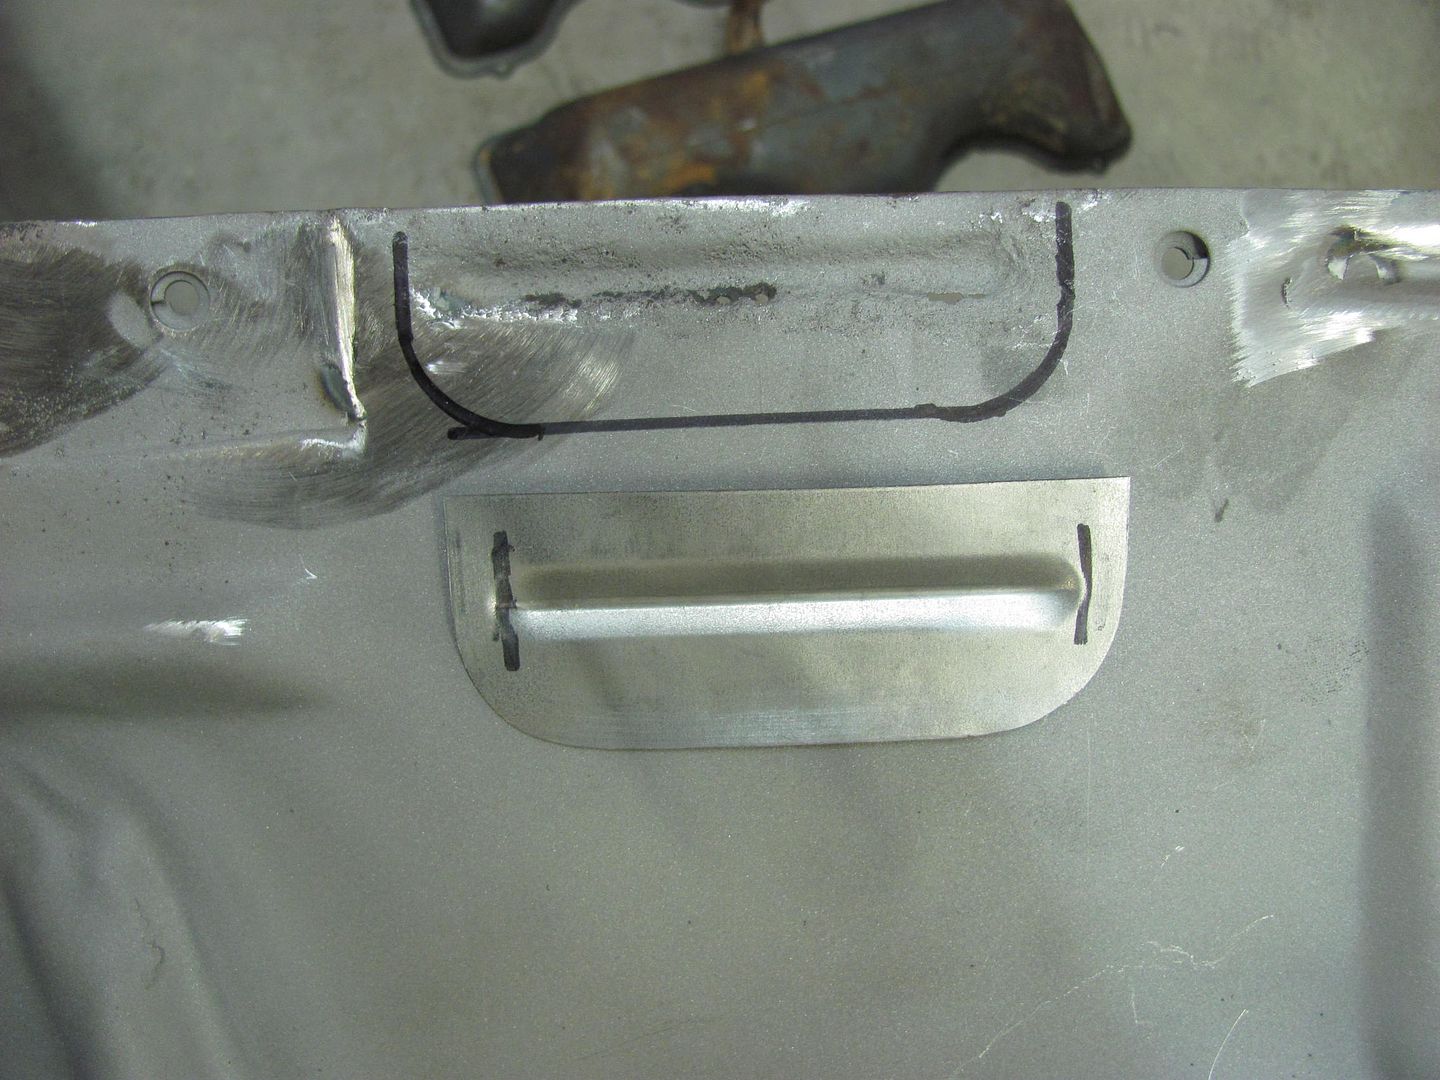 Took a reference measurement to insure any shrinking effects were properly planished out... 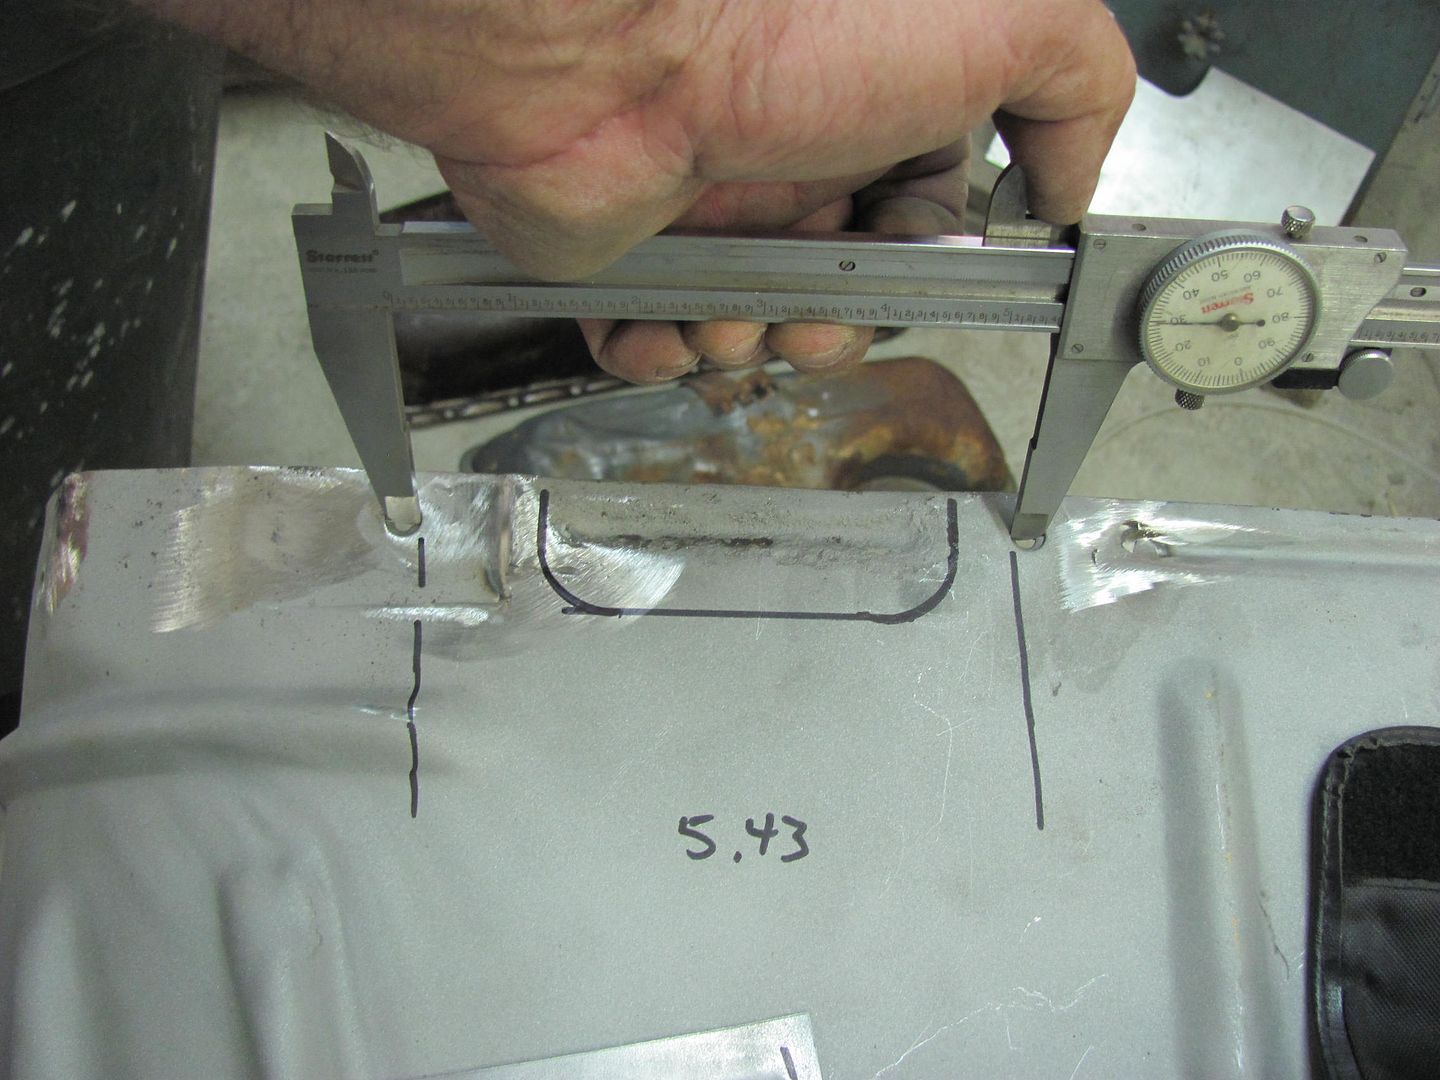 Ice pick works well in marking the cutout pattern... 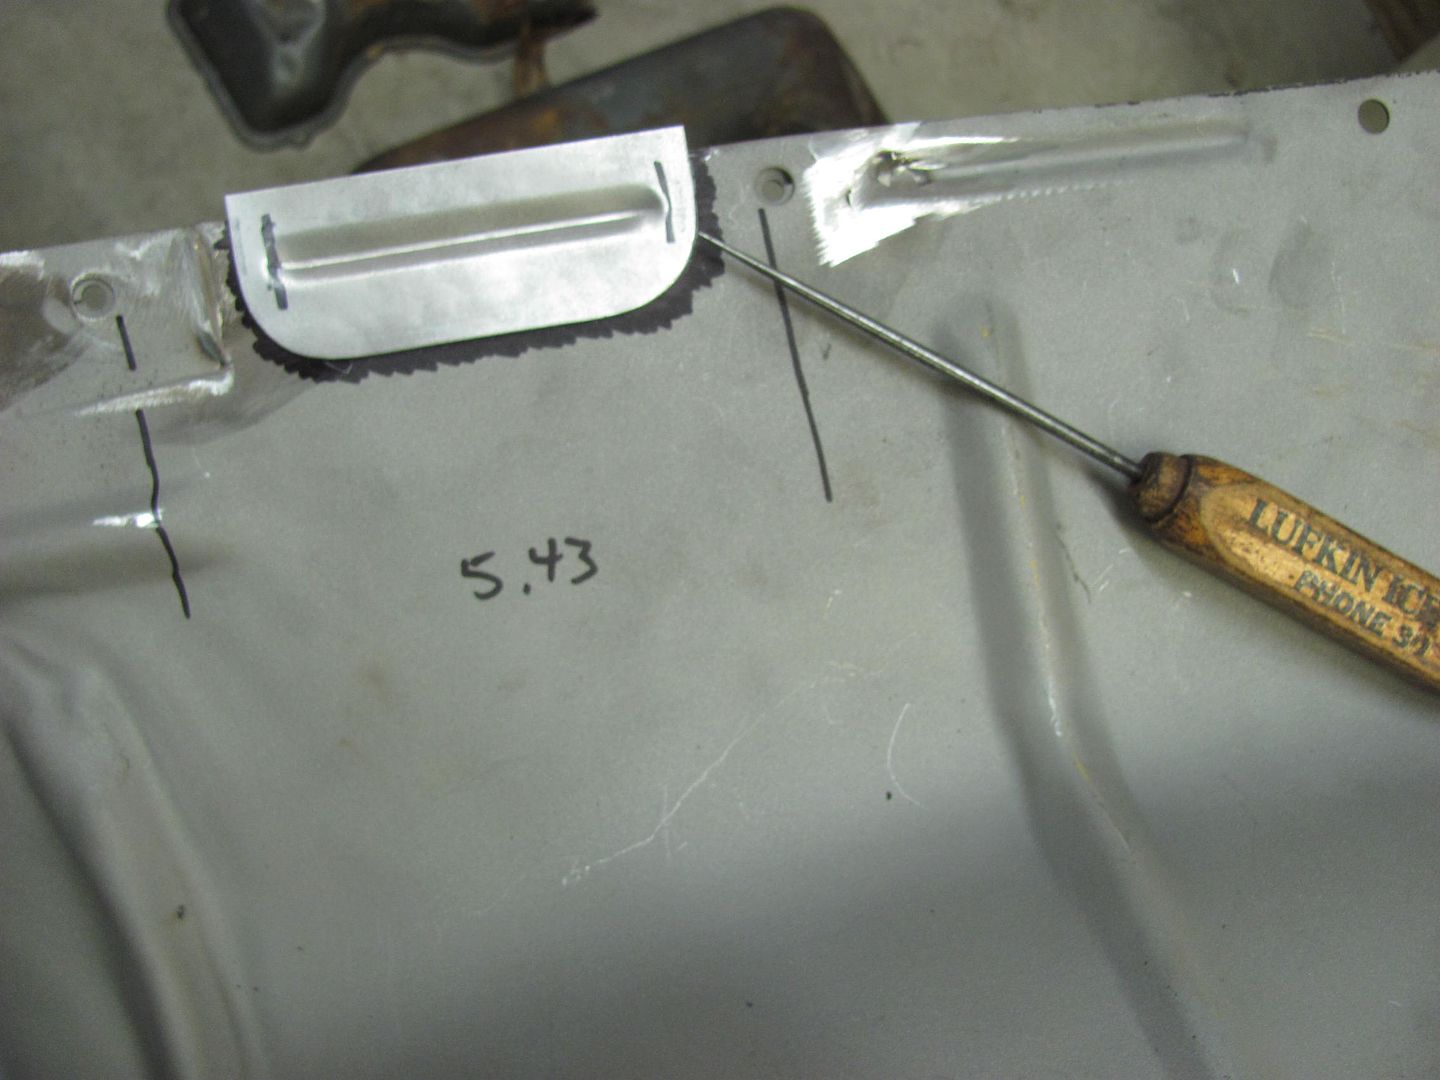 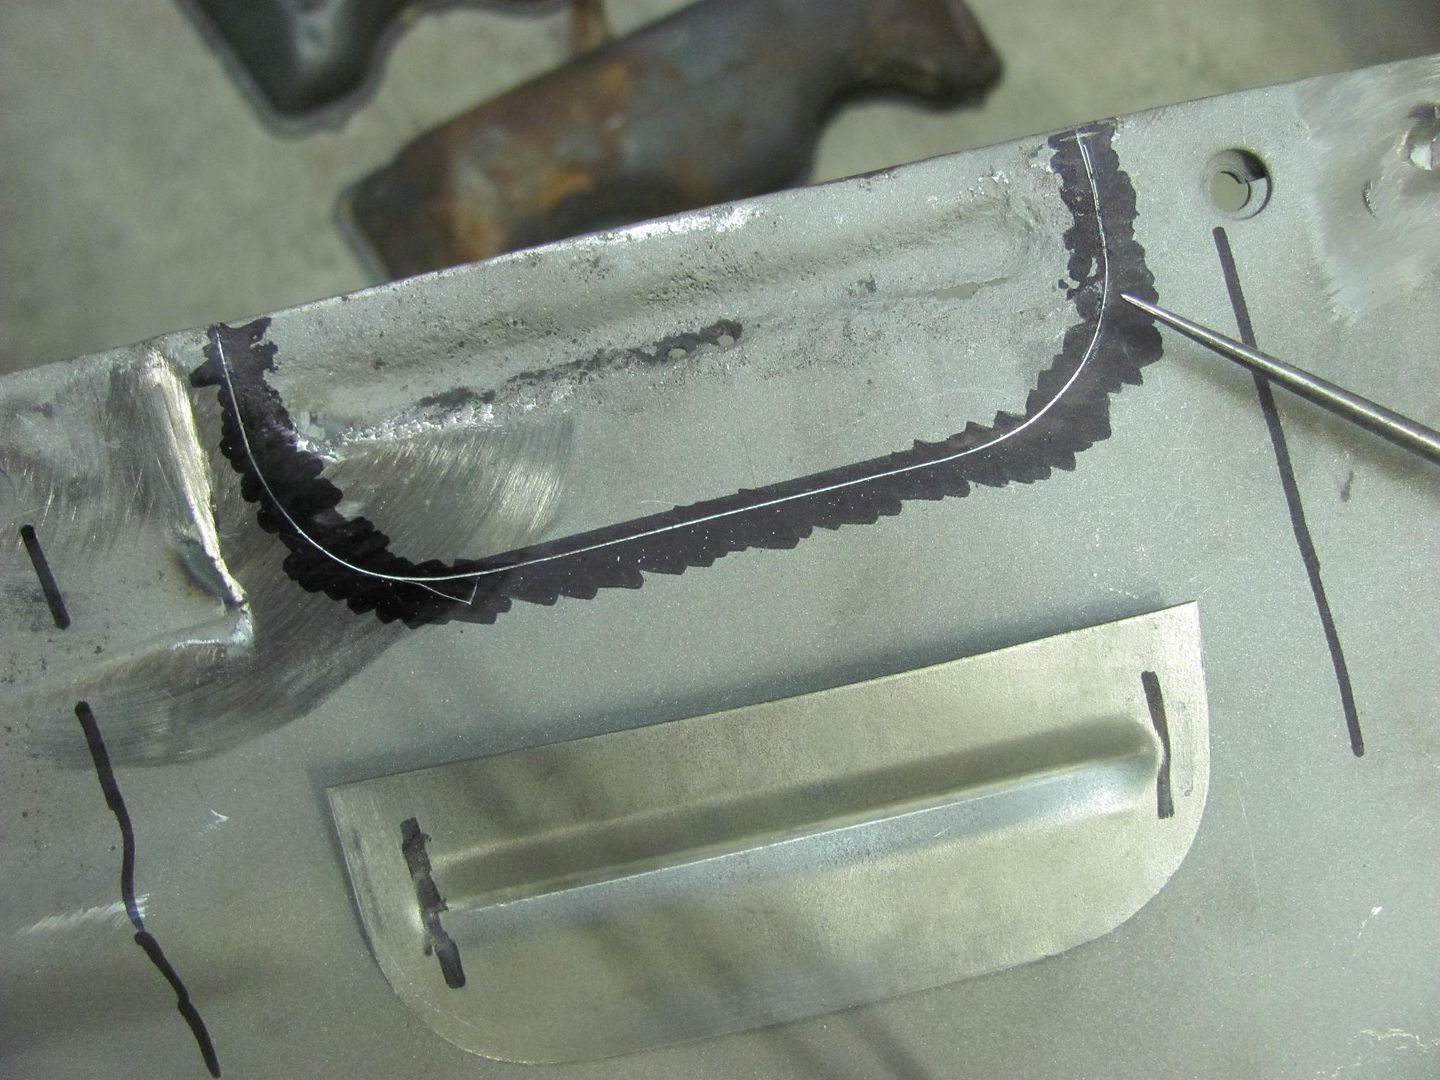 Trimmed and fitted 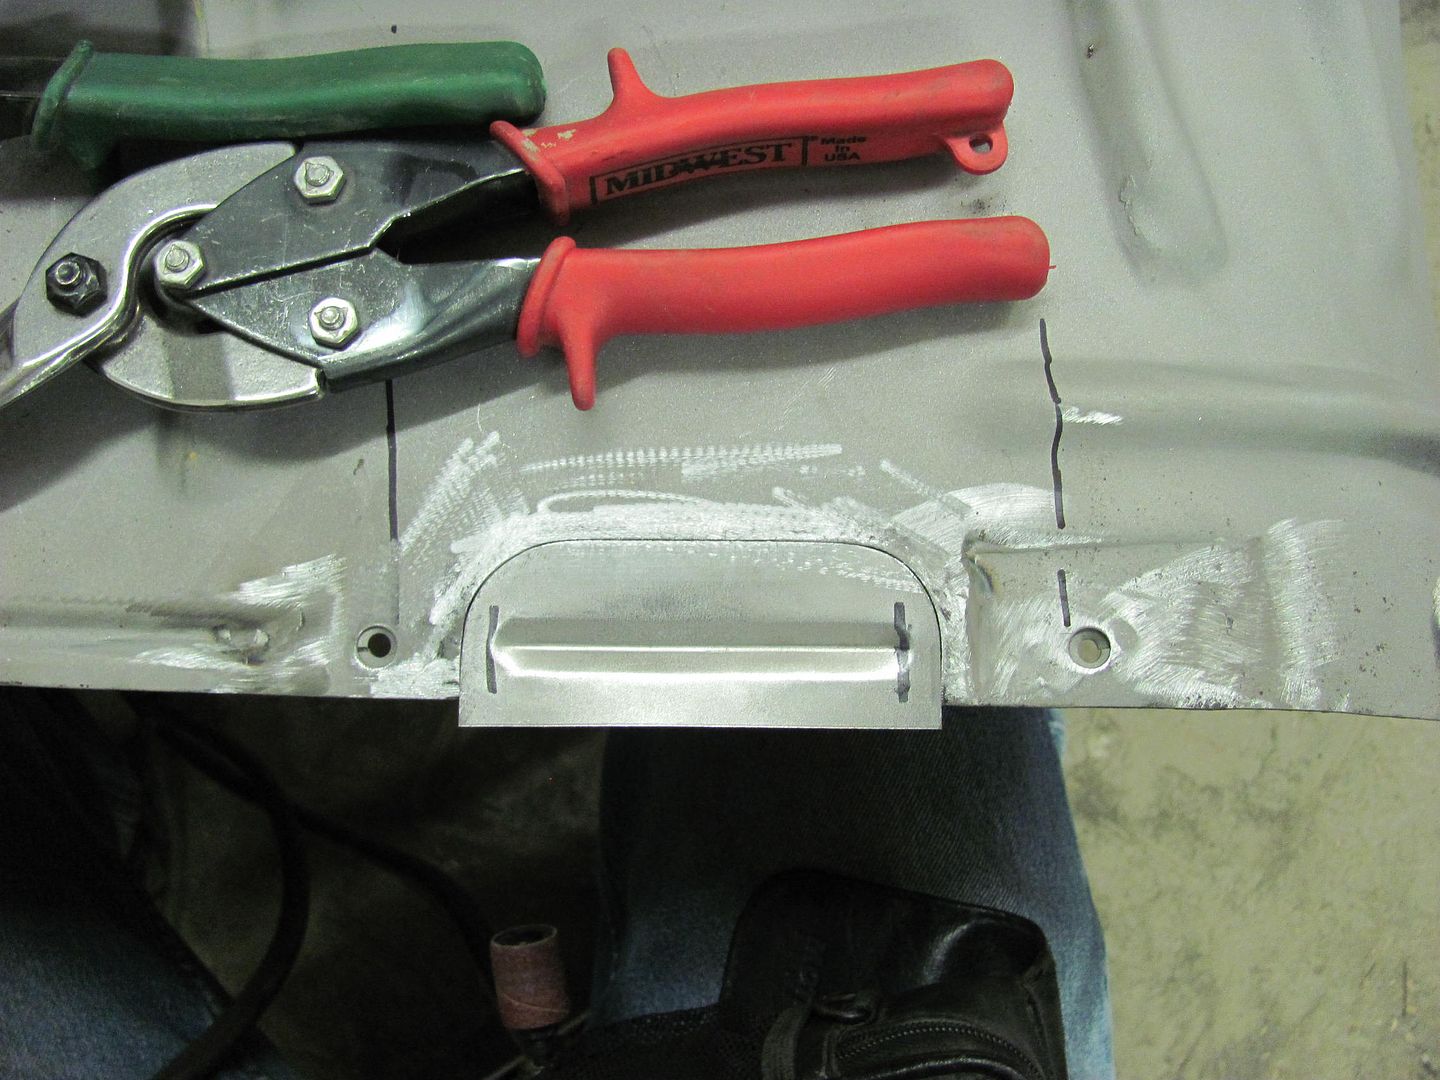 Tacked in place... 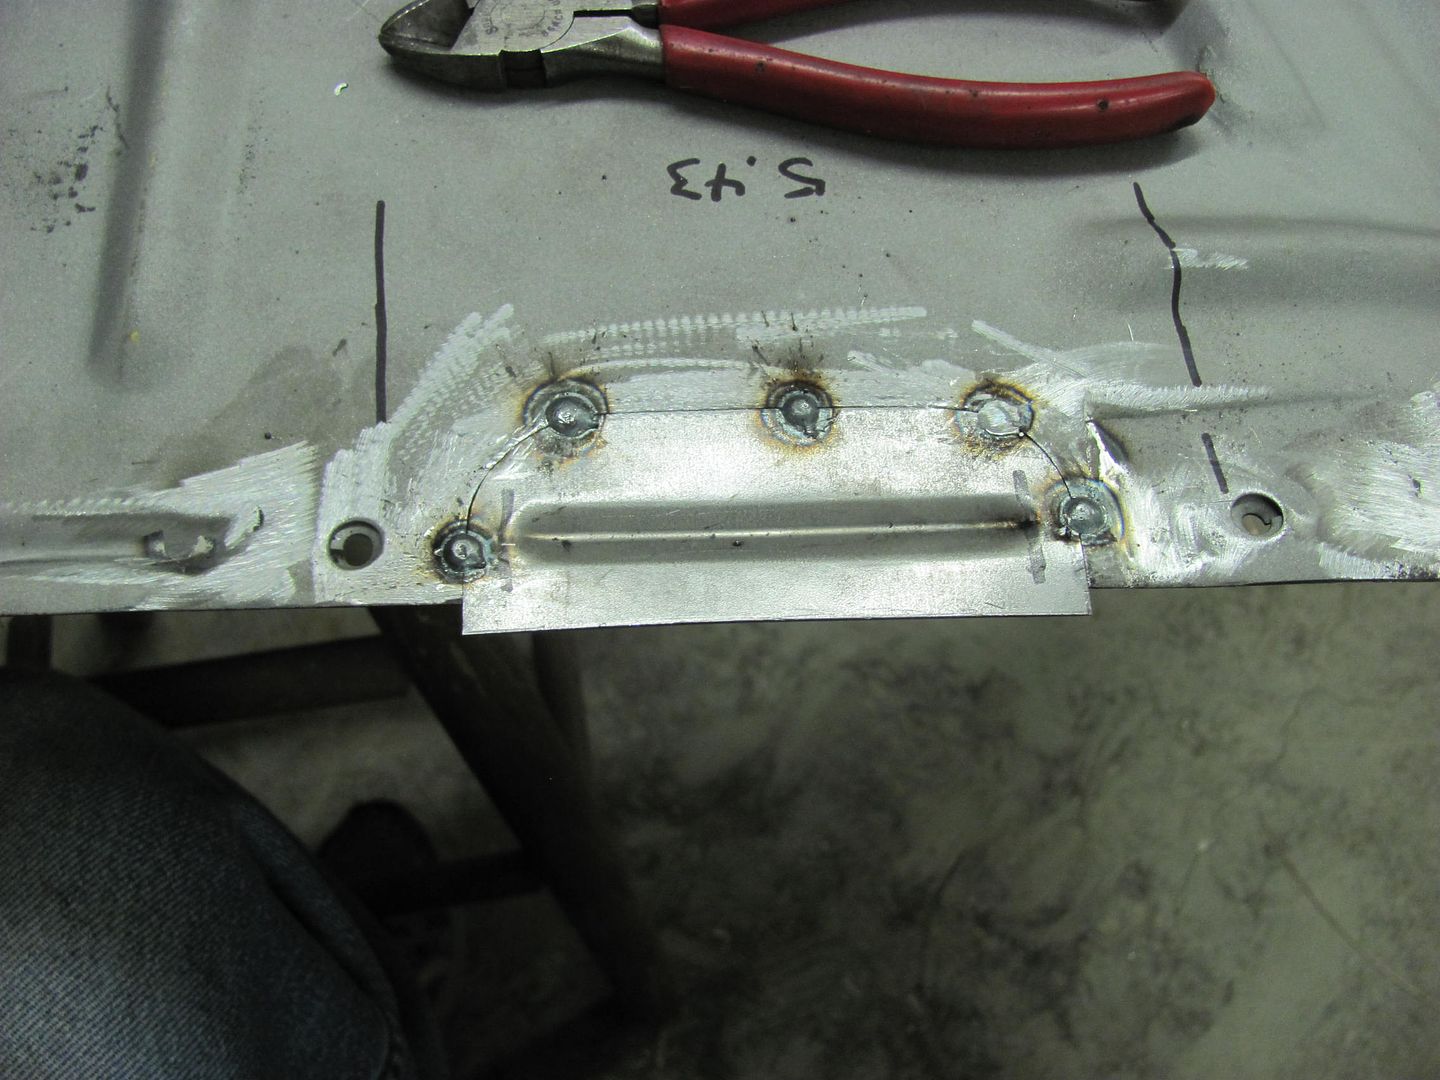 Rear side 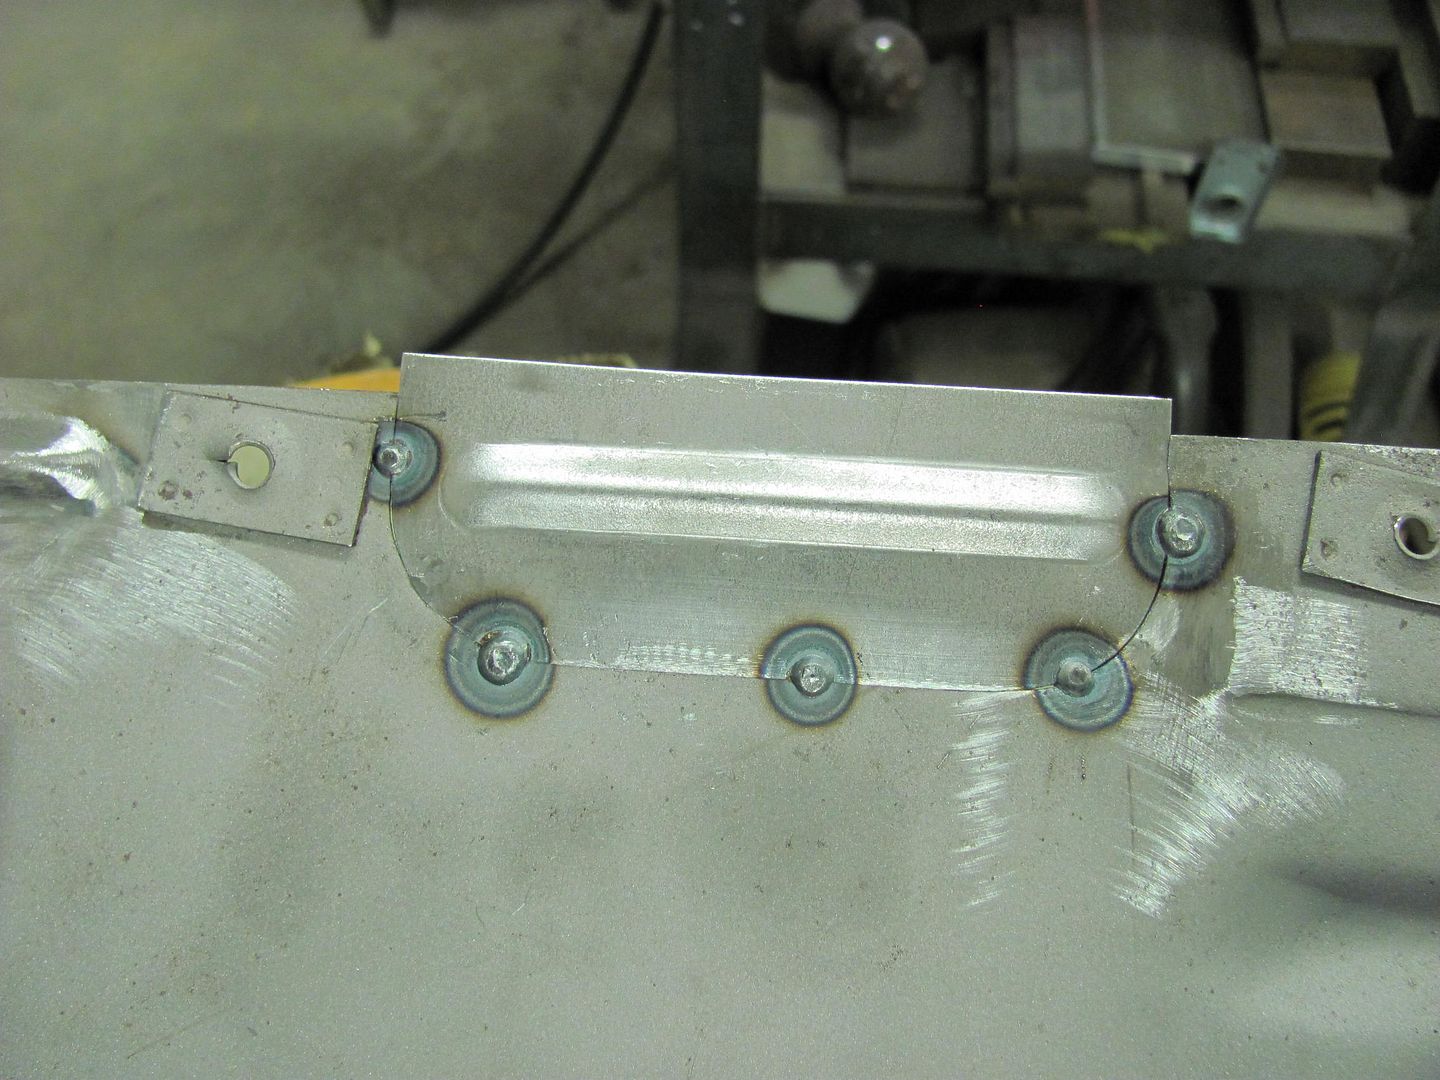 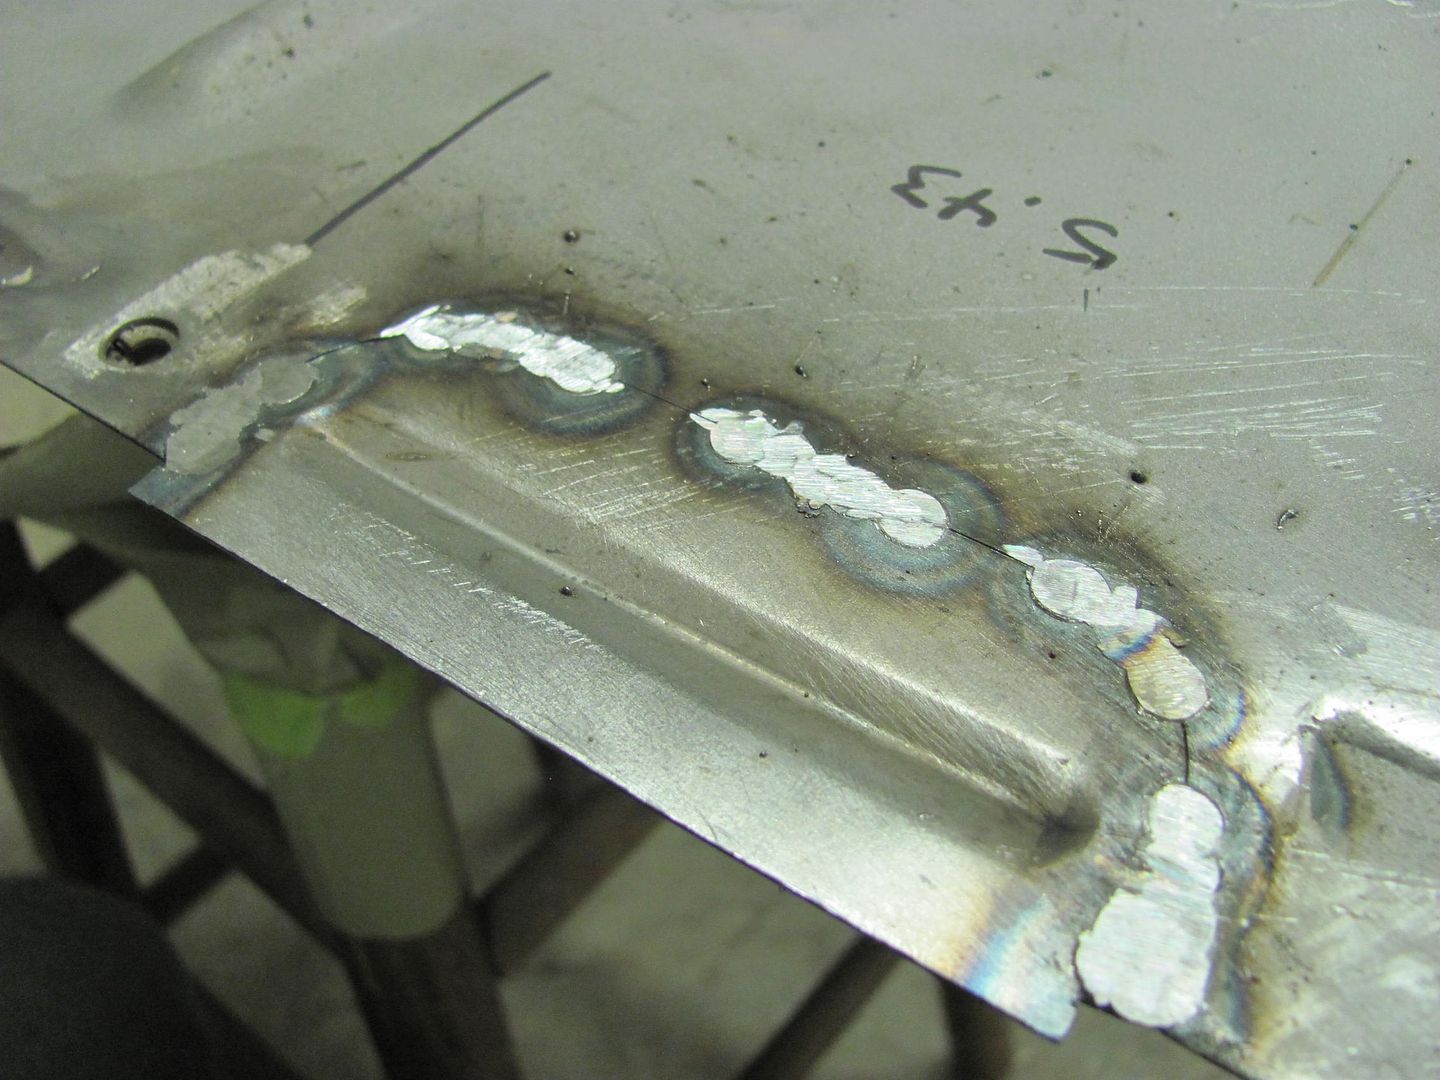 After planishing and dressing the welds, re-checking the reference measurement.... 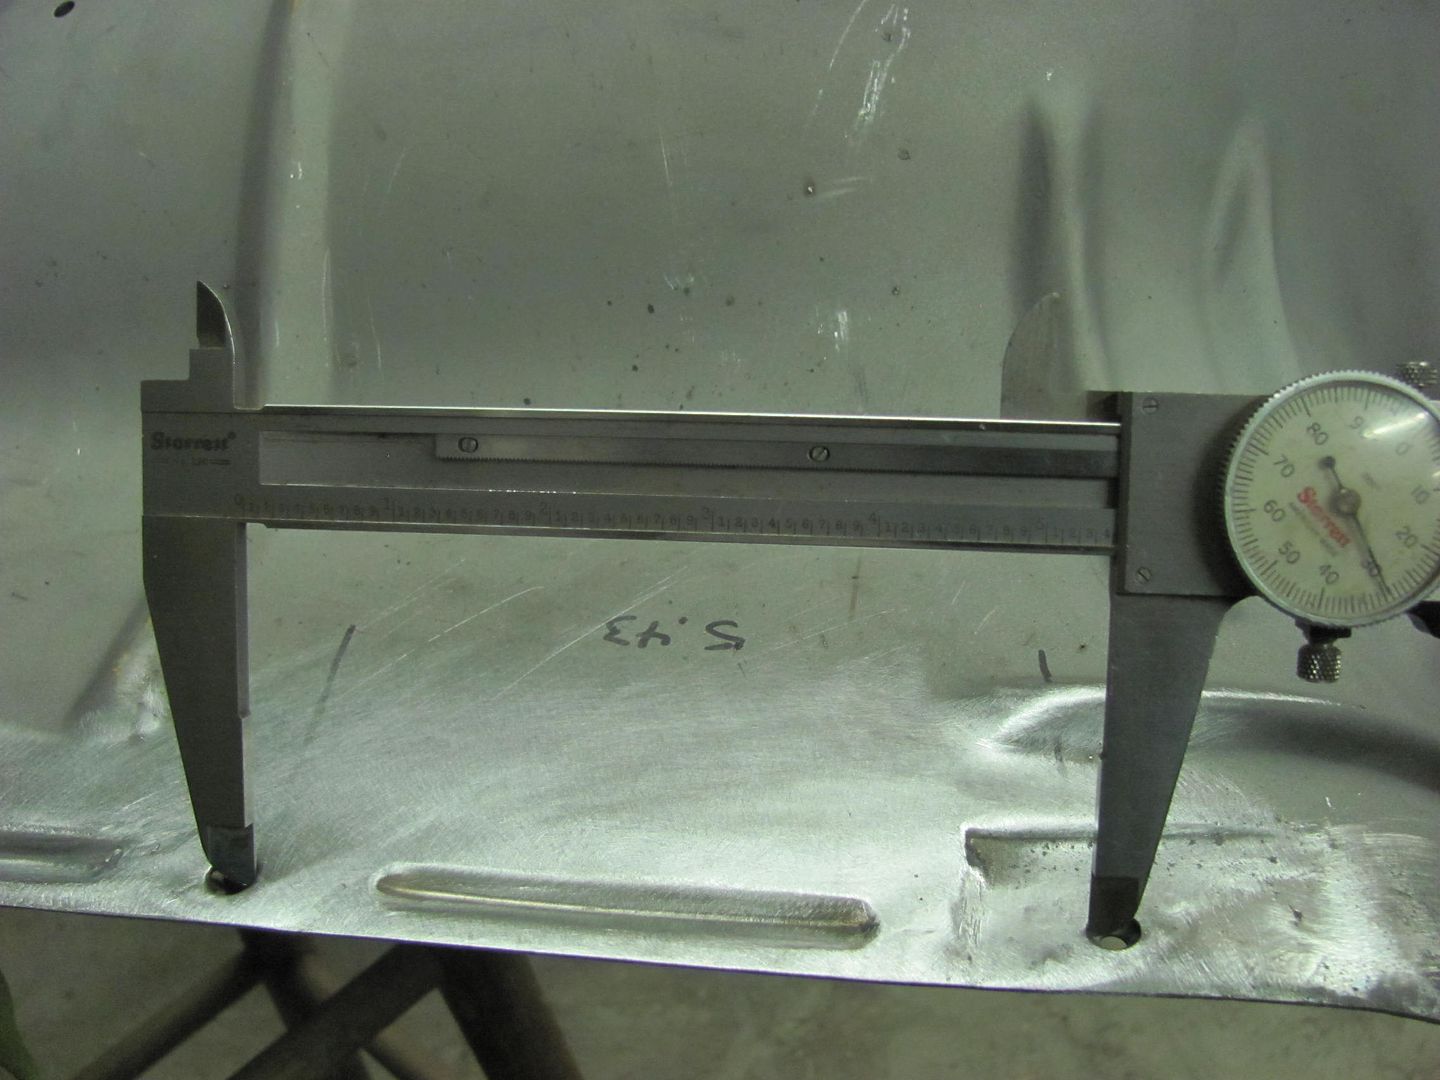 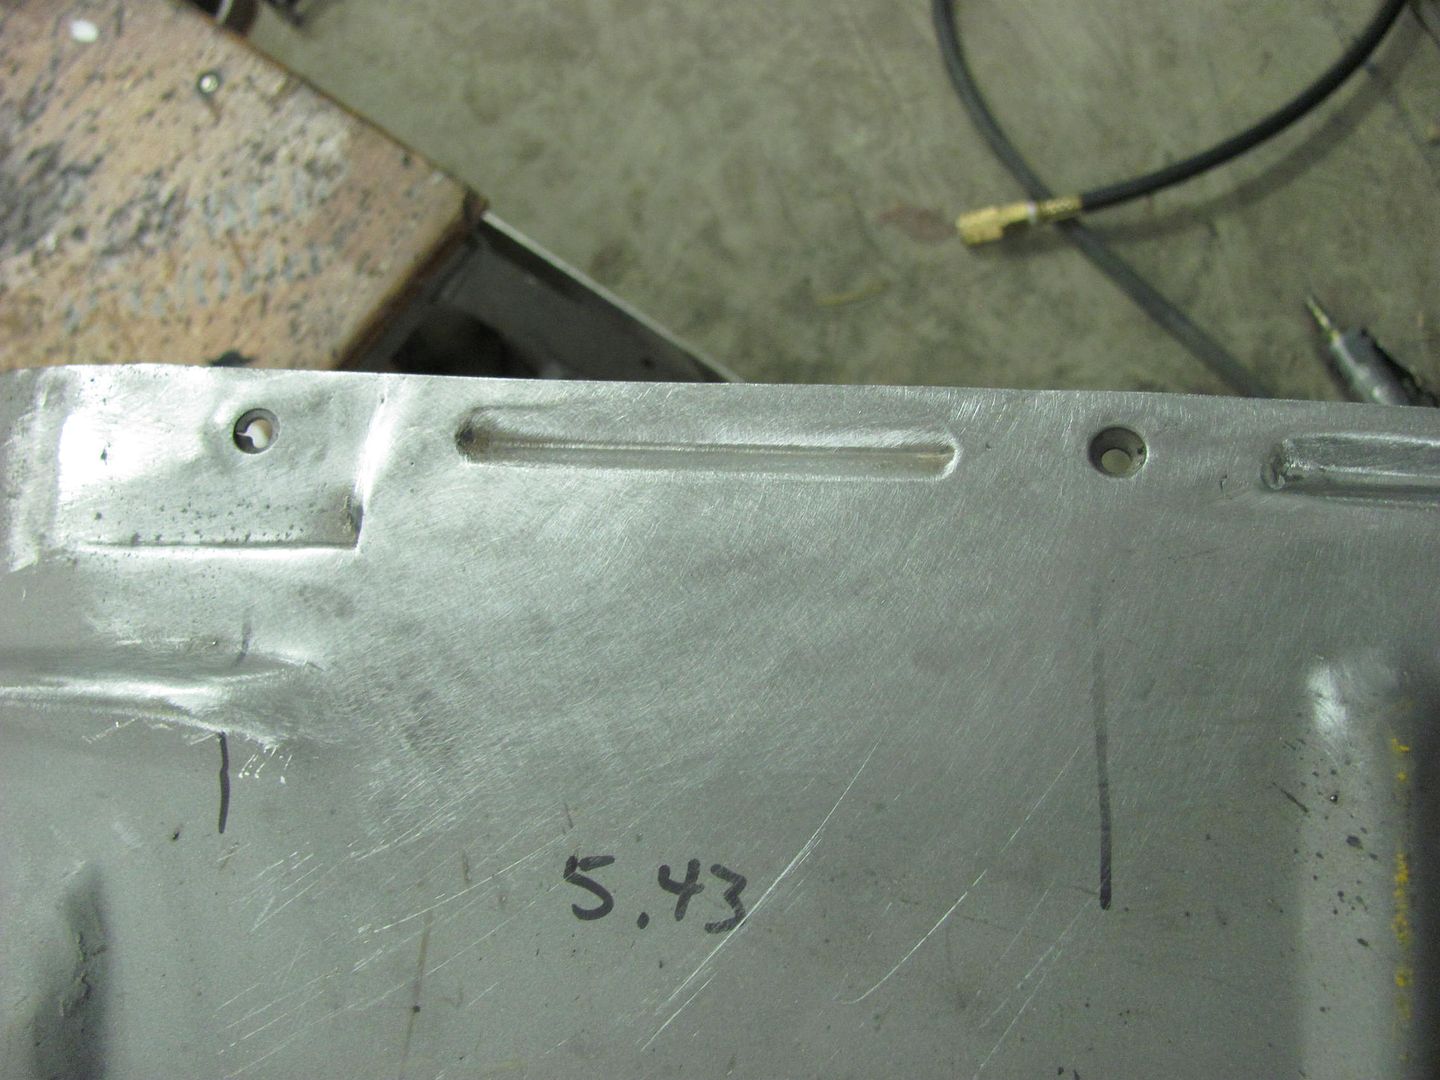 Passenger side complete.... 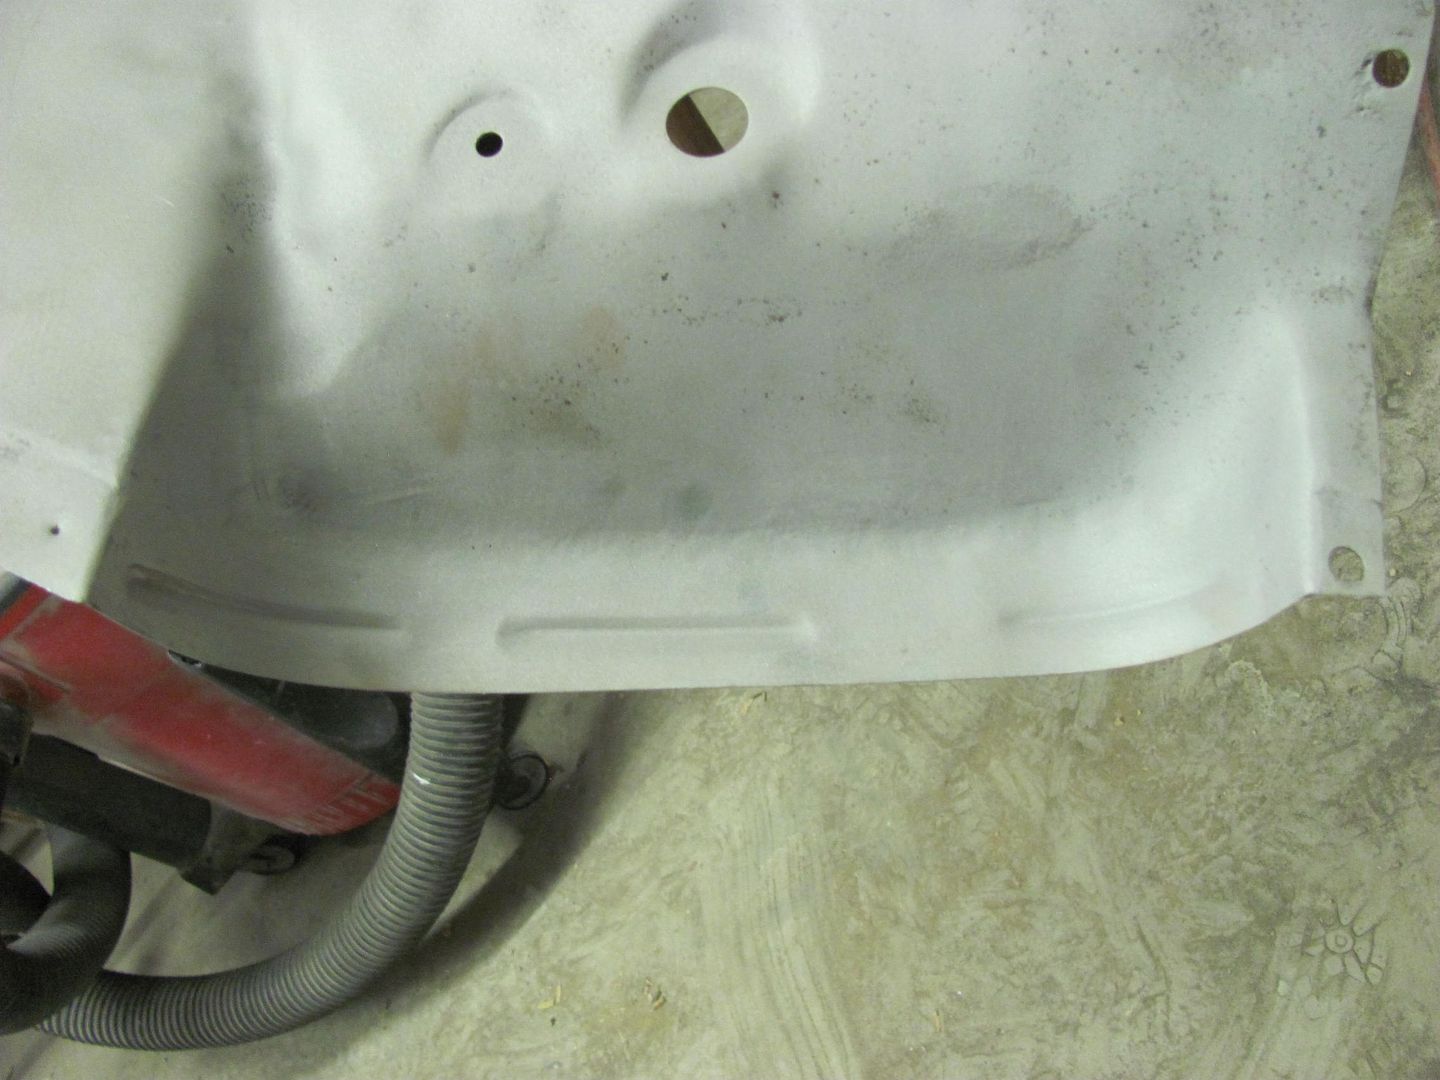 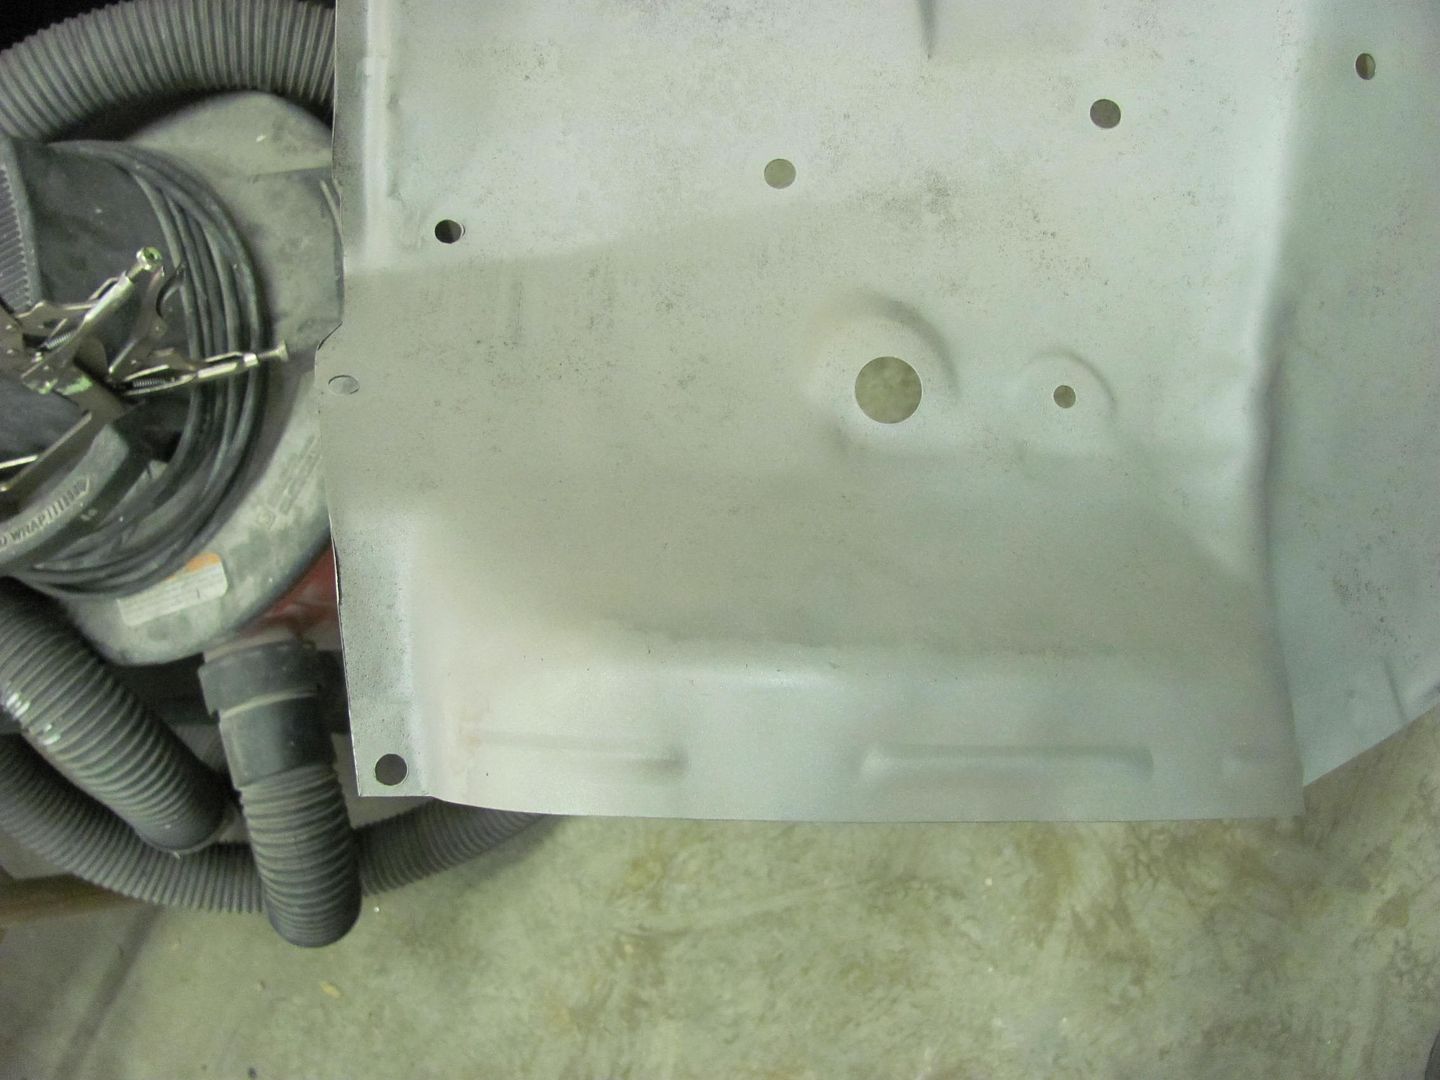 Driver's side complete..... 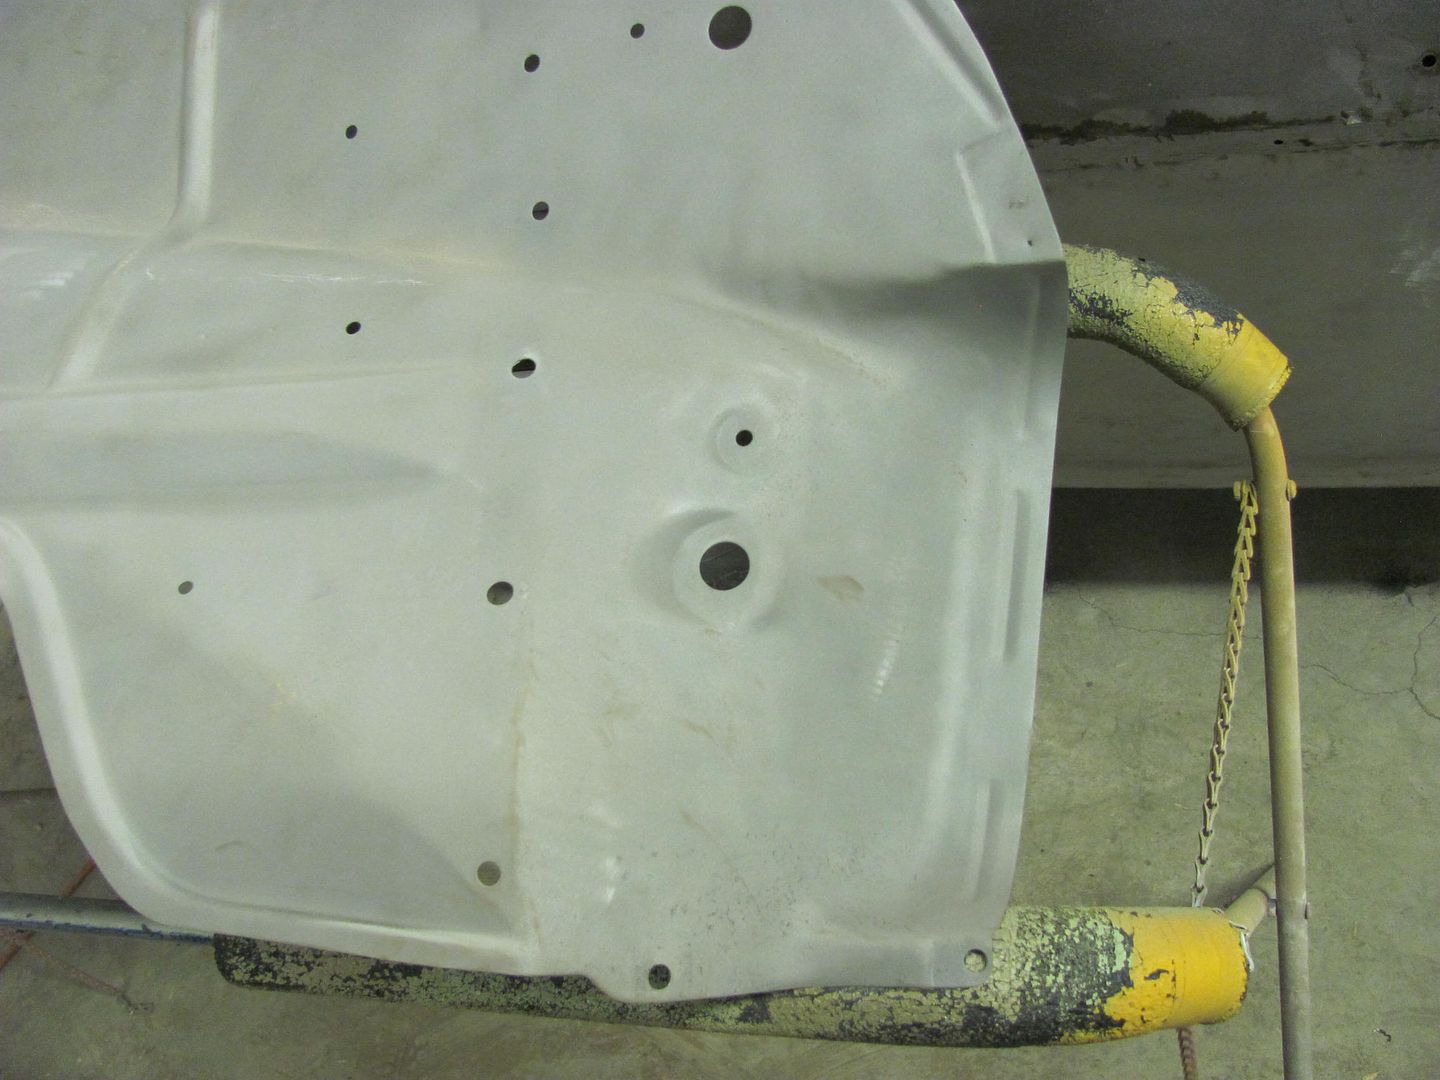 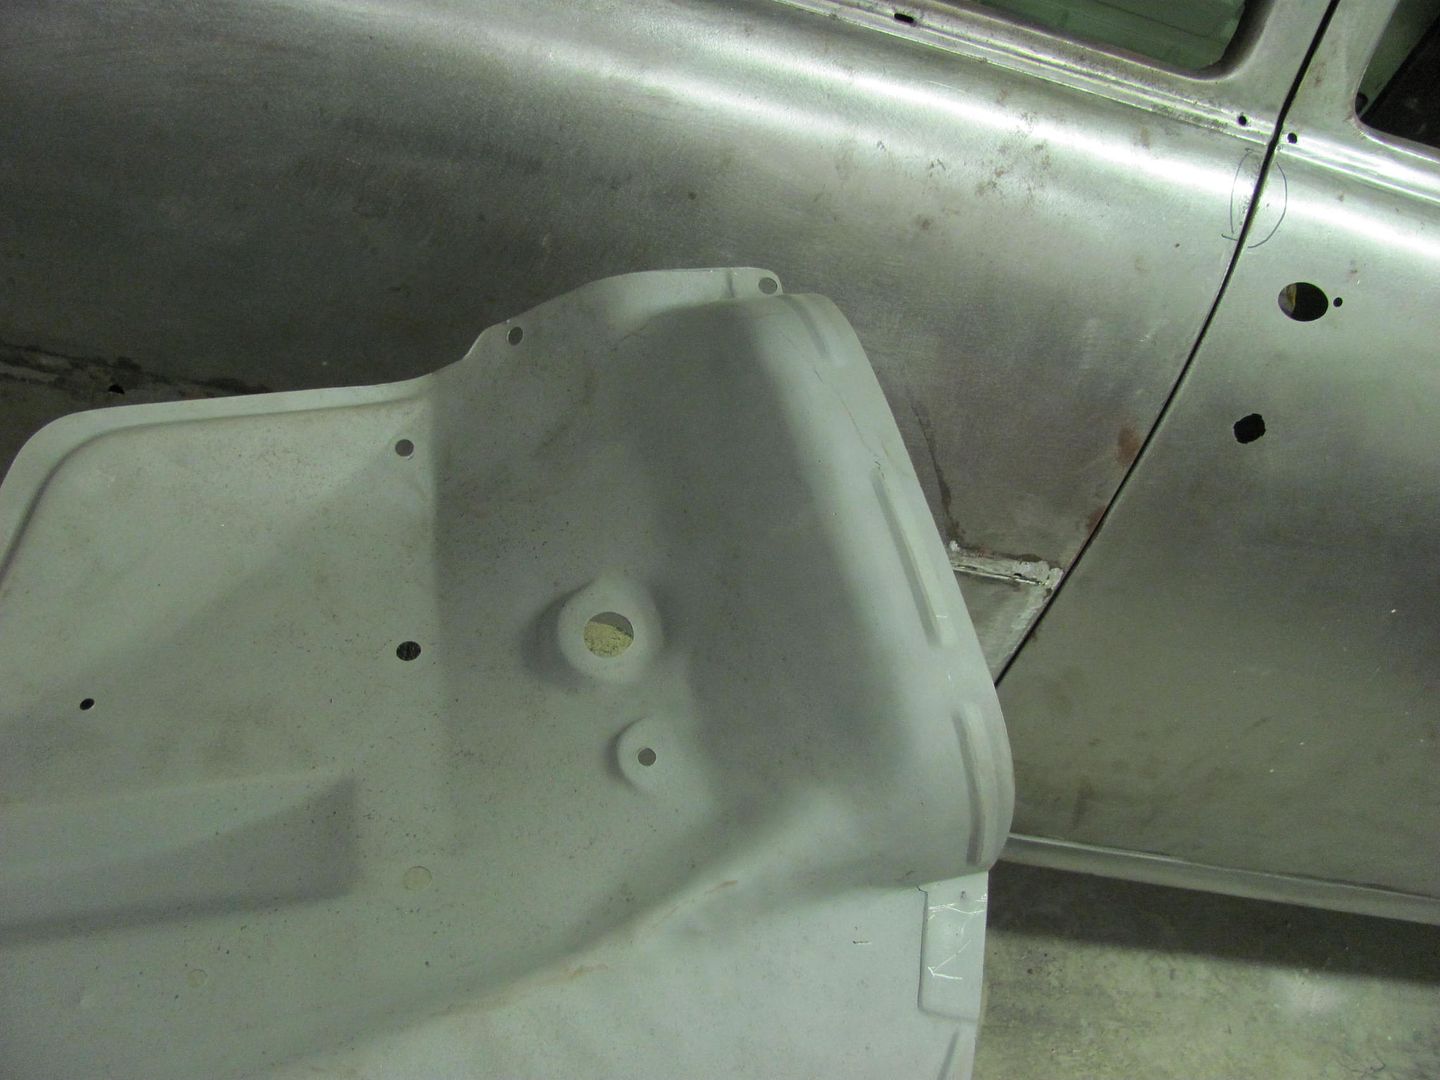 Next task will be to assemble the battery tray and send off the goodies for powder coating.
__________________
Robert |
|
|
|
|
09-20-2014, 11:02 PM
|
#8 |
|
Senior Member
Join Date: Jul 2012
Location: Oblong, Illinois
Posts: 7,017
|
Re: 55 Wagon Progress
Very nice work! Like the bead roller and shrinker too.
|
|
|
|
|
09-21-2014, 10:50 AM
|
#9 |
|
Registered User
Join Date: Apr 2011
Location: .
Posts: 3,104
|
Re: 55 Wagon Progress
Seeing your work keeps me on target.
You make it look like there was never any repair at all. Top Notch |
|
|
|
|
09-24-2014, 10:52 PM
|
#10 |
|
Registered User
Join Date: Jan 2013
Location: Leonardtown, MD
Posts: 1,636
|
Re: 55 Wagon Progress
Thanks for the comments guys!
Tonight we worked on fitting the new Gene Smith grille components. It started with the mandatory instructions... 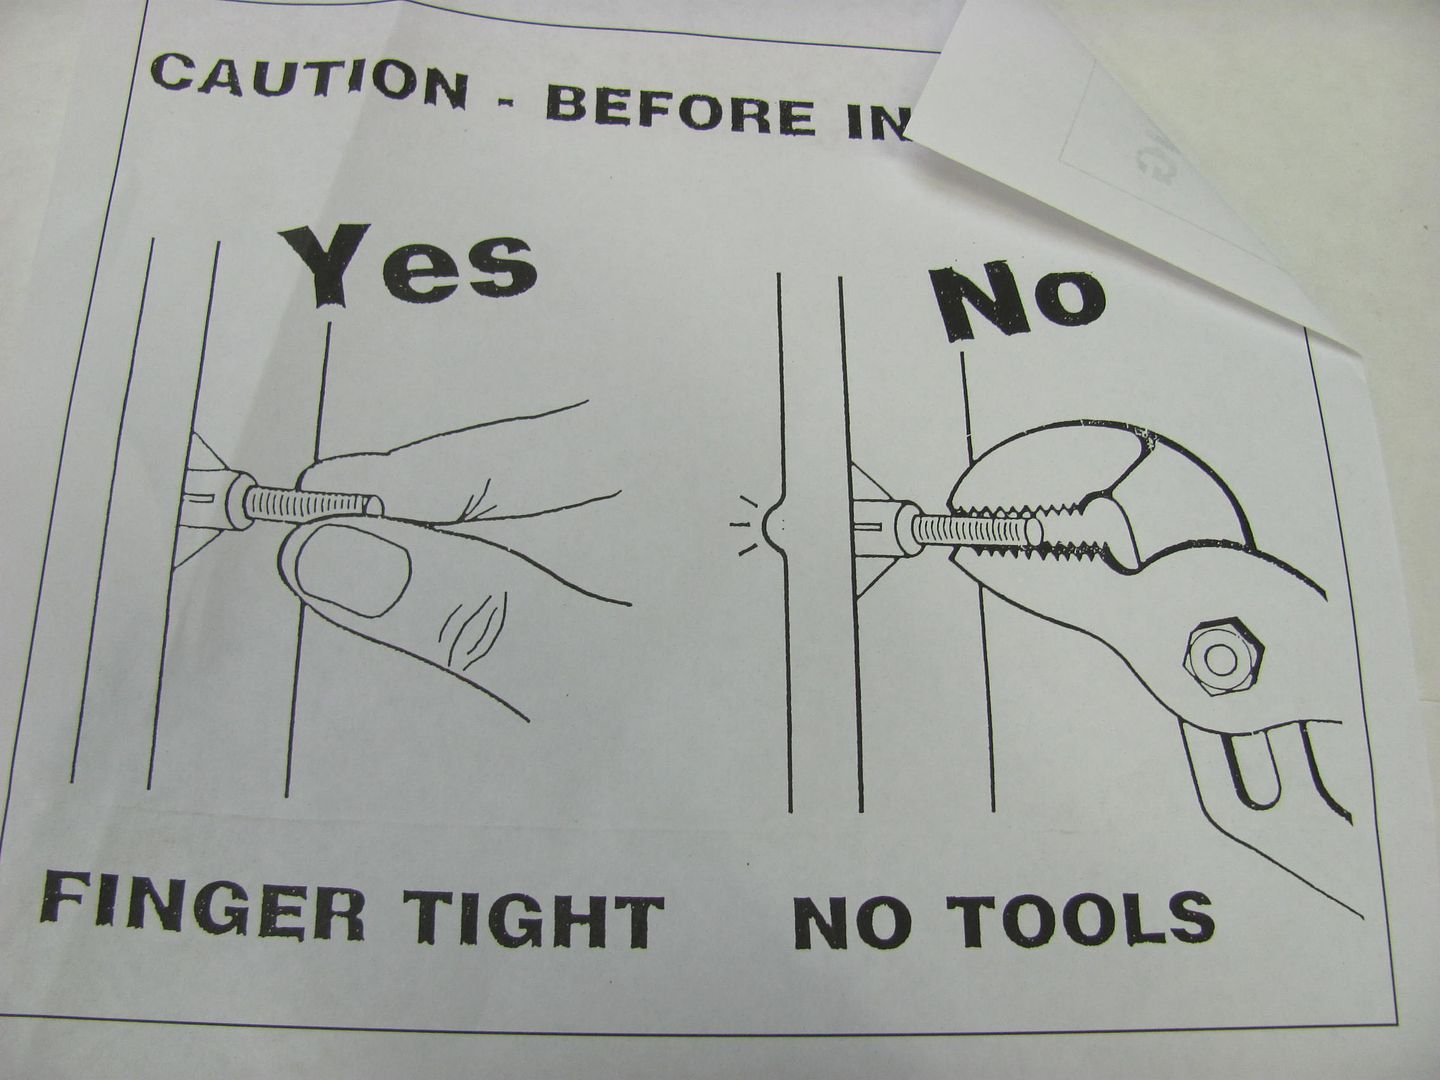 To insure the studs didn't move once hand tightened, some thread lock stuff was used... We did find the qty of hardware was short by two each, and after a quick call to Gene Smith, Fred has some on the way for us.. 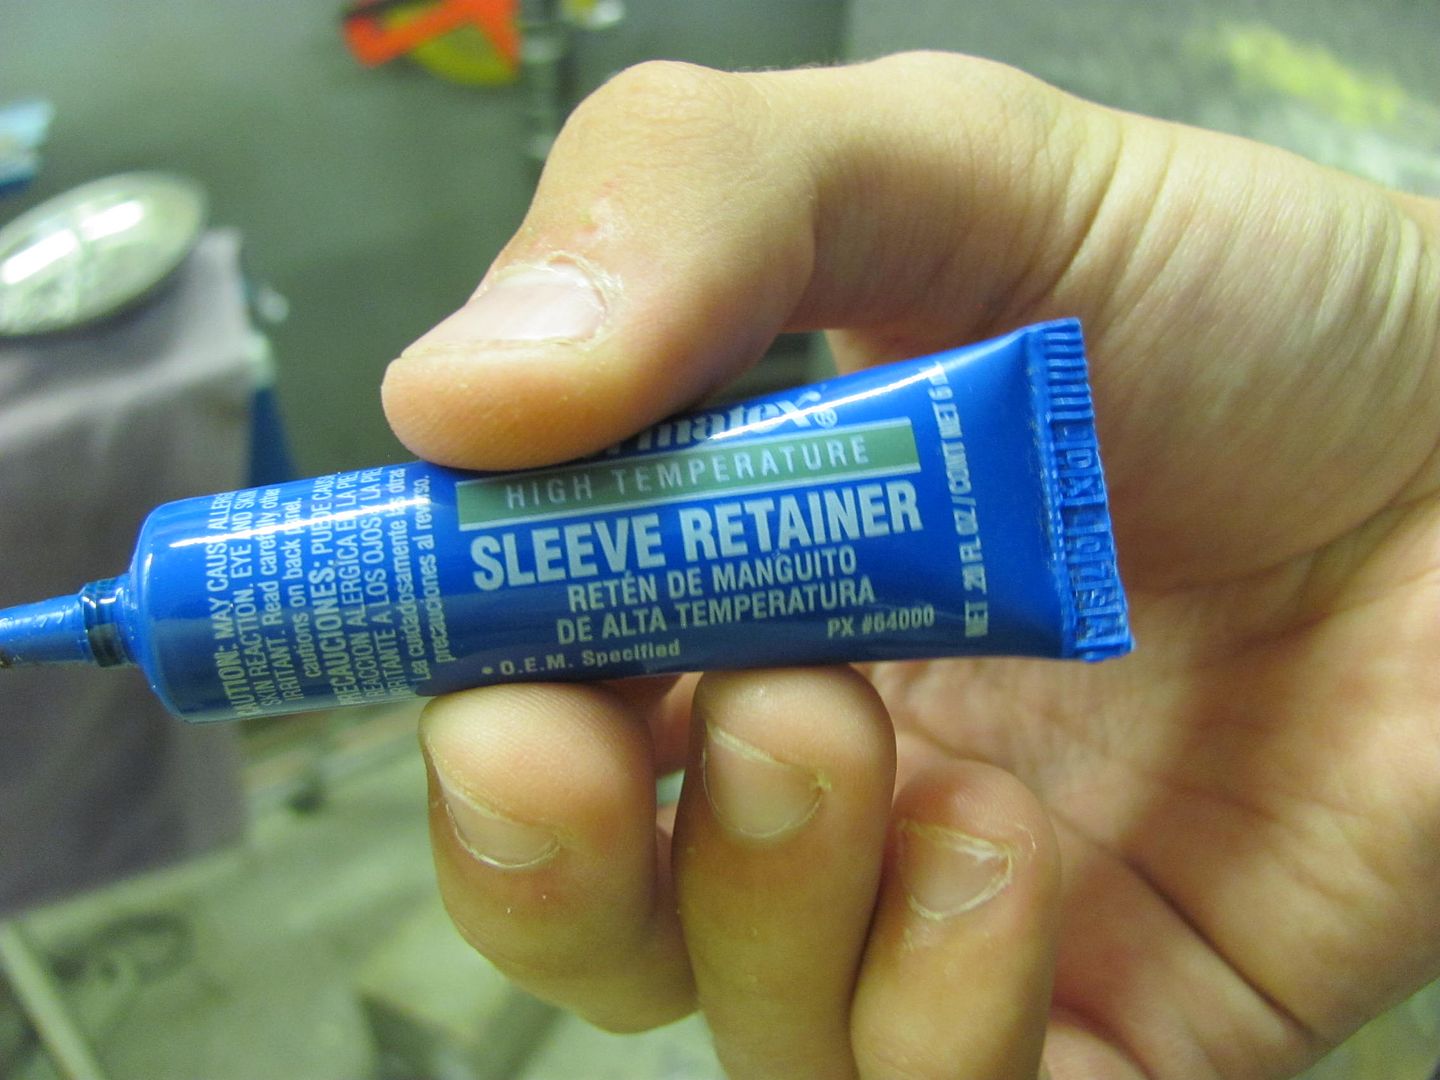 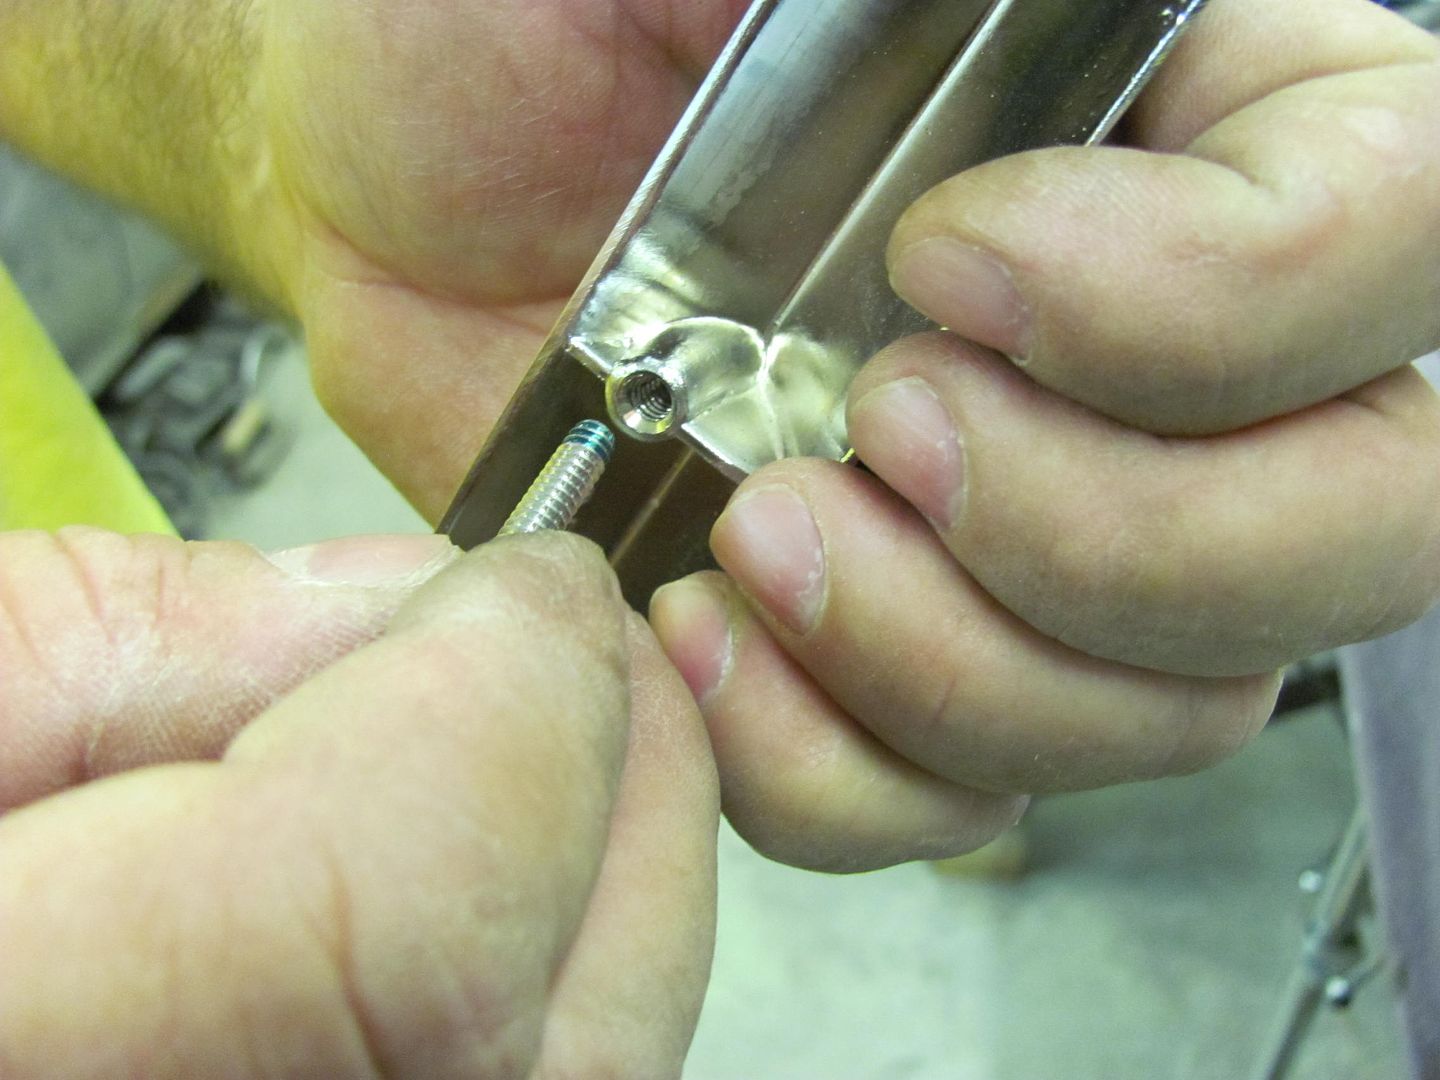 The new grille fits just like the old one, it is VERY tight in the top corners.. 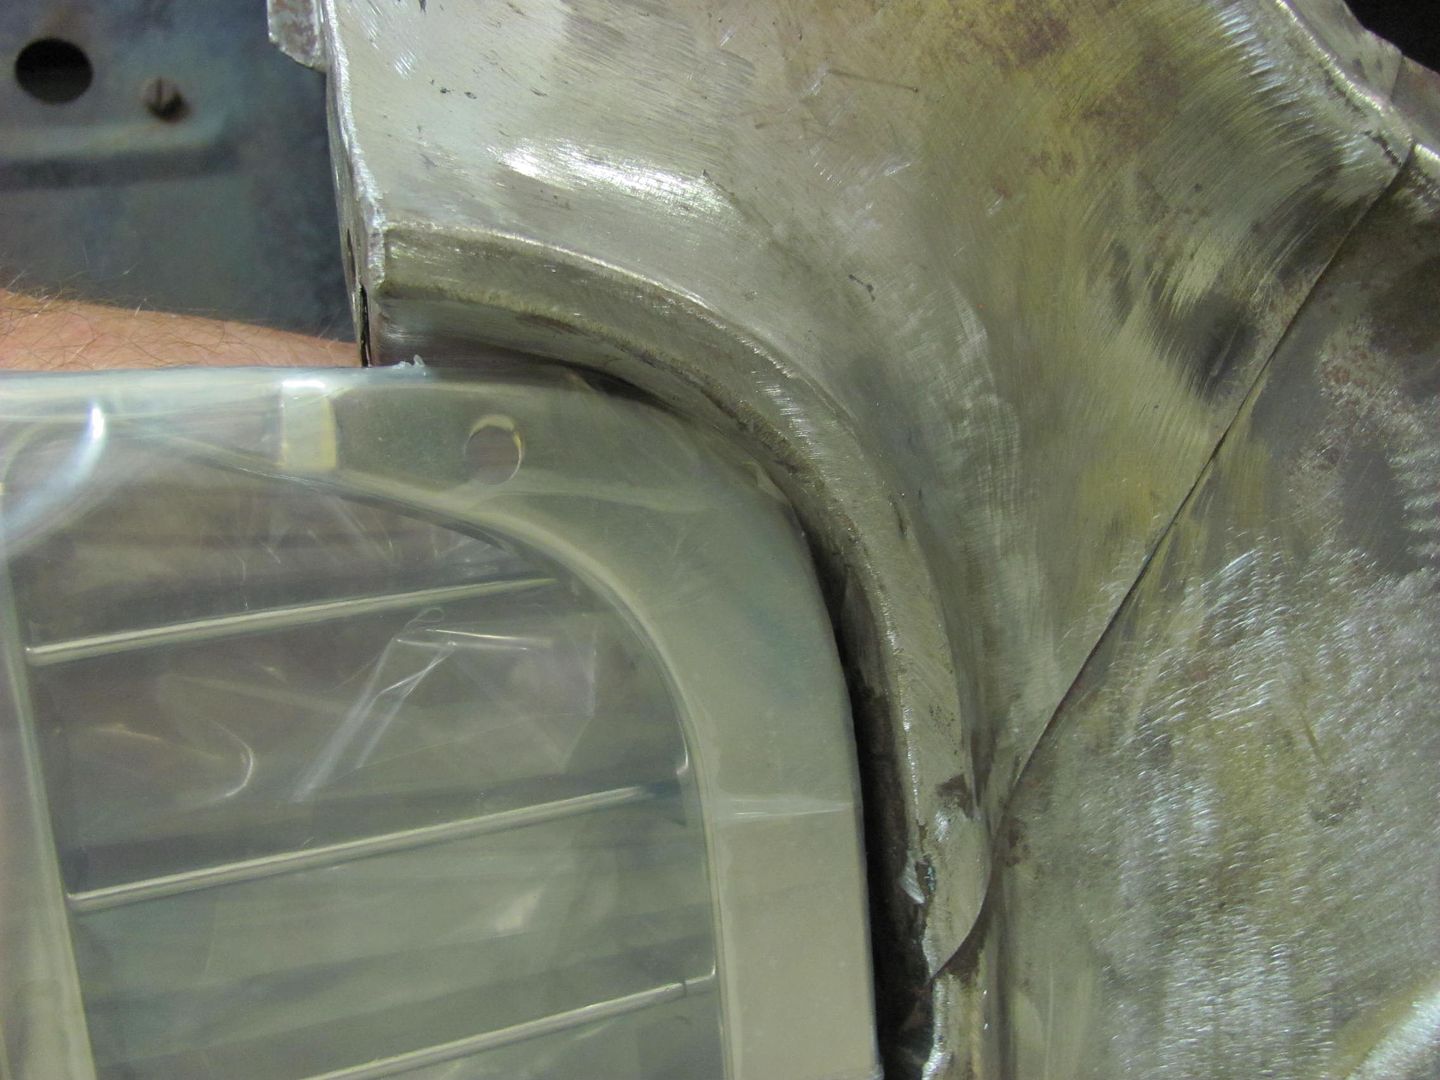 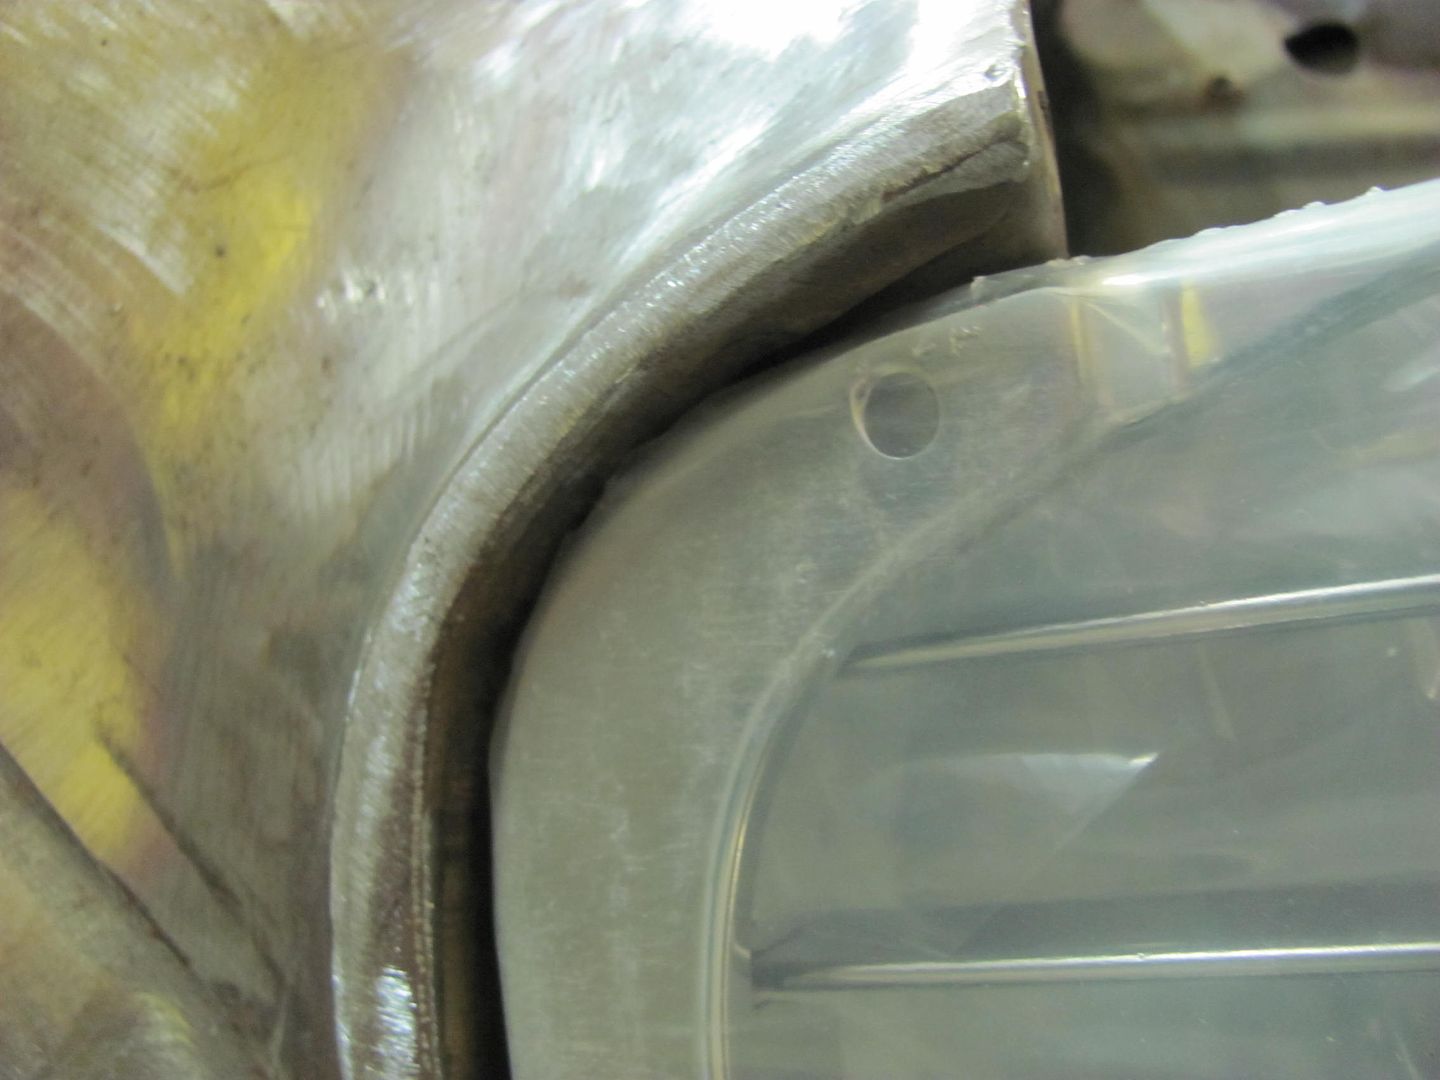 To eliminate the paint rub syndrome and other possible front end squeaks from metal on metal, some templates were made so we can do some hammering on the new grille... and keep a consistent distance between. 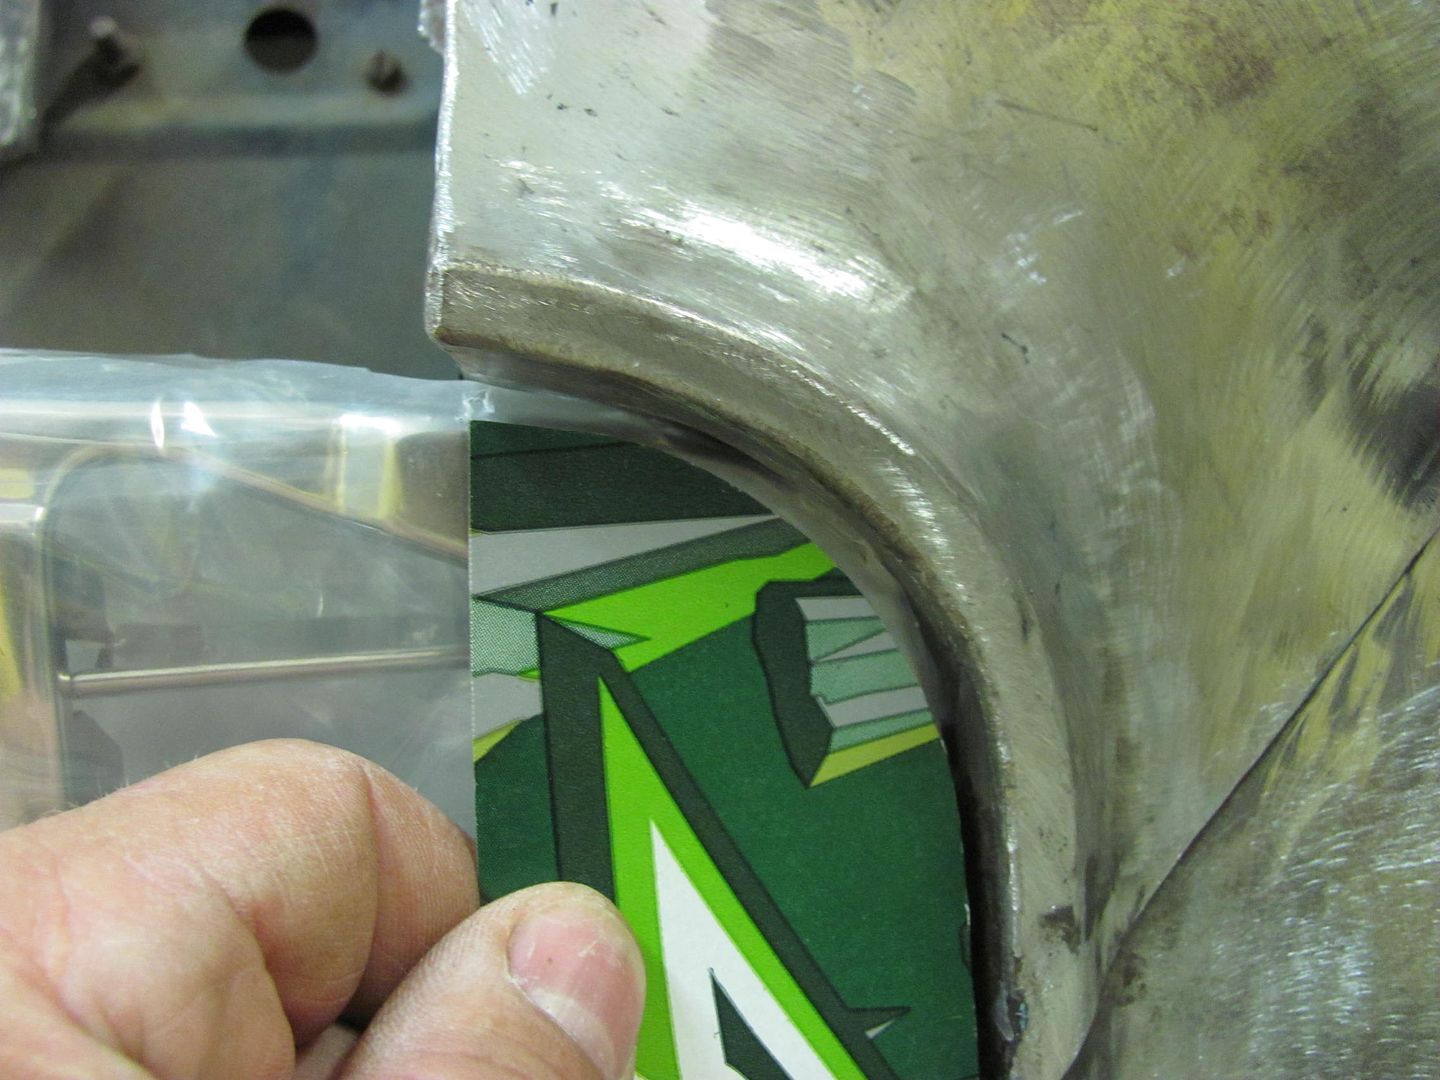 Initial fitment: 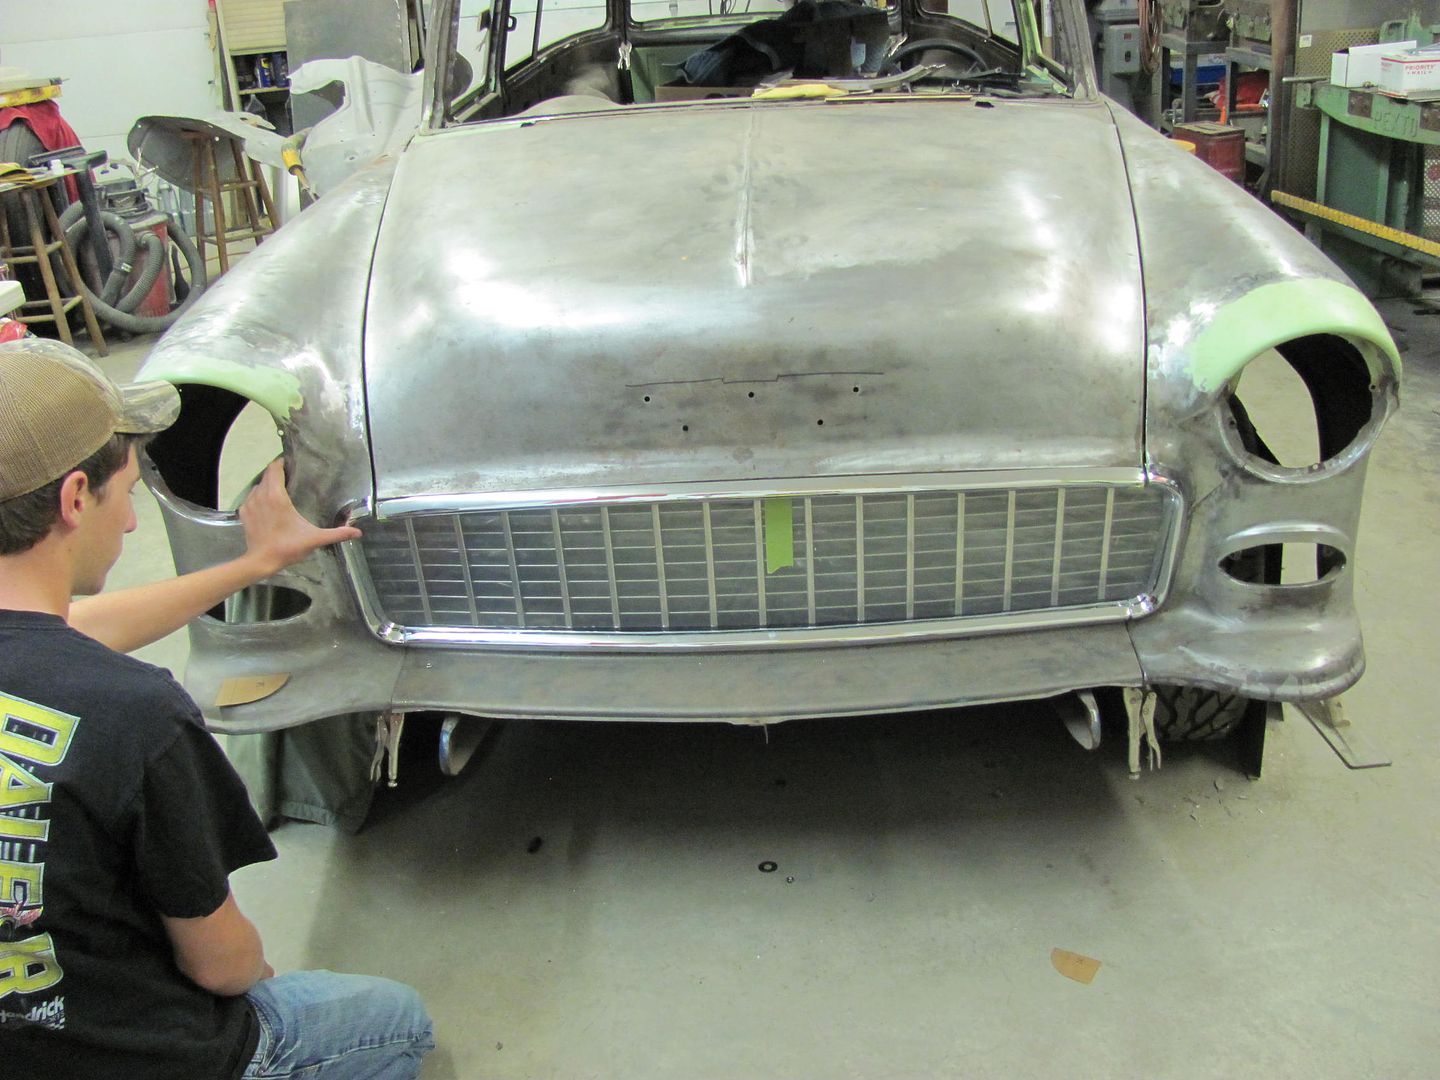 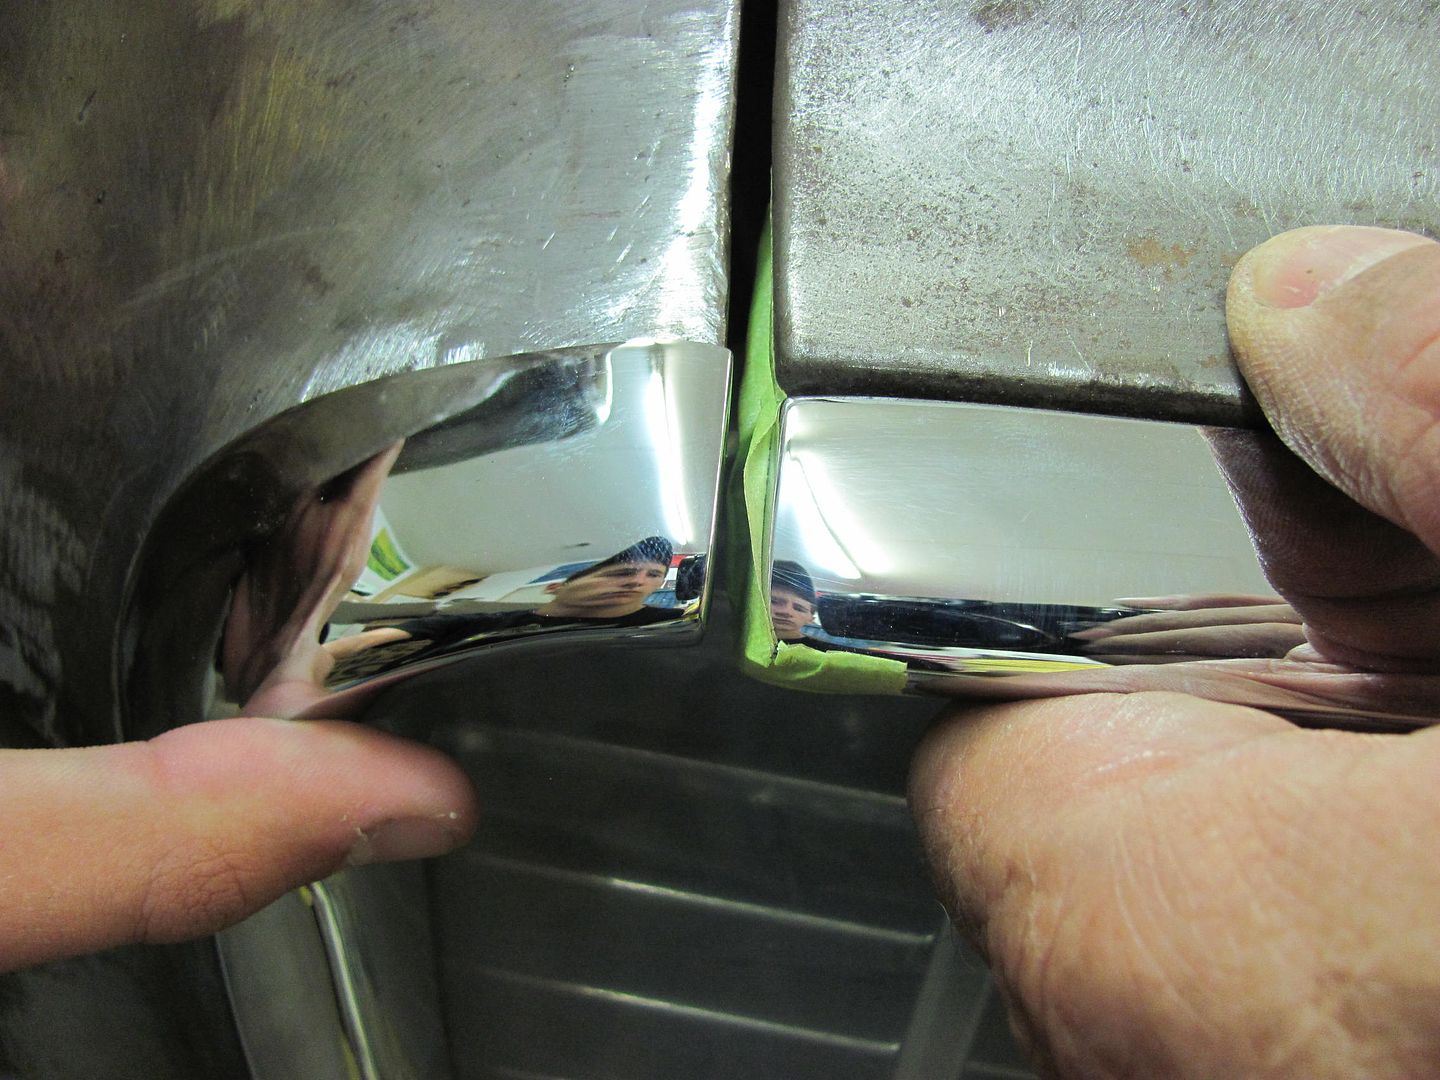  Where the passenger side fit fairly well initially, the drivers side showed some rocking and gap issue. 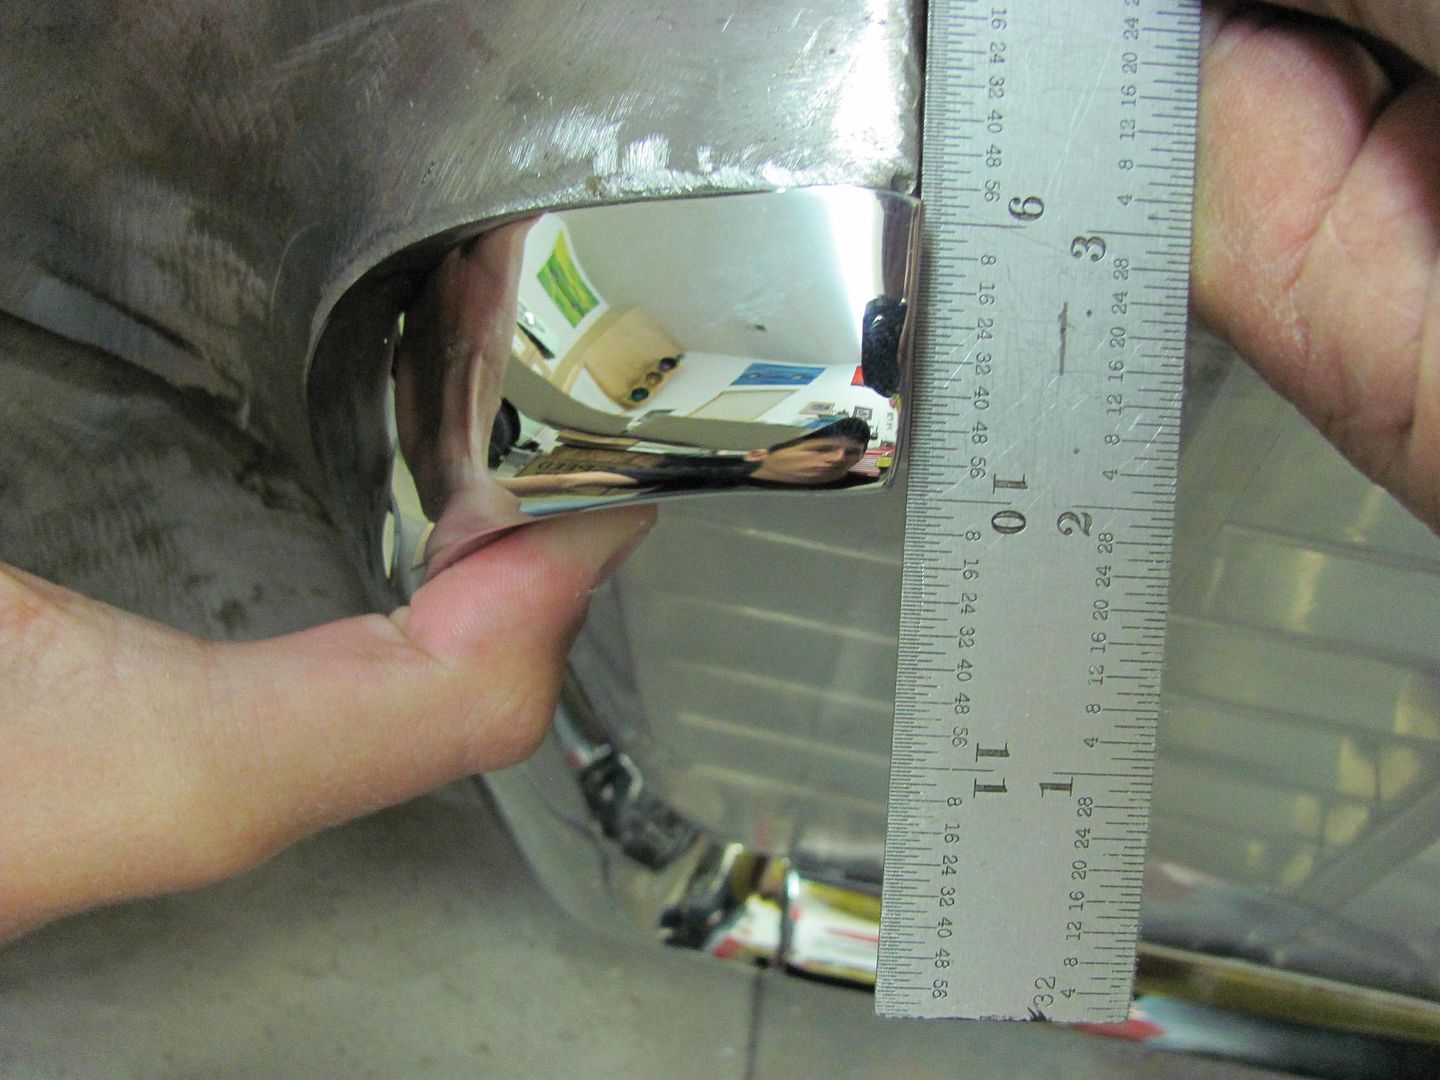  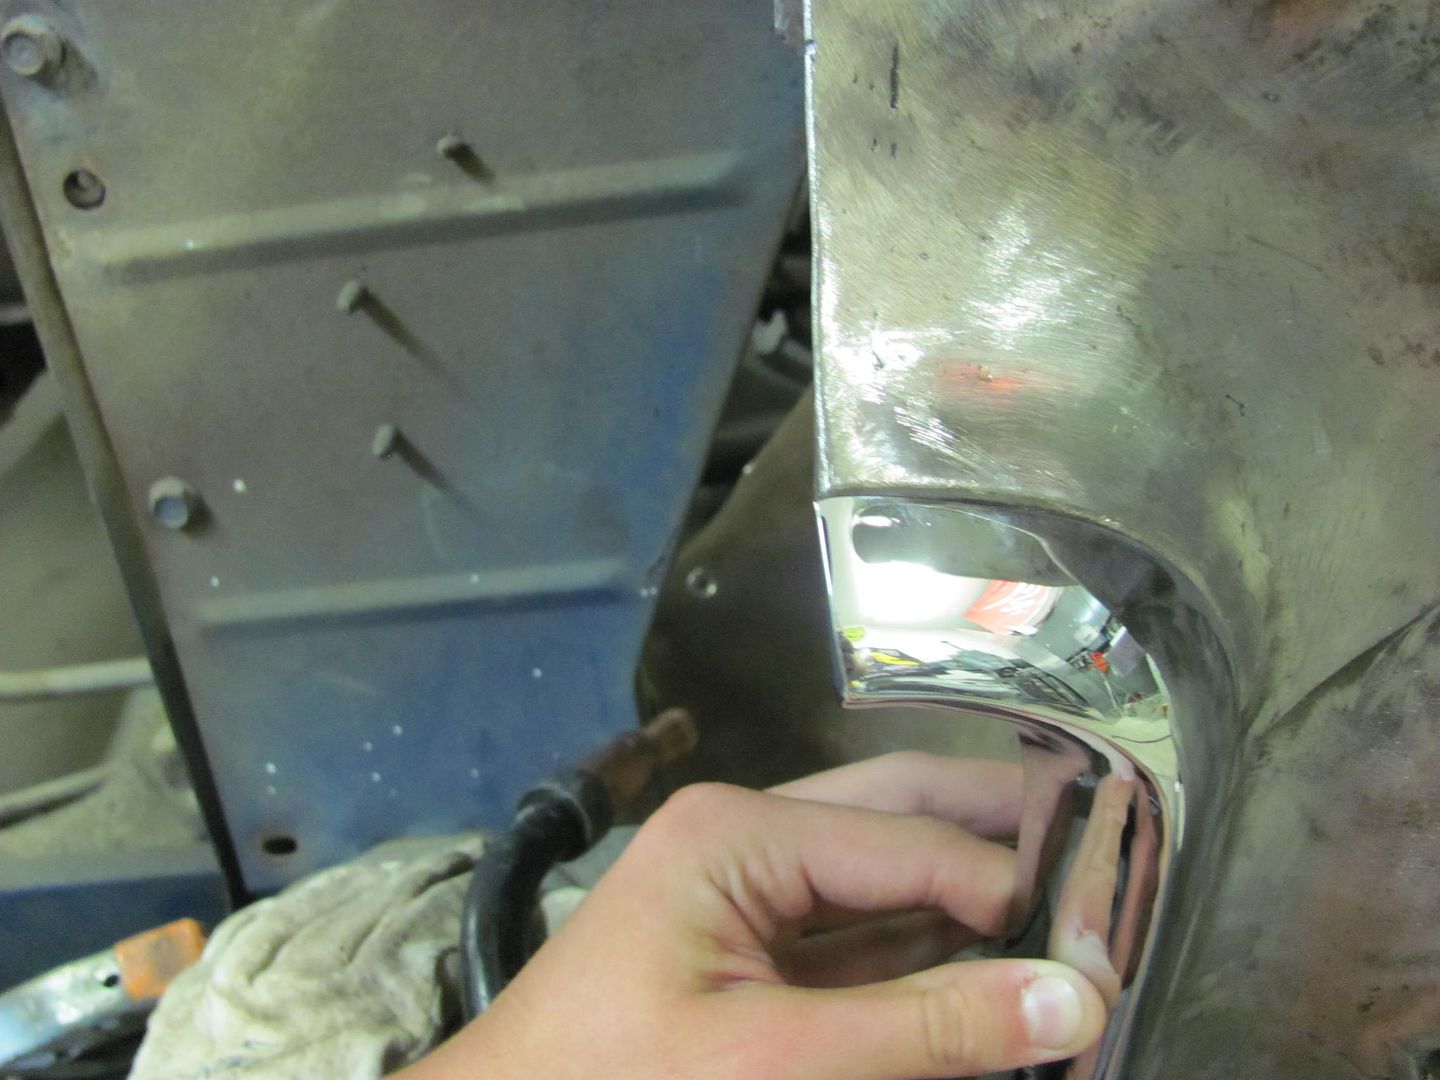 I initially thought the driver's side piece was mis-shapen, but in placing them side by side they were pretty much a mirror image. Checking the front edge of the opening with a straight edge, the passenger side showed to be good and straight, the driver's side had a depressed area. This likely occurred when some fender shaving and rust repairs were performed, without the luxury of the chrome pieces for fitment. So some relief cuts were made to bring out the low area of the opening... 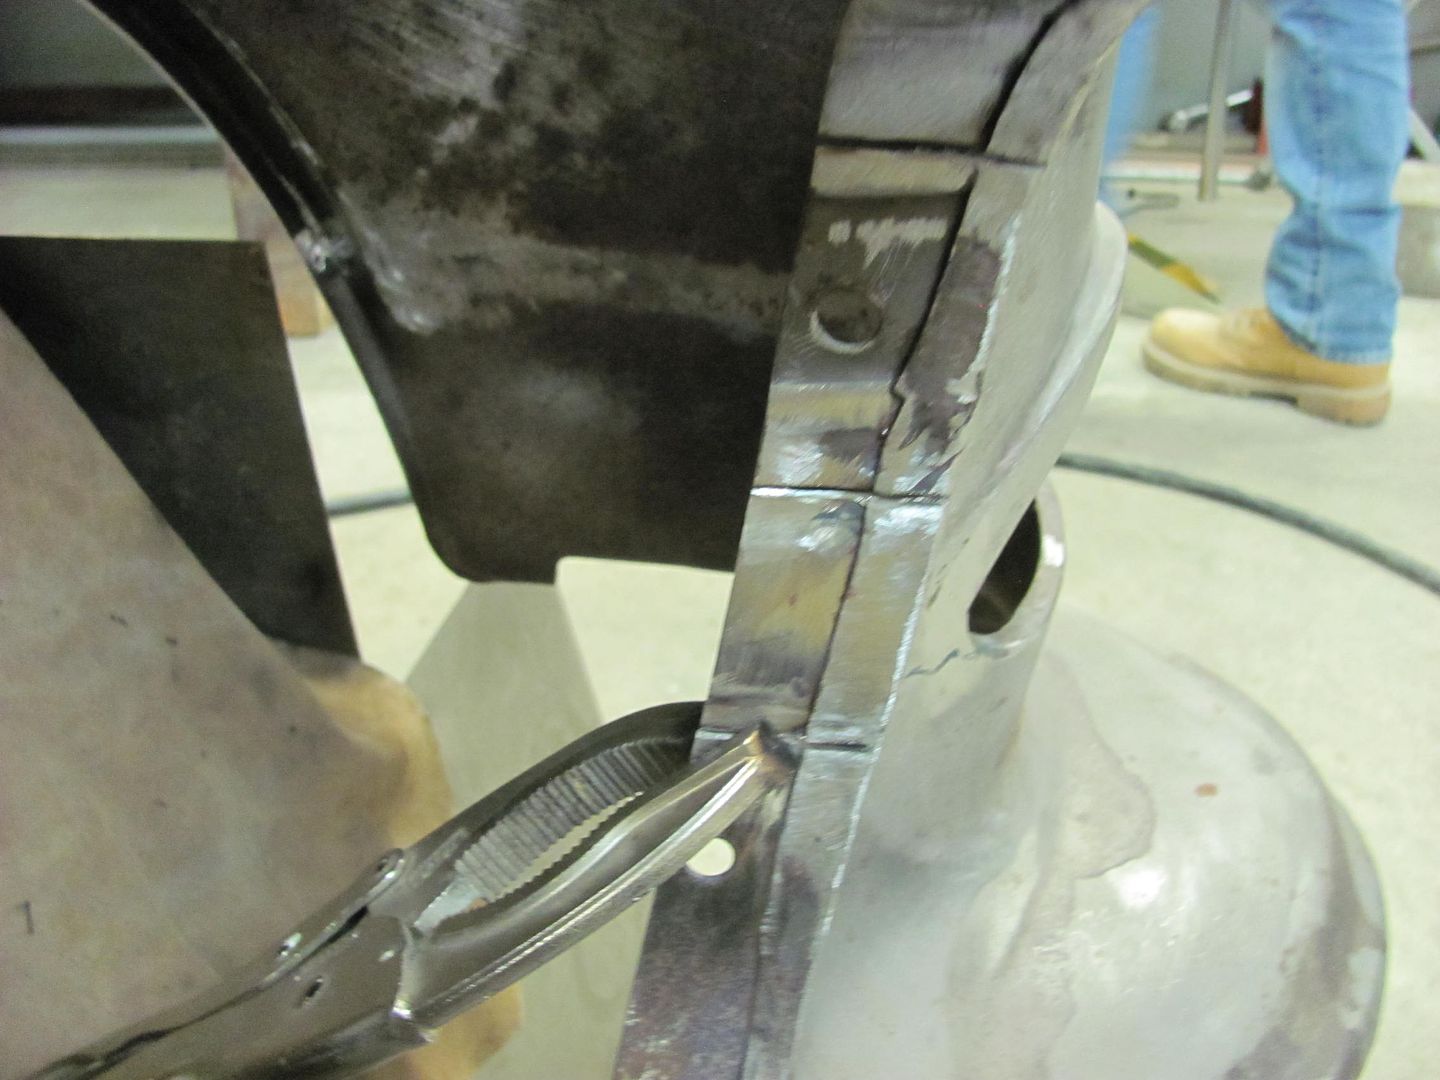 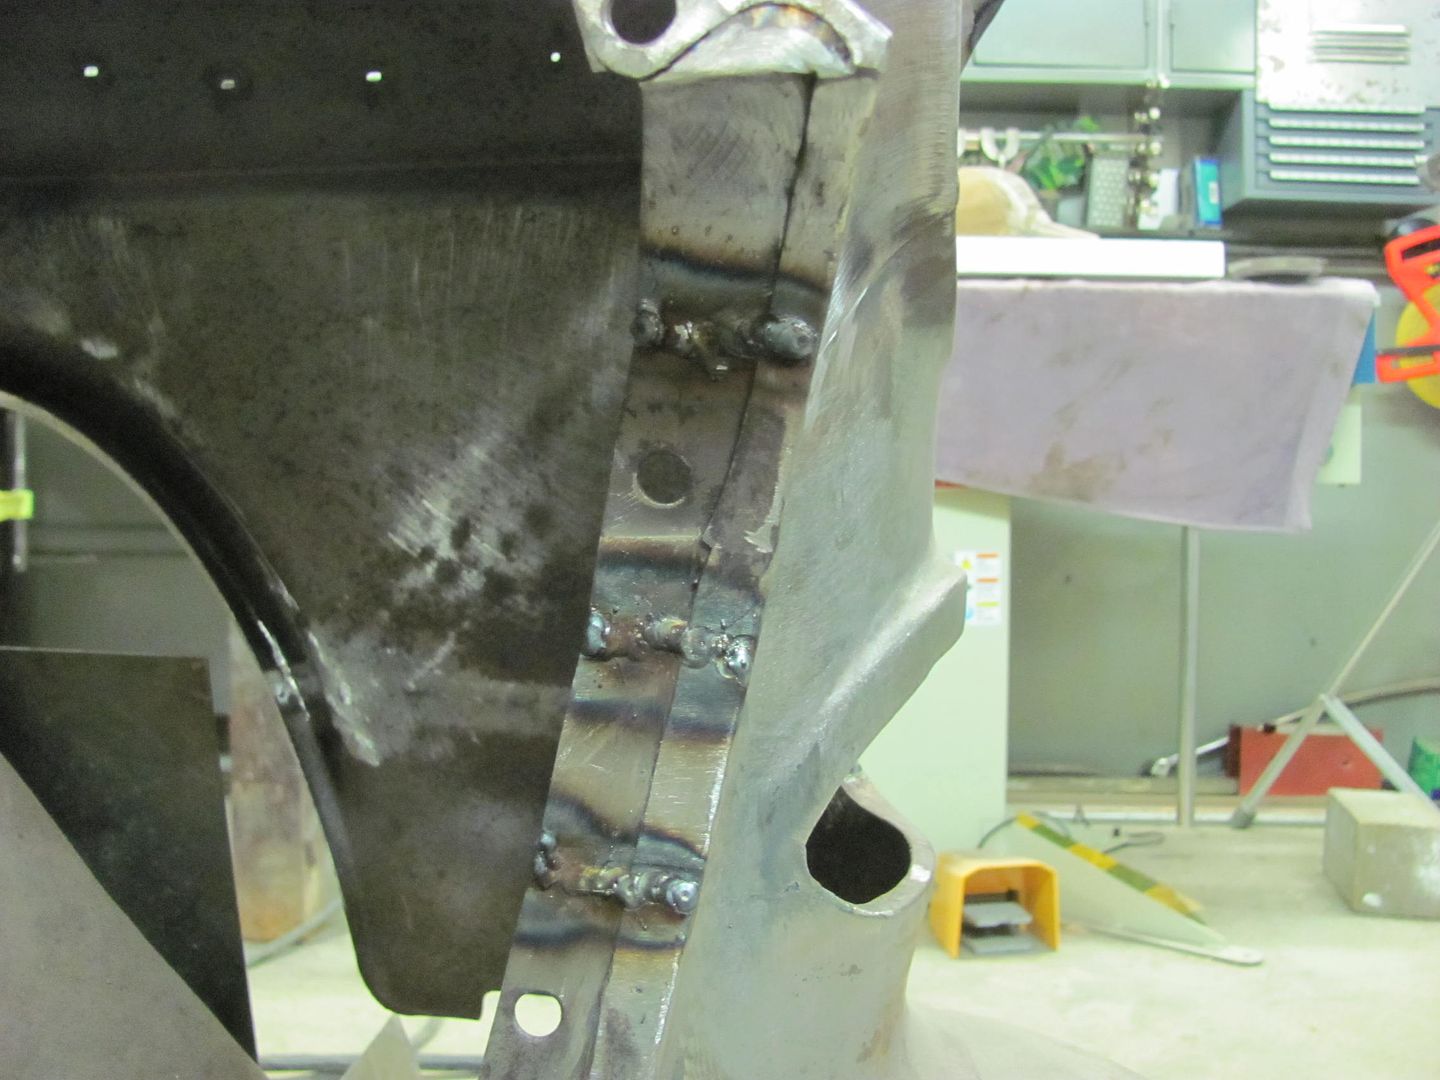 ....for a drastic improvement in the fitment. 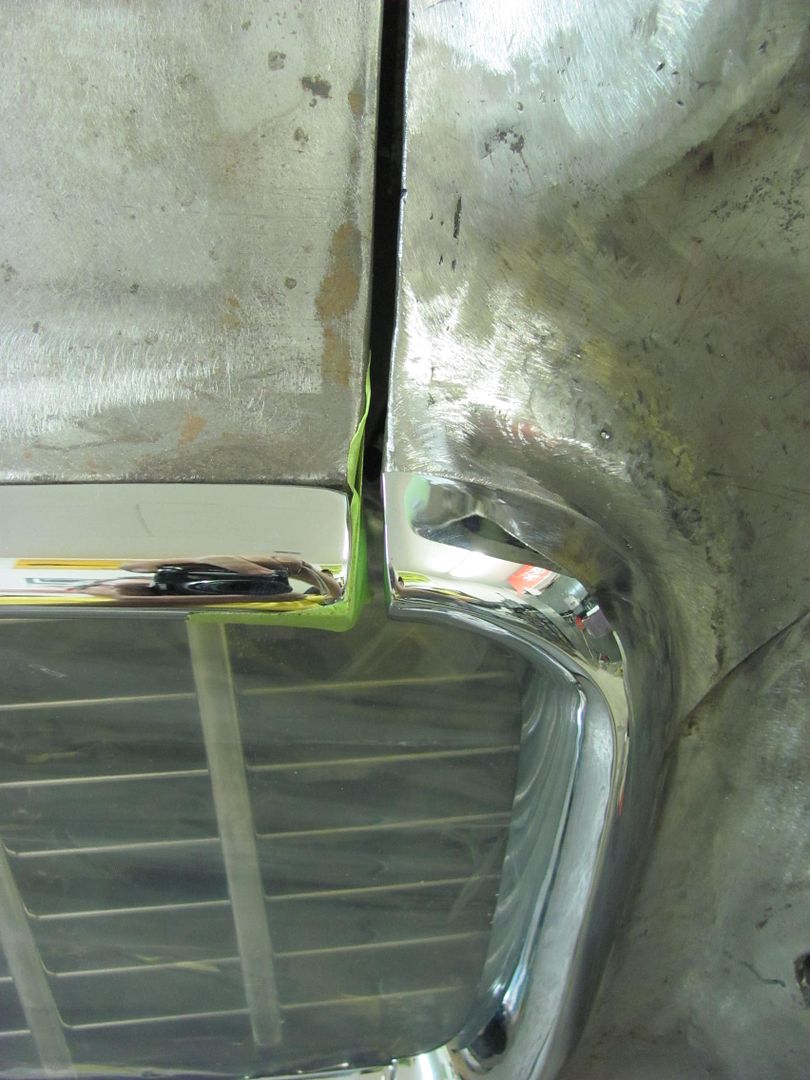 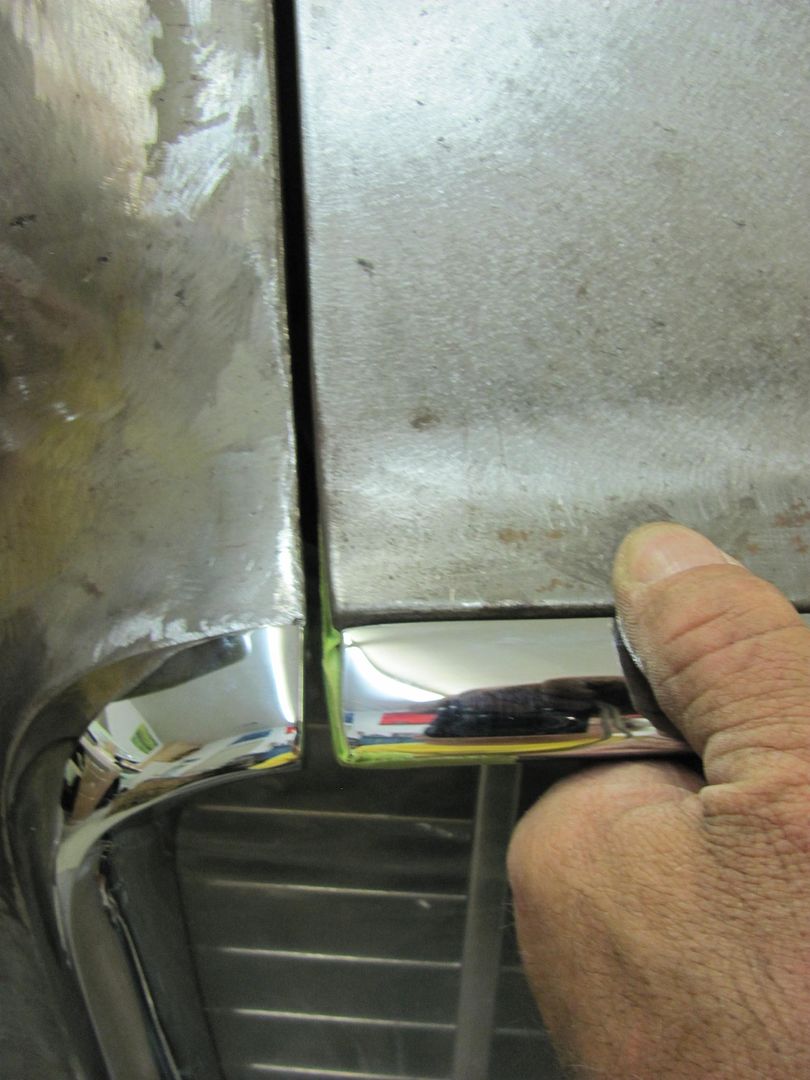 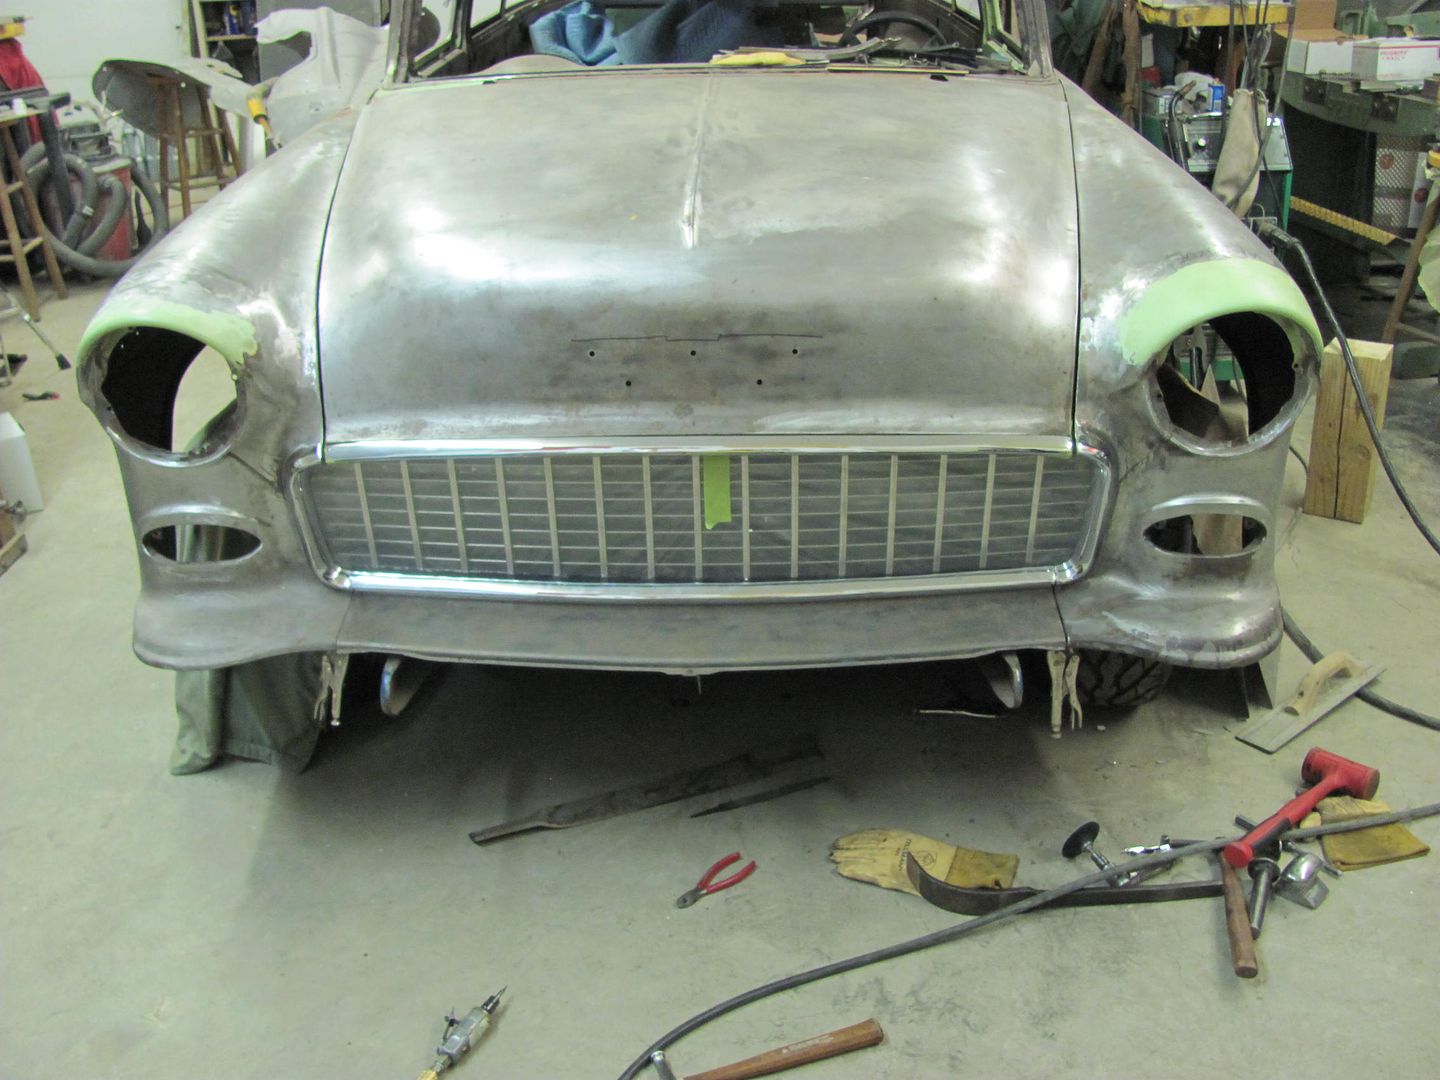 The surround trim studs did have some alignment issues with the grille. One of these "tweaking" devices is highly recommended to fine tune the fitment.. 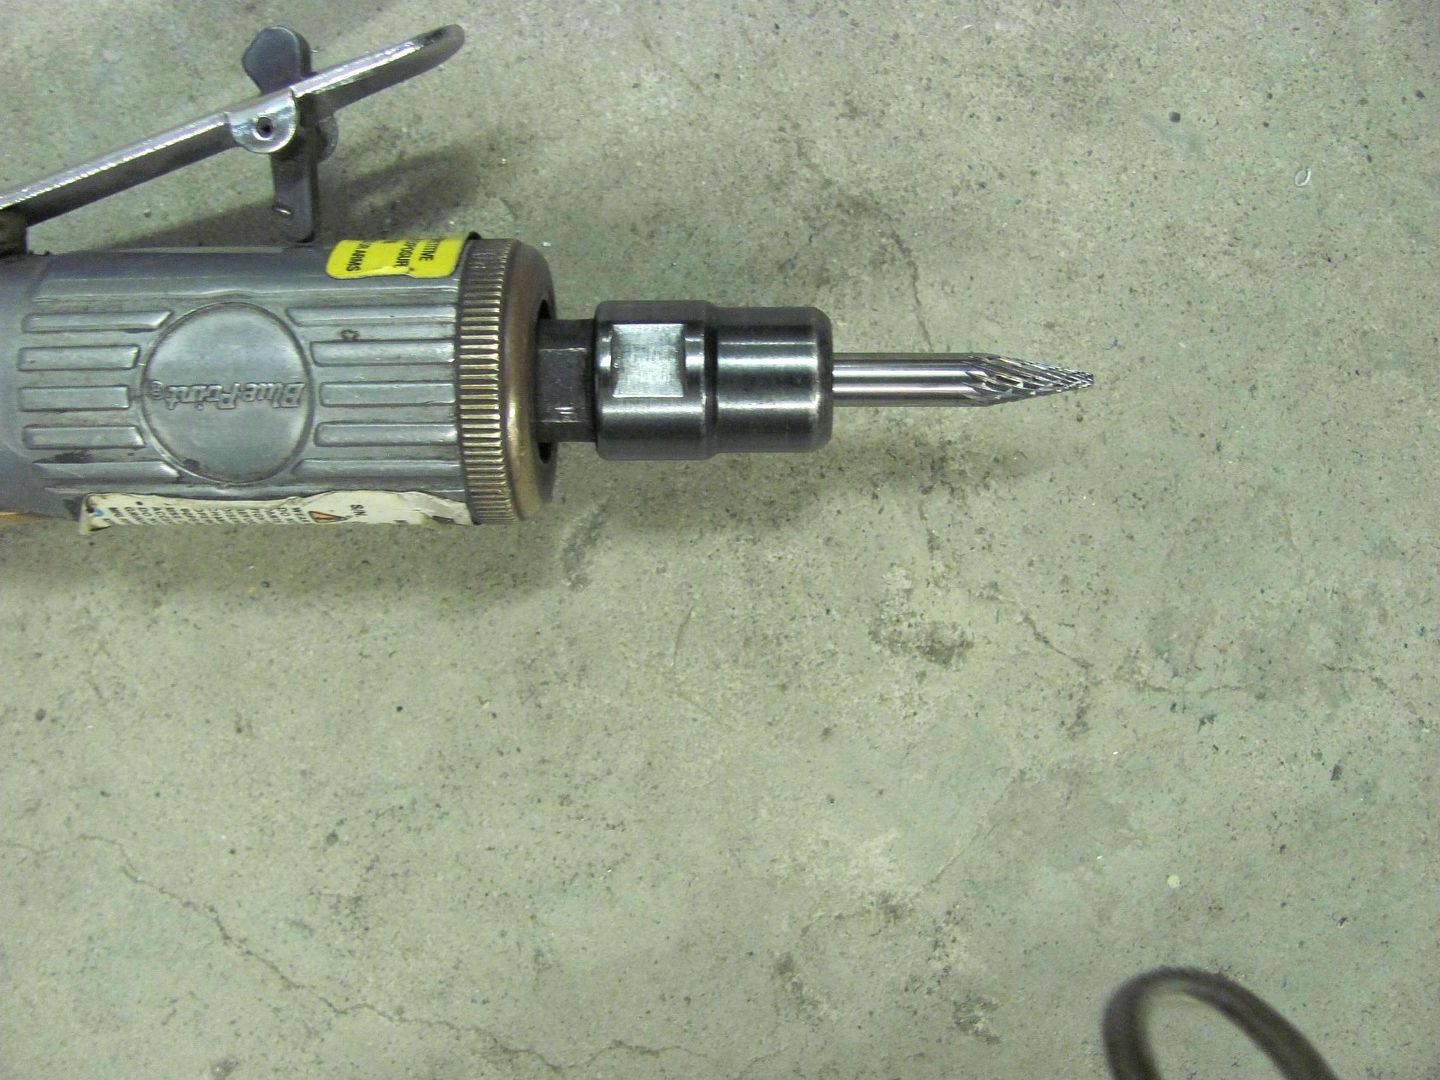
__________________
Robert |
|
|
|
|
09-25-2014, 07:47 AM
|
#11 |
|
Registered User
Join Date: Jan 2012
Location: Eastern Ontario, Canada
Posts: 1,041
|
Re: 55 Wagon Progress
Great work!
__________________
1952 Canadian Chevy 1300 C4 IFS & D44 IRS 5.3 HO L33 My Build: http://67-72chevytrucks.com/vboard/s...d.php?t=632938
|
|
|
|
|
09-27-2014, 07:04 PM
|
#12 |
|
Registered User
Join Date: Jan 2013
Location: Leonardtown, MD
Posts: 1,636
|
Re: 55 Wagon Progress
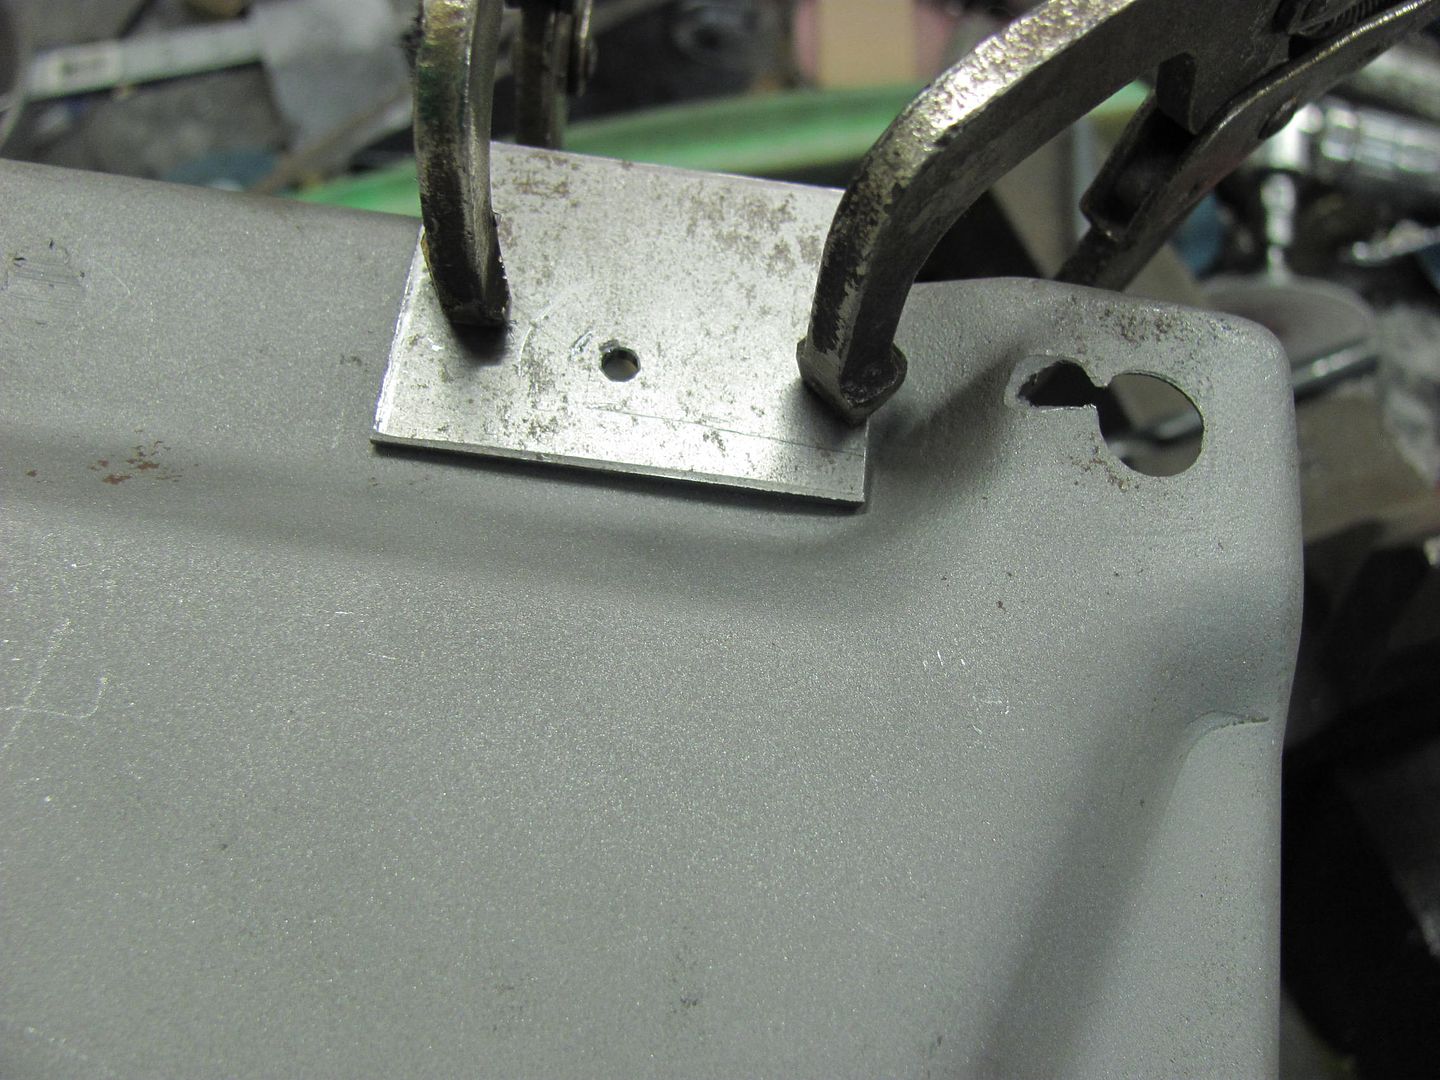
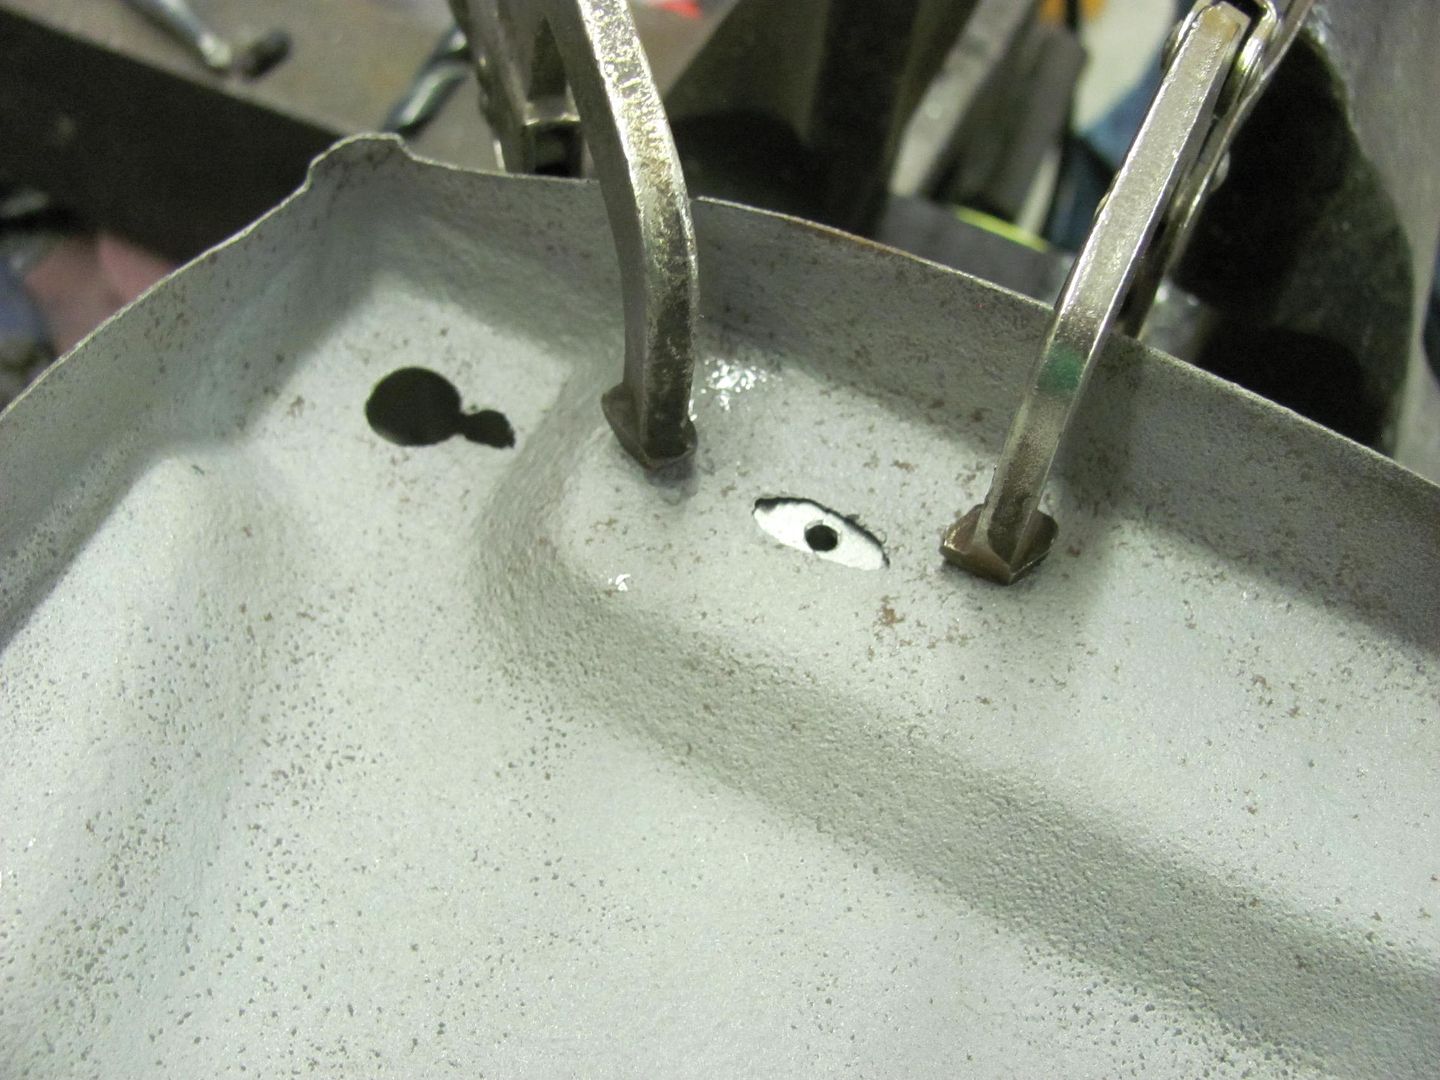
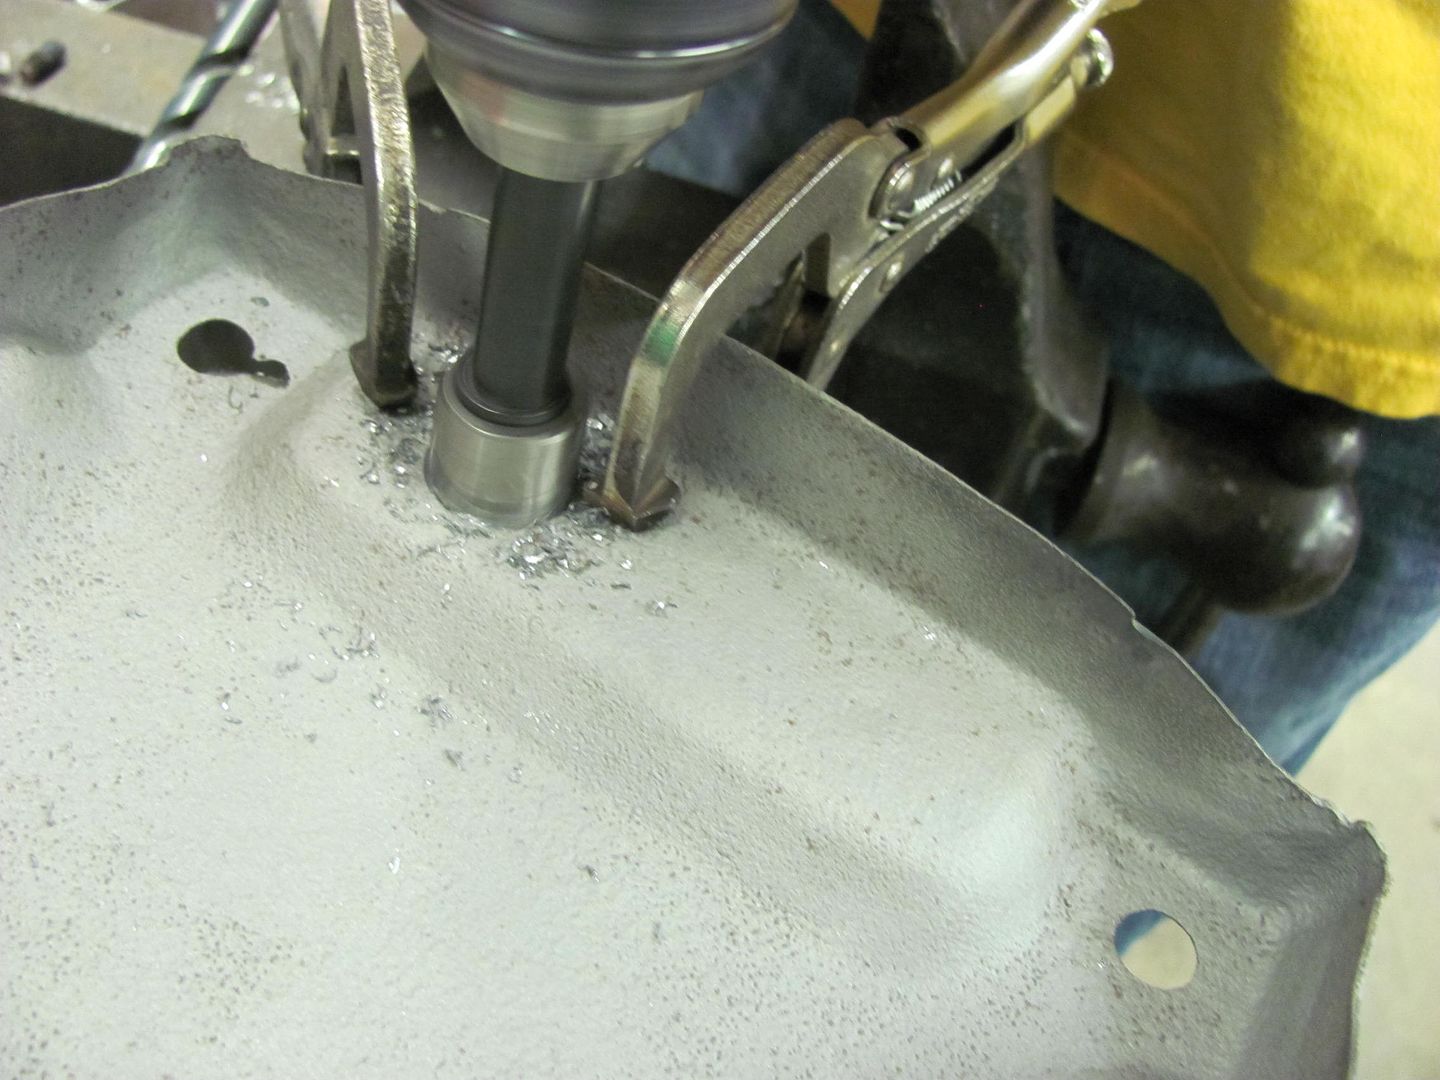
Today we worked on filling some holes in the battery trays so we could finish the inner fender mock up. Hard to drill out a slot, so we clamped on a plate with a pilot hole to use with the Blue Point sheet metal hole cutter:
   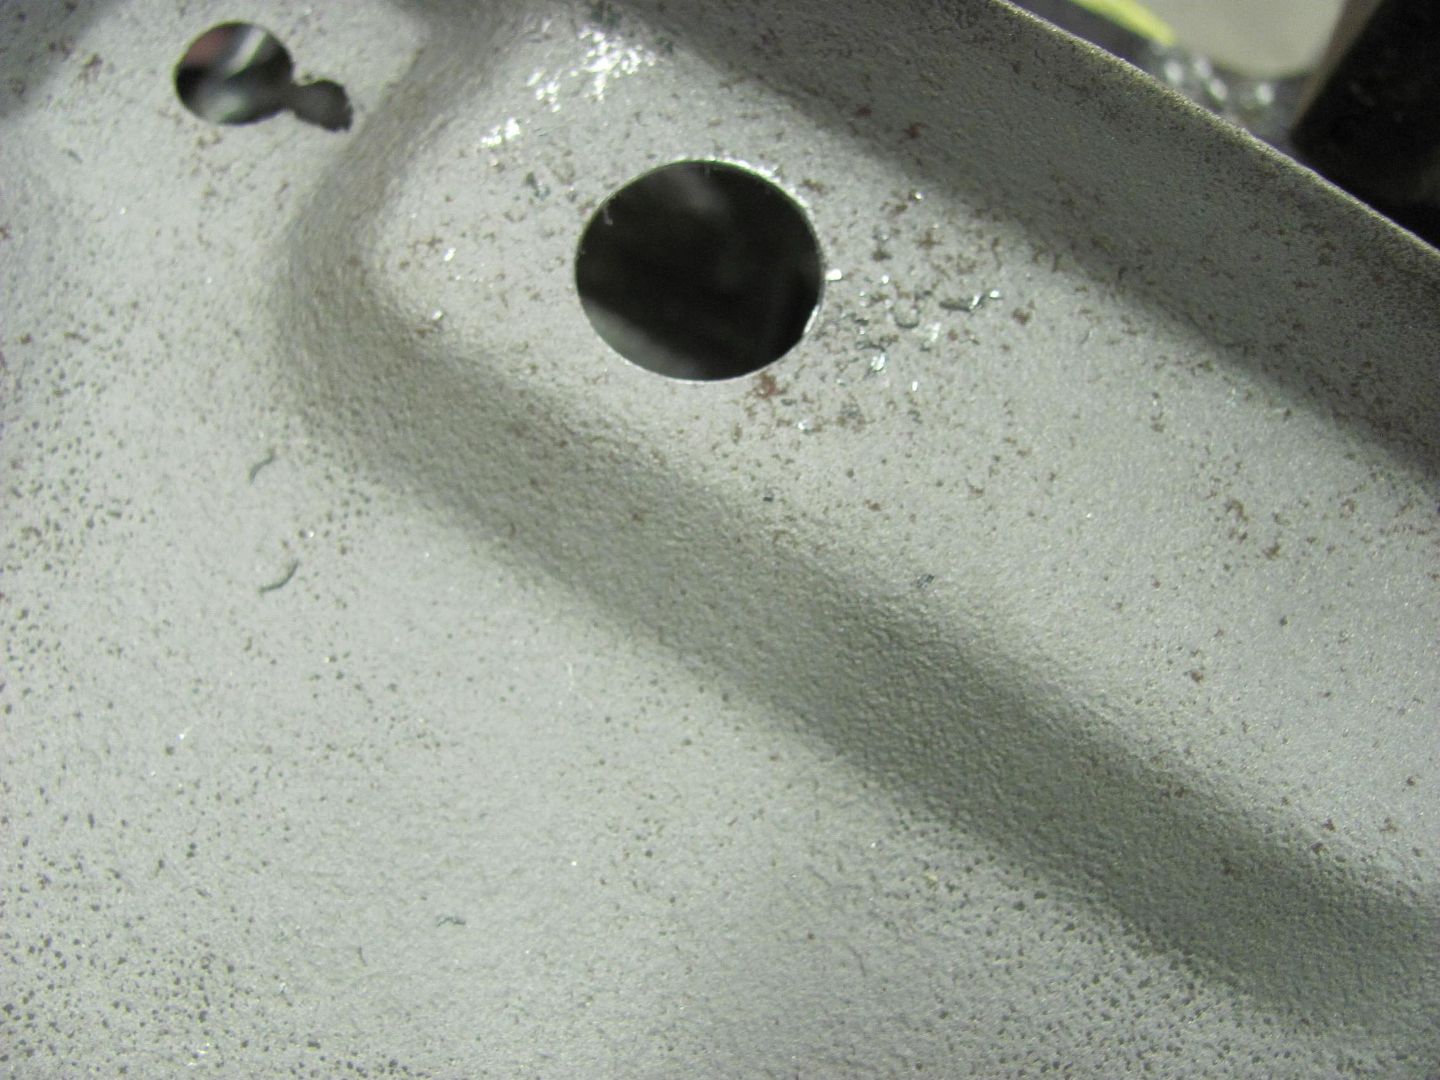 Plugs..... 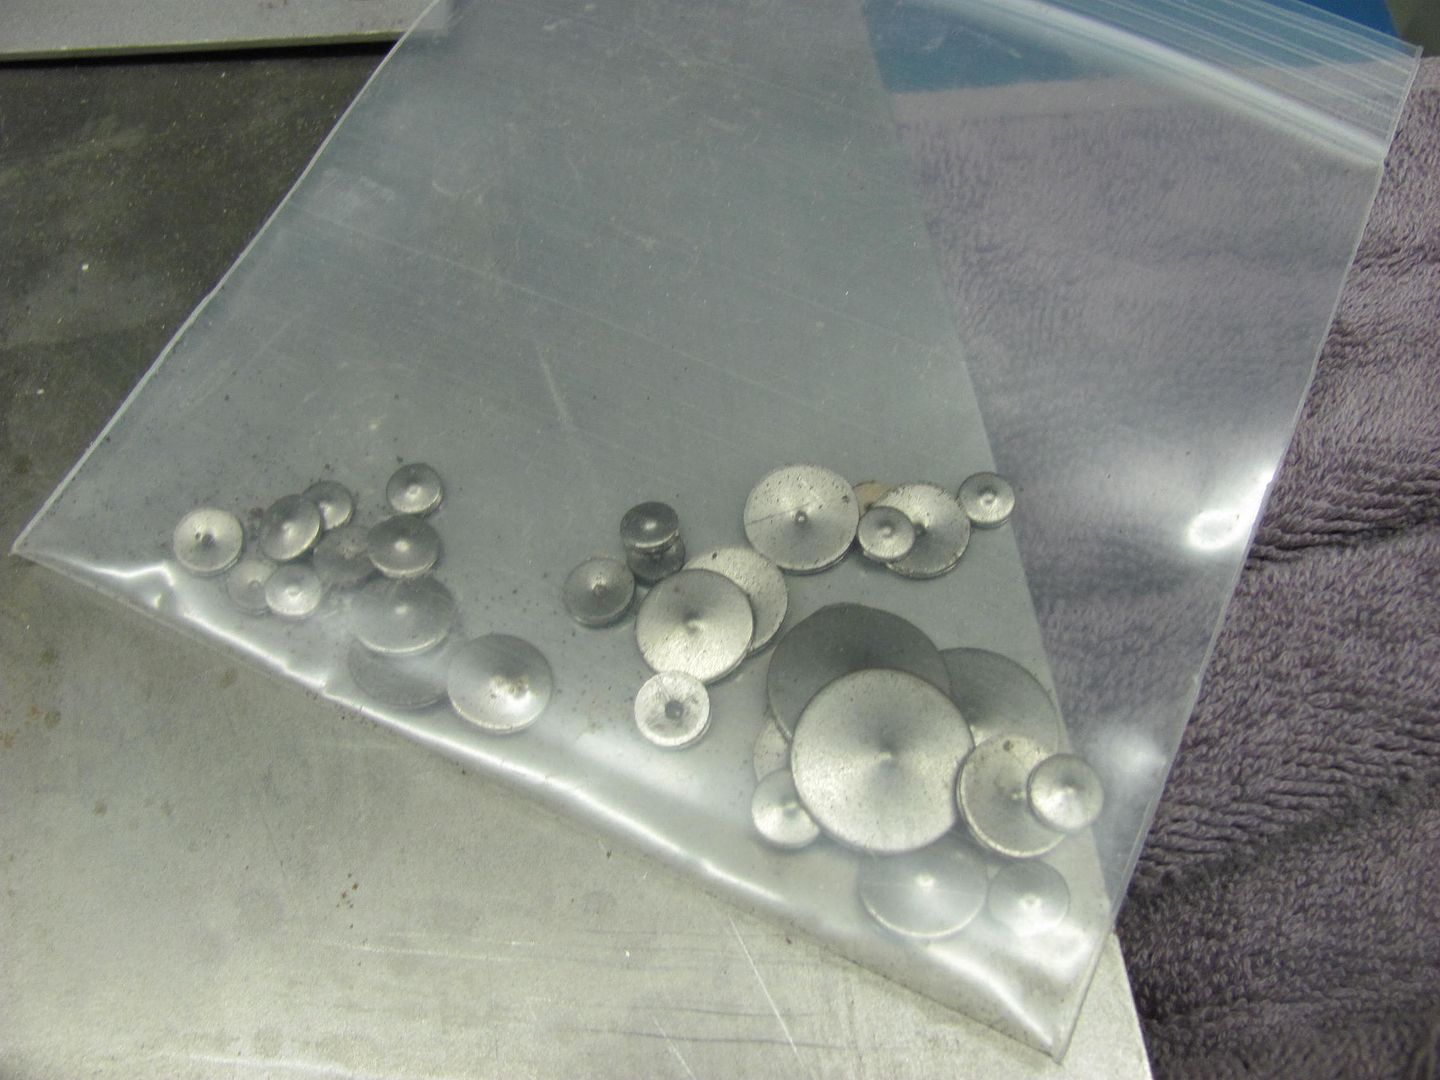 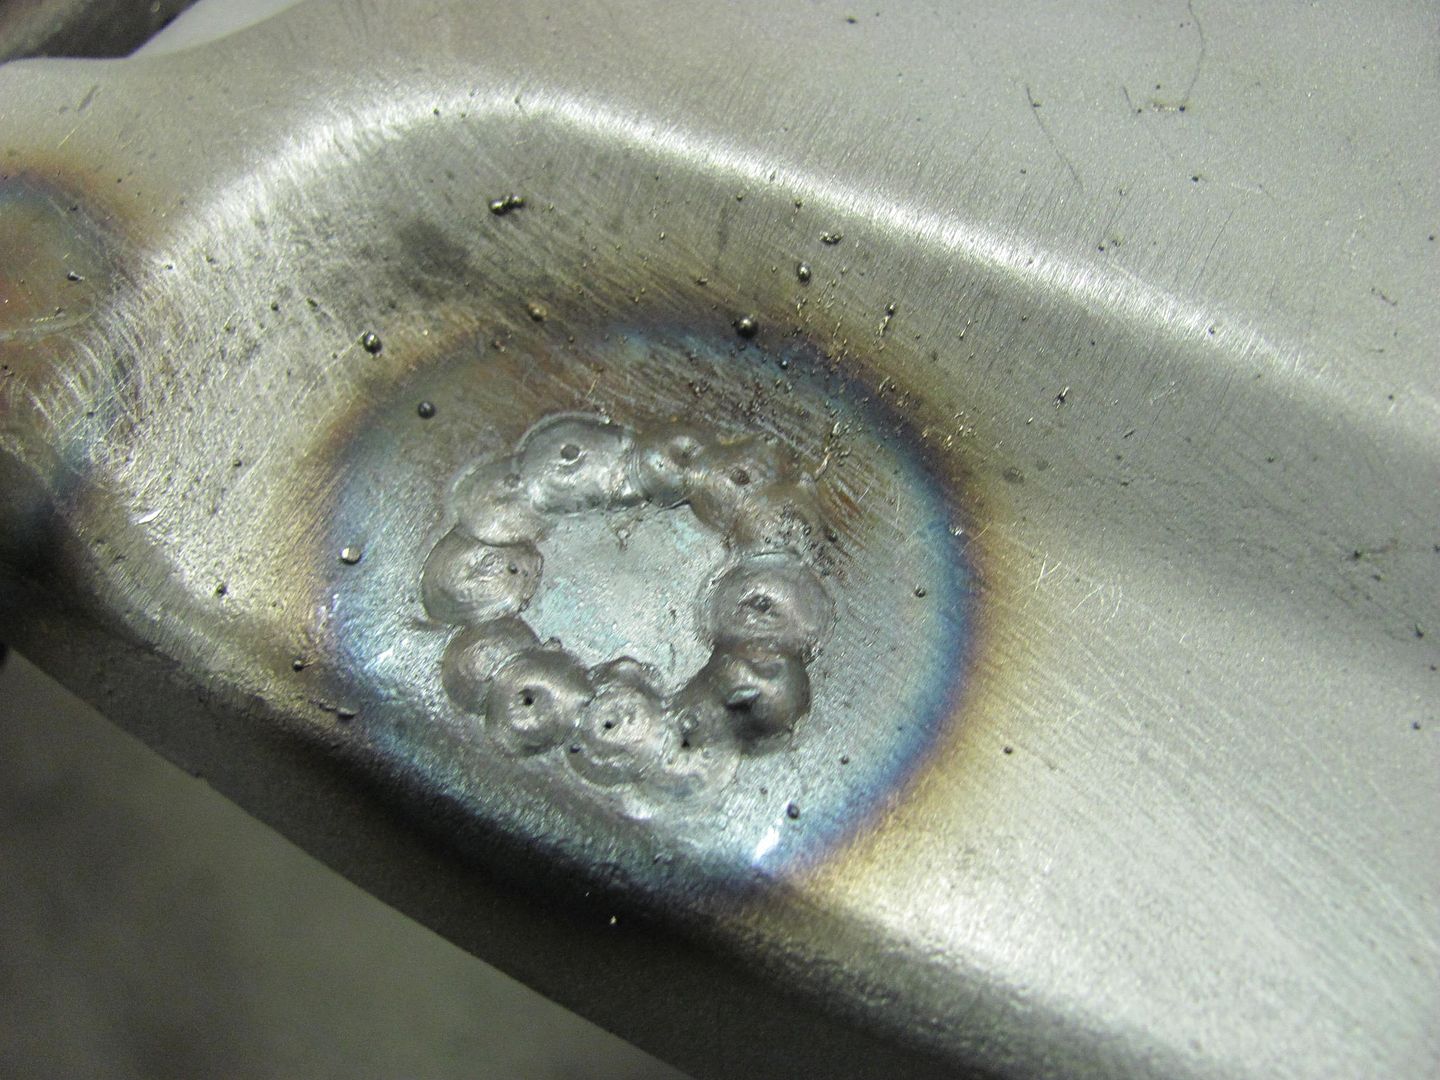 We tried this same repair in the corners, but the pitting was too far along and did a good job of blowing holes. So, time to back up an punt, let's make some new corners.. 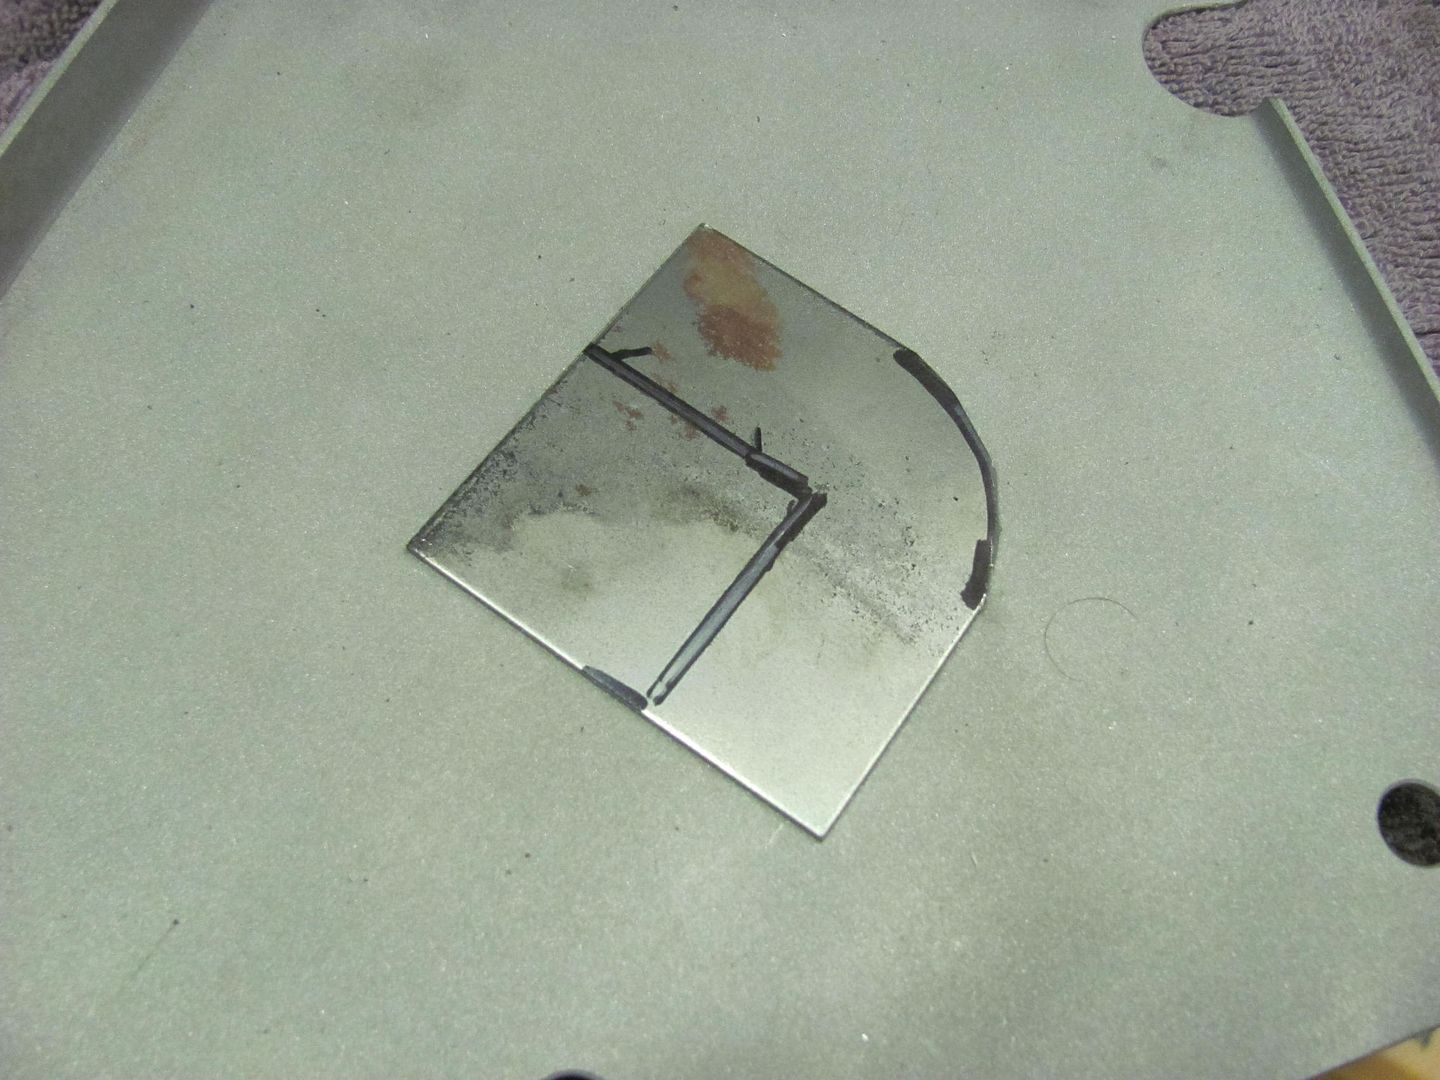 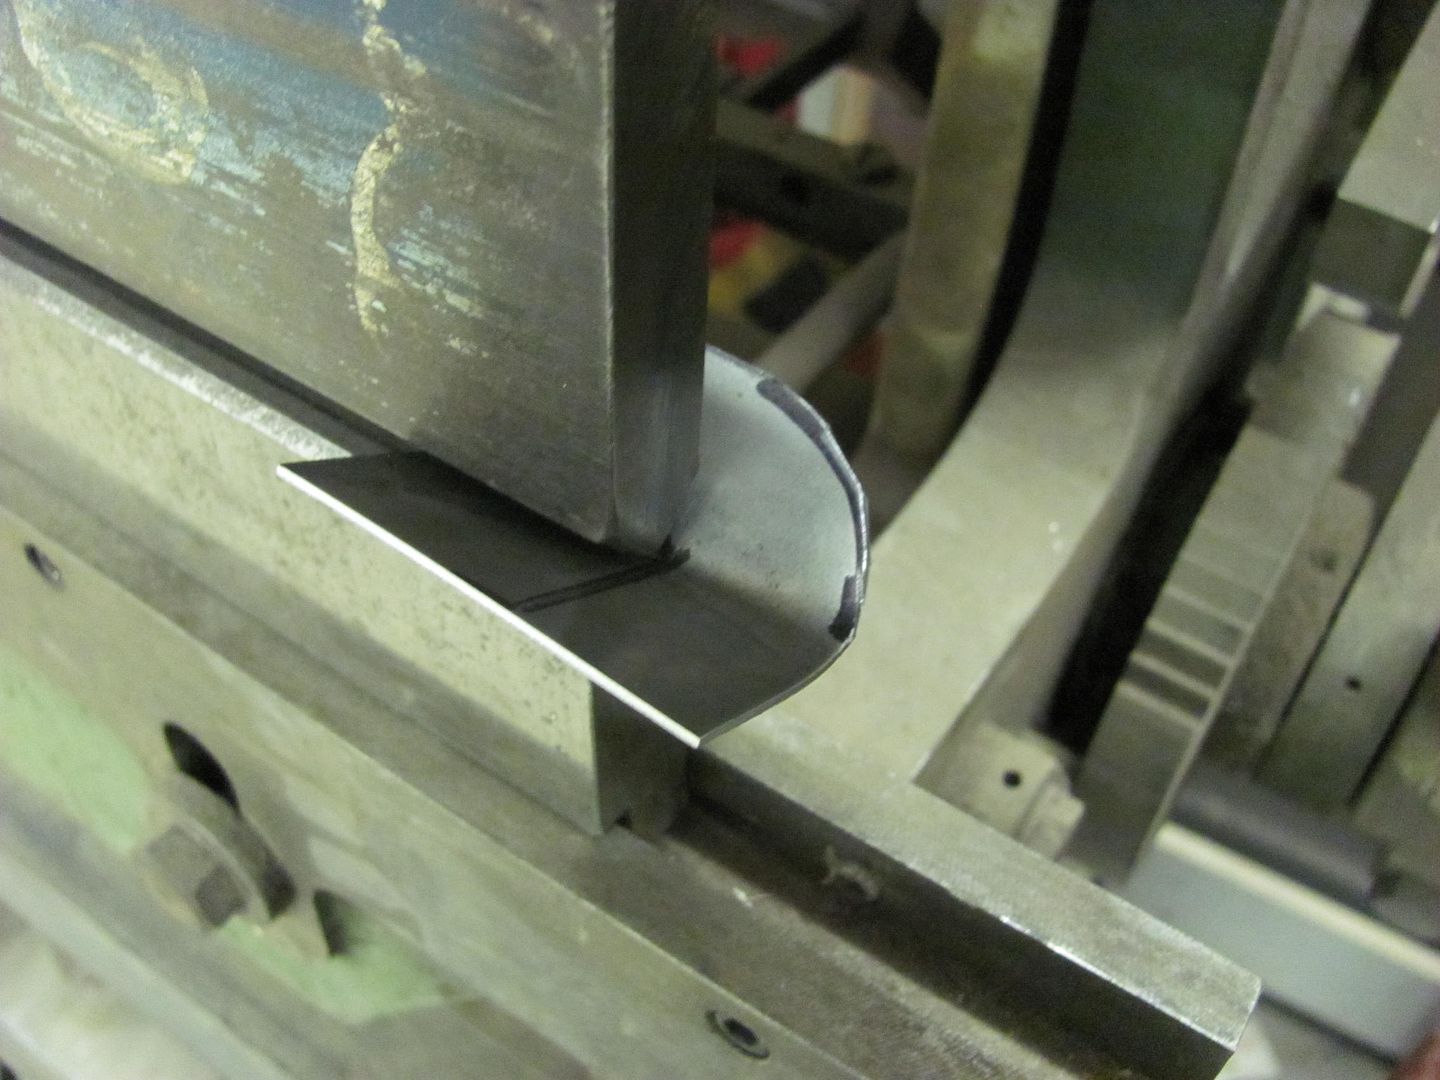 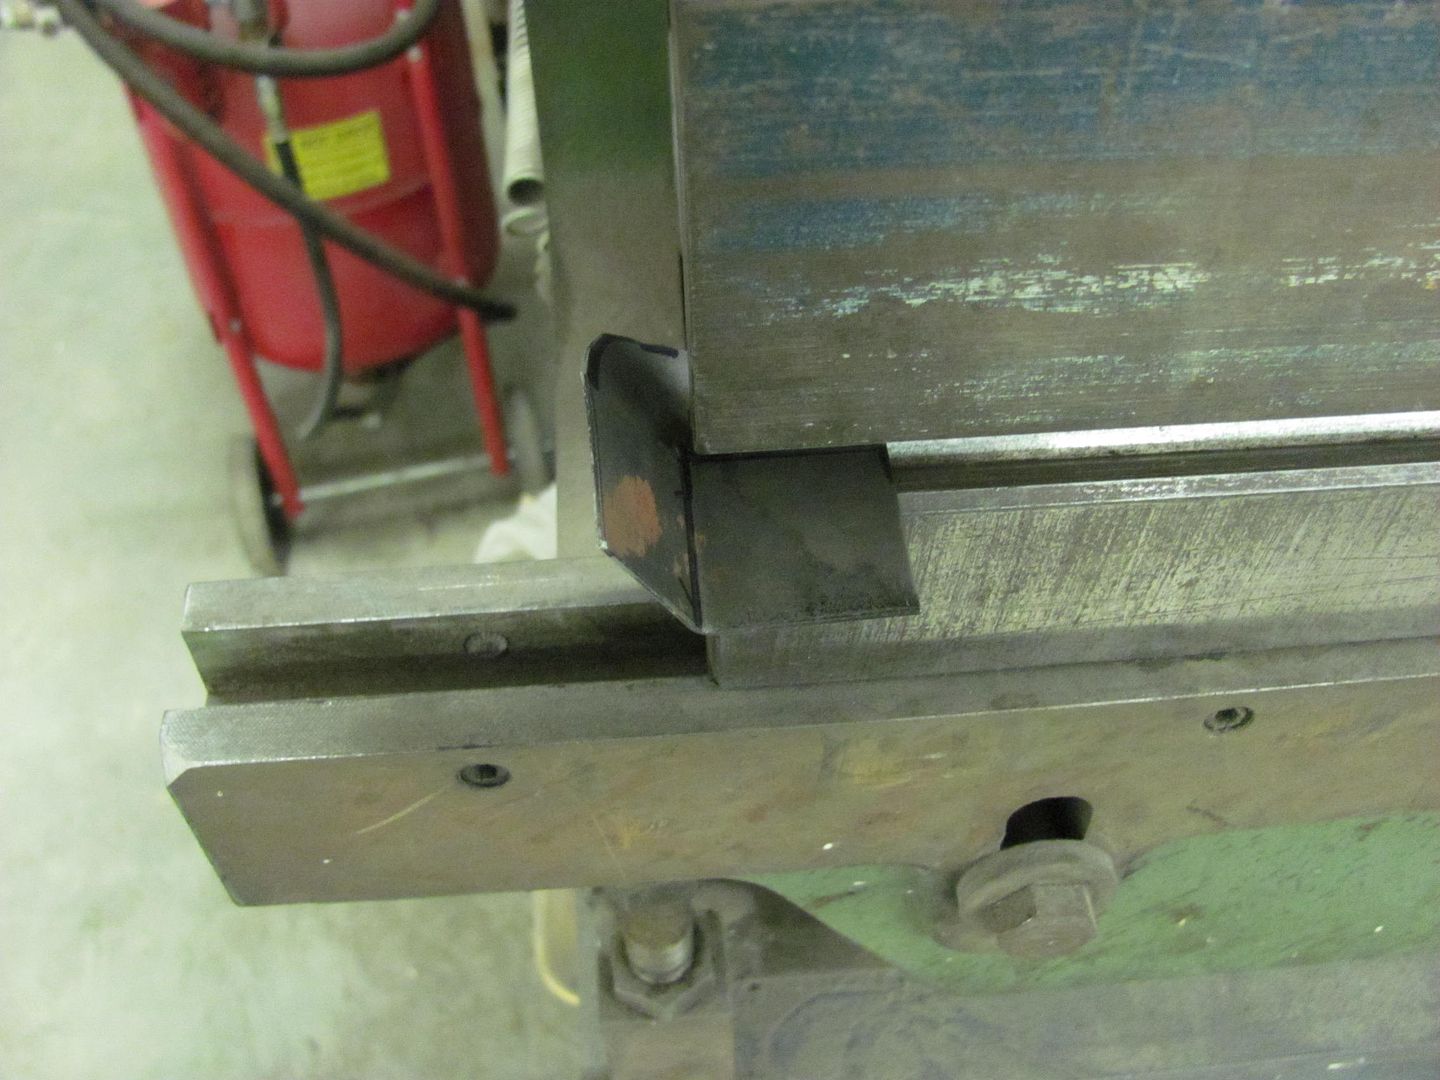 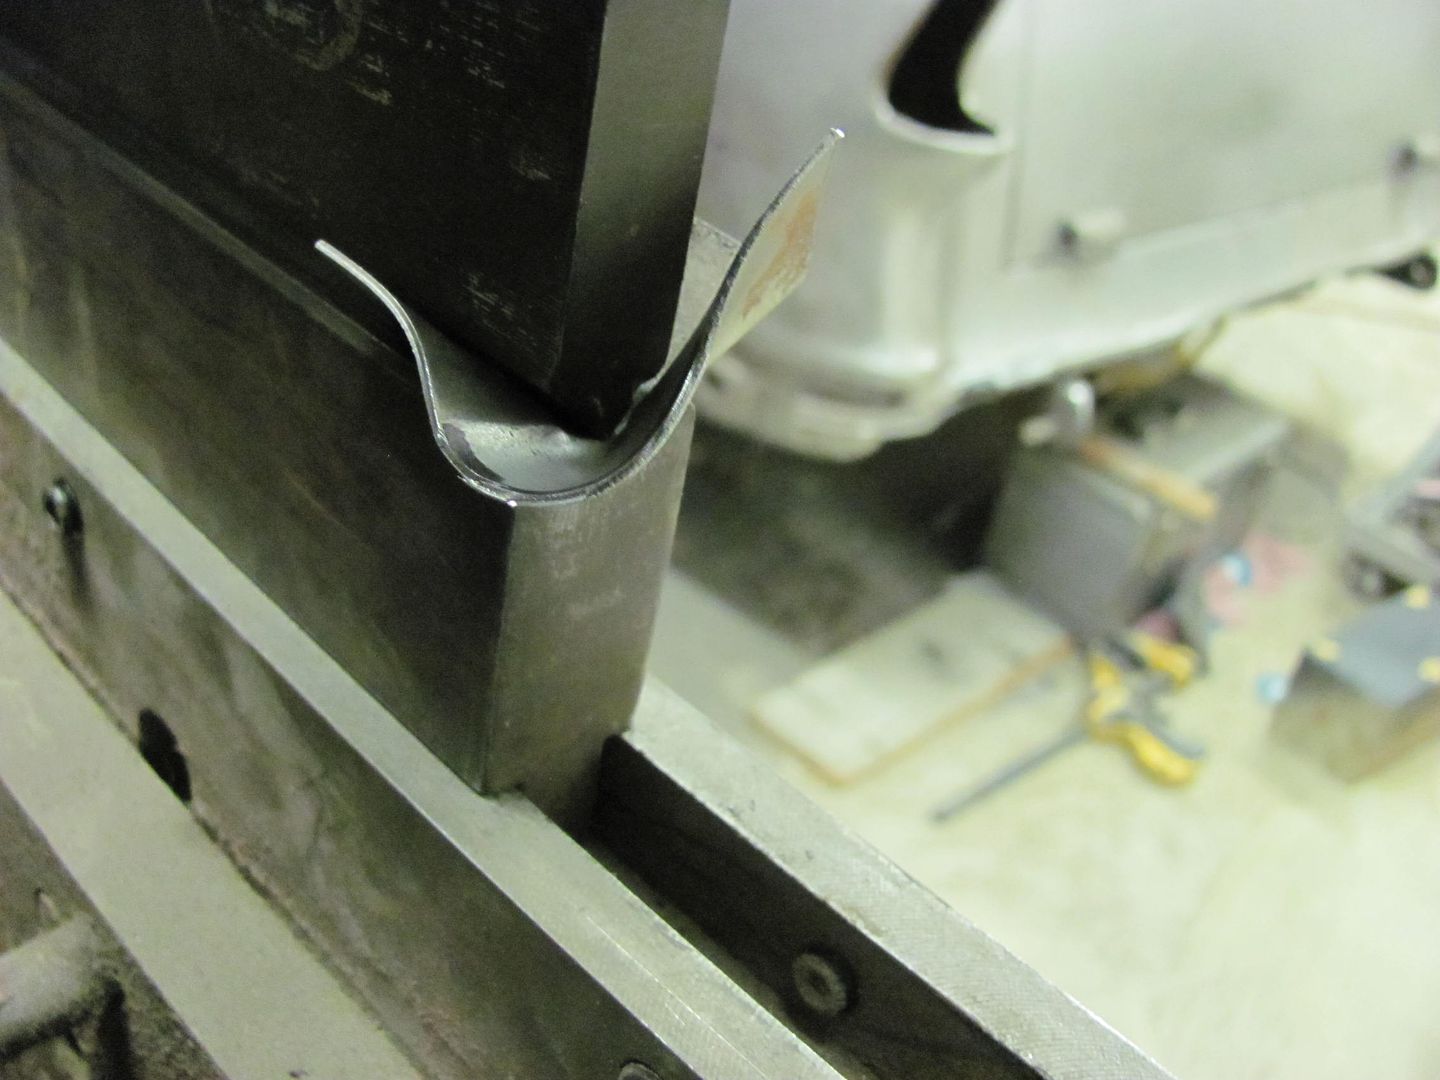 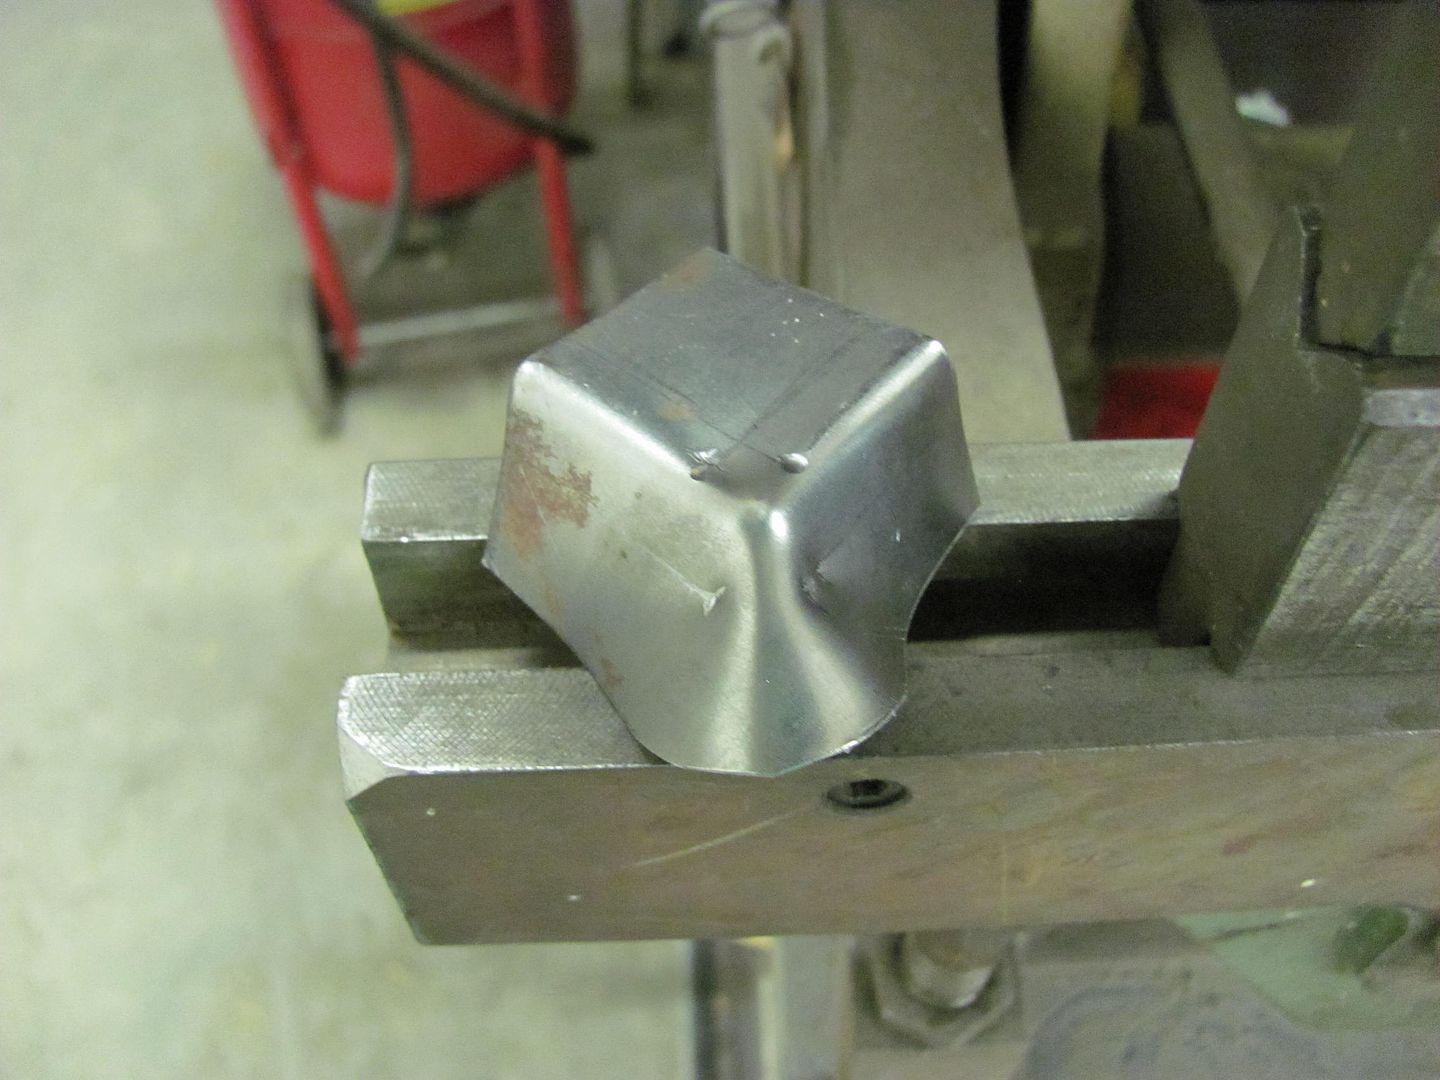 Shrinking the tuck.... 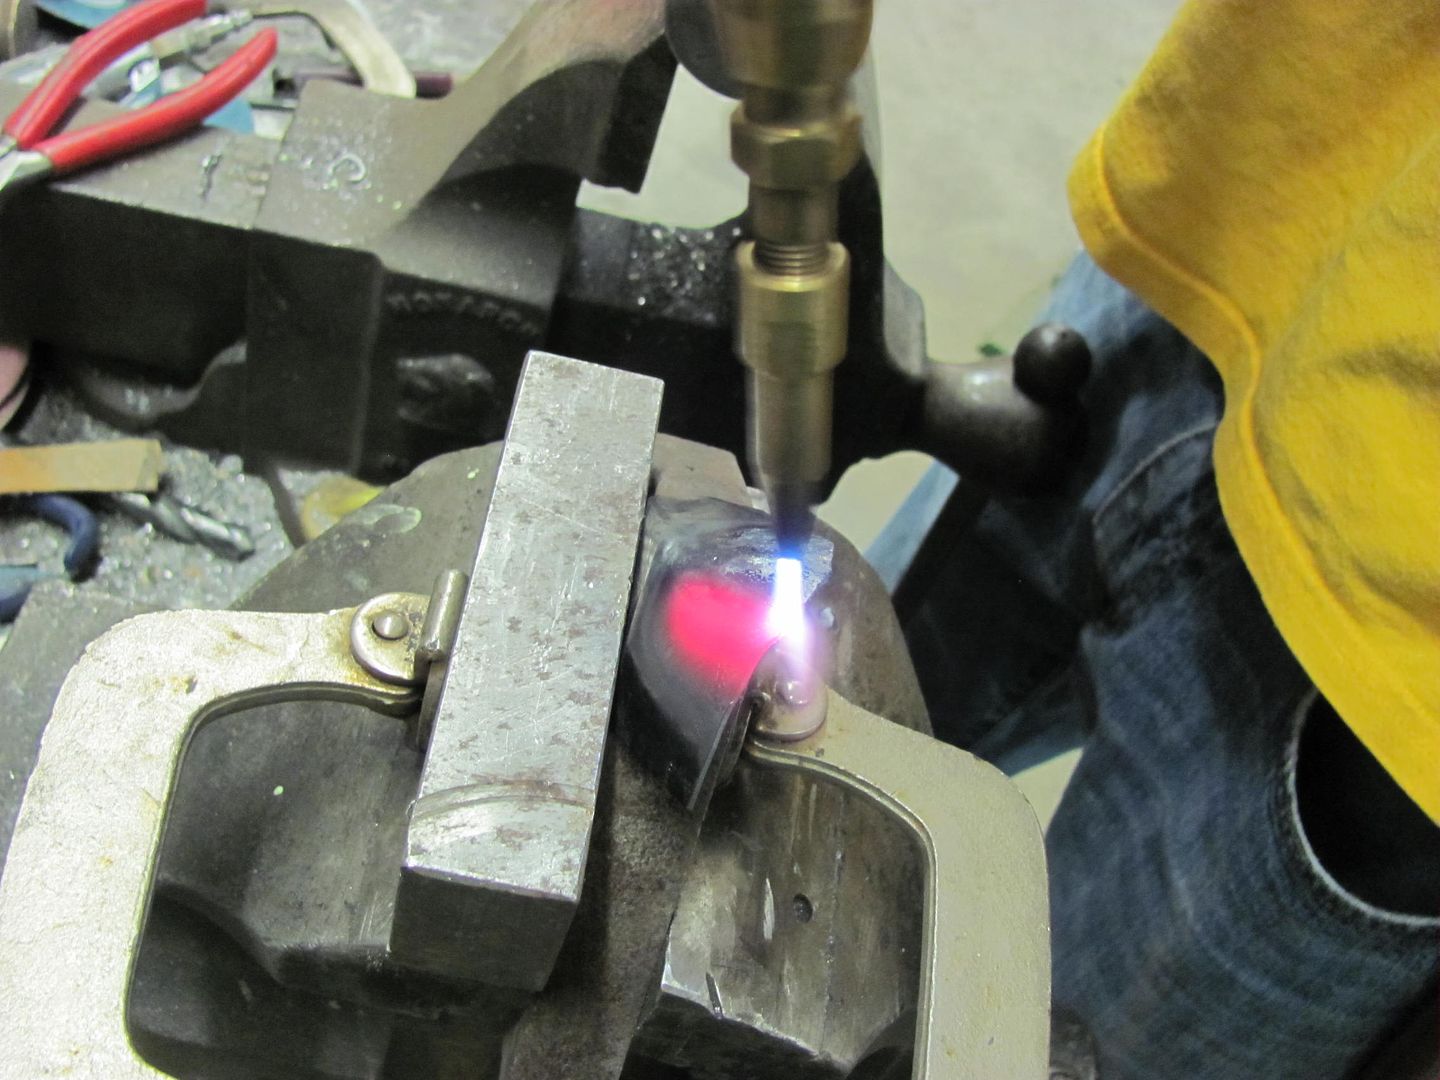 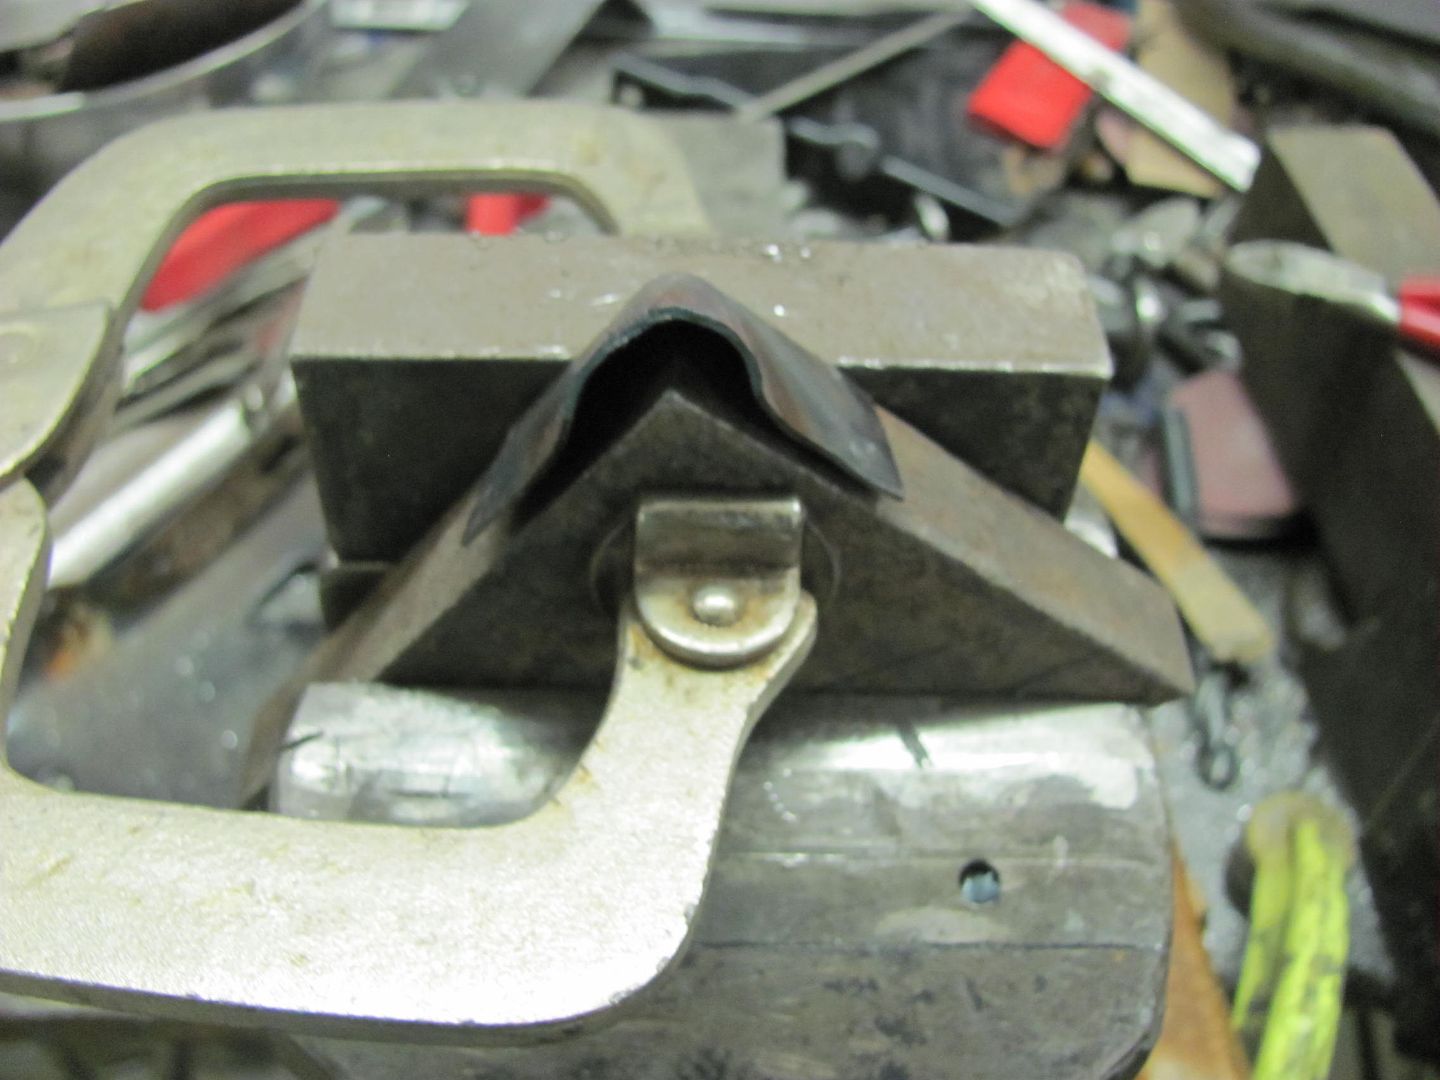 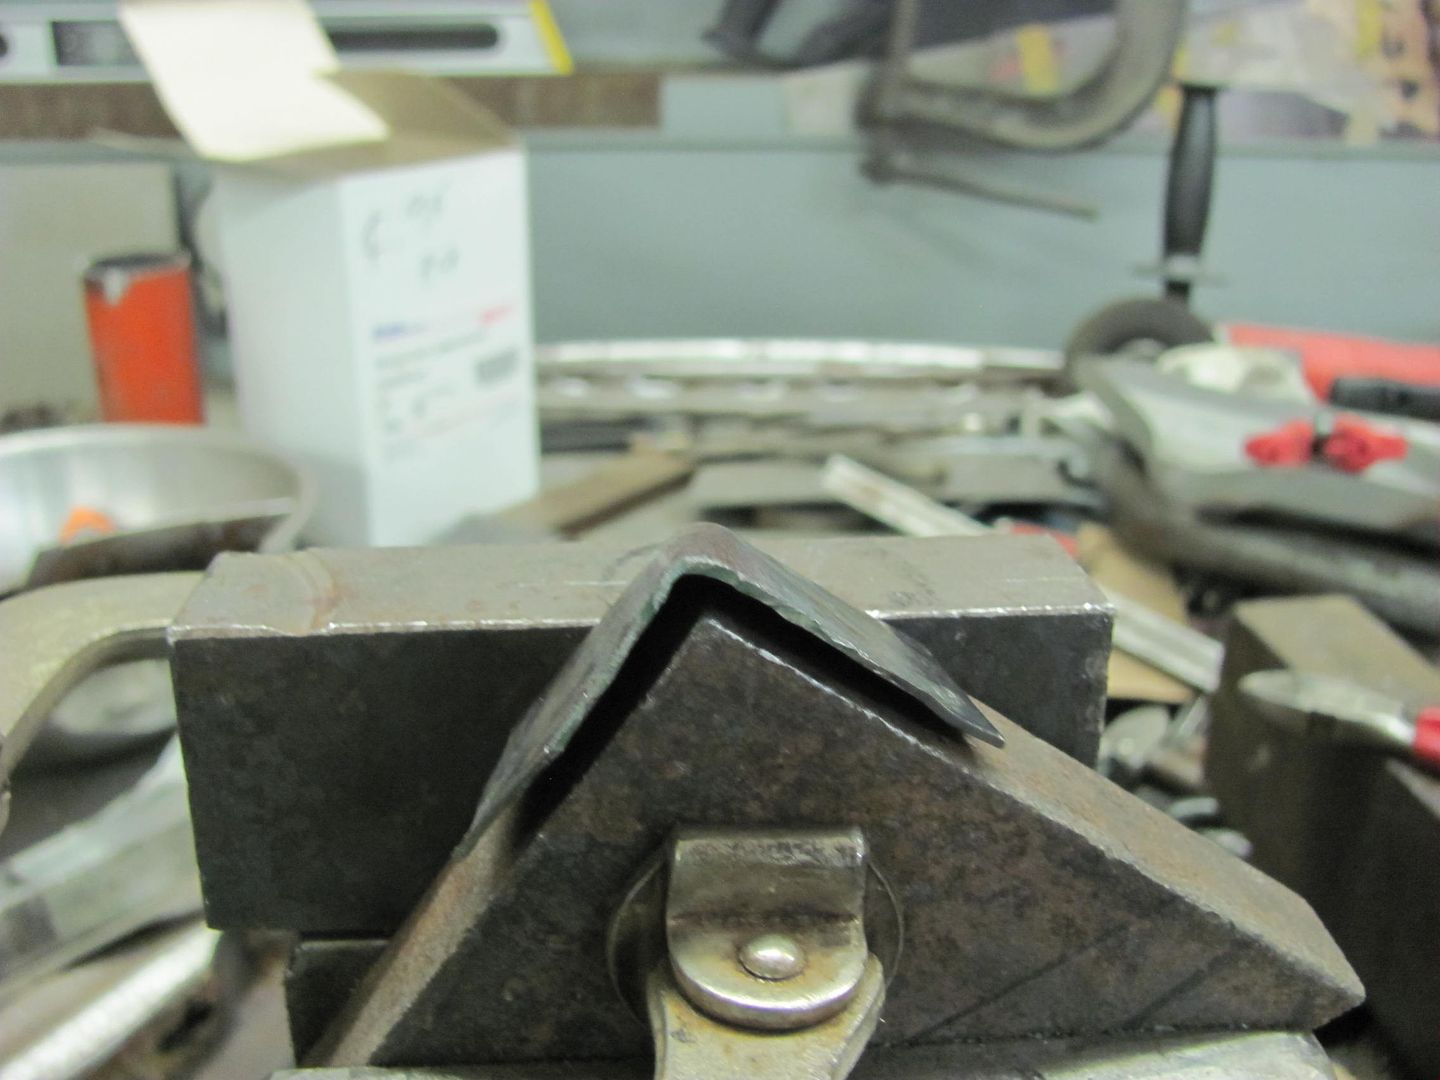 New corners welded in.... 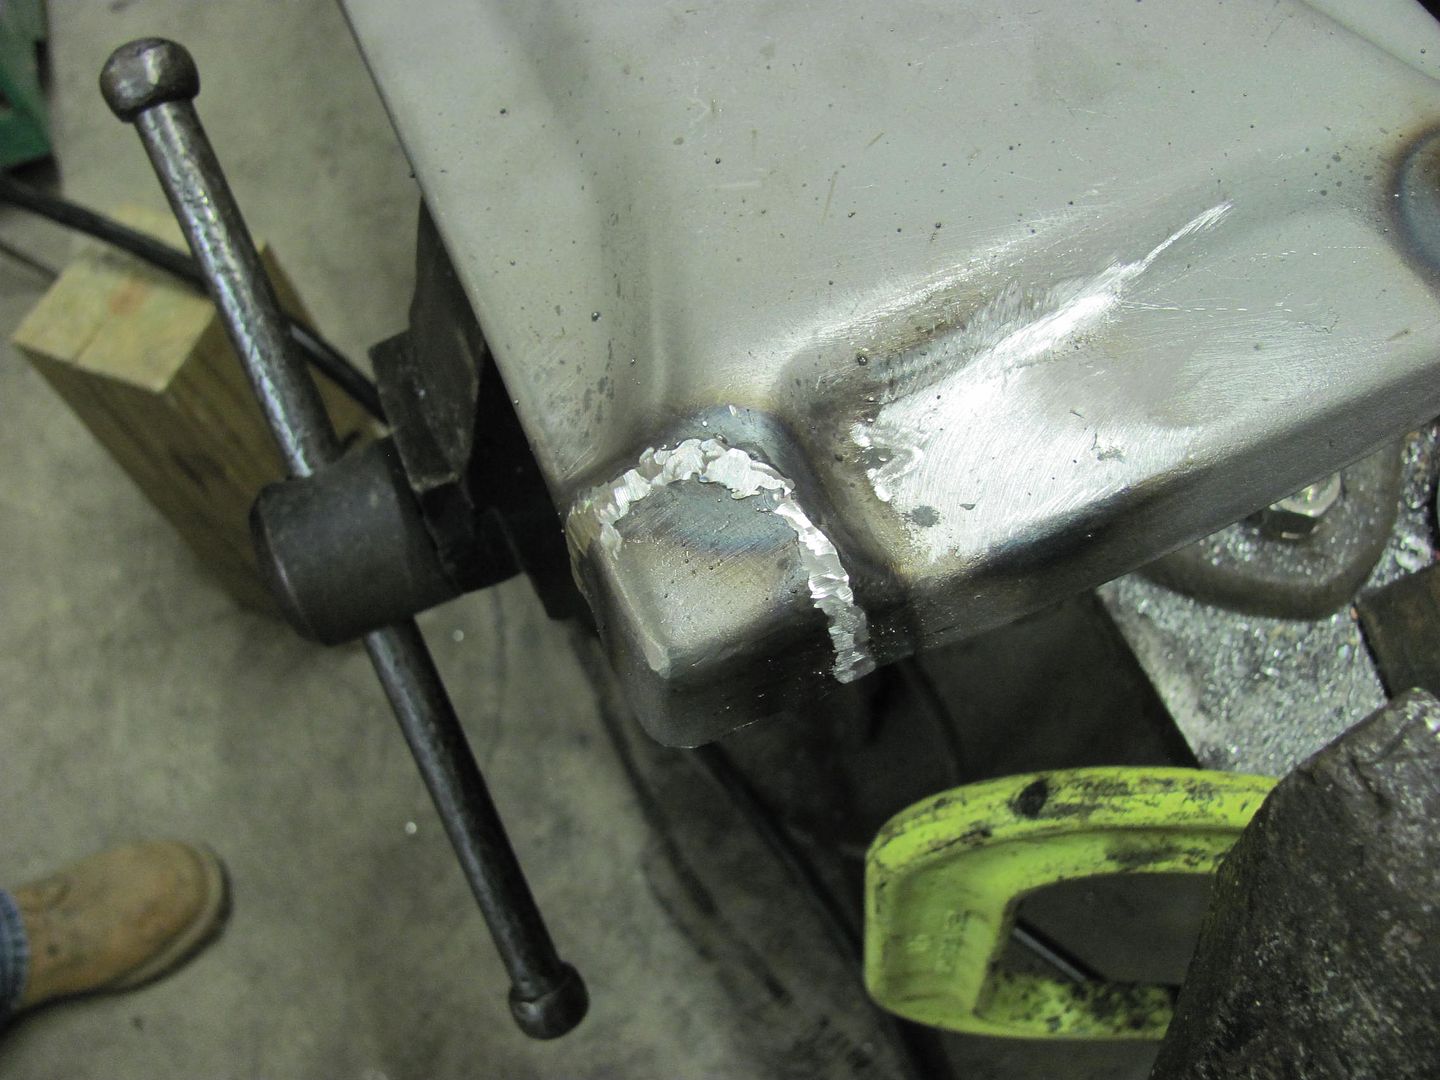 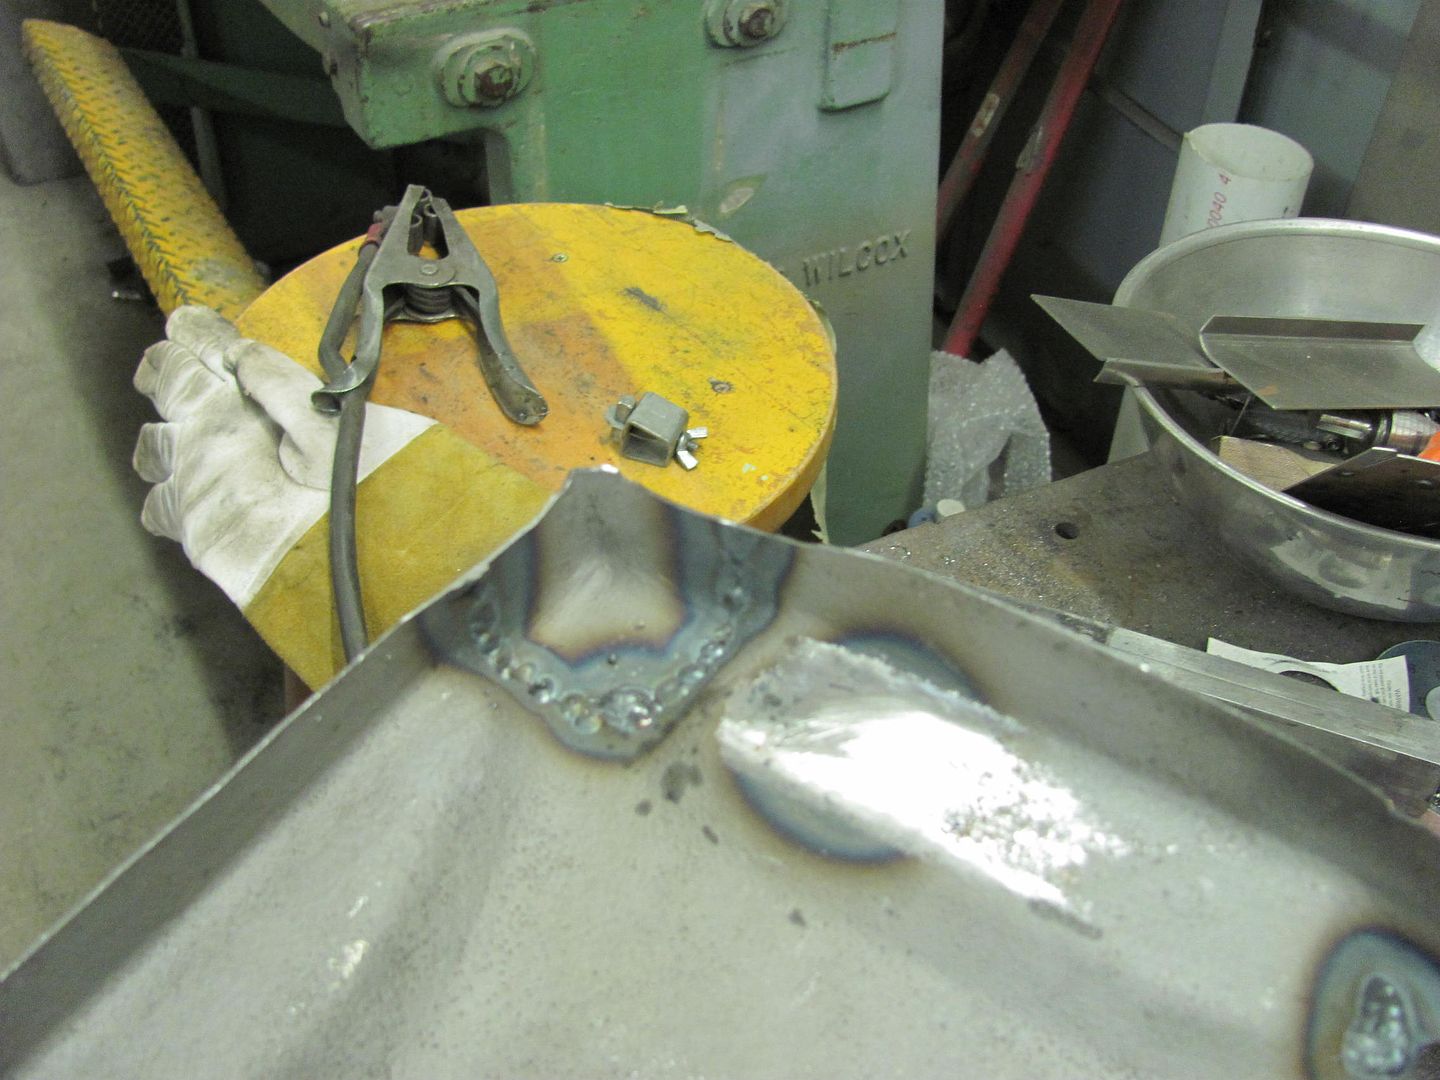 Some of the lines from forming were left to duplicate those from the factory... 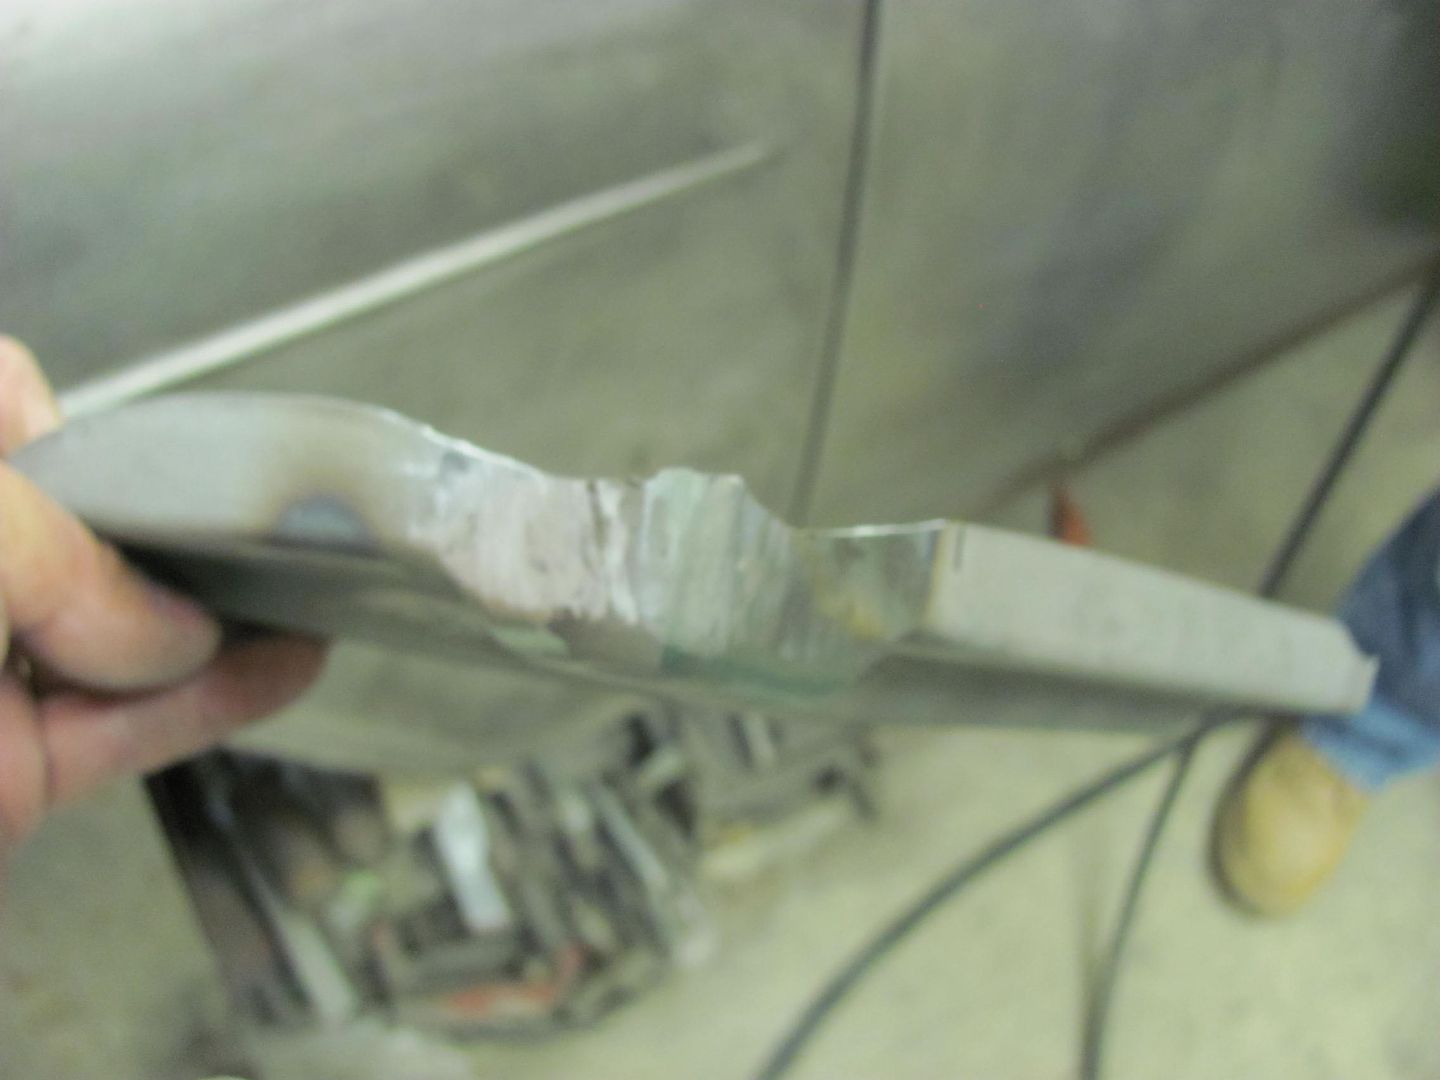 Gusset bracket added to core support.... 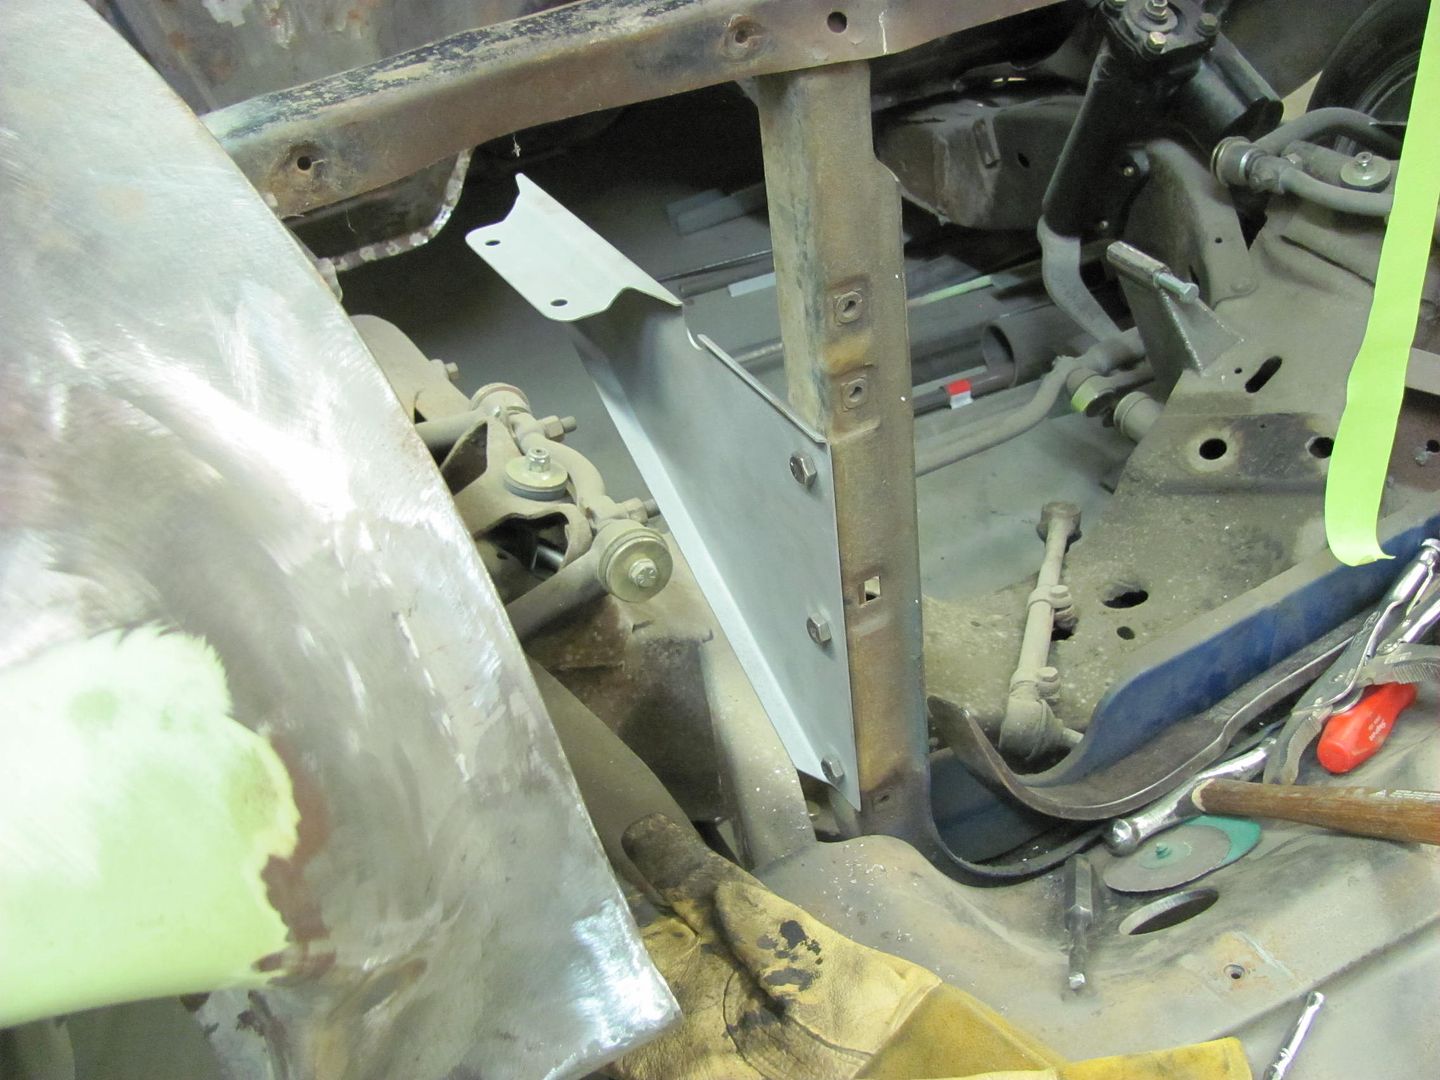 Holes located on inner fender.... 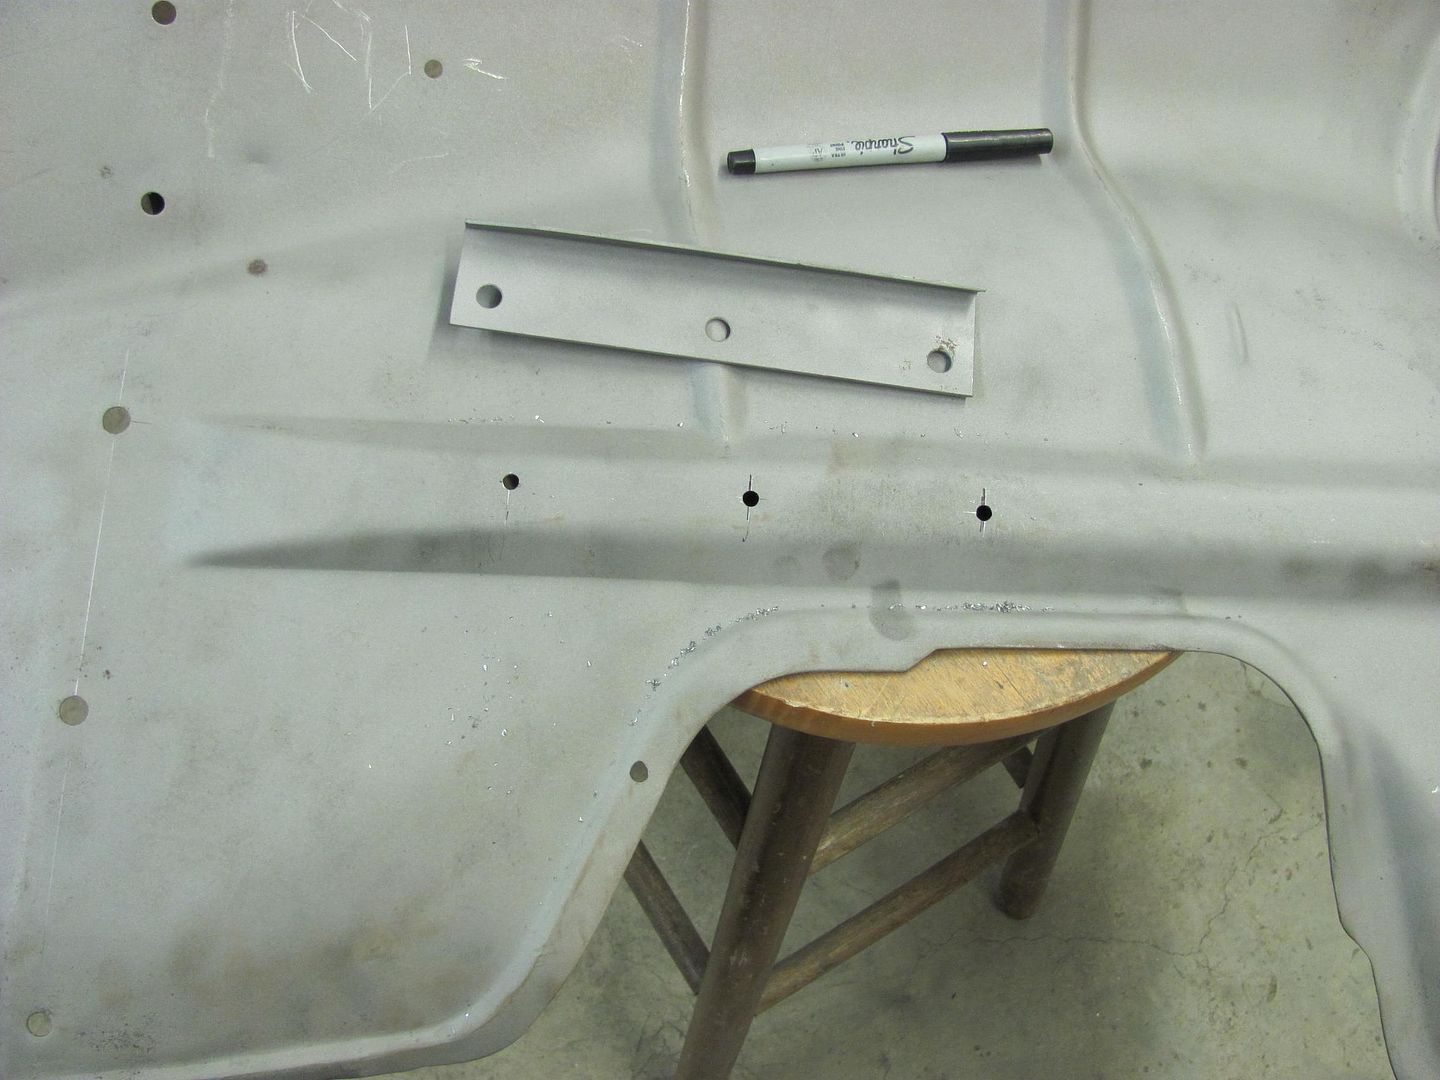 Stiffener brace and angle bracket bolted in.... 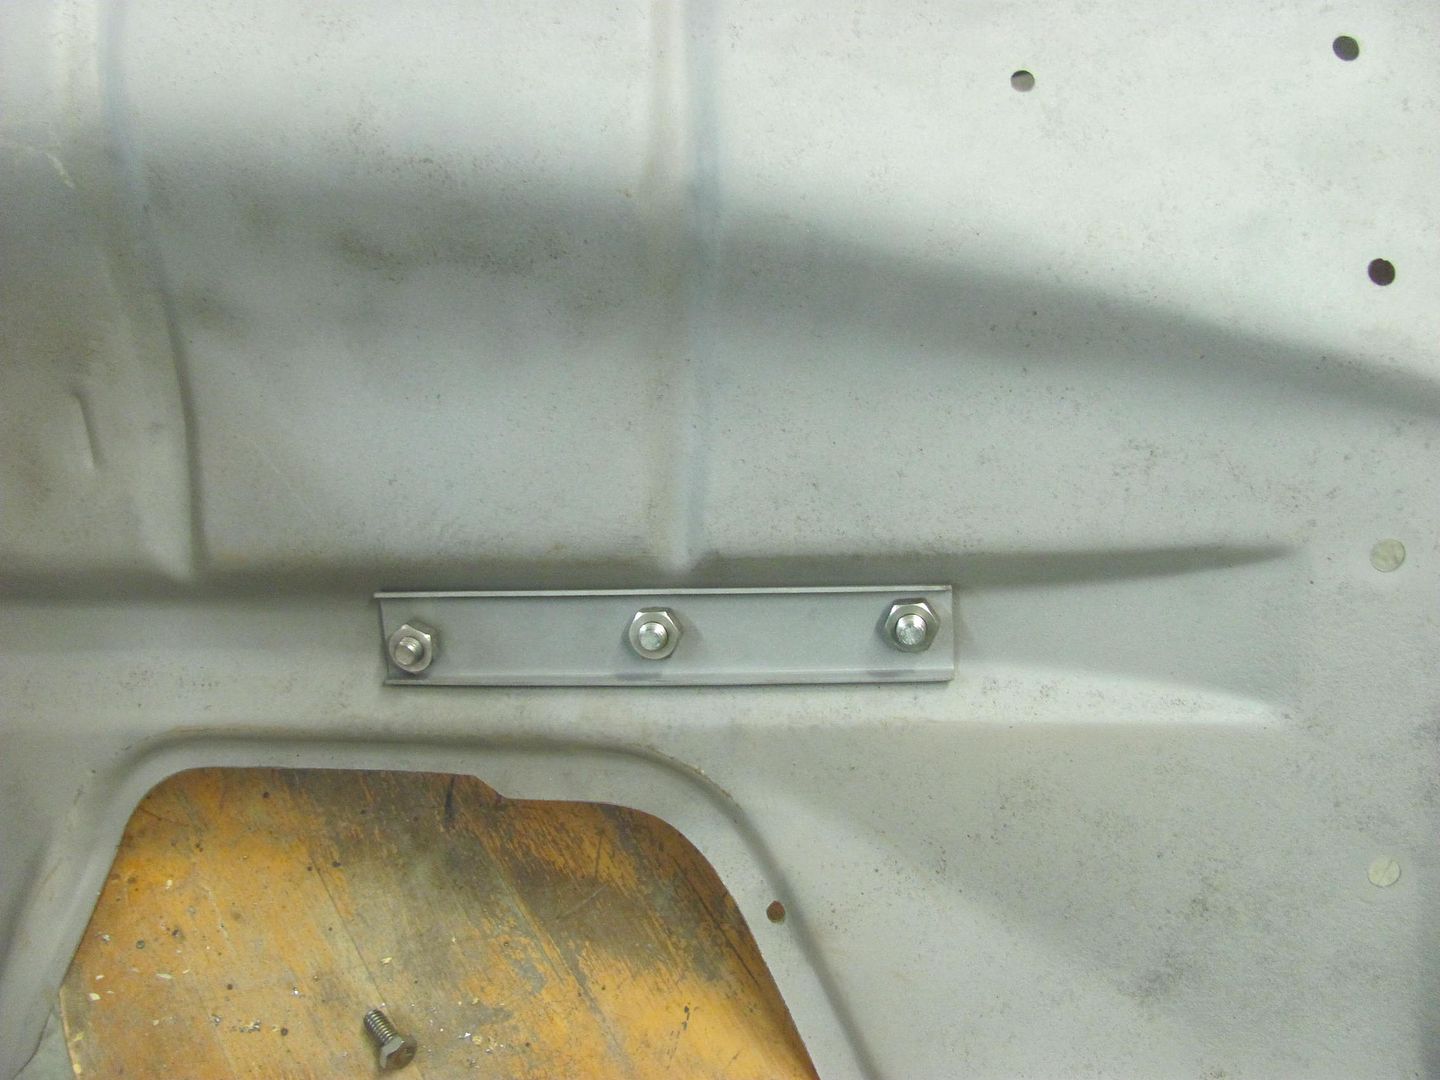  Tray bolted to the gusset, and plug welded to the angle bracket.... 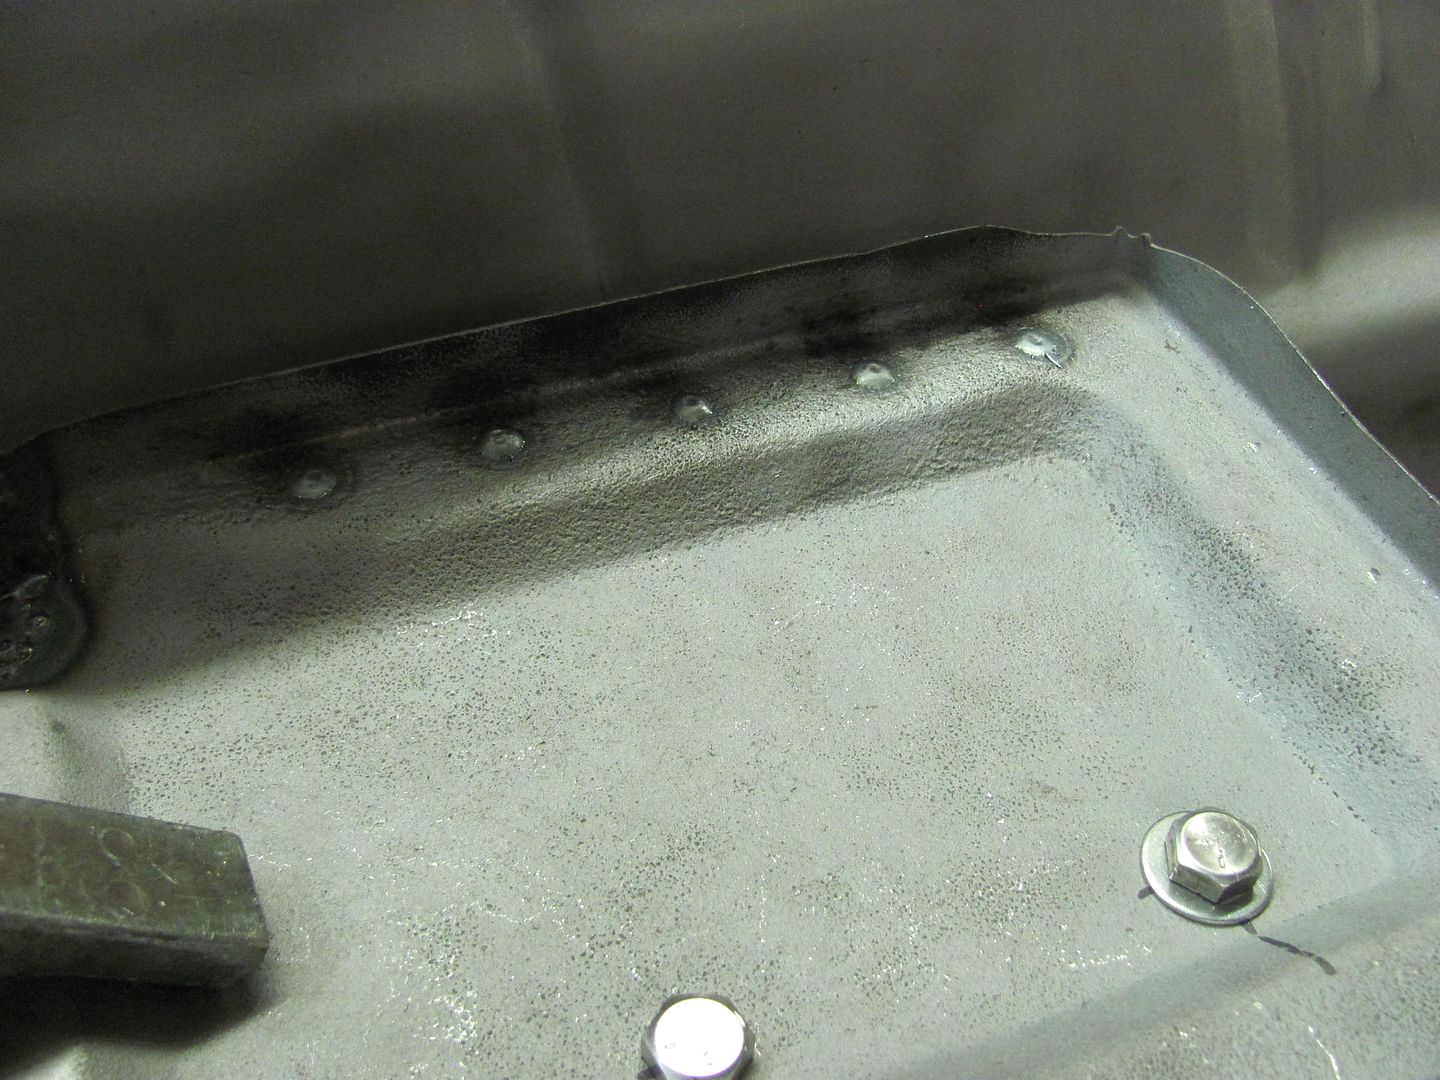 Battery hold down brackets added.... 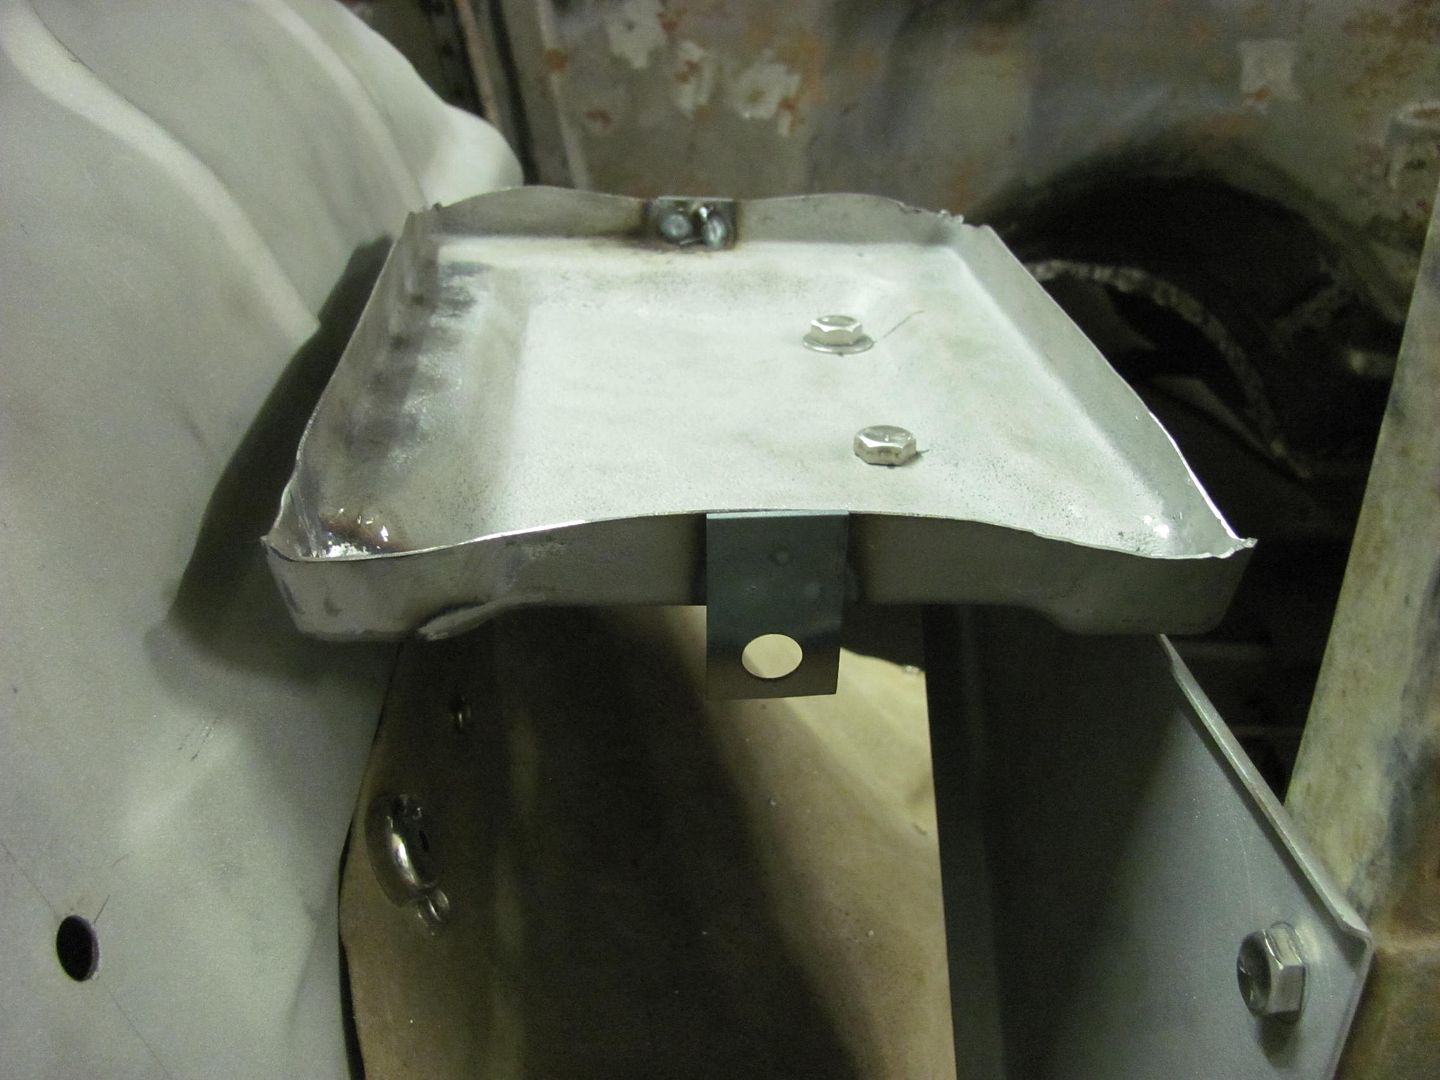 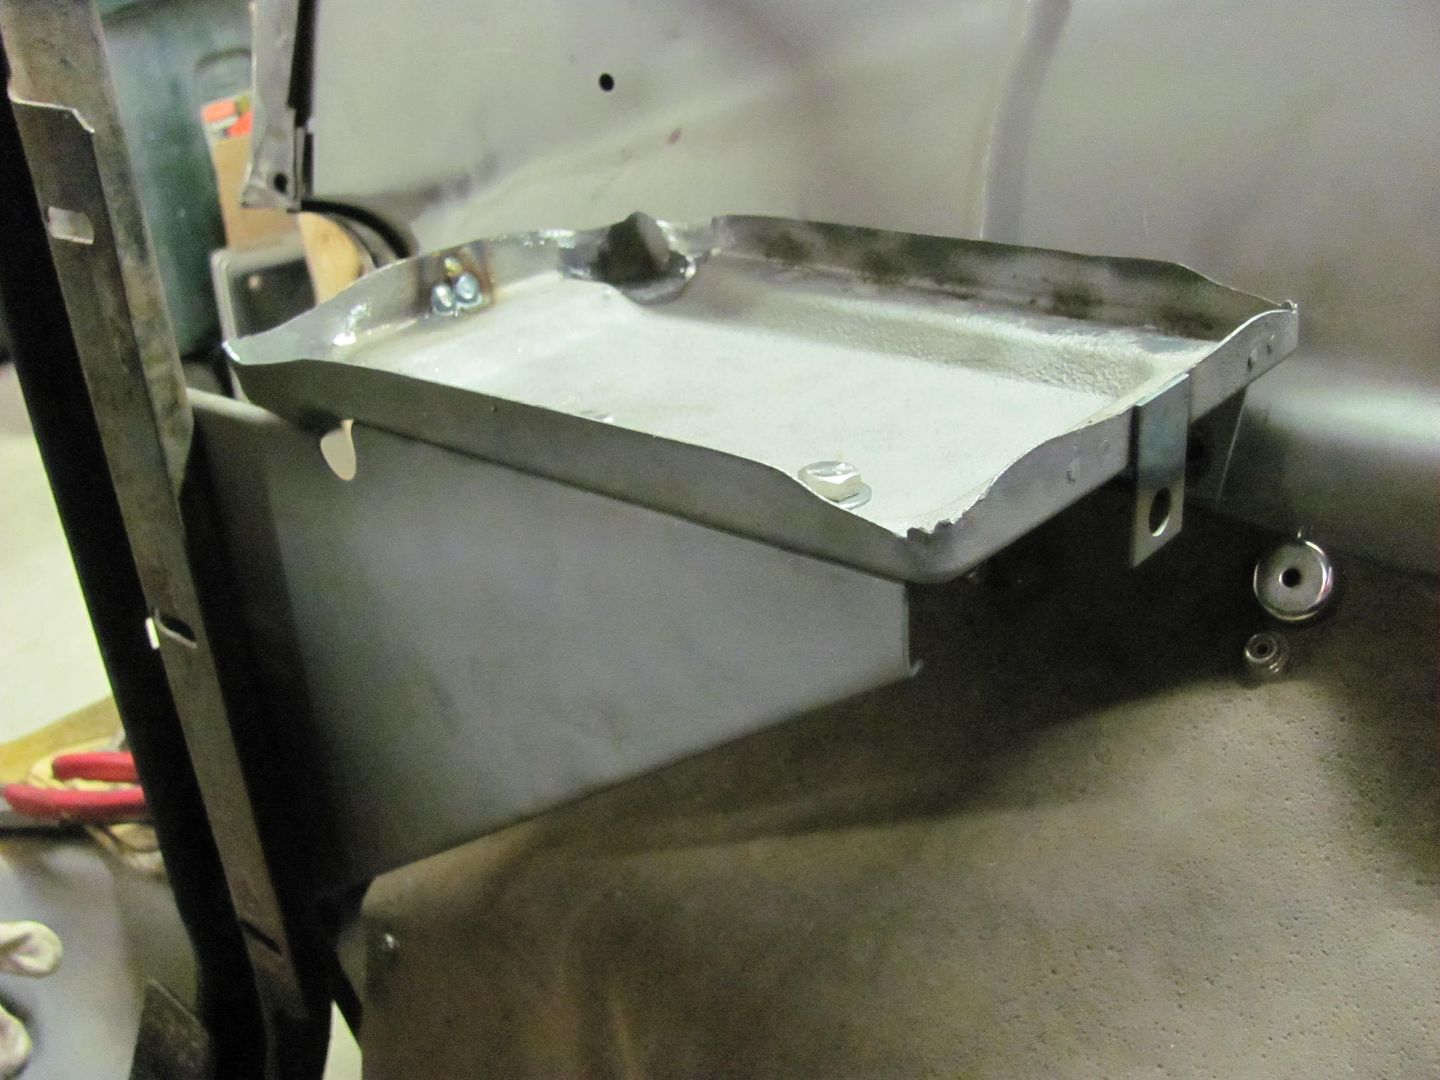 Got a couple plug welds to grind, media blasting, and these parts are ready for powder coating!
__________________
Robert |
|
|
|
|
09-27-2014, 08:03 PM
|
#13 |
|
Senior Member
Join Date: Jul 2012
Location: Oblong, Illinois
Posts: 7,017
|
Re: 55 Wagon Progress
Great ideas, nice work! Did you make the plugs?
|
|
|
|
|
09-27-2014, 08:09 PM
|
#14 |
|
Registered User
Join Date: Jan 2013
Location: Leonardtown, MD
Posts: 1,636
|
Re: 55 Wagon Progress
A buddy of mine has a turret punch, and I punched out a variety to have some for such repairs....
__________________
Robert |
|
|
|
|
10-01-2014, 10:21 PM
|
#15 |
|
Registered User
Join Date: Jan 2013
Location: Leonardtown, MD
Posts: 1,636
|
Re: 55 Wagon Progress
As Kyle media blasted and otherwise prepped parts for powder coating, I turned my attention to the new grille. This looked to be a very accurate reproduction as it fit tightly in the corners exactly as the original did..
In order to do some metal bumping on the grille corners and provide some clearance, which should help eliminate future front end squeaks and paint rubs, we'll need to make an anvil. This piece of pipe looks close to our templates.. 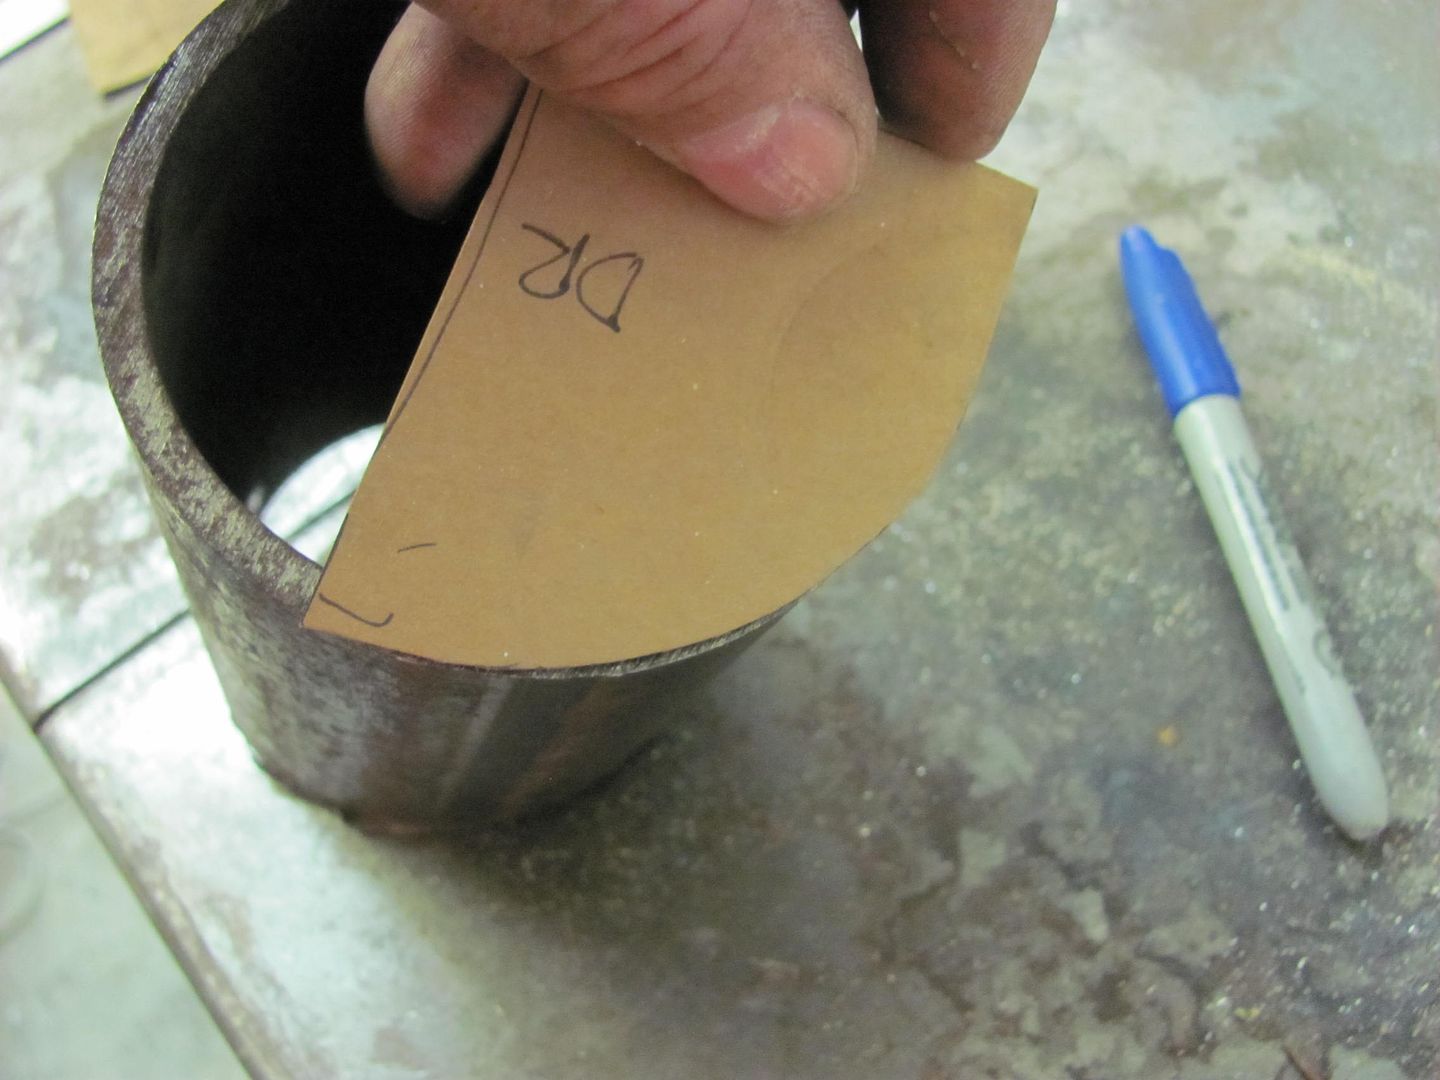 Unfortunately our grille shows some interference, so unless we plan on disassembly of a new grille, the anvil will need a specialized shape.. 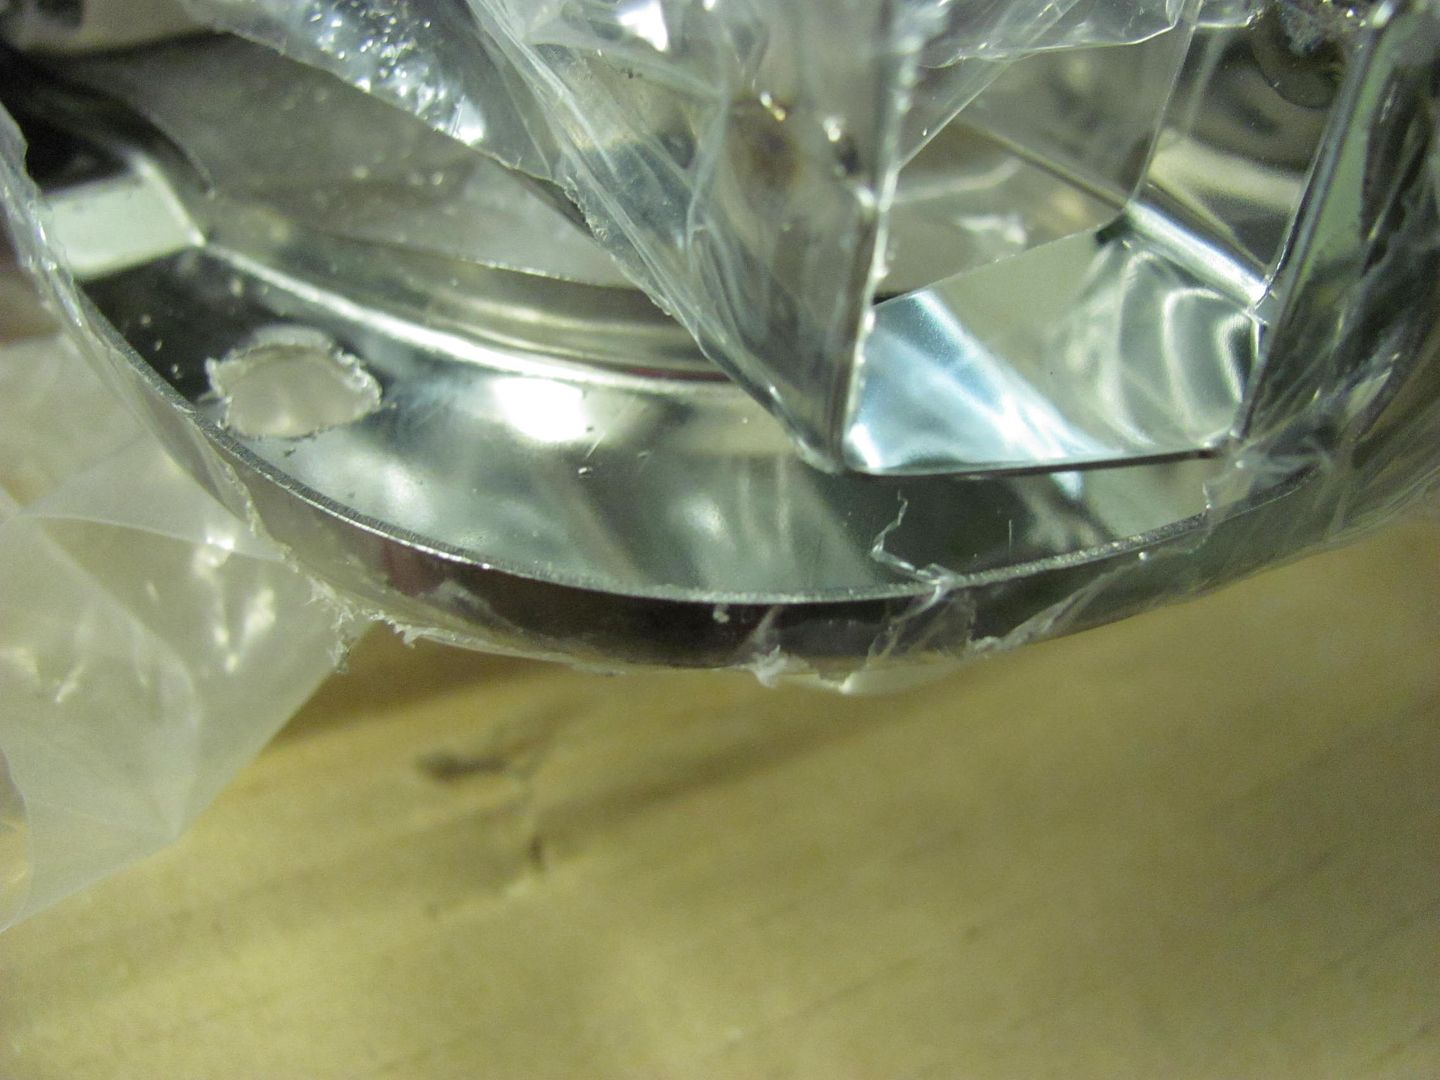 After some drilling, band saw and sanding action, here are the results: 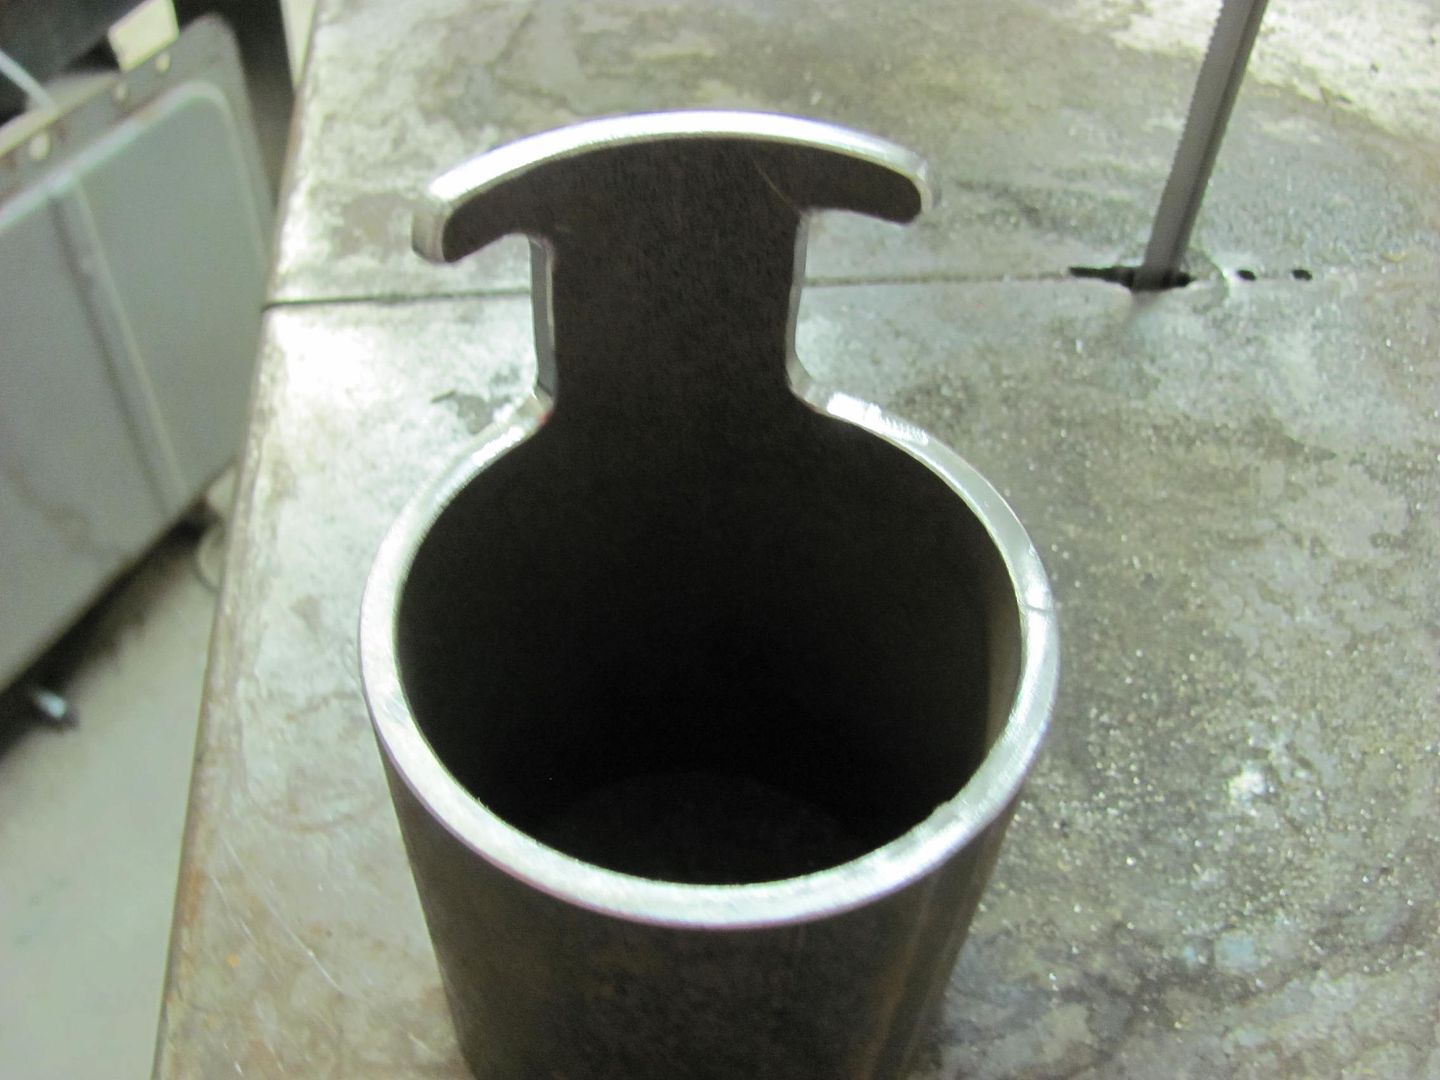 This may just work... 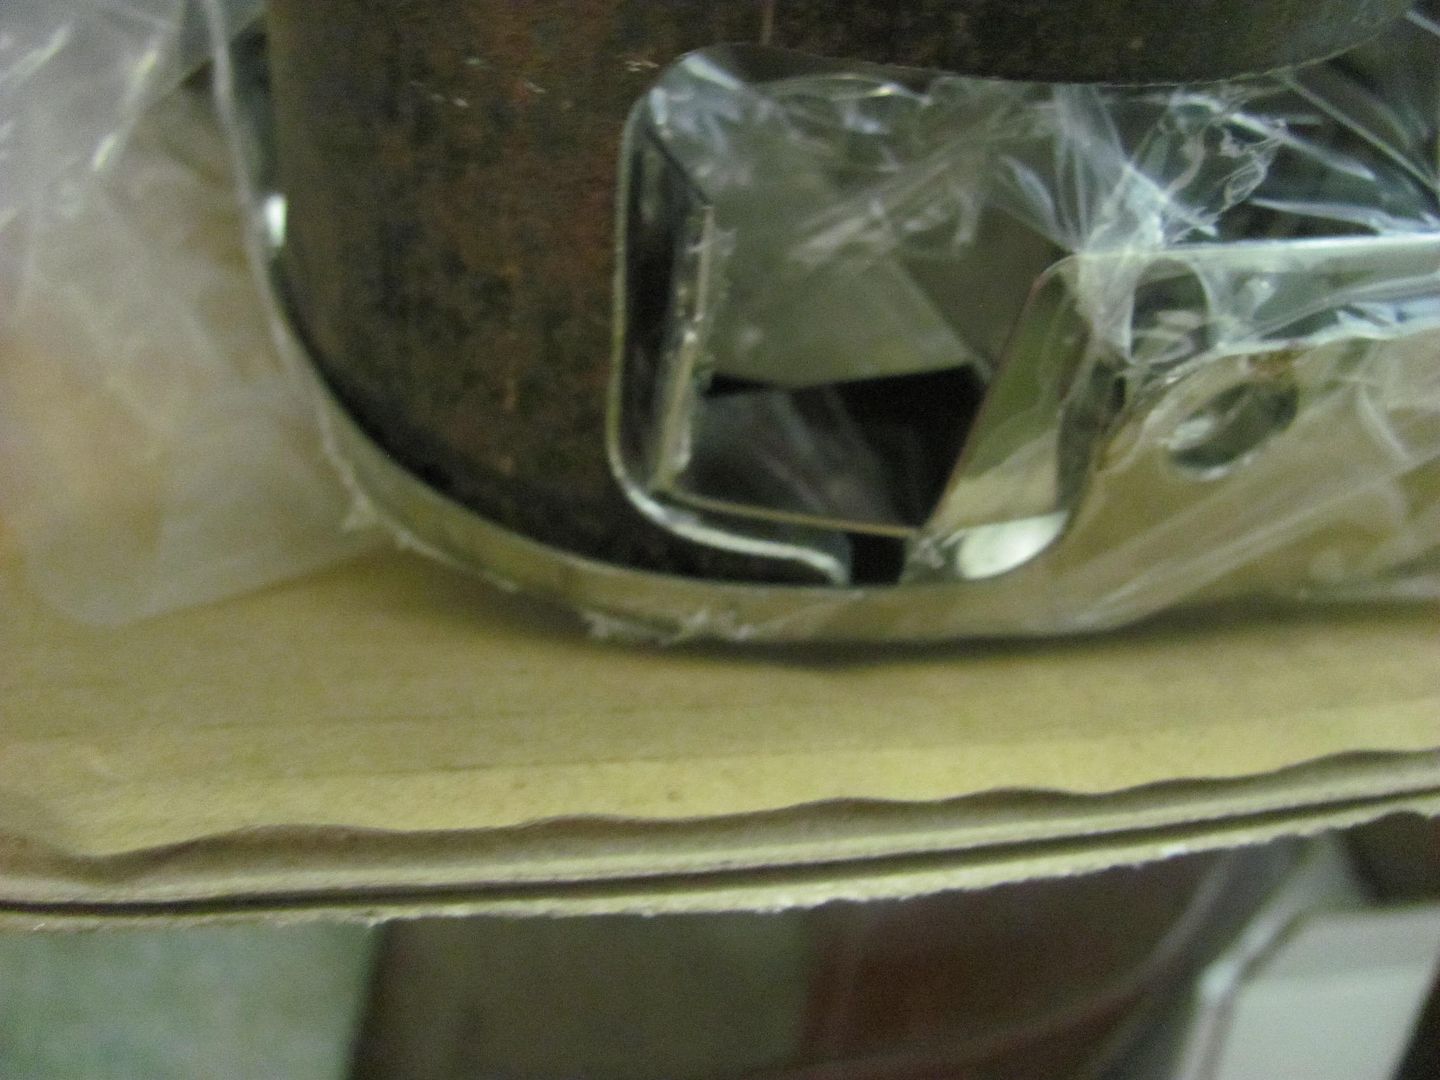 Working the corners.... Luckily any markings that may occur here will be covered by the surround chrome.. 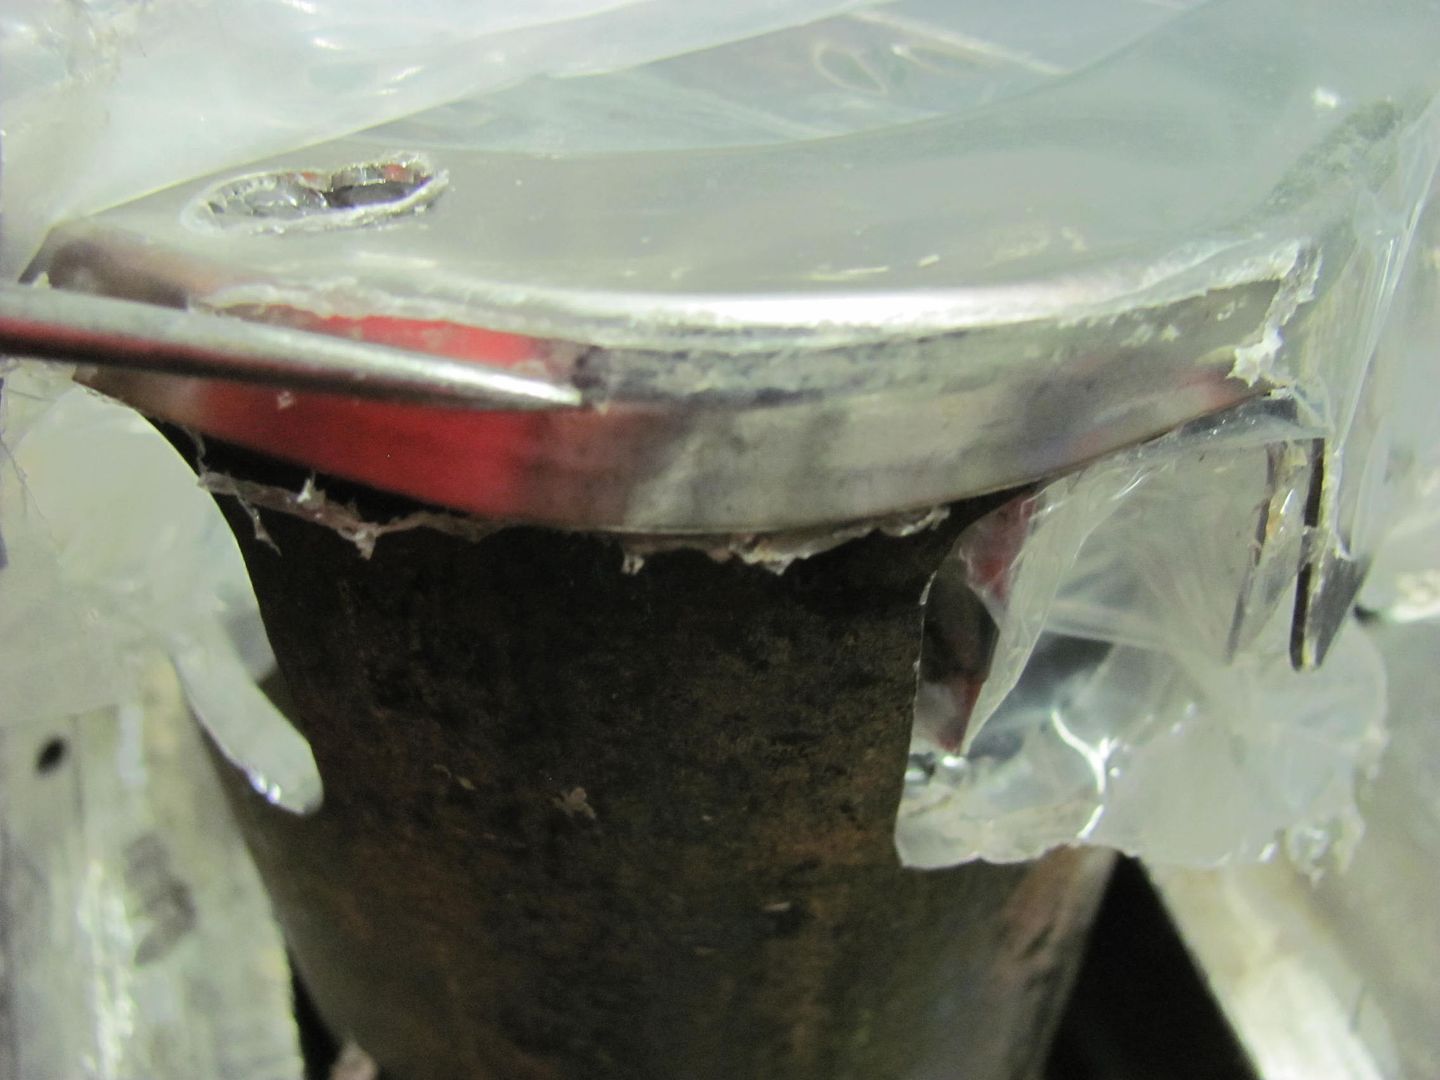 Test fitment shows a nice consistent gap: 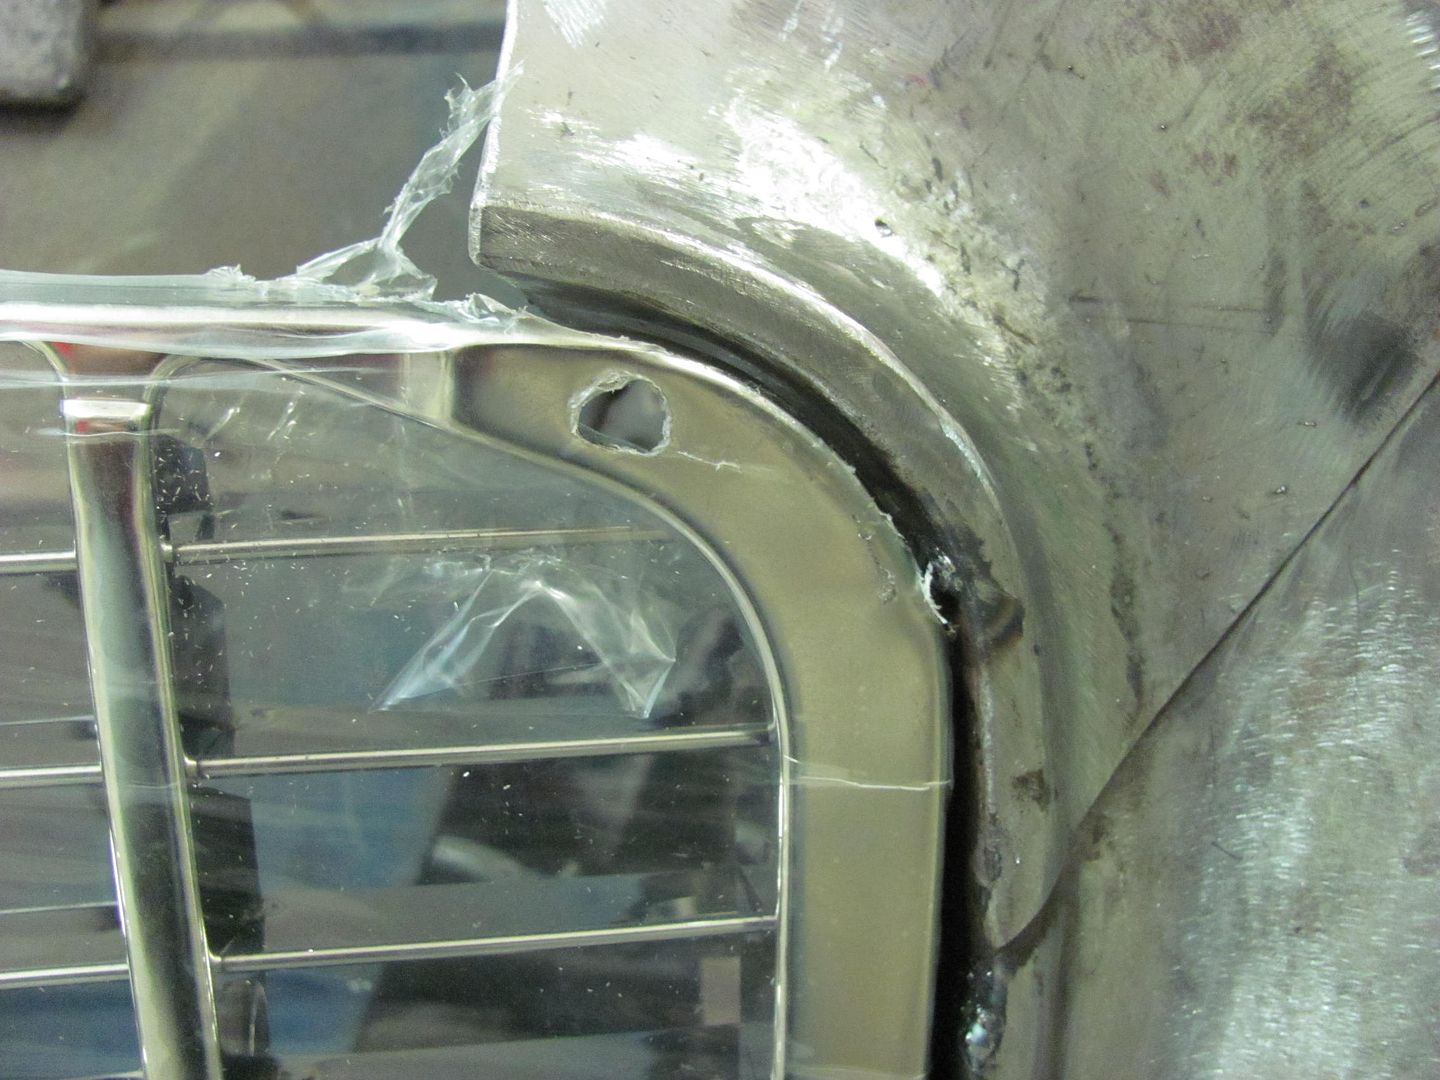
__________________
Robert |
|
|
|
|
10-03-2014, 01:59 AM
|
#16 |
|
6>8 Plugless........
 Join Date: Sep 2007
Location: Prairie City, Ia
Posts: 17,141
|
Re: 55 Wagon Progress
You do such an amazing job and thanks for taking the time to document all this and post it!
__________________
Ryan 1972 Chevy Longhorn K30 Cheyenne Super, 359 Inline 6 cylinder, Auto Trans, Tilt, Diesel Tach/Vach, Buckets, Rare Rear 4-link and air ride option Build Thread 1972 GMC Sierra Grande Longhorn 4x4 1972 Chevy Cheyenne Super K20 Long Step side tilt, tach, tow hooks, AC, 350 4 speed 1972 C10 Suburban Custom Deluxe 1969 Chevy milk truck 1971 Camaro RS 5.3 BTR STG3 Cam Super T10 1940 Ford 354 Hemi 46RH Ford 9" on air ride huge project Tired of spark plugs? Check this out. |
|
|
|
|
10-03-2014, 06:33 AM
|
#17 |
|
Registered User
Join Date: Jan 2013
Location: Leonardtown, MD
Posts: 1,636
|
Re: 55 Wagon Progress
Thanks for the comments guys. James, I'm surprised some of the car owners didn't run you off, picking their car apart like that

__________________
Robert |
|
|
|
|
10-05-2014, 09:42 PM
|
#18 |
|
Registered User
Join Date: Jan 2013
Location: Leonardtown, MD
Posts: 1,636
|
Re: 55 Wagon Progress
Today we worked on hood and gap alignment at the front of the car, the passenger side is all but done, so we started around to the driver's side. The windshield cowl showed a high spot behind the fender and door, that was bulged about 3/16. Good ol' factory fit!
 So we made a vertical slice behind the fender and door, bumped the high spot down, and welded the joint. We had a blowout near the leaded seam due to some rust that had collected on the back side.. Forgot to take a picture before slicing and dicing, but here's the culprit. Also had some porosity in the vertical weld that got cleaned out and re-welded later... 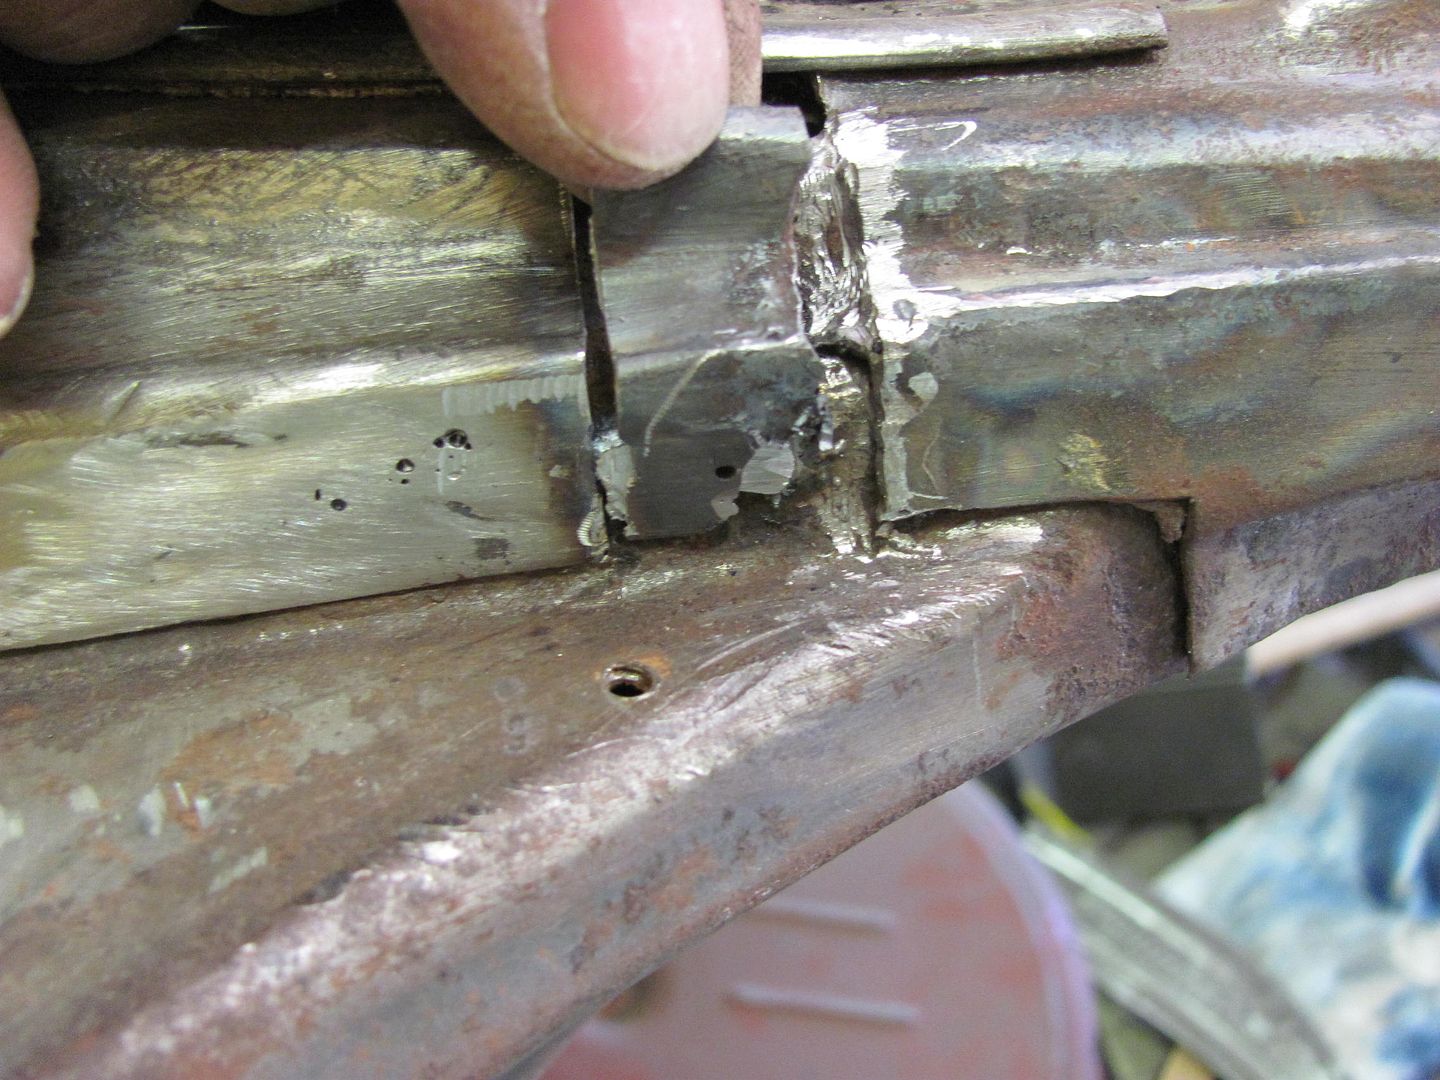 Fitted, tacked, and finished 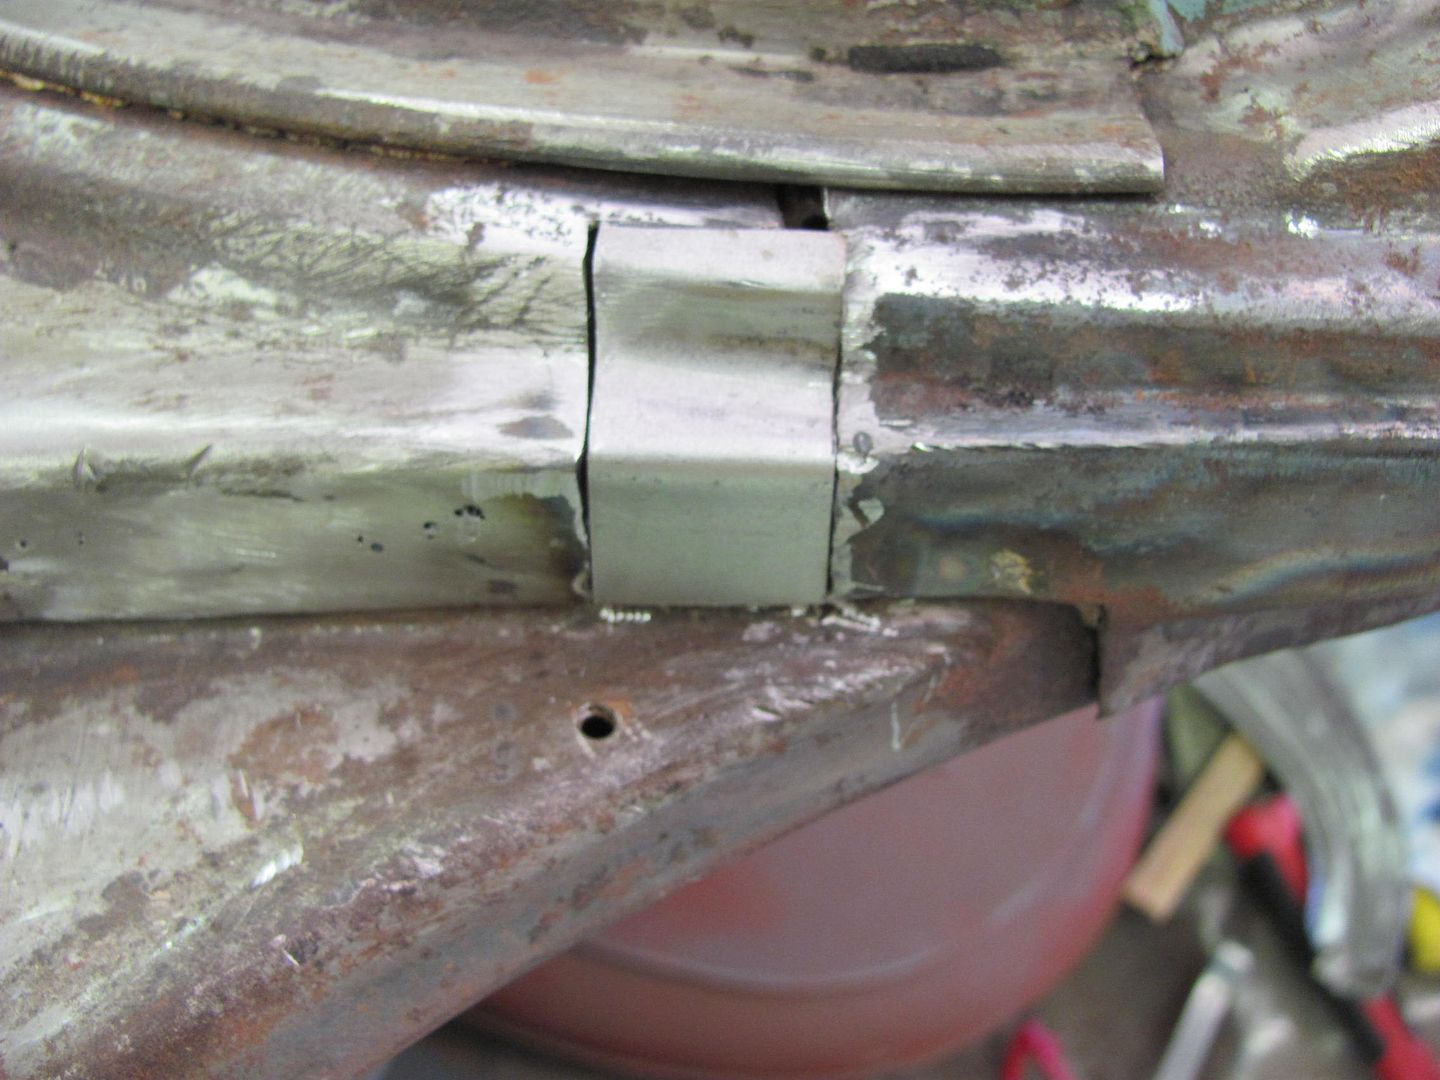 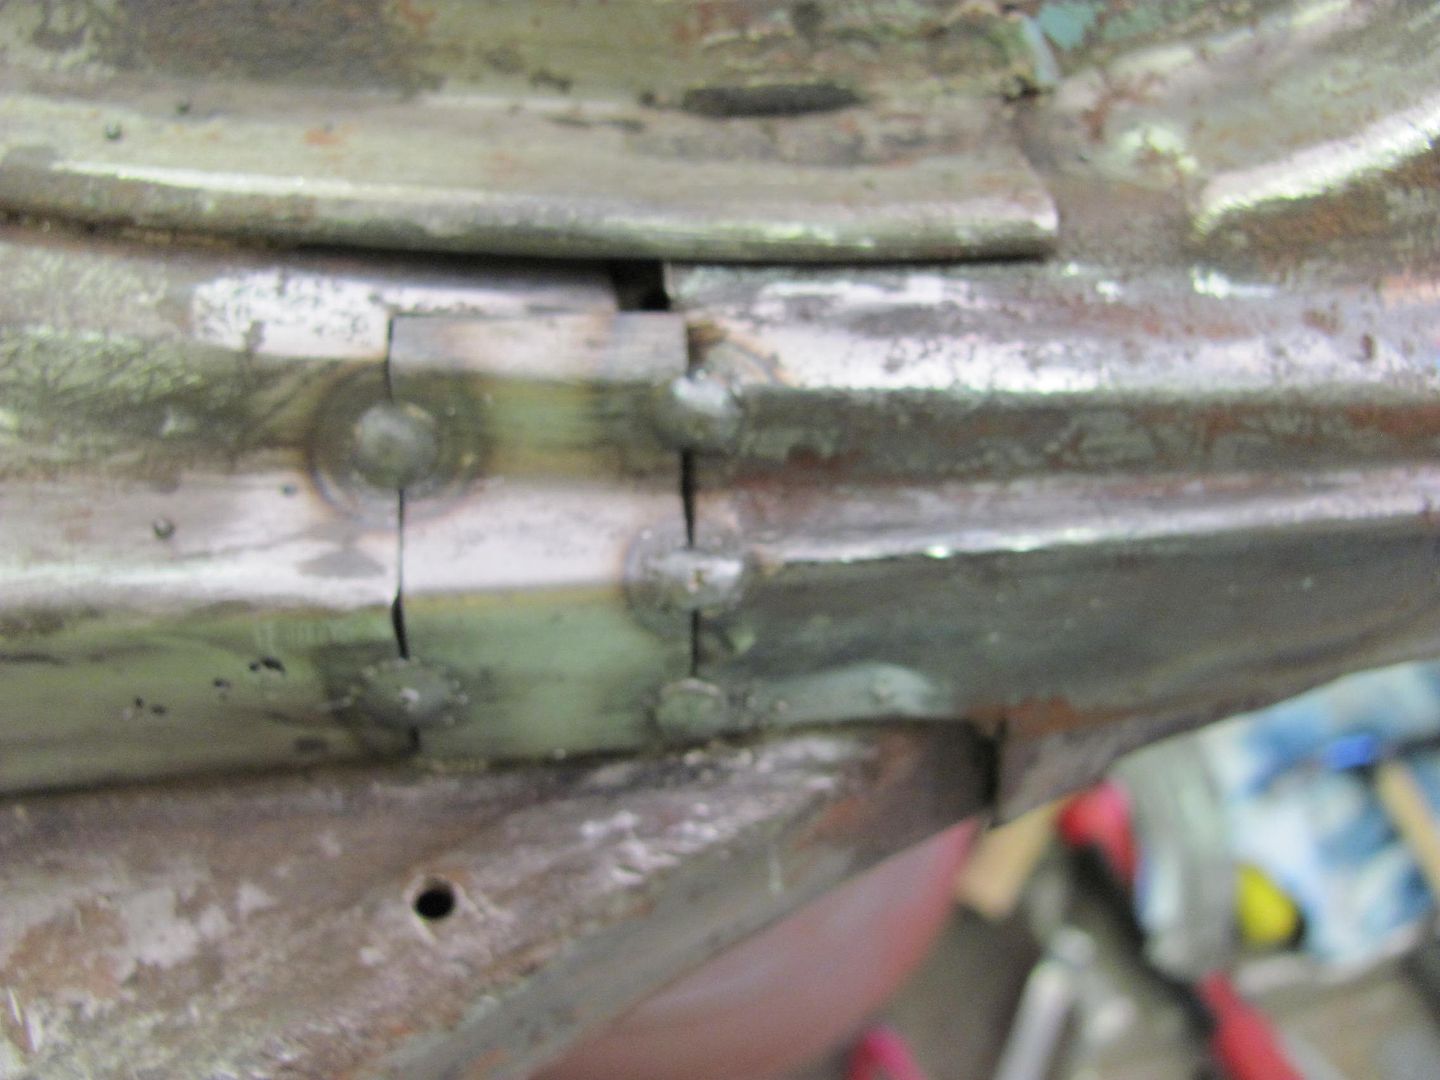  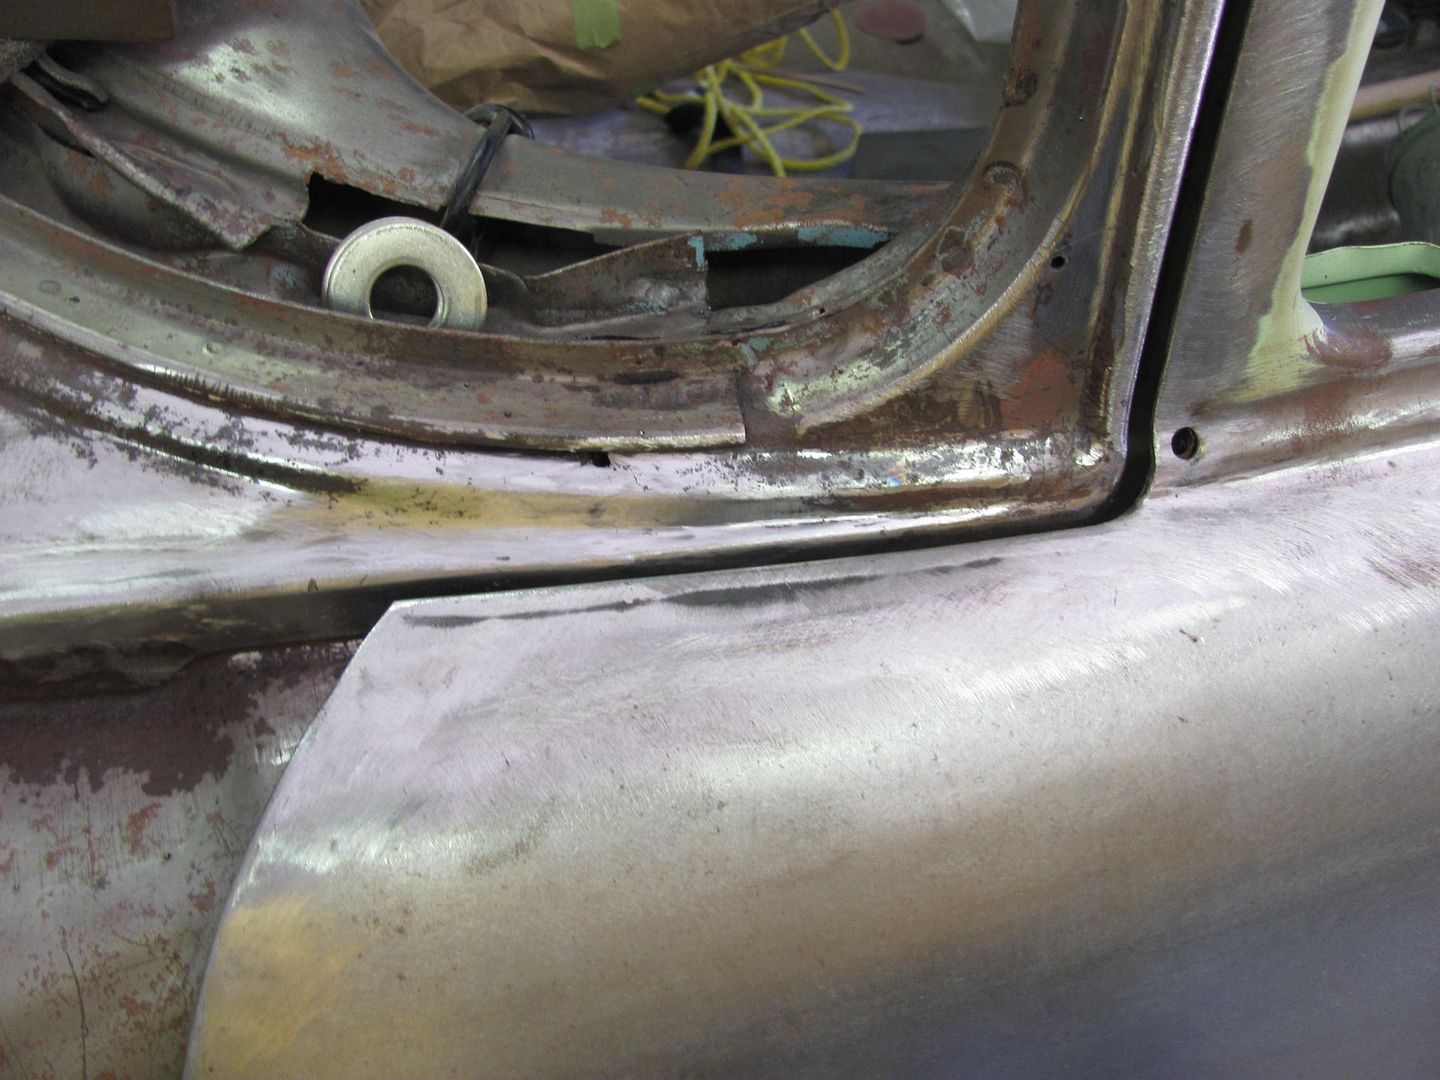 Gaps... 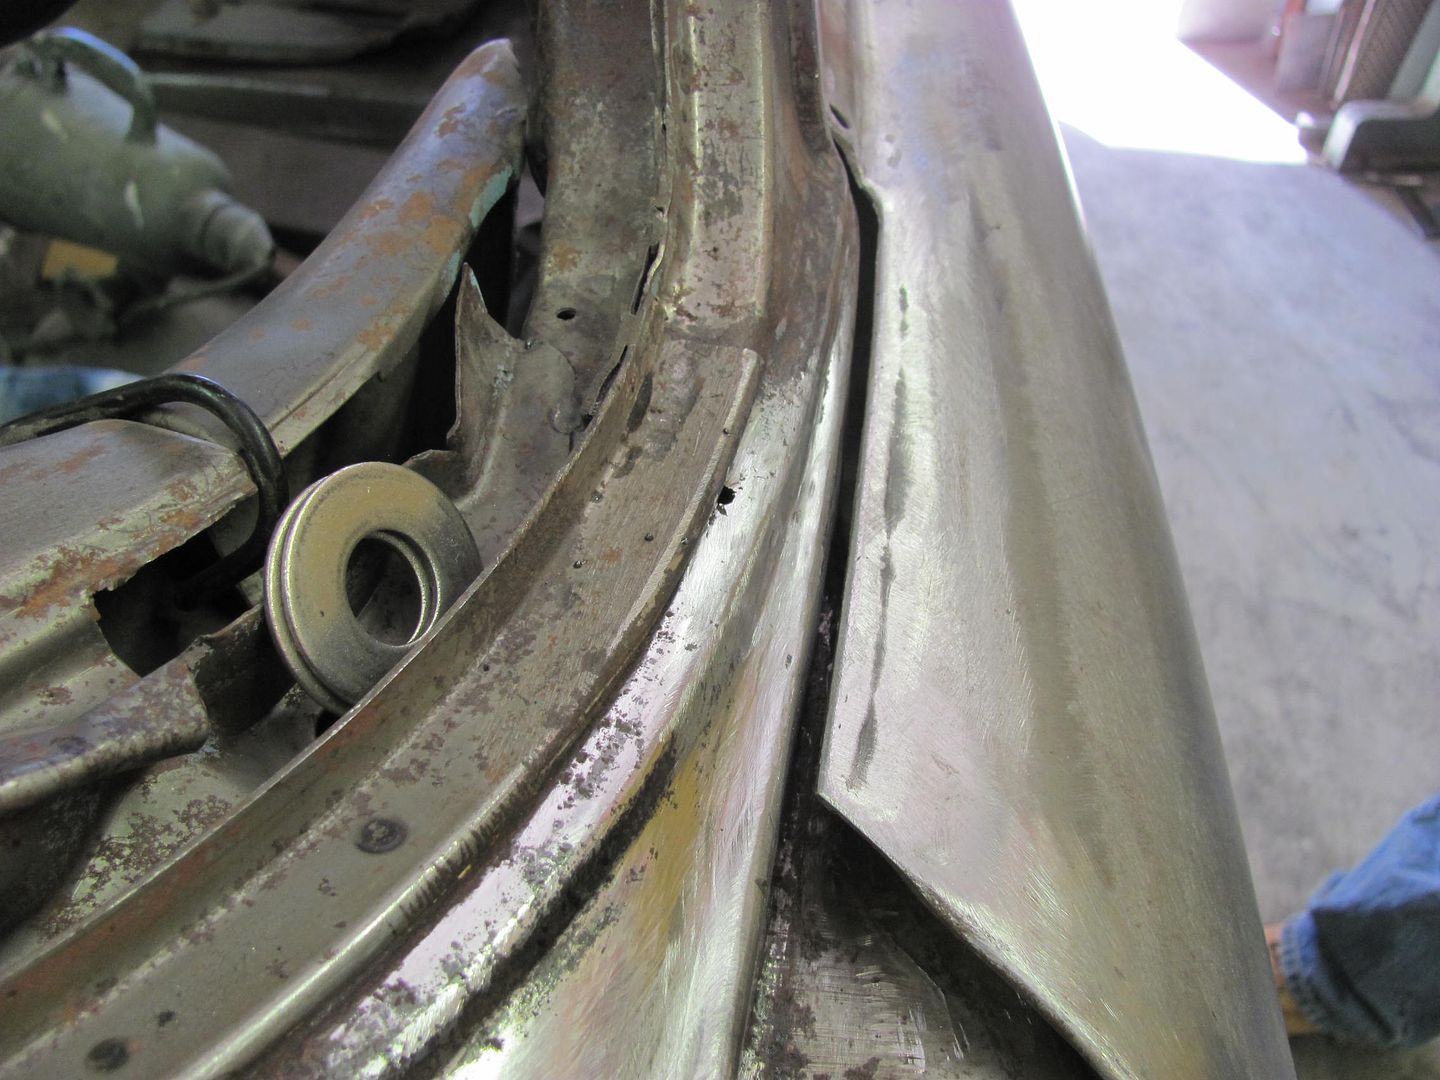 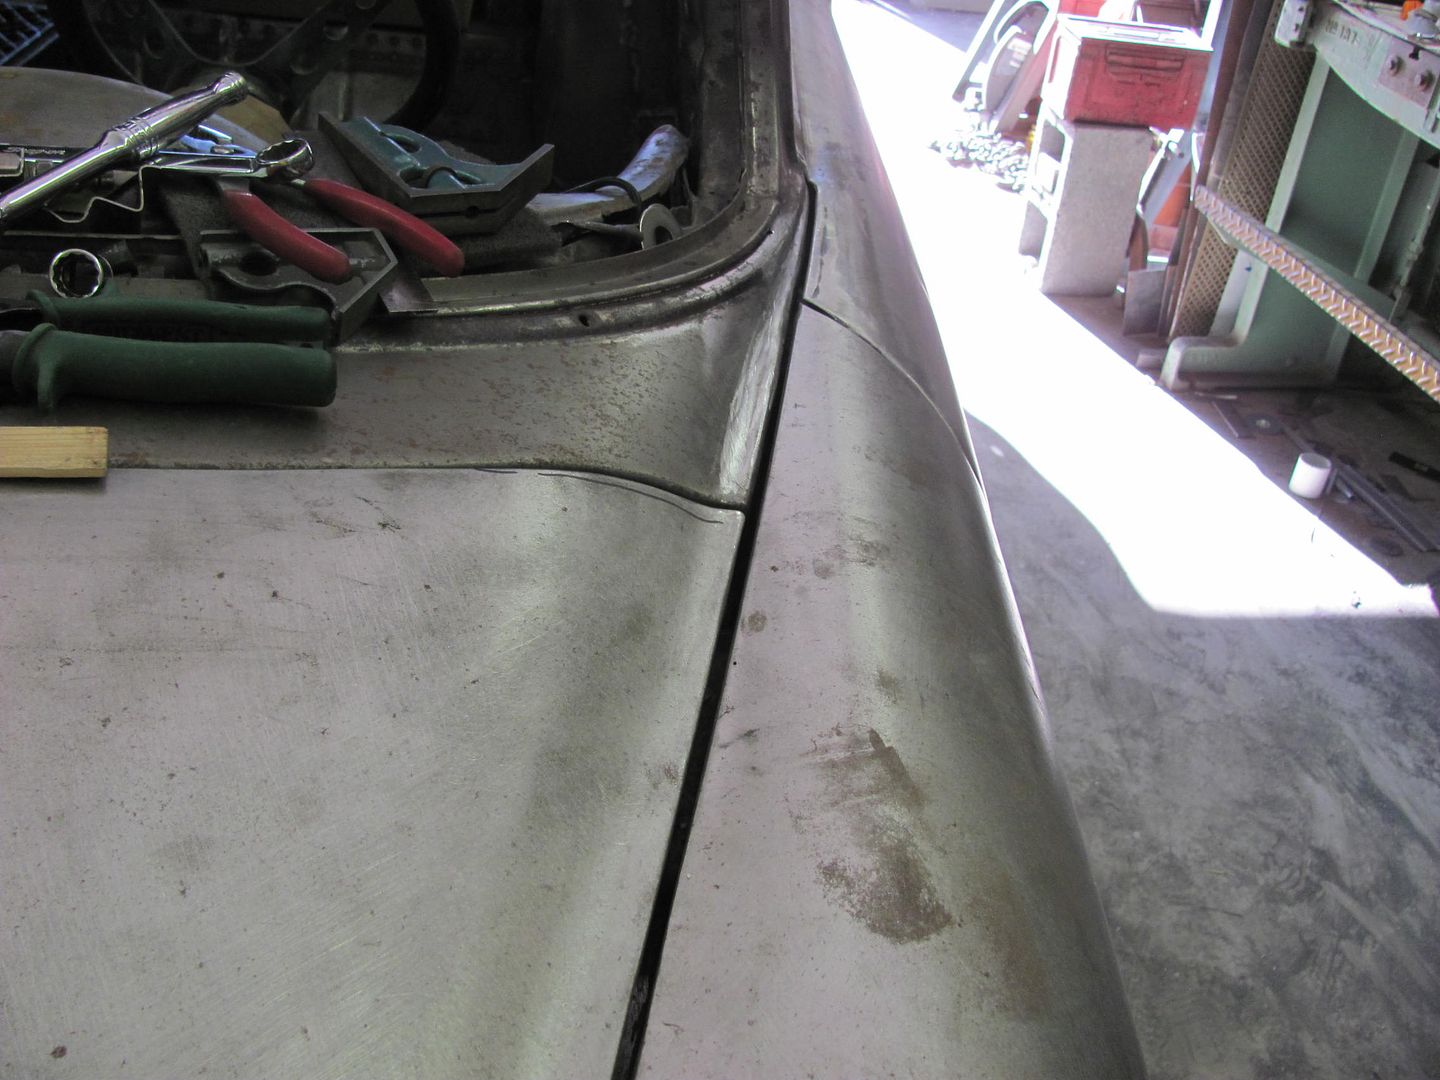 Much better 
__________________
Robert |
|
|
|
|
10-05-2014, 10:24 PM
|
#19 |
|
Senior Member
Join Date: Jul 2012
Location: Oblong, Illinois
Posts: 7,017
|
Re: 55 Wagon Progress
Very nice. Really appreciate the focus on detail and quality of the work.
|
|
|
|
|
10-08-2014, 11:17 PM
|
#20 |
|
Registered User
Join Date: Jan 2013
Location: Leonardtown, MD
Posts: 1,636
|
Re: 55 Wagon Progress
Thanks!
I've had my Mig welder for quite a while now, and thought I'd downsize a bit. Most of the work I do is sheet metal, and the occasional 1/8 or 3/16 plate. I had looked at the Miller 211's online and on eBay, so I had a price range in mind. I stopped by my local Welding supply and was pleased to find that he had those prices beat by a good bit. So it came home with me.. 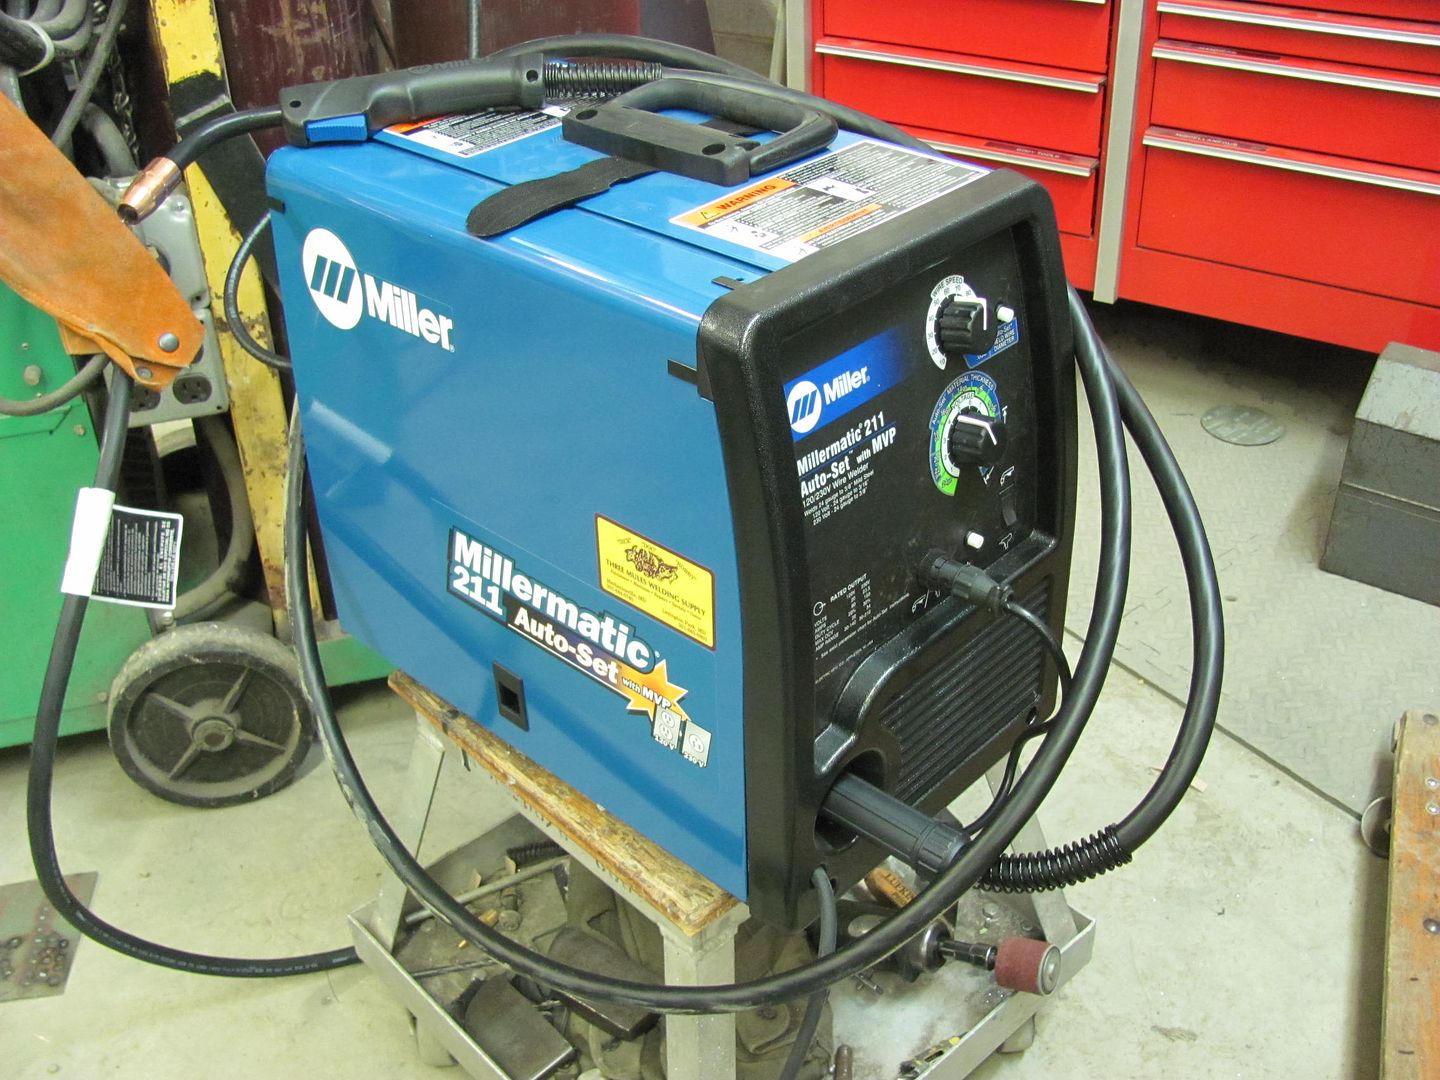  First order of business was to test it out and do a comparison to the coupon I had done with the old machine. I still had the 11 lb. roll of .023 EZ Grind, so that was used in the new machine. Here are the results... 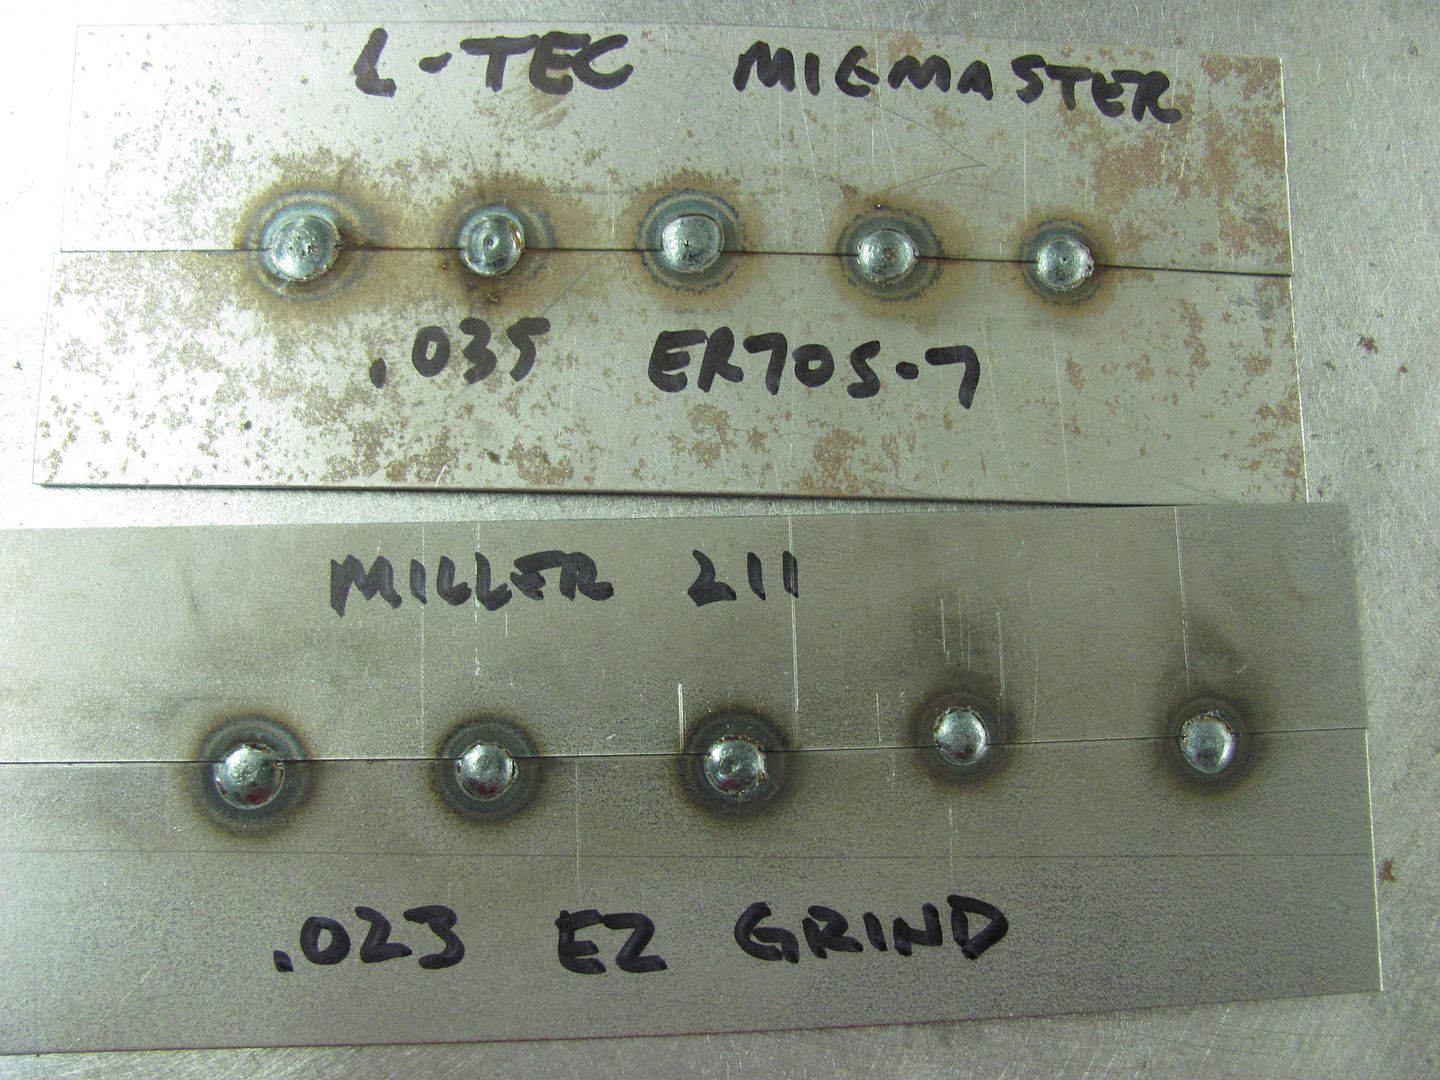 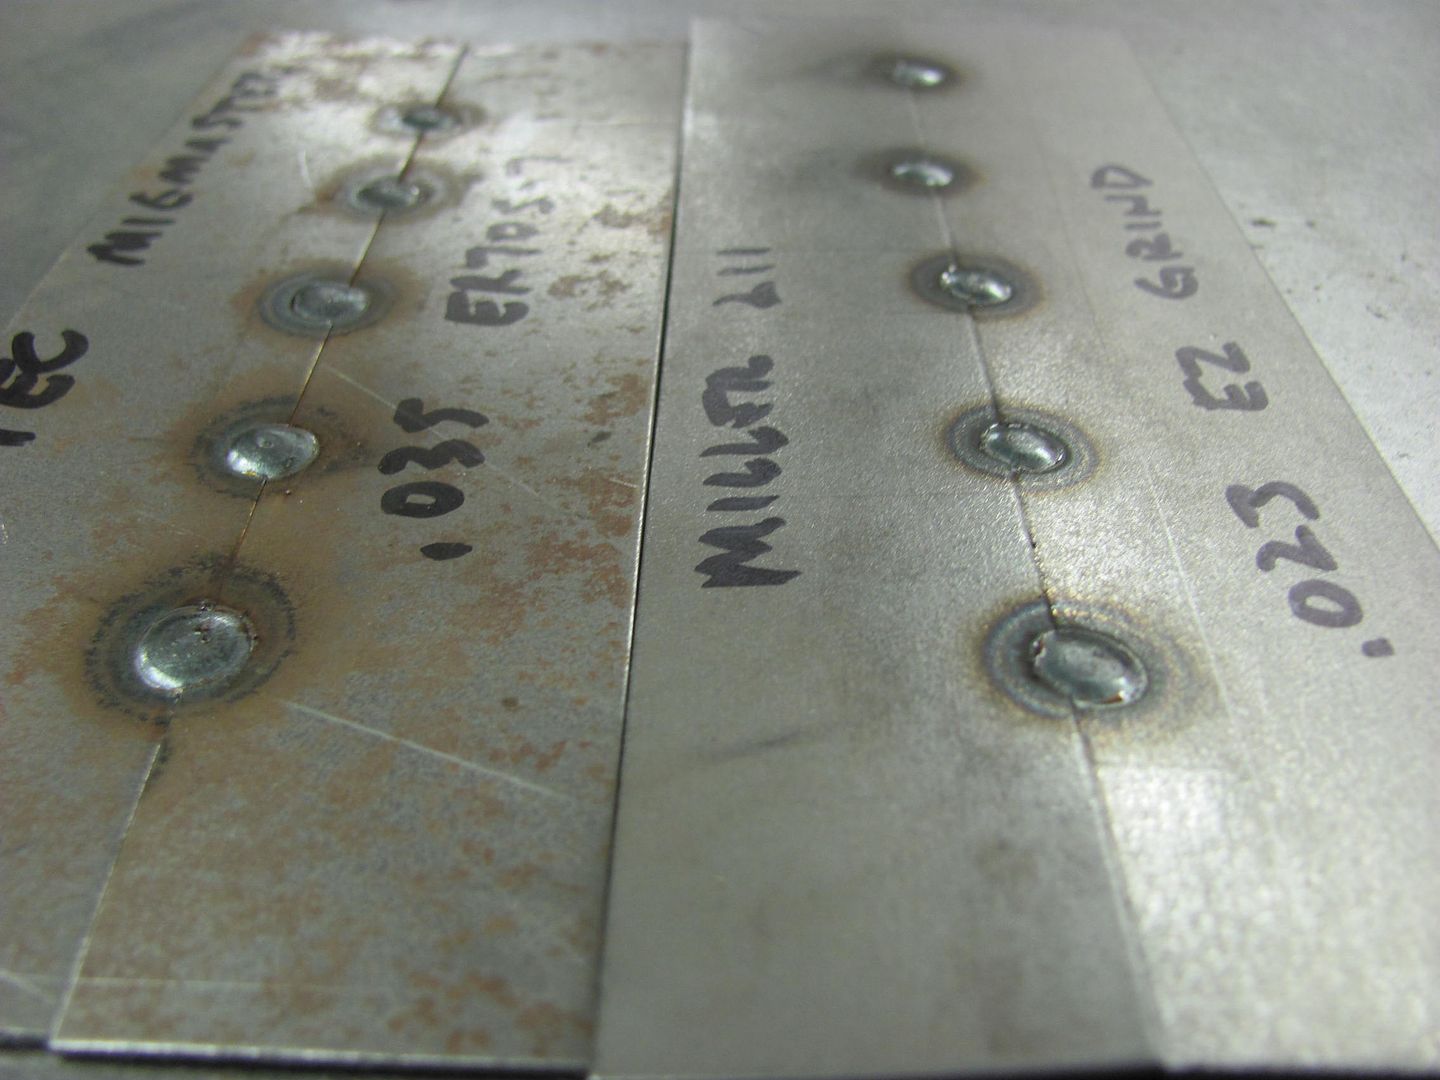 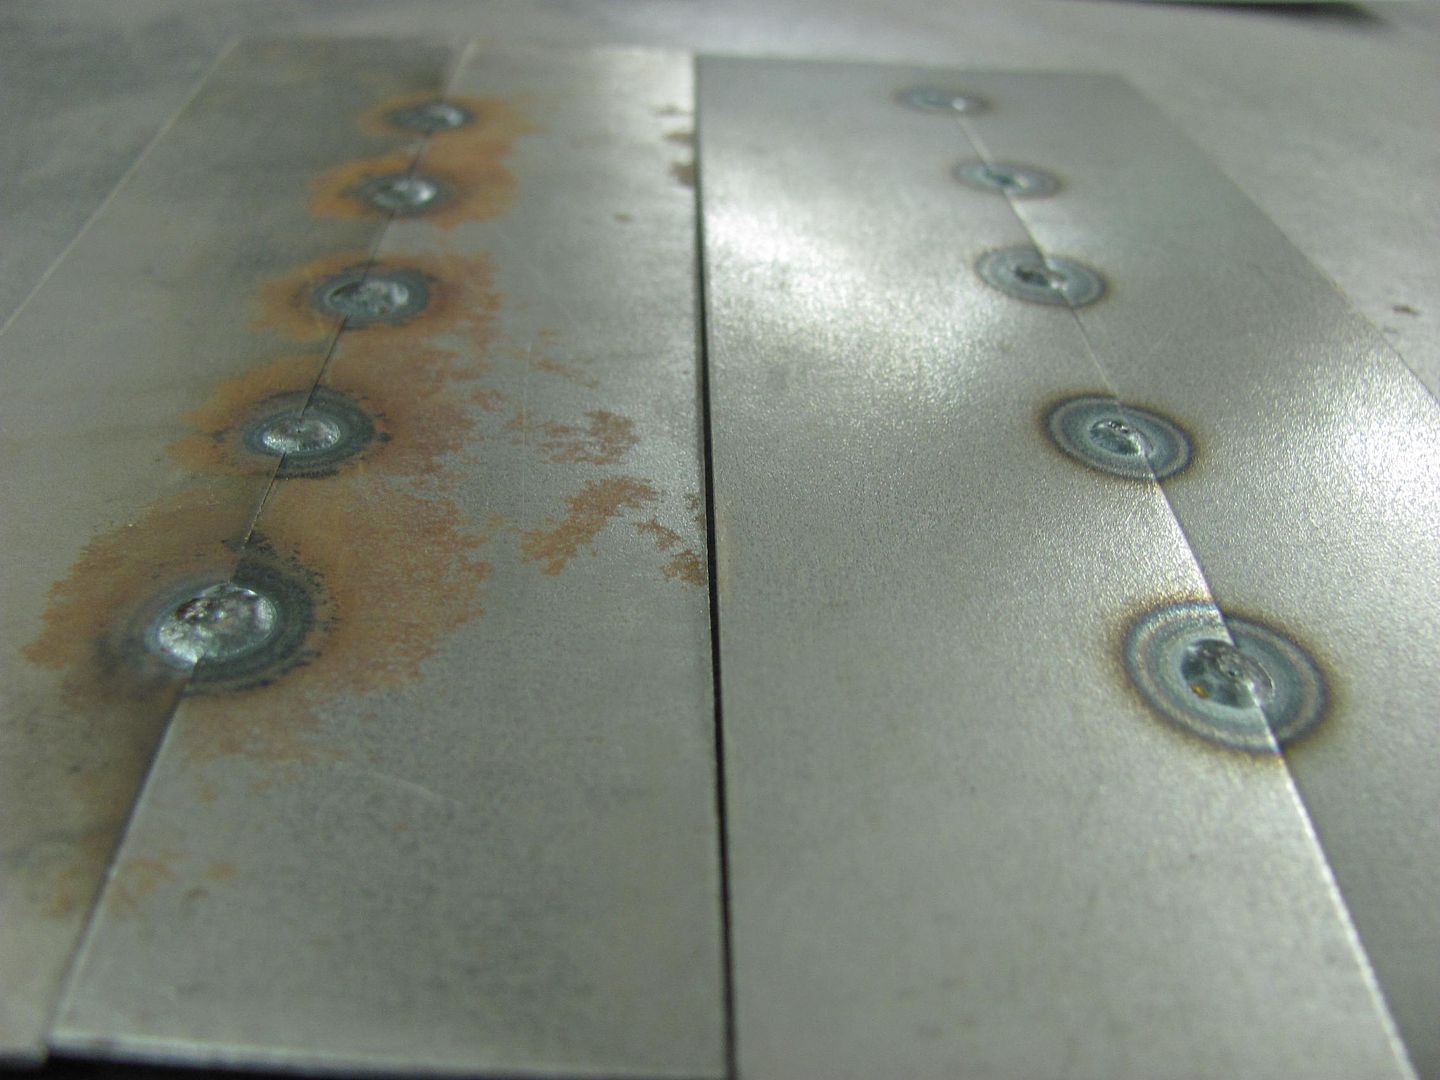 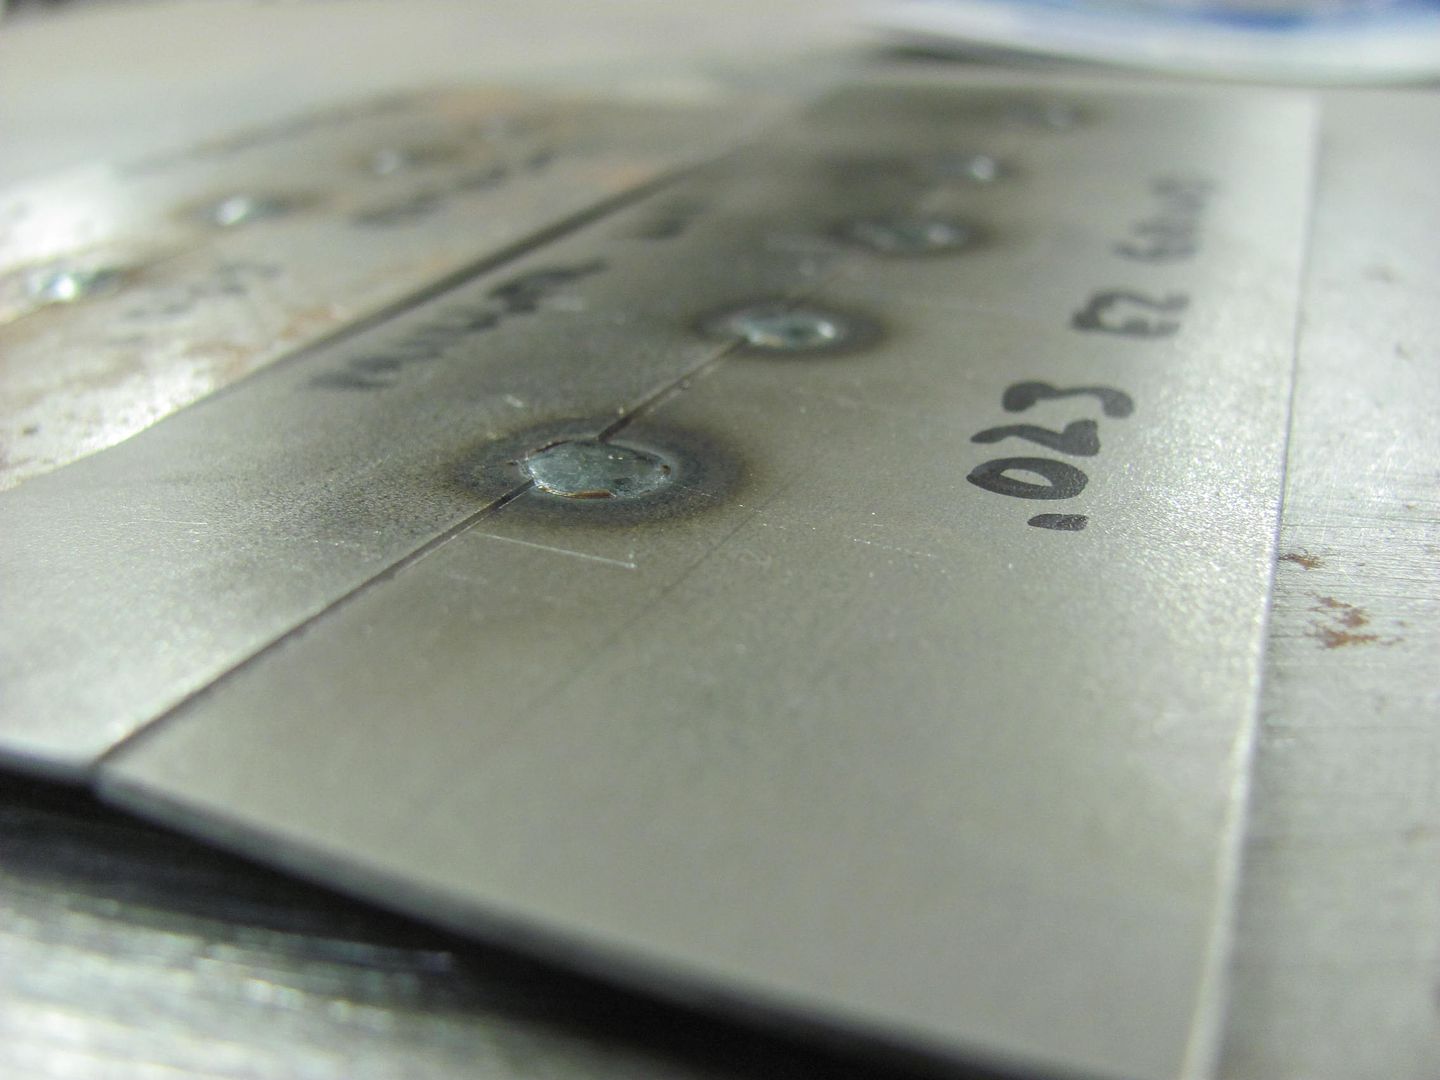 Both versions, .023 EZ grind and the .035 ER70S-7 in the old machine had very similar results. Good wetting, nice flat weld for minimal build, less grinding, less cleanup. 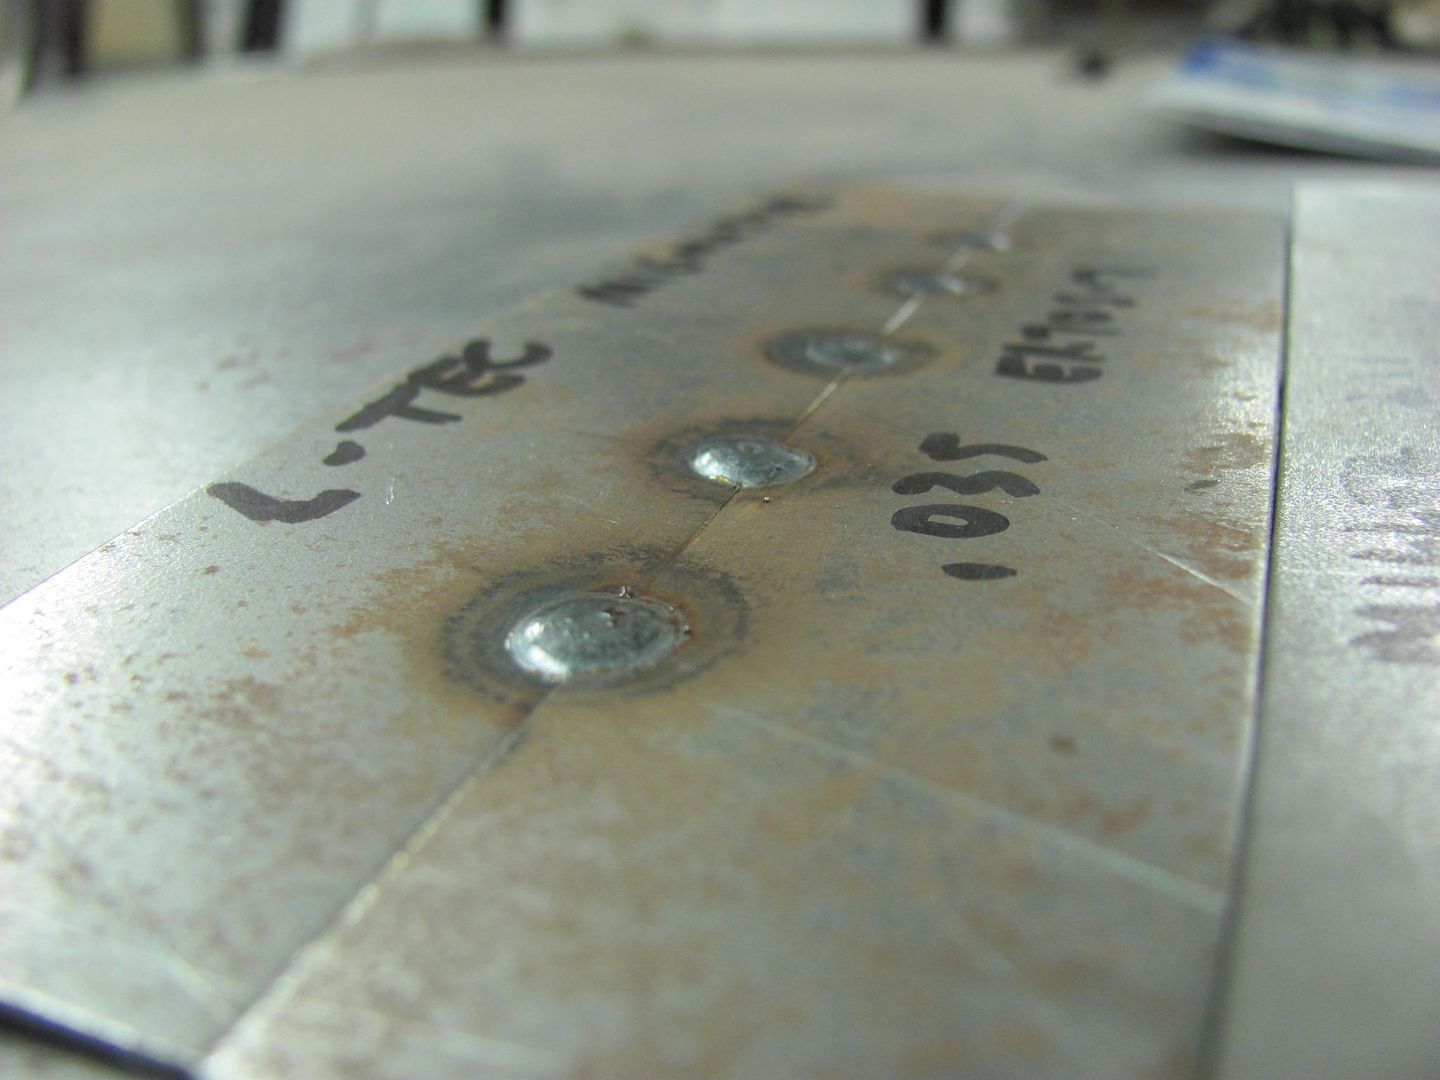 Back to the front end of the car, the hood had been giving us fits when opening, it was dragging the cowl vent in a few spots... 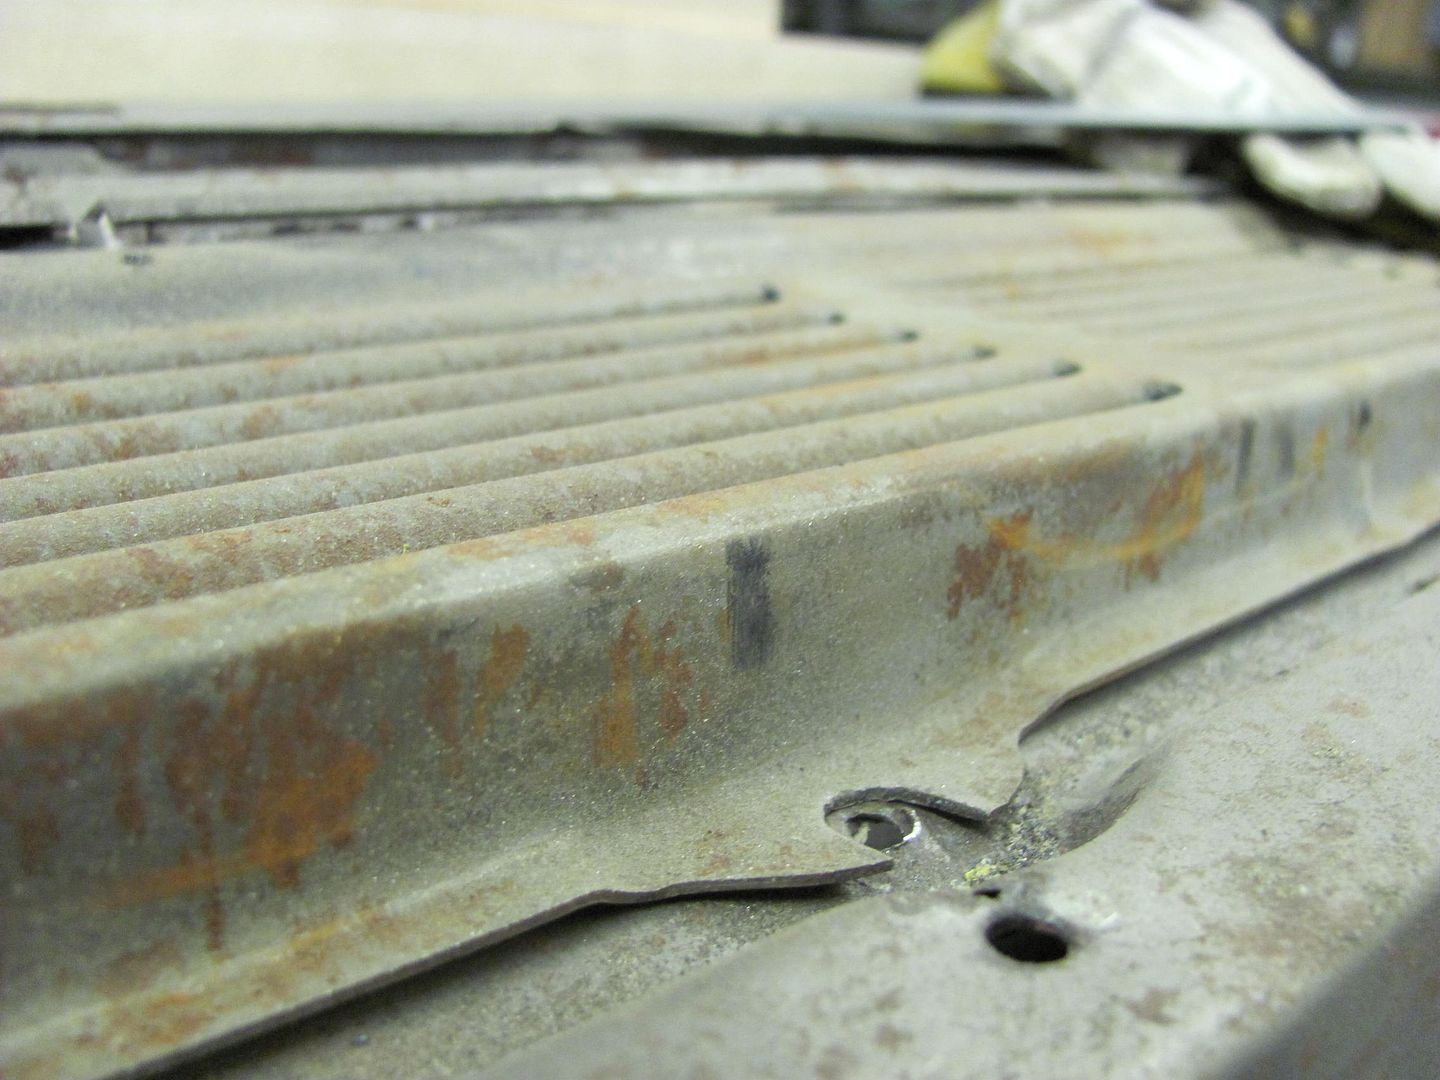 Removed the hood and altered the angle of the rear flange for better clearance to the cowl vent....  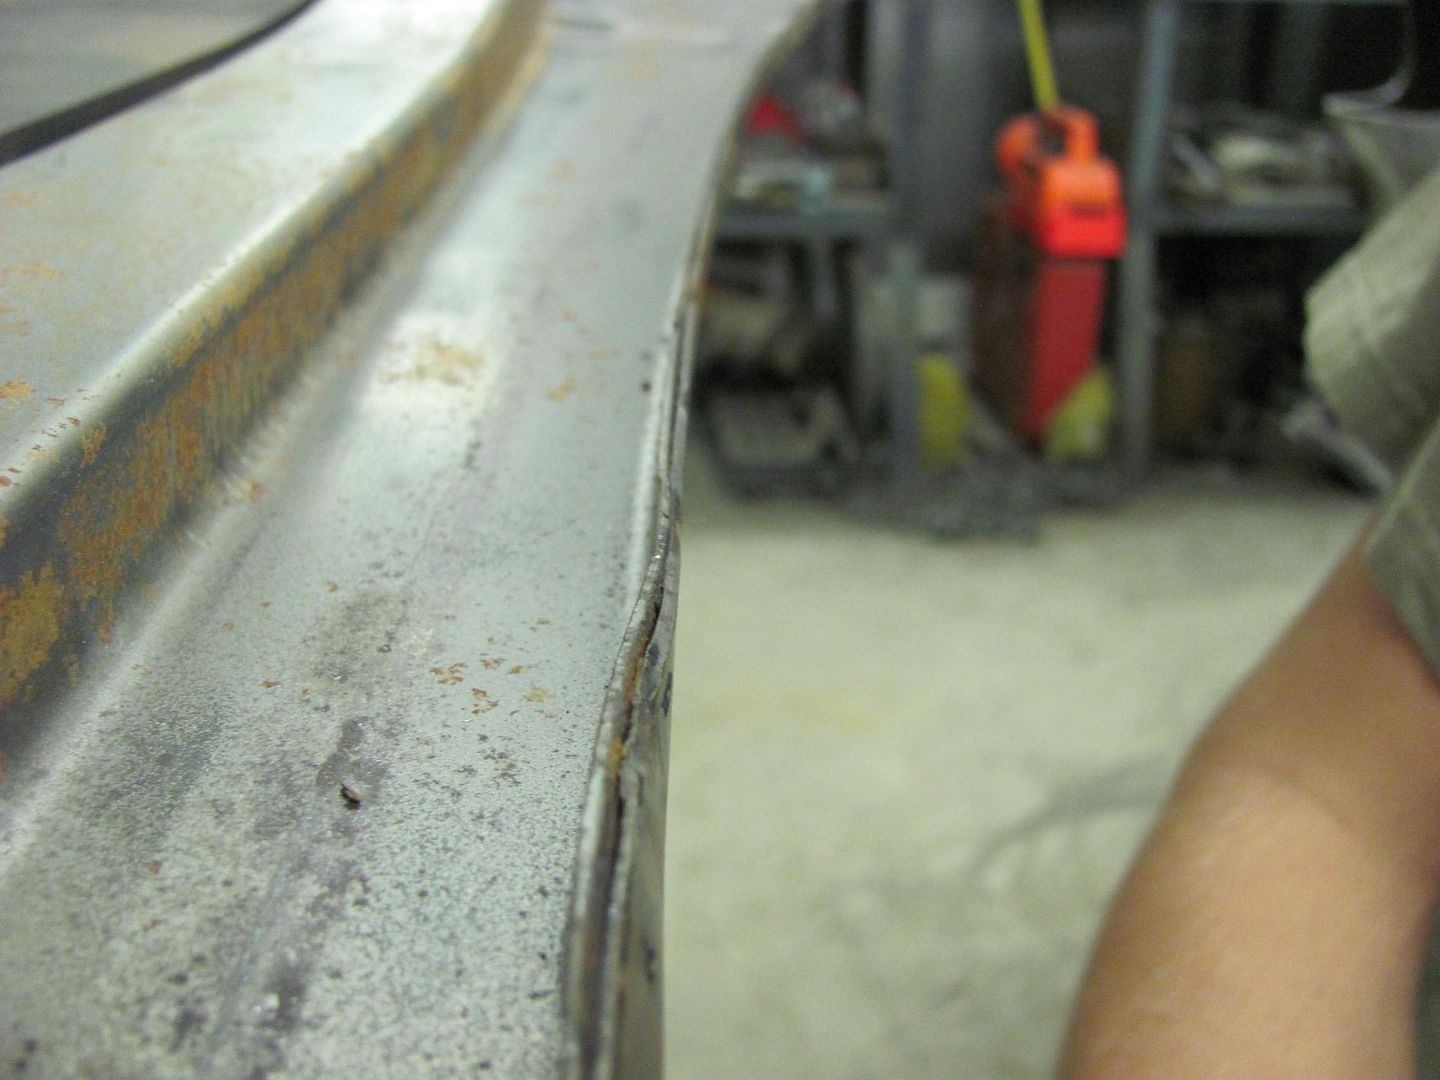 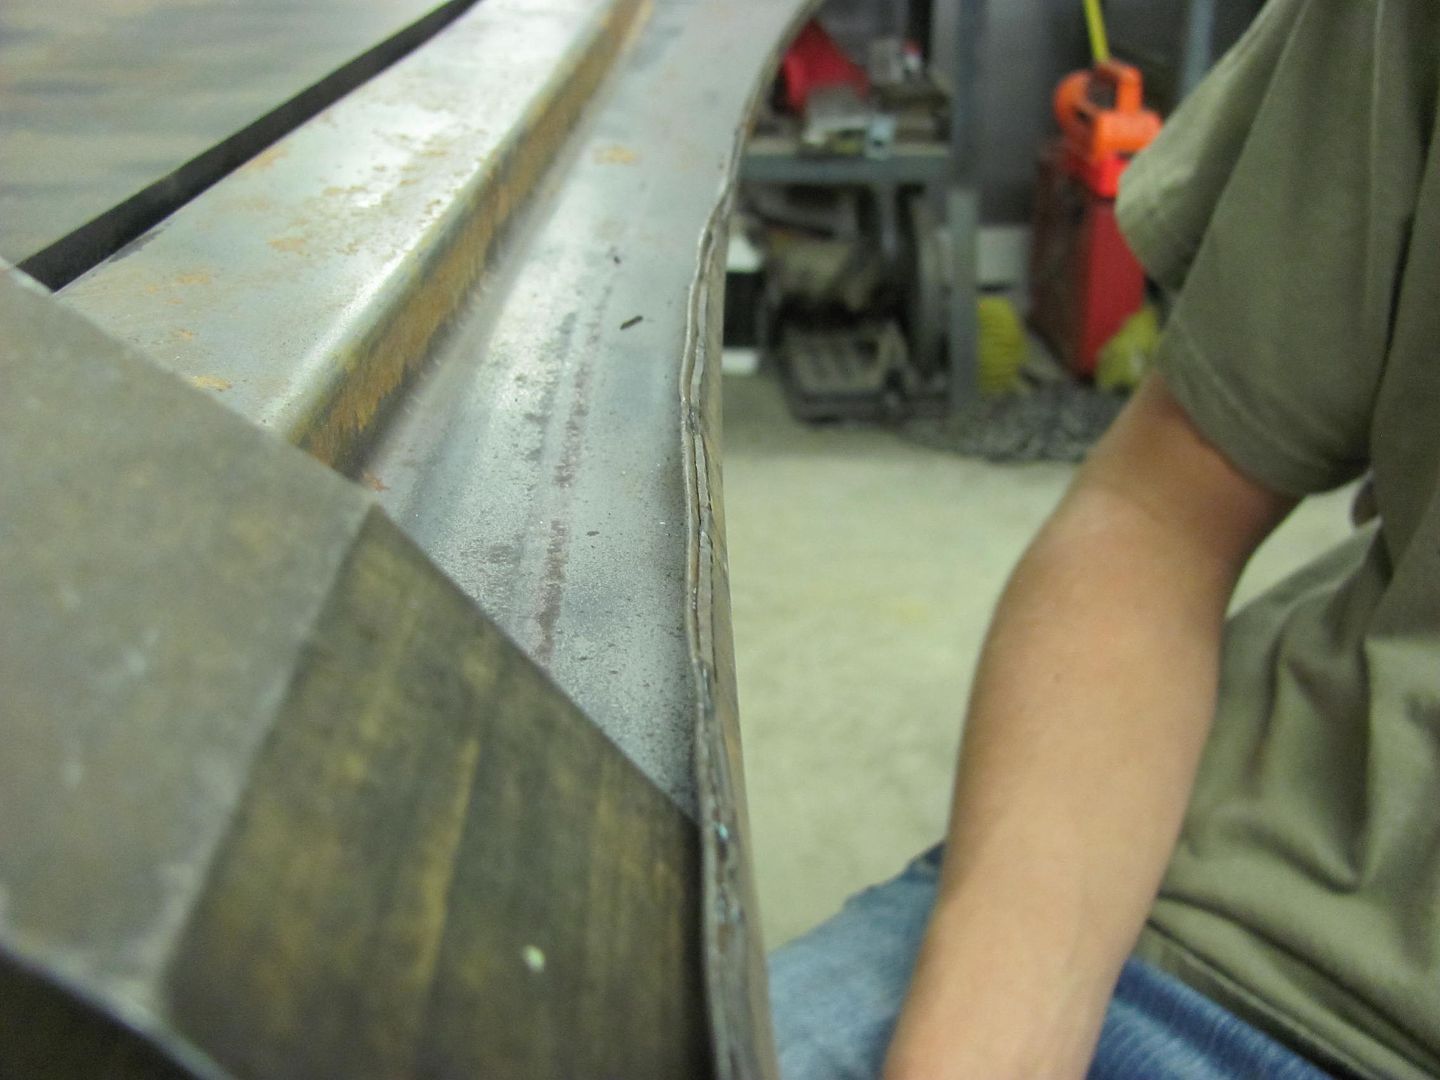 After refitting, the problem persisted, but was not as pronounced. We did notice the center of the hood was sagging a bit. So I jumped inside the engine compartment with the torch and did some contracting of the rear brace to give the center a lift... 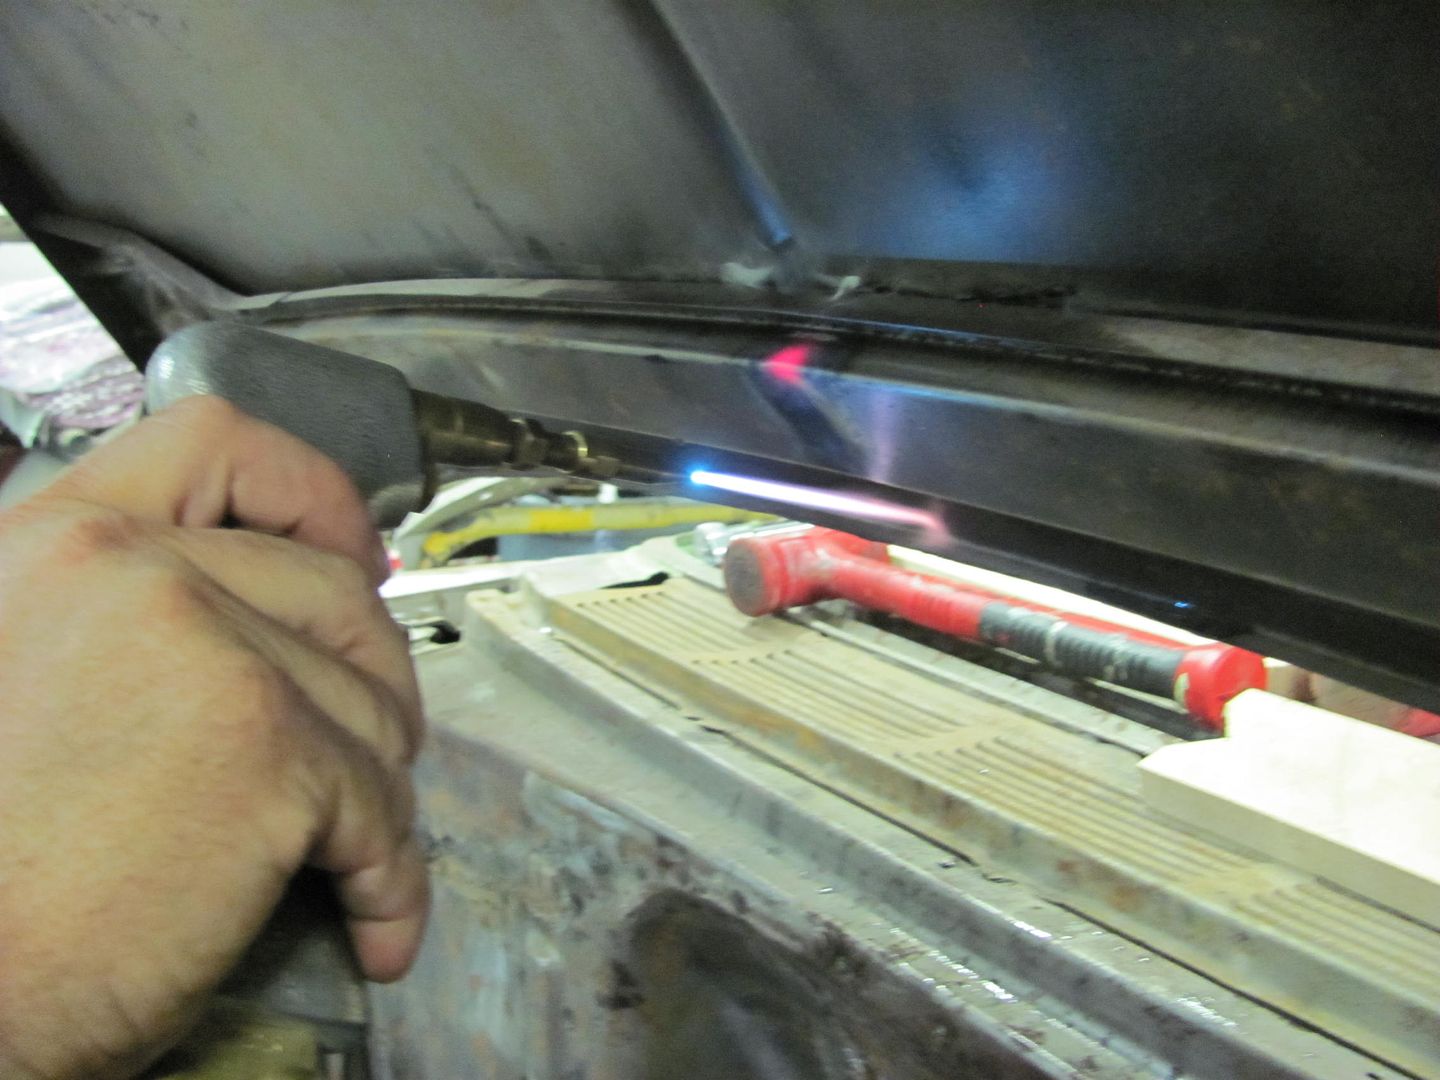  Cooling off the hot spots with a damp rag did the trick. Next we worked on getting the hood's rear edge to match up to the cowl. This is something that the driver will stare at continually, so it needs to be a whole lot better than it is now: 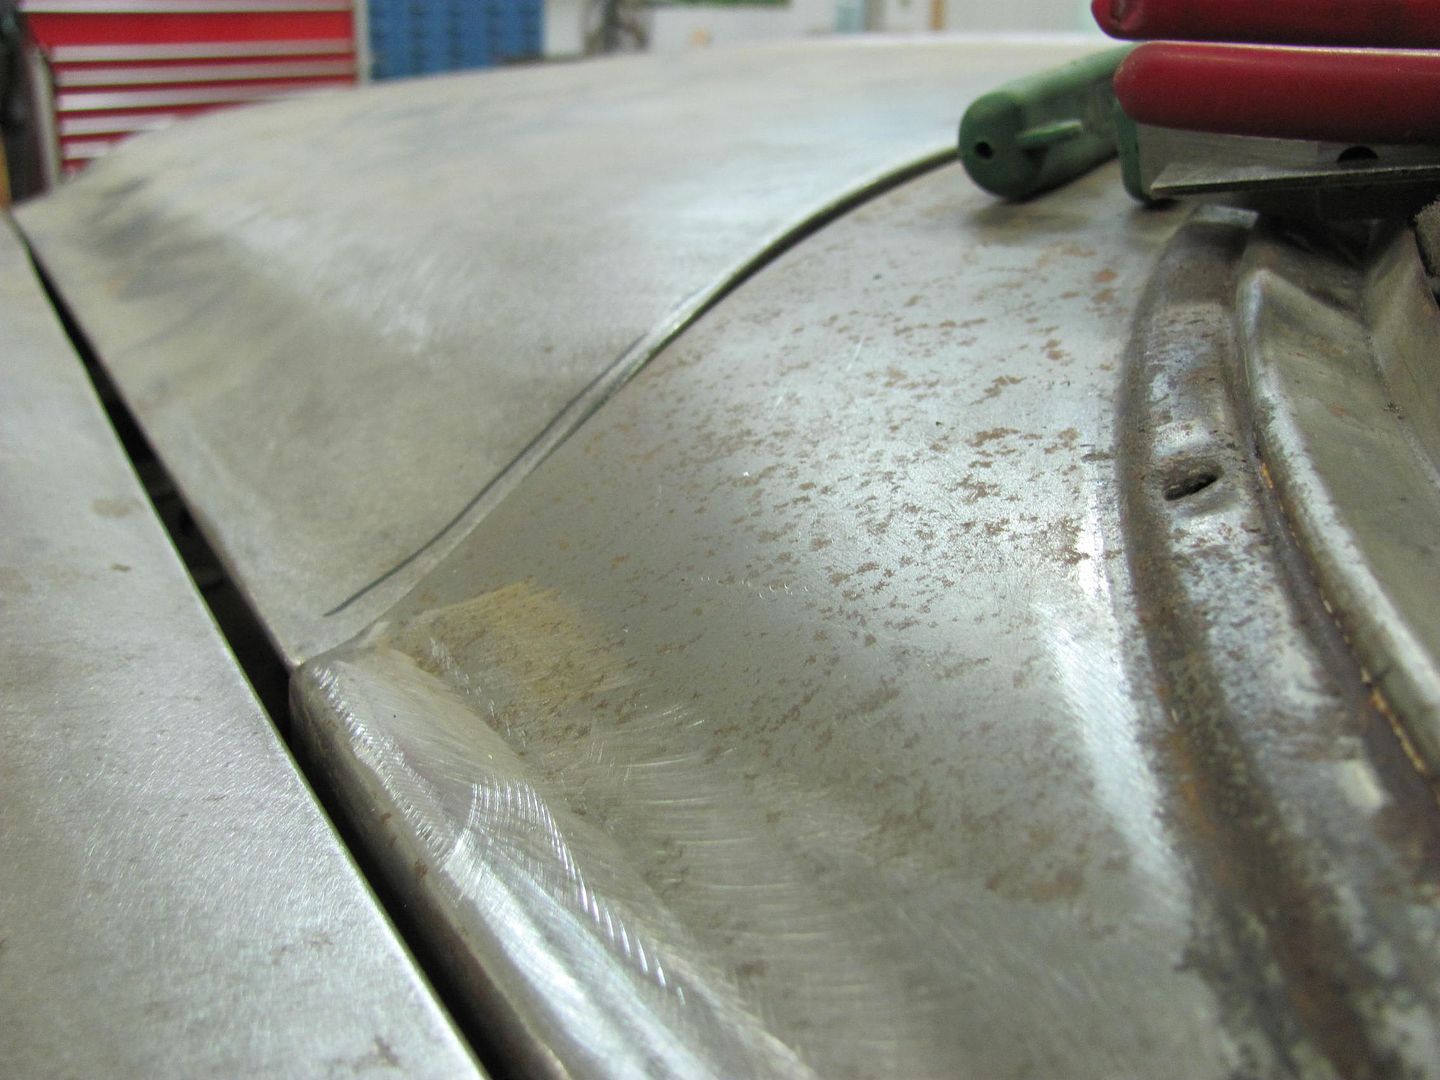 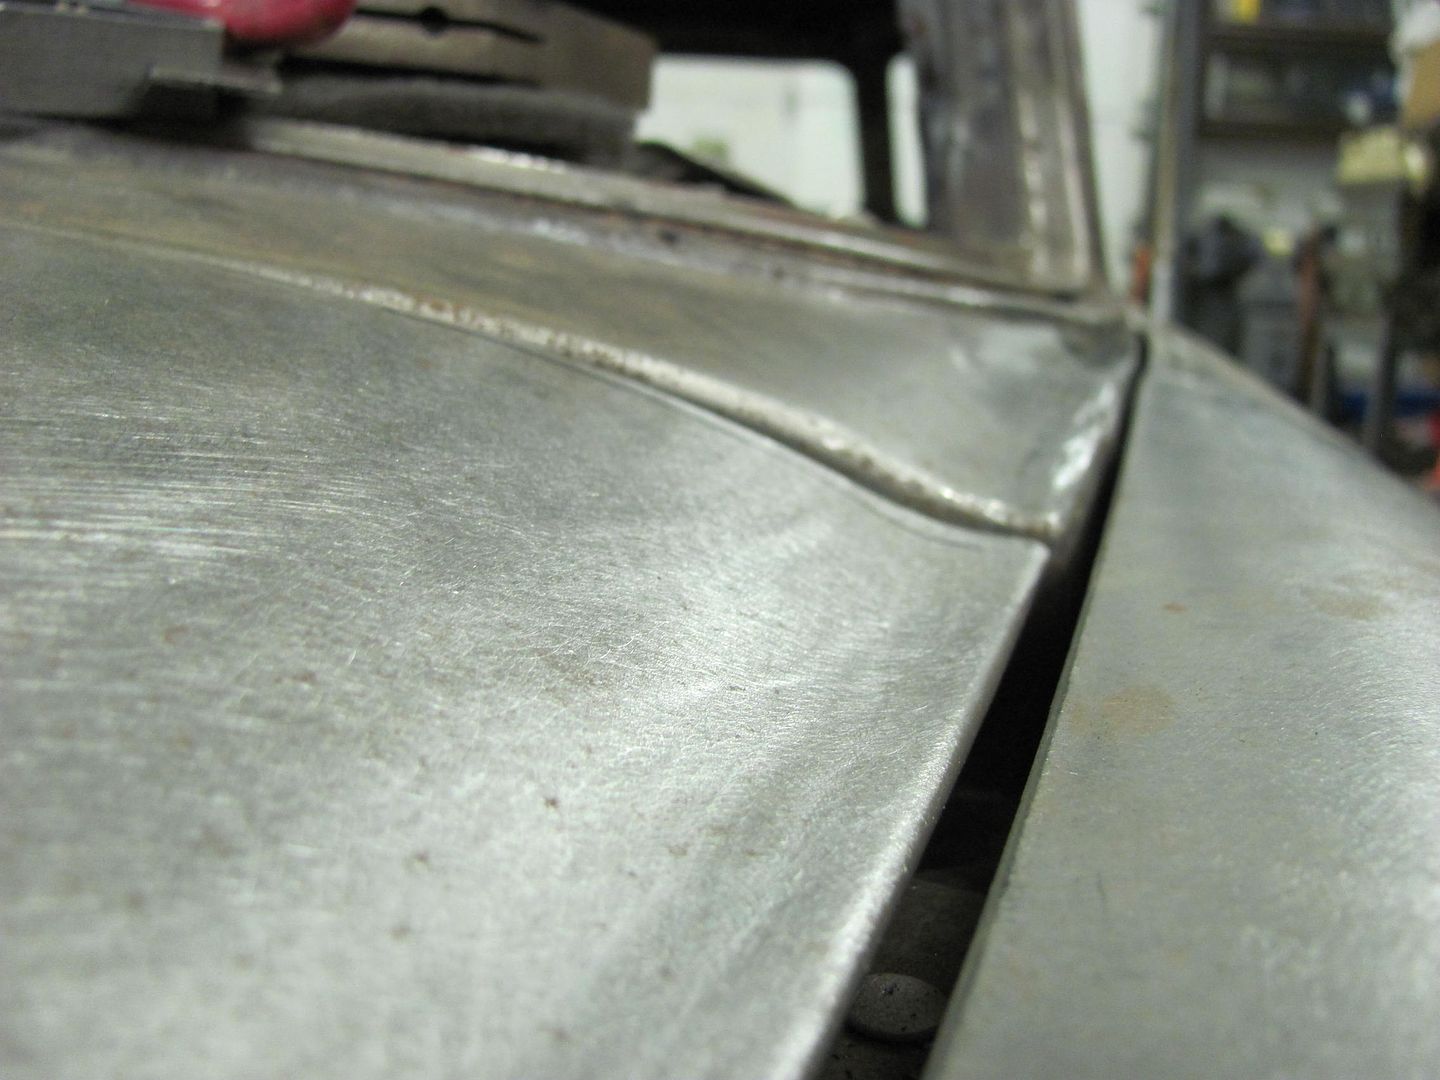 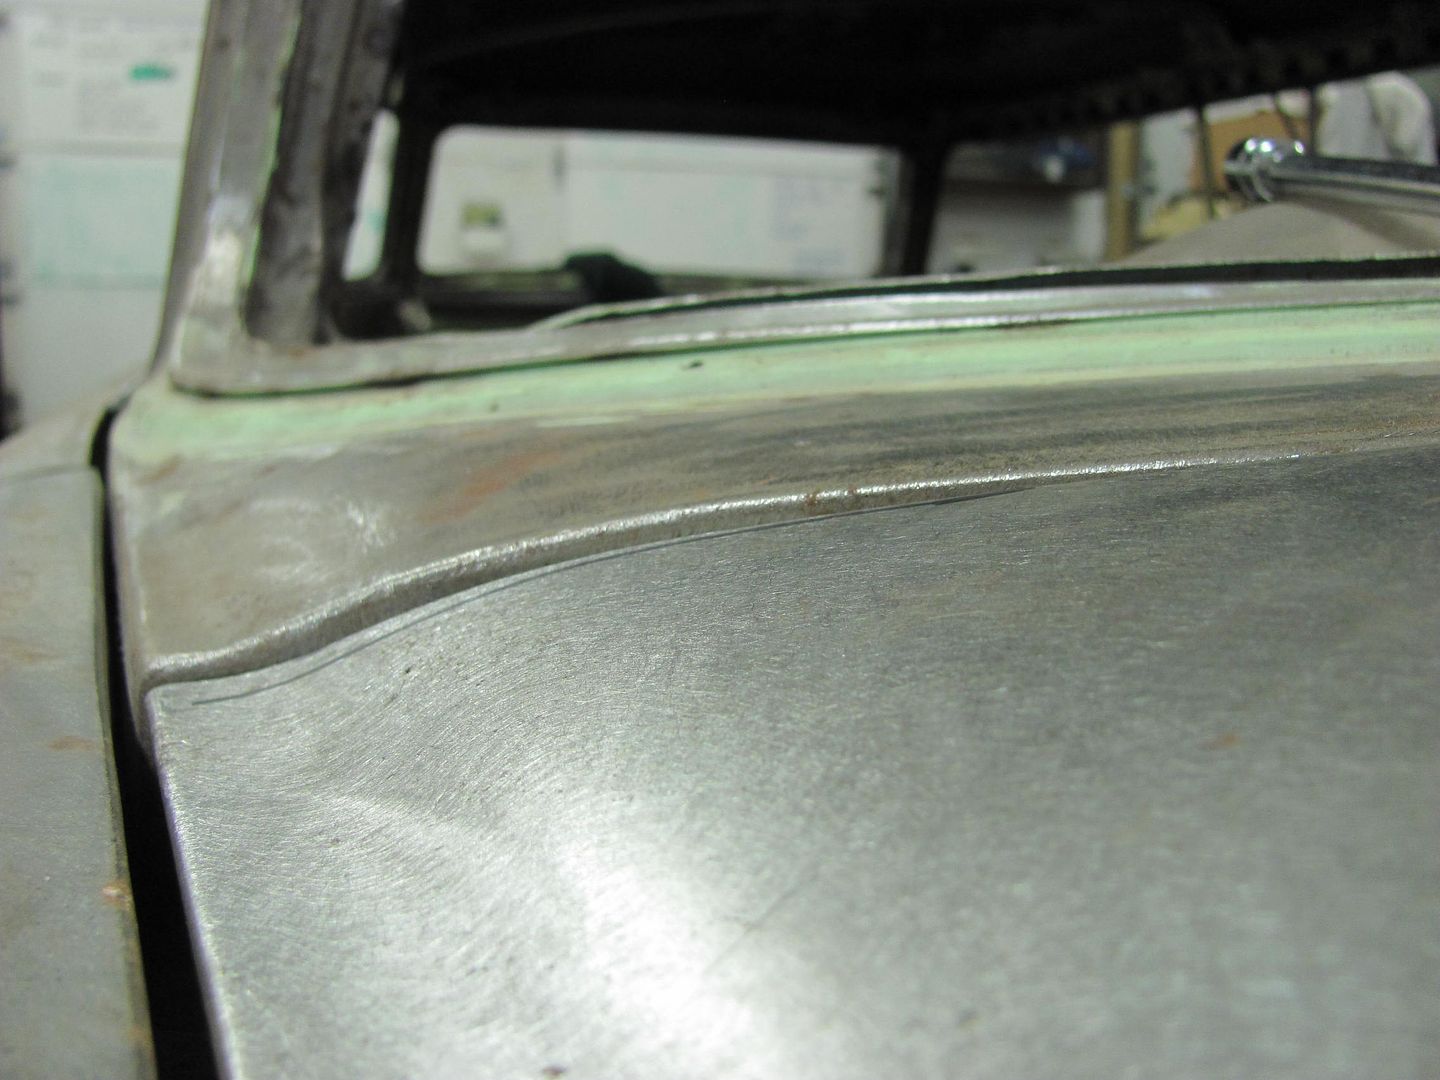 Further refinements included this and others: 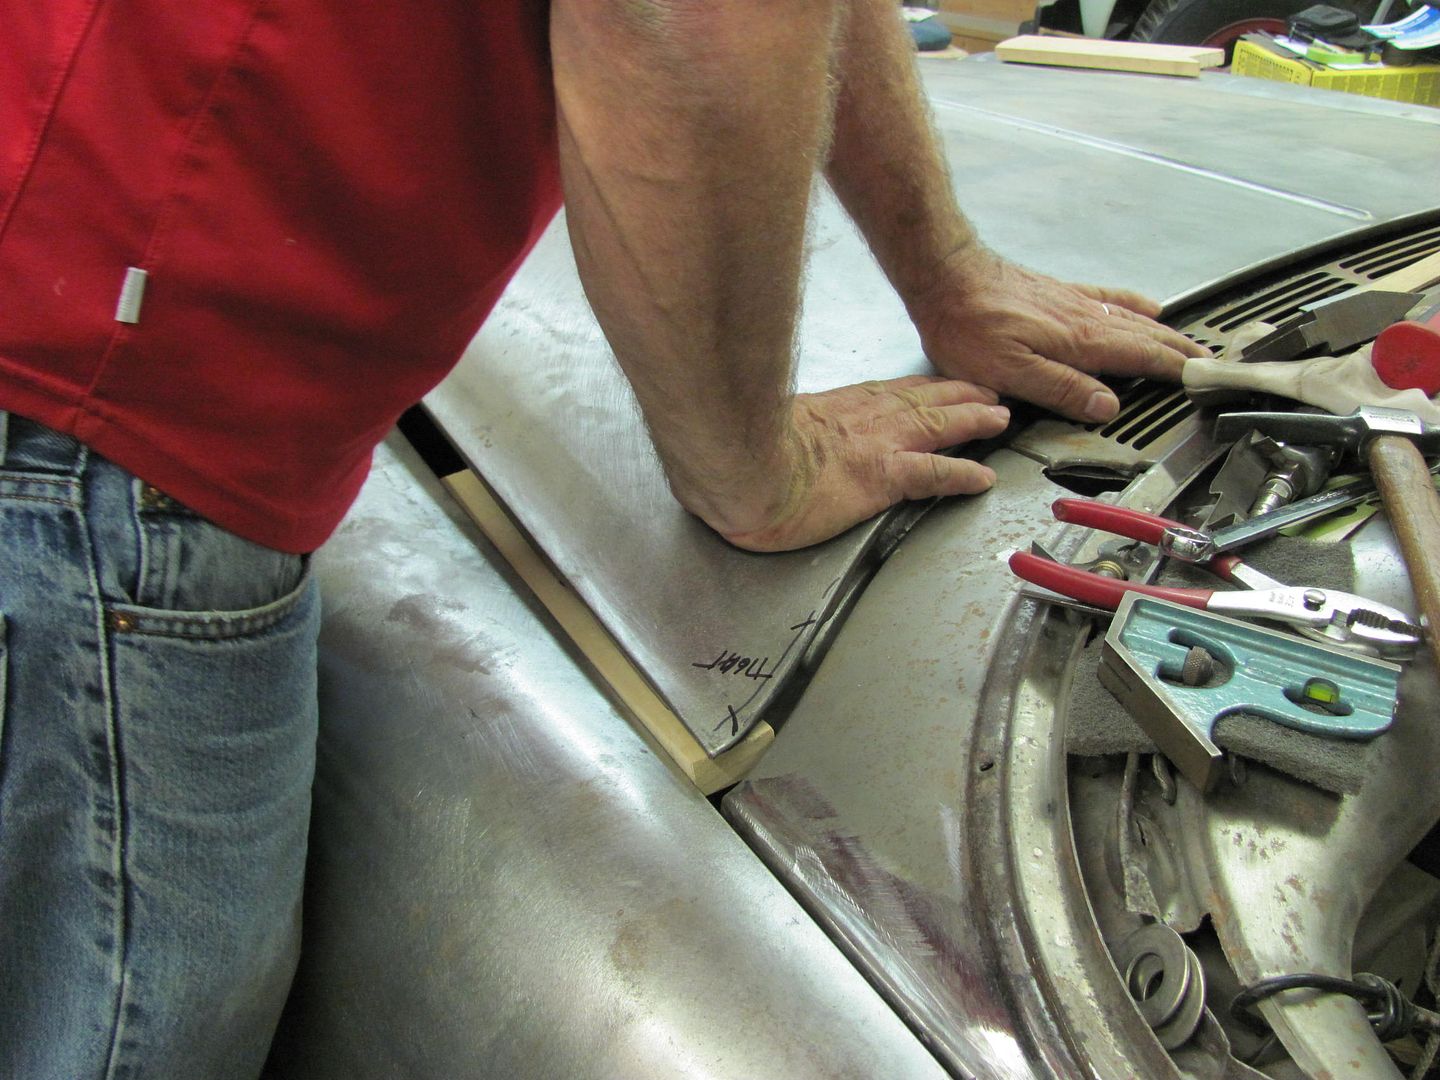 After taking the hood on and off about a dozen times, this is closer, and the outer edge adjacent to the fender needs to "droop" a bit more. We're running out of time this evening, so we'll try our luck next time with the rocker panel roller to see how well it addresses the edge. 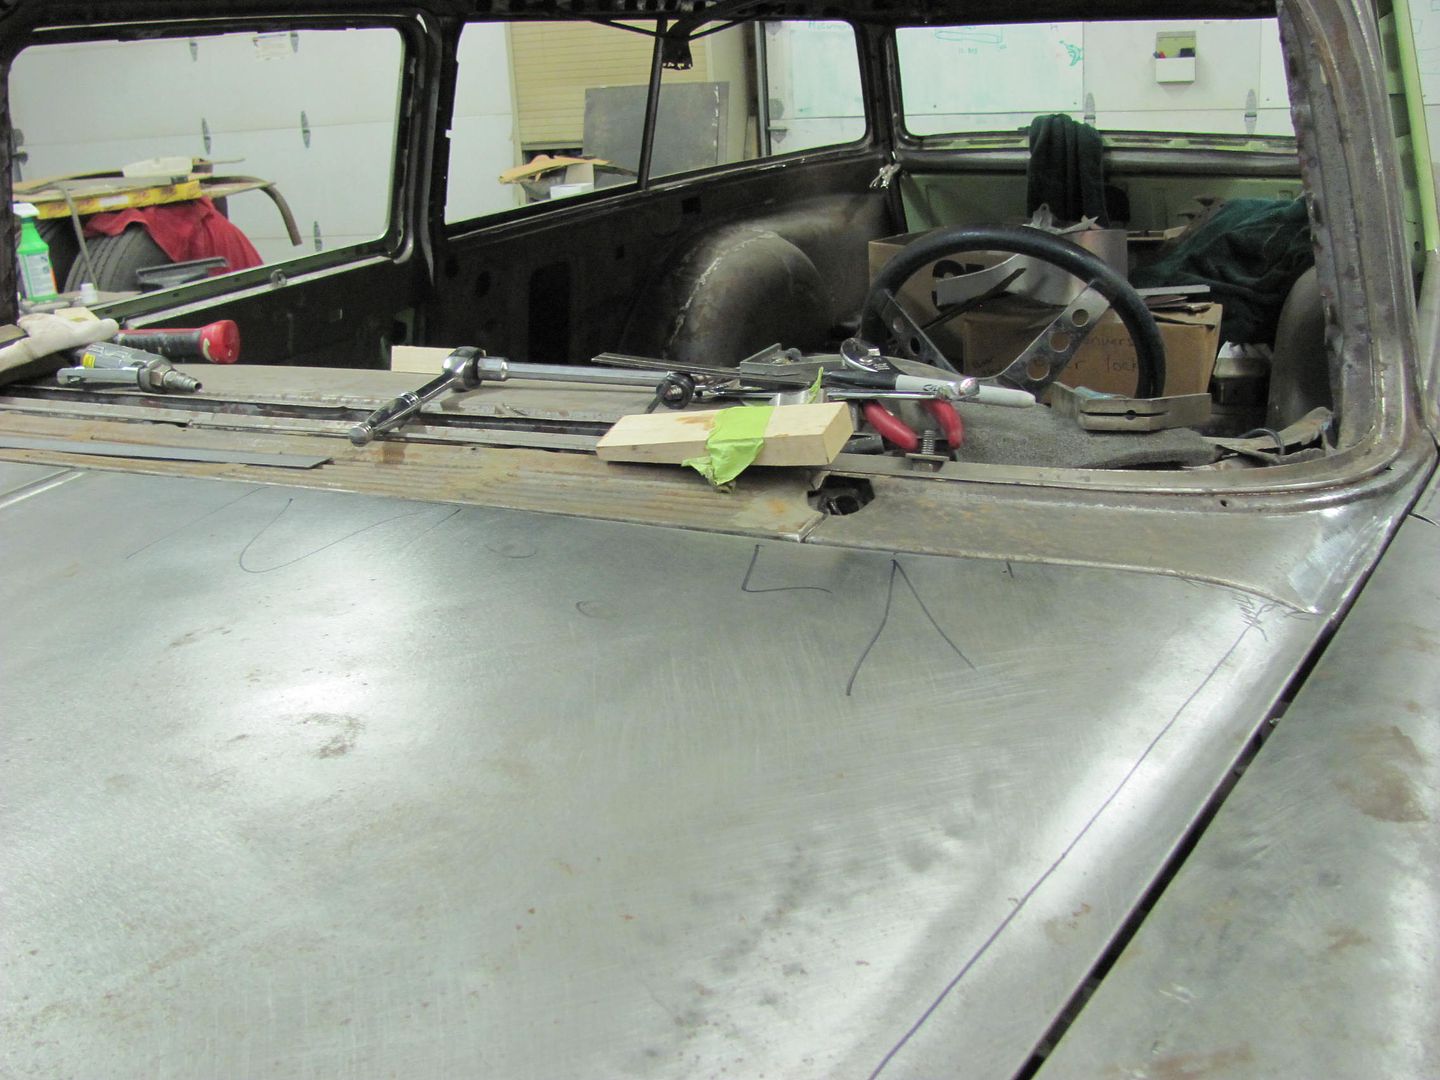 
__________________
Robert |
|
|
|
|
10-09-2014, 02:15 AM
|
#21 |
|
Registered User
Join Date: Oct 2007
Location: Spanaway
Posts: 8,451
|
Re: 55 Wagon Progress
So. In your opinion is the little touch worth the money? I have seen them at the fair and car show but kinda pricy.
I'd be remiss if I didn't say nice work yet again!
__________________
Mike. Swamp Rat build thread : http://67-72chevytrucks.com/vboard/s...d.php?t=595019 72 3/4T 4X4 4" BDS Lift 33" BFG's |
|
|
|
|
10-09-2014, 06:42 AM
|
#22 |
|
Registered User
Join Date: Jan 2013
Location: Leonardtown, MD
Posts: 1,636
|
Re: 55 Wagon Progress
I haven't done too much welding with it yet, but so far so good. Looks to have better adjustability than the old one, this one has infinite control on both settings, the old one didn't have that on the heat settings.
__________________
Robert |
|
|
|
|
10-13-2014, 02:15 PM
|
#23 |
|
Registered User
Join Date: Jun 2006
Location: Indiana
Posts: 4,859
|
Re: 55 Wagon Progress
I thought he meant the gas torch but maybe not.
I am not a pro welder, but the big Millers and Lincolns I used in class had very heavy cables. I had to drape the cable over something to get good control of my welds. My small Thermal Arc has a very lite weight feed cables. Much easier to work with. It won't weld a ships hull, but I don't plan on that either.
__________________
'70 GMC C1500 LWB Power disc brakes. WooHoo! Posi 6 Lug Dana 60 |
|
|
|
|
10-14-2014, 12:41 AM
|
#24 |
|
Registered User
Join Date: Oct 2007
Location: Spanaway
Posts: 8,451
|
Re: 55 Wagon Progress
Yea i could have been more clear in my post. I was refering to the oxy acet hand held torch ☺
__________________
Mike. Swamp Rat build thread : http://67-72chevytrucks.com/vboard/s...d.php?t=595019 72 3/4T 4X4 4" BDS Lift 33" BFG's |
|
|
|
|
10-14-2014, 08:01 AM
|
#25 |
|
Registered User
Join Date: Jan 2013
Location: Leonardtown, MD
Posts: 1,636
|
Re: 55 Wagon Progress
Sorry, misread that. The torch is a Henrob, which should tell you how old it is. I think I bought it some 20-25 years ago. I believe the company has changed names twice since, they should be going by Cobra torches now. It comes with about 5 or 6 different tips for a good range in heat, and works well. I use it mainly for heating (shrinking) purposes, and should get out of my comfort zone a bit more and do some O/A welding.. Maybe it's time I try some of that and do another video so the results can be seen firsthand.... But other than high heat where someone would need a rosebud, it's done anything I've needed it for..
__________________
Robert |
|
|
|
 |
| Bookmarks |
|
|


 Hybrid Mode
