
|
|
|
 11-02-2013, 09:53 PM
|
#1 |
|
Registered User
Join Date: Mar 2008
Location: Waukee, Iowa
Posts: 1,608
|
Re: 55 Wagon Progress
Thanks for the video. What grit do you like on the roloc discs?
Something I do with mine is buy 3" discs and run them on a 3" arbor, then when they don't cut so well anymore I put them on a 2" arbor and while running the die grinder hit the edge with a cutting disc perpendicular to "shave" them down to about 2". Then I use them some more and repeat the process with a 1" arbor. That way I can finally feel good about throwing them away!
__________________
build threads: 86 Suburban 88 Jeep 6.0 swap 49 Chevy truck 54 Chevy wagon 86 Suburban lowered 4/6 54 Chevy wagon 49 Chevy/s10 mix 88 Jeep Wrangler rockcrawler |

|

|
|
11-02-2013, 11:10 PM
|
#2 |
|
Registered User
Join Date: Jan 2013
Location: Leonardtown, MD
Posts: 1,635
|
Re: 55 Wagon Progress
I was using 80 grit there. I've tried 60 and 120...... 60 seems to leave too deep of scratches, 120 seems too fine/slow at acting. 80 is a happy medium. I don't change arbors, but my 3" arbor is actually about 1/4" shy, so when the outer edge loses its bite I will cut around the perimeter up to the backing using a pair of tin snips to get a bit more life out of them.
__________________
Robert |
|
|
|
|
11-03-2013, 12:10 AM
|
#3 |
|
Registered User
Join Date: Jan 2013
Location: Leonardtown, MD
Posts: 1,635
|
Re: 55 Wagon Progress
Tonights repair was to duplicate one of these mounting blocks for the lift gate's gas strut.
The good one... 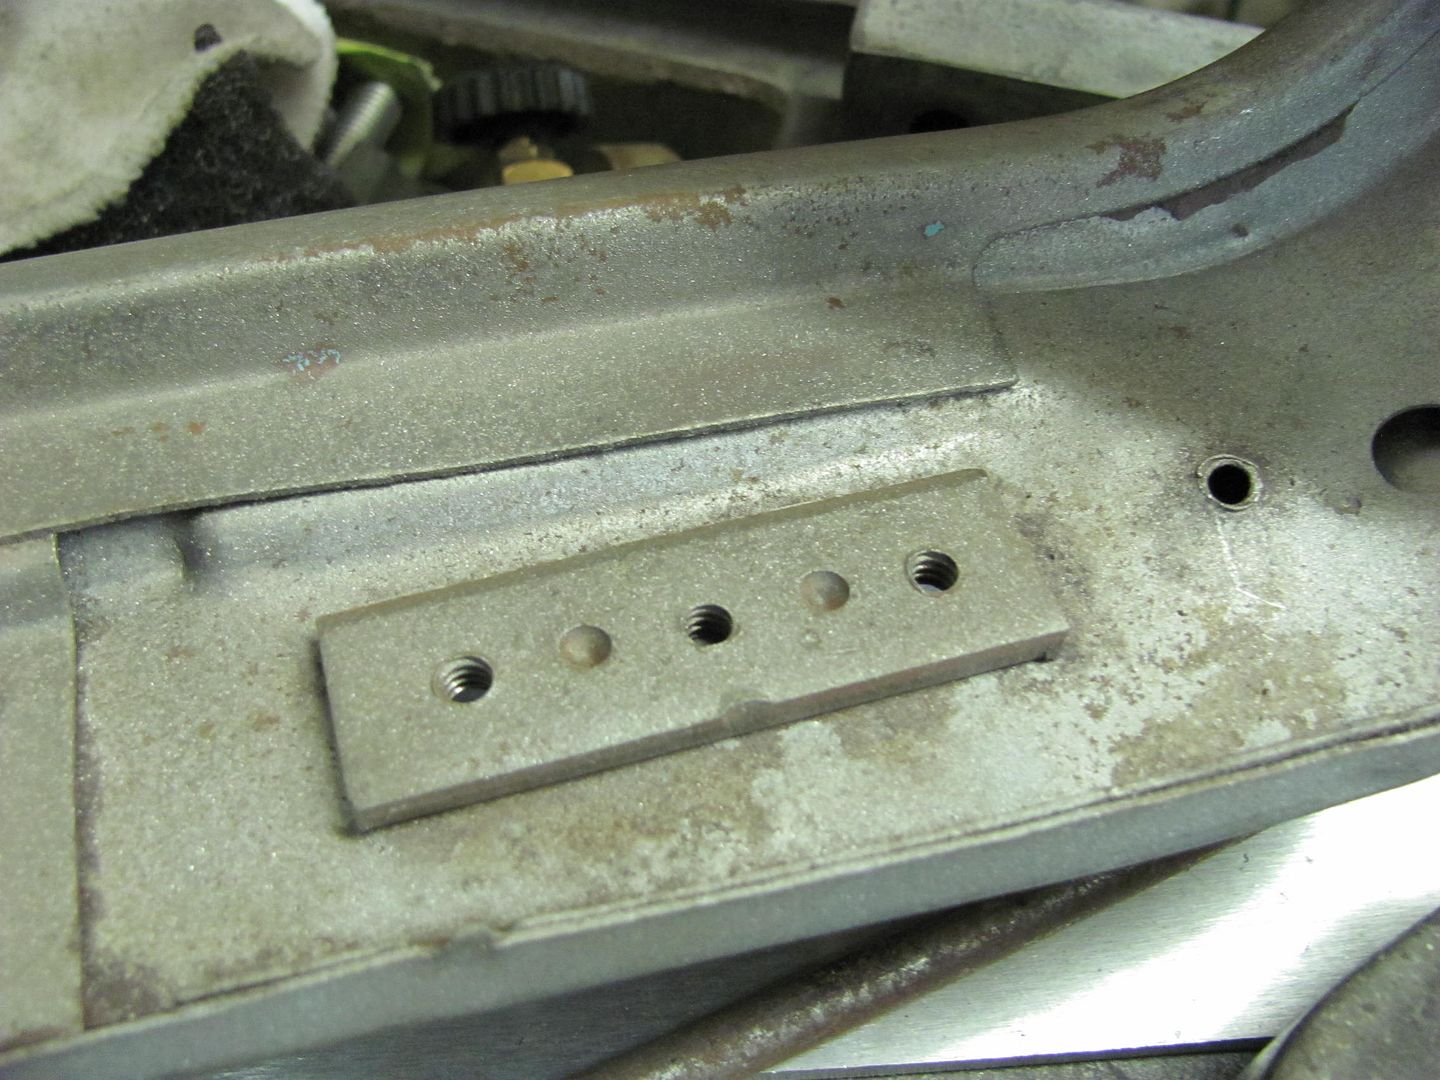 ...not so good... 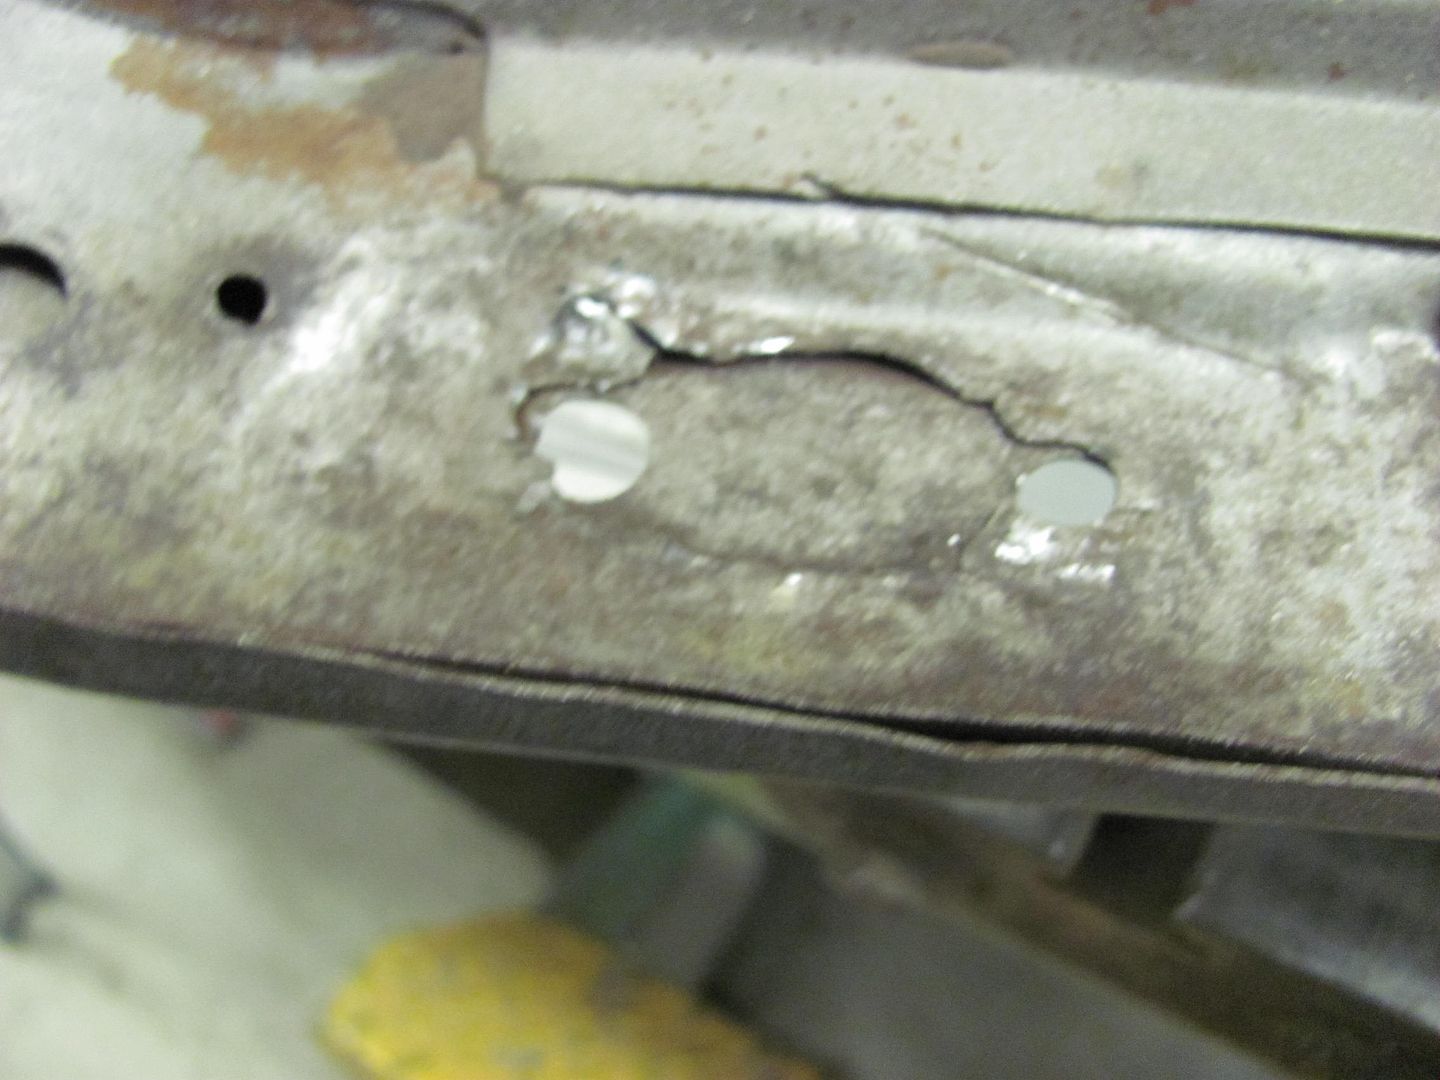 Used a hole saw to provide some radiused ends and the 3" cutoff wheel to cut out all the torn and ragged metal..  A piece of 19ga is tacked and welded....note the original color.... 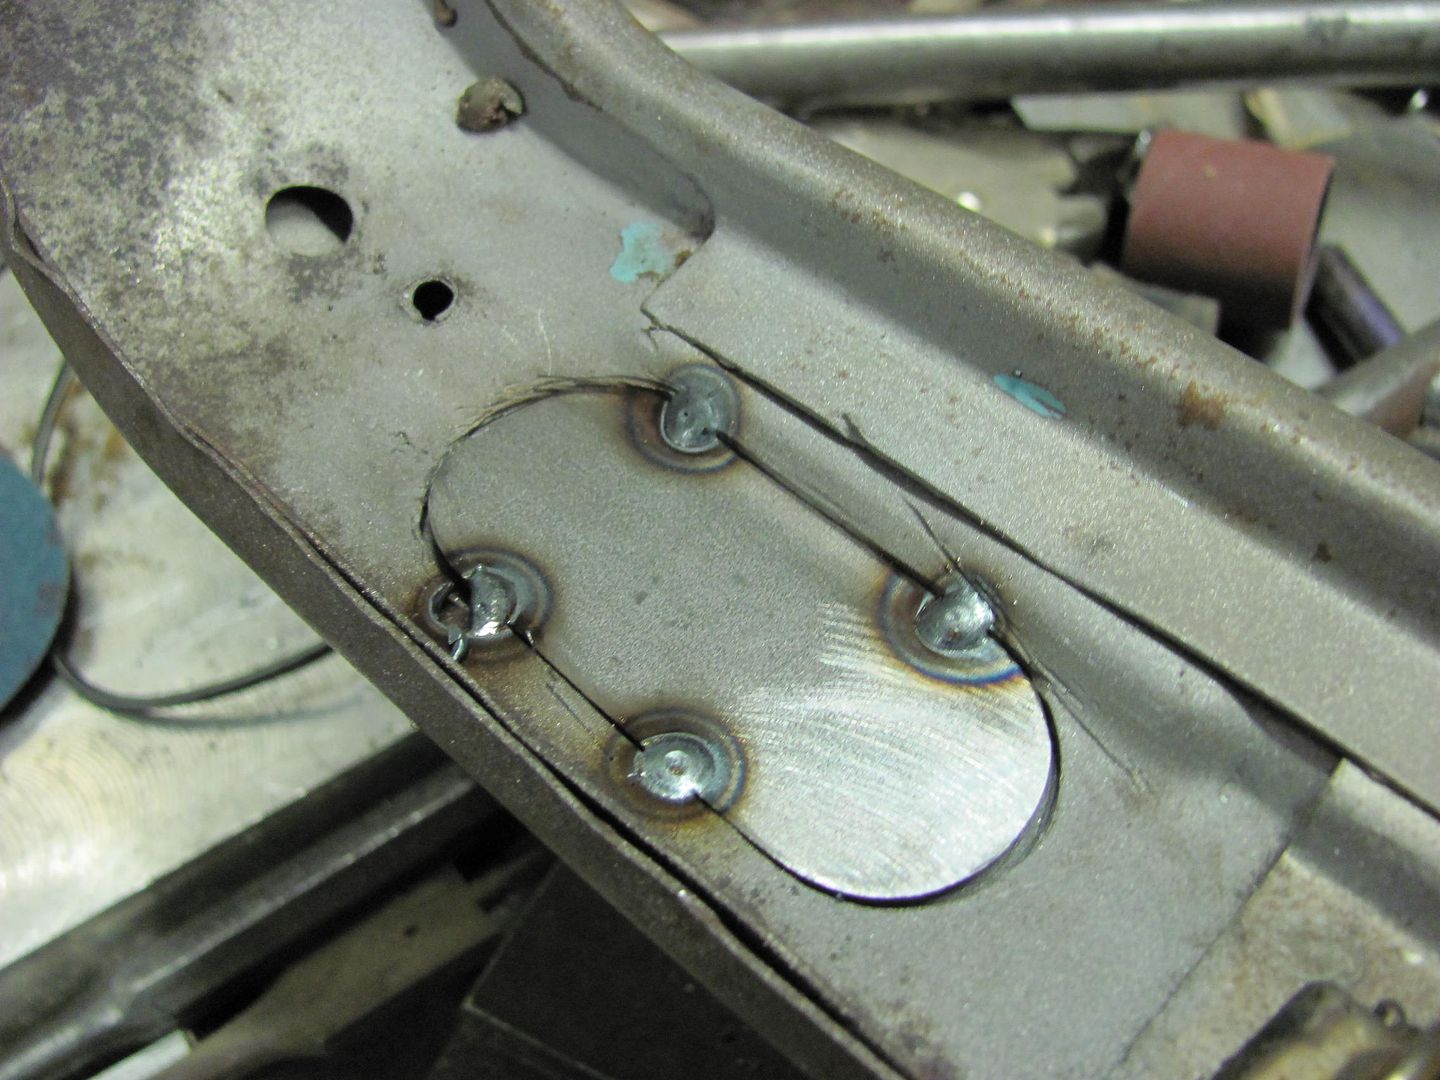  Cut out a piece from a steel angle, drilled and tapped the three 10-24 holes. This was bolted in place using anti-seize on the screw threads to prevent galling during the weld process.. then plug weld holes drilled and welded from the outside.. 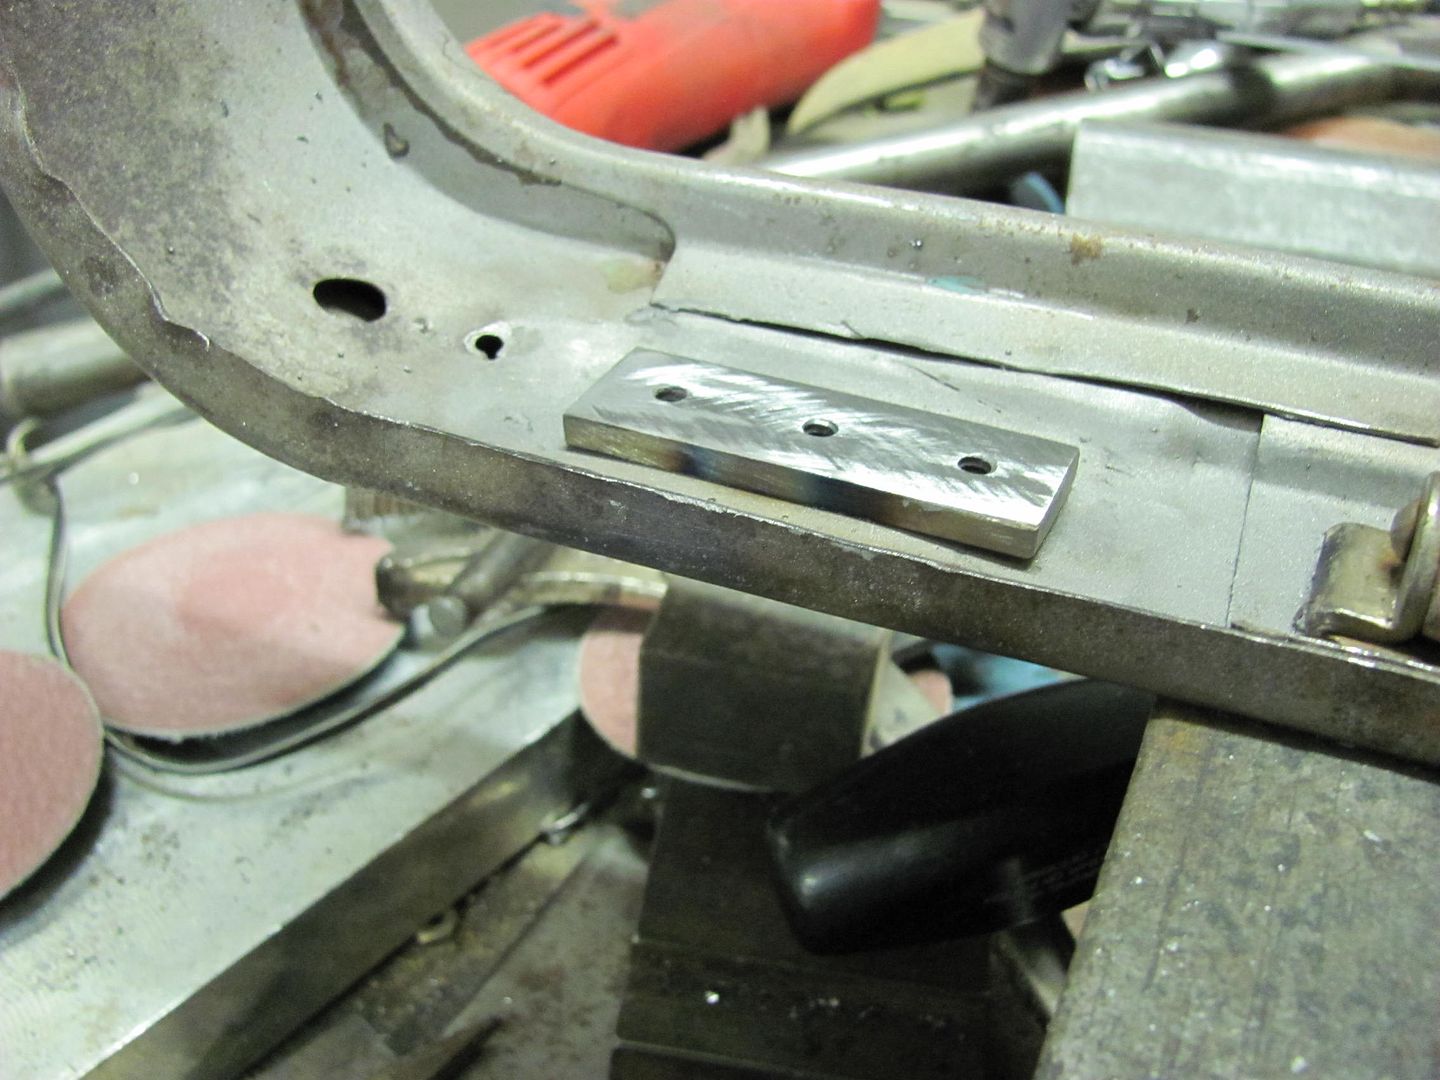 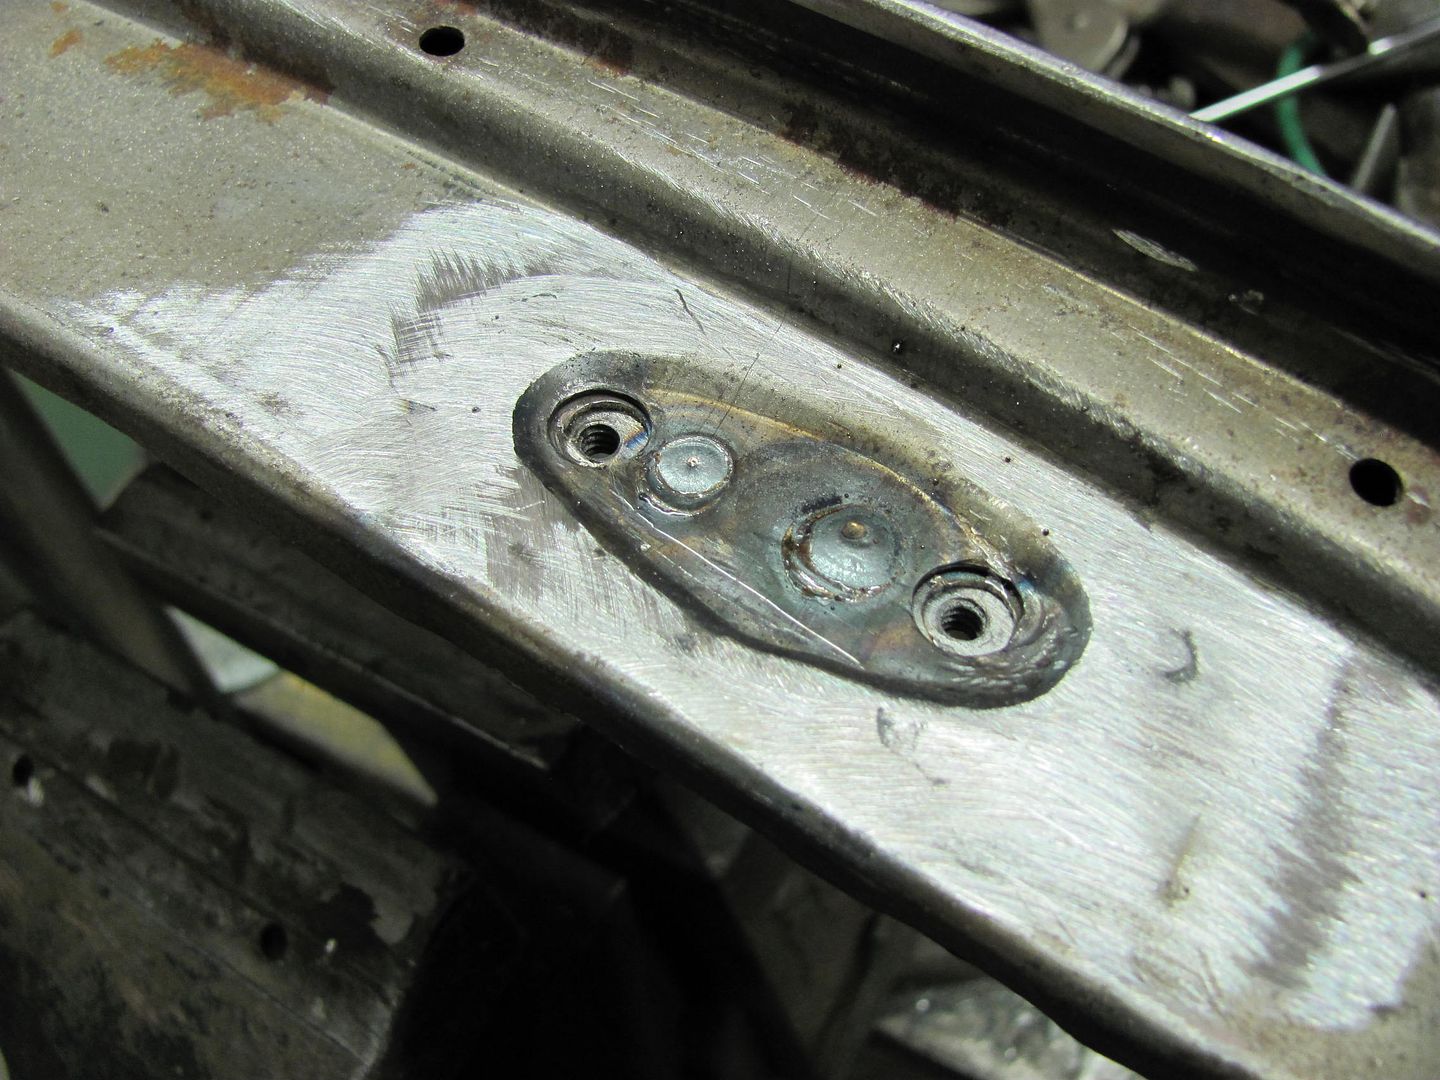 Plug welds cleaned up, checking the threads for burrs... 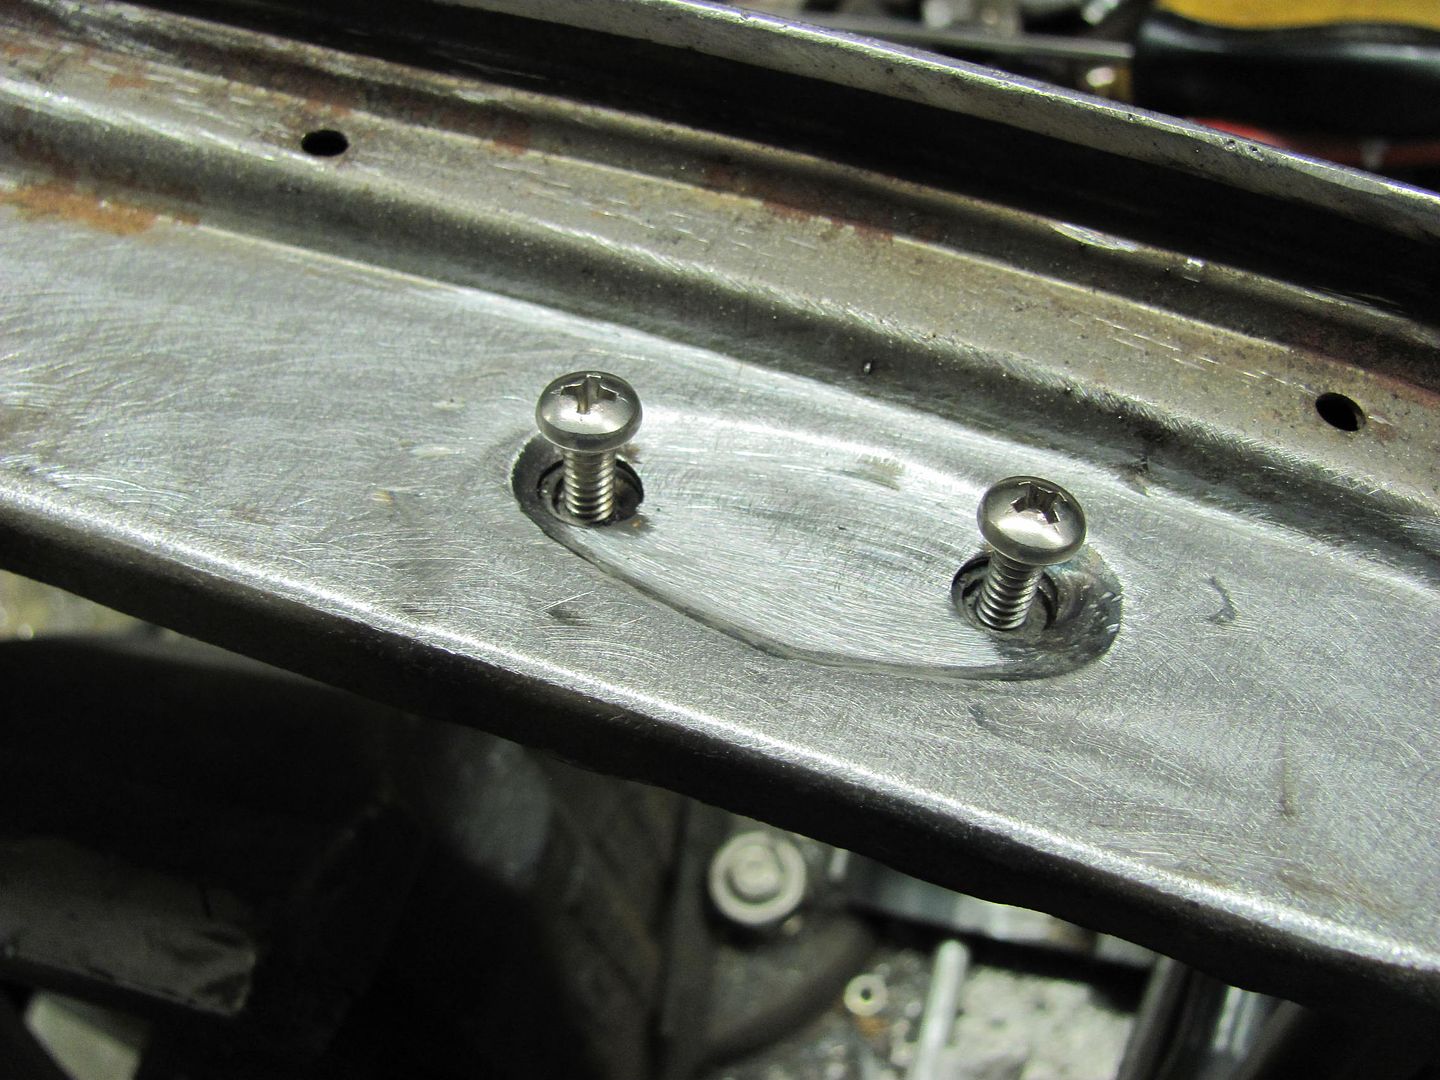 And for next time, we have one more piece to add while the bottom is still open, the floating nut plate for the tailgate latch.... 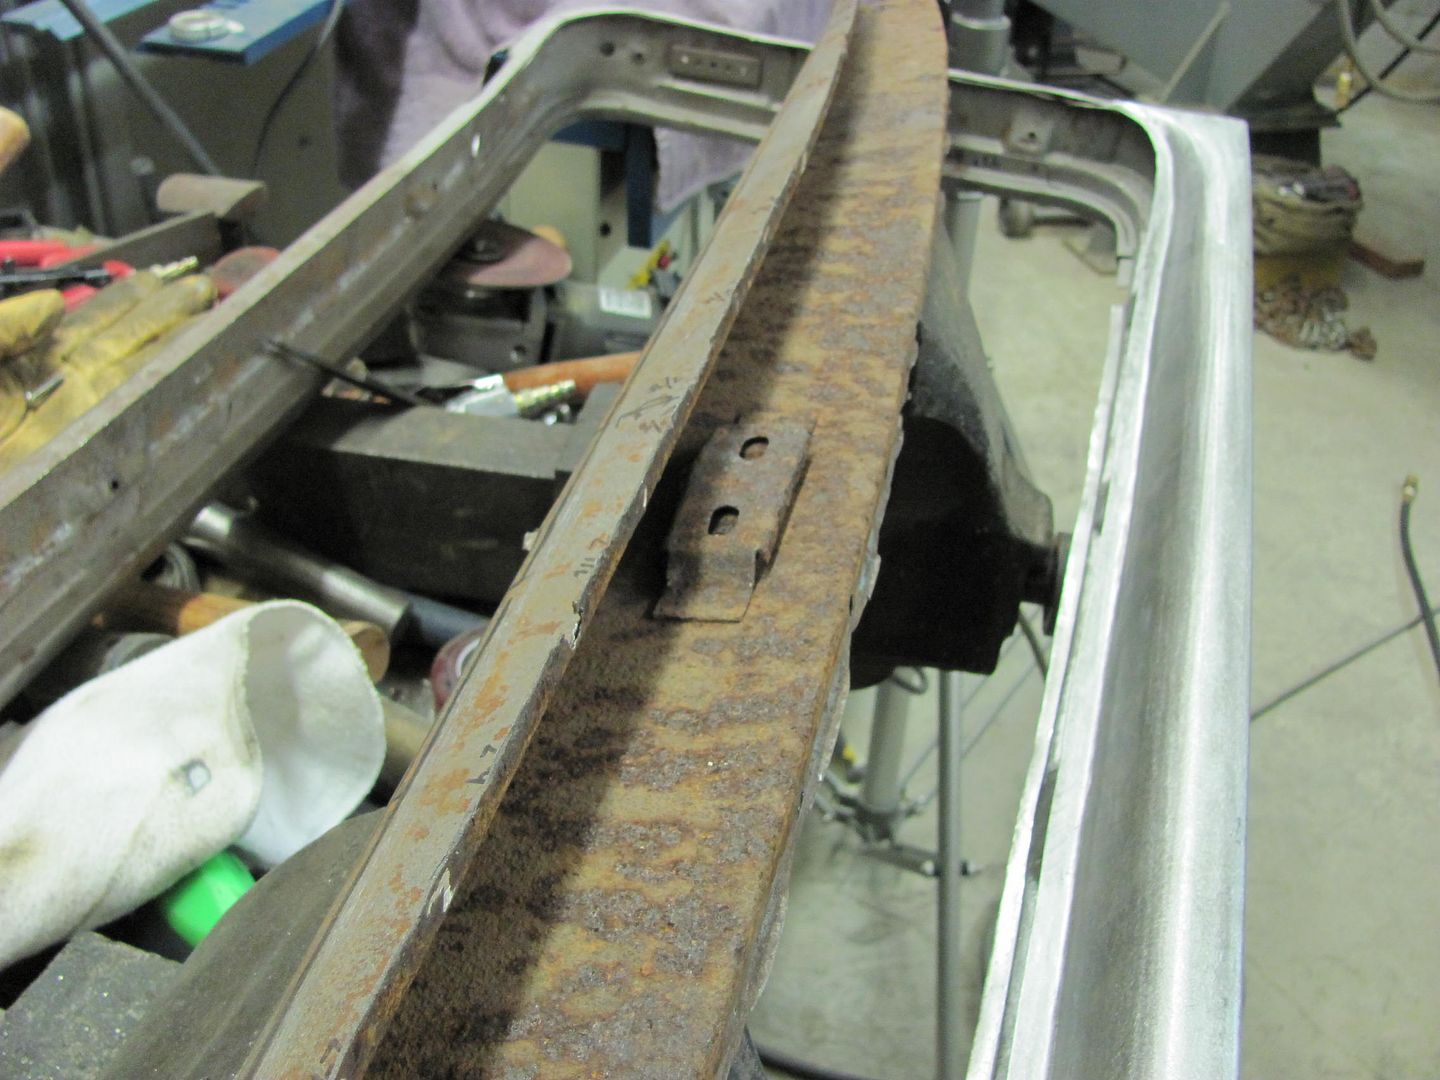 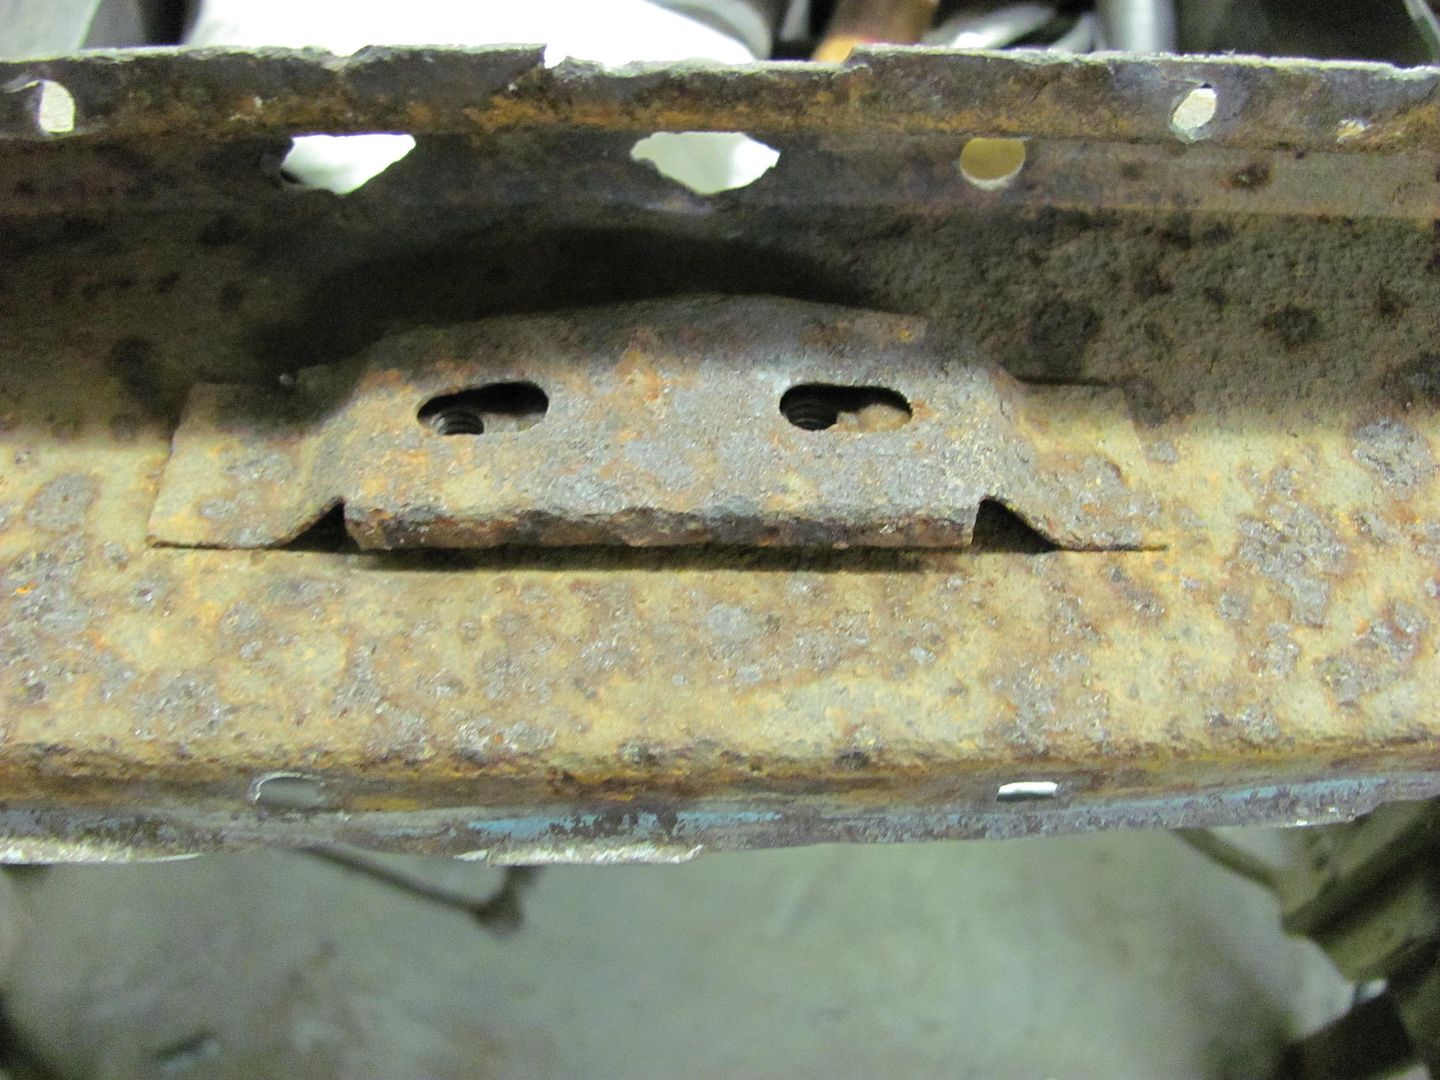 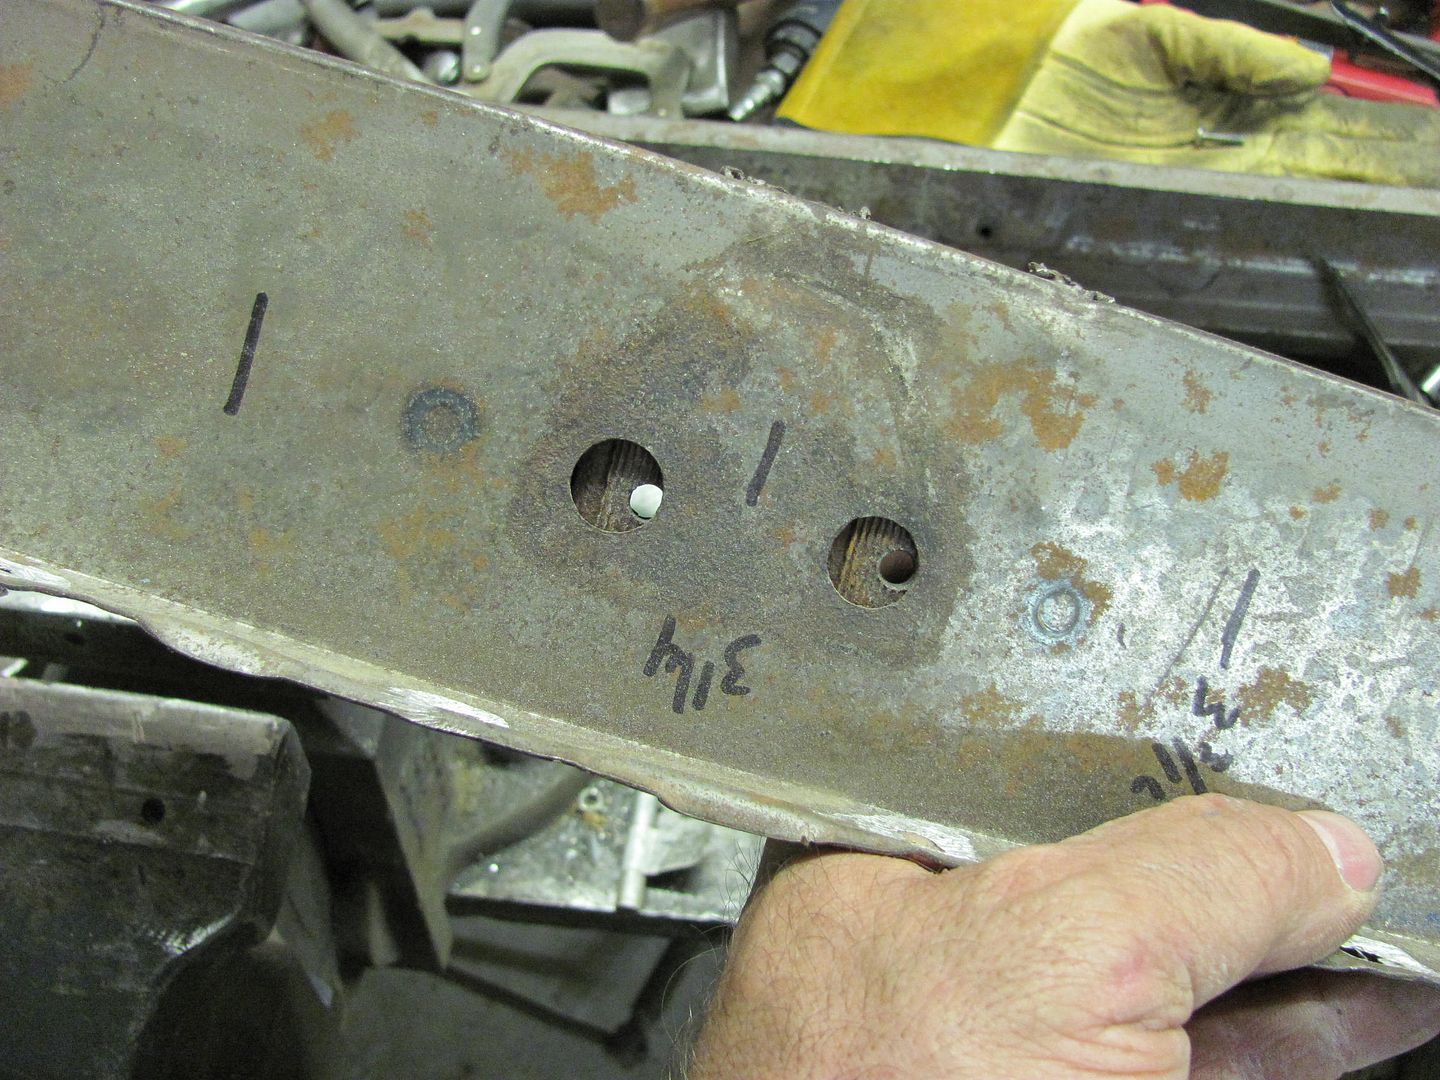
__________________
Robert |
|
|
|
|
11-12-2013, 06:36 PM
|
#4 |
|
Registered User
 Join Date: Aug 2005
Location: Hillsboro Oregon
Posts: 6,449
|
Re: 55 Wagon Progress
Speechless as always. Incredible!
|
|
|
|
|
11-13-2013, 07:24 AM
|
#5 |
|
Registered User
Join Date: Dec 2011
Location: Mobile, Alabama
Posts: 996
|
Re: 55 Wagon Progress
Keep it coming....the attention to detail is inspiring. By the way, nice welding table. dug
__________________
My Build - http://67-72chevytrucks.com/vboard/s...d.php?t=515876 |
|
|
|
|
11-17-2013, 12:57 AM
|
#6 |
|
Registered User
Join Date: Jan 2013
Location: Leonardtown, MD
Posts: 1,635
|
Re: 55 Wagon Progress
Yeah, I'm starting to get the table filled back up again.
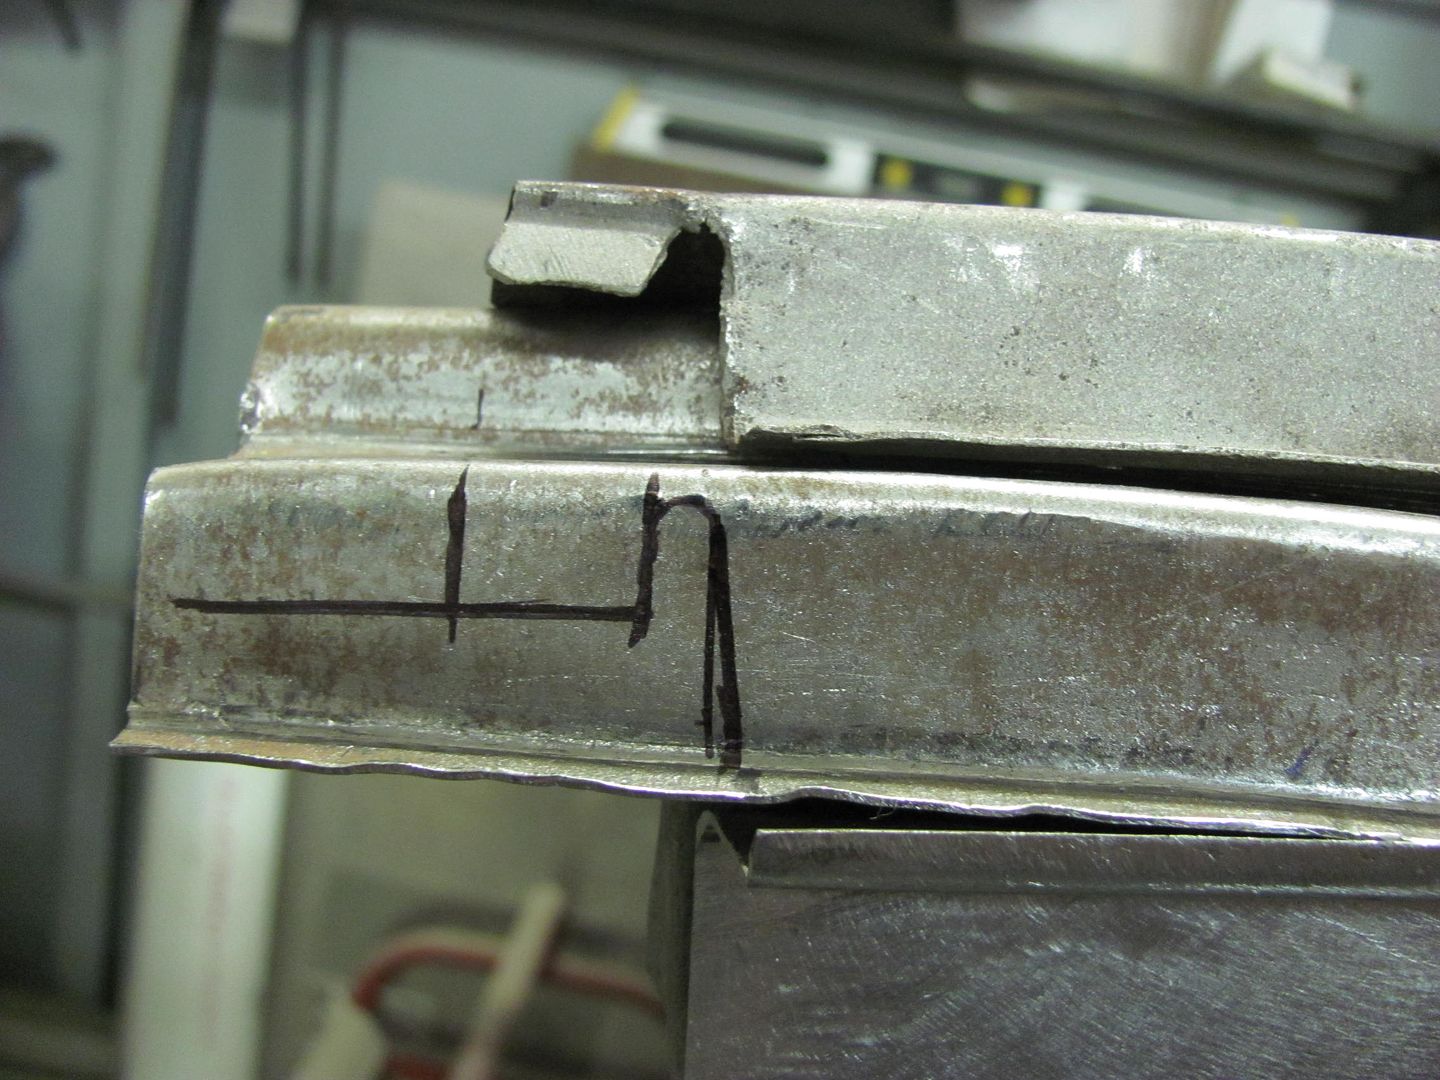
 Another slight detour.... I need to stop looking for this stuff....or is it looking for me? This pinch weld showed swelling between the two sheets, and a closer inspection showed some rather thick scale... 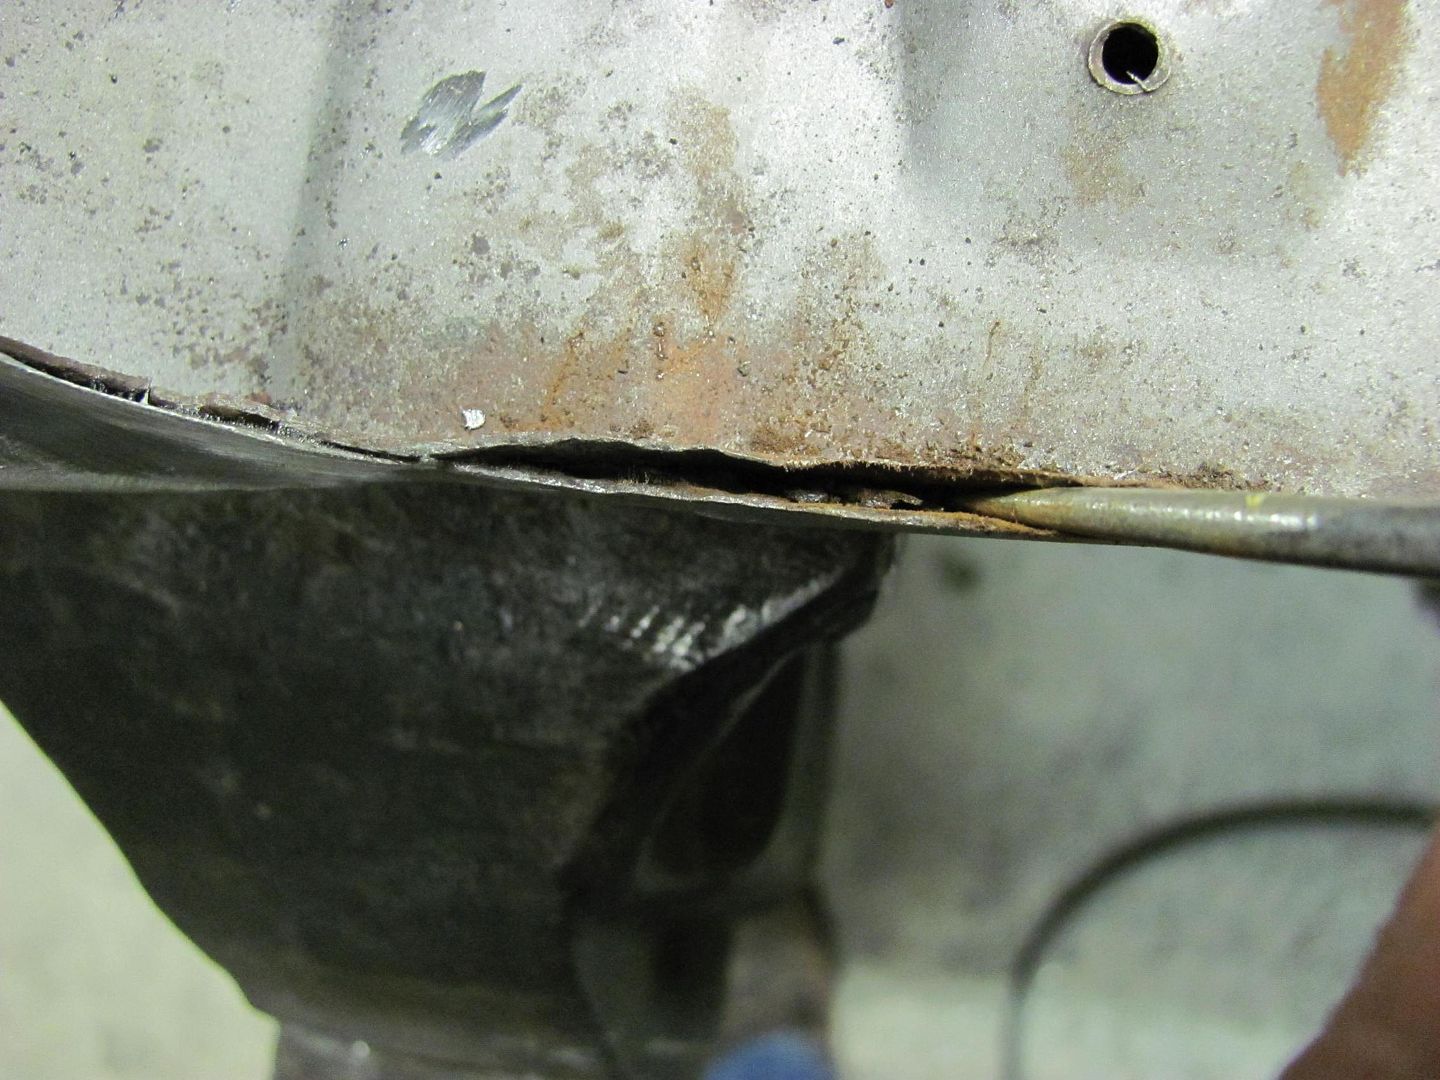 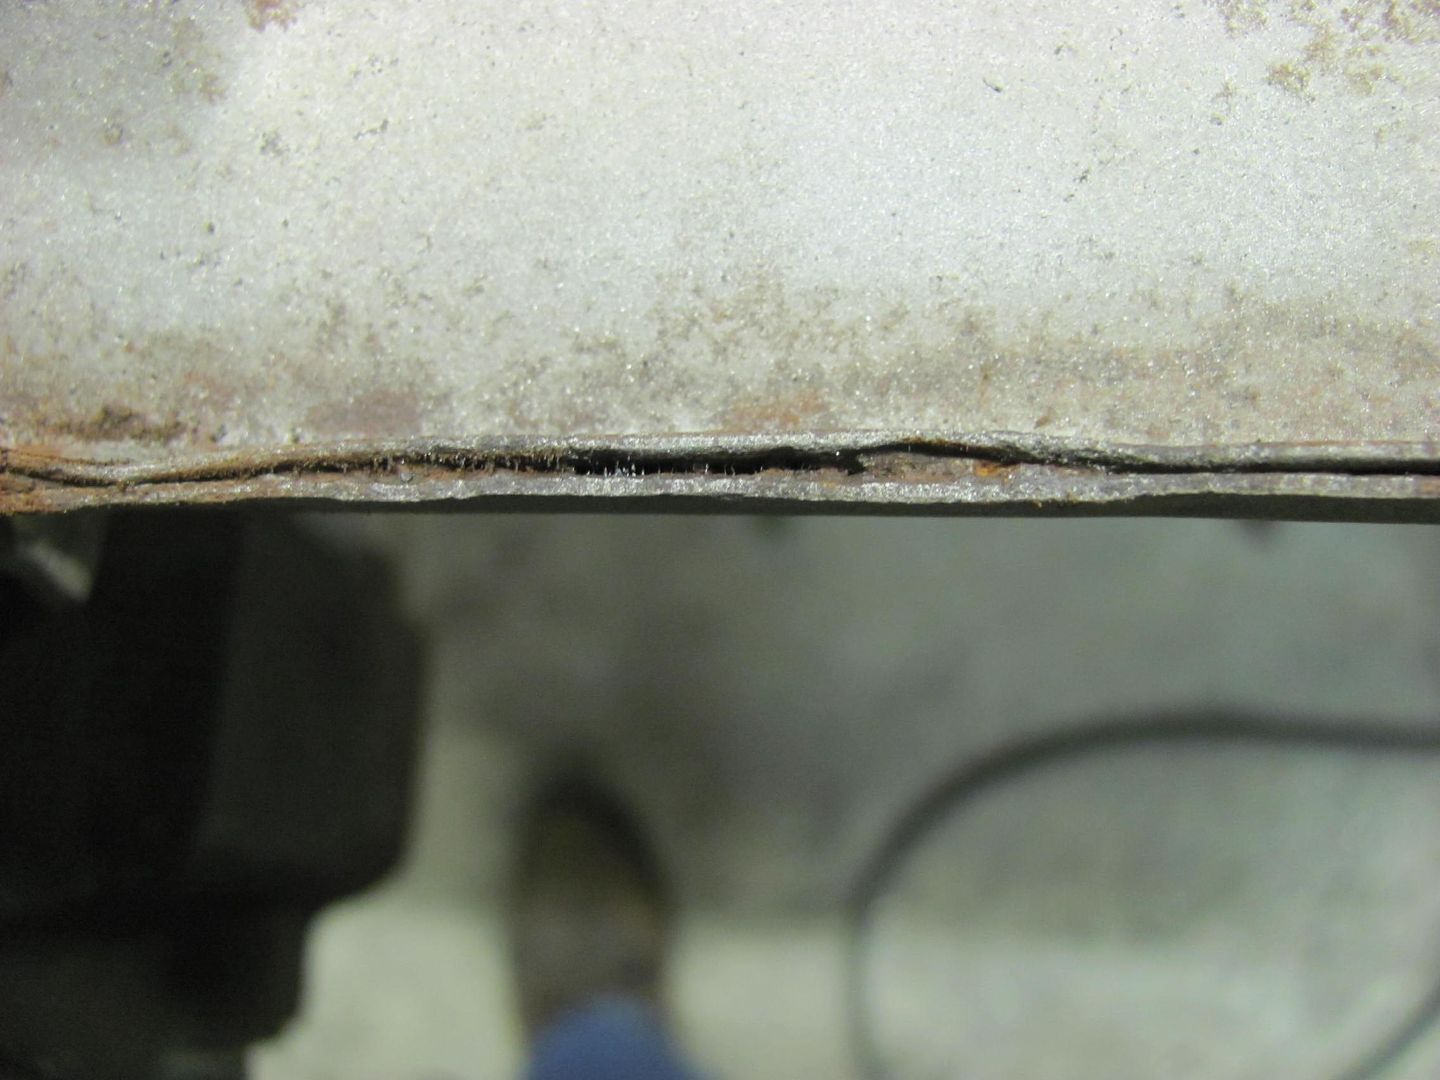 Out with the old...  Test fit of the new... 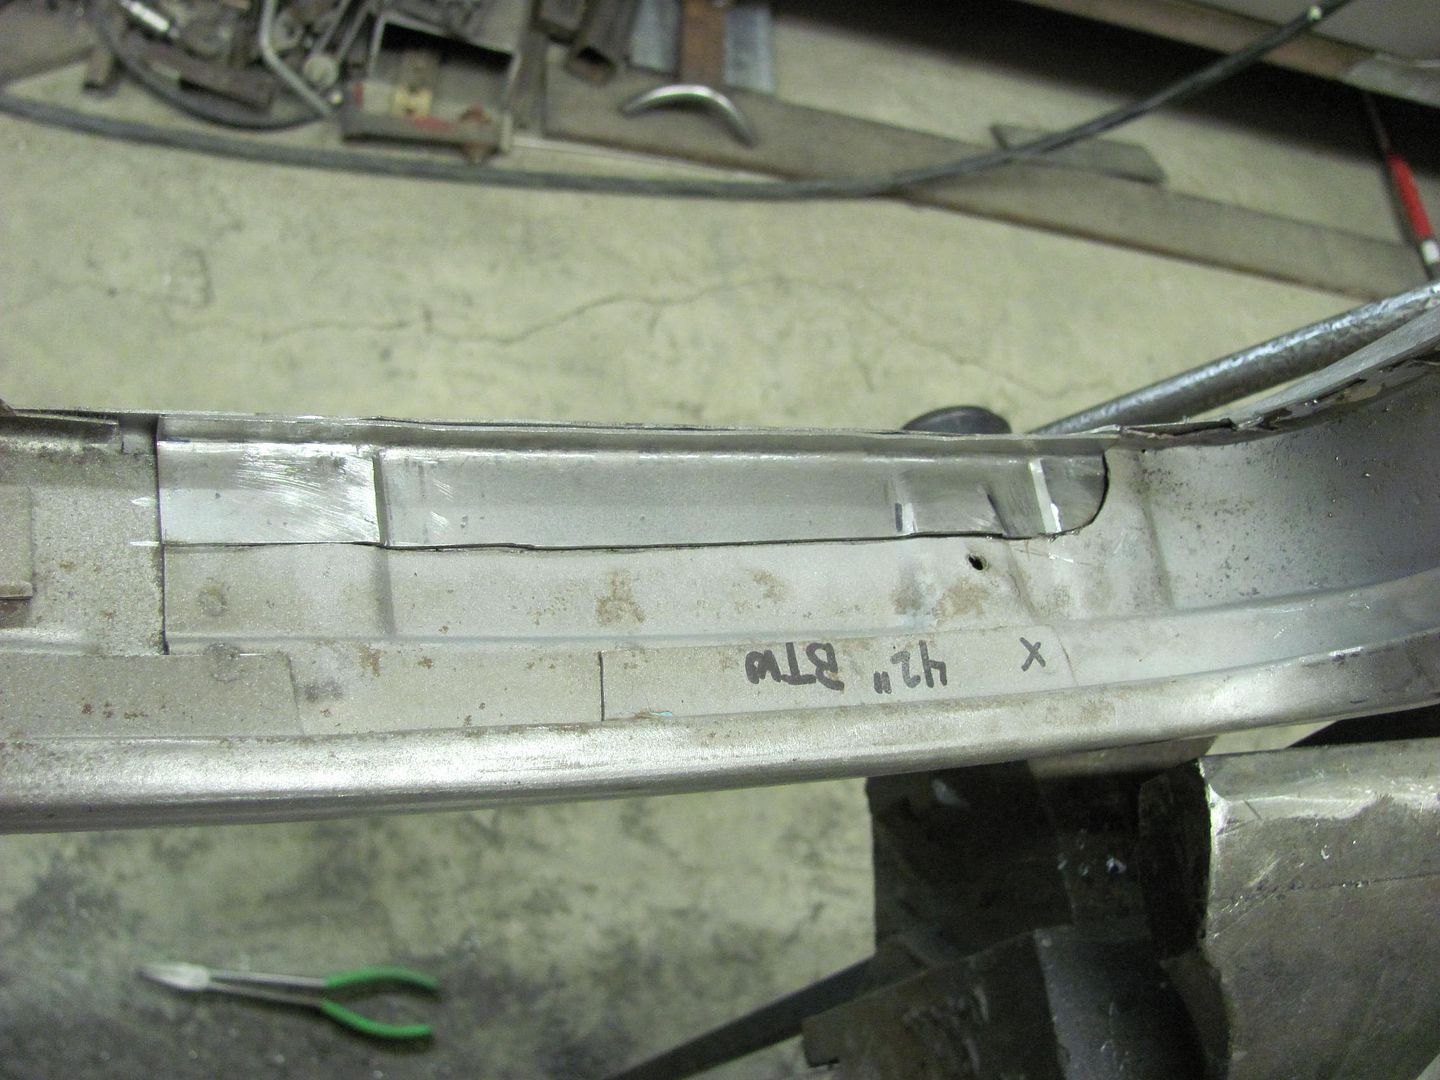 The exposed metal was media blasted, as was the inside of the newly made patch....and some epoxy primer added... 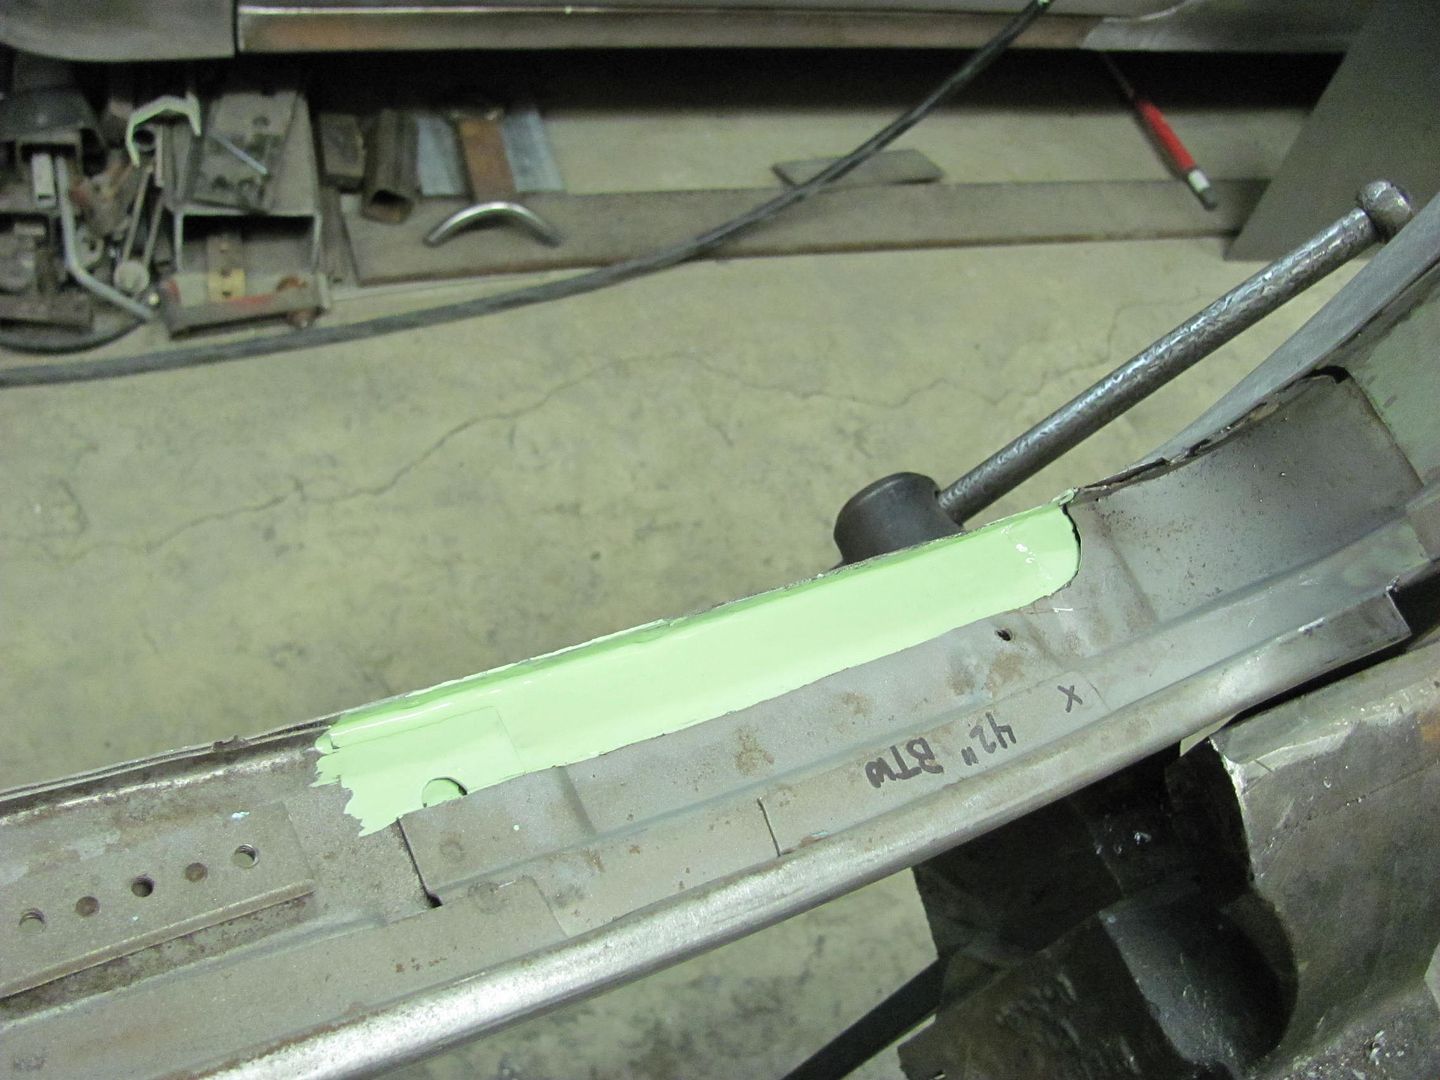 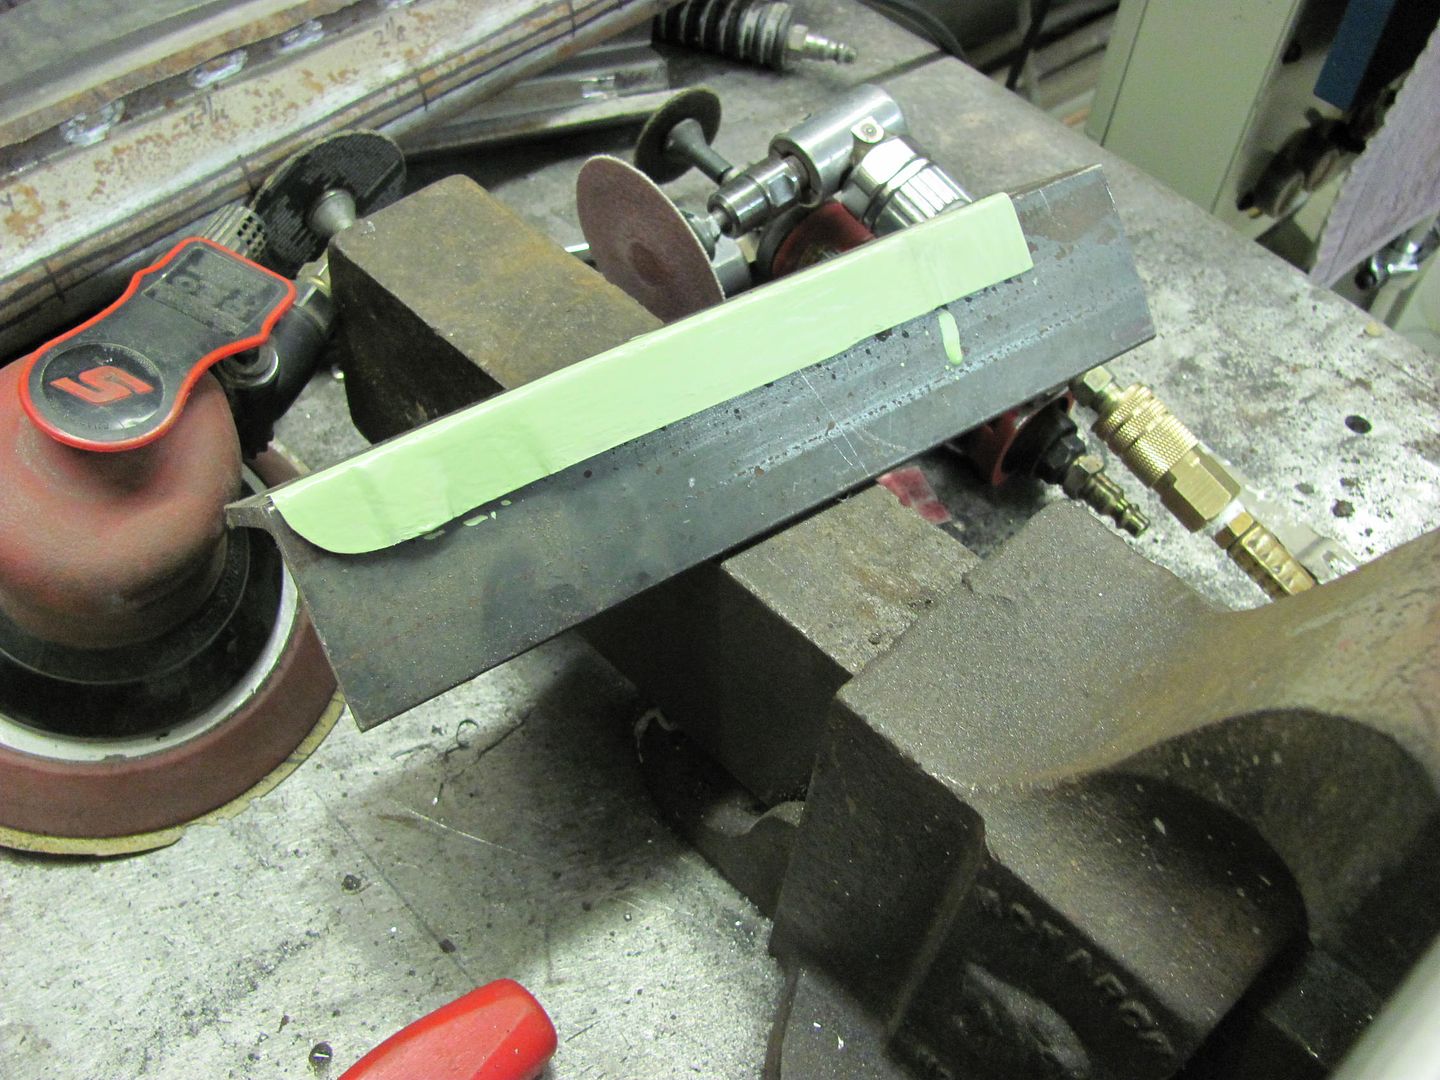 We'll let that dry and then get it welded in place. And just to show the makeshift clamping system for cutting, grinding, and painting in an awkward spot...... 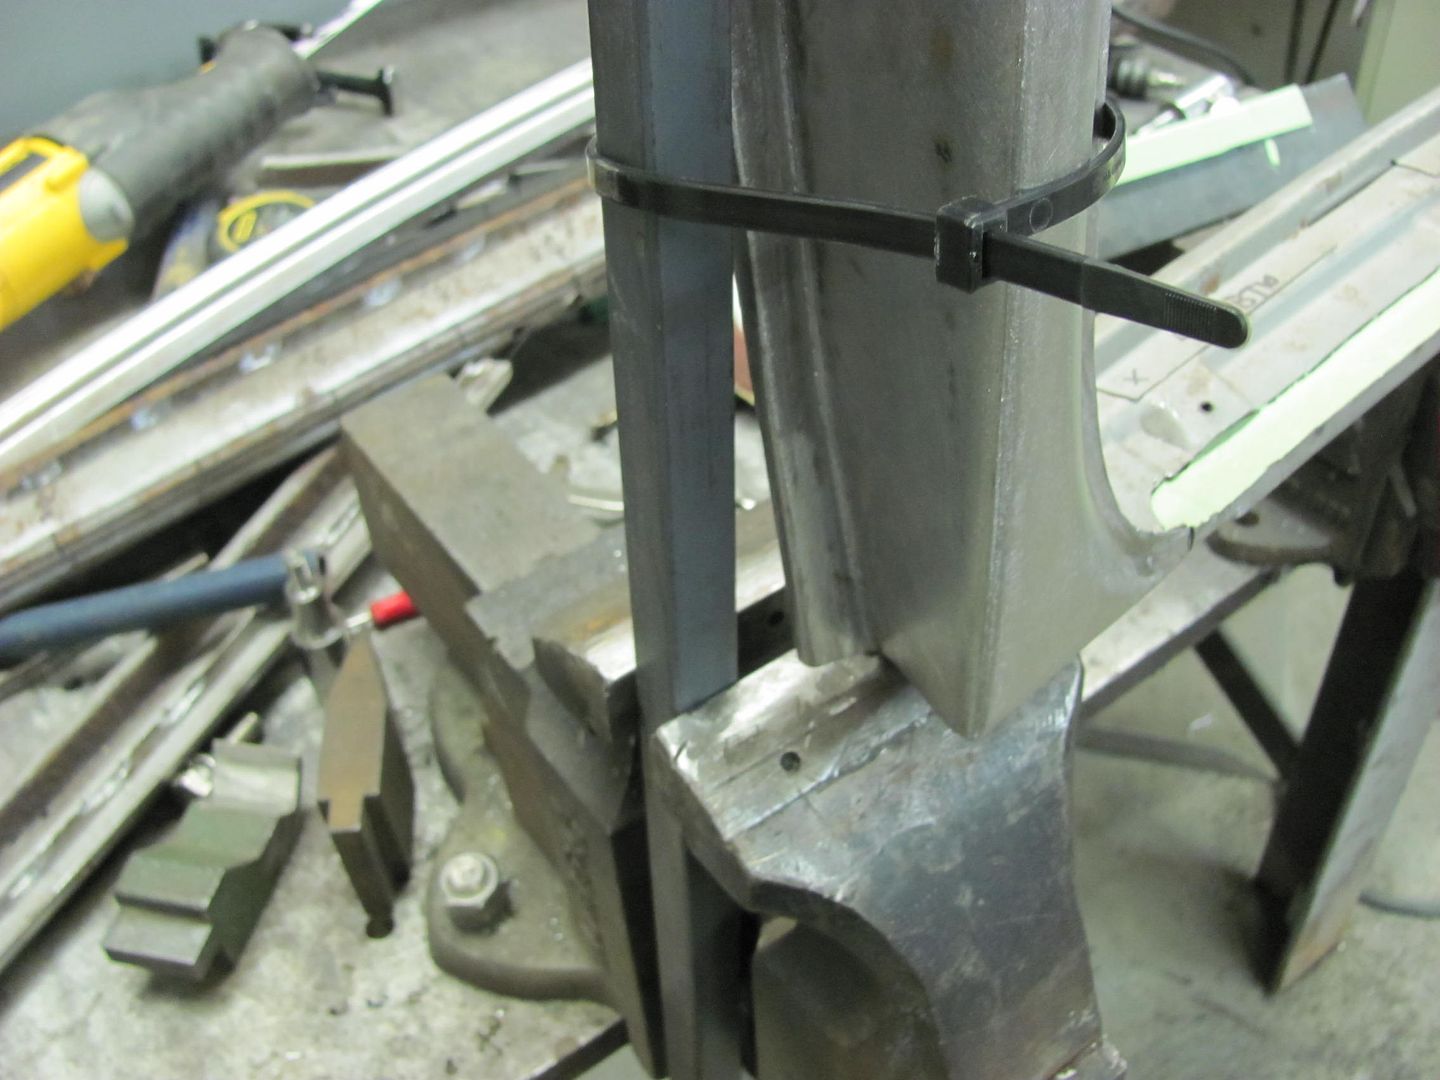 
__________________
Robert |
|
|
|
|
11-22-2013, 11:22 PM
|
#7 |
|
Registered User
Join Date: Jan 2013
Location: Leonardtown, MD
Posts: 1,635
|
Re: 55 Wagon Progress
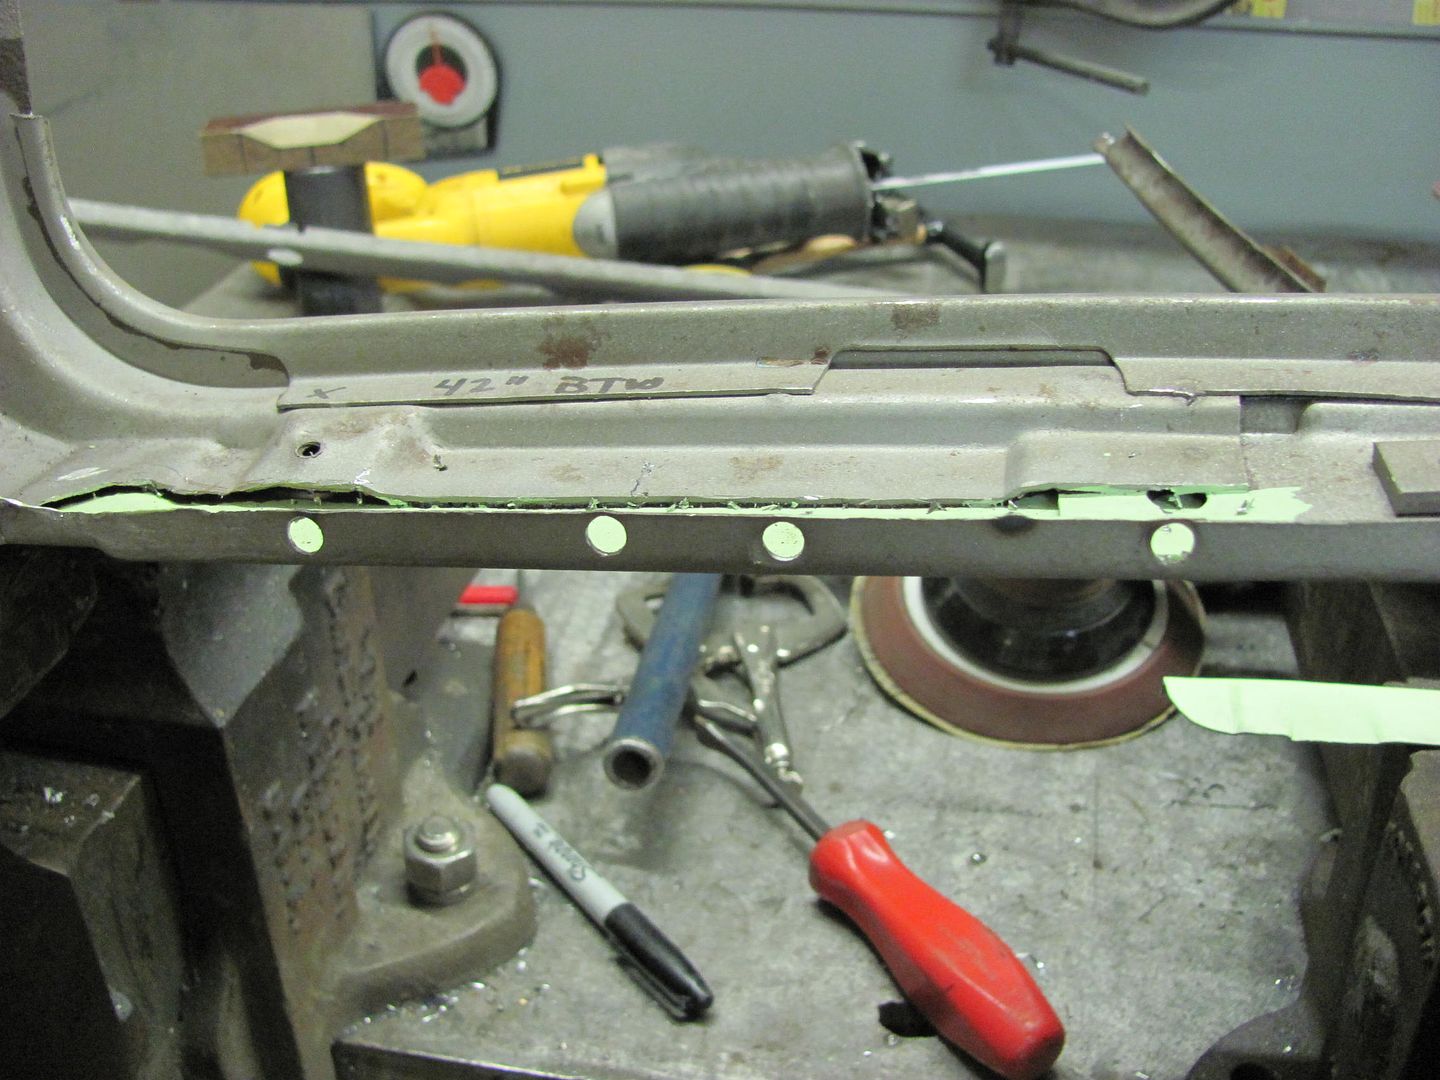
With the epoxy well cured, holes were drilled for plug welds....
 Then used the modified plug weld bit for cleaning out the adjacent panel...  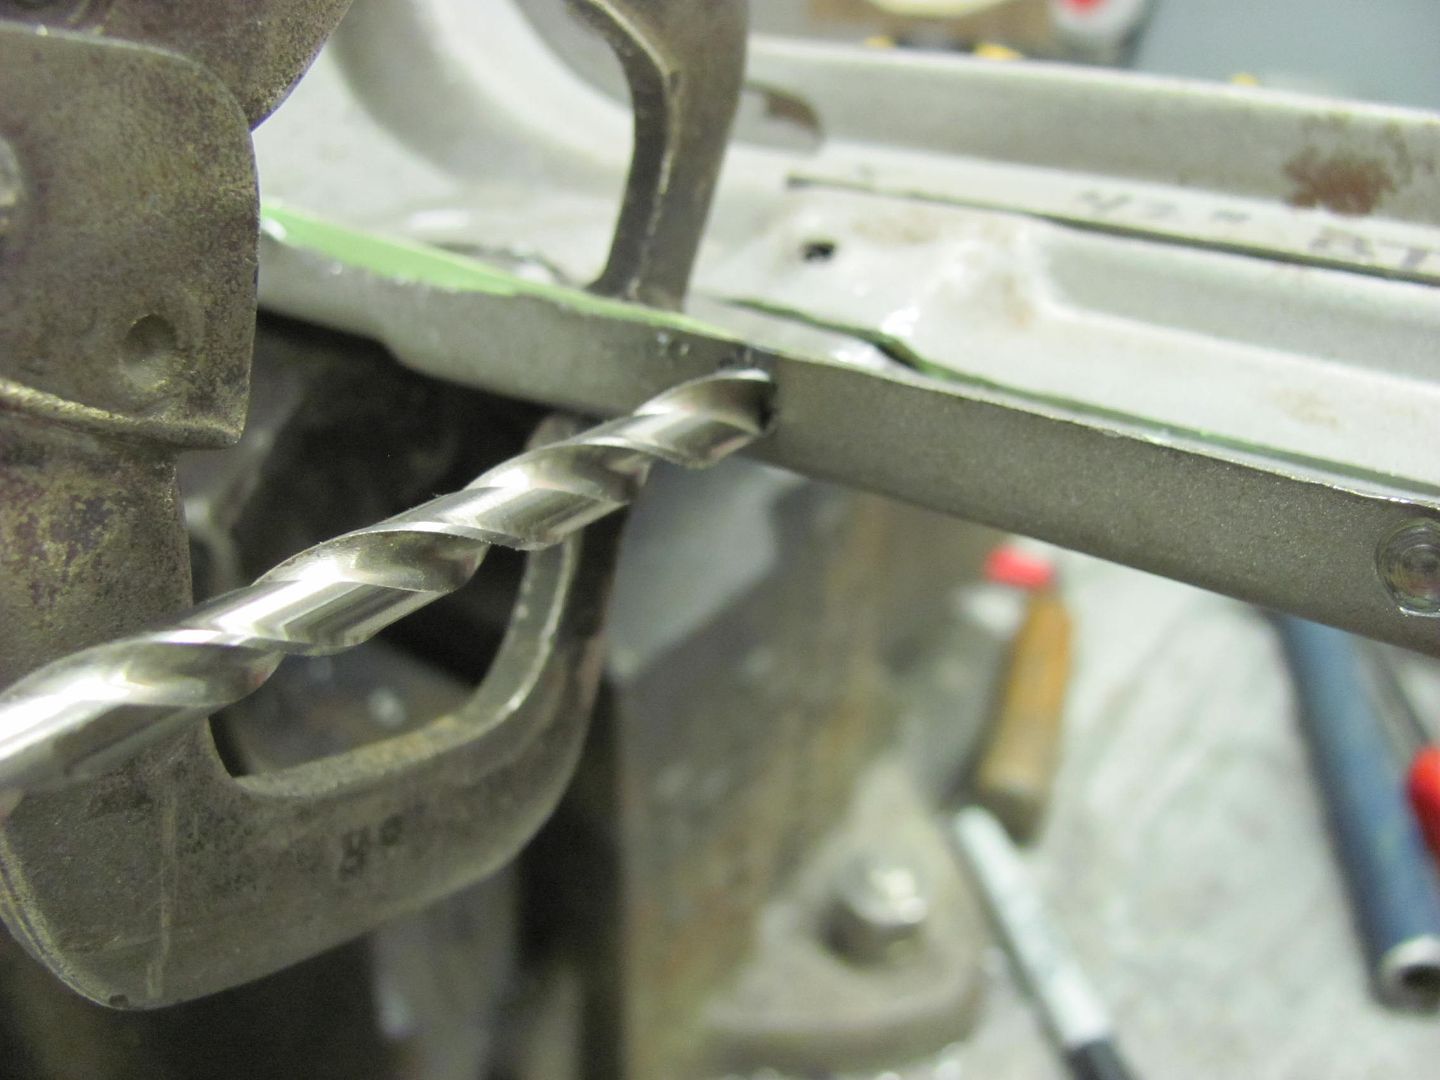 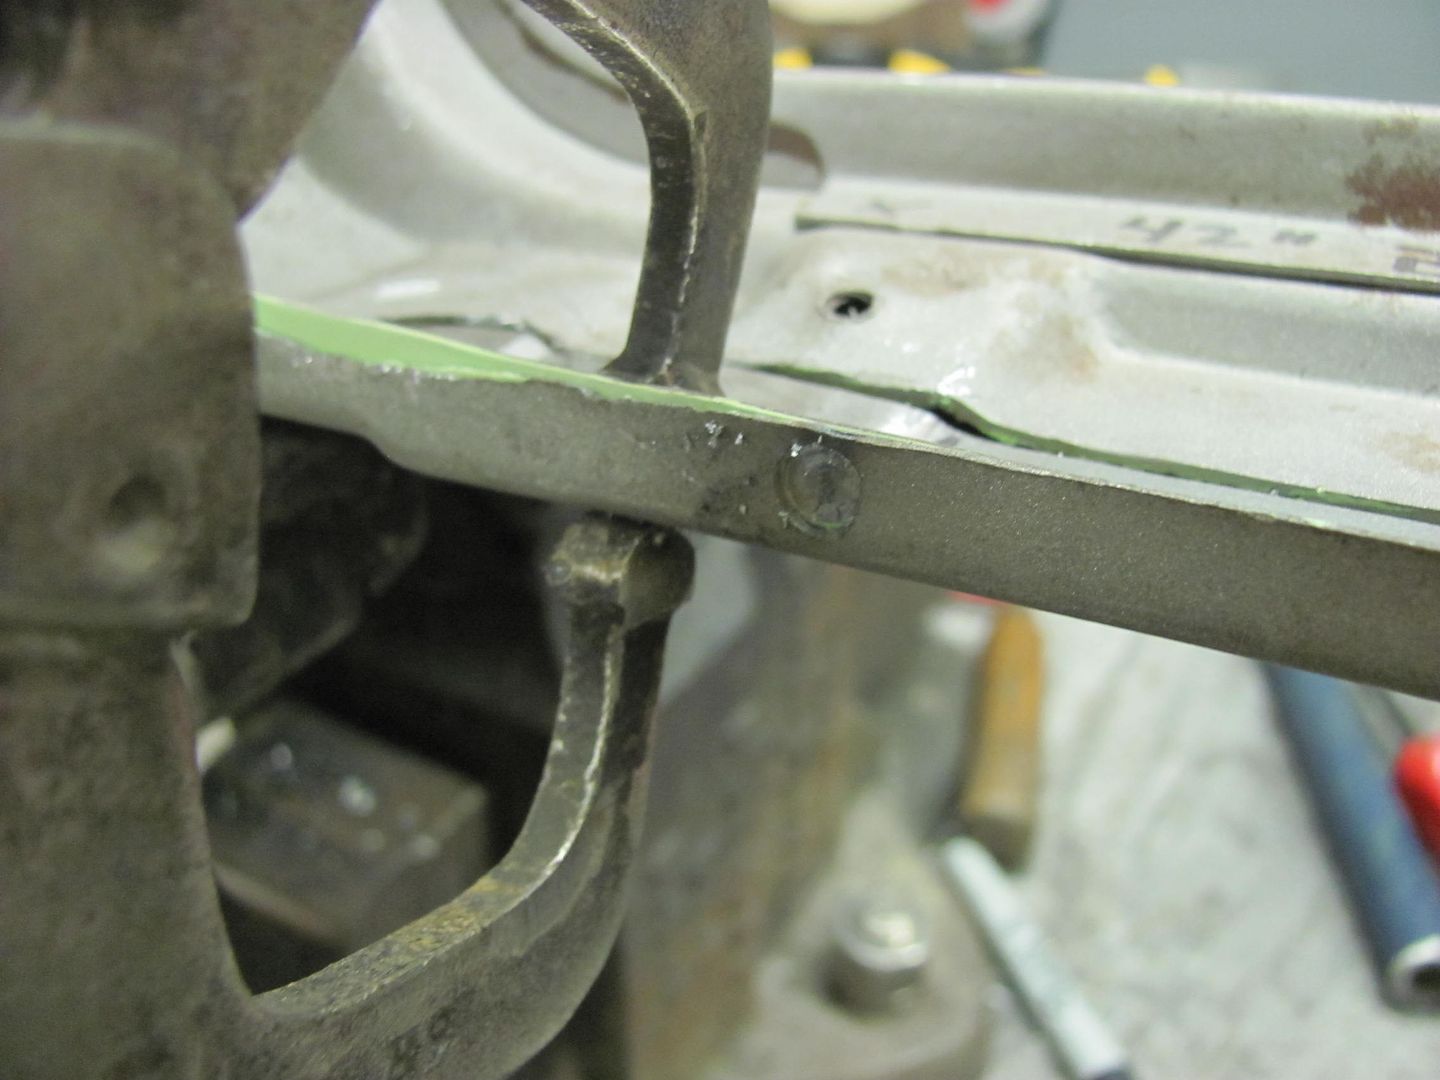 Cleaned spots for the plug welds...  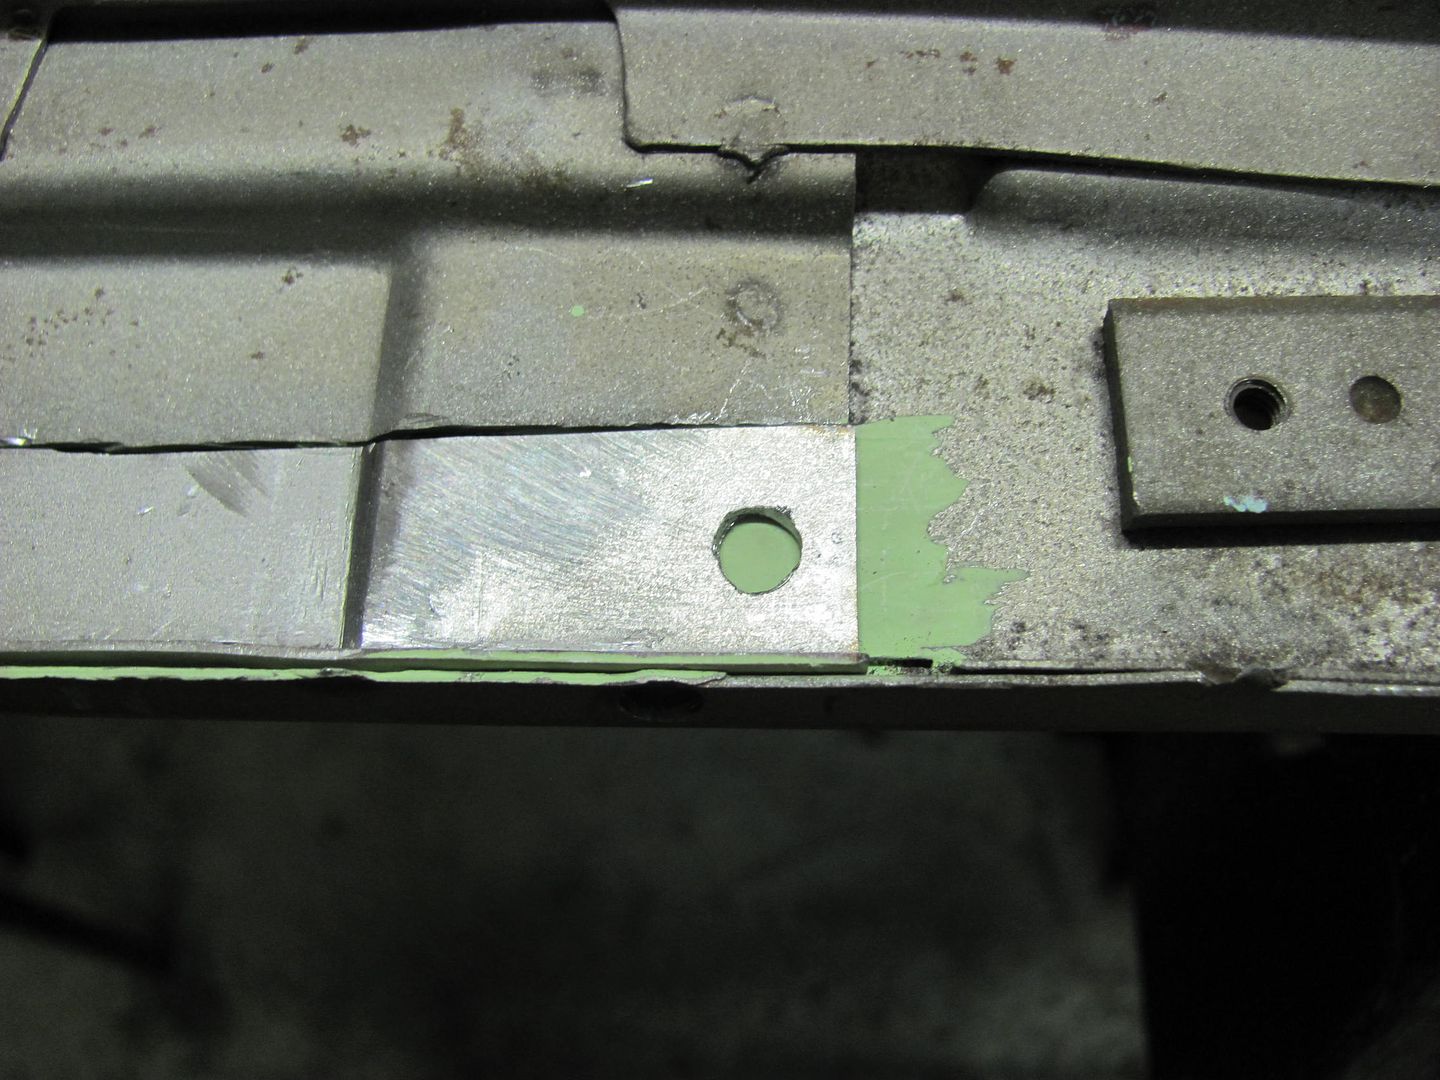 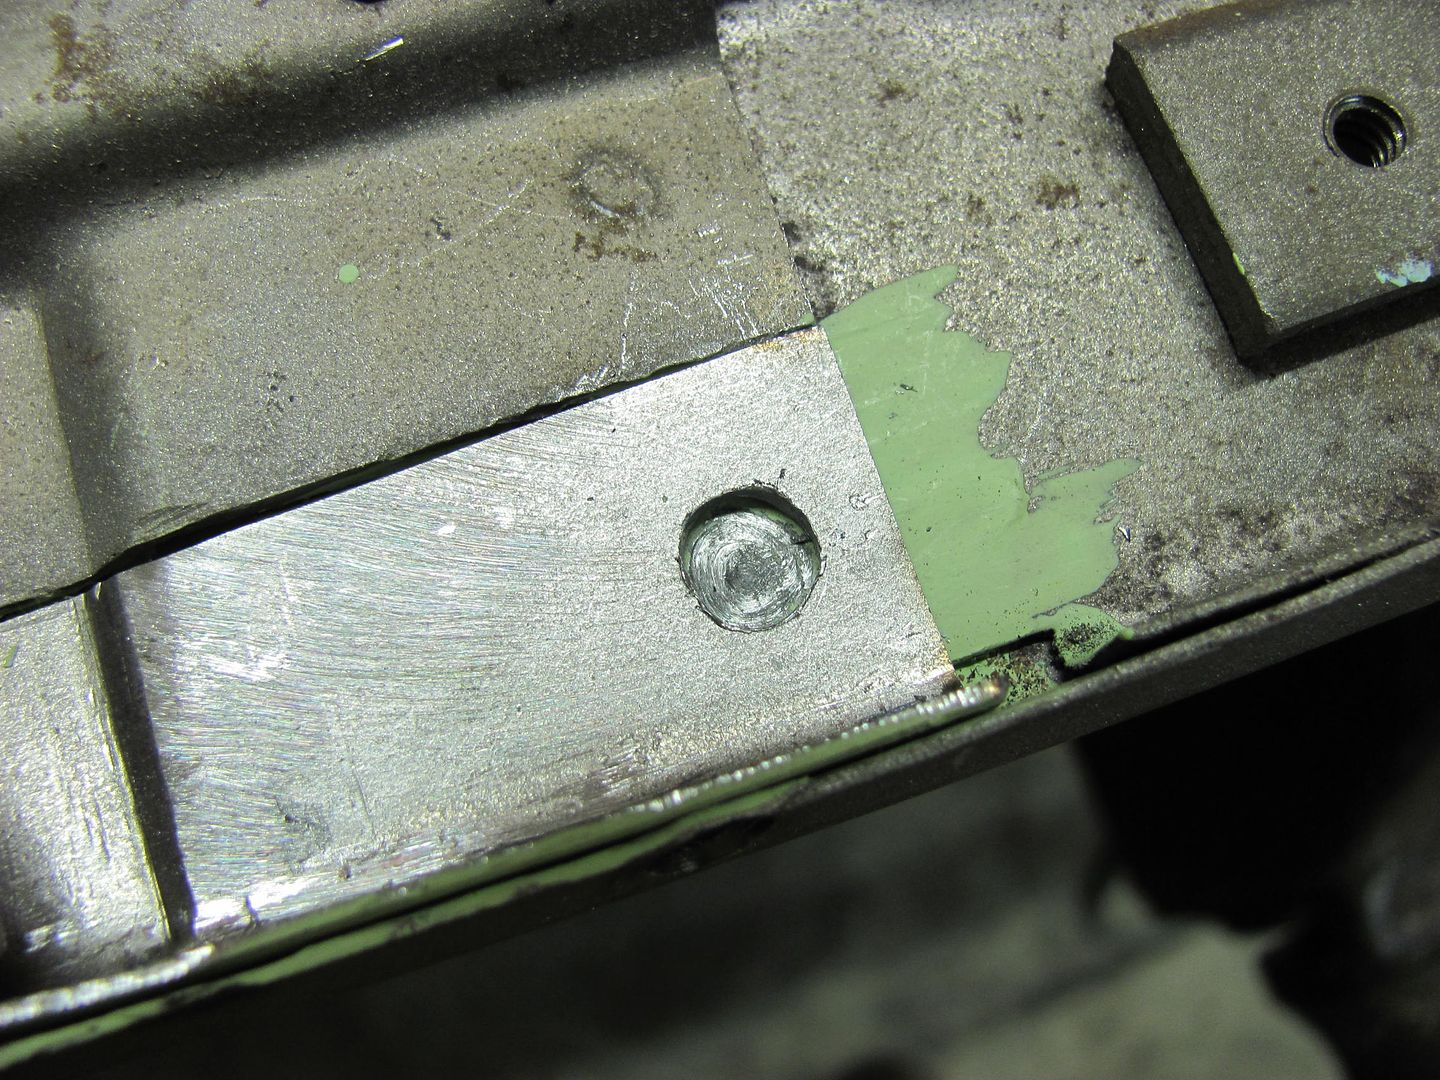 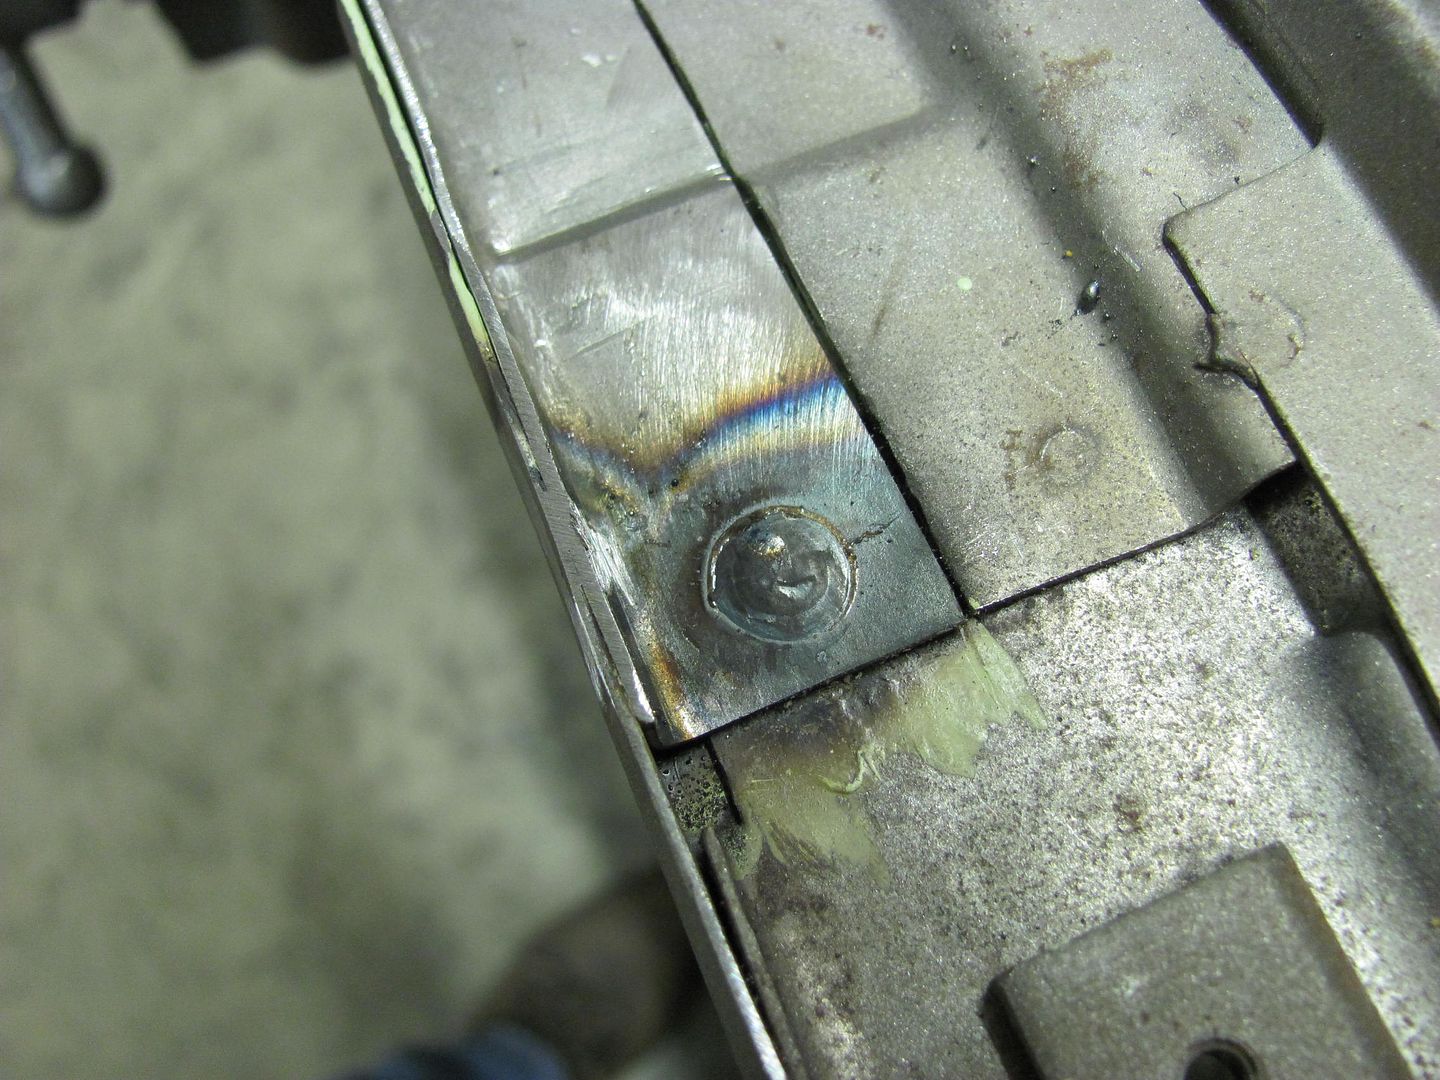 I had some questions about how well the epoxy held up to heat from welding. The epoxy next to the weld above, where it turned brown from the heat, was allowed to cool off, then attempted to scrape the paint with my thumbnail. I thought it may scrape some off, but it held tight, not so much as a scratch. Then I got on a roll and forgot pictures, but here's the patch all welded in.... 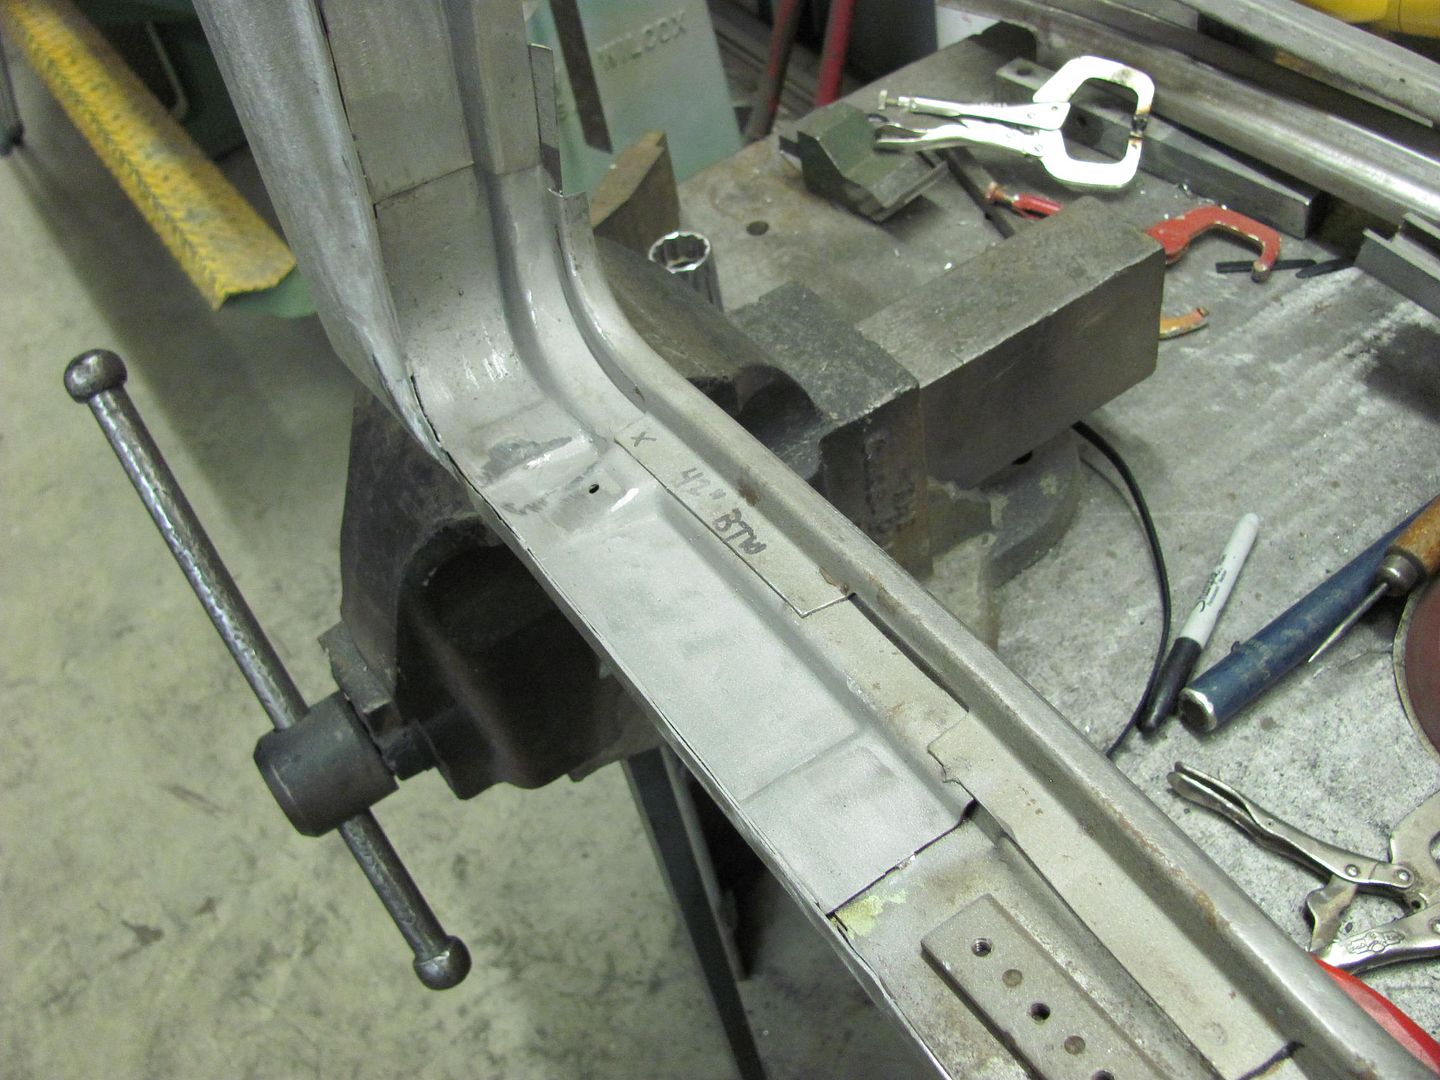 Next, drilled the holes in the lower window opening.... 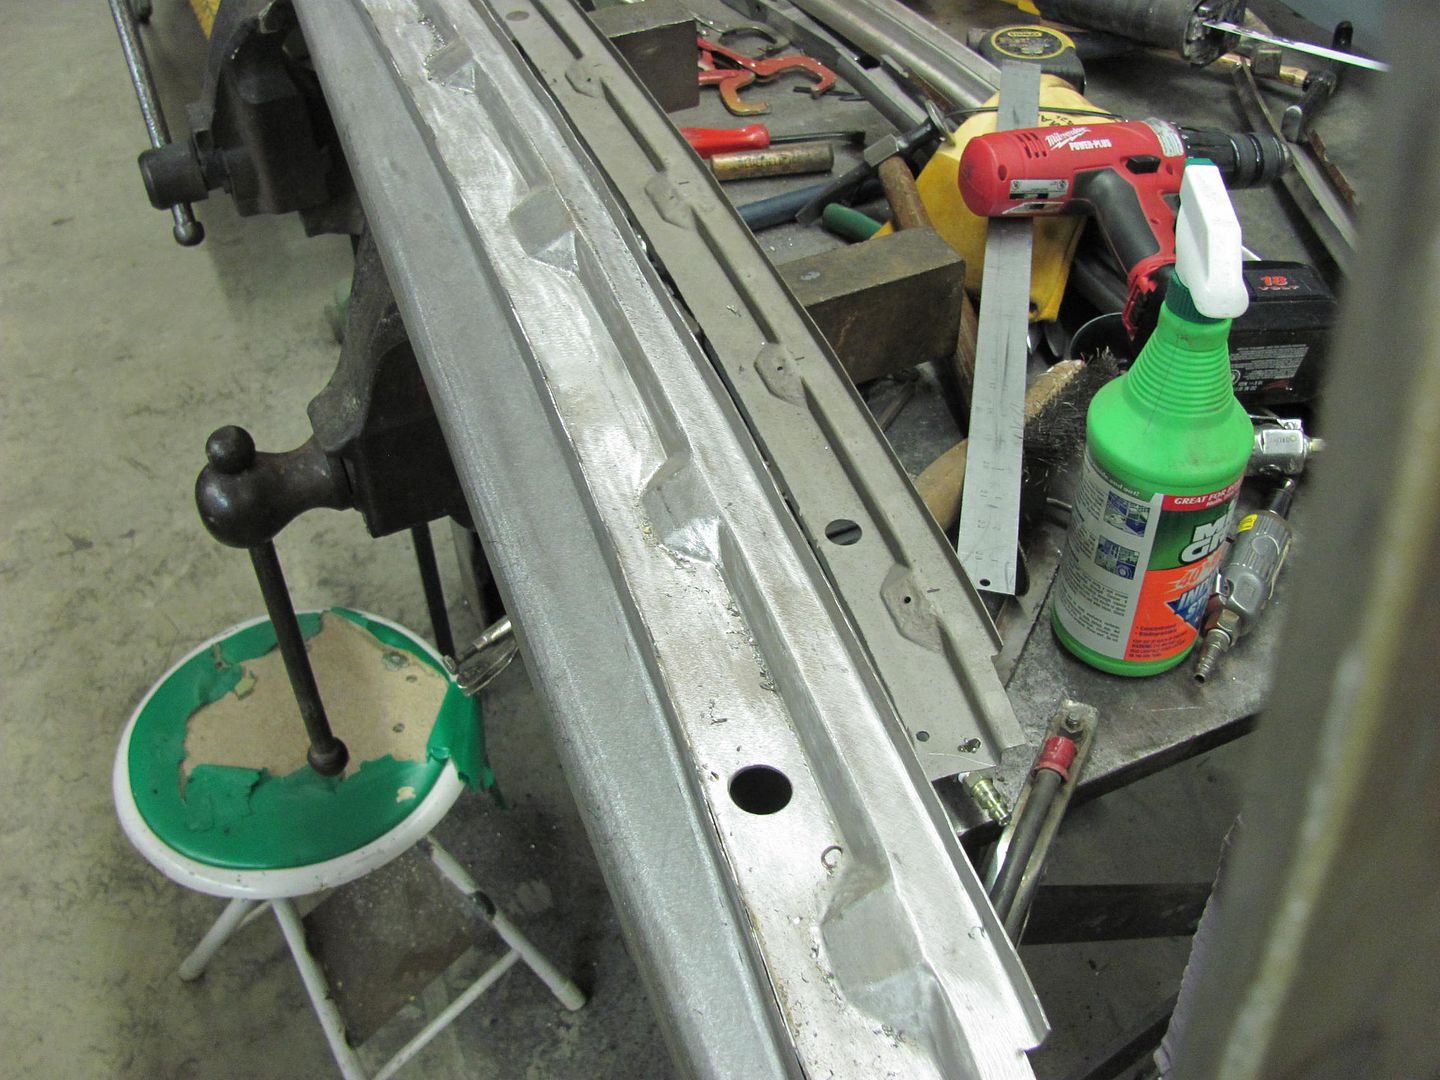 .....and got the holes placed for the nut plate and it's plug welds... 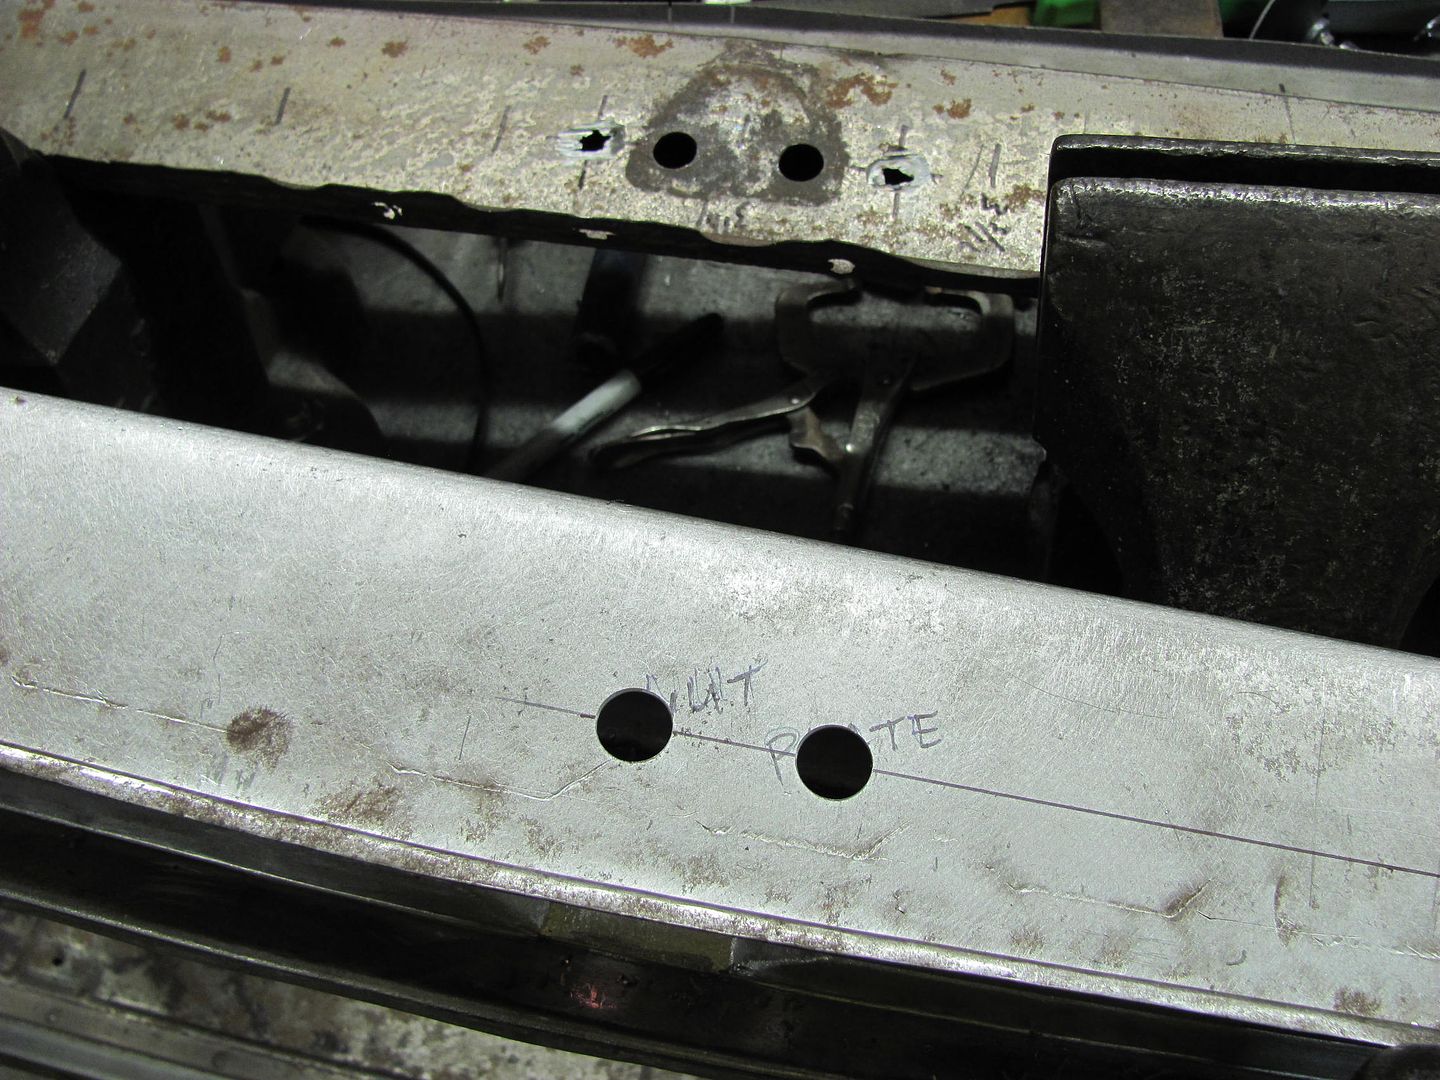 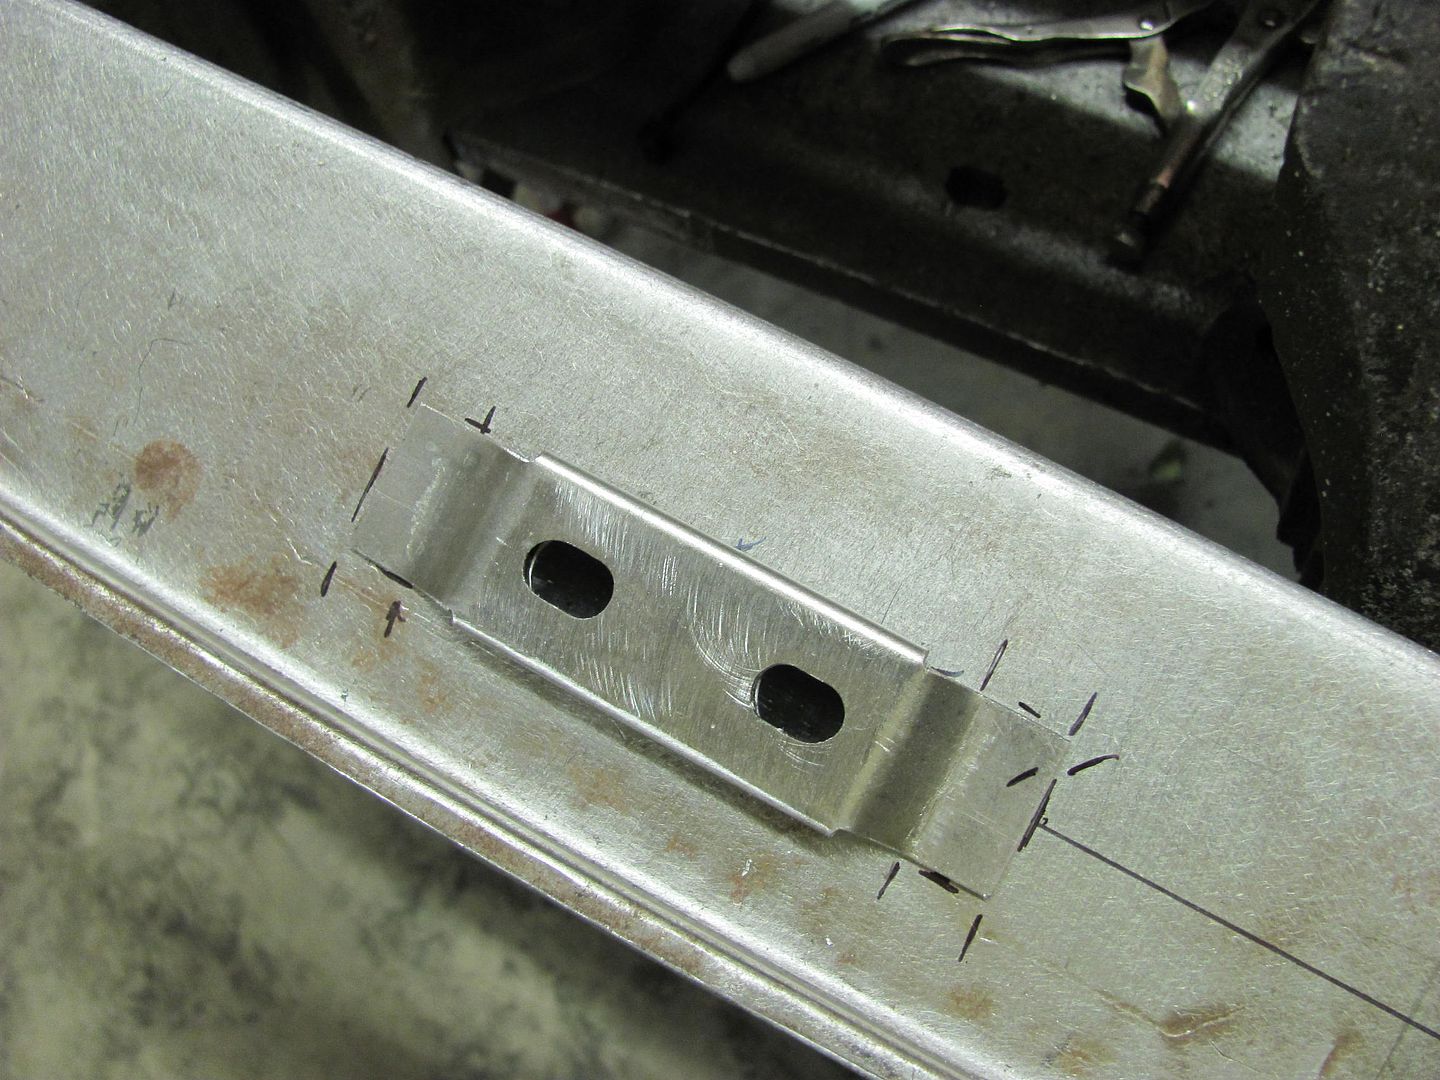 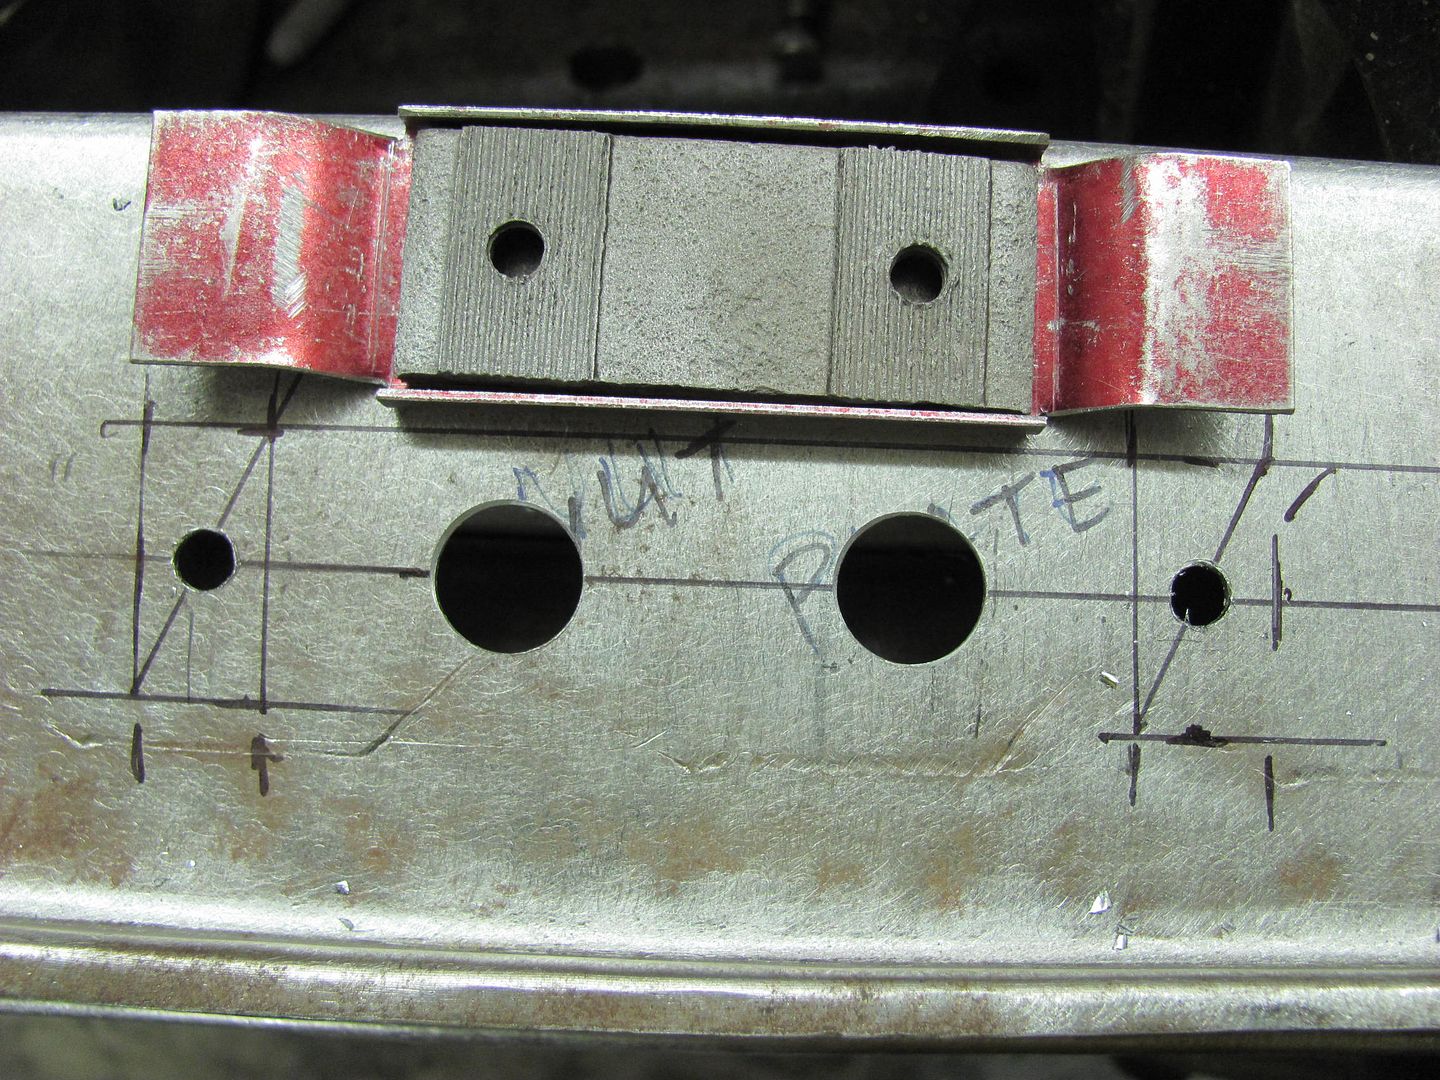 Hopefully tomorrow we can get some profile blocks cut out to fold over the ends of the outer piece...
__________________
Robert |
|
|
|
|
11-23-2013, 11:19 PM
|
#8 |
|
Registered User
Join Date: Jan 2013
Location: Leonardtown, MD
Posts: 1,635
|
Re: 55 Wagon Progress
Laying out the ends for trimming.....
  Here's the piece we'll use to cut out the profile blocks, 3/4 thick steel  As I am fresh out of good band saw blades, these were used....  The lower piece was tapered at the bottom as the bottom of the lift gate tapers in below the bead detail..  .....like so..... 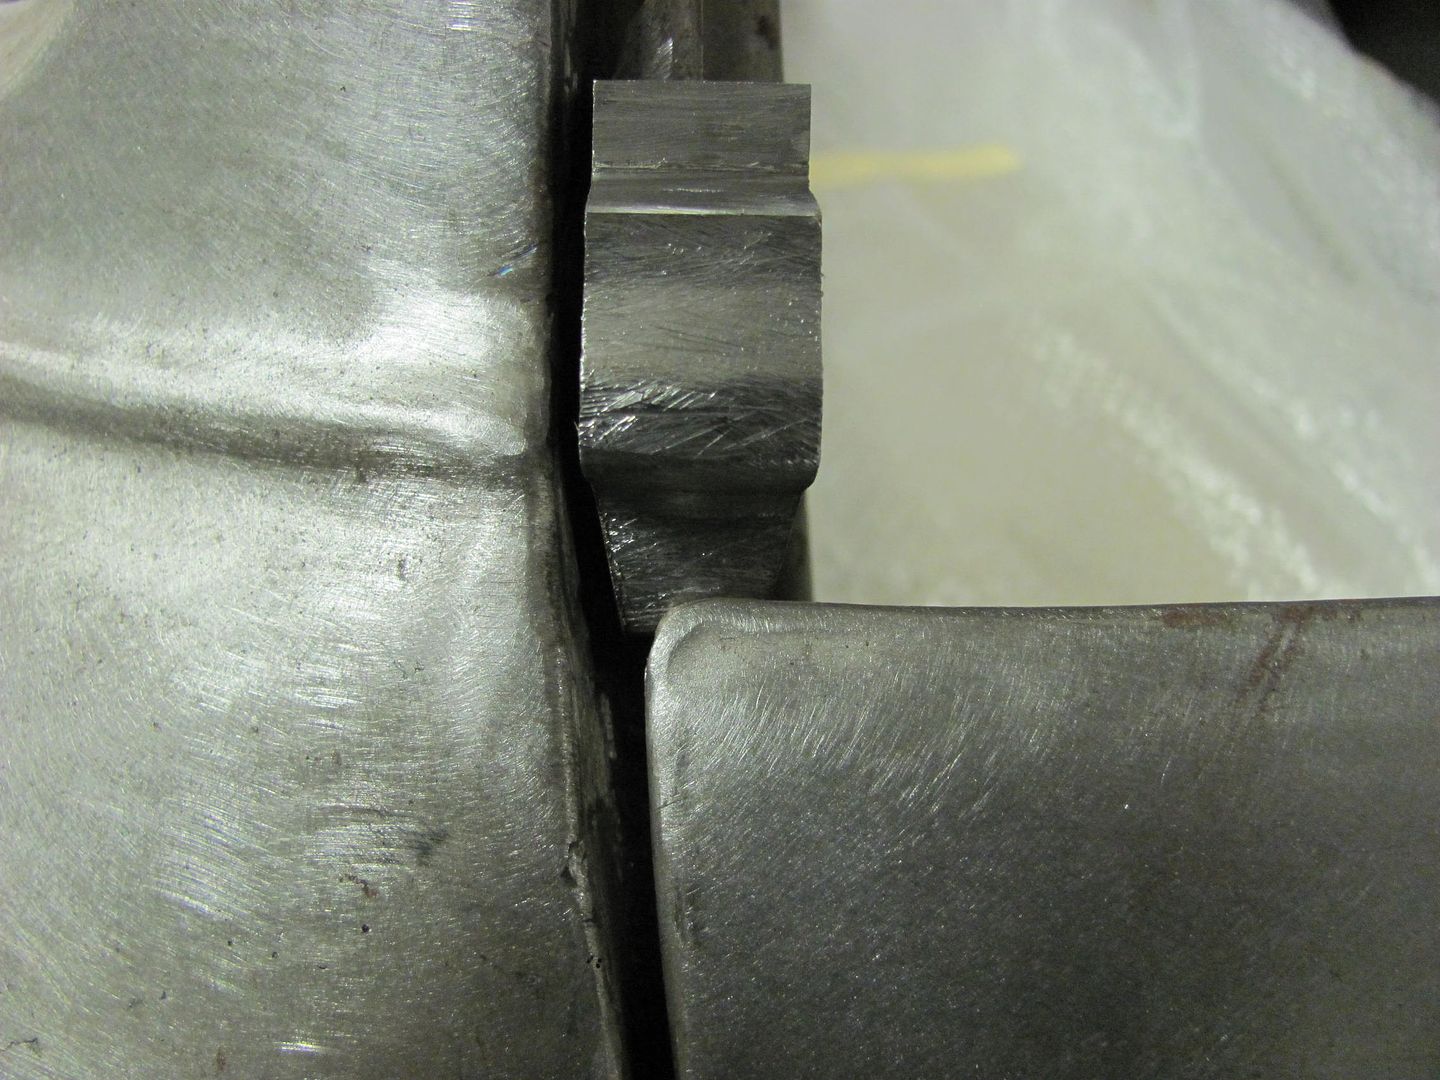 Not perfect, but should work just the same... 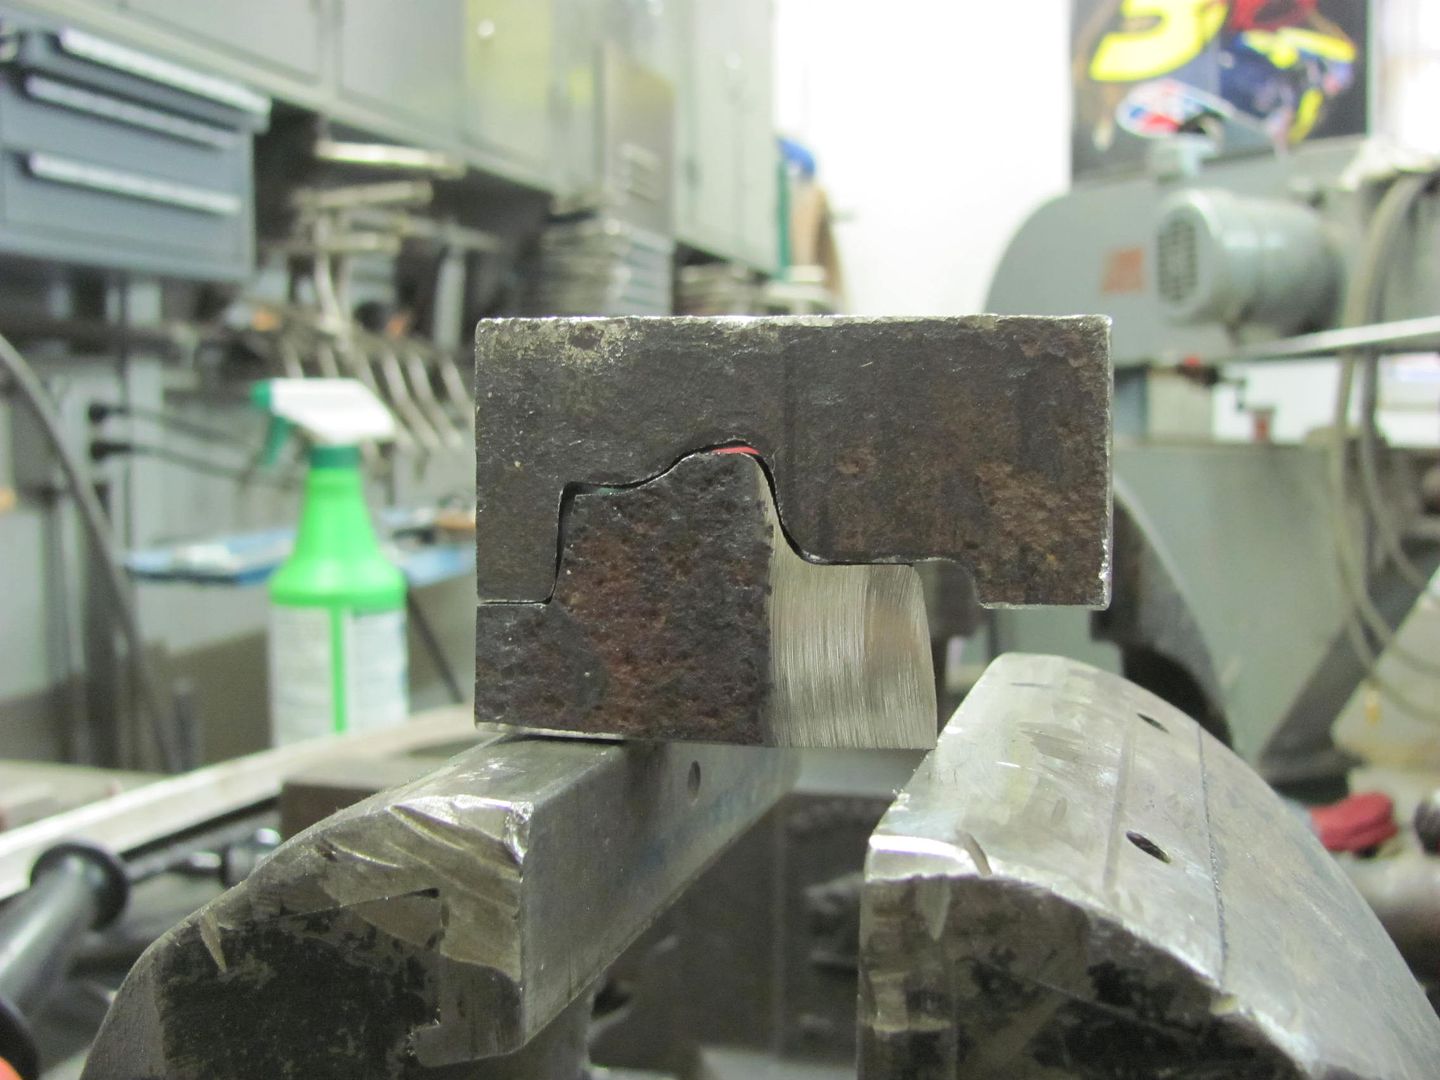 Clamped in the vise.....  Then some heat is applied, and hammered the high spots..  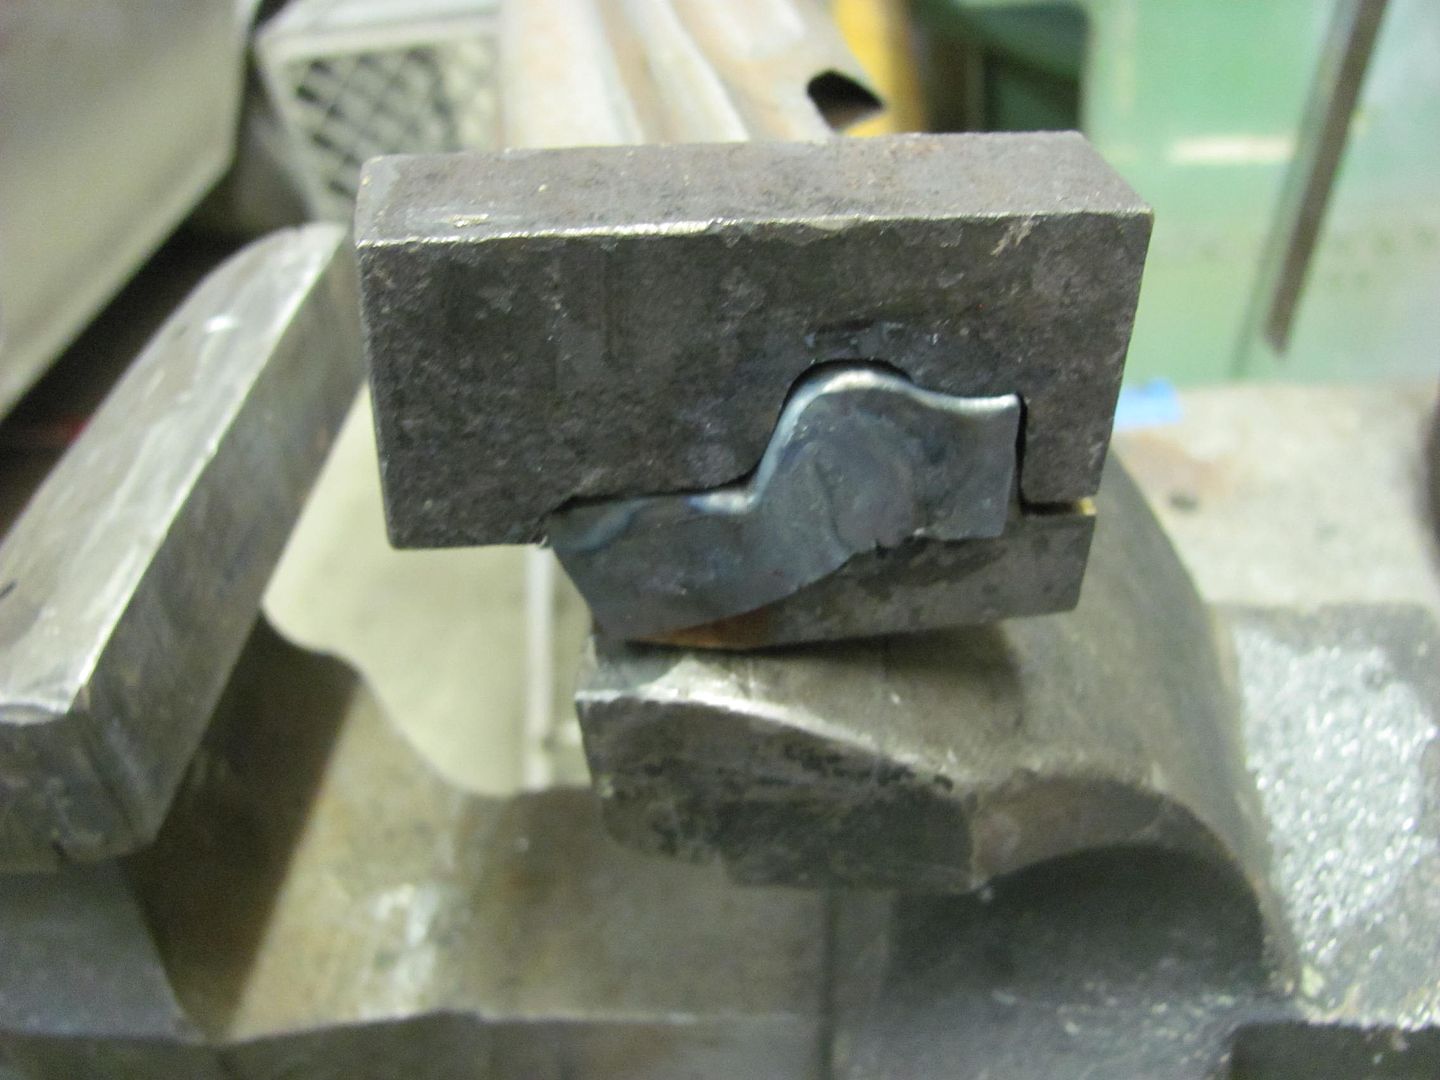  Fitted..... 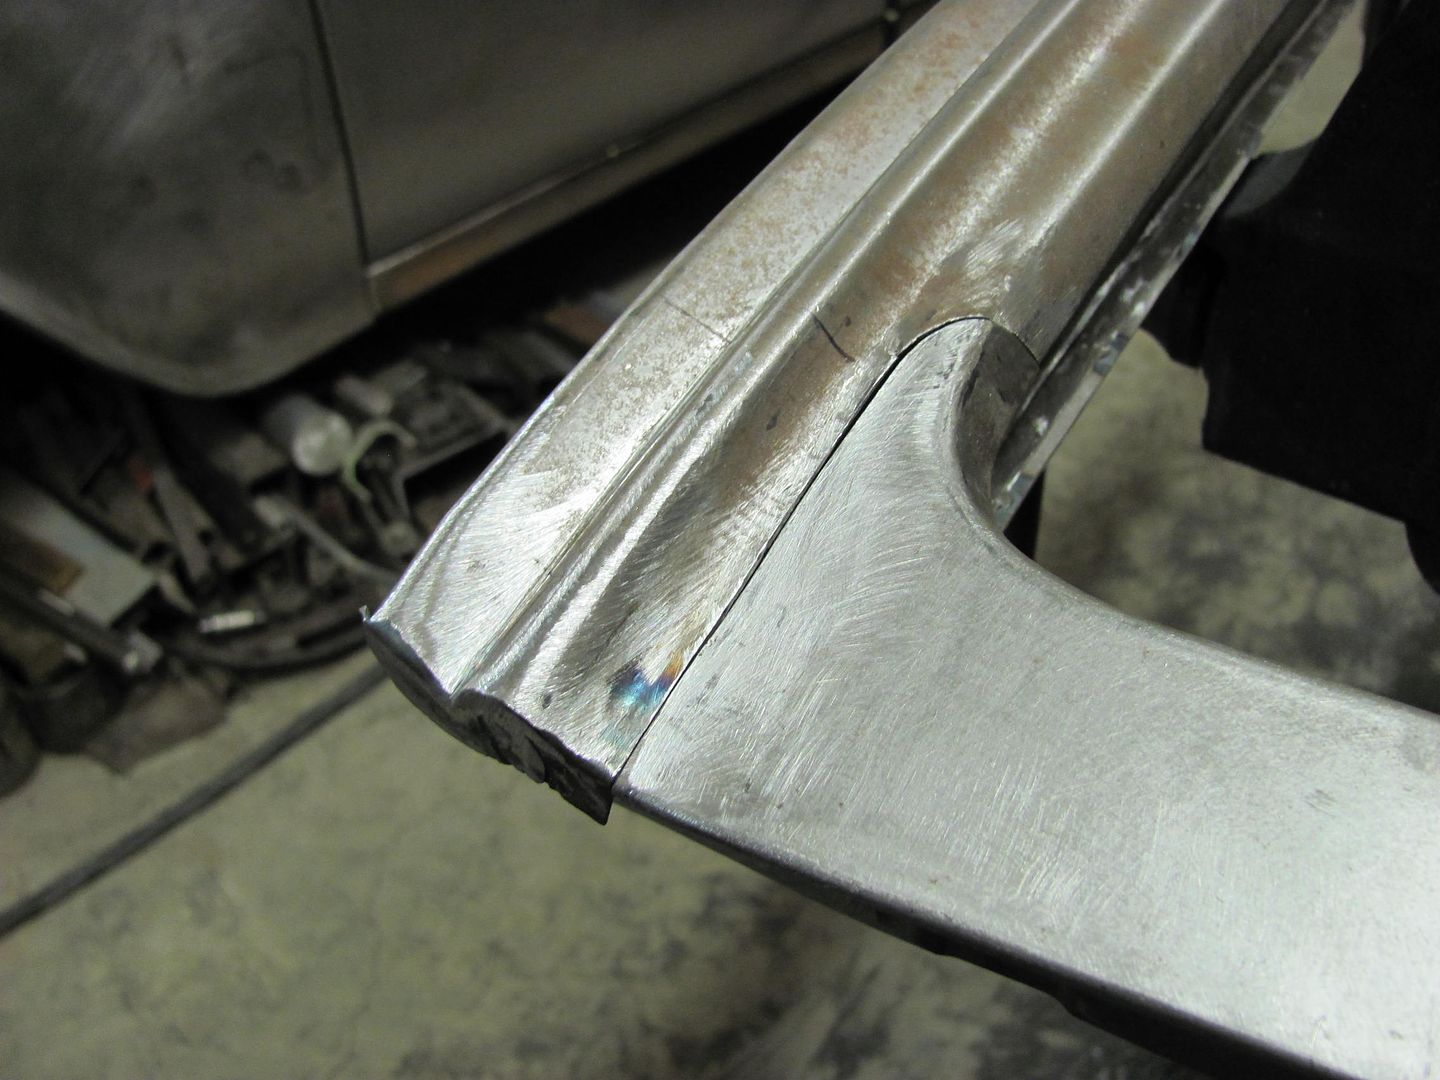 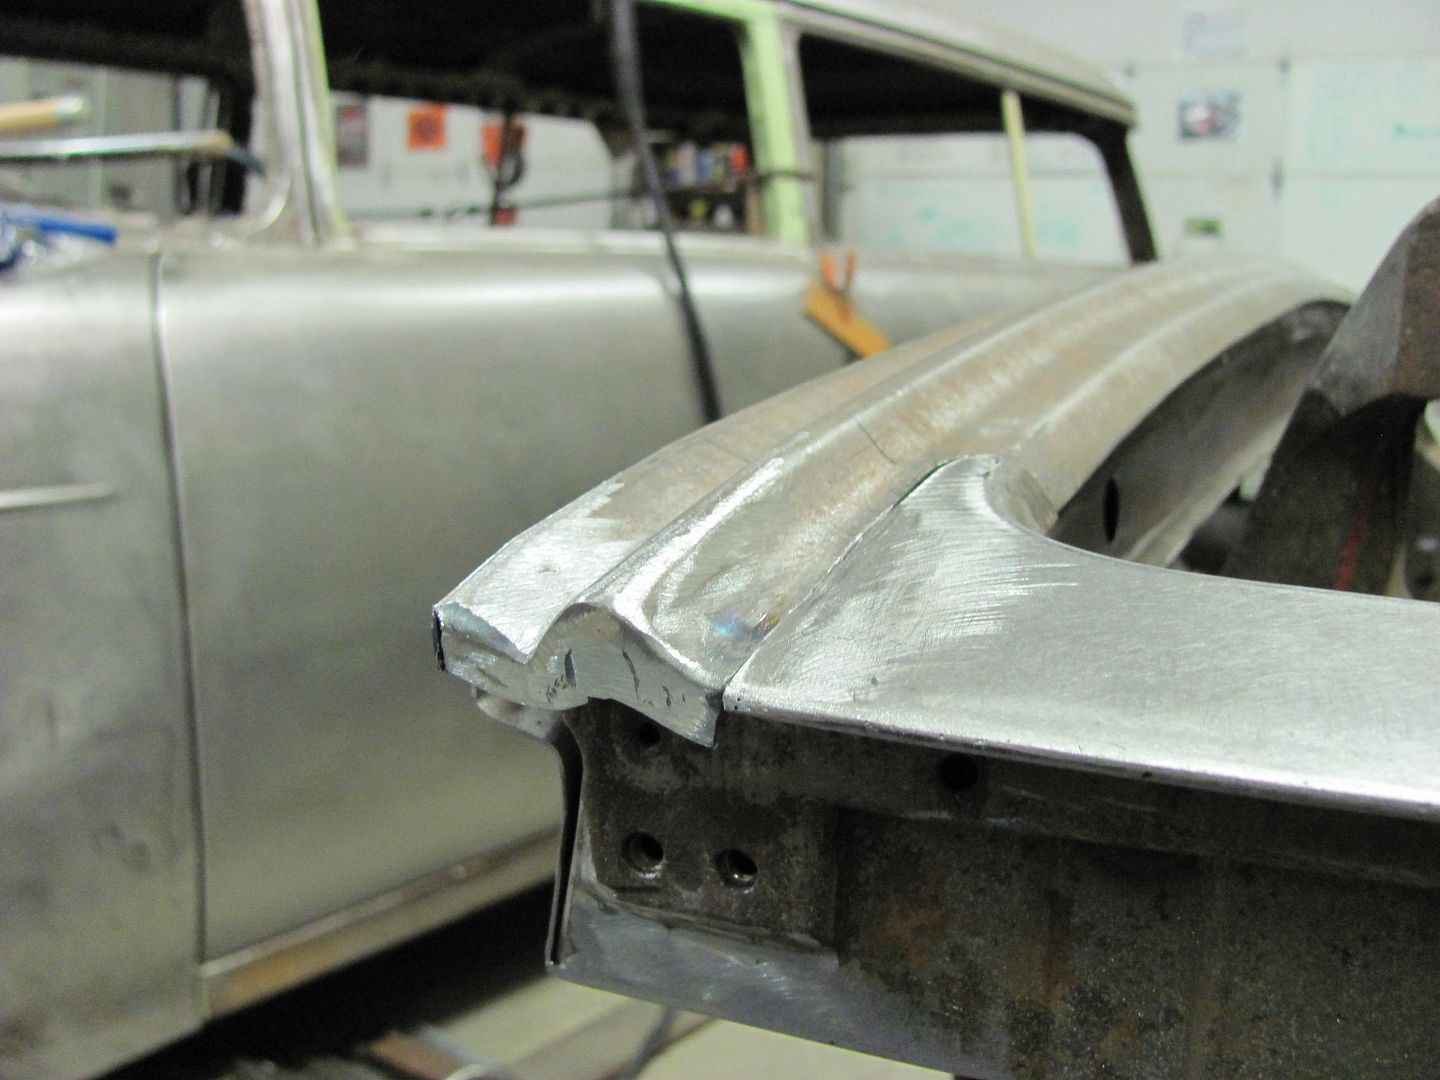 and the other end...... 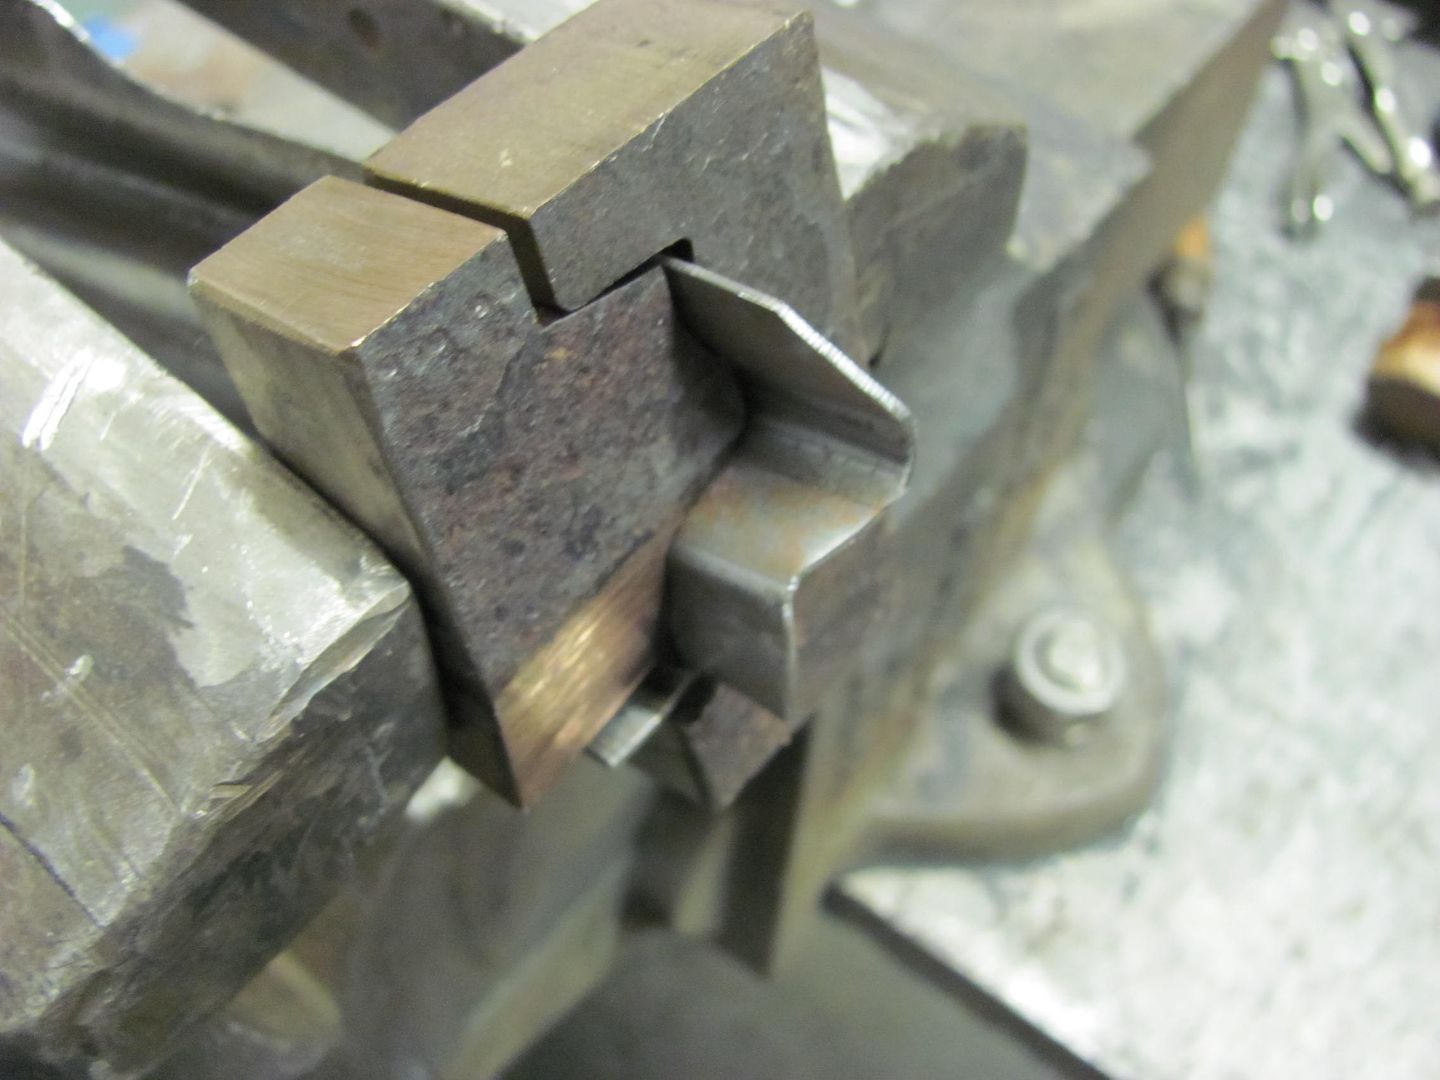  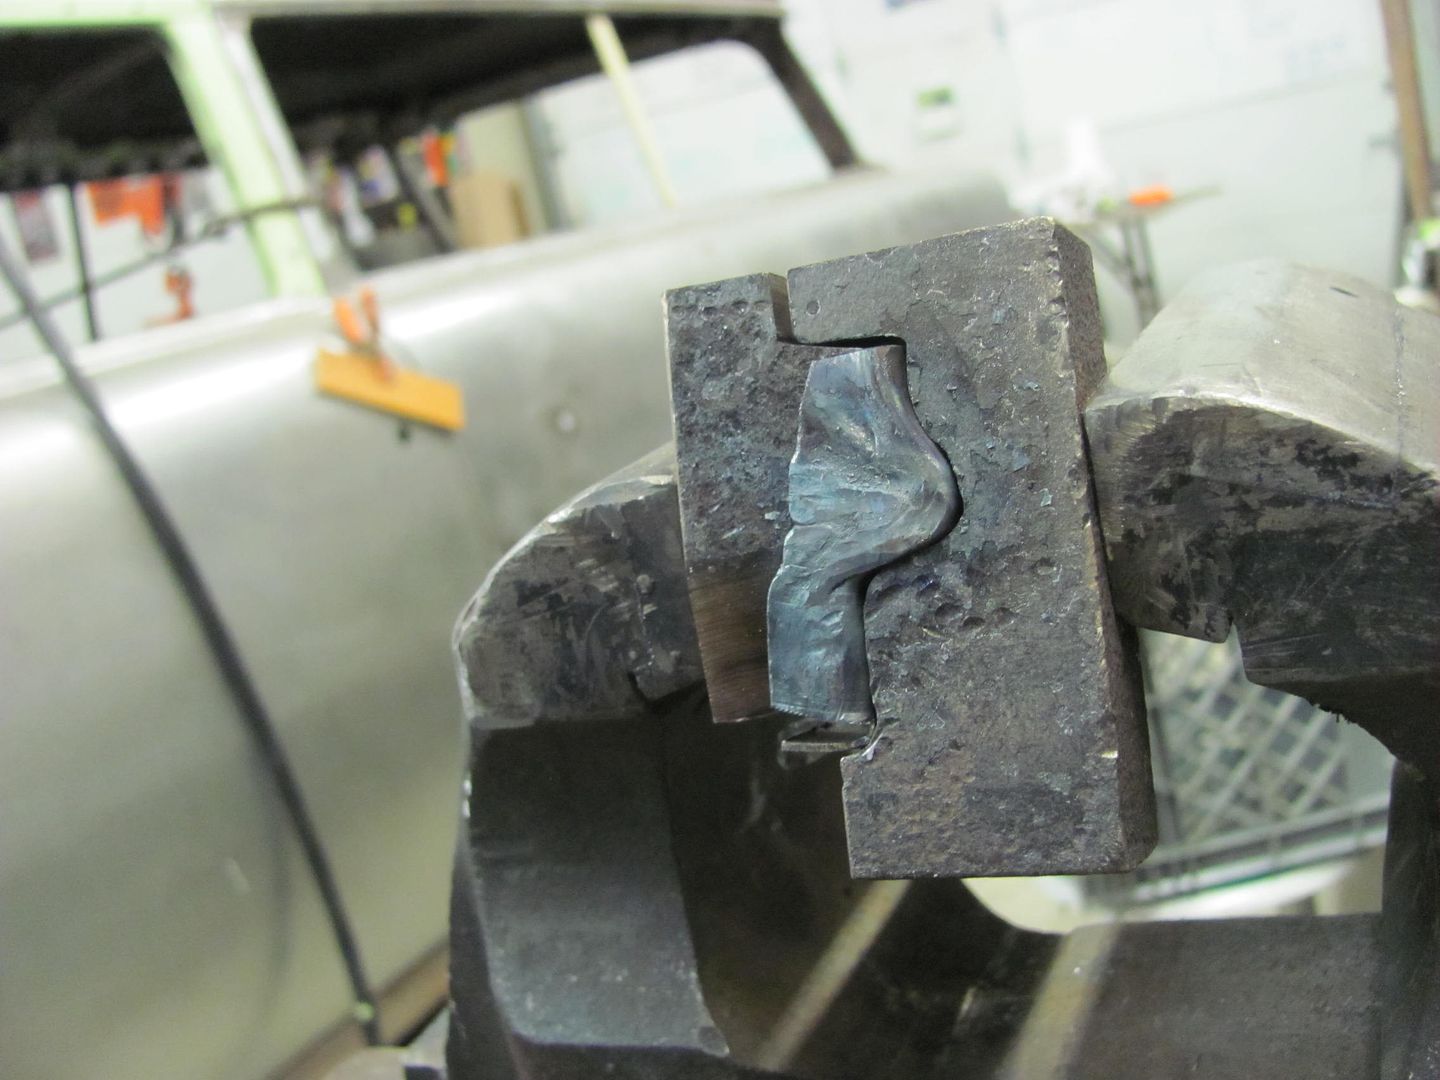 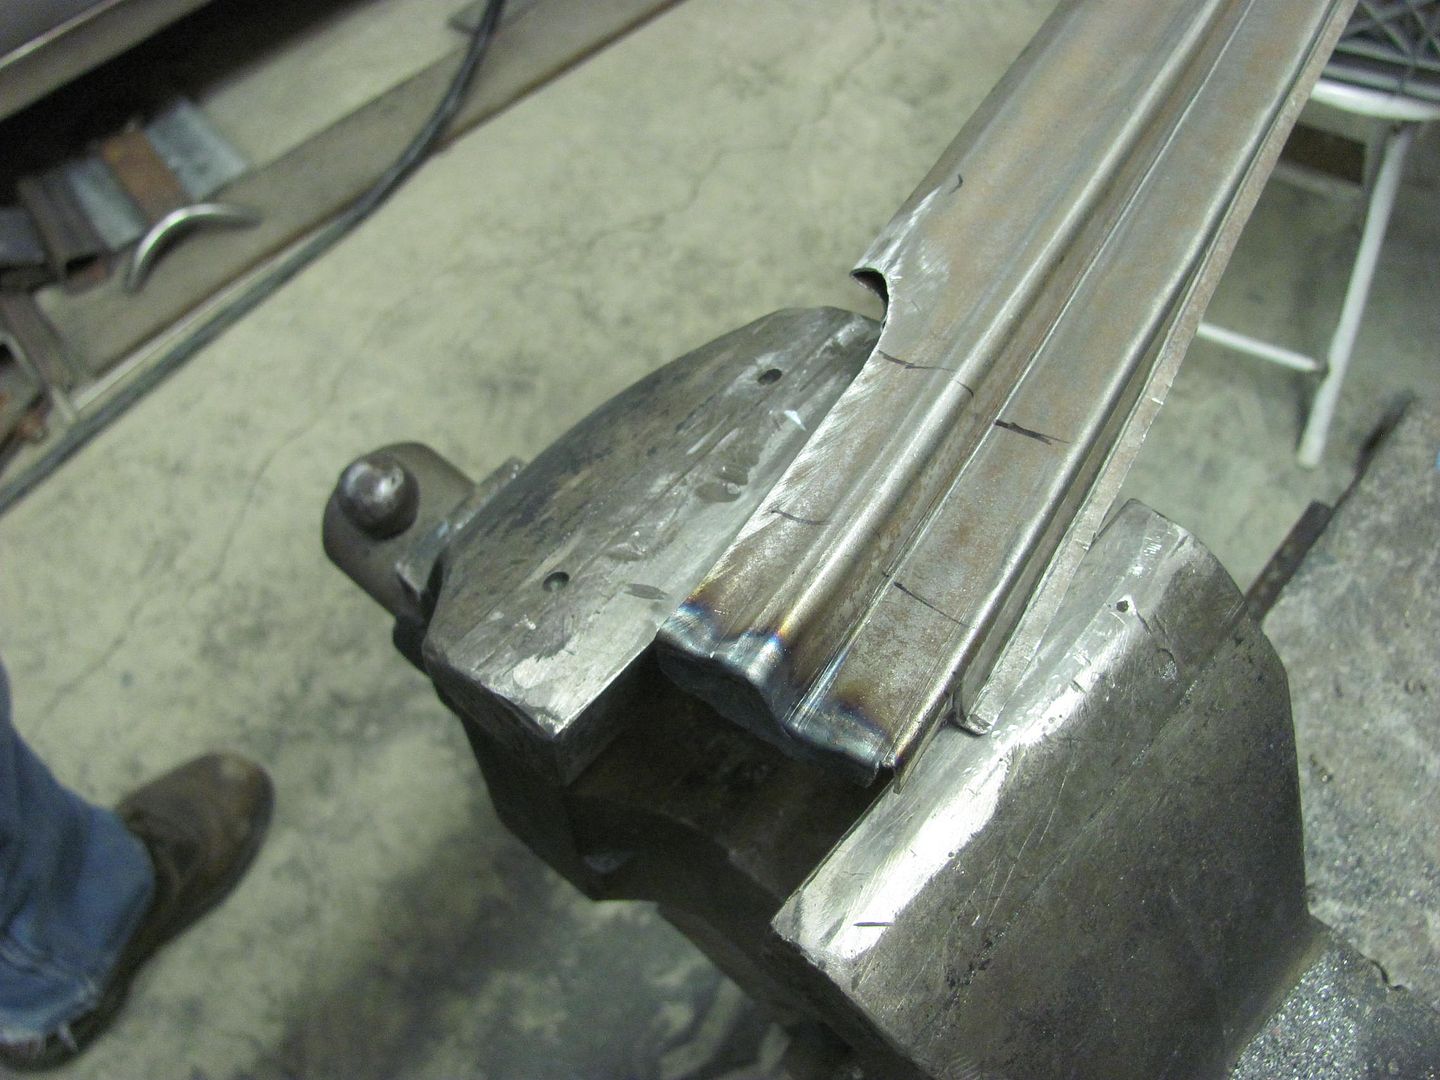 Hope to test fit everything tomorrow before all the parts get media blasted..
__________________
Robert |
|
|
|
|
11-23-2013, 11:37 PM
|
#9 |
|
Registered User
Join Date: Aug 2013
Location: Ruidoso, NM
Posts: 290
|
Re: 55 Wagon Progress
Nice job. You have to hate rust.
__________________
http://67-72chevytrucks.com/vboard/s...d.php?t=592642 '48 Chev extended cab with attitude http://67-72chevytrucks.com/vboard/s...d.php?t=592769 My daughter's '46 International PU |
|
|
|
|
11-24-2013, 09:02 PM
|
#10 |
|
Registered User
Join Date: Jan 2013
Location: Leonardtown, MD
Posts: 1,635
|
Re: 55 Wagon Progress
It has kept me busy!
Things don't always work the way you planned. Before the ends were folded, the bottom piece could never be test fit into the opening. Now with the ends folded, it was slipped over the bottom of the lift gate and it bolted into the opening. With the upper bead detail aligned, the lower was considerably off kilter. Slightly off on the contour, I guess. 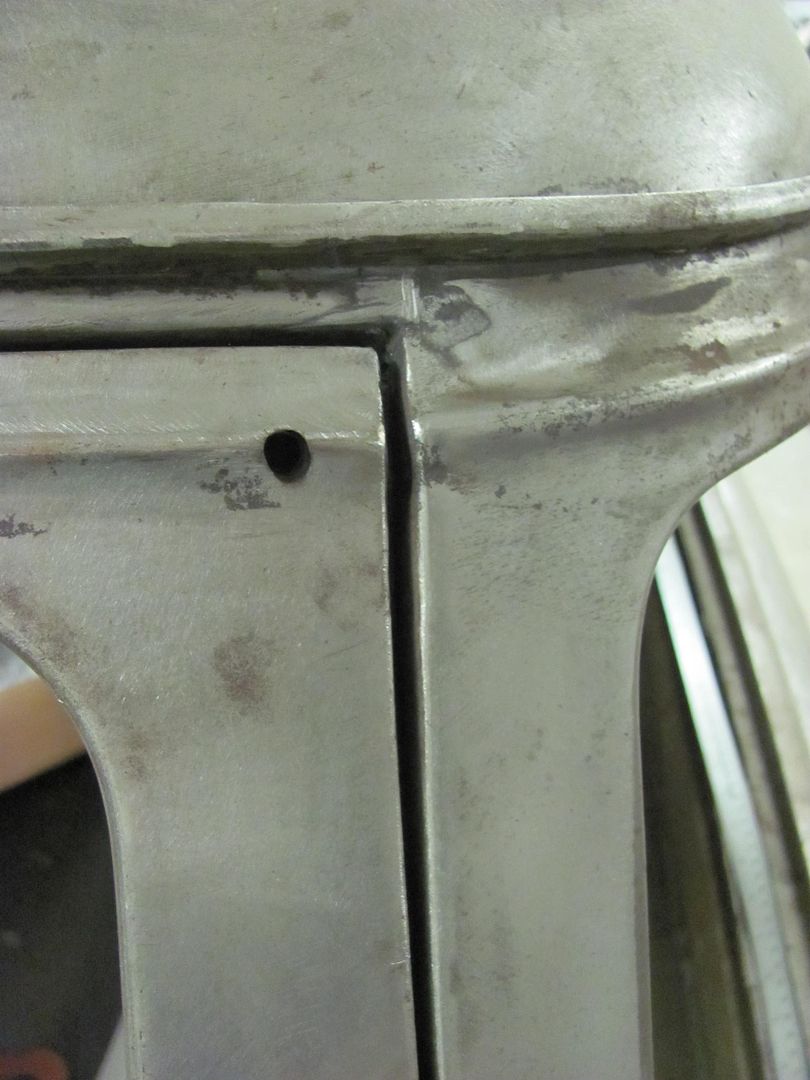 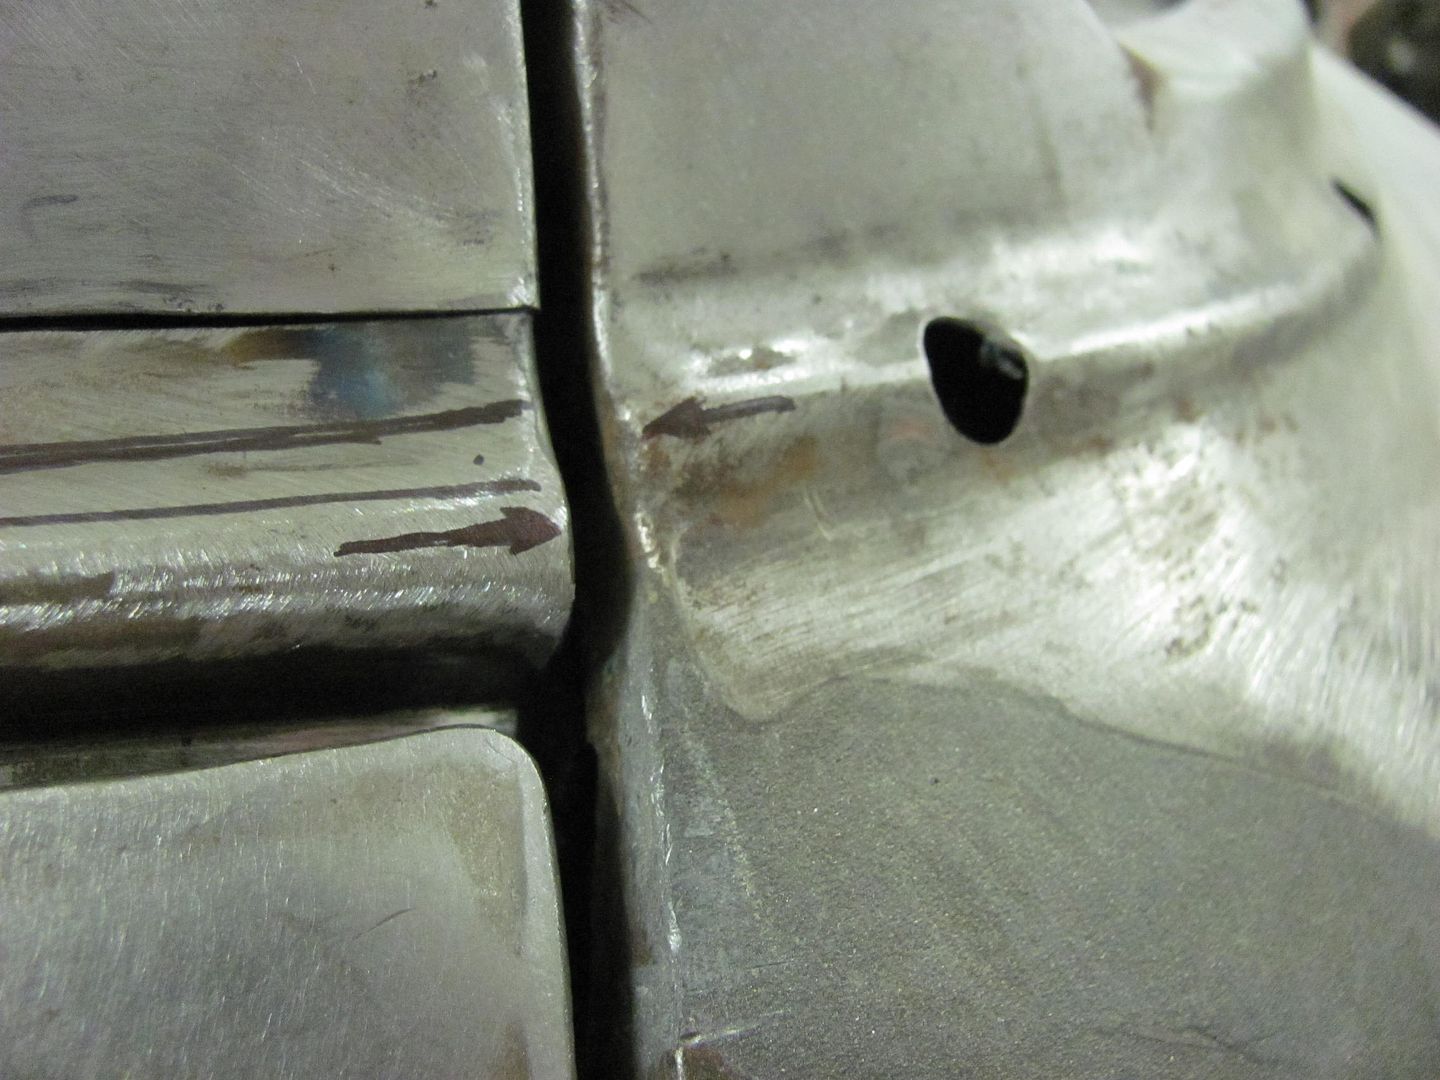 The patch piece was marked off on both ends to bring the lower bead detail up into the car for better alignment... 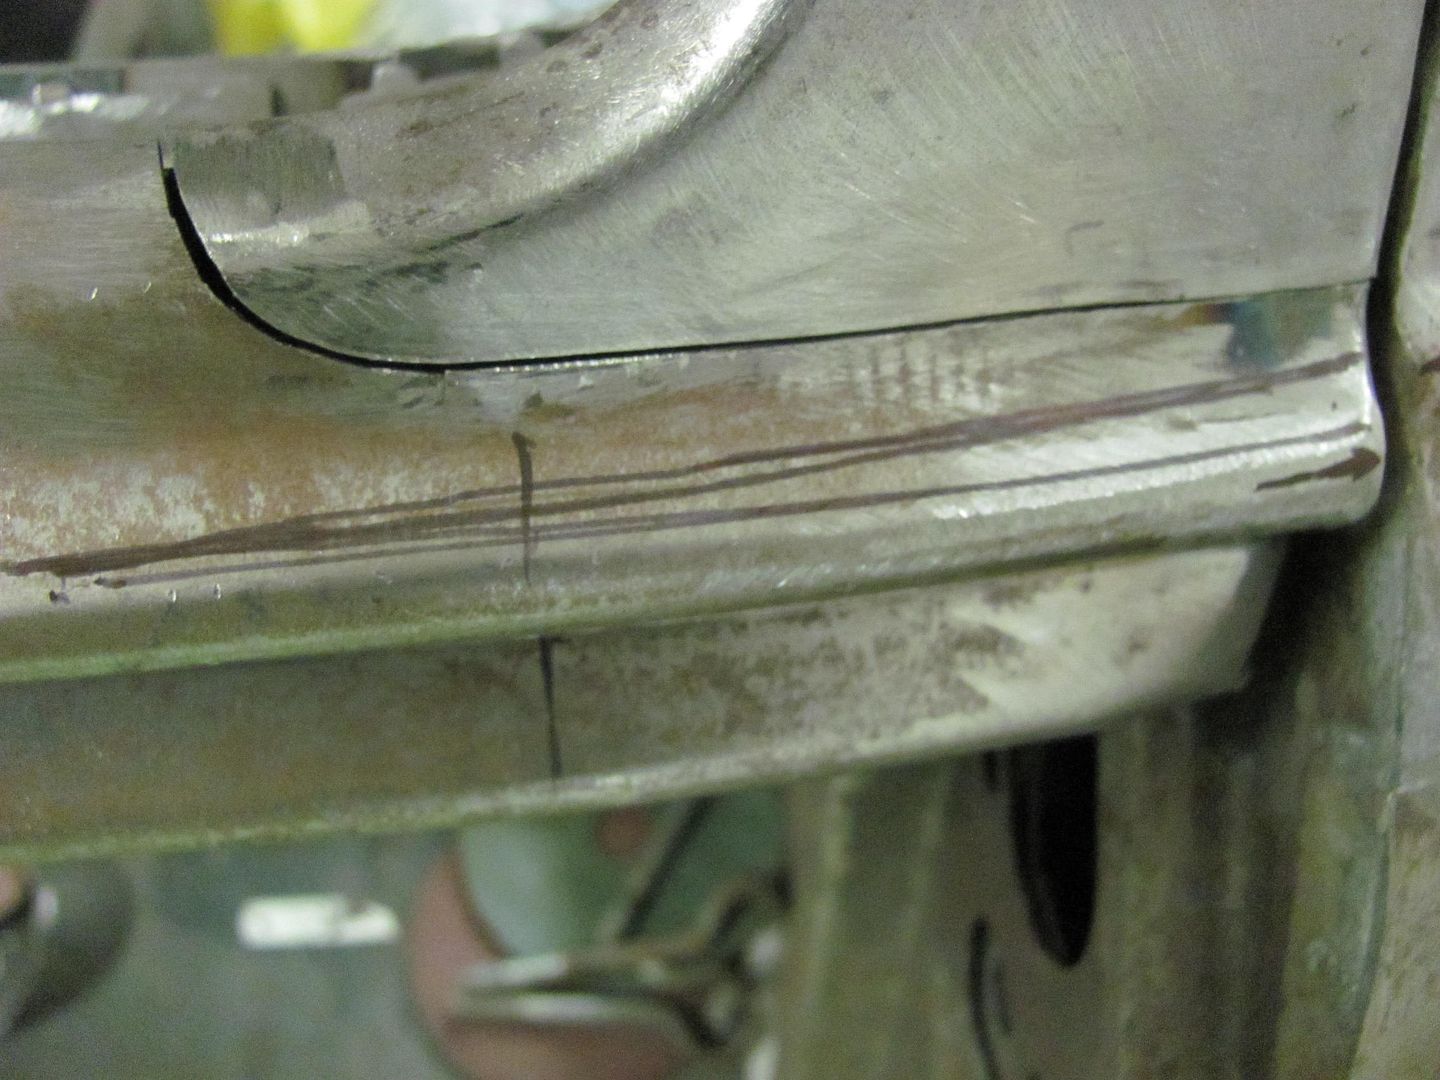 Here's the driver's side after cutting and welding, shows a much better alignment. Good weld penetration on the inside, the seam at the end will be finished after folding onto the lift gate.. 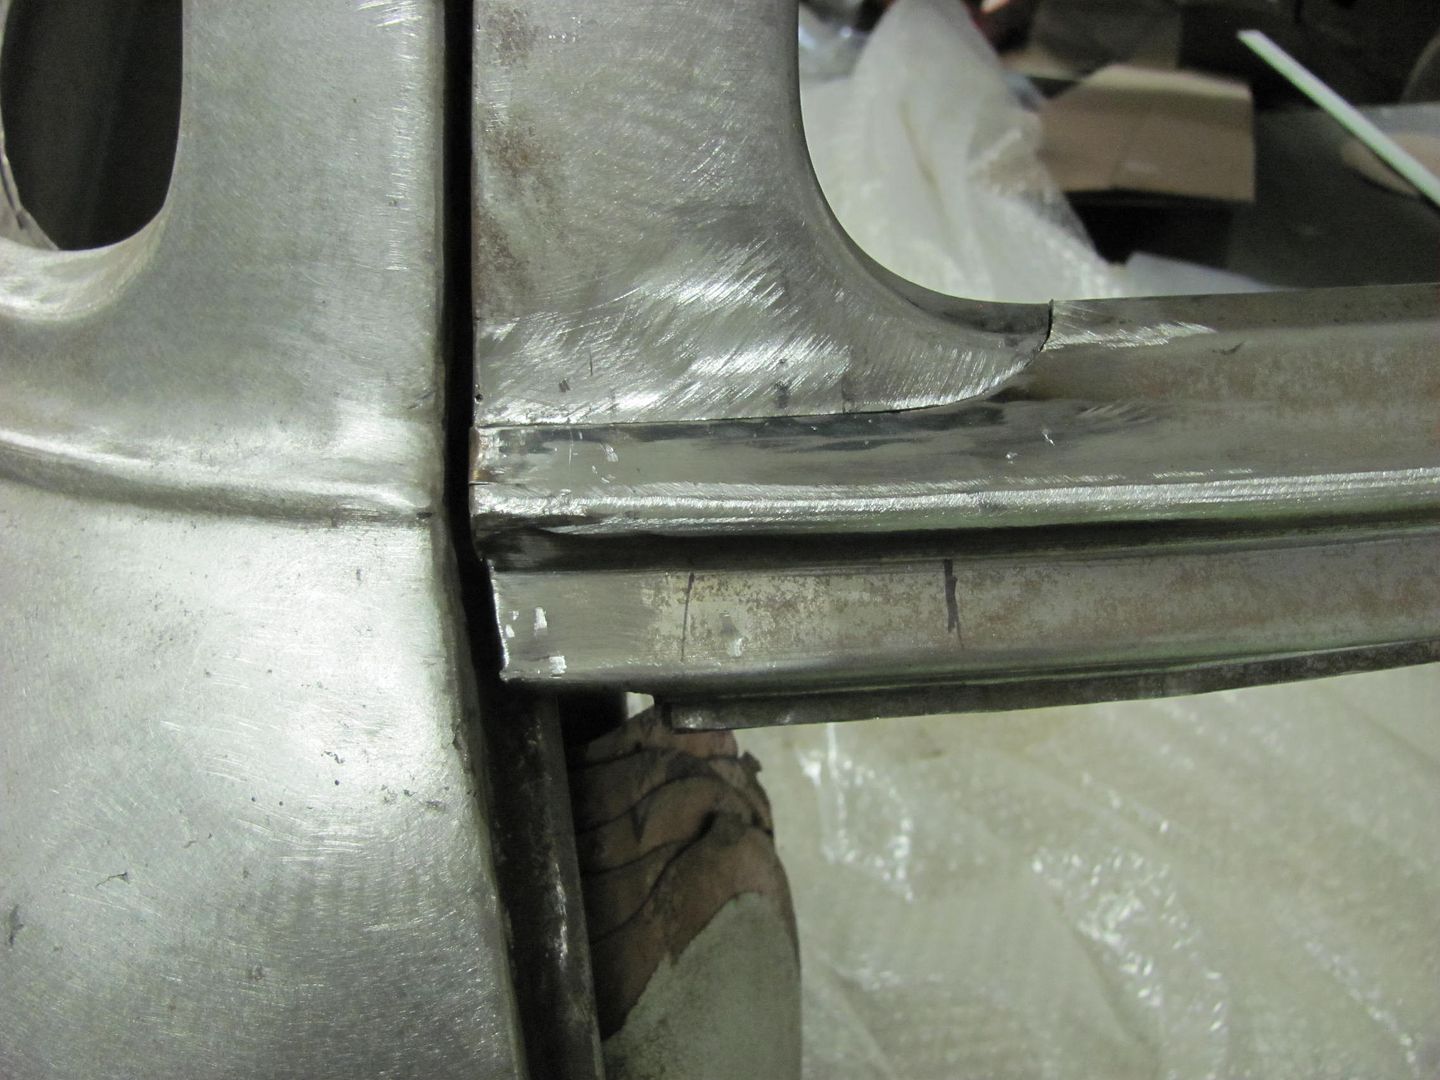 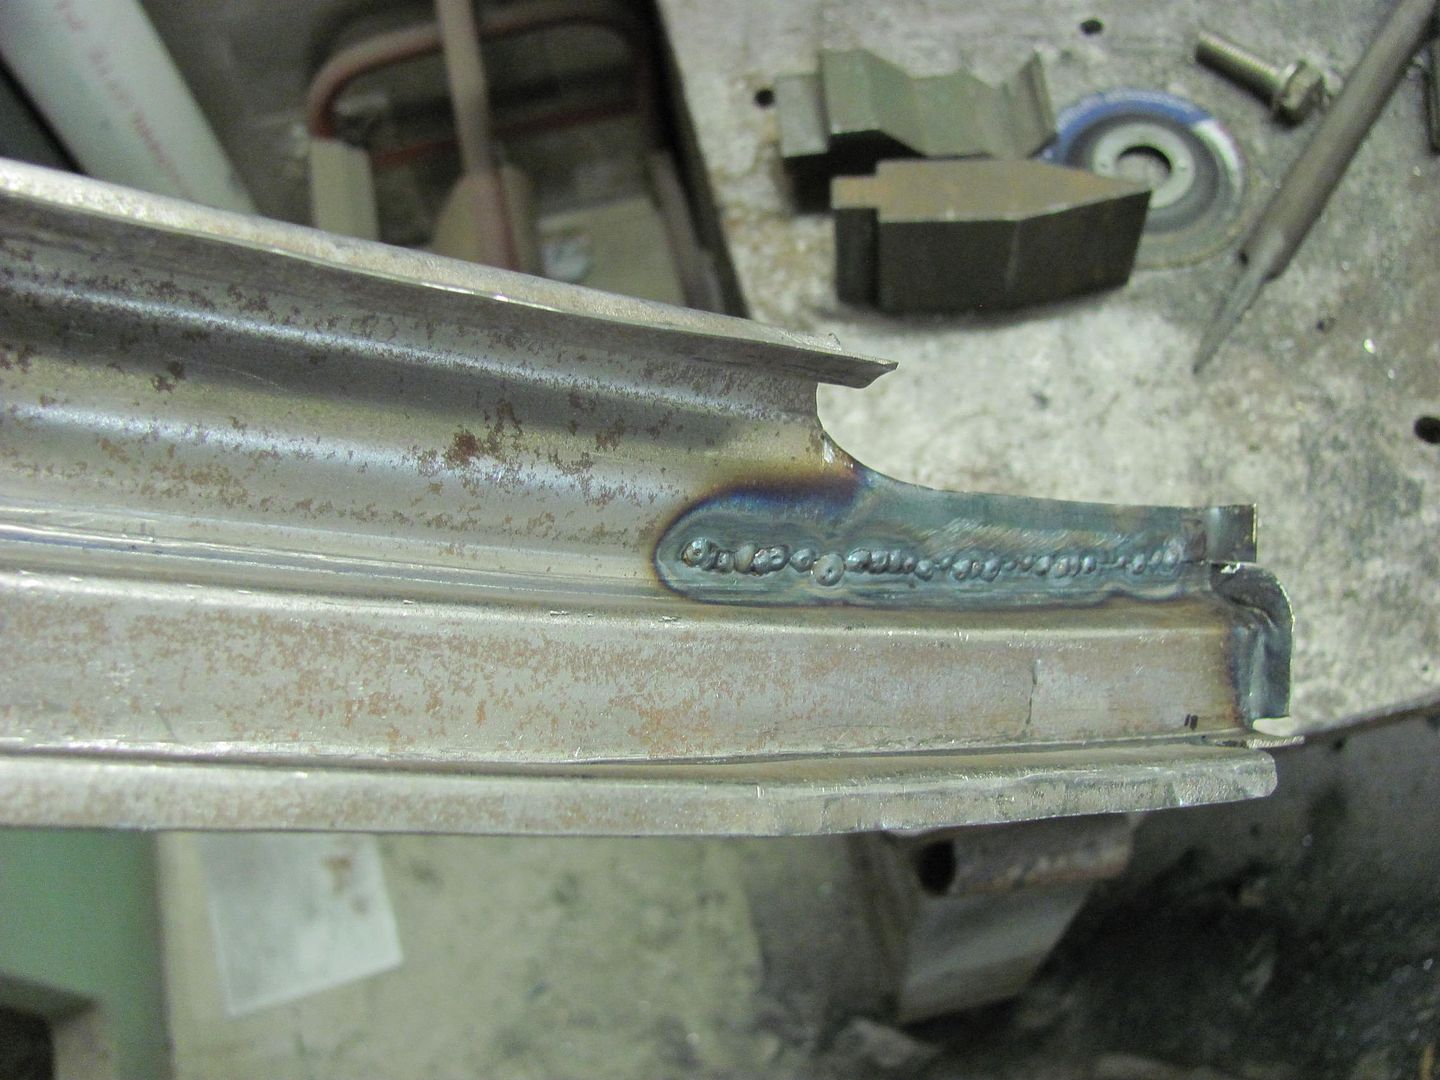  We may be able to save this yet..
__________________
Robert |
|
|
|
|
11-26-2013, 11:28 AM
|
#11 |
|
Registered User
Join Date: Apr 2003
Location: Indep, MO
Posts: 5,893
|
Re: 55 Wagon Progress
Tricky Tricky! I had to do the same to Yeller's rockers. Boppa about had a fit when I just rammed his brand new rockers into the bandsaw! "Naw, It'll be cool."
Great stuff with that die. Do you like your Henrob?
__________________
Boppa's Old Yeller Truck Build, Old Yeller's New Heart! Project Buzz Bomb Flyin' Low! |
|
|
|
|
11-26-2013, 01:07 PM
|
#12 |
|
Registered User
Join Date: Apr 2011
Location: .
Posts: 3,104
|
Re: 55 Wagon Progress
Amazing metal skills. Read and learned. Learned a lot.
|
|
|
|
|
12-10-2013, 02:25 PM
|
#13 |
|
Registered User
Join Date: Dec 2009
Location: Arizona City, AZ
Posts: 747
|
Re: 55 Wagon Progress
 <-----This icon explains better then anything I could say!! <-----This icon explains better then anything I could say!!
__________________
----------------------------------------------------------- Erik My 69 suburban http://67-72chevytrucks.com/vboard/s...d.php?t=530626 1970 C10 step Project Jiminy http://67-72chevytrucks.com/vboard/s...d.php?t=682647 RUST!? Thats just mother natures way of telling all of us.....MINE!!!! |
|
|
|
|
12-10-2013, 09:50 PM
|
#14 | |
|
Registered User
Join Date: Jan 2013
Location: Leonardtown, MD
Posts: 1,635
|
Re: 55 Wagon Progress
Thanks for the comments guys!
Quote:
Yes, It comes with about 6 different tips, lets you dial in the flame nicely for the job at hand. I got it quite a few years ago, think it's sold as Cobra torch now...
__________________
Robert |
|
|
|
|
|
12-11-2013, 12:54 AM
|
#15 |
|
Senior Member
Join Date: Jun 2005
Location: Clovis Ca.
Posts: 3,311
|
Re: 55 Wagon Progress
Your mettle working skill continue to impress me!
__________________
Classic Trucks Link http://www.classictrucks.com/feature...uck/index.html 1958 GMC.Project Build http://67-72chevytrucks.com/vboard/s...d.php?t=162816 1966 Chevelle Build http://67-72chevytrucks.com/vboard/s...d.php?t=443576 Video http://www.youtube.com/watch?v=prrNKo8F7Zw#GU5U2spHI_4 |
|
|
|
|
12-28-2013, 09:17 PM
|
#16 |
|
Registered User
Join Date: Jan 2013
Location: Leonardtown, MD
Posts: 1,635
|
Re: 55 Wagon Progress
Caution: A couple of OT pictures follow, proceed at your own risk!
Sorry for my short hiatus from the shop, after 226K miles my trusty 16 year old truck has been giving me fits with transmission issues. After spending about 3 weeks on and off looking for good used trucks, the year end deals and rebates made a brand new one only slightly higher in price than a three year old model. So..... Out with the old...  In with the new....  And with the truck shopping headaches behind us, we can get back in the shop ... Worked on the other end of the lower patch today, to fix the mis-alignment of the beltline trim... Made a relief cut.... 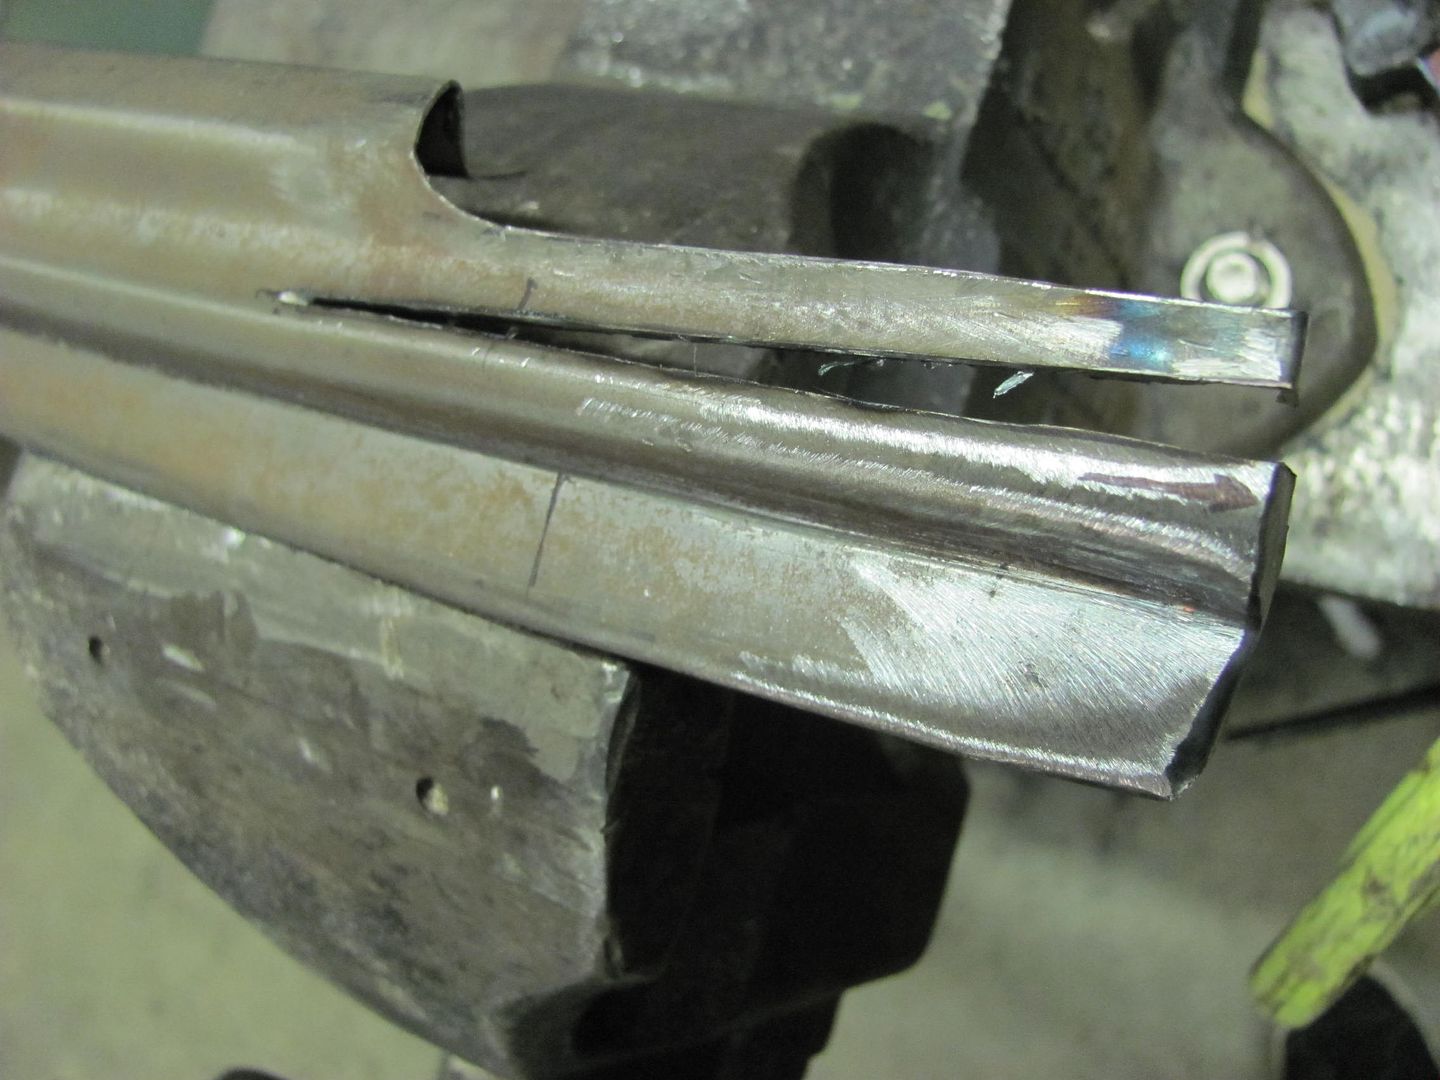 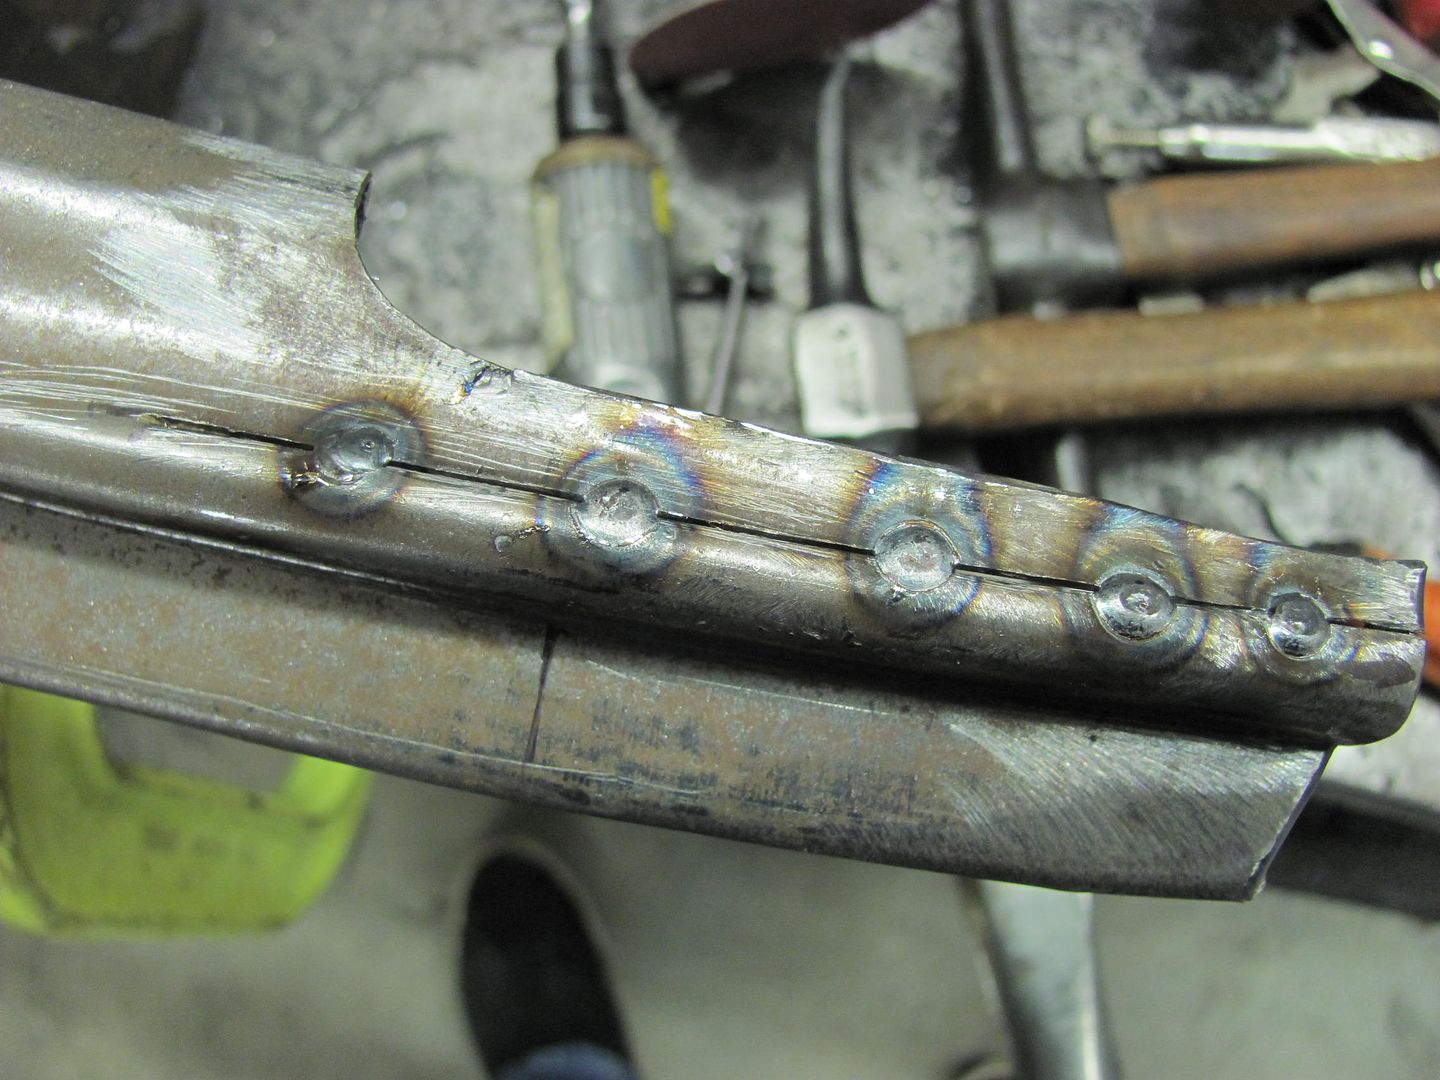 Rear view shows full weld penetration.... 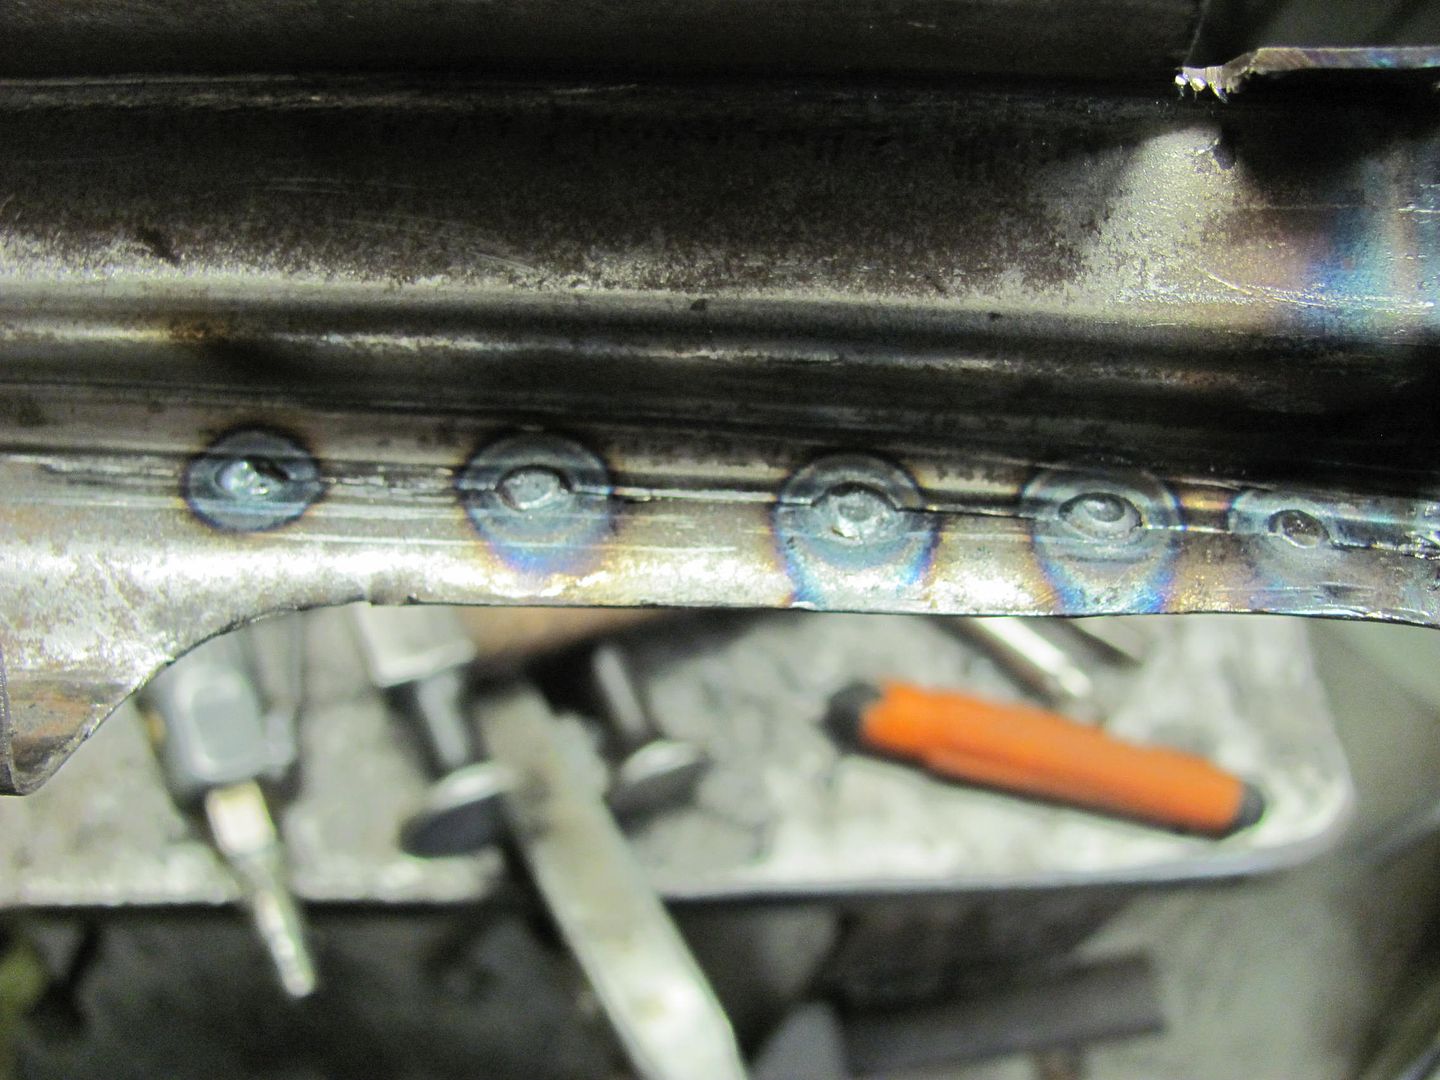 Welds were planished, then ground to just above panel surface, and next weld overlapped, and repeat. The overlapping helps to eliminate any missed welds/pin holes. 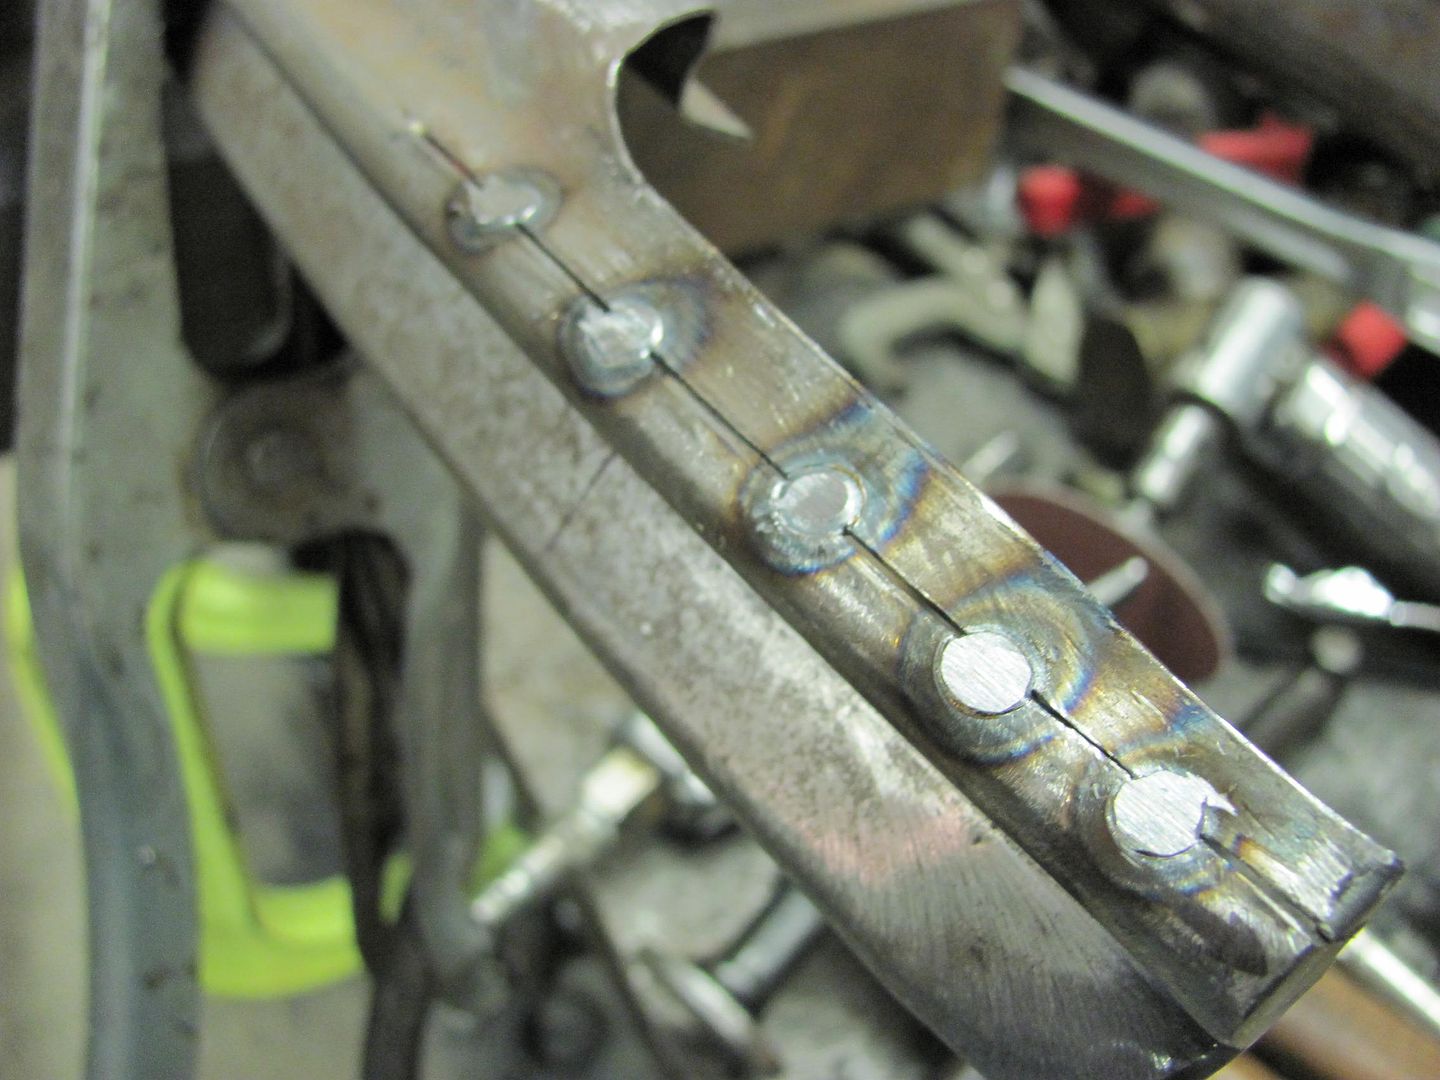 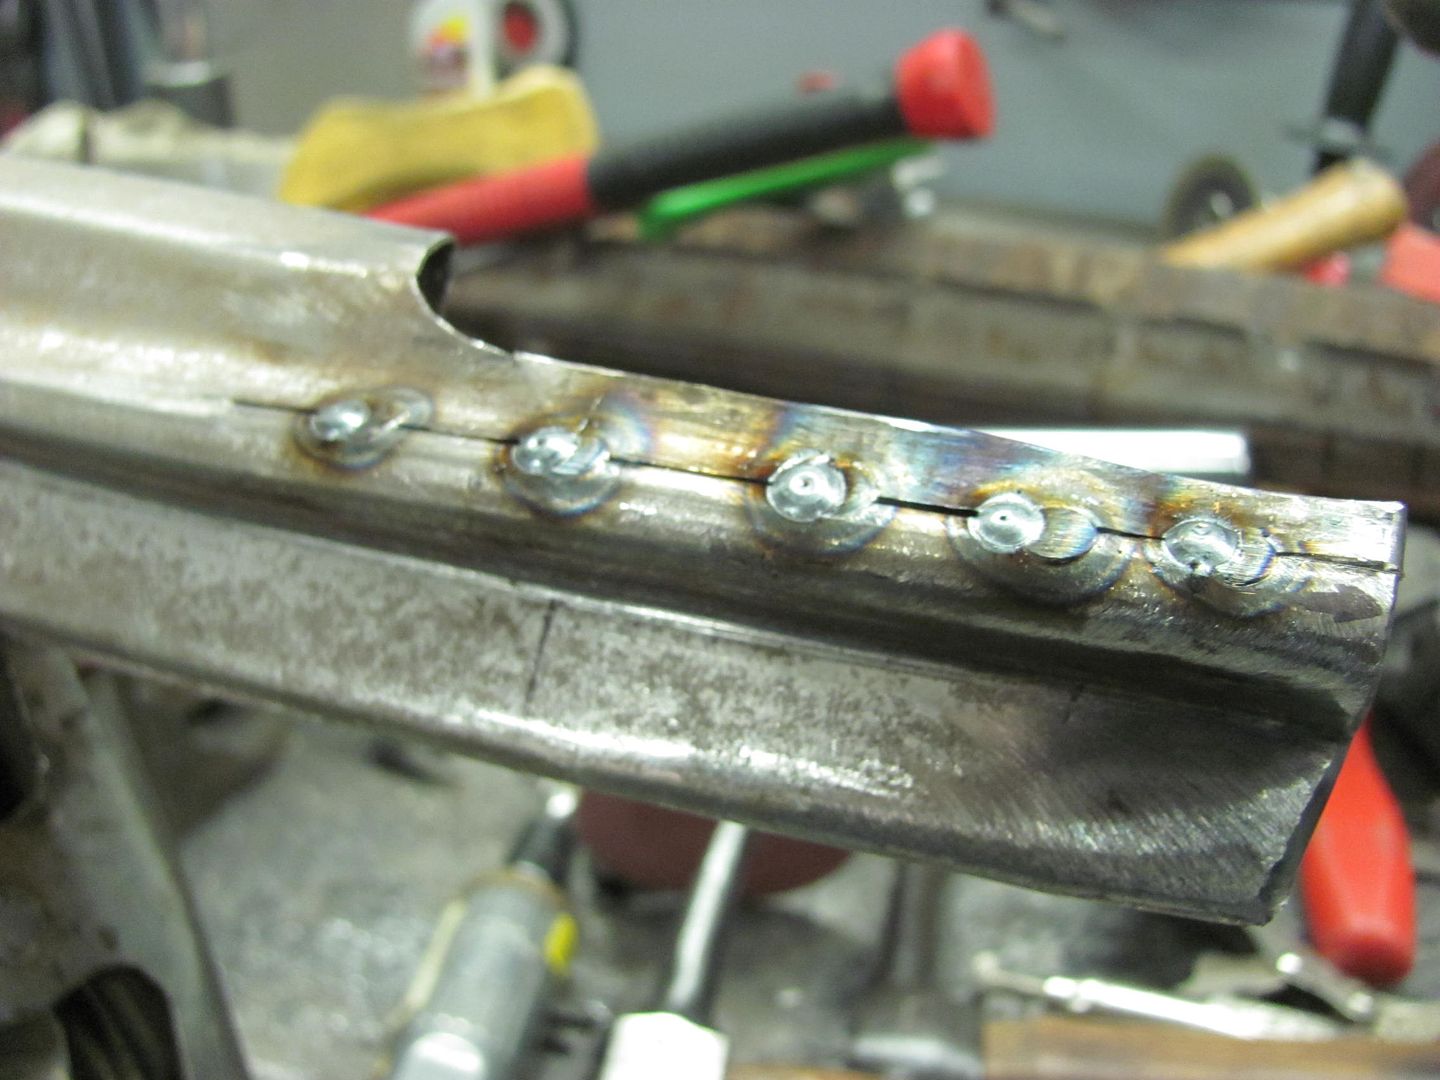  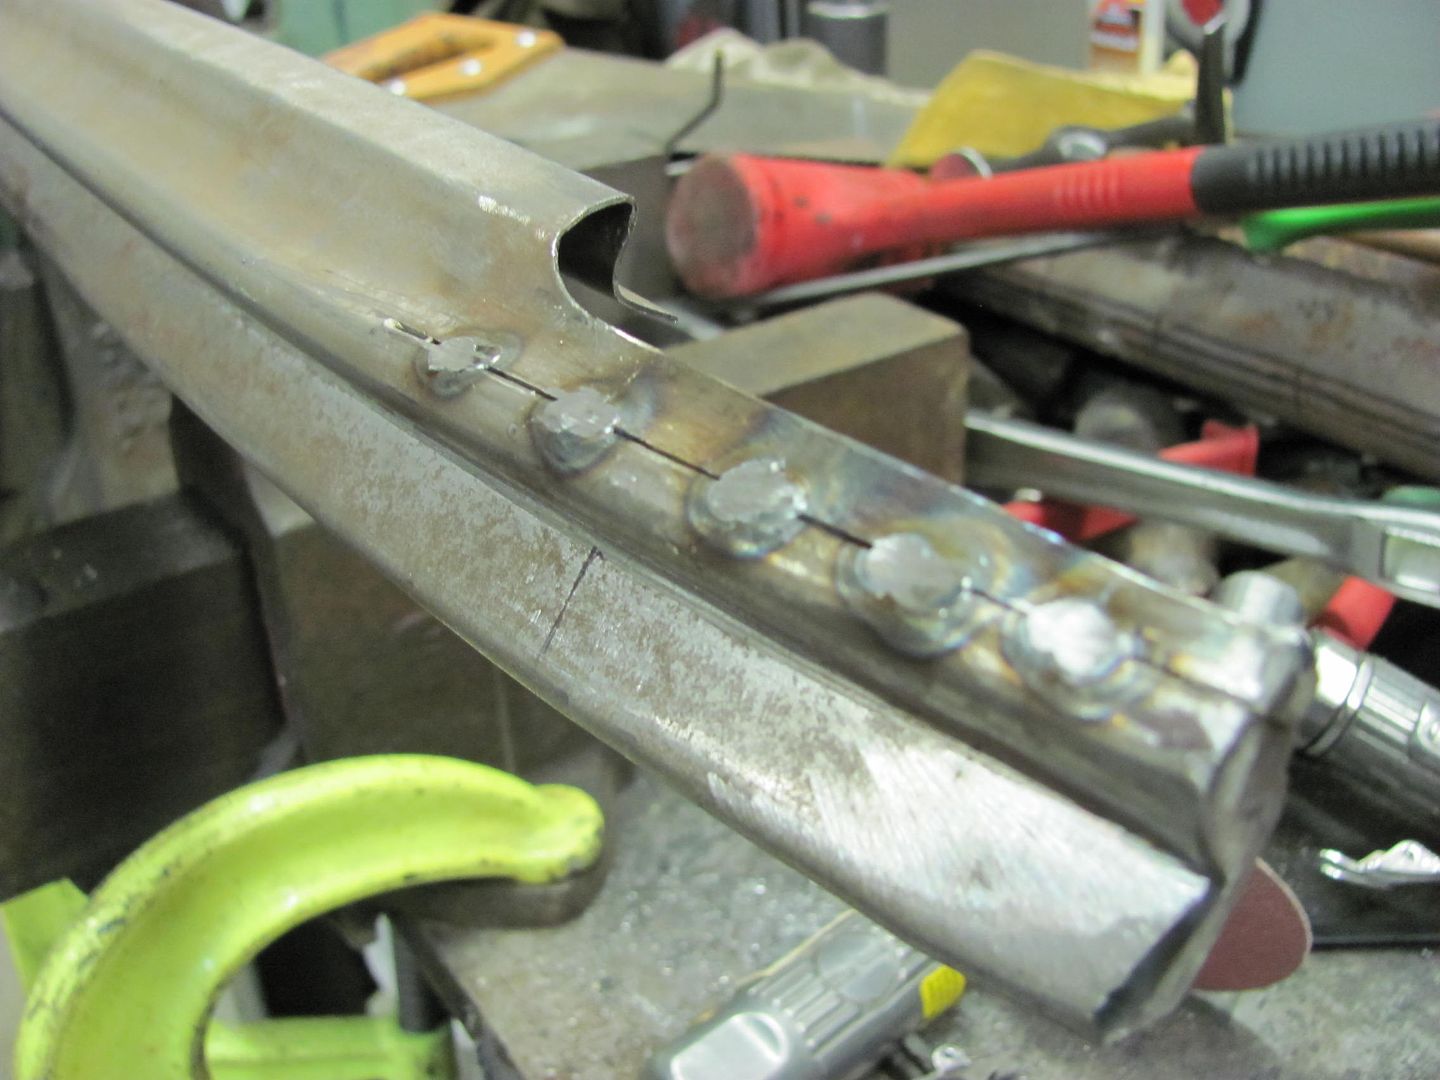 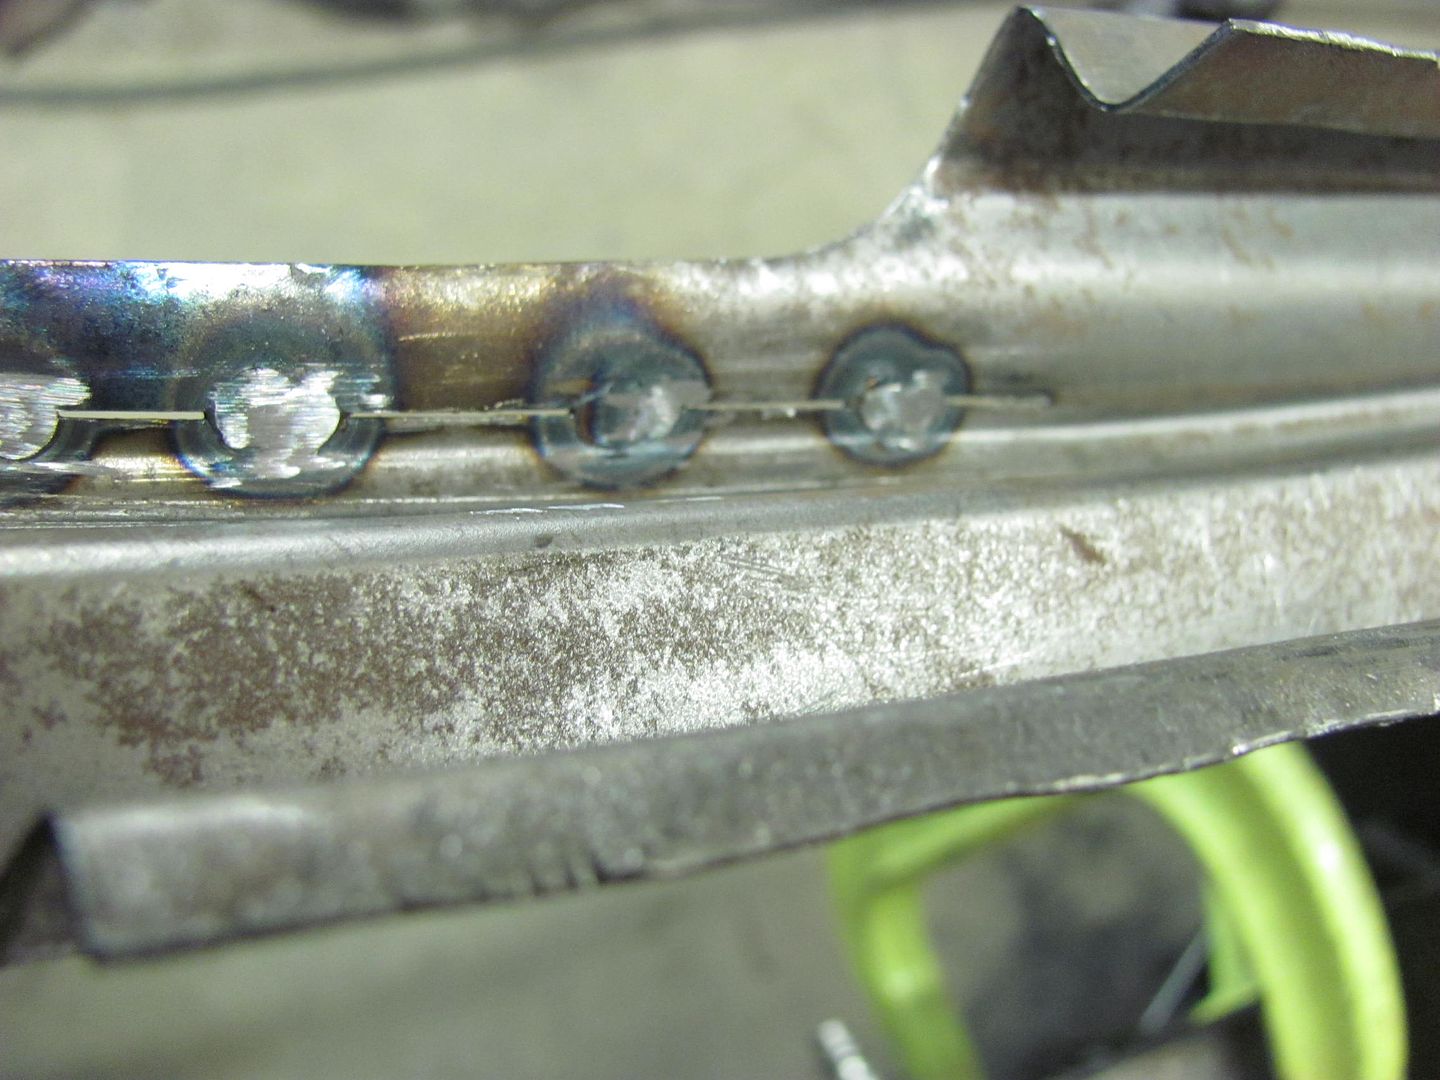 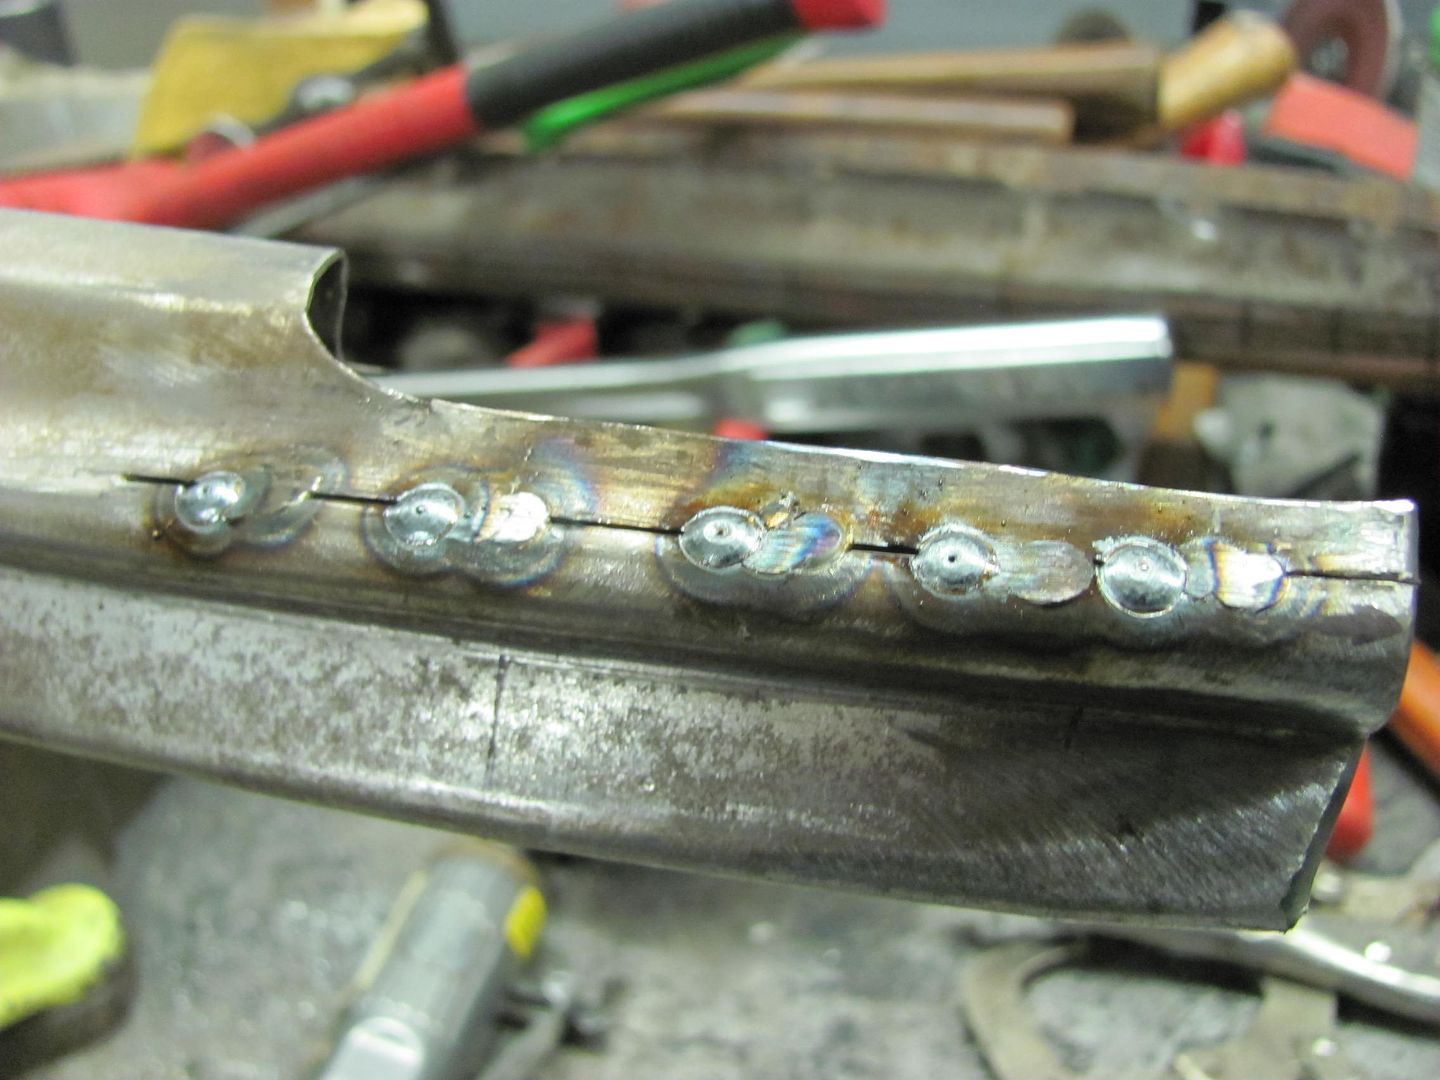 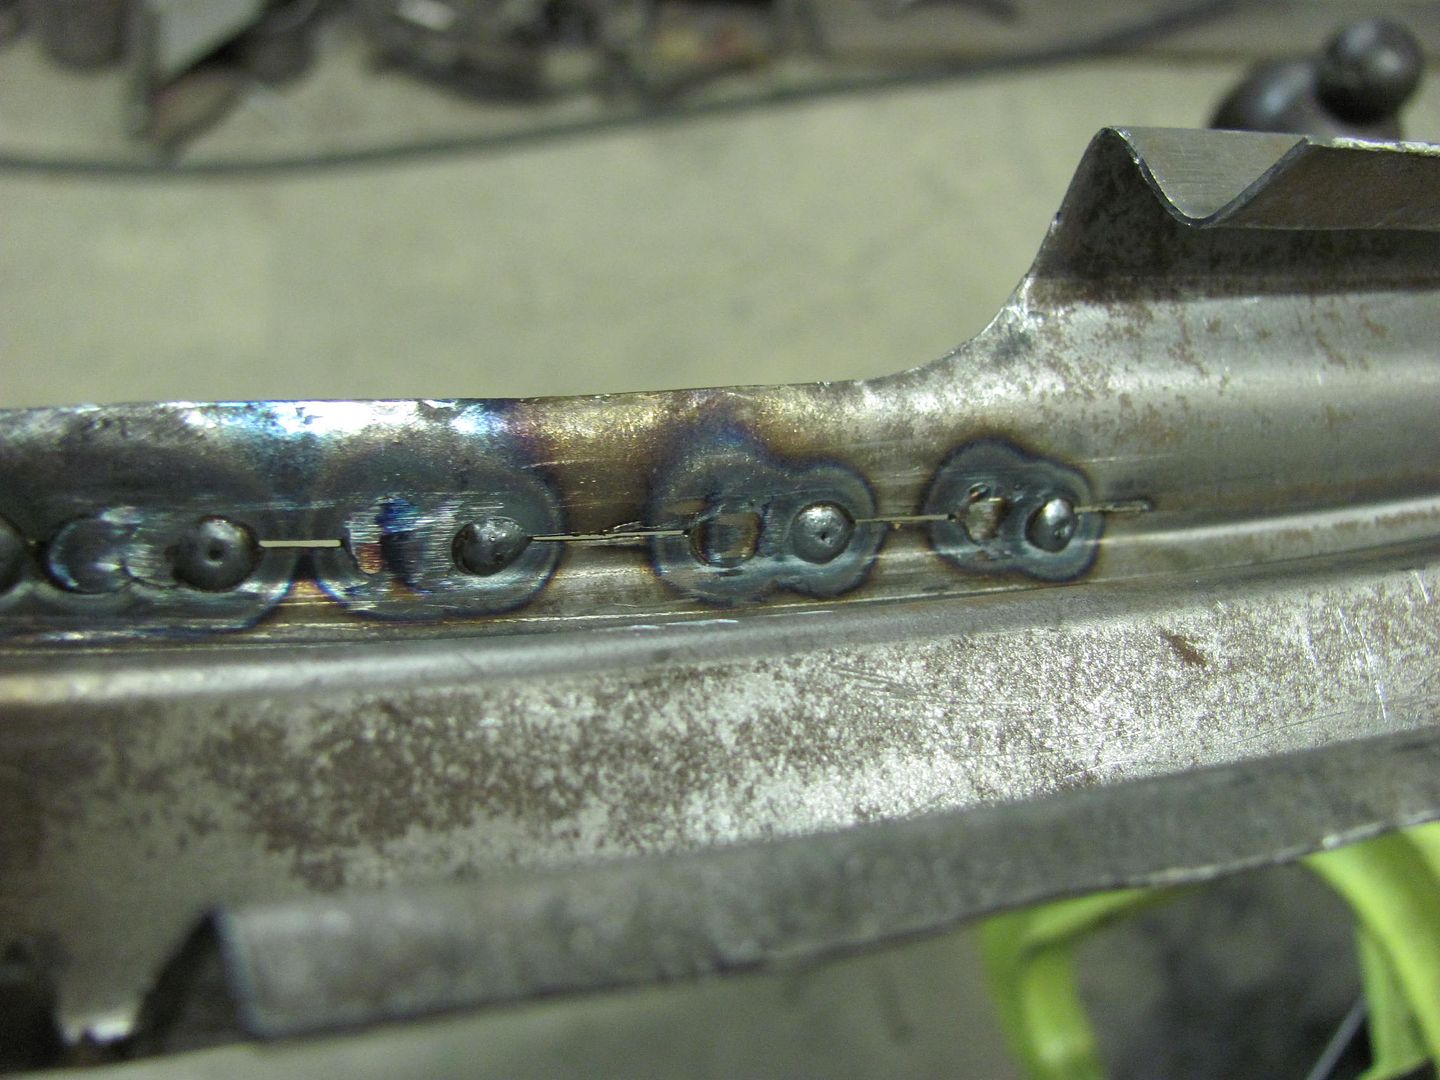 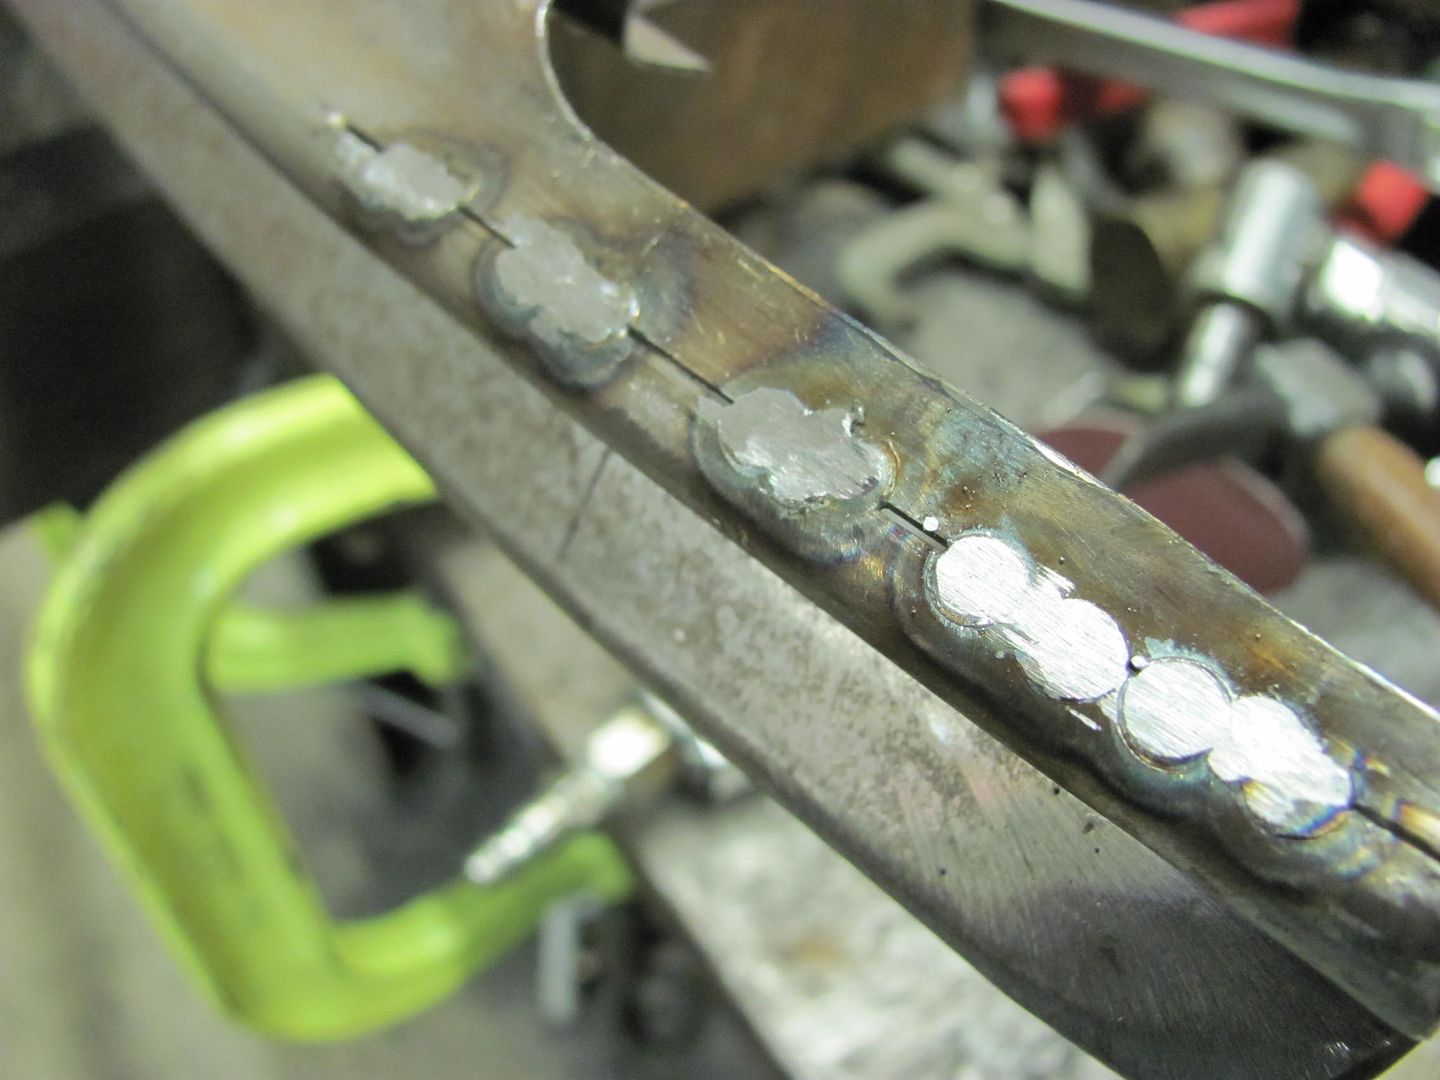 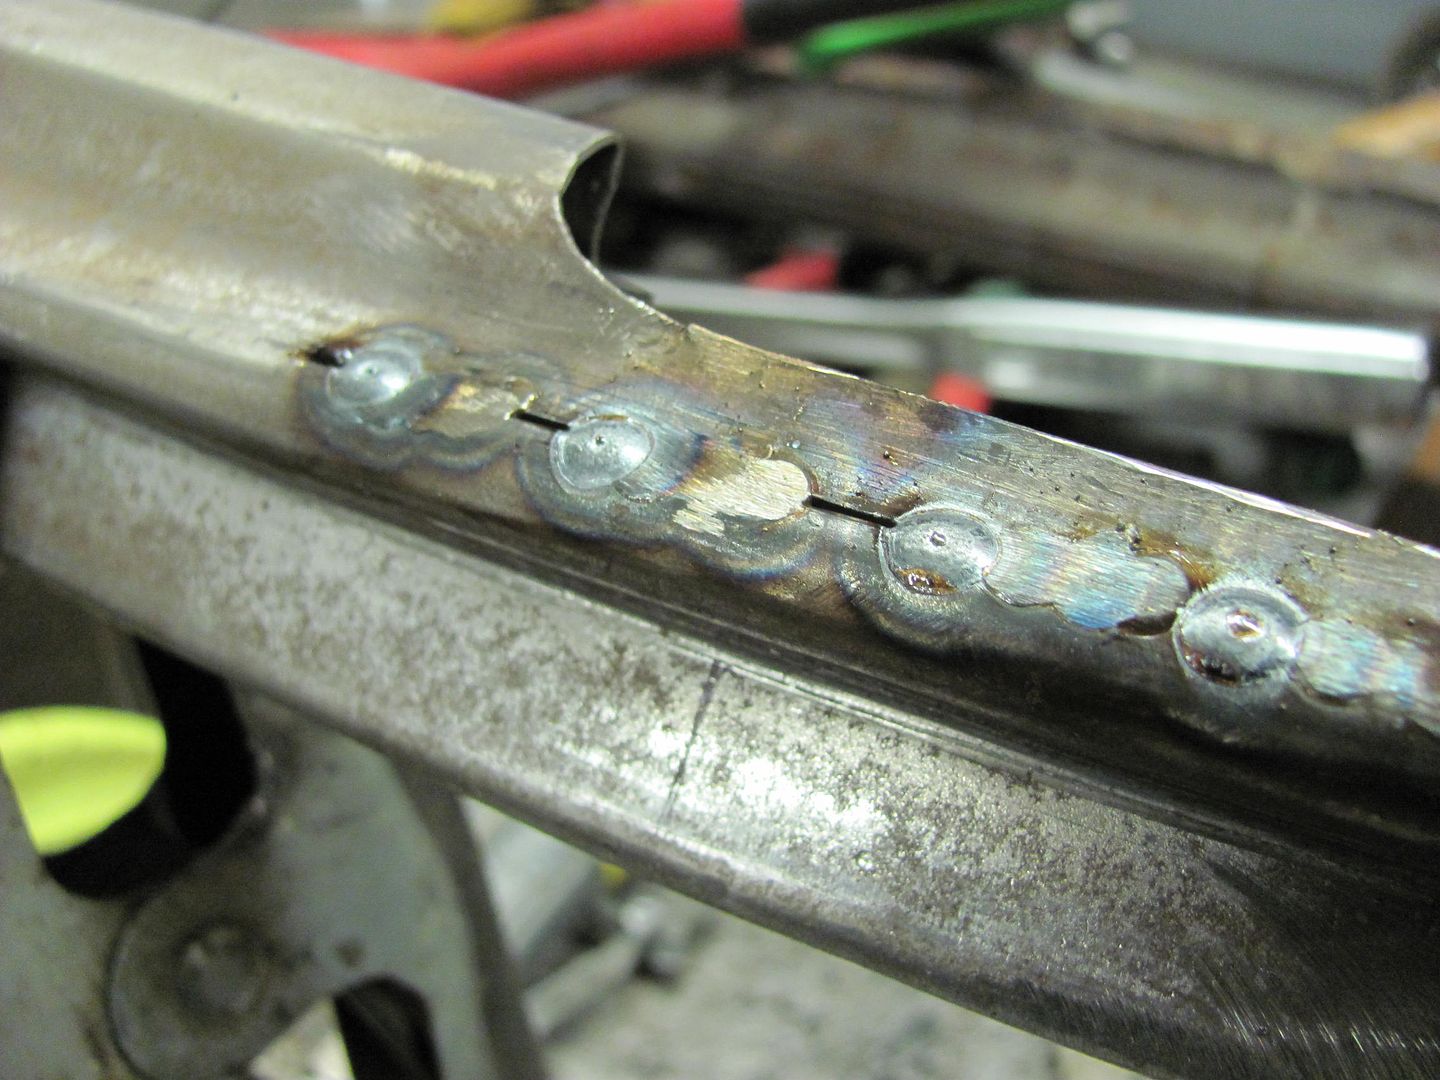 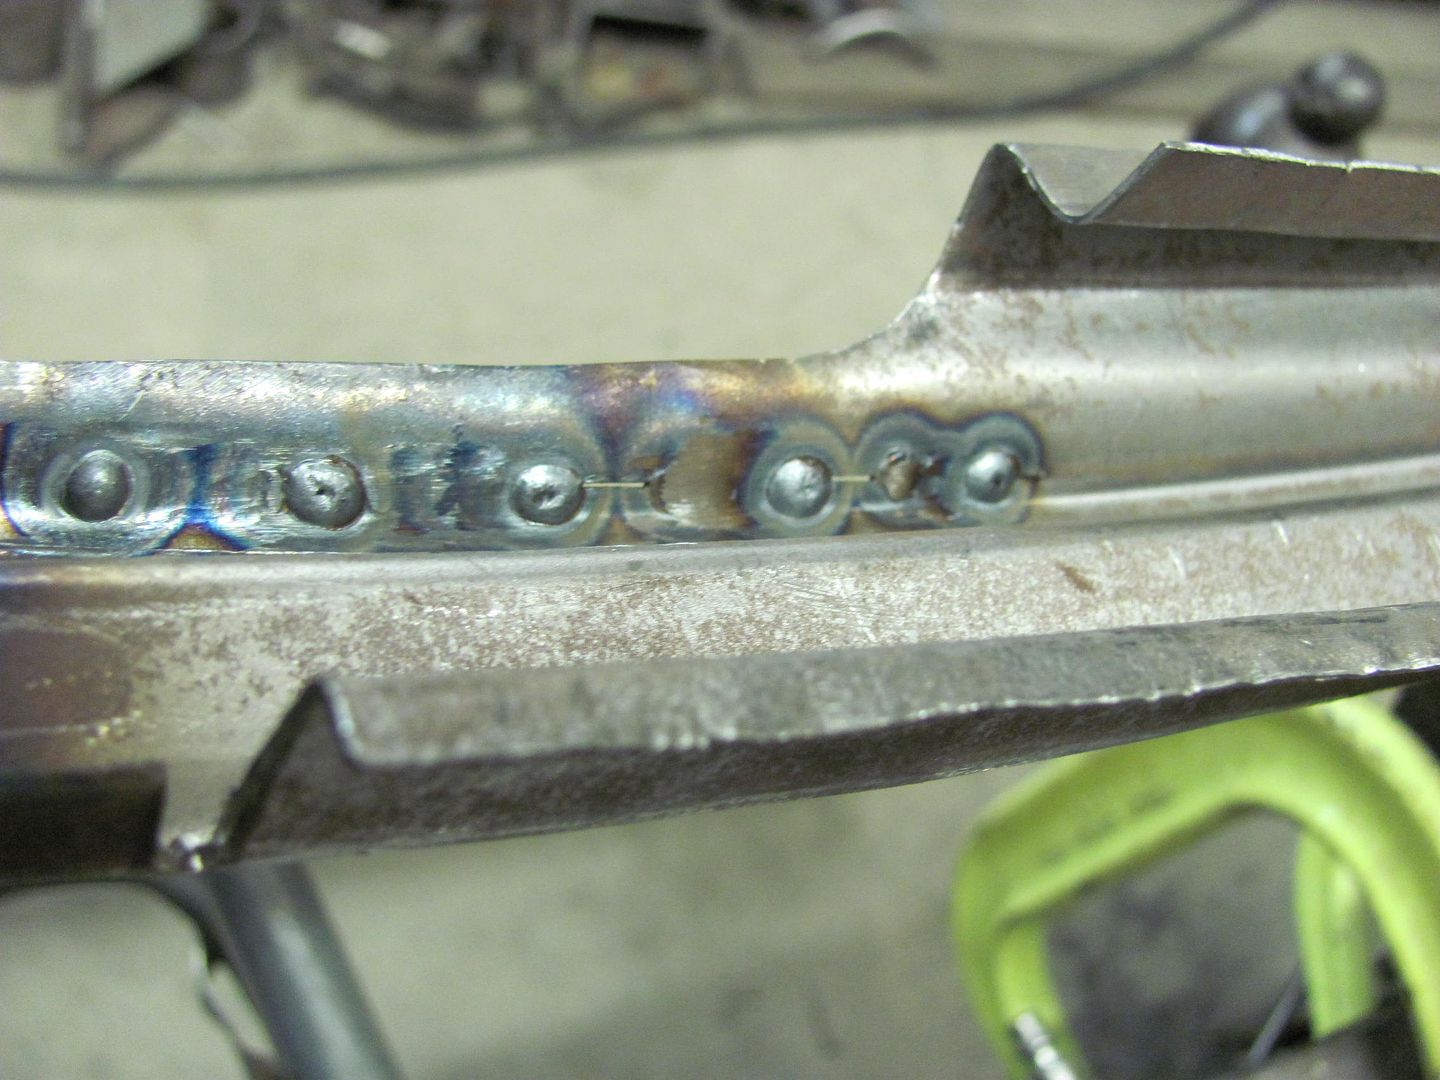 All done and cleaned up.... 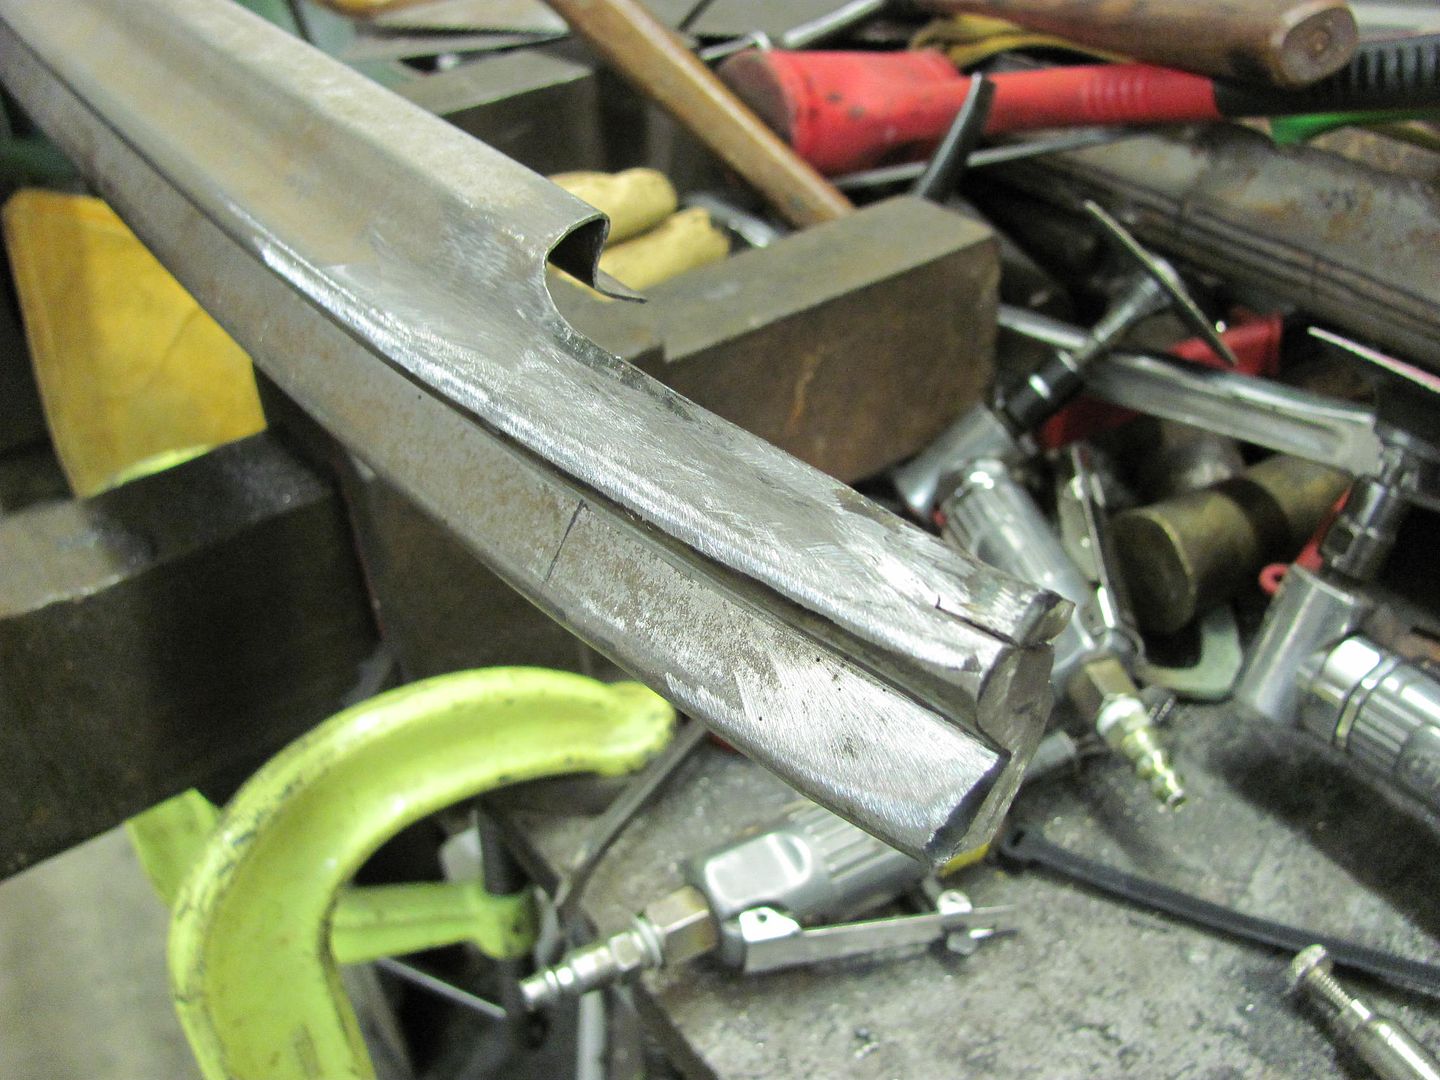 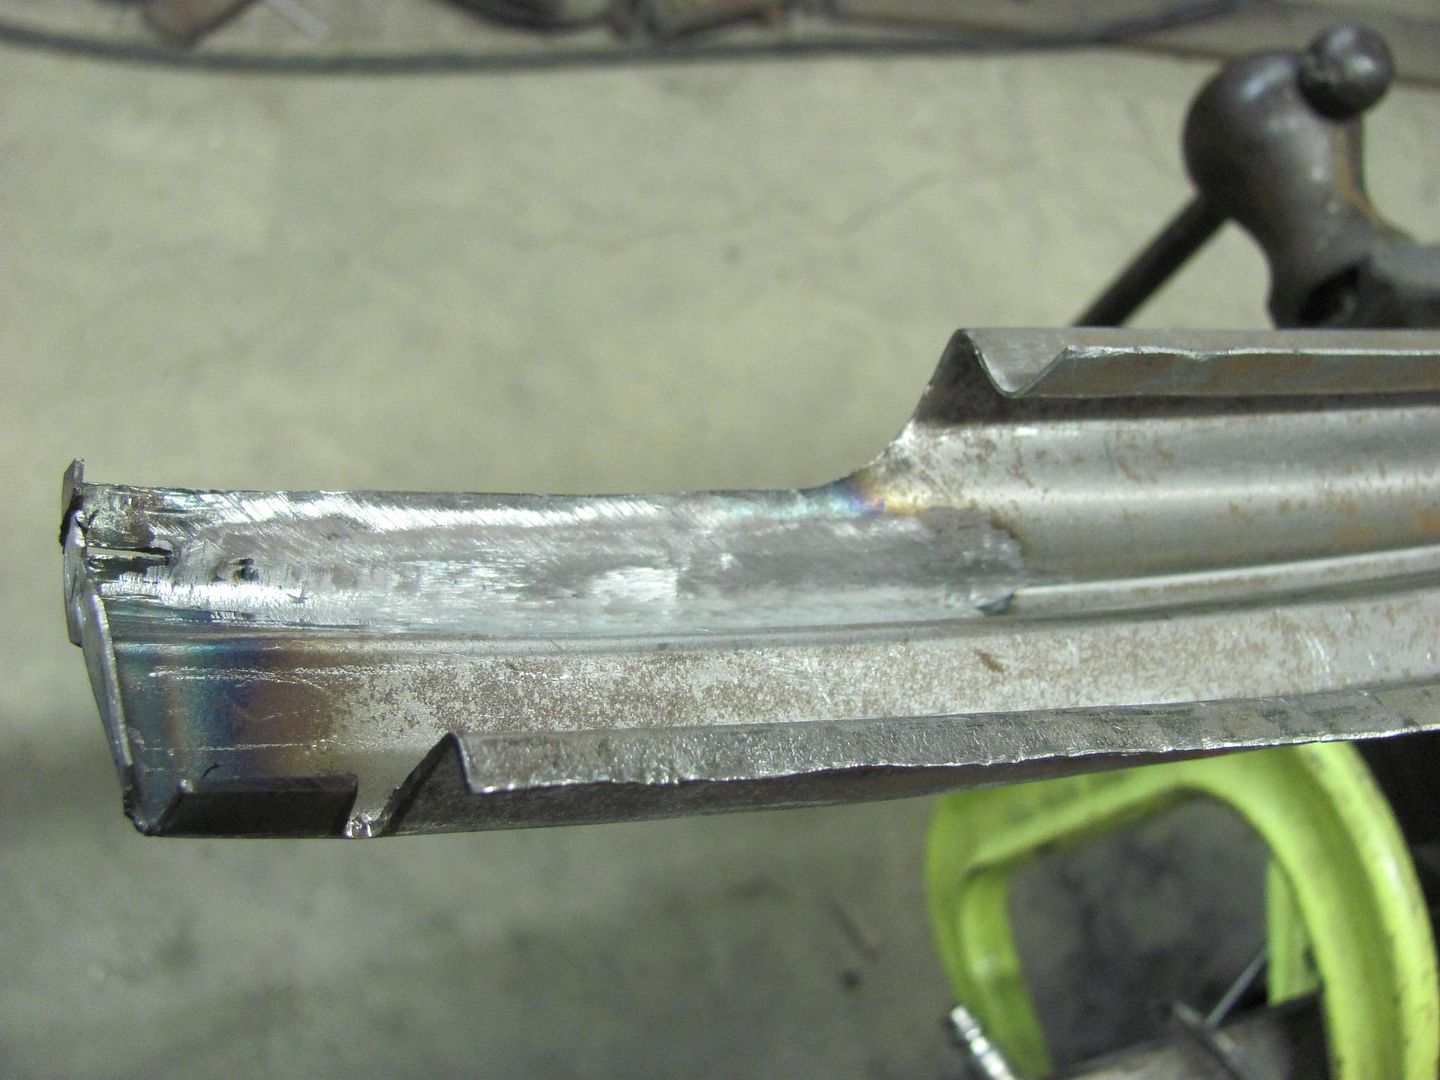 ......for a much better fit.. 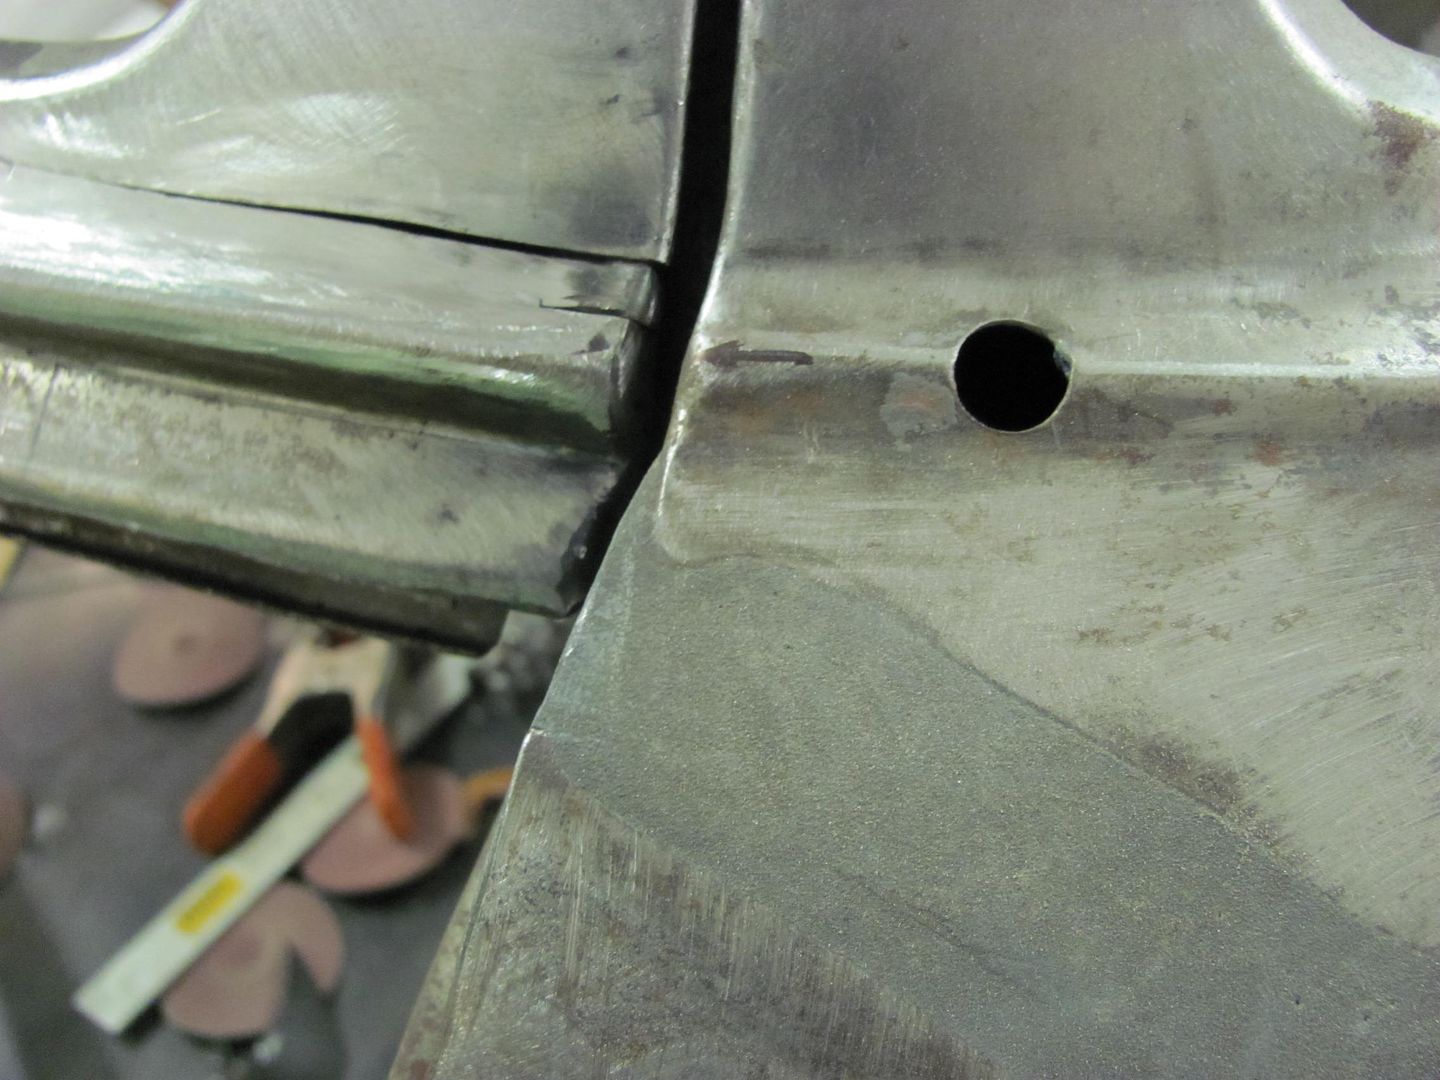 Then media blasted the inside in preparation for some epoxy primer... 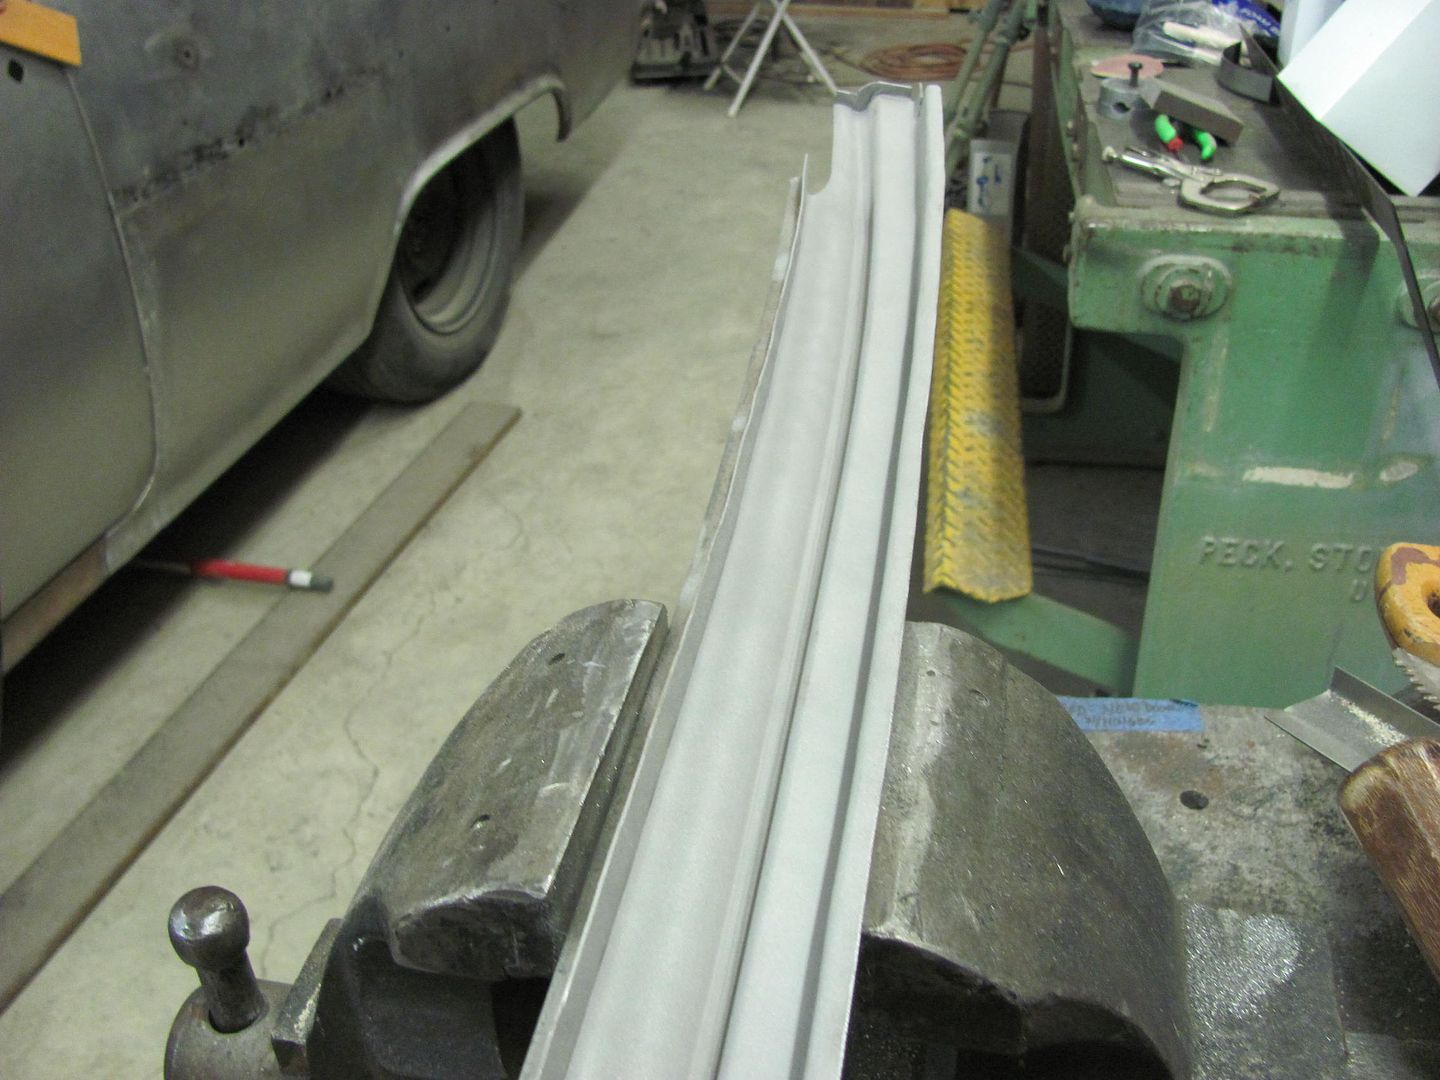 .....and did some adjustment of the tailgate fitment. 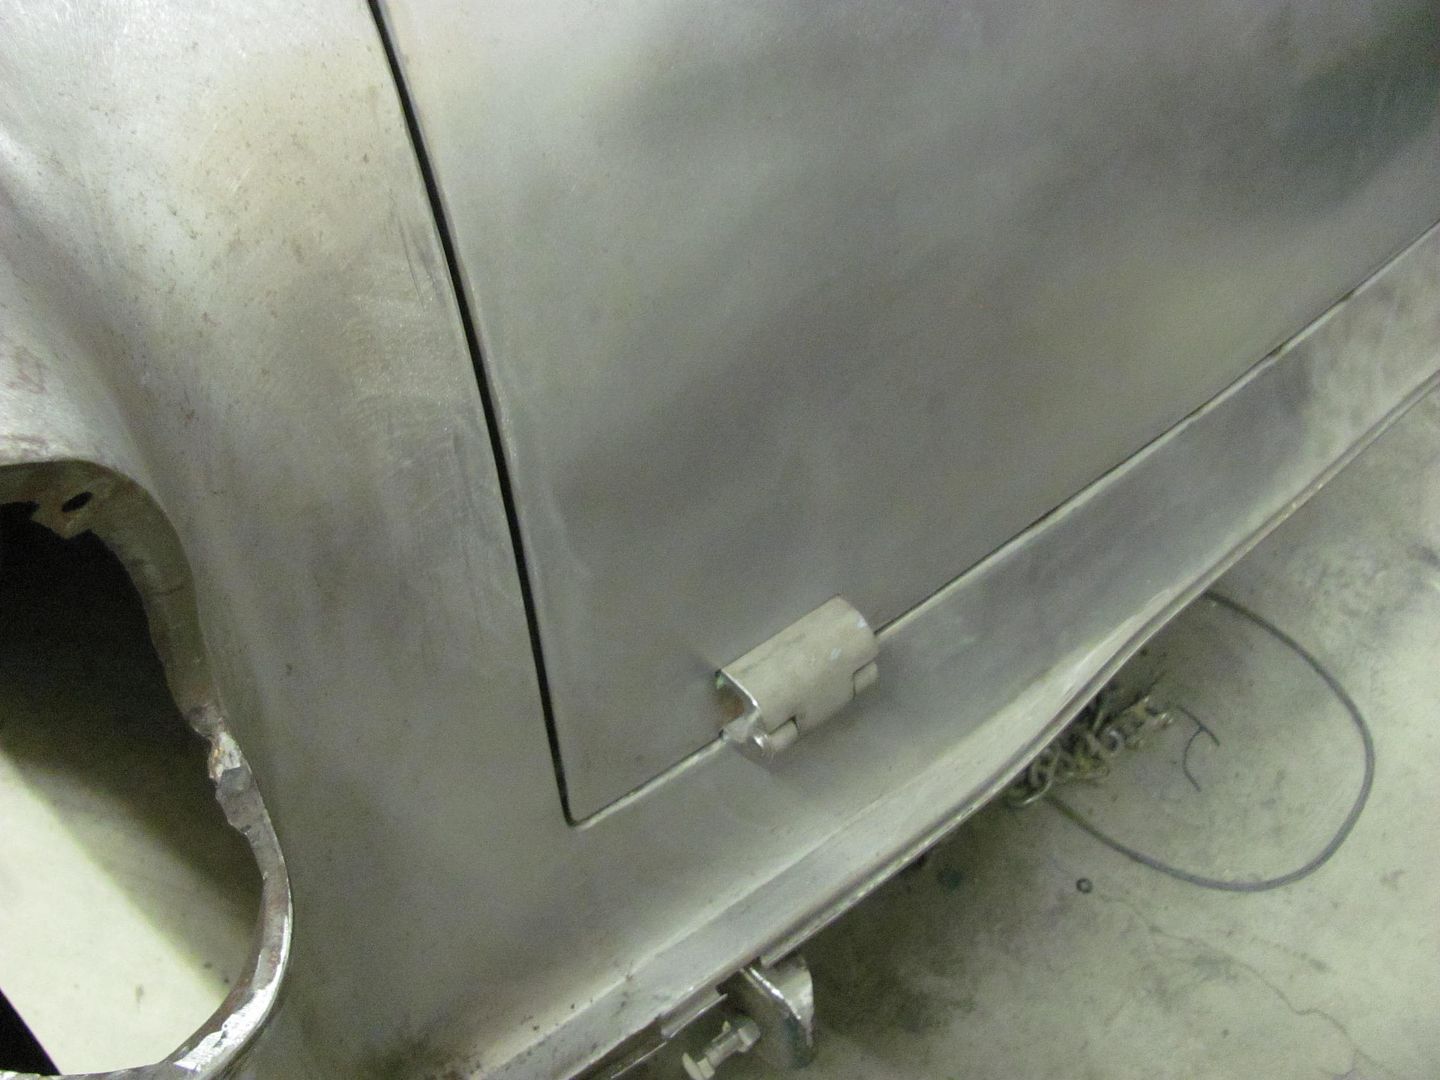 
__________________
Robert |
|
|
|
|
12-29-2013, 08:25 PM
|
#17 |
|
Registered User
Join Date: Apr 2003
Location: Indep, MO
Posts: 5,893
|
Re: 55 Wagon Progress
Nice new sled! How did you do the actual move of the trim ridge? I see the relief to go up, but how did you actually do it?
I can personally attest to the weld/grind/lap method. Helps keep the heat down, as well. Great tip.
__________________
Boppa's Old Yeller Truck Build, Old Yeller's New Heart! Project Buzz Bomb Flyin' Low! |
|
|
|
|
12-30-2013, 10:35 AM
|
#18 |
|
Registered User
Join Date: Jan 2013
Location: Leonardtown, MD
Posts: 1,635
|
Re: 55 Wagon Progress
After making the relief cut, the lower folded section was placed in the vise for some "finesse" to persuade it upwards a bit. A pair of vise grips held the two together for the first tack, and after that things just fell into place.
__________________
Robert |
|
|
|
|
01-01-2014, 12:04 AM
|
#19 |
|
Registered User
Join Date: May 2007
Location: Deale Md
Posts: 4,663
|
Re: 55 Wagon Progress
Got some B I G time skills.
__________________
James 63 GMC V6 4speed carryall 65 chevy swb bbw V8 auto 68 K20 327/4 speed, buddy buckets 2002 GMC CC Dually Duramax 64 GMC lwb 3/4 V6 4speed SOLD 66 GMC swb bbw buddy buckets SOLD IG duallyjams The only thing that stays the same is constant change! |
|
|
|
|
01-01-2014, 03:54 AM
|
#20 |
|
Registered User
Join Date: Mar 2010
Location: a t w a t e r cali 95301
Posts: 10,713
|
Re: 55 Wagon Progress
damn, i believe im gonna have to go get my socks, they blew off on the 1st page.
|
|
|
|
|
01-01-2014, 01:00 PM
|
#21 |
|
Registered User
Join Date: Apr 2011
Location: .
Posts: 3,104
|
Re: 55 Wagon Progress
Every time I check in I feel "schooled".
Amazing skillz,,,, Shouldn't there be a TOTY or something along side your name? |
|
|
|
|
01-04-2014, 07:21 AM
|
#22 |
|
It's alsways something.....
Join Date: Nov 2008
Location: Douglasville GA
Posts: 1,171
|
Re: 55 Wagon Progress
Thanks for the generosity of your time to share these methods. Awesome!
__________________
1968 RS Camaro 'Vert Matching number 327 and M21 Muncie 1968 C10 Black with red interior and orig paint. 5.3 / 4l60e,3:73 POSI 17" Torq Thrusts 1968 CST 514 Red with black interior. Buddy Buckets, Factory A/C, PS, PB- 20" AR custom shop TT, 5.3 and 4l60e |
|
|
|
|
01-05-2014, 07:43 PM
|
#23 |
|
Registered User
Join Date: Jan 2013
Location: Leonardtown, MD
Posts: 1,635
|
Re: 55 Wagon Progress
Bomp, still learning myself
Was in the middle of media blasting the innards of the lift gate and noticed the threads for these nut plates didn't look too "full" A test with a 10-24 screw showed that some of the holes were so bad that they had a "slip" fit. 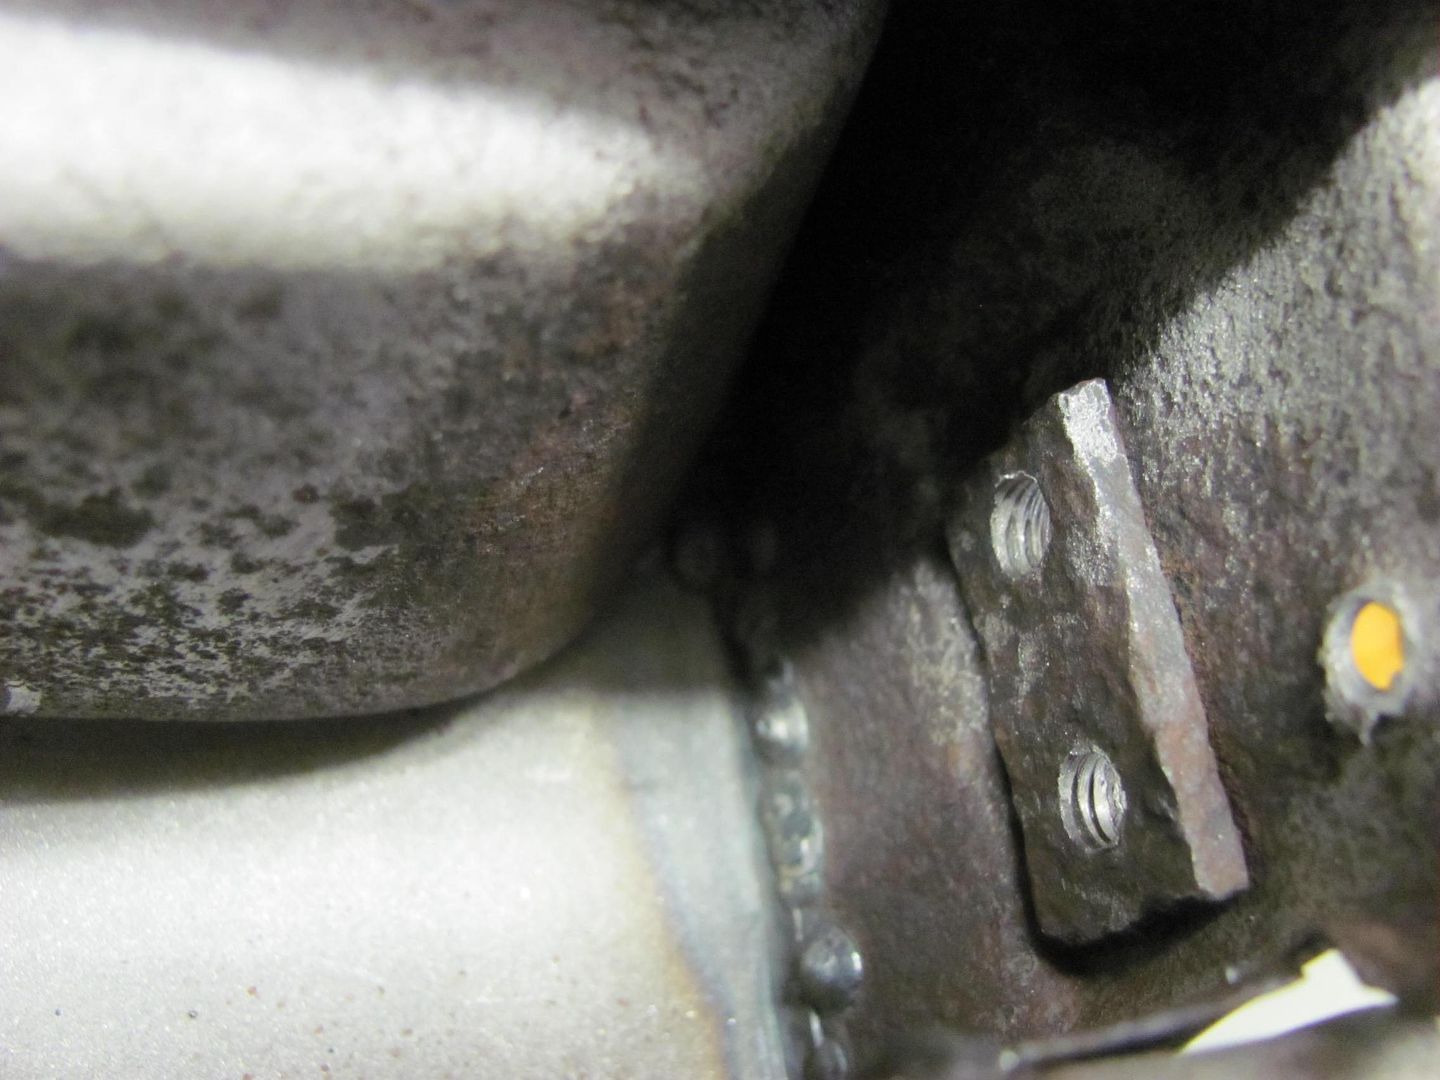 These hold the rubber bumpers on the bottom inside edge of the lift gate. The spot welds are drilled to release the nut plate..  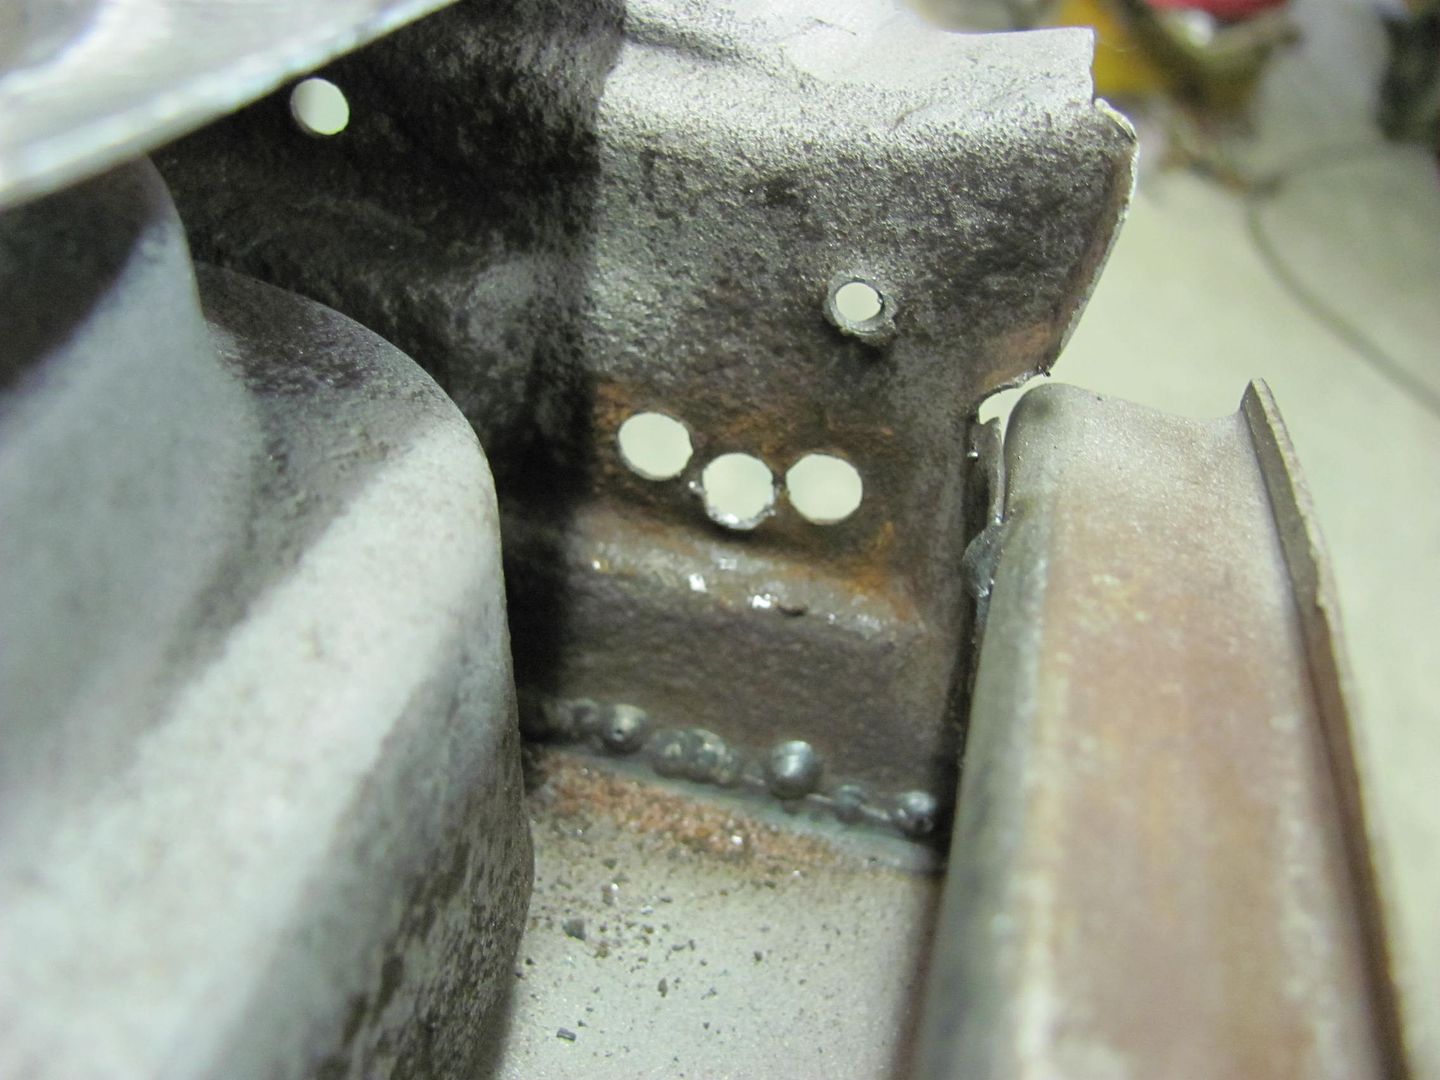 The new ones are cut out of some 10ga steel, holes drilled and tapped.  yeah, these threads look much better.... 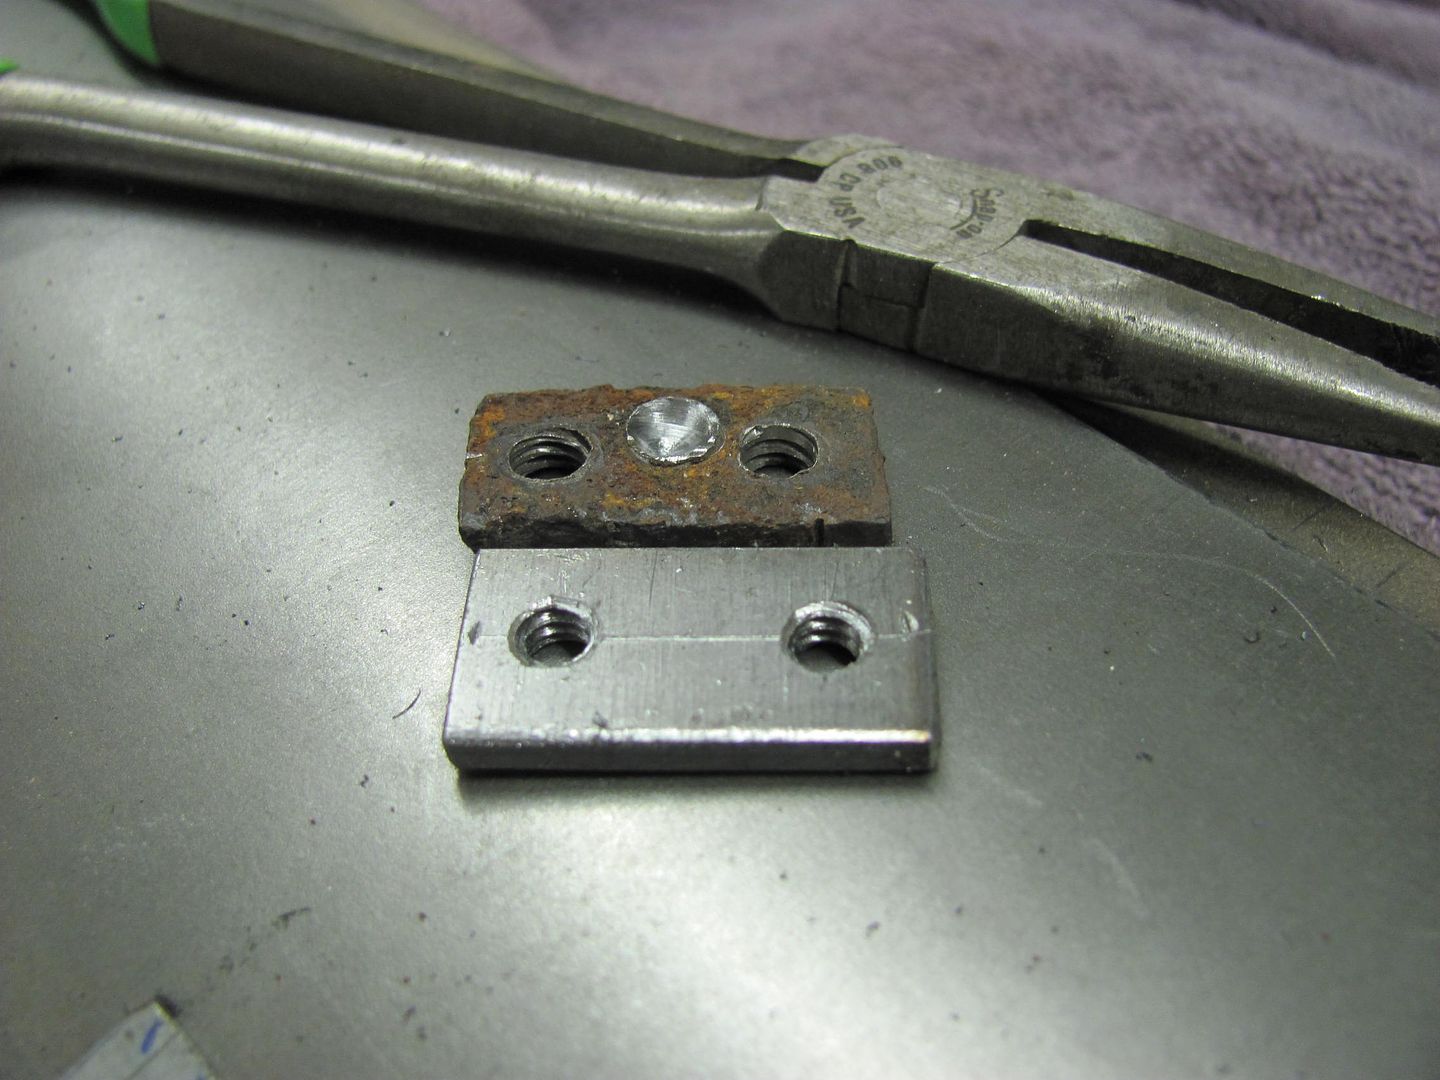 Where I normally use a couple screws to hold nut plates in place for welding, with the close proximity of the plug weld hole the screw heads would obscure some of the hole, and we would undoubtedly be welding in the screw heads for difficult removal. For this case, we'll use some brass tubing as a spacer. Since the tubing I picked up passes though the screw holes, a sacrificial lock washer is used for it's minimal diameter. 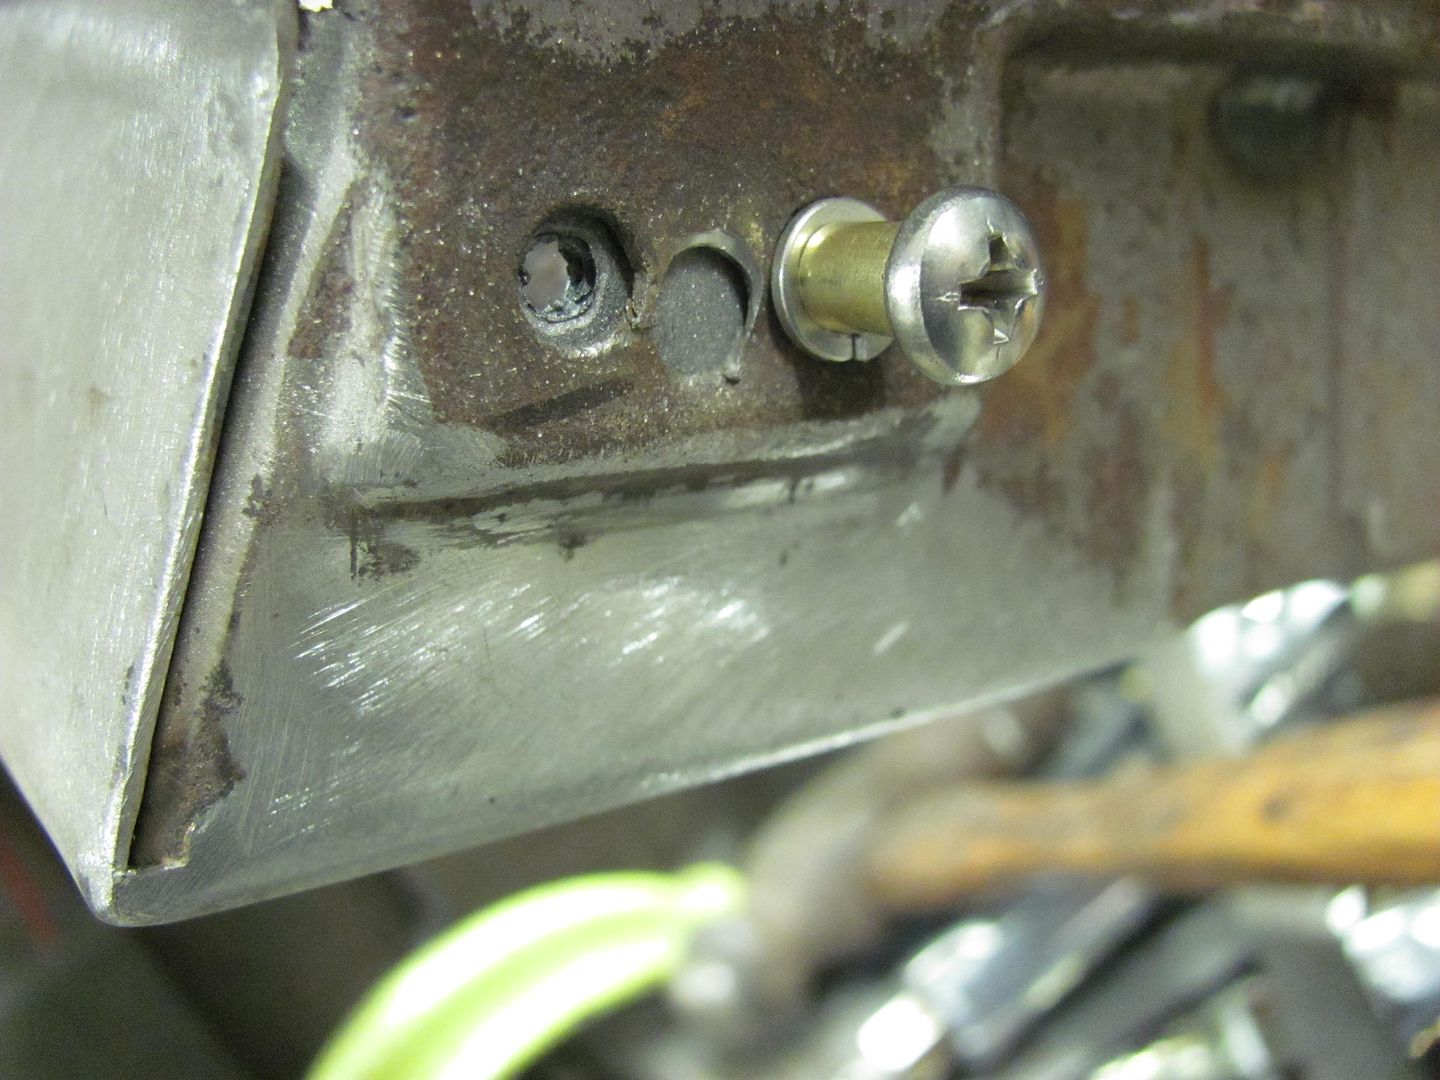 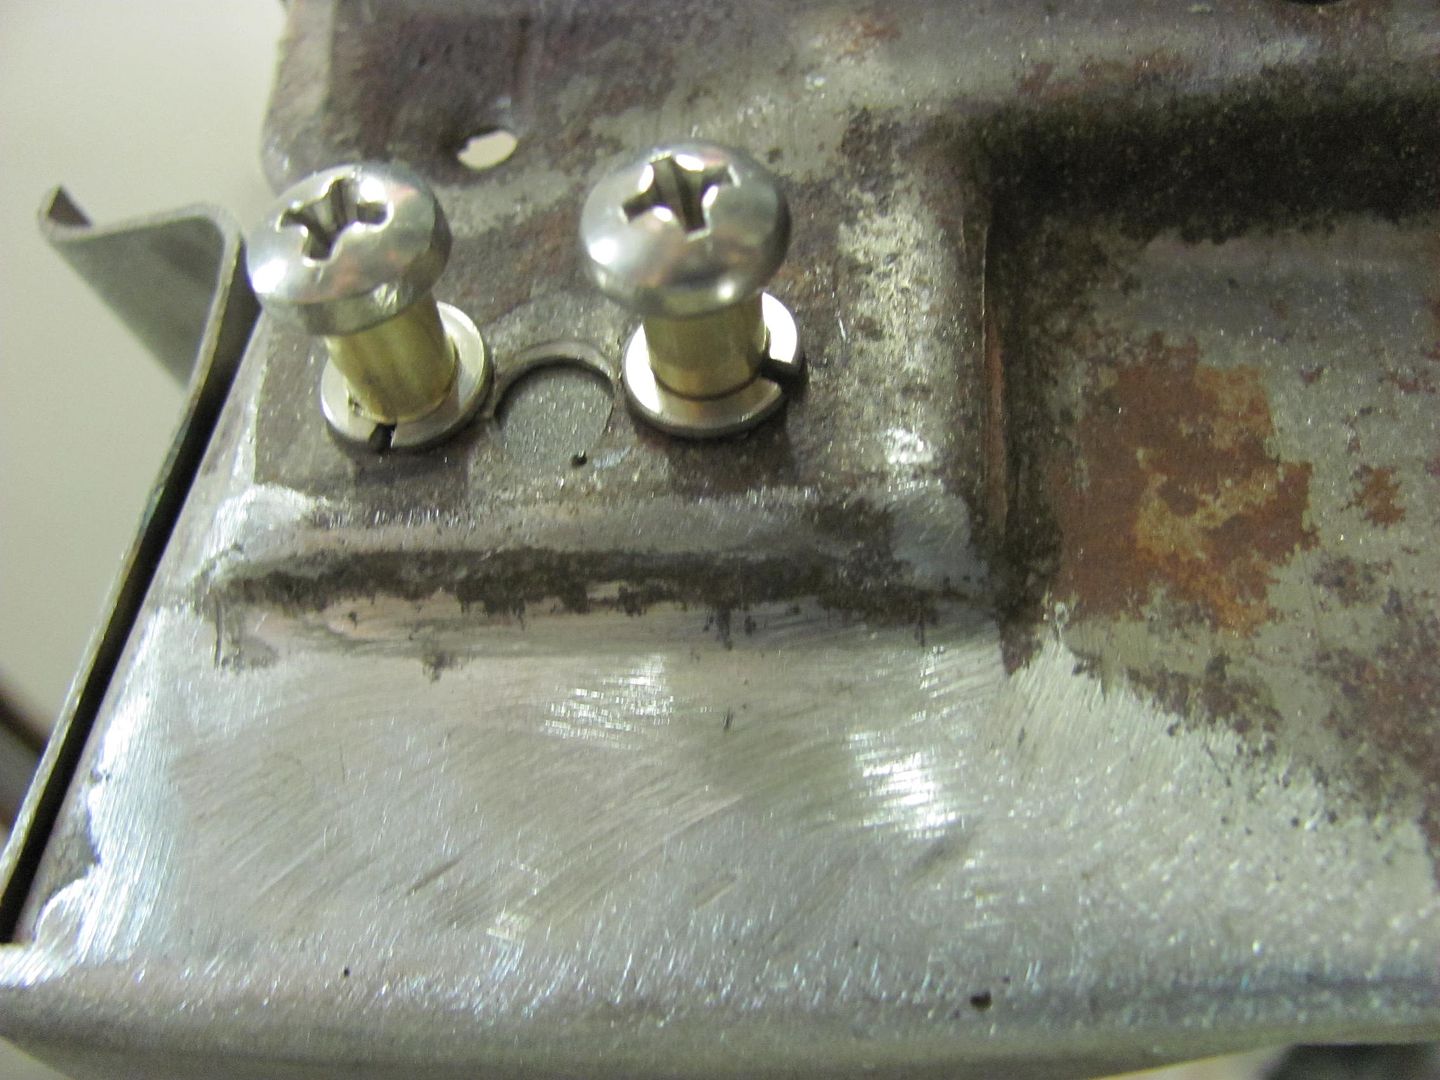 A dab of anti sieze is placed on the screw threads to insure they don't get welded in place from arcing across the threads.. Plug welded, and screws removed.  Lock washers removed and plug welds ground flush.... 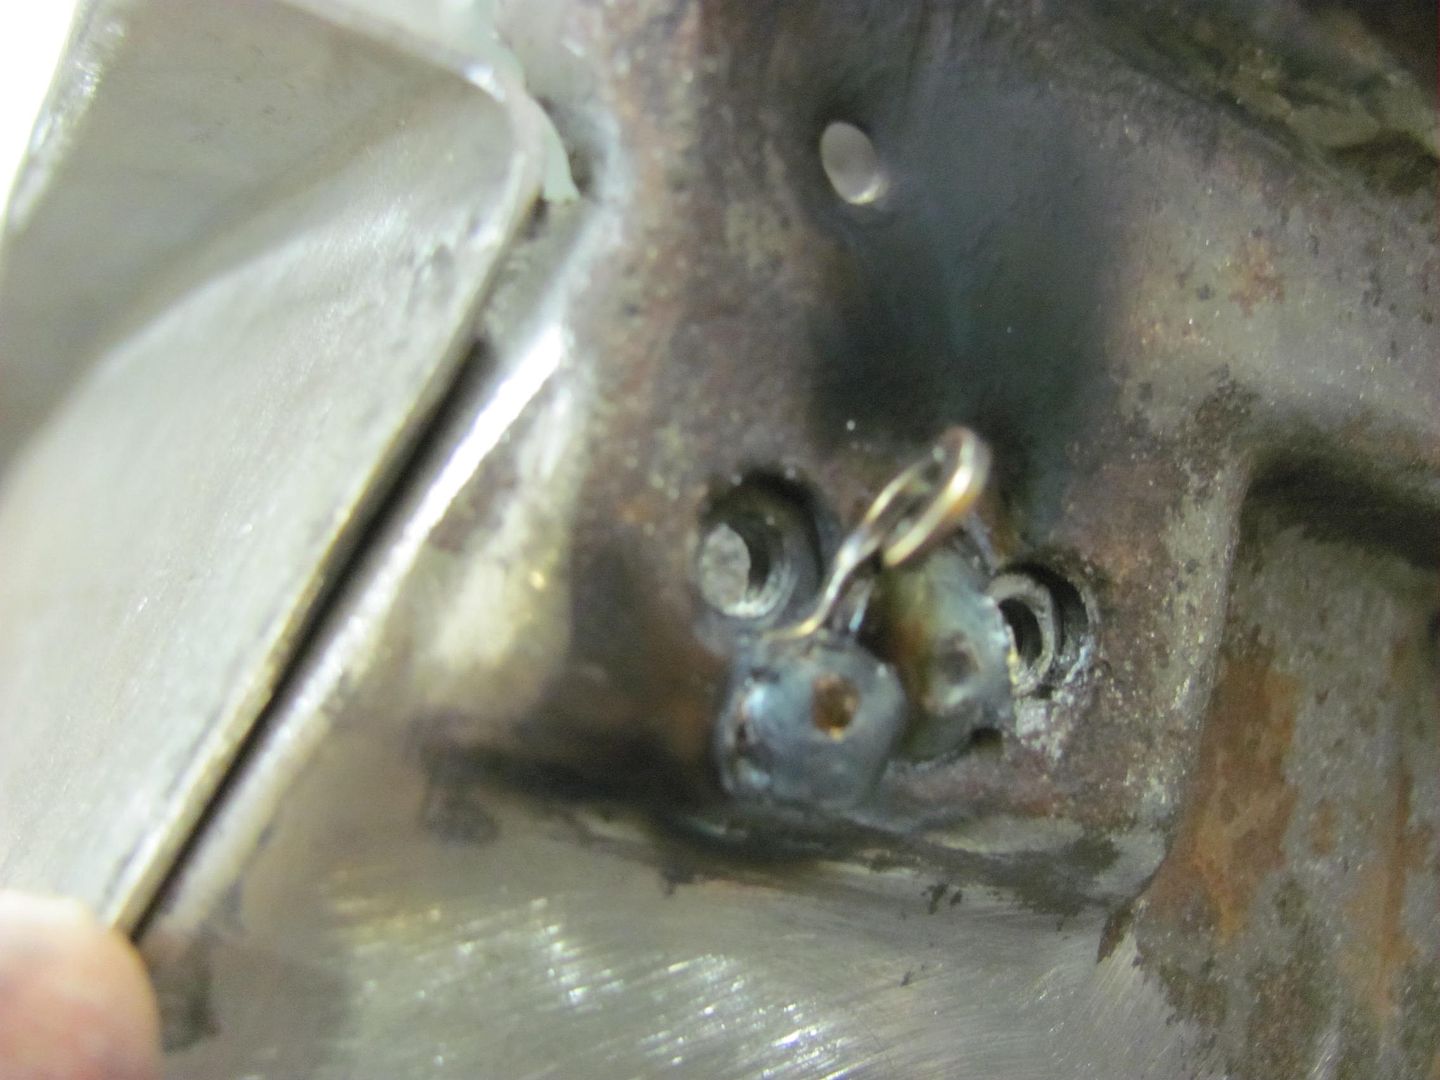  And now we can finish up the media blasting....  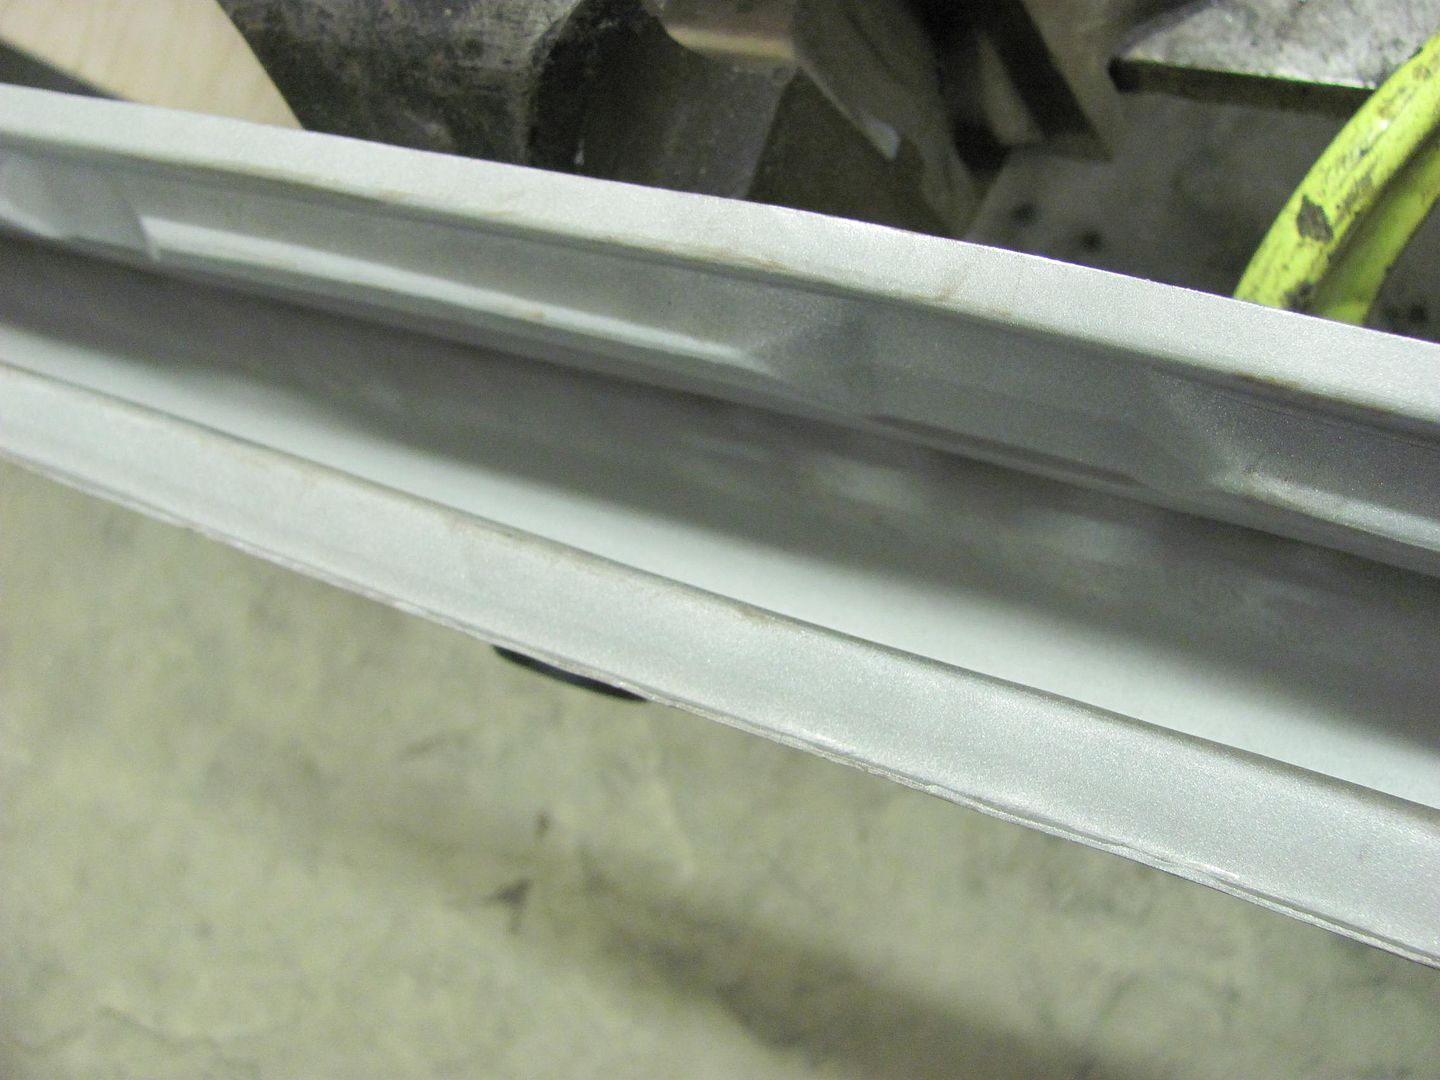
__________________
Robert |
|
|
|
|
01-05-2014, 08:34 PM
|
#24 |
|
Registered User
Join Date: May 2007
Location: Deale Md
Posts: 4,663
|
Re: 55 Wagon Progress
And if all looks good after your super micro inspection it's time for some primer.
__________________
James 63 GMC V6 4speed carryall 65 chevy swb bbw V8 auto 68 K20 327/4 speed, buddy buckets 2002 GMC CC Dually Duramax 64 GMC lwb 3/4 V6 4speed SOLD 66 GMC swb bbw buddy buckets SOLD IG duallyjams The only thing that stays the same is constant change! |
|
|
|
|
01-05-2014, 09:08 PM
|
#25 |
|
Registered User
Join Date: Mar 2008
Location: Waukee, Iowa
Posts: 1,608
|
Re: 55 Wagon Progress
Can you post more details on the cutoff wheels you use? Brand, where to get them, how much longer they last than a "standard" Norton one? Thanks!
__________________
build threads: 86 Suburban 88 Jeep 6.0 swap 49 Chevy truck 54 Chevy wagon 86 Suburban lowered 4/6 54 Chevy wagon 49 Chevy/s10 mix 88 Jeep Wrangler rockcrawler |
|
|
|
 |
| Bookmarks |
|
|


 Hybrid Mode
